The Die is Cast (Continued) - Grumman "Operation Torch" F4F-4 Wildcat and Martlet Mk. IV (F4F-4B)

Those who have been on Aeroscale for a while know I have an occasional presence here other than chronicling the Luscious Lady build, which, to my horror, has now gone on for a solid nine years (04/21/2014). (What was I thinking?).

The same folk e.g. (RDT1953) also know that I have this quirk of accurizing diecast models, based on the fallacious notion that it is somehow easier than building injection kits from scratch. Indeed, my insecurity about this has even prompted me to try and fool others here into thinking that my work was on an injection kit. See Mystery Model! Boyington’s AVG Curtiss Hawk.

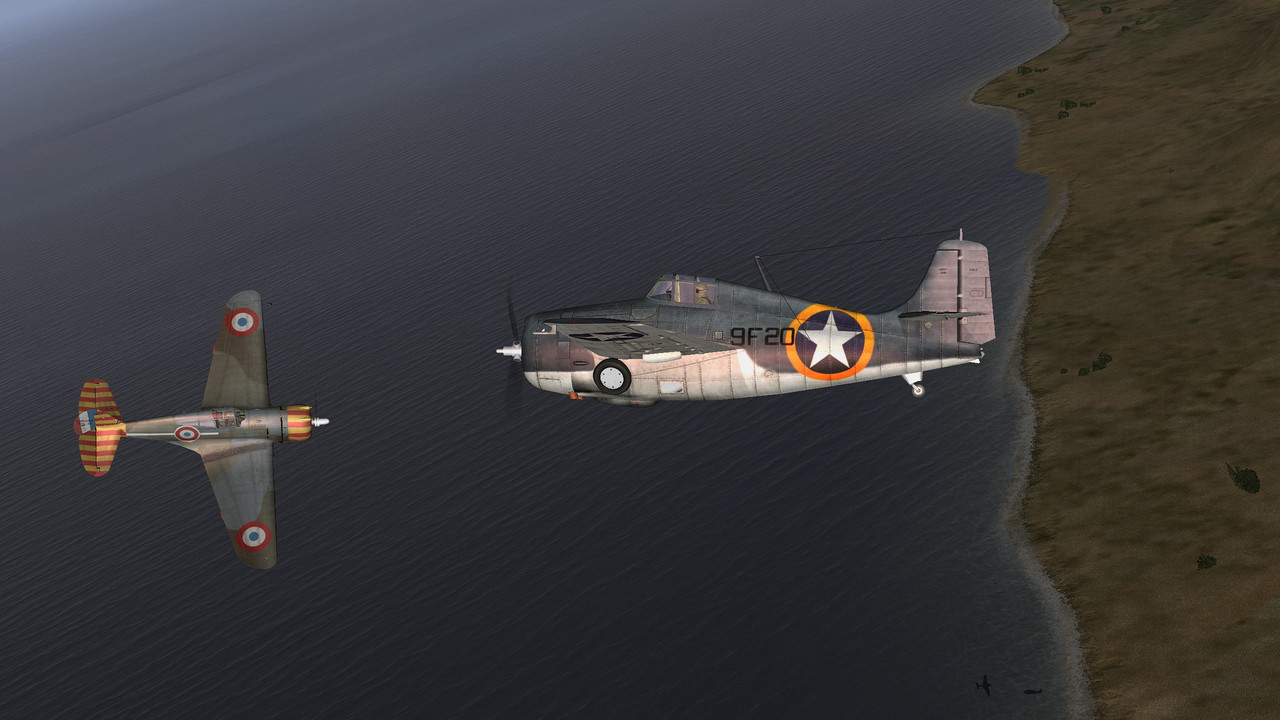
Finally, my personal history as a former Curtiss-Wright employee has created a perverse desire to see Pratt & Whitney R-1830 engined aircraft, Curtiss and otherwise, re-engined with the venerable Wright R-1820 Cyclone. See H.G.'s CURTISS MOHAWK IV in 1/48 by “Must Have” in KNIL Leaf and this:

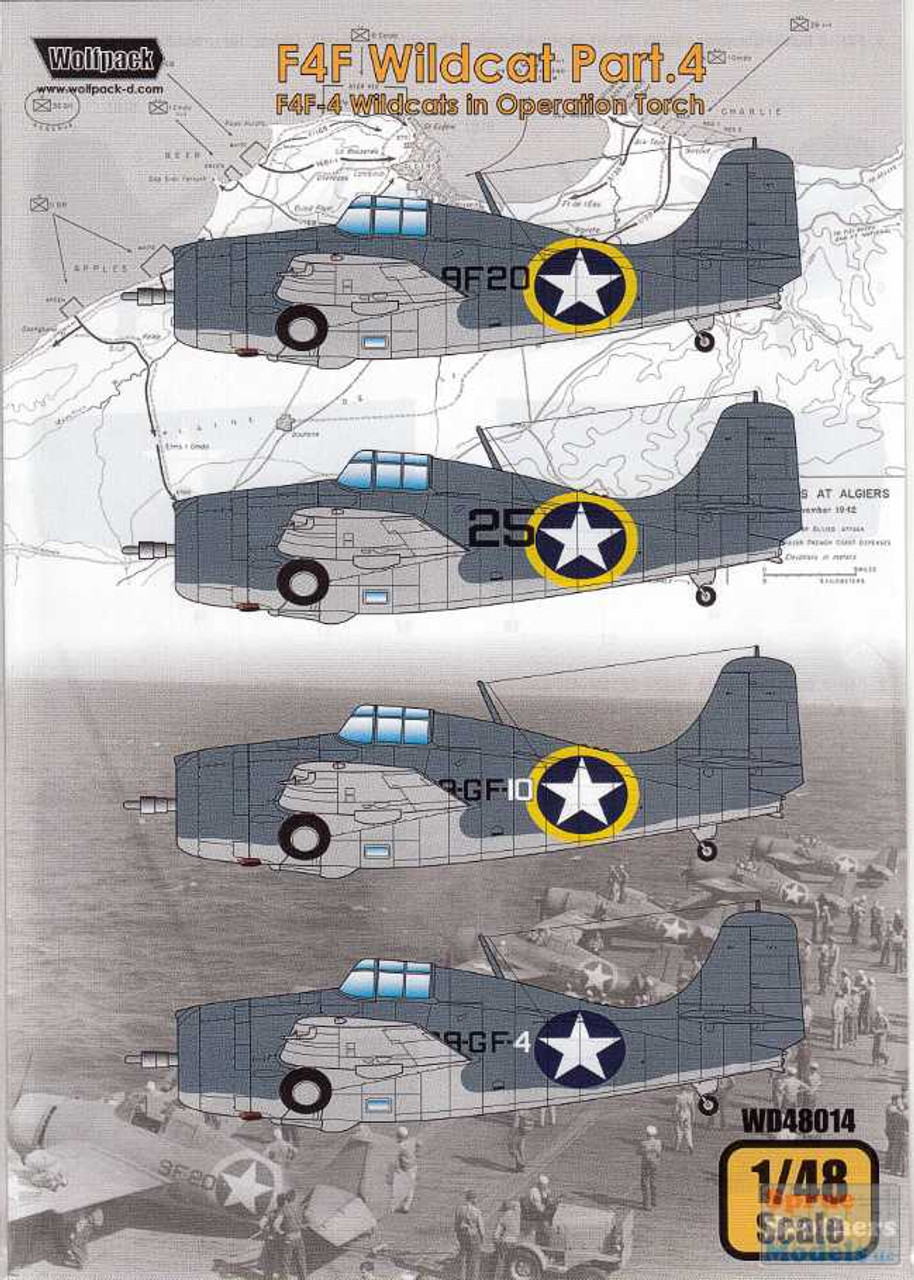
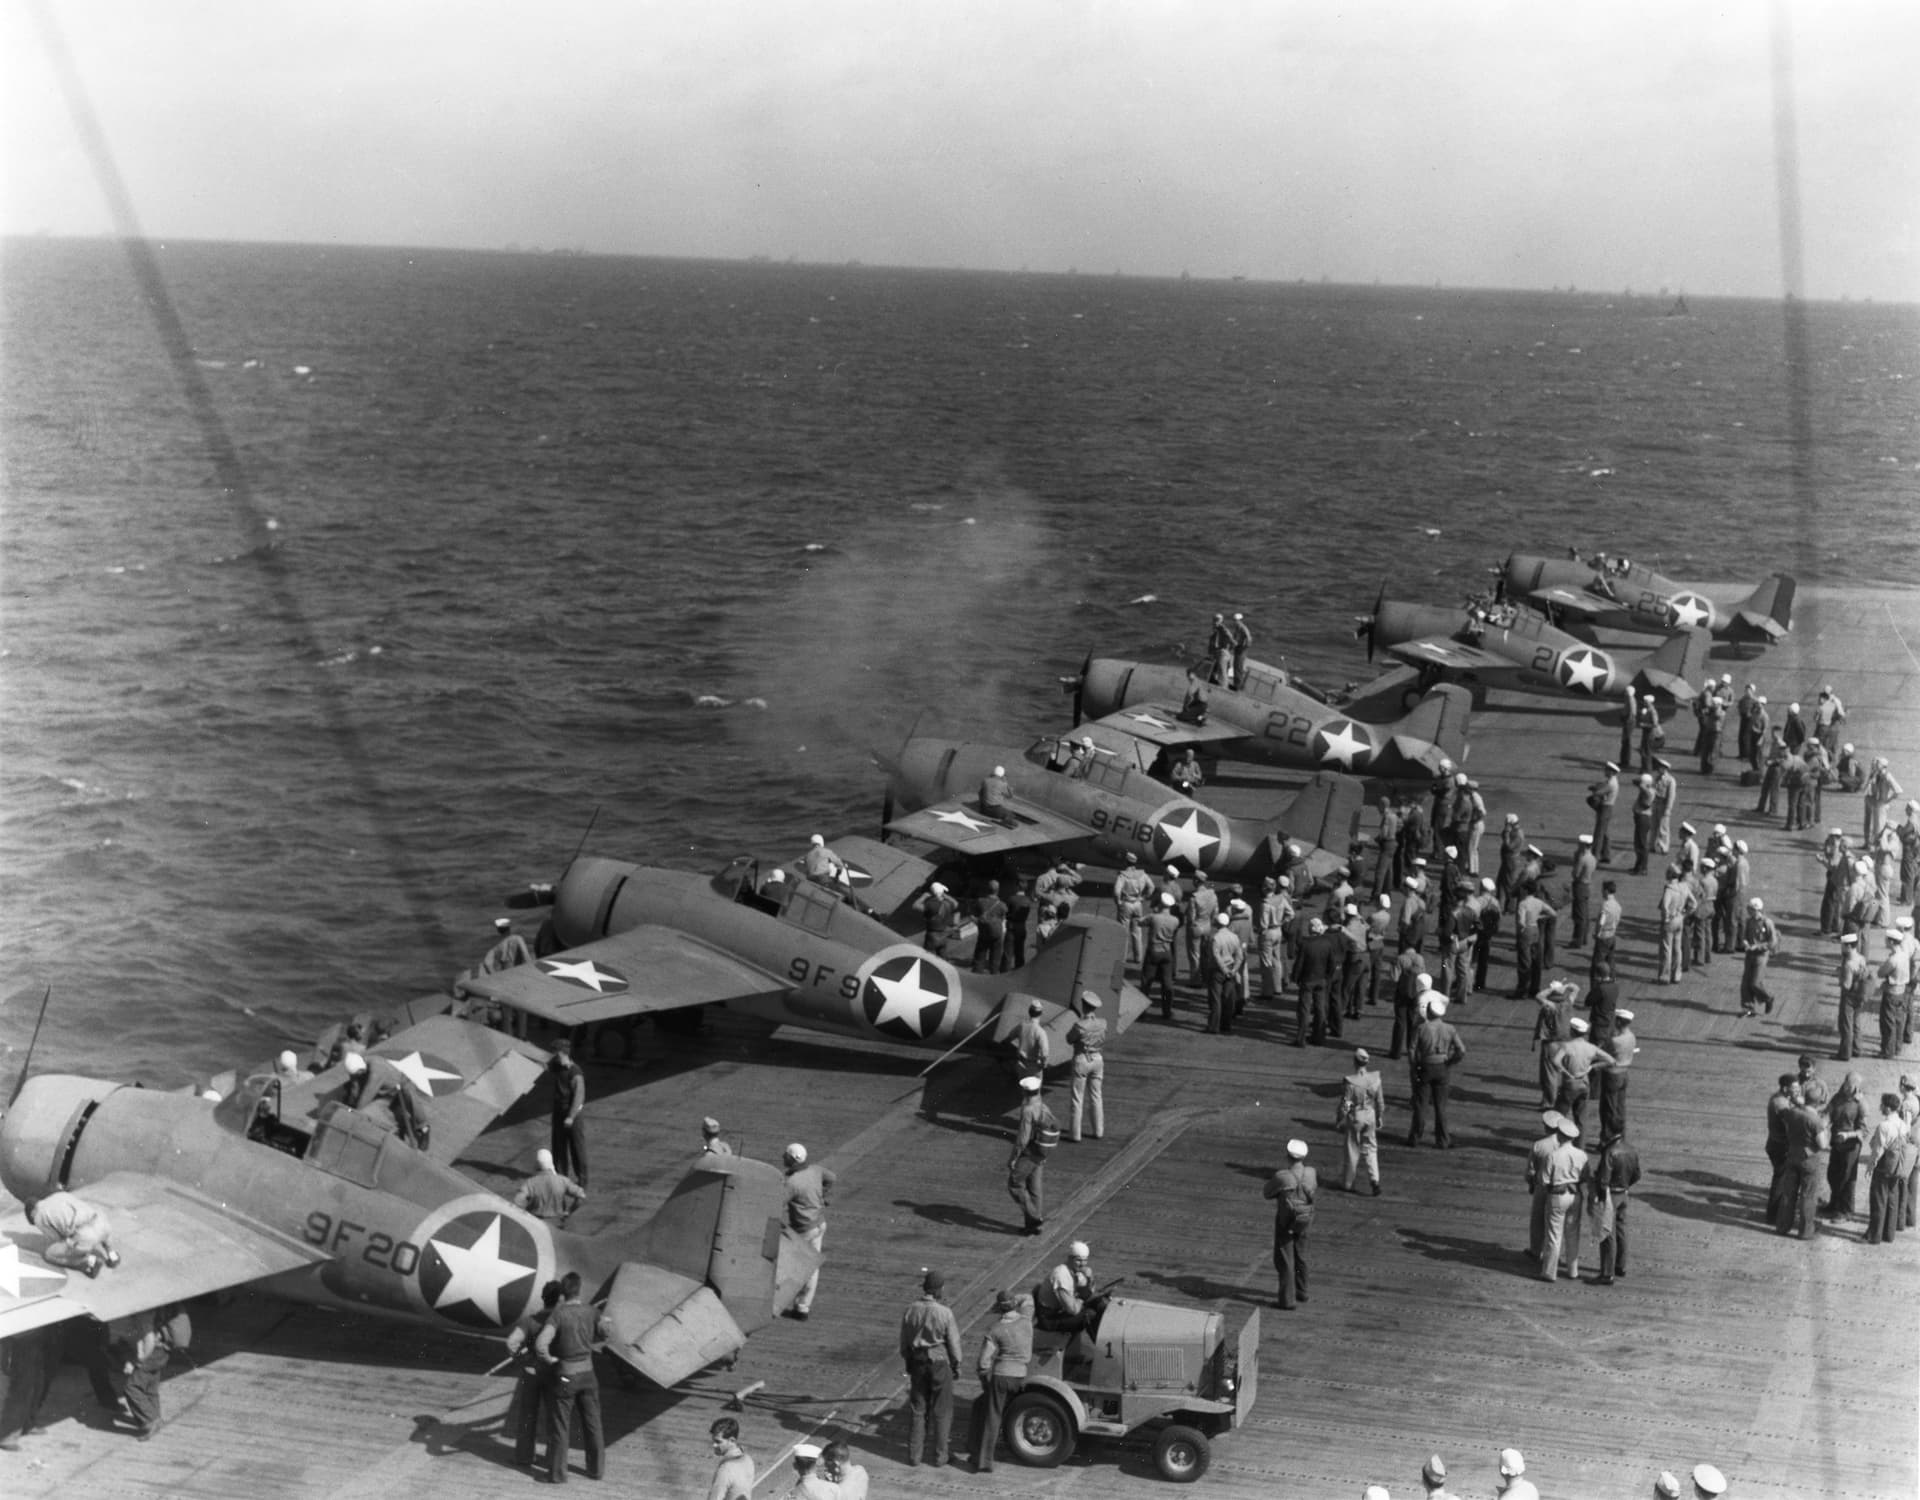
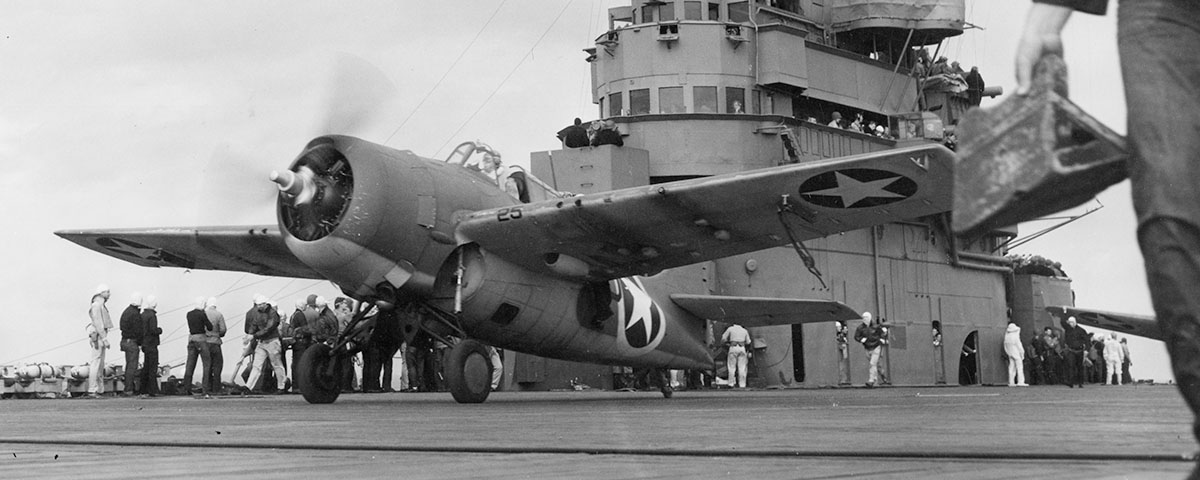
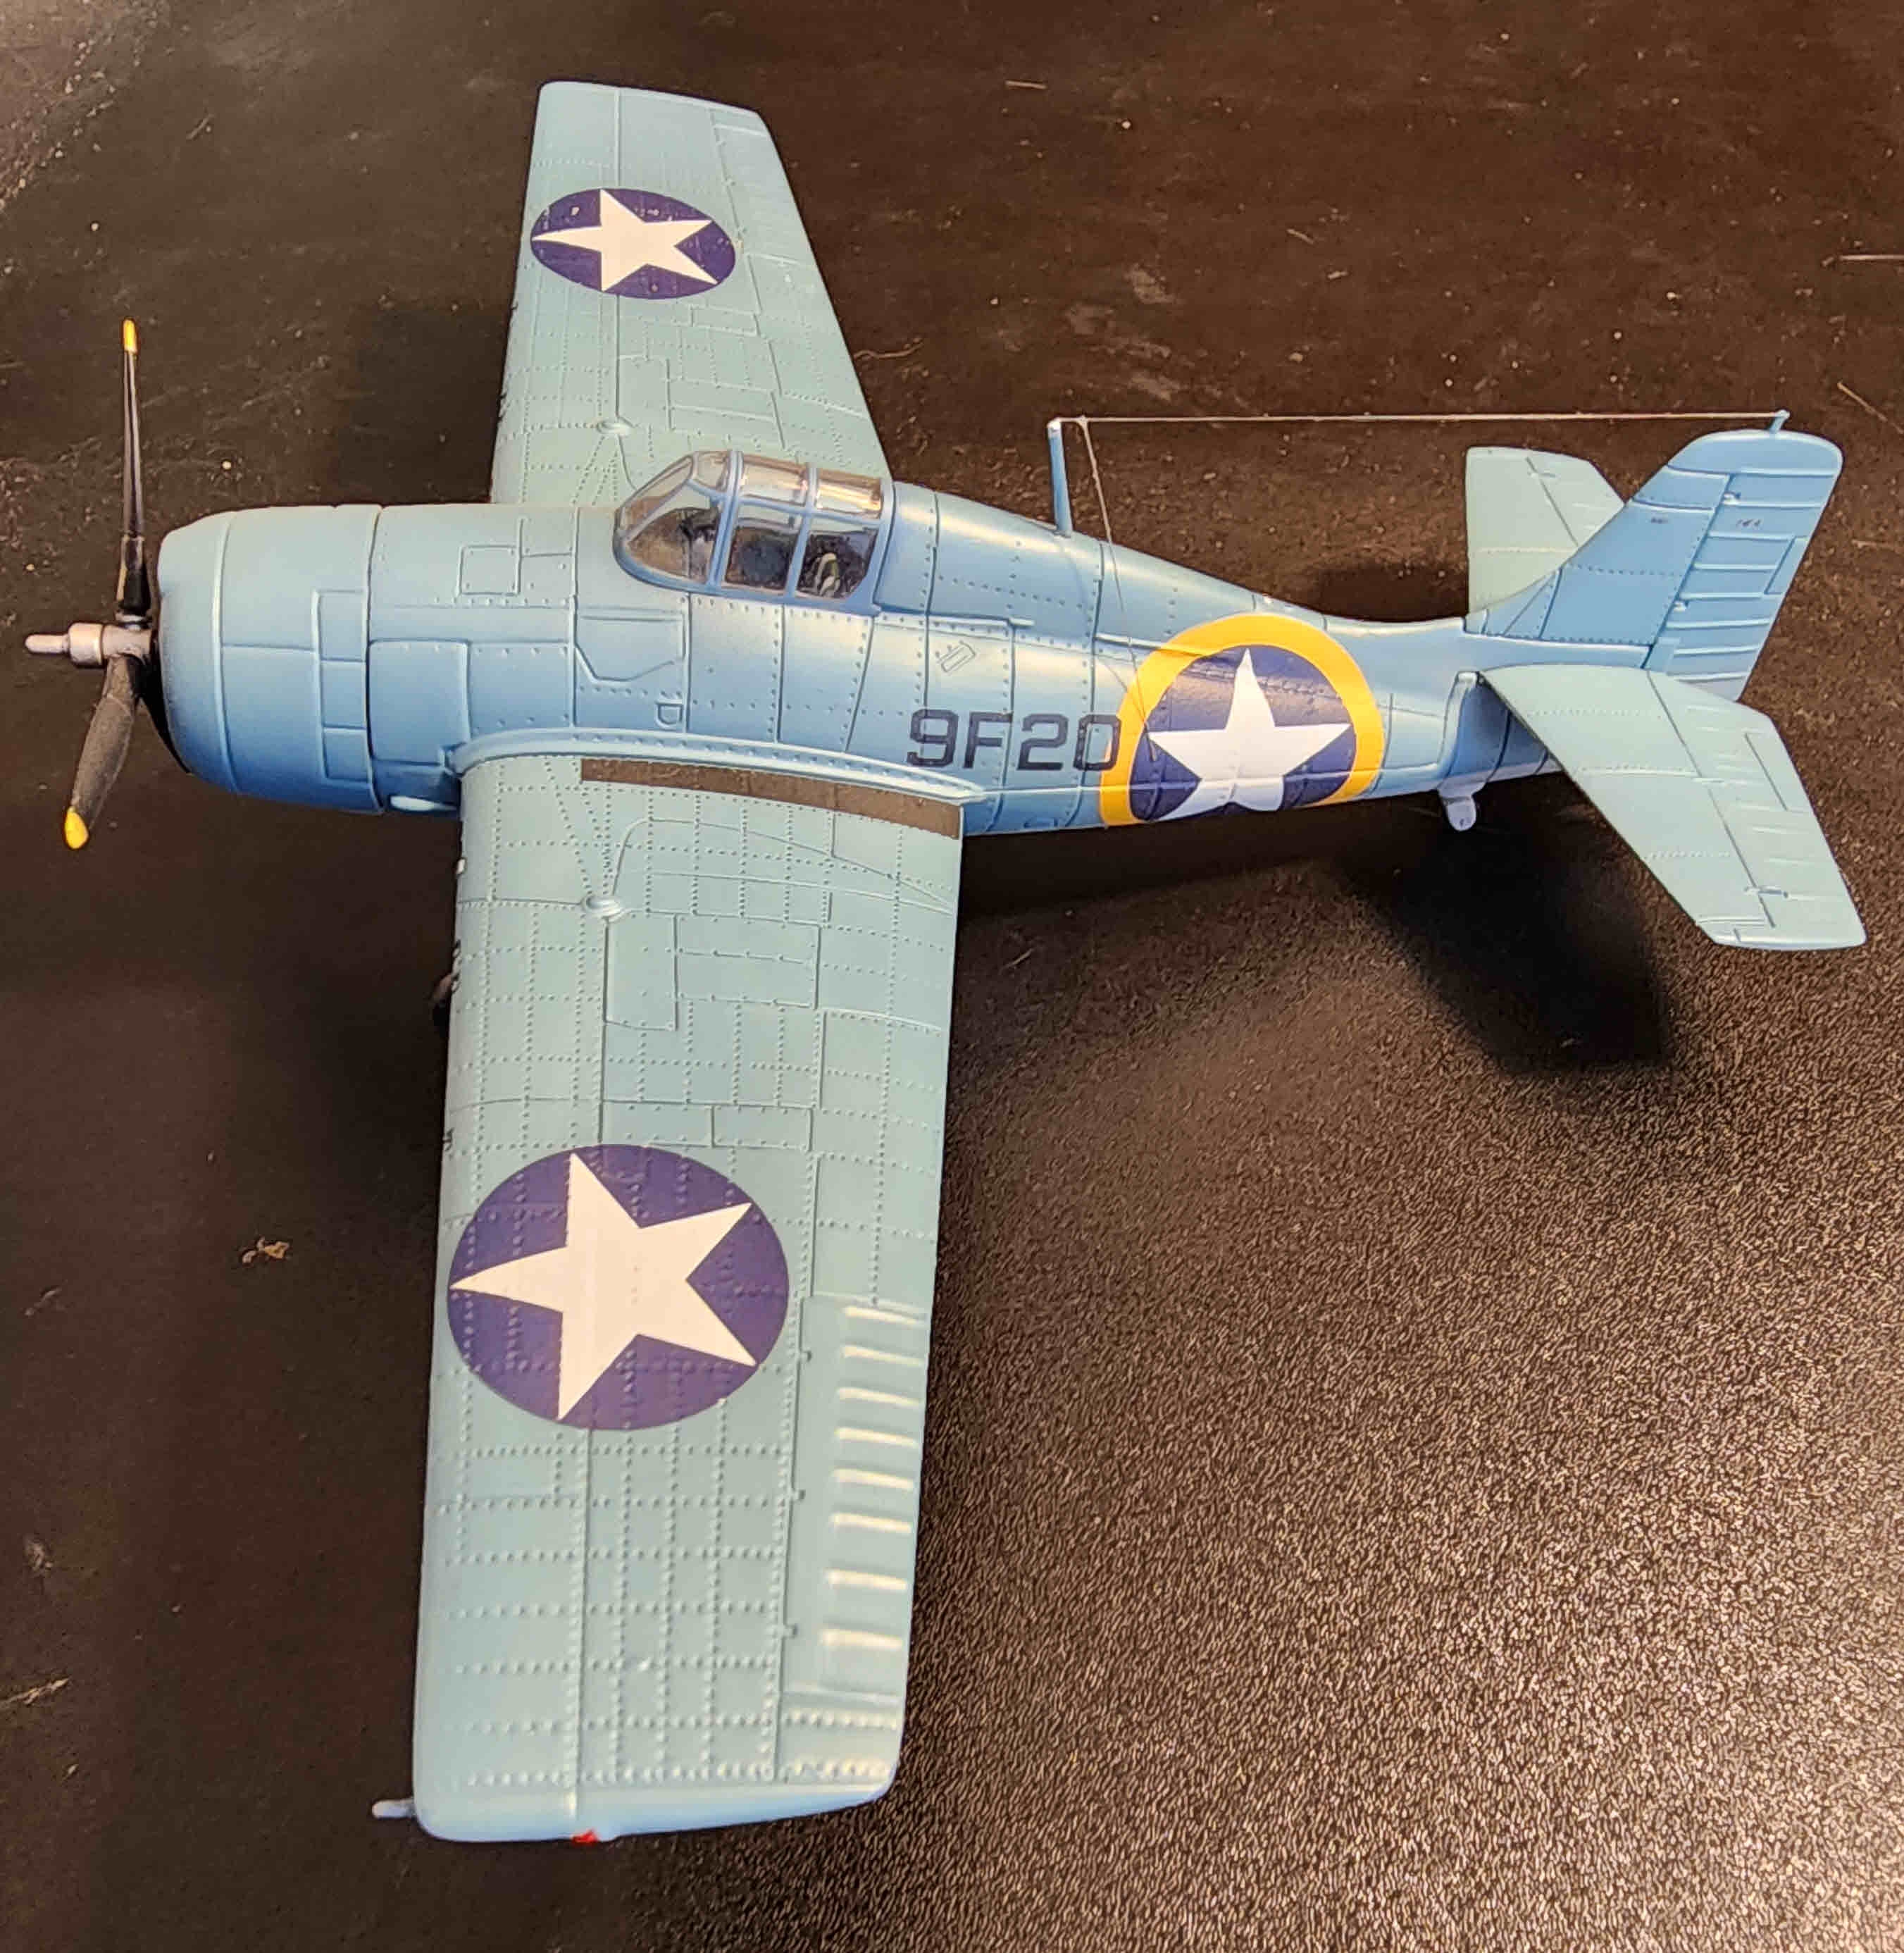
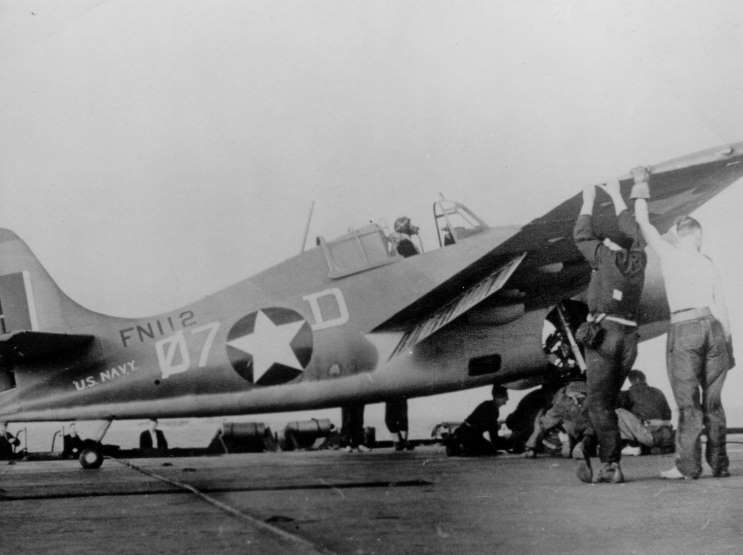
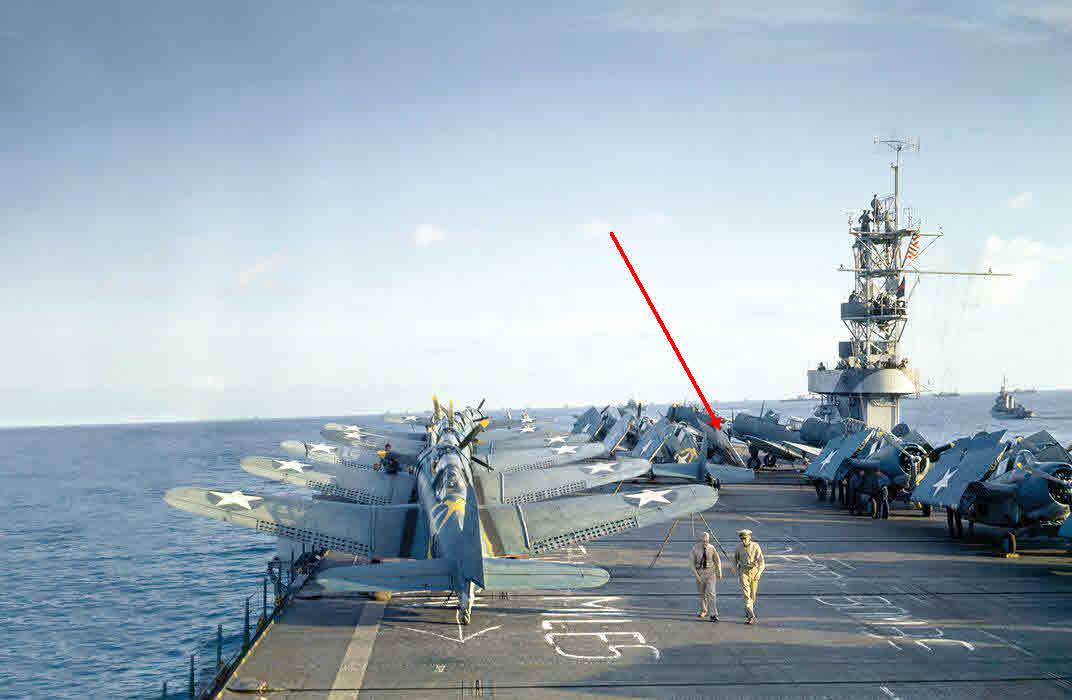
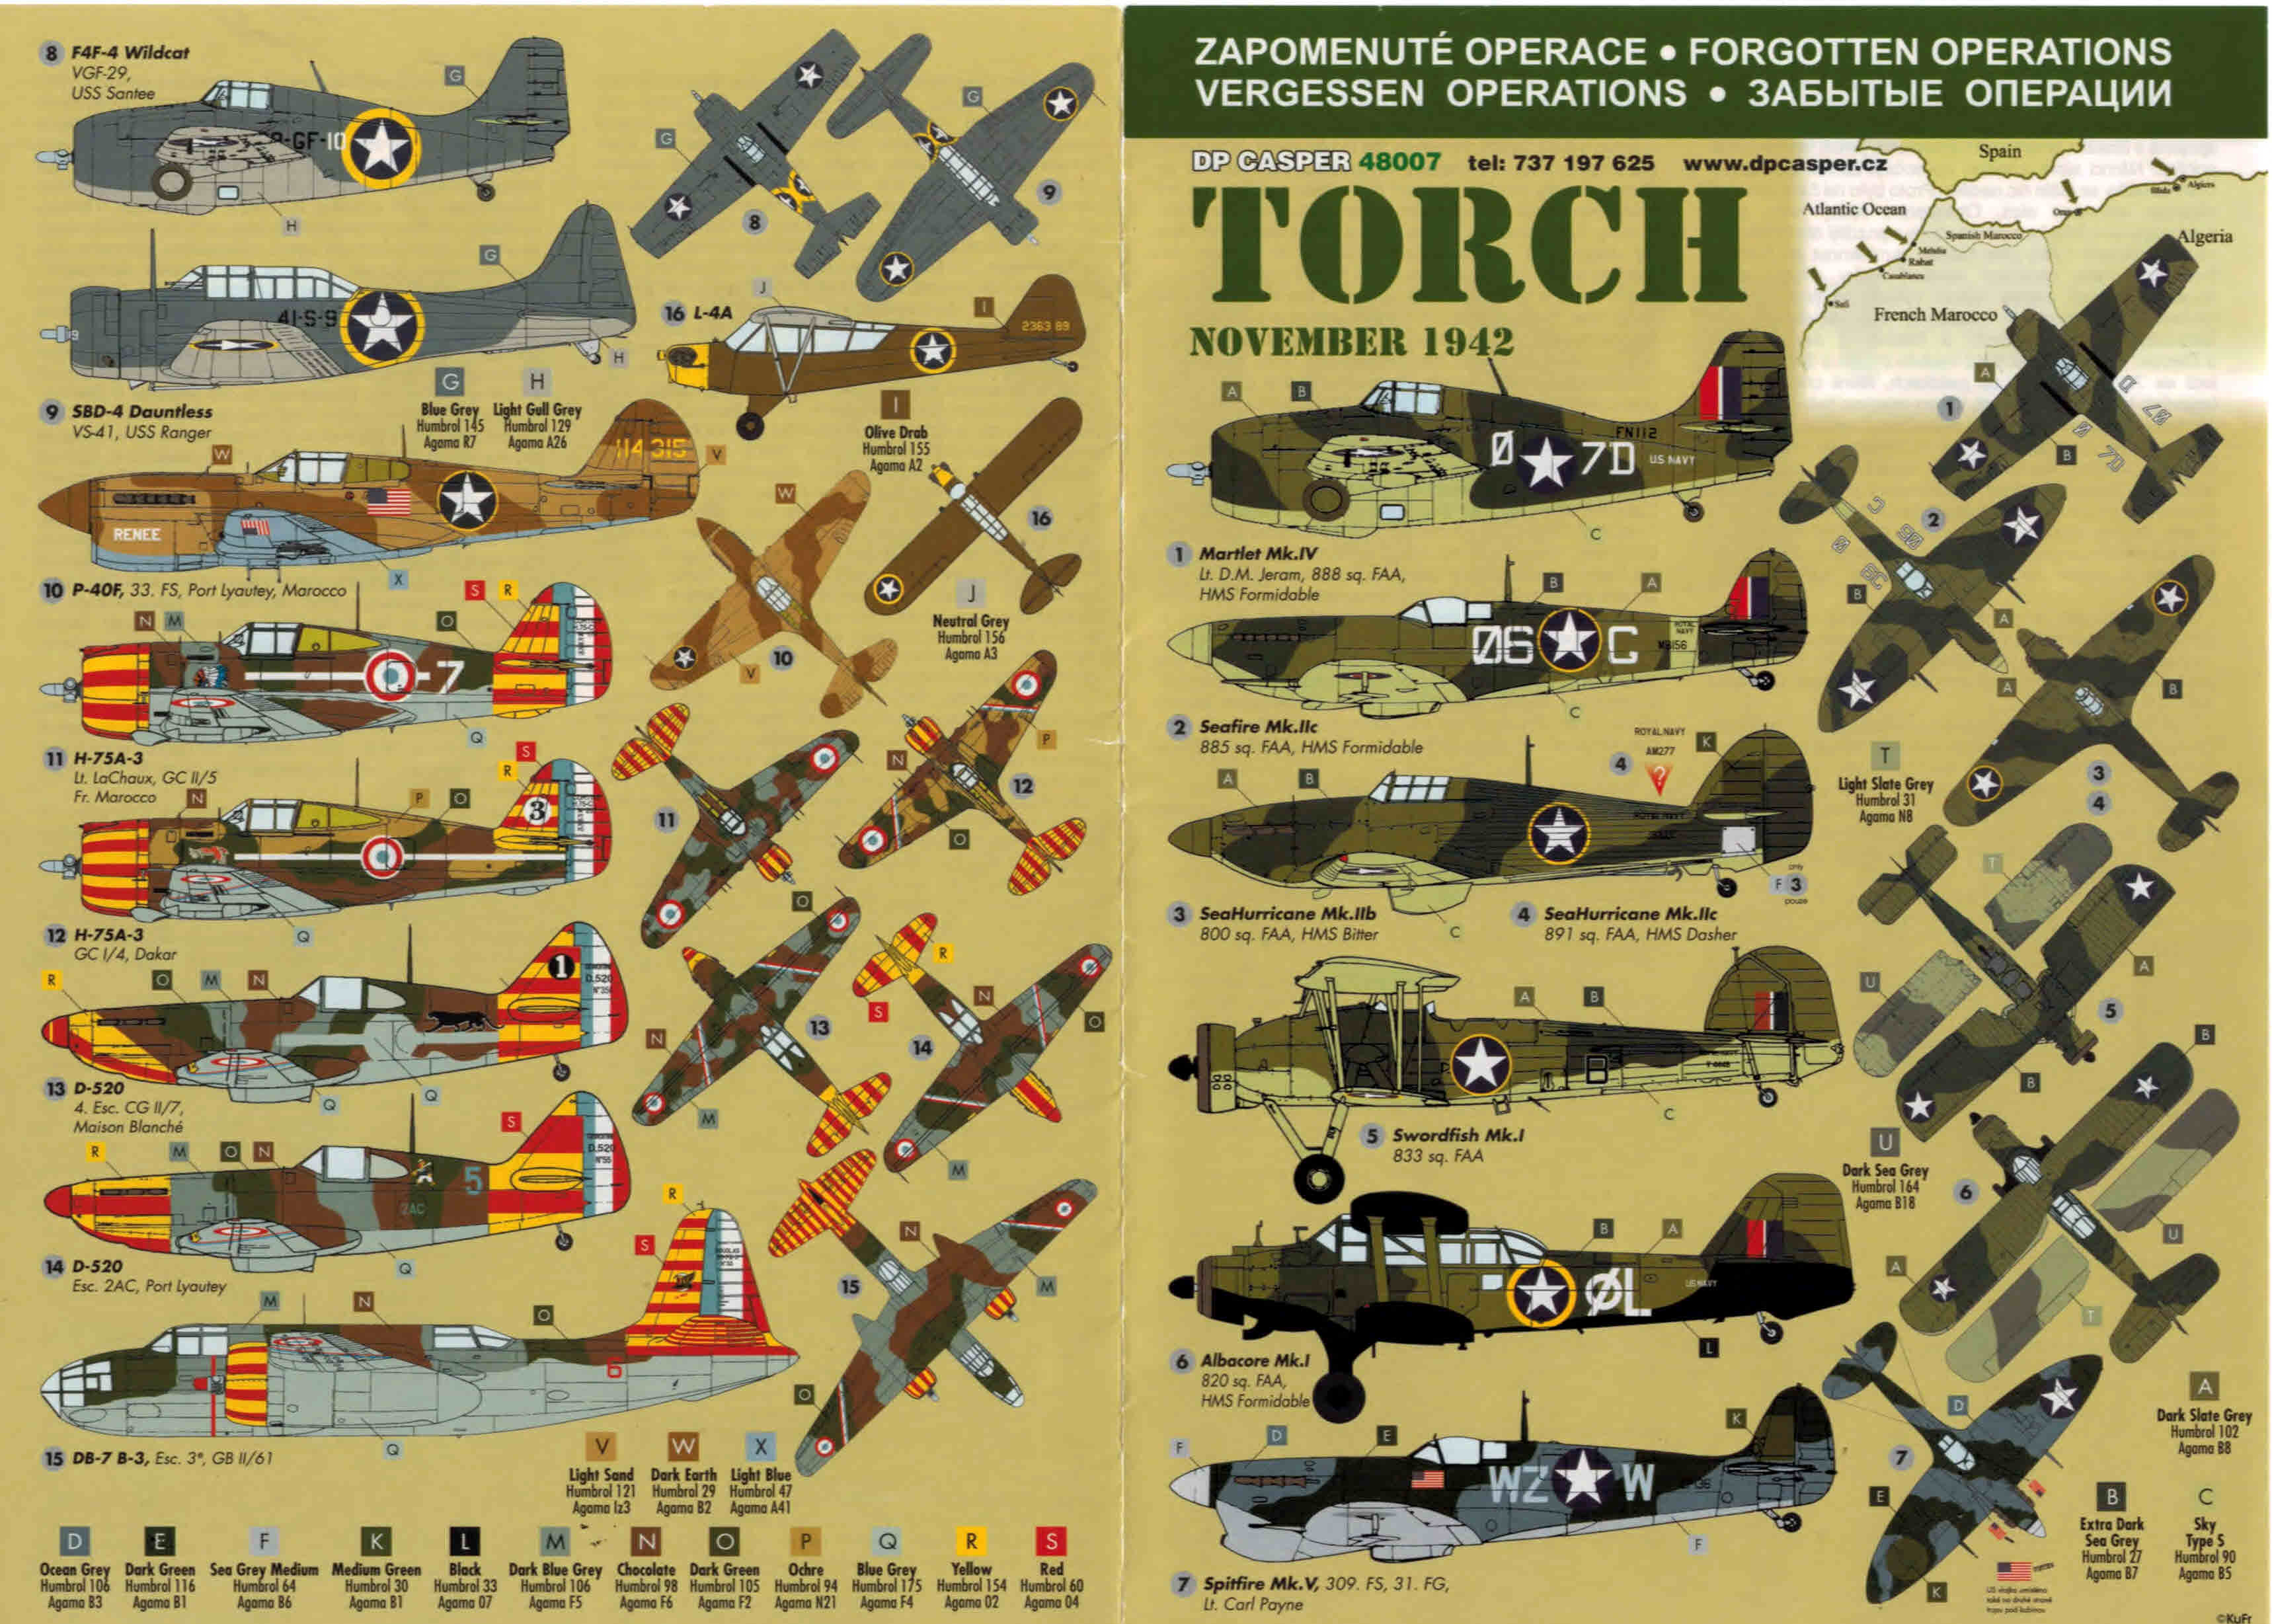
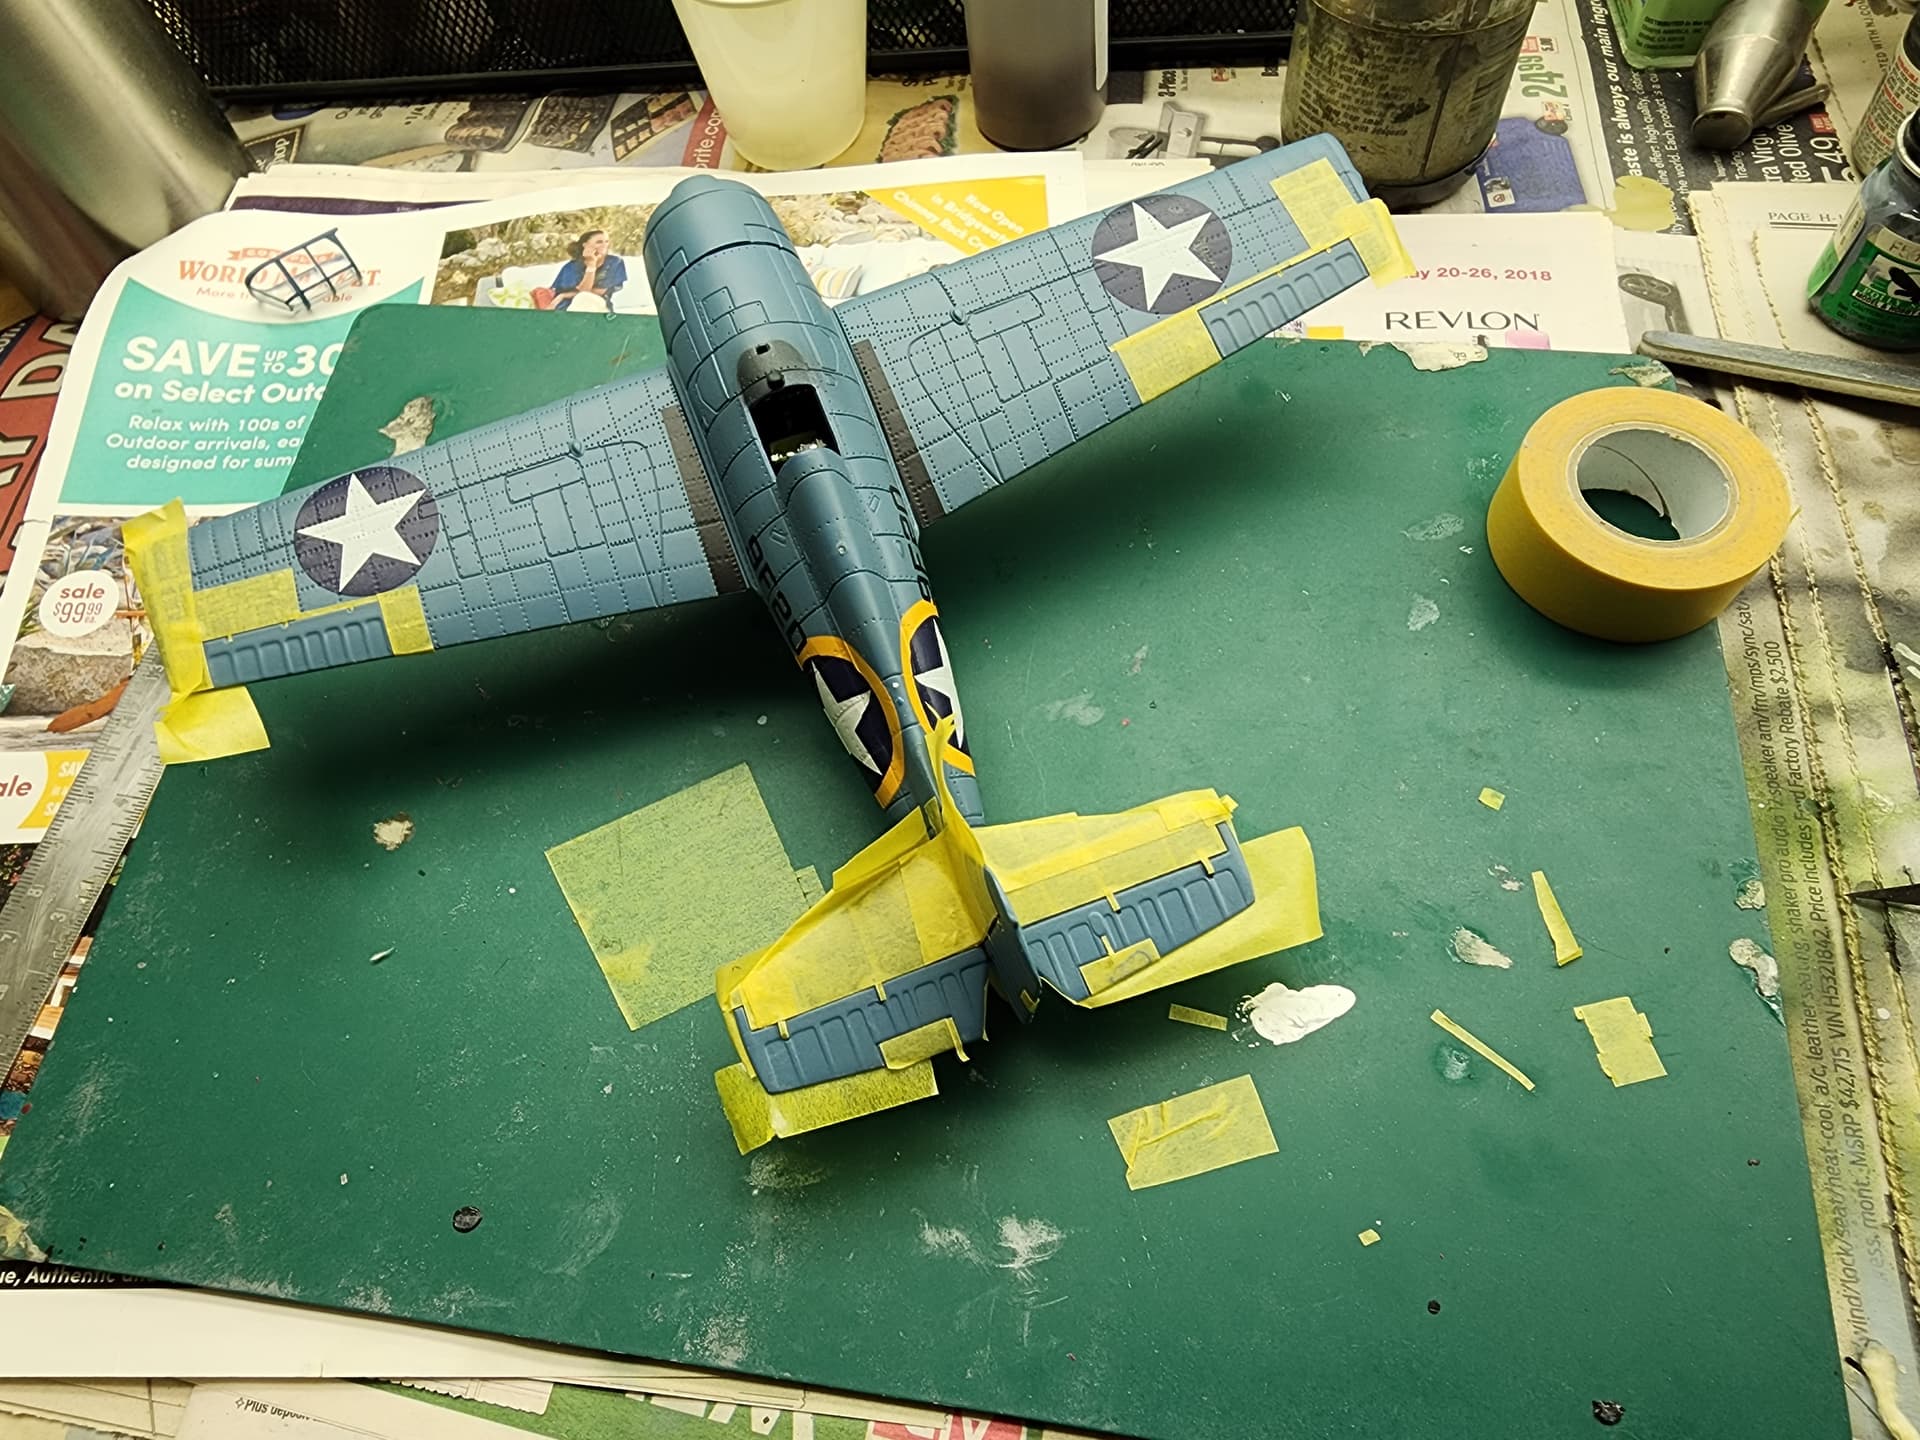
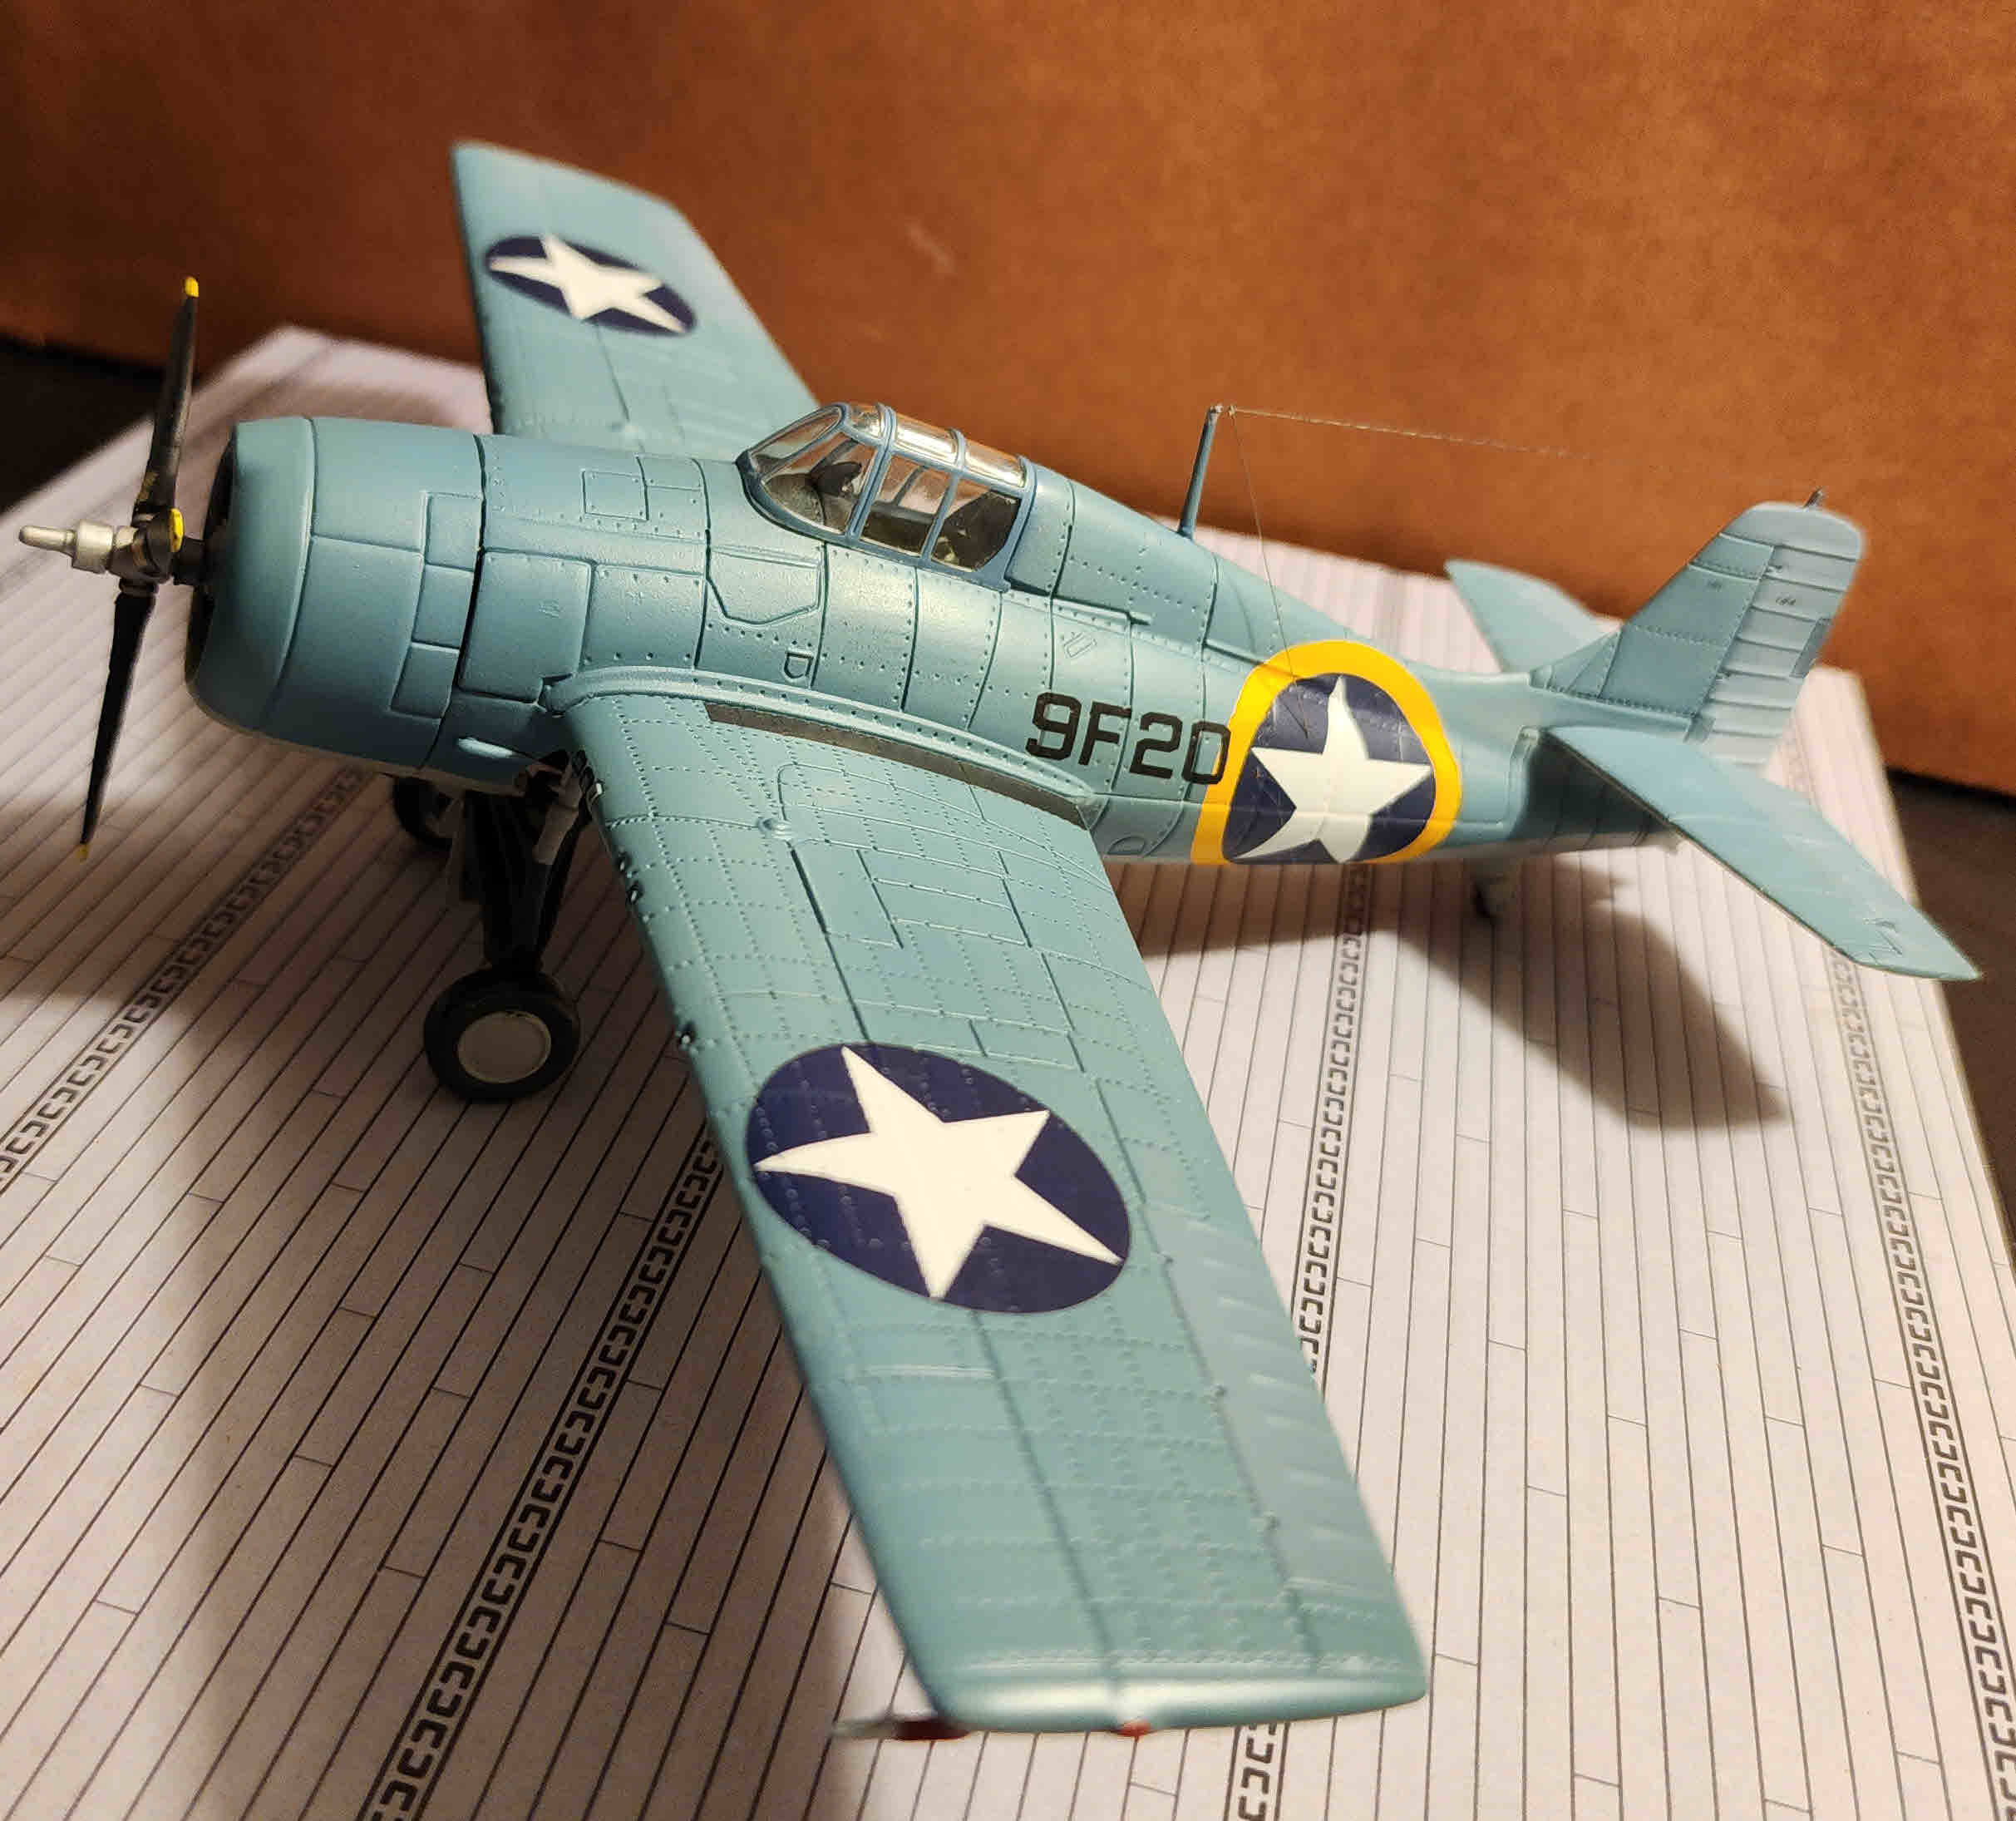
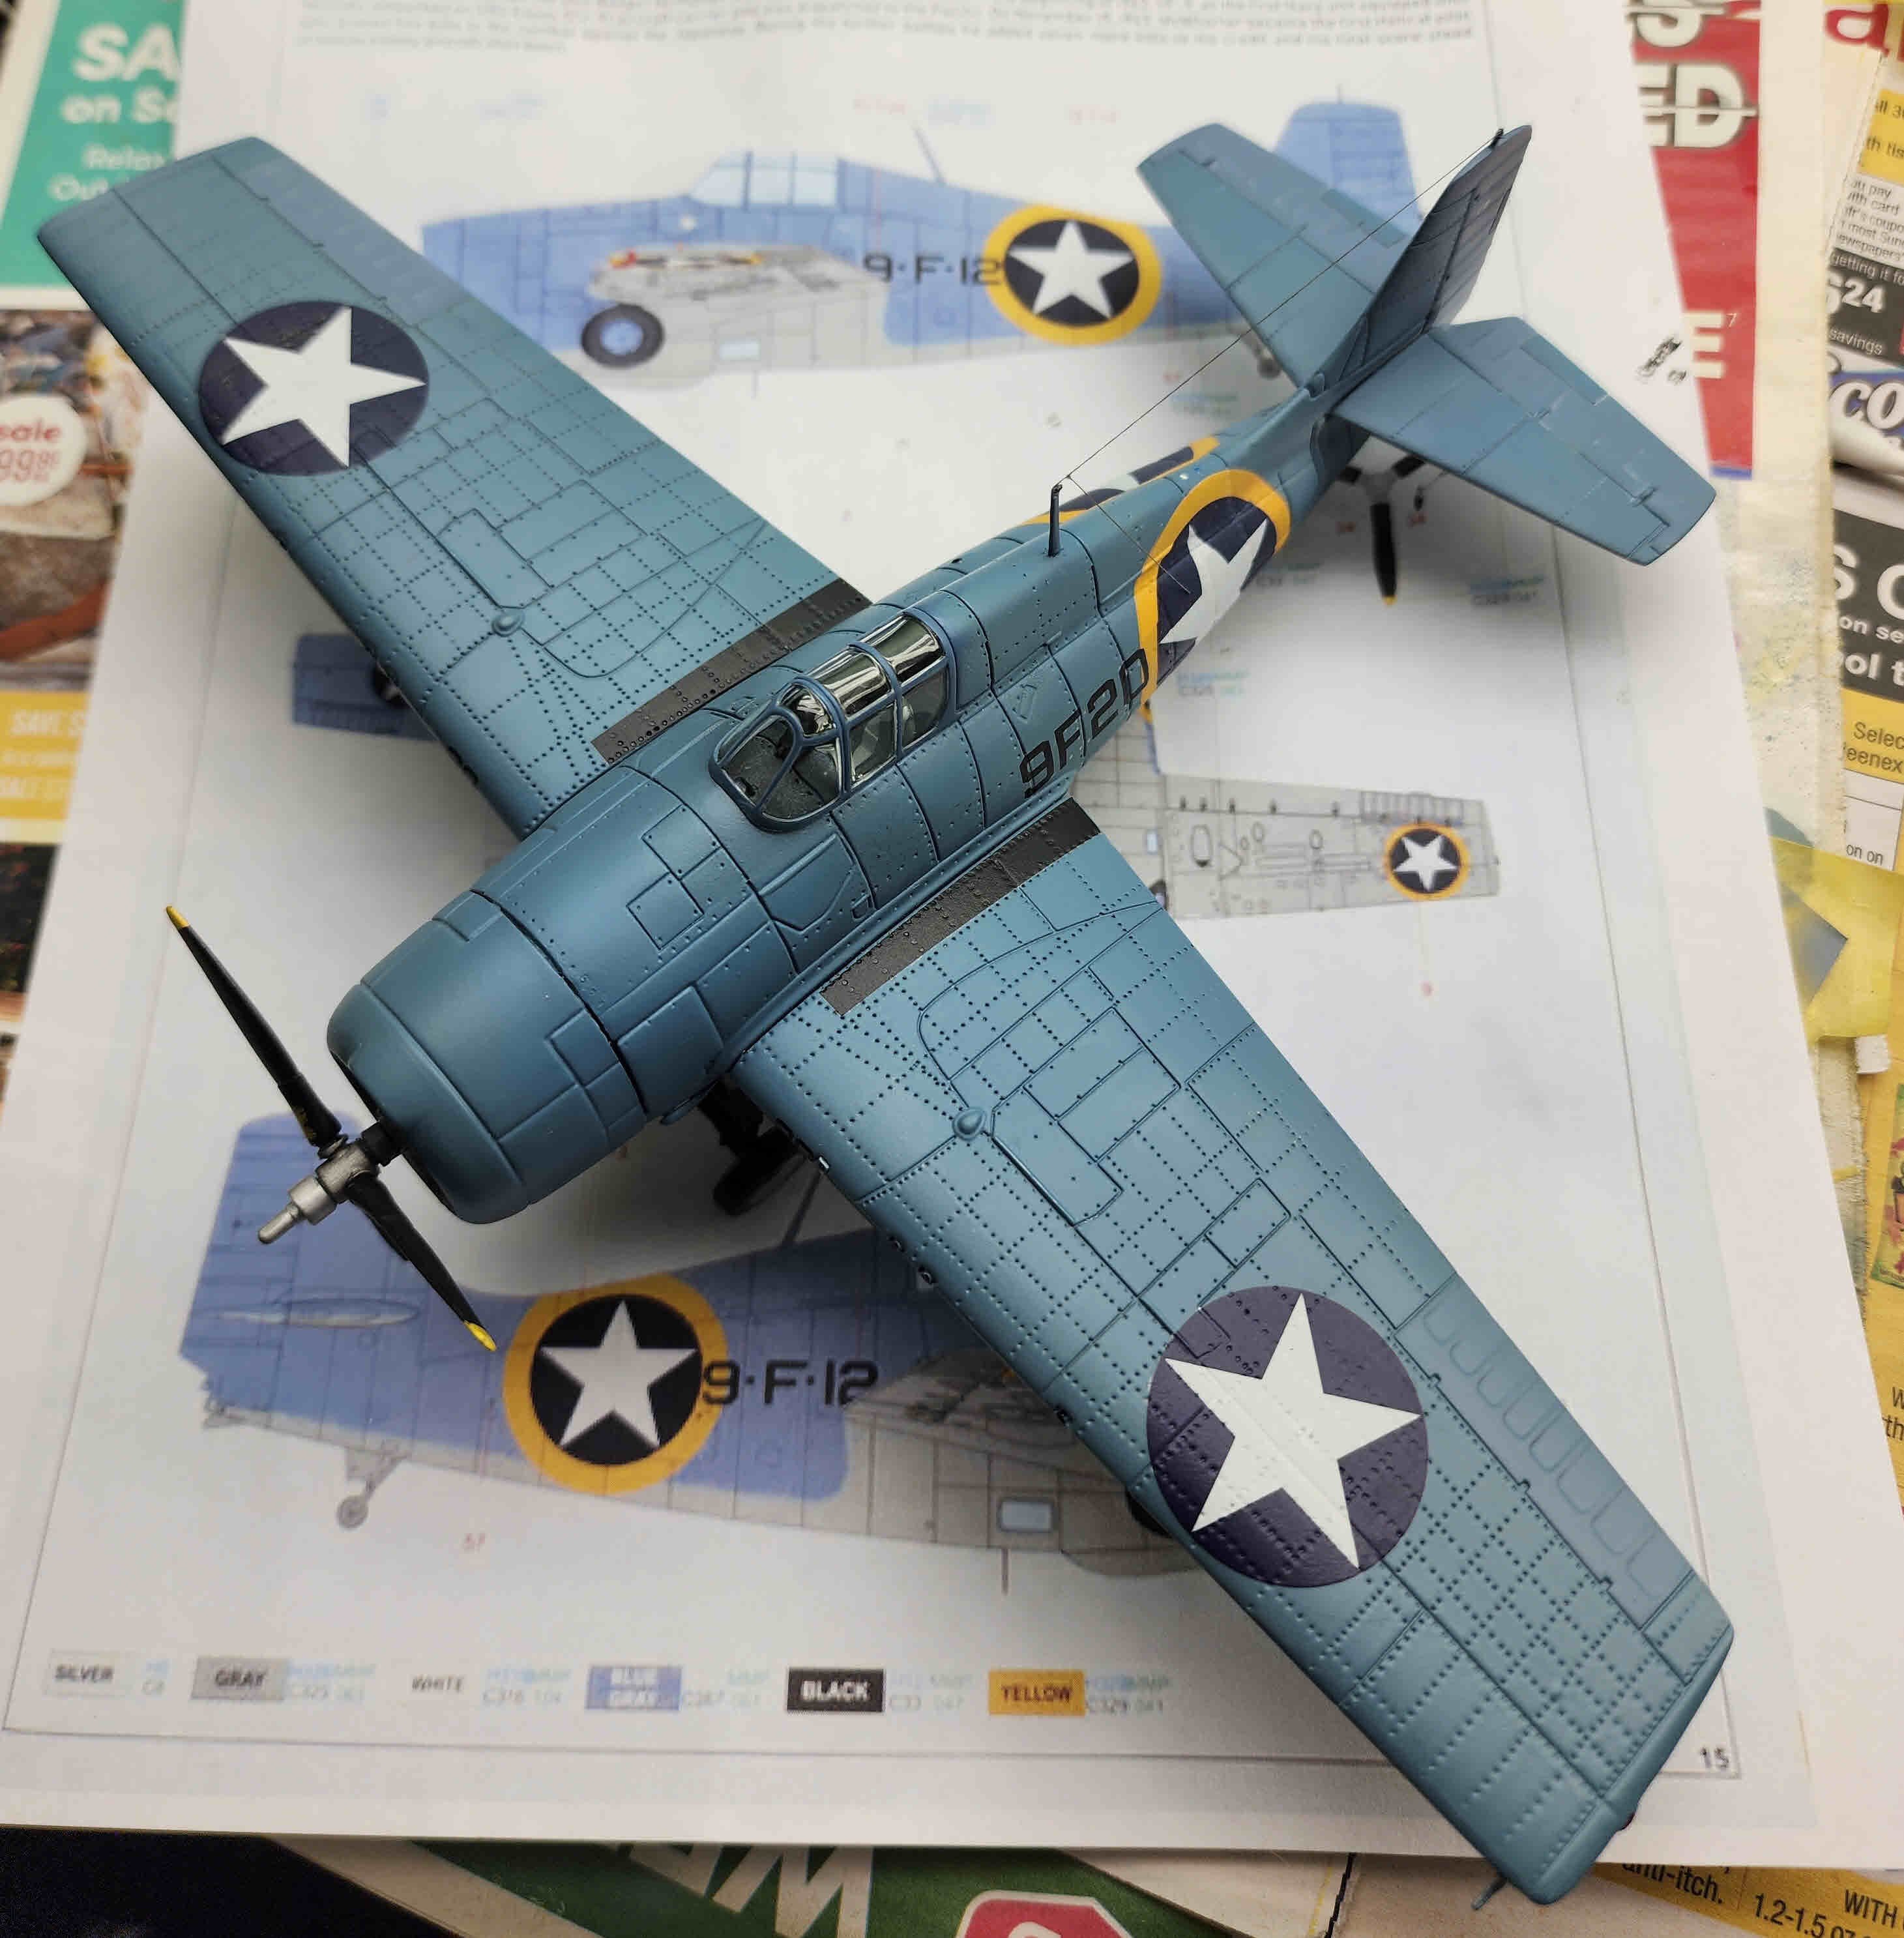
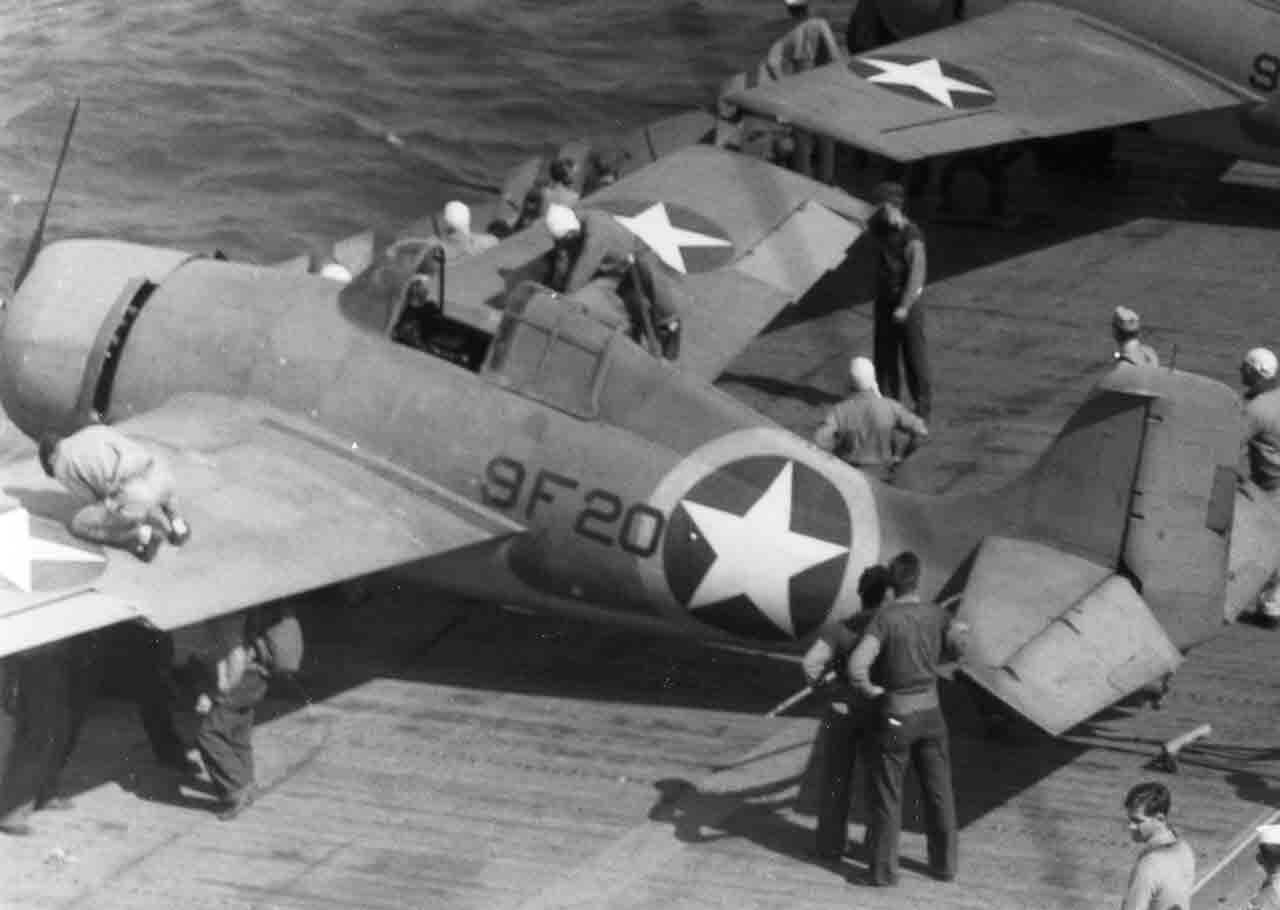
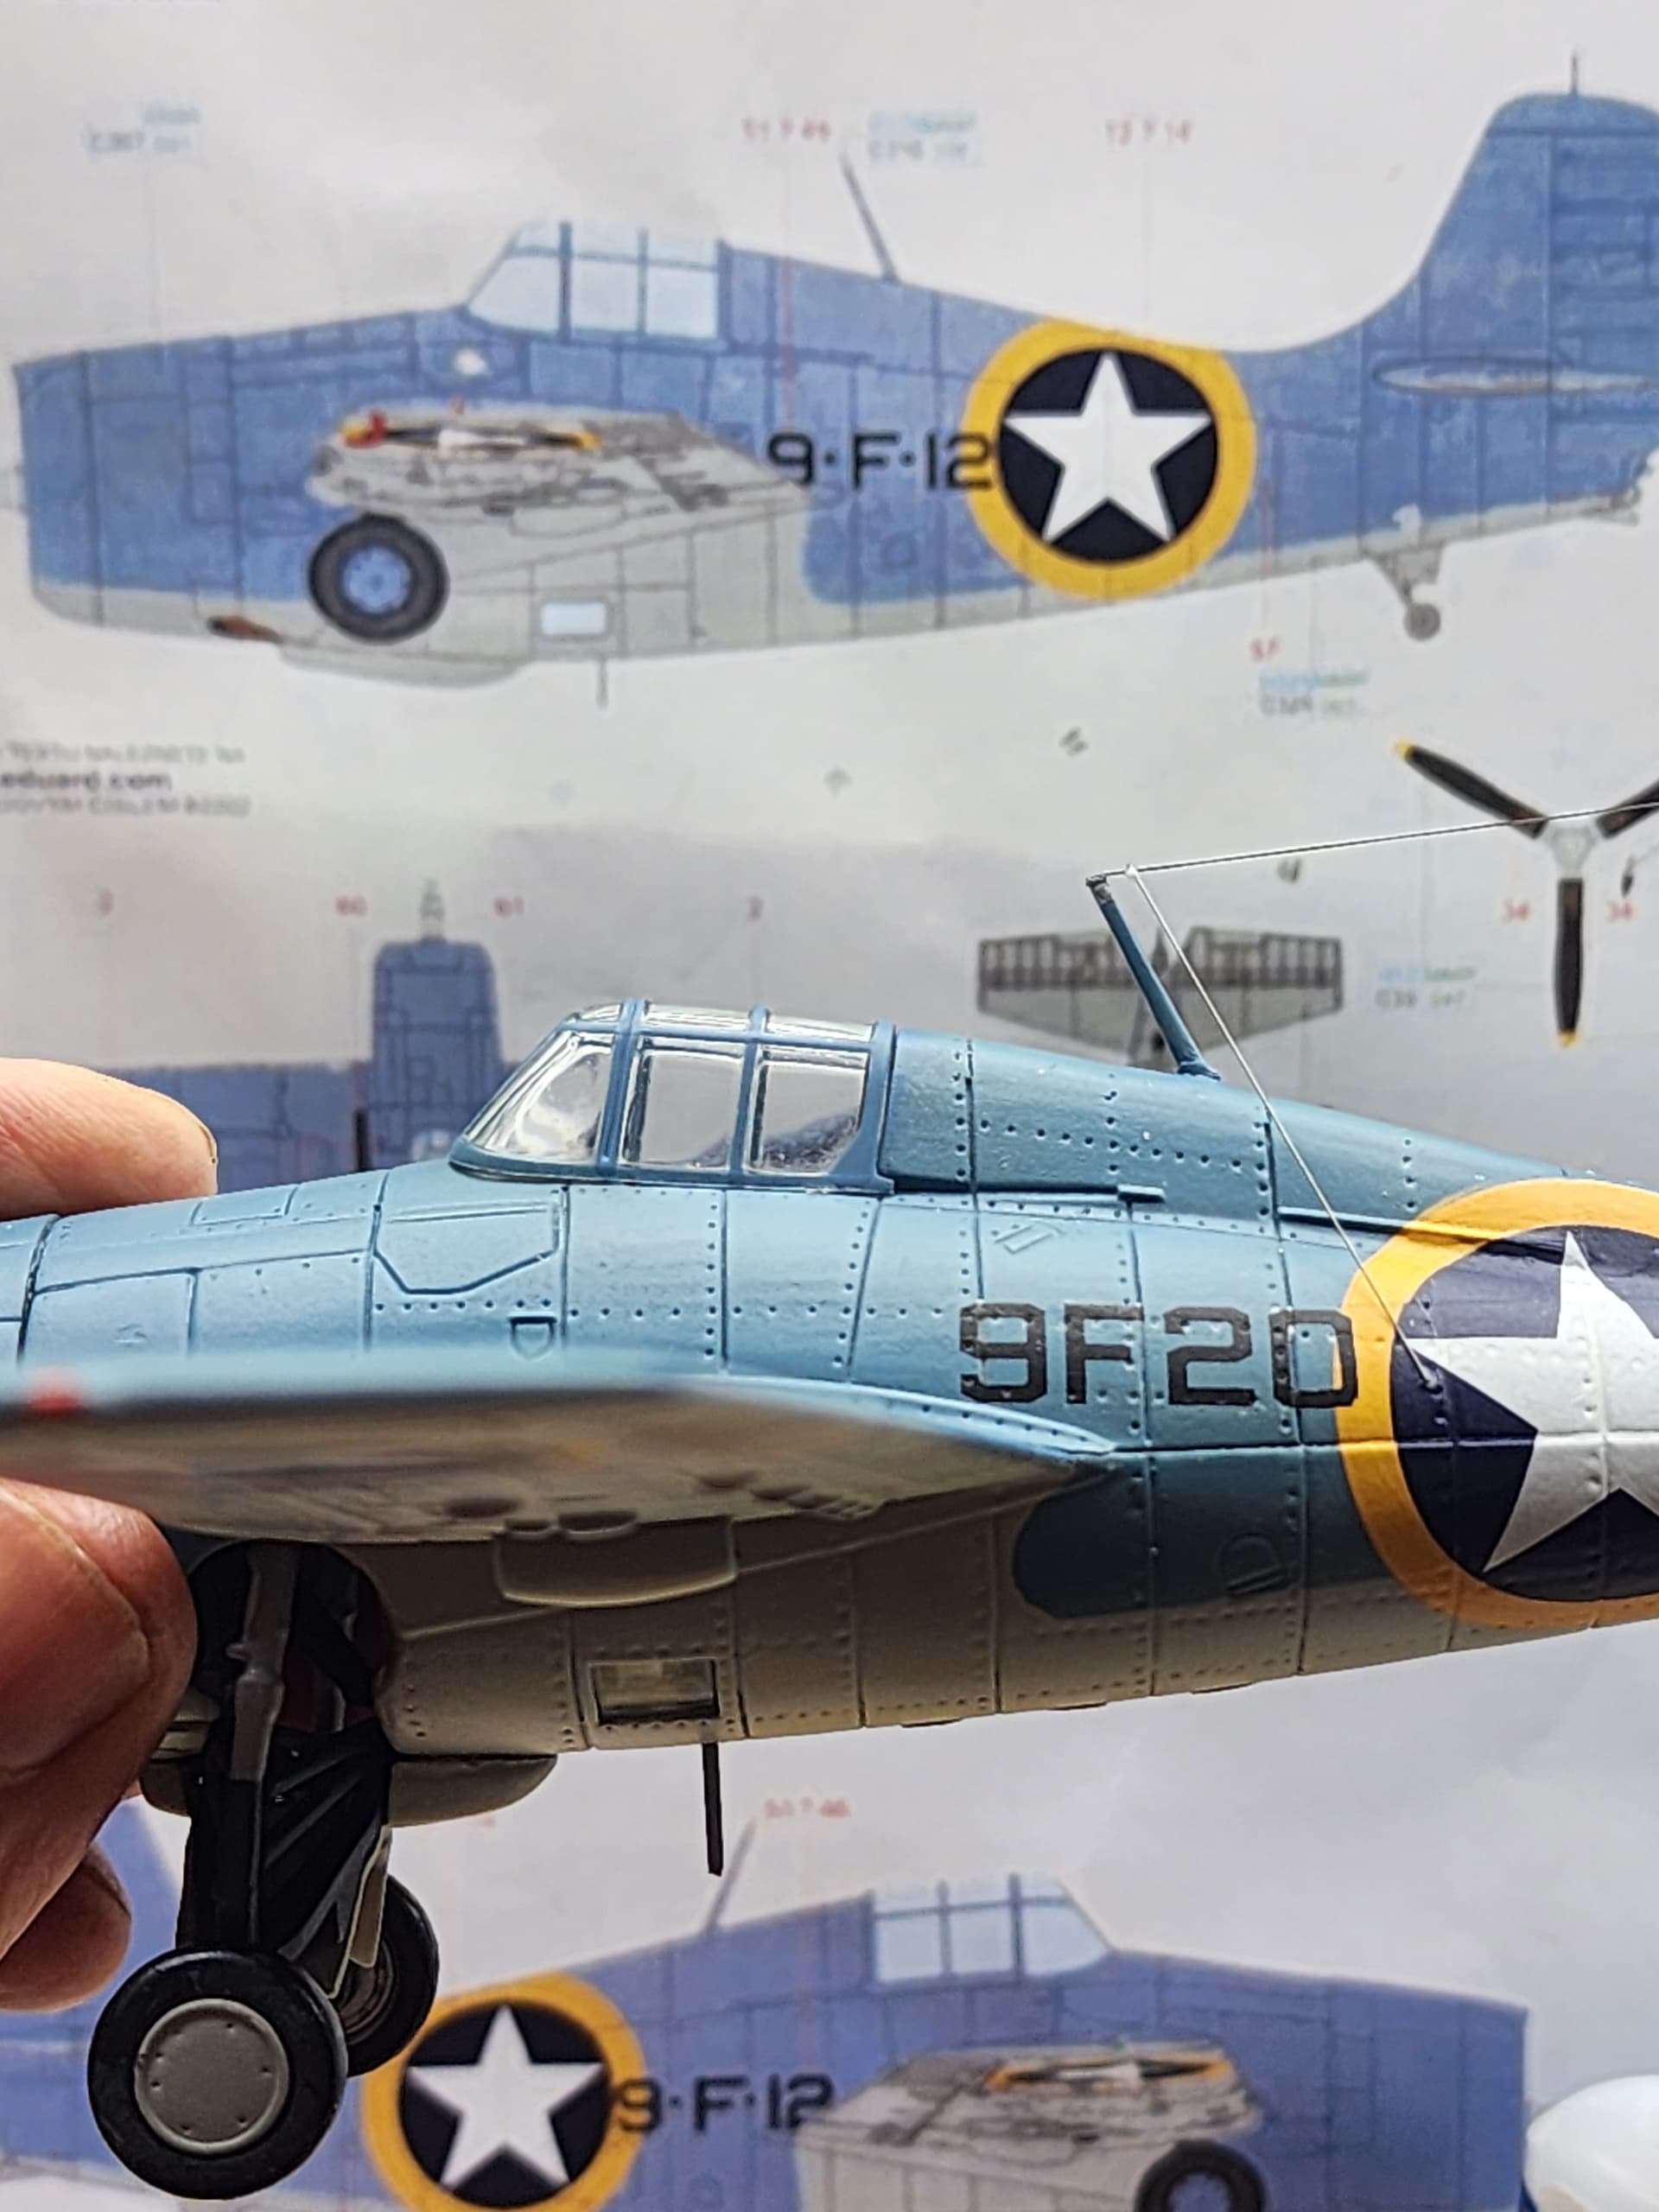
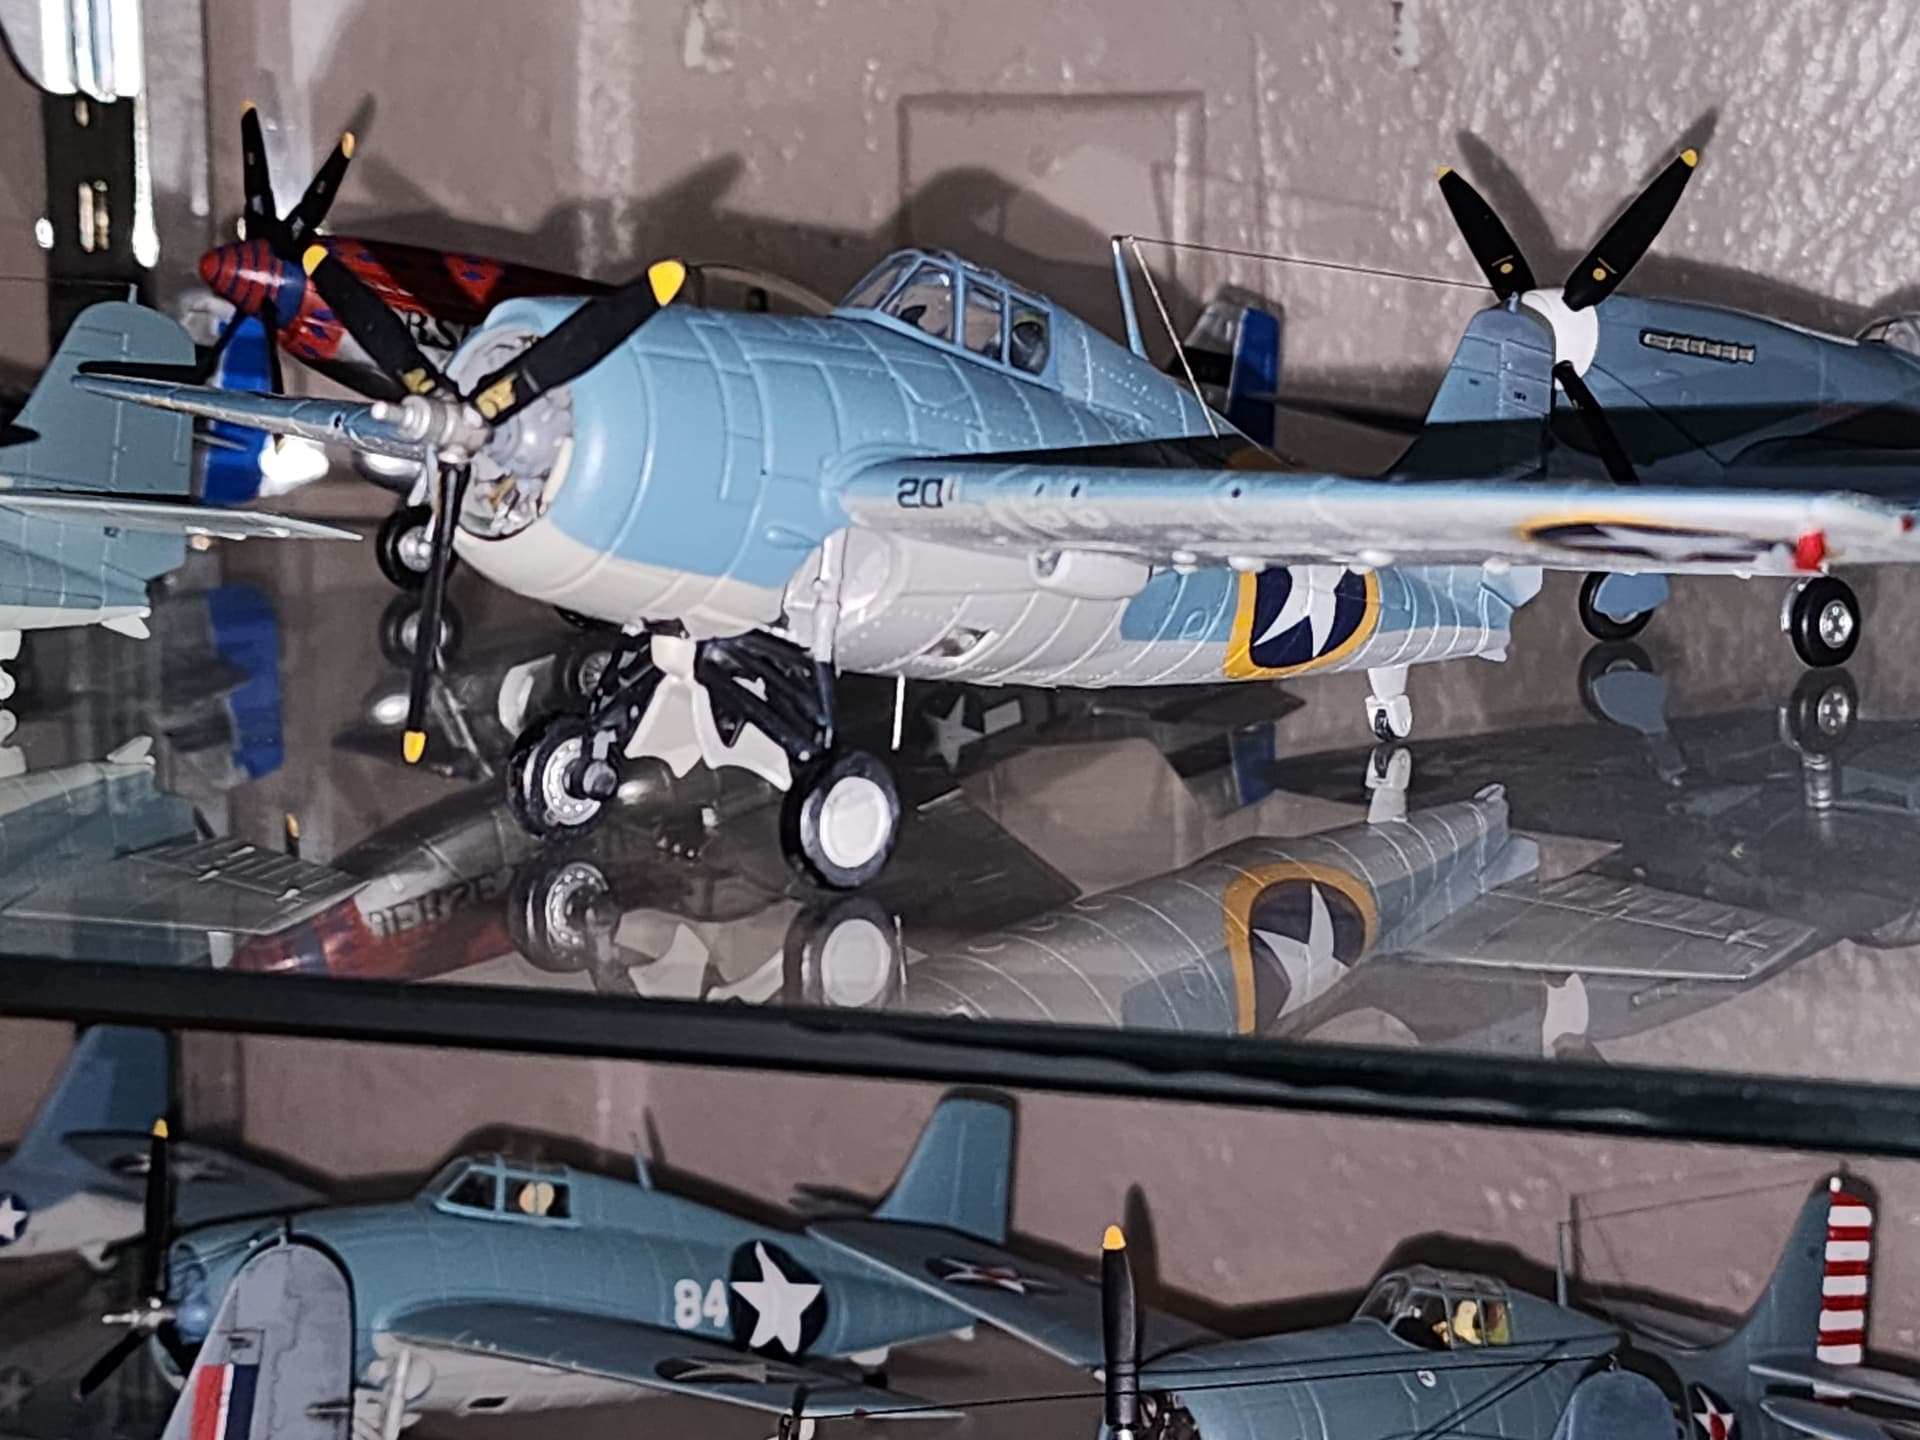
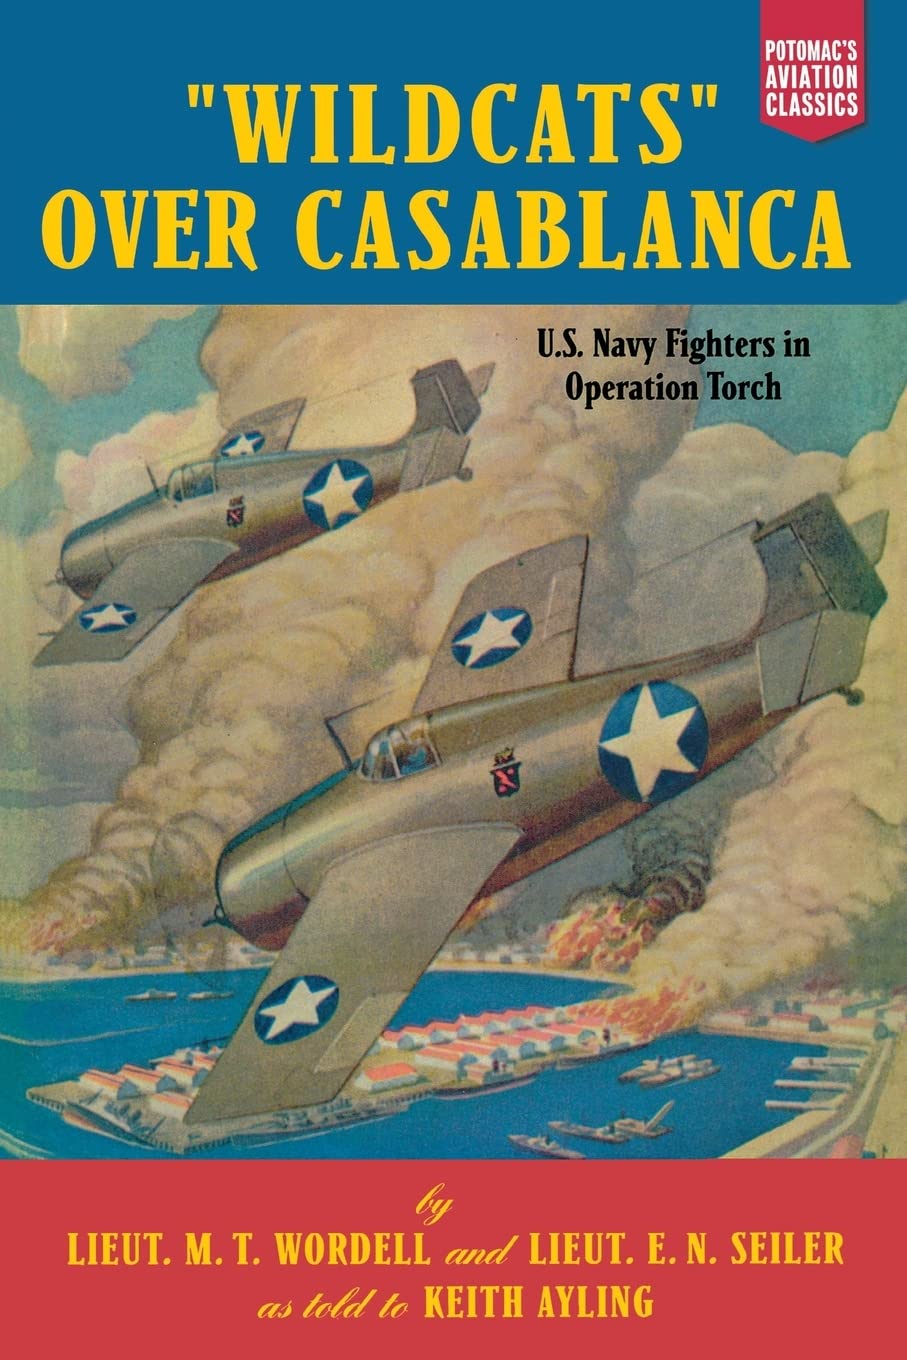
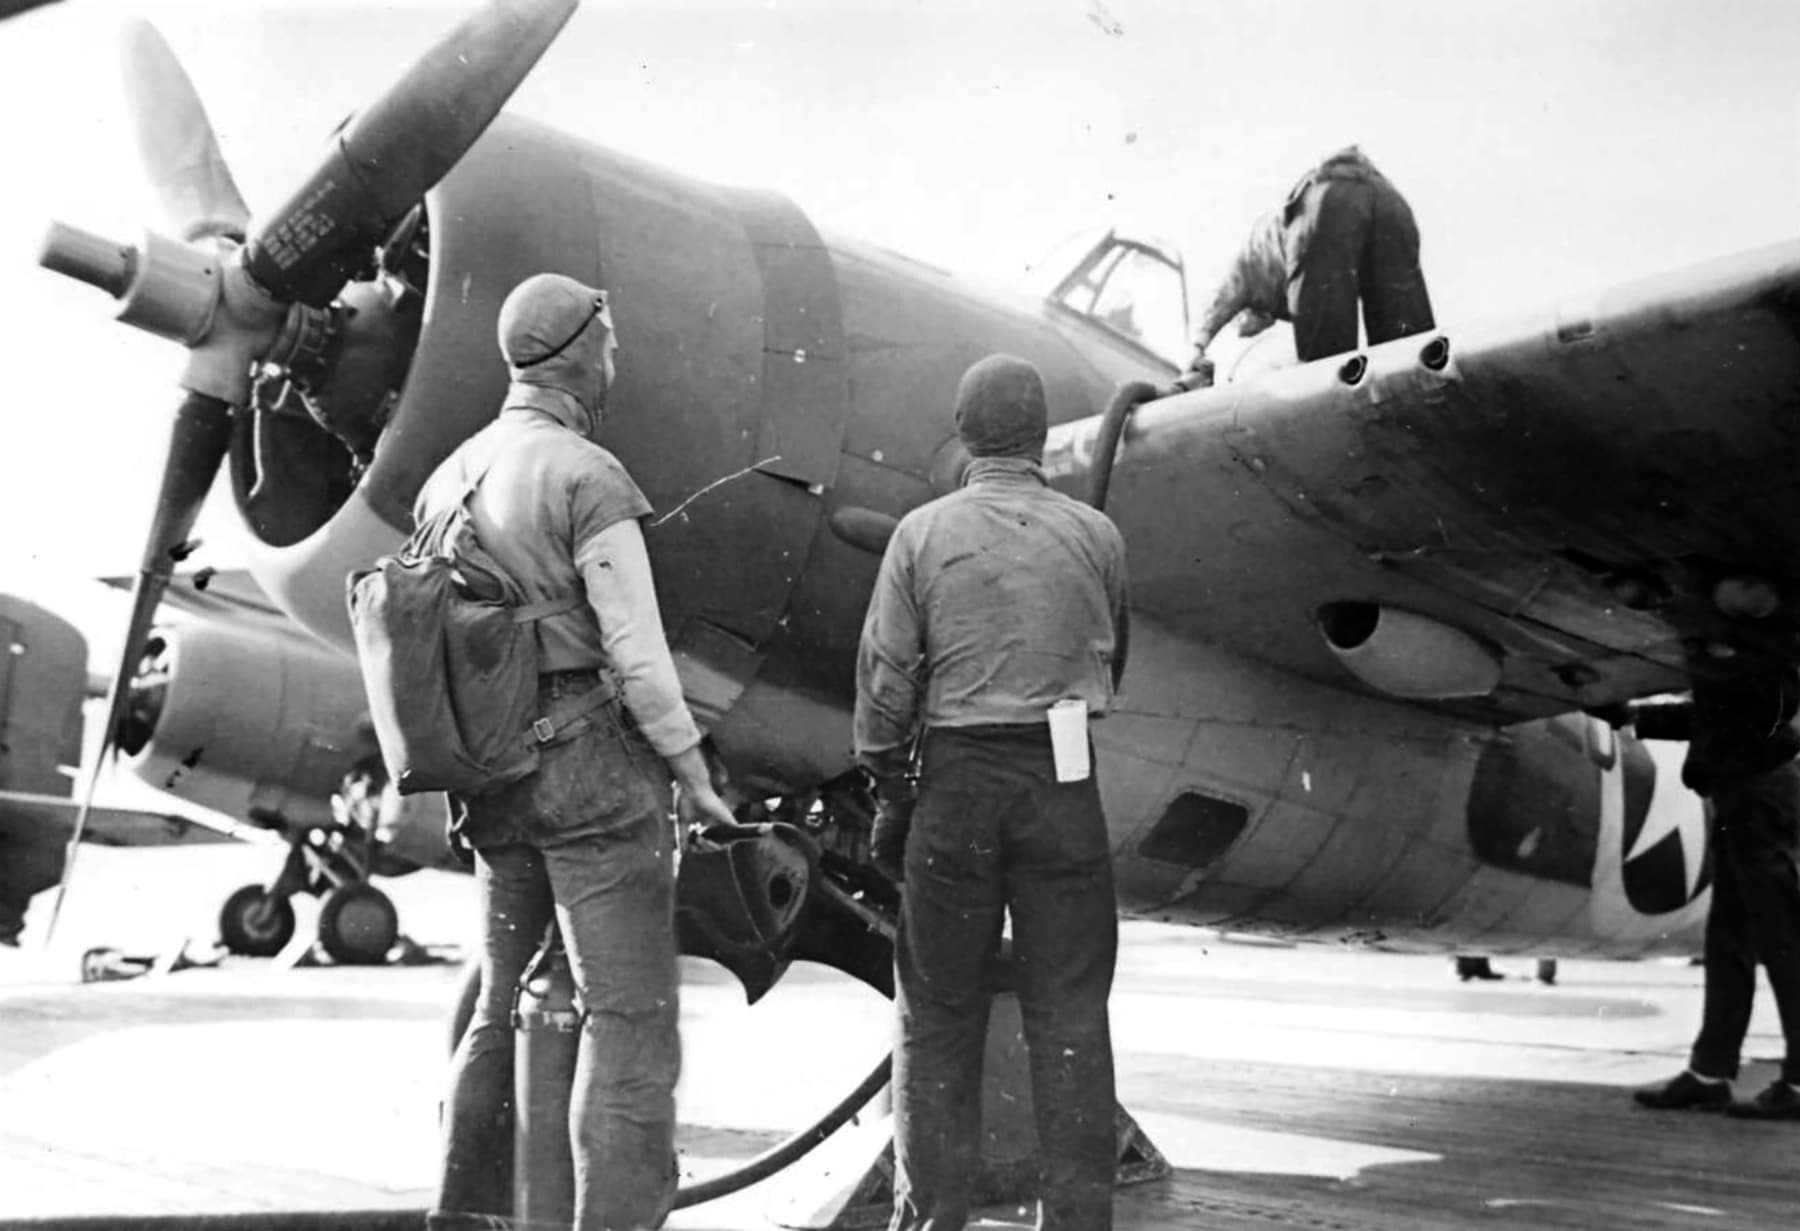
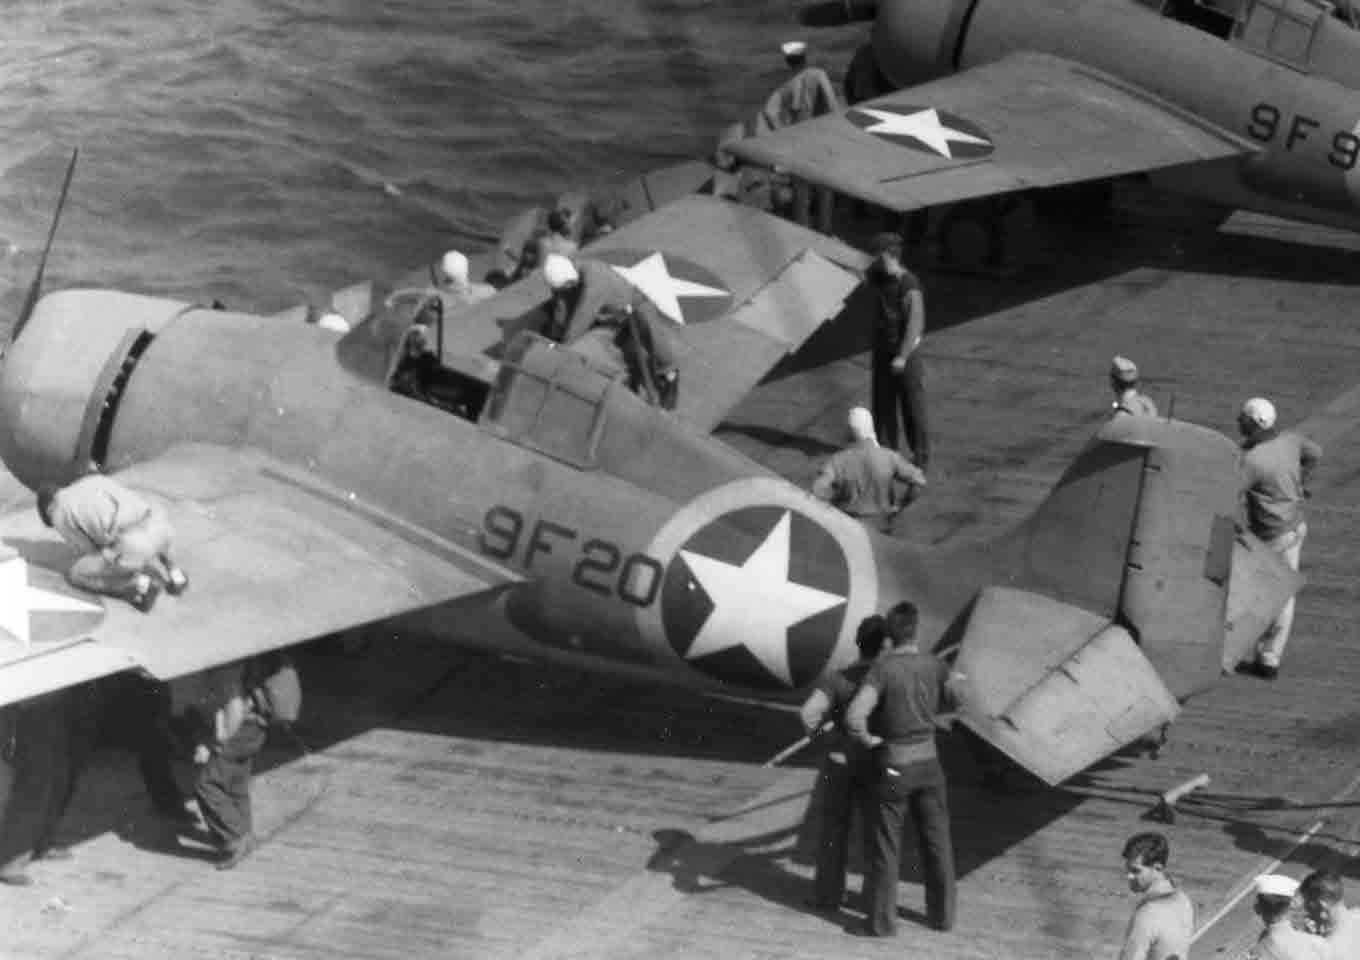
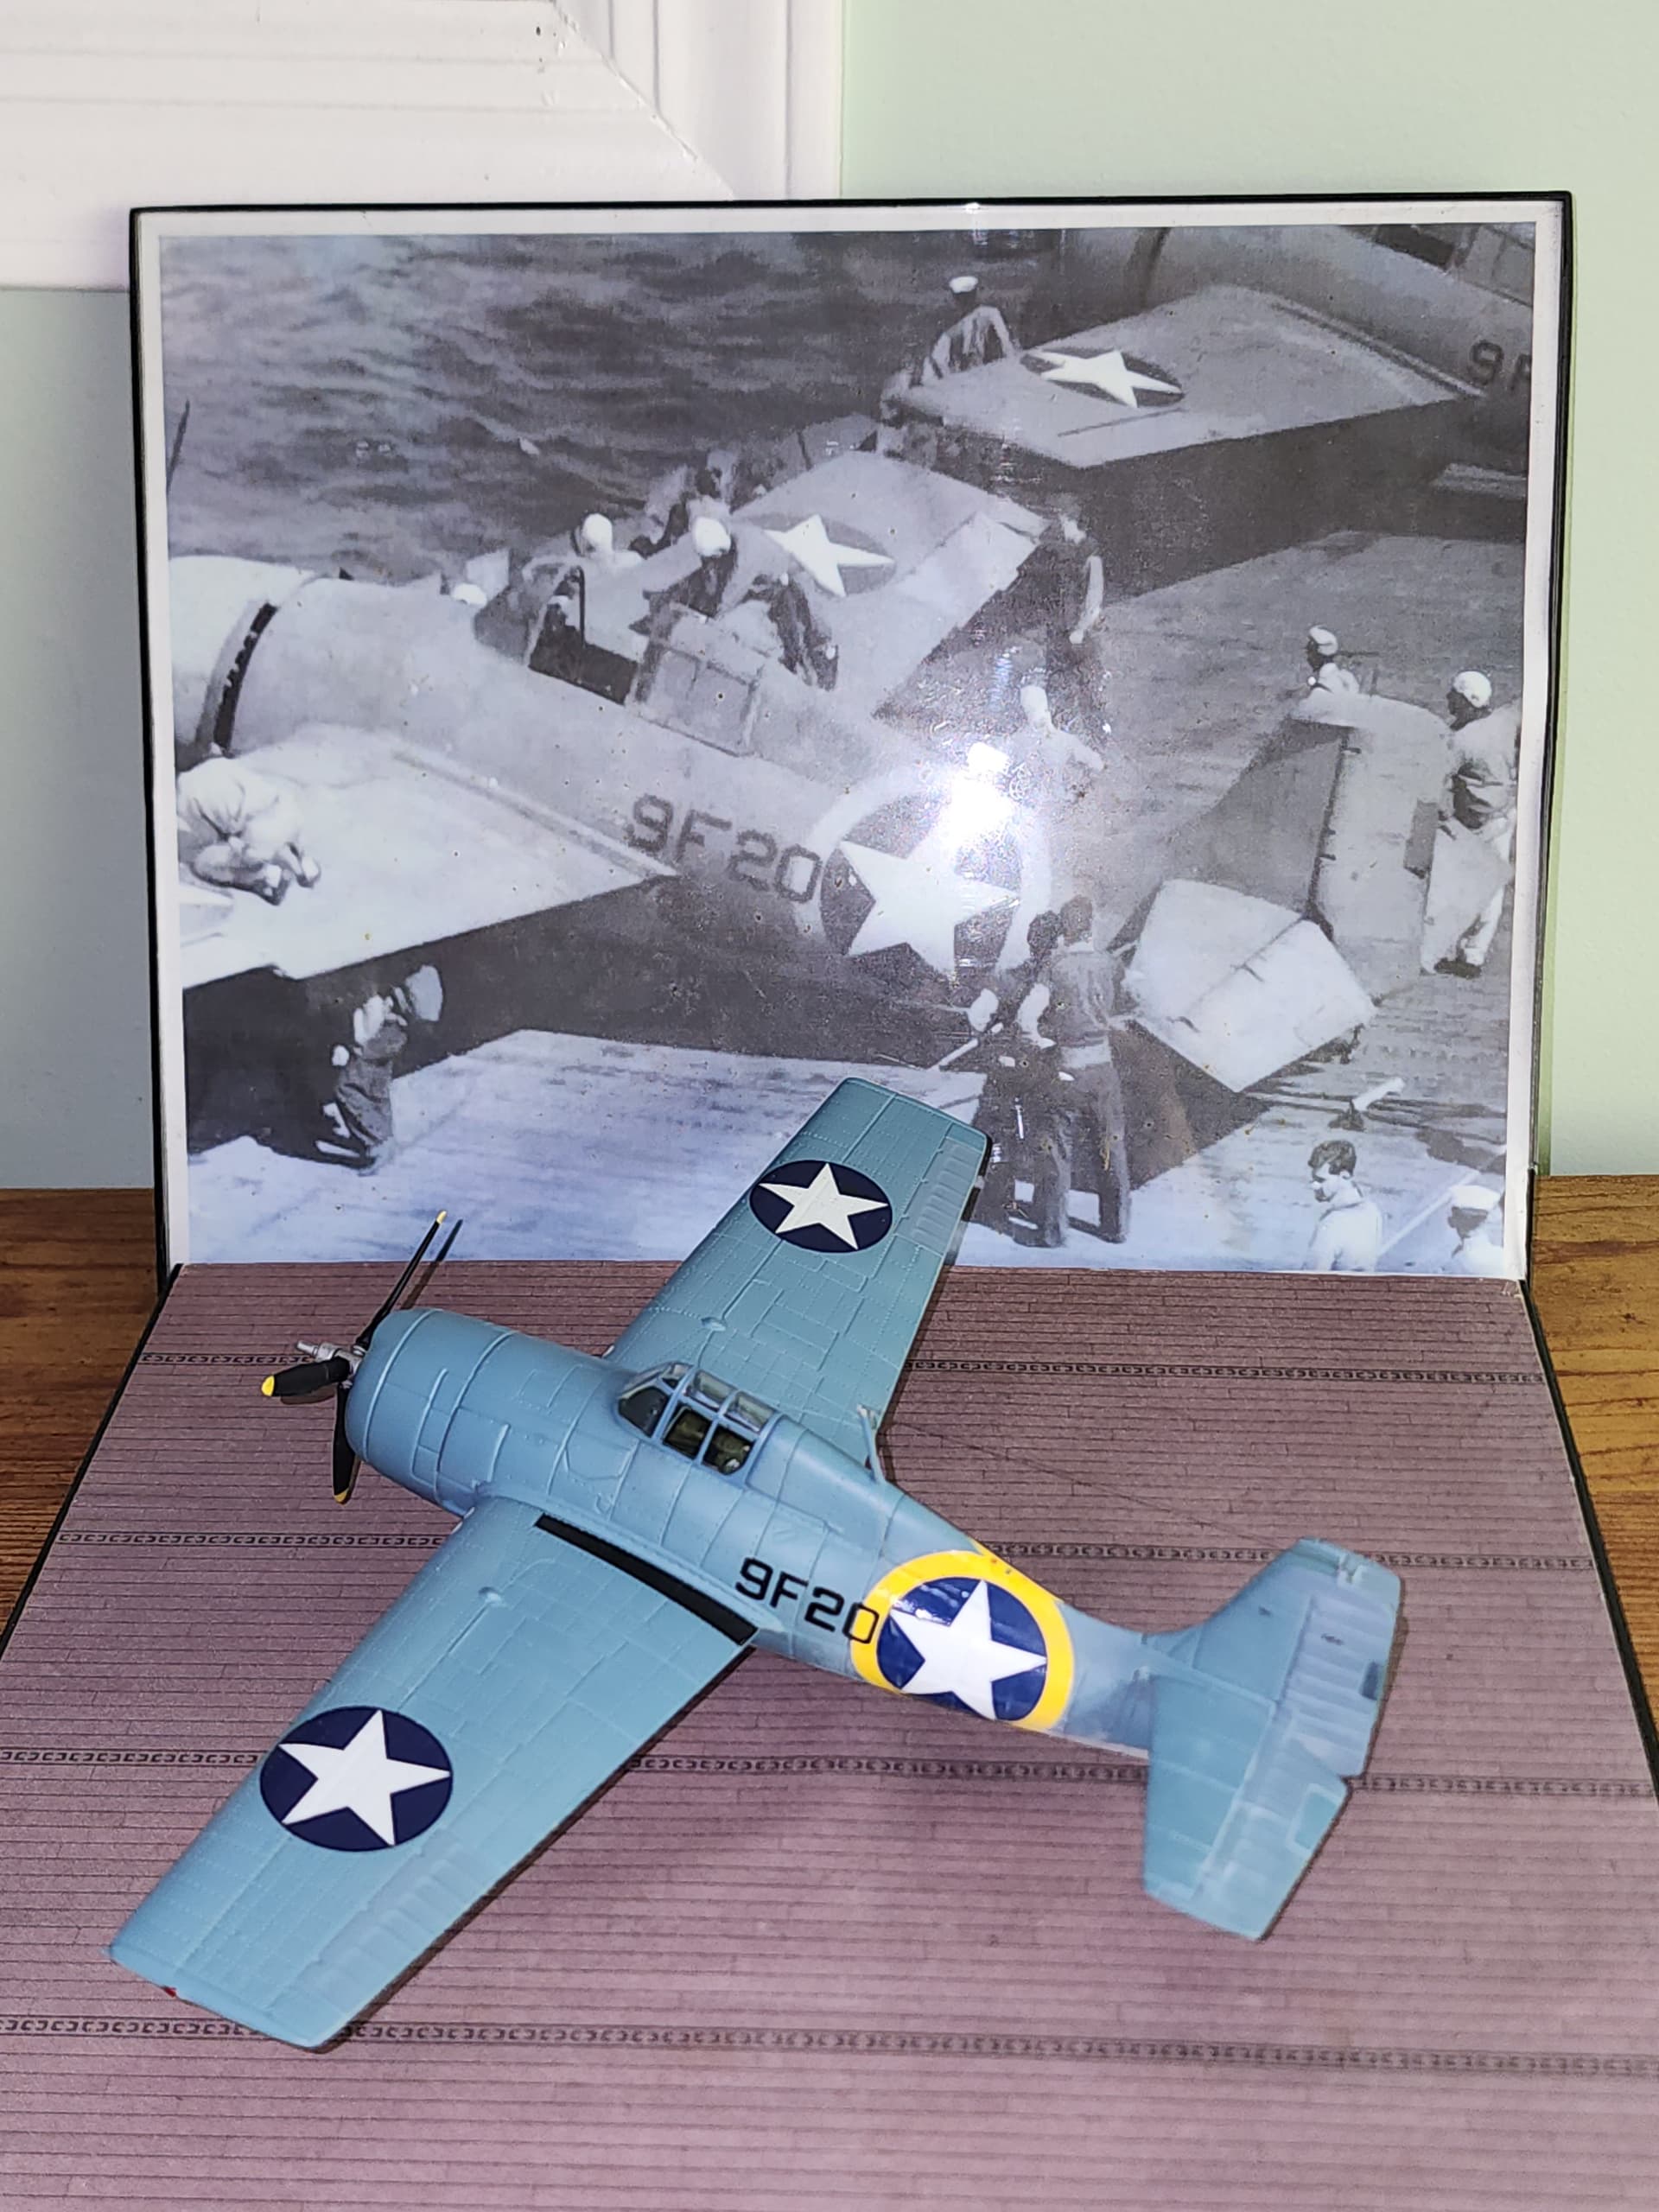
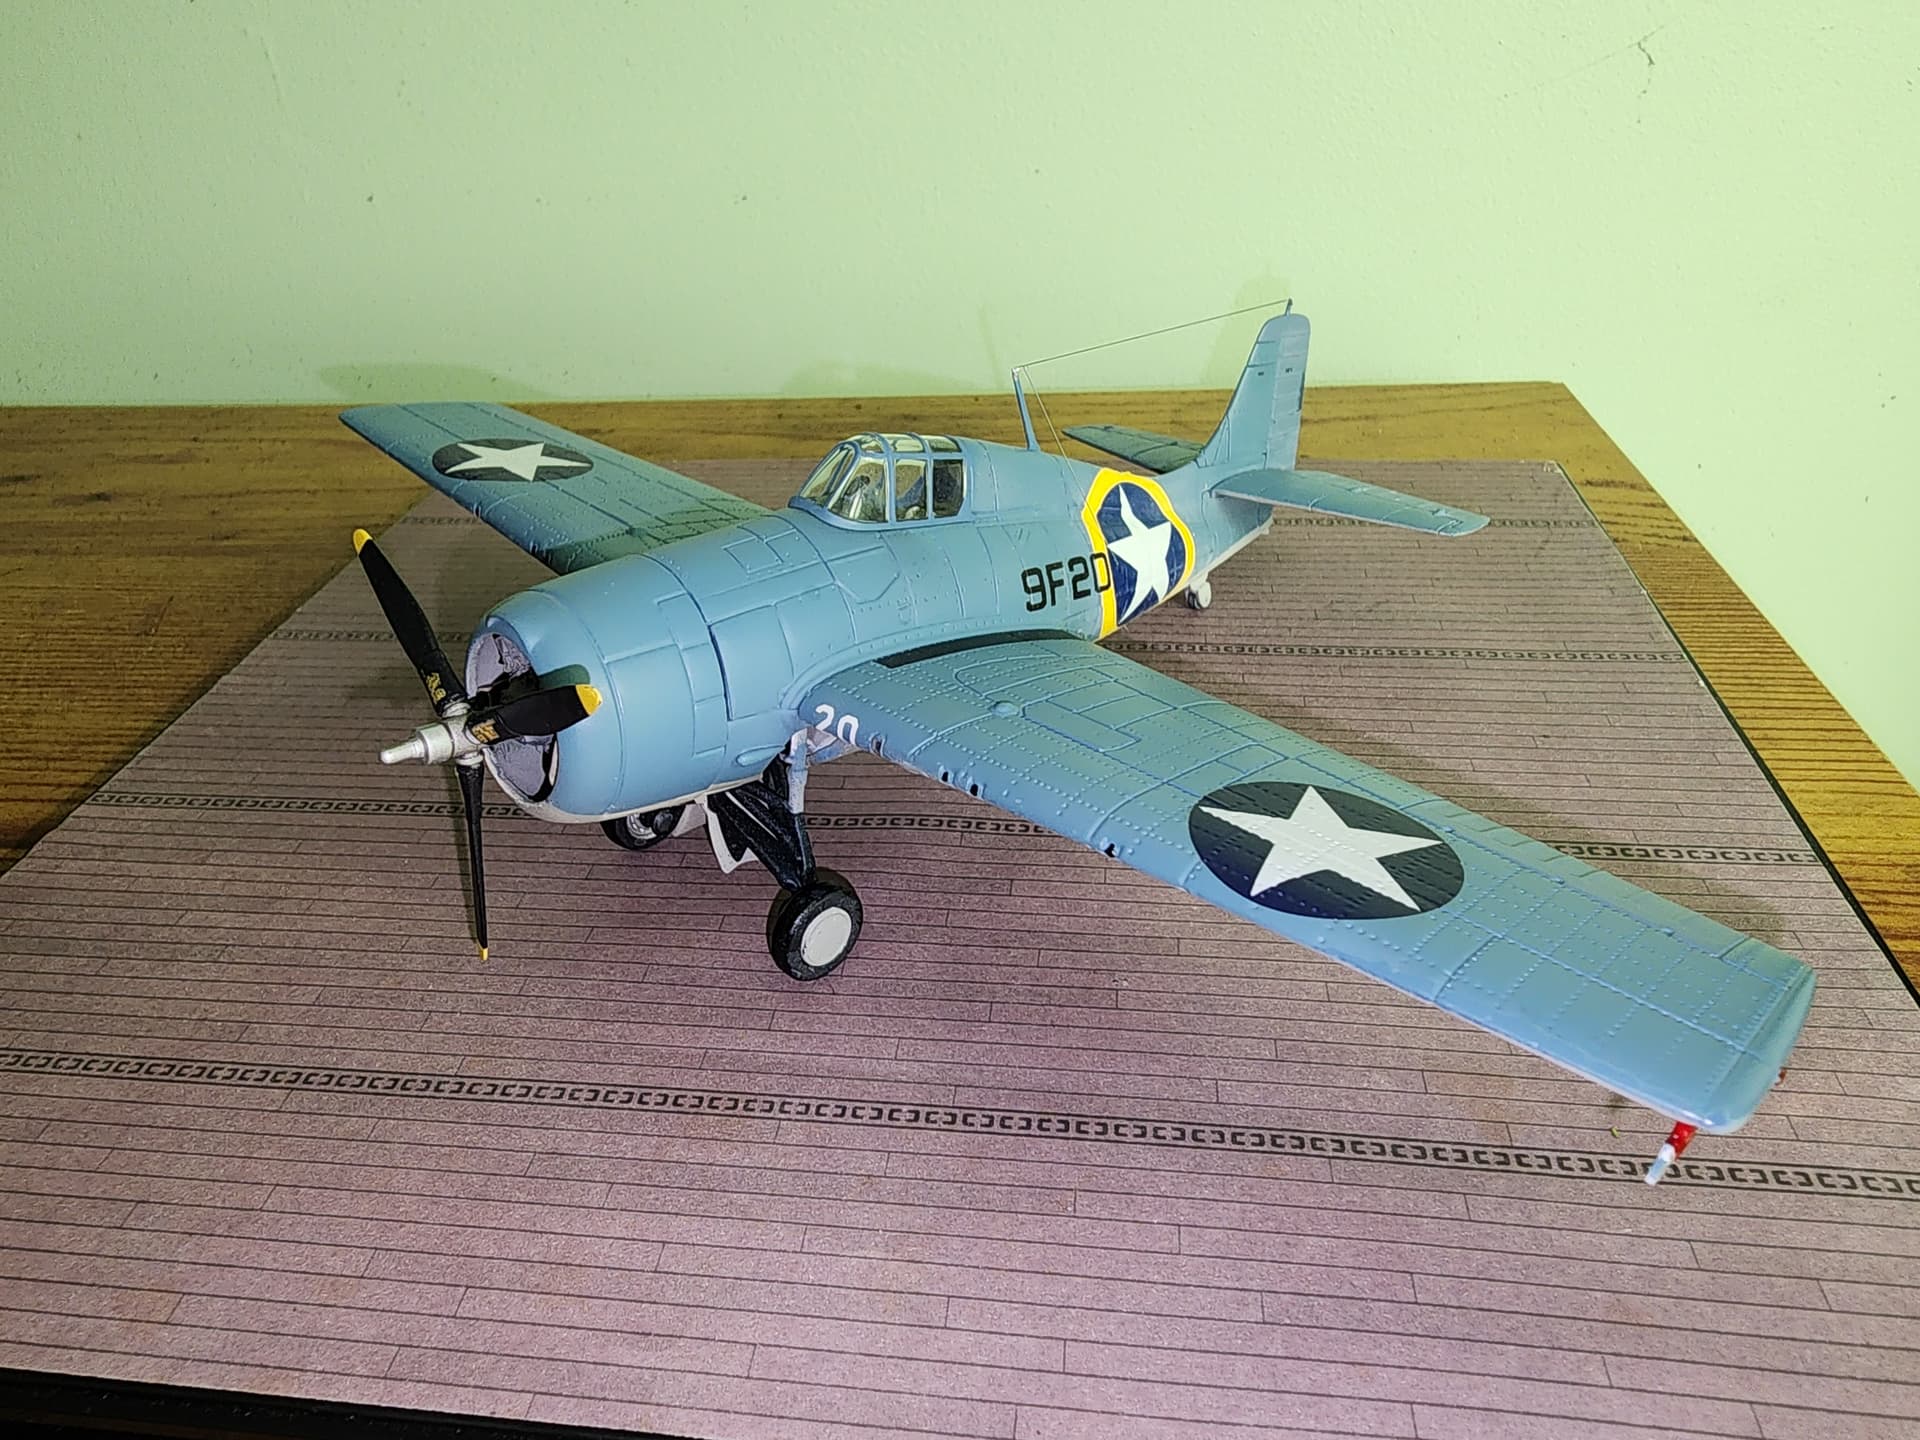
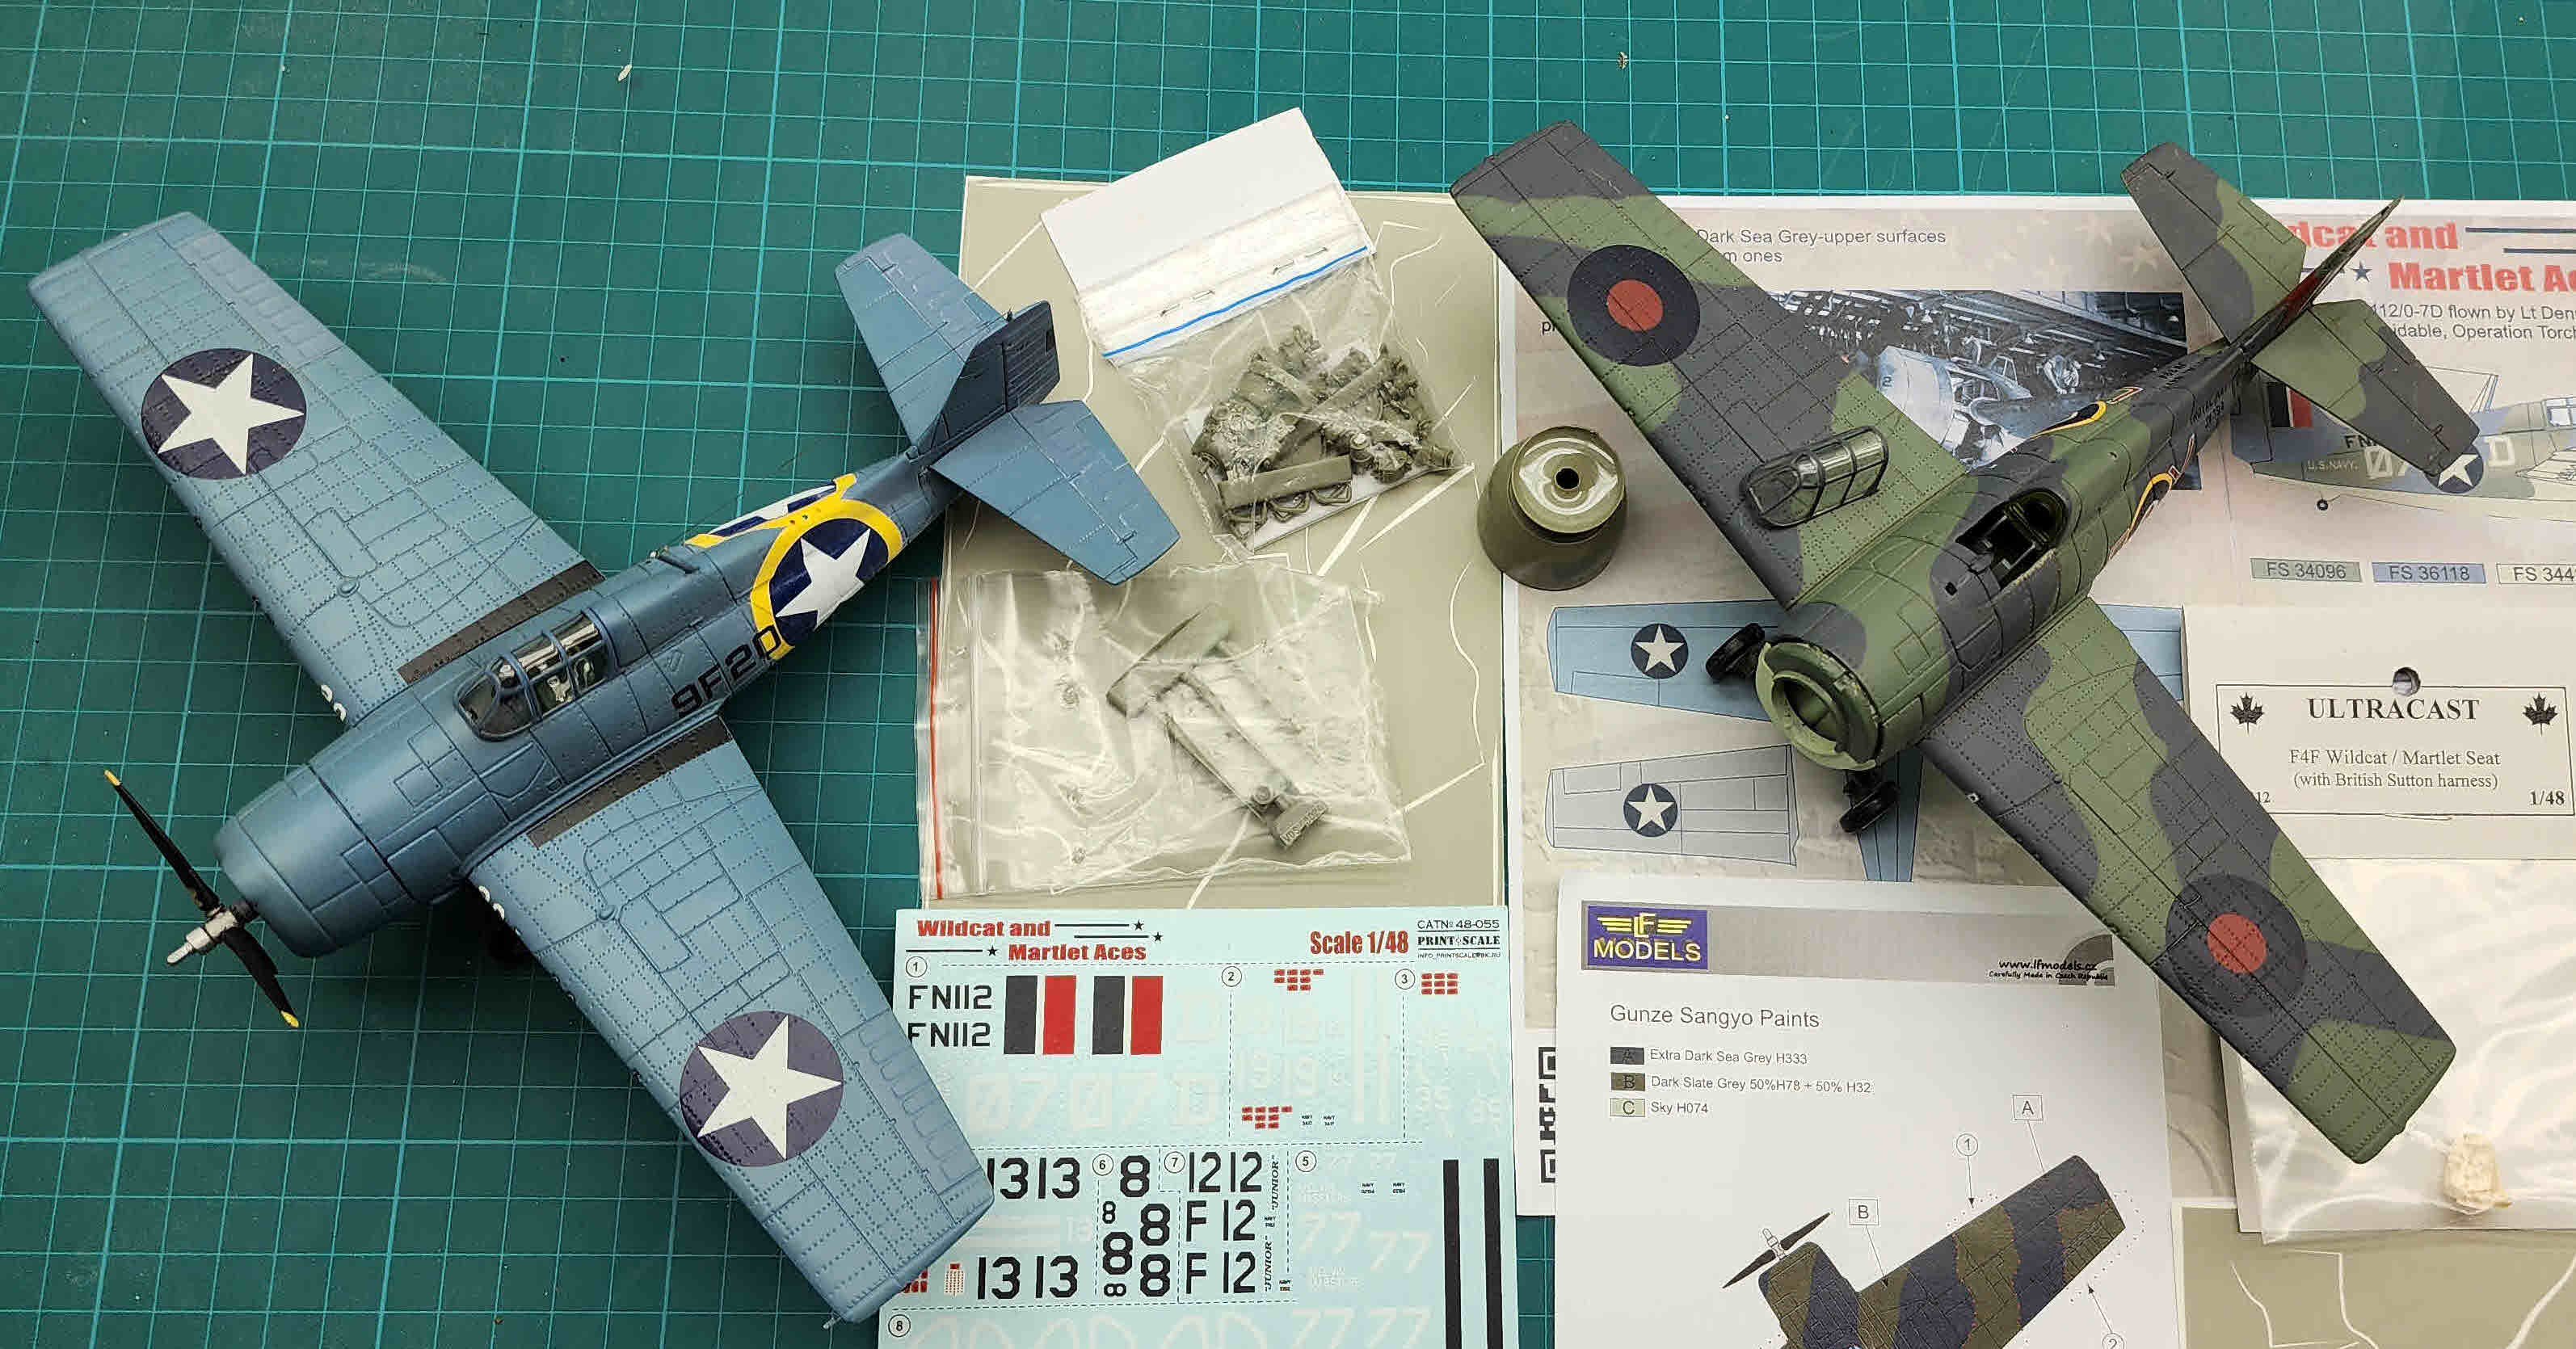
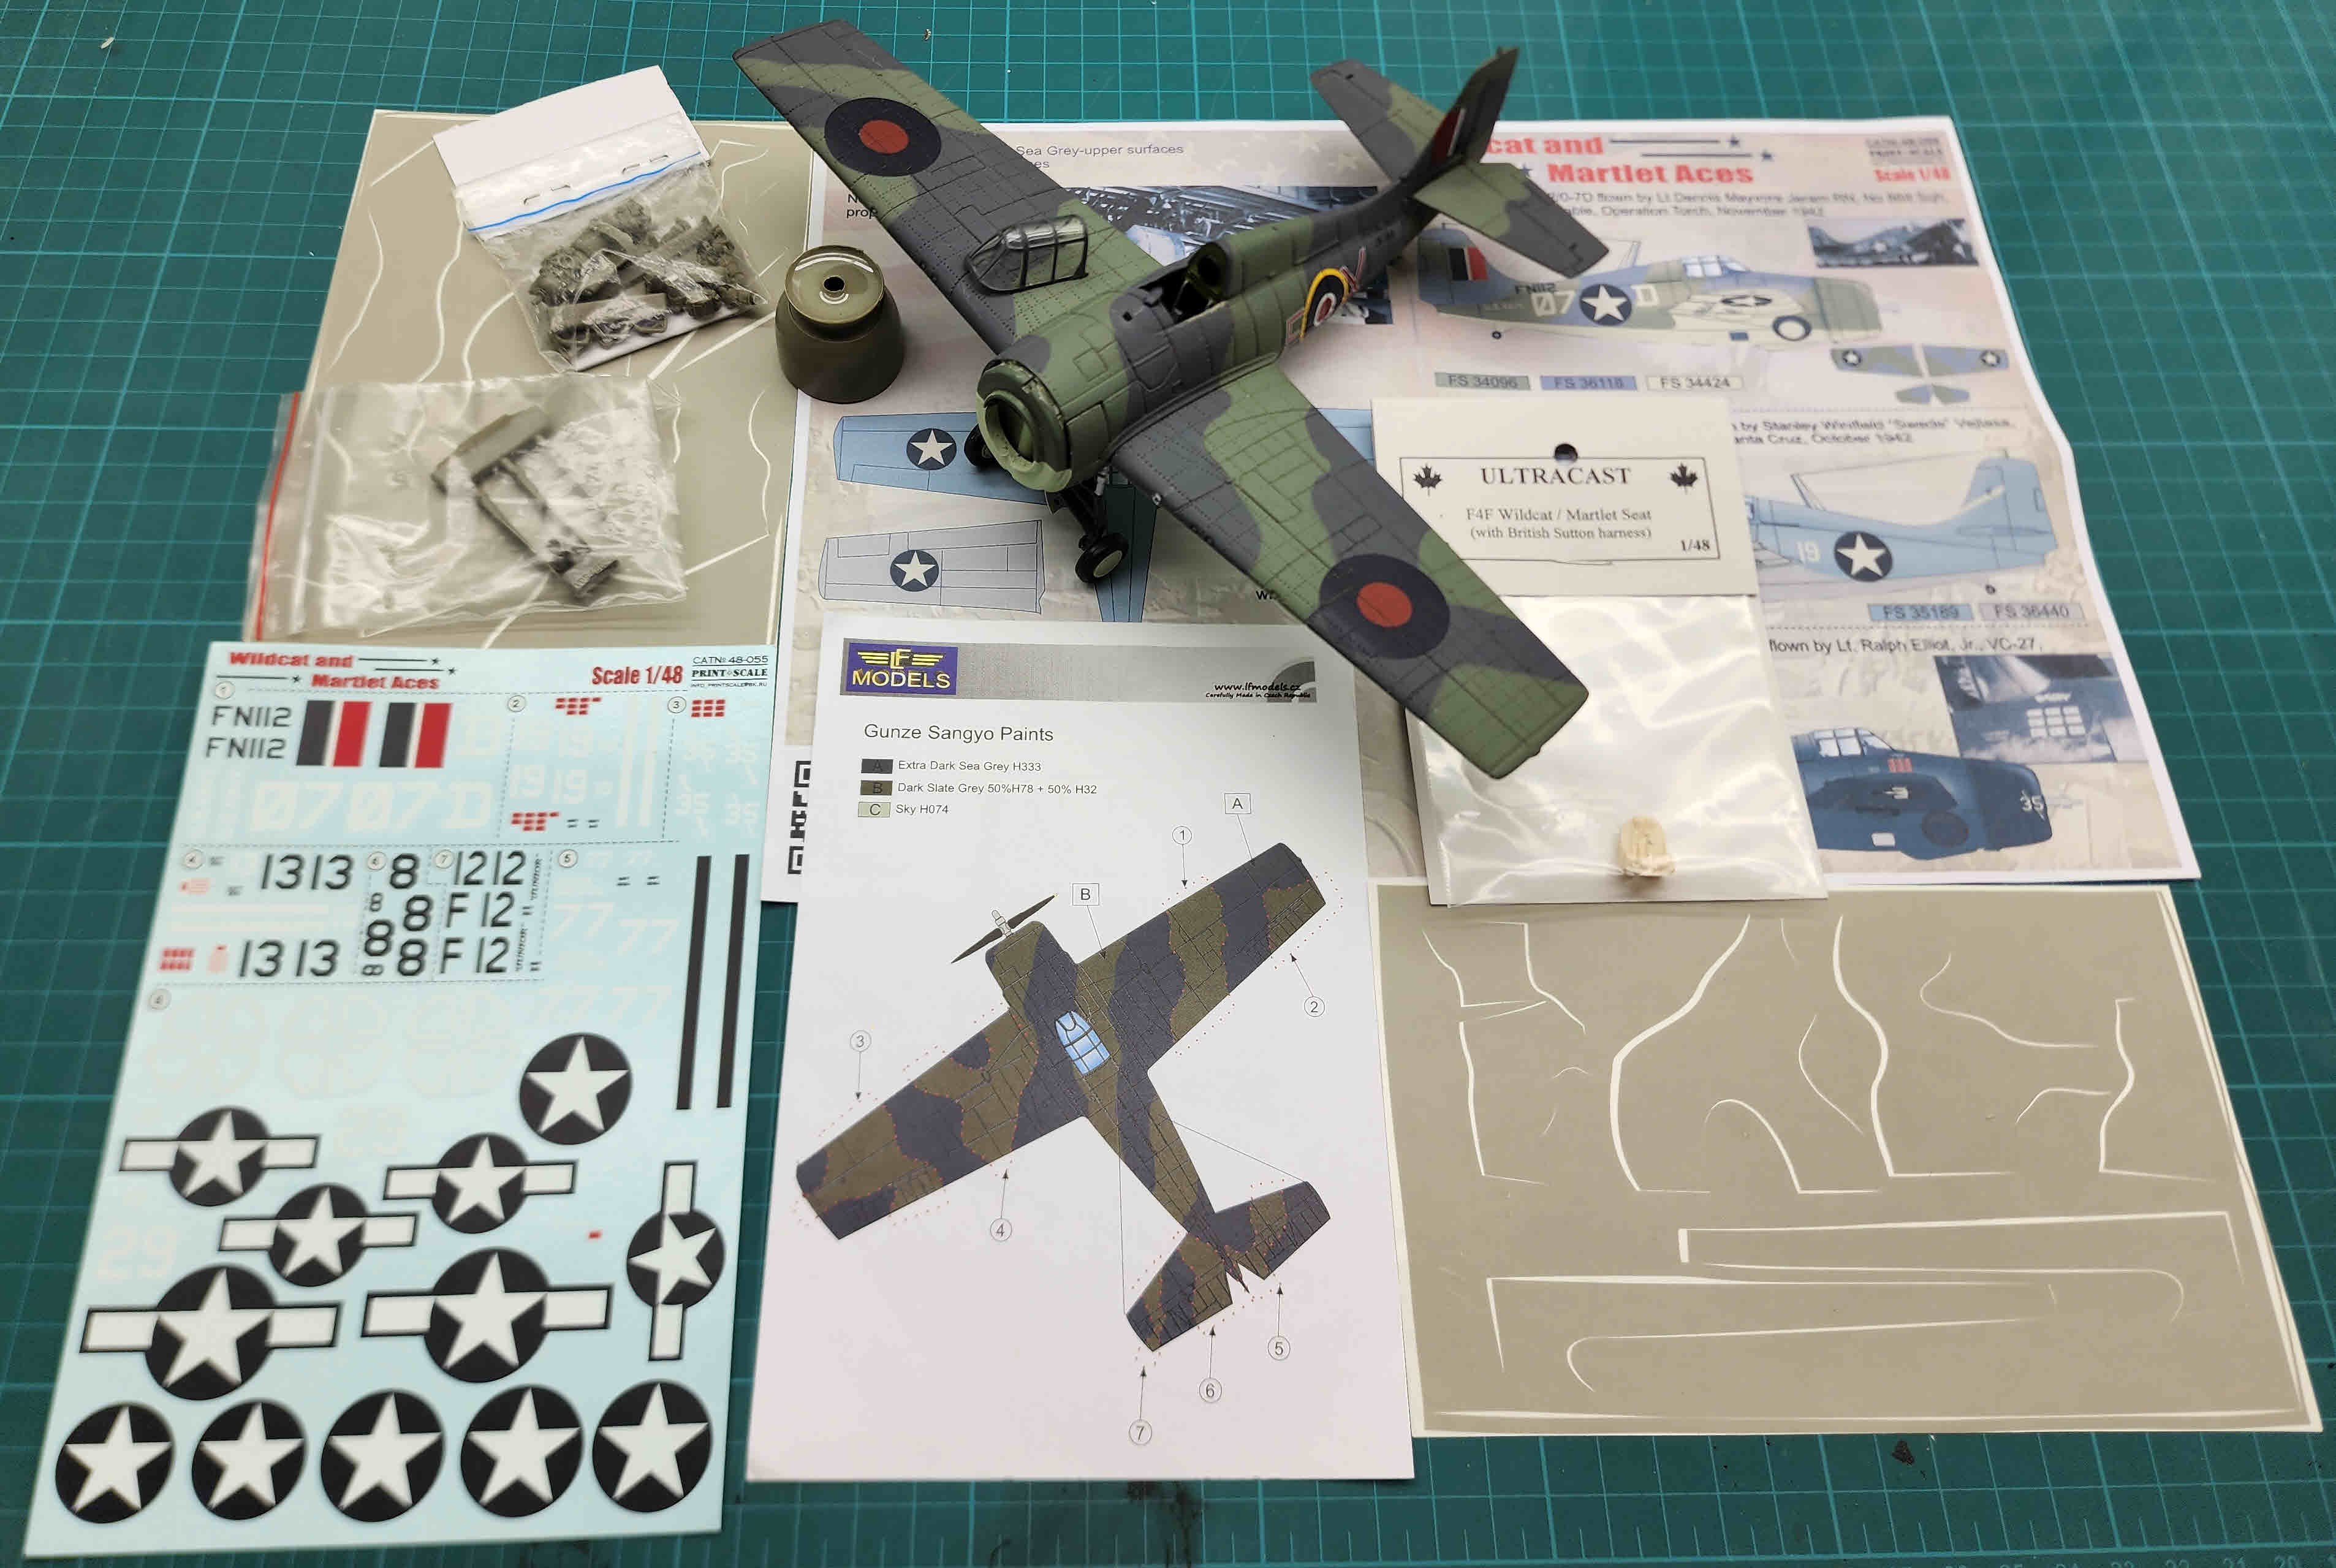
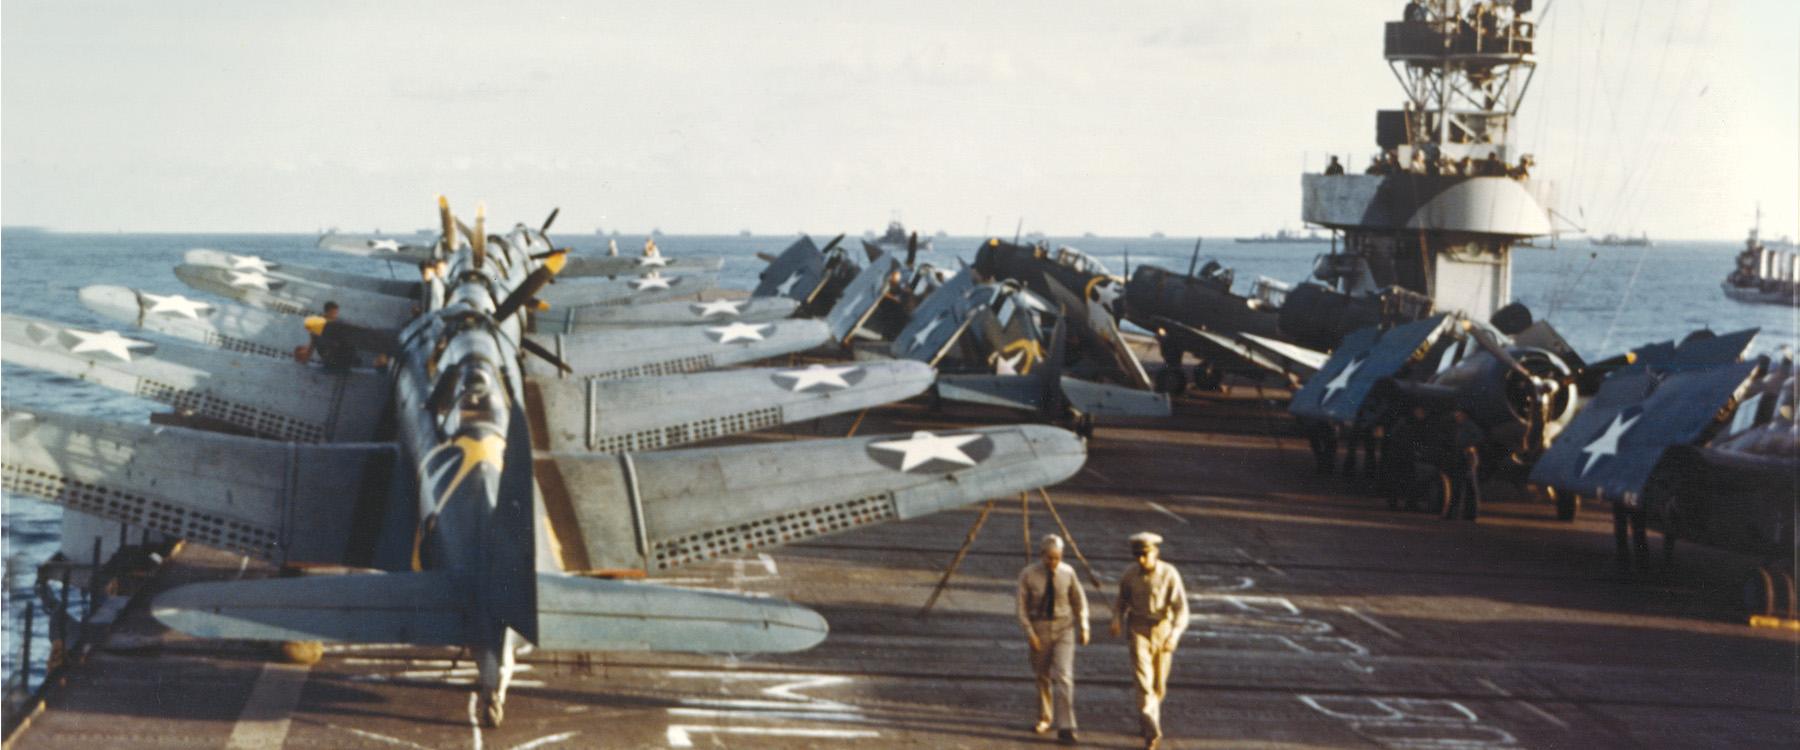
A few years ago, I acquired a couple of Franklin Mint diecast models of Grumman “Wildcats” The first was an F4F-4 flying off the USS Santee (ACV-29) during Operation Torch.

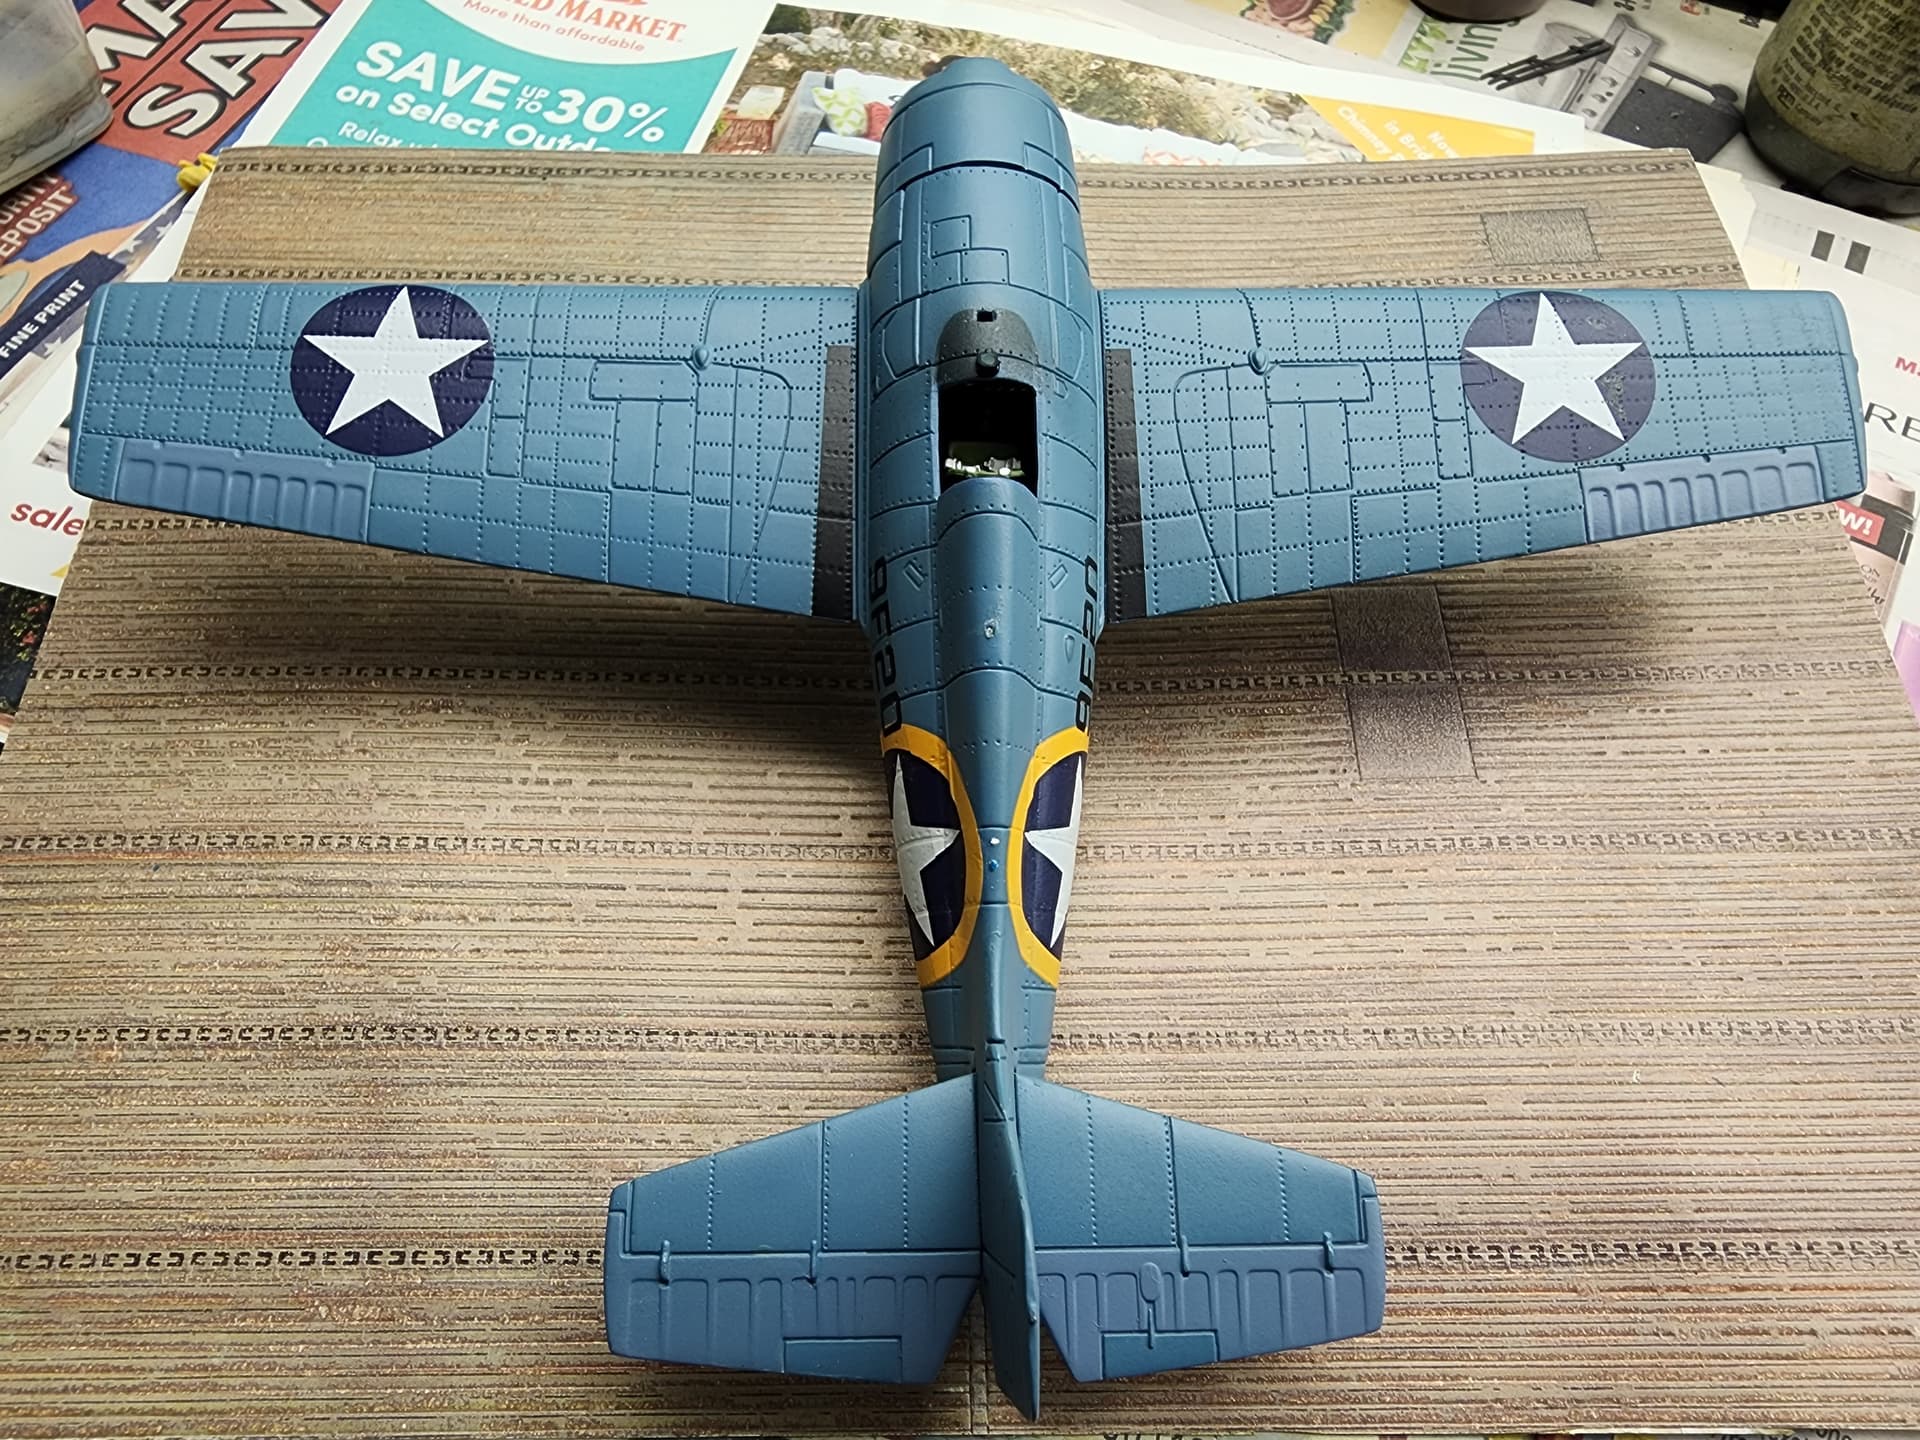
I liked the subject but the model was disappointing. Dimensionally, it “looked right,”

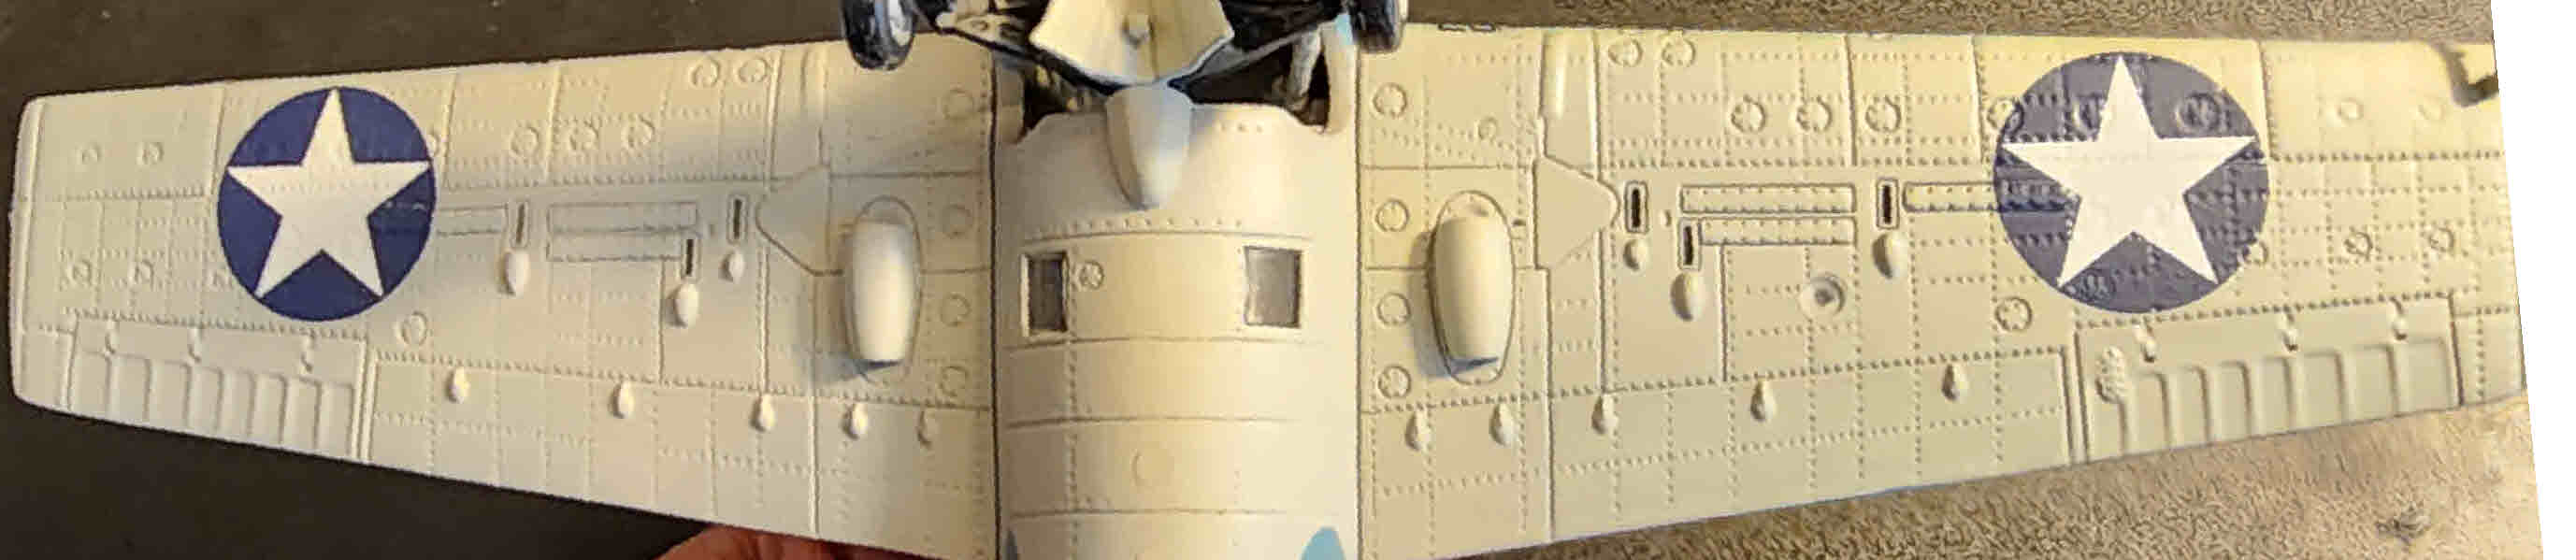
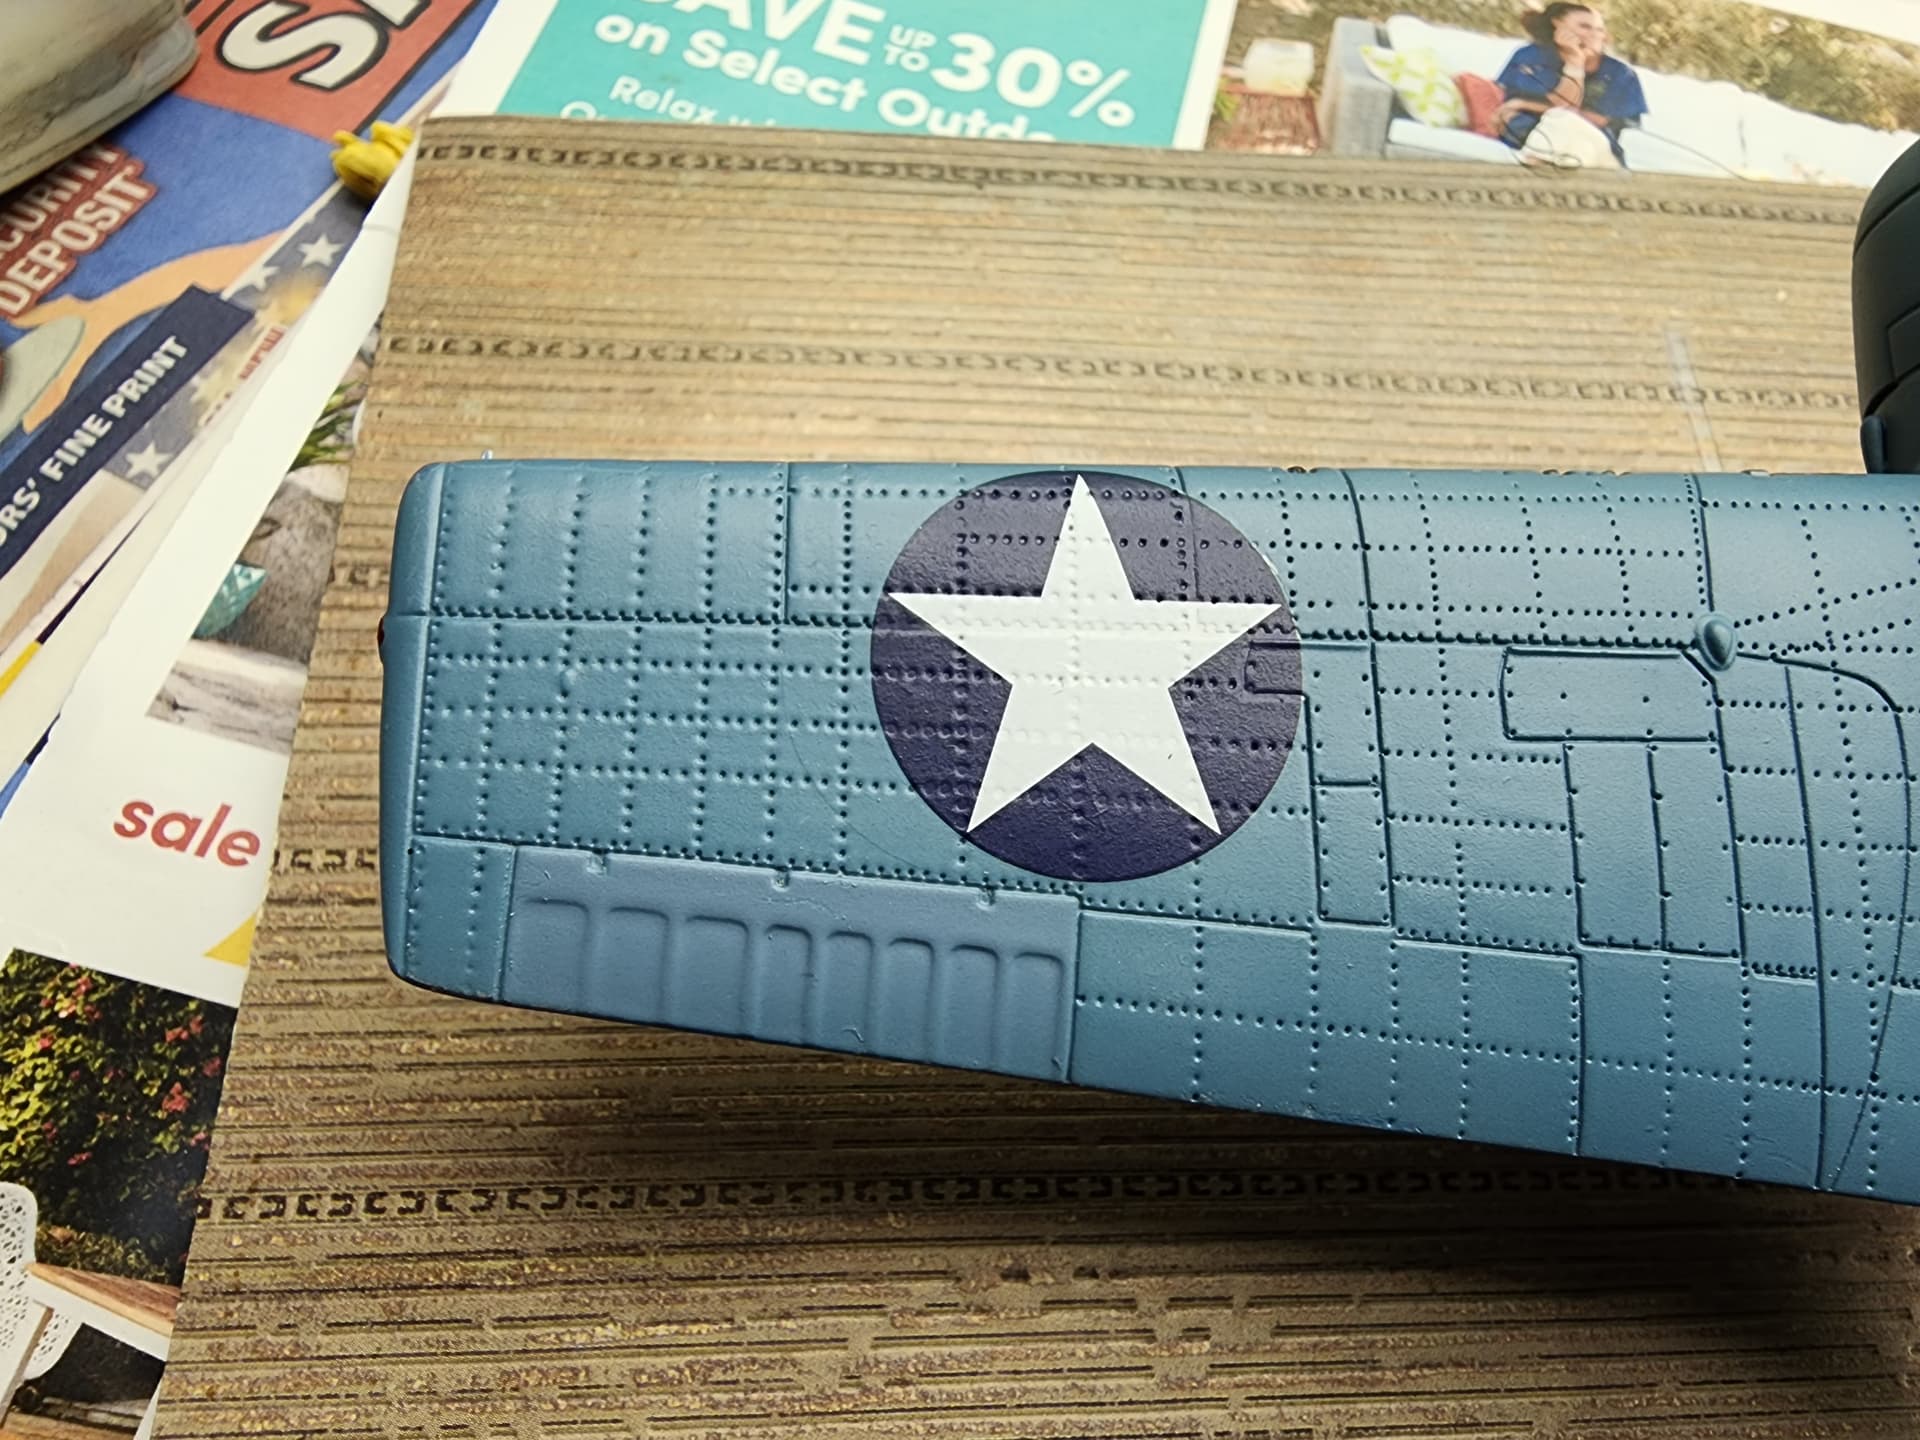
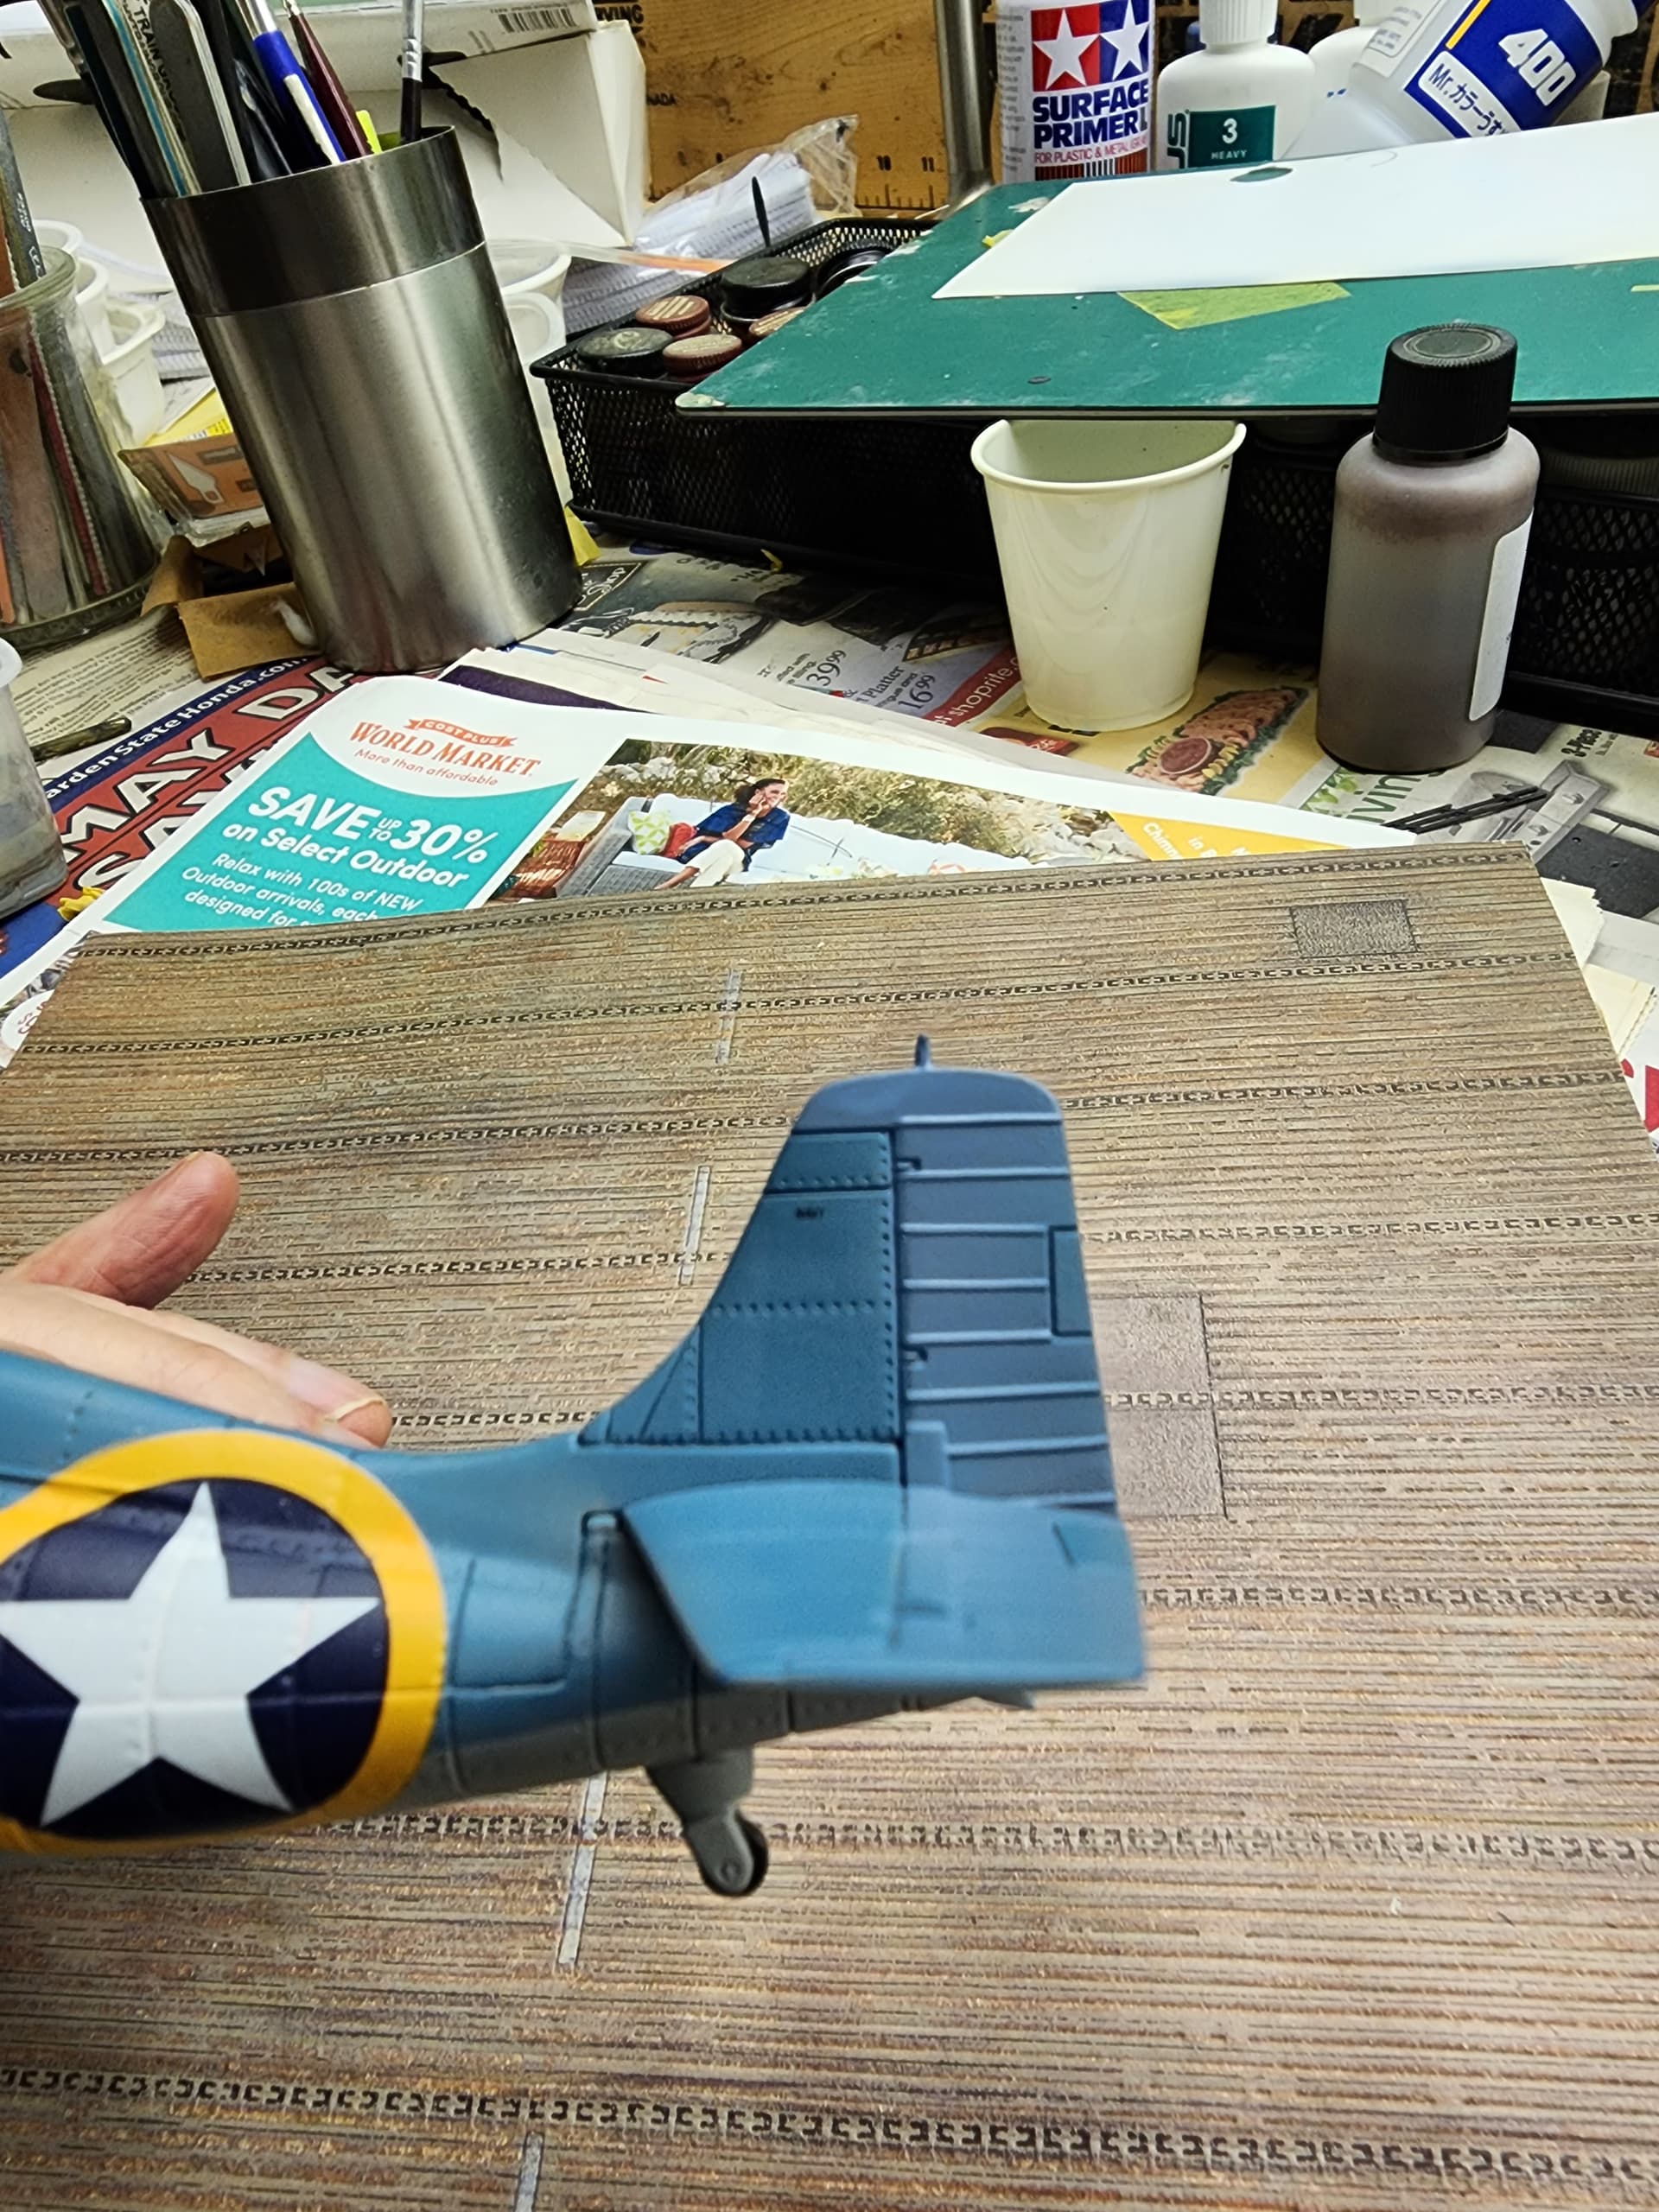
but I was disappointed to see that the undersurface looked more like non-specular white than the light grey it should have been.

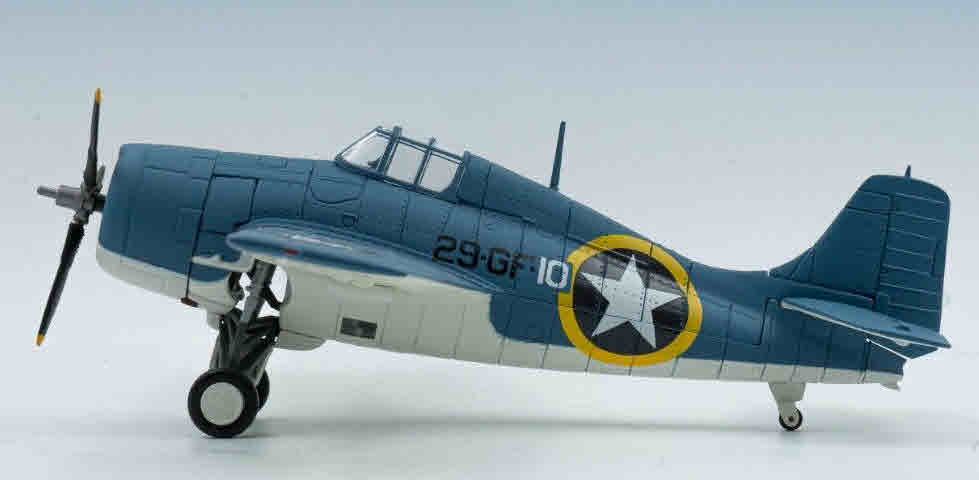
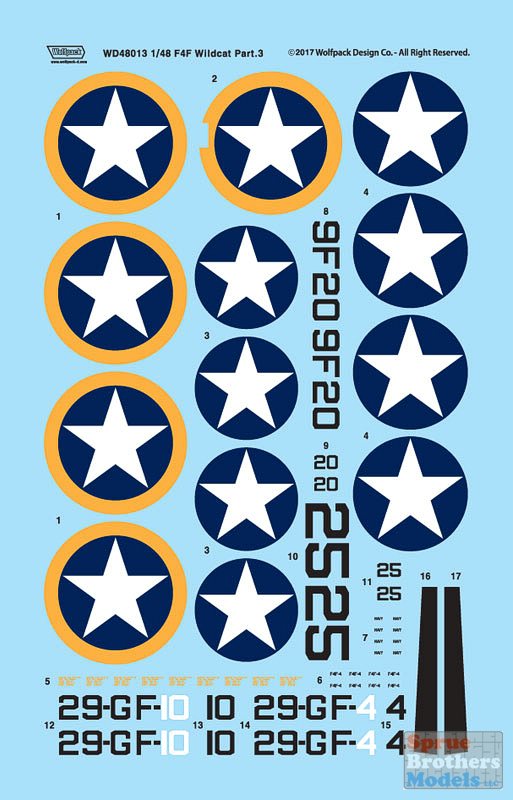
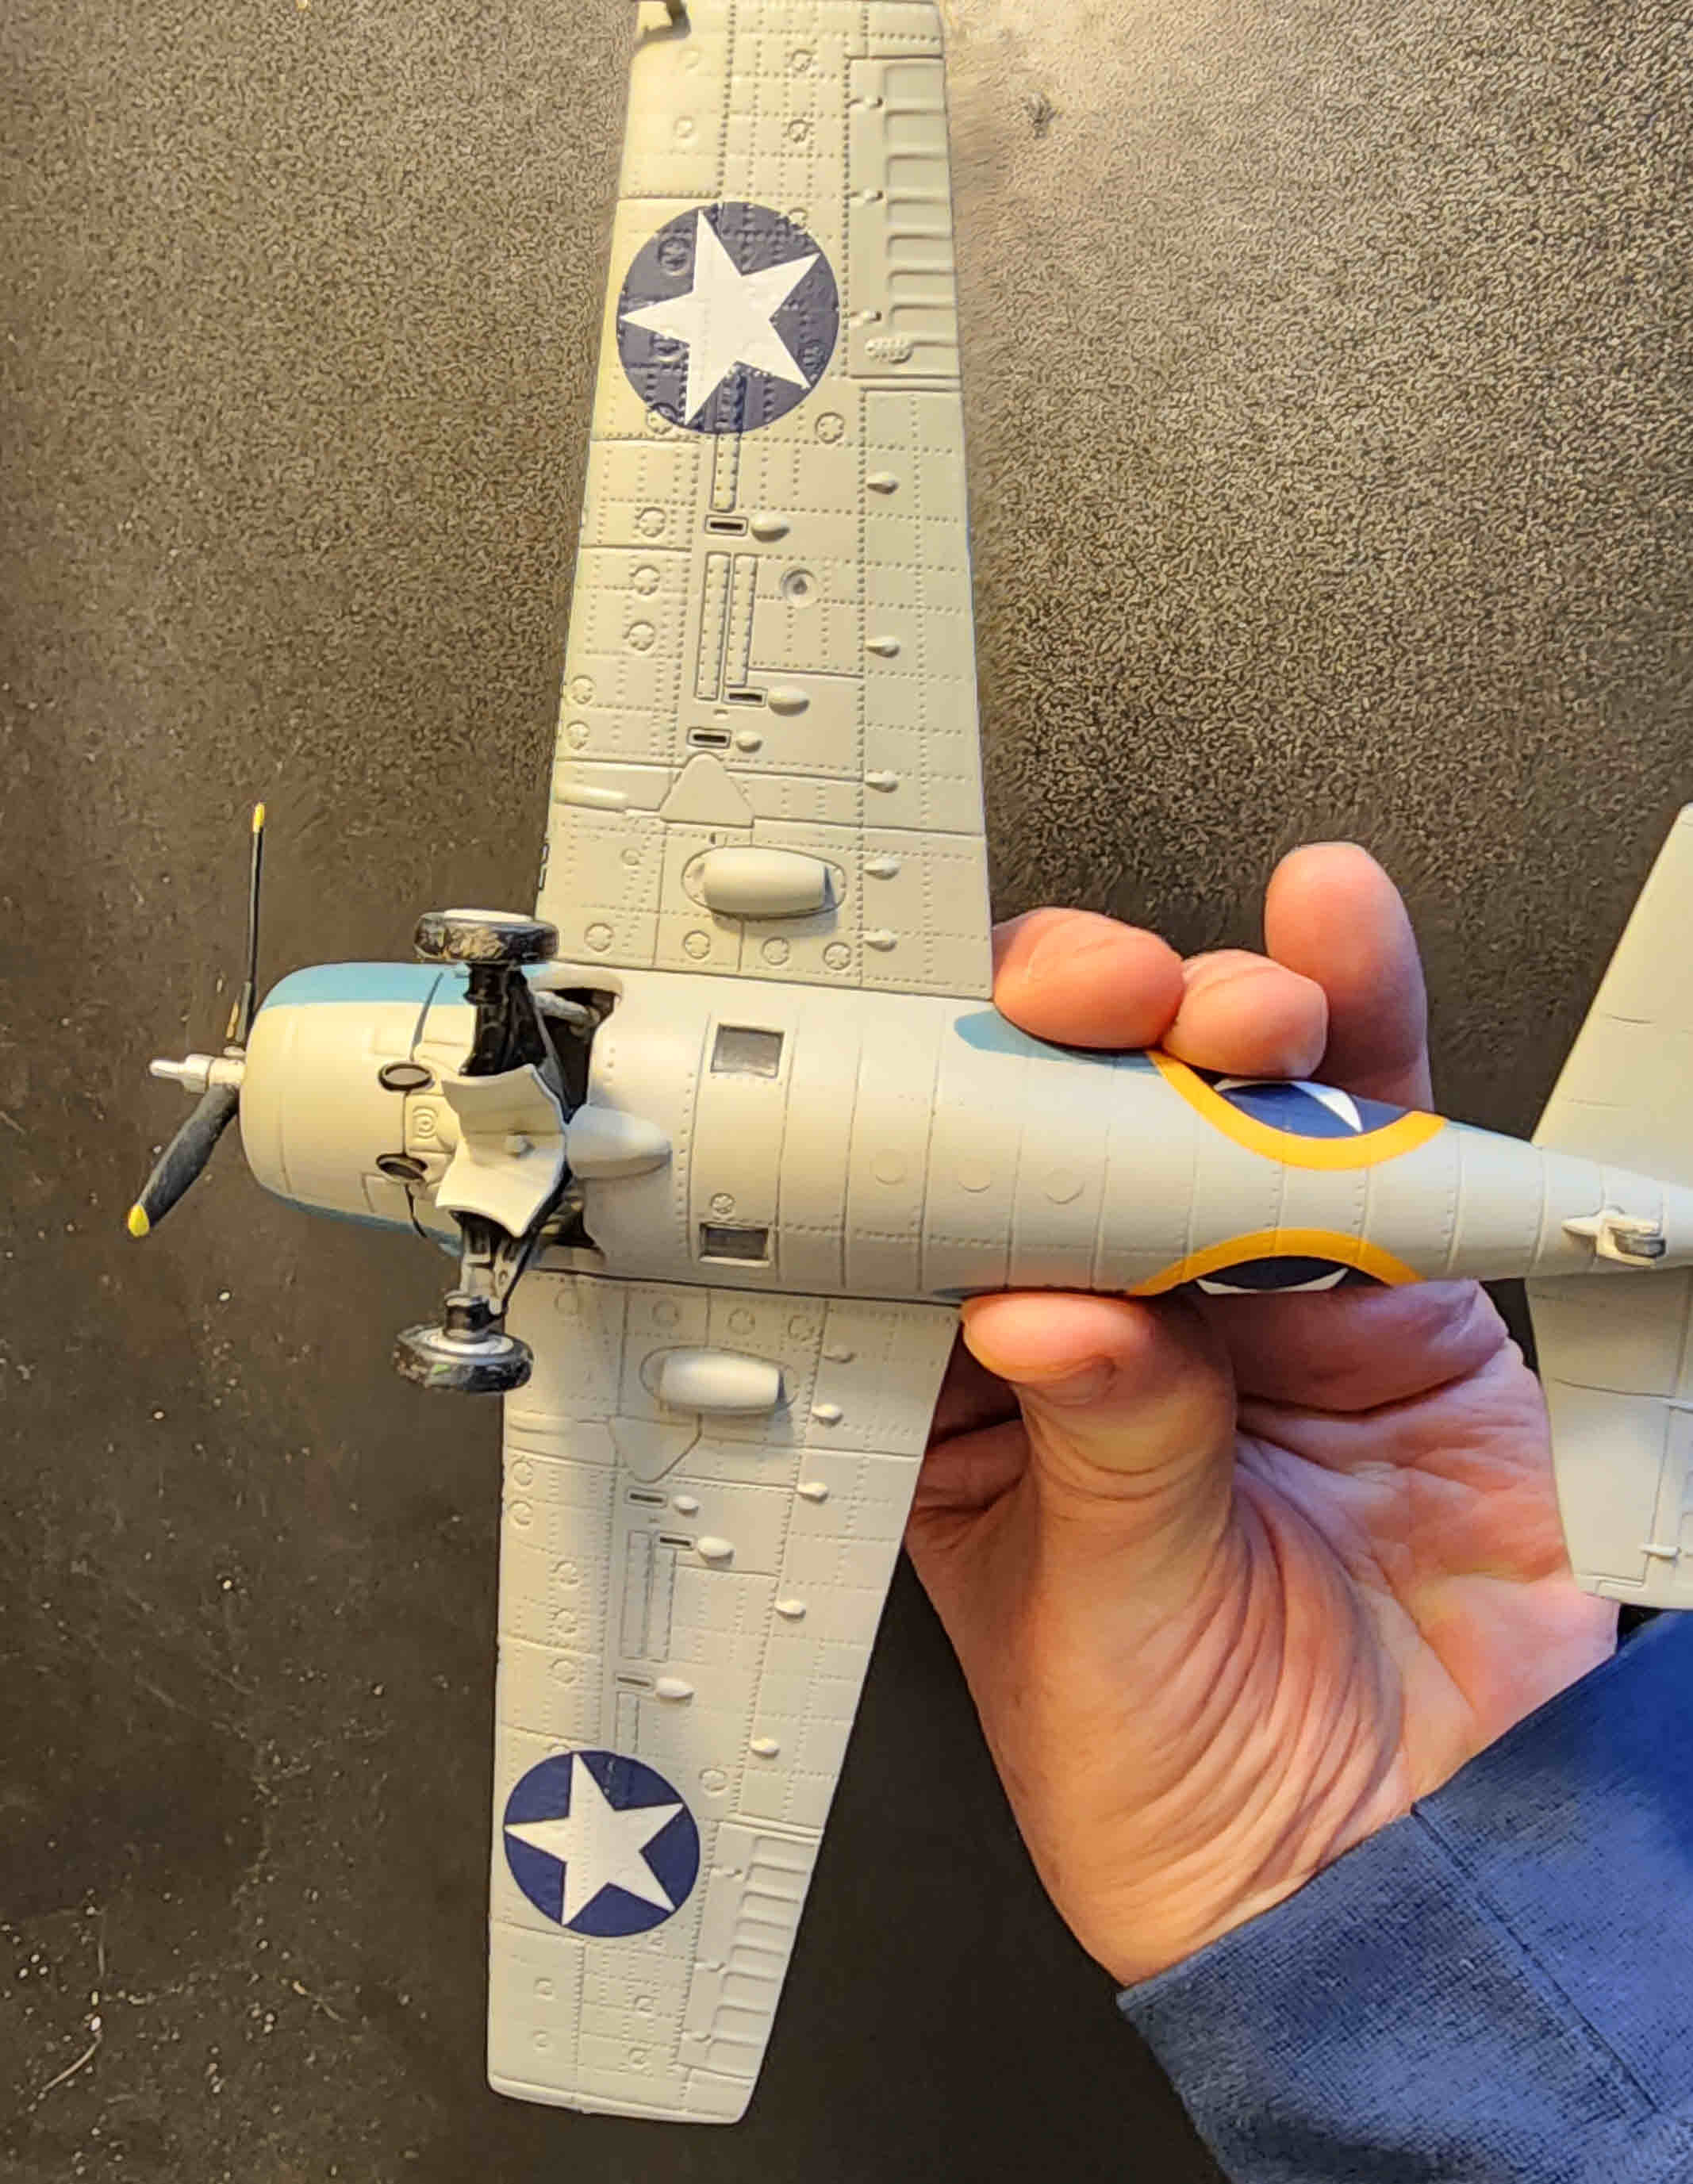
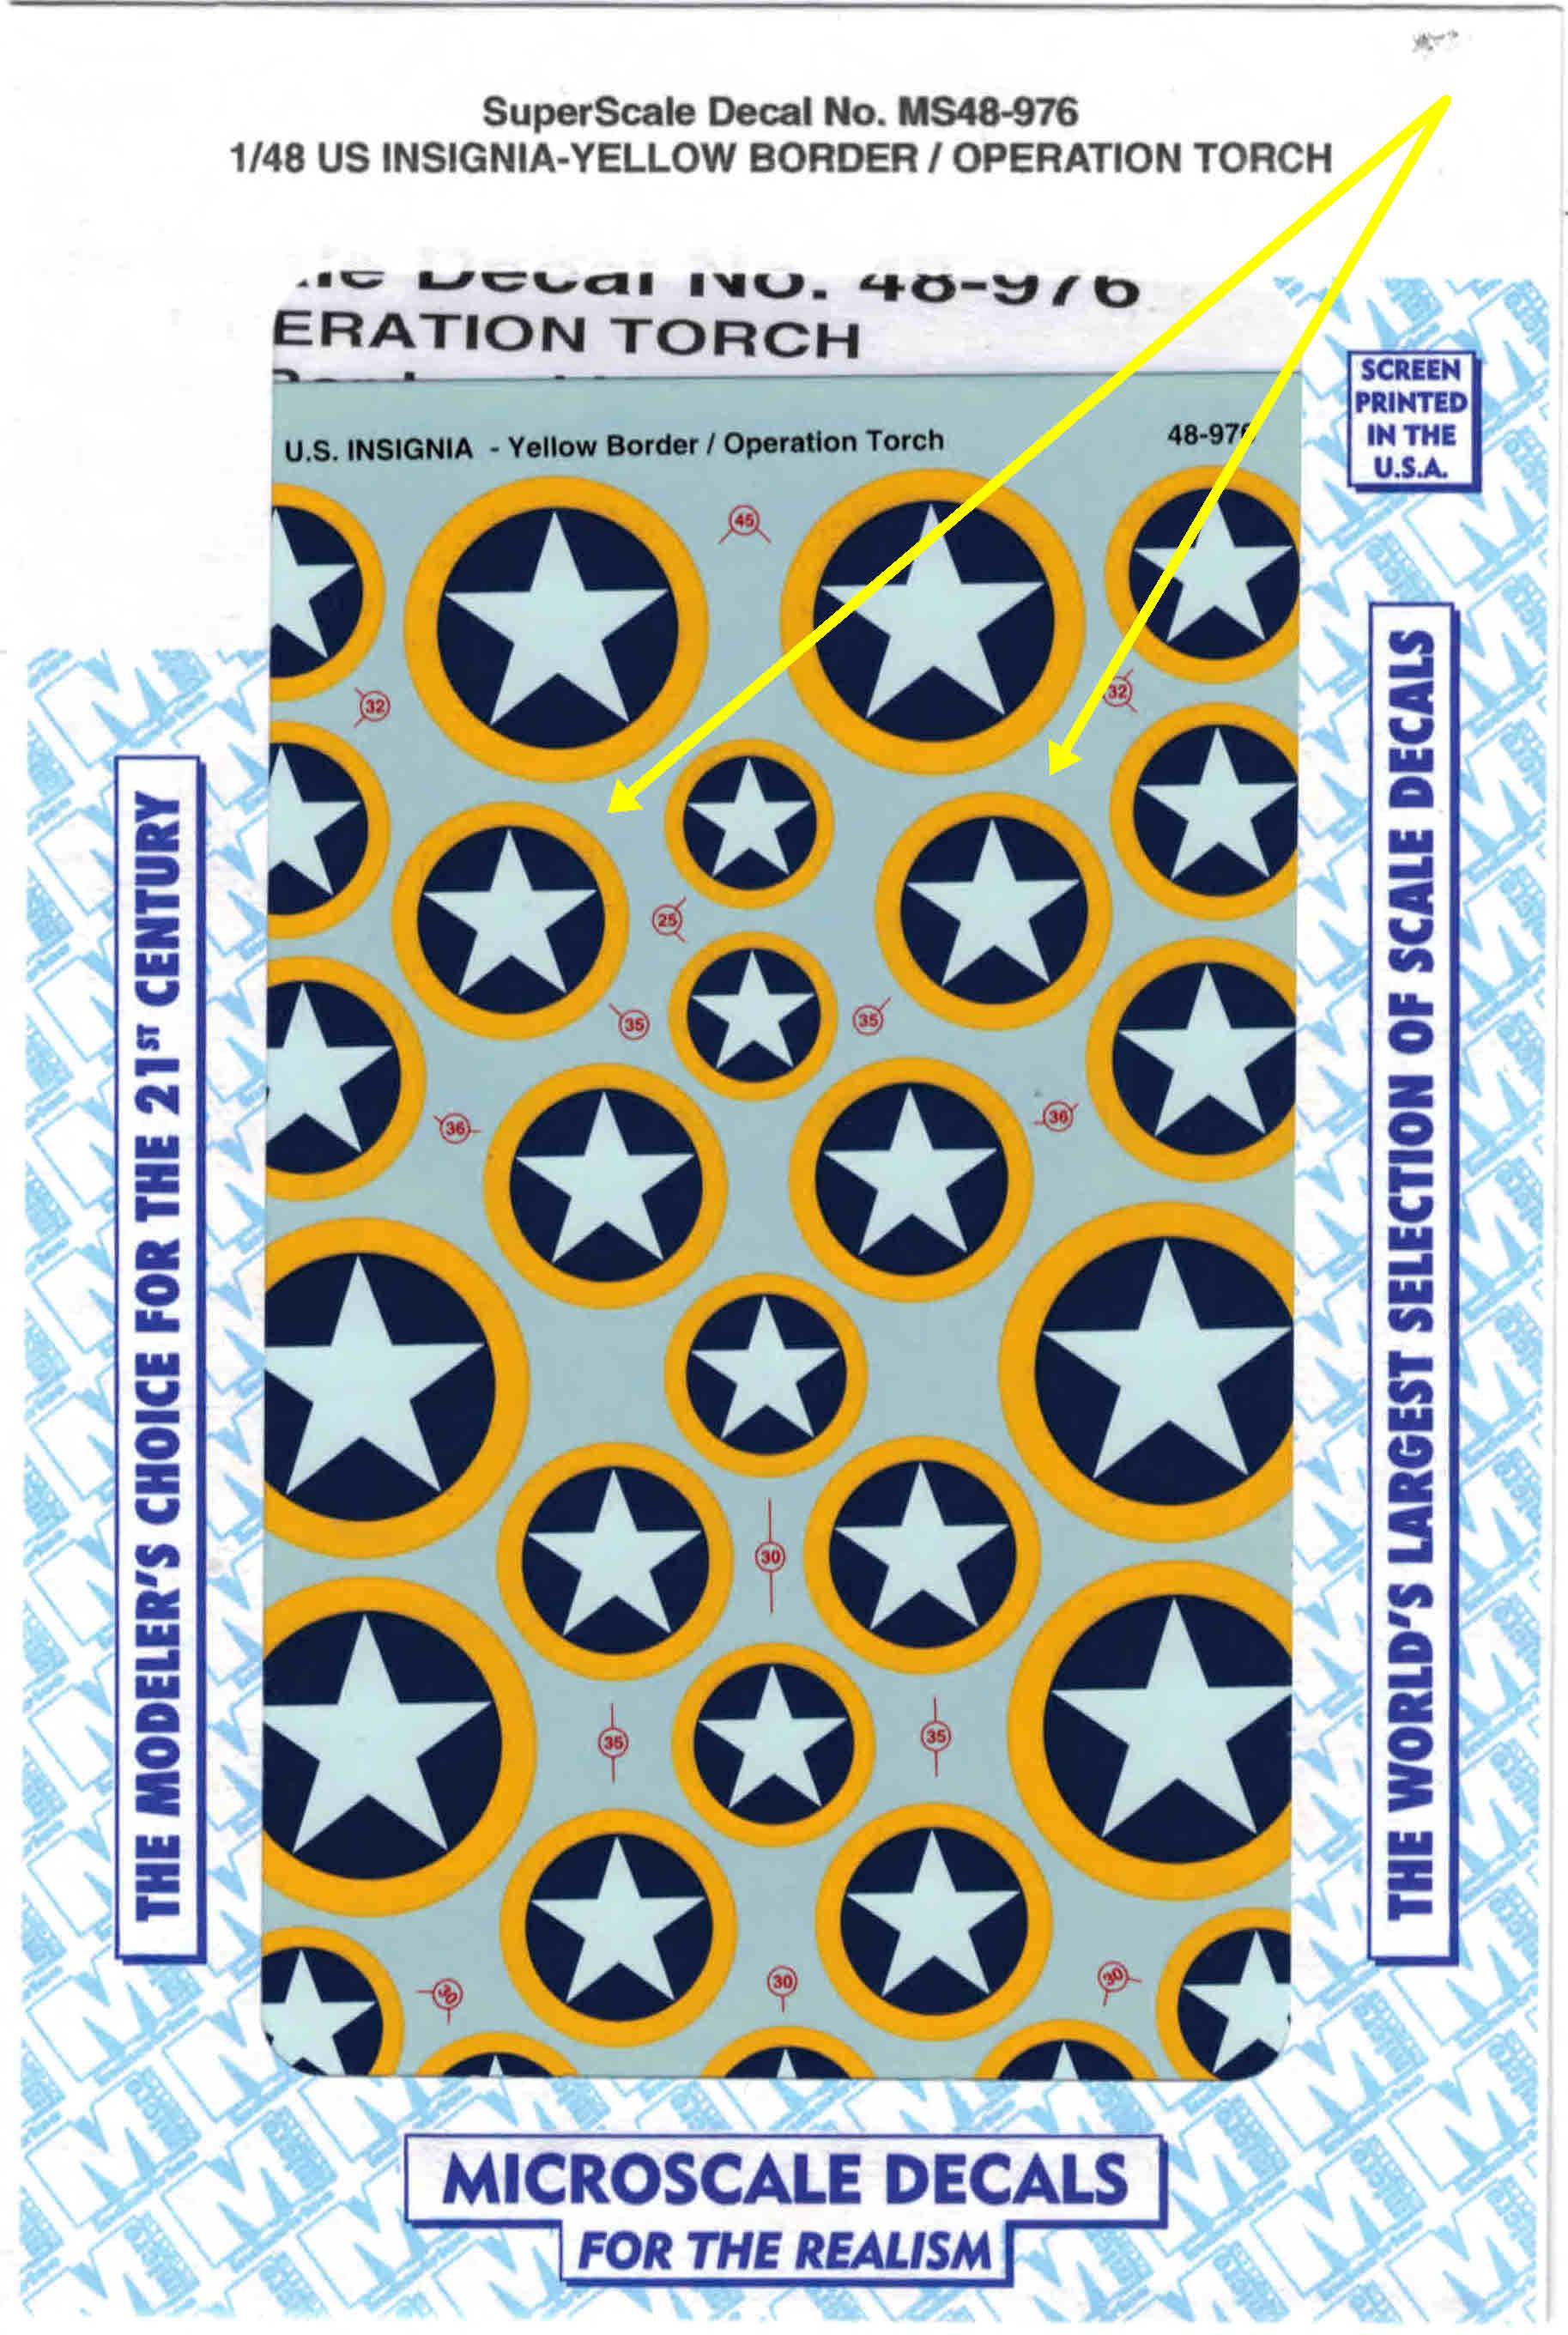
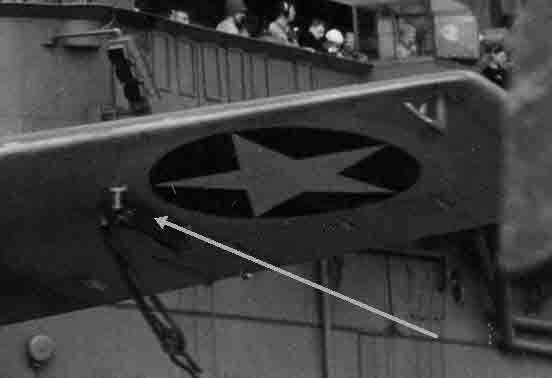
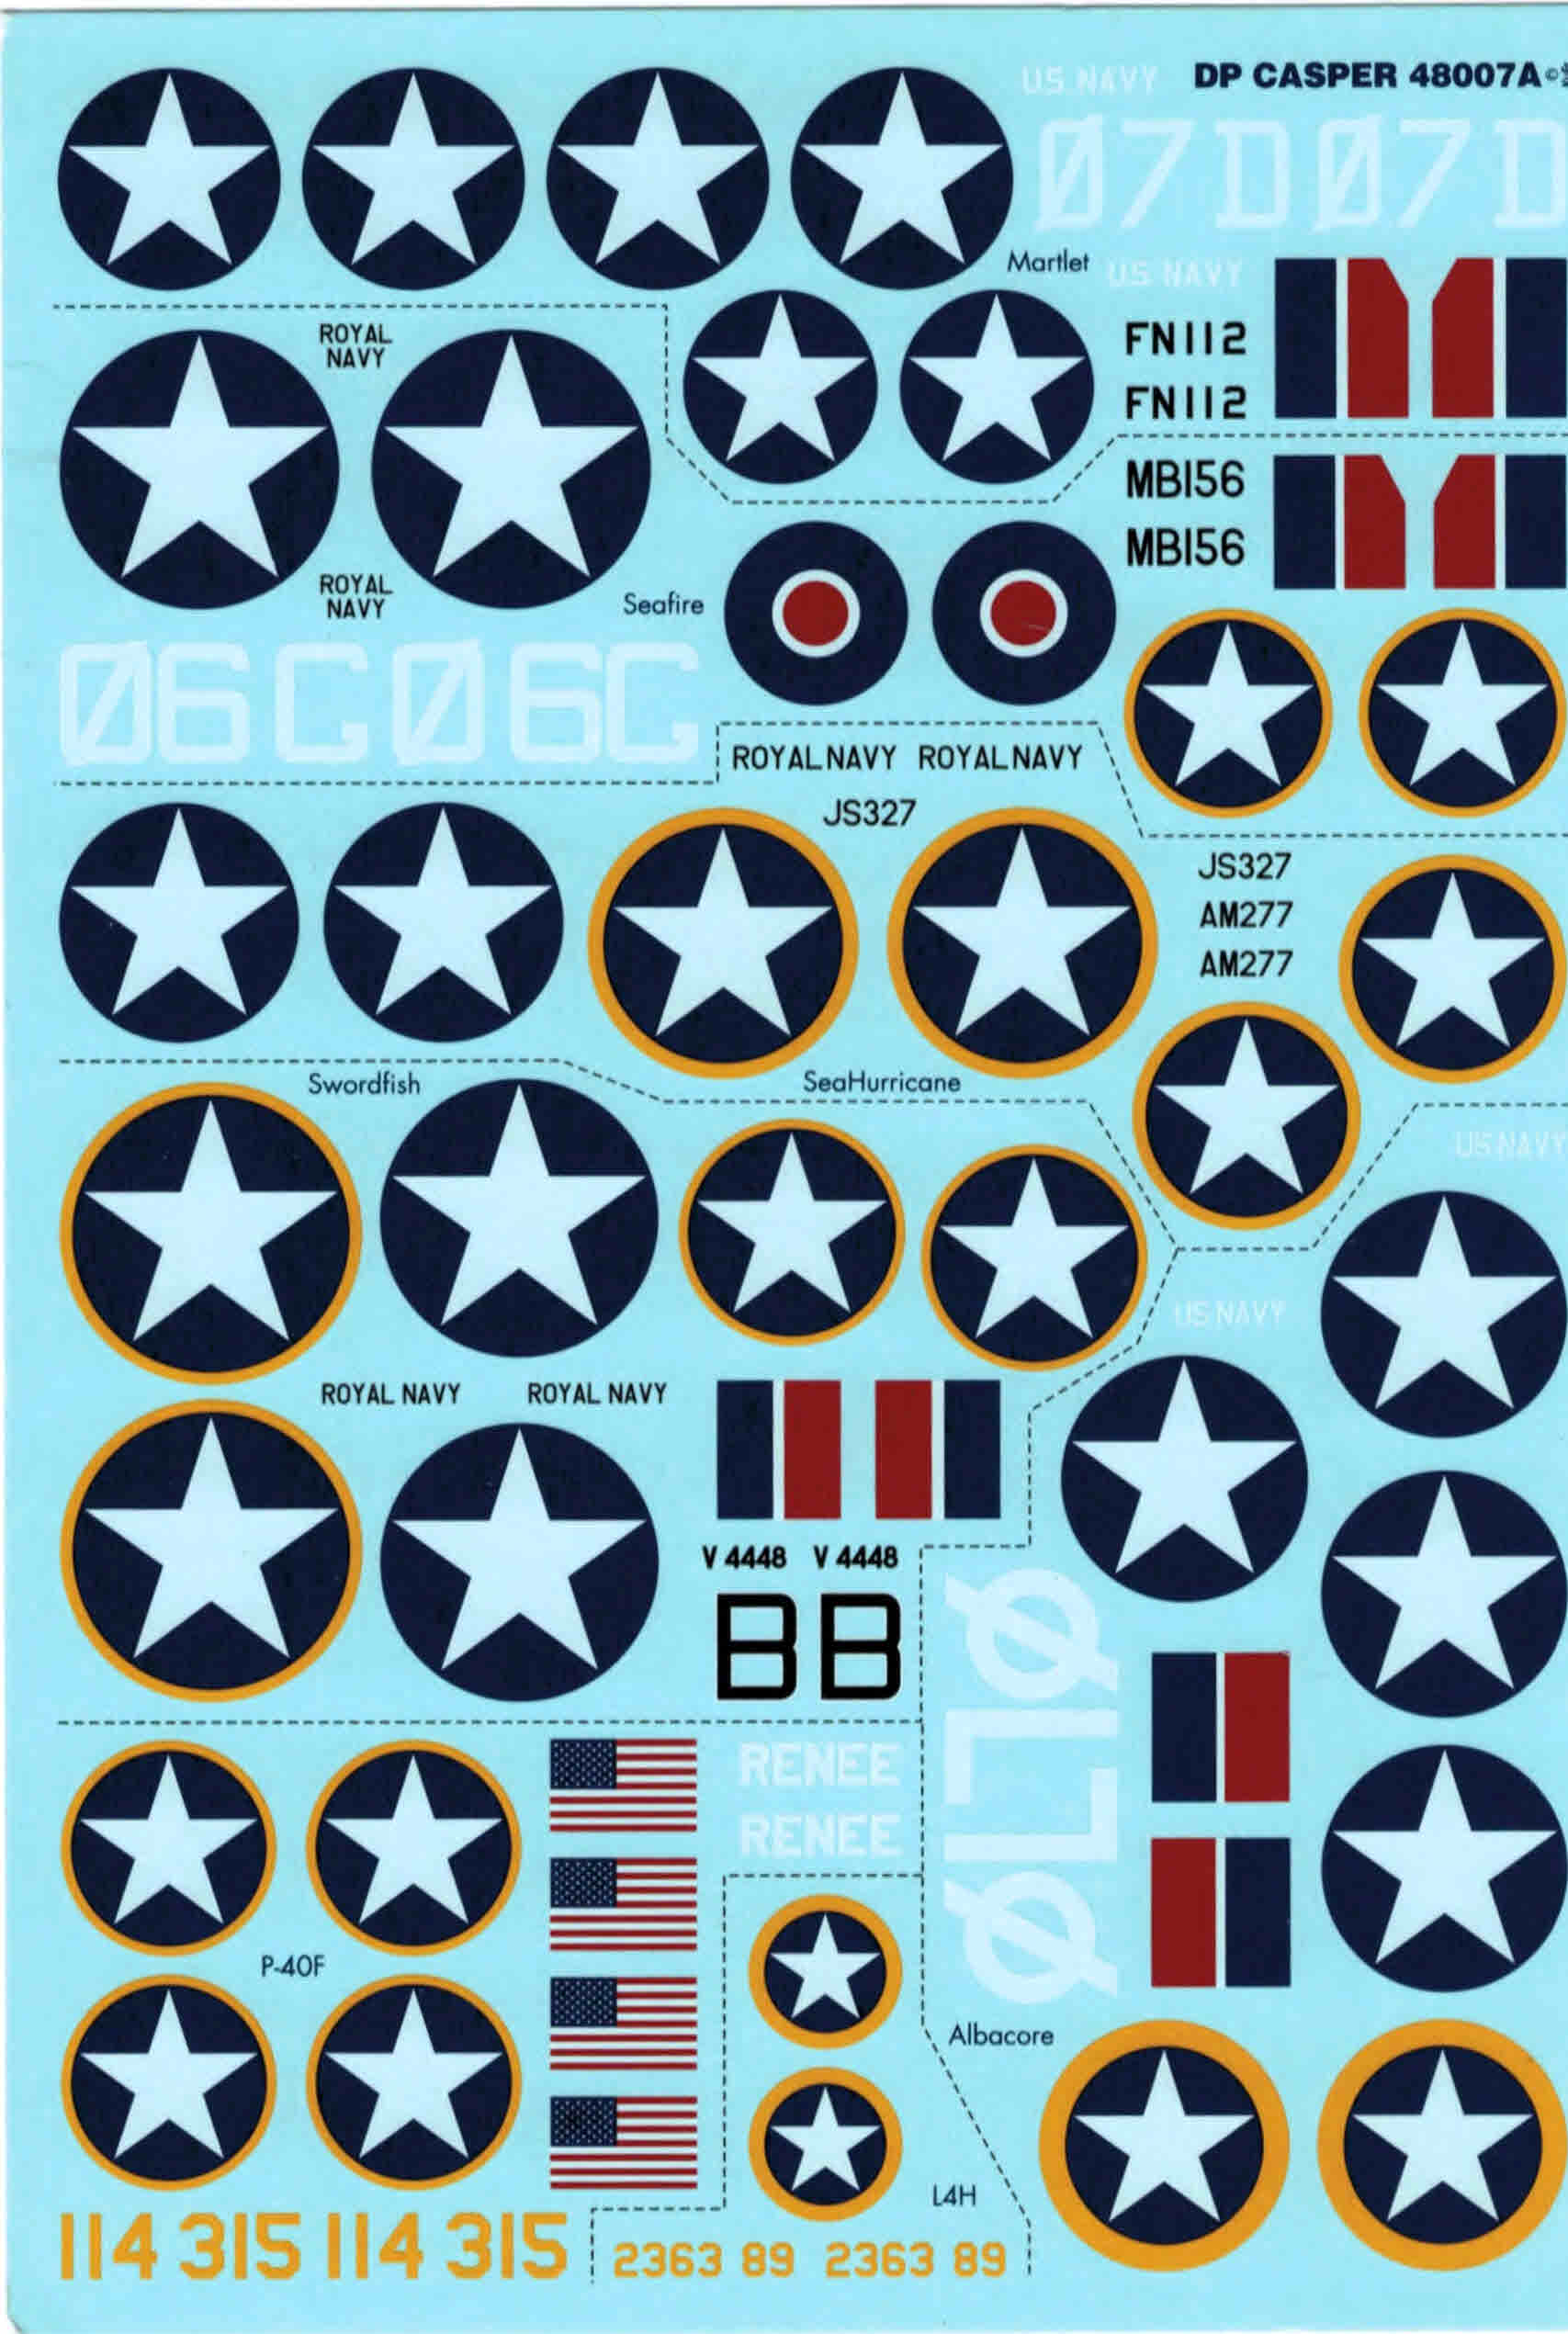
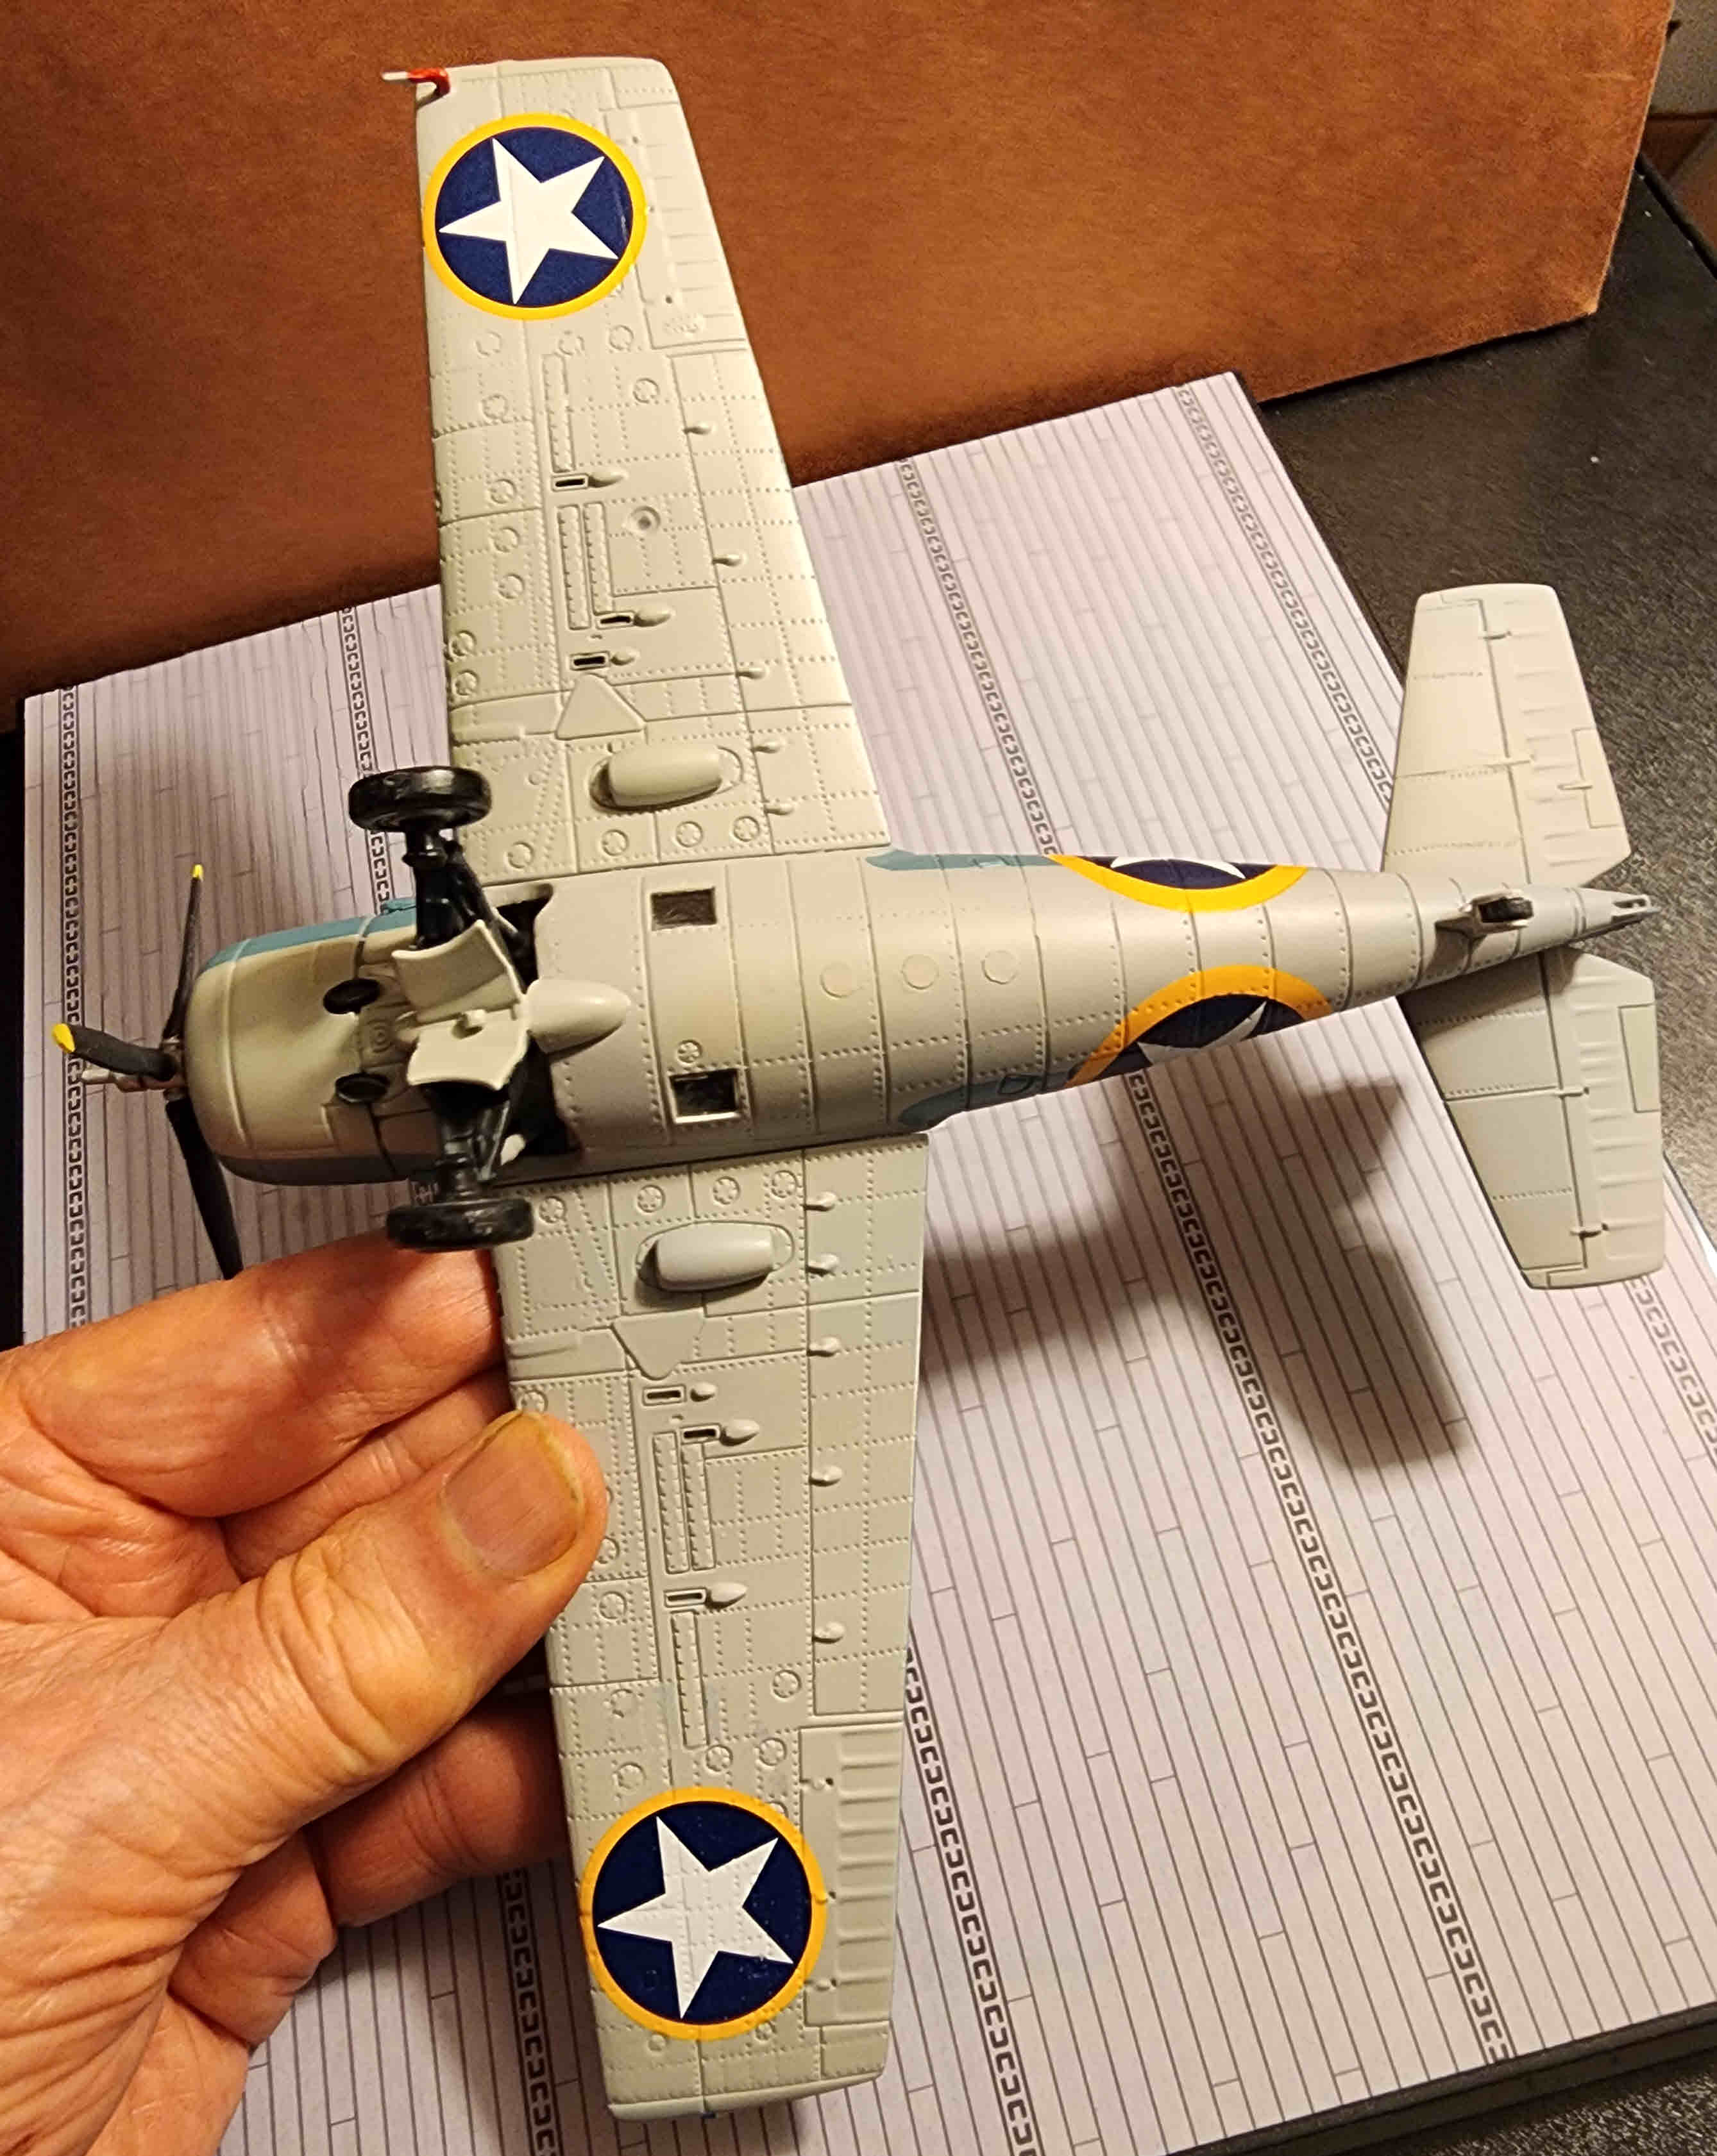
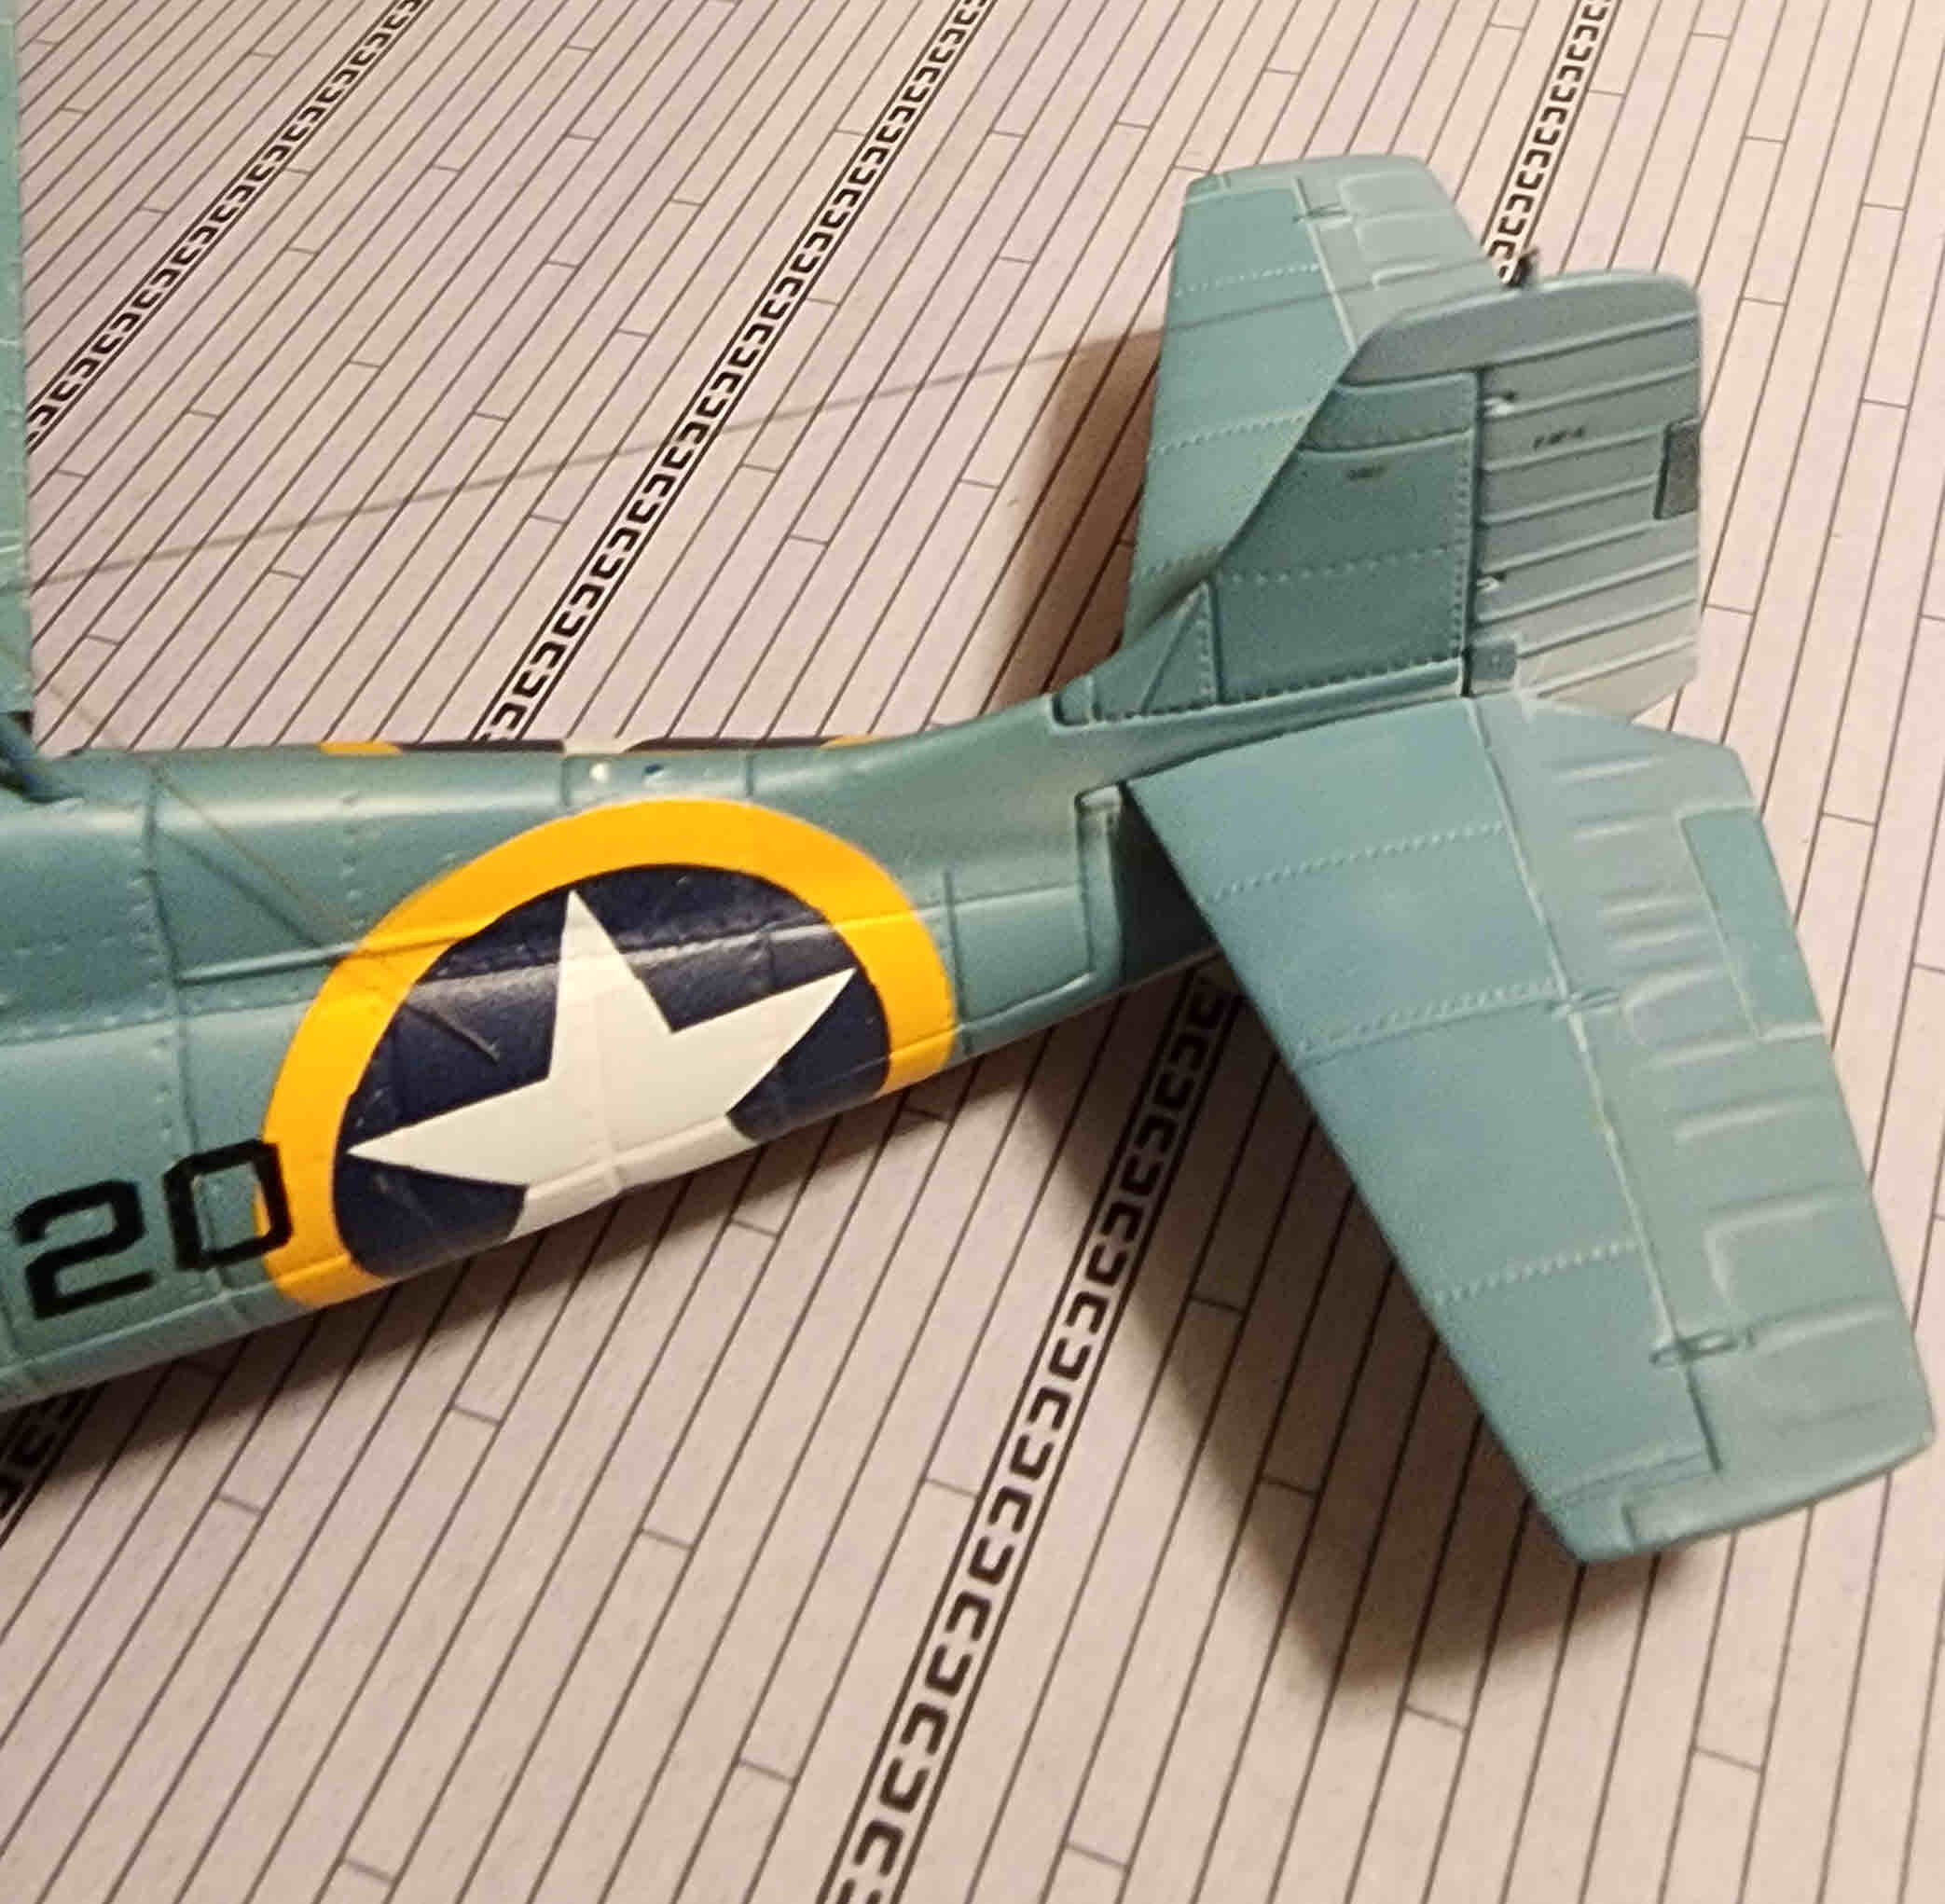
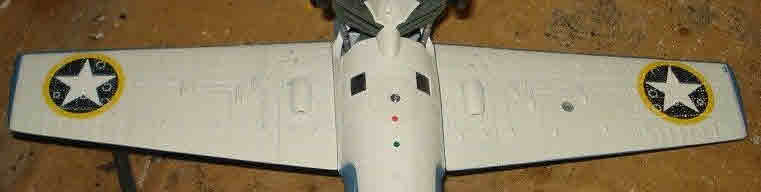
That was “Unsat,” a phrase common from my own Navy service in the 1970s. Also, I had some questions about the placement of the national insignia on the wings, which looked a little “off” to me on the top. (Maybe, maybe not).

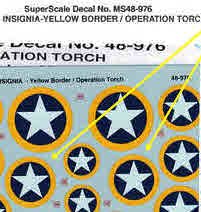
The insignias on the bottom were definitely wrong. [Ah, famous last words, see next post!] :expressionless:

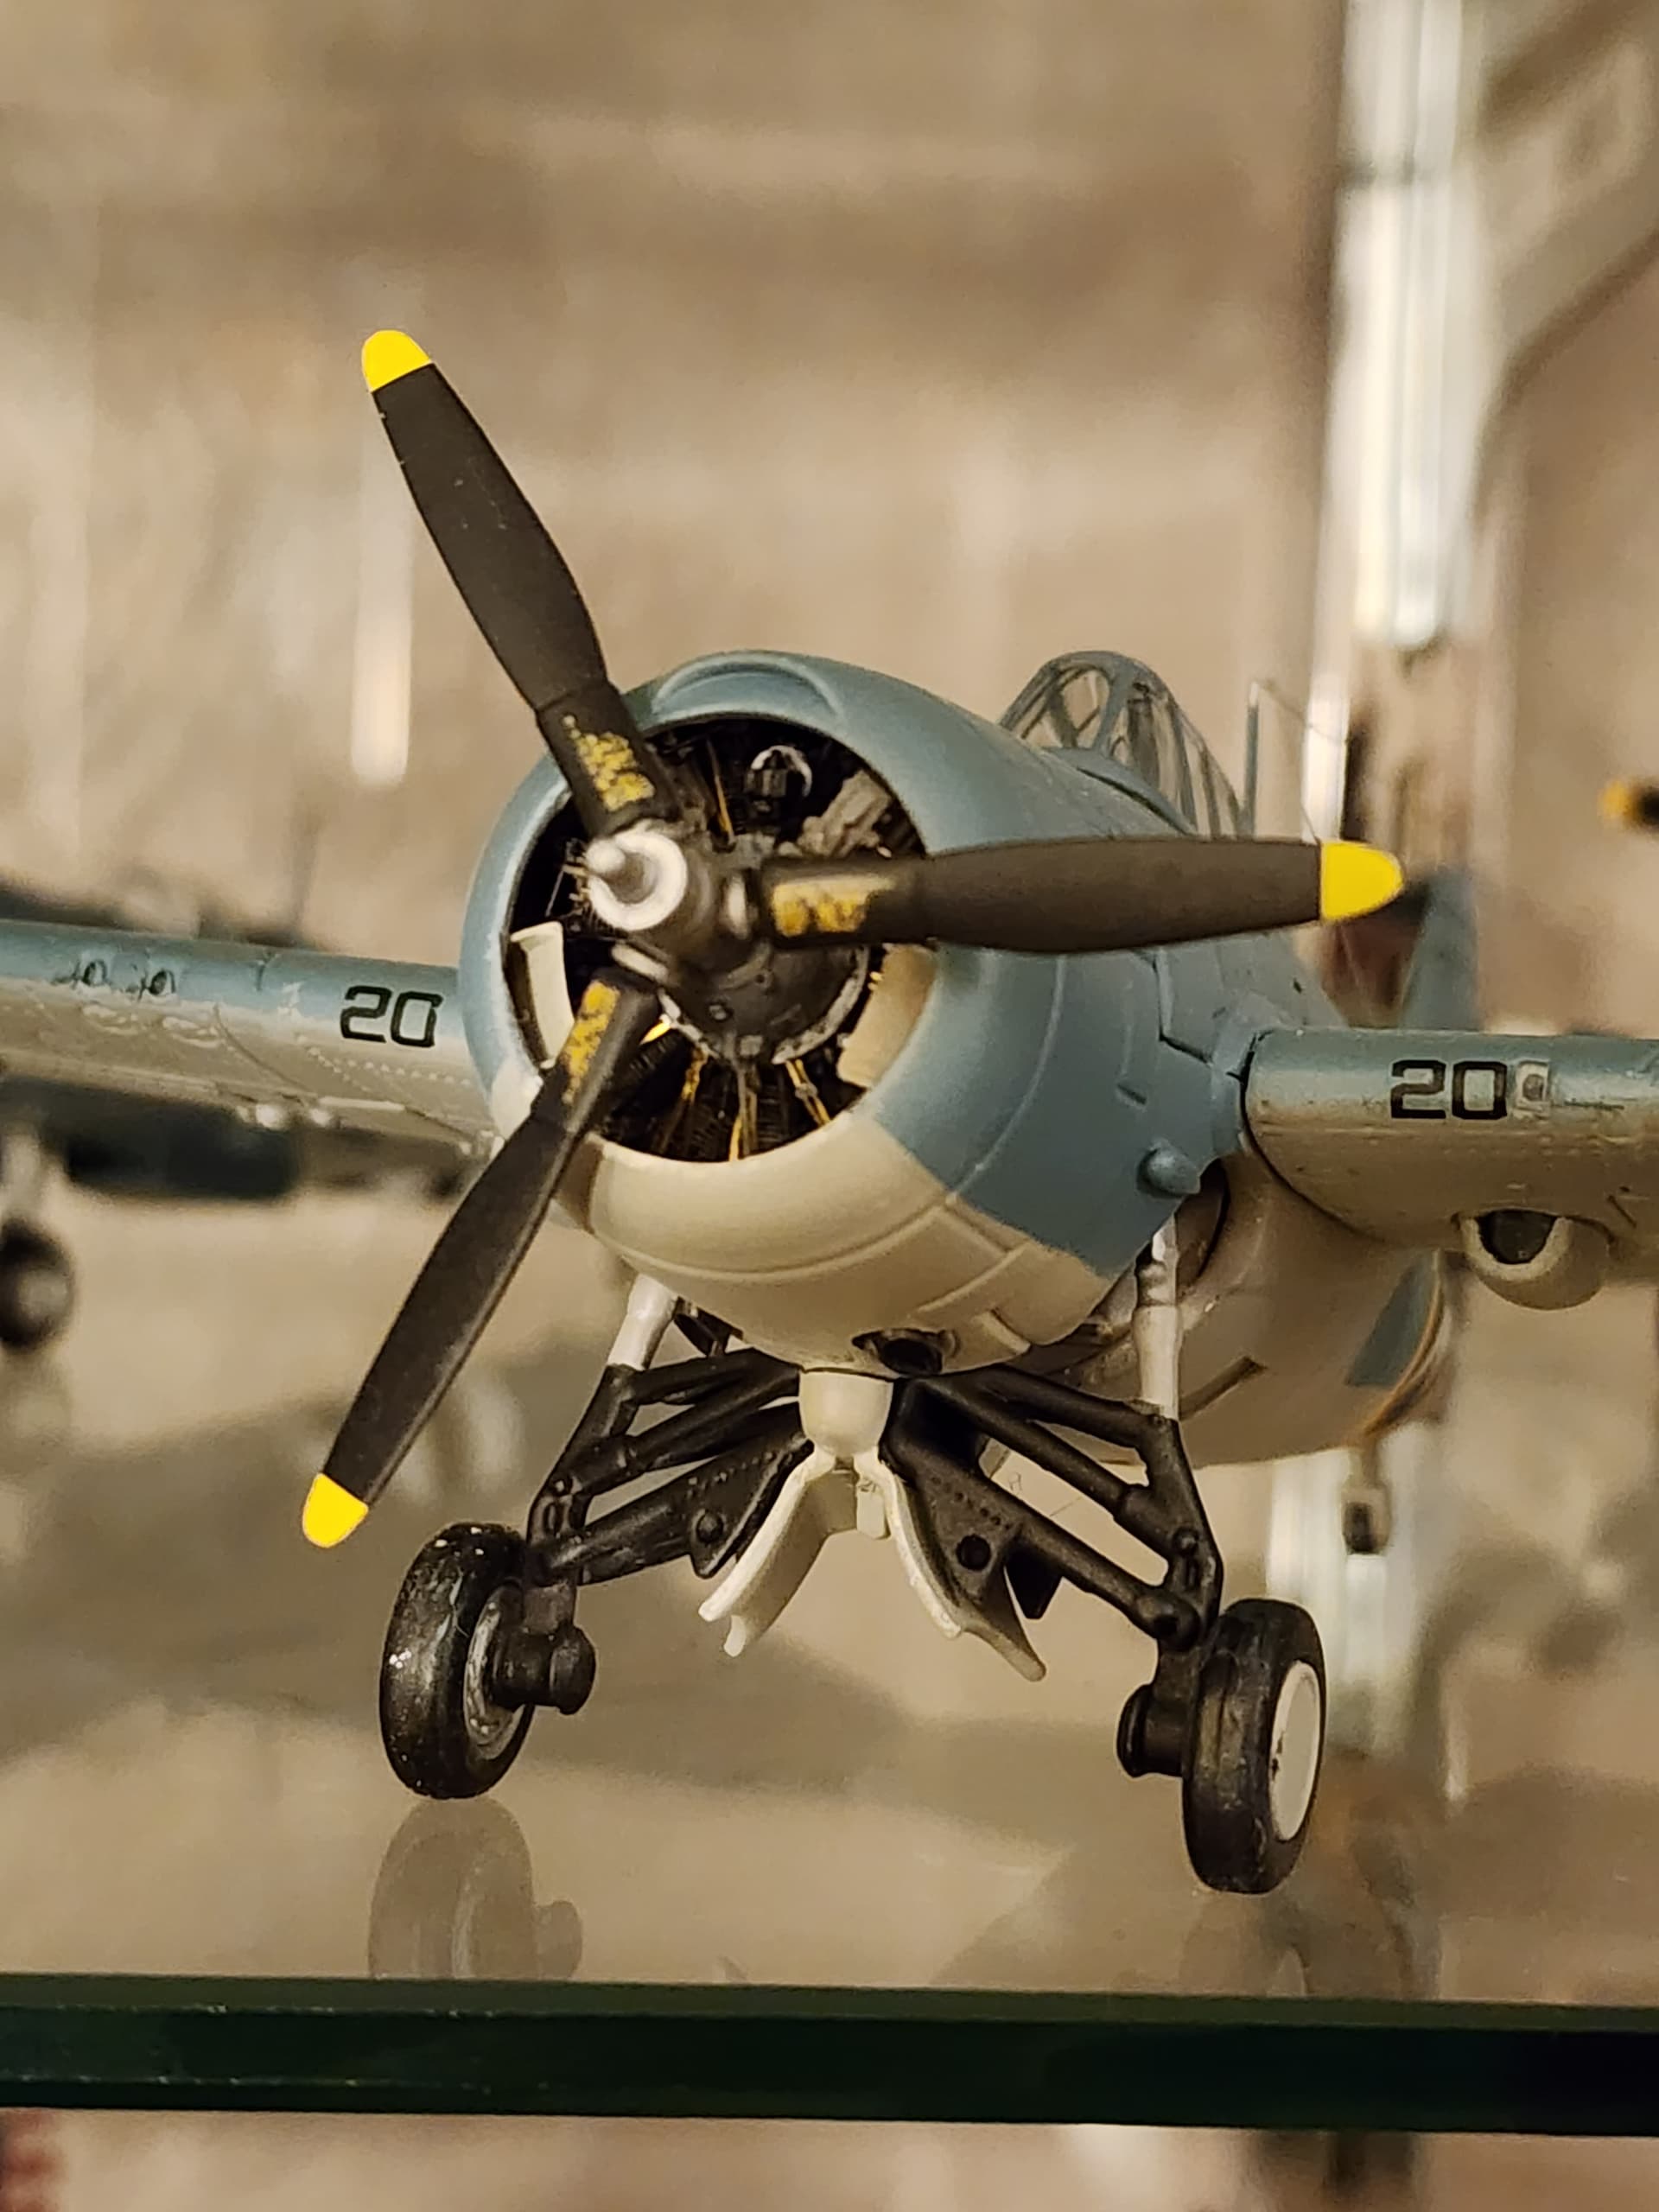
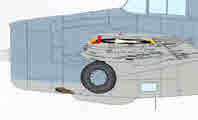
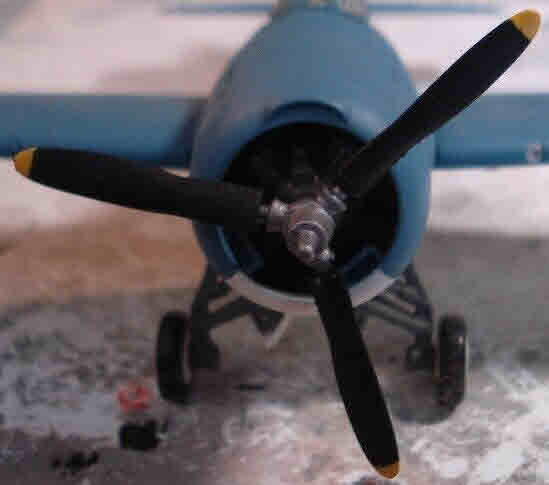
Finally, the air intakes inside the lower cowling were comically misaligned, and the kit engine sadly needed an upgrade.

s-l1600 (1)

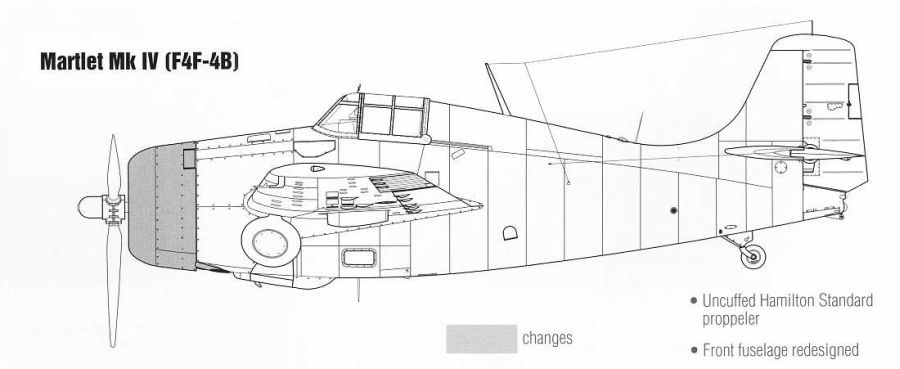
In the next post, I’ll show you briefly what I did the fix the Torch F4F-4 and then move on to the next to-be-started project, a Torch FAA Martlet.

4 Likes

Having decided to repaint the whole thing, I sourced some “Torch” Wildcat decals. This sheet by Wolfpack is good, except they maybe made the same mistake on the wing bottom insignia that I did. (See below).

I had a preference for a VF-9 aircraft, so I picked 9-F-20, pictured below left.

Contrary to some sources, VF-9 clearly had four national insignias, two on top and bottom of both wings.

However, now that I look at this picture more closely, I see that I may have been too smart by half and that the original locations on the wing bottoms are probably right, right down to the yellow surrounds on the insignias! UHG! :rage:

Well, this just means I have an excuse to “finish” this build correctly, including lightening the fabric control surfaces on the rudder, elevators, and ailerons. See above photo.

At least I’m happy with the engine,

And the topside is basically OK.

So, I guess this is going to be more of a dual build than I originally anticipated.

And with that, let me introduce the second subject, a Martlet IV participating in Operation Torch from HMS Formidible.

More details on how that differs from an F4F-4 in the next post. (Hint, it’s the engine, cowling and prop.)

6 Likes

Neat idea. The engine changes look very good and add a lot more to it :+1:

1 Like

Two Yellow Ringers

These came today,

and over the weekend, I will start preparing 9-F-20’s lower wings to receive them.

In the meantime, I decided to research exactly where the insignia with the yellow borders were placed, other than on the fuselage sides – if anywhere.

The Yellow Wings Decals sheet for Operation Torch had this interesting explanation for them.

The sheet provides U.S. national aircraft insignia with a (FS13538) yellow-orange surround that are associated with OPERATION TORCH, the allied invasion of French North Africa in 1942.

The markings arose out of the complaints from pilots who found it difficult to distinguish the then standard white star on blue circle background U.S. national insignia from the national insignia worn by German, Italian and even British aircraft. With this in mind, an amendment to the Operation Memorandum No 9, dated 25 September 1942 was issued by the Allied Force Headquarters directing that all American aircraft participating in OPERATION TORCH, display a yellow band around the white star on blue circle background U.S. national insignia on each side of the fuselage and on both lower wings.

Since the memorandum was only concerned with air to ground recognition, no mention was made of the markings on the upper surfaces of the wings. It is apparent though from period photographs that some aircraft did have the markings on the upper surface of their wings suitably altered as well.

The marking was short-lived on U.S. Navy aircraft though as they returned to the U.S. after the invasion but the marking did remain on of the U.S. Army Air Force machines used in the North Africa and Mediterranean theatres.

TBH, I thought for years that they were only applied to the fuselage sides. “Wisdom too often never comes, and so one ought not to reject it merely because it comes late.”

I’m also going to add something else under the wings that I missed the first time.

Copy of Grumman-F4F-4-Wildcat-VF-9-Black-9F25-about-to-launch-CV-4-USS-Ranger-Nov-1942-80-G-30244

A pair of those will come in next week. They are positioned far more outboard than I have seen on other F4Fs.

Finally, before I mess up the underwing markings on the Martlet 4, whose artistic renderings show markings on the lower wings without the yellow borders, let’s take another look at the one photo I have of my subject.

Notice anything? Take a closer look:

Copy of ToTMartlet4martlet FN112 on the flight deck of HMS Formidable._zpsetq1n1vy

It sure looks to me like the underwing of the VF-9 F4F.

Copy of Grumman-F4F-4-Wildcat-VF-9-Black-9F25-about-to-launch-CV-4-USS-Ranger-Nov-1942-80-G-30244

It would make sense, given the instructions directing yellow circles on the lower wings, even if the Brits omitted them on the fuselage sides.

Whaddaya think?

4 Likes

Torch Wildcat Underwing Insignia - More Proof?

This is a view of SBDs and Wildcats on USS Santee (CVE-29) during Torch. I think I see some color evidence of the yellow ring on the lower wing of a Torch Wildcat in this photo.

Here:

Perhaps “you’ll wonder where the yellow went,” and reasonable minds may differ, but I’ll be fixing the lower wing insignia on my VF-9 F4F-4 later today.

3 Likes

Marking Mystery Solved

Herewith is a small story about how apparently well-researched decal sheets just can’t be trusted. You have to do your research and take nothing for granted.

The question is, how did I go from scorning the pre-existing, yellow-ringed placement of the national insignia on the Franklin Mint Torch F4F-4,


to this,

, which I was sure was right?

The "wolfpack decals sure looked impressive,

and when I checked the instruction sheet, I was blown away by their diagrams showing plain insignias placed at different locations on the lower wings based on which aircraft you were modeling.

WOW! I thought. I’ll get this right by following diagram 1.

Sadly, no, as the foregoing photos show, together with that info from Yellow Wings decals about the reason for the Torch yellow borders on the fuselage sides and lower wings. Plus, there is ample evidence that the SBDs on the Santee had the yellow rings on the lower wings, so logically, there was no way VF-9’s Wildcats flying off the same ship wouldn’t have them.

So, where was I going to get yellow-bordered national insignia that the photos suggest stretched from near the “edge of the leading edge” to the border of the ailerons?

Well, why do you think I got those Superscale Torch decals?

Copy of 48e2da18e92e8f06de7df56a407c6cf89209272a_2_335x500

But again, sadly, no, they seemed too small to me. So now what do I do?

I had one more resource to tap into, and if you have an interest in exotic, oddball schemes from Operation Torch, this is the set to get.

So I started to look it over.


At this point, I think it’s a bit of a toss-up between the Sea Hurricane ones on the first sheet and the thin-bordered ones for the SBD’s on the second sheet.

Let me close by showing you, from the chaos of the work table, that at least the lower wings are ready for the ones I choose.

Before I apply the decals, I plan to spray a lighter shade of blue-grey on the control surfaces, as previously mentioned. One question, however. Should the lower ailerons and elevators also have a lighter shade? Part of me says yes, because of the fabric vs metal contrast, but OTOH, the lower surfaces weren’t exposed to as much sunlight as the upper surfaces were.

Your thoughts, anyone?

3 Likes

For what its worth and my uneducated air knowledge, I would of said there would be some colour variation between the 2 surfaces, not only for your reasons of 2 differing surface materials, but because the underside would receive other types of elemental weathering apart from sunlight which could effect the material ?

1 Like

Sounds right, and thanks!

1 Like

Who was that Masked Man?

It’s not exactly on topic, but it has a better ring than “Who did that masking job?”

I found time to mask the top surfaces of the control surfaces of my corrected U.S. Navy F4F-4. Here’s what was involved.

I forget what I used for the main Navy Blue-Grey on the metal upper surfaces (and I have to find out for some touch-up work!), but I found a lighter shade of the color in an old Poly-Scale acrylic bottle and gave it a try. The contrast is less than the photos suggest, but for this, I felt that “less is more.”

Whaddayathink?

I am going to darken the rudder trim tab a bit more on this one, however, and move on to the underside control surfaces.

Oh, and Happy Father’s Day for those who Are~

5 Likes

Great start and I like where it’s going with the faded surfaces :+1:

1 Like

Unmasked!

I will call this the end of my “correction” to the diecast VF-9 9F20. You’ve followed my research journey to find the correct underwing markings and I feel I came to the right conclusion – after I discovered that Eduard’s research beat me to it. This is from their “early” F4F-4 kit.

and I think they nailed it, right down to a small surprise – the main body of the pitot tube is painted red!

Copy of IMG_1522_fs

So, I pretty much followed suit.

It’s far from a perfect match in appearance,

especially at the top where the fuselage yellow rings merge together

but it’s close enough for me as OCD diminishes with age. :slightly_smiling_face: and in my modeling case, "no one will ever know! (It’ll just be our secret.)

And I do like the way the weathering experiment with the tail surfaces went.

Next up is the more exotic conversion of the Franklin Mint “Martlet” to a Mk. IV with that different cowling and engine.

5 Likes

Great info and I agree, the tail surfaces look really nice with the new tones done. :+1:

1 Like

Glad to see you keeping your hand in it Brian !

1 Like

A Touch of OCD

but it’s close enough for me as OCD diminishes with age. Well, it’s not completely gone.

I’ll never be completely cured.

In looking the bird over, I decided that the radio mast was not tilted forward enough and that the antenna extension to the radio compartment should be repositioned. So I did this:

And added a small antenna under the fuselage.

The bird now rests in my display case,

Where I want it to stay (for now).

A final note. There is a 1943 book authored by some pilots from VF-9 that’s worth a read for its gung-ho zeitgeist and description of dogfights with the frustratingly (what the hell are you doing, you’re supposed to be on our side!?) feisty Vichy French flying Curtiss Hawk 75s and D-520s. I believe it’s the only time during WWII when U.S. pilots flew against adversaries flying U.S.- built combat aircraft. It’s worth a look if you’re interested in the campaign.

Coming up next is the Martlet IV. The two should look interesting together!

5 Likes

OCD Redux – Detection, Correction, Completion

Well, I fell prey to my desire for perfection, again, . . . or at least my version of it. I decided, casually, to look for additional pictures of VF-9 Wildcats on Ranger during Operation Torch, and, whaddayaknow, I found a beauty.

But, but, what did my eyes behold after all the work? Need a hint?

W.T. F.?! The numbers on the leading edges of the wings are white, not black?

Well. there was no way I could convince myself that black is white, so I had no choice but to correct it.

While I was at it, I said that the fuselage national insignia needed to be fixed, too. There was no way I could pretend any longer that this:

looked like this:

I won’t bother you with the details of how I did it. It suffices to say that I had extra decals and the requisite desire.

This particular Wildcat finally looks right, or as near as I can get it.

And here is some inspiration for a future subject to complement 9F20.

It’s finally time to move on to that Martlet conversion.

5 Likes

That’s what I wrote on July 29, 2023. Now, on December 2, 2023, I find it actually is.

Through some miracle of of motivation and time.I managed to clean off the entire area of my work table, which is about 6’ wide by 3’ in depth. This time I have promised myself not to allow model junk to creep onto the surface to the point where my actual workspace is about a square foot.

So, this is the next part of my effort to accurize a U.S. Wildcat in true Operation Torch markings, and to show a Brit “Martlet” in U.S. markings for Operation Torch too,

The task before me is to convert the Franklin Mint Mk. V. diecast model (it’s the wrong configuration!) into a Martlet Mk. IV (aka F4F-4B) powered by a Wright R-1820 Cyclone. The below picture shows some of the stuff I’m going to use to make the conversion.

Before ending this post, do any of the Non-Brit and non-Commonwealth folks here know what a “martlet” is? I finally asked myself that question to see if my hunch was right: I figured it was some exotic feral cat not unlike a wildcat, something like an ocelet.

Well, no.

The martlet is a small bird, usually depicted without feet and (in some cases) without beak.

Who knew?

4 Likes

Glad to see you back in the groove somewhat Brian - I hope the mojo continues.
Bird watching is something I dabbled in some years ago so I knew of the Martlet . Impressive, eh ? LOL

1 Like

I do plan to persevere on this one. As an enticement, I think I’ll do the engine first. With that done up nicely, I’ll have motivation to do the rest.

The Guardian remains as a reproach, however. I put it aside when it began to go backwards, but do want to get it done . . . eventually.

"Later * * * "

2 Likes

Looking good, all the pieces are present I see. Sutton harness, cyclone, radio mast and color looks great.

By the way taking notes for my conversion when the Eduard kit arrives. I’ve been keen to the fact that Grumman paid particular attention to color matching for export craft as compared to other lend lease providers. That said I use dark olive drab for slate from vallejo, seems to be in the neighborhood.

Also, just snagged an A-20 B/c speaking of lend lease, now all I need is a turret from an Su-2, I think you know where that train of though is headed.

I can supply that turret, and decals.

I will probably re-paint the Martlet, at least topside. The masking template I have for the topside differs, I think, from published camo patterns for this A/C on decal sheets, and from the “apparent” scheme in the one photo of this A/C I have.

I need to look into this more. There’s also the question whether this version had IFF wires fron the ends of the horizontal stabs to the fuselage sides.

While I hope to start soon on the engine, I want to research the pilot and history of the a/c a bit more before starting.the main part of the conversion.

I admit that “accurizing” diecasts is a freakish mutation of the hobby, but it can bring nice results. This project done three years ago shows what can be achieved: Mystery Model! Boyington’s AVG Curtiss Hawk.

IIRR the diecast Franklin markings are for a Martlet Mk V., which is like a four-gun FM-1 Wildcat, The diecast model has six guns, like an F4F-4. In any event, until Eduard decides to do a Martlet IV, when done this will be only the second of two 1/48 versions on the net, and I am taking a very different approach to it: See Tamiya 1/48 Martlet IV by Tom Cleaver.

2 Likes