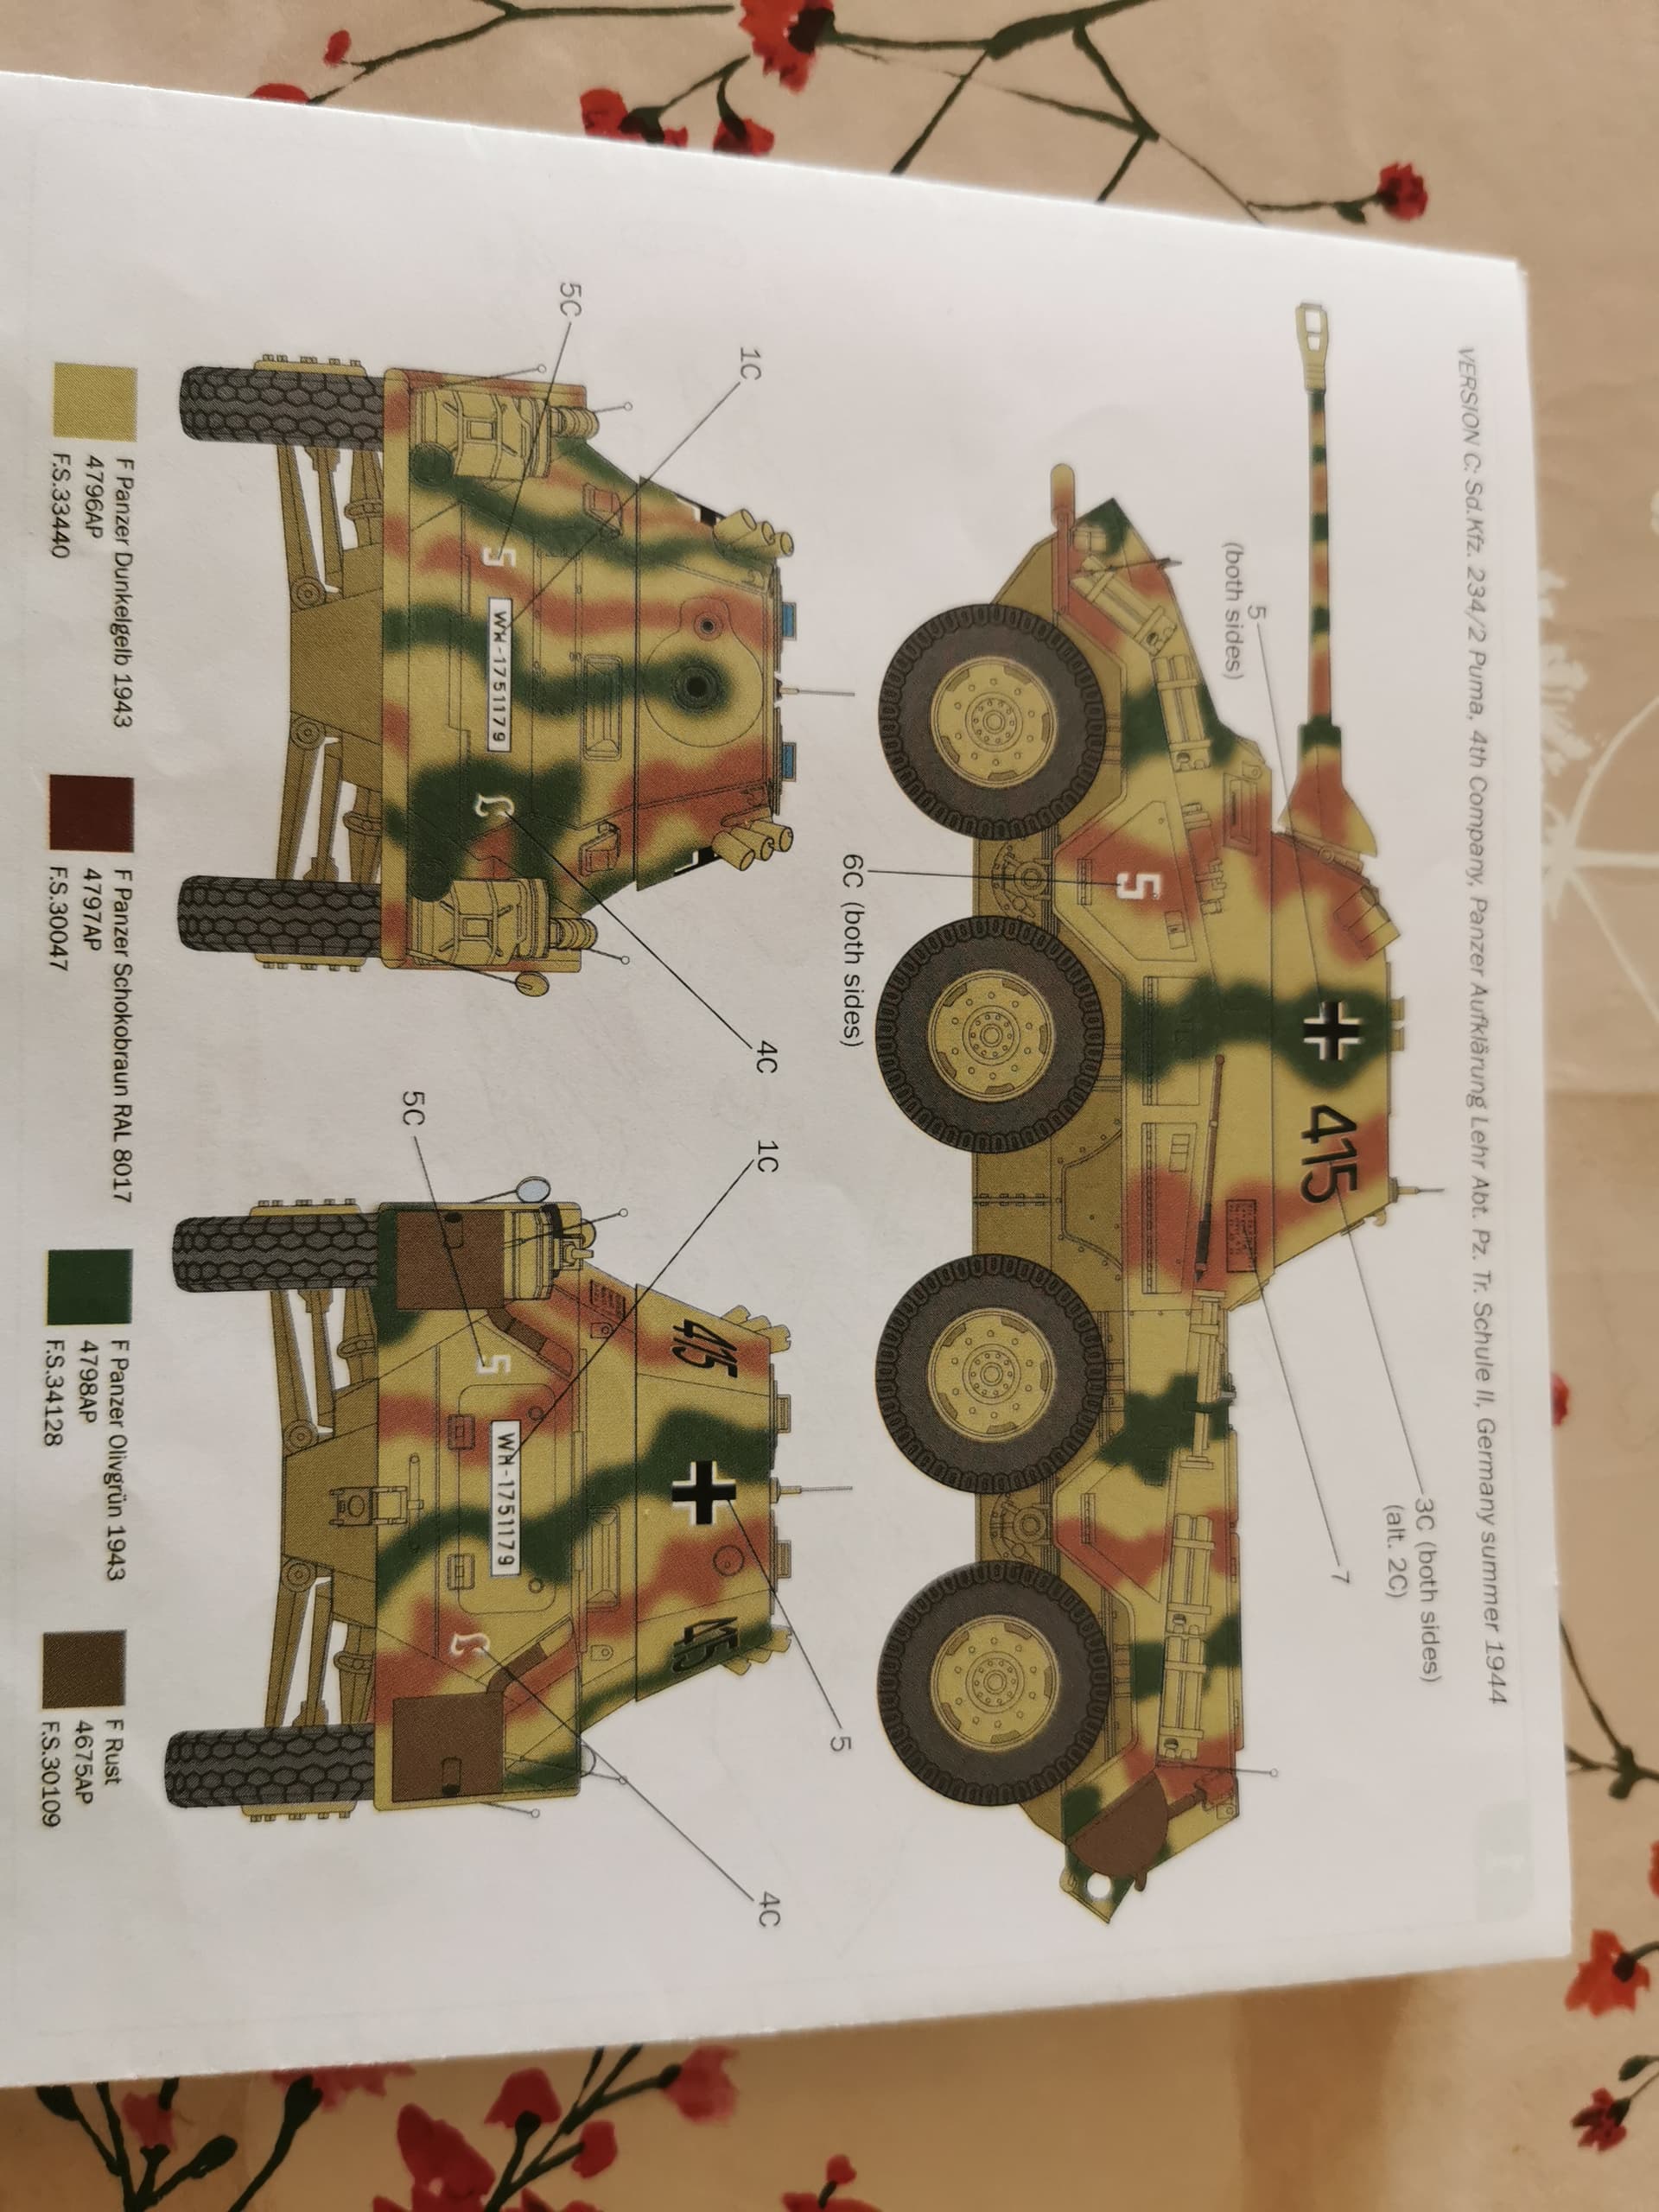
I want to paint this version, but the top view of the camouflage pattern is missing.
How do I know how I have to paint the top side of the vehicle?
In the absence of photographic evidence, I think you’re safe to wing it based on the side pictures
1 Like
Just connect the side cammo spots / lines across the top.
I assure you that the artist that did the rendering for the kit instructions did not have pictures of all four sides, much less the top. (In fact, the artist probably only had a single, probably pretty poor photo to work from.) The majority of what you see in the artwork there is totally speculative.
Trust yourself. You can finish the pattern just as well the person who did the color renders.
Keep in mind the general ideas represented and try to think like a tiny, 1/35th scale soldier with a spray gun and orders to get the job done in the least amount of time. You’ll do at least as well as the artist.
5 Likes
And what about the right side?
I assume you are being humorous? ![]()
![]()
![]()
![]()
I think you’ll find that the left side and front views don’t jive with one another. Look at the gun mantlet.
Just follow the basic pattern and you’ll be fine,
2 Likes
We Germans don´t have humor! We are all Spassbremsen!
5 Likes
Luckily, Wehrmacht don´t had any Dienstvorschrift for camo patterns
1 Like
What is ‘winging’ of the camouflage pattern? I have some idea of what you mean. But just to be sure, can you explain to me?
“winging it” : to improvise, do something without being prepared.
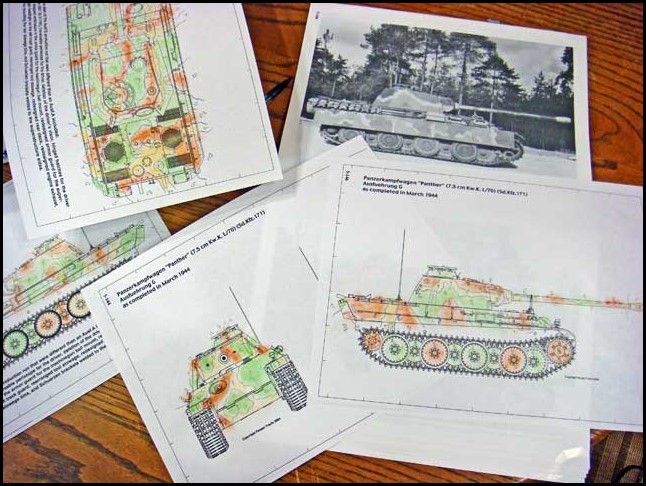
If you want to be more deliberate in your camouflage design, you can print a 4-view drawing of the Puma and use colored pencils or markers to draw up the artwork for yourself.
Here’s an example of one of the Panther “factory” camouflage designs worked out on paper. Even with multiple wartime photos of this same tank (sitting at the factory grounds), there was no top (plan) view photo. So, the top pattern is speculative and done by extending the patterns on the sides, front and back up and across the top. The side camo spots were connected on the top as seemed most logical.
I wouldn’t normally go to this much effort except that the factory patterns were fairly consistent (although not strictly precisely so - the workers used the approved template as a guide and their adherence to that template was only somewhat approximate). In this case, it was worth the time in order to get as close to the prototype example as I could.
However, the vast majority of German WWII 3-color camouflage was done in the field by the units that the vehicles were issued to. If there was any guidance for the patterns or colors, that guidance came from the unit commander. In the absence of such detailed instruction, the maintenance (or even individual vehicle crews) personnel were left to their own devices. Colors (2-color or 3-color), percentages of those colors and patterns were all up the painters. The pattern you’re trying to replicate (based on the kit instructions) is such a field applied pattern.
(The initial factory patterns all have some similarities, to include larger colored areas at ratios of about 1/3-1/3-1/3 for each color. This is not 100% universal and correct but generally true when the factories first started cammo painting the vehicles before they were accepted by the military. The topic of late-war factory applied cammo is convoluted, each factory had its own patterns approved by its local Wehrmacht inspection officers and the guidance changed over the last 8-9 months of the war when factories were camouflage painting their AFVs. Finally, factory cammo painting is not really pertinent to your question about how to figure out and apply your own cammo pattern.)
As a field pattern, you’re as free to design your own pattern as were the units and crews. The example here is just offered as an idea that you might use if you’re having a bit of trouble visualizing the overall pattern you want to paint on your Puma. If you want, you can do your own camouflage artwork just as accurately as the artist working for the kit maker could do his or her renderings.
2 Likes
FWIW I really like Michael’s ( @SdAufKla ) method. As he states the camo patterns of Germany (generally) varied quite a bit so the precise patterns are not that important. I like the exercise of sketching out the pattern though. As it gives you an idea of where you want which colors and how much of each color before starting. If you don’t like the pattern you draw you aren’t going to like it when you paint either so you can do a few iterations of drawing before starting to paint. Once you start painting, the drawn out guide is a good reference to follow
1 Like
This 3D Puma has a similar camo scheme. Maybe it could inspire you…
https://www.turbosquid.com/fr/3d-models/ww2-german-sdkfz-234-3d-max/449440
H.P.
Nattevingerwerk.
1 Like
You realize that the drawing you have is mostly fabricated too, right? It’s 98% likely simply the imagination of the artist, inspired by typical German patterns.
2 Likes