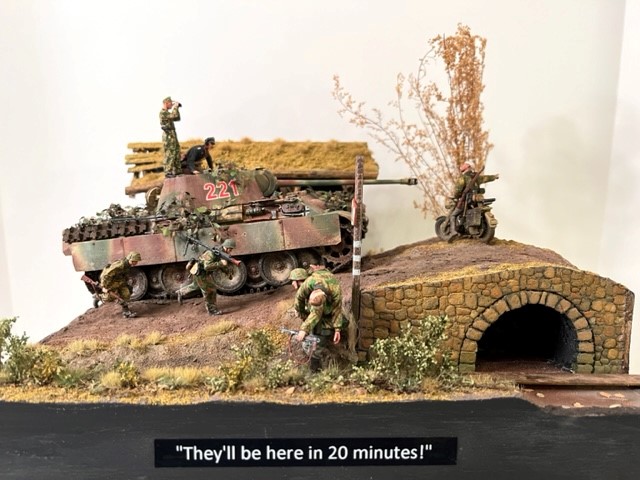
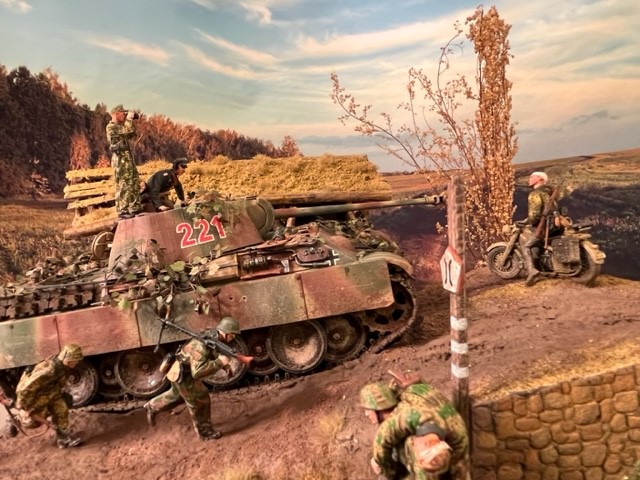
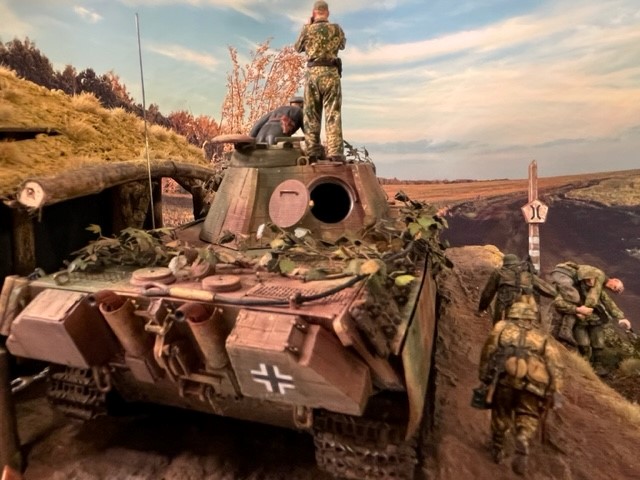
Yet another Panther (‘YAP’). This one a Panther G, with Zimmerit. (You may recall, I’m an admitted Panther addict.)
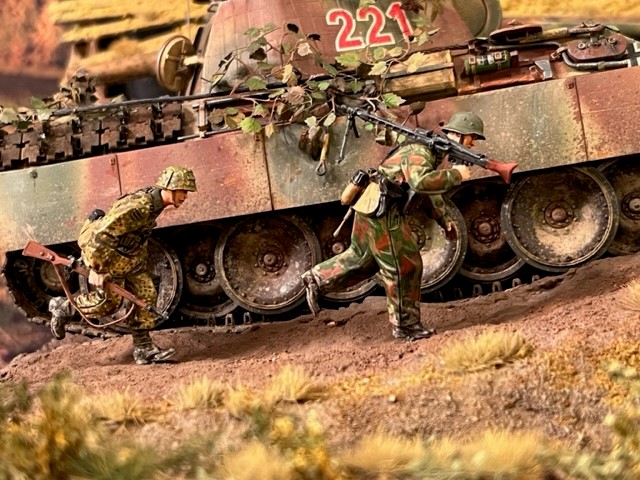
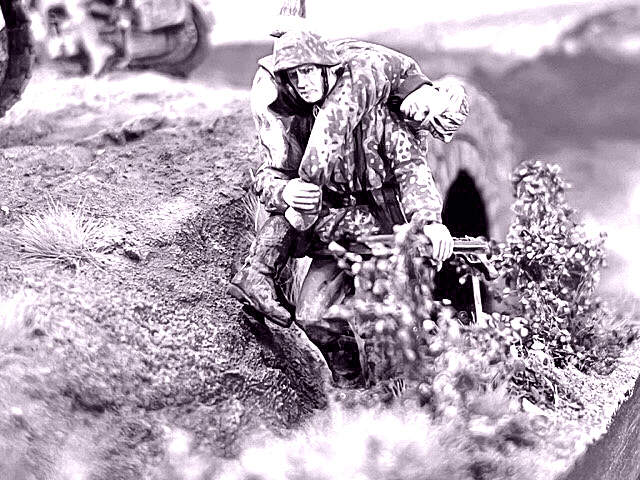
The concept started with the two beautiful Rado machine-gun team figures and grew from there.
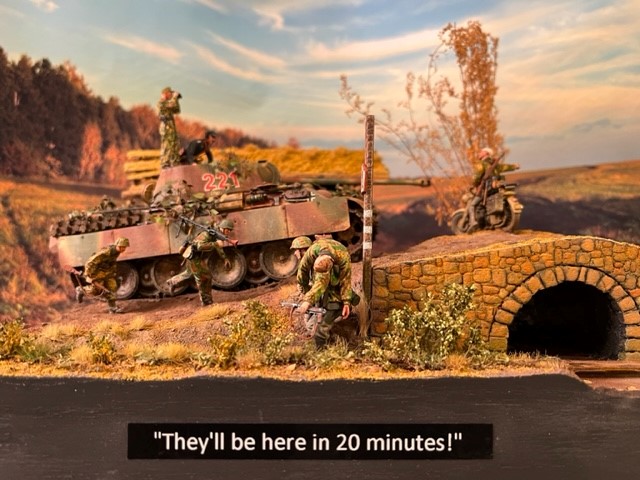
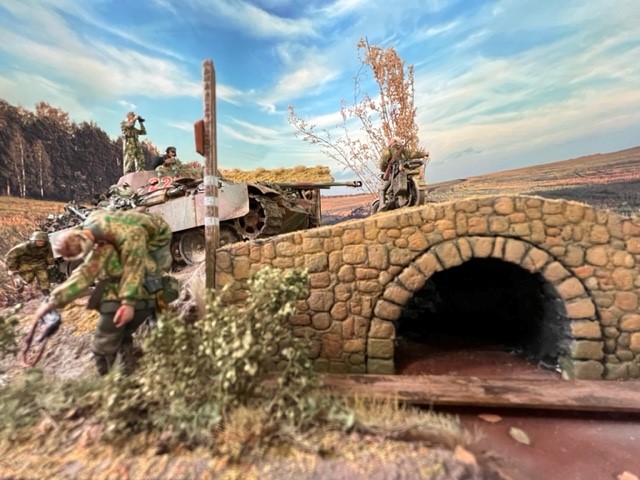
As always, I wanted my diorama to tell a story. Where were those two Landser rushing to?
I wound up picturing a Panther commander being warned that the enemy was coming and the running infantrymen were hurrying to get into position to intercept - passing the panzer along the way…
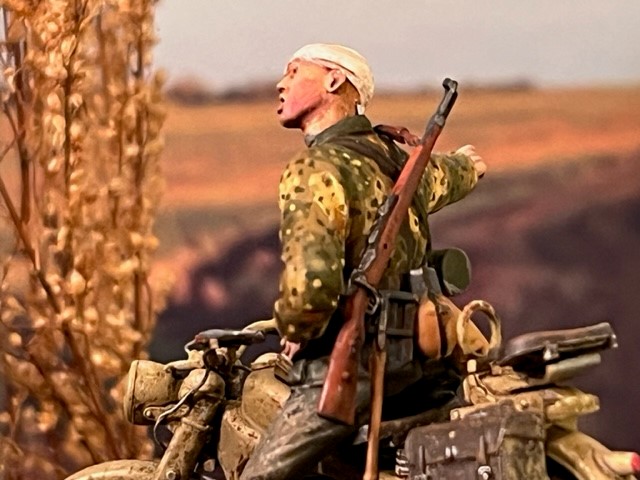
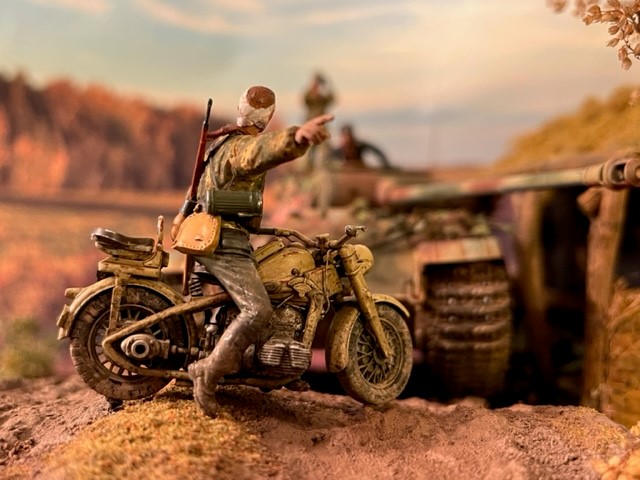
The word about the pending arrival is coming from a motorcycle messenger. He’s actually a Dragon figure, horse-mounted, converted easily to perform as a more modern rider. I only had to adjust his feet and replace a hand. He’s wounded as are a couple of his comrades, heading back to the rear area.
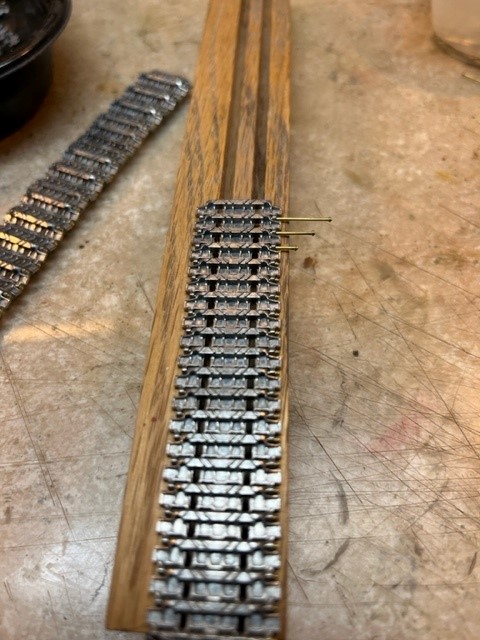
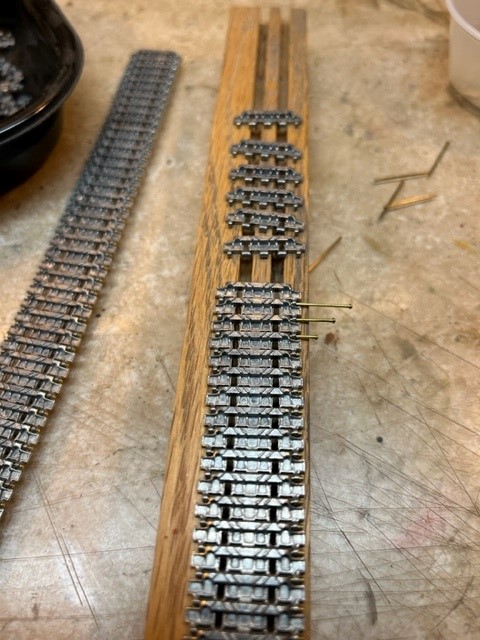
The Panther is from Takom, a wonderful kit, except for the tracks. No matter what I do, or what glue I use, I can’t keep the track horns in place. They break off when I separate them from the sprues, or when I’m trying to fit the tracks to the sprockets, or on the forms provided in the kit. It’s frustrating and far too much work.
That said, I’m also having trouble finding after-market tracks. It seems that all of my sources have dried up. Everyone’s out of stock of the good stuff (per Panzermeister36’s reviews), either metal or resin. Anyone out there have a solid source, with reasonable prices?
I did finally find a set of metal tracks from WARP United. They went together perfectly. I made myself a jig a while ago, that helps – I simply cut a pair of grooves into a block of oak on my table-saw.
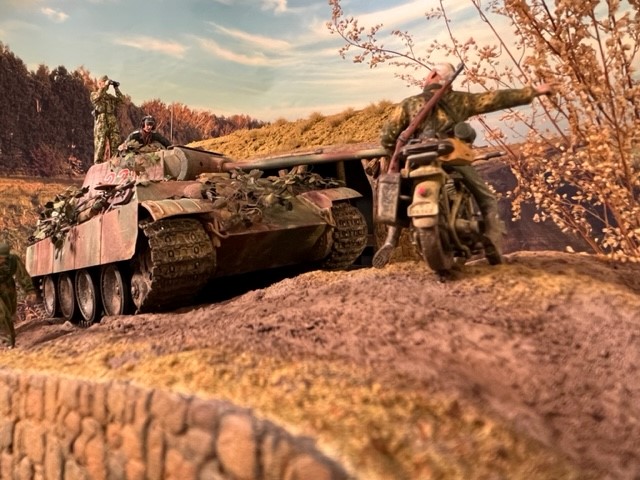
I built the base out of insulation foam, covered in Sculptamold. Wanting something more than a flat stretch of road.
For the stonework on the drainage system, and within the shed, I used a home-grown tool set. I purchased a cheap collection of make-up brushes of different sizes, and (laboriously) pulled out all the bristles; then I reshaped the ferrule into more-or-less rectangular shapes. This produced a bunch of punches in varying sizes and shapes, I could use to randomly impress different size stones into a sheet of foam.
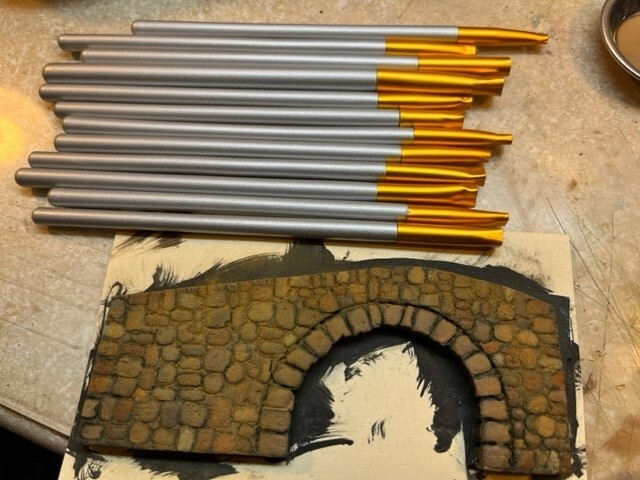
Painted you can see the result. I think it works pretty well. With more practice, it will probably look even better.
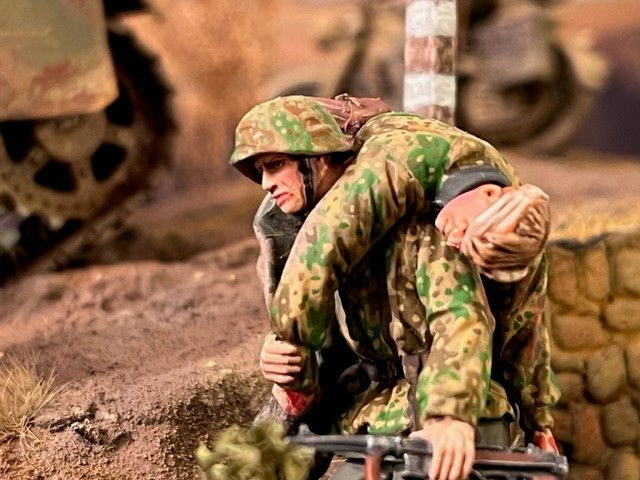
The soldier carrying his wounded comrade is an old one from Verlinden. They seem a little out of scale, more like 1/32 (54mm) compared to the Rado and Alpine figures. But they fit in with the story and I’ve been waiting to include them in some project for years.
The shed is built with twigs from my garden – a feat of engineering…
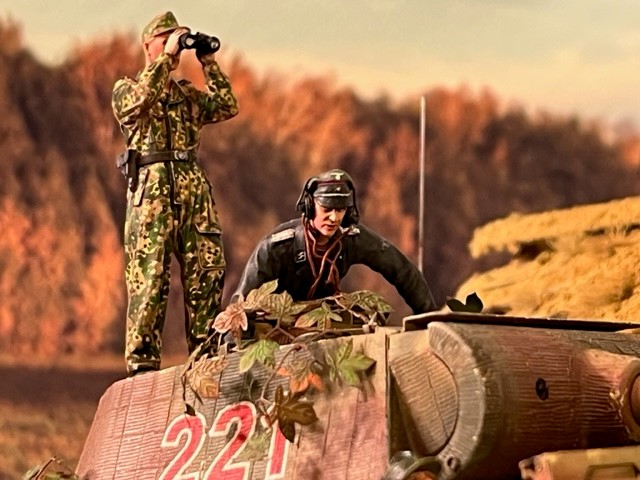
The tanker with the binoculars is from Alpine and the tank commander and crewmen are plastic from one of the sets. The plastic figures all have Hornet heads.

The water was a failure, in my opinion. I tried using layers of AK ‘Still Water’, over a smooth base – I should have stuck with two-part epoxy. The stuff climbed the walls, and as it dries rubbery, it was impossible to cut back the edges. You may be able to see how I had to cover those edges, to hide the ugliness.

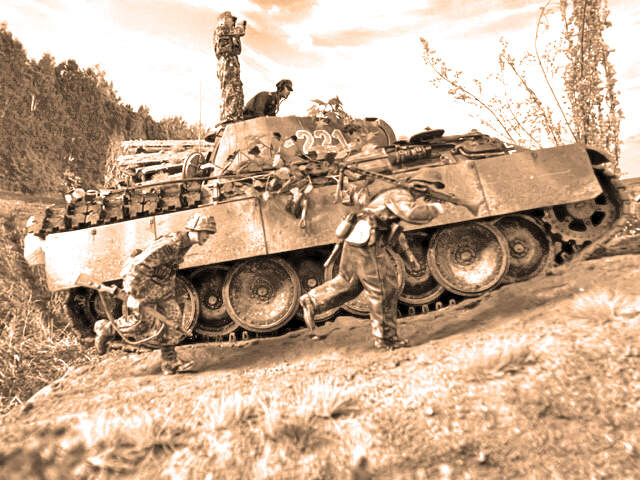
From the backside
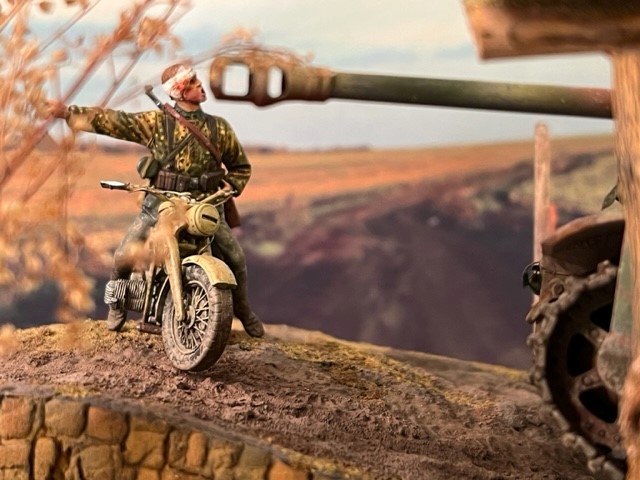
This photo, was trying to show the messenger form a better angle, came out comical – he’s not rally looking down the gun barrel.
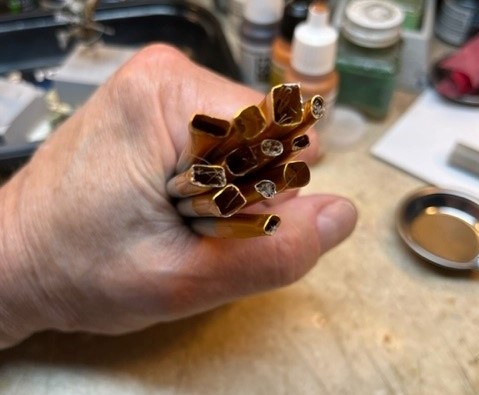
With this project, I also wanted to experiment more with camouflage foliage on the tank. I’ve never been thrilled about covering my wonderful (LOL) paint job and the detailed work on a tank with branches, even though it was common practice, particularly in the later years of the war, but…
For this effort I bought a bunch of Eduard PE branches and worked them to the best of my ability – what a pain! But they I think they look pretty nice. They do seem a bit over-sized – out of scale when compared to a figure’s hand.
Bonus Material:
Now for a few of my favorite tips. (Please reply with yours)
As I mentioned recently to Armor_Buff, I use .015 silver solder for twisting into tow cables or electrical wiring. It’s also great for straps, as it flattens easily and holds its shape well.
Lead wire also works well for the same reasons, and Cabelas/Bass Pro (in the USA) sells sets (6 rolls) of various diameters, starting from .010 - all for fly fishing lure making.
The .010, ultra-fine, wire works well for the wiring on crew headsets.
I do all of my assembly and painting on a sheet of plexiglass, bought at my local home store, and cut to fit. Not only does it protect my desktop, it also serves as a cutting mat, and a paint pallet. I can place a drop of my favorite acrylic paint on the surface, along with a drop of water, and then dip my brush, or mix, right there. When I’m done, I simply wipe it all away with a rag, and move on to my next color.
It’s not a substitute for a wet-pallet – I only open that up for figure-painting.
I keep stacks of index cards around to use in dry-brushing, hold dollops of white-glue, or with masking tape, to hold parts for spray painting, or just to lay out sub-assemblies. Very handy and inexpensive.
I use water bottle caps, as small pallets for drops of CA glue. Applied with a tooth-pick or my modified dental pick.
For antennas on my vehicles I use ‘piano wire’, discovered way back when I was building RC aircraft. It comes in a variety of diameters and is very sturdy – difficult to break, bend or even cut. Although there’s no taper, I think they work well. The ones that come with kits always seemed too thick, and I got very tired of breaking stretched sprue antennas, or having them broken during competitions by spectators or judges.
All comments welcome… (Some of the most interesting discussions occur, as the result of some positive or negative comment.)
Thanks, Ralph (Bravo36 – for a while I ran 3rd platoon, Bravo company, 1/11 Infantry (Mech))
Finally, sorry for the long post…