Awesome job! That whitewash really fits that model. Looks great!
3 Likes
@SSGToms Matt, thank you!
@CKPlasticModels Colin, thank you!
Your interest and comments really help keep the fires burning to push this over the finish line.
The sharing of information online by so many wonderful modeler’s makes trying new techniques easy. The open friendly atmosphere here at Kitmaker is a critical factor too.
Those clasp Fruilmodel Ostketten tracks have me wanting to try the winterkettens on a Pz IV soon.
3 Likes
Modeler used too much putty.![]()
1 Like
Panzer of the Green Putty must be cousin to Panzer of the Lake.
1 Like
Looks as if it were sculpted out of a block of clay.
1 Like
Indeed, tank fossils for future archeologists. ![]()
Full Circle aka Every dog has its day!
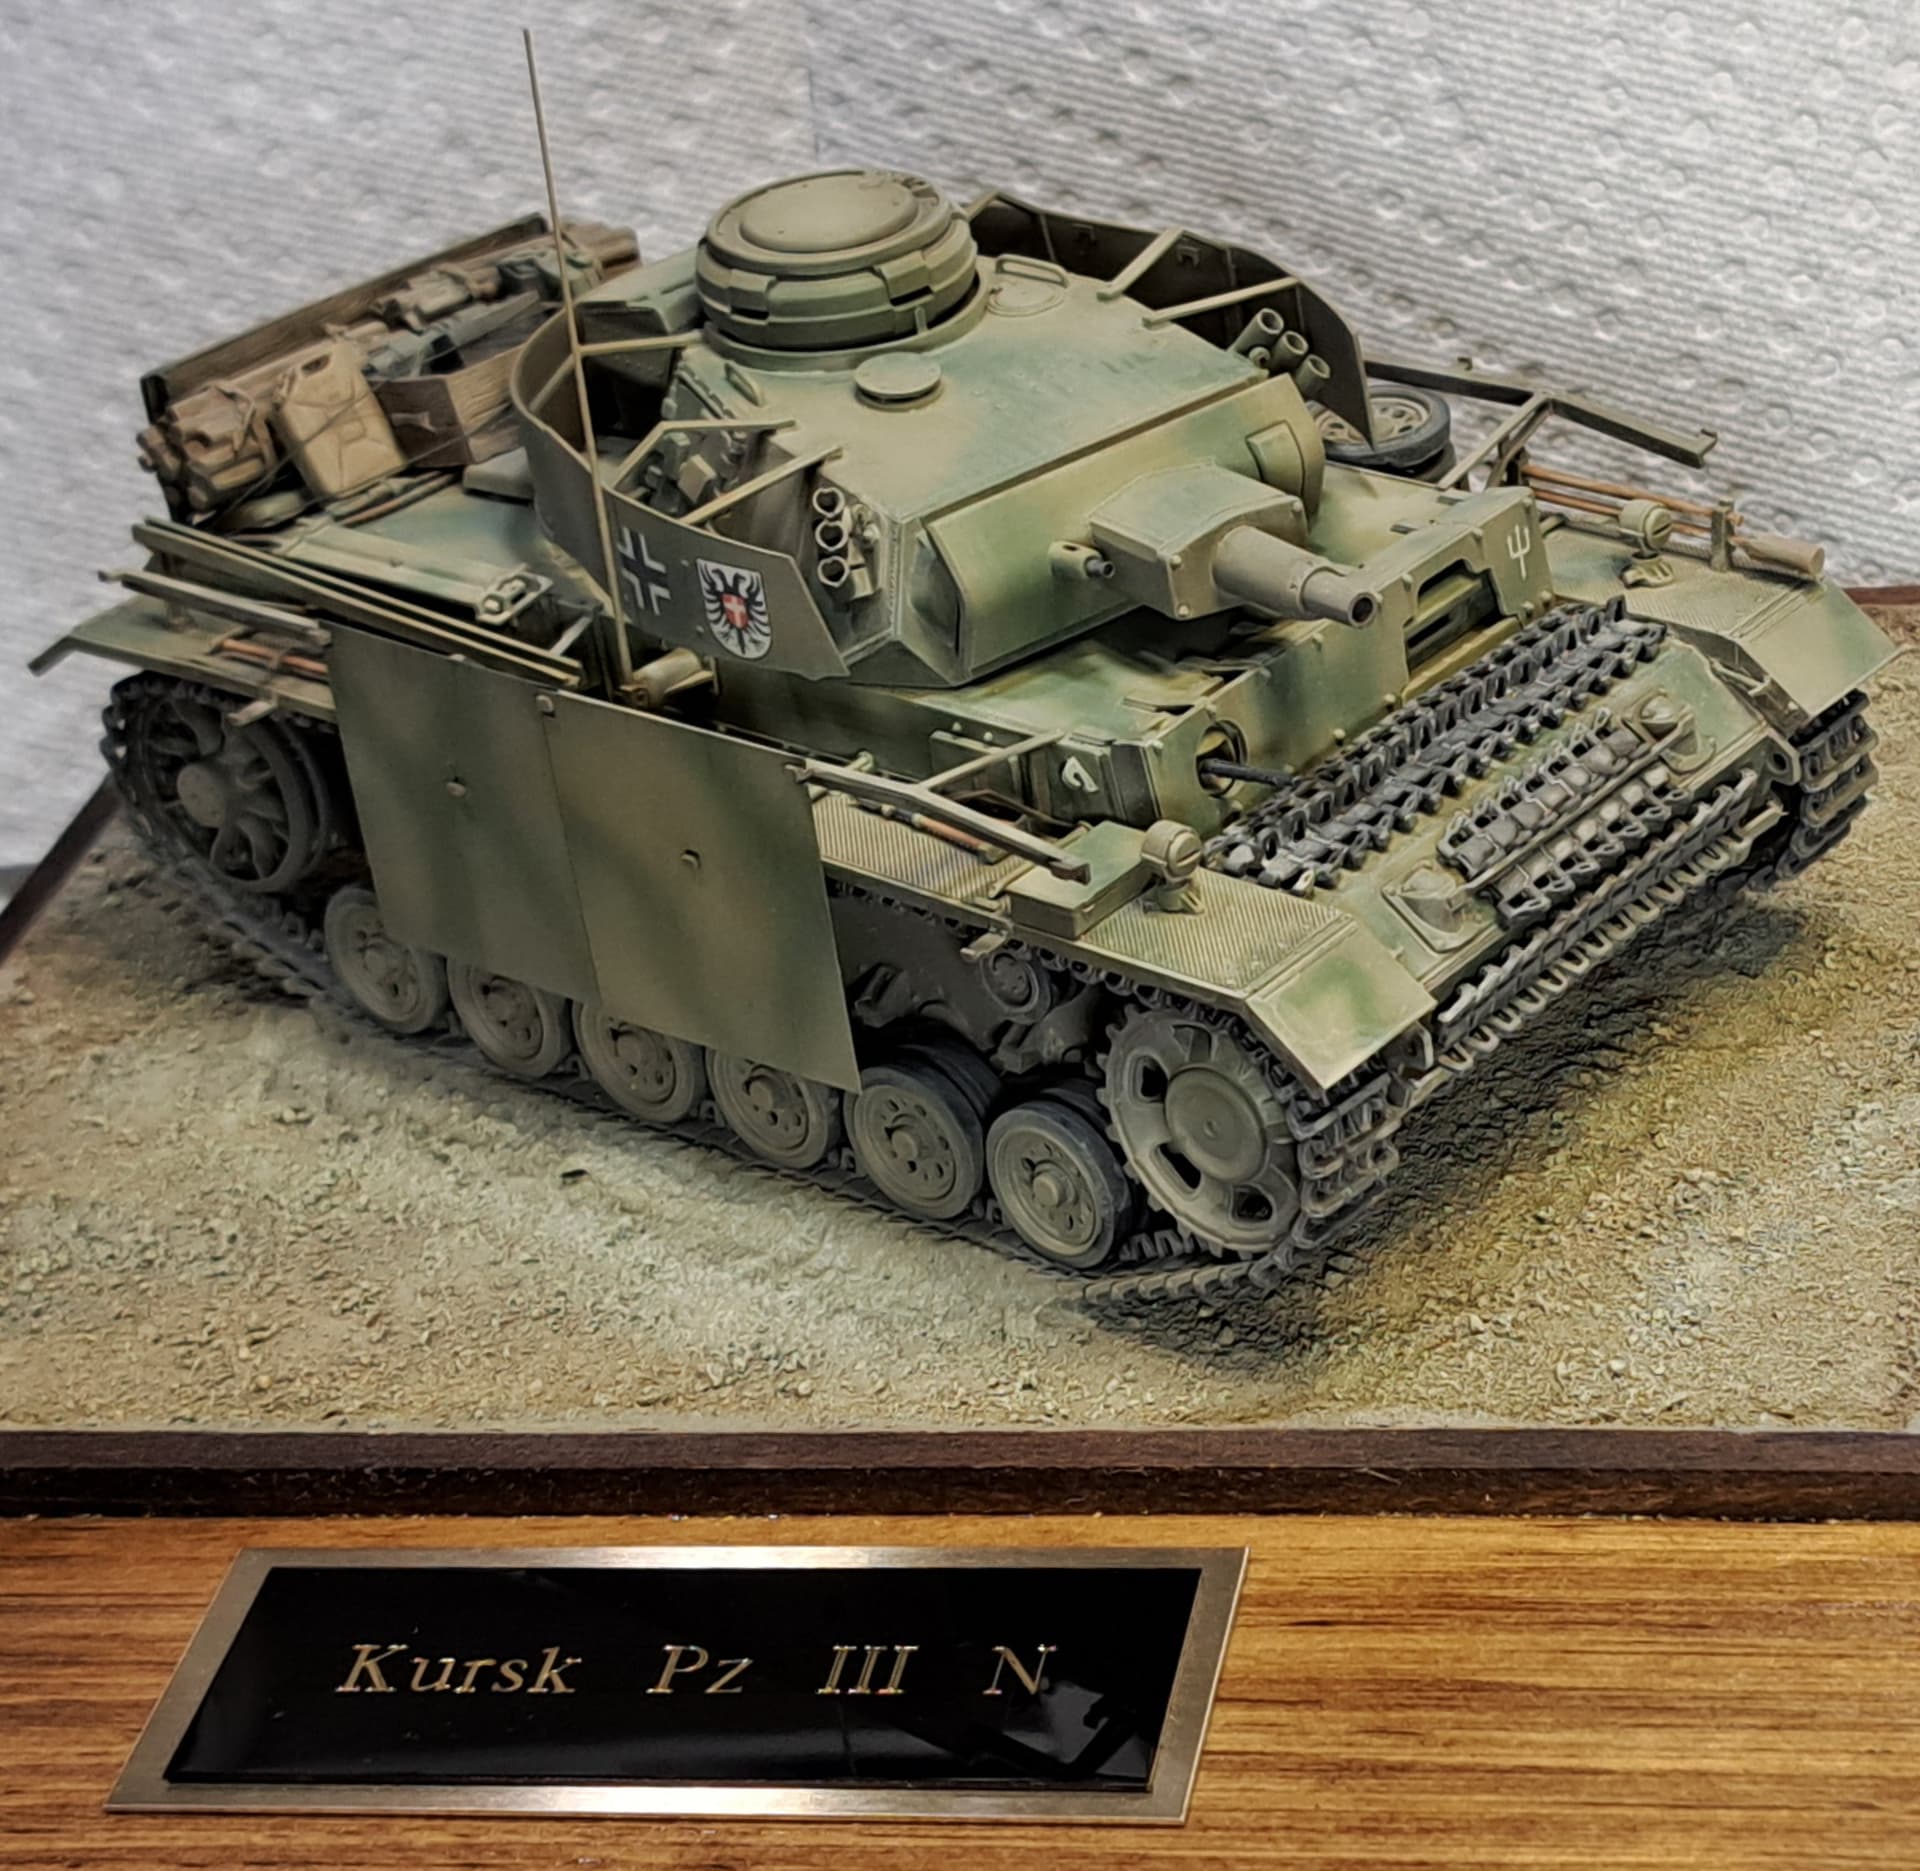
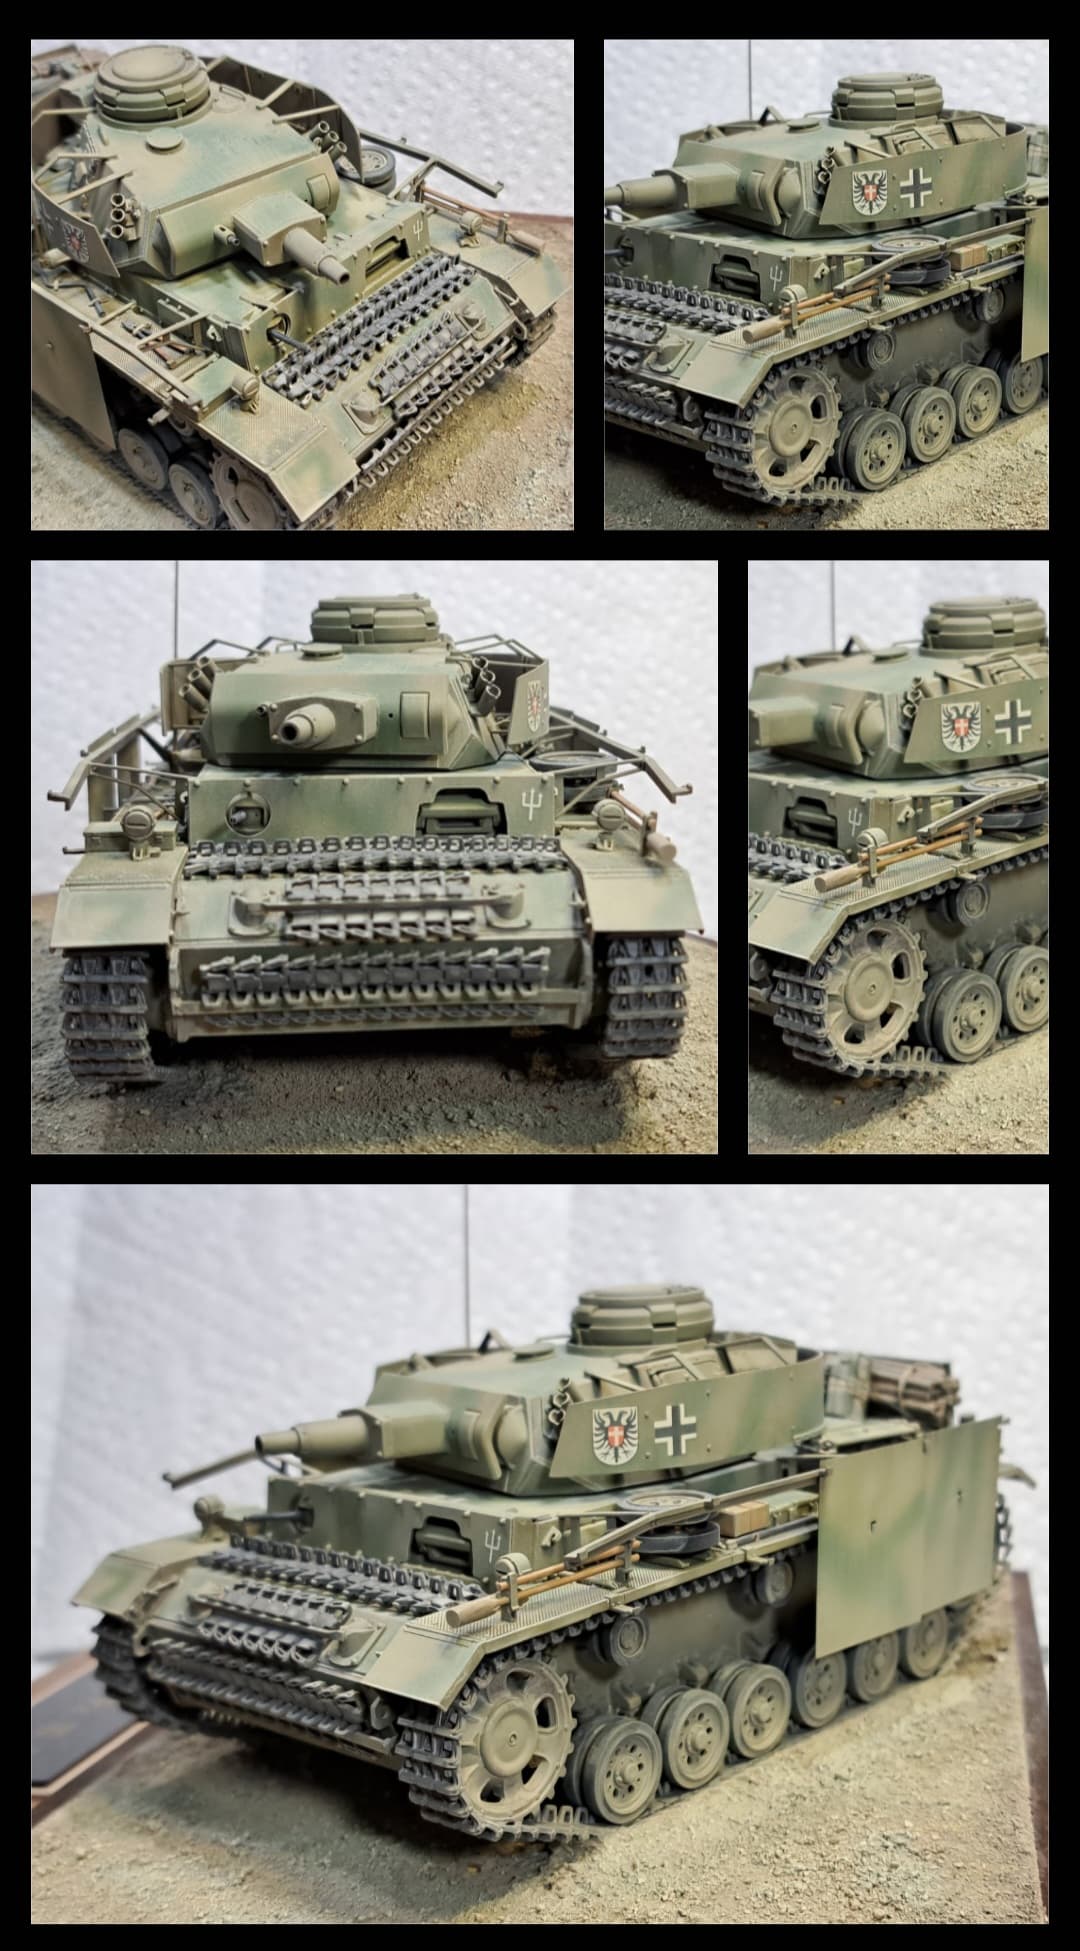
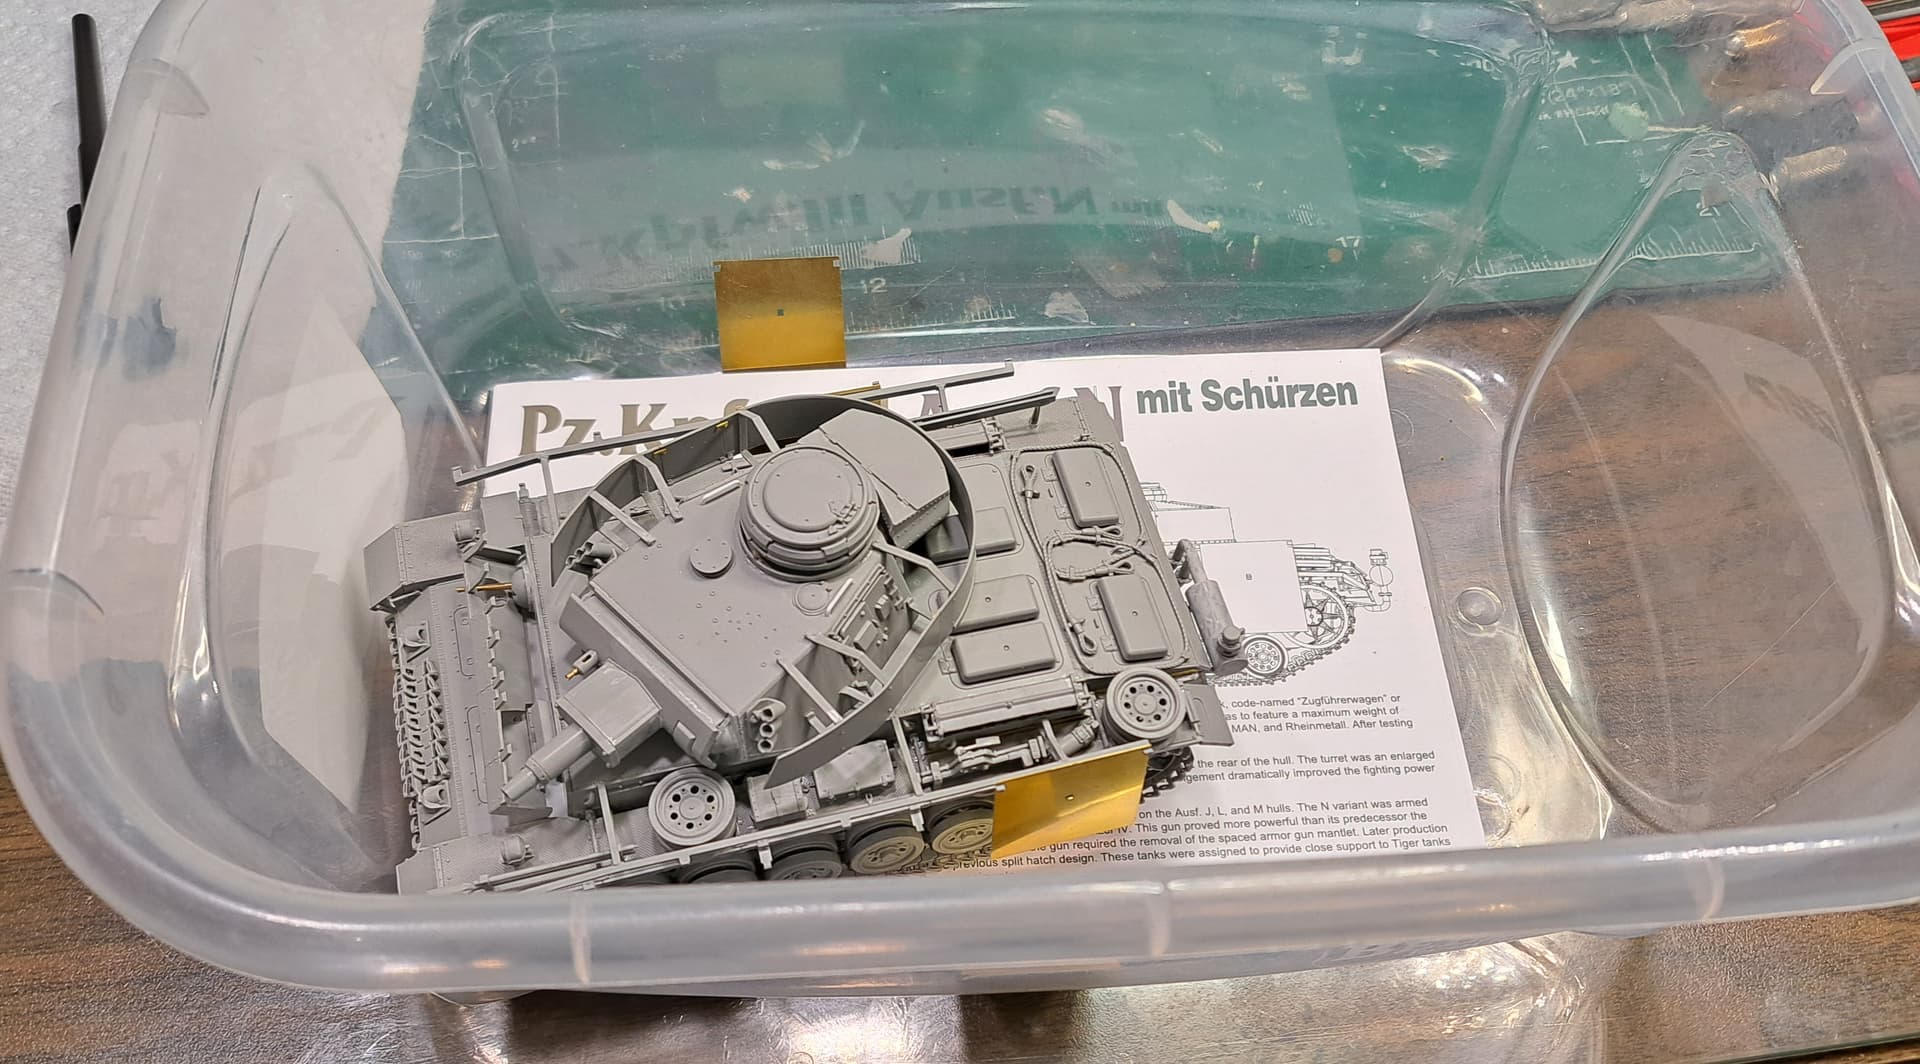
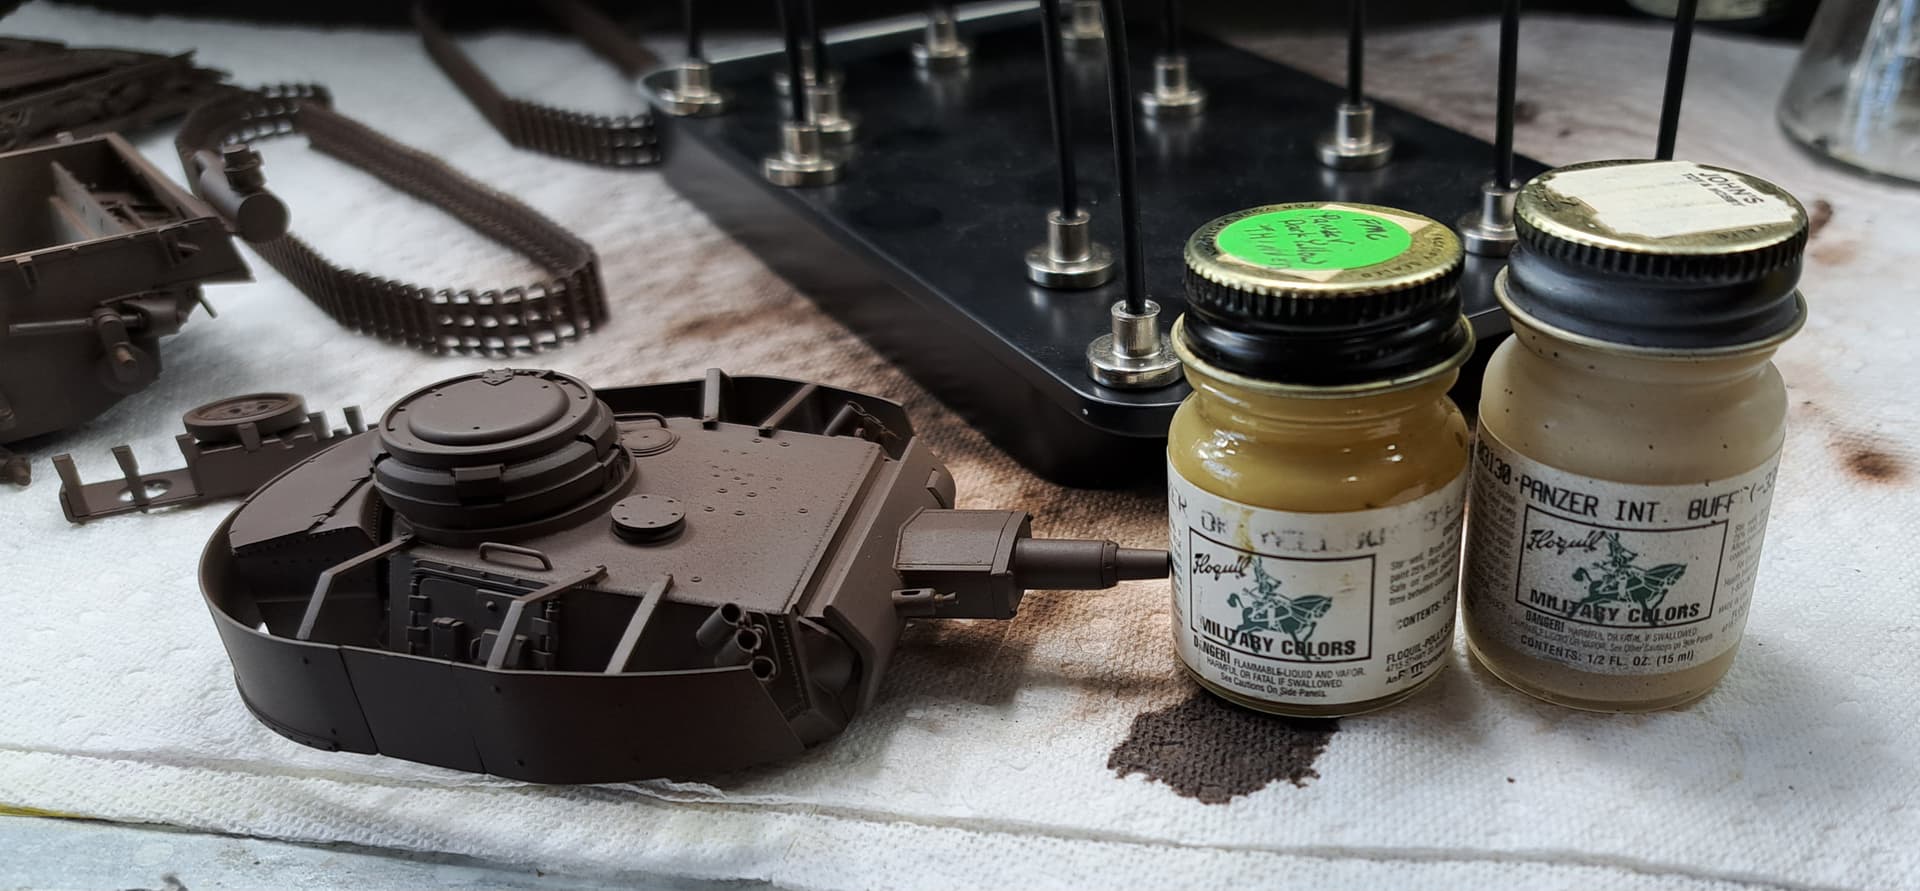
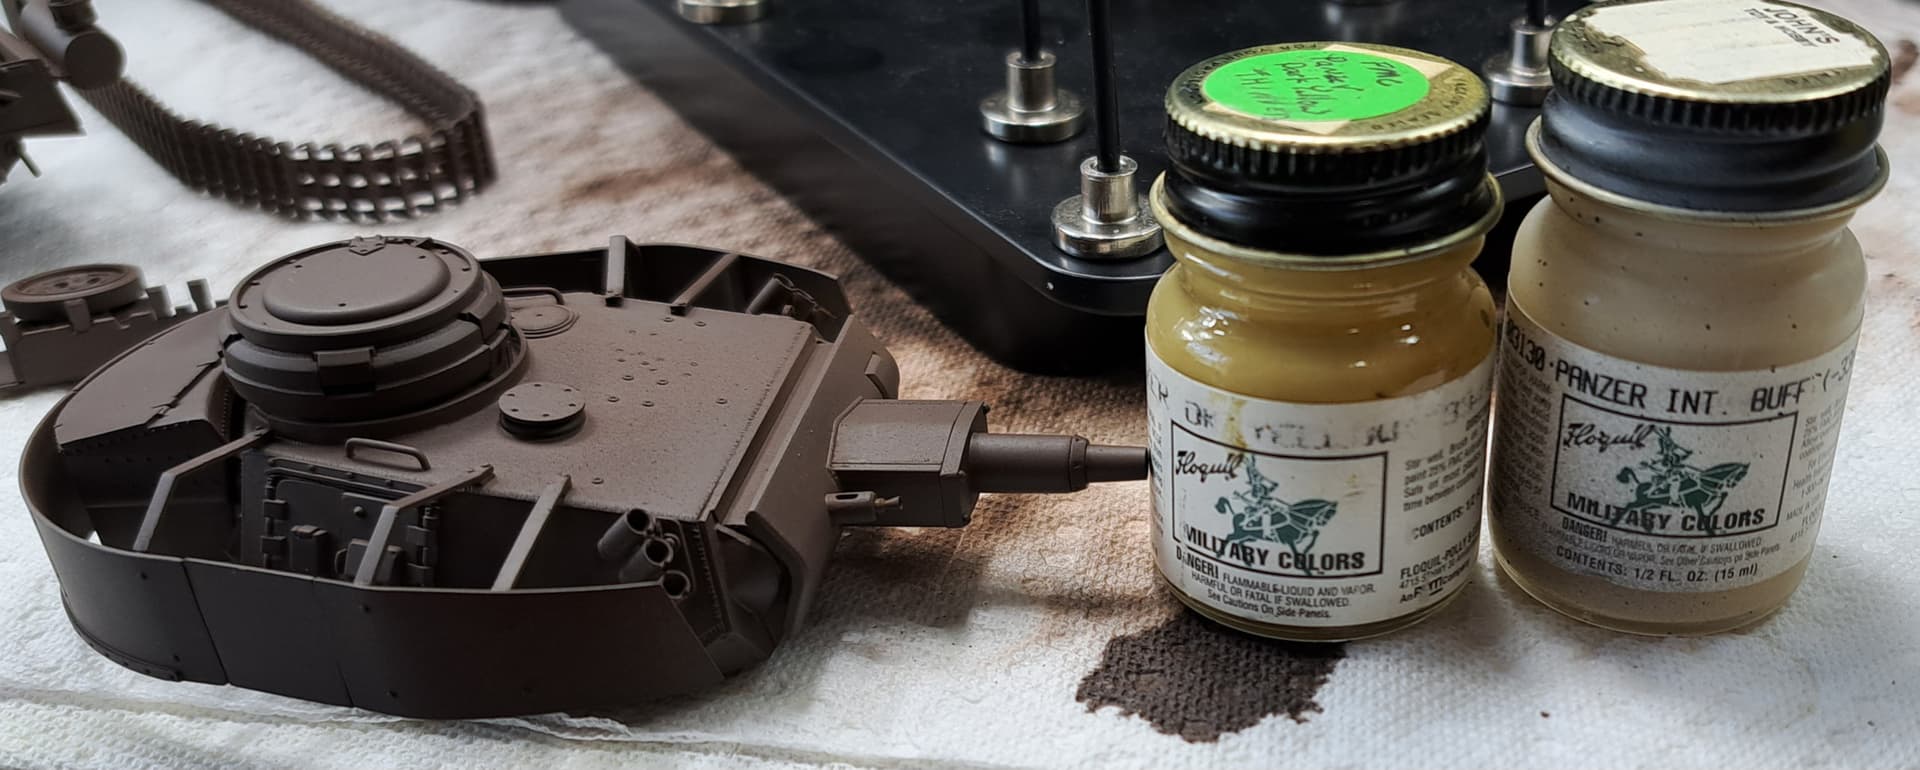
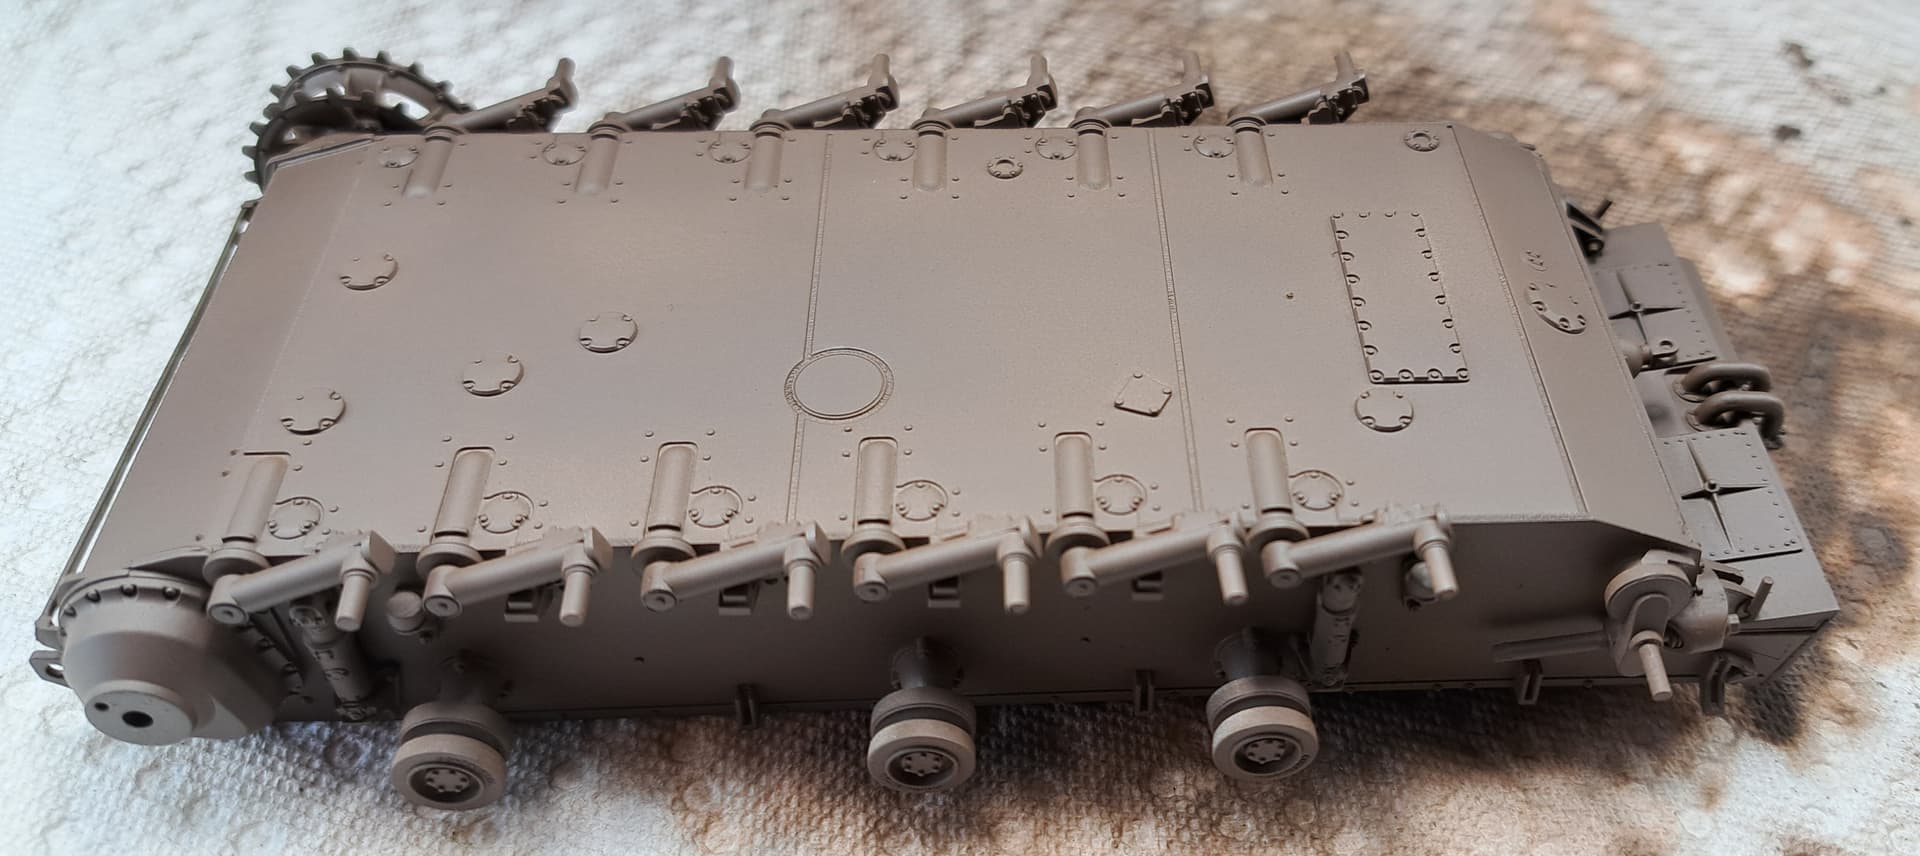
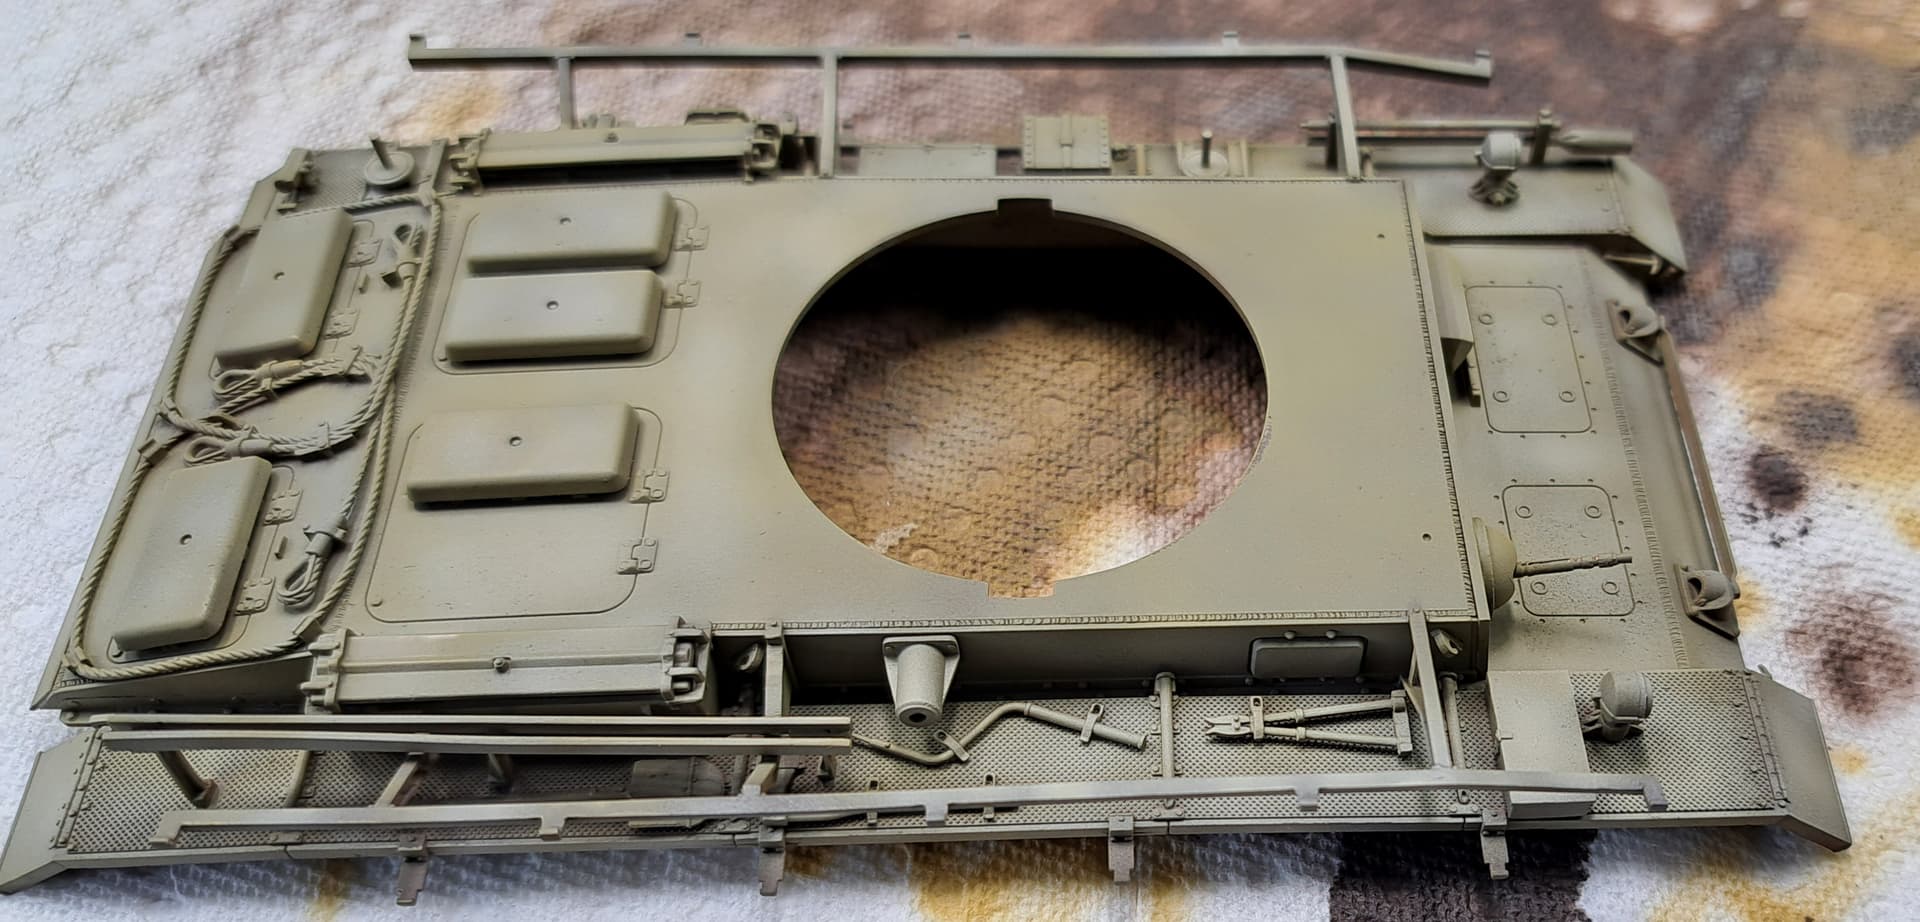
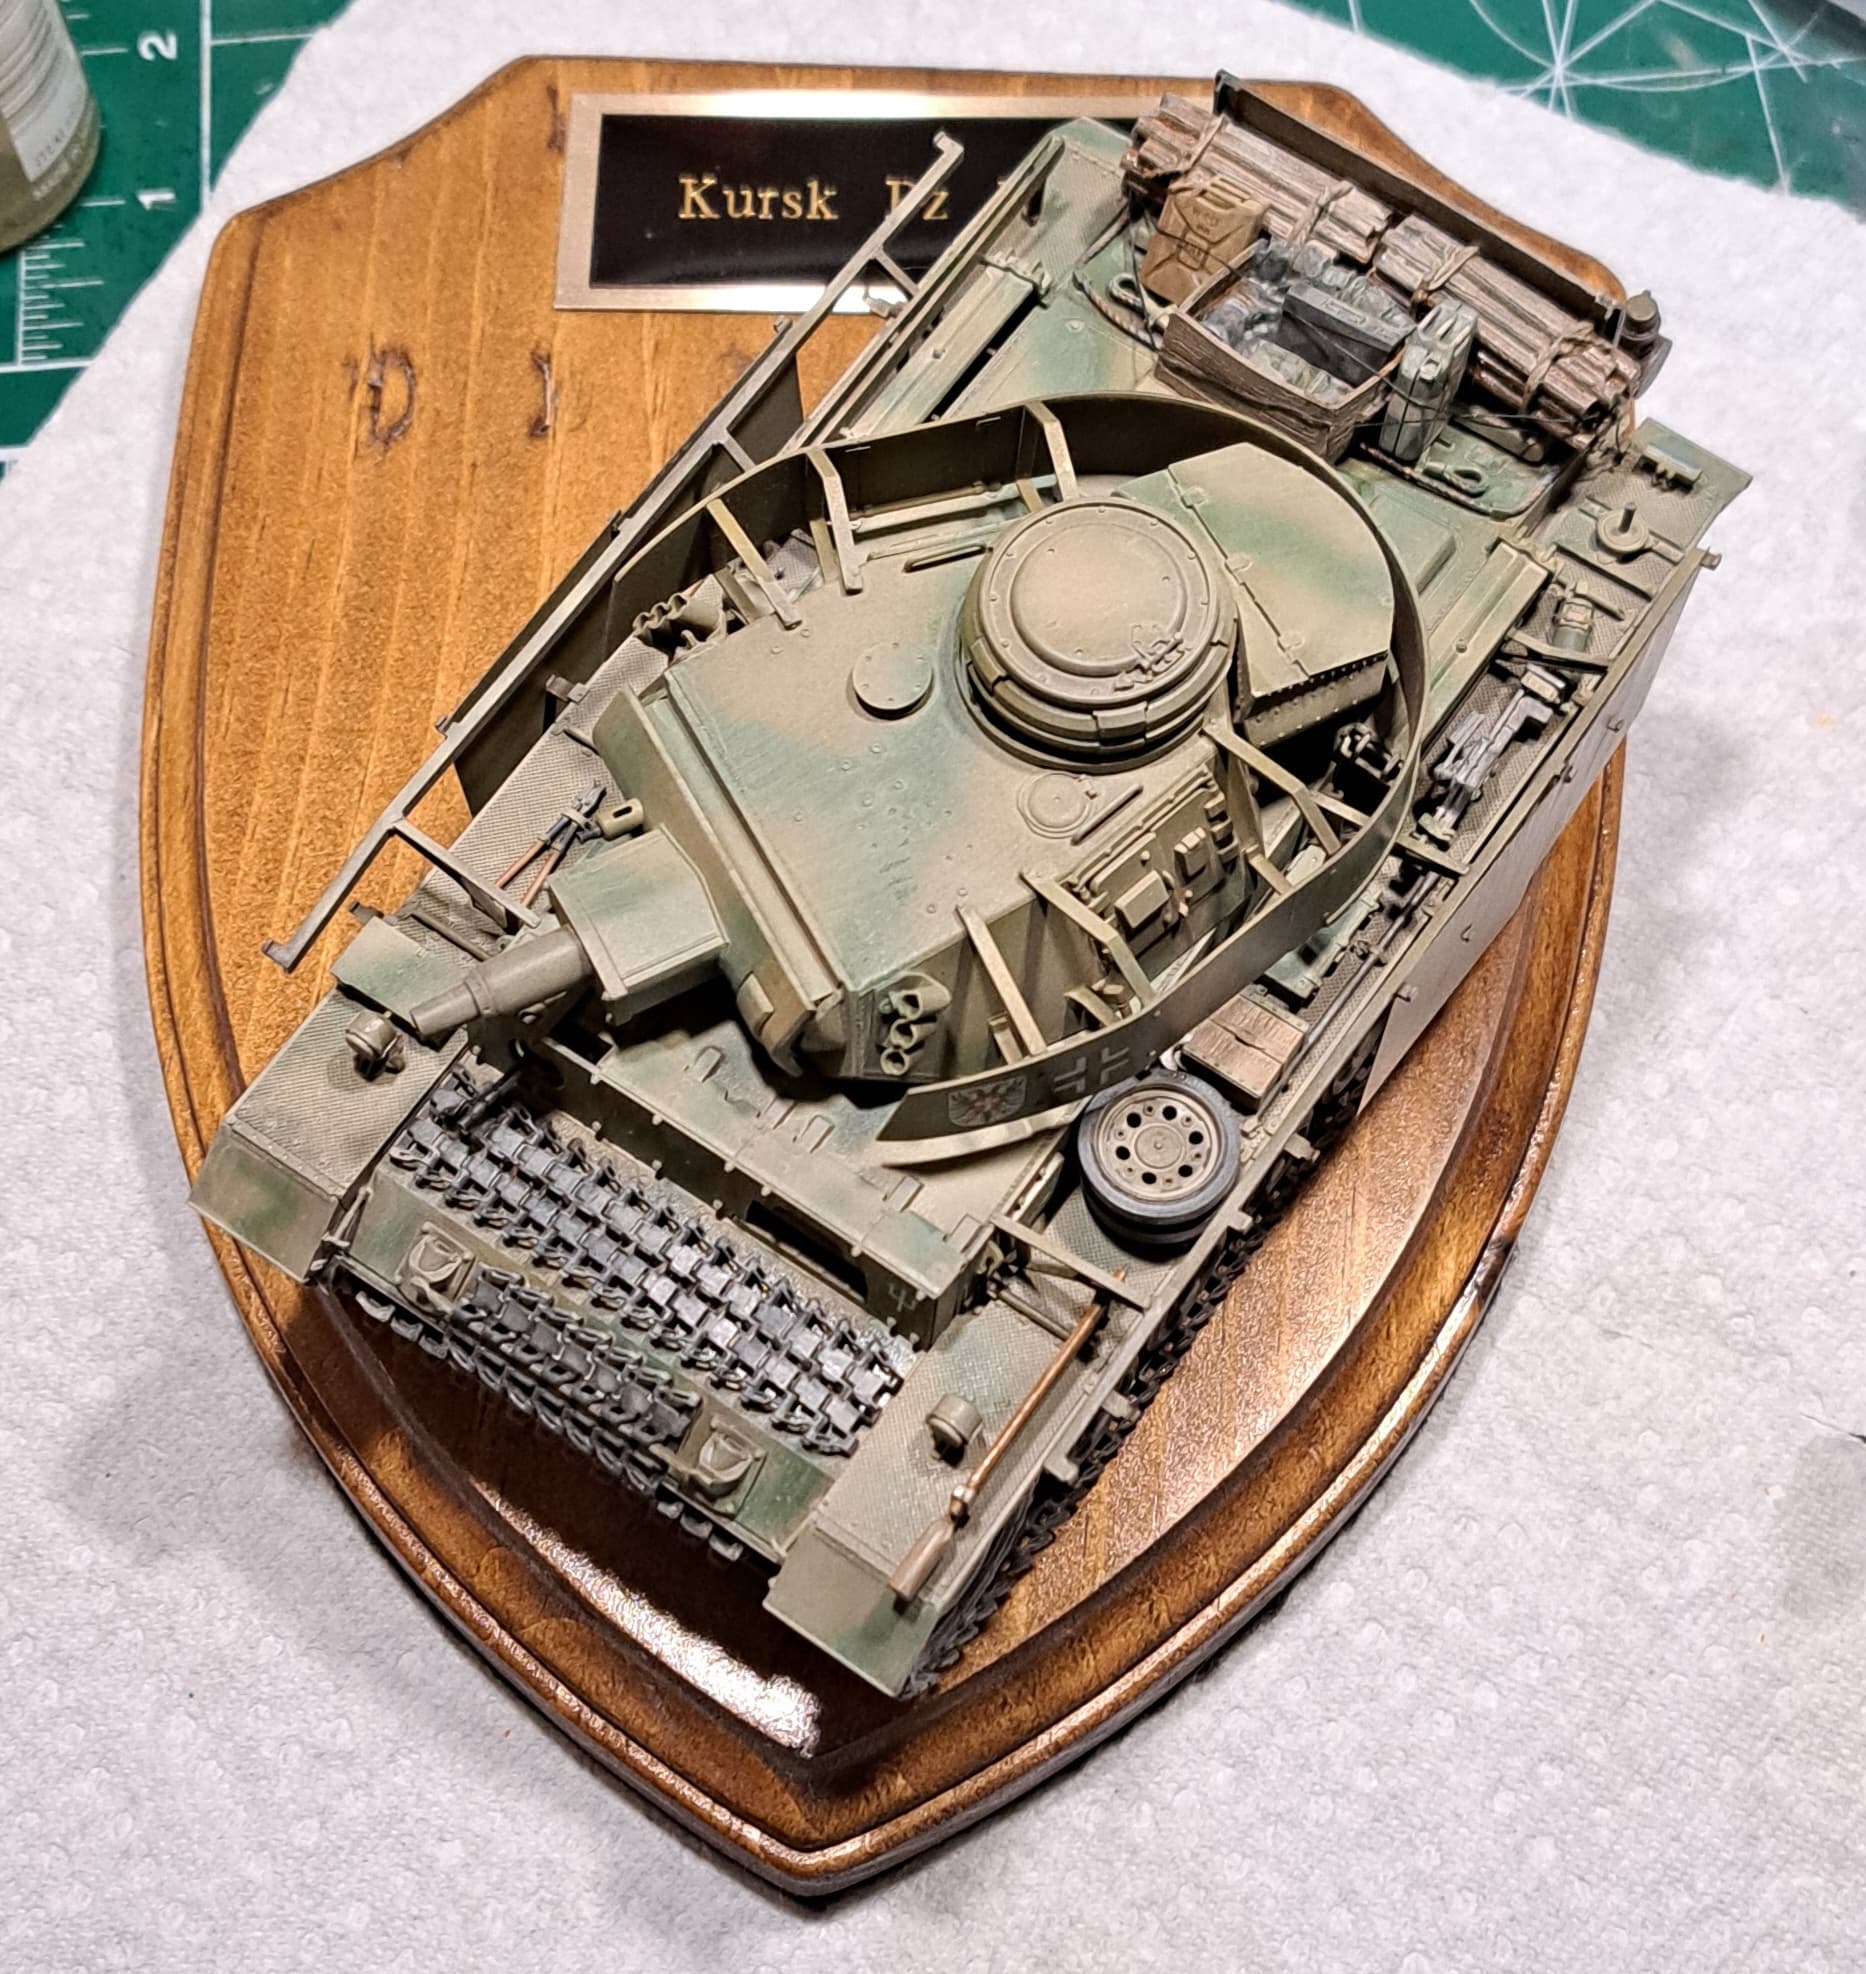
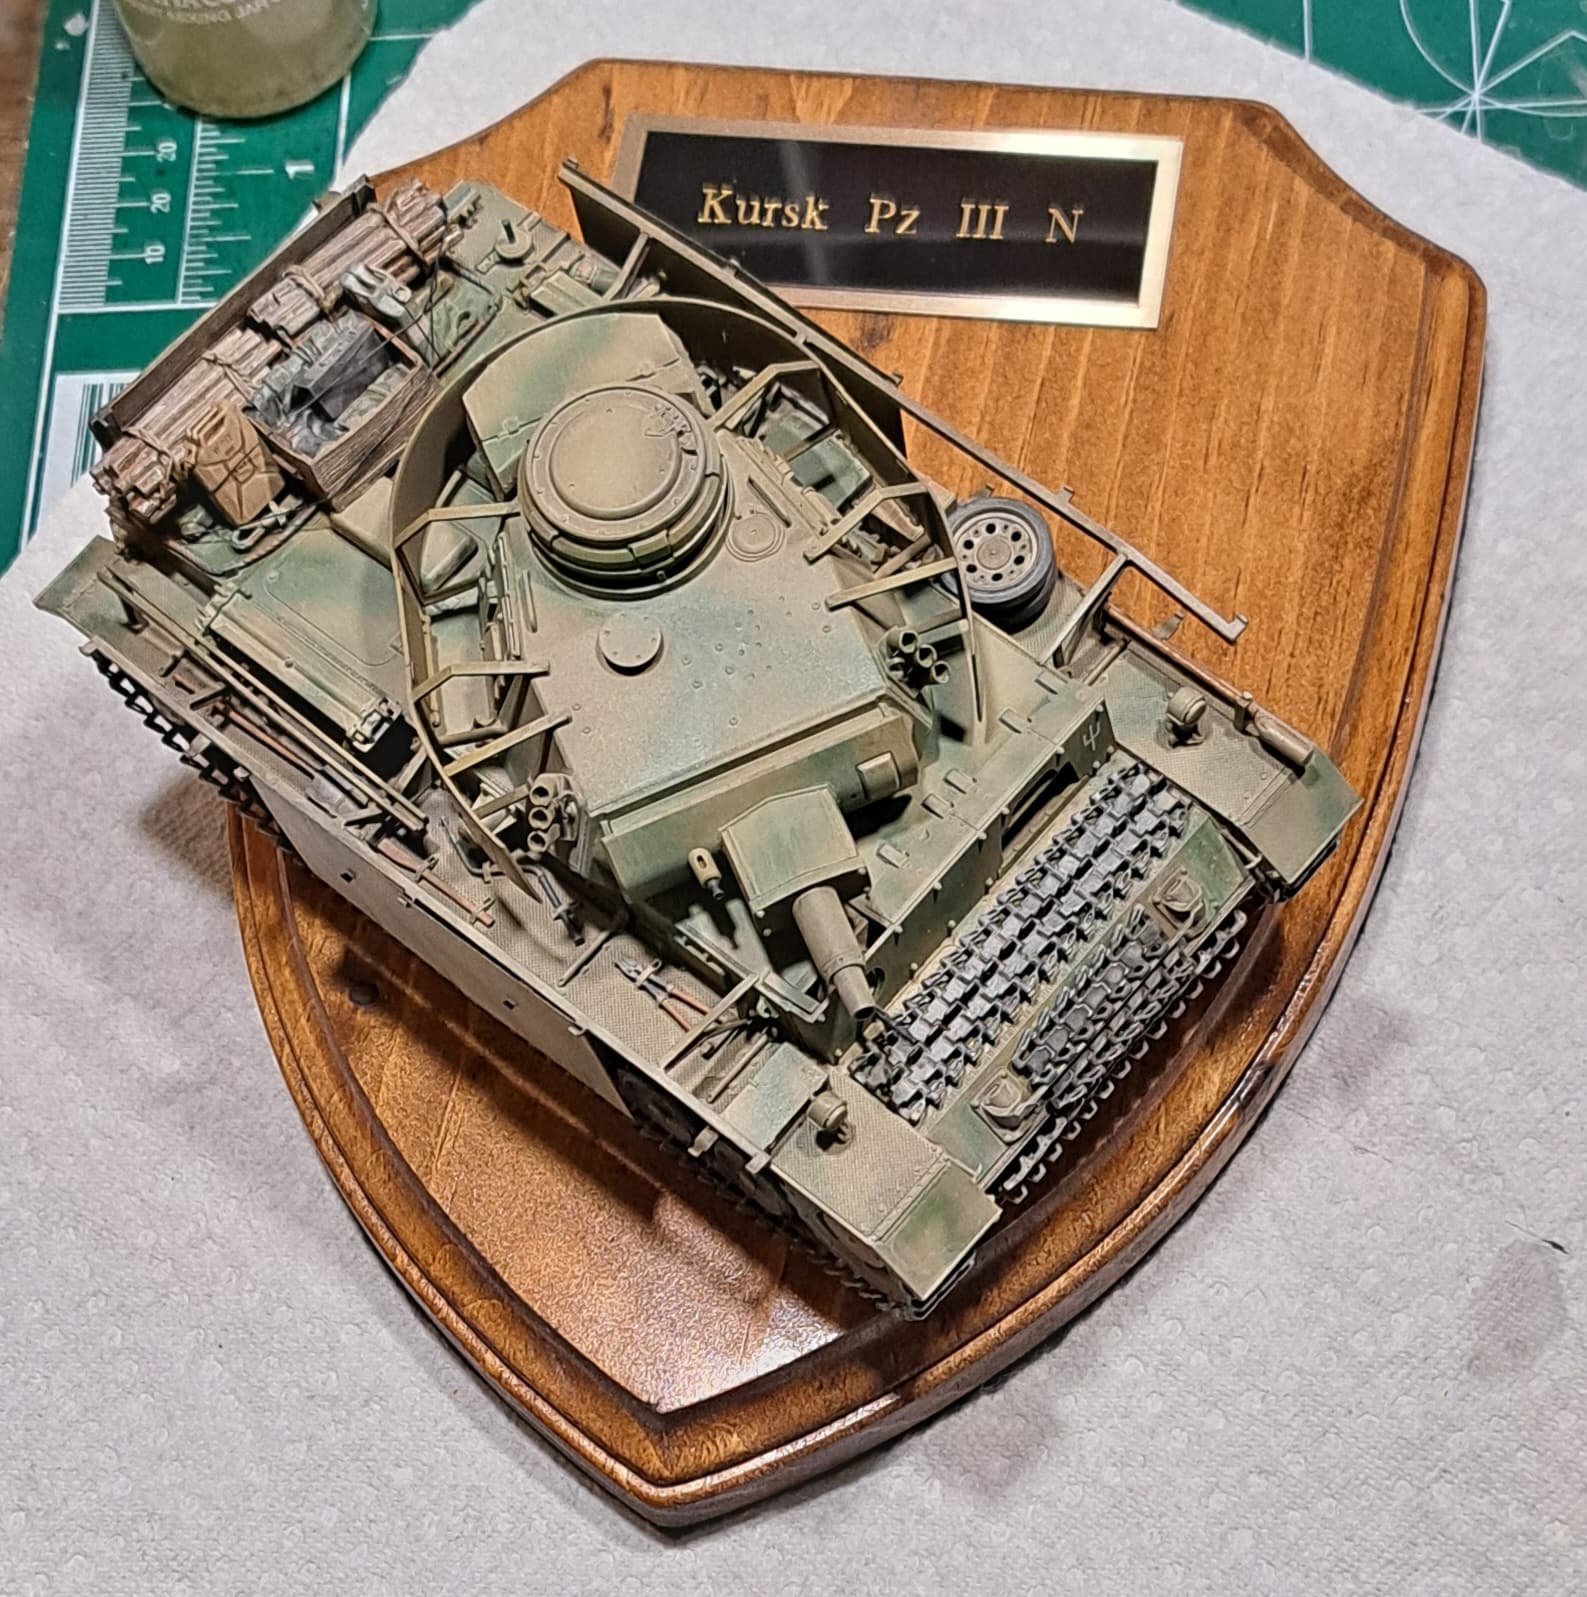
The thread’s first Amigo, the suck-taclular Takom Blitz kit Pz III ausf N returns to the work bench. Another project is curing so decided it was perfect time to base coat this one.
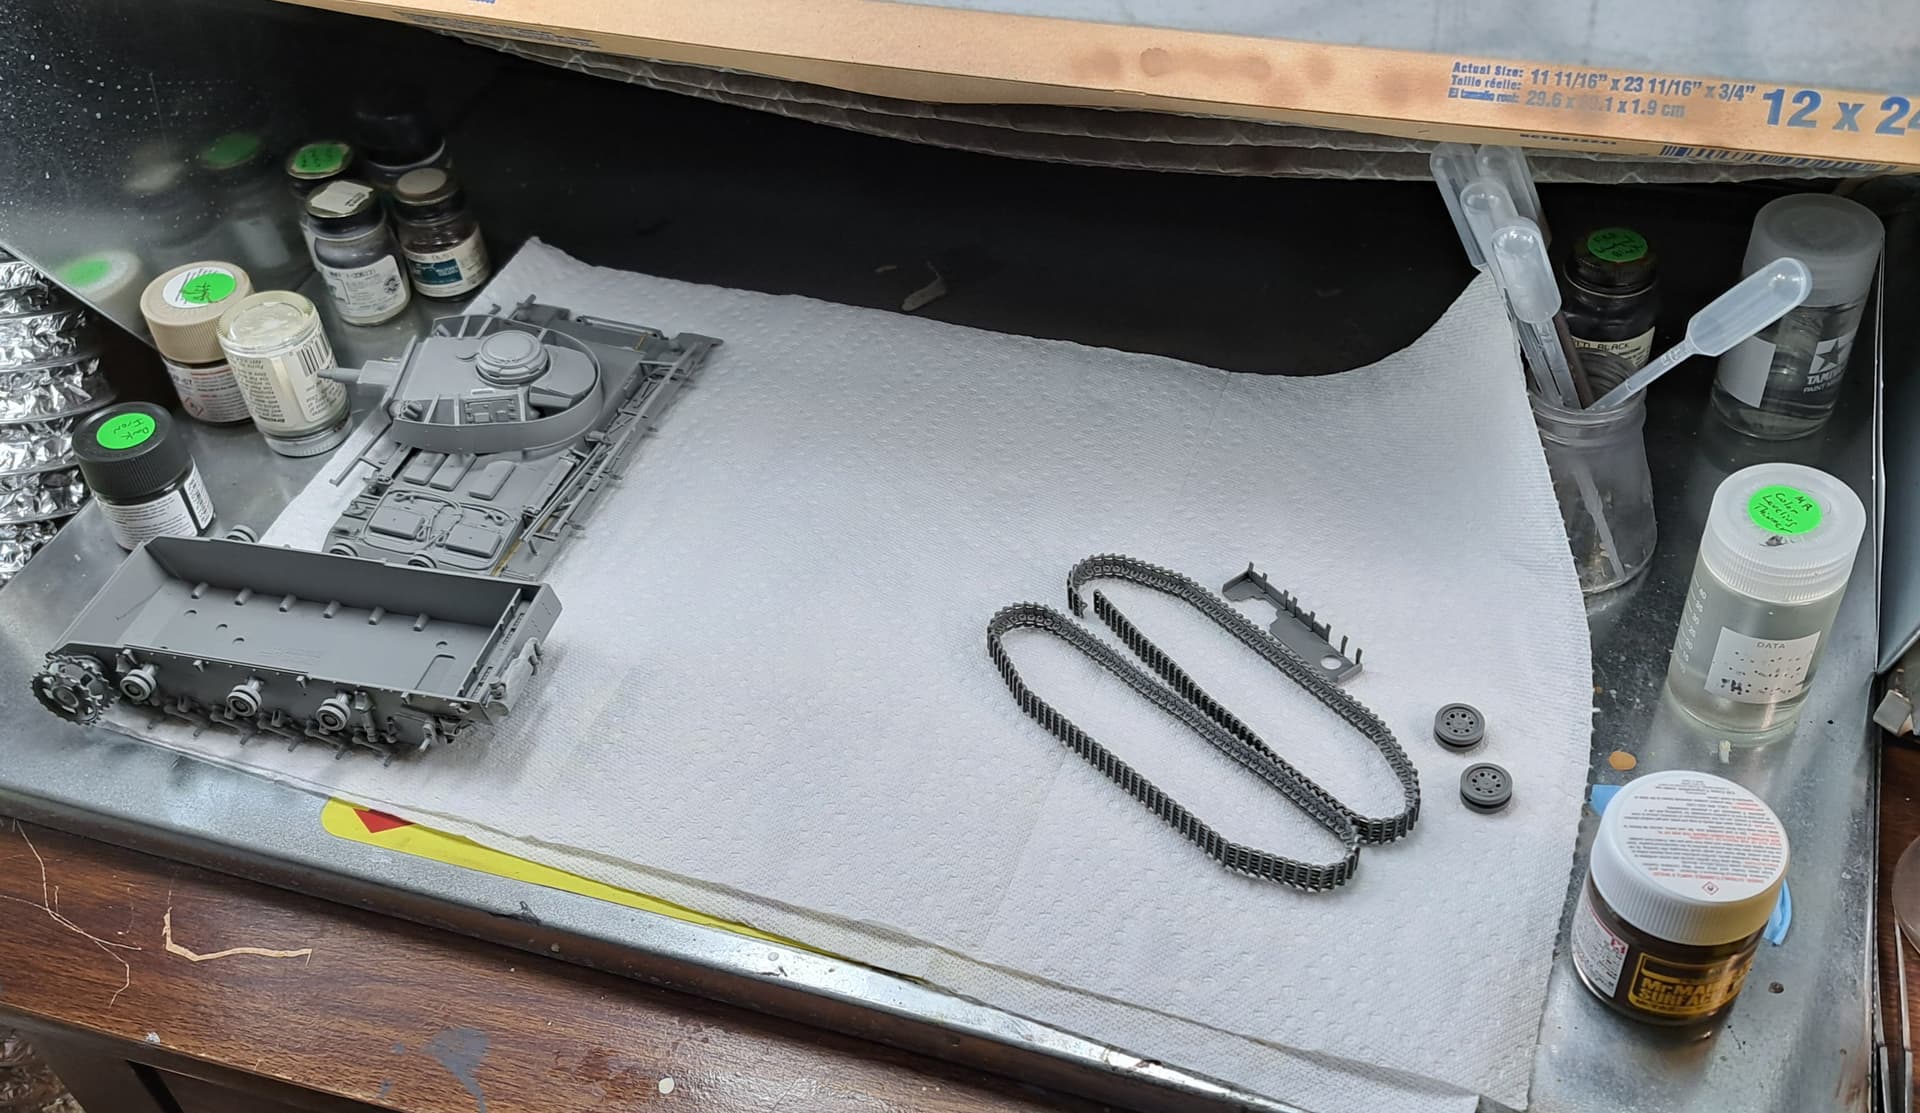
Washed & freshly dusted.
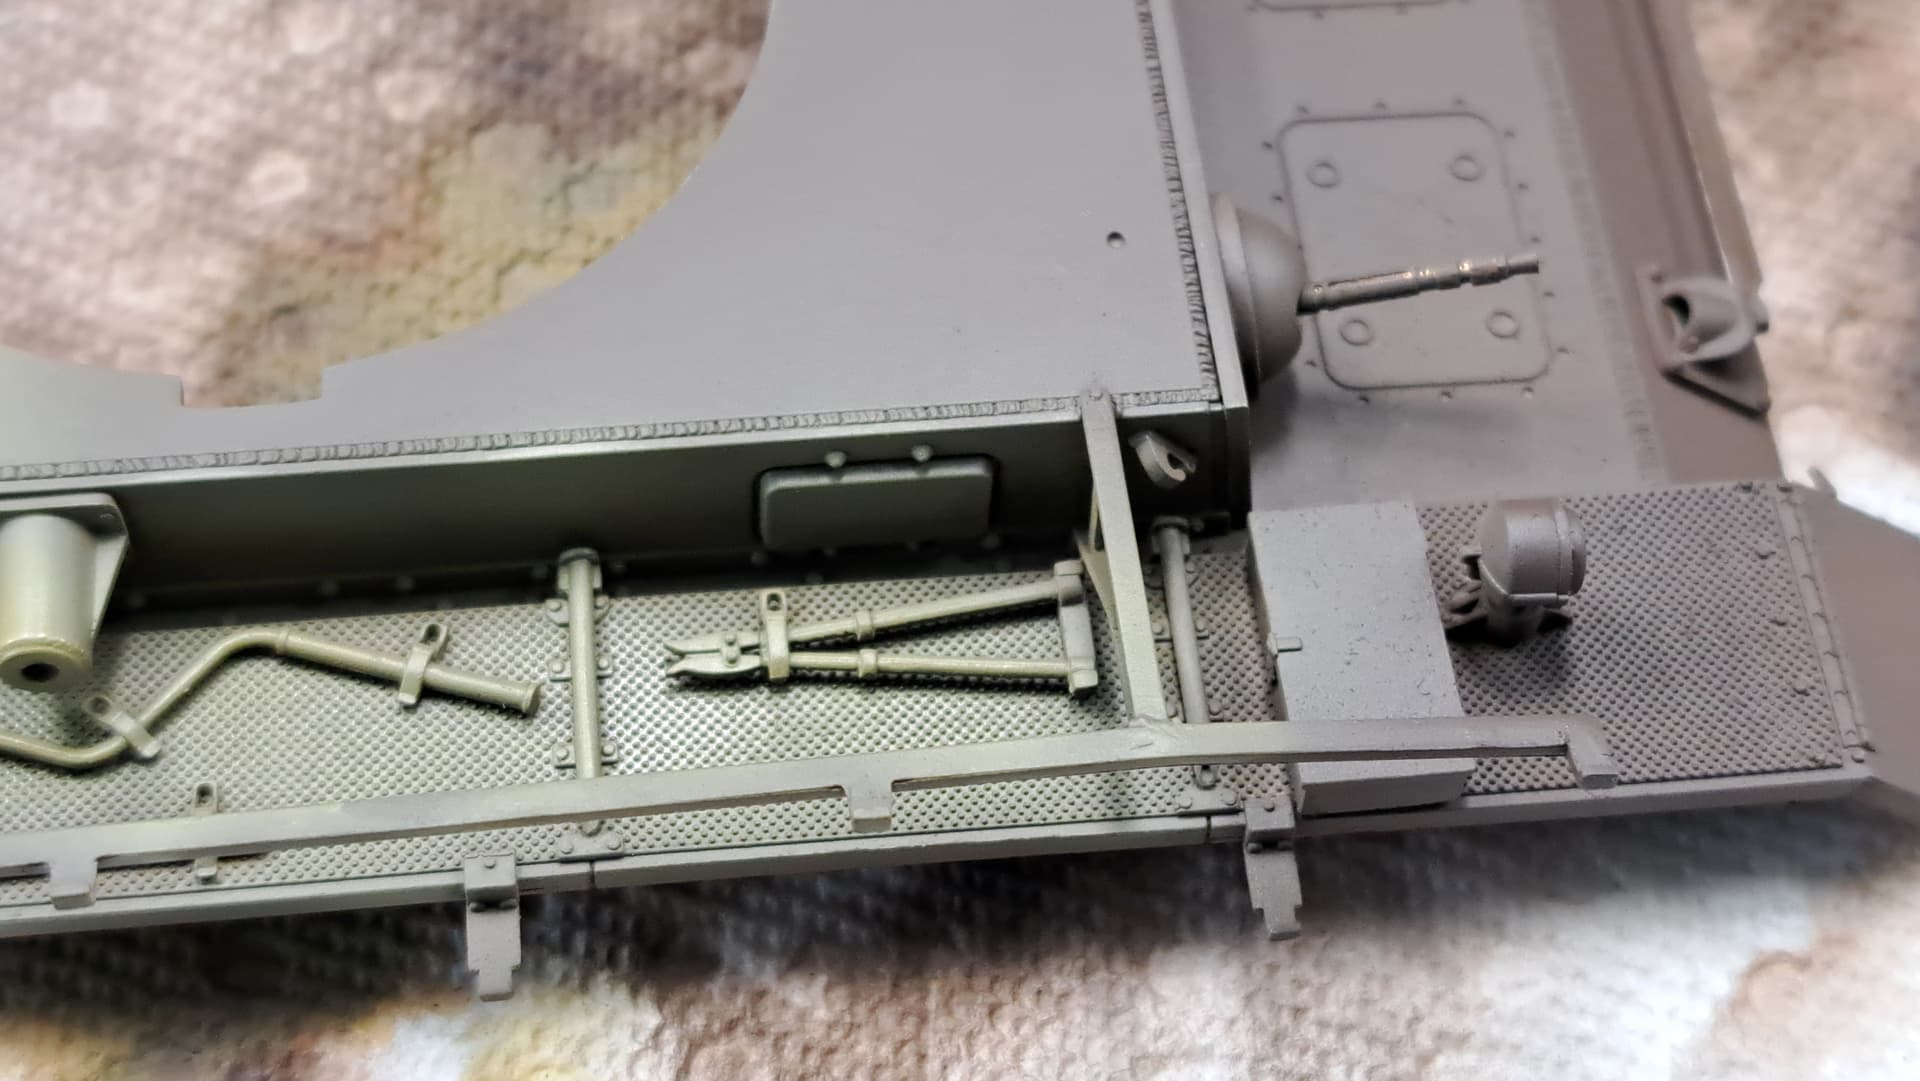
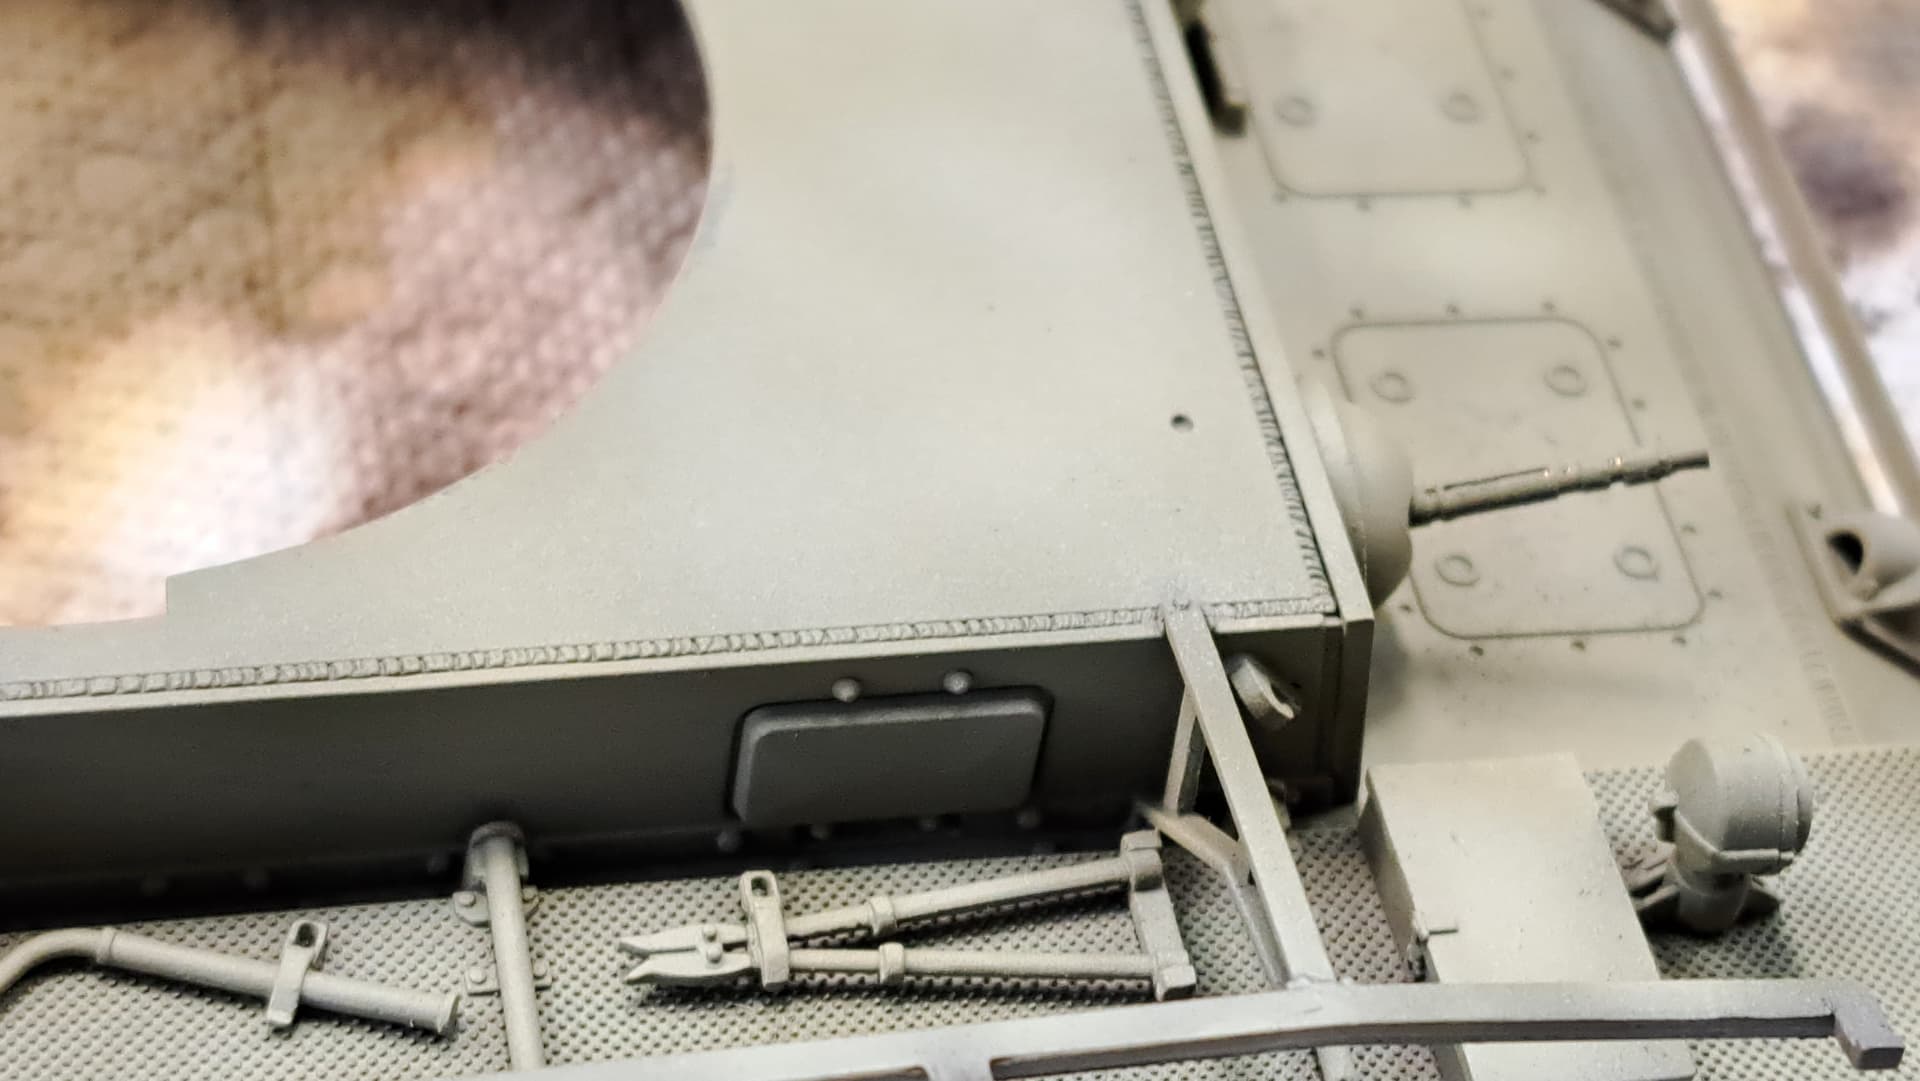
Subassemblies
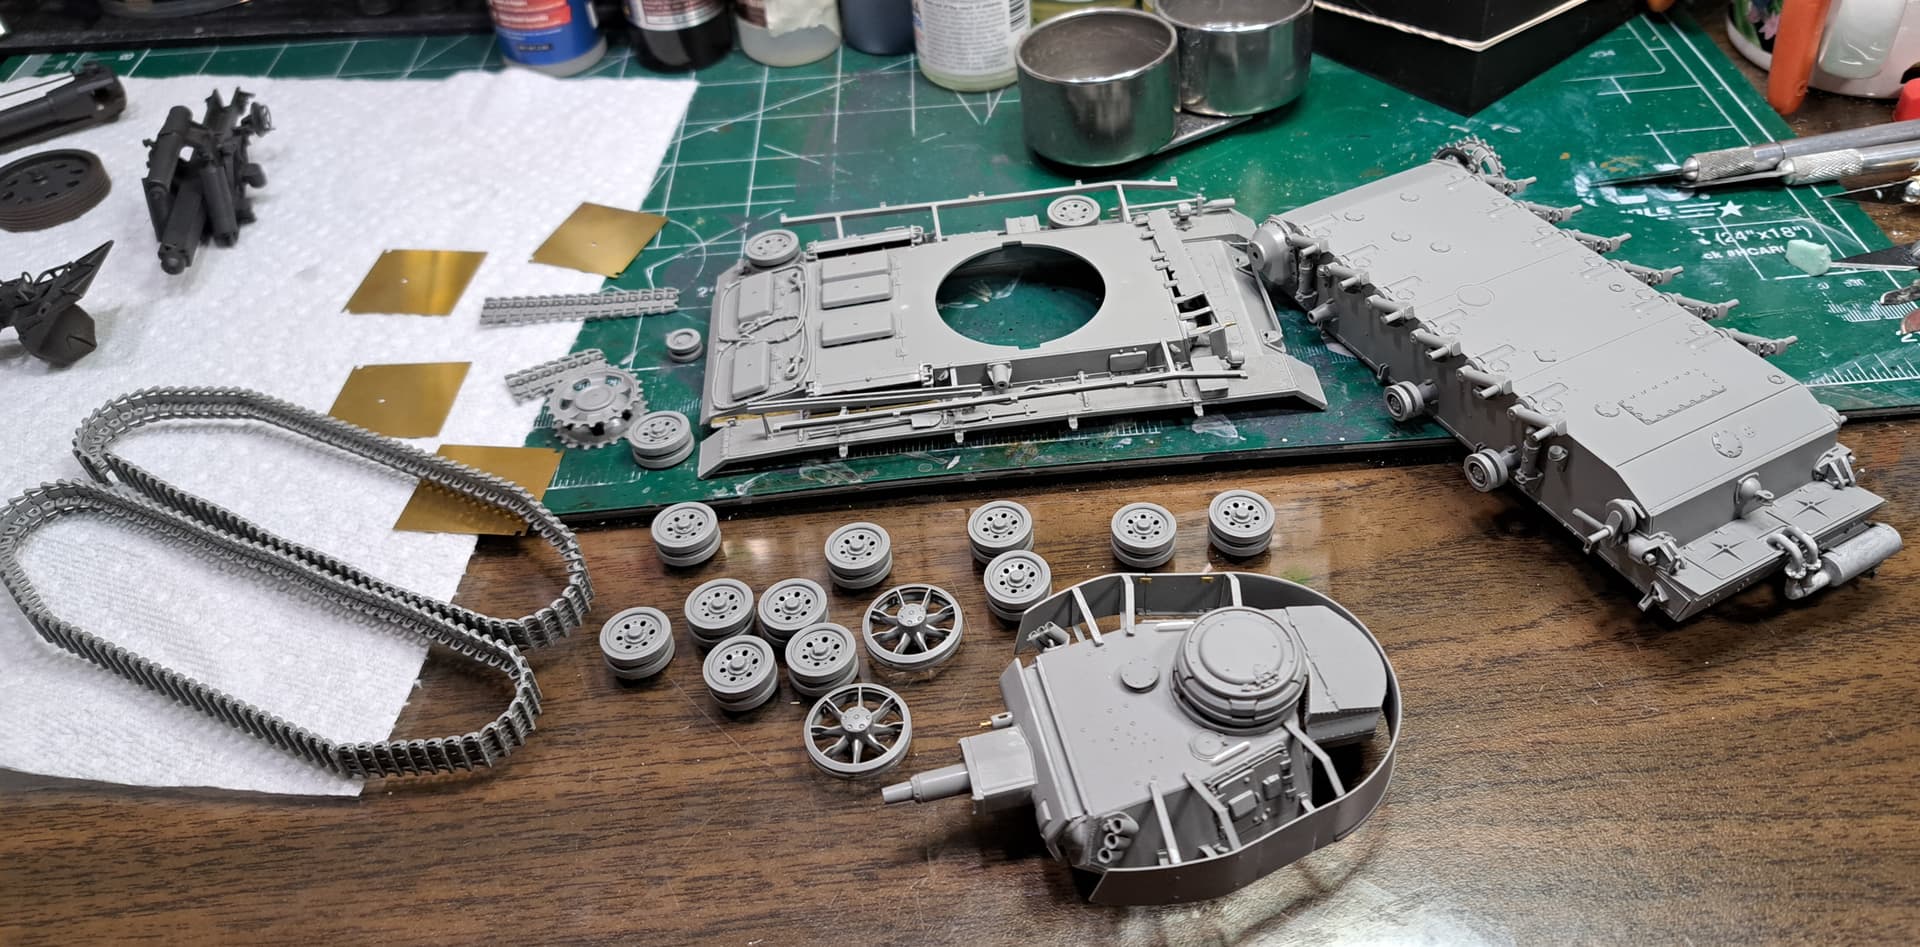
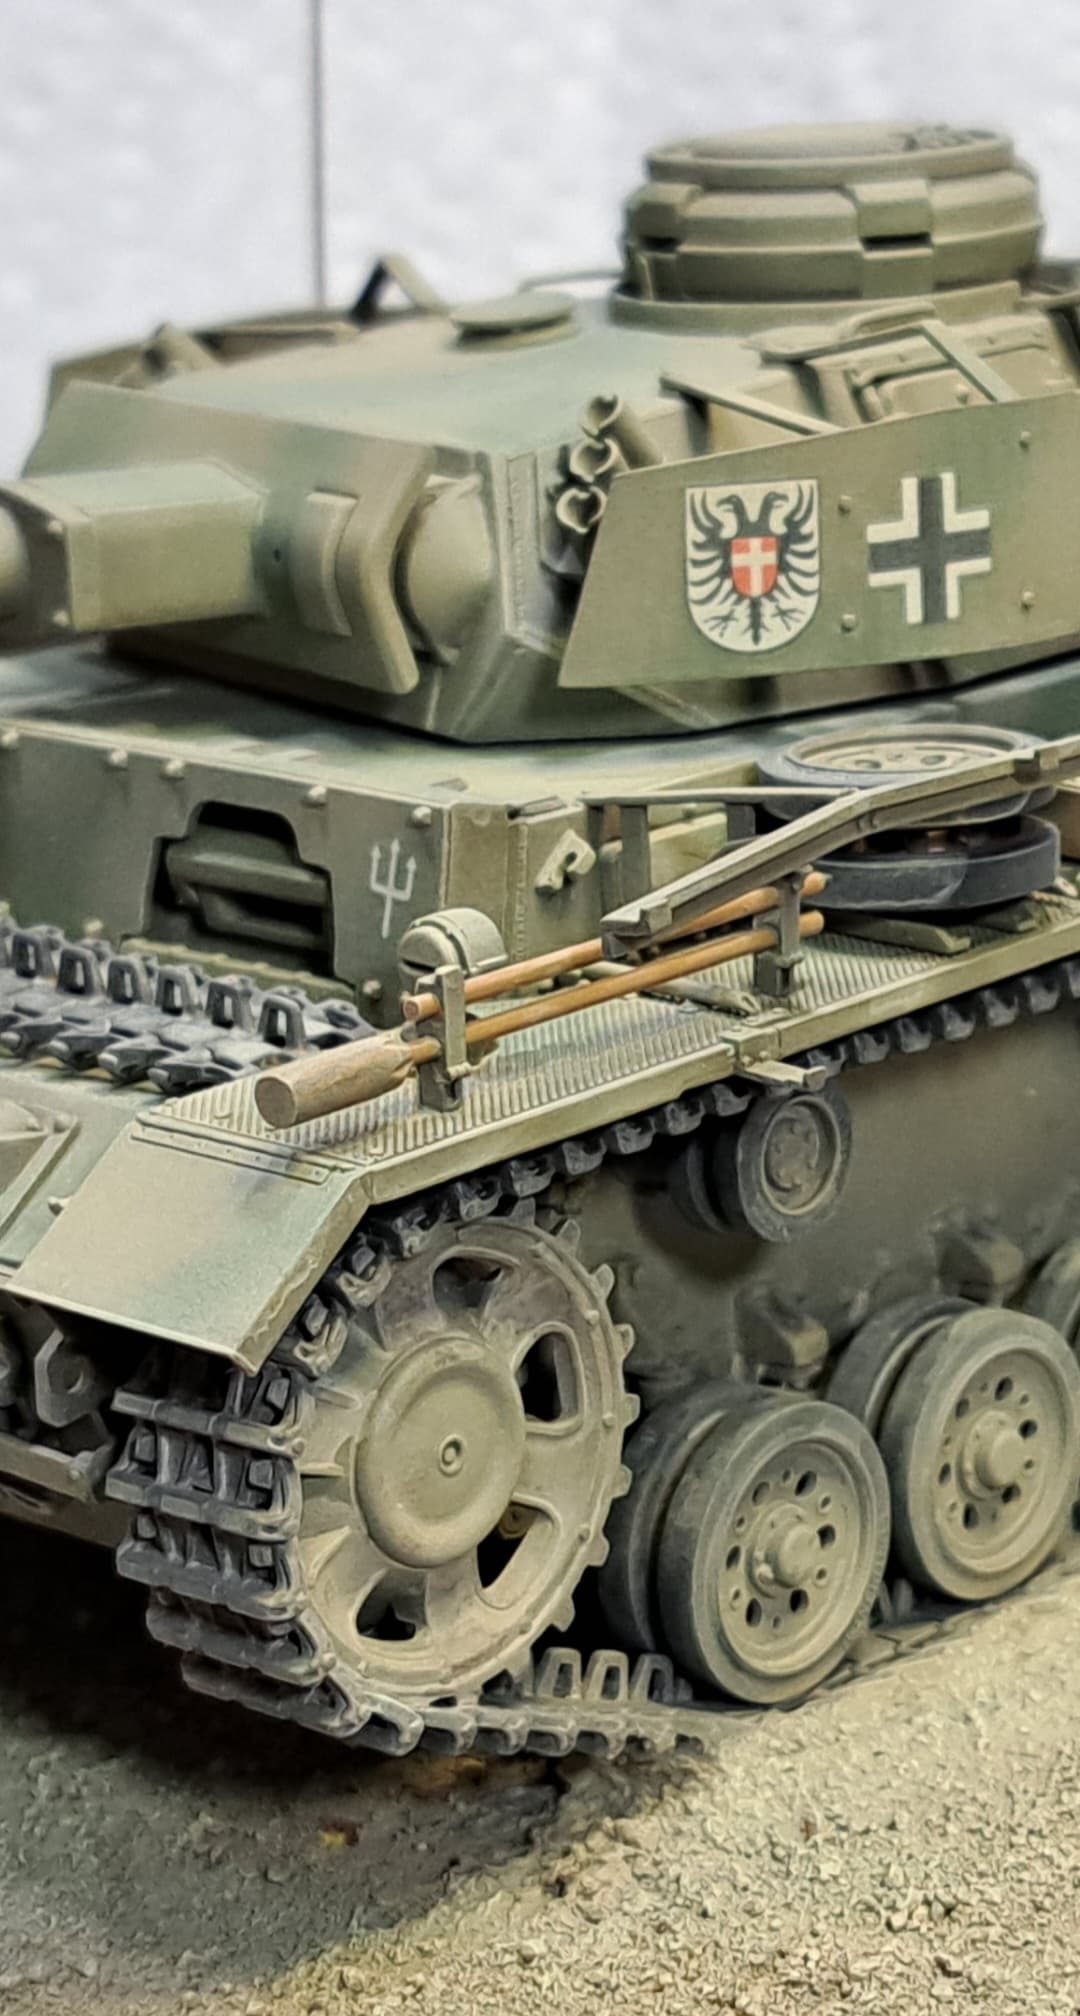
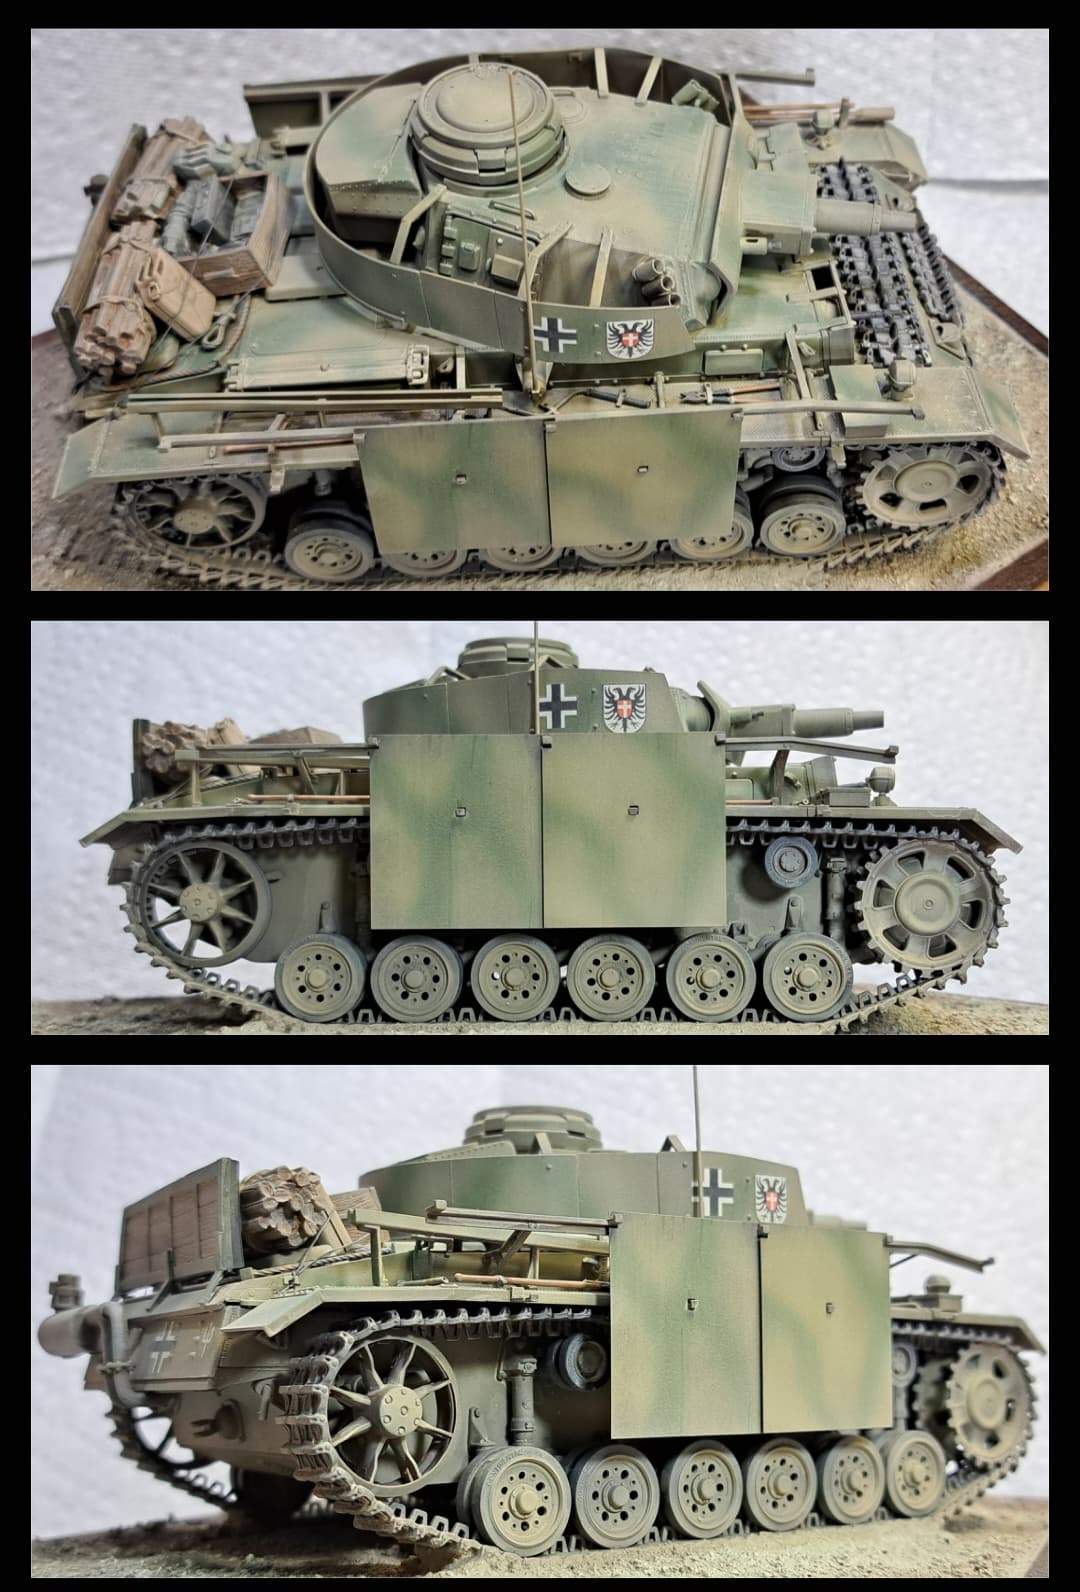
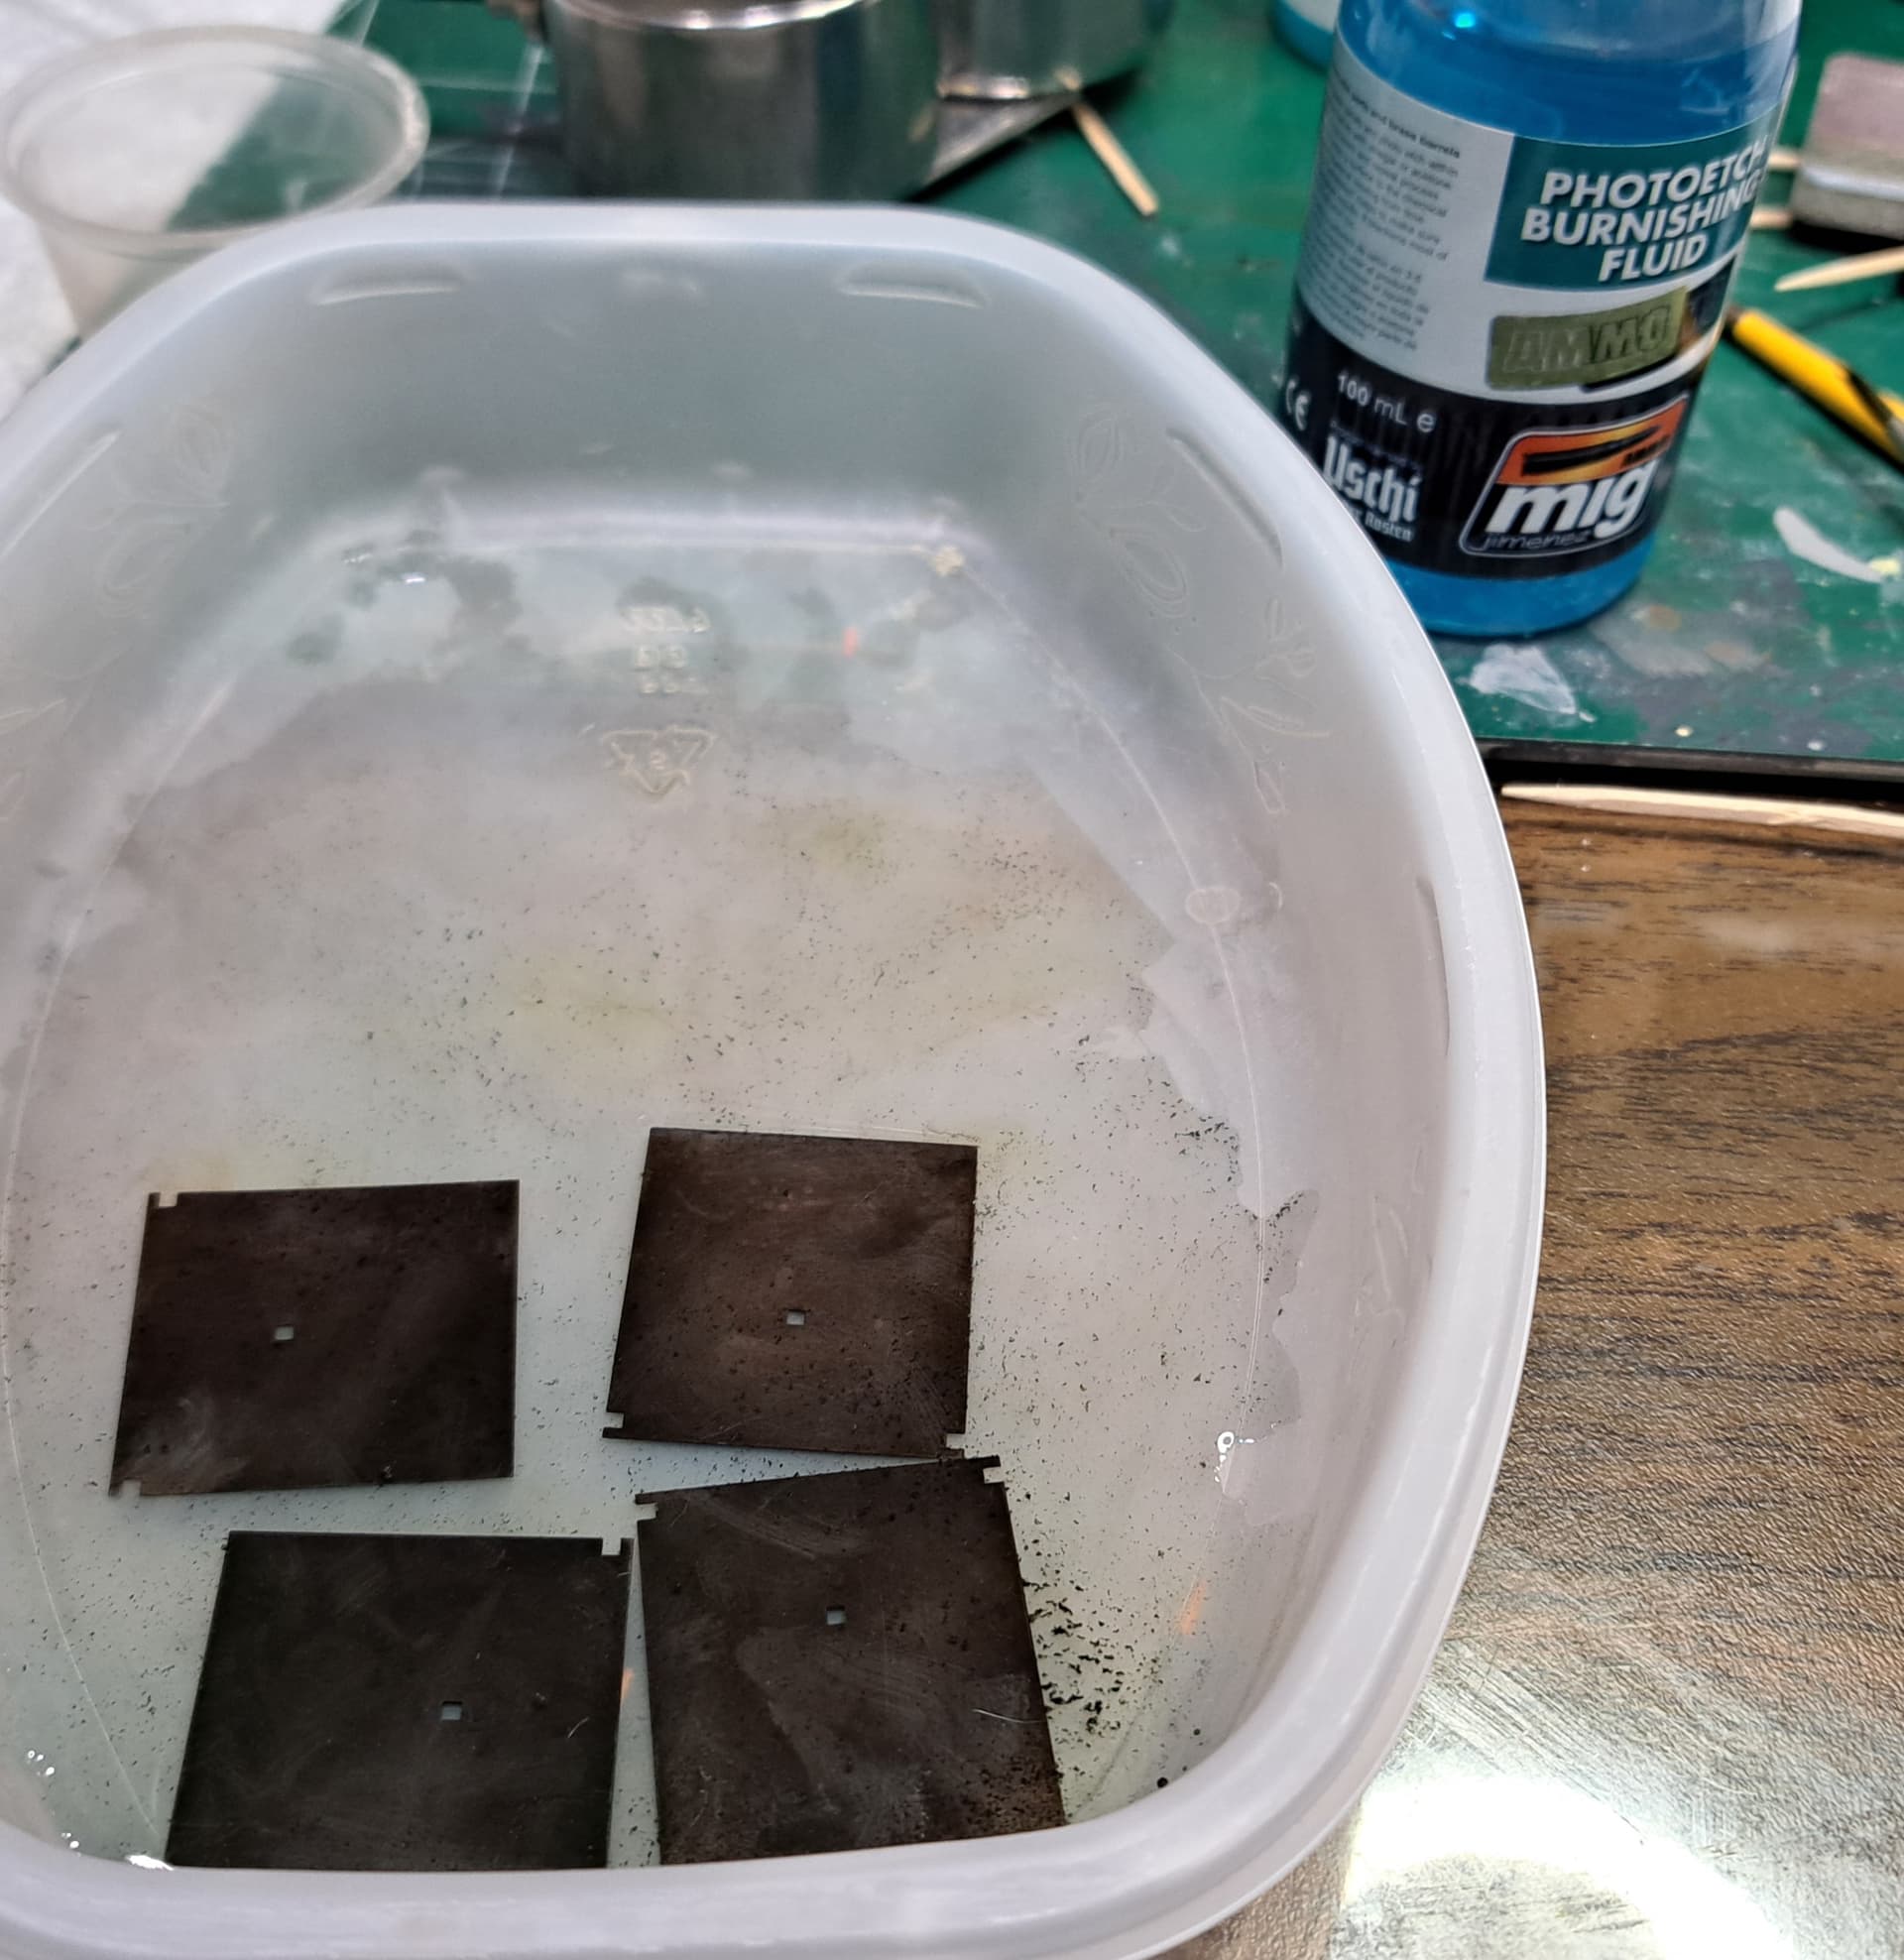
Burnishing fluid for the PE skirts. The skirts rock. They are favorite part of the kit.
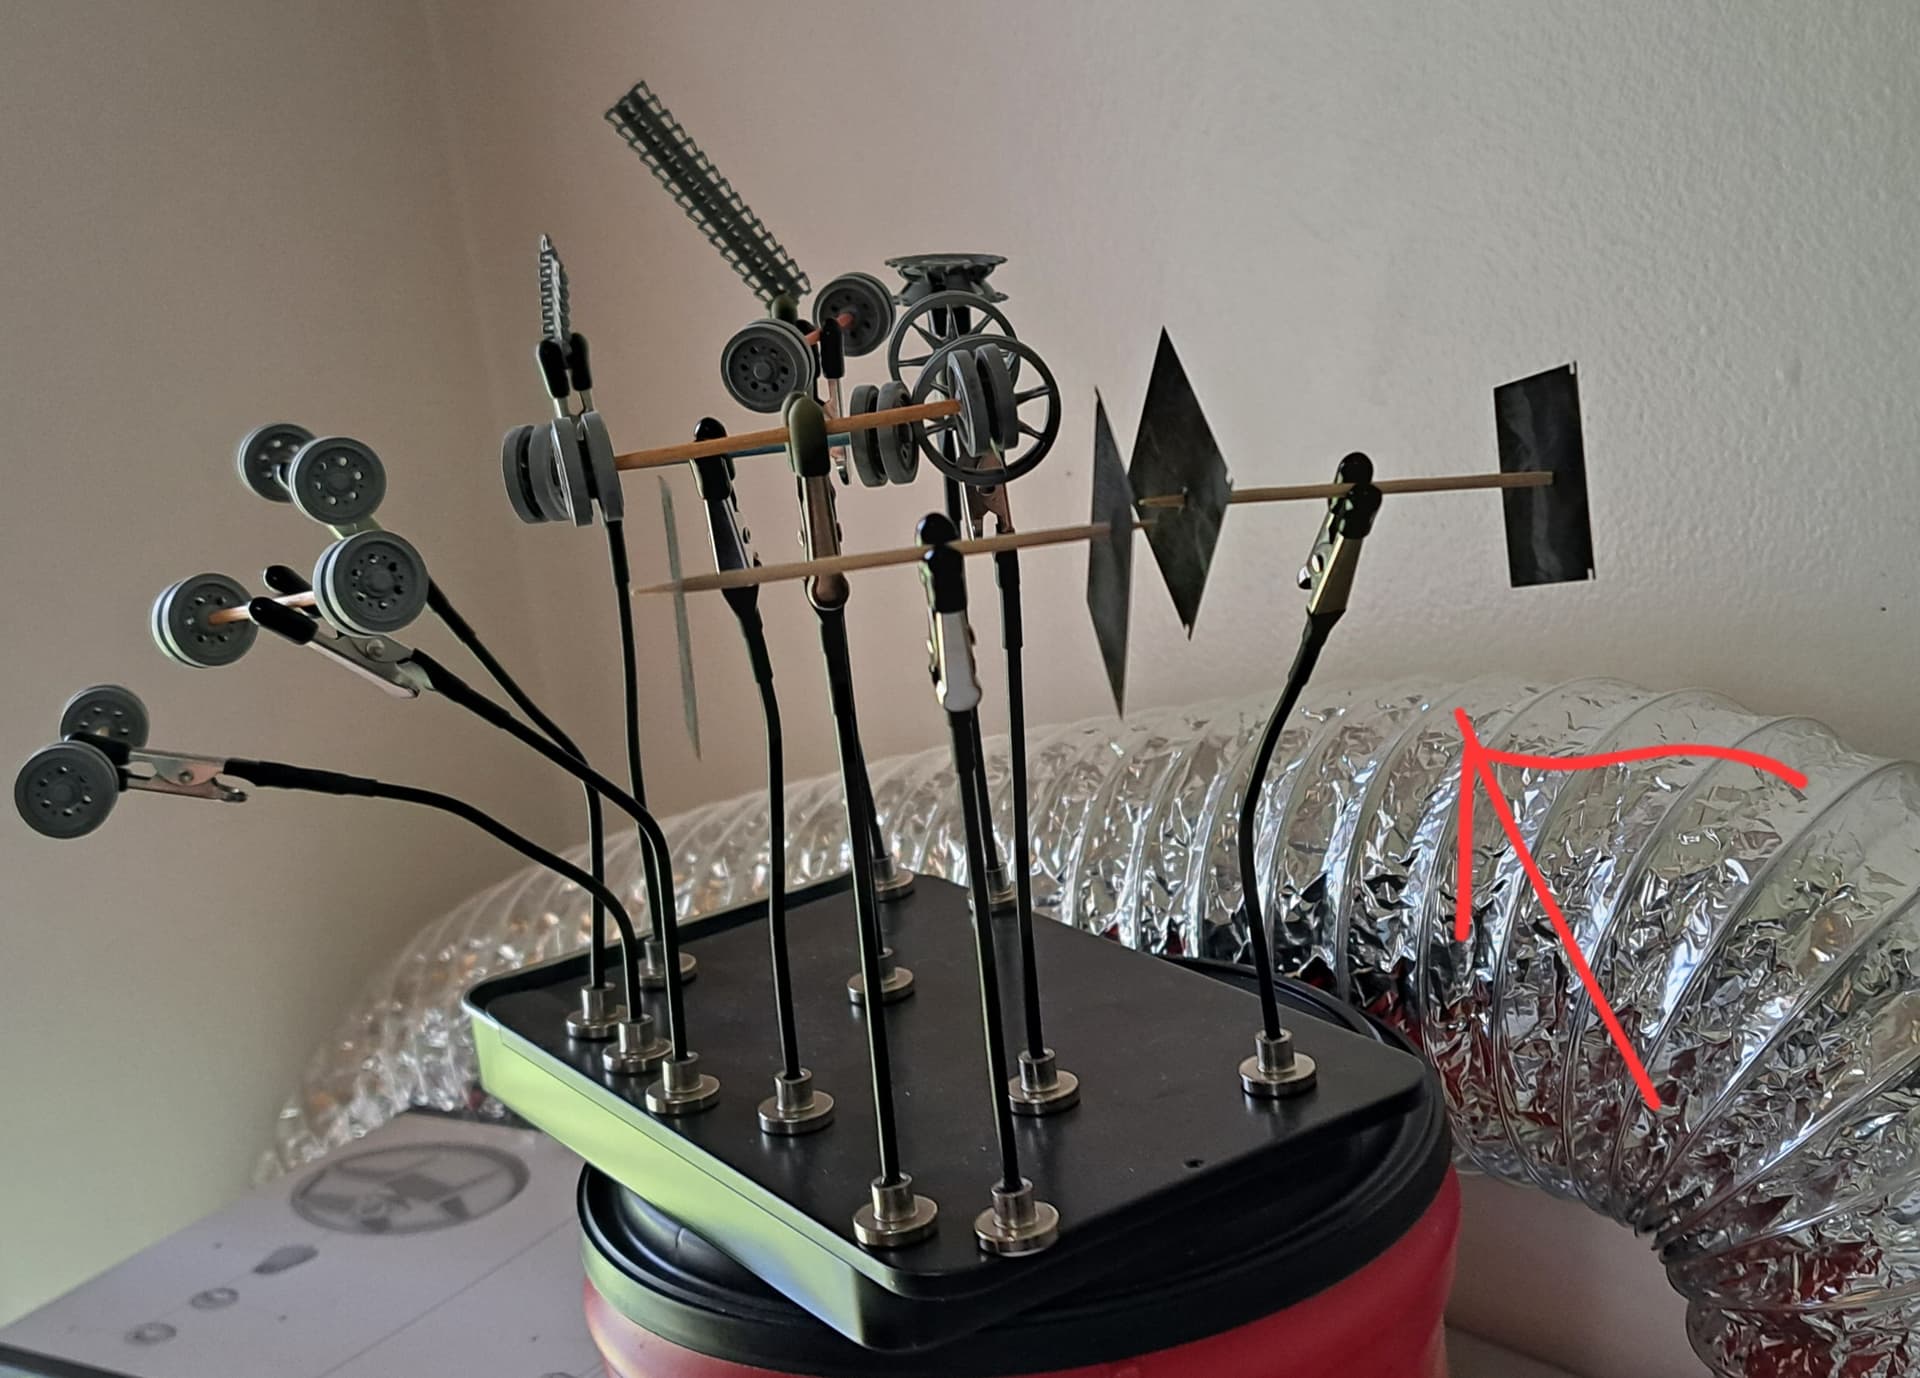
In the paint booth and staged for painting.
Skirts on the hanger looking like a Tie Fighter?
Base coated with Mr Surfacer 1000 Mahogany.

7 Likes
Wade why did you basecoat it mahogany?
2 Likes
Randy,
Reader’s Digest version - helps add visual impact by adding a variety of contrasts to thinly applied coats of color coat paint.
Long winded, self-indulgent, soap-box rabble below…
I learned a technique from friend’s called Shadow Painting in the early 1990’s. Today it’s commonly known as Black Basing. Paint the model black then fog by airbrush thin color coats and/or highlight coats of color coat mixed with white.
Being a contrarian, I didn’t want to do exactly what friends were doing. Generally the better AFV modeler’s in my area used the same paints, Floquil Railroad, Floquil Military Color and Model Master.
I used Aeromaster Tire Black (Floquil) or Floquil Railroad Weathered Black as my base. These were more shadow like than straight black in my opinion. I used Floquil Panzer Interior Buff (off white) as the high mix for the color coat. It was less harsh and bleached out than pure white.
This gave a result similar to my friends but slightly different. I didn’t want a copy cat look for my painting and finishing.
Took ridicule from the exact color aficionados for screwing around with Aeromaster airplane paint on AFV’s. Only a moron would mix in Panzer Interior Buff to highlight a Russian, Japanese or American AFV’s etc.
The trophy wins came pouring ![]() in Shadow Painting was a powerful painting technique. The technique got one stock out of the box Tamiya Pz IVD (1970’s release) tossed into the Masters Class in the 1990’s at one show. The Pz IV scored Gold much to my surprise. Probably due to novelty of the painting technique way back then. I’ll admit it was delightful to hear folks go BMW (bitch, moan & whine) about having to compete with a 20+ year old kit that was built out of the box.
in Shadow Painting was a powerful painting technique. The technique got one stock out of the box Tamiya Pz IVD (1970’s release) tossed into the Masters Class in the 1990’s at one show. The Pz IV scored Gold much to my surprise. Probably due to novelty of the painting technique way back then. I’ll admit it was delightful to hear folks go BMW (bitch, moan & whine) about having to compete with a 20+ year old kit that was built out of the box.
So decades later, I still have a fondness for Shadow Painting and experiment with the technique. Spanish skool is all the fad now days and Black Base & Shadow Painting are probably about as antiquated as Dry Brushing, another favorite technique. I still enjoy finishing models similar to how I used to in the 1990’s plus learning a few new tweaks.
With Floquil Railroad Weathered Black at $50 a bottle on EBAY and hard to find plus my supply of Aeromaster Tire Black nearly gone, it was necessary to test new (to me) base coats that are more readily available.
So far I’ve experimented with
Floquil Military Color - RLM 66 German cockpit Interior black or something like that. It works OK with lighter colors but is a fail with colors like Panzer Gray aka Dunkelgrau RAL 7021
Mr Surfacer (Gunzy) 1500 Black - too black or black/blue for my tastes. Works well enough mixed with Mr S. 1500 Gray
Floquil Railroad Roof Brown - works great but very limited availability.
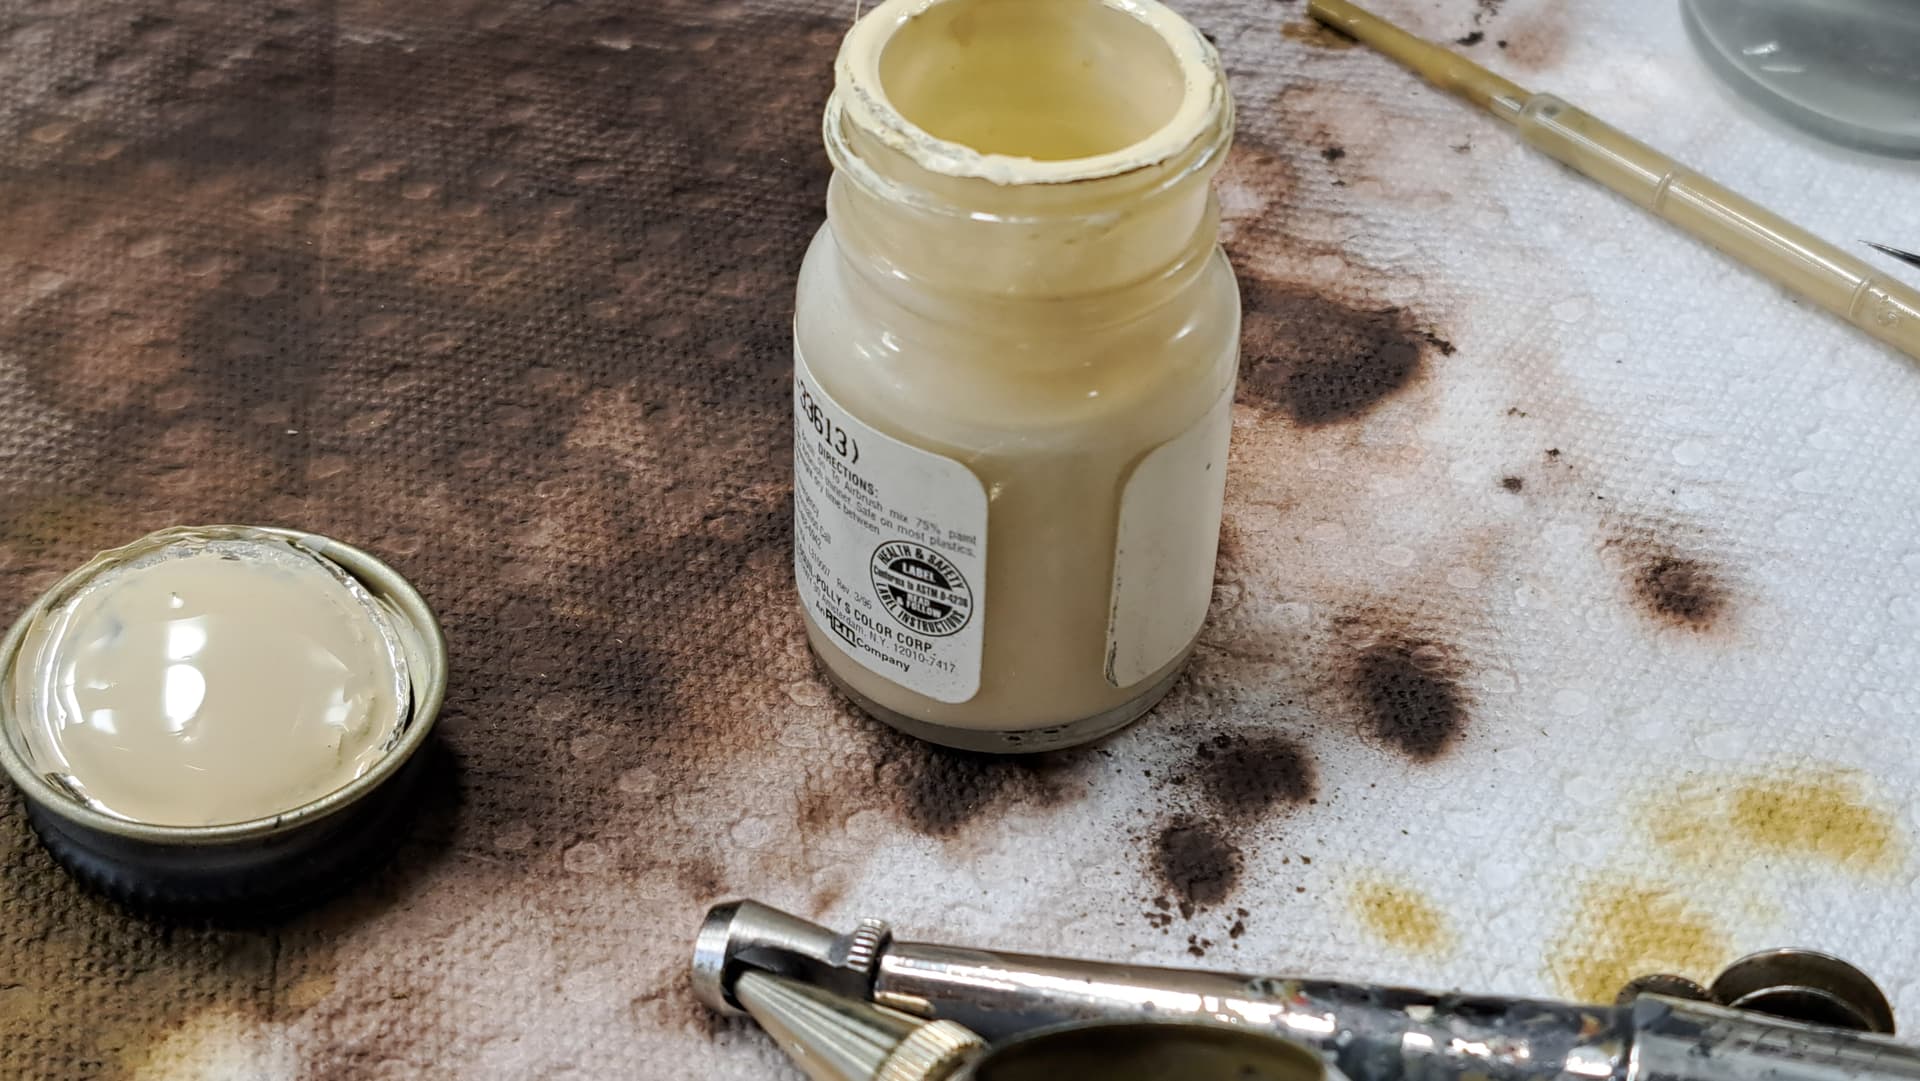
Mr Surfacer Mahogany used it on my winter white wash Stug III G and thought it looked promising enough to risk on a model w/o white wash, the Takom Pz III ausf N.
Not a fan of the Takom Pz III ausf N kit so if it gets jacked up at least it will have served a purpose as a test bed. This minimizes the risk to painting the Italeri Panther D build with a Mahogany under coat. I like that Italeri Panther D enough would like for it to get a decent finish.
Special thank you to anyone that made thorough the rambling.
HTH
For kicks, will try to take a picture at each stage…
Test - Mahogany plus Floquil Panzer Dark Yellow w/Floquil Panzer Interior Buff
5 Likes
Two old favorites, Floquil Military Panzer Dark Yellow (Dunkelgelb RAL 7028) & FMC Panzer Interior Buff (Elfenbein RAL 1001) will do the heavy lifting.
Mr Color Leveling Thinner for reducing and since I’m on nostalgia kick, it will all be shot with an old ever trust worthy Paasche H, external mix single action airbrush.
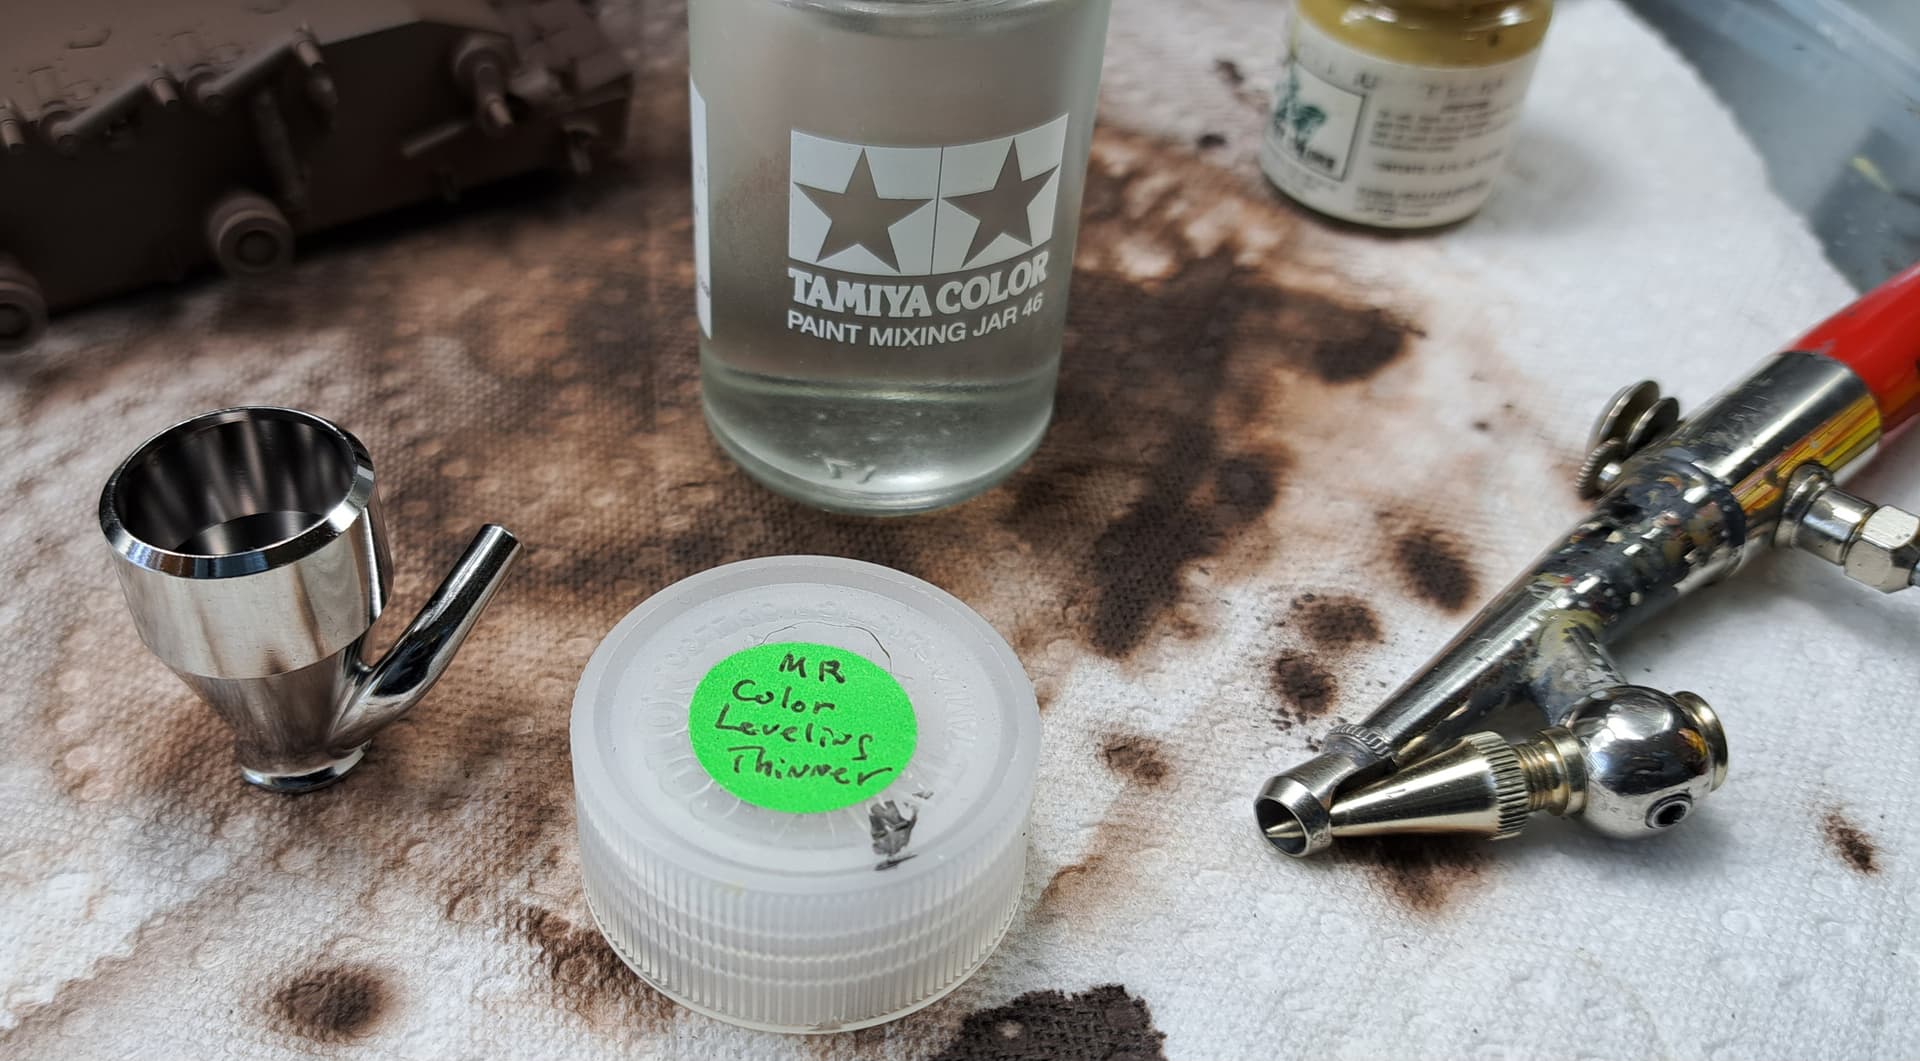
Despite all the sage advice to NEVER MIX in the COLOR CUP, I always do. After adding paint & thinner, used the pippette to ensure it’s thoroughly mixed. This helps decide if the paint viscosity is what’s wante or an adjustment with mote pain or more thinner is desired.
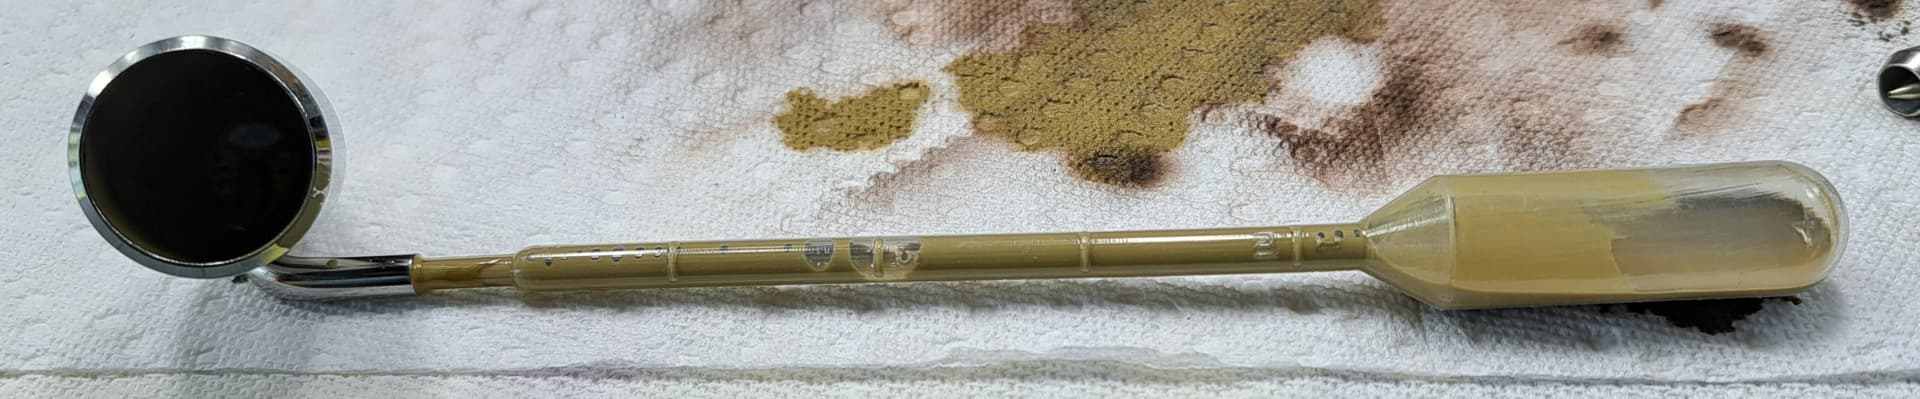
With no tweaks, the H cut a finer line than I’ll need for this session.
I like to start on the bottom to ensure any painting issues are sorted before moving to mote easily observed areas.
Random spraying of wiggles, squiggles, spots & dots to build contrast.
Moving to hull side. Random thin lines plus spots & dots to develop overlapping, contrast & shading.
Result

Moving to upper hull…
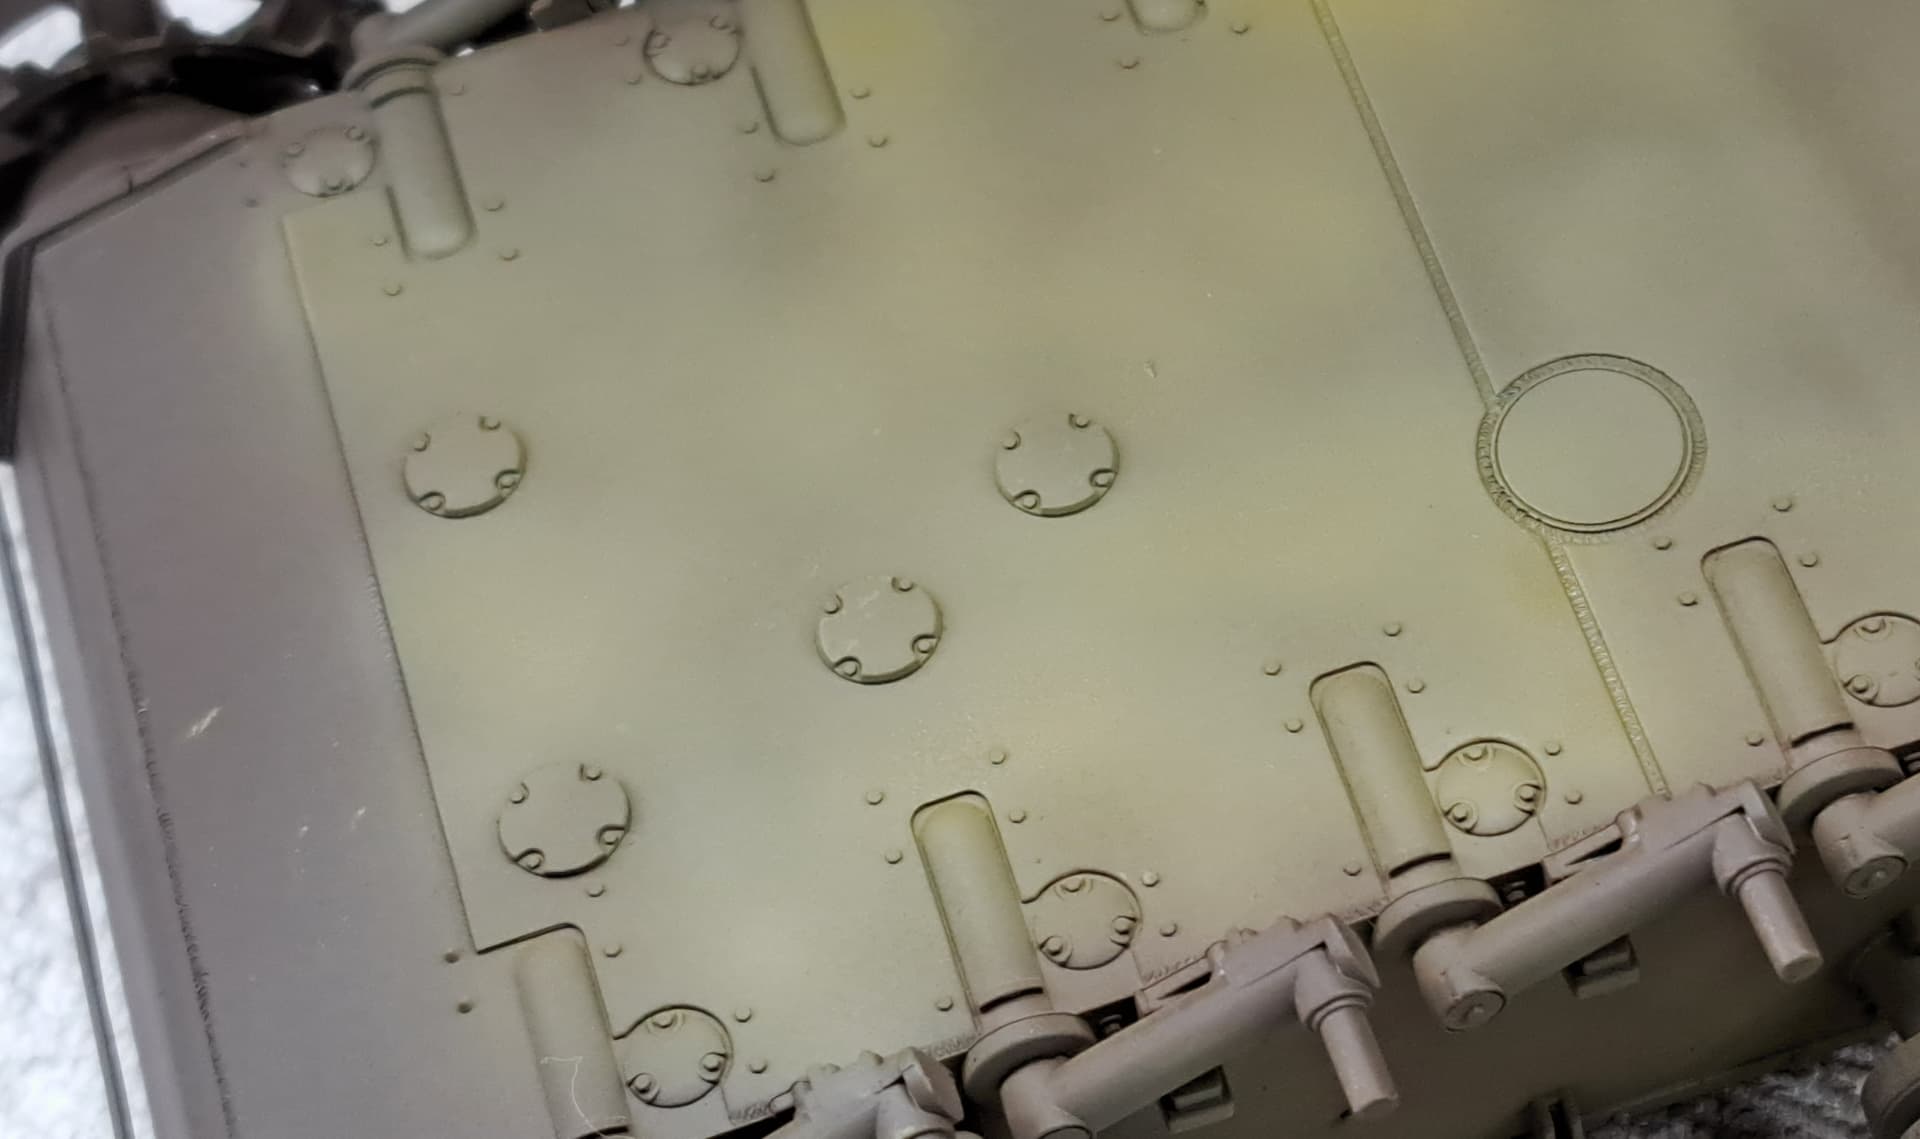
Adding ~50% Panzer Interior Buff plus equal thinner to a similar amount of Panzer Dark Yellow.
Fogged open areas with mixture.
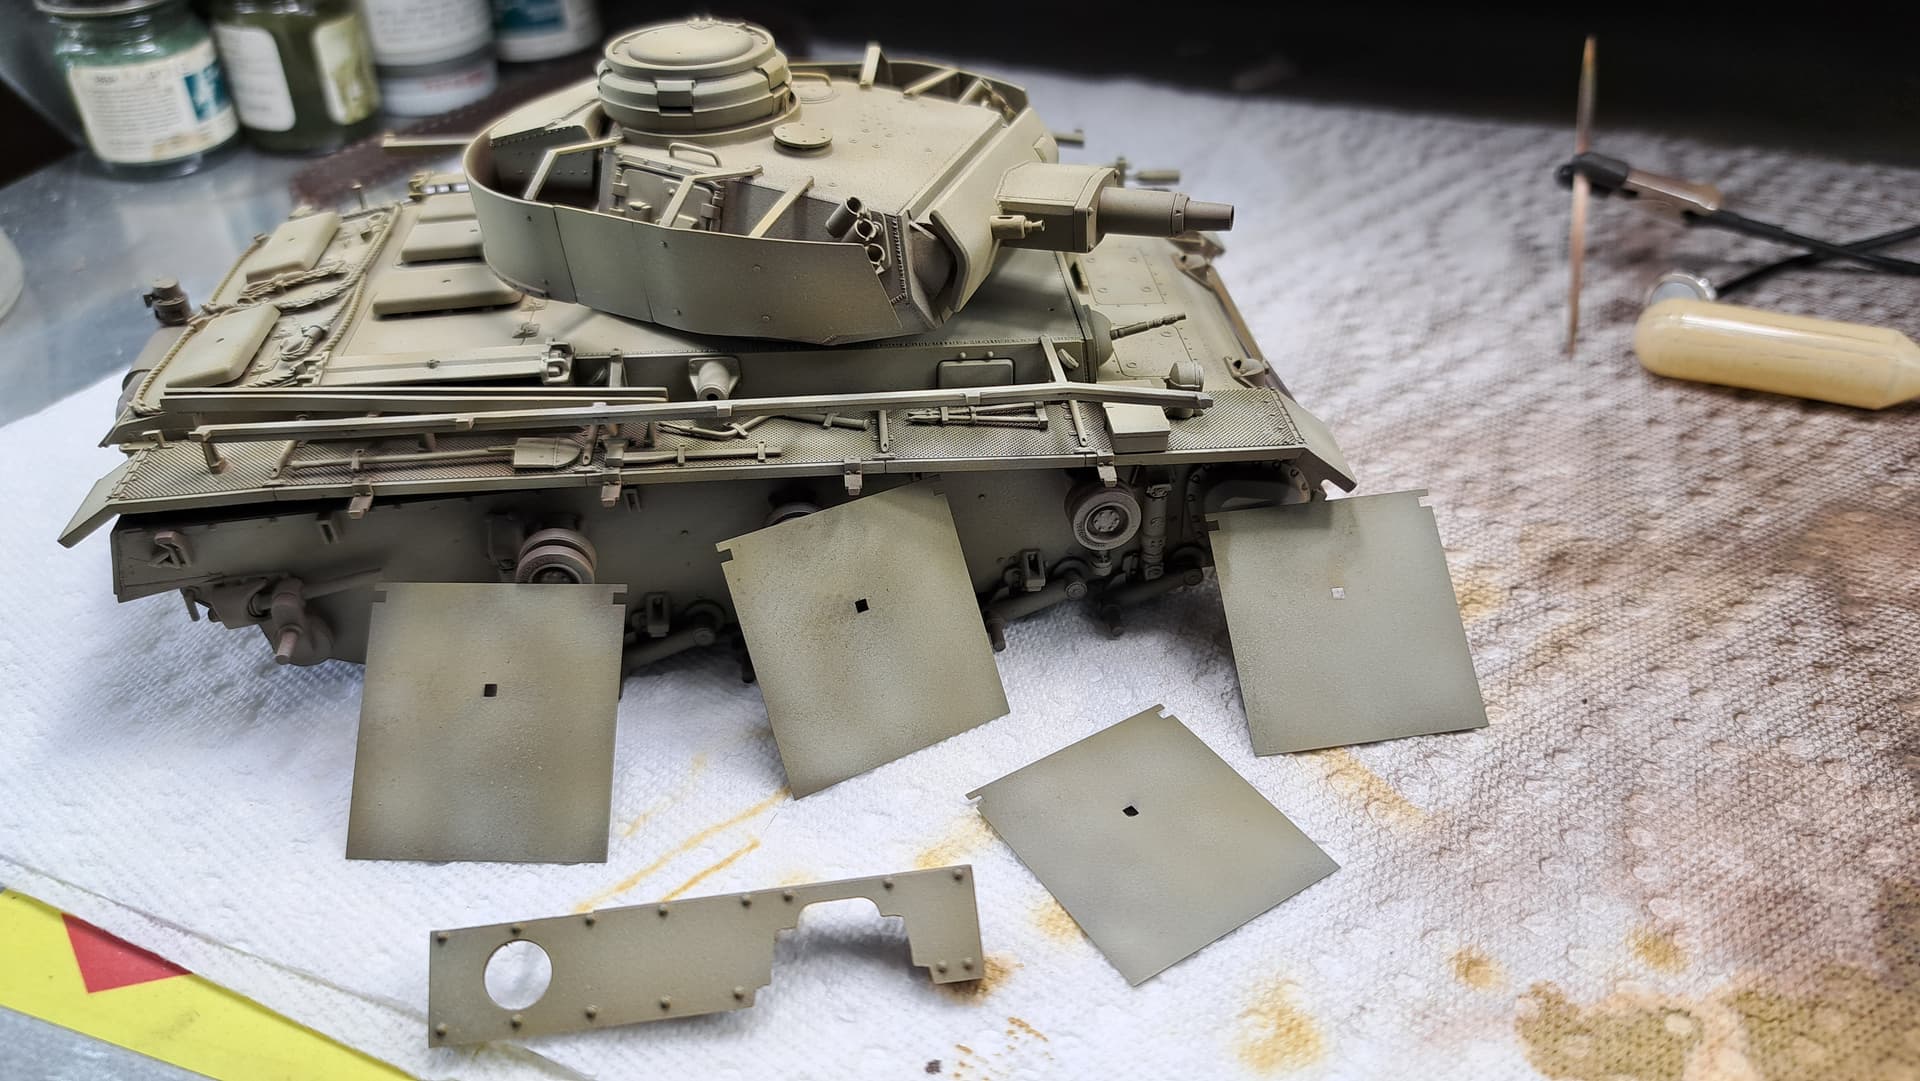
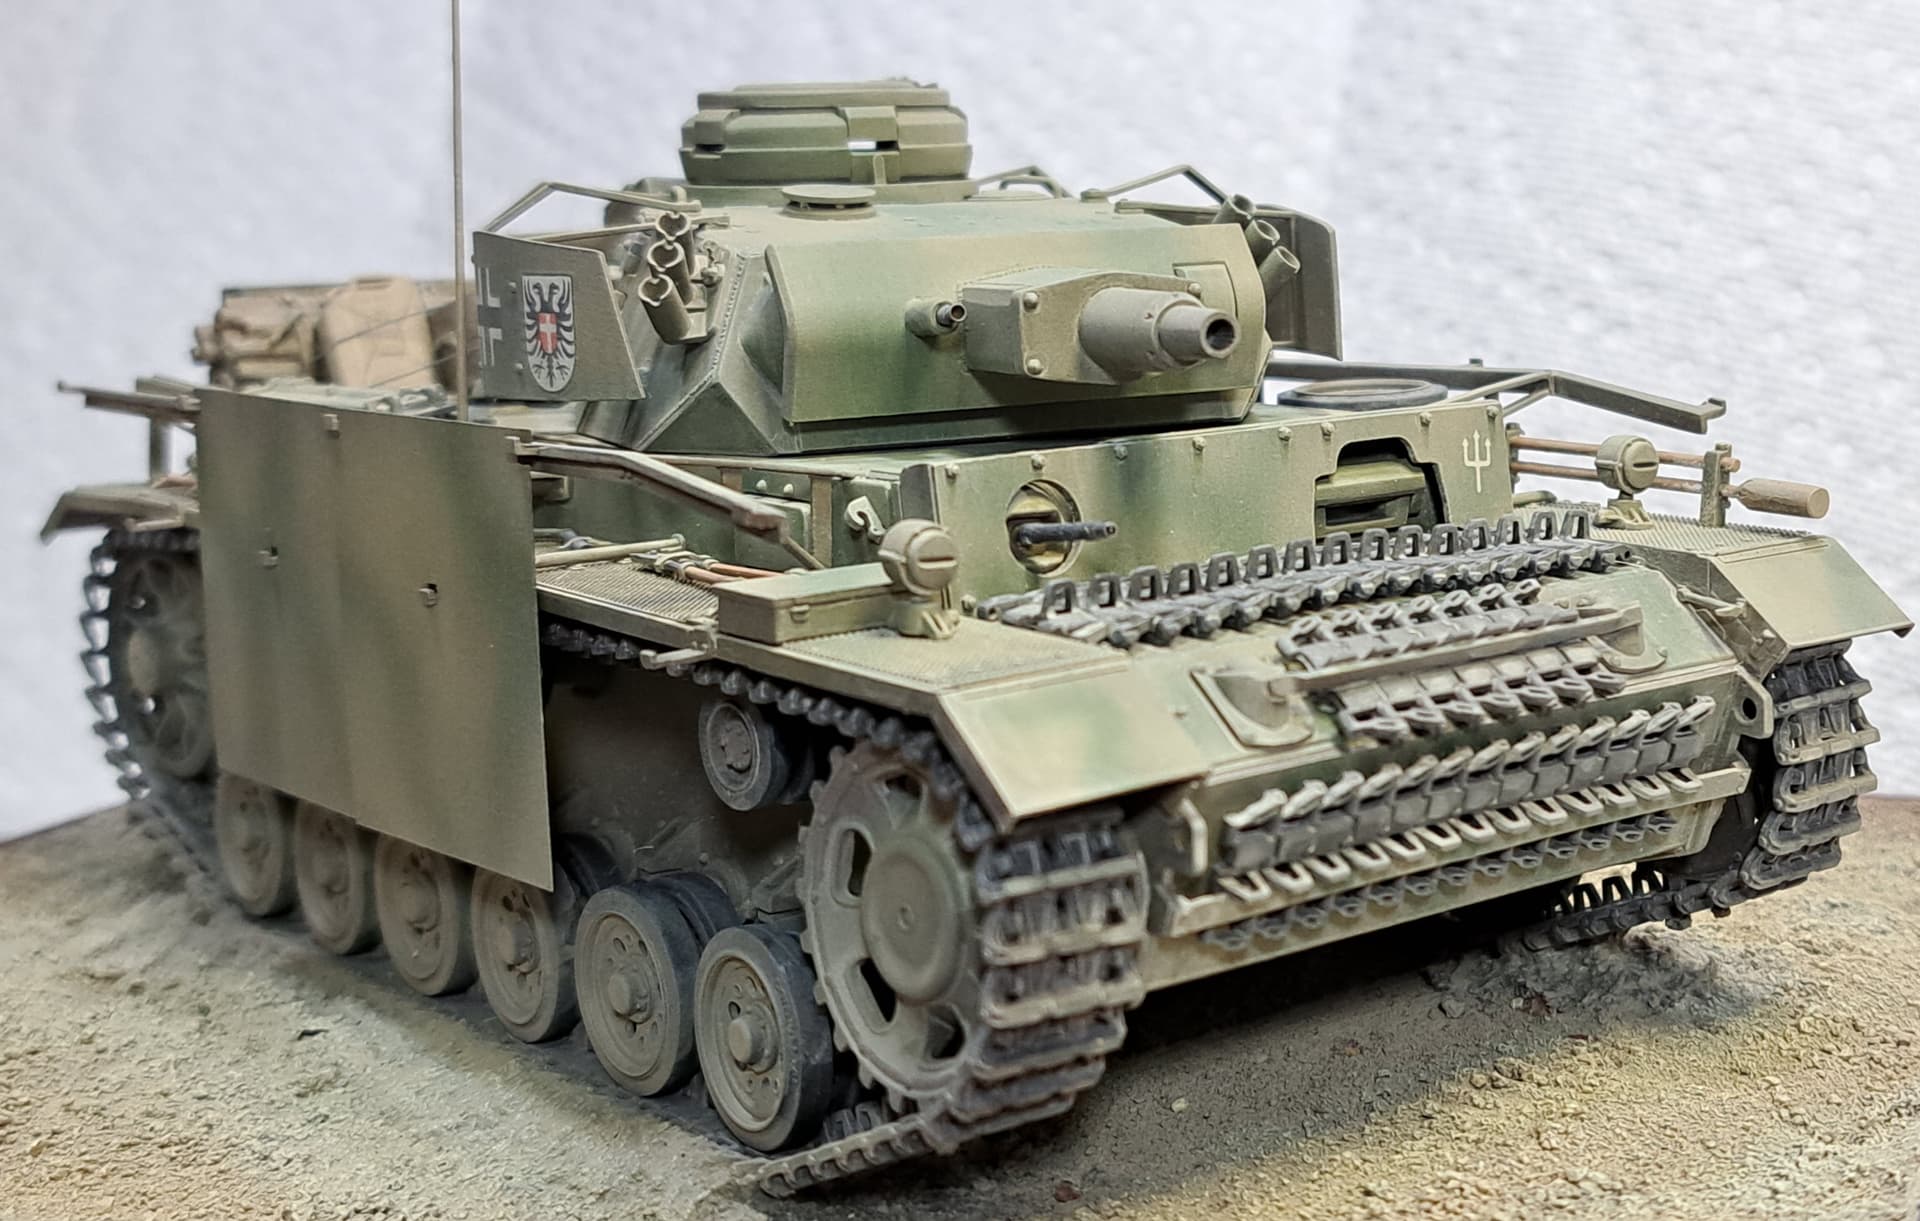
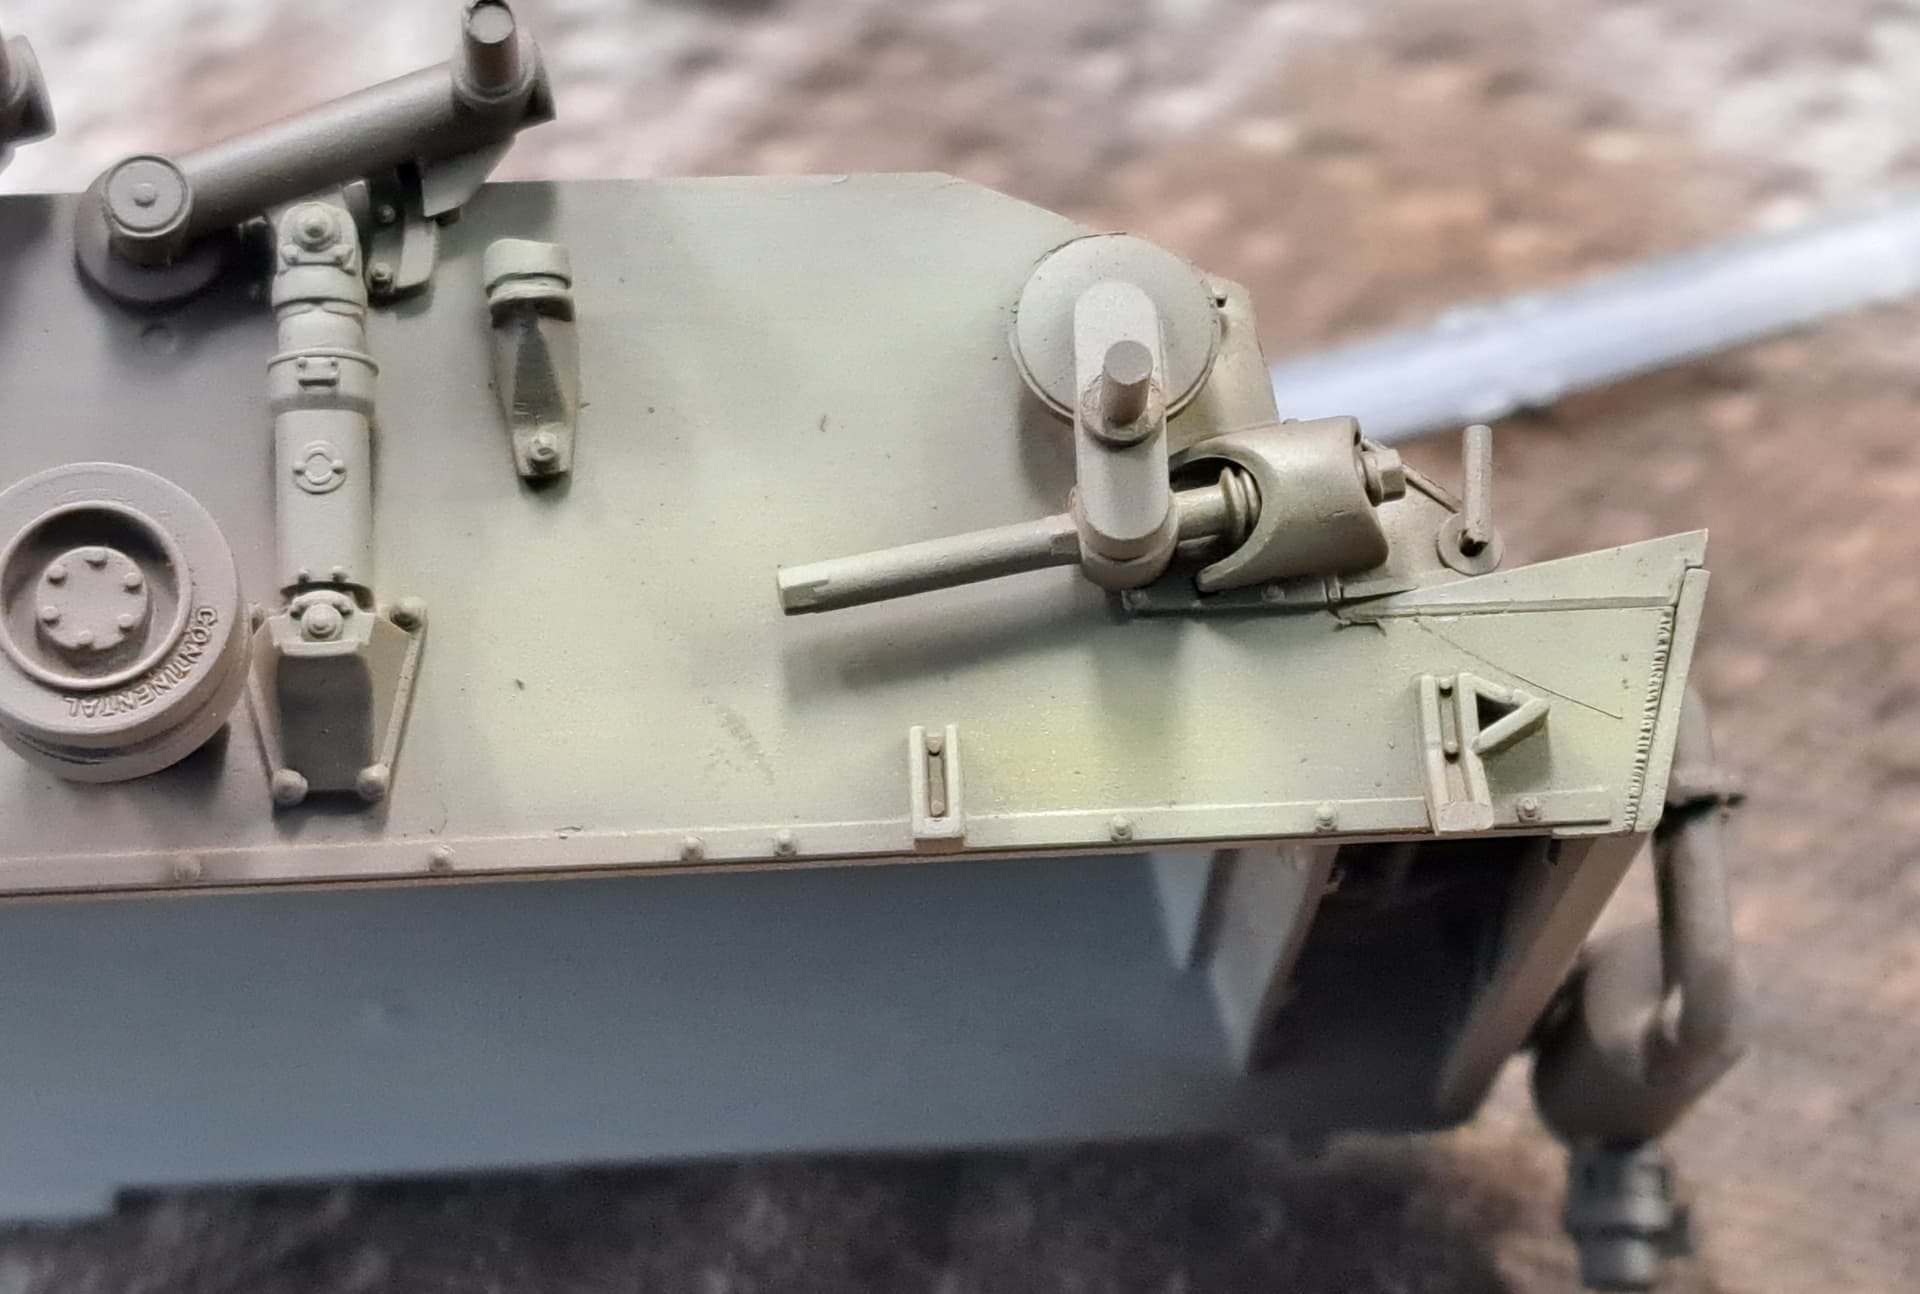
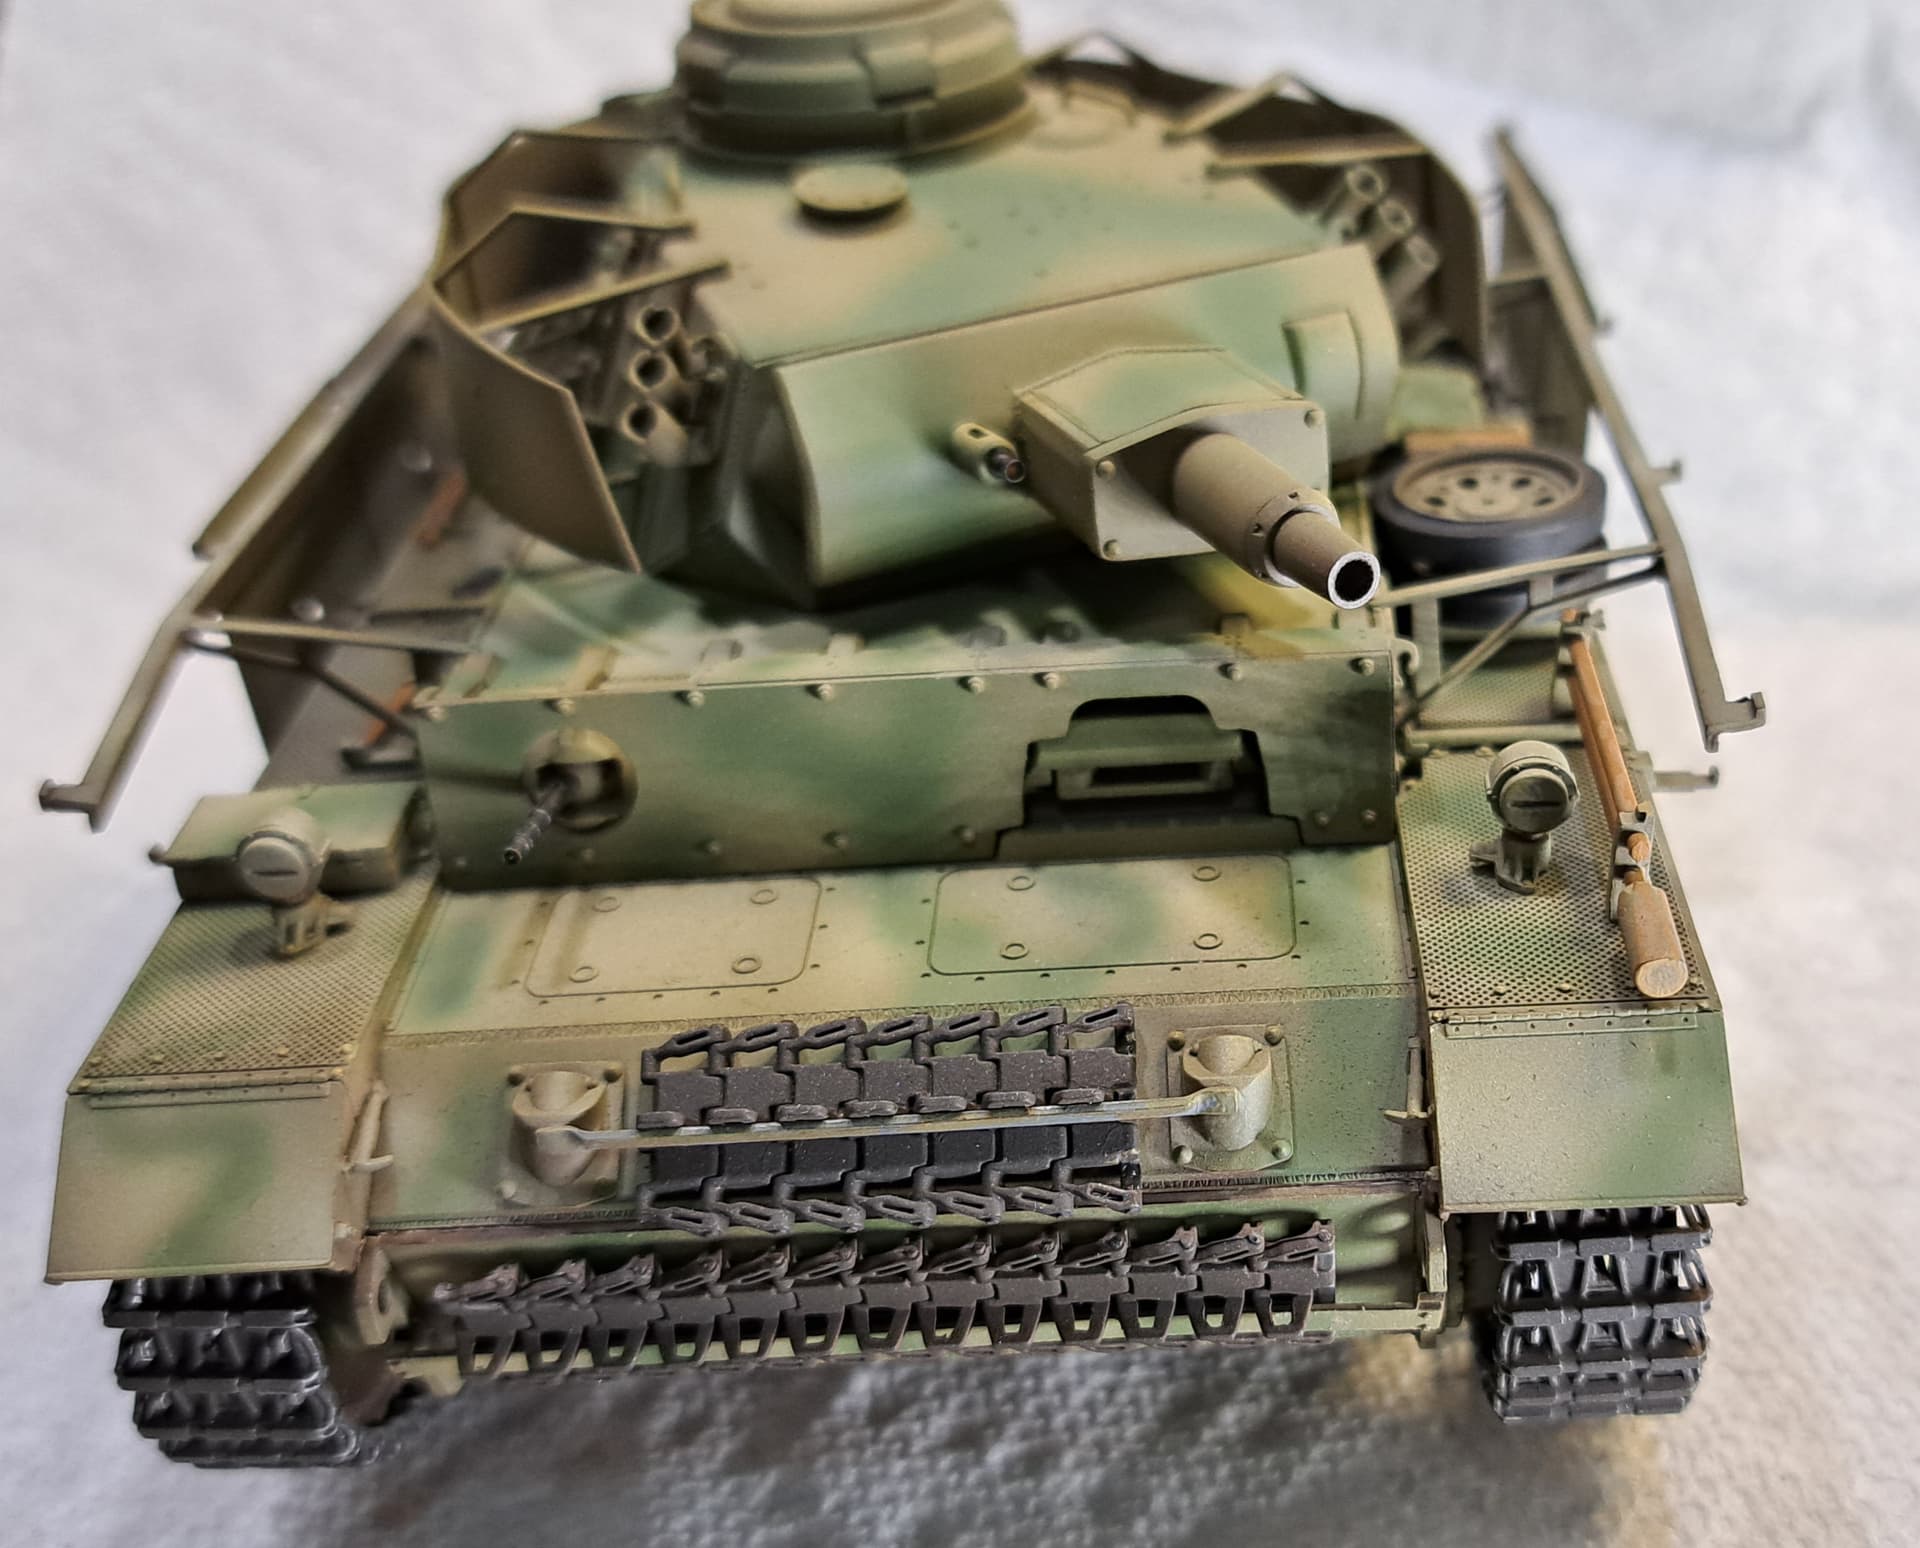
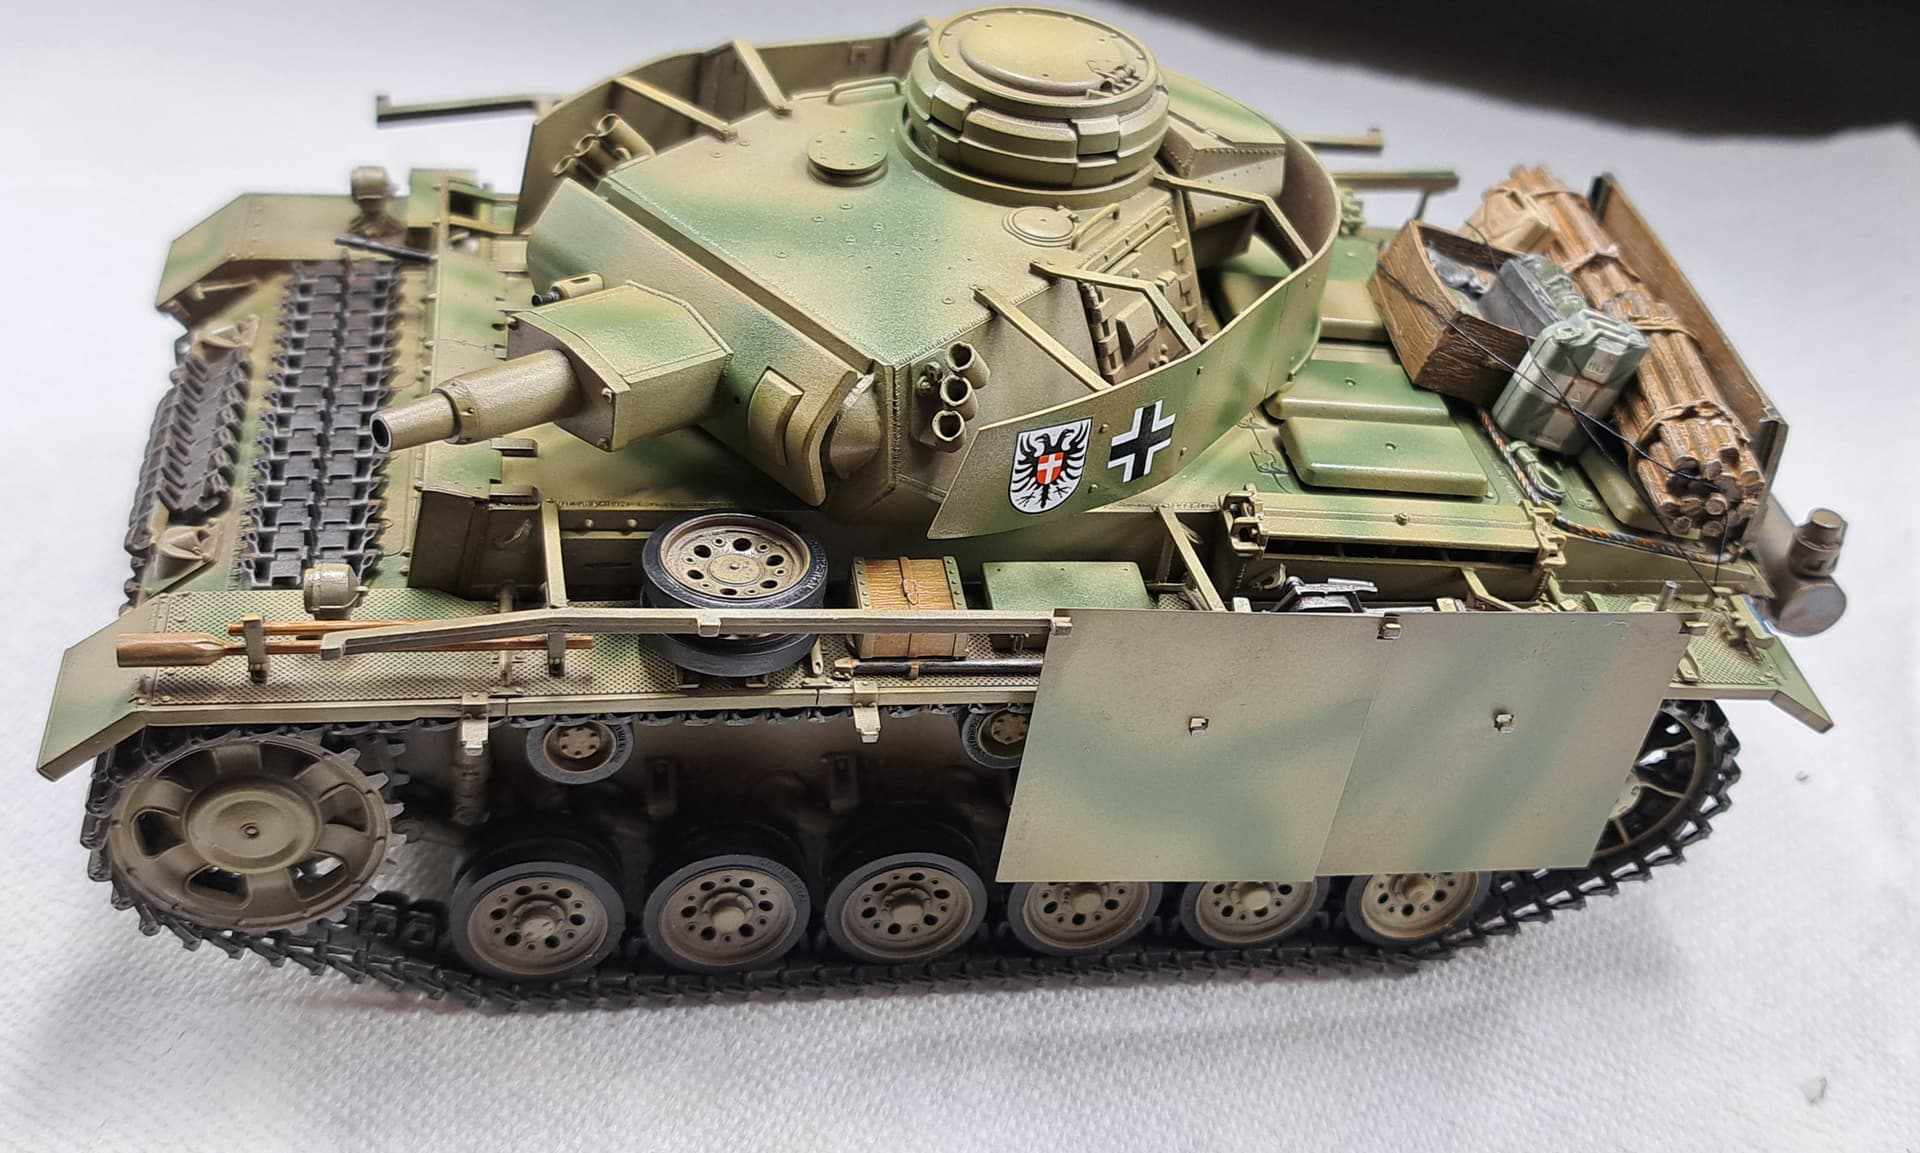
Camo w/Floquil Panzer Olive Green (RAL 6003 Panzer Olivgrun). Demarcation is sloppy but will hopefully be passable by the time it’s weathered.
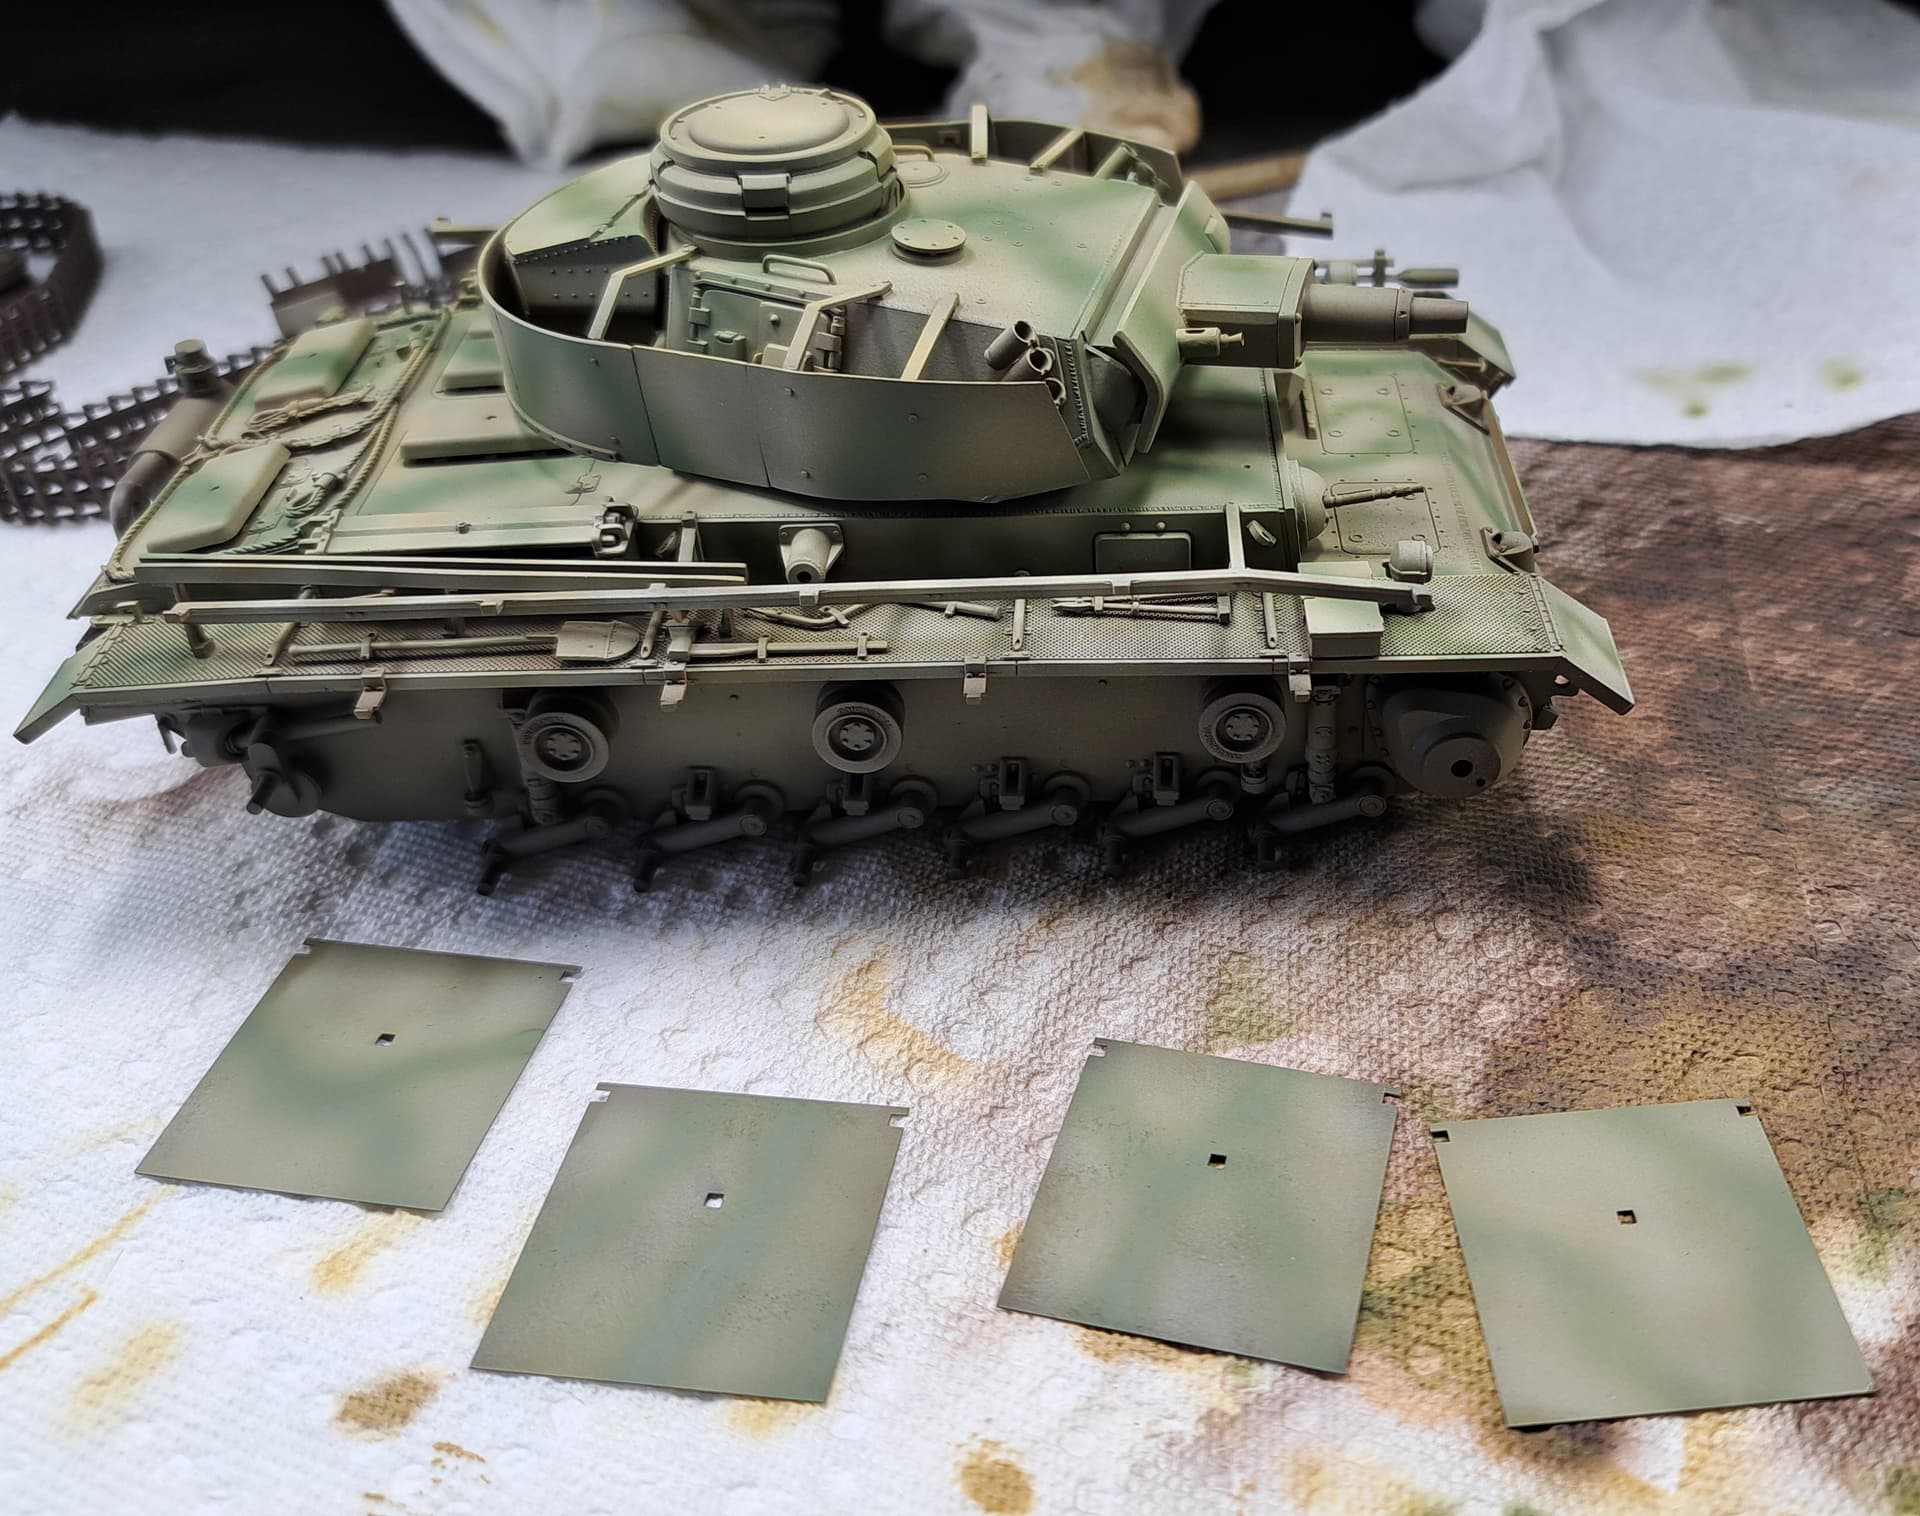
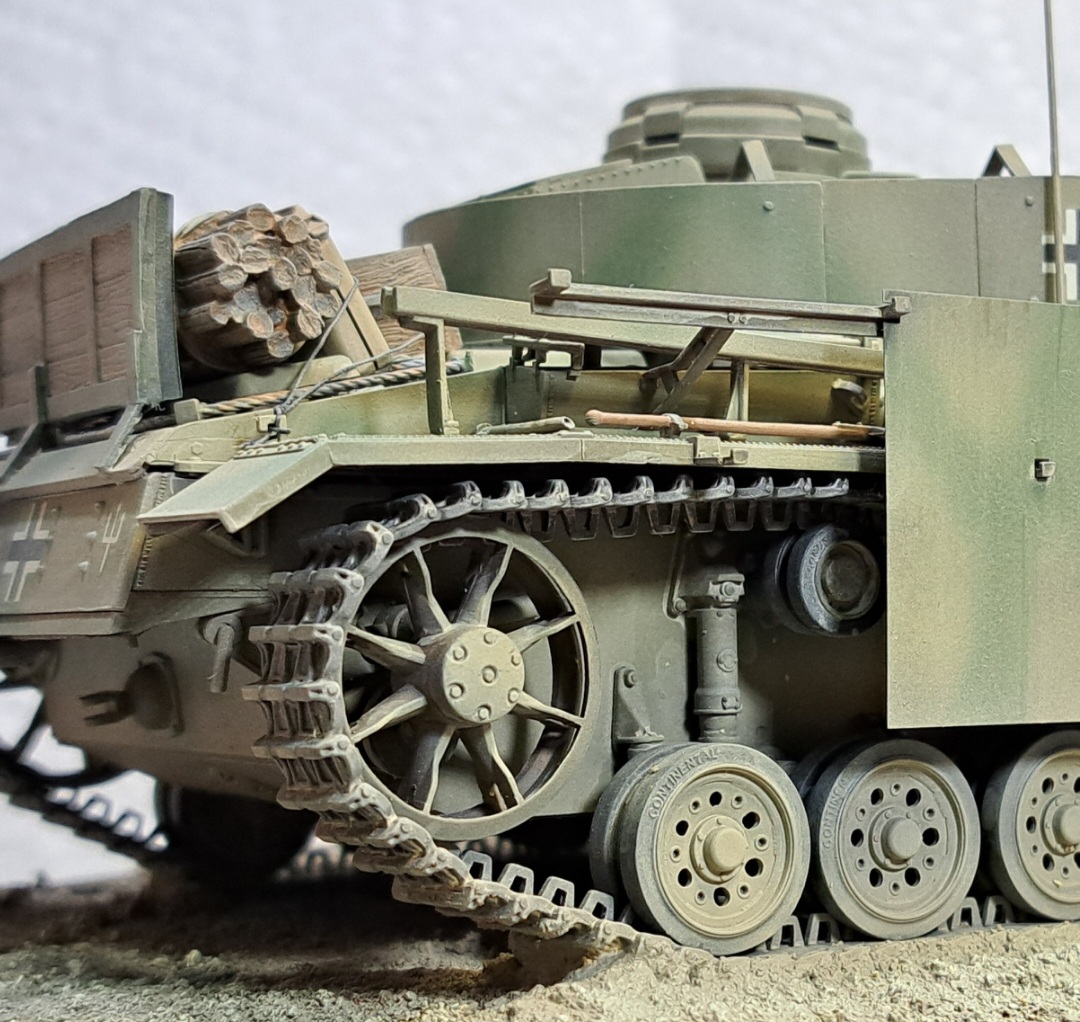
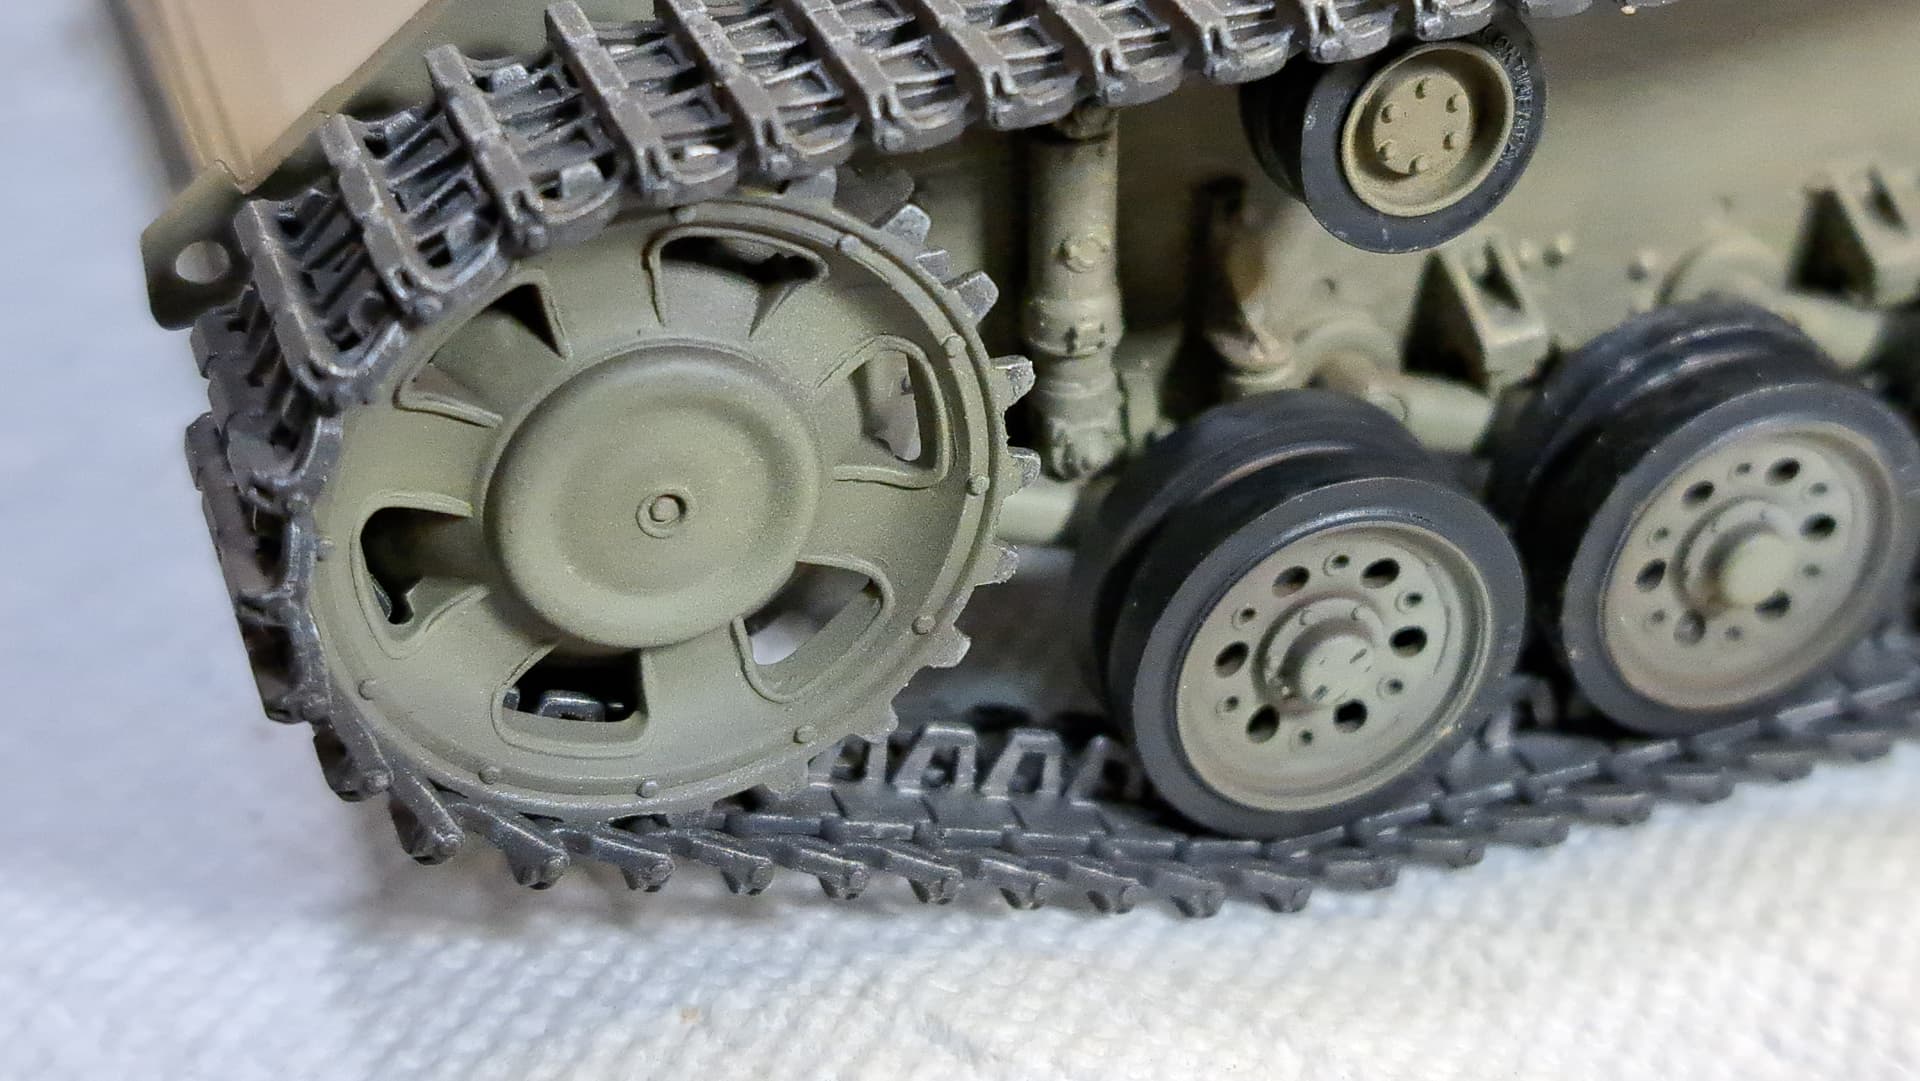
Pz III plus tracks after Tamiya Dark Iron base & thin over spray of Floquil Railroad Antique Bronze.
Will let this cure for a few days before continuing.
7 Likes
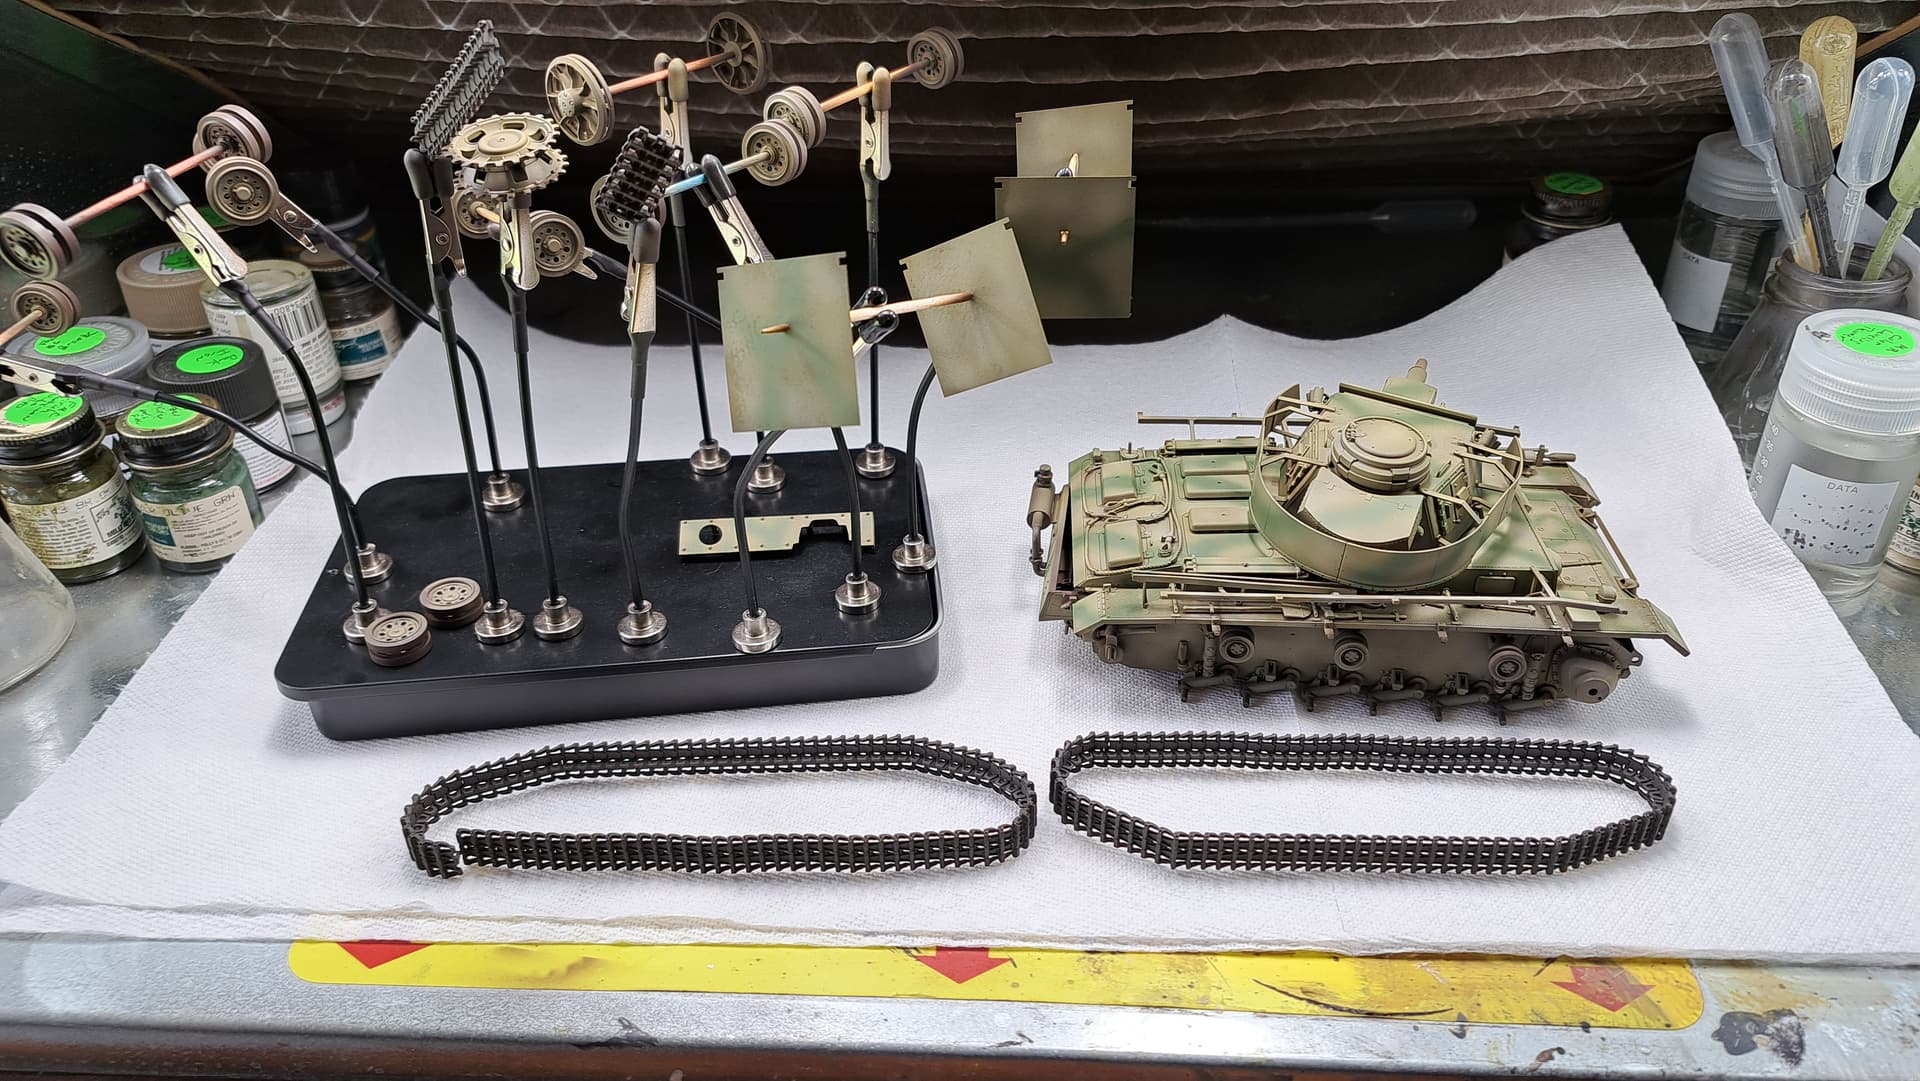
Touched up tires and returned rollers with a nice heavy Gunzy Tire Black wash over the Mahogany base. Added metallics to tracks, sprokects & idlers. Lightly applied MIG Ammo texture paint to lower hull
Scrapped my previous idea for new 3D tracks for this kit. Used the kit link & length tracks which I detest.
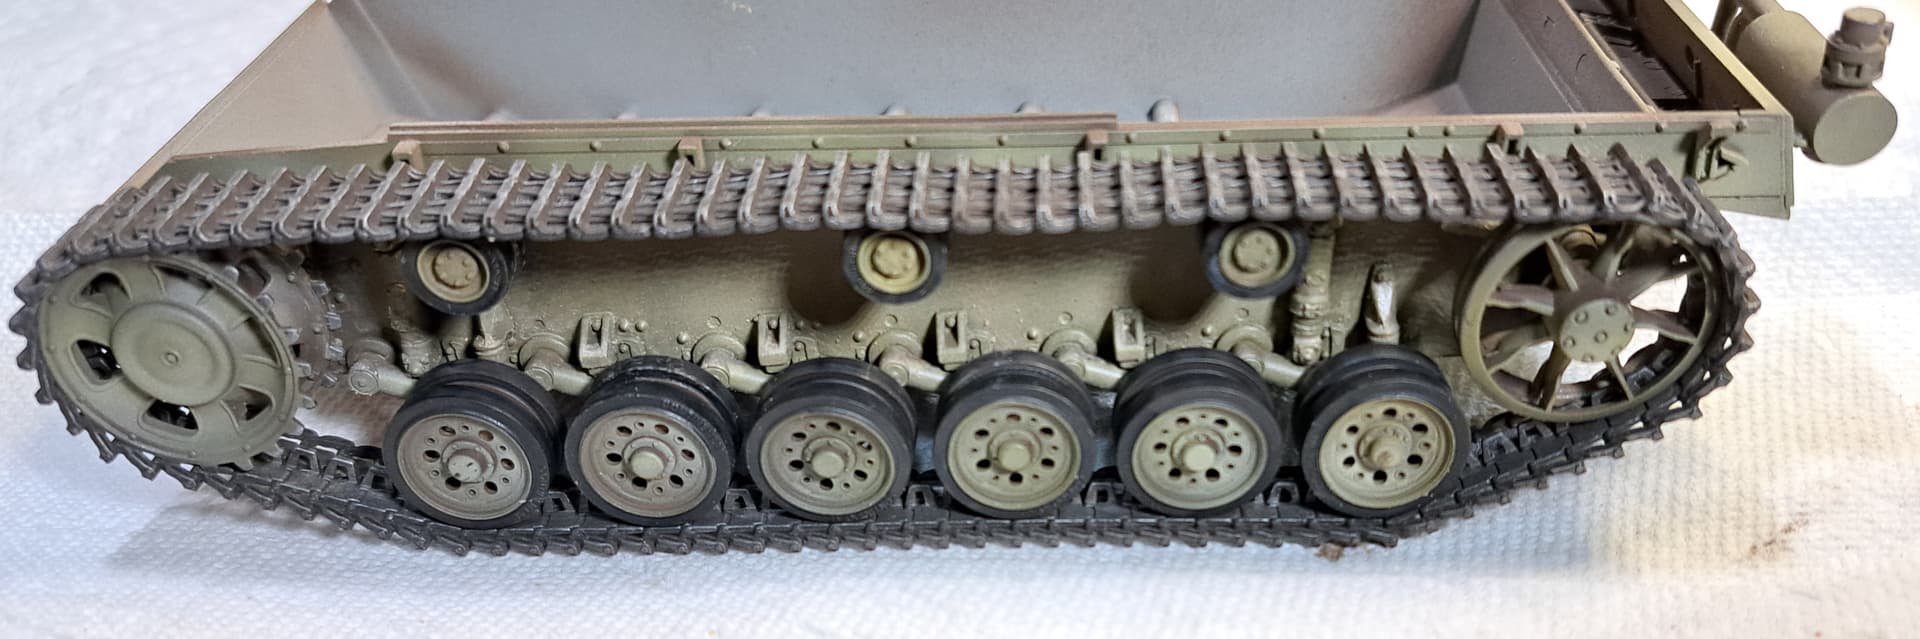
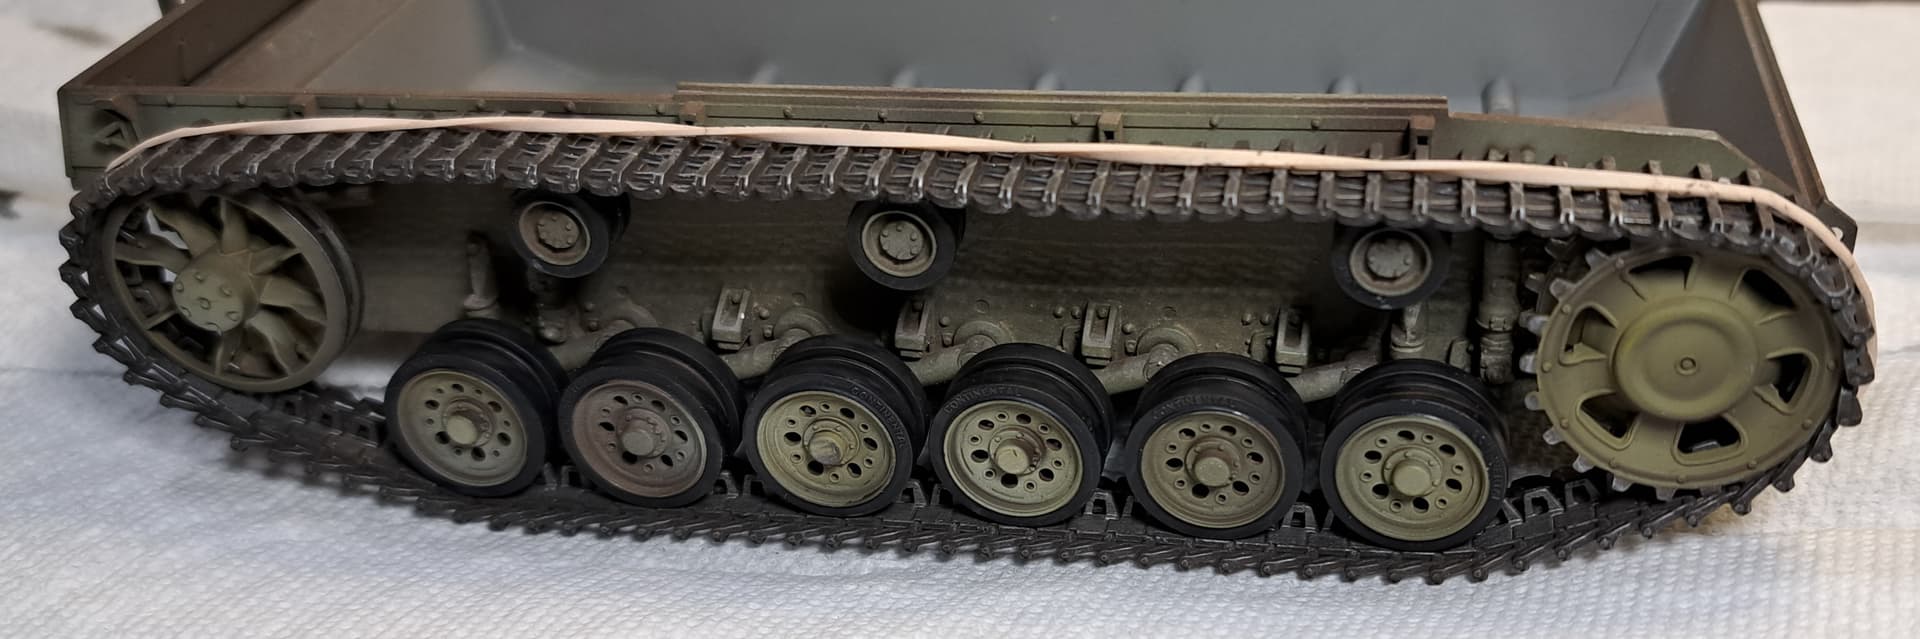
Previous tribulations with the suspension paid off as it all went together smoothly.
Plenty more to do with the lower hull, after addressing the upper hull sub-assembly.
5 Likes
Wrapped detail painting & putting subassemblies together today, except for the antenna. That will be attached later.
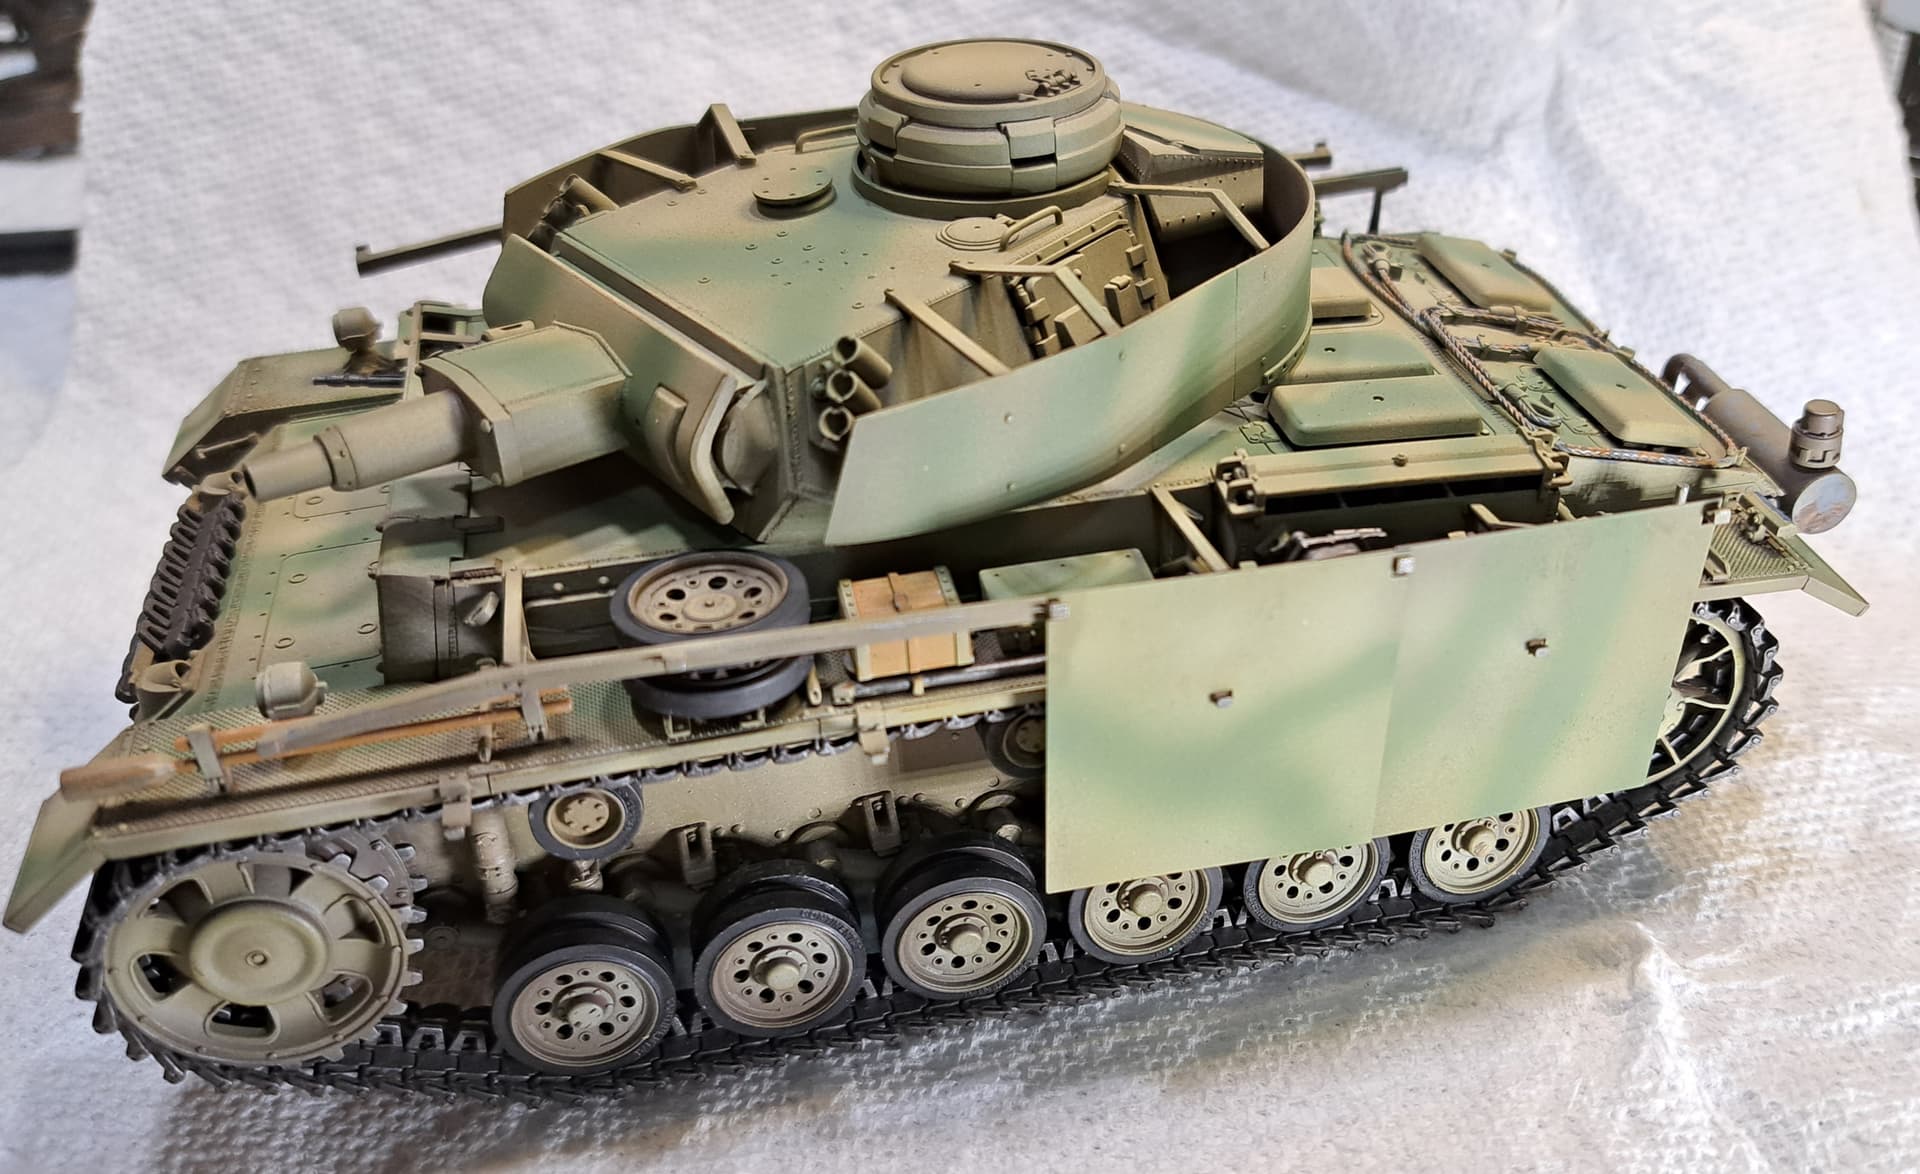
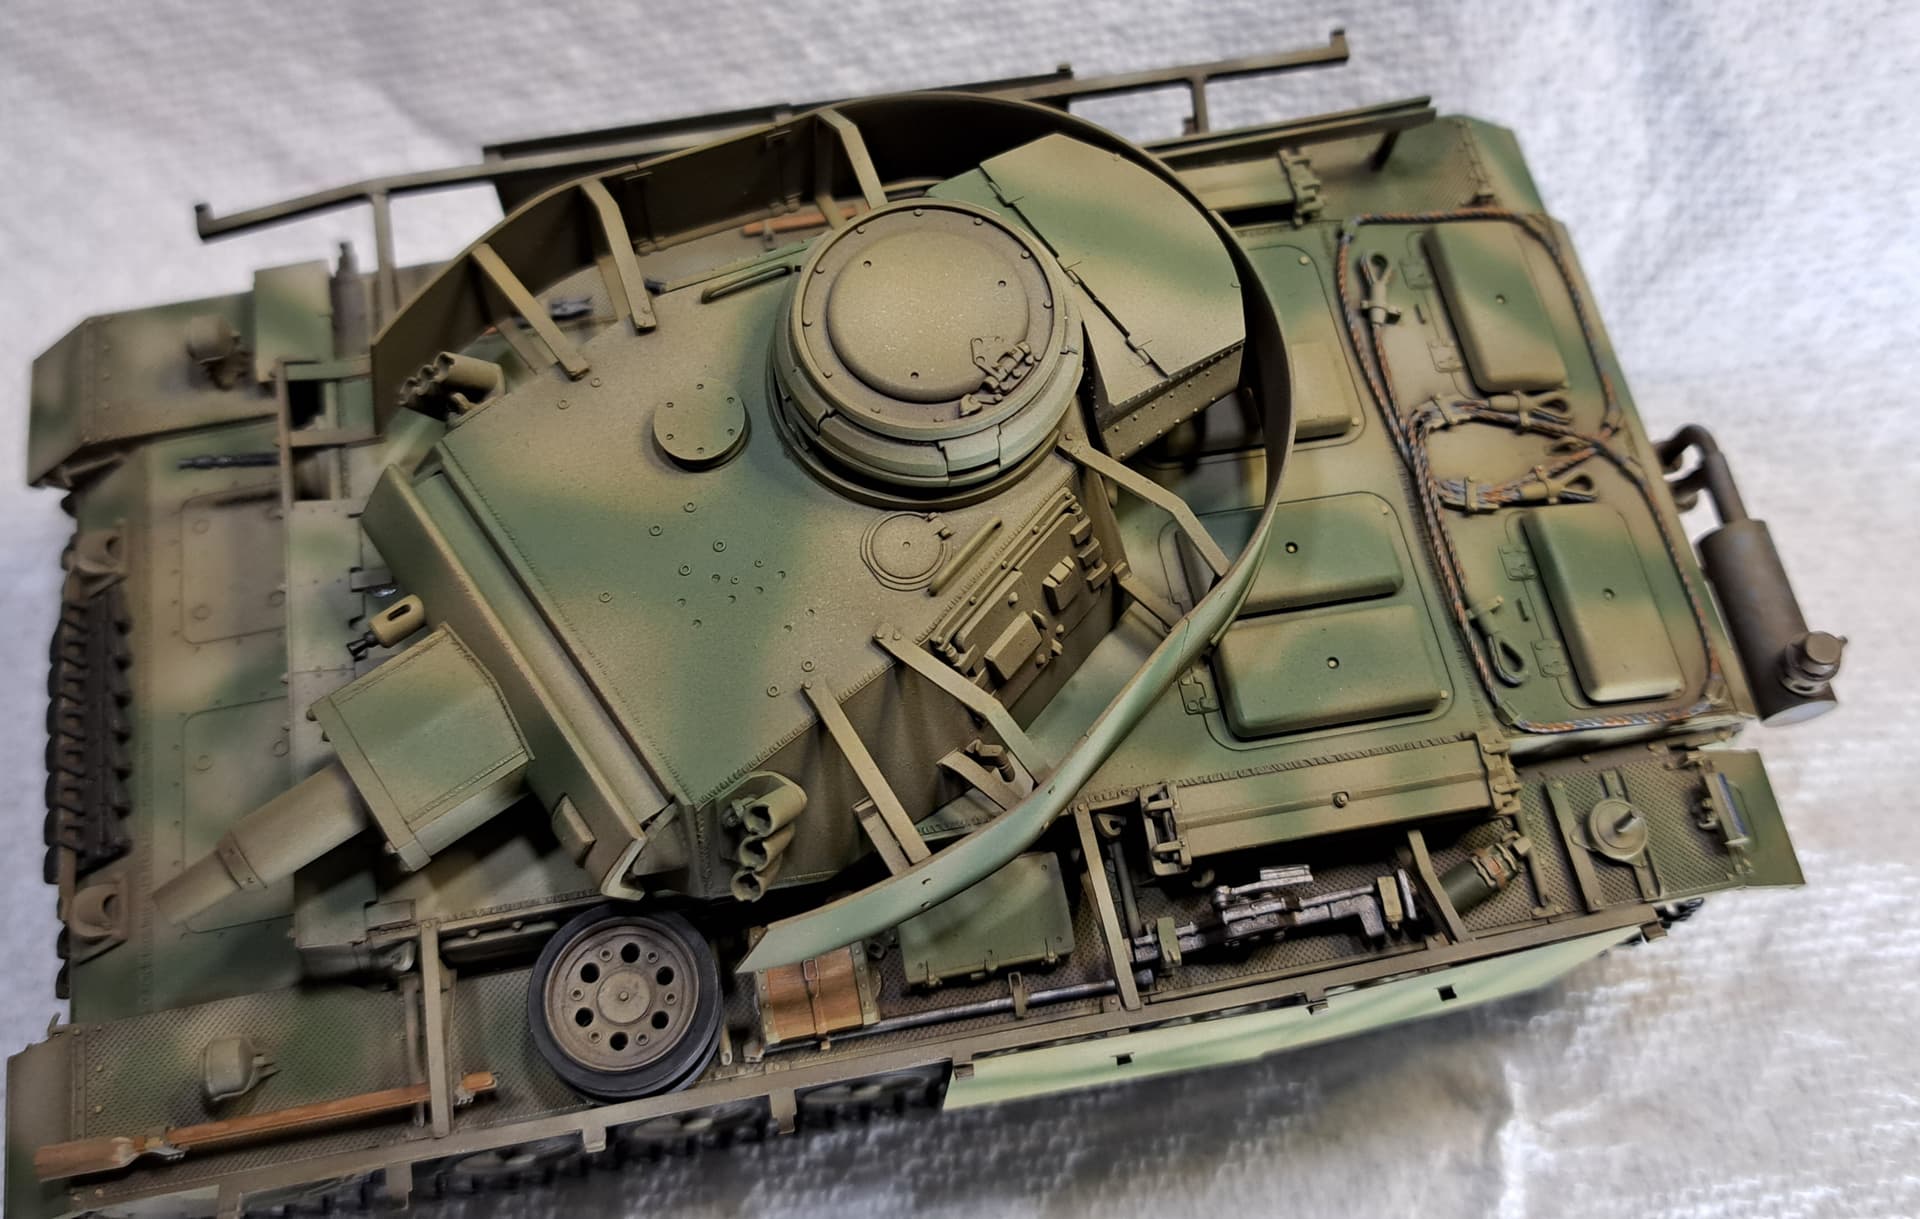
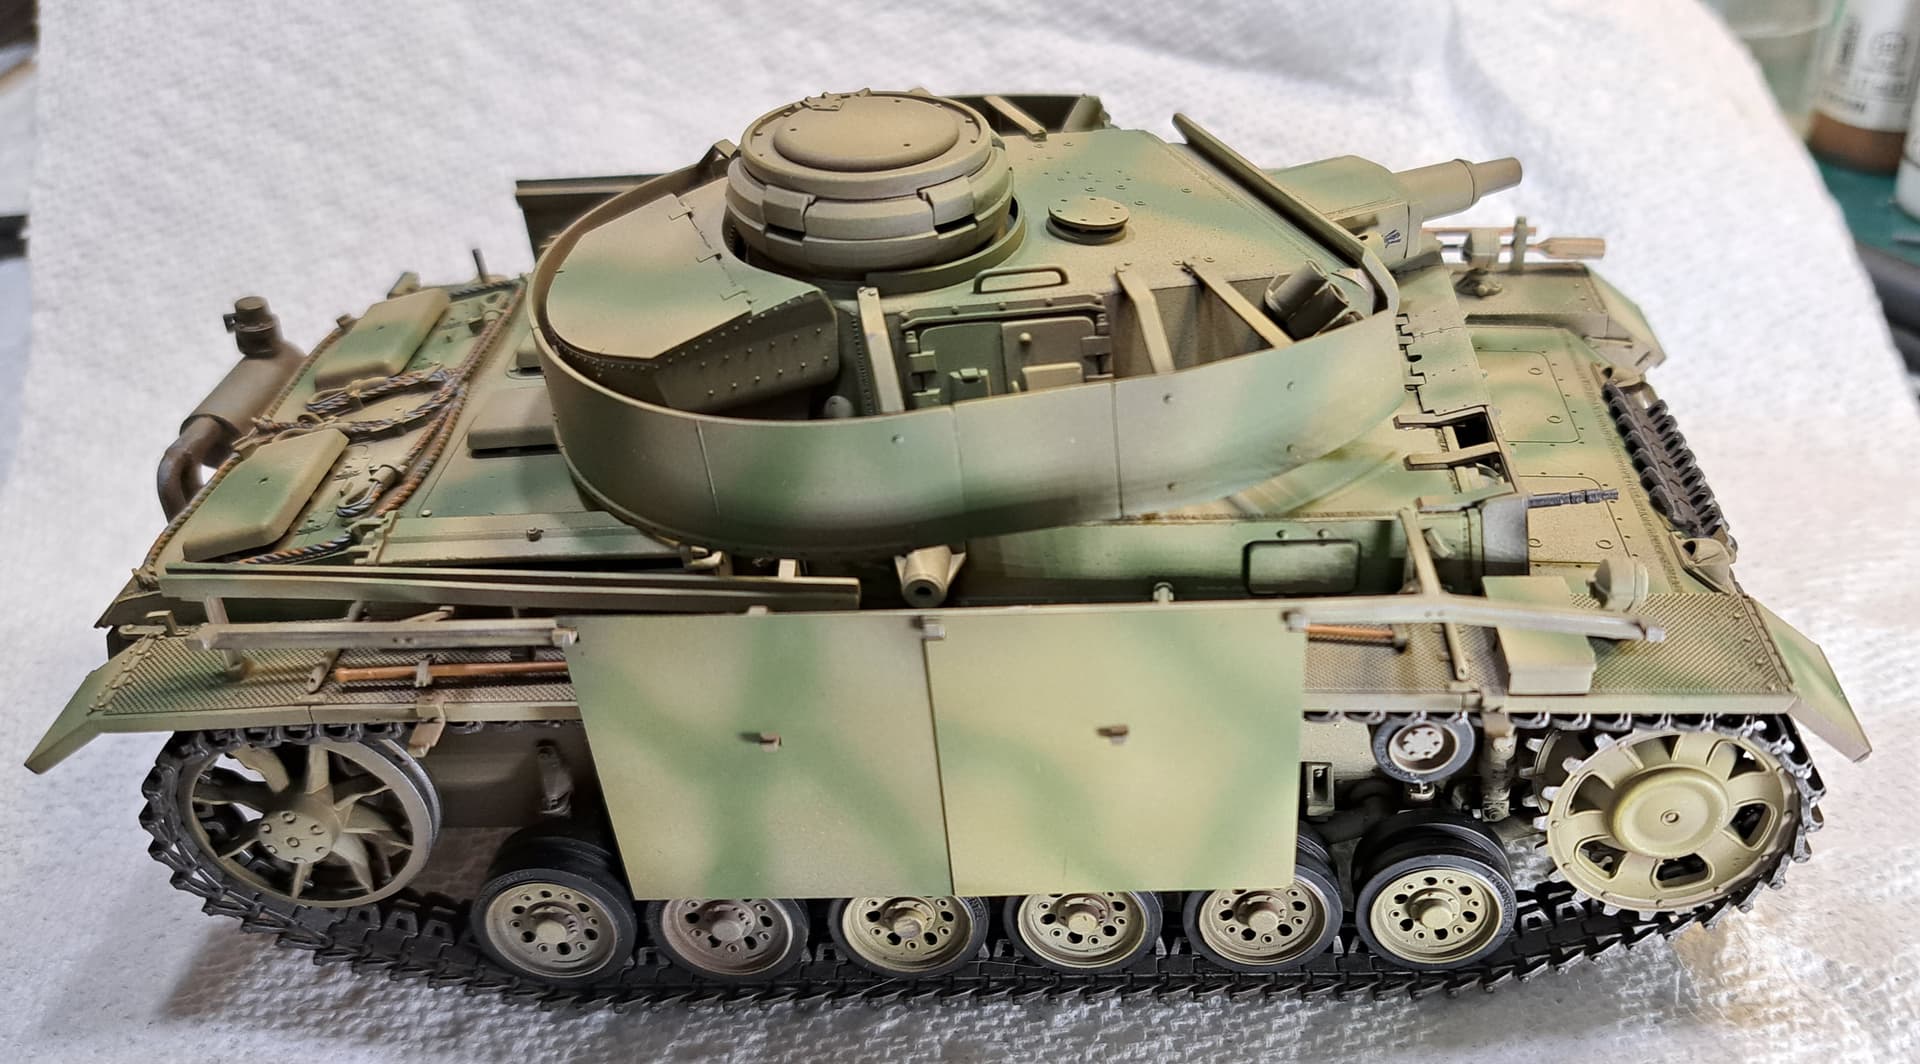
Hopefully gets gloss coated later tonight so the weathering and finishing can start.
Paint & subassemblies wise, the Takom kit has been a pleasure to work with unlike the build process. The kit’s side skirt system is a joy to work with during painting.
8 Likes
Looks great
3 Likes
Thank you, Chepster.
Late night comedy of errors…

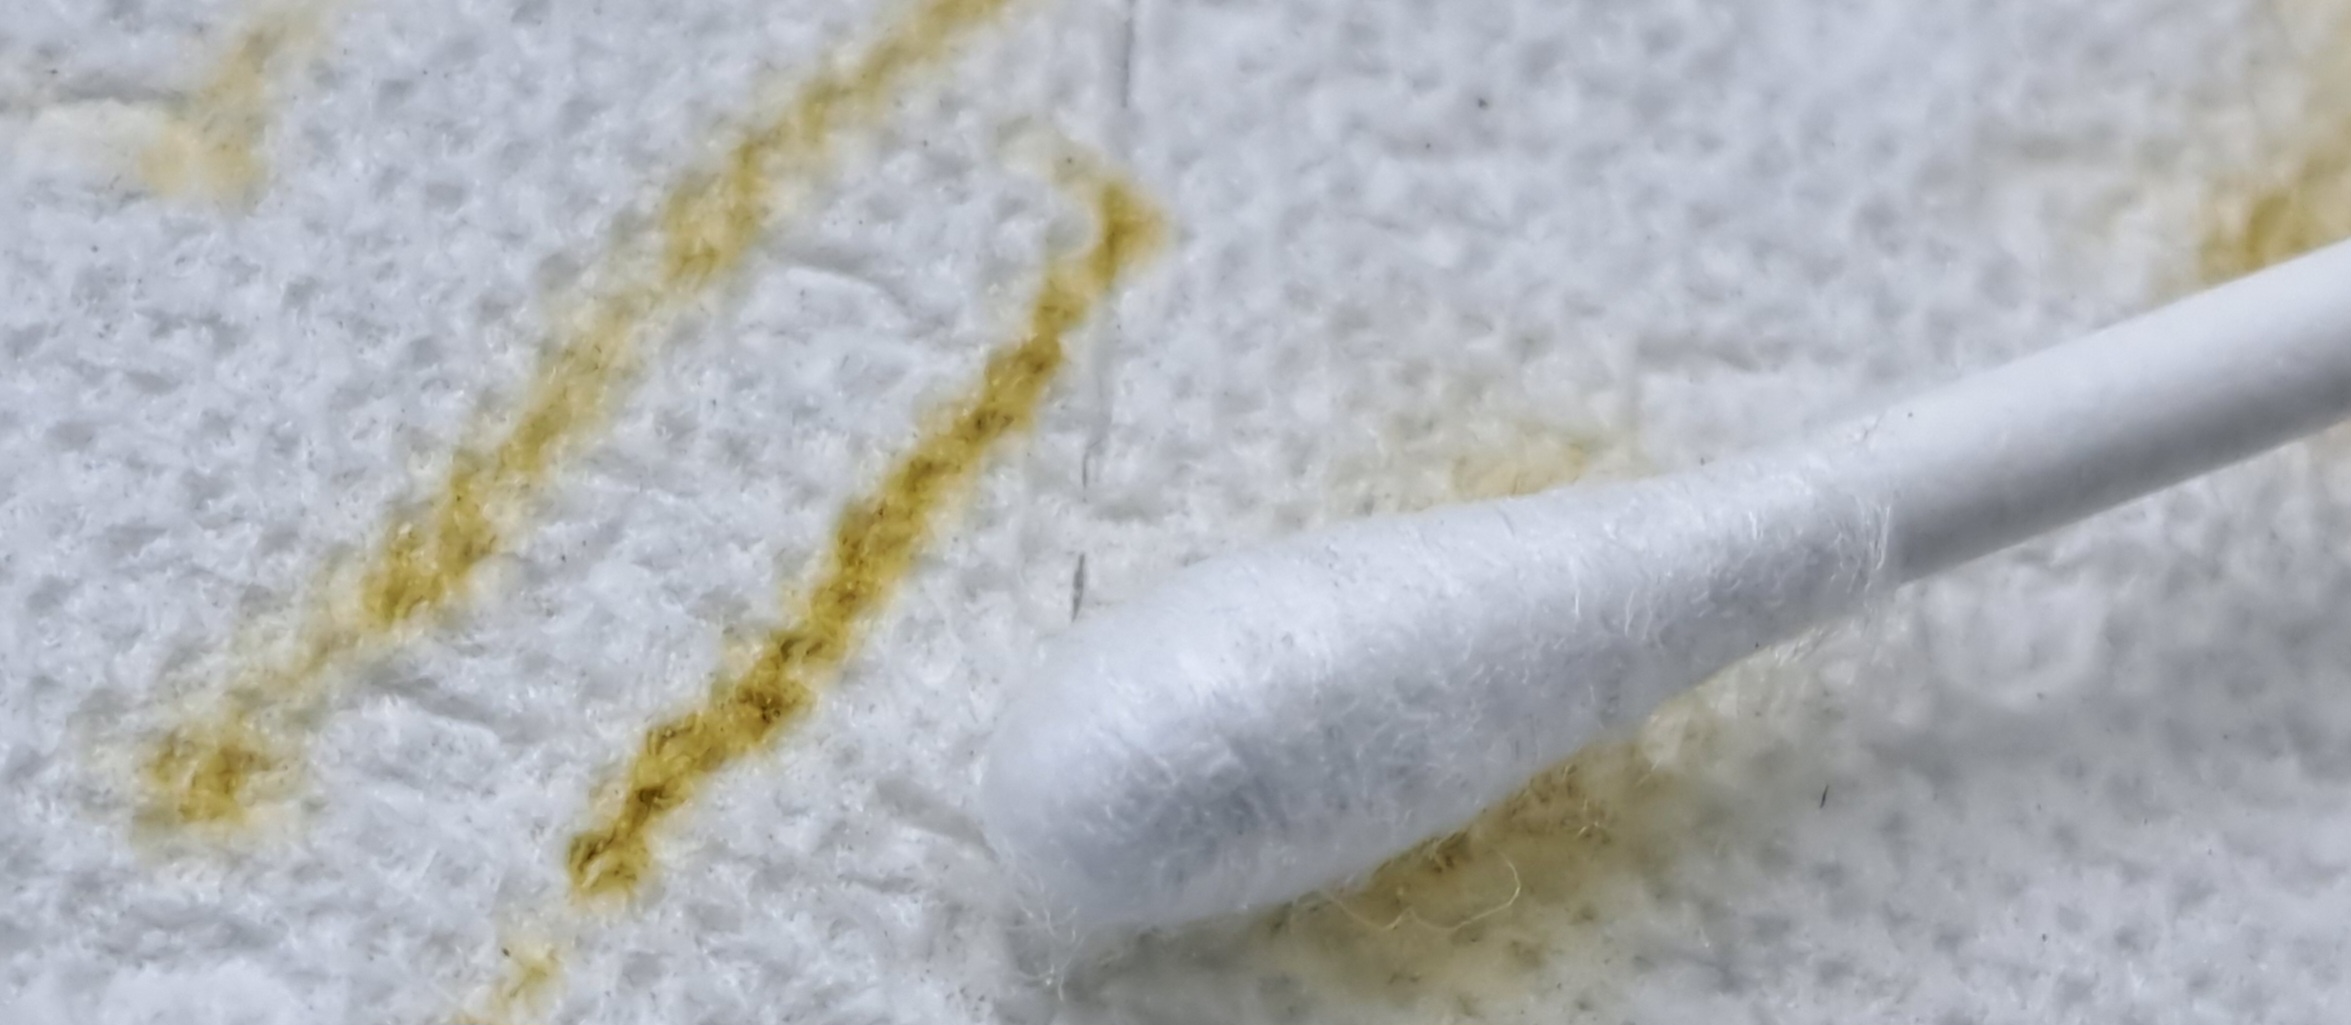
Decided to shoot the gloss coat late last night before calling it a night. Apparently, I used the wrong thinner with my Floquil Crystal Cote as Spider-Man style webs engulfed and frosted the model much to my horror. Tossed a bottle of unmarked thinner that was probably Goof-Off Paint & Tar Remover or Xylol or pure MEK in the trash etc.
It’s the sort of mistake, I’ll own up to doing but am not in the mood to take pictures of and post. When starting these build threads, I promised myself the (my) goof ups would be included because that’s just as important to acknowledge as finding a new fiddle bit to add to a kit etc. Wouldn’t really be fair to eviscerate a bumbling kit manufacturer like Dragon without acknowledging my own fumbling. Striving towards Candor has a price.
Decided to let the mess cure and inspect damage this morning. Whatever the Crystal Cote was thinned with it was HOT HOT HOT, as 90% of the frosting brushed away with a soft paint brush. Leaning towards it was fresh MEK in the unmarked bottle for cleaning airbrush parts but I don’t know.
Decided to roll the dice and very lightly brush down the “dust” with Tamiya X20A thinner. To my delight the dust disappeared and stayed disappeared.
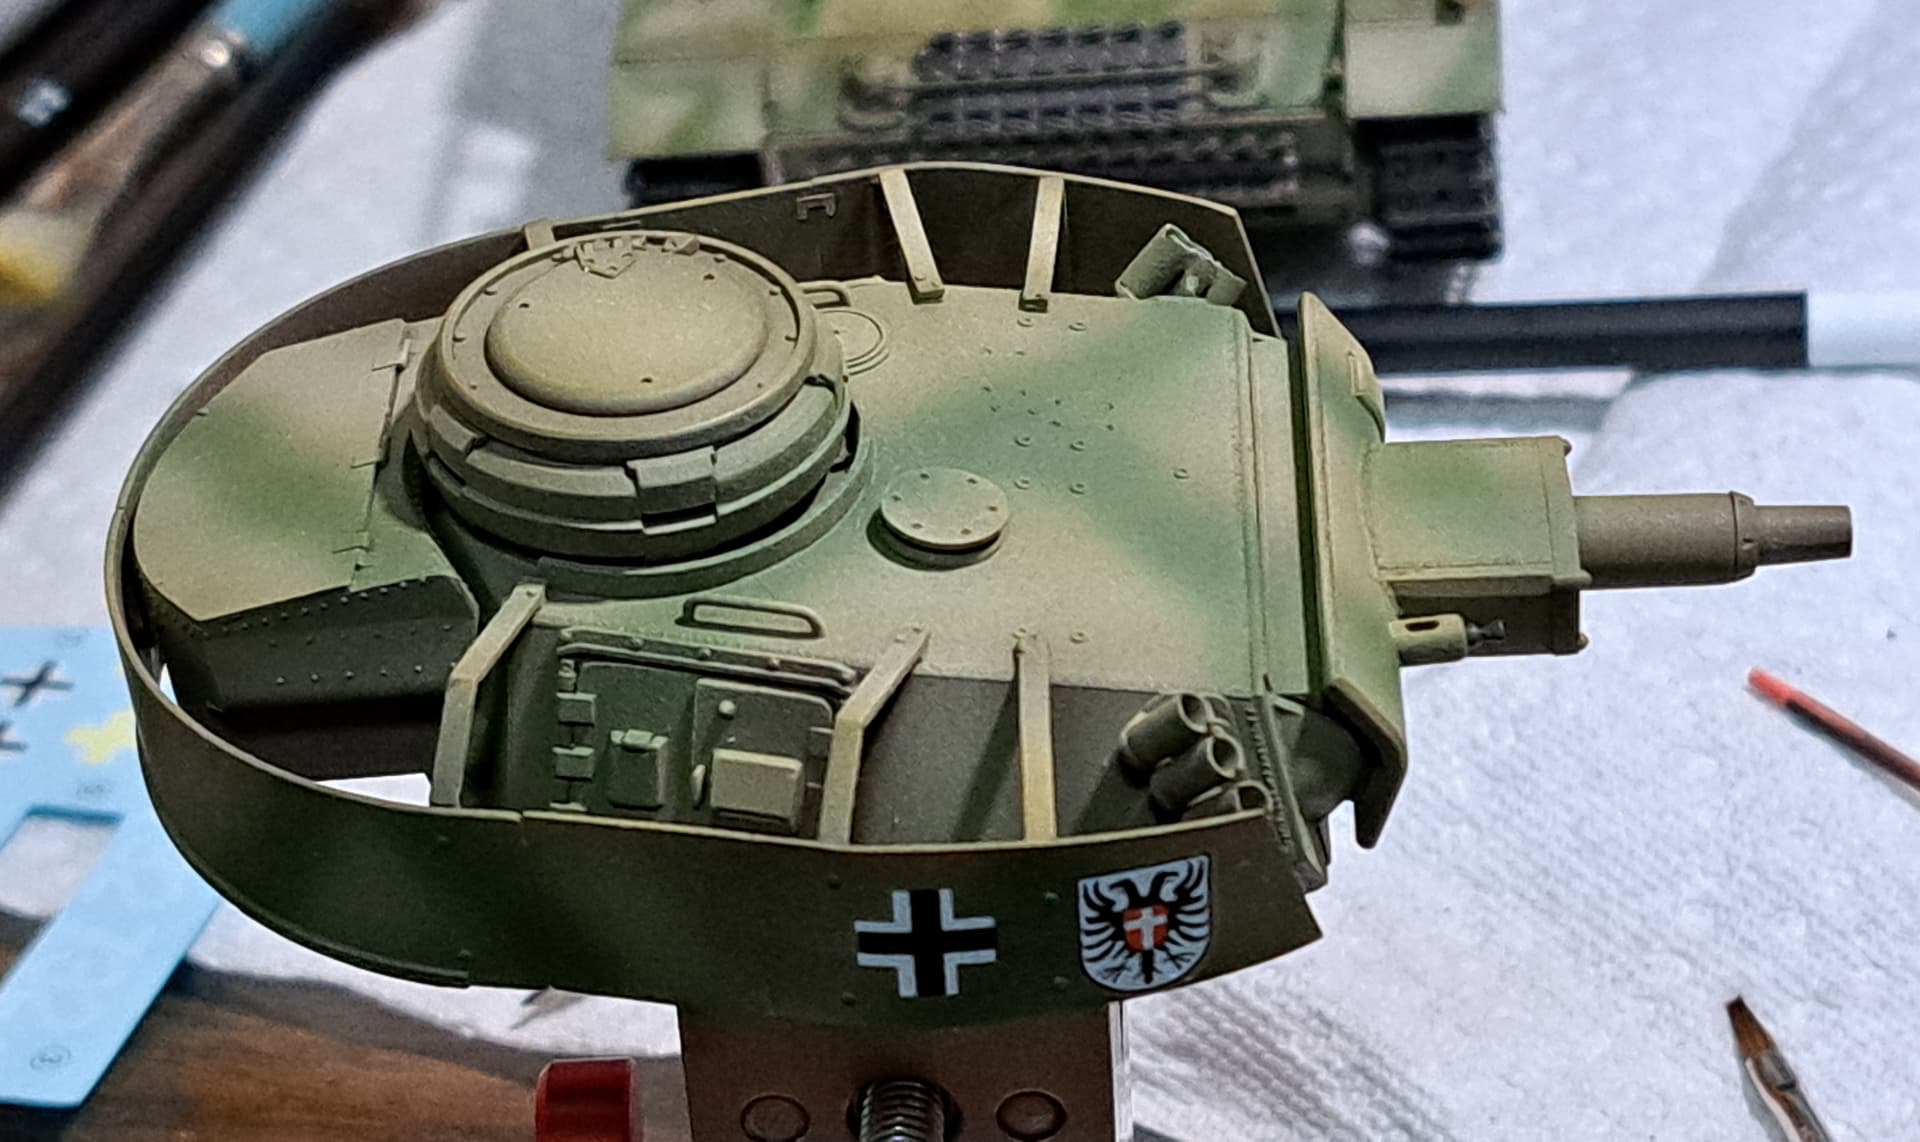
Repaired the gloss, let dry and finally applied decals. So my Takom Turkey survives for the next step, a second layer of gloss coat.
Too much bench time and stress over this mistake and fixing it. Taking a few days or a week away from the bench. Knees are bothering me from time at the spray booth.
8 Likes
Nice recovery Wade. I hear you, sometimes you just got to step back from the bench for a while. Take a break. Go outside. I hear it’s nice this time of year.
2 Likes
Thank you, Matt. Definitely a good change of pace. Just being outside & grilling burgers was refreshing. Even Kali & Jesse called a temporary ceasefire.
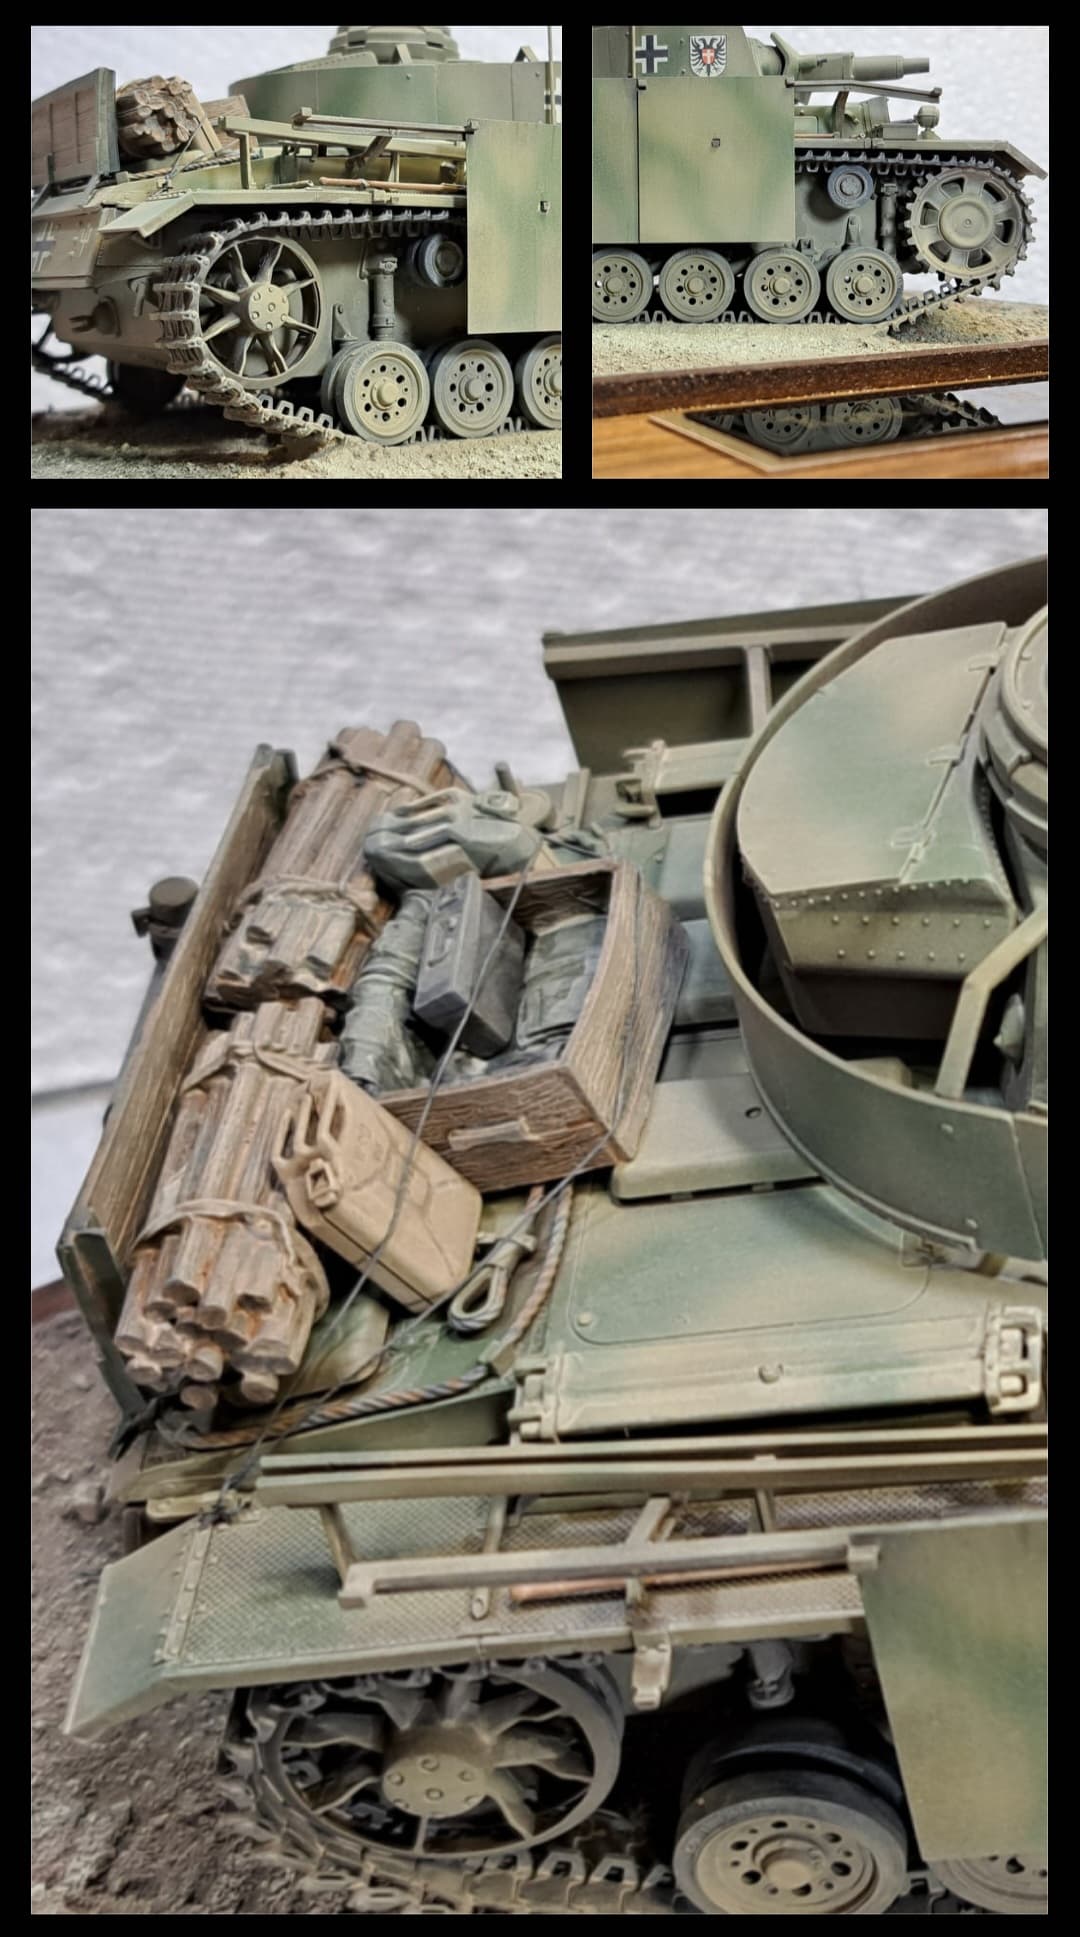
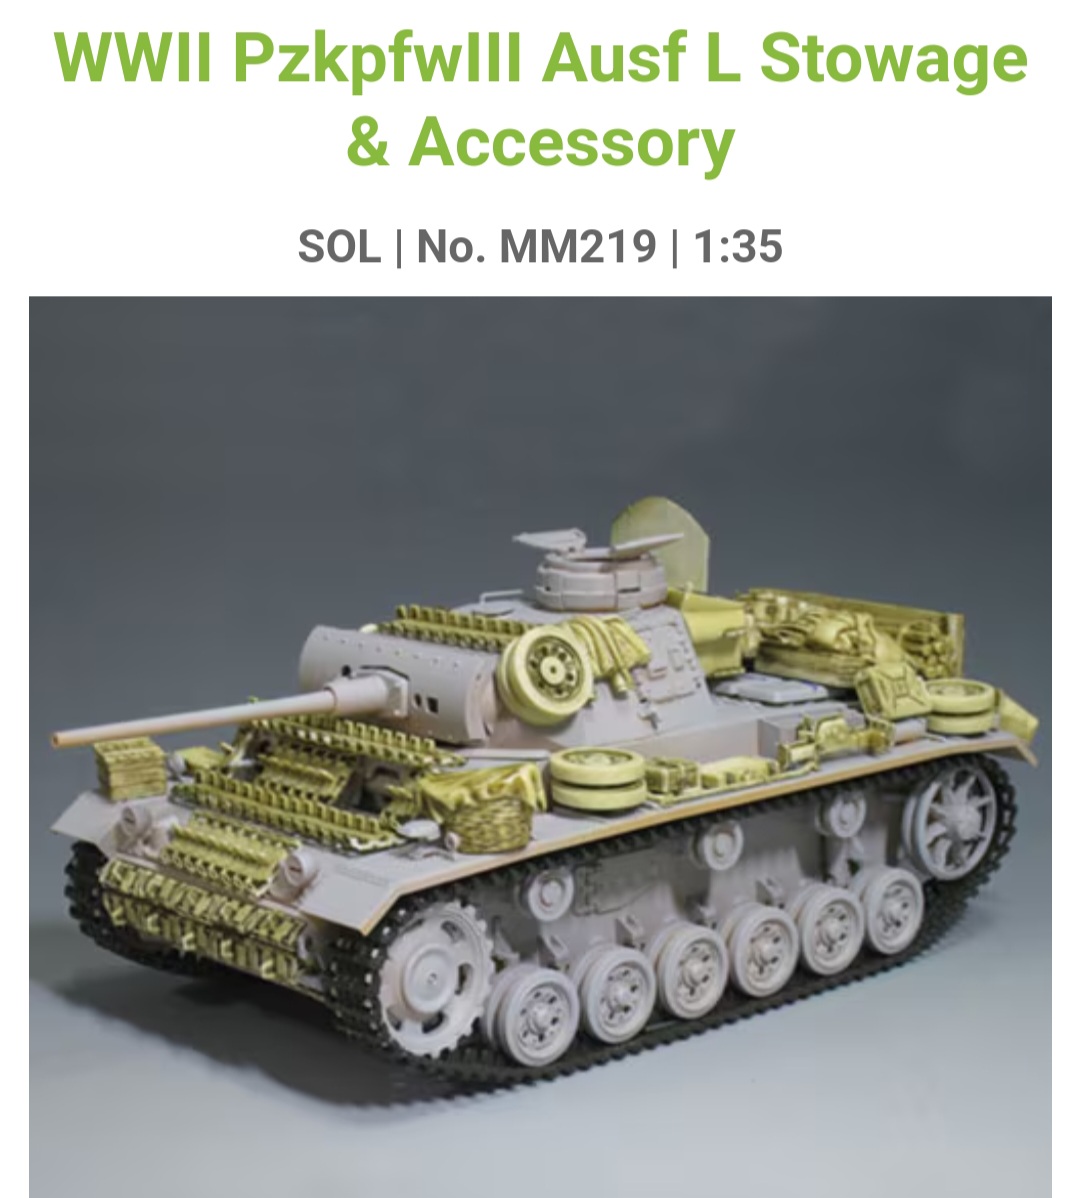
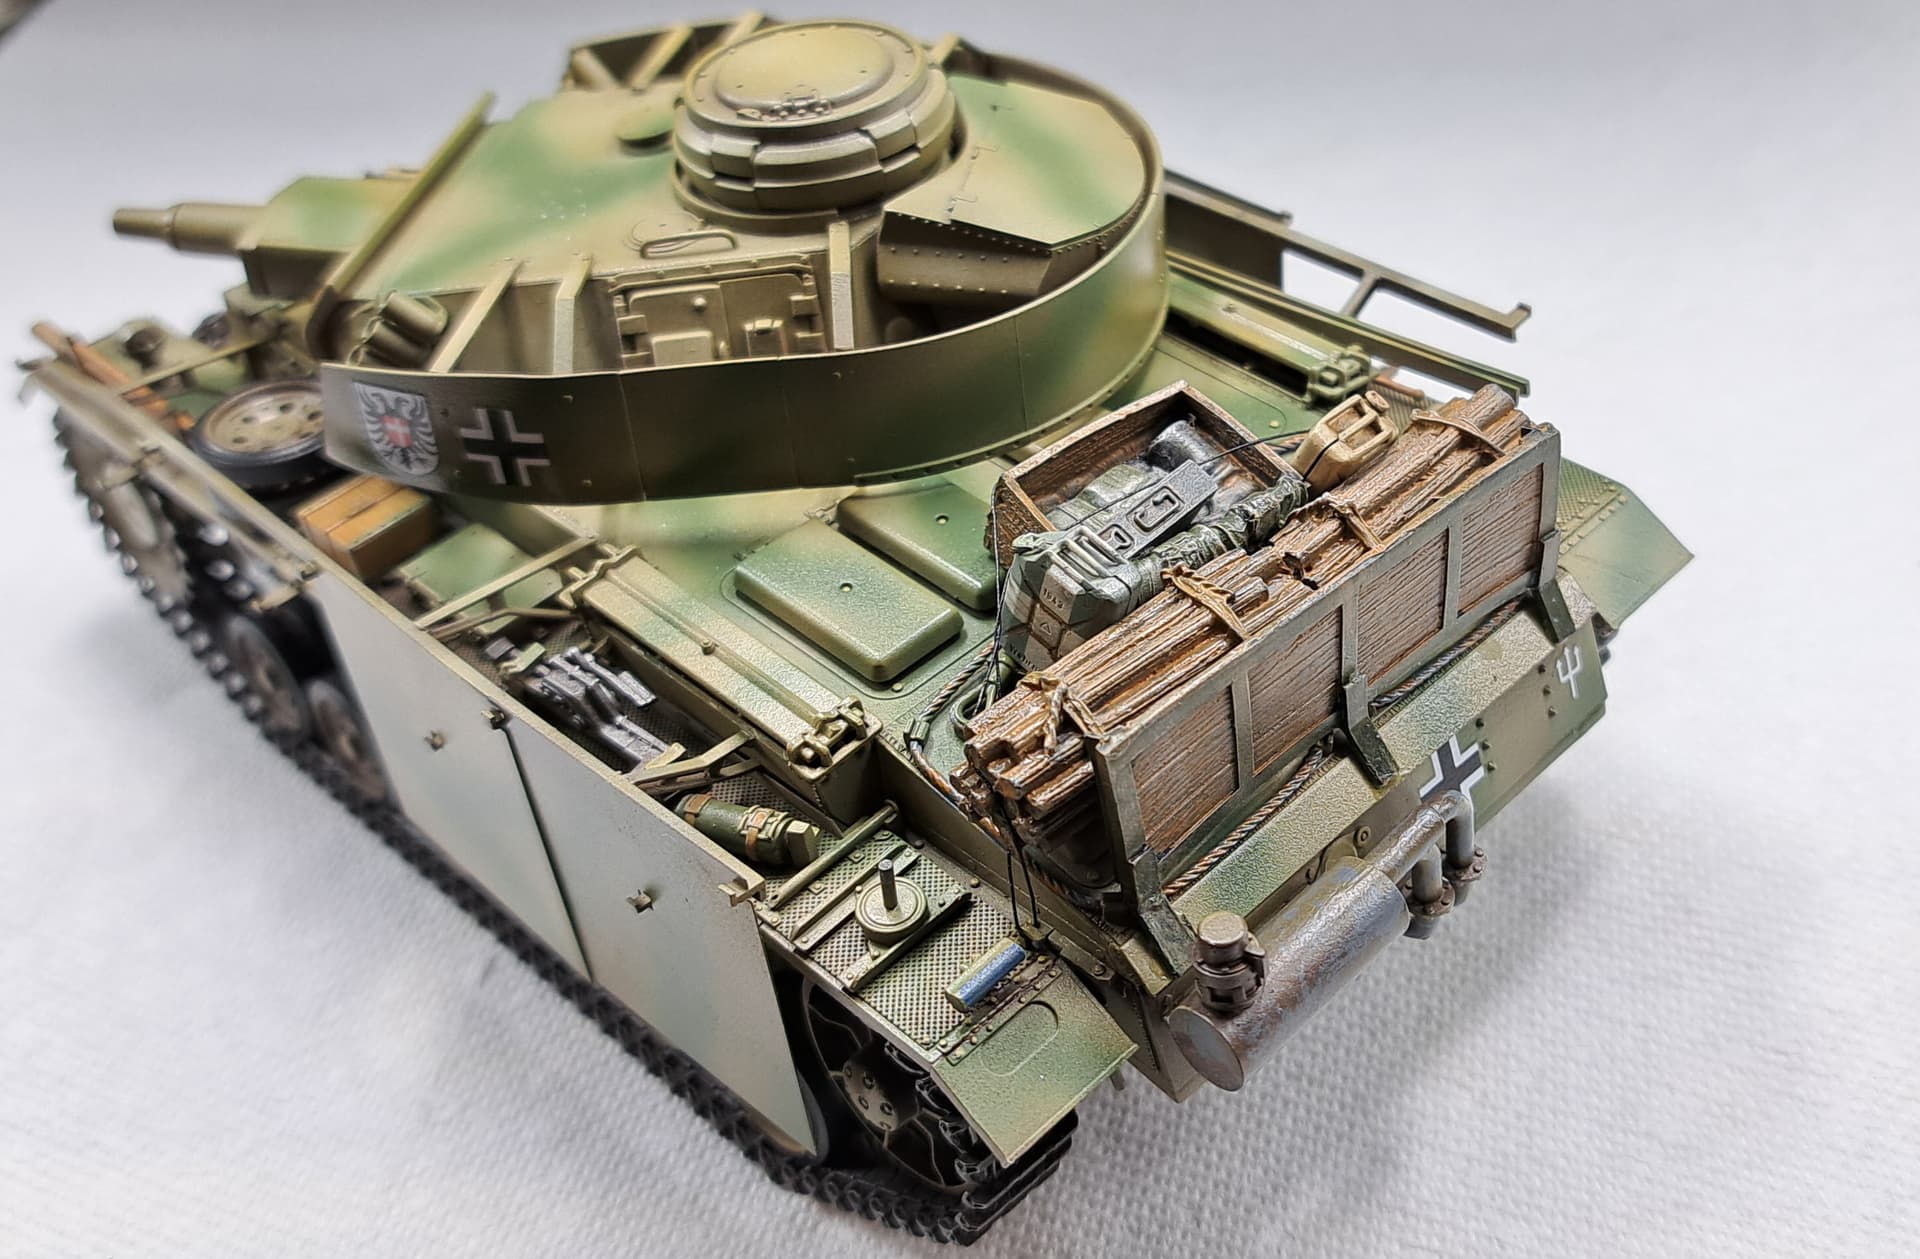
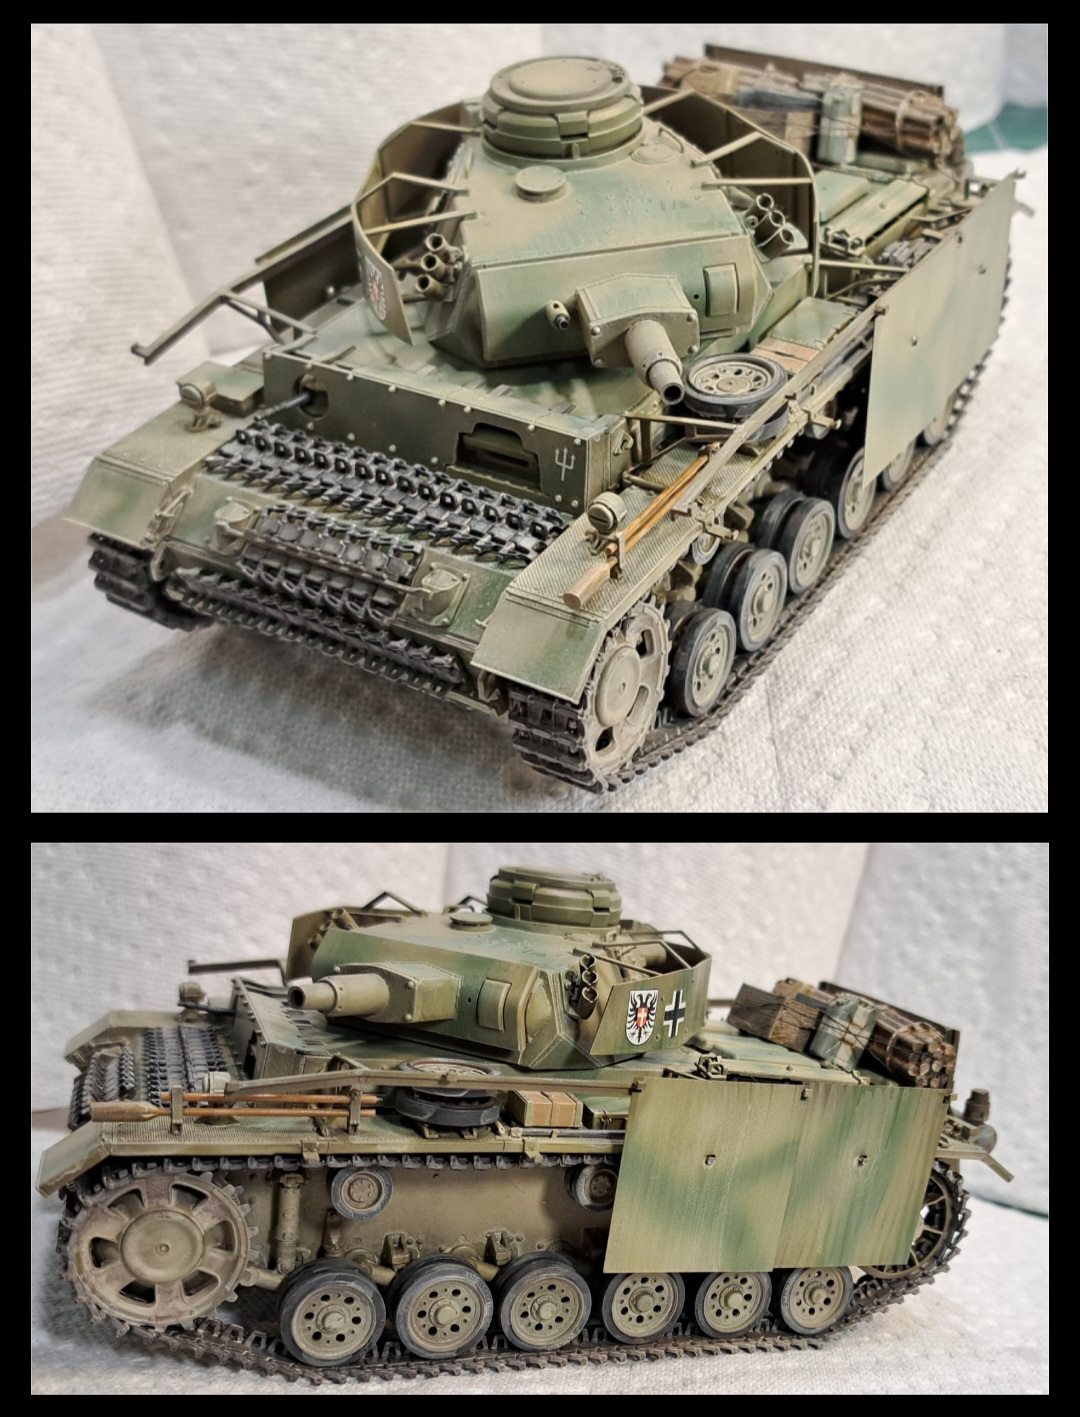
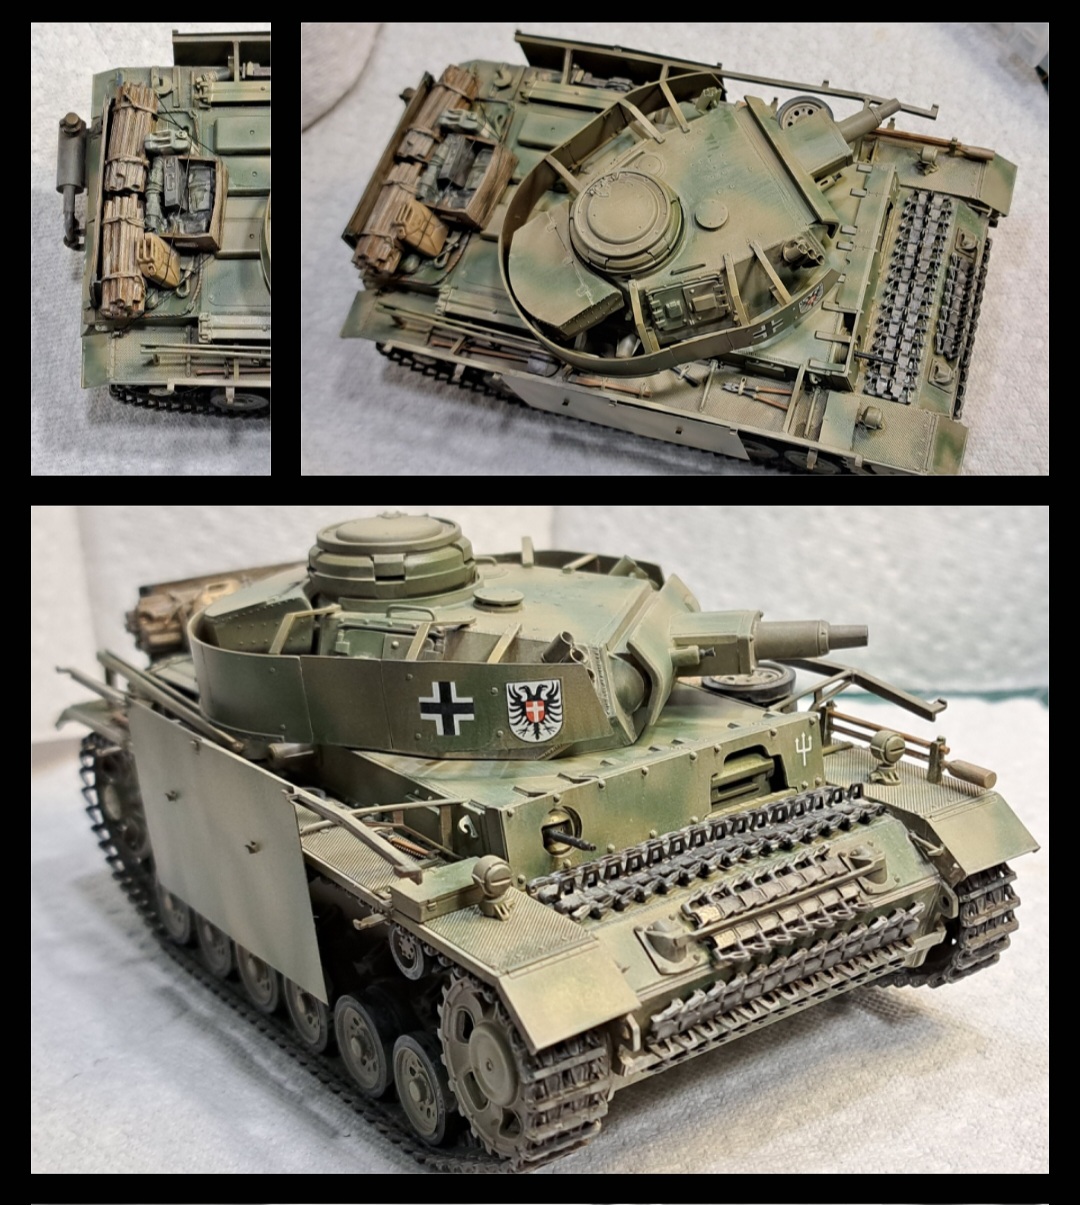
Decided to take the Takom Pz III in a slightly different direction with some external stowage. I’m not a fan of the “Trash Panda” look but felt some clutter would be OK. Besides I want to stretch the stowage kit for another two Stug III’s & one more Pz III.
SOL’s Tamiya Pz III ausf L kit was in the stash.
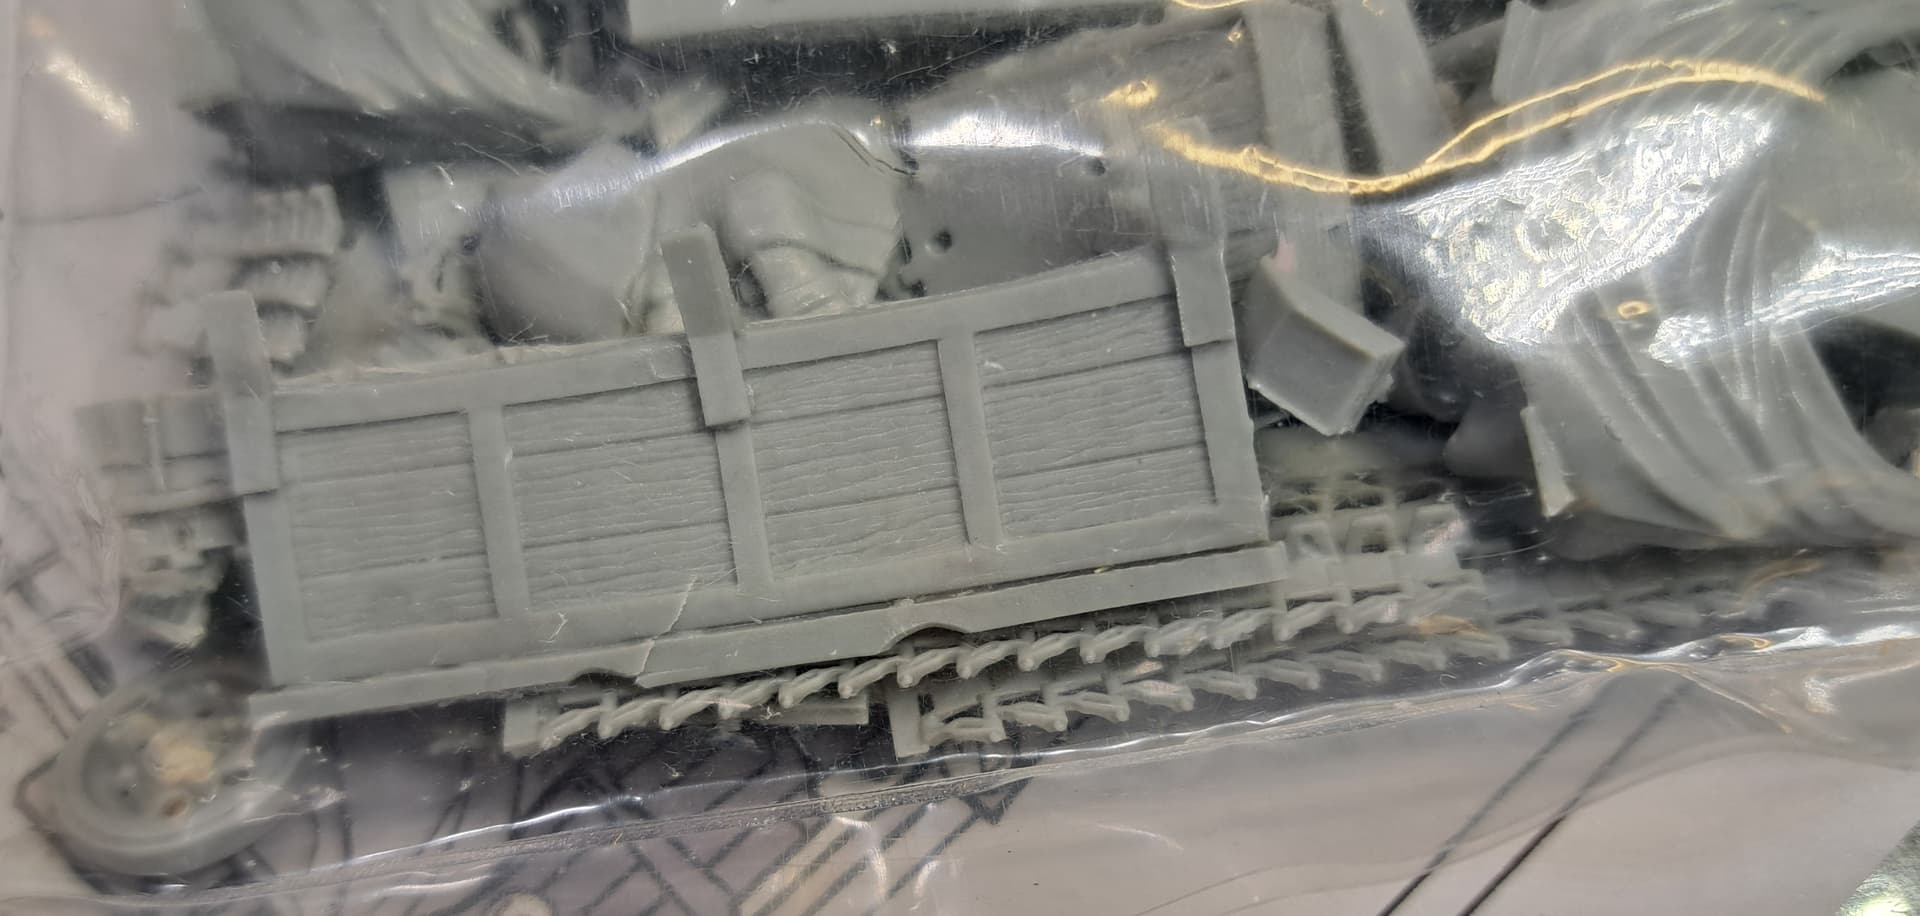
Resin mold quality is surprisingly good much better than the Black Dog garbage I’d purchased. Some warped parts but air bubble free. Worth the price.

Lots stuff, tools, wheels, tracks, jerry cans, two turret stowage boxes etc
Picked a few choice parts, plus two Italeri Jerry cans & a Tamiya ammo box that weren’t used in a prior Pz III build. Decided to use spare RFM track links over the resin molded tracks.
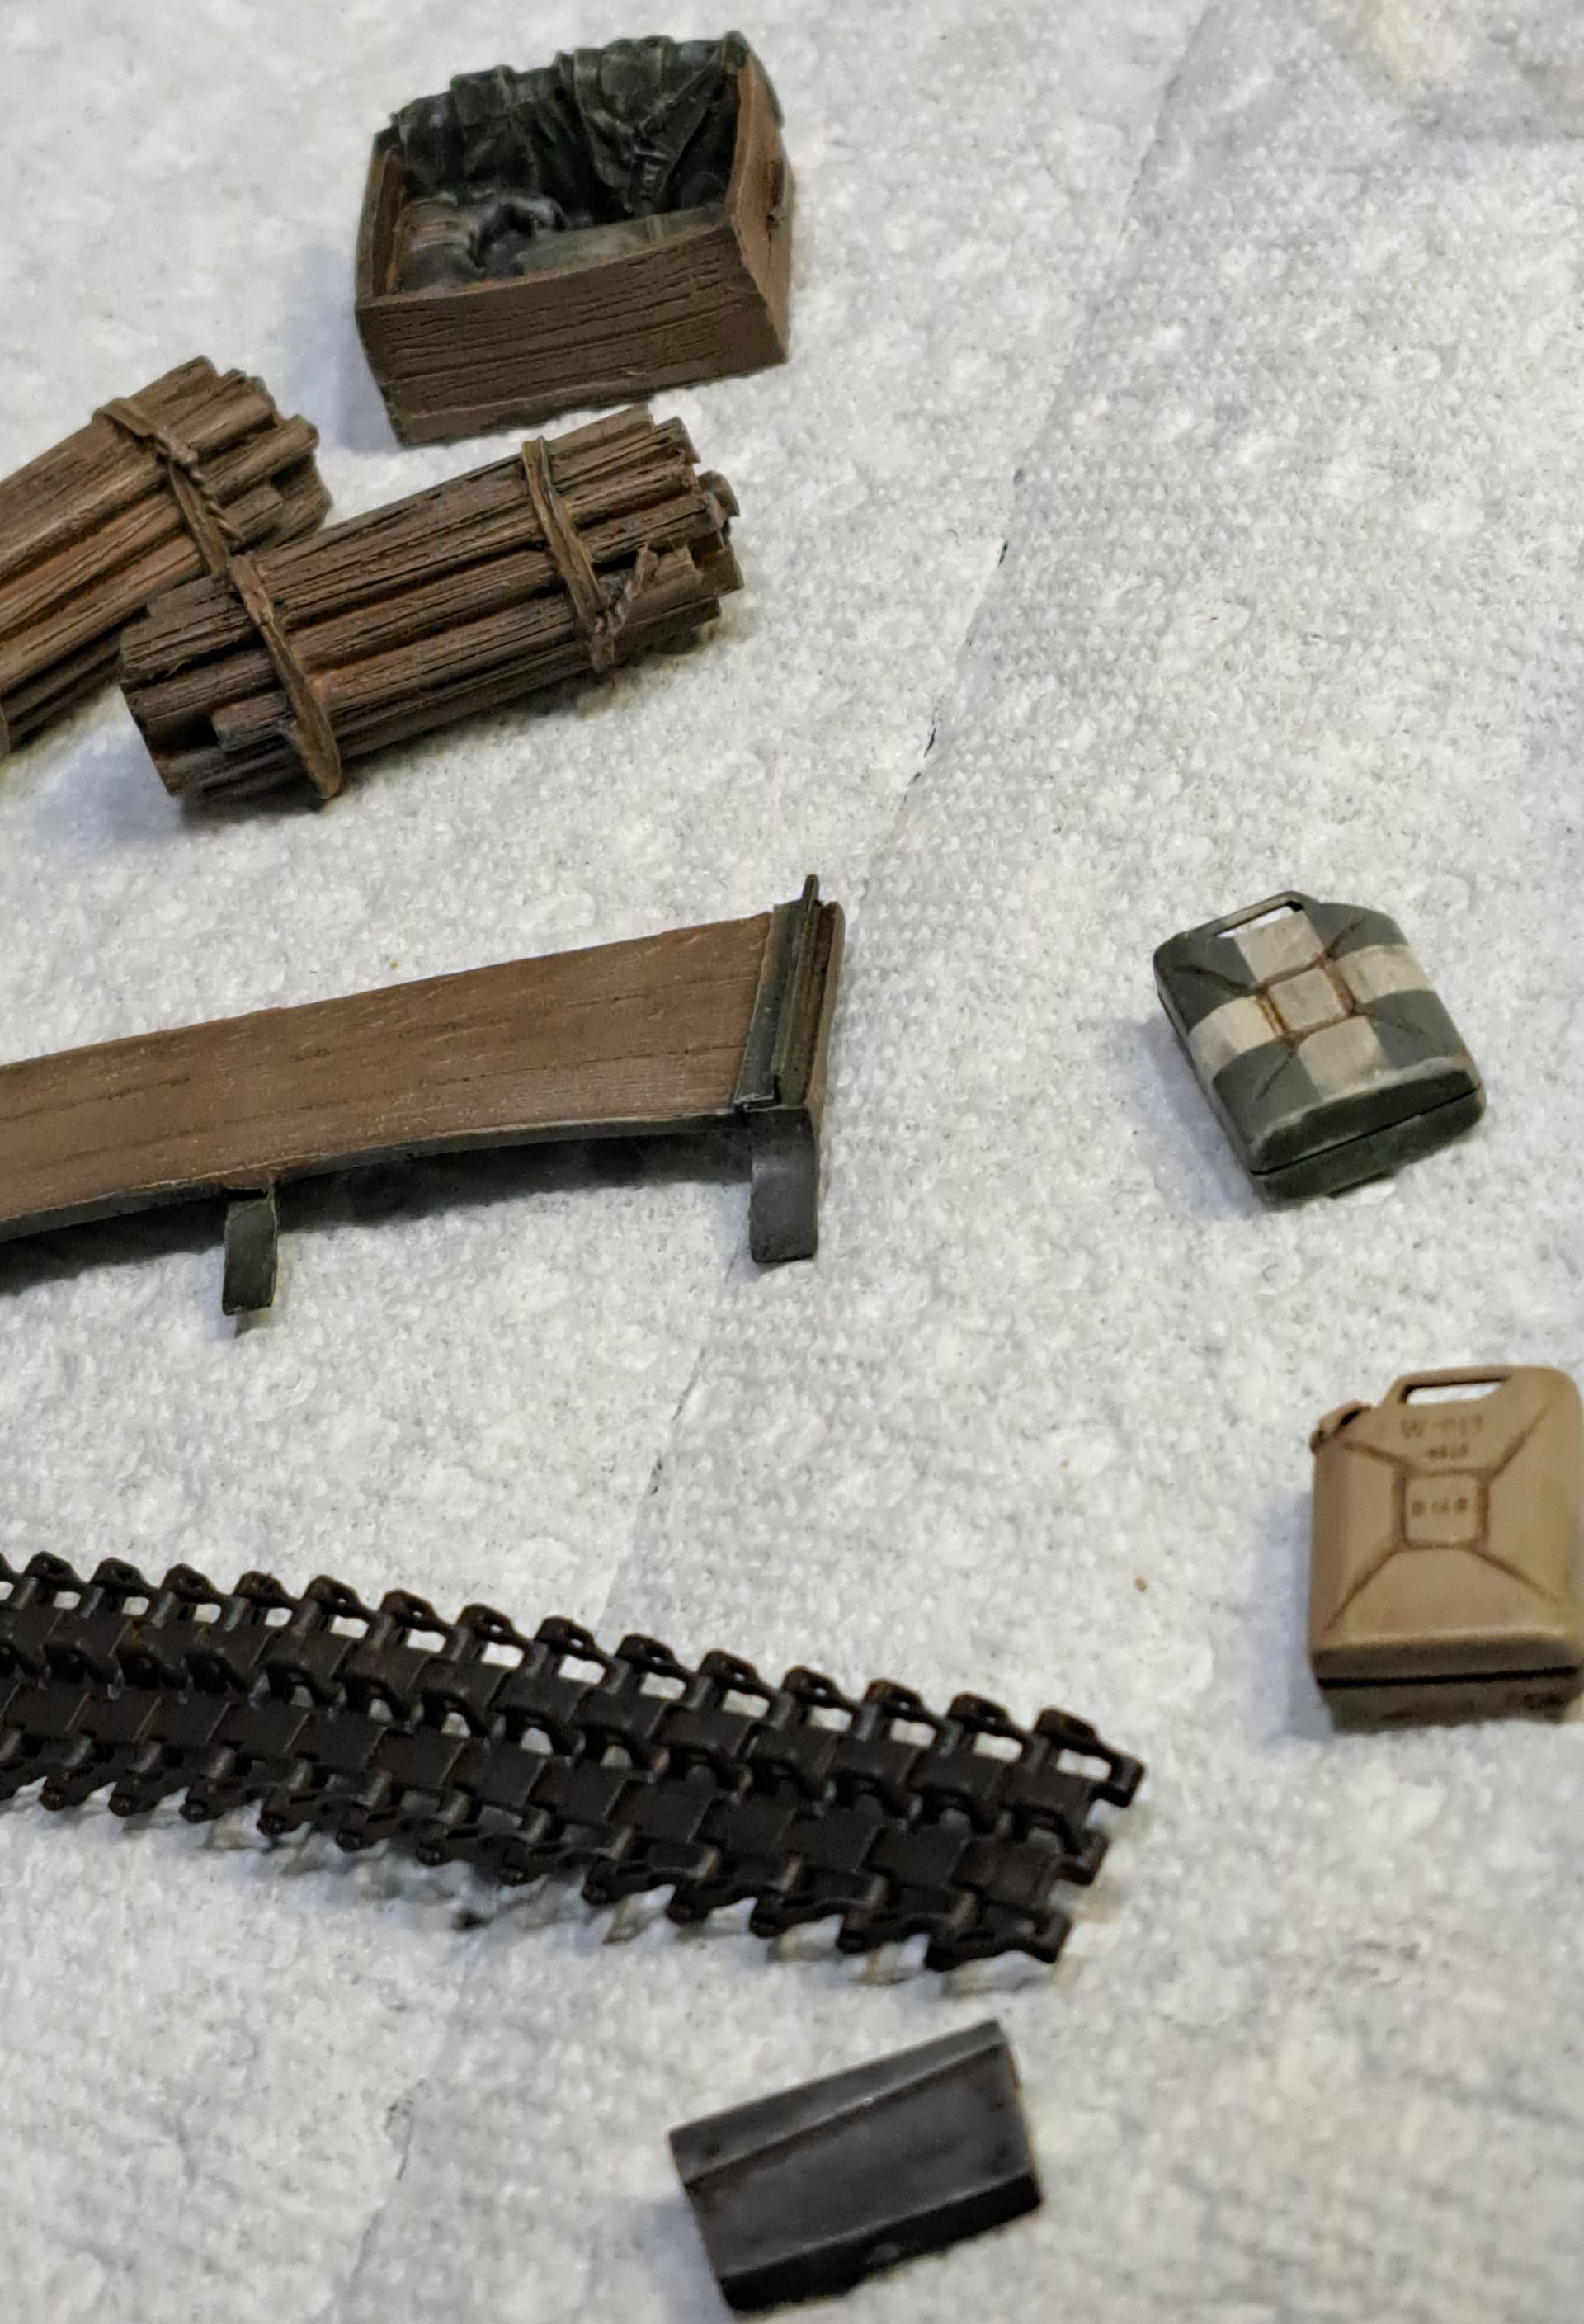
Brush painted black base coat, wash of color coat plus drybrushing a highlights.
Attached to Pz III
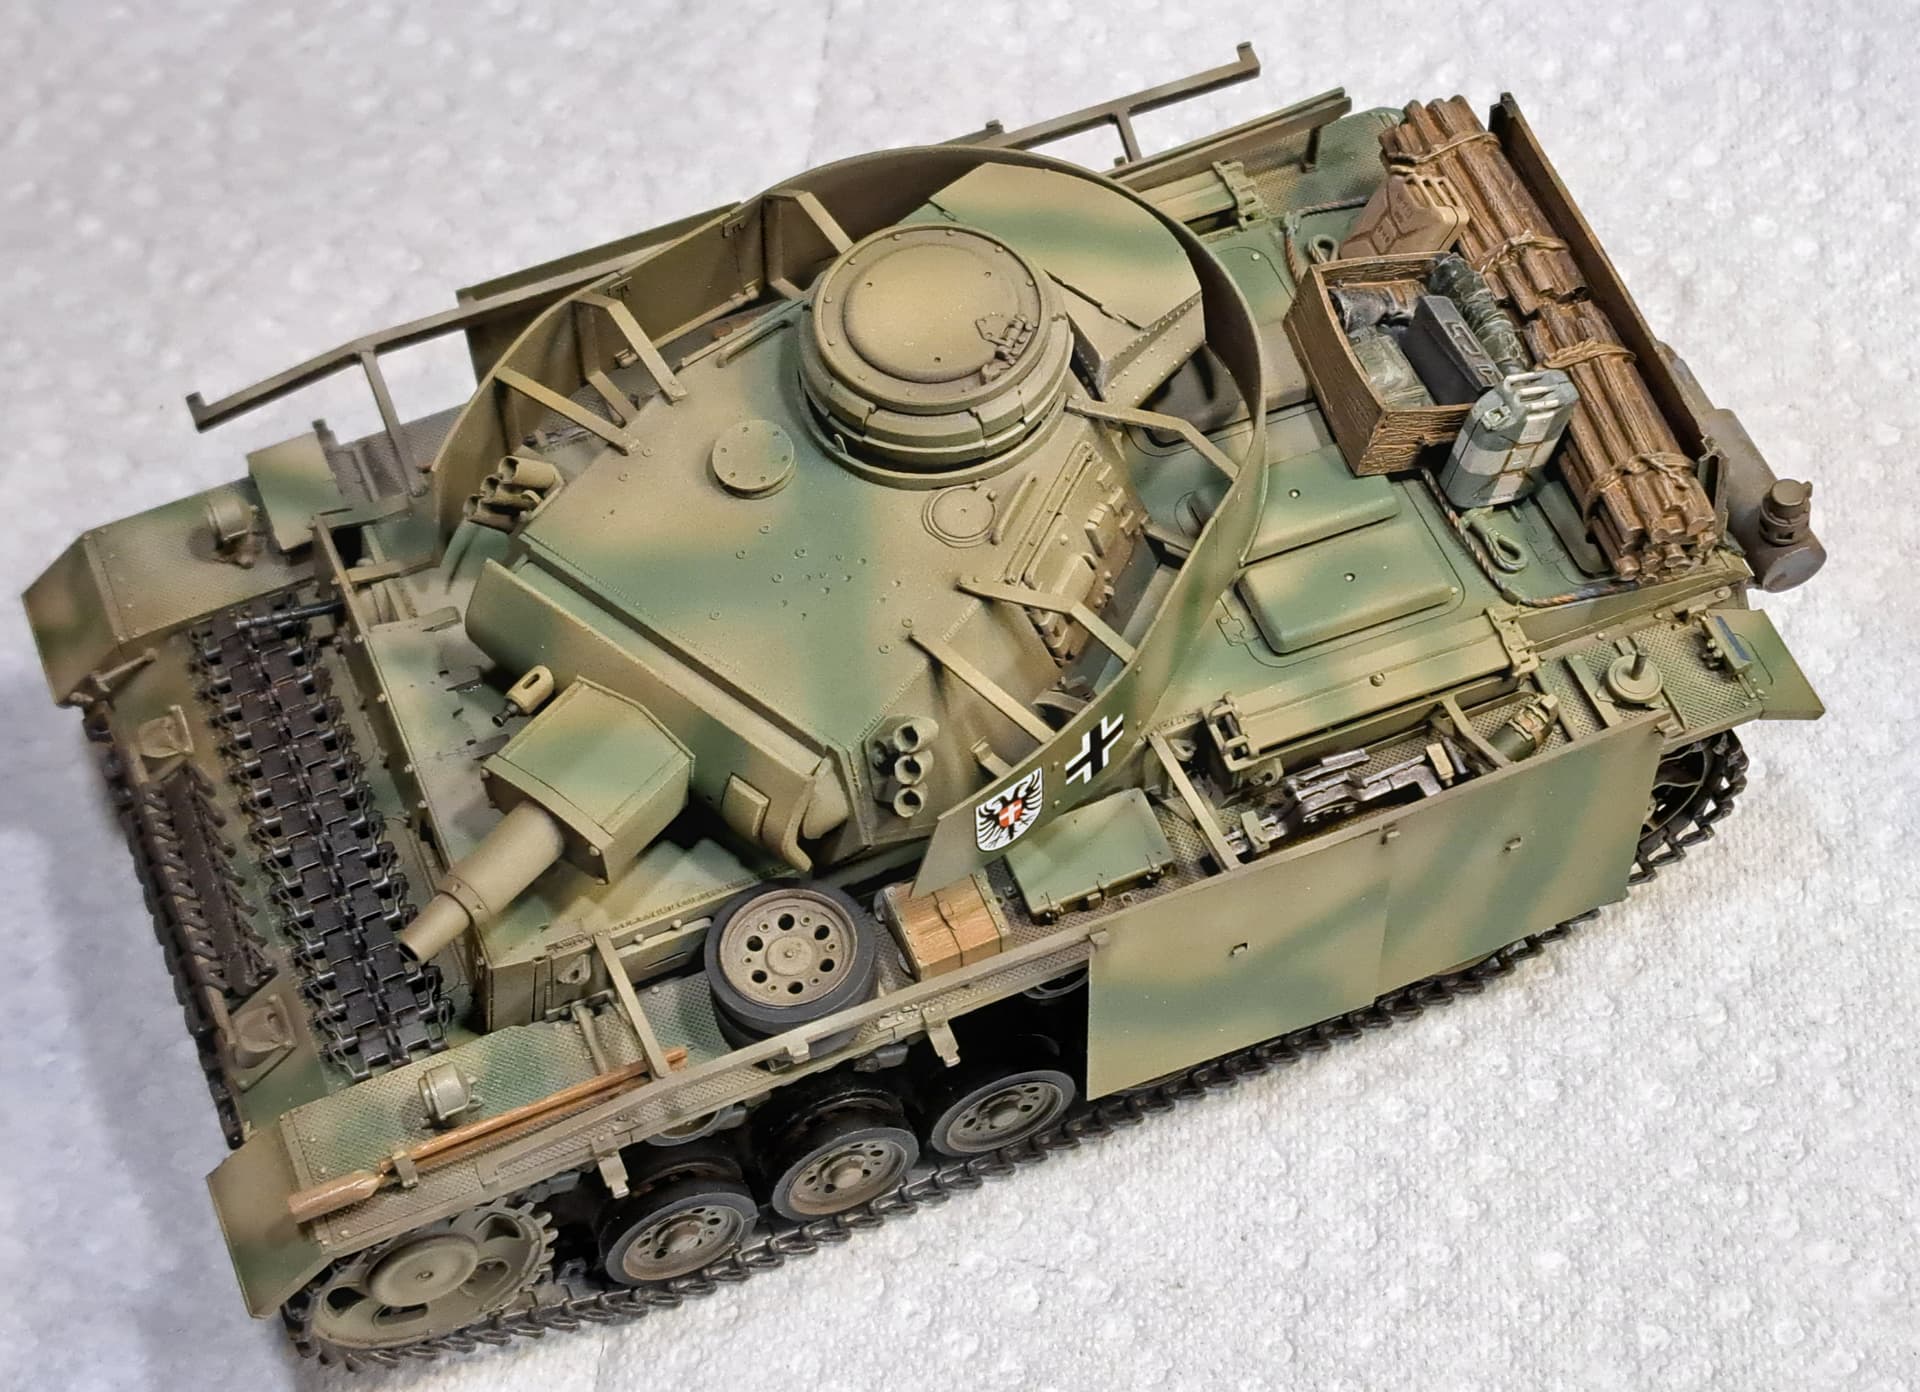
Needs tie downs etc.
Edit
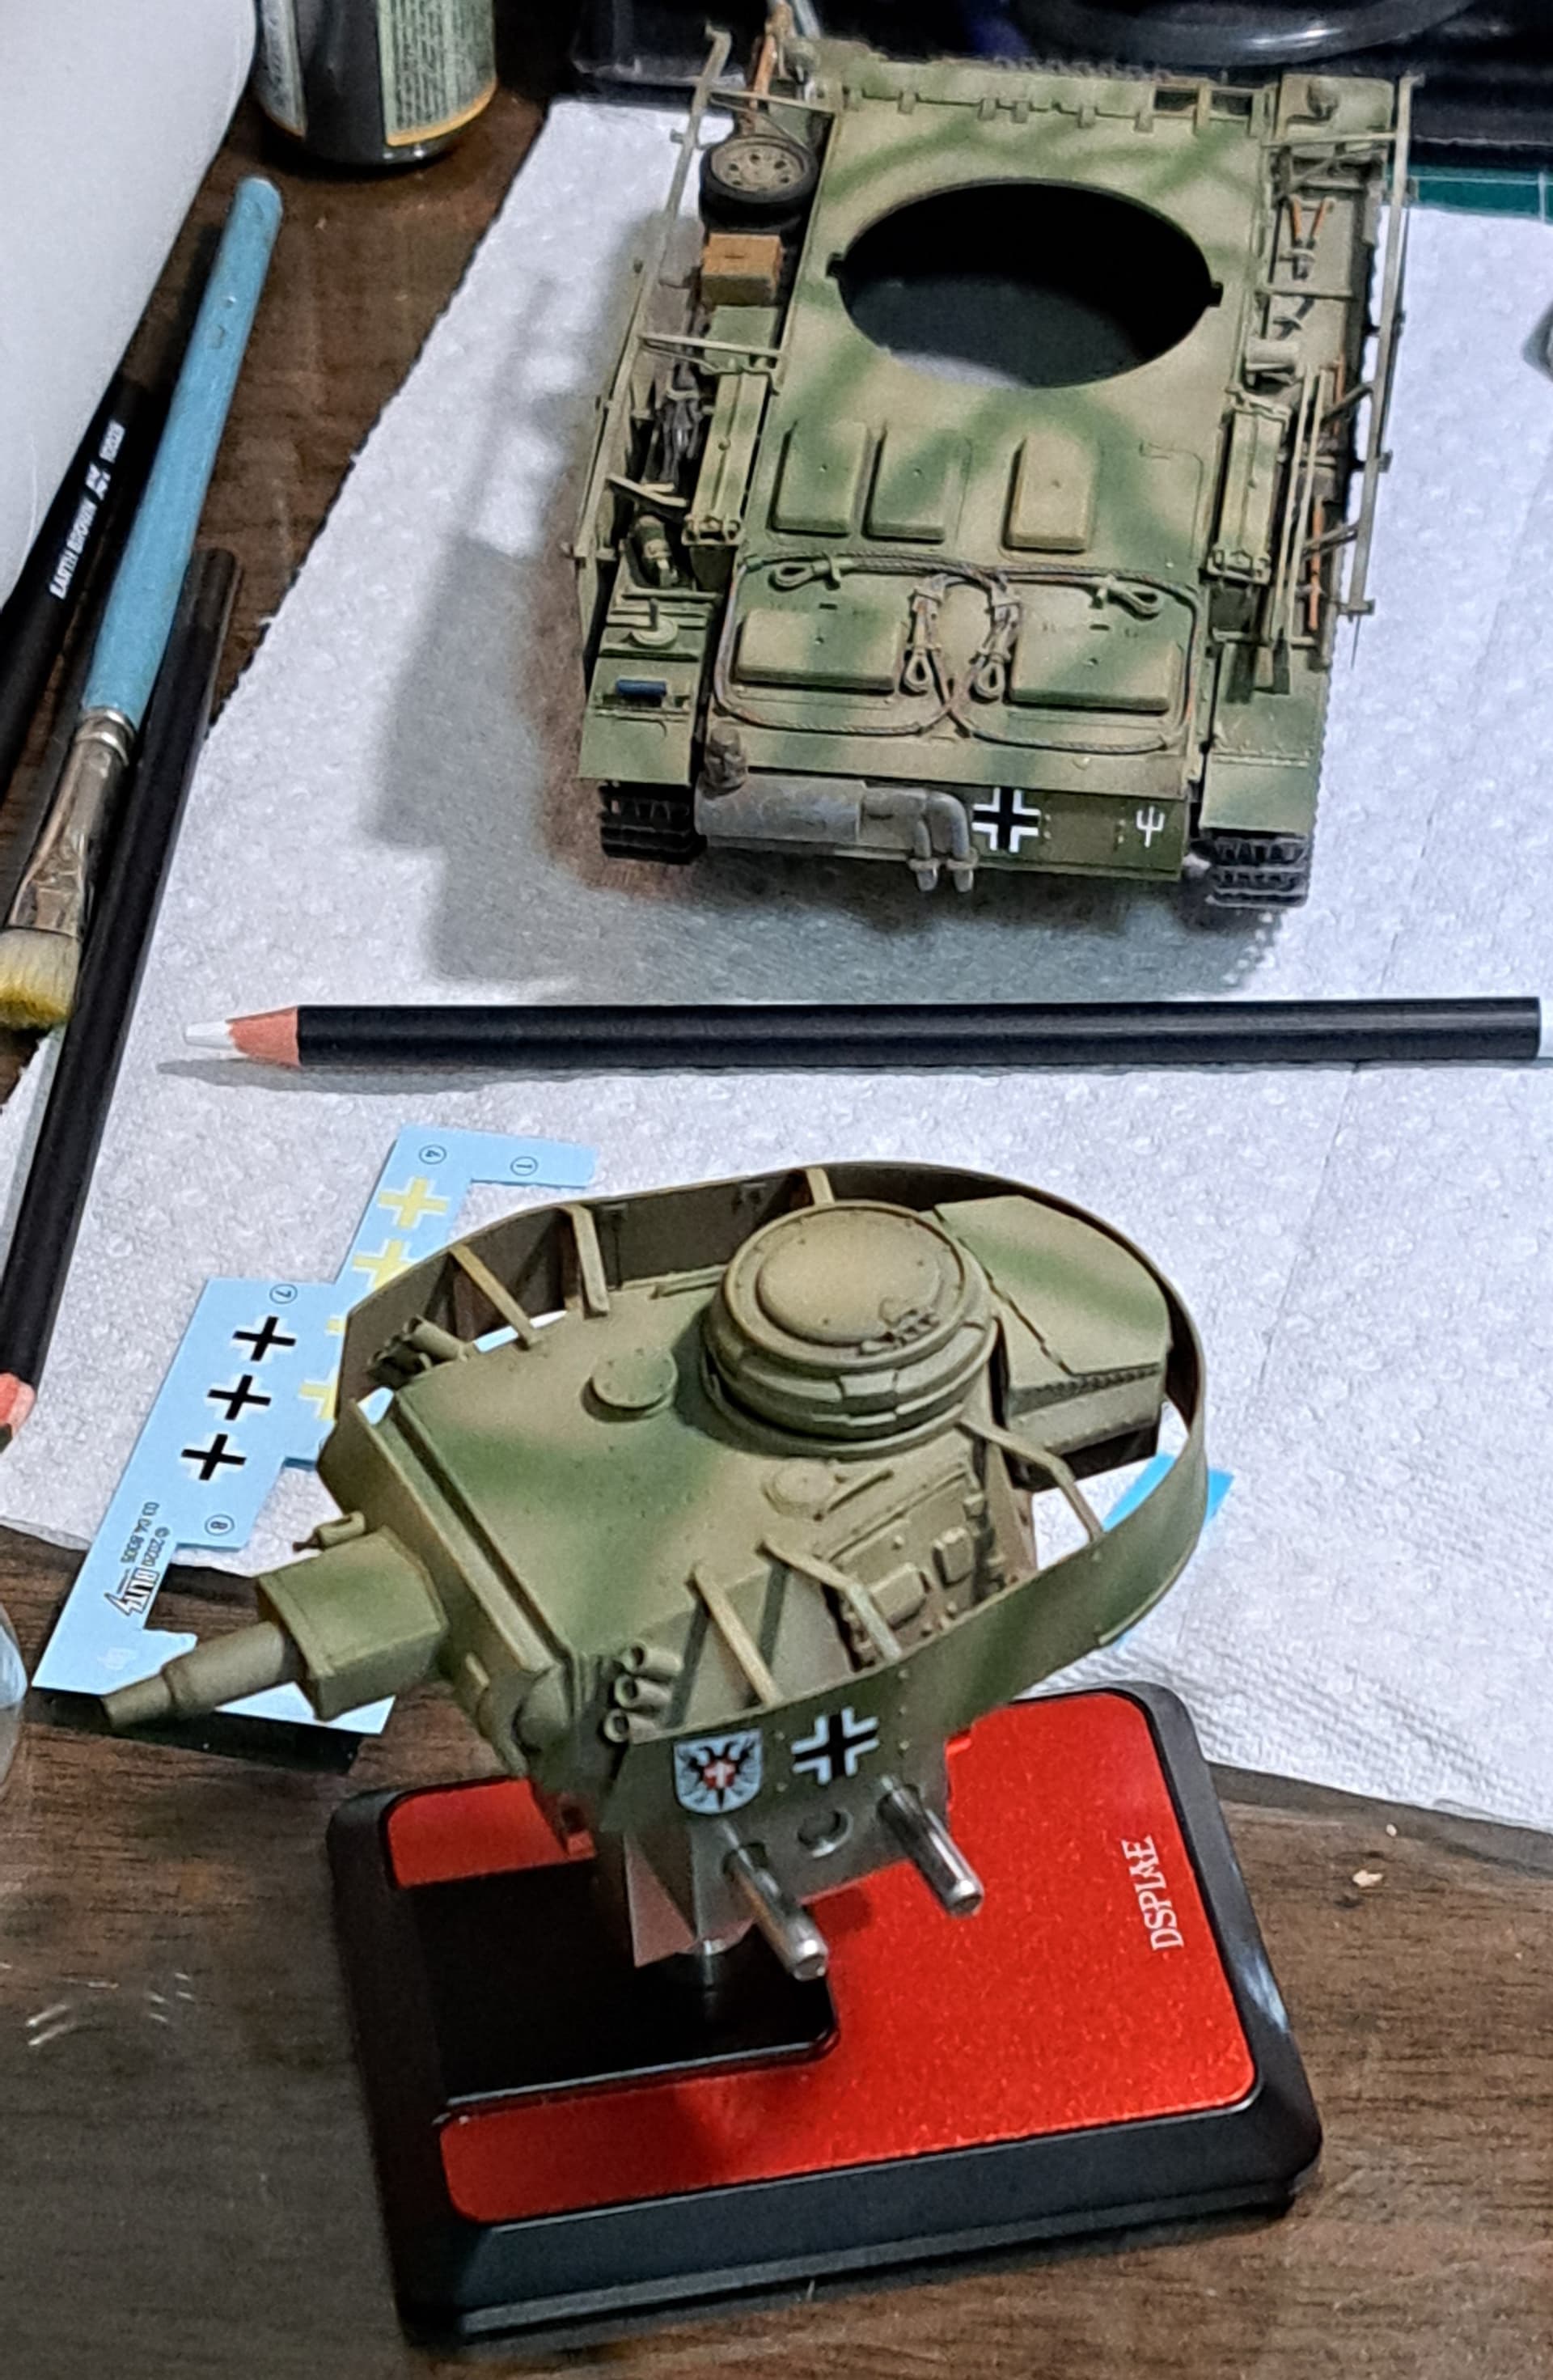
2nd gloss coat to seal decals plus tie down.
9 Likes

I’d planned to shoot the Pactra Acrylic Flat A48 coats today. With an early rain and 90% humidity currently, decided to wait. Pactra Acrylic Flat has always came through but I’m a little reluctant (aka superstitious) about spraying ANY flat coat when the humidity is high. Too many bad experiences with low quality flat coats previously etc.
Today, testing compositions with various bases and the Takom Pz III ausf N. Bottom line all of my bases are too big, way too big, too small or too goofy ![]() .
.
Example…the arrow base for a Schwerpunkt image just doesn’t work…
Looked just as stupid when tested w/Pz IV last year. Thought the smaller Pz III might look OK. It didn’t.
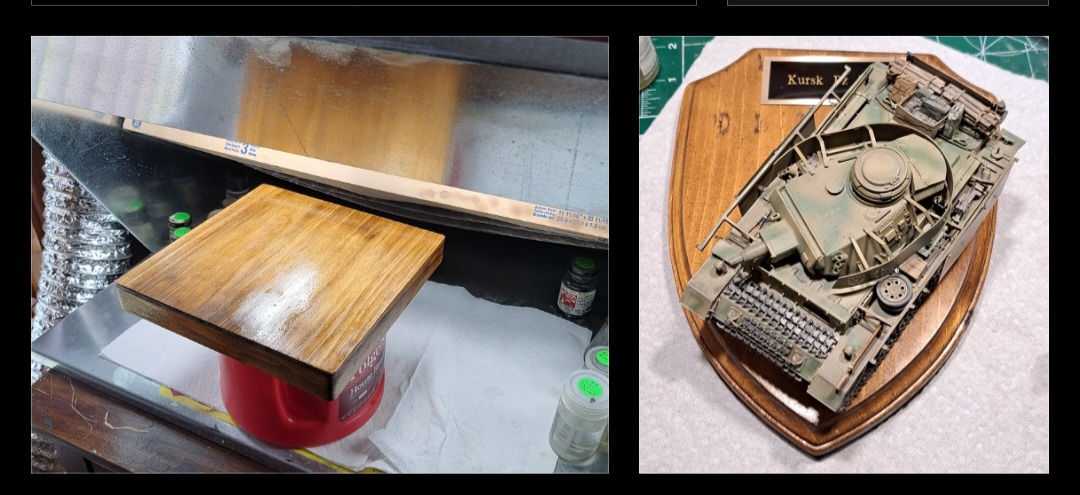
Since the shield is an Epic Fail decided to stain a brand new base for the Takom…

6 Likes
@ Wade (Armor_Buff). There’s a mother-load of untreated wood blocks in various sizes on ‘Amazon.’
I can usually find the perfect size for my needs there. HTH.
BTW: If I haven’t said it before… I think your Panzer skillz are simply outstanding! — from super-detailing to super paint! ![]()
![]() …
…![]()
—mike ![]()
5 Likes
Thank you, Mike for the kind words.
I appreciate the info on the wood blocks and will check out Amazon. Not much choice at the local JoAnn’s or Hobby Lobby.
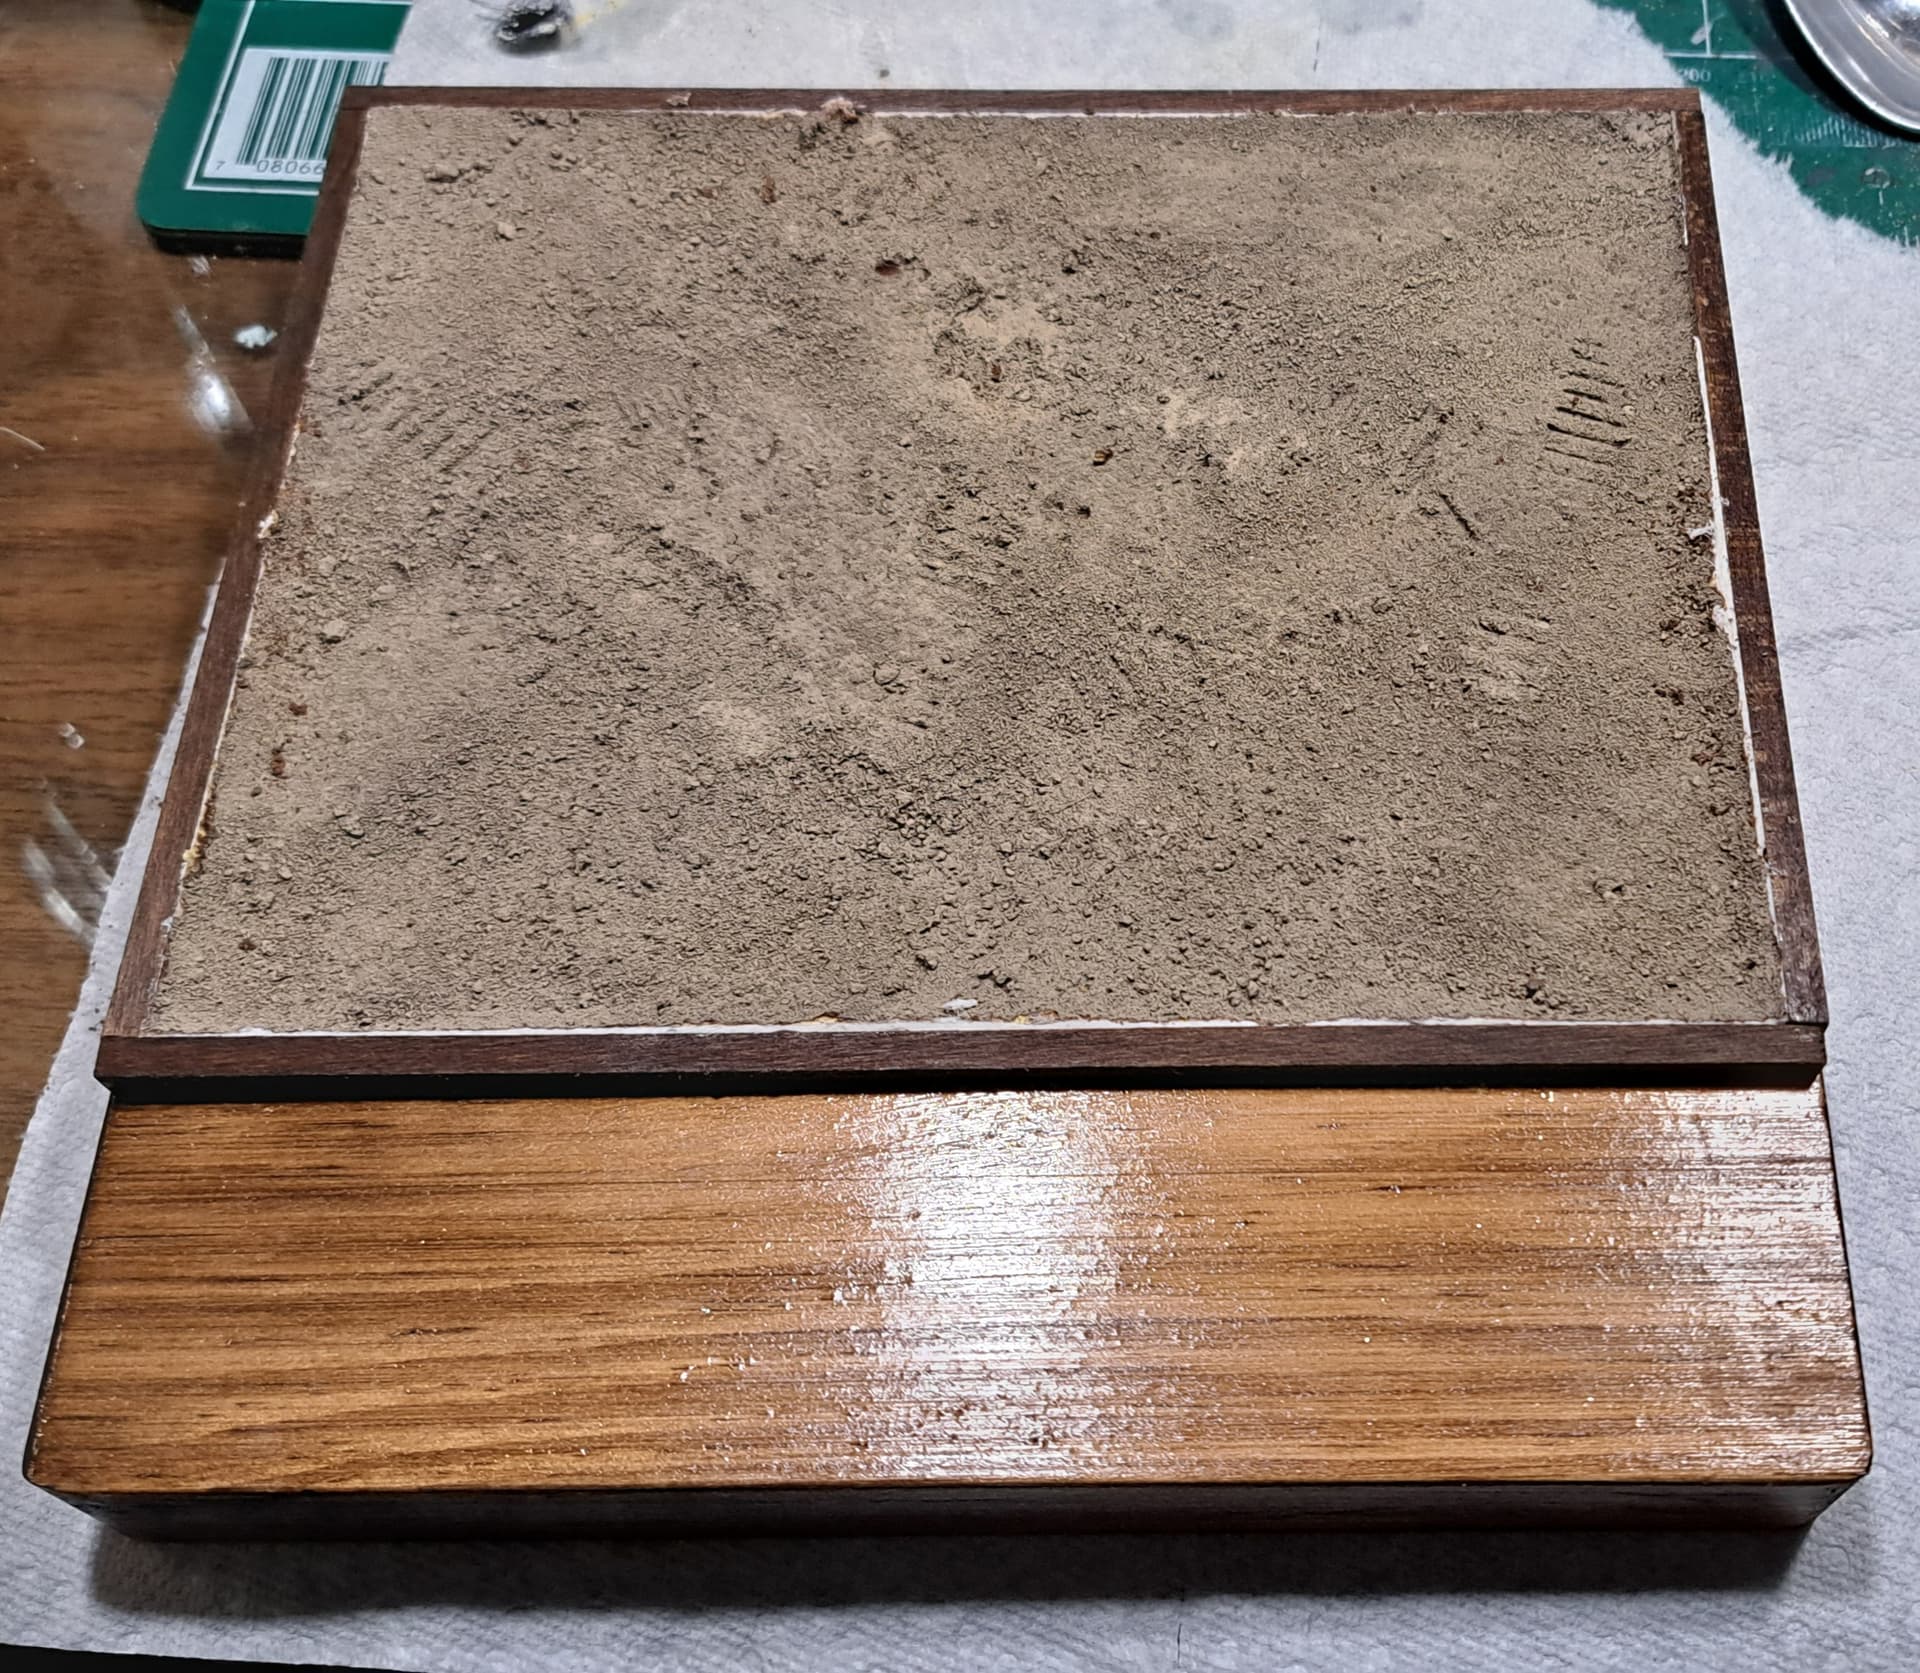
Finished the new wood base, I think the square will work for the Pz III.
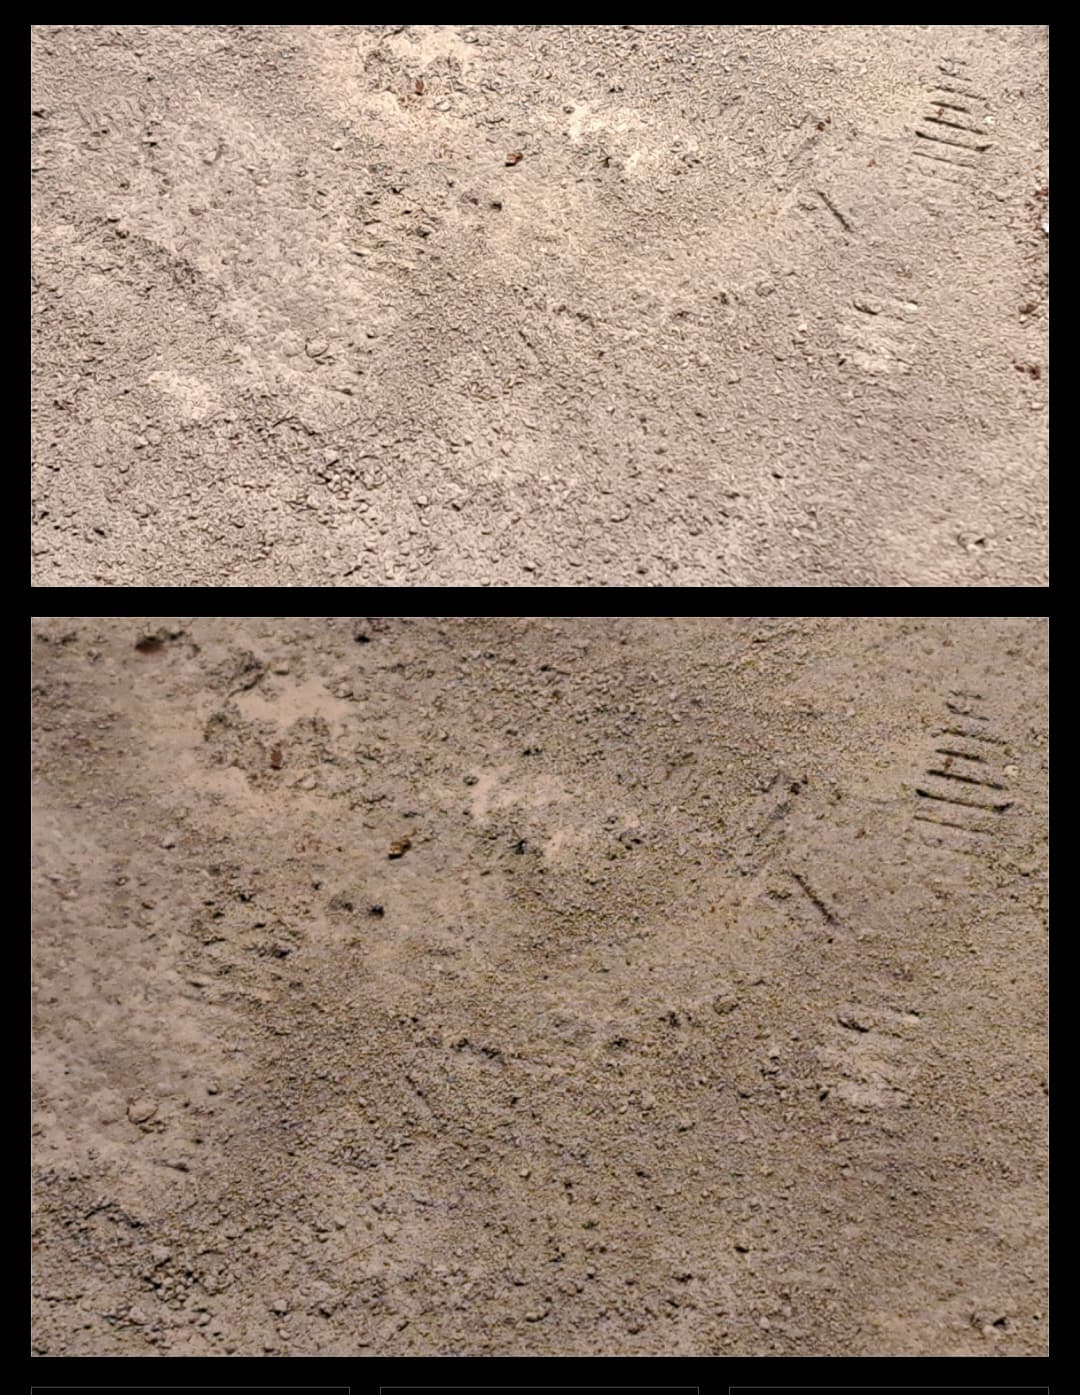
Started the groundwork. Taped off the border, filled with a mix of Sculpt-A-Mold, water, Elmer’s Glue, sand and yard dirt. Sprayed with a liberal mist of home brew ballast freeze.
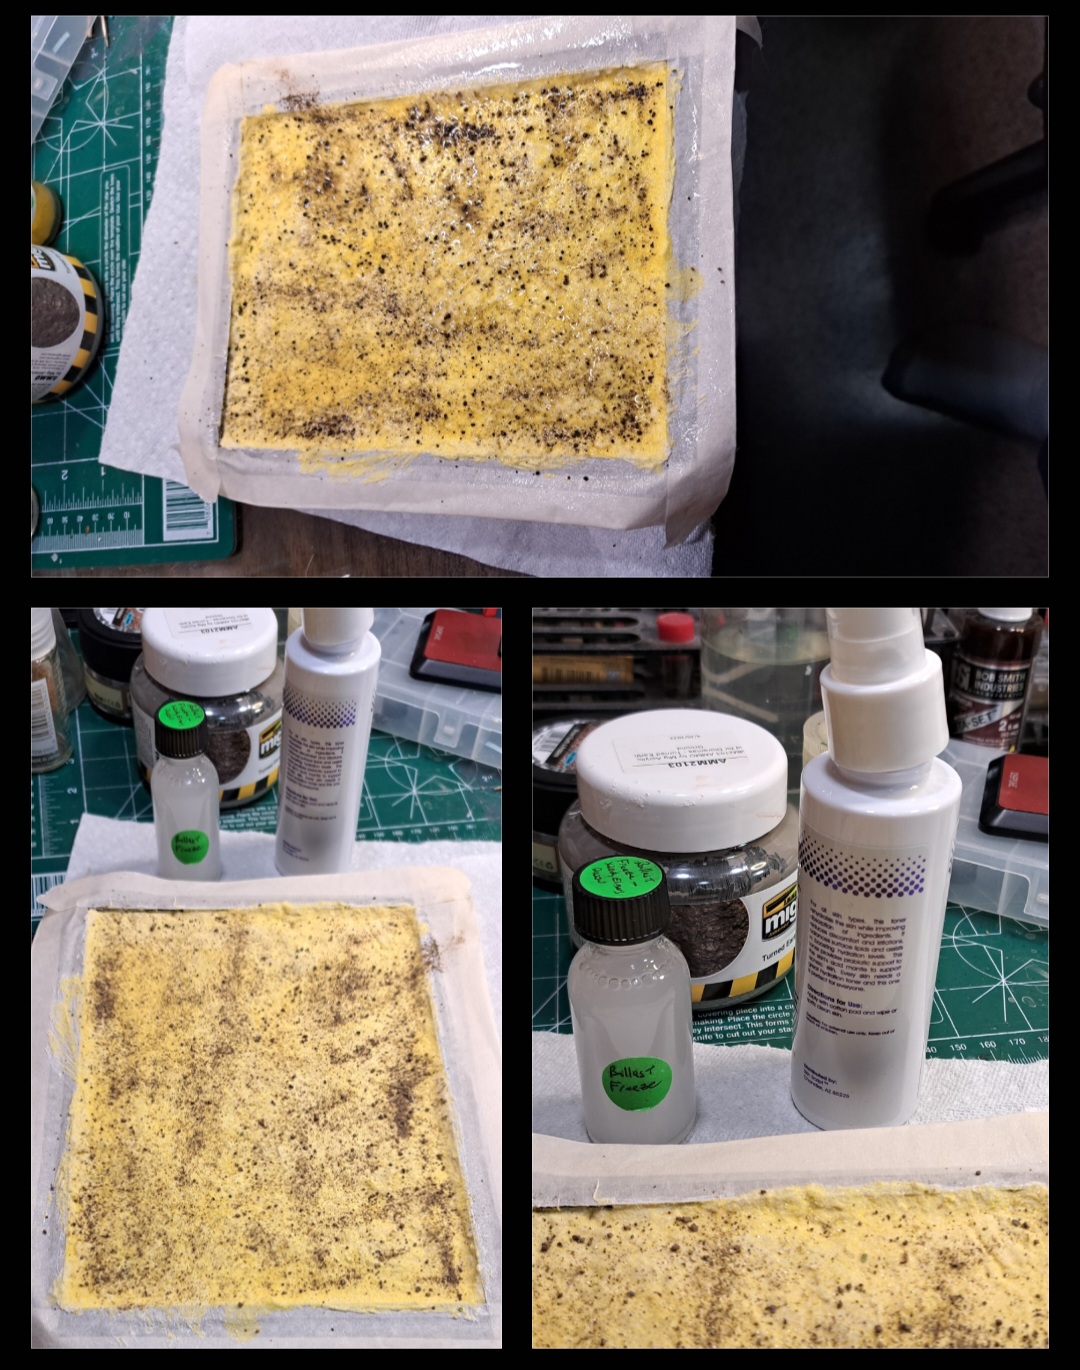
Shook a few spoonfuls of VMS Diorama texture over the wet mess. Shook the excess off over the waste can. Used the tank to make a few track impressions.
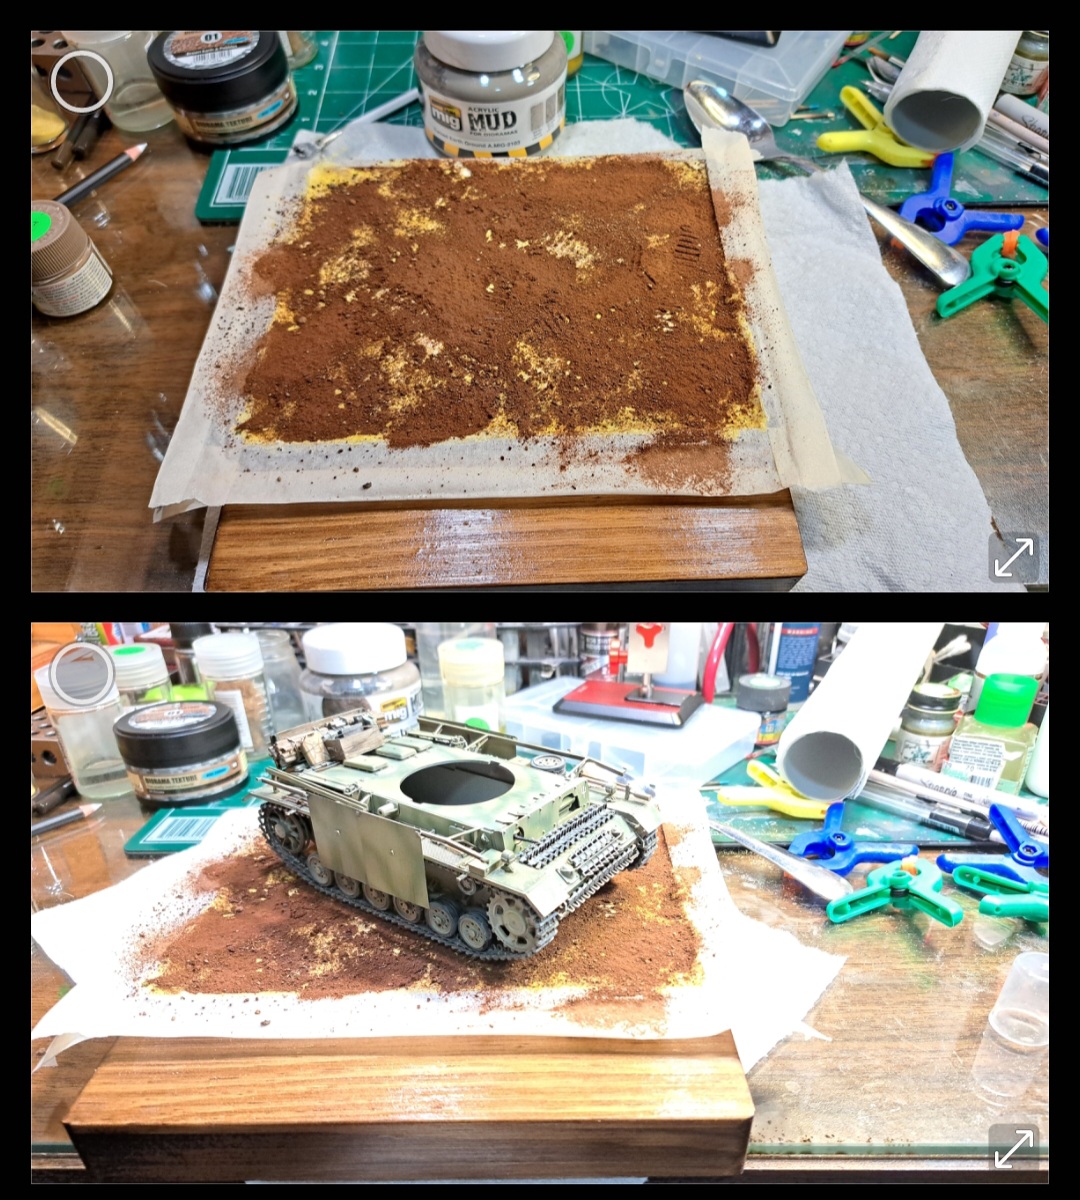
Used the old firehose of an airbrush, the Paasche H to lay a base of Tamiya Brown as a base coat. Followed by Tamiya Flat Earth plus an over misting of Tamiya Buff.
Have to touch up a few spots as the masking tape was off slightly at the edge but that’s nothing a wash won’t fix.
Result…
5 Likes