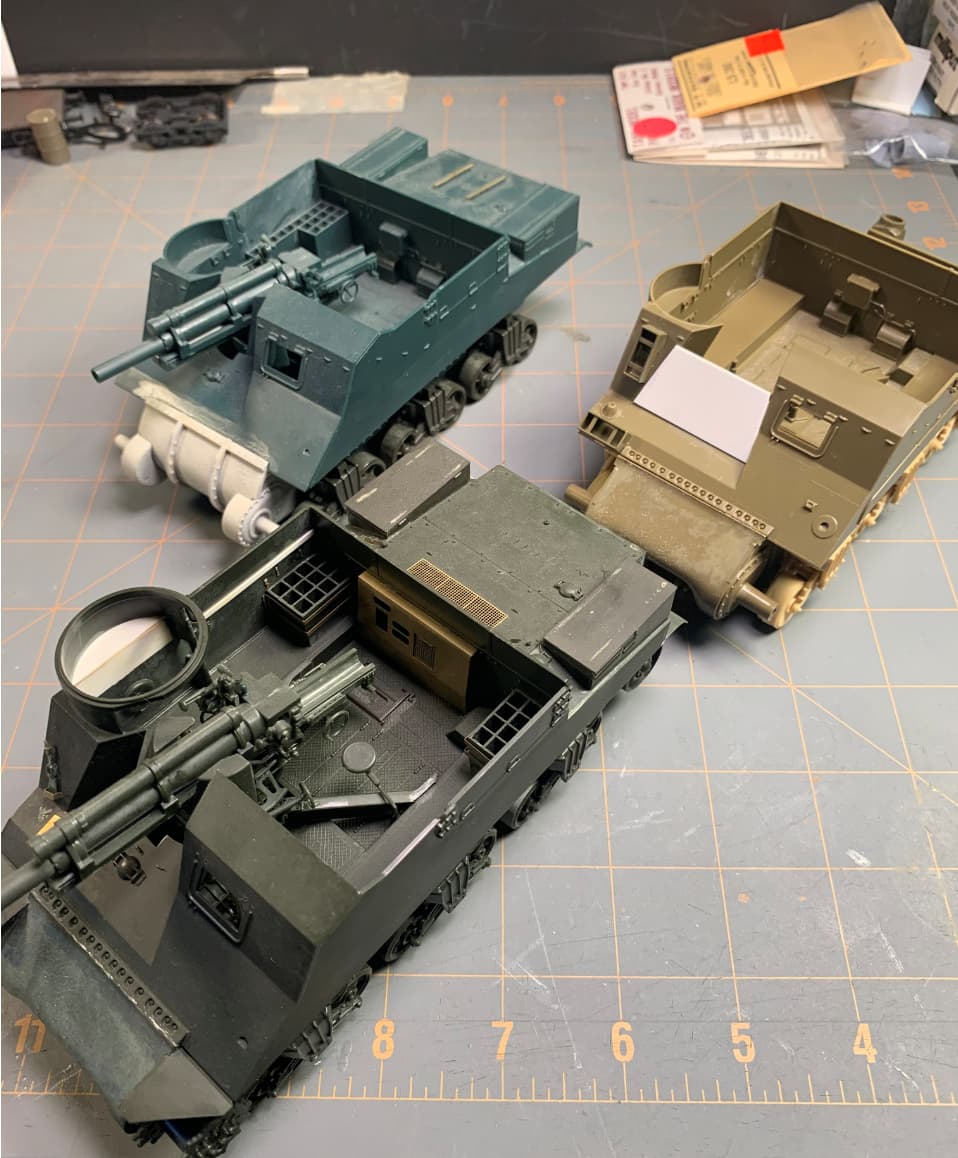
Different variants all predating the Academy or Dragon offerings. It’s finally time to get them finished.
14 Likes
The Italeri kit? Don’t forget to alter the headlight locations on the backdated ones.
This should be fun
Looks fun!
Is that a Canadian Kangaroo I see in the back? 
I also have Priests on the shelf. Mine are a Dragon, an Academy, and 2 Italeri. One of the Italeri kits will be converted to a Korea War vintage M7B2. I’ll follow your journey closely.
That one is actually going to be an M7B2, which has been produced in smaller scales, but oddly never in 1/35. That’s why it’s missing it’s ass end.
Thanks to Metalhead for the dished wheels - the particular vehicle I’m doing has them on the front bogey, and might arguably be the most famous M7B2 of all time.
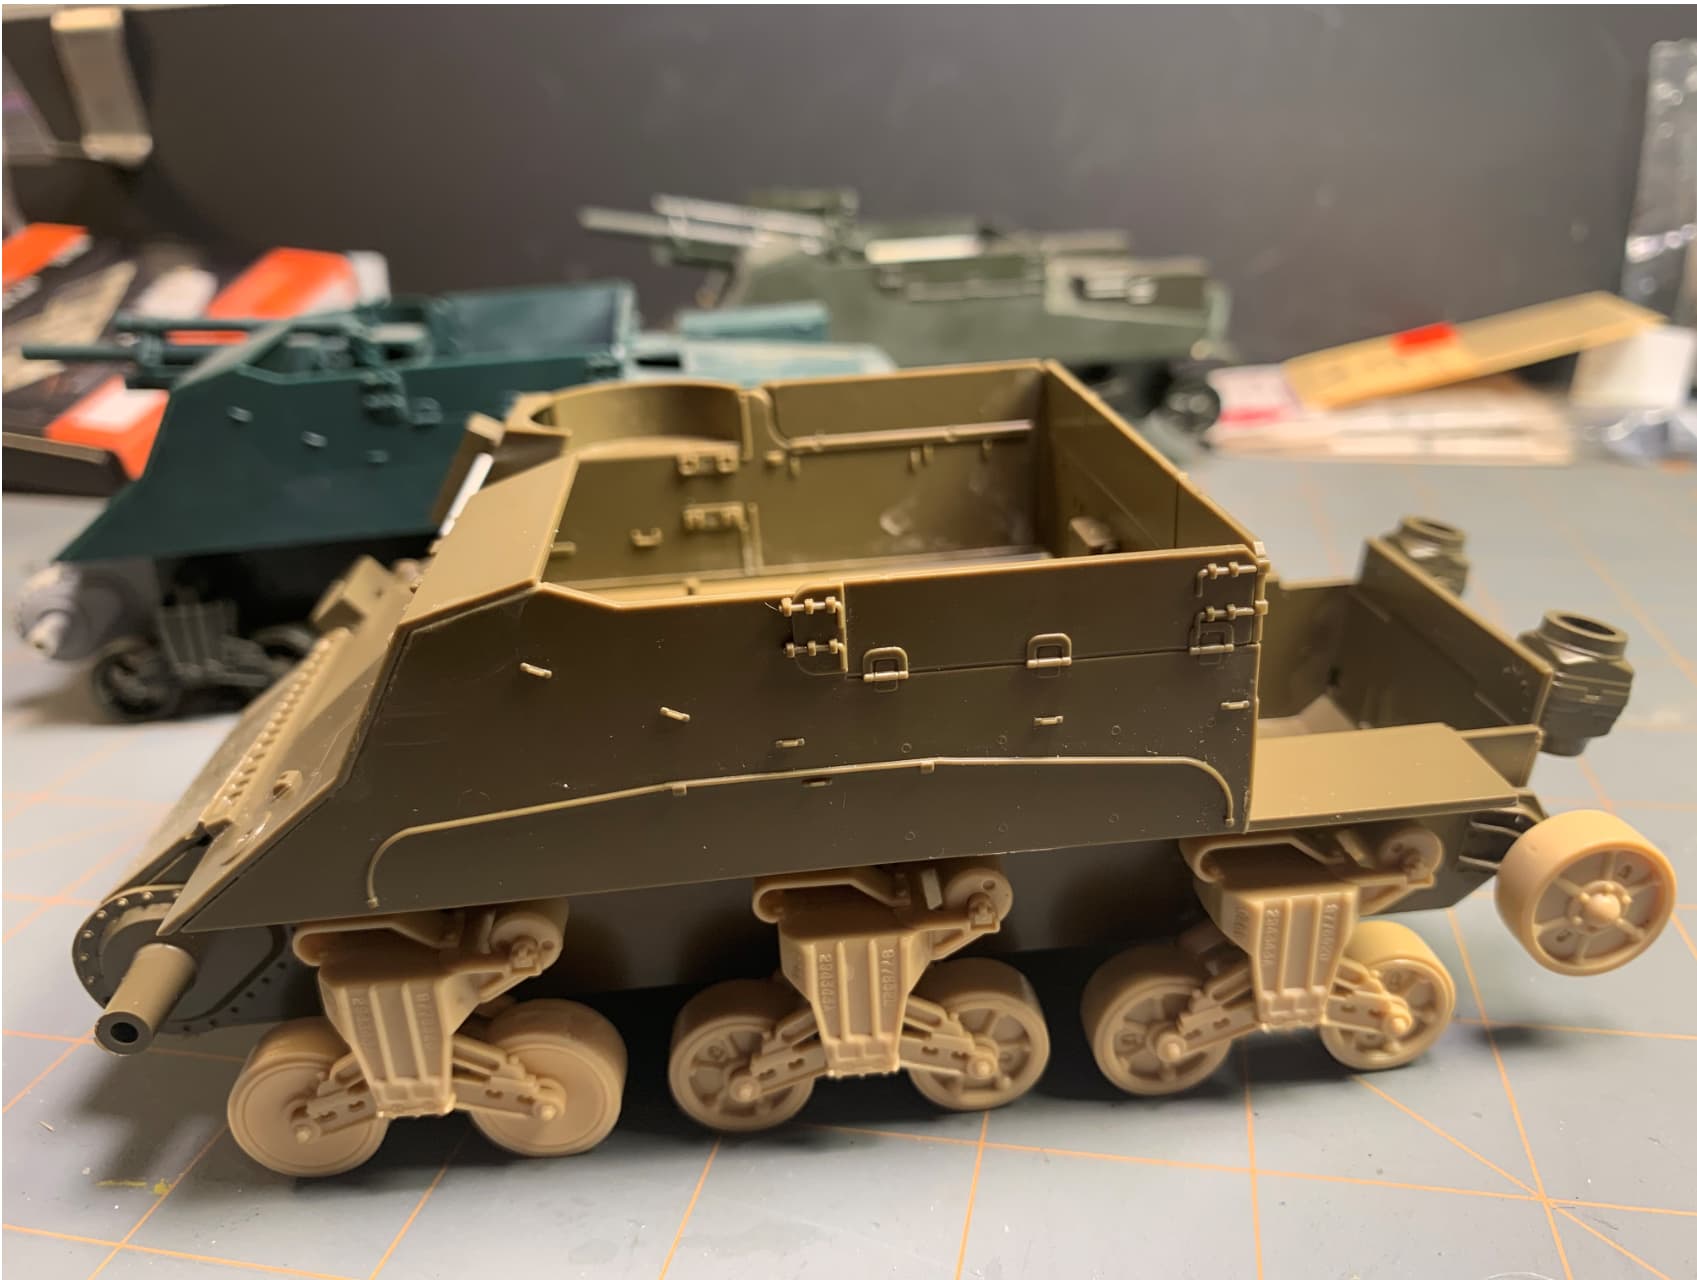
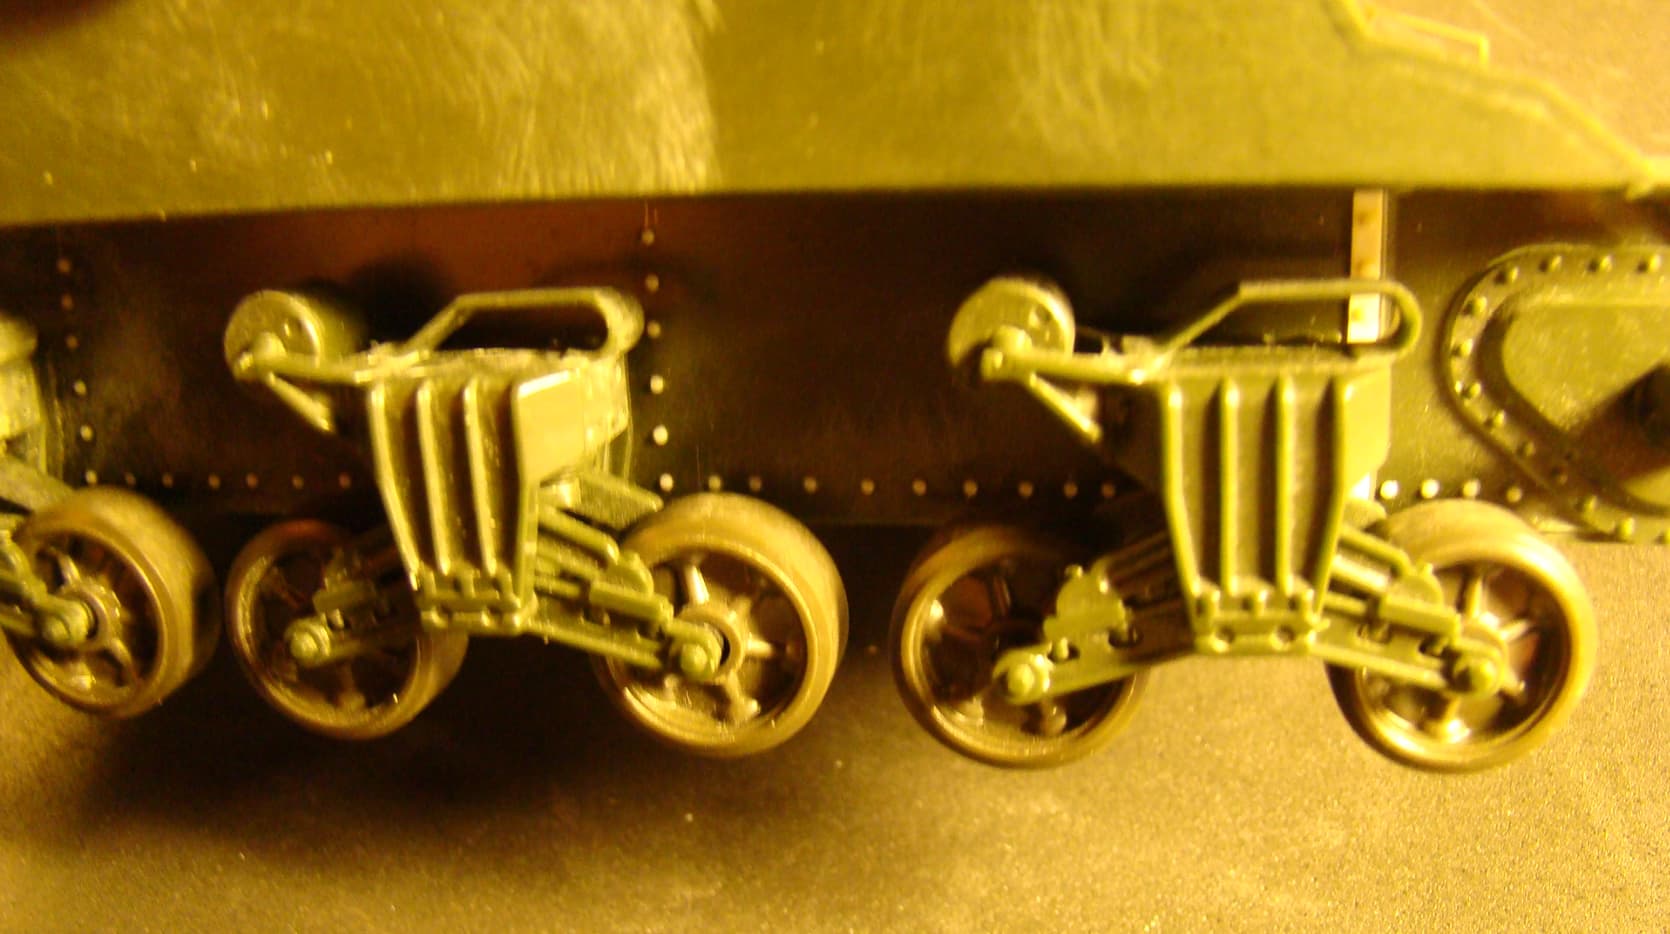
The different suspension is simply because I like the cast numbers, and I happened to have a spare set.
2 Likes
Anytime bro…… looking forward to seeing this progress.
I think I have a Sexton by Dragon….
Finally, work on the M7B2 can continue.
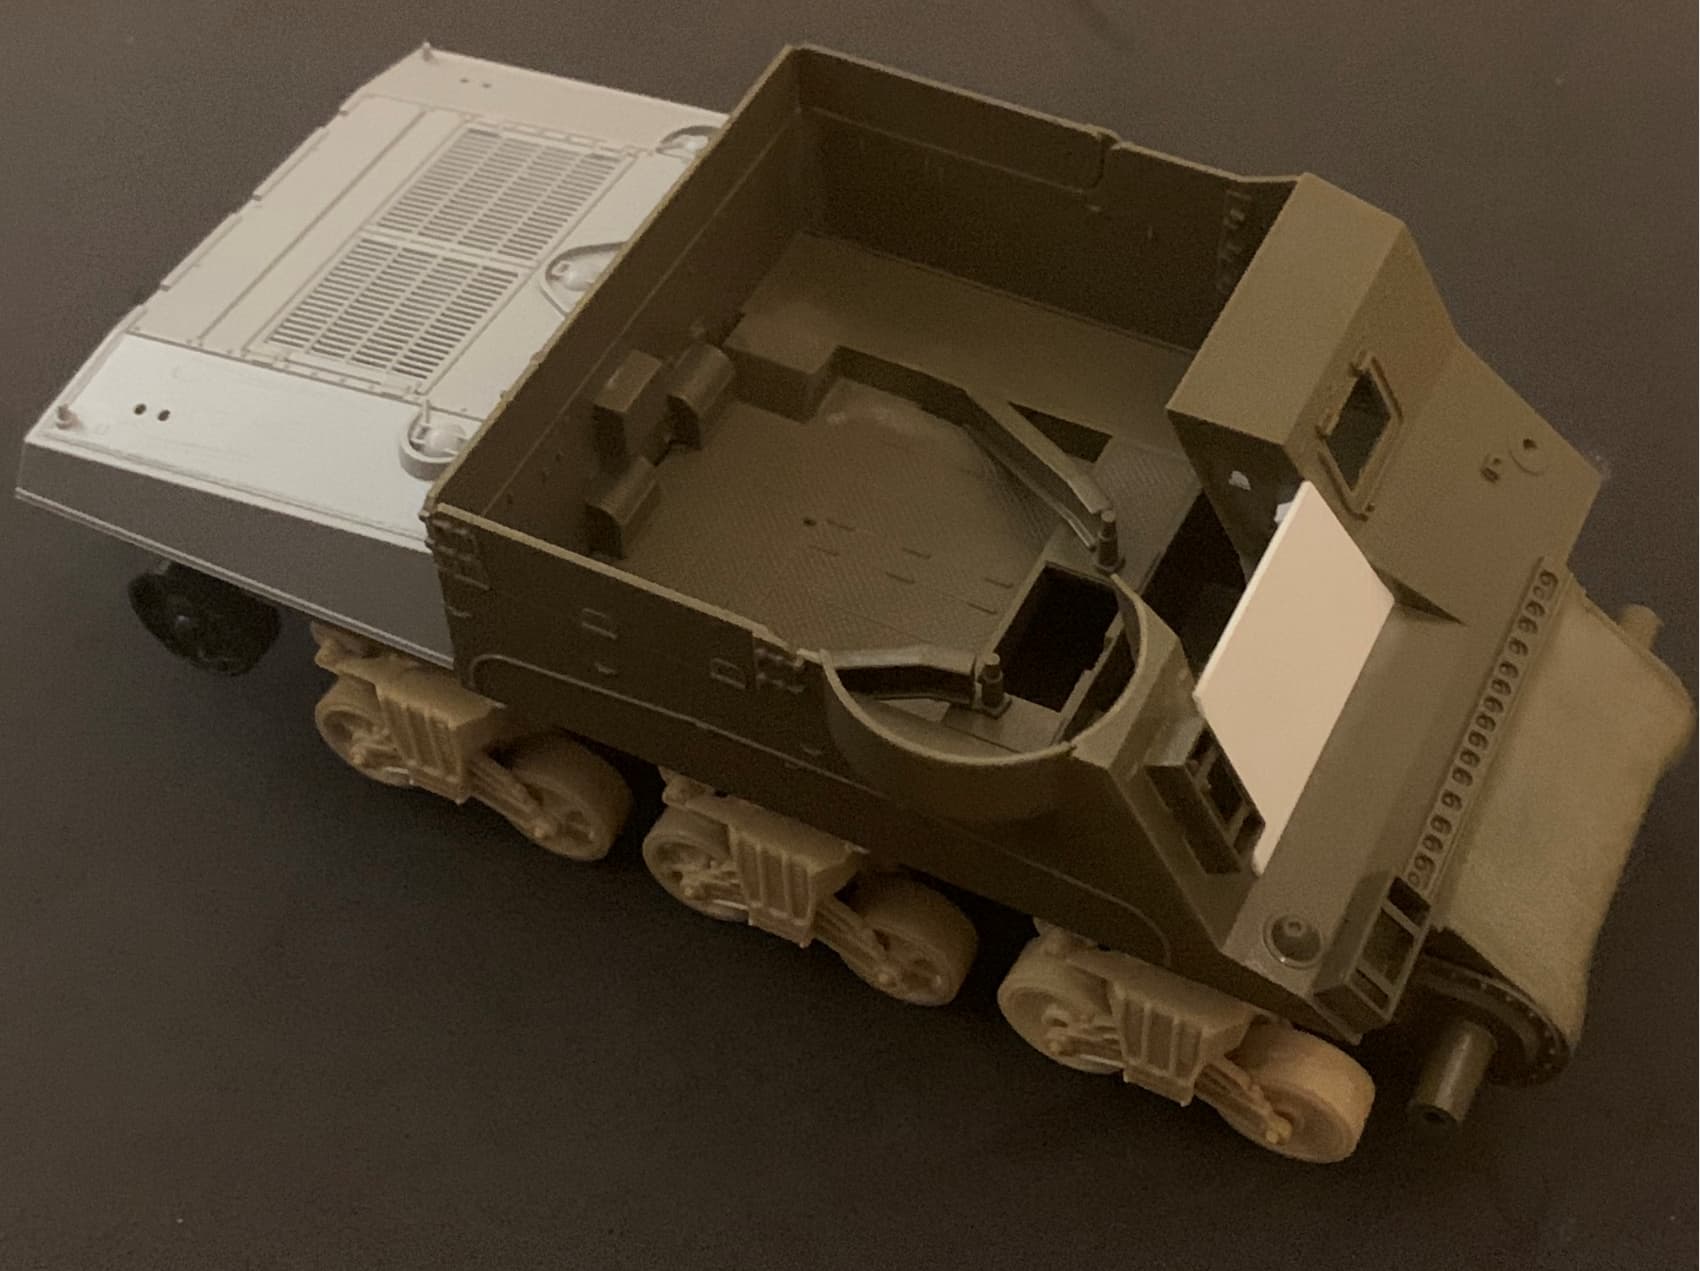
First, a shout out to my favorite hobby shop in the entire country - Colpar’s in Aurora. They have another one in Lakewood as well, but the one in Aurora is top notch. At any rate, during my trip to Ft. Carson I managed to drive up to Colpar’s and I was not disappointed. I needed and M4A3 engine deck and I wanted to stick with Italeri so the hull width would mate up with the Priest hull. They had an M36B1 on the shelf. Perfect! And the cashier knocked off $15.00 not because I was in uniform, but because the box looked so old he said he was about to put it in the Bargain Bin. Later I discovered 2017 in the instructions, so not that old.
Surgery can commence tonight, and I’ve got a slew or spares now, including a dozen dished wheels.
2 Likes
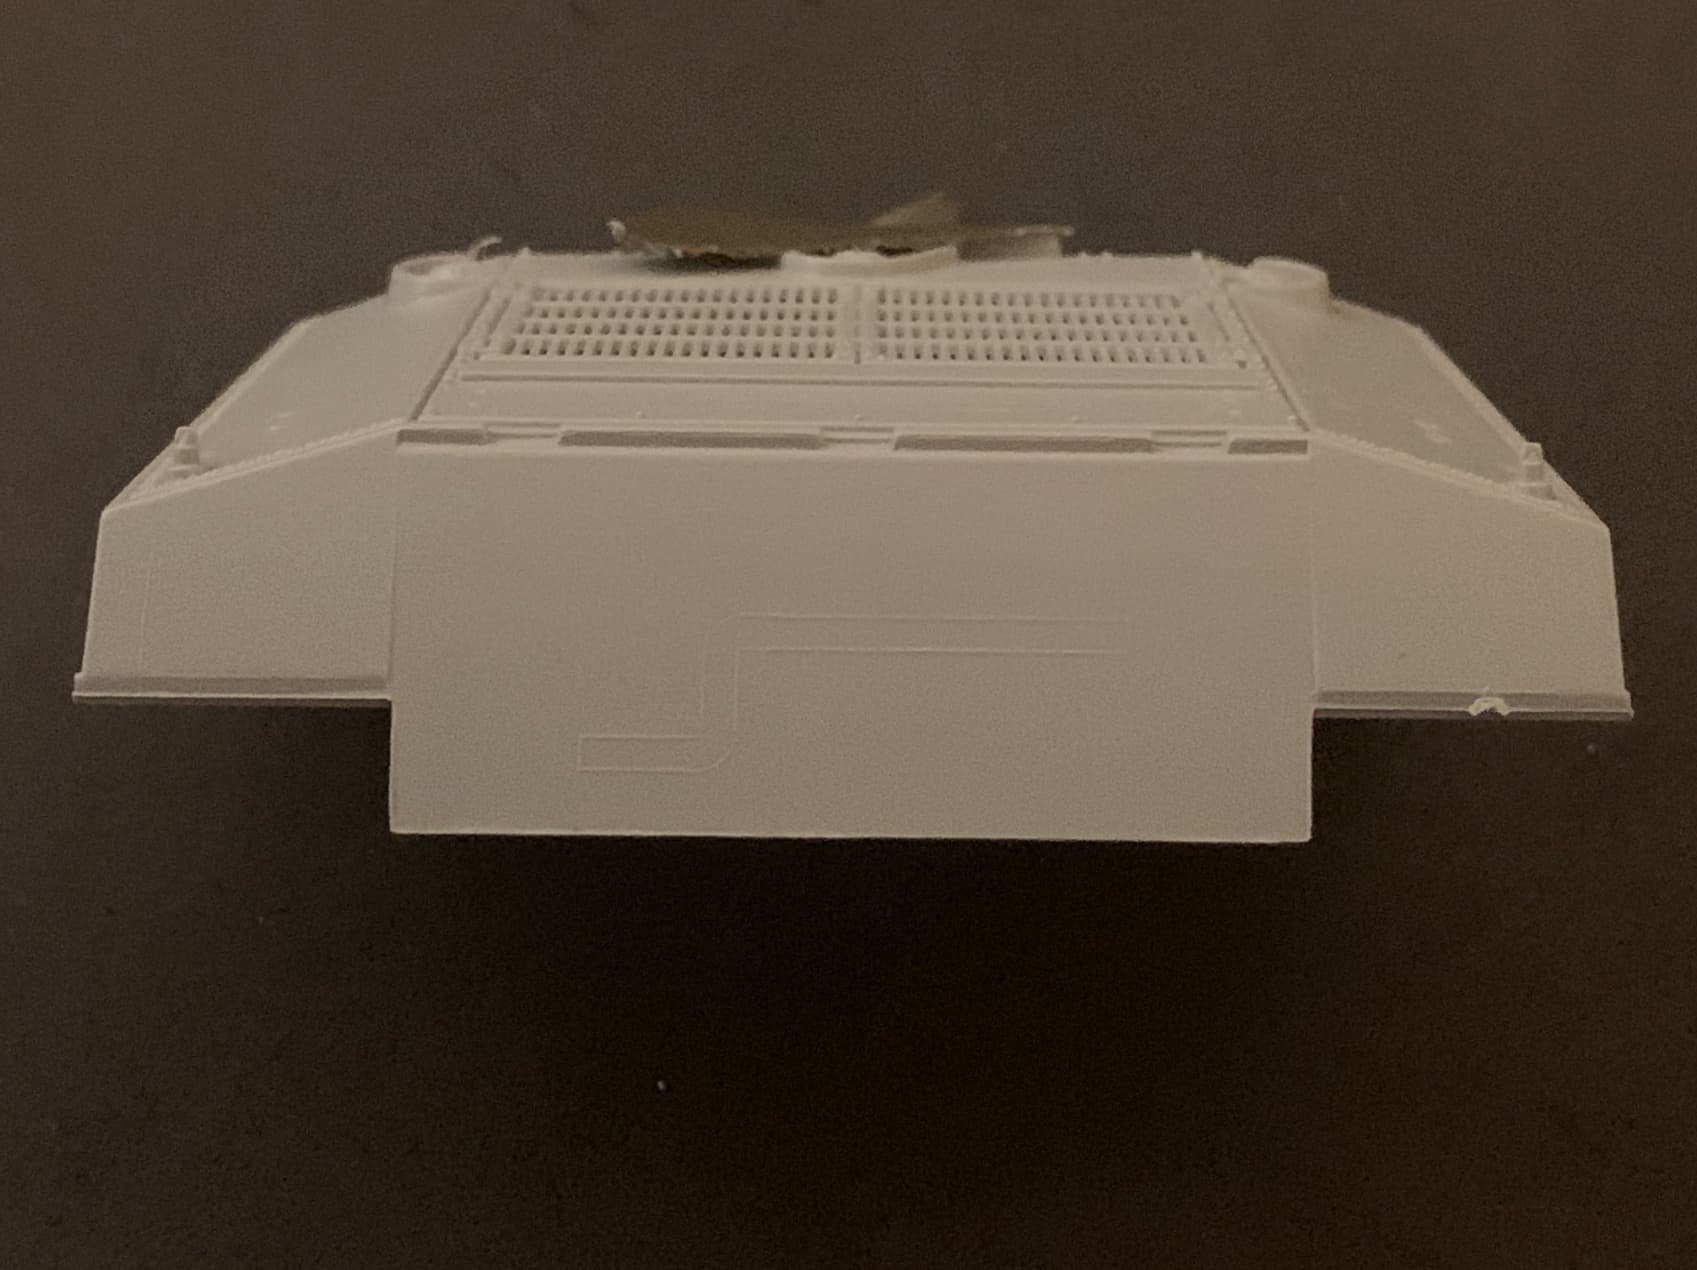
I had a tiny bit of a setback today. The sides of a Priest are perpendicular to the bottom of the hull. However, the Italeri M4A3 kit and its derivatives have sides plates that are very slightly off of 90 degrees due to drafting. Mating up slightly angled sides to perfectly perpendicular sides obviously won’t work.
Slight angles due to drafting - not lens distortion:
Fortunately I have a leftover Dragon hull from an aborted attempt at building the AEF Designs L-33 Soltam SPG. The rear hull has been lengthened but I can trim it back and make it work, putting the Italeri engine deck in the void:

The Dragon kit works because - wait for it - they utilized the over half century old method of using slide molds. I wince every time someone mentions that in a review of a kit, like it was a cure for cancer, but in this case I’m glad they chose to use it. It renders perpendicular sides plates and eliminates the need for drafting.
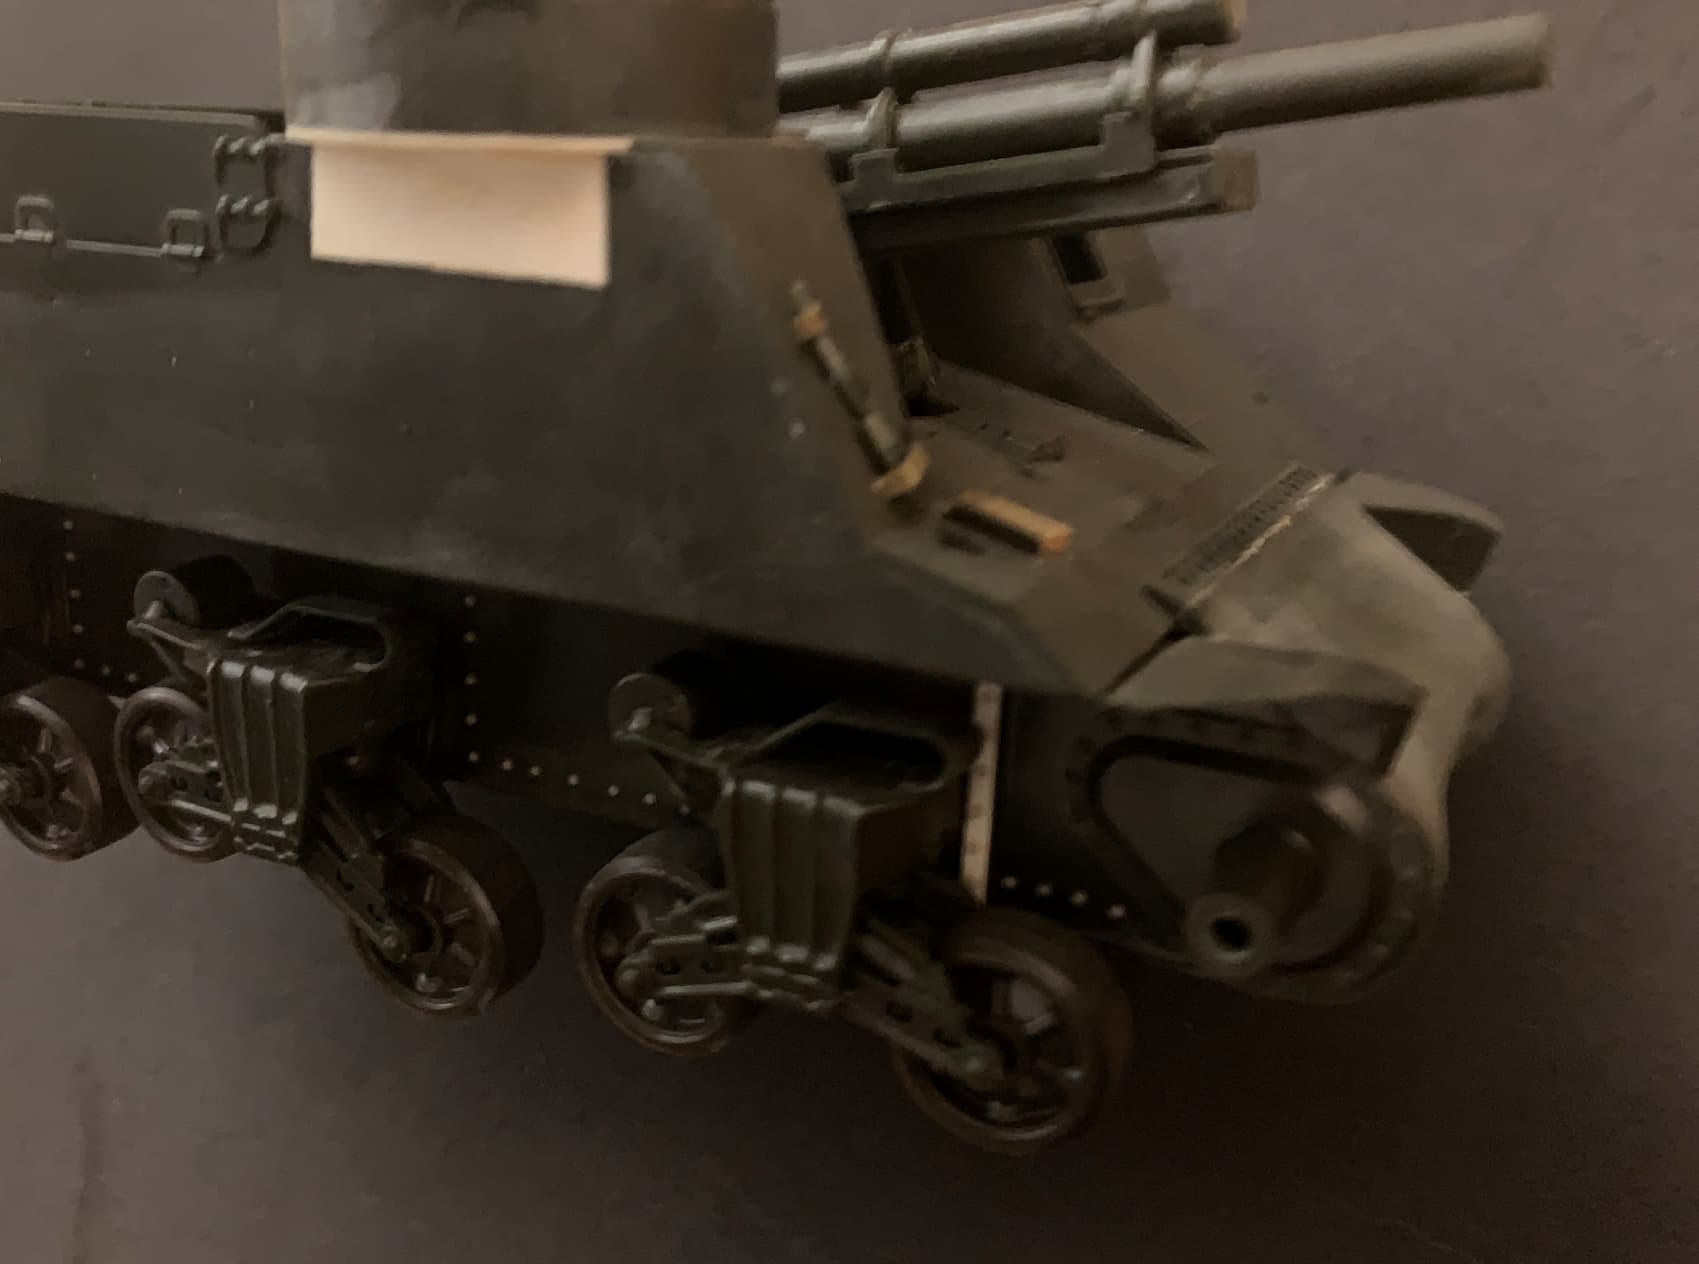
The early production version gets some leftover anti tank mine racks from a Dragon Half Track:
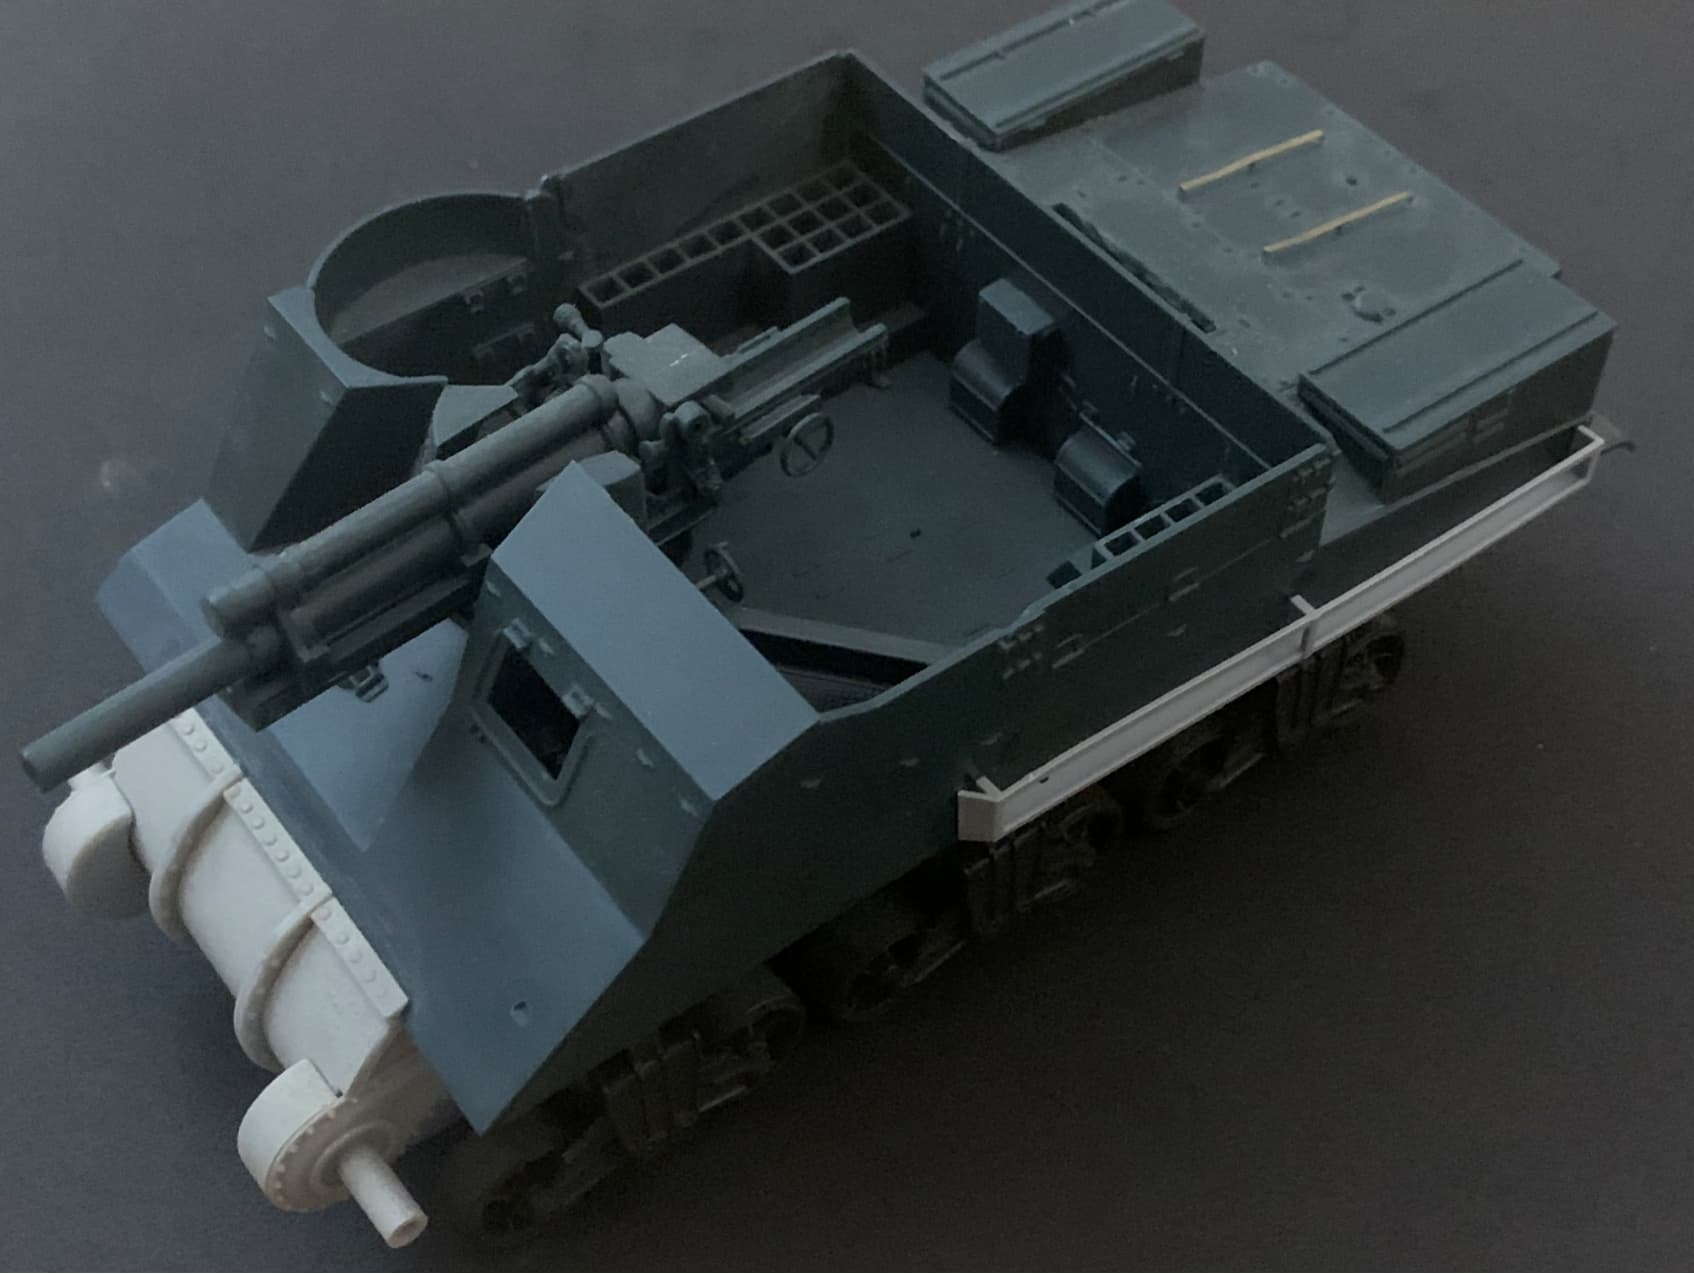
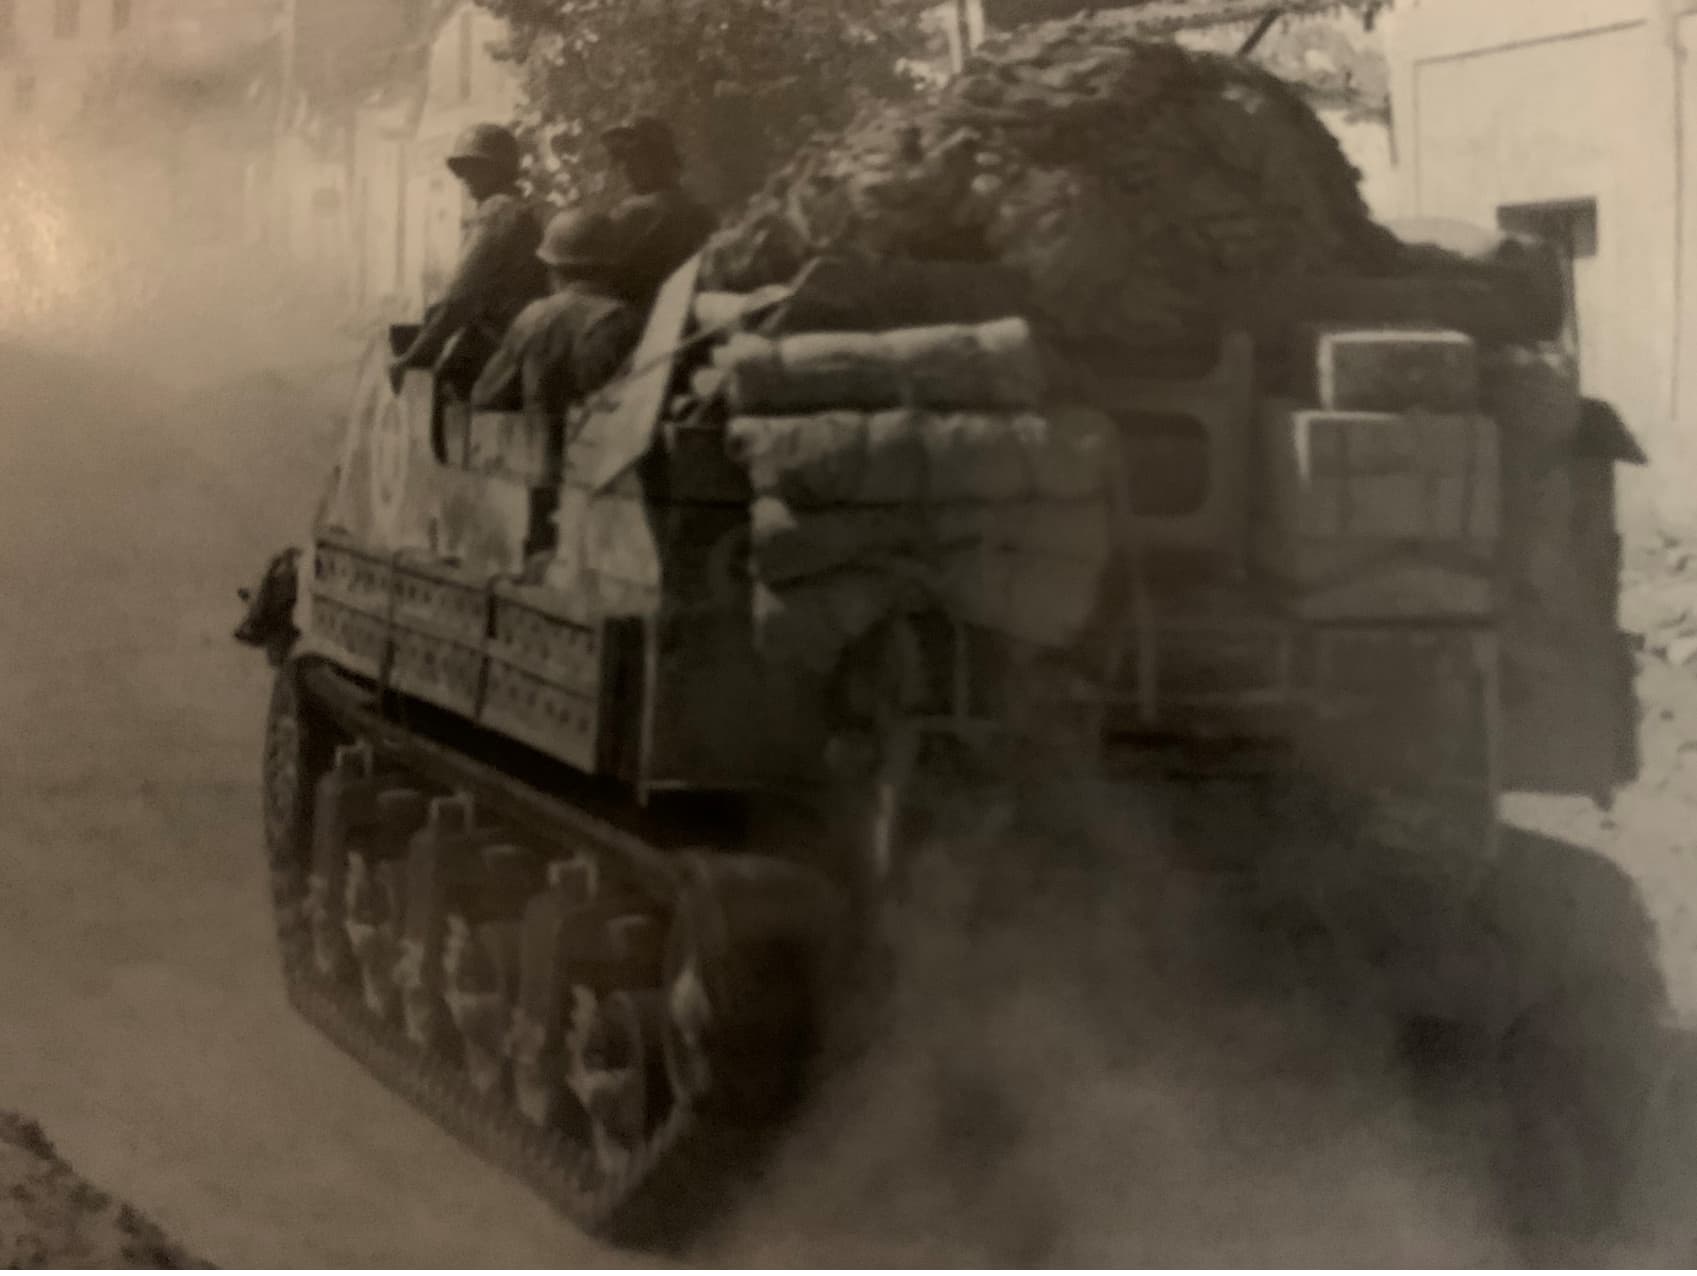
I thought I’d replicate this vehicle: (it’s hard to see but I did use the older style bogies)
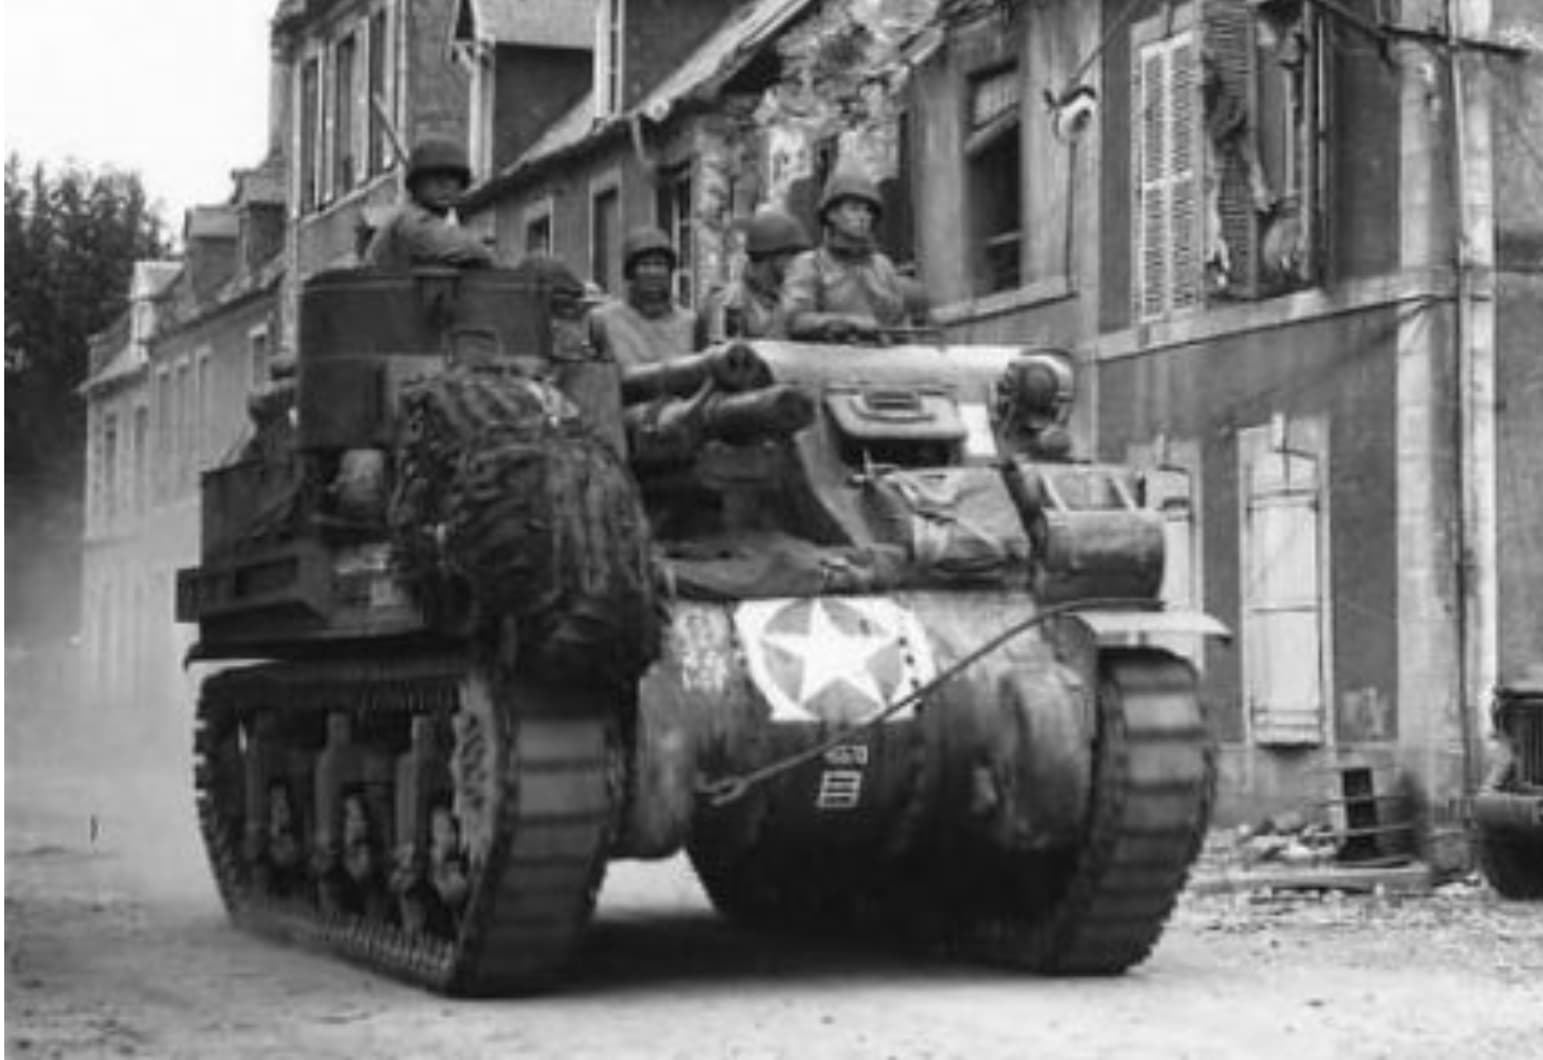
With all the Dragon Half Tracks I’ve built I had more than enough racks to replicate this photo, but after dry fitting all of those racks it just wasn’t aesthetically pleasing:
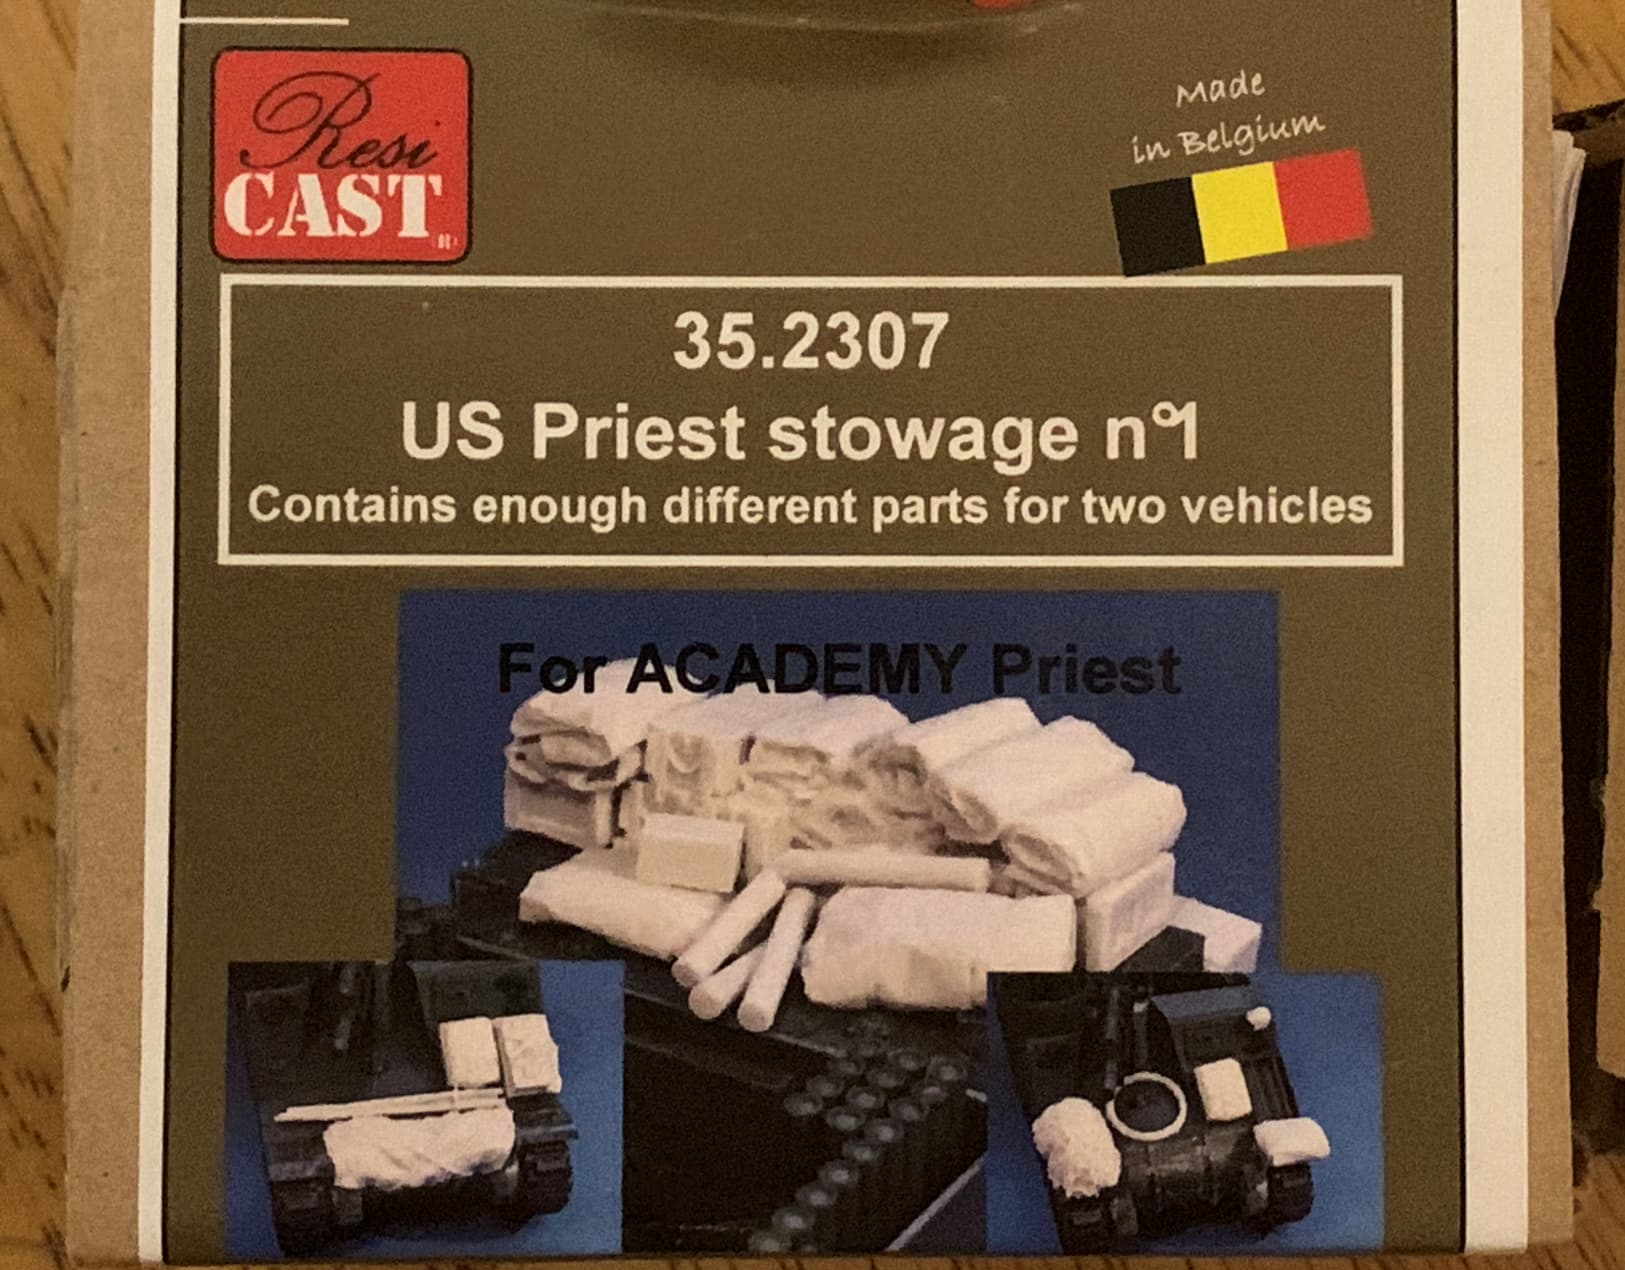
I received this in the mail today. As you can see it has enough to do two kits. Actually more than that. It’s a nice set indeed. It even seems to be in part based on the above photo of the Priest with the single mine rack on the side - some of the stowage is virtually identical.
And what to do with the other stowage? Why not pay homage to the masters of covering their vehicles with assloads of equipment? This one is IDF. Note different tool stowage arrangement on glacis, and riveted hull:
So these and about two dozen other builds, and about three bikes builds ought to last me through the Omega variant.
3 Likes
https://photos.app.goo.gl/3yShv7roaPWgZC299. I ran across an M7 recently in a little out of the way town in Montana. Took about 3 dozen detail shots so when I pick one up, which I’m Inspired too watching your project, I’ll be all over the little details.

FYI: I have a stalled M7B2 project too. Note the alterations needed to the splayed arms that brace the howitzer mounts.
1 Like
Lots of major surgery there Rob. Good on you for replacing the rear hull though. A lot of guys wouldn’t go that far but now it’s “right”. And placing rivets is good for the soul. It definitely makes the Zen flow.
yes!!!
another saw-lover
I follow you: go ahead!
This might be my most riveting post ever.
I’m not a rivet counter, but if rivets should be present, and they’re not, then they do need to be added.
So, here’s a better shot of the Israeli variant - an odd mid-production model with newer bogies, single piece final drive housing, but still using the old riveted hull.
The process is pretty straight forward. I’m not going to take apart a water filer and bogart the little plastic beads out of it for rivets. I find it’s much easier to just buy these:
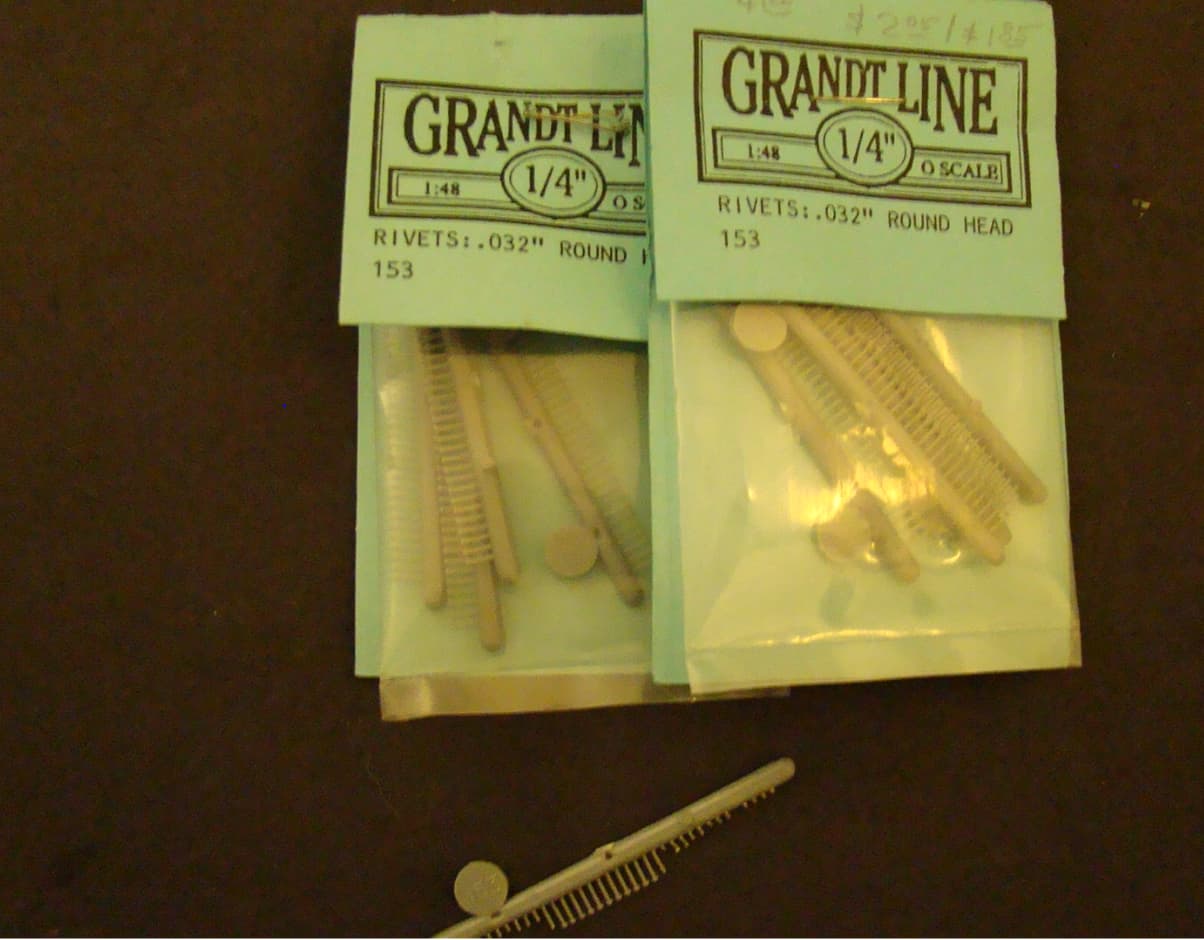
Then all you need is a no. 80 drill bit and some time. Drill the holes and insert the rivets.
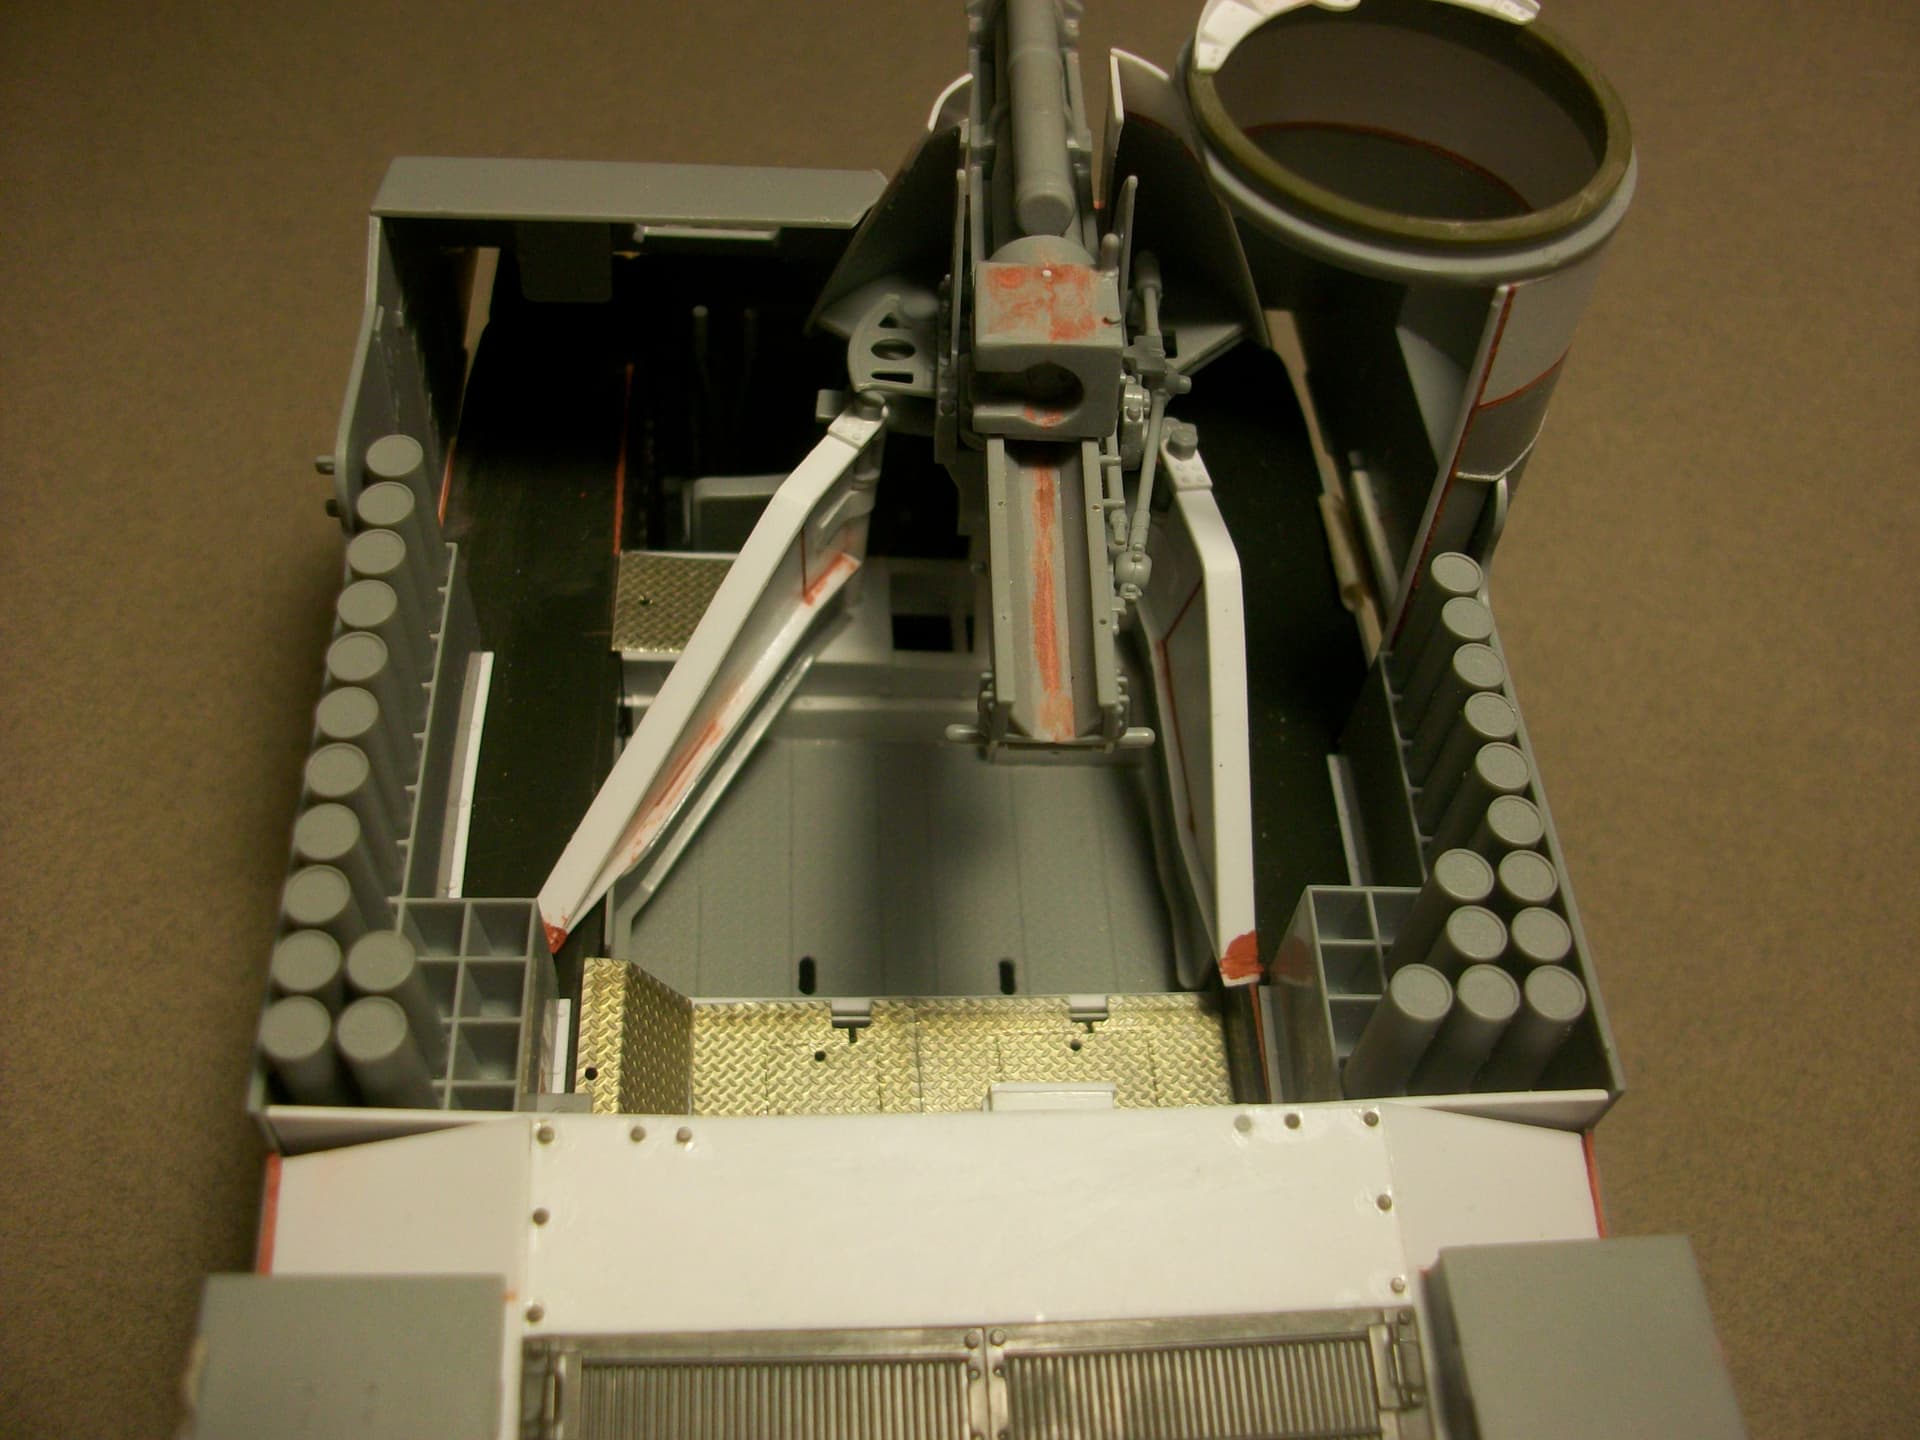
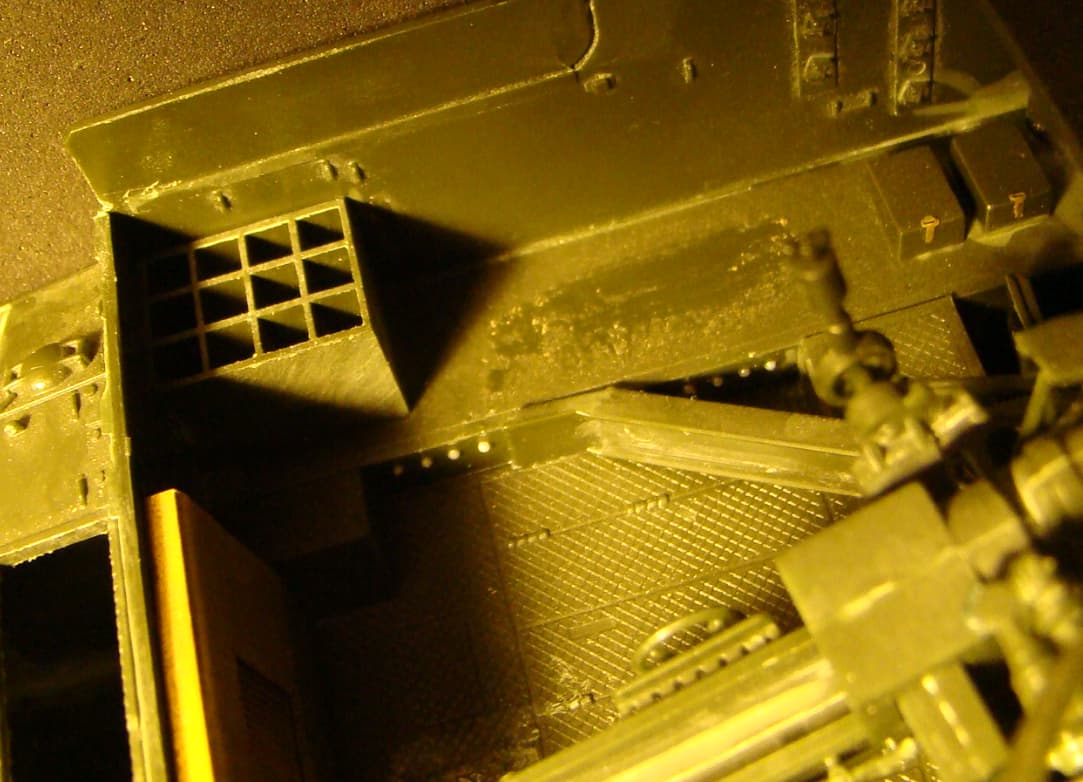
For the interior of the fighting compartment, it’s a little trickier. I had to cut the rivets off their stalks and just manipulate the heads into place. It would have been far easier to do this if I had not already installed the gun,

I wonder if the Academy “early” production version includes the rivets inside the compartment. Looking at the parts breakdown it doesn’t seem likely. If anyone knows the answer please enlighten me. I might be doing another of these soon. I’ve checked the instructions on Scalemates. They don’t even show the rivets on the outside of the hull in the instructions, but they do show them in the side view drawings for the decal placement.
You can see in the photos for the IDF version I removed the rear fold down door from the compartment. Again, much easier if you know you’re going to do it ahead of time. I was not aware of this mod way back when I started.
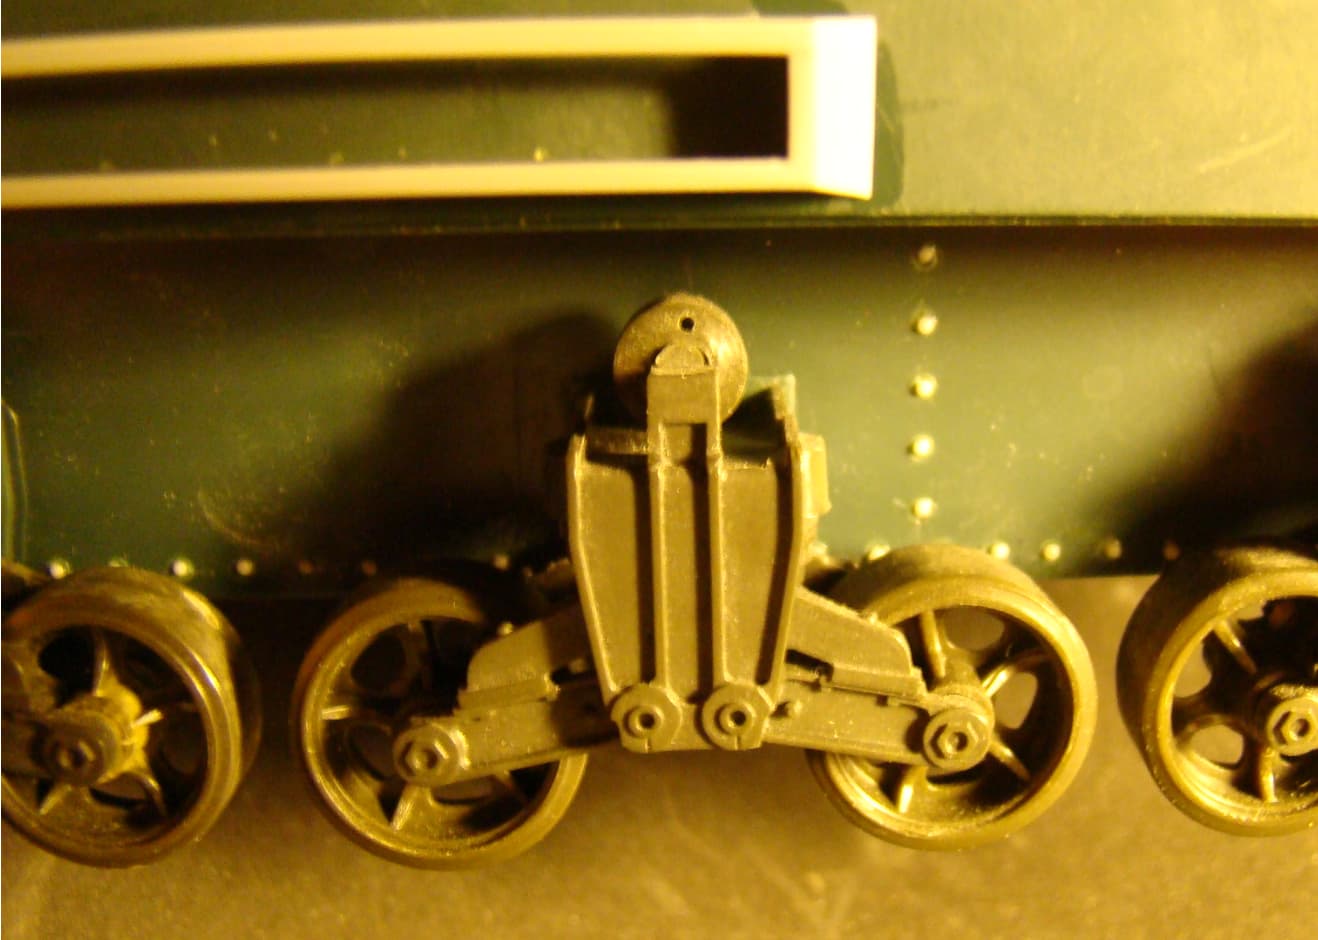
Rivets on my WWII early version:
Just as soon as my eyesight recovers I’ll be able to add interior rivets to this one as well.
4 Likes
Looking good Robert
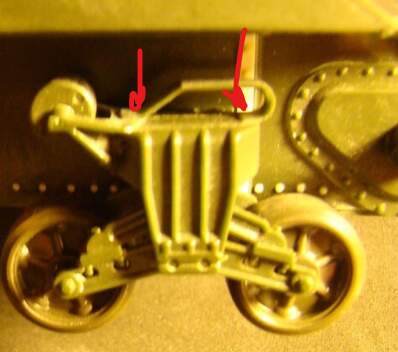
i suggest you, lord of rivets , to add here bolt of track supports
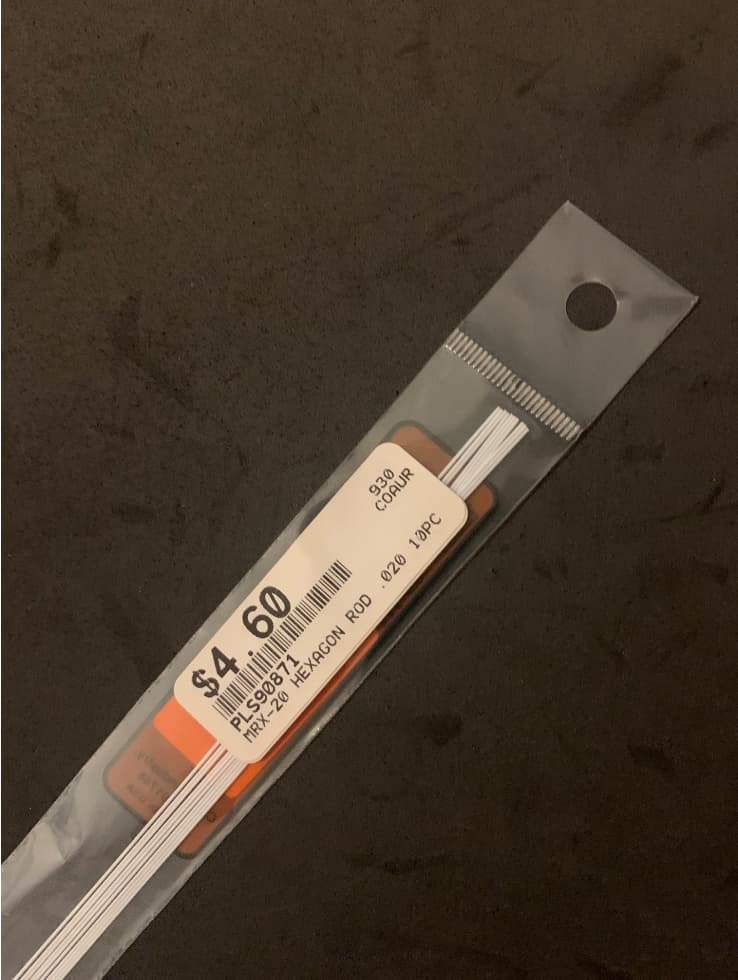
Thank you for the suggestion. I have indeed been adding those bolts to later Sherman builds. Some of these were started over 25 years ago before I either knew or cared about a lot of the smaller details. Last month in Colorado I purchased the necessary hex rod last month to add to these kits.
In one of the photos you can also barely see the holes I drilled on the front edge of the bogies - the edge that does not have the trailing arm bolted to it.
Adding the bolts heads is tedious so we’ll see how far I get.