Thundermodel 1/35 M1A1 Wrecker build

Hi all - starting a new build here . This is the just released Wrecker from Thundermodel.

Lots of parts with this one with all the good and bad that accompanies kits like this . The detail is very good and the fit is good as well IF you get it all right . Any time there are many components involved the chances to go astray increase . I do not want this to be seen as a criticism of Thundermodel - they give us subjects that others ignore.

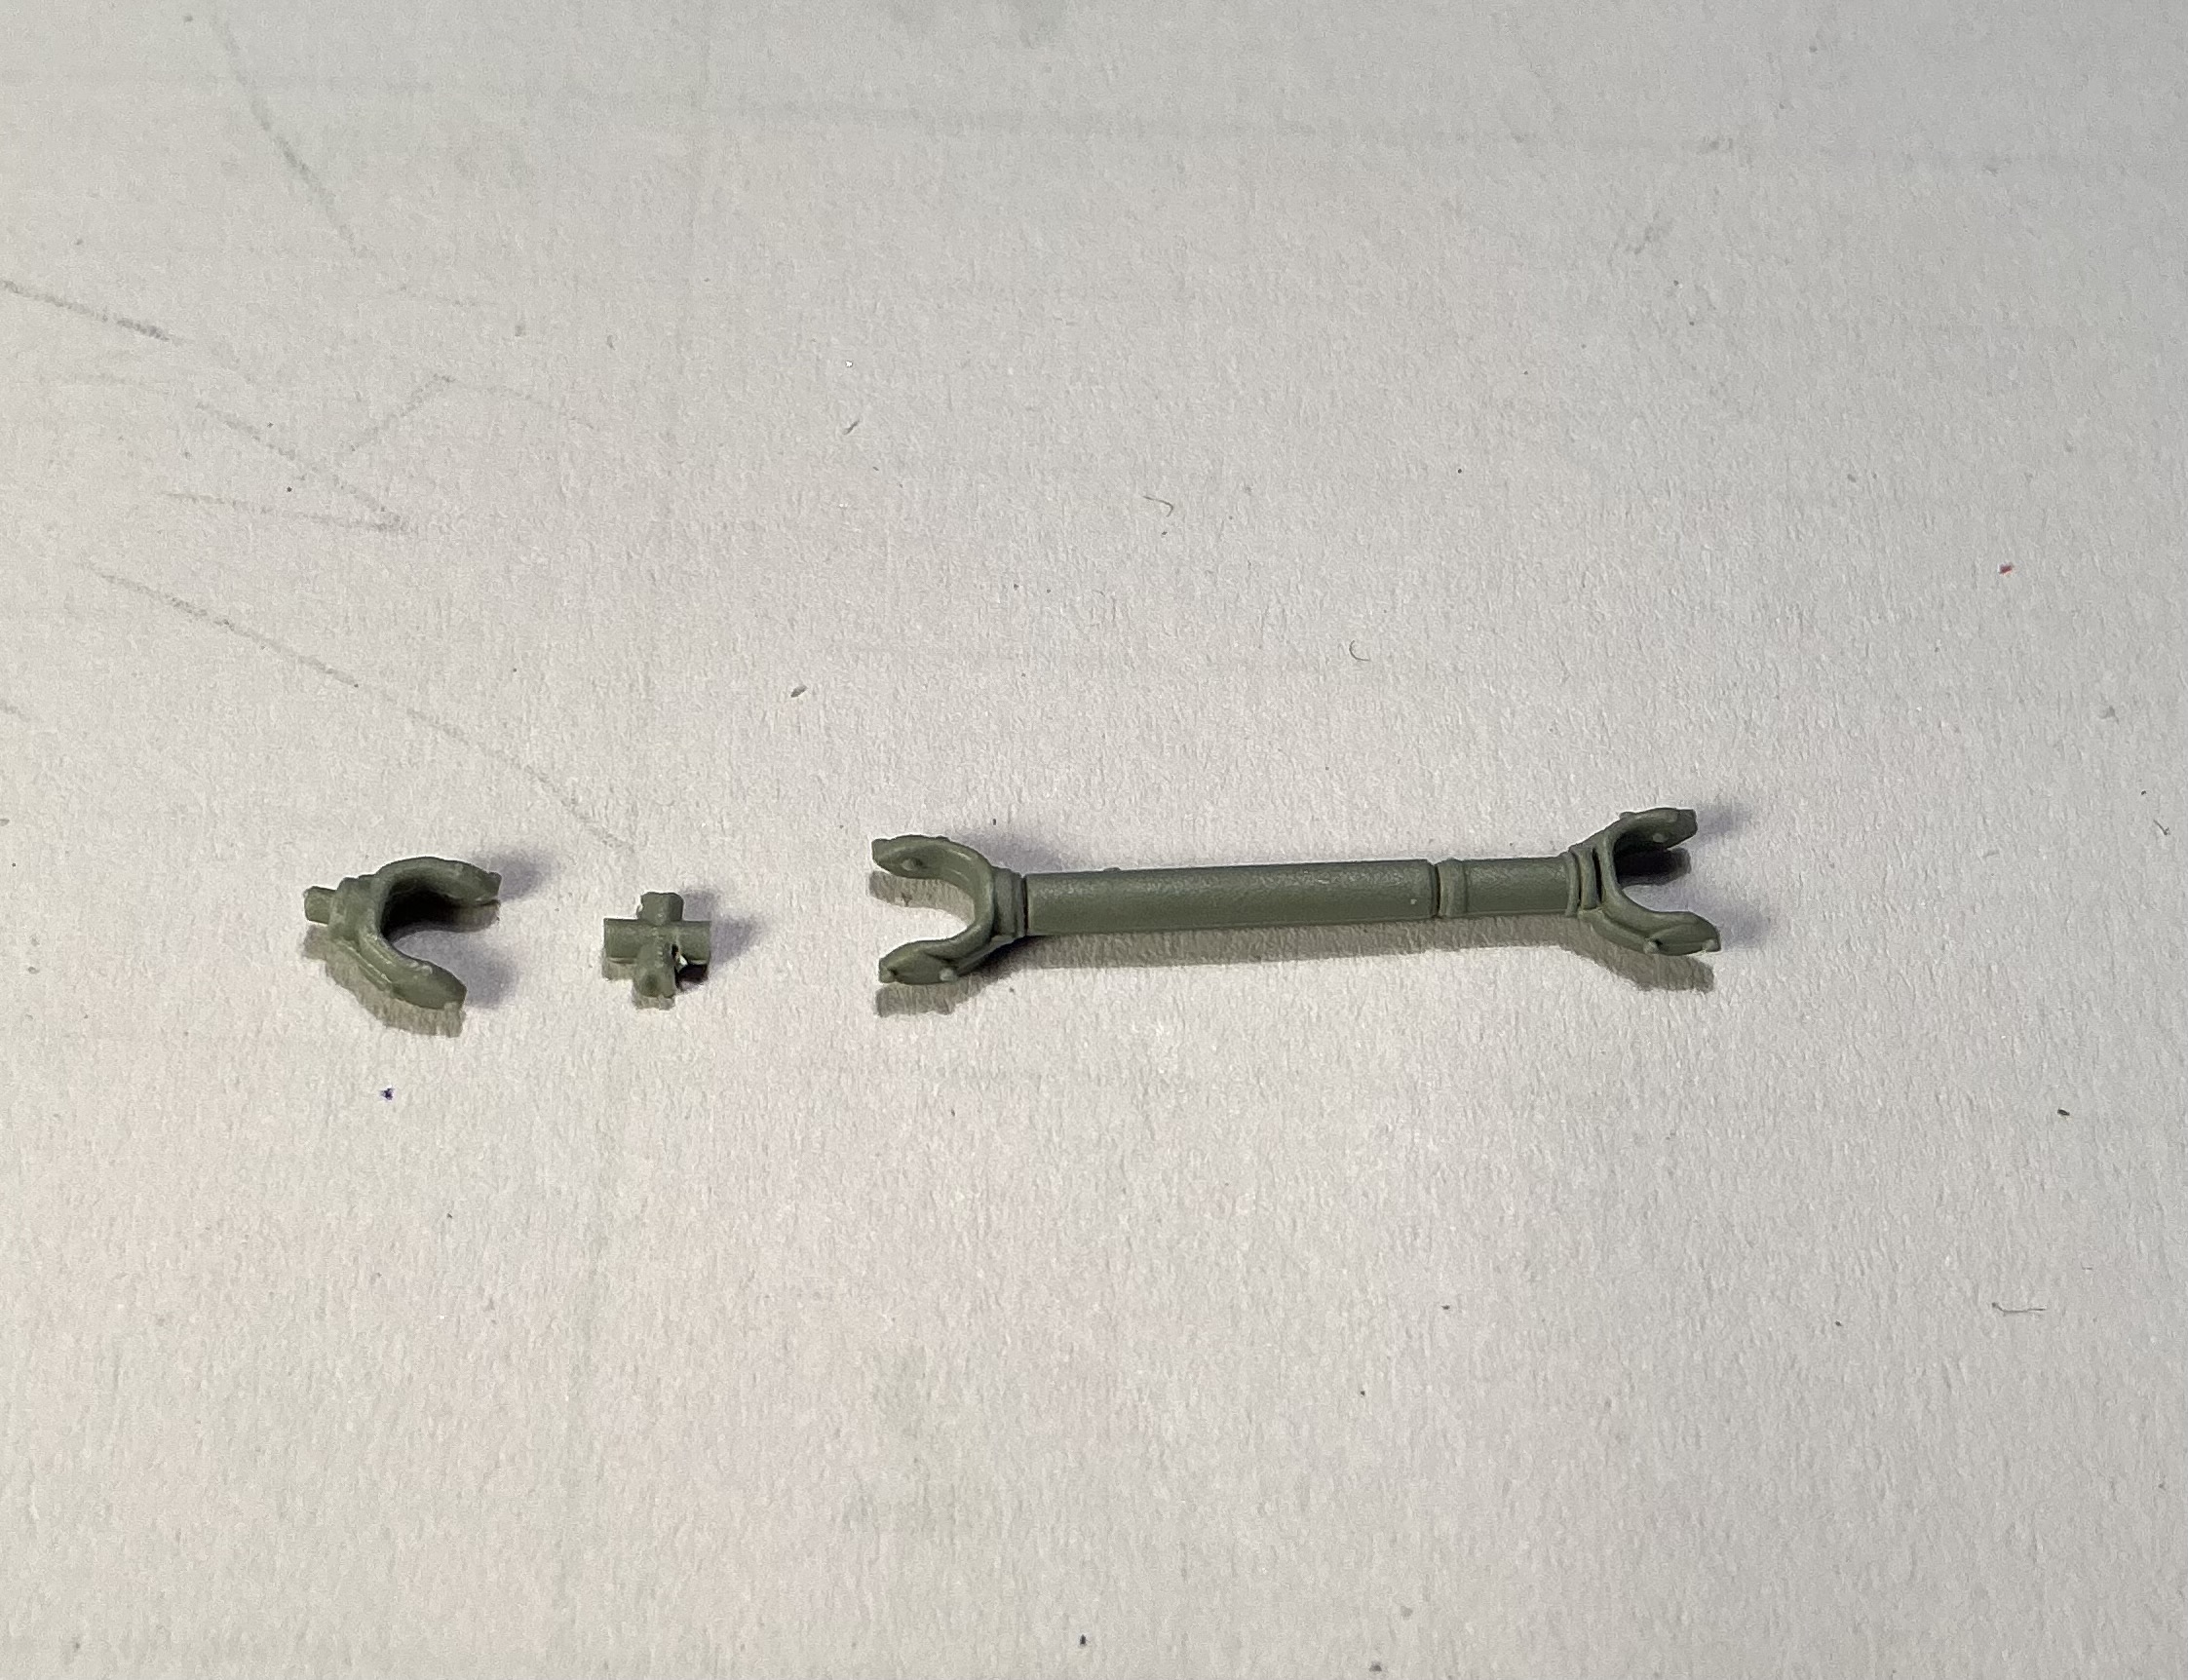
To give you an idea of how much detail there is and approaching the limits of sanity , the universal joints are supplied as separate parts for the u joint and yokes-
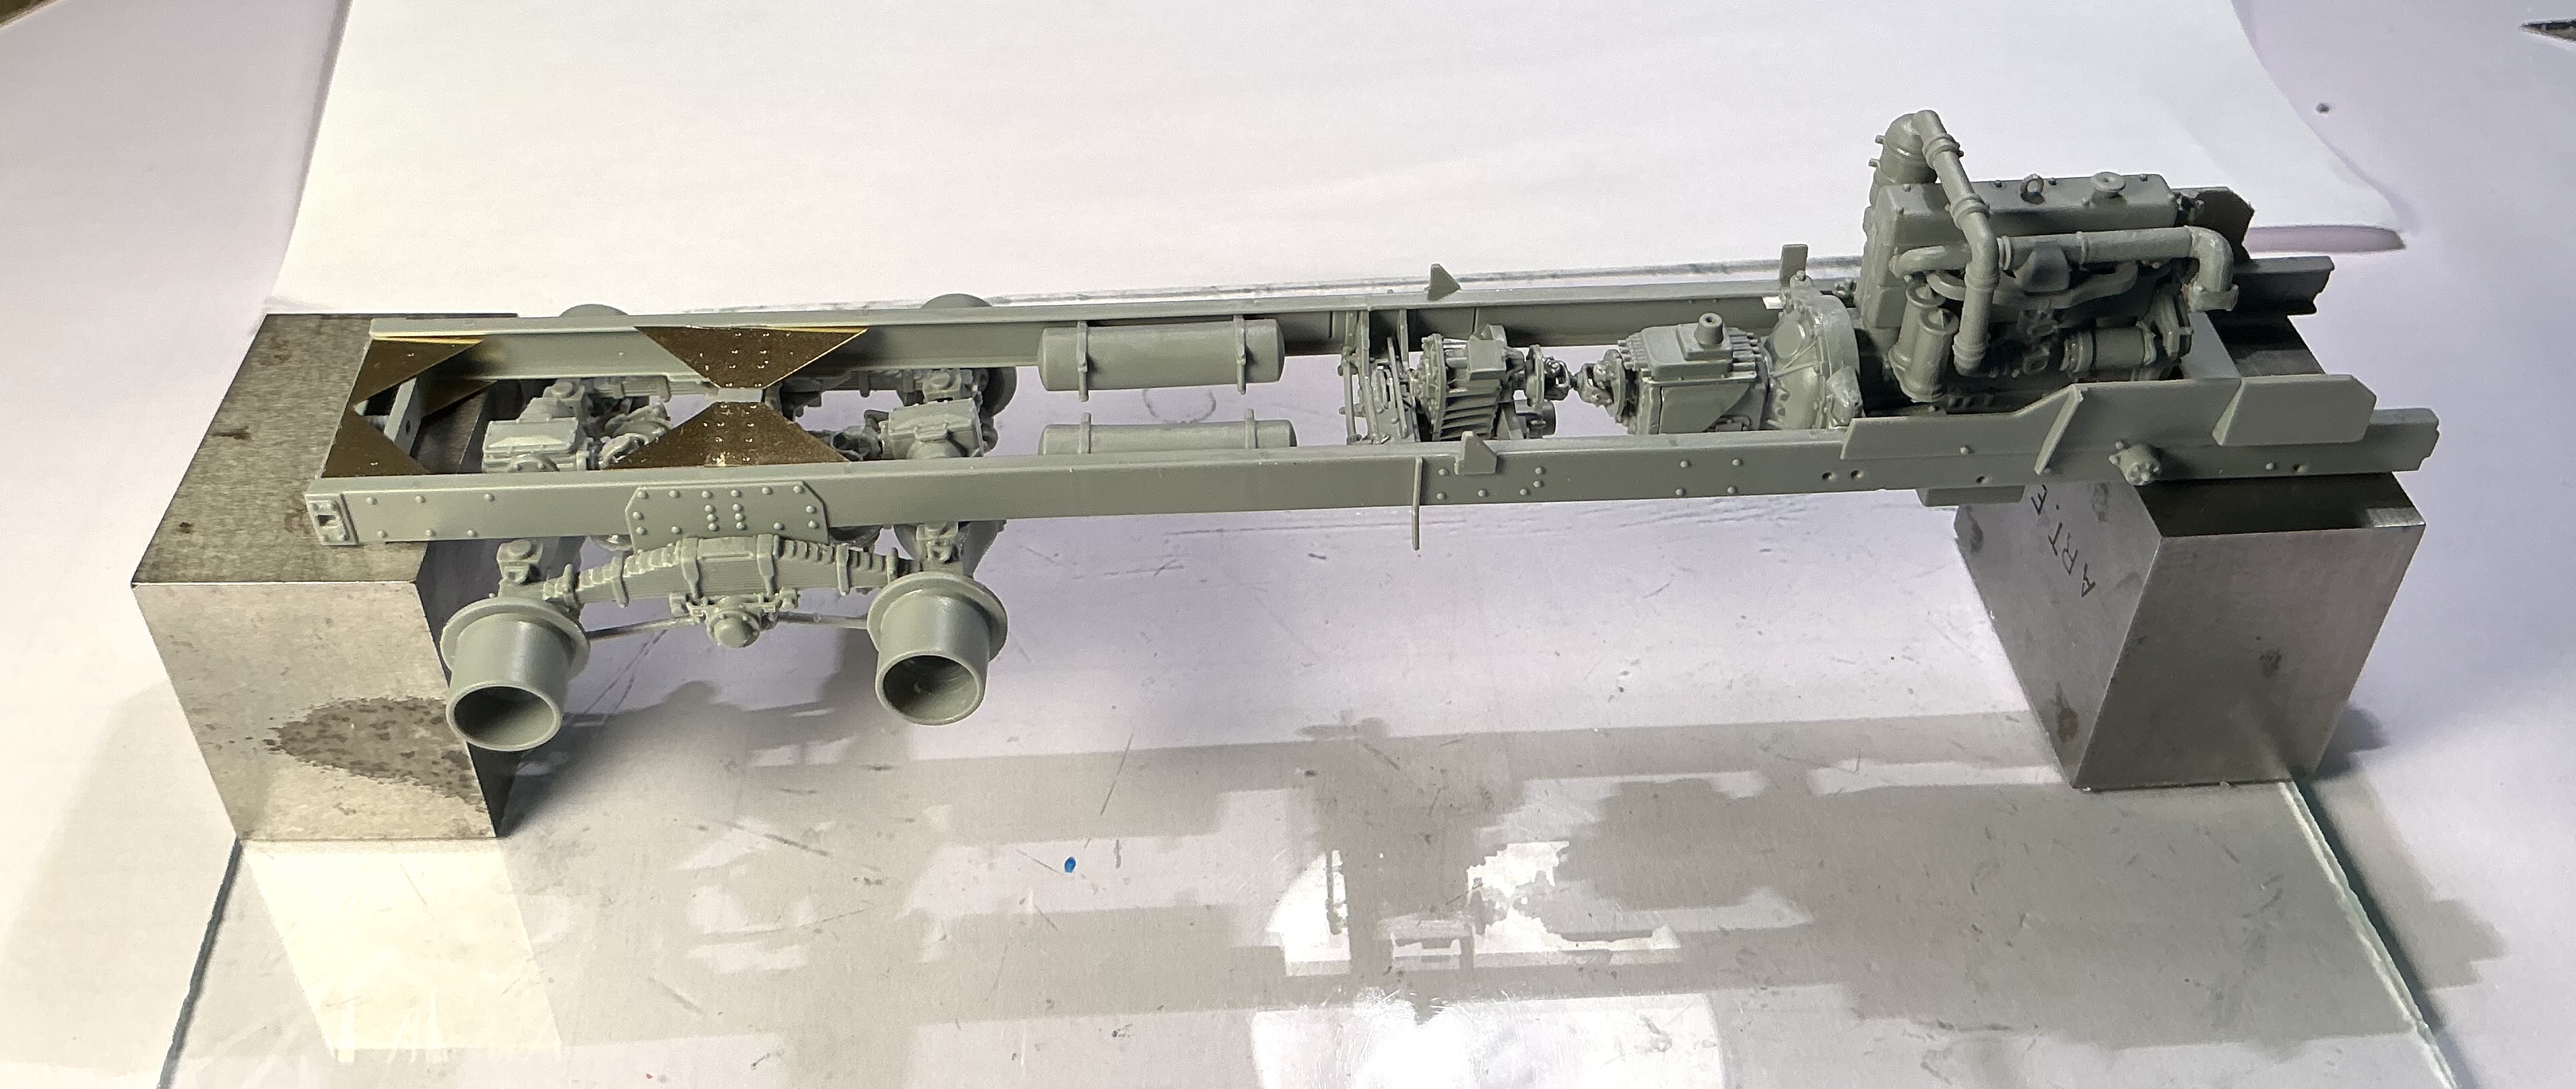
I’ve made a start with the chassis and driveline -
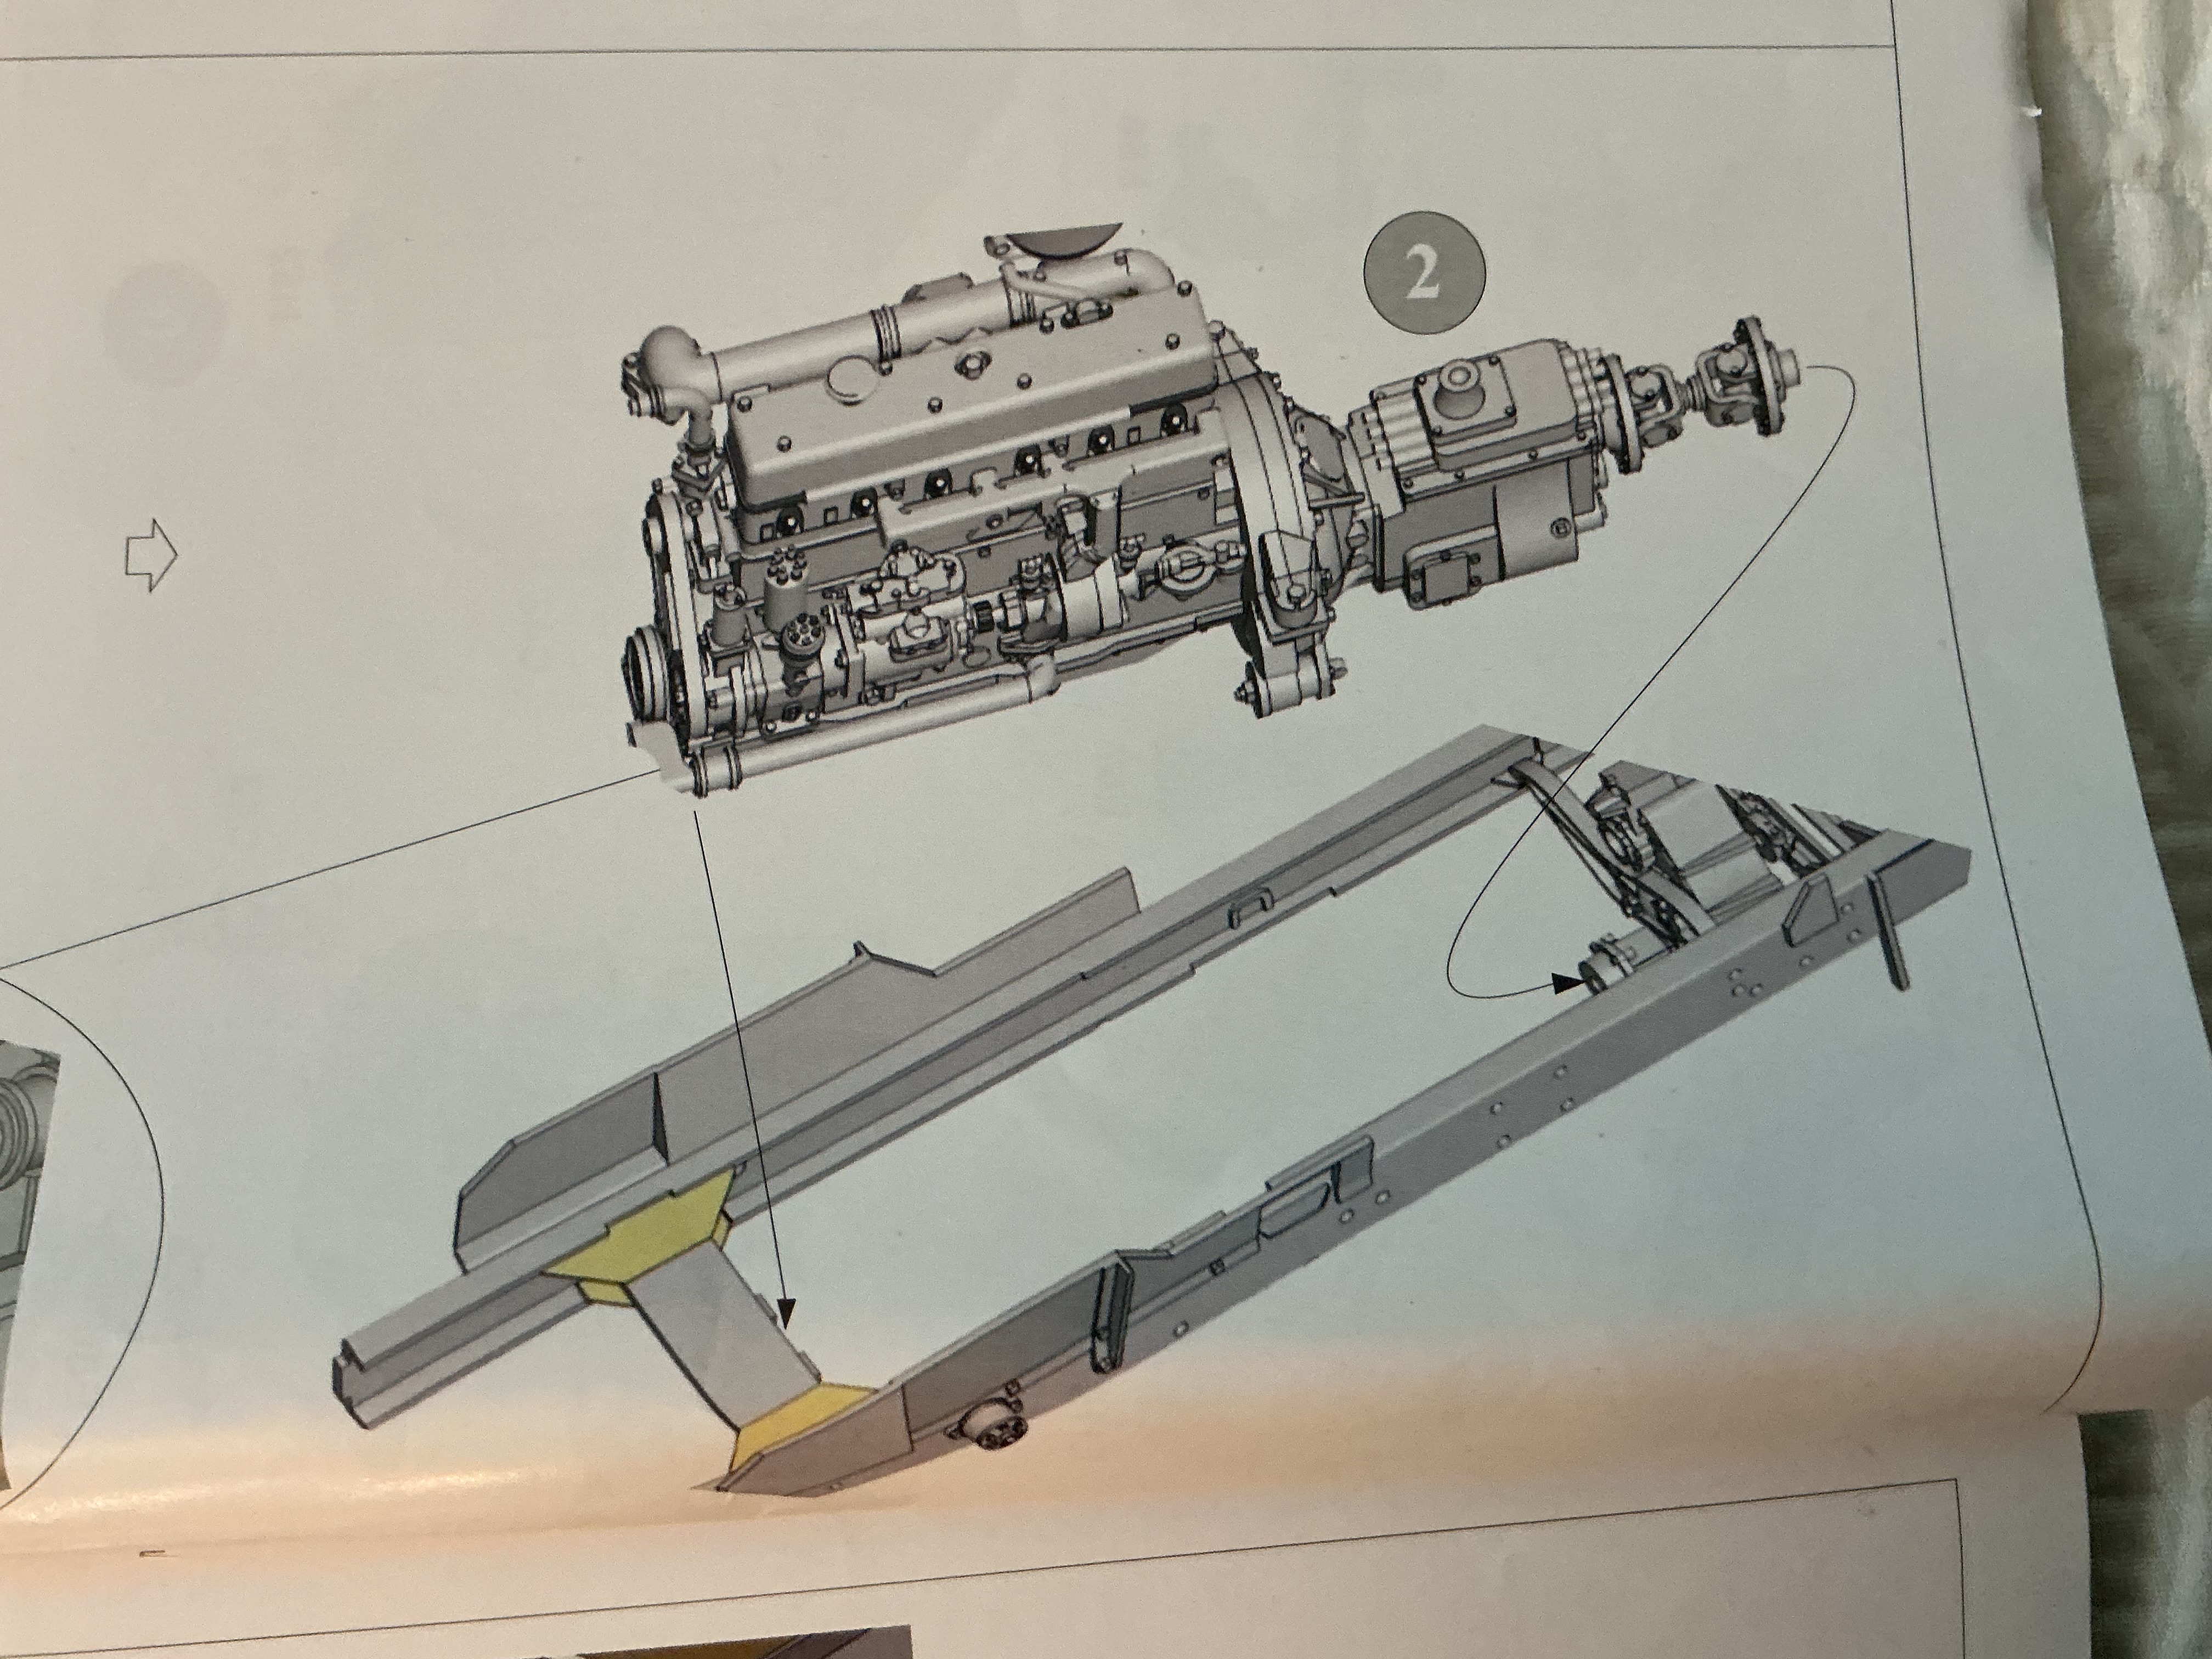
Some errors in the instructions -

They would have you insert the output shaft of the gearbox in the lower hole in the transfer case when it should go in the upper -
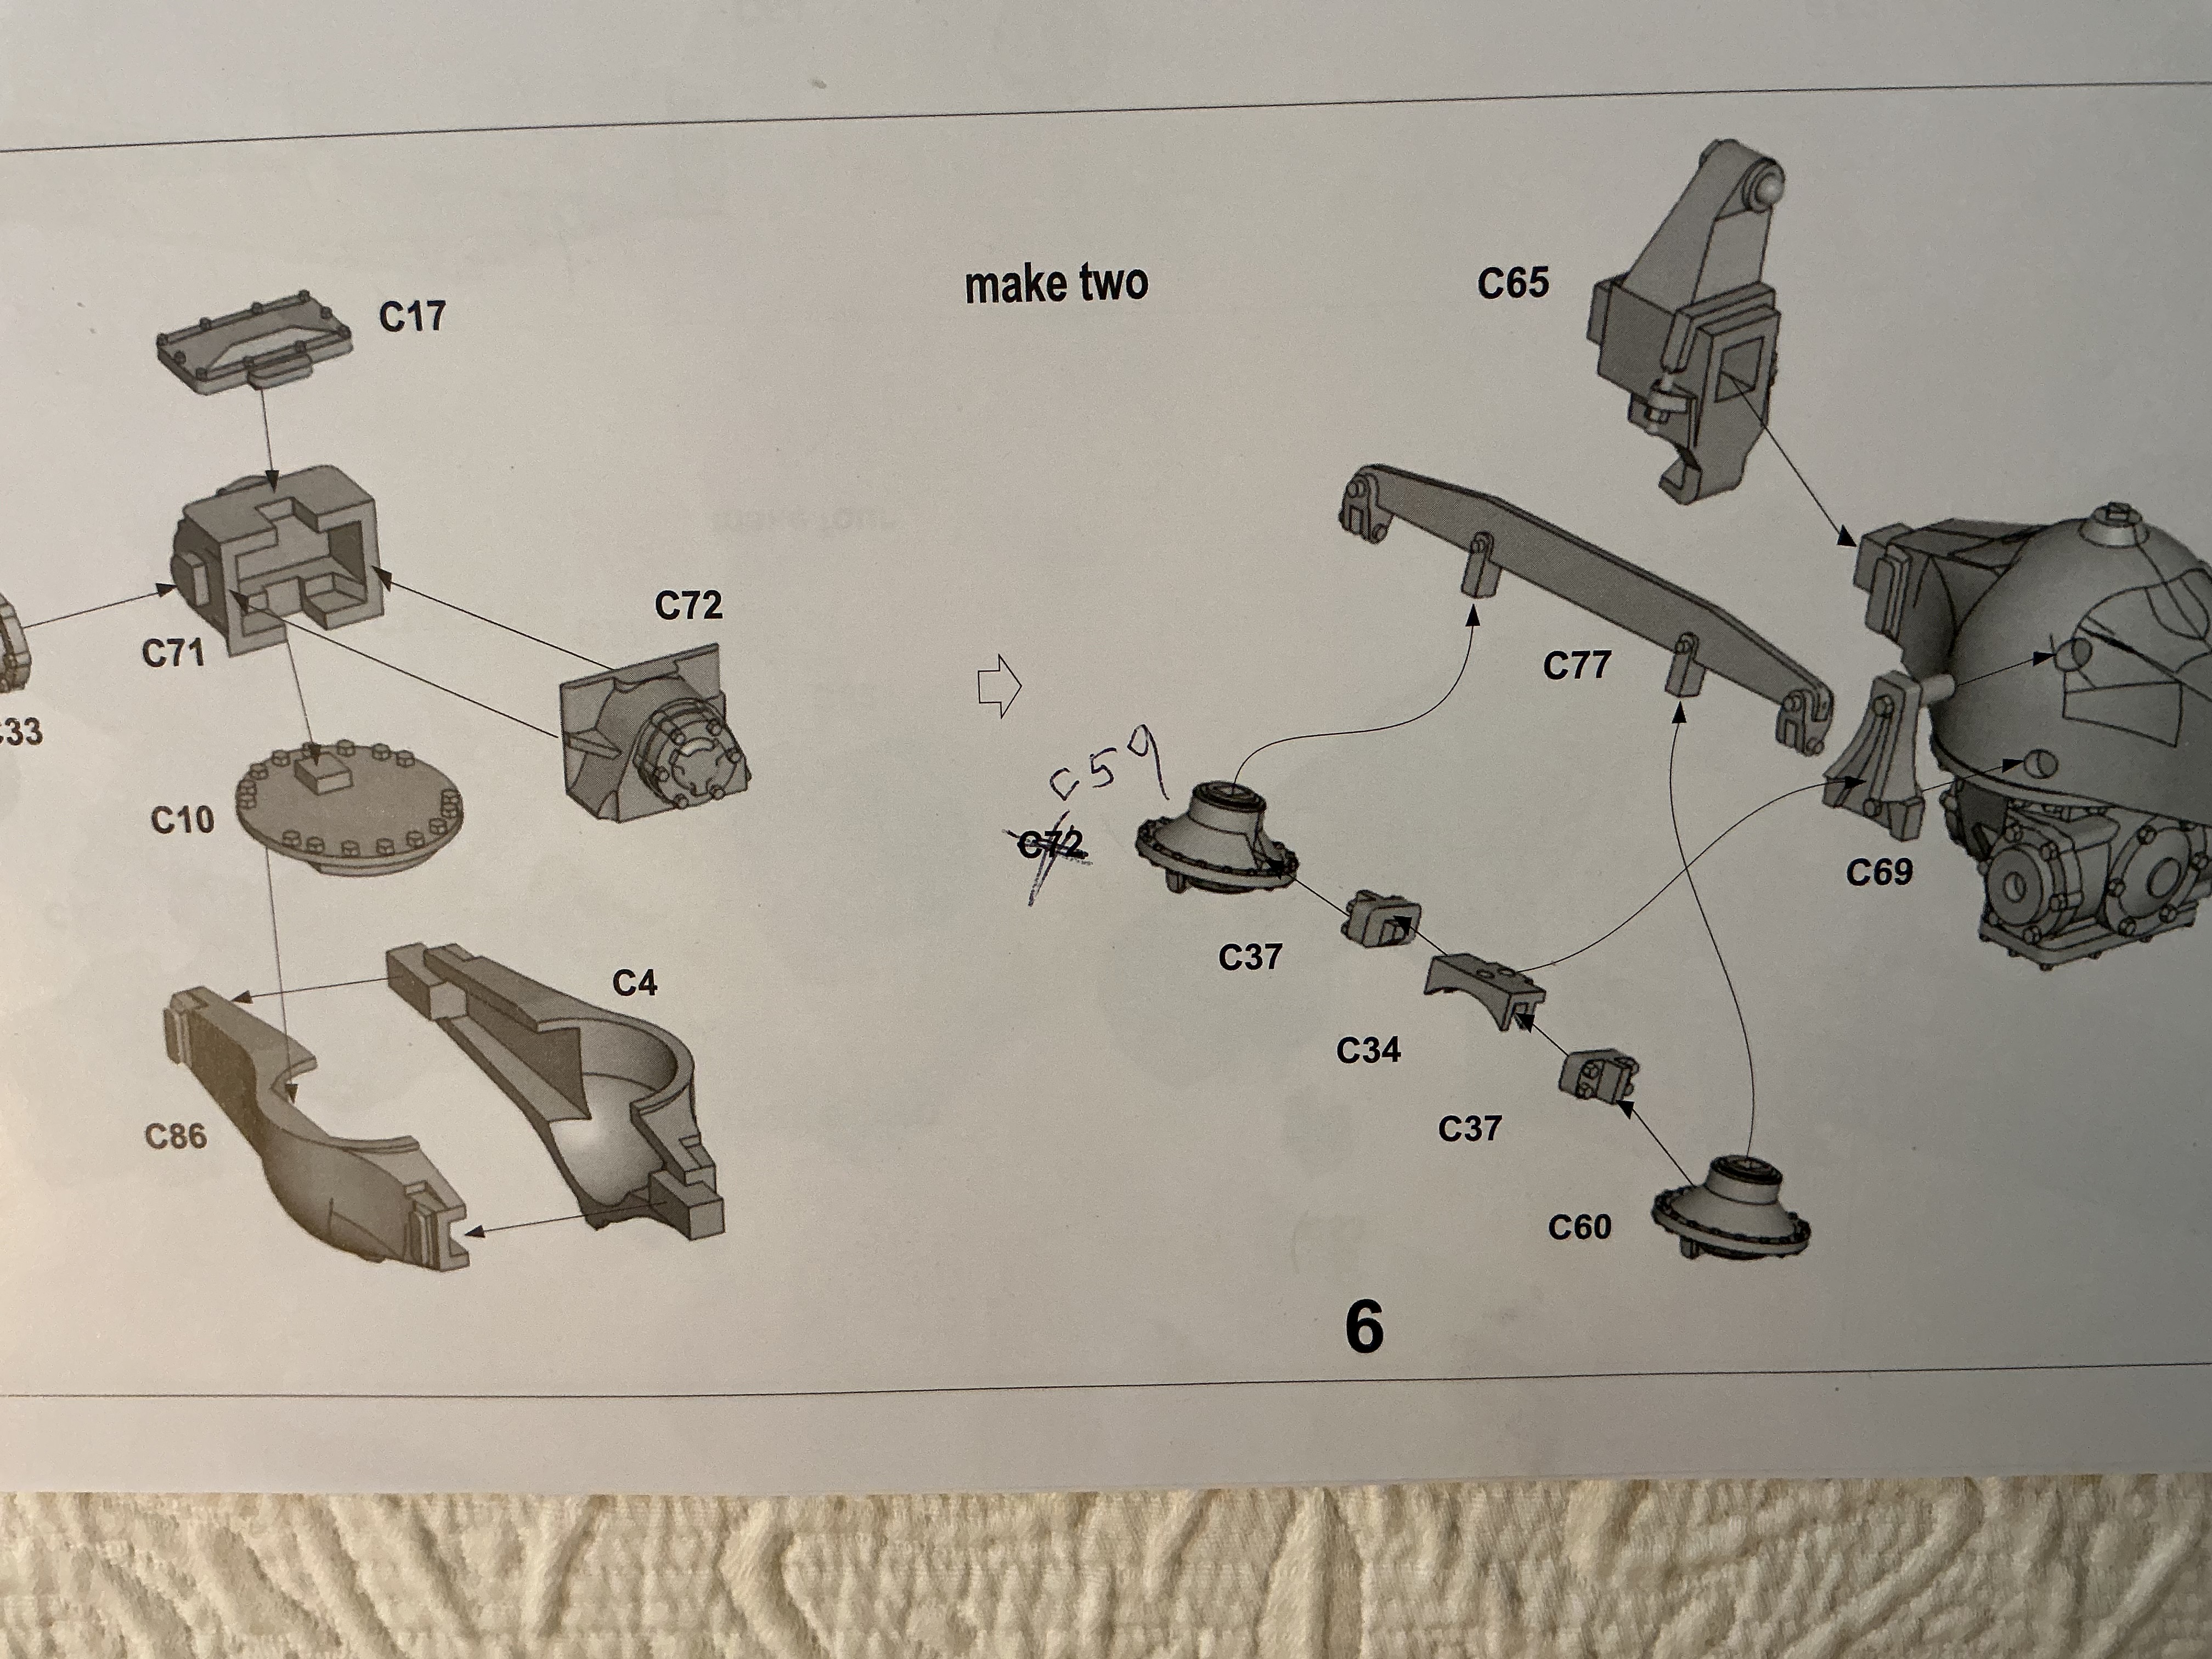
and some errors part numbers - Brake diaphragm is labeled C 72 when it should be C 59.
More to come and thanks for looking.

Cheers- RT

16 Likes

Looks like a decent kit. I’ll be following

1 Like

Chassis mostly complete. Lots of fiddly details but in the end it looks great. Universal joints and driveshafts everywhere. Some locations don’t reveal themselves till further along and much scanning ahead in the instructions is necessary.

The gussets for the chassis are supplied as photo etch - they are very thin and I think they would have been better in plastic - seemingly photo etch for photo etches sake.

I have begun assembling the cab and much puzzling out of the locations is needed - some idiot proofing locator pins and / or illustration in the instructions would be helpful.

Again I want to emphasize that this is not a criticism of the kit - just calling out the pitfalls .

It is a very detailed model and I think we are lucky to have it . Producing something like this is extremely difficult and expensive and I’m glad to have it , pitfalls included.

8 Likes

Your build is coming along really well, and the amount of effort you are likely putting into it is clear.

As a model truck building and detailing enthusiast, I understand and agree with the points you raise about the kit, or others like it. I generally like working with PE, but have come across kits where it is ridiculously thin, and to your observation, makes it almost more work than it is worth. And, I suppose the same goes for tediously complicated suspension/driveline assemblies (the Bronco 6x6 MPCV coming to mind here!).

I think the material used for PE makes a huge difference in how the parts work and look, reminding me of my favorite, being the Aber PE sets for T-55s. As ridiculously high count of small and complicated parts, but, they work well and look good once installed, with most actually looking better than the parts provided in the kit, even some on the MiniArt versions.

Like the gussets you have installed, were they really needed to be made from PE? and if so, why did they use such thin material? As ‘simple’ as they appear, my bet is they were harder than someone might guess to install - not just gluing them in, but keeping the material flat, and the edges flush or perpendicular to whatever they were being attached to, or installed next to. I wonder why they didn’t make them in plastic? and instead make the splash guards next to the engine in PE? which look too thick. And, as a suspension enthusiast, I’m not sure how much I would love making up multiple sets of scale U joints! I know, gripe, gripe. gripe! :grinning_face_with_smiling_eyes: :grinning_face_with_smiling_eyes:

Coincidentally, I’ve been working on a few old AMT kits lately, and can report with clarity that the plastic shapes called U joints…yeah, do not look as good as yours do, or much like U joints! At all! Many of the parts share this attribute, as they look vaguely similar to the the desired part, but need some work to get them looking better. And, locating pins and clear instructions would help!

So, I will watch you bravely march, or in this case, drive forward with this interesting build!

Cheers

Nick :man_biking:

1 Like