Mr Byrden ,
do you have any data about the plate thickness of the “Late “ model Rear Mudflaps on the Tiger I ?
See picture
Regards,
Mr Byrden ,
do you have any data about the plate thickness of the “Late “ model Rear Mudflaps on the Tiger I ?
See picture
Regards,
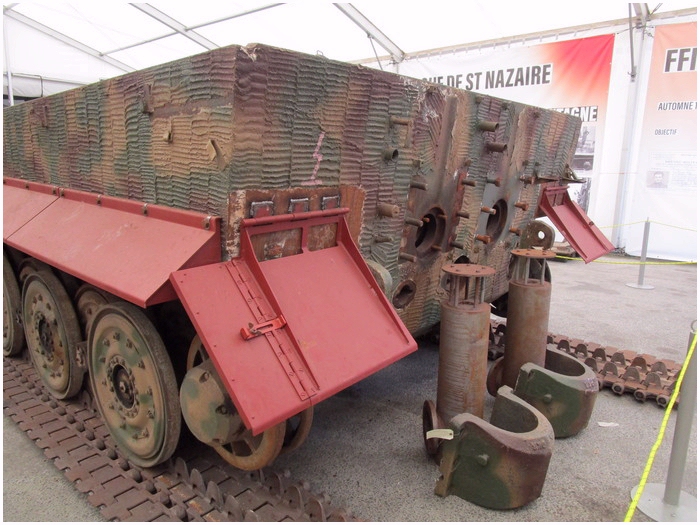
I recall reading on Tiger1.info that side skirts were on the order of 5mm thick. From photo comparison, I believe the mud guards were of the same thickness.
Thank you for the info. When considering your answer and looking at my 1/16 TAMIYA Tiger I mudflaps , being 1,34mm thick , I realize the kit flaps are way too thick…. The above picture also shows they are made out of steel sheets, reinforced with corners. Cheers mate !
Glad to help. Cheers!!
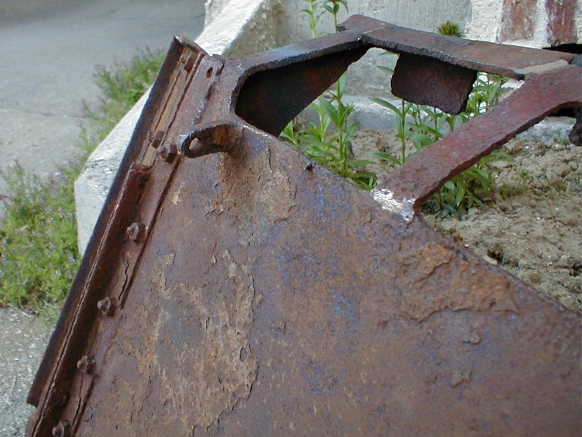
They look like they are made of thin sheet metal that you could dent with a good strike with a hammer. The edges are bent 90 degrees that make them look thicker.
![]()
![]()
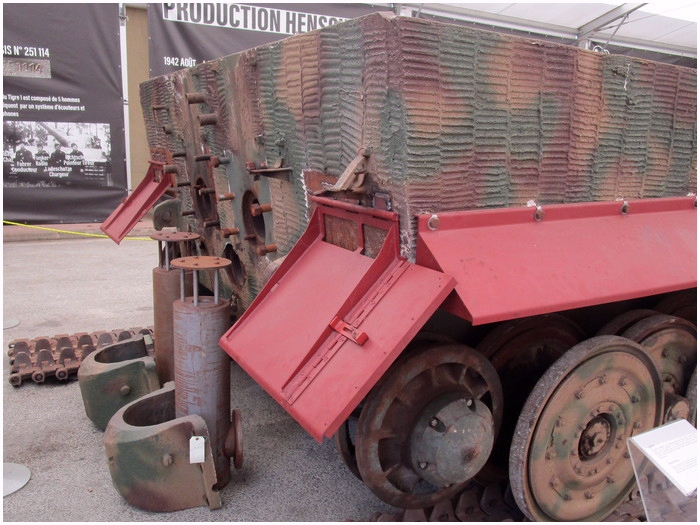
Forgot to mention WHY the thickness is so important for me : I ‘m going to use the 1/16 Aber Set 16051 Rear Fenders Late Version ( See picture hereunder) and I want to avoid to use ONLY the photo etch of the Aber kit because the PE metal sheet is as thin as a blade. Way too thin if you compare with the metal sheet thickness on the real mud flap.
I’m planning to add a layer of 0,2mm plastic card under each PE surface just to create an impression of material , slightly thicker as the Aber PE. If the real plate was 5mm thick , then in 1/16 scale it would be 5 / 16 = 0,31mm thickness. Considered a moment to rework the existing Tamiya Mudflaps but beside the fact they are the wrong( early) version they are way too thick. Bad idea…
It would be difficult to know about the late version, because as far as I can recall, not a single Tiger or Sturmtiger in any museum still has its original late-version rear mudflaps.
Fortunately a gentleman surveyed one that was dug out of the ground.
Five millimeters.
Do you need some more of his photos?
David
Thanks for your info, Mr Byrden. And if you have more photo’s : they are most welcome…
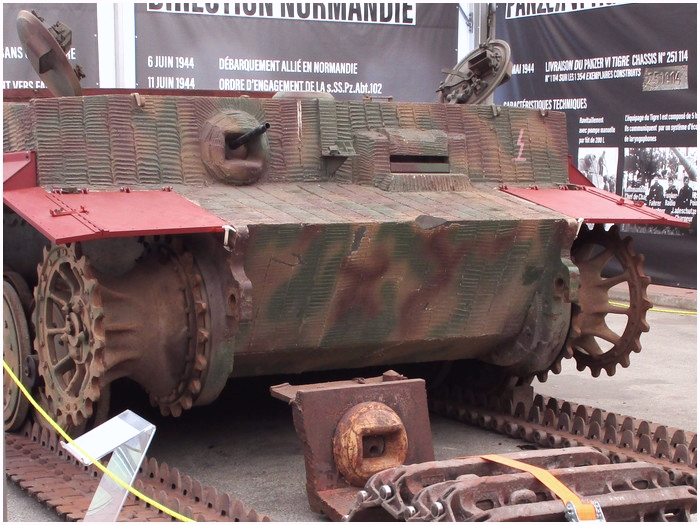
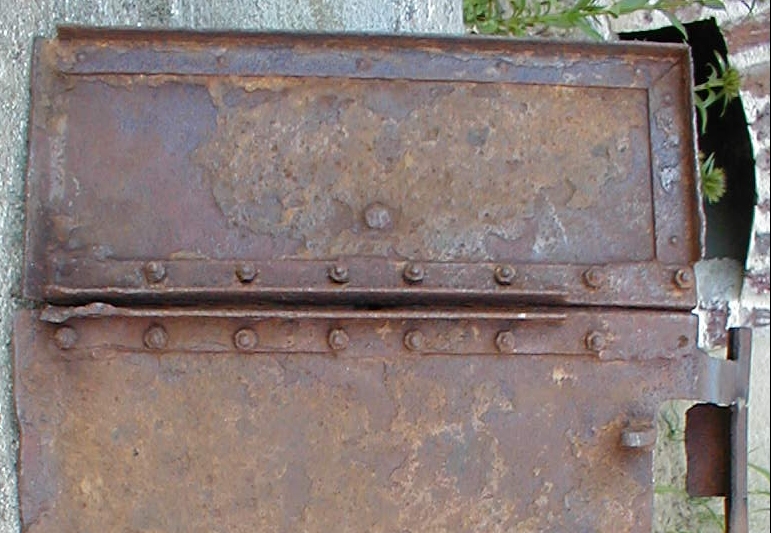
In the mean time I have found these : until recently, the Saumur Tiger I had no rear mudflaps but since it is having an Overhaul at Saumur , they made brand-new (Late) Rear Mudflaps & side skirts : see pics
With the edges folded all around the actual thickness (or thinness) of the metal is not evident. Is it necessary to add to that?
![]()
![]()
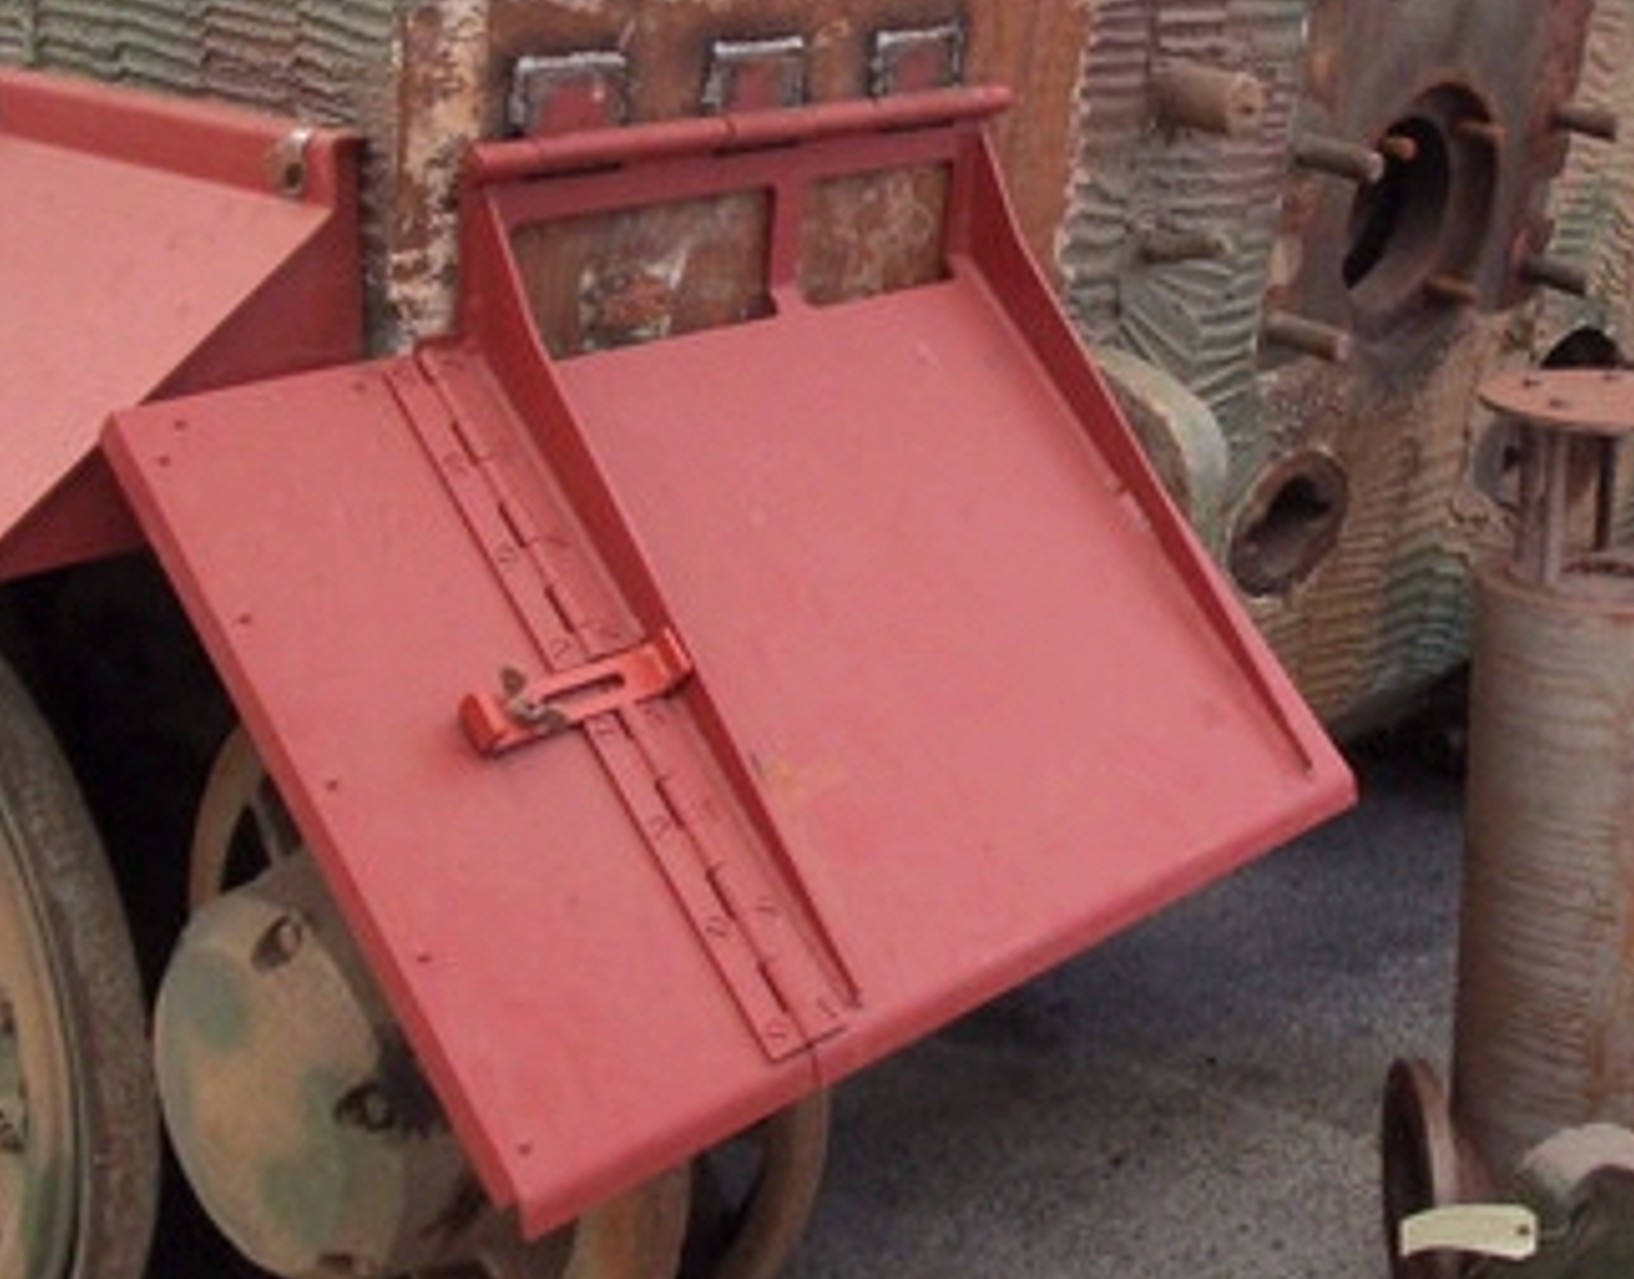
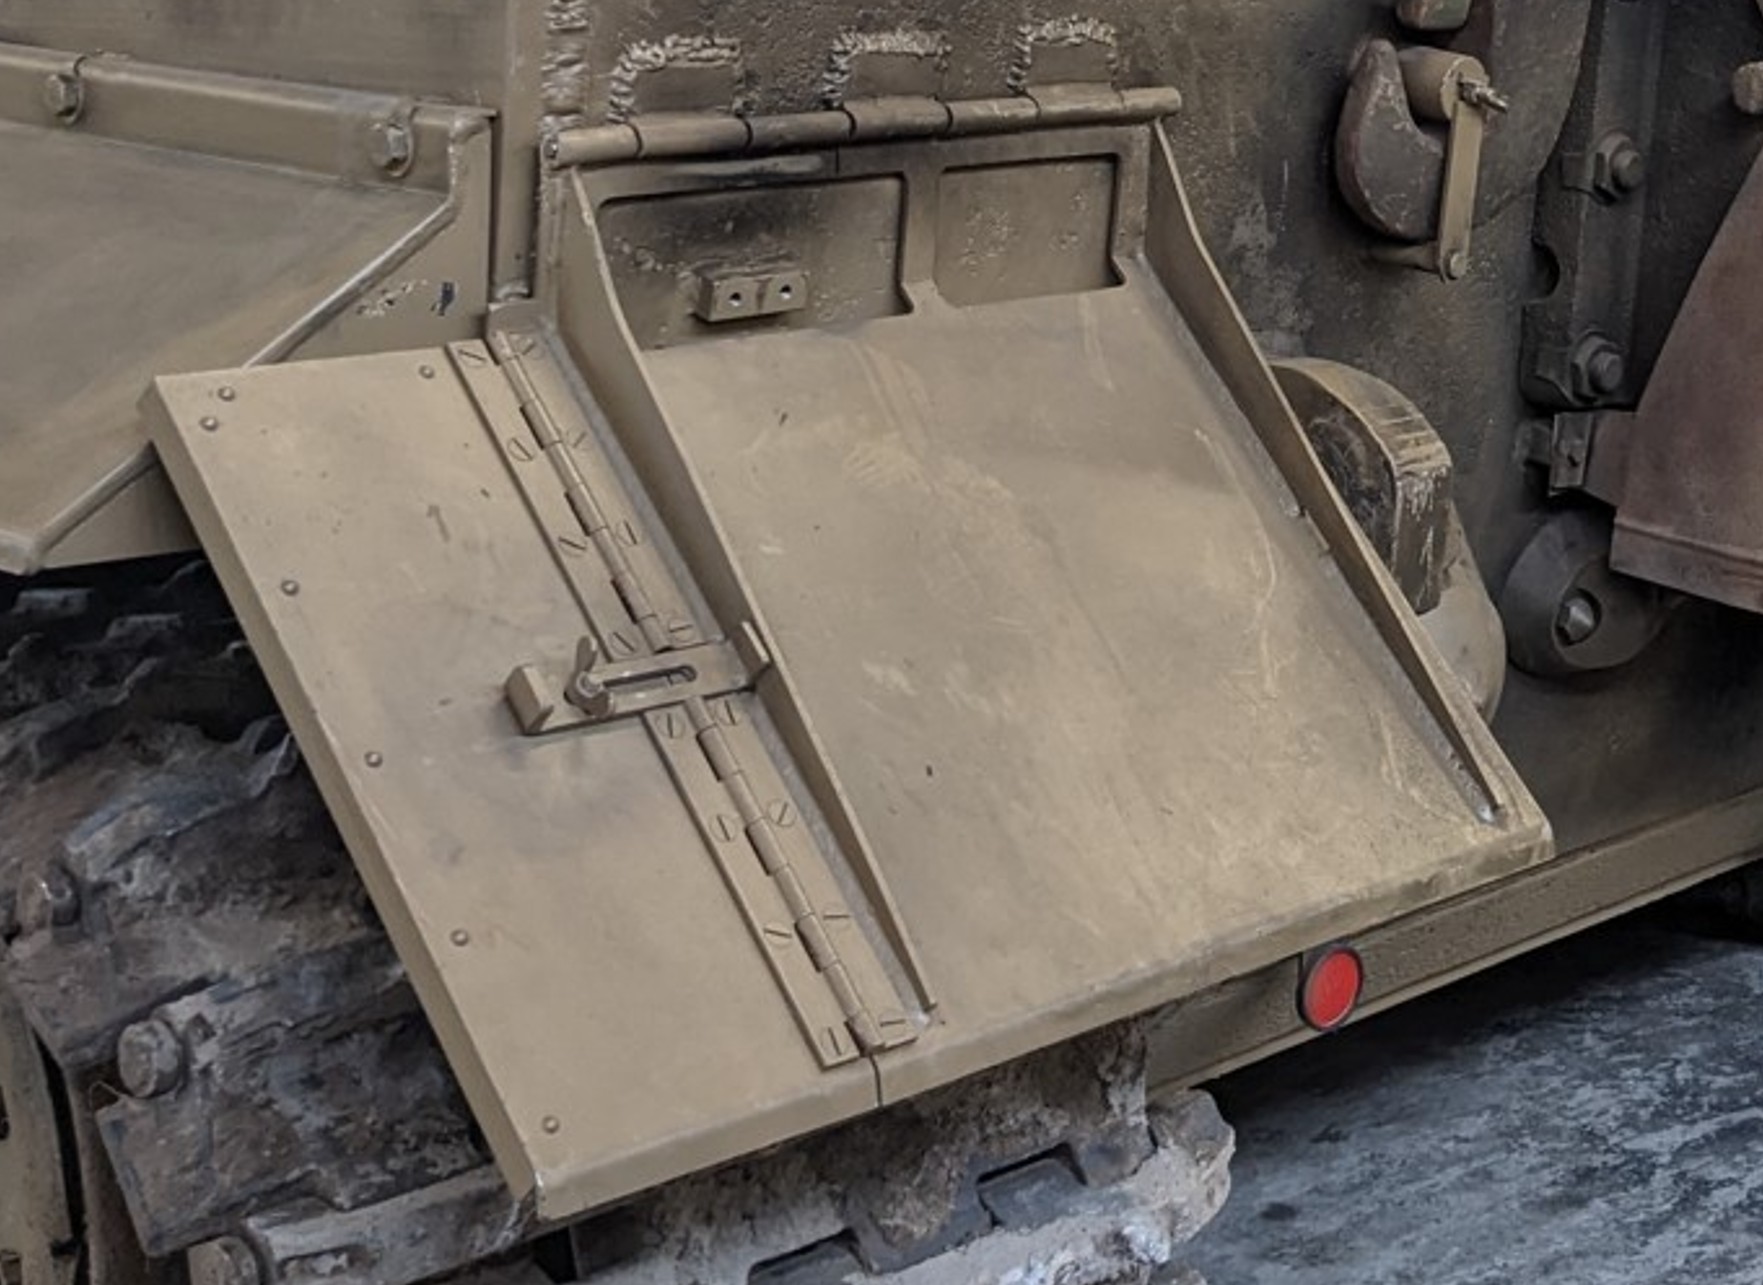
A couple of points:
This protrusion is meant to be there.
These are the only angle brackets on the mudflap; all other edges are bare.
David
Thanks again , Mr Byrden. Like you say : these are rare pictures of the original “Late “ Rear Mudflaps. I don’t doubt that the brand new rear flaps they manufactured for the Saumur Overhauled Tiger I are made following original plans and dimensions, but they still remain “ replica”s… Just like so many parts they manufactured for the Tiger I that is restored in Australia.(See underneath picture). You made an intresting remark about the protrusion. Nowhere on the Aber instructions , neither on any picture of the mudflaps that I ever saw, these protrusions were ever shown. I suppose the protrusion was serving to “lock” the mudflap in the down position when the tank was driving. Maybe I’m wrong but it would make sence to lock the mudflap in (secured) down position, just to avoid the rear mudflaps start “dancing” at each bump or hole the Tiger encounters. Beside the protrusion matter : your 2 pictures give a good view on the quantity and size of hexagonal bolt heads that were used to attach the brackets to the plate(s). I want to reproduce those nuts also when using the Aber 16051 set. But I will use plastic replacements instead of the kit parts. My first guess is these nuts are M8 size - wrench width 13mm. M10 seems a little too big, and M6 looks too much undersized. But that’s only a guess of me…..
Hello Biggles , there are some positions when you look at the rear mudflaps at the naked Aber PE , without additional plastic card, it is visually too thin. A slight 0,20 mm plastic card gives a completely other view. Just my 2C ….Now I am aware this is not an easy job, but having a lot of sandpaper, rulers, knives and a whole bunch of files, I think I’m going to try it.
You are correct. M8 nuts and screws.
They are spaced at 65mm, except the middle ones 55mm.
David
Thank you Mr Byrden for the very accurate info. Appreciate it. Have a nice day.