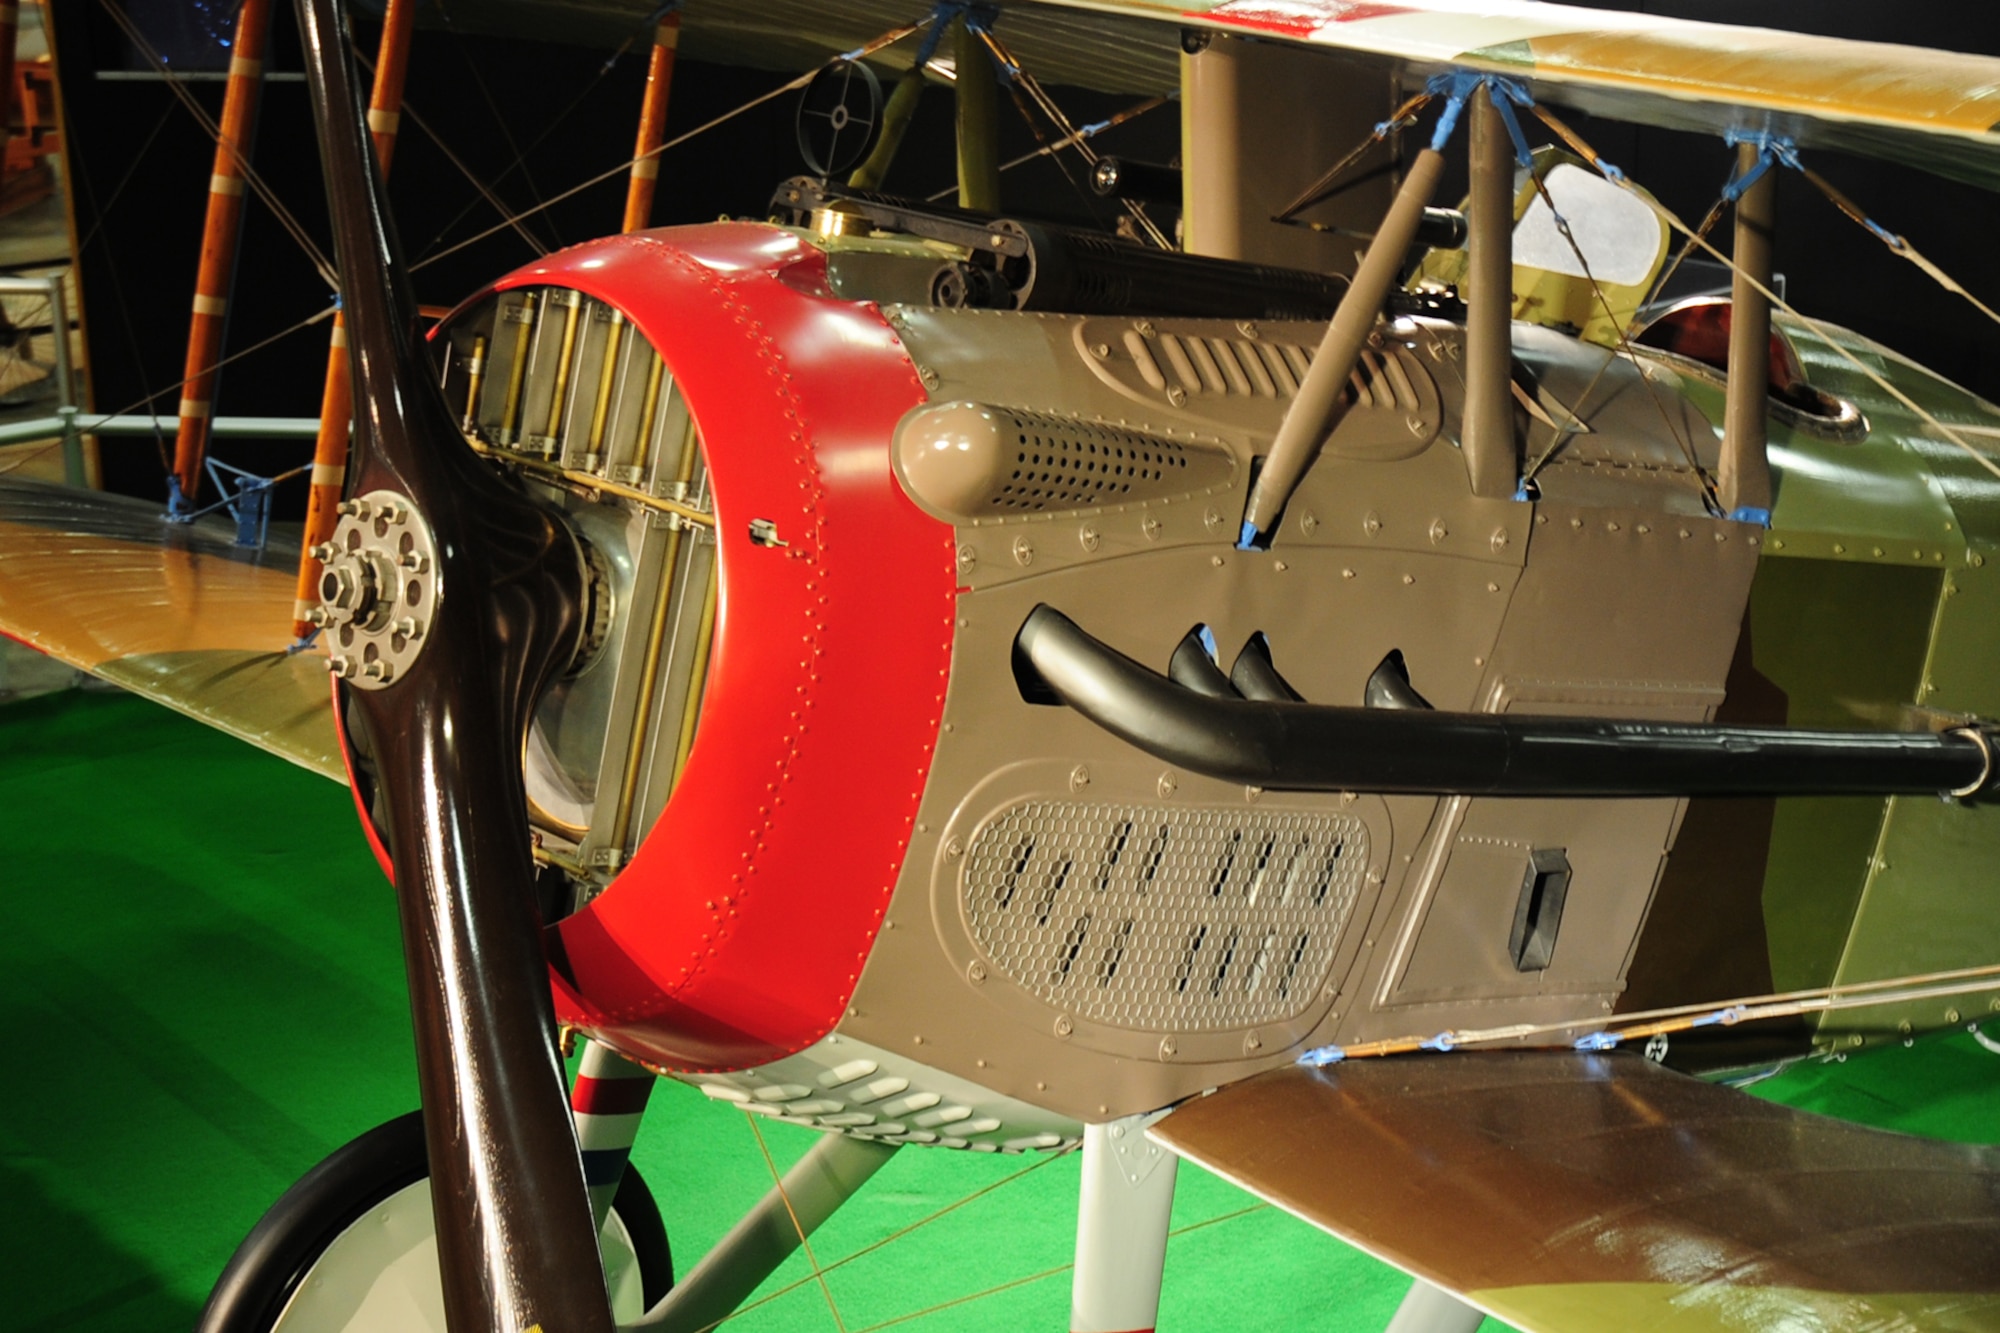
I have been thinking and checking photos of the Spad.
The struts don’t have a uniform cross section.
I think that the load from the upper wing might be more than Evergreen (which is rather soft) can handle. Maybe that was the reason for using PE …
I would experiment with copper wire, hammer it flat to try and recreate the “airfoil” section and file the ends to correct shape.
Maybe the wire could be rolled into shape with a largish steel cylinder.
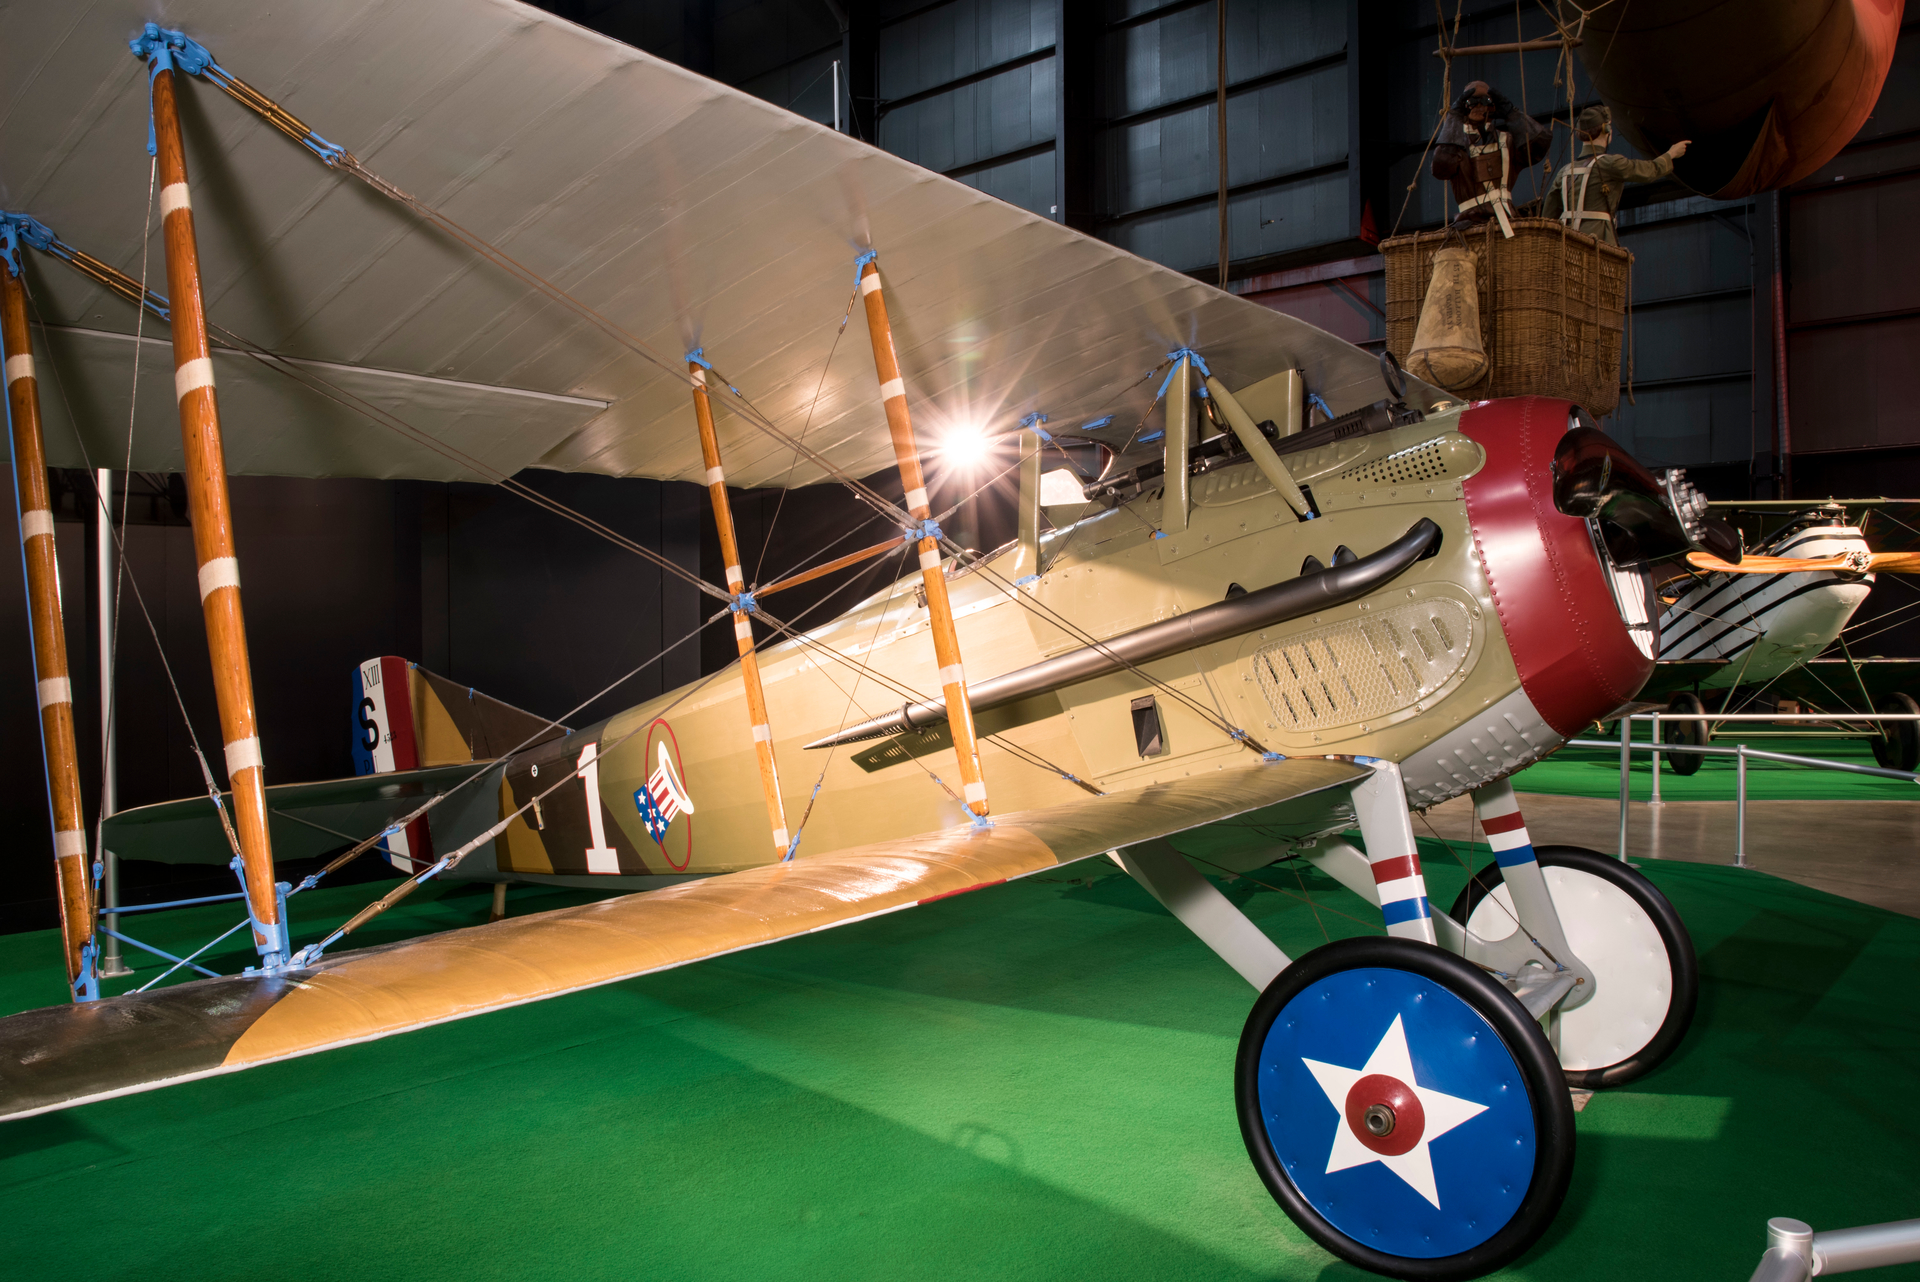
Photo from the Airforce museum
Walkaround at netmaquettes (a French website)
1 Like
In these situations, when I look at the work done on the model if I can still reasonably get within 10% of what I’d planned, I’ll keep grinding forward. In one case, that took 30 years to finish the model. It sat on the shelf many years while my skills refined.
In other, cases the kit is a disappointment and it’s never going to be close to what I wanted, it’s off to the waste bend.
Spilled bottle of liquid cement being rhe exception as that can wipe out anything sometimes.
4 Likes
Thank you Uncle Heavy I’m a total history nerd I have these in my collection on the Spad. If I lived in upstate NY I would go to Old Rhinebeck Aerodrome since they have flying replicas and they are known to build them to the same specifications. The odd thing in the museum photos is the Spad representing Eddie Rickenbacker’s Spad has 2 tension cables at almost every location. I thought from other photos I’ve seen they only use single cables.
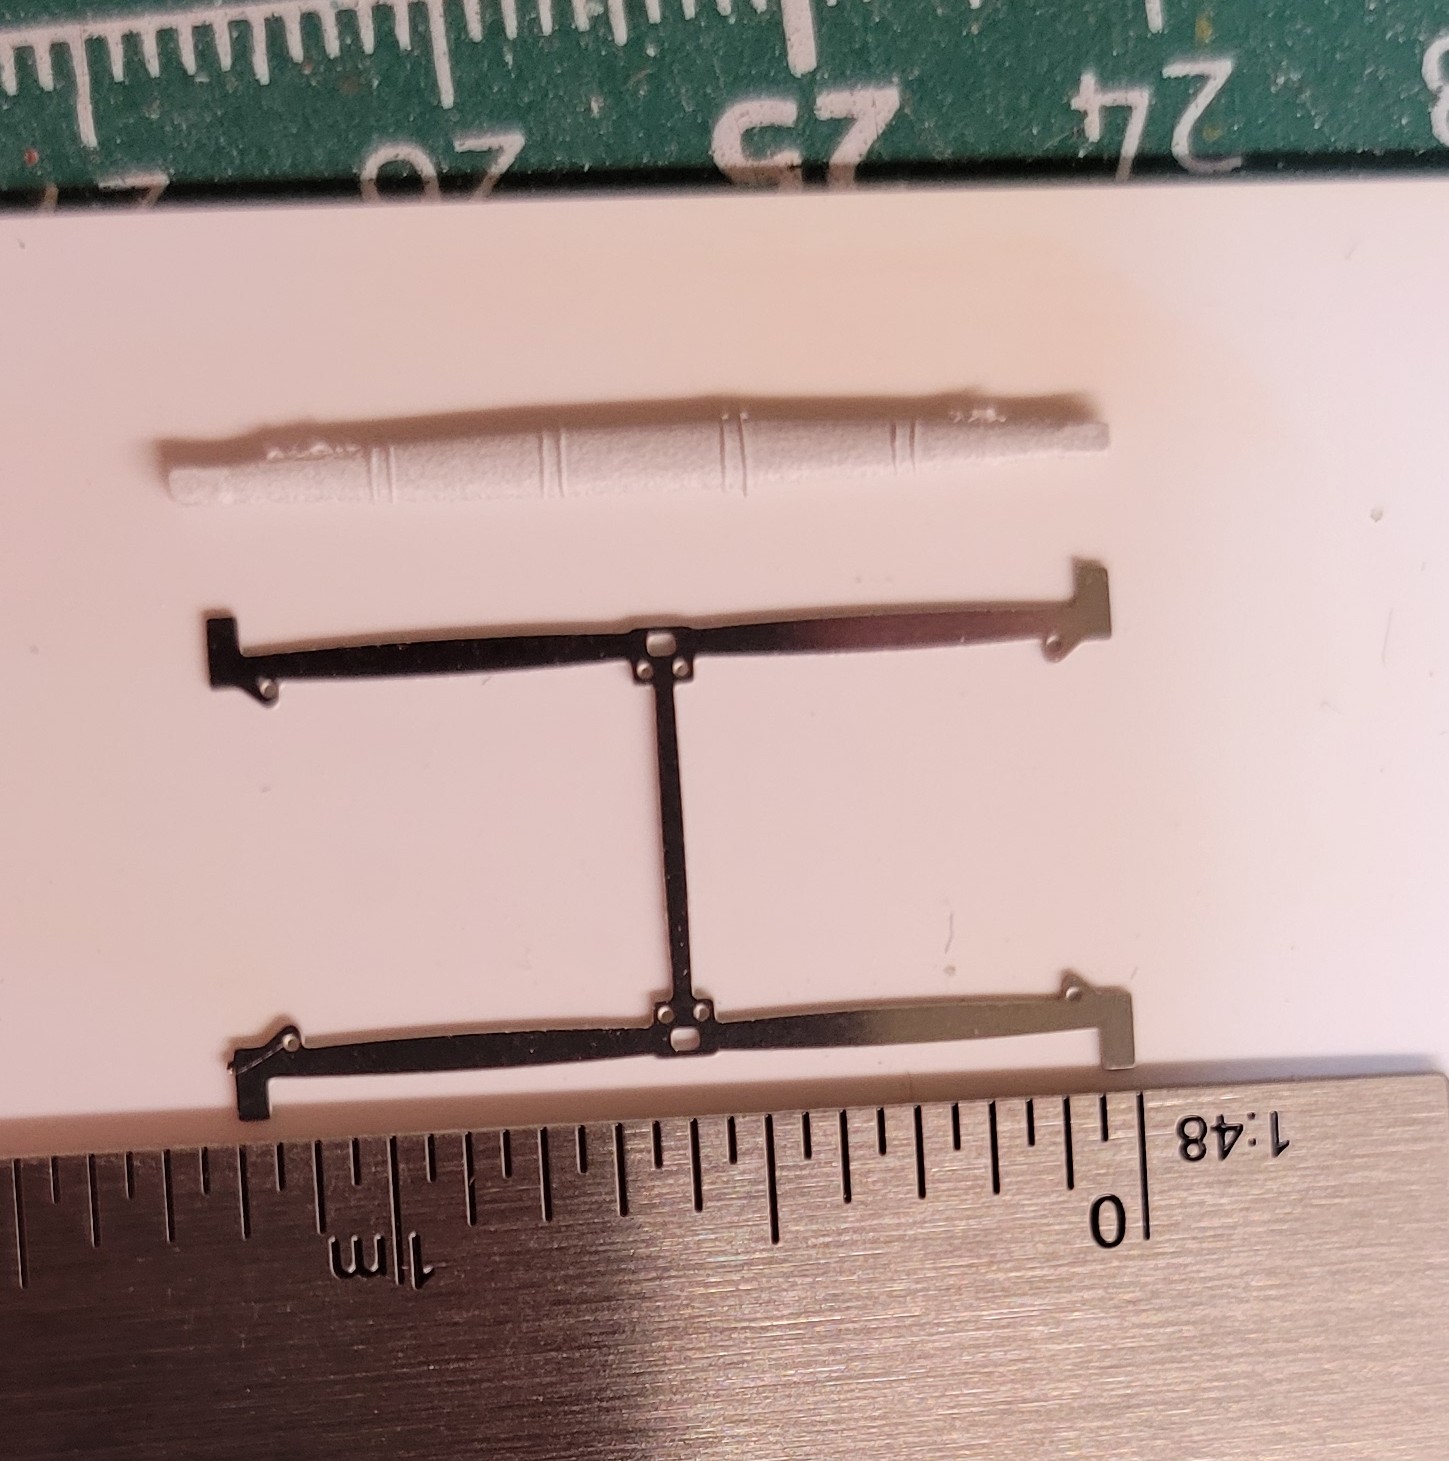
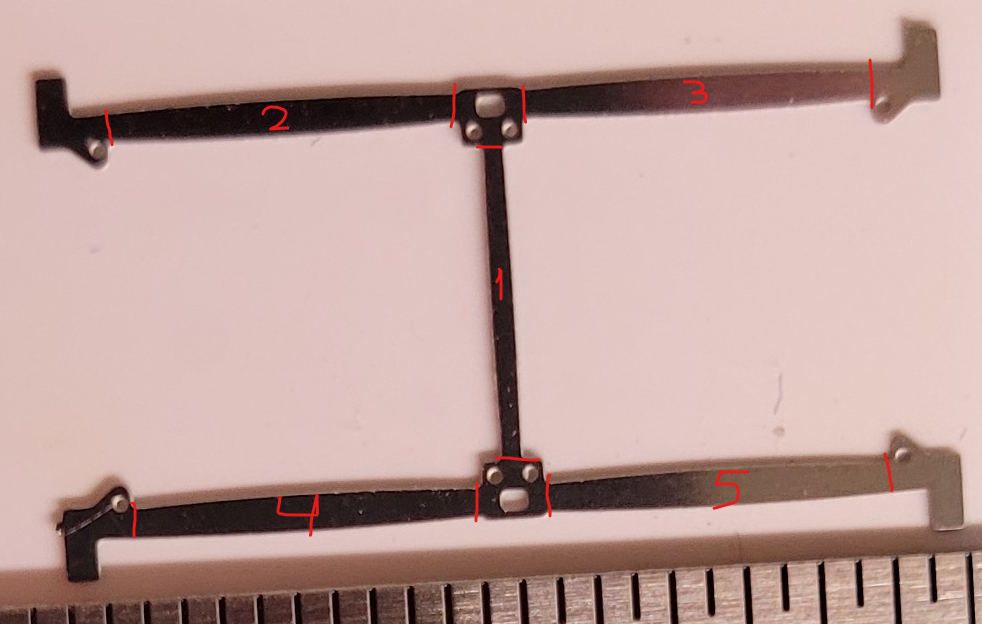
The struts that the PE is representing is in the center of the wing “H” shaped. Maybe they used PE because they had a problem casting that part and it was too fragile. Since it is in the center of the wing Evergreen might be able to be used but I’ll need a thick enough piece to shape it as the inside piece is a single molded strut from the fuselage and the outside pieces are single individual molded pieces. The PE is too flat to represent wood correctly.
But, I could use the PE to trace out the strut on sheet styrene and work from there. At least dimensionally it might get me closer. I have some thicker styrene on order but won’t see it for a week. In the meantime it is shelved and I’ll start on something a little simpler for this man-child lol Tamiya 1/48 BF109E-4/7 Trop
5 Likes
@Armor_Buff thats a reasonable view. Admittedly I am anal about some things and I’ll need to reexamine my levels of expectations and acceptance. 40 years as an electrician 35 of which were all about precision shaped some perceptions. The 14 yr old me would of tried to finish it without any research so there is that train of thought. I also probably would’ve blown it up lol. Like figurine painting I want it to come alive and as you said skill level will play a part in it.
@Uncle-Heavy Here are 2 pics of the part(s) the casted part is the outside forward part of the wing and the Etched is that “H” support. I also just noticed that the instructions want me to install a photoetched part for the angled piece for the strut on the fuselage but, one problem at a time. here is a side view
Here is the overhead view with my scale ruler
I’m wondering if I use the photo etch part and traced out two thin pieces of styrene and sandwich the etched part thereby creating a stronger thicker piece and then bevel the leading and trailing edges. Scaling for thickness could be a bit of work, I won’t know till I try it. The L shape at the ends go into slots in the wings so the styrene will have to end just around the eyelets where the tension wire will pass through. I think I have some thinner sheets in my supplies.
3 Likes
AHA!
I totally misunderstood the problem.
You’re onto something there.
I would not try to cut out that shape from a sheet of styrene (I would go nuts trying to get it right). I would glue thin Evergreen strips to the PE-part, one strip at the time, 5 strips each side:
Gently sand the PE part by rubbing it on a sheet of fine sandpaper or wet&dry to get a coarse surface for the glue to bite into.
Cut to length, don’t worry about the width as long as it is slightly wider than the PE,
use epoxy or CA (many types, every modeler has his own favourites, there is some black stuff that doesn’t go brittle, I think there is a CA-topic somewhere, use the search function (magnifier in the top right corner))
to glue the strip to the coarse and cleaned PE,
let it harden/cure,
cut and or sand the Evergreen strip to shape by following the edge of the PE (rounding off to the correct airfoil can be done now or later).
Repeat for the other 4 strips on this side.
Repeat for the 5 strips on the other side.
The reason for doing one side at the time is to make it easier to see and trace the edge of the PE
4 Likes
Robin, that sounds like a plan! Definitely worth a try.
2 Likes
That may be more economical from a build point. I ordered some additional styrene. I also ordered some black glues to have on hand. Thank you Robin. Just so you know I sometimes do things the hard way 
1 Like
Nothing wrong with an occasional challenge

1 Like
