Still working on the Chipmunk cockpit, so nothing worth to show yet but I hope in the next days I have a first update.
Joel, on Thursday and Friday we had a storm front going over many parts of Europe, in Germany the northern part was hit heavily. In Hamburg a harbour ferry was hit heavy by waves of the river Elbe. The water wanted just to wish everyone a good morning but no one wants to be close to this … https://www.youtube.com/watch?v=35Yry2H3gR0
It happened on the day exactly 60 years after the horrible storm flood in Hamburg 1962. What a coincidence!
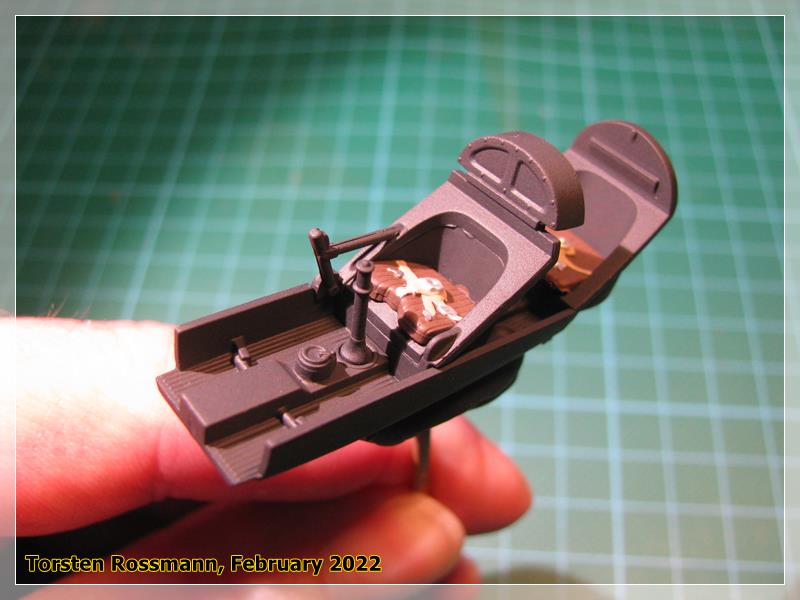
First small update of the Chipmunk. Most cockpit parts are together here. The seatbelts are moulded to the cushions. Eduard would have a ton of PE parts here …
… ooops! This part needs definately some pressure but first I have to check the reason for this gap. The cockpit is sitting correctly in its marks. Will see how the fire wall fits in …
Thanks a lot for that link, Peter! Great help! So the issue is not my fault. Phew! After reading the english version I even let Mr. Google translate it into German …
I had about the same idea as this guy and took some material off from the sides of the cockpit floor with a rough sanding stick …
Torsten,
Just got home from my stay at the hospital, so I have some catching up to do. Will checkout the you tube vid in a few.
Great start on the Chipmonk. Cockpit looks darn good. As for the fit issues, working with resin that seems to be a fairly common issue. But the end result now has a proper fit.
Thanks guys for the support and well wishes. I posted in my The Last 24 hour thread about my procedure and the hospital visit that really didn’t go very well. But both Carotid artery stents are perfectly in place as I had a Sonogram to check it out as the last step to being released.
Hi gang!
Not much progress this week. TV news run more or less the whole evenings and the whole weekend. Need building time in these days for distraction to get my mind free. Kiev is just 2000 km away from my door.
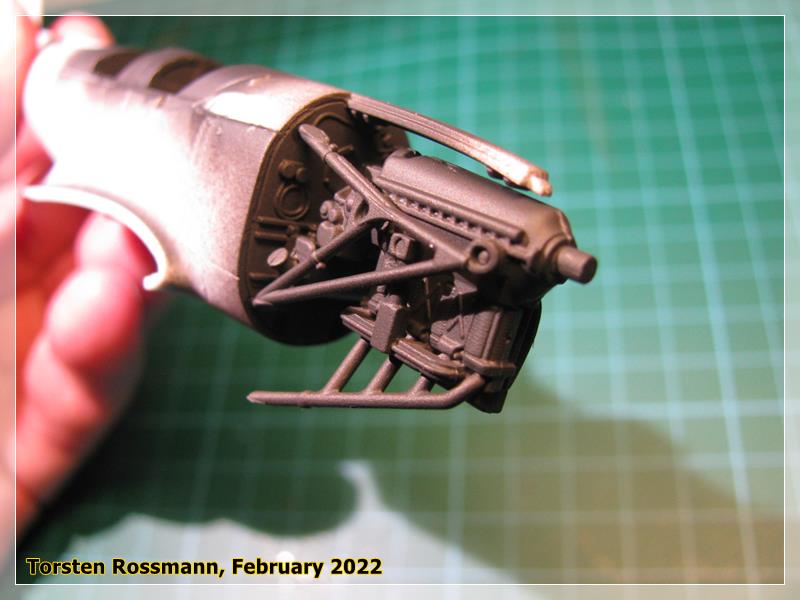
Have built the parts for the engine. As I’ll keep the cowling close it’s not necessary to paint every detail, so Black is good enough …
Our thoughts are with you all in Europe at this time Torsten: with immediate family and friends in Czech and Germany it’s nerve wracking to see what’s happening right on your doorstep!
Thanks Russell! Yes, it’s a horrible situation there but there’s not much we “ordinary people” can do. Only pray and hope for safety and peace soon for the Ukranians. First refugees from UA have arrived in my town. Some have relatives here but many don’t know where to go. Hotels are open for them. Who can believe it, we live in the 21. century and have war in Europe. Some have not learned from the past. Really, really scary!
But I’ve also seen in the news that dramatic floods over in NSW and QLD. Hope you and all Aussies here at the Kitmaker Family are safe.
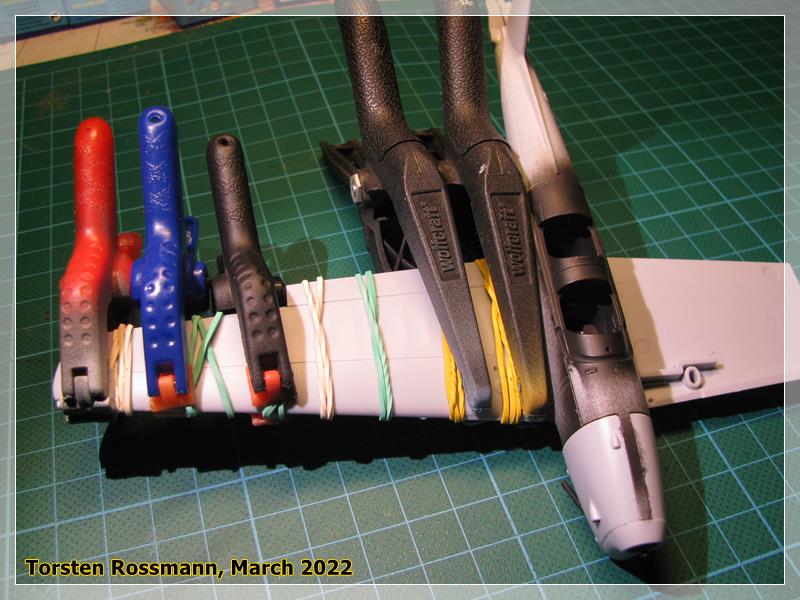
Have done some more work on the Chipmunk. It has now slowly turned into and aircraft. From the instructions the underside of the wings has to be installed first. Not my favourite way to go …
I think Airfix warped wings was one reason for me switching to Tamiya Tanks all those Eons ago…
No chance for some heat therapy?
BTW… I am high and dry myself. There was some local road flooding, but that is not unusual here. We have had 3 major flooding incidents in the wider Brisbane/ South East Queensland Region since 1974. Having been around for as long as I have, I know where not to buy a home. The worst thing is, as the redeveop areas and put in more and more homes on smaller blocks of land, the basic infrastructure struggles. More roof lines, and more stories means more water directed to storm water drainage than when it just fell on land. More water means more back up … some areas not affected in the past were this time around.
All in all though, we have nothing to complain about compared to the Ukrainians… water damage you can get over, bombs and bullets you can’t.
The wing warpage is certainly a negative, but it’s not that bad. Not sure how to attempt o fix it once the wing halves are glued together as well as to the fuselage. Have you considered a quick dunk in almost boiling water, then press the warp between to straight pcs of wood or better yet metal?
The news is certainly more then a little scary over here as well. I’m always checking it on my computer and it sure doesn’t look like there’s going to be a quick solution to this invasion any time soon.
Thanks for your advices, guys! But as I have mentioned above, I’ll leave the wing as it is now. I’m a bit anxious that I would do more damage to the wing in hot water than correcting it. Have never tried it before and should try it at some left over parts or an old model first. The warpage is only really visible when the Chipmunk comes “head on”. No model ever is perfect.
Have masked the canopy parts over the weekend with EX809 from Eduard …
… like for the turret of the Defiant, Airfix has included a small jig for the canopy of the Chipmunk. It’s important to place the side parts in the “rails” on both sides of the jig (yellow arrows) …
… Step 3. Have used White Glue. There’s a small crack on the lower rear part. It happened while I was cleaning the part from a sprue rest. Hope it won’t be seen to much later …
… after leaving the canopy to dry over night, this is the first dry fitting today to the waiting wind shield. There’s still a small gap on both front sides. Have to see how I can fill it. The easiest way would be to keep the canopy open, but I’m not sure if I want that. Hmm, Airfix is not Eduard …
In the next step I will sort out the landing gear parts. But as usual I won’t attach it to the build before painting. The next days will sure see some paint on this nice little squirrel … errr … bird. It will become quite a masking job again. Stay tuned!


 This part needs definately some pressure but first I have to check the reason for this gap. The cockpit is sitting correctly in its marks. Will see how the fire wall fits in …
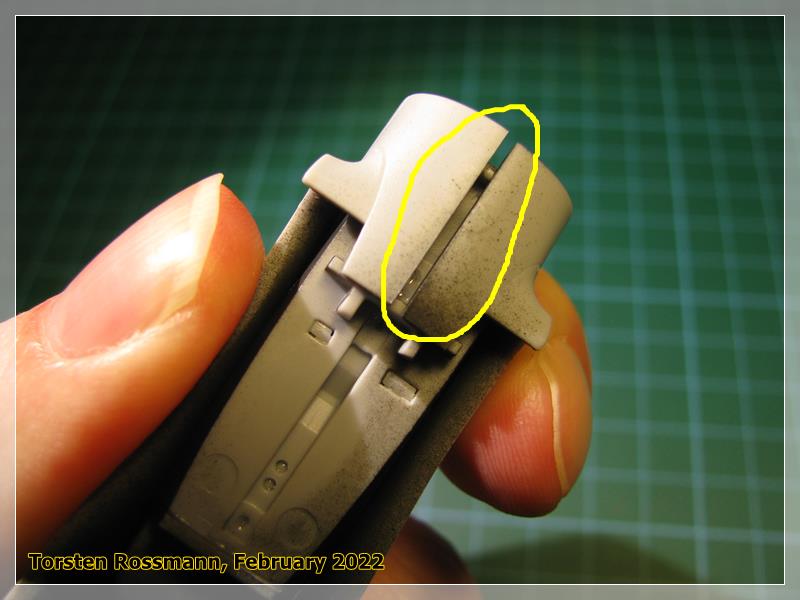


 Great help! So the issue is not my fault. Phew! After reading the english version I even let Mr. Google translate it into German …