Torsten's bench works

Okay, I want to start a new continious build blog of my aircraft works as the old forum will be closed sooner or later. Let’s see if I can copy my current work of the Eduard P-39, started in August, over here … Of course you are most welcome to leave a comment or just step in.

The past 3 months I’ve been strolling around Armorama most of the time working on 2 campaigns. Now that my new Leopard 2A4GR is in the books and the M 110 close to the end of the assemly line, I think it’s time to build some flying plastic again, isn’t it?

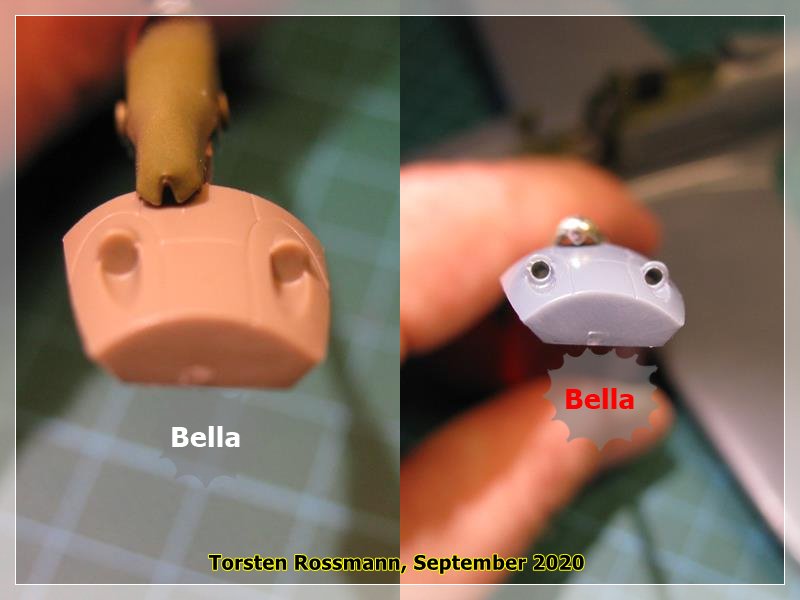
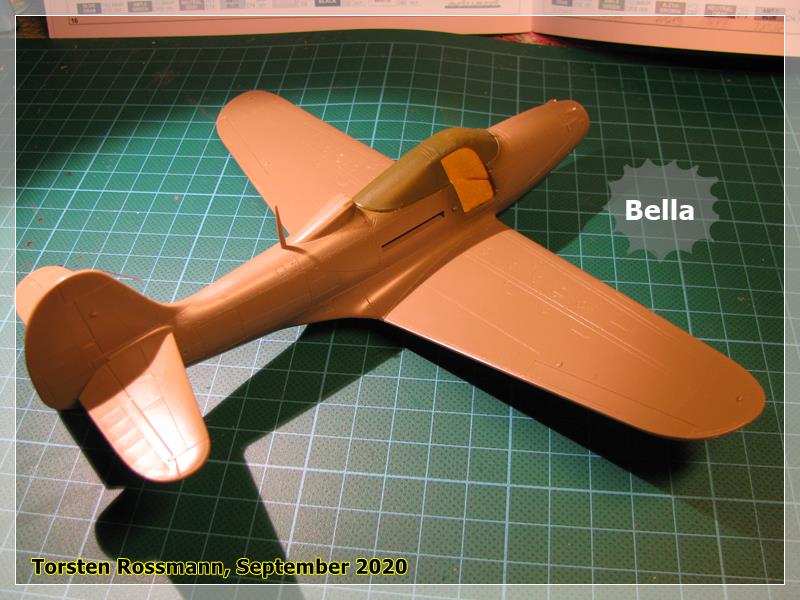
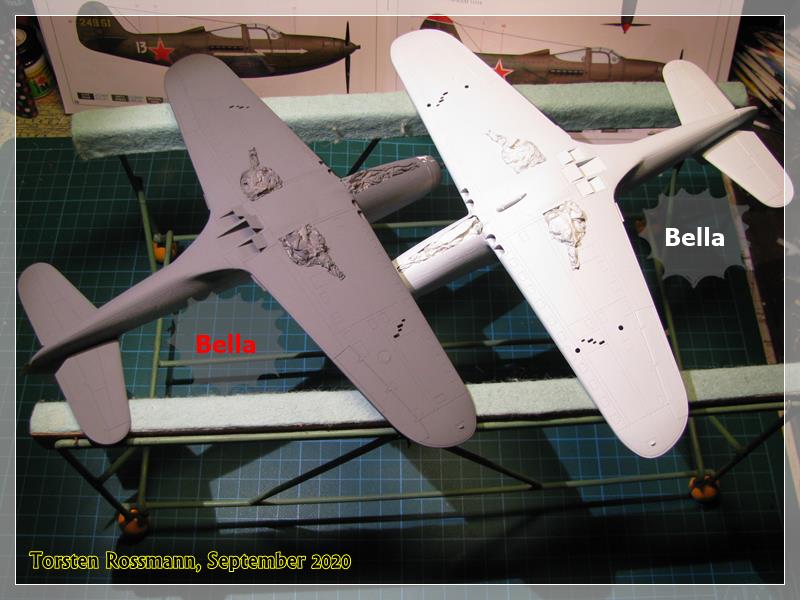
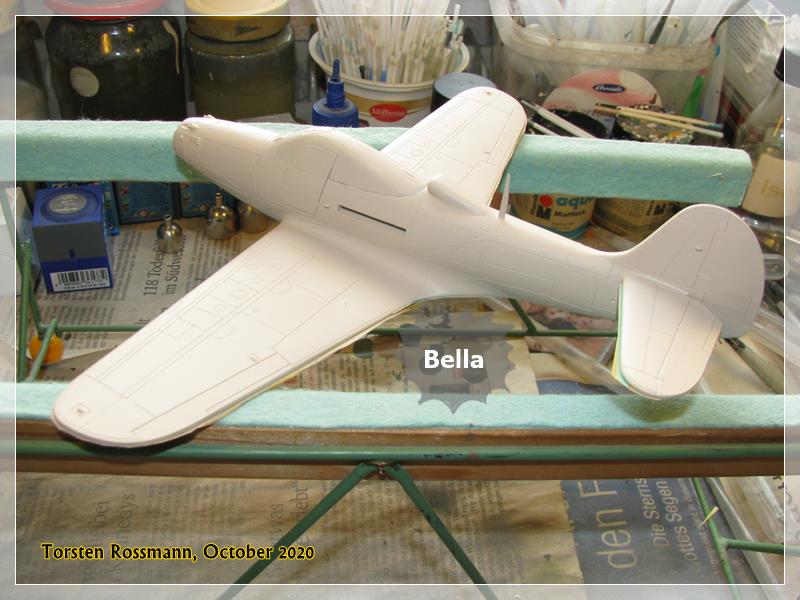
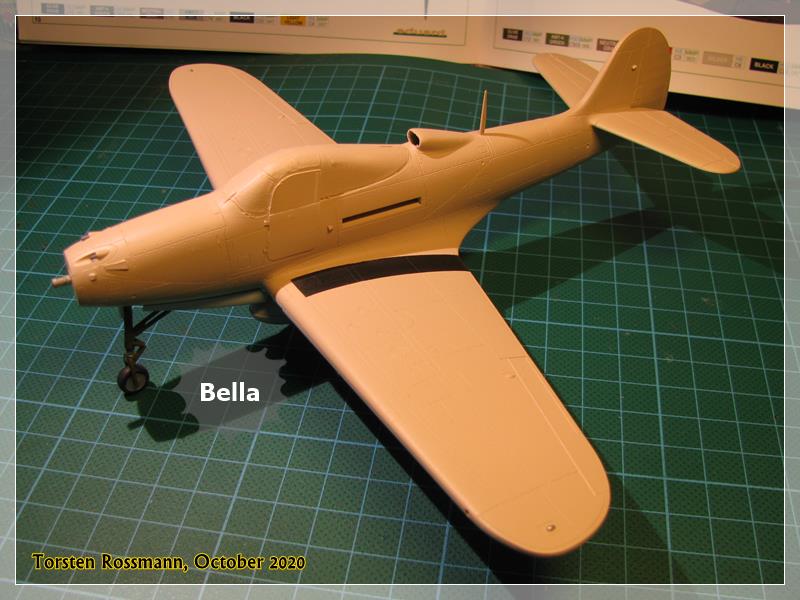
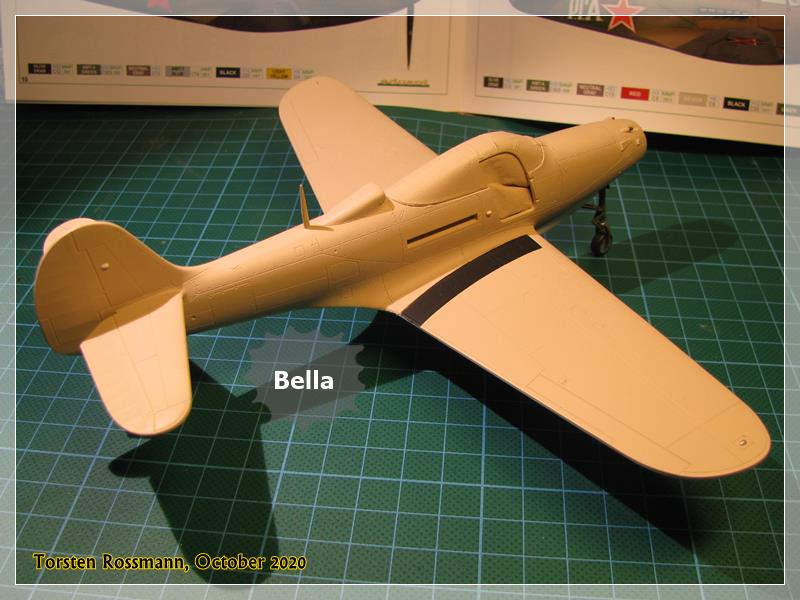
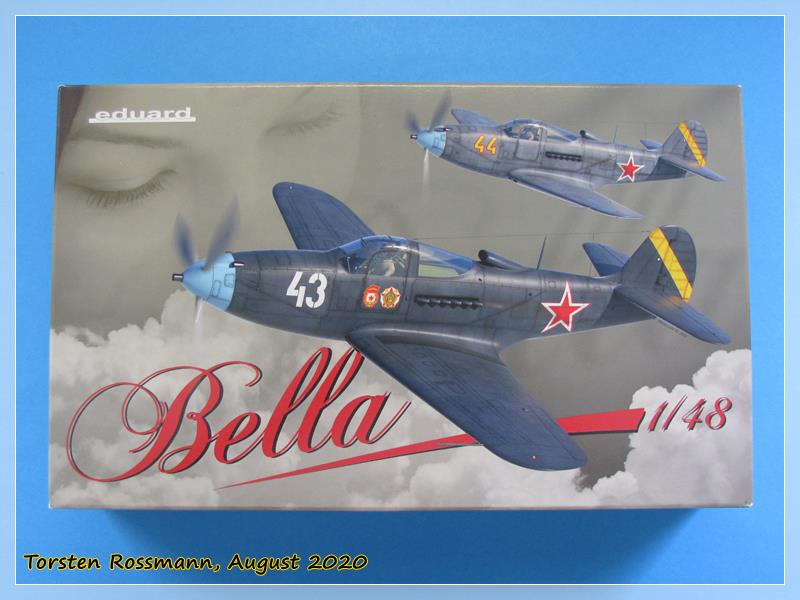
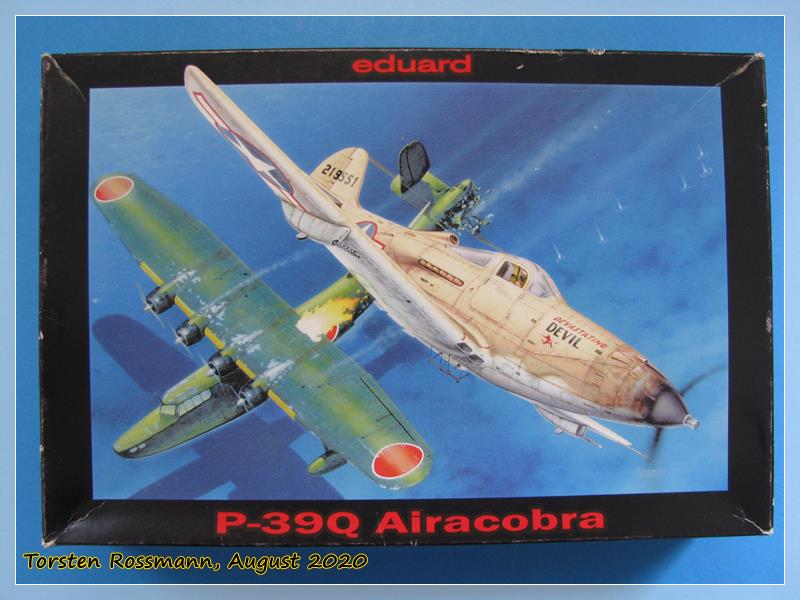
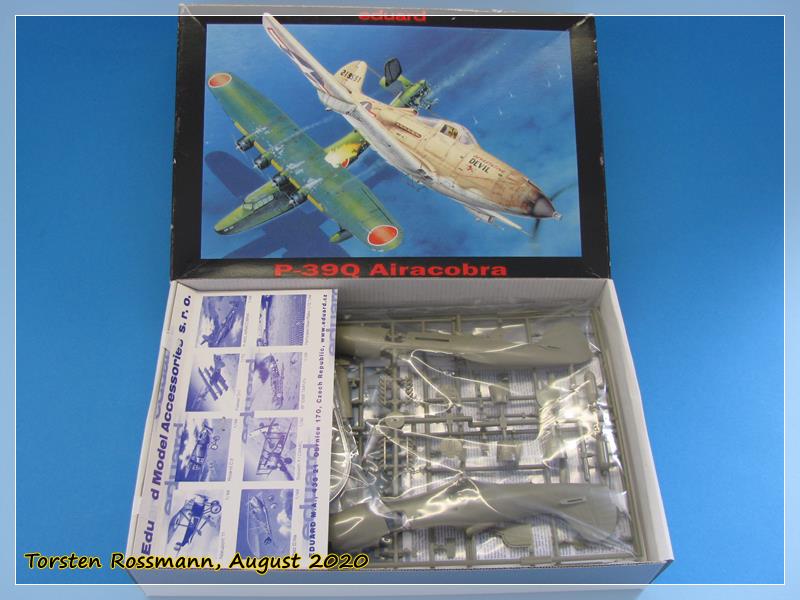
For my next project I’ve chosen another fine dual combo from Eduard, as usual in 1/48 scale. Early last year, when there still were models shows around, I found this nice kit of the P-39 Airacobra. I think it’s a nice idea of Eduard to call it Bella, and I shamelessly take the name over for my new build blog.

Okay, let’s see what we have here. As always the box art is already half the purchase … :slight_smile:


… in the box are parts in grey plastic for 2 complete kits of Red Star Cobras …

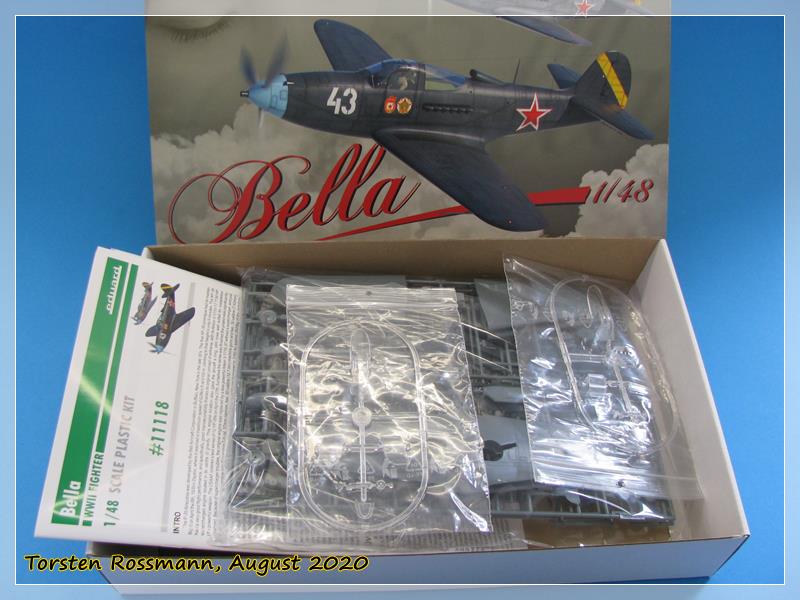
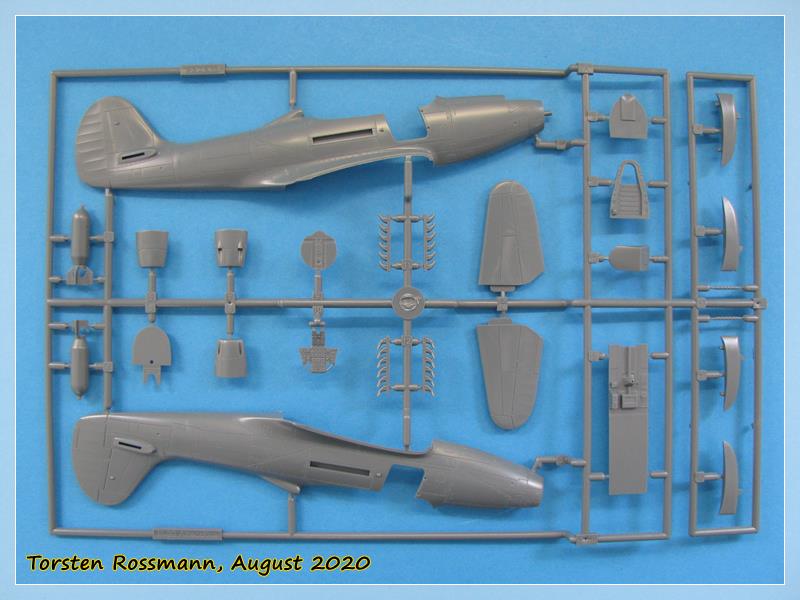
… let’s have a look at the sprues. All sprues are double. First we have Sprue A with fuselage and cockpit parts …

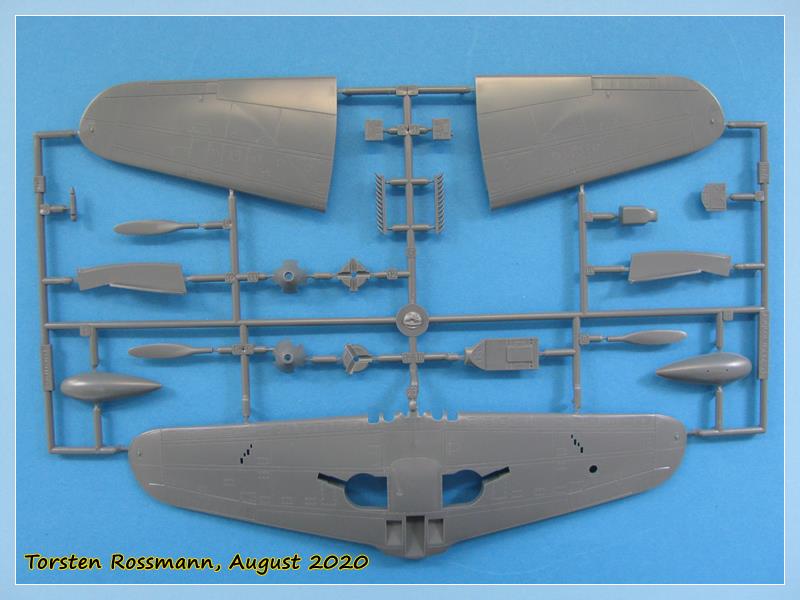
… Sprue B has the wing and further parts for cockpit and the front wheel …

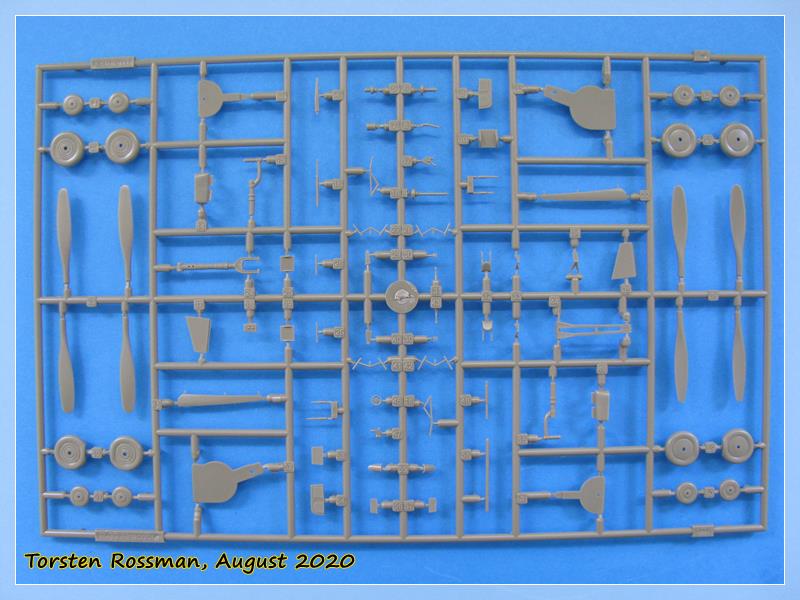
… Sprue C has various parts for the landing gear and prop …

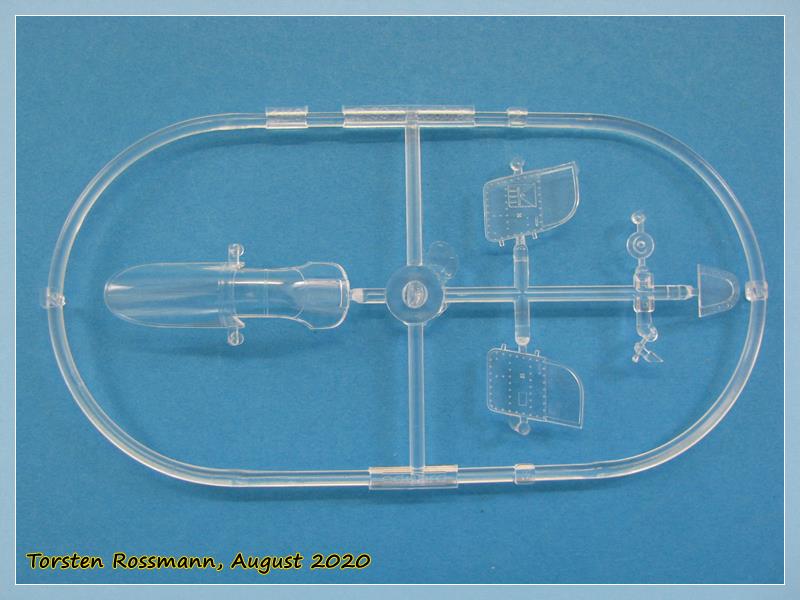
… the sprue with the clear parts has the canopy, the famous “car doors” and the armor glass for the pilot …

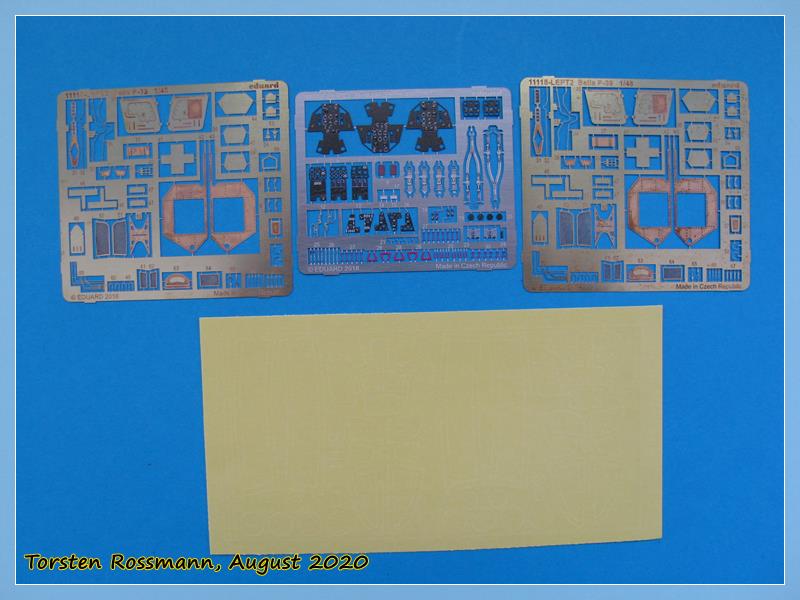
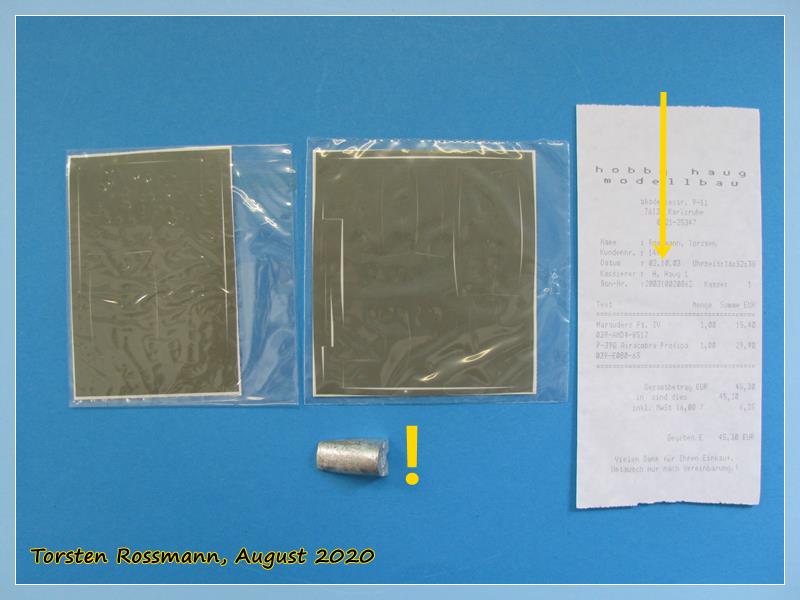
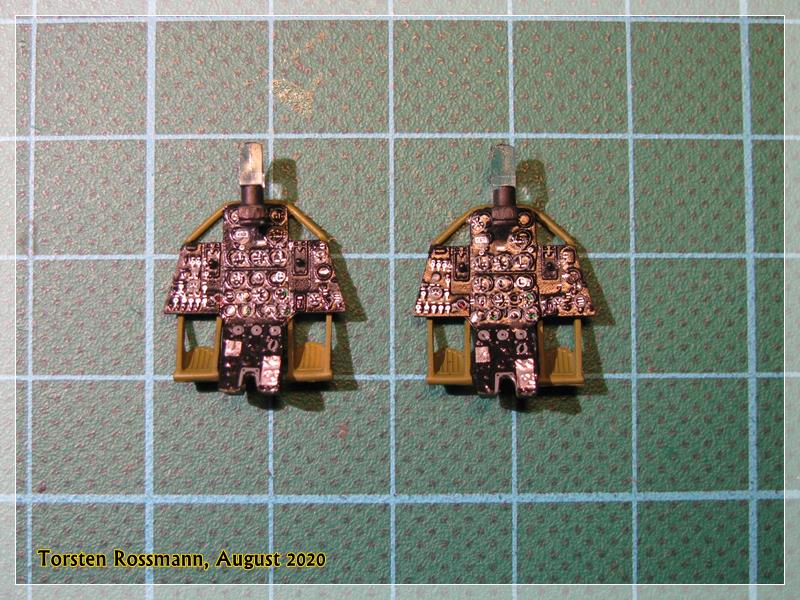
… as this is a Profi Pack, we find also PE parts and masks for boths builds …

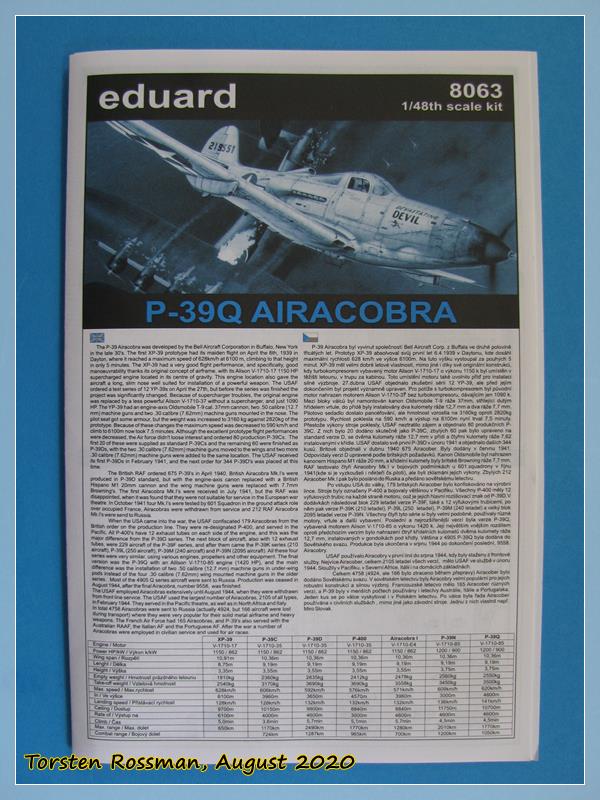
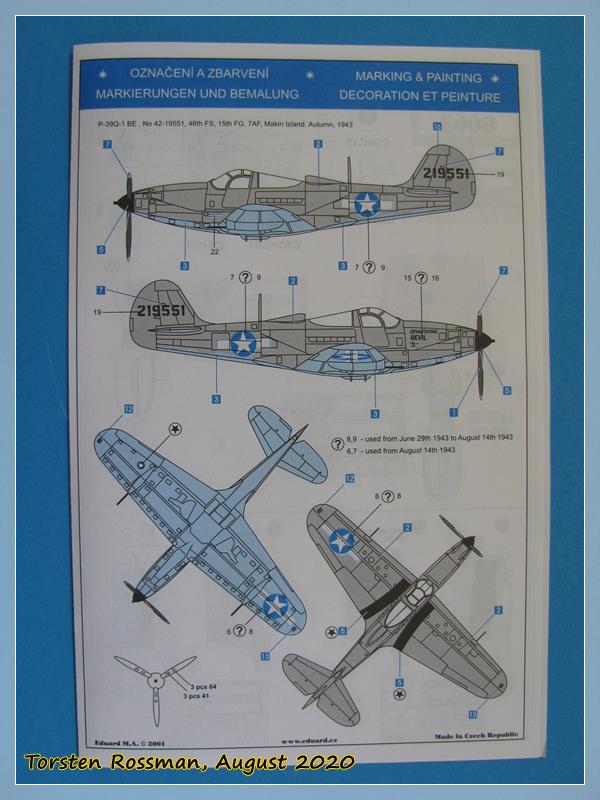
… with every Profi Pack comes a colourful building instruction which looks like a booklet …

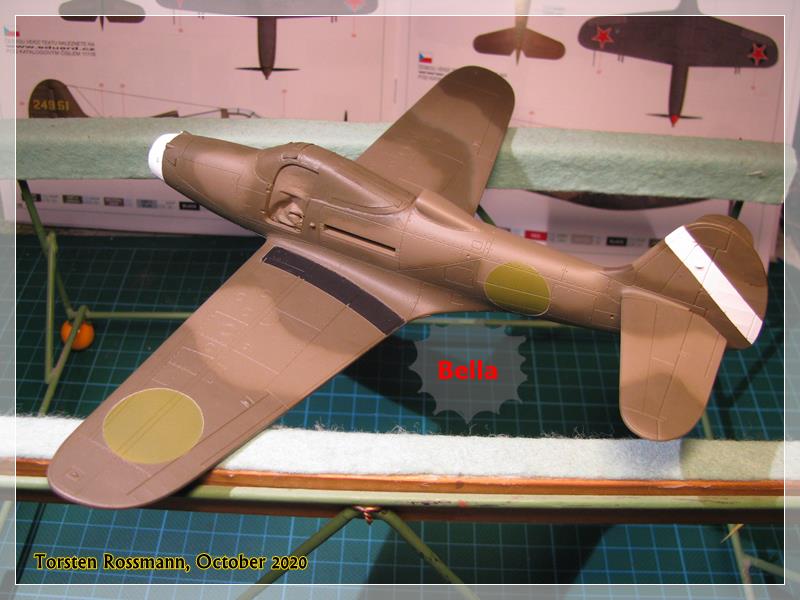
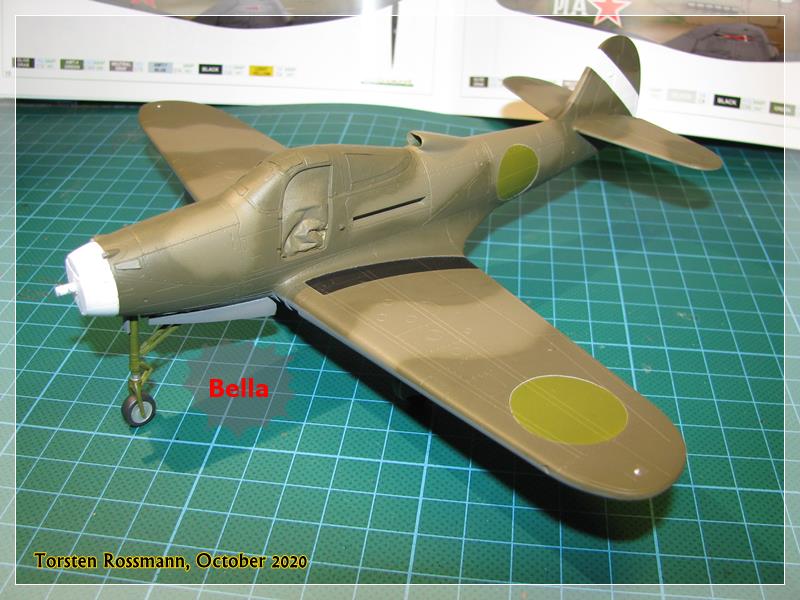
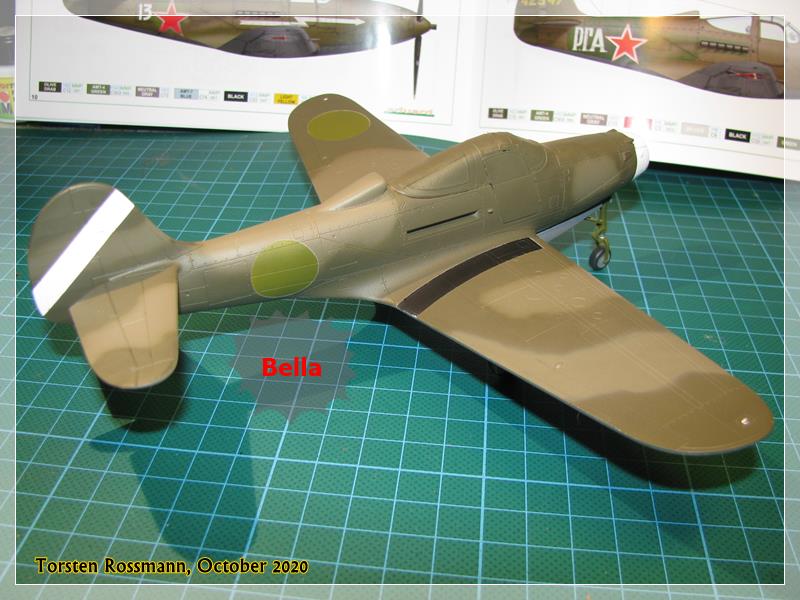
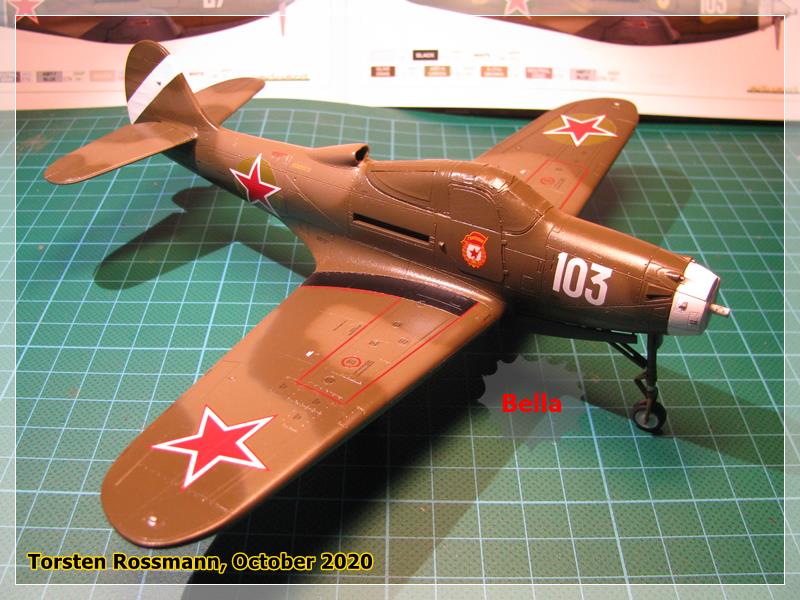
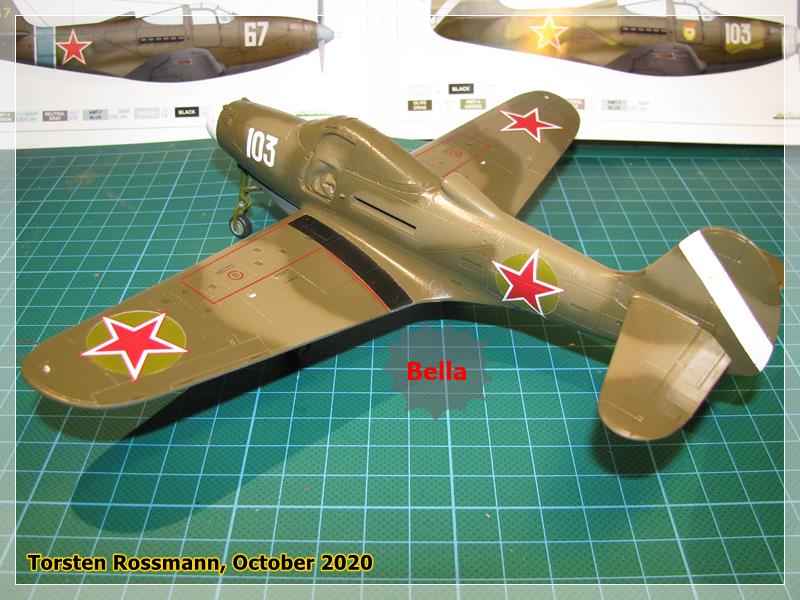
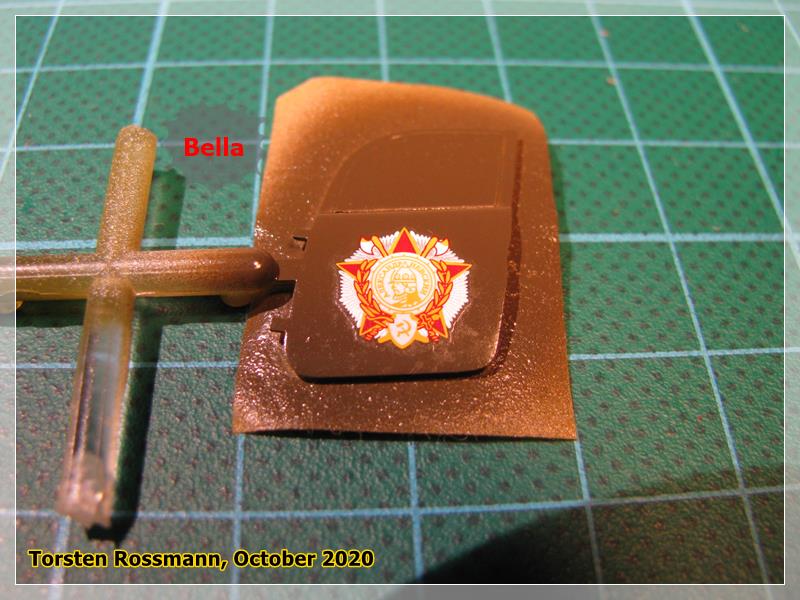
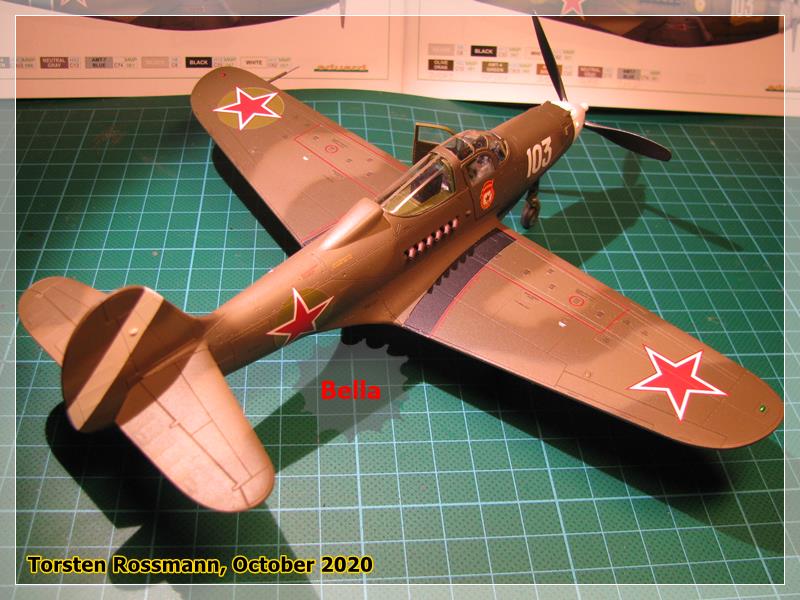
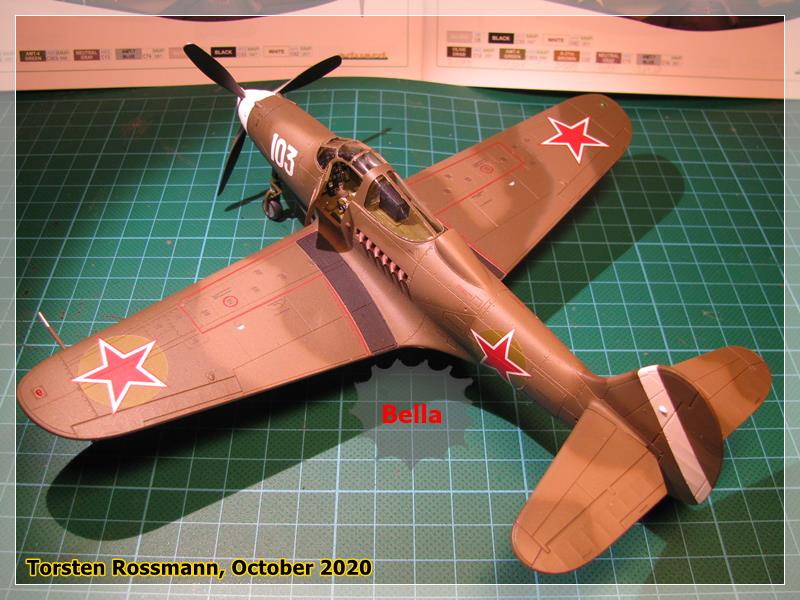
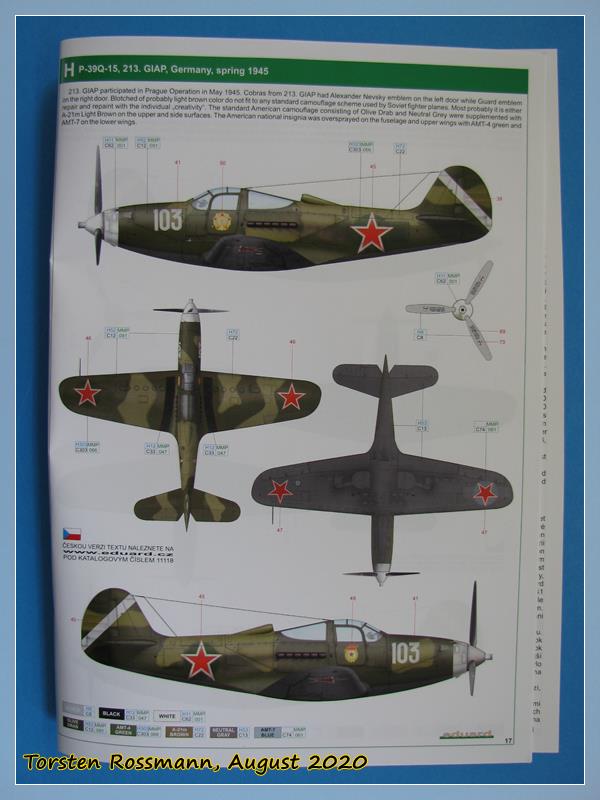
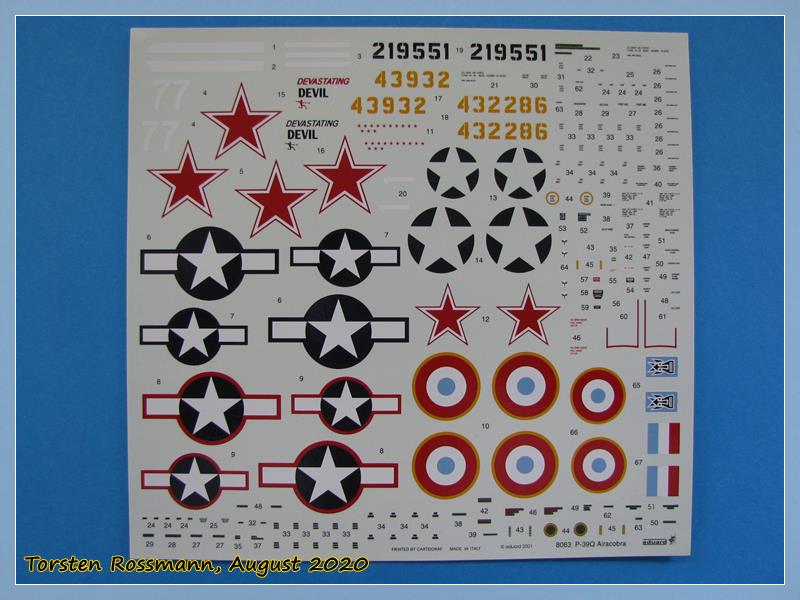
… like on my finnish “Mersu”, Eduard offers again 10 tasty looking versions of VVS Cobras and after some long thinking I’ve decided to build “White 103” of the 213. GIAP, a P-39Q, because it’s the most colourful Cobra and wears the Guards Banner on one door and the Alexander Nevsky Order on the other …

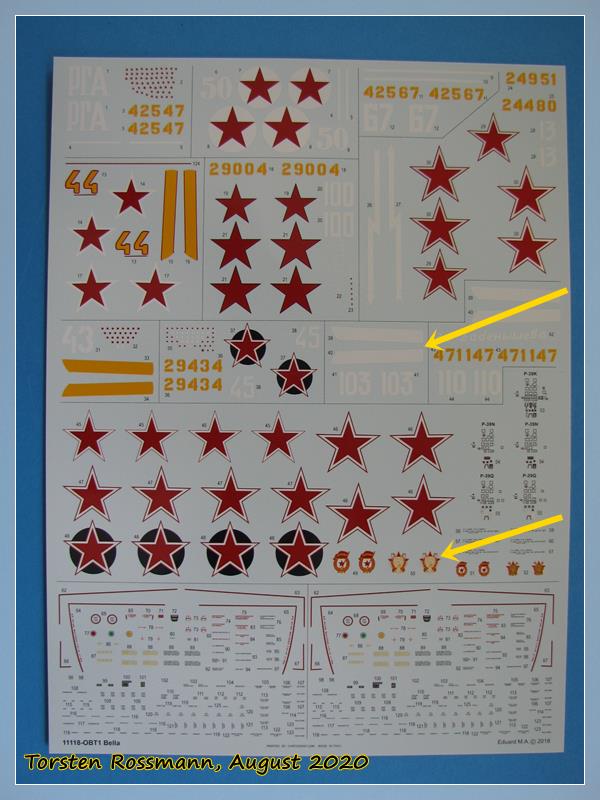
… the decals are again printed by Cartograph and made the decision not easy …

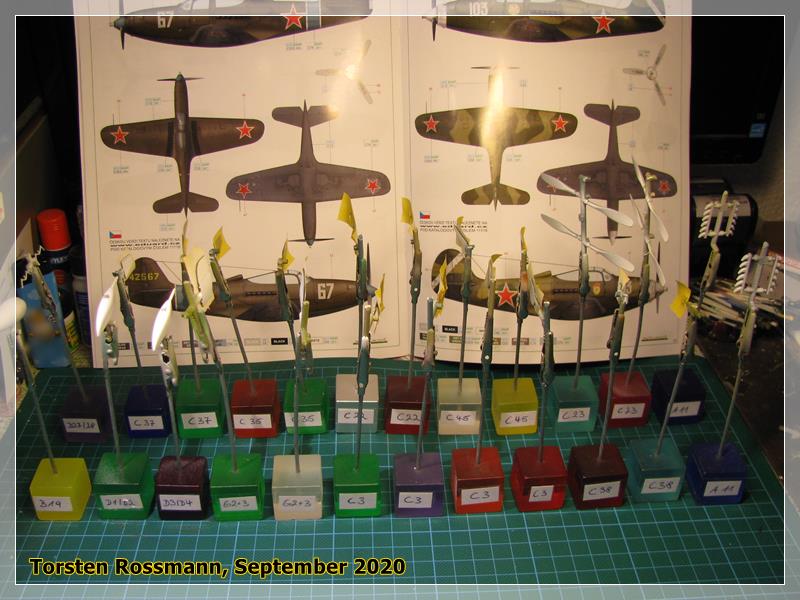
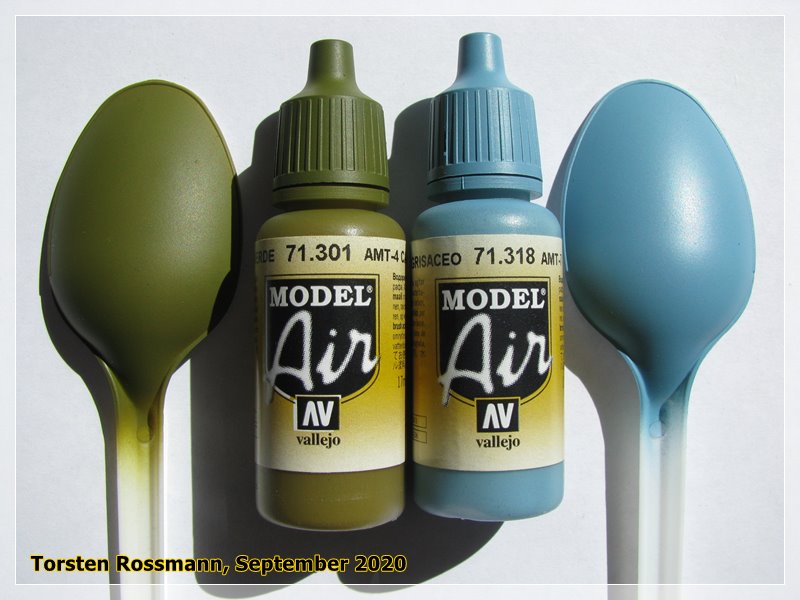
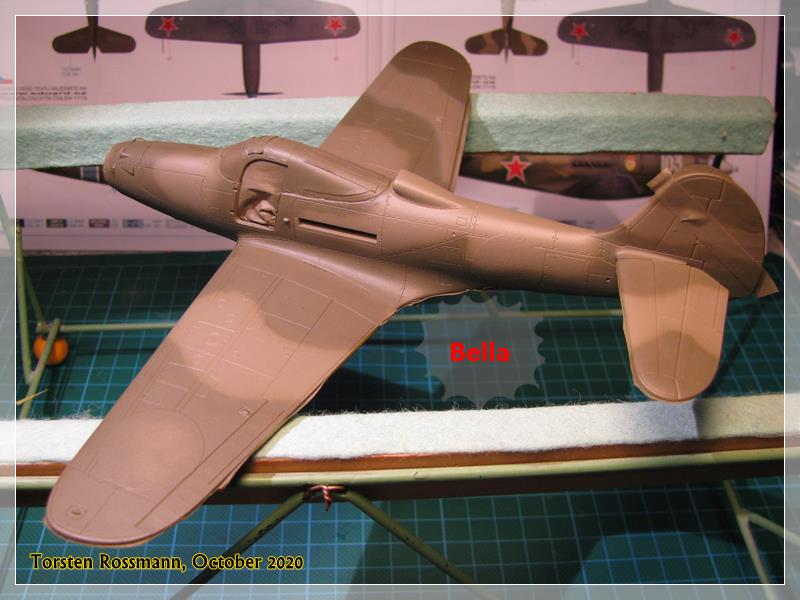
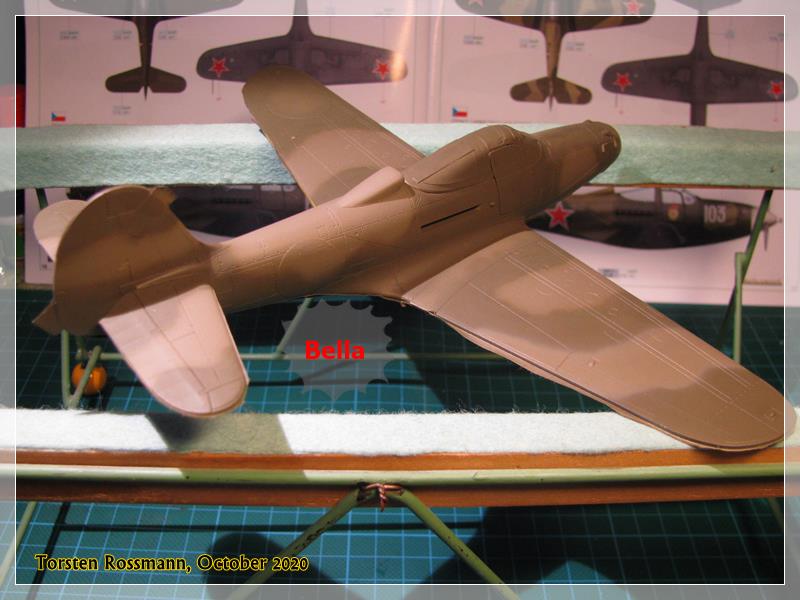
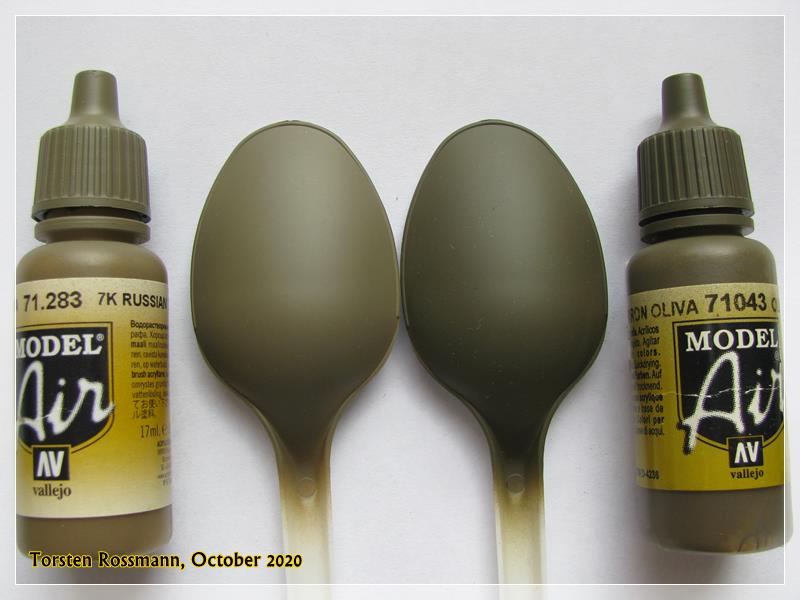
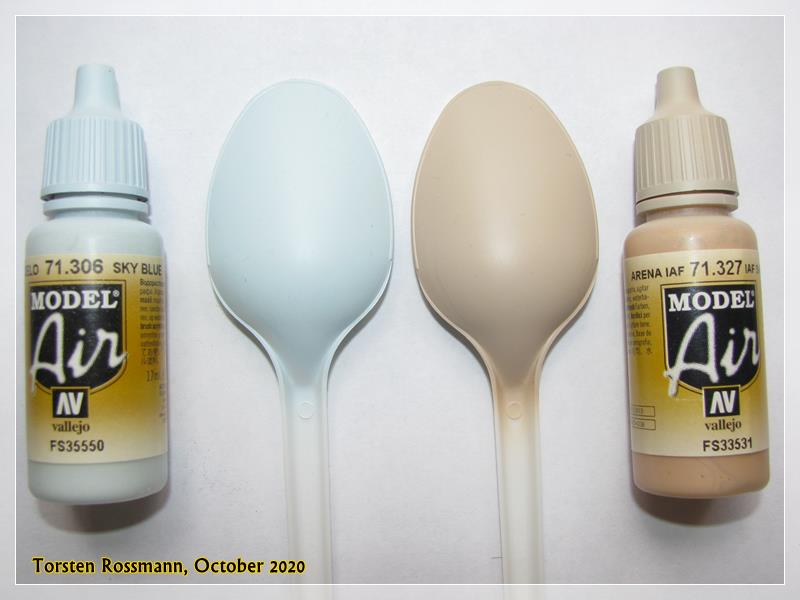
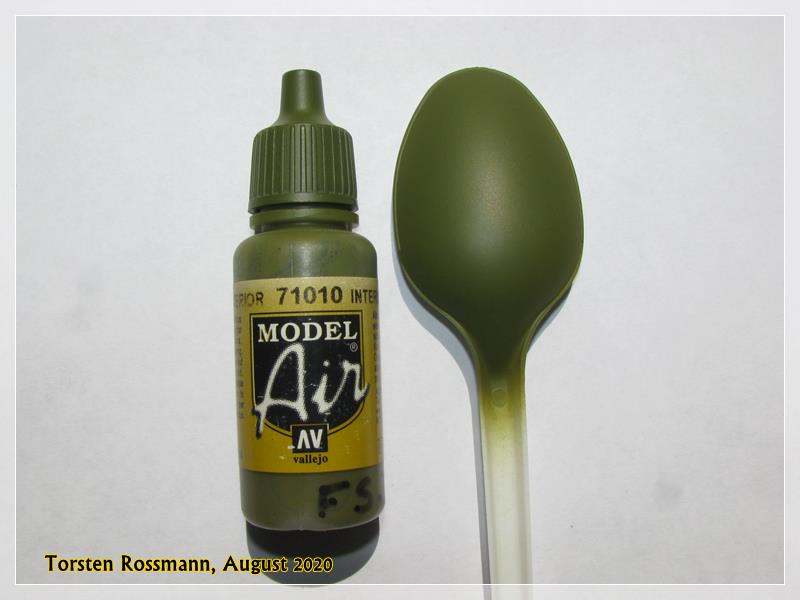
I have already looked for the right paints, this time from Revell and Vallejo, and will start in the next few days …

Happy modelling!
Torsten :wave:

2 Likes

Wait! Didn’t I say Dual Combo? Hmm, yes I did …

Okay, then let’s have a look at this one … :slight_smile:


… the box already looks a little battered because it’s really an old kit in my stash. Look at this! Do remember when Eduard started in the 1990’s with their well known brown plastic parts?

… and look at this! A nose weight included in the kit! And what kind of masks are that? I even found the sales slip inside the box. The date when I bought this kit was the 2. October 2003, which makes it one of the oldest kits left in my stash. The hobby shop from my hometown sadly does not exist anymore, btw …

… the plastic parts look all the same as in the Dual Combo. Really? No they don’t! With Sprue B comes here a pilot which is missing in the Dual Combo. But I’m sure I won’t need the guy …

… the building instruction is still in black, white and blue and comes in A5 size …

… after all these years hiding somewhere in my stash, the decals (made by Cartograph) still look in good shape and offer 3 versions of a VVS, French and a USAF version …

… I have decided to go for the US Cobra on the box art, again a P-39Q from the 46th FS, 15th FG on Makin Island in summer 1943 …

… no PE parts here, it’s only half a Profi Pack with masks and w e i g h t.

Still have to look for the correct paints for this beauty. Will spray some colour samples in the next days and see what will come out of that. So now I have my 2 builds together, a Bella Red Star and a Bella White Star. Will start to build them in the next few days and I hope some of you guys will join me again along the way.

Happy modelling and stay safe!
Torsten

1 Like

After working on both kits for a few days, I can finally show some progress.
While Magnus has his small parts on sticks, I found the clamps some great little helpers. Here all cockpit parts for both Bella Red and Bella White …


… and the canopy parts for both. I found another set of EX250 masks in another Cobra kit, which I use here instead of that old 2003 masks …

Next step is painting Interior Green and I hope to show some further progress soon.

Torsten :-H

2 Likes

At the moment there’s only slow progress on my Bellas but at least there is some progress. I’ve painted both cockpits and decided not to use the PE parts for the instrument panel this time. I save them for a later build … Have used the plastic part of the kit and the decals for them. They don’t look bad at all …


… cockpit assembly is also done by now. But I have used the PE seatbelts here. They consist of 4 parts per seat. There is no difference in the builds yet (except for the colour of the plastic) but I will name them in red and white …

… for painting the cockpits I’ve used Vallejo 71010 Interior Green FS34151 …

… while there is the balance weight shown in the old instruction (sorry, a bit blurred) …

… in the new instruction the Eduard Bunny reminds us not to forget some weight (I like the look of it) …

… and believe it or not, I found another balance weight in another early Dual Combo with RAF and VVS Cobras … :slight_smile:

There will be no further update the next days because I’ll be away for the weekend. But hopefully more progress next week.

Thanks for stepping in and stay safe!
Torsten :vulcan_salute:

5 Likes

Thanks for stepping in, Magnus. I also remember the good quality of early Revellogram kits, especially that F-86 D Sabre which I built in the early days of this century as one of my first ever kits and brush painted.

Speaking of older kits, here’s my Hasegawa P-400, which I’ve built in 2010 or 2011. A bit dusty but still looking good. Painted with Revell Aqua and Agama paints back in those days … :slight_smile:

Anyway, some little progress about what I did yesterday and today. Fuselage halves are together now. Just have to sand the seams. The Revi … gun sight … of Bella Red has broken off the IP for 95 times now already, so I will give it one last chance before I glue the canopy to the fuselage … ==)


… over at Armorama Peter Battle would recognize my builds now because of the rubber bands … :smiley: 
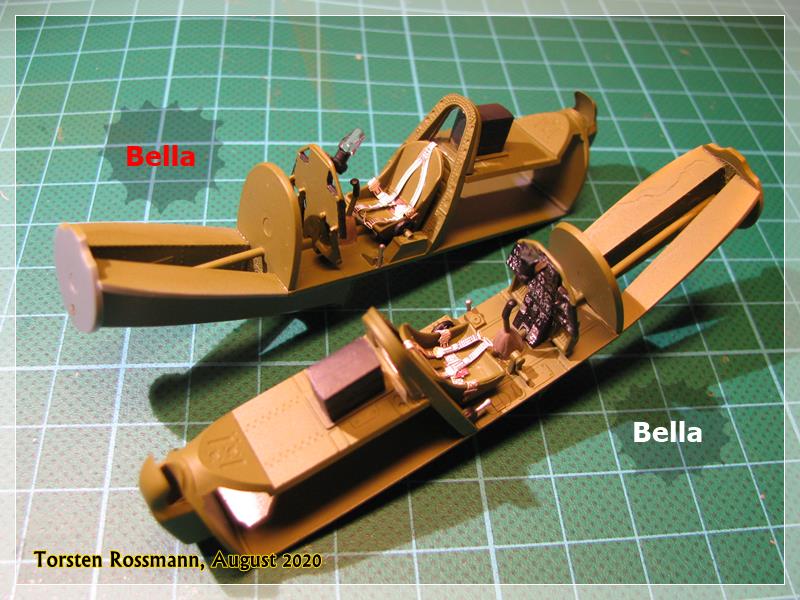
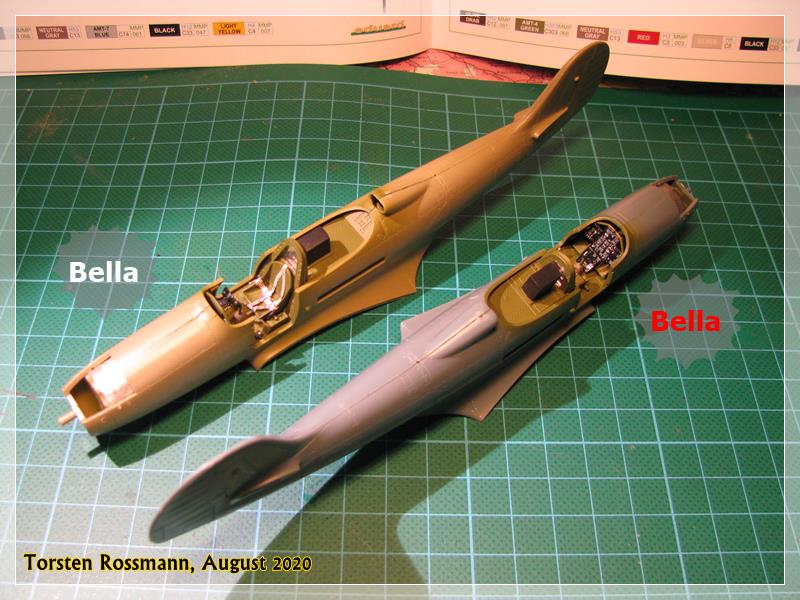
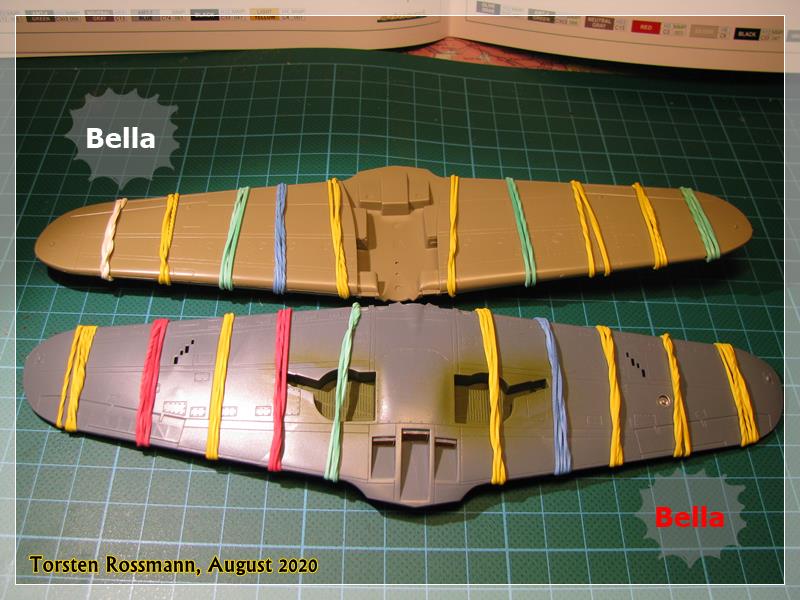
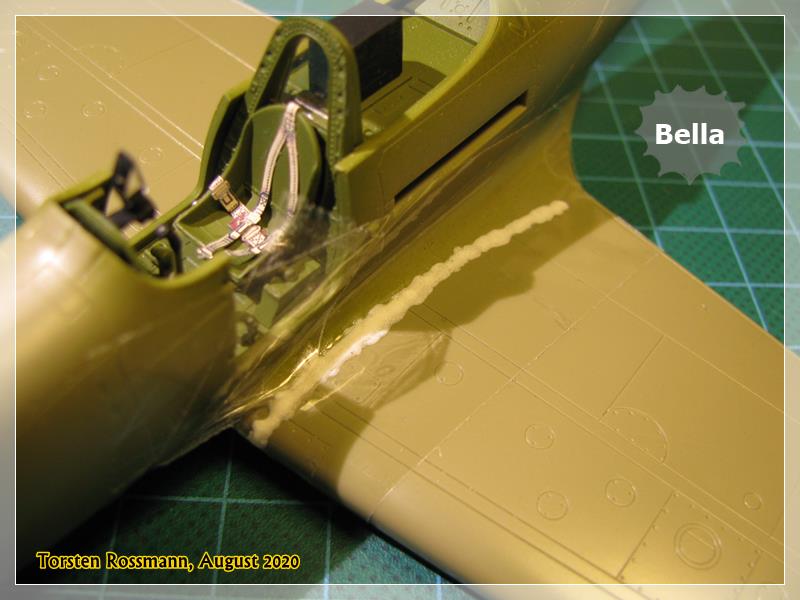
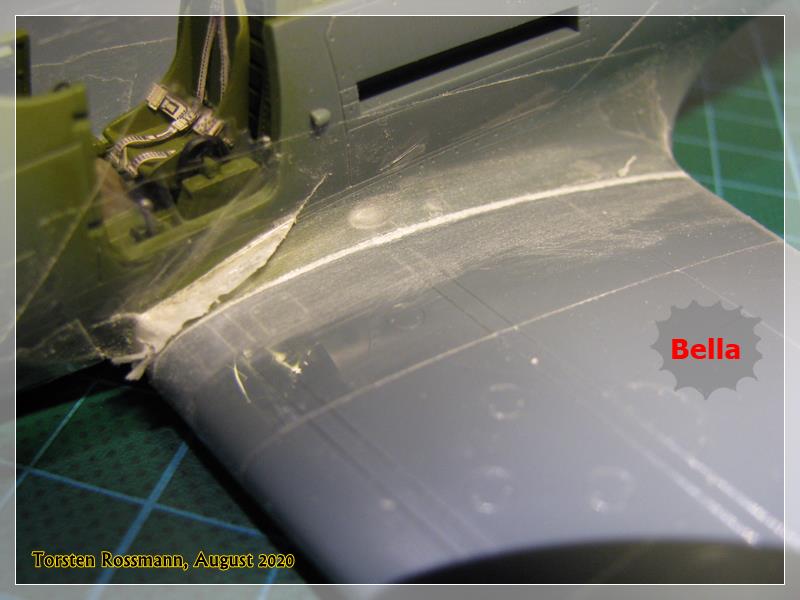
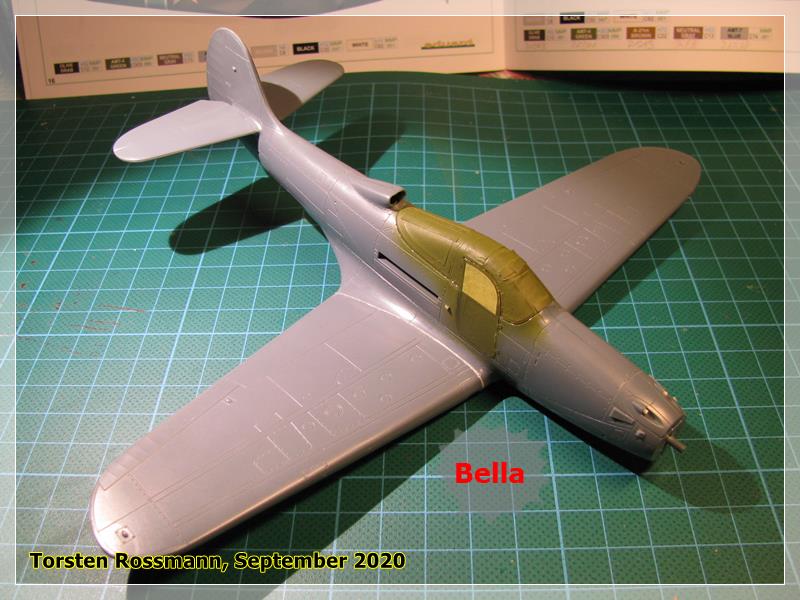
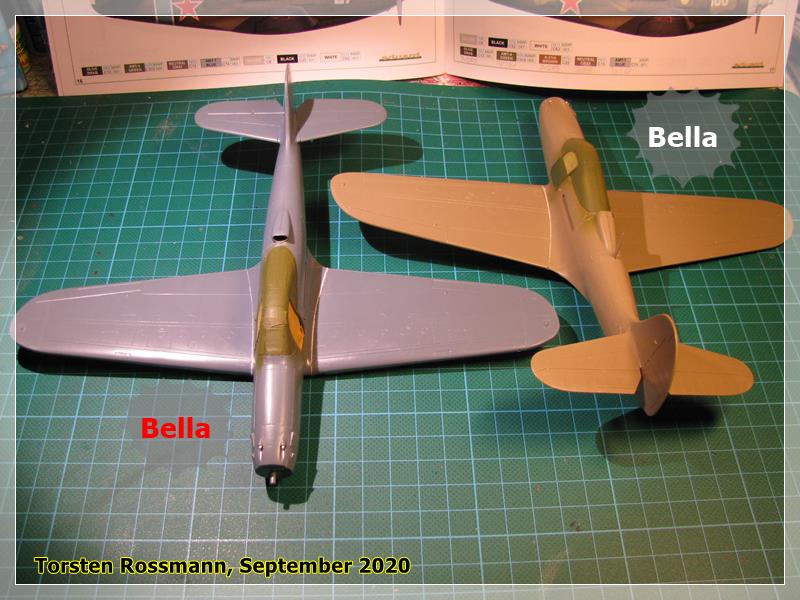
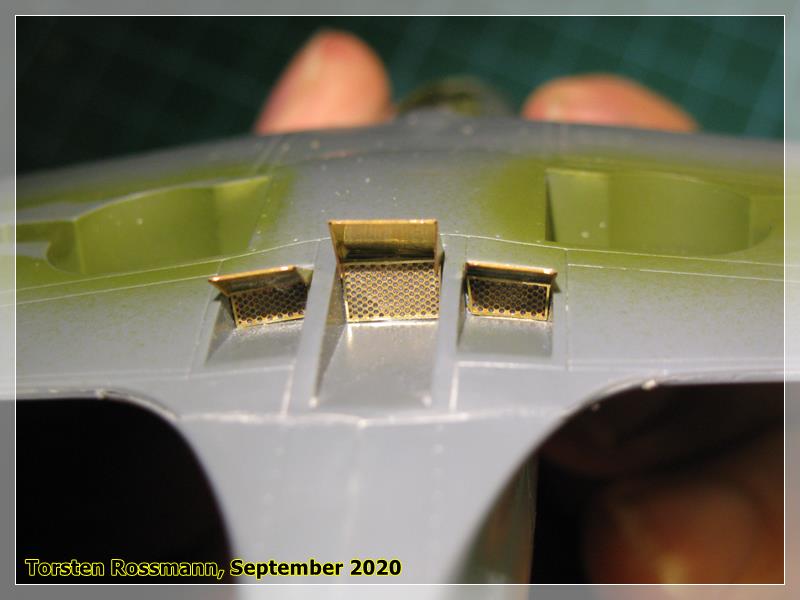
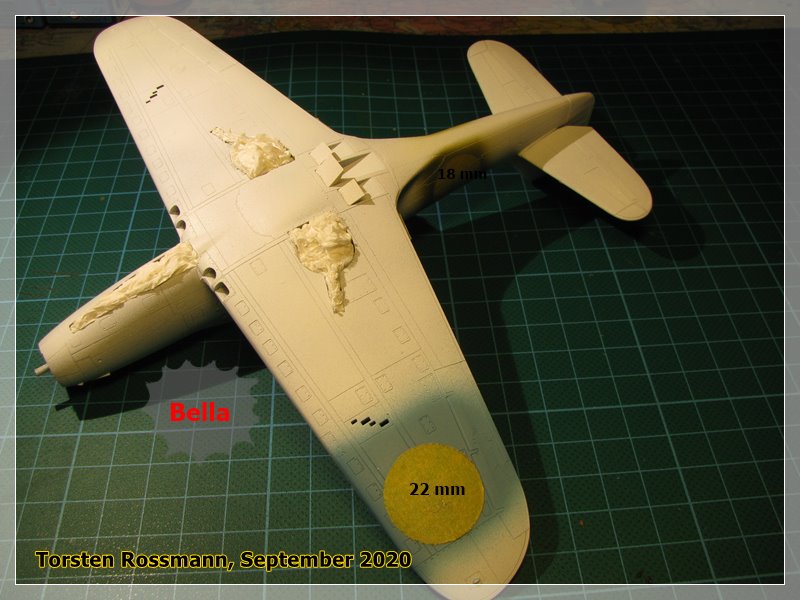
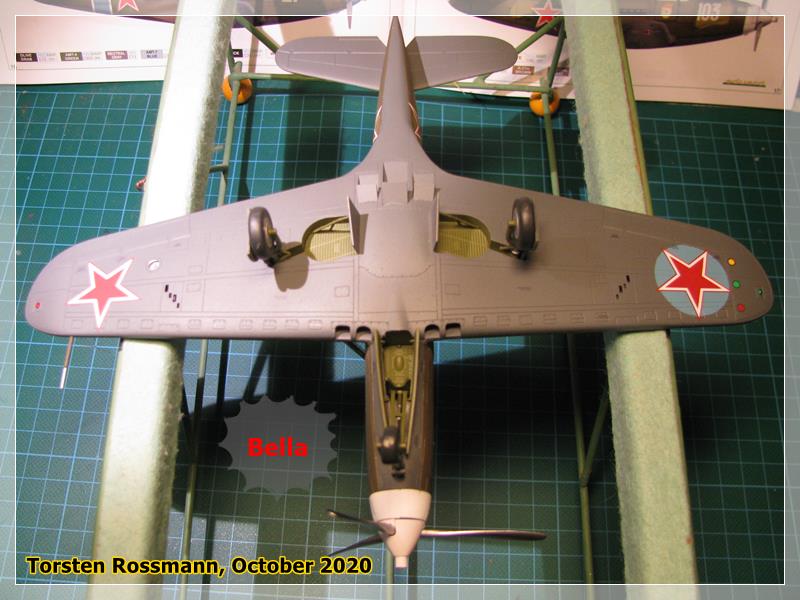
I still have to attach the PE parts for the cooler flaps on Bella Red …

… here is the difference of Bella White to Bella Red. In the middle there will be an external fuel tank later and gun pods will be attached under the wings. The VVS Cobra won’t get that …

… first test fittings showed some ugly gaps between the fuselage and wings on both builds. So I’ve ordered some putty for correction … :slight_smile:

Thanks for looking !
Torsten

5 Likes

Another small update from my Bellas today … :slight_smile:

I was right to order a truckload of putty for my builds. This is how the US Cobra looked like after dry fitting. The right side is okay and can be filled with glue but here is a WW 1 trench visible … :expressionless:


… okay, let’s work. Step 1 - clear tape …

… Step 2 - putty, left to dry over night …

… while Bella White has the gap only on the left side, Bella Red has it on both sides … :frowning:

… it is as always, preparation takes longer than operation. After a few minutes of sanding the clear tape looks “heavily used” but is not torn …

… because of the clear tape, all panels are safed and not harmed, though during polishing this little hole came up. Might go over it again. But the result really pleases me … :slight_smile:

… the right side …

… the result on Bella White is even better … :slight_smile:

Thanks for looking! Have a great weekend!
Torsten

1 Like

Did some work on my Bellas. First I changed the look of the muzzle covers for the .50’s a bit. Left side is what the kit offers and I drilled them open a bit …


… from my reference photos (Osprey) I noticed that the muzzles are not completely covered so I used 1 mm Evergreen Profiles and drilled them also open. The muzzles on the US-Cobra are a bit too long but they are still okay. I’ll see what I can do with the 37 mm cannon later …

… further work is done. The clear parts fit not well to the fuselage. Especially the door on Bella White. I had to bend it carefully to fit somehow. But it looks worse here on the photo than in real. I will leave one door open to have some “action”. Getting the masking paper inside was a bit fiddly but I always win …


At least here you see that the moulding form is one of the early works of Eduard and over 20 years old. Todays Bf 109 or Spitfire moulds are a completely different world.
Both kits are now slowly looking like Airacobras and I hope to throw some paint on them on the weekend.

Thanks for looking and stay safe!
Torsten :vulcan_salute:

1 Like

Thanks, Damian! I have a decal sheet here by Eagle Strike called “Venomous Cobras of the world” and among them is also a RAAF version. Don’t know when or if I’ll build it. It’s just in OD/NG.

Have done a bit more on my Bellas. First the cooler flaps on Bella Red …


… followed today by primer …

… and some crocodiles at work … :wink:

I have just started painting the black walk ways on both. More paint in the next days.

Thanks for stepping in!
Torsten :-H

1 Like

Another small update from Bella Red. First “real” paint is on … :slight_smile:

As we all know, the Soviets overpainted the US insignias on their Cobras with various paints. That’s what I did yesterday evening. I hope I have got the dimensions about right as the Red Stars were usually bigger that the US roundels. The stars on/under the wing have 24 mm in size, so I try 22 mm for the roundels, the stars for the fuselage have 22 mm in size, so the roundels here are 18 mm in diameter. Well, I’ll see at the end of the build if I have worked correctly … :wink:


… for the wing underside I have used Vallejo 71318 Russian Greyish Blue AMT-7 and for the upperside and the fuselage I used 71301 Russian Camo Green AMT-4 …

… meanwhile I have painted the overspray white again and Bella Red has also got its white snout. This is my last update before my vacations. More painting and building in about 2 weeks.

Torsten :wave:

2 Likes

Back from holidays means back at the bench … :slight_smile: Though I haven’t done much progress yet in the last days.
Before holidays I took care of the 37 mm cannons as the kit part shows the same kind of stumb as for the .50’s. I only have a 1,5 mm drill as the biggest but at least a 1 mm Evergreen Profile fits inside and it looks much better than what the over 20 years old kit offers … :slight_smile:


… a bit of painting was also done already. Bella Red got the white band across the side rudder and snout …

… and the undersides are now also painted. For Neutral Grey on Bella Red I’ve used Revell 77 Dust Grey, which should come close to NG. And the underside of the US Cobra is not white, it’s Sky Blue FS35550, a very very light blue (Vallejo 71306) …

… now follows some masking fun. Hope to show you some more good progress by next weekend.

Have fun!
Torsten :vulcan_salute:

1 Like

In the past few days I came pretty far with both builds. Bella Red got the second camo tone, Vallejo 71043 Olive Drab. I spent 2 days working on it …


… I sprayed complete nonsense with Olive Drab on the right wing so I had to re-do Russian Tan here. It was not the fault of the painting instruction, the mistake was between my ears … :wink:

… this are paints used …

… this morning I demasked the VVS Cobra. There are some touch ups to do here and there but I’m very pleased with the result … :slight_smile:


… painting on Bella White is also more or less done. This is how she looks like fresh from the paint shop this morning. Will leave it to dry thoroughly now and demask the bird tomorrow …


… it was not easy to find the paints for this camouflage but finally I decided to use FS35550 Sky Blue for the underside and FS33531 IAF Sand for the upperside. Have no clue what IAF means but it most likely stands for Irish Air Force … :smiley:

… I didn’t find a profile of the “Devasting Devil” in my sources but in my book about the P-40 I read that the birds of the 15th FG had a “pinkish Tan” when based on Makin Island. So I believe it was the same on the P-39 and hope this comes close to the real deal. And if not, I won’t change it now …
Further work was also done on the 24 exhaust stacks with a 0,7 mm drill …

Now that the major painting is done I’ll concentrate on the landing gears and props.

So stay tuned and stay safe, guys!
Torsten :-H

2 Likes

We have enjoyed our little trip to the Emerald Island but let’s now turn our attention to Uncle Sam and Mother Russia again.

I came pretty far with both builds this week. First I painted and assembled the props. I’m not sure if the VVS Cobra really had NMF blades in the final months of the war but I followed the painting instructions here. On some of my reference photos the blades could be NMF, but most look black. Anyway here I go …


… both Bellas are now standing on their wheels and all paint corrections are done. Now they are ready for some shiny Bodenglänzer (= german Future) … :slight_smile:


… there are only a few more parts to add, exhausts, pitot tube, the missing door and - for the US Cobra - the underwing guns. They will be attached after the decals are on.

More to come soon …
Torsten

3 Likes

Hi Torsten! :slightly_smiling_face:

Great to see you start up your build over here on the new site: I’m along for the ride :relaxed:

1 Like

Thanks for stepping in, Russell and welcome to my new thread. Yes, I think it makes not much sense to continue this thread in the “old forum” as I believe it will be shut down for postings sooner or later. And it gives me the chance to try something new. I had the idea earlier yesterday and plan this as a constant build blog for all or at least most of my aircraft builds. The finished builds will be seen afterwards as usual in my Assembly Line Thread.

Well, nothing really much to show yet, as I had not much time to work on my Bellas. Both have got Bodenglänzer all over and I started with the decals on the VVS-Cobra. Looks like I did a good job with painting out the US markings on the wing … :smile:

3 Likes

Great to see this thread carried across here Torsten, I will be following along for sure!

Thanks also for the inspiration and motivation to get my P-39 “Bella-Roo” started.

Cheers, D

1 Like

Thanks Damian! It’s my pleasure if I have motivated you to start your build.

This weekend was quite successful for Bella Red. All decals are on and sealed. In the next days I will add the last misssing parts and spray Marabu Dull Coat all over. Everything should be done by next weekend. And Bella Red has now turned into “White 103”. Here without flash …


… and here with flash …

… the left side door with the Alexander-Newski-Order …

I will finish this build first, so I can complete the Land-Lease Campaign on Armorama, for sure my last campaign in the old forum.
Bella White is still waiting for the decals, I will start with that next week.

Thanks for stepping in and have a nice Sunday!
Torsten :wave:

2 Likes

Part one is done! I call the first of my dual combo Bellas finished … :smile:

Bell P-39 Q Airacobra, Soviet Air Force, 213. Guards IAP, Germany, Spring 1945
Kit: Eduard 1/48


The fitting of the propeller is not really glamorous but that mainly my fault. The formation light panel on the underside of the wing is just a decal, but it’s better than nothing. More and better photos soon in my new Assembly Line Thread over here.

Thanks for stepping in and take care!
Torsten :wave:

10 Likes

Great work Torsten! :beers:

I’ll keep an eye out for the post on your assembly line thread :slightly_smiling_face:

1 Like

HI Torsten,
I’m glad to see you are still forging ahead with builds! Both look great!

Keep up the good work!

Ga

1 Like

Very nice build as always Torsten, and the Lend-Lease scheme definitely gives it an interesting twist!

Cheers, D

1 Like