I am and nice of you to participated in that model show.
1 Like
Thanks for your kind words, Dragos! Don’t worry, take your time for your builds. Not all builds are easy assembly kits. And I’m happy if my builds are of some help for you and others. ![]()
Phil, I sure had a great time at the show of the guys and girls of the MBC Wyland. Being also a member of IPMS Bern I have been to many shows in Switzerland so far, mainly at the Kuspo in Basel.
Thank you!
Torsten
![]()
1 Like
Sweet build Torsten. A great pair for the collection.
1 Like
Dear friends!
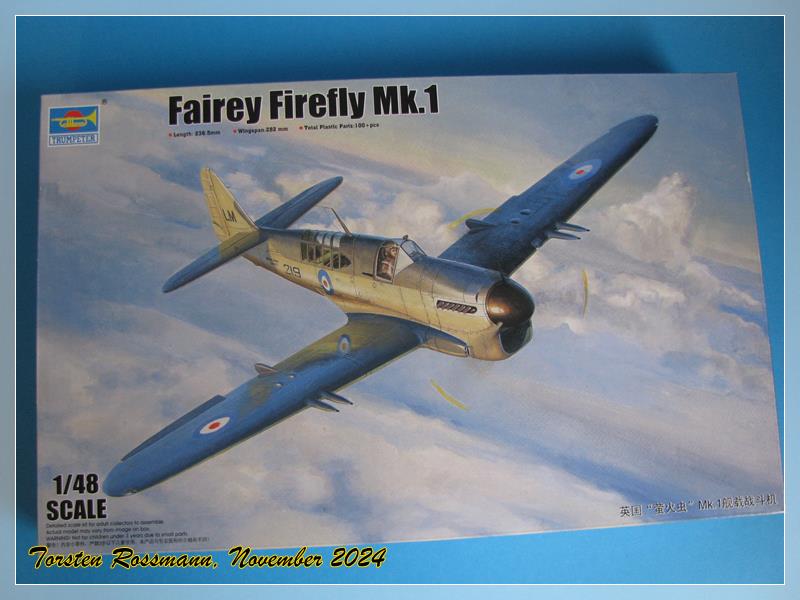
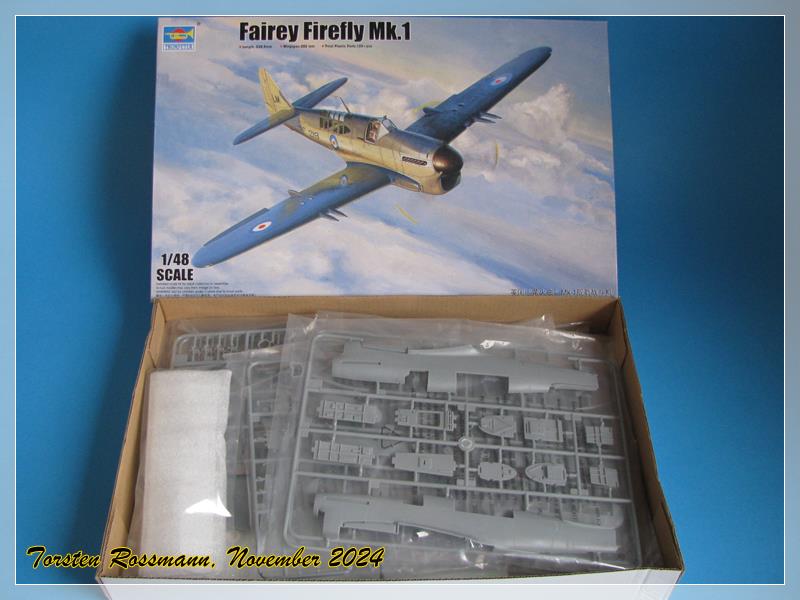
Over the past few weeks it has been a bit quiet in this thread. But don’t worry, I have been active! I’ve been over at Amorama and built a Bundeswehr Unimog S 404. Maybe some of you have seen it. Now that the build is almost finished, it’s time to think of some new sins. For a long time, I had this kit on my plan, so I guess I should start it now. Most likely my final build this year. It’s the Fairey Firefly Mk. I from Trumpeter in 1/48. Now let’s open the box … ![]()
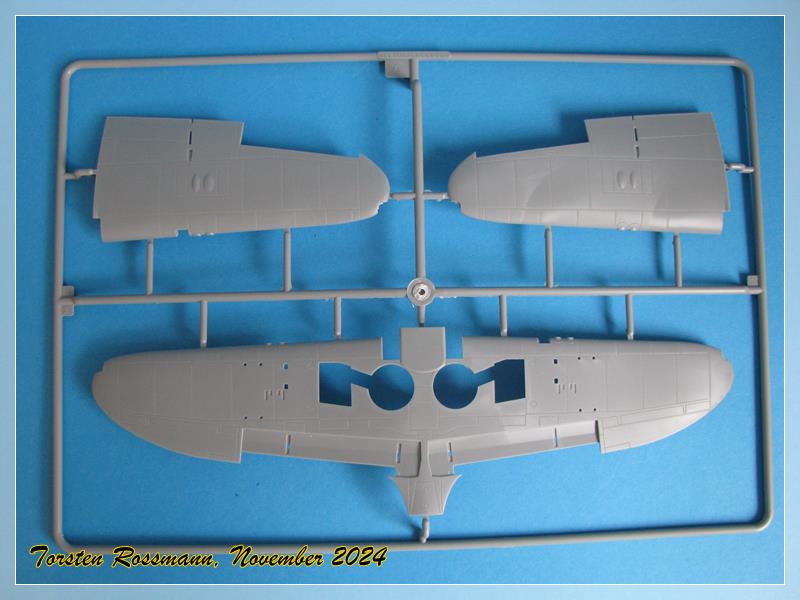
Let’s have a look at the sprues. Sprue A has the wing parts. This won’t be a small bird … ![]()
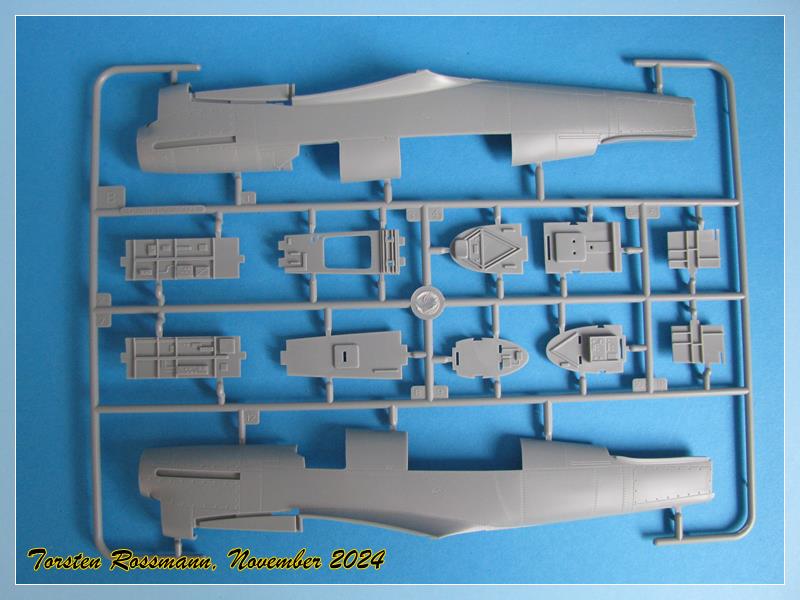
Sprue B comes with the fuselage and some cockpit parts …
Sprue C has the elevators and the side rudder …

Sprue D has most parts for the landing gear, engine and propeller …
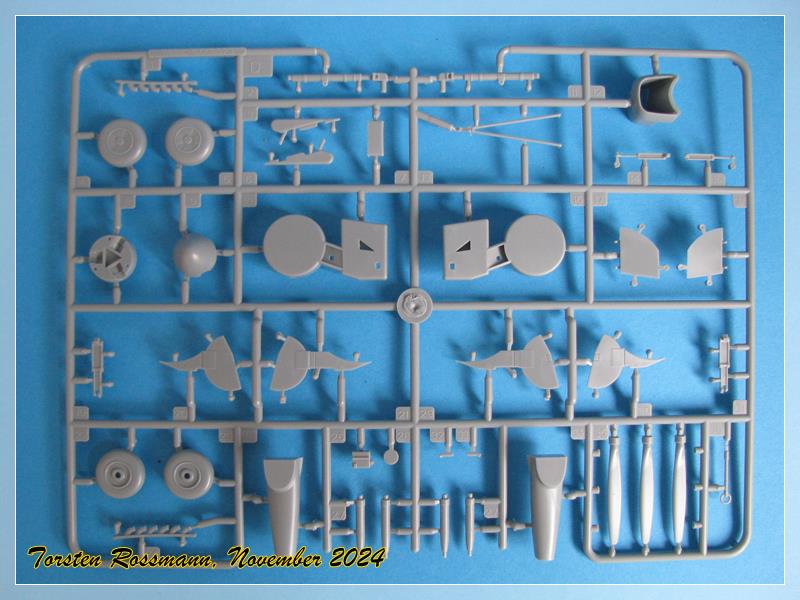
Sprue E comes with the clear parts …

Finally sprue F is twice and has the payload in form of rockets and bombs …

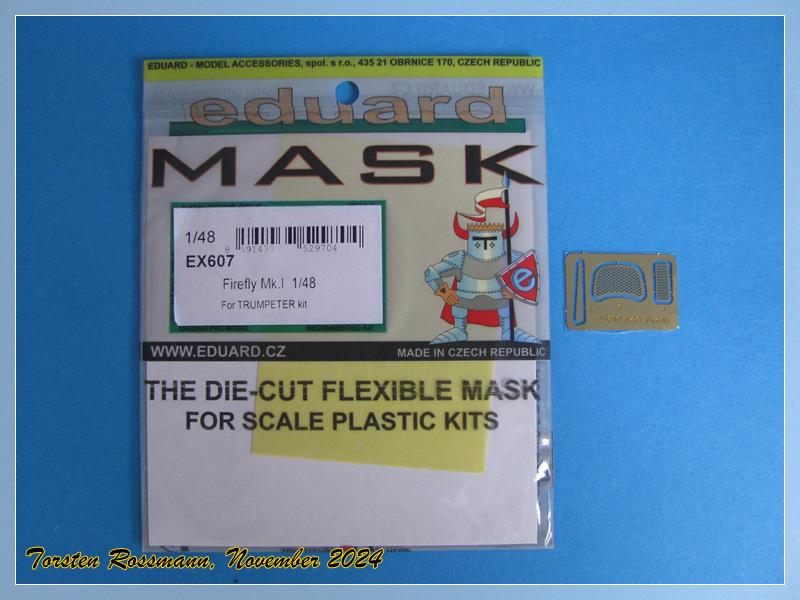
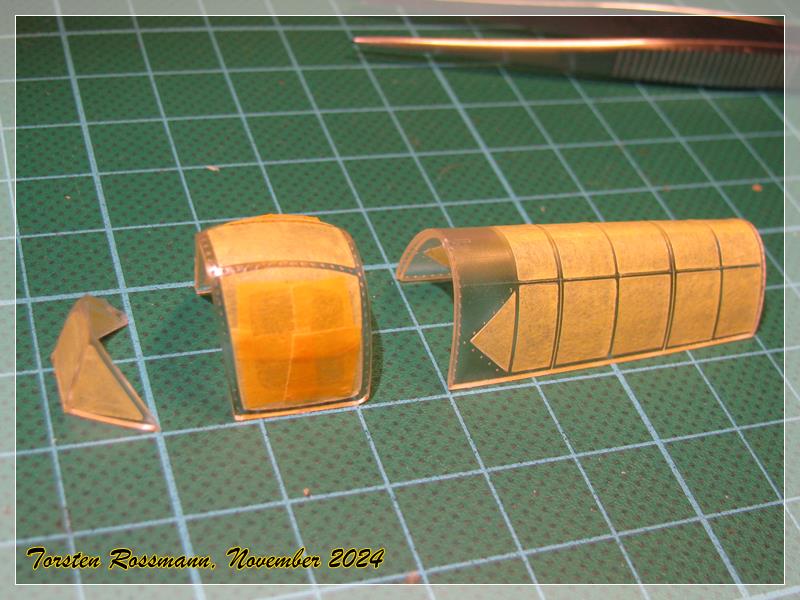
For the canopies I’ve got the Eduard mask EX607. There’s also a small PE fret coming with the kit
The decal sheet has nearly A4 size and the decals look well printed …

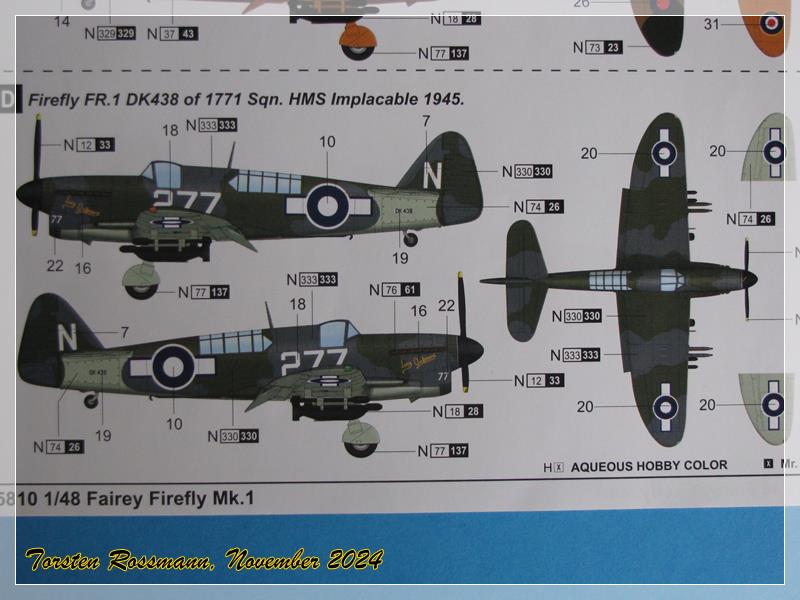
There are 4 options for this kit from WW2 and the late 1940’s, so I have decided for this Firefly from No. 1771 Sqn from the PTO in their typical Extra Dark Sea Grey and Dark Slate Grey camo …
Trumpeter says the kit has +/- 100 parts, so I hope for a relaxing build. The Unimog had 240 parts. Not that it was not an enjoyable build, too!
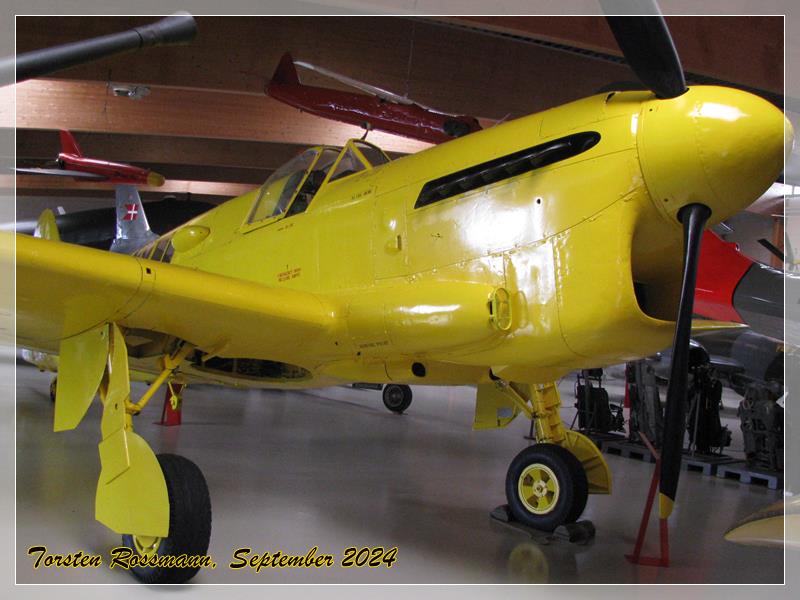
I have already seen an original Firefly recently. It can be seen in the Flymuseum in Skjern/Denmark. Don’t wonder about the colour, it was used as a target tug in the Flyvevåbnet.


So I will start with the Firefly in the next few days and it would be great if some of you would again accompany me along the way.
Have a great weekend and happy modelling!
Torsten
![]()
9 Likes
I have started with the Firefly today, degreased the parts and started painted the cockpit parts with Interior Grey Green 71305 from Vallejo. Hope to show you first pics of the progress soon.
For anyone who has missed my last build I would like to show you what I was up to recently.
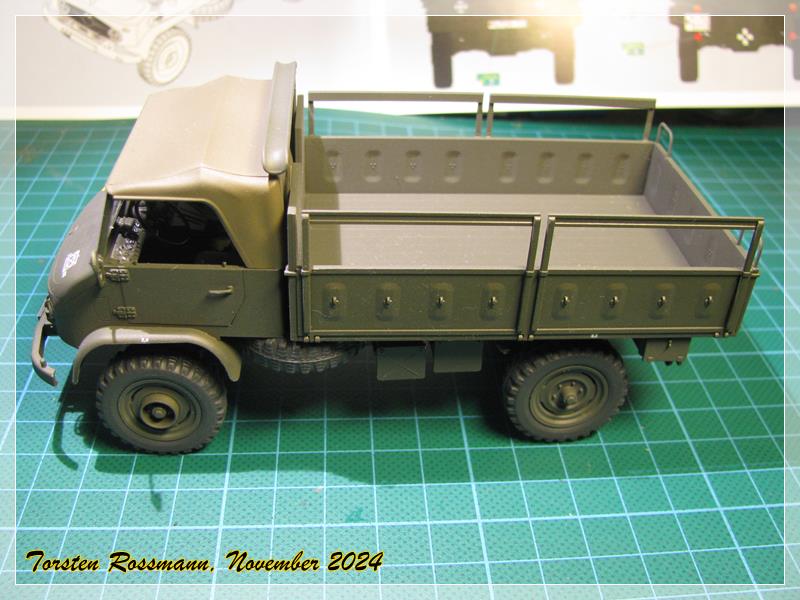
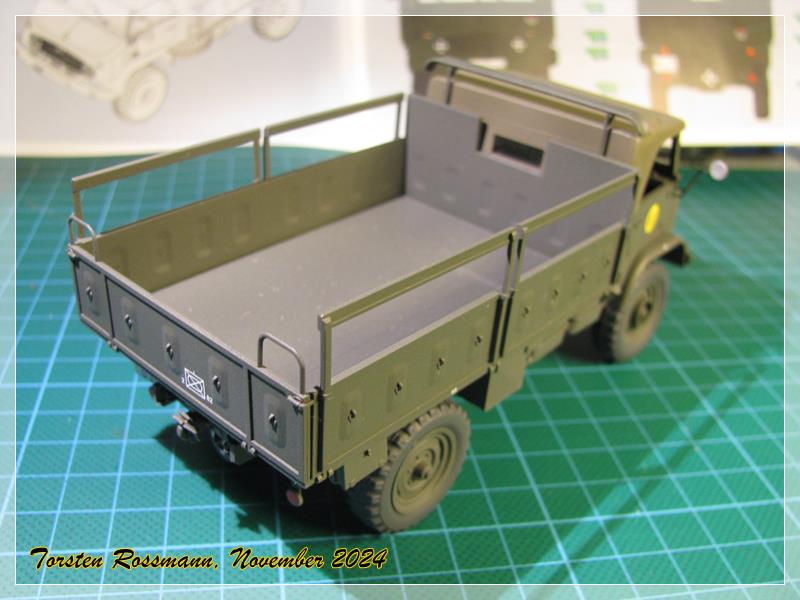
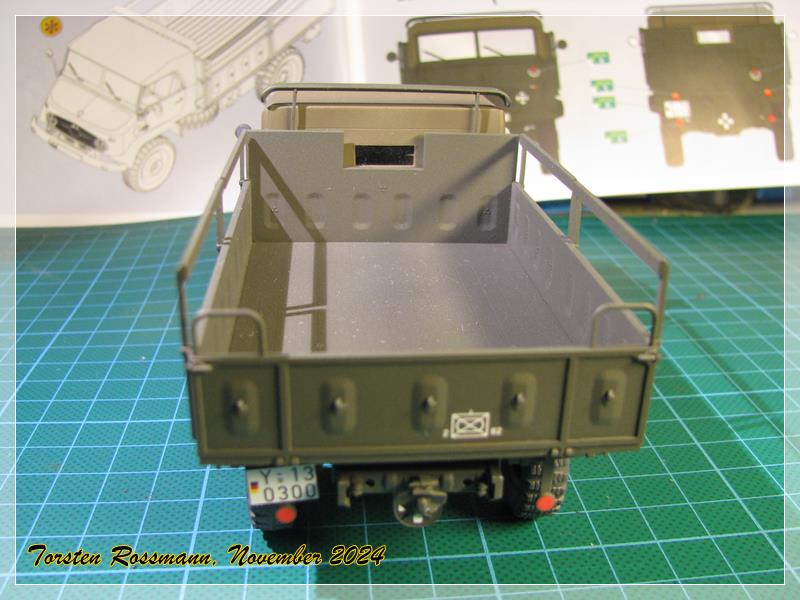
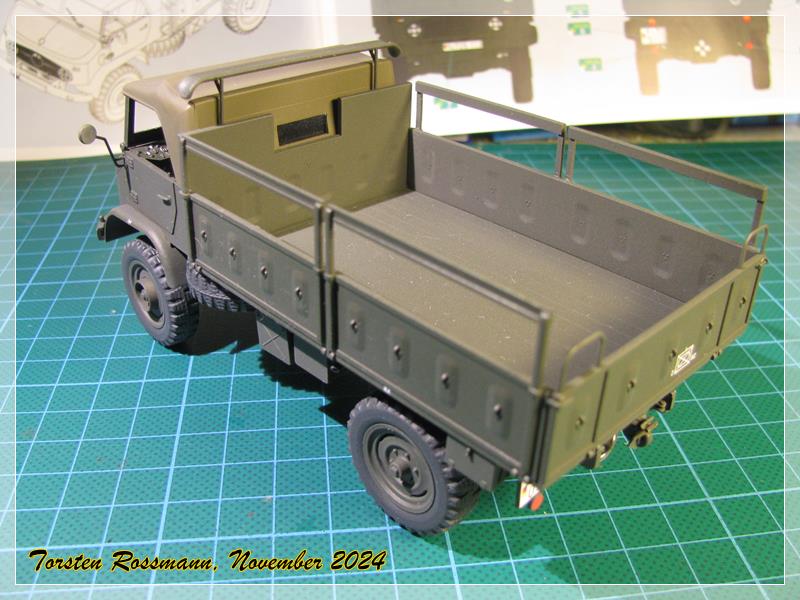
Unimog S 404
Bundeswehr
2./PzGrenBtl 82, Lüneburg, Germany, 1970’s
Kit: ICM/Revell Germany 1/35
Tyres are made of vinyl. Everything is painted with Revell Aqua, the final coating is a 50/50 mix of Revell Clear Gloss and Clear Matt. This build gave me a lot of fun, the overall fitting is excellent!
Interesting fact, this unit was in the same barracks as me in Lüneburg during my service (I was with PzBtl 83) until everything was closed down in the early 1990’s and the units disbanded. They had their SPz Marder 1A3 and we our KPz Leopard 2A4. It was always a friendly rivalry between them and us ![]() Long ago …
Long ago …
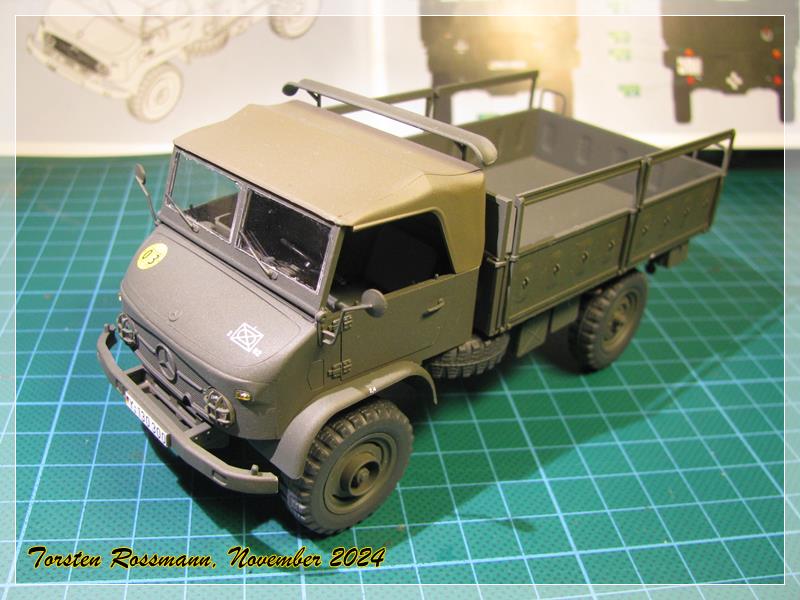
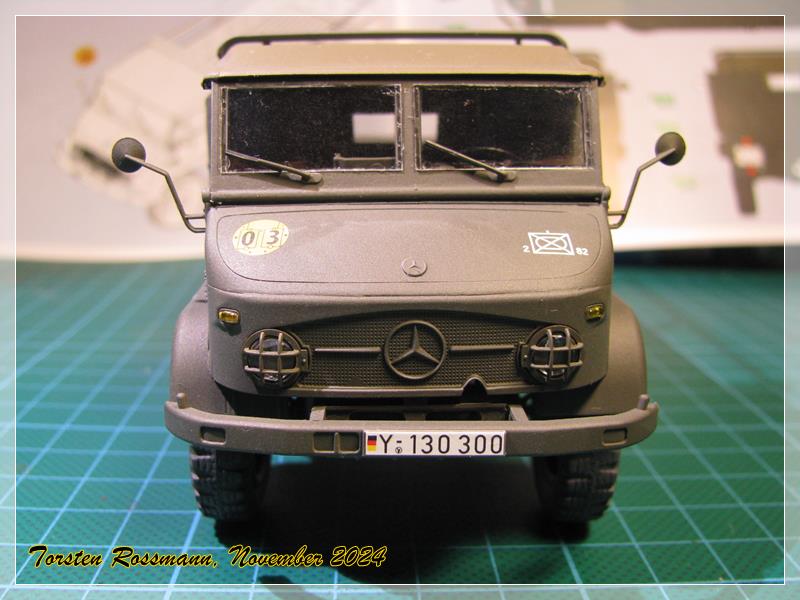
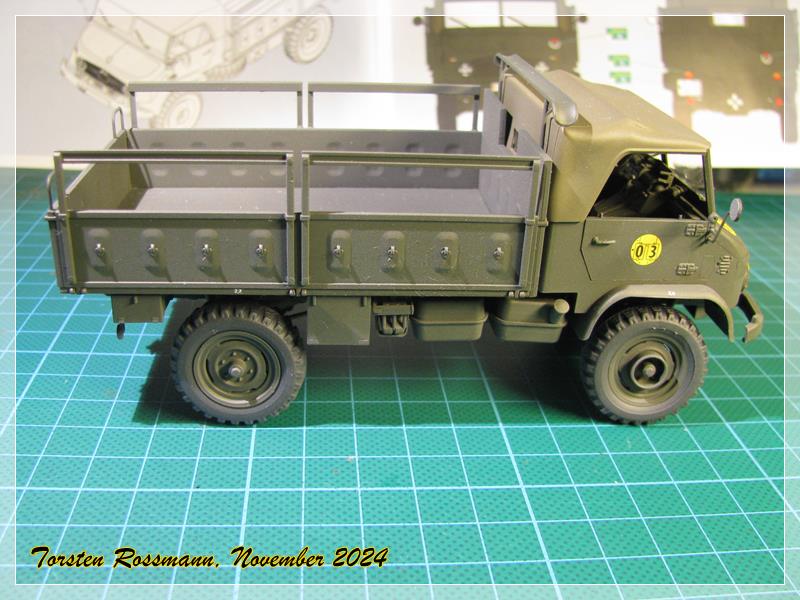
Anyway, here are some quick shots I made on my workbench yesterday … ![]()

12 Likes
Looking good T
1 Like
Looking good !!!
It’s always a pleasure to follow your build progress.
1 Like
outstanding work
1 Like
Thanks for all your comments and kind words, Quint, Nito and TinyDog. As always I try my best … ![]()
Did I really say that? ![]()
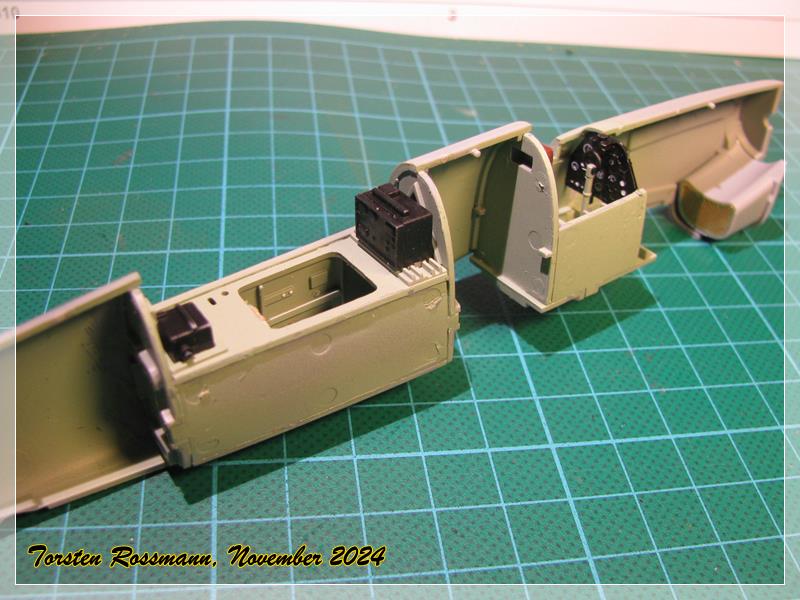
Okay, time for a first update. Against all odds this build has turned out to be a bit problematic. I had to work on nearly every cockpit part with scalpel and/or file to make it fit to eachother. I don’t say it’s chinese crap … but I think it. The cockpit looks really rudimentary like in my 20 years old French F4U-7 from some time ago. All I added were seatbelts made of Tamiya Tape. The canopy will be closed so it doesn’t matter anyway.


The rear cockpit needed some force to stay in place … ![]()

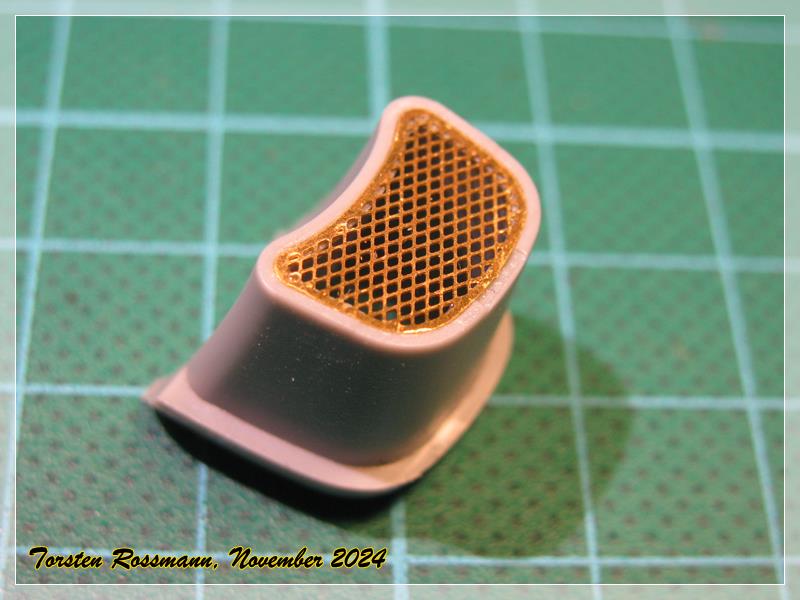
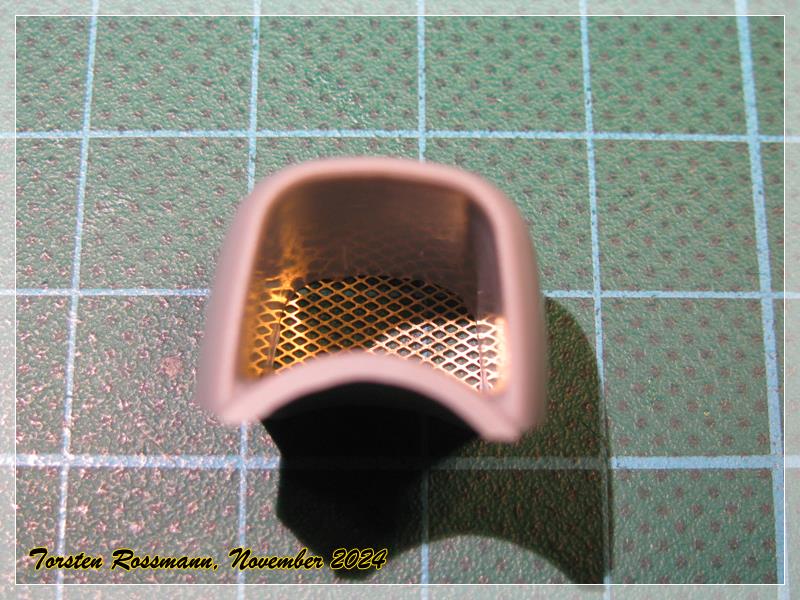
Nice extra for the large air intake is this grille PE part …
Ooops! That was quick! First sprue is already done! ![]()

The fitting of the cockpit parts to the fuselage is another story. There are fixing lines to hold the parts in place and it’s a really, really tight fit. Too tight for my taste, so I erased one line on each side to have a smoother fit …
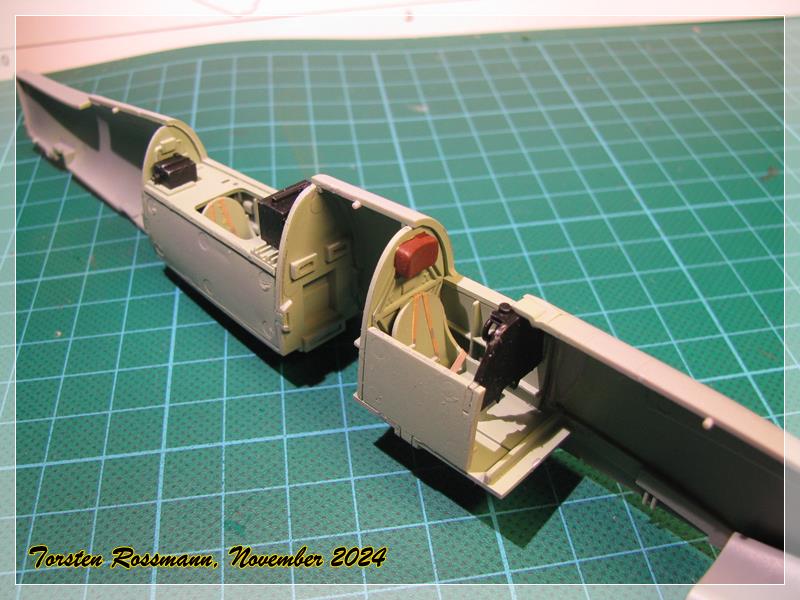

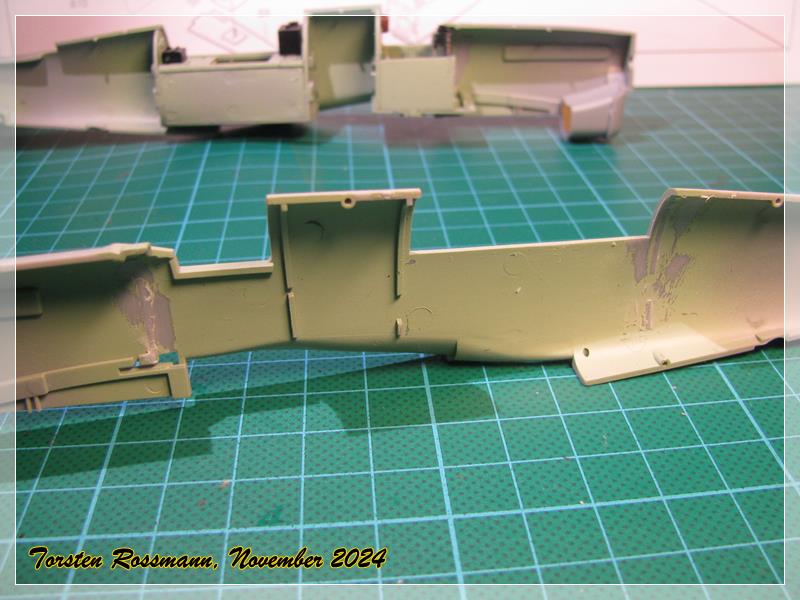

Now both halves fit well together. There’s only a small gap on the underside which needs to be filled with some putty. I have used again Ethylacetate to glue the parts together step by step …

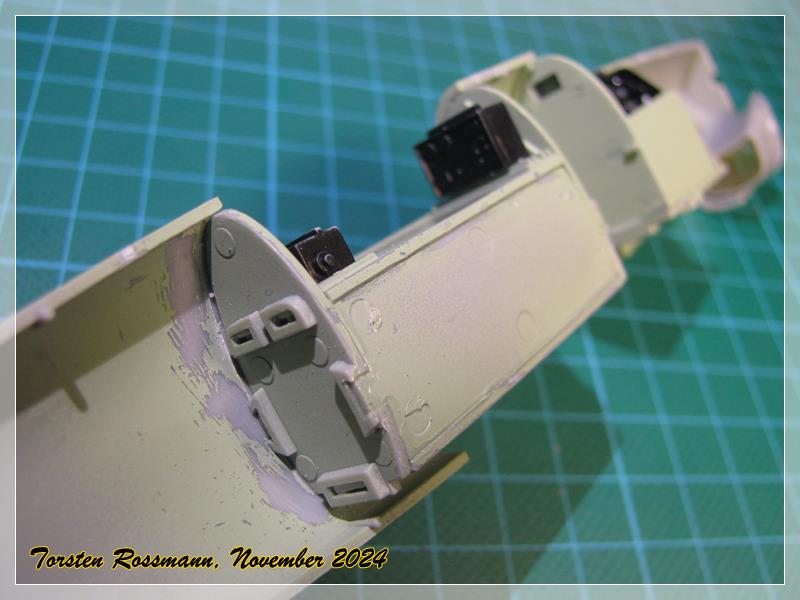
Still need to sand the seams a bit but that should be a quick job … ![]() Next steps are attaching the left out parts for the fuselage and the side rudder and elevators. Stay tuned!
Next steps are attaching the left out parts for the fuselage and the side rudder and elevators. Stay tuned!
Have a great Sunday!
Torsten
![]()
9 Likes
I feel your pain Torsten. I’ve had similar issues with this very same brand, not too mention accuracy issues…
All that being said, you’re overcoming the challenge and making some good progress ![]()
1 Like
Thanks for your feedback, Russell! Good to know a fellow sufferer, but I guess we’re not the only ones. Your Punjabi build is also no “add glue and shake” kit … ![]()
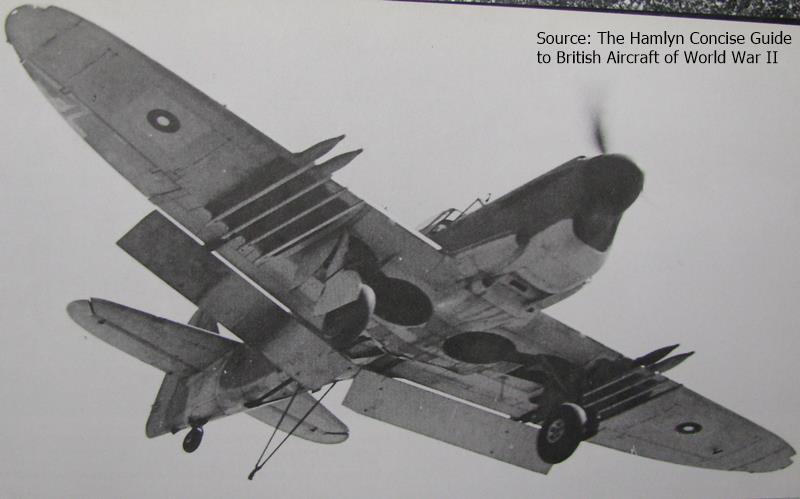
While I was on research yesterday in my books I found this spectacular photo of a Firefly just seconds before touch down on deck and I noticed that the wheel wells don’t have the same colour as the underside, which is Sky. What colour did you use on your recent FAA-Corsair build? Looks like Interior Green, right? Maybe you can check again?
2 Likes
Hi Torsten.
The colour I chose on the Corsair’s wheel wells a was a US interior green, but since Fairey built the Fireflies and were British I’d suggest to go with similar colours to what I used on the Fairey Fulmar, which was aluminium…
If I recall correctly, the RAAF Firefly at our local museum also has aluminium coloured wheel wells…
Hope this helps ![]()
5 Likes
Yes, I think Aluminium is a good idea! Will go for that. Thanks a lot! ![]()
Oh, you have a Firefly at your doorstep, Russ? Can you show us some photos of it … ? ![]()
1 Like
Here she is mate… ![]()
I don’t have any great photos of her, but I can drop by and take some if there’s any specific areas you need reference pics for???
1 Like
Thanks for the offer, Russell! ![]()
Indeed, you could show us photos of the wheel wells of that bird and maybe also from the inside of the trailing edges of the wings. Of course only if it doesn’t give you too much hassle … Just like to know if they are also Aluminium. On the photo above they look like Sky like the rest of the underside.
And of course we want to see here also an Aussie Firefly after the photos of the danish bird … ![]()
Btw., came a bit further with the build. At the moment it’s going trouble-free. More photos soon!
1 Like
Hi Torsten ![]()
I’ll try to get there on the weekend and grab some pics for you ![]()
2 Likes
Looking great, I love the marking choice!
1 Like
Thanks Russell and Bryan! ![]()
Let’s see what you will find out, Russell! Much appreciated!
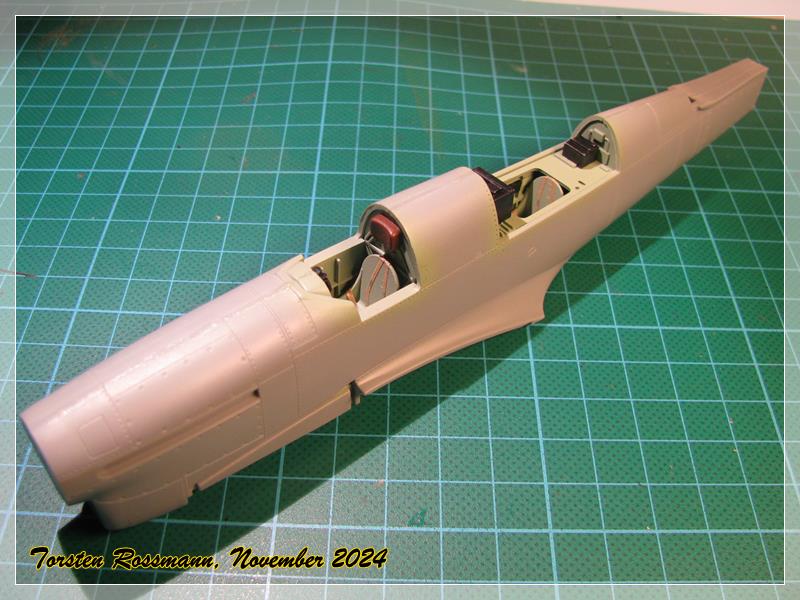
In the last few days I came a bit further with the build because everything went smooth now (hear hear!). Filling and sanding the small gap on the underside was my usual procedure …

… attaching side rudder and elevators was also no problem …
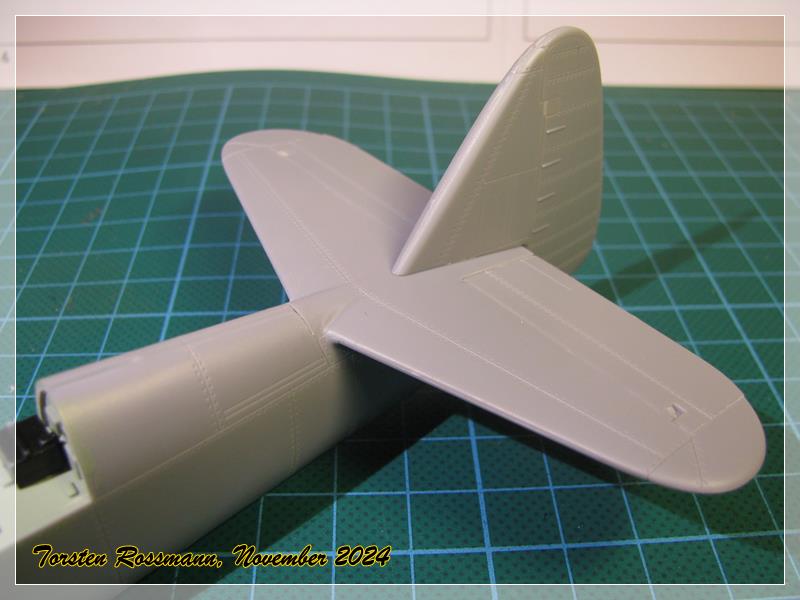
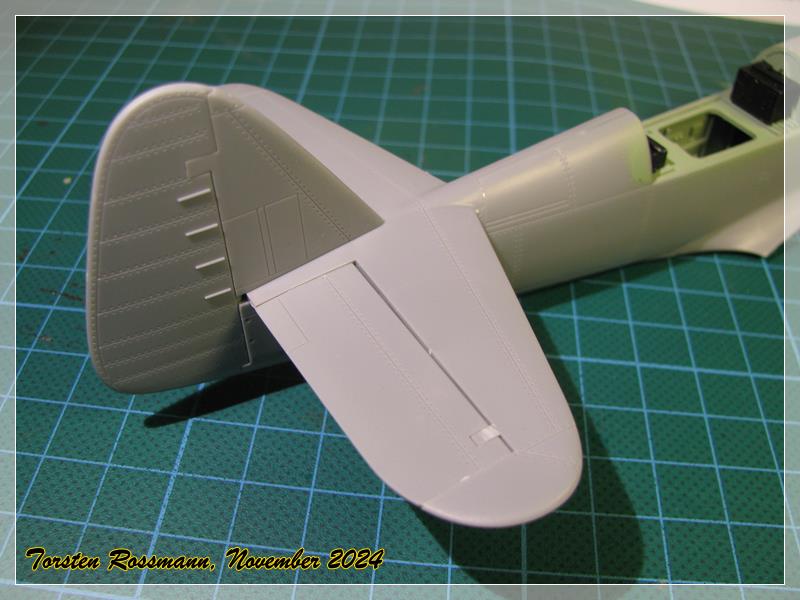
… adding the wings to the fuselage was again a very tight fit, so I attached this part without glue first until there was a good fit and glued the parts again together with Ethylacetate. For bigger parts this stuff is very useful … ![]()

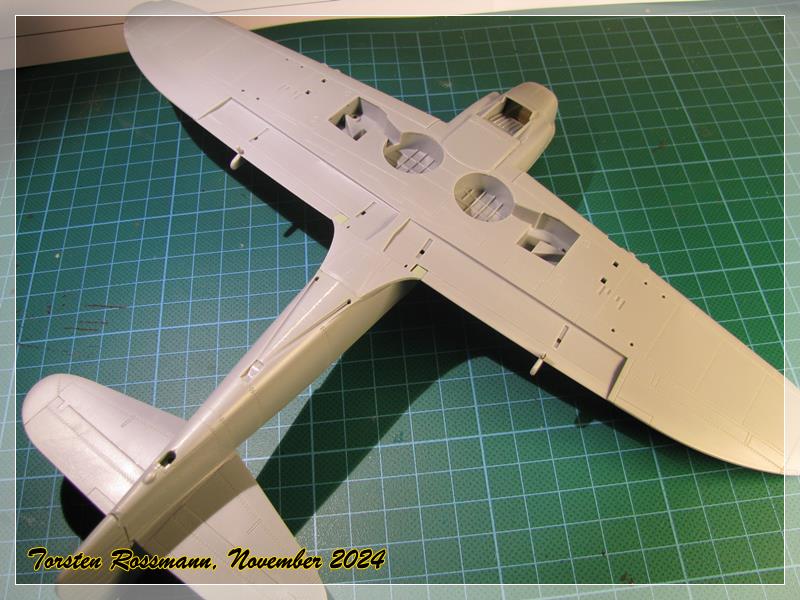
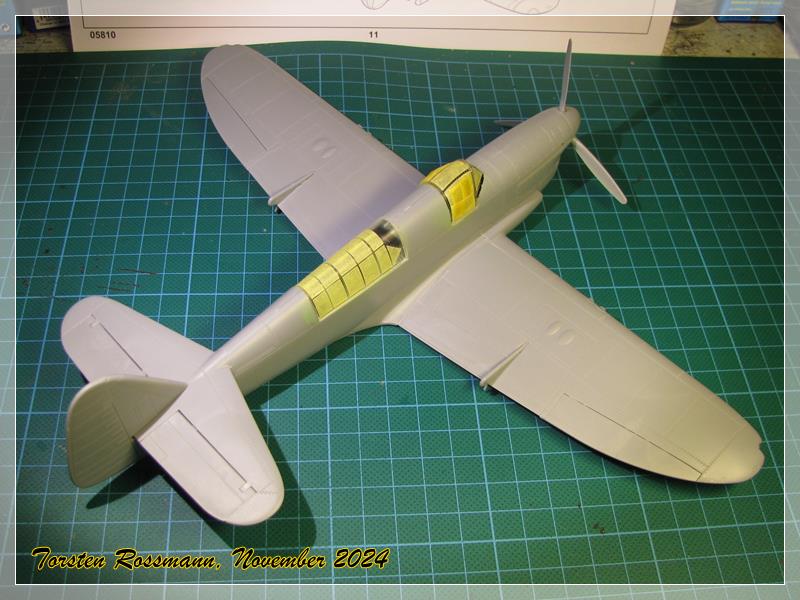
With 28 cm wingspan this won’t be a small bird! ![]() In the next step I will mask the canopies.
In the next step I will mask the canopies.
Torsten
![]()
8 Likes
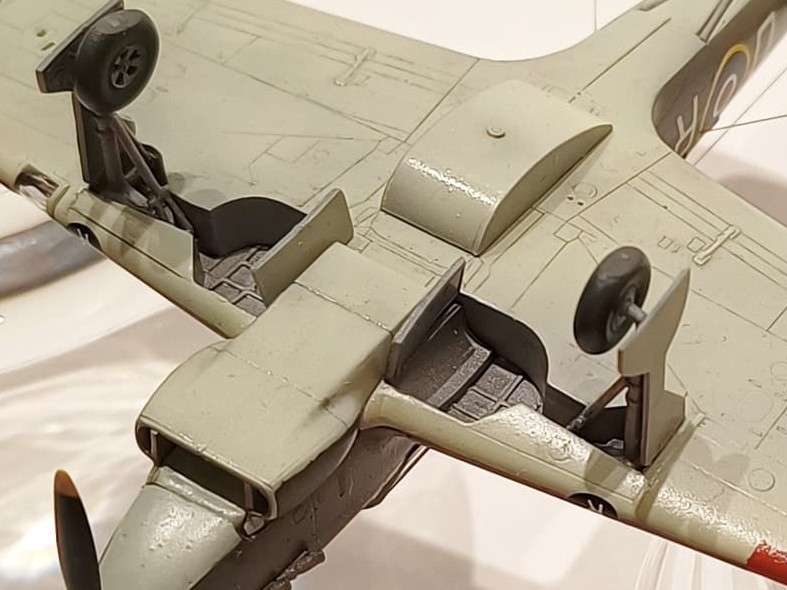
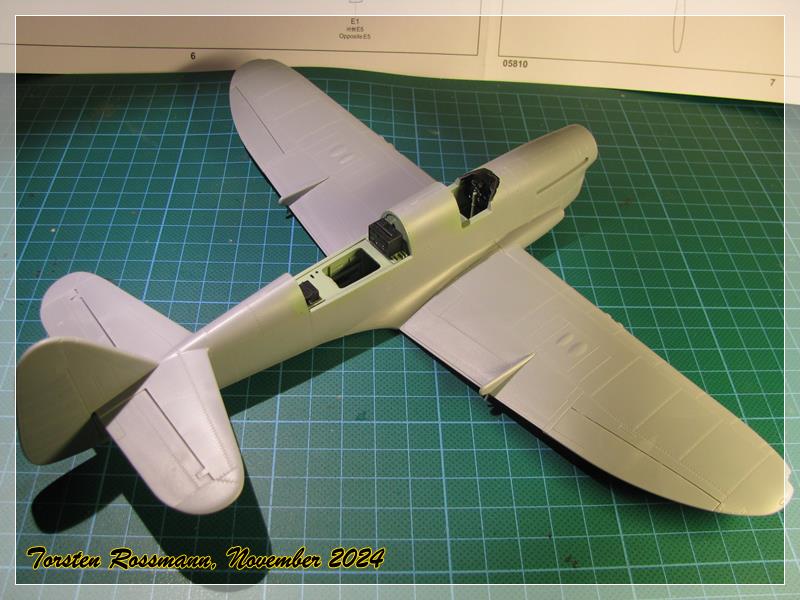
This week I masked the canopies of the Firefly. But before that I made some test fitting and noticed that the rear canopy and the pilots sliding canopy are slightly too long to fit in the cockpit parts ![]() So I made some careful sanding and now they fit well in the spaces …
So I made some careful sanding and now they fit well in the spaces …
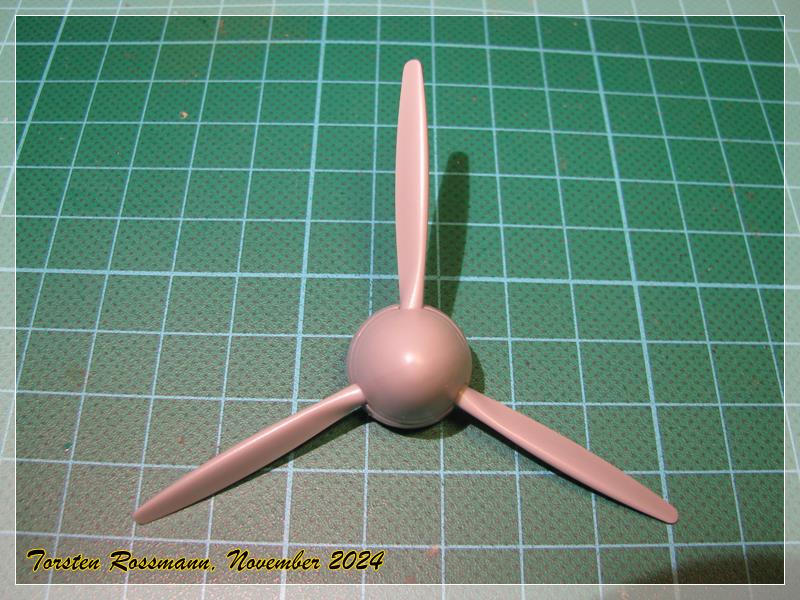
… and while I was “in the flow” I assembled the propeller. Blades and hub will be black so no problem here. Only the tips will be yellow later …
… this is how far I am at the moment …
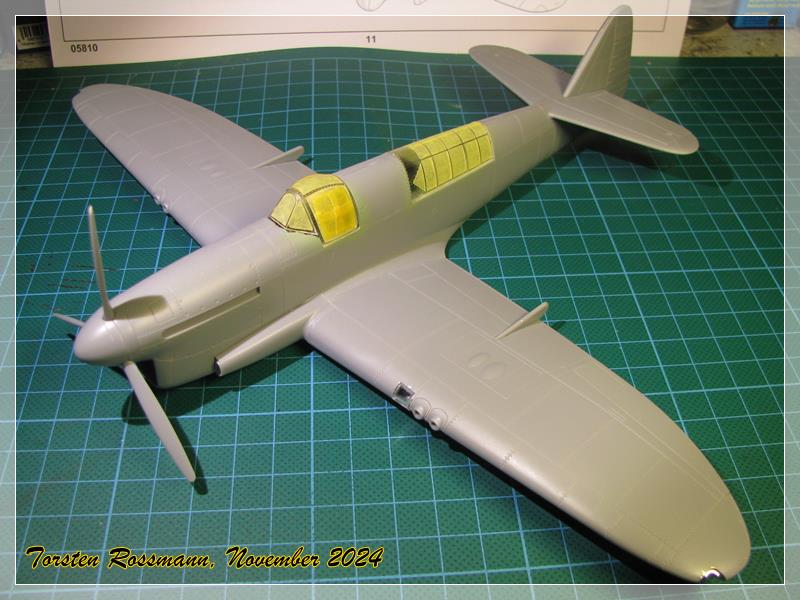
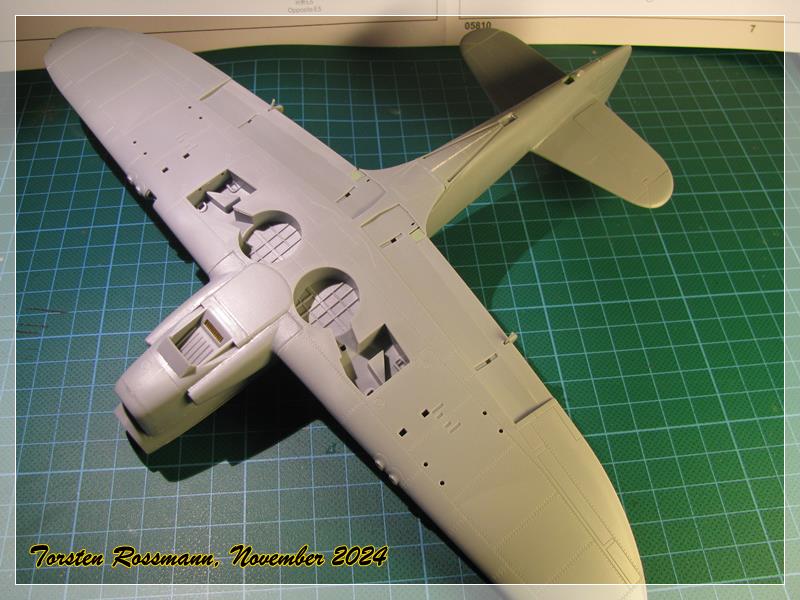
White glue is used for the canopies. Before painting I will also add the landing light and the position lights and cover the clear part of it with Revell Colour Stop, same as Humbrol Maskol but less aggressive to the plastic. I can leave it on for weeks. Next I will have a look at the landing gear and the landing flaps. I hope to start painting by next weekend … ![]()
Torsten
![]()
10 Likes
Great double build.
2 Likes