Tried to improve the Border Models T-34 with spaced armor


HI guys.

I was a lurker on this forum and finally decide to post something :stuck_out_tongue:

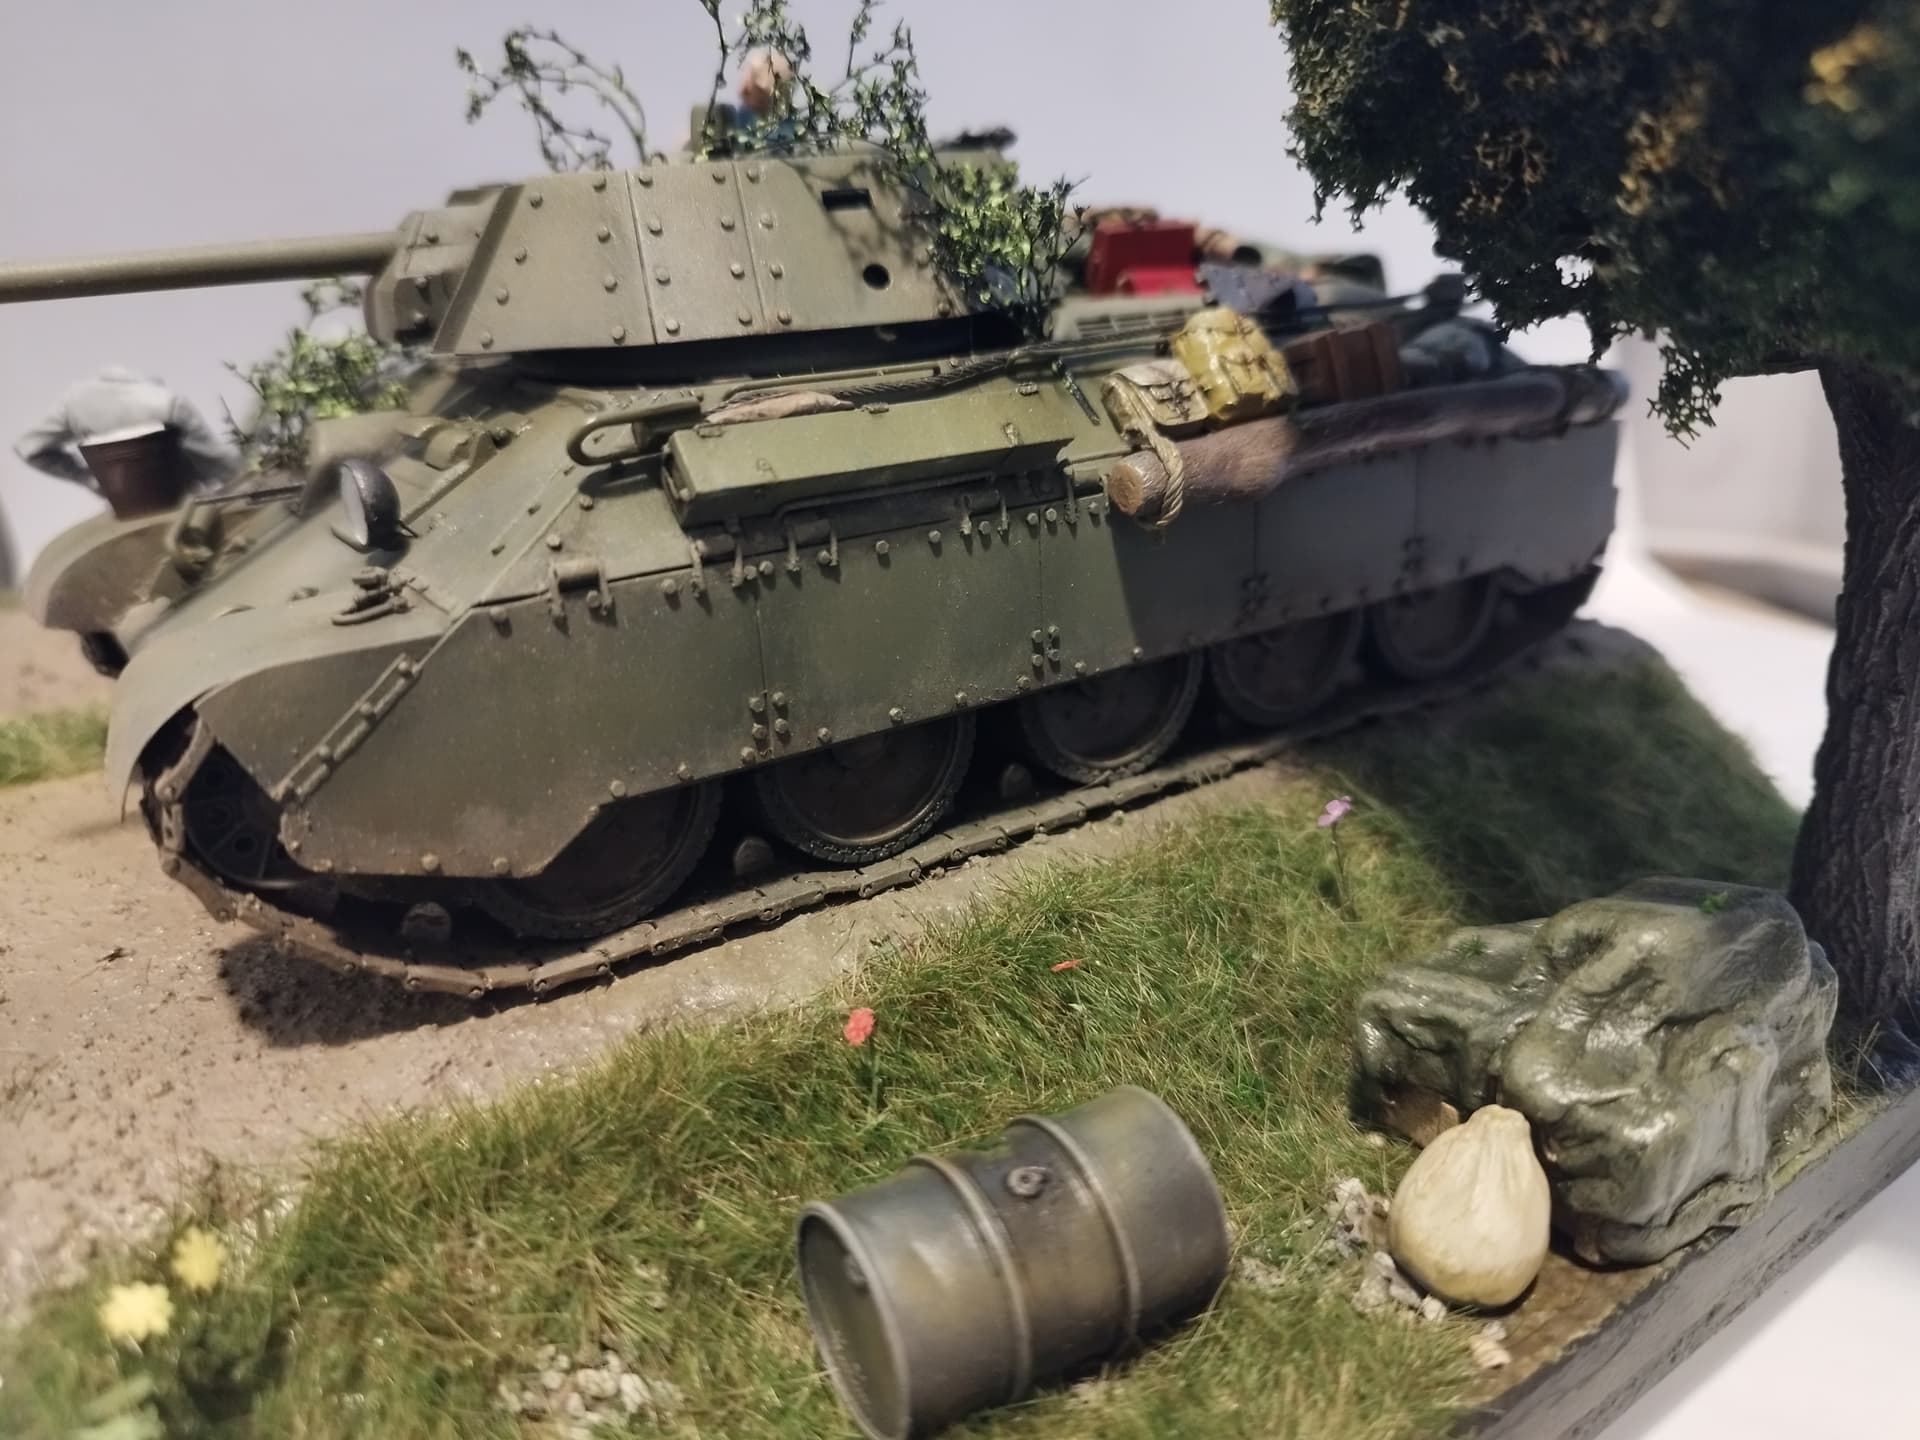
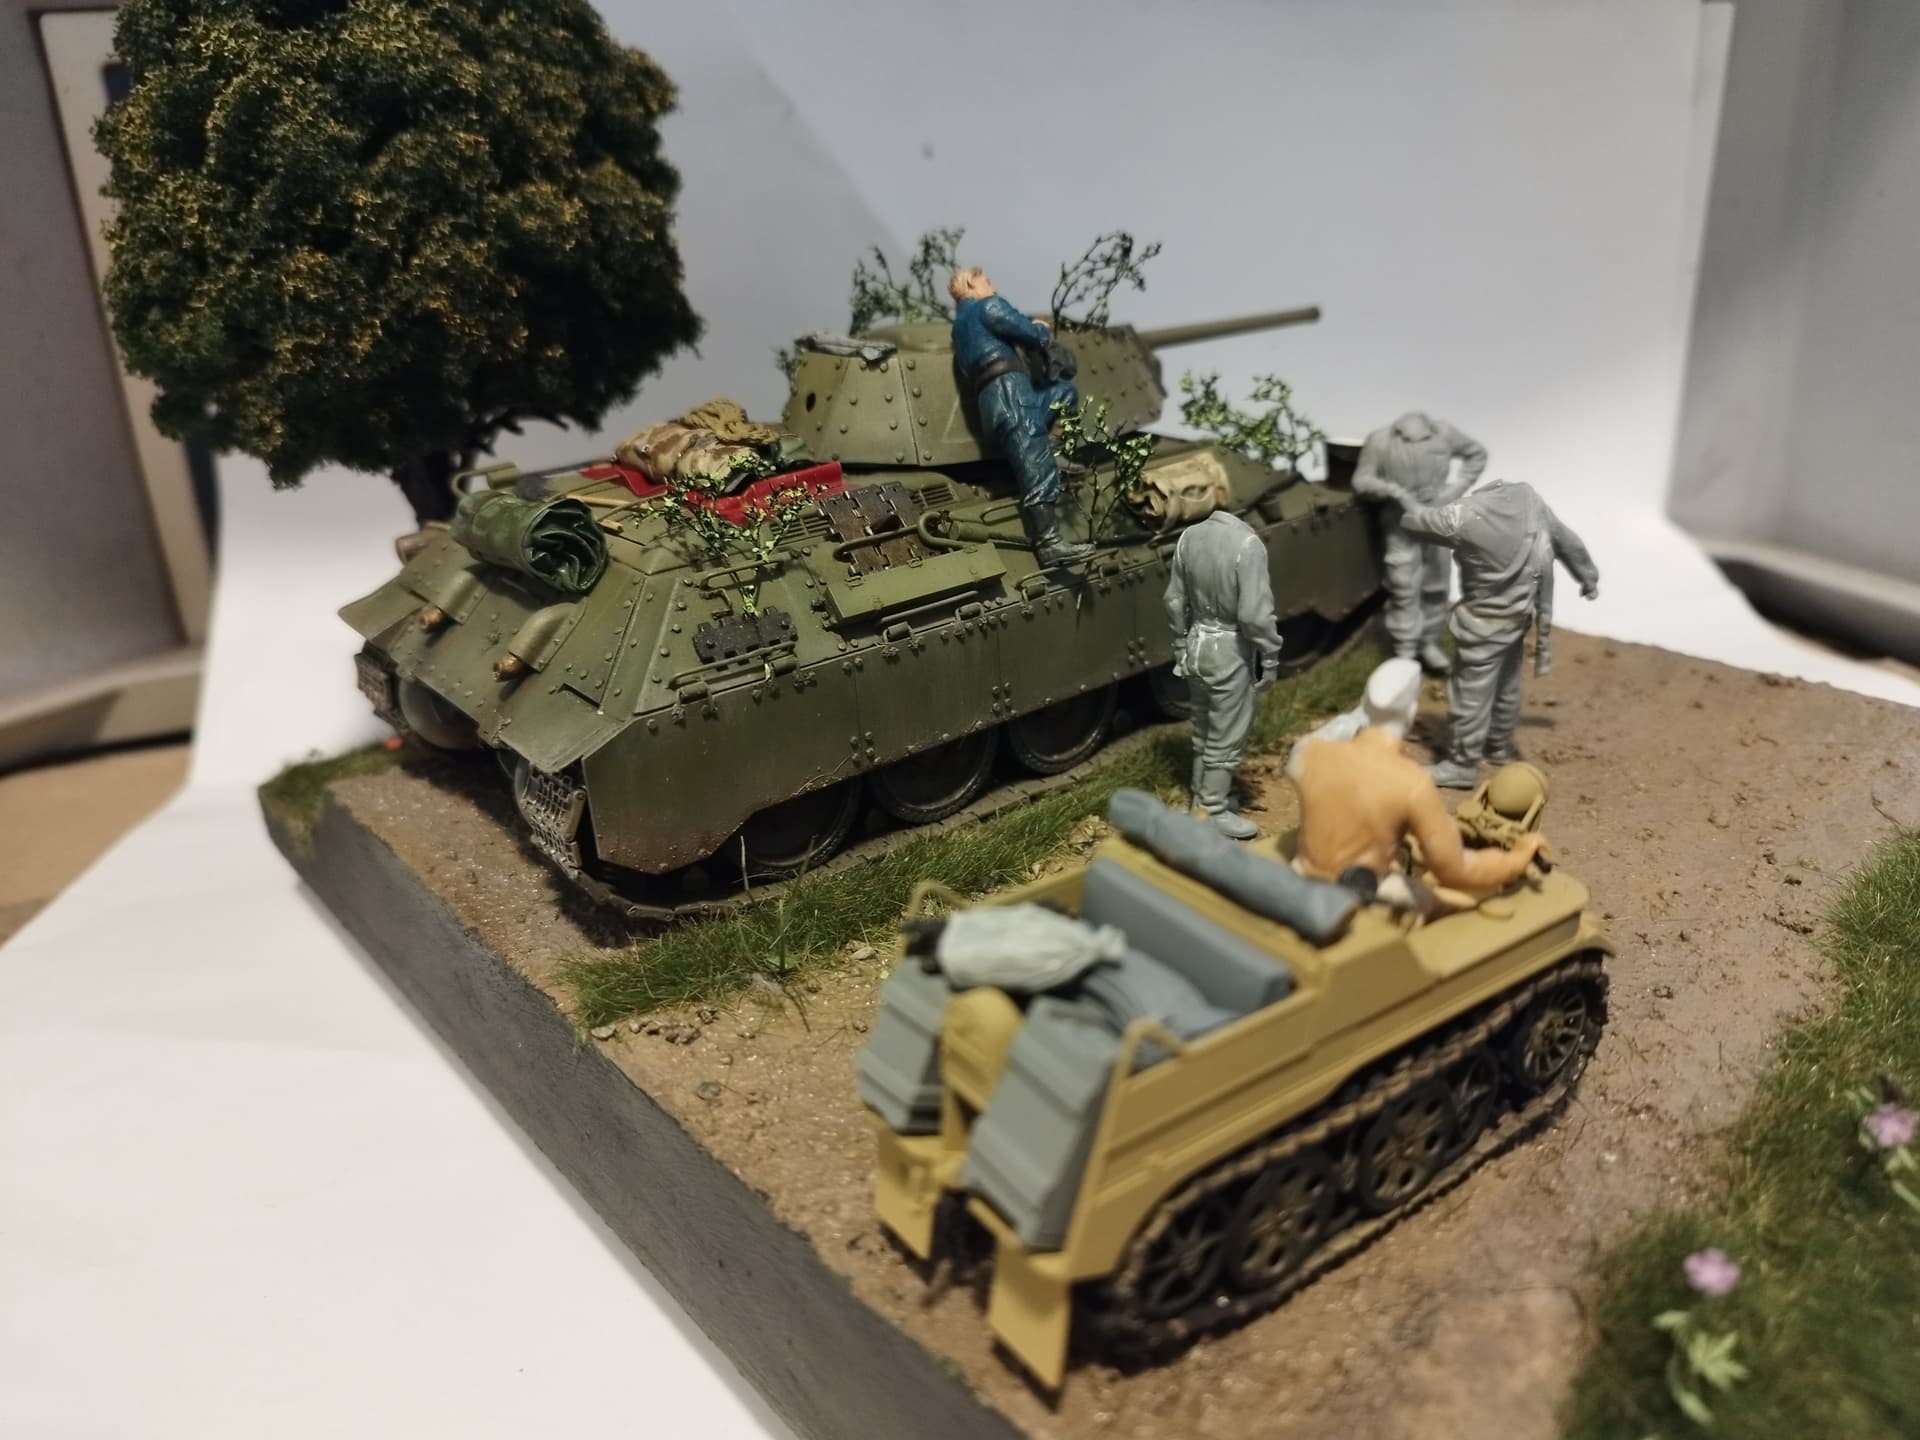
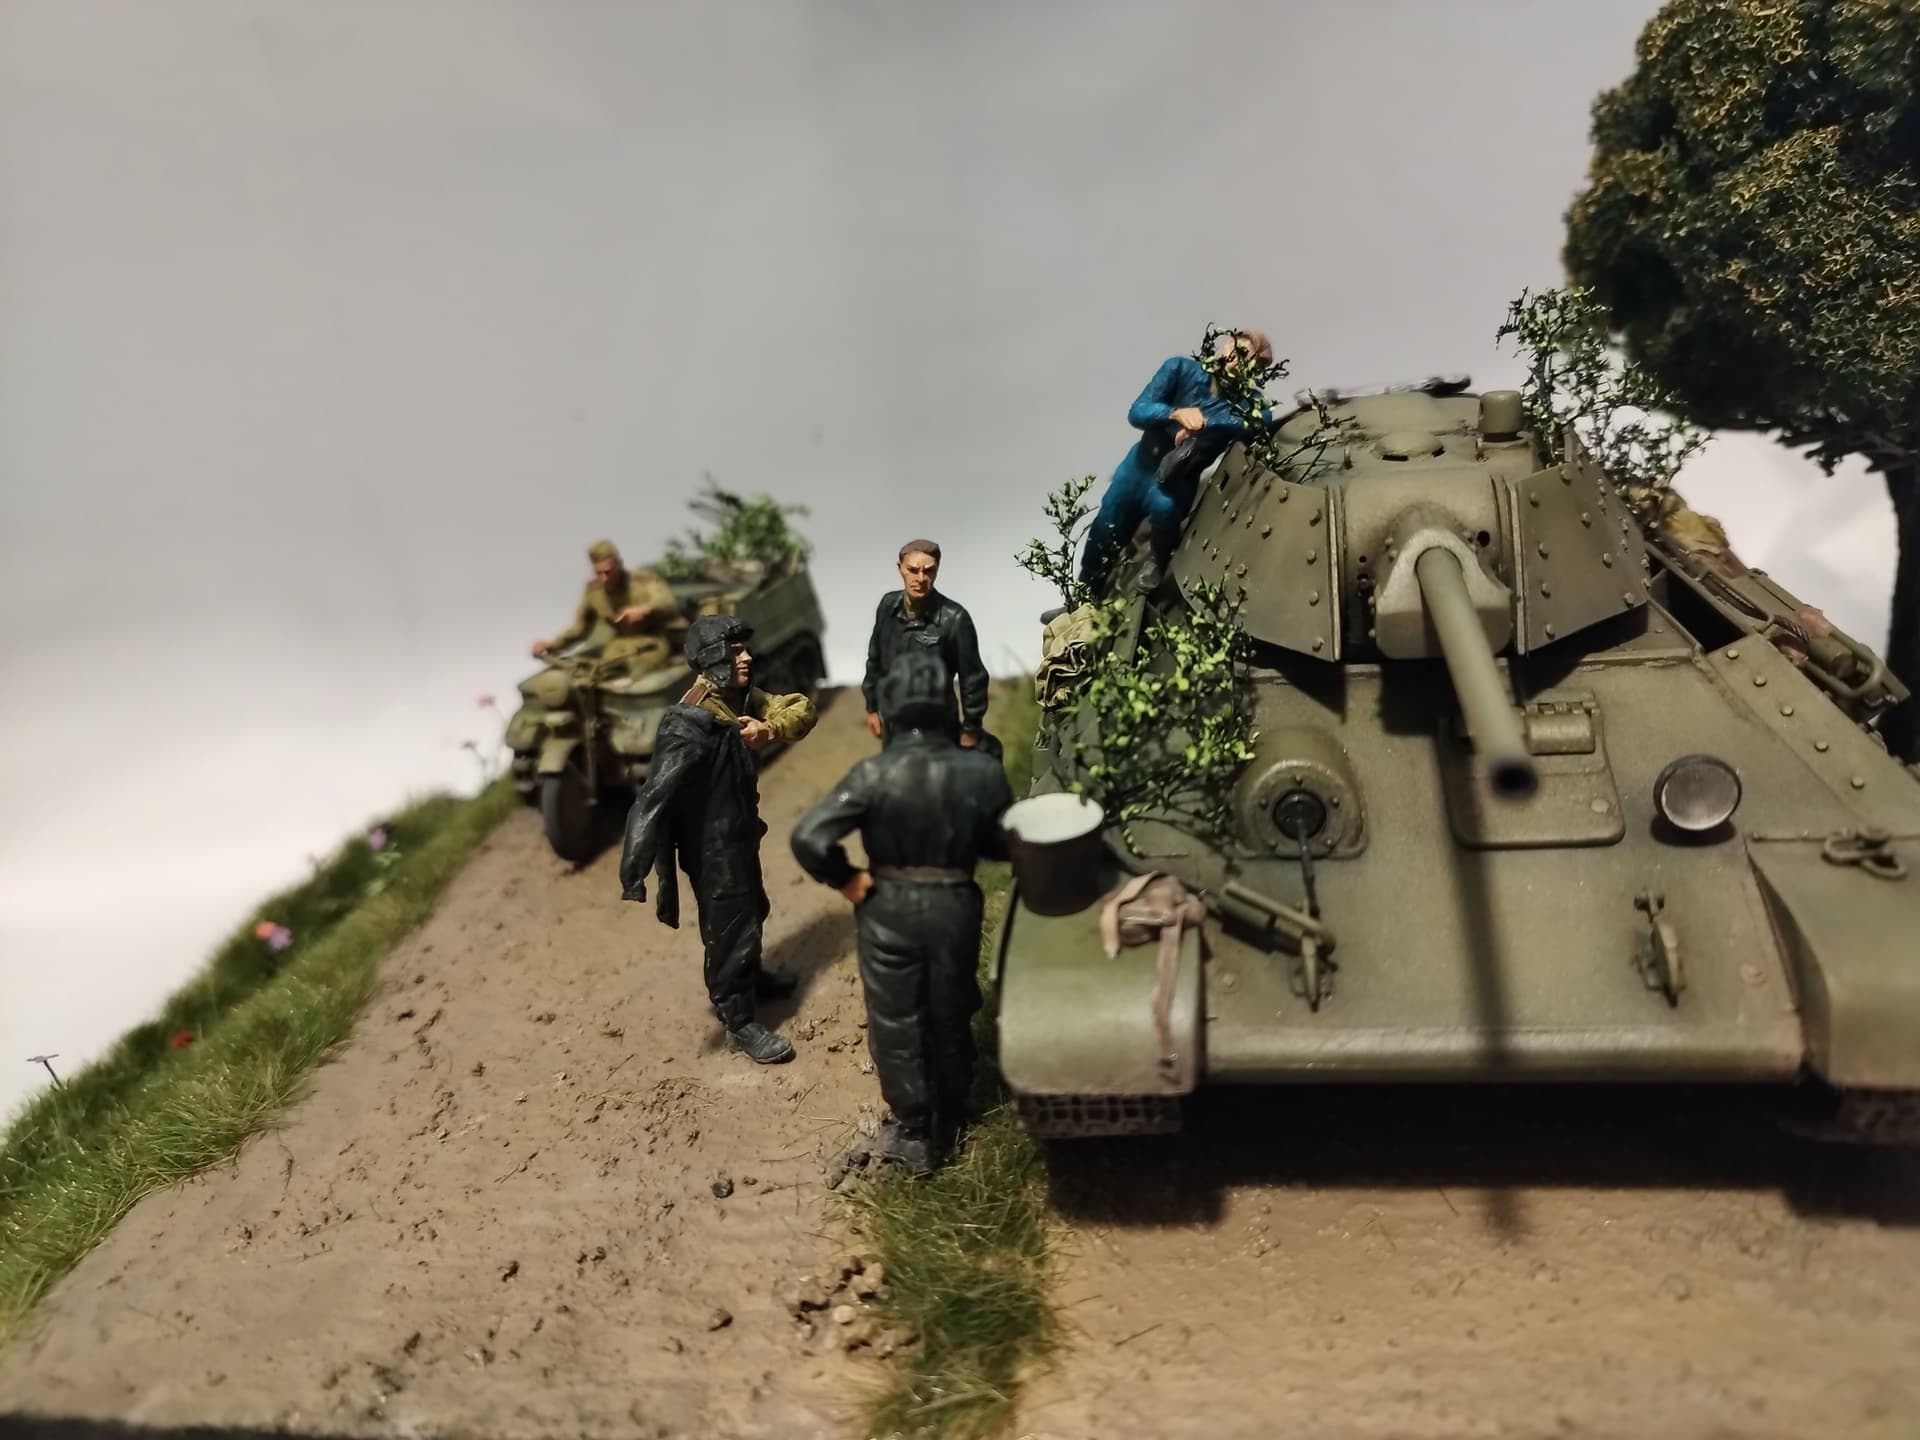
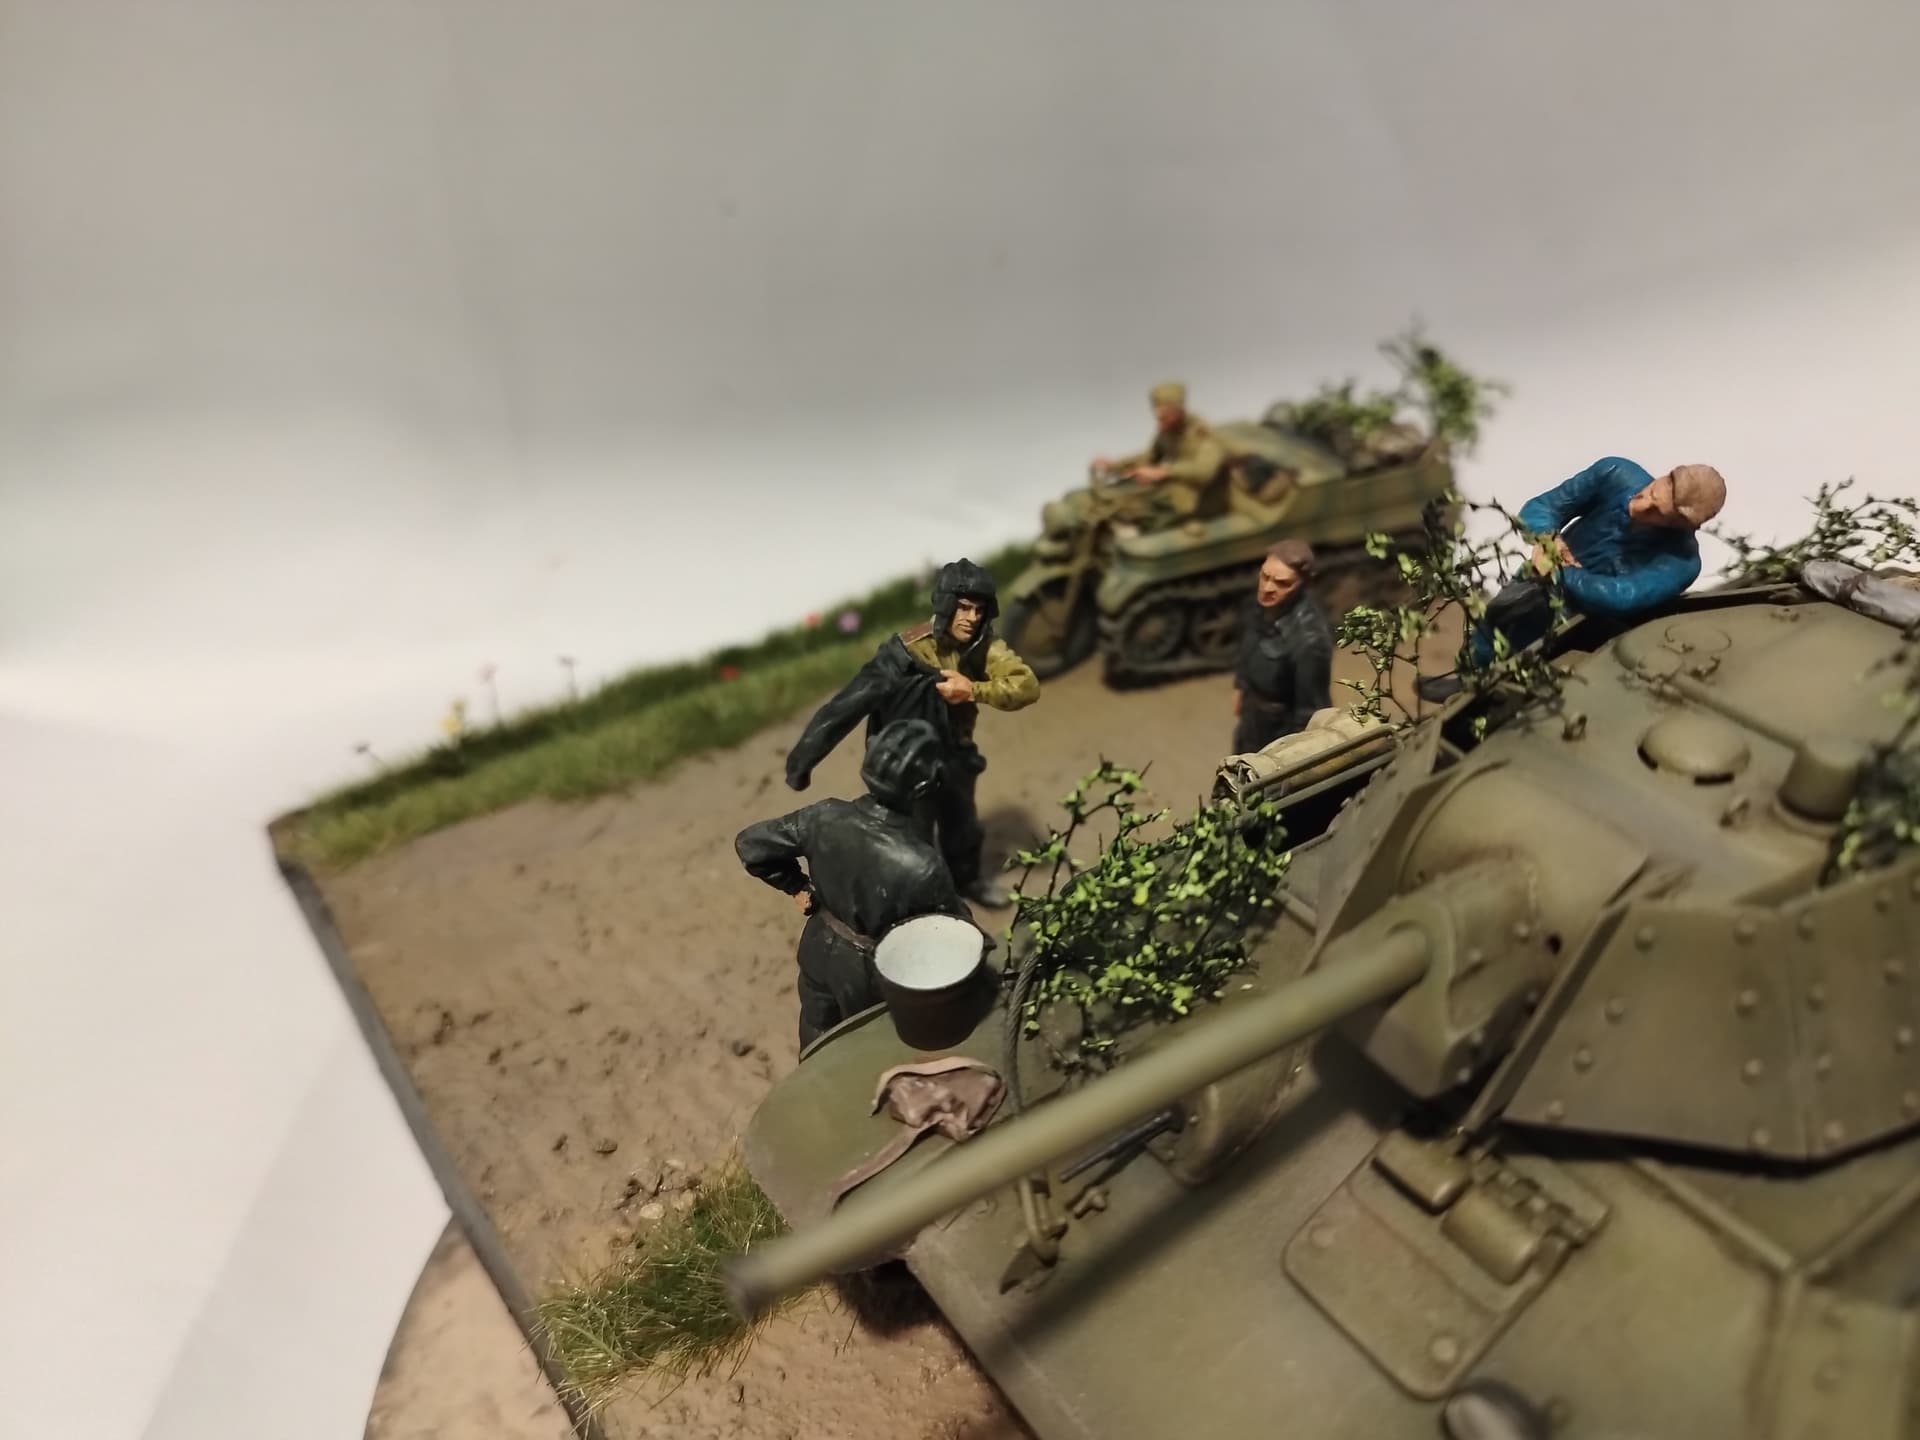
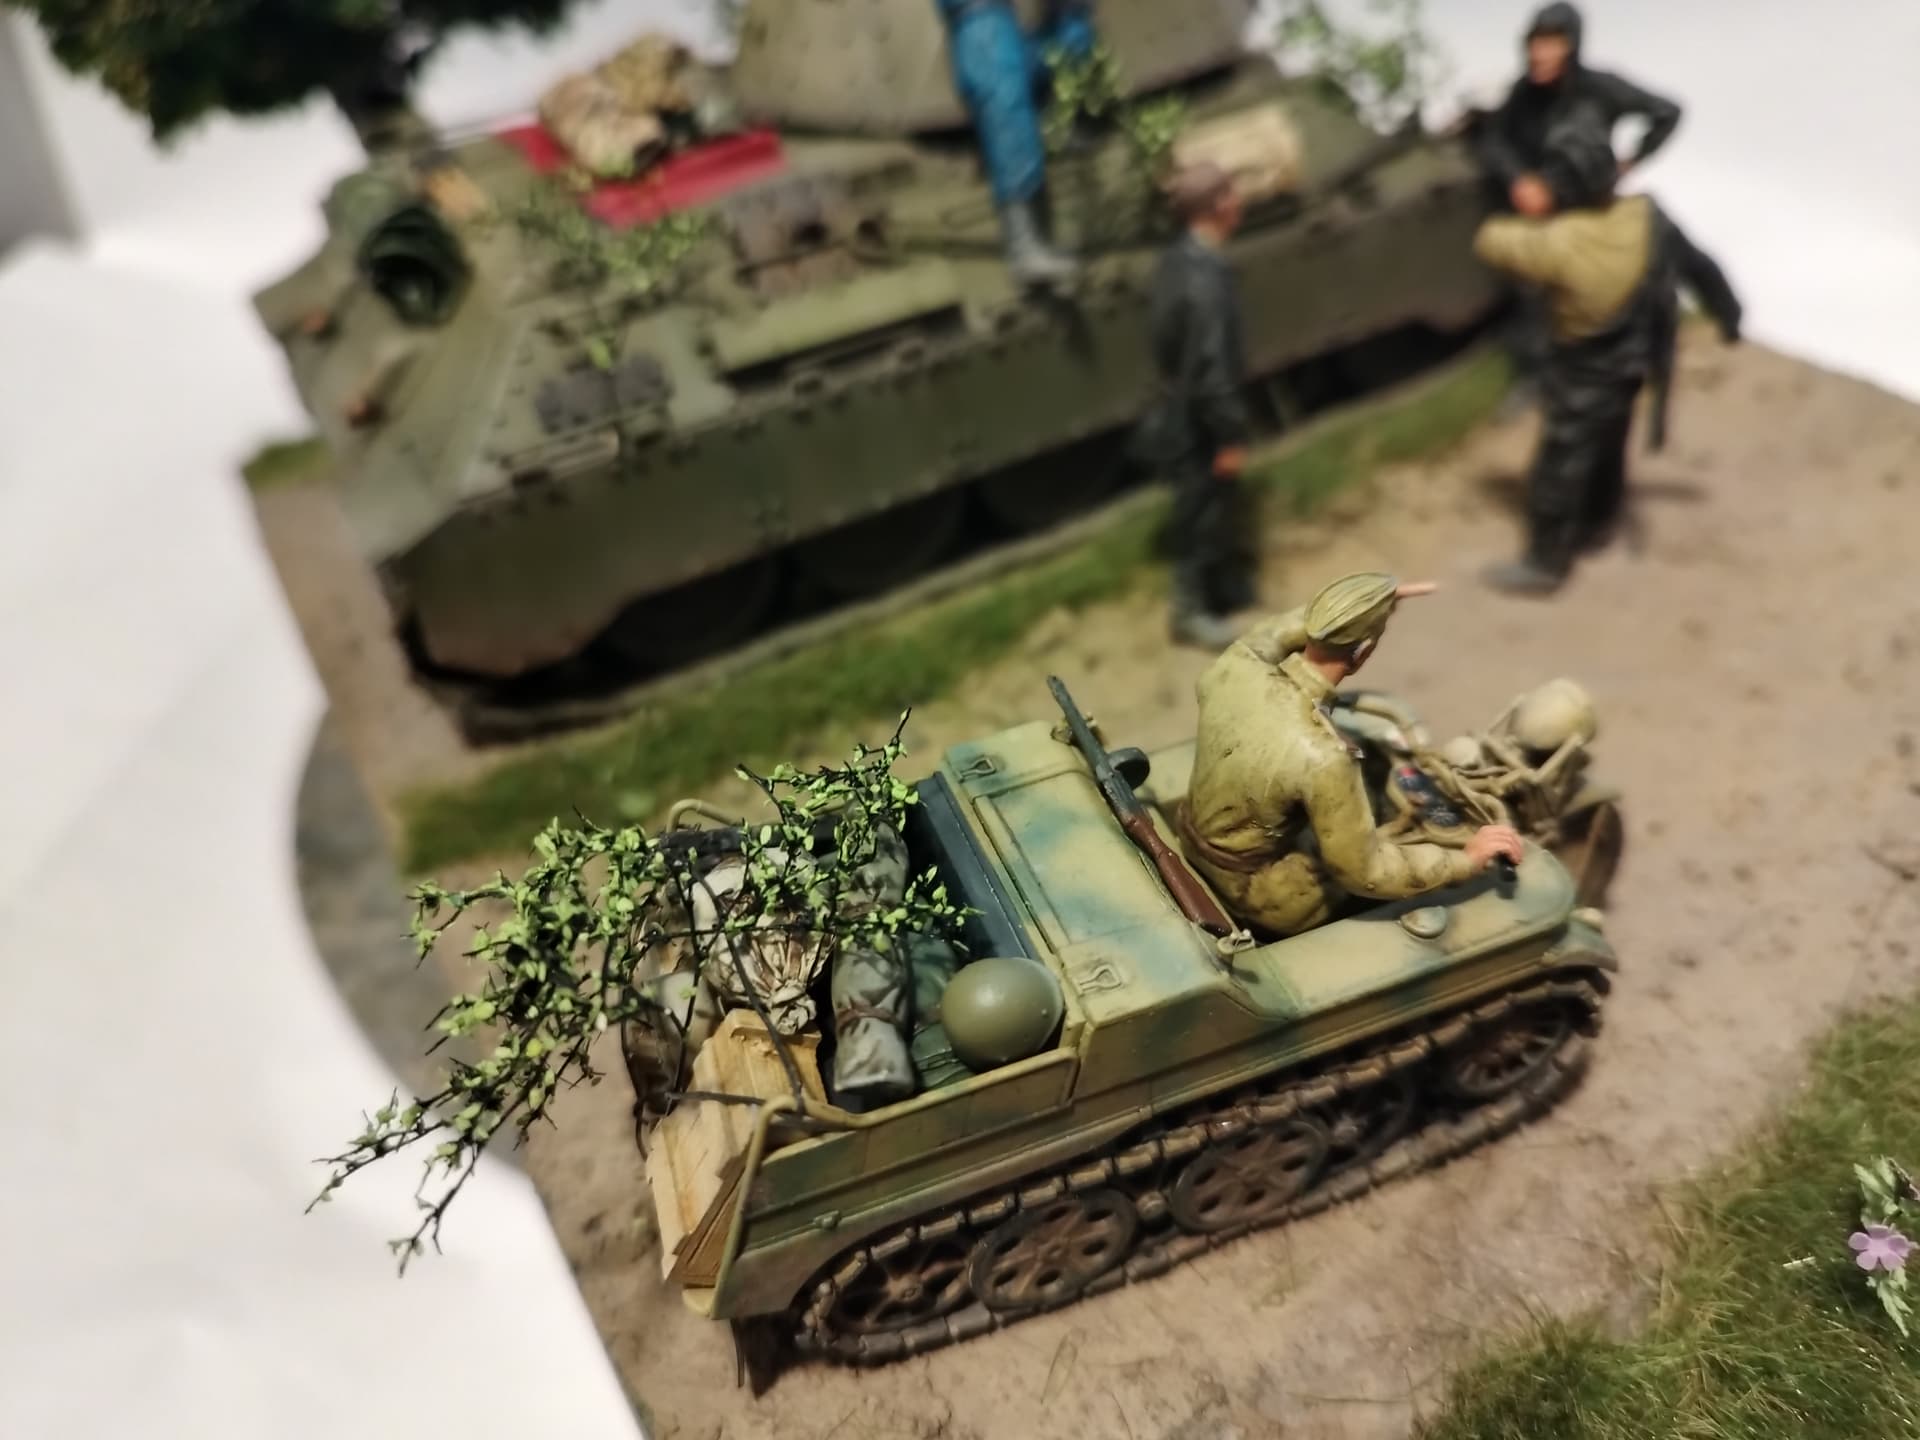
It is my attempt to produce a more authentic T-34 with spaced armor from the Border Models kits, which tries to represent a modification to the factory 112 T-34, using various examples of vehicle from late 42 and early 43.

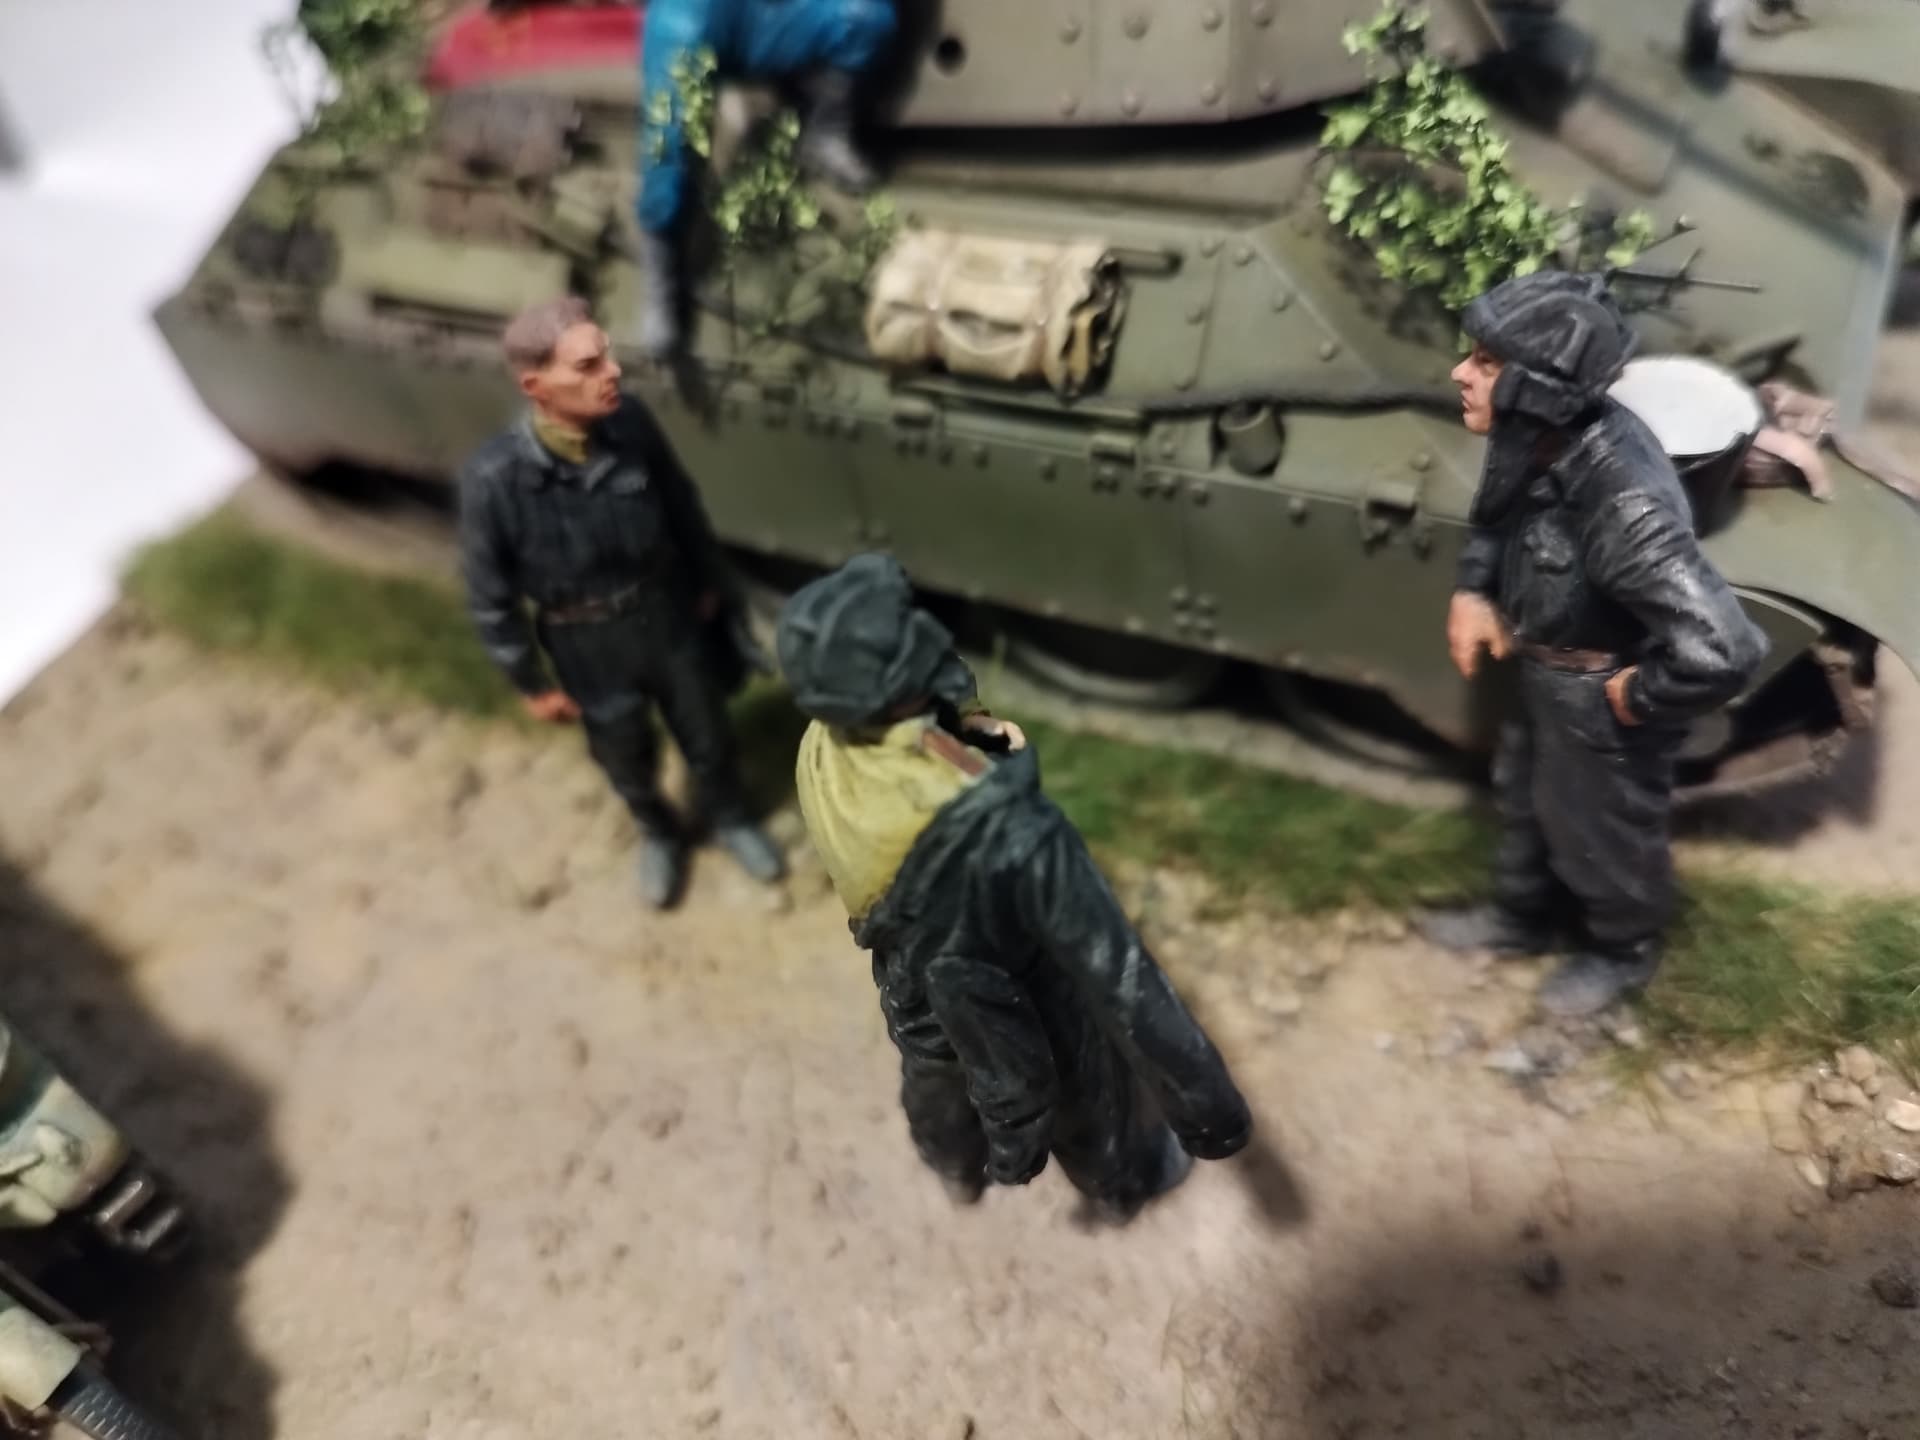
The biggest problem that kit replicates the pictures of fairly inauthentic scale model from who knows when., even that not correctly. Also, the turret is copied from AFV club with is bad roof plate.

As a rule, I replaced all the bolts on the extra armor with bigger ones from punched out 0.5 styrene and which were glued in a more hap-hazard manner as it is shown it the pictures of the real vehicle. I omitted the washers for mental sanity reasons. I have replaced all the grab handles with wire, but on the extra armor there should be 8 such handles instead of 3 as the kit has.

Now inspecting the lower hull. The wheels should be of the 42 variety not the 40 (did not replace as I have noticed to late), and also the sprockets should be replace with once from Miniarm. Keeping the running even in there new T-34/85 is a big disappointment. I made my sample to represent a model with the smaller diameter, 4 bolted transmission cover, so I have also replaced the exhaust pipes cover with the shorter ones (carried over from the rounded baked early T-34s). Also I have not seen one picture of a small turreted 112 tank to not have the rear mash cover being held in place with straps and not the later pins running tru the loops things. So, I have corrected also this.

The front has the MG blister replaced with Miniarm parts as the kit provide one is too short. Grab handles were omitted per pictures, also the bar under the driver’s hatch. The weird straight piece over the rounded nose of the tank was omitted, as I could not see it in any picture.

On the right side there should have been a cutout for the antenna holder which I have added. The skirt holders were reworked, the same with the shape of the first skirt plate. The mud guards were also reworked as at the end where they attach they are not cut as regular T-34s.The kit says to place 2 gun barrel tools in wrong positions. Reworked that by changing one box with a track tool box from pe (but in the pictures the box seems bigger than regular, not with a different holding mechanism)

On the turret side, I cut of some plastic of the vertical plates that cover the mantlet. The 2 metal plates on the mantlet were also reduced in side and the plate over the mantlet was omitted as I have not seen that in any picture. The roof top was also rework.

The result is not 100% right as general shape and size of the extra armor plates from the kit is not correct and modifying that is beyond my pay grade.

Hope that your are not that mean to me, Gabriel

14 Likes

Welcome Gabriel,

If anyone’s mean to you the Diorama Police have your back, not to mention the site Administrators. But I very much doubt they’ll be needed, bravo for posting in the first place and for the vignette - I’m no expert on that T34/kit but overall the scene’s a great start. As you’ll already know opinions are personal & subjective, take them all at arm’s length because all that really matters is if you’re happy with it & had a good time doing it.

However, if you’re interested in constructive criticism, some suggestions – it’s low on story/narrative, most of us struggle at times with including plausible elements that say something extra without crowding it, but for example some interaction with an additional figure(s) often works. Your landscaping’s fine although the tree looks too bright to my eyes, could be easily faded a tad. The tank looks very clean – it could be brand new of course, or otherwise this site’s awash with a multitude of different techniques for weathering & dirtying – and it may benefit from some i/d markings and/or graffiti. :beers:

2 Likes

Thanks Martin,

The dio is not complete I posted here only to tell about my efforts on the tank itself.
I plan to add the rest of the crew at on empty part of the round with a captured Kettenkrad passing by. So no much of a story there,

About the tree, could you suggest a method for fading. It was not painted at all so, yeah…

2 Likes

Ah, well the aforementioned Diorama Police can take a dim view of incomplete information. OK well ignore what I wrote before.
As for the tree, there’s several ways to skin that cat (sorry Wade) – I’m not sure what it’s made of or whether it would repel acrylics/water-based paints, so this is speculation. First I’d want to remove it from the base. Then try dusting it (using a dry sable/soft brush) with finely powdered pastel chalks – khaki/light brown shades. If that didn’t work dip the tree in water to wash it all off. Plan B would be a series of very dilute acrylic or oil washes (same colours as above), allowing each to dry & monitor the effect. Can’t go far wrong provided each wash is dilute enough. It shouldn’t take much, it’s just there’s a real dissonance between the grass tones (which are A1) and the foliage which is too intense IMHO.

BTW the name’s Tim…no problem, if I had a dollar for every time etc. Looking forward to developments :+1:

3 Likes

Welcome aboard, the T-34 looks good. I am disappointed to hear about the Border issues since I have the kit.

Looking to the rest of the diorama being completed. :+1:

2 Likes

@ignoramusRex Gabriel, welcome to the forum and thanks for sharing your T-34 build.

I appreciate the insight into the Border kit, wasn’t aware of Border borrowing from AFV Club, the bolt positioning plus wheels issue. Confirmed decision to toss my Border T-34E into the club raffle.

3 Likes

Welcome Gabriel and well done on a first and very cool post.
Just to echo what Tim said really about the tree… Once that (and tree does look good in its own right BTW) is toned down a bit, you are on with the winner. Some really lovely work on the T34 as well…very nice .:+1:

1 Like

Thanks all.

@Dioramartin Sorry to have baptized you… We in Romania say in such instances that we owe you a :pig2: . But thanks for the help.

@Armor_Buff my intention was not to poo-poo on Border but get ego points from other modelers. I bought this kit 3 times and also bought their new T-34/85, which also has some weird engineering choice (like for example it has the pistol port plug on the turret molded but with a rain guard bulge and the instructions have you remove the bulge only without damaging the plug). but comes with 5 resin figures. I could also talk about some boneheaded decisions on Dragon, Academy, ICM, or Zvezda T-34 kits (to mention the newer ones).

4 Likes

Welcome Gabriel to Armorama! Great start with this T-34. Excellent work so far. Looking forward to seeing more.

2 Likes

Thanks

1 Like


Sorry to provide feedback only after a week, but the war in the neighborhood and work absolutely brought my mojo to historical lows.

Painted the tree, added the unfinished crew figures and the Kettenkrad to show how I imagine the dio should look like in the end. Also, took the photos with the room light bulb, not with the spray booth LEDs, because I think those obfuscated the weathering too much (albeit it is not that heavy).

Thanks in advance.

5 Likes

The T34 looks great.

2 Likes

Some new pictures of the state of the dio:


Created the Frankendriver for the Kettenkrad, applied first layer of paint and filled the gaps in the crew figures.

5 Likes

I like it!

1 Like

Wow yes that tree looks excellent now – how did you do it? Great variation on the leaves too, and the Ket’s a nice unusual addition. Soon you’ll be facing the horror that is Figure Painting, best of luck. I’m not sure about the blue uniform, looks too green-ey? I imagined a darker “proper” blue. Also, experts may tell me I’ve got it the wrong way round, but from memory I think the blue uniforms were replaced by dark grey/black by the middle of WW2. So it could depend on which year your scene is. :+1:
(Afterthought – the blue guy seems to have a shiny uniform, needs flattening whichever colour you go with)

2 Likes

Thank you. Well, I sprayed with the airbrush the foliage on the tree with a green Vallejo acrylic wash(inspired by the color of the water after cleaning the brush cutter … ) after which I stapled with the brush some diluted green and ochre oils.

The few 112 factory tanks in these config were “alive” only during the summer of '43 so I think I am stuck with that year. I’ll darken up the blue (I don’t really have blues and was too cheap to order some) over-all with some dark wash. The next ones I’ll do them then in dark gray.

2 Likes

Sorry guys for being a slow modeler, but here is my final dio (I hope).


Well open a new try to improve t-34 topic soon, maybe still in construction phase. This time of a Dragon spring 42 built at STZ

Ps. O the fender of the tank is wet bucket and the belt with the pistol holster and map case of the dressing dude,

6 Likes

You did a nice job

1 Like

Really great job! Love the finish on the tank and the kettenkraftrad. Figures look very nice as well and I love the detail of the belt on the fender of the tank- excellent!

2 Likes

Yep, really good looking scene, with that detail of belt of the dressing guy!

2 Likes