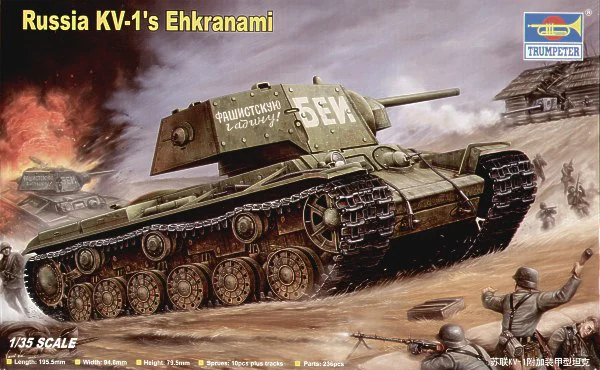
Think I’ve made my choice! Trumpeters Kv-1 Ehkranami, which I’ll be upgrading with an Eduard Kv-1 PE set. I was thinking of doing the Graf spee but I likely can’t start this build until later in the year so I wanted something simpler.
Think I’ve made my choice! Trumpeters Kv-1 Ehkranami, which I’ll be upgrading with an Eduard Kv-1 PE set. I was thinking of doing the Graf spee but I likely can’t start this build until later in the year so I wanted something simpler.
That’s going together rapid Don… And it looks great … You need a very nice job with the rear light housings, they make a big difference… Very nice 
Sounds like a sensible plan Mead, and as per your other builds I am sure it will be great watching it take shape
My floaty contribution will be Trumpeters 1/350 USS Independence LCS-2.
I will attempt to build her as LCS-10, the USS Gabrielle Giffords as she is armed with the Naval Strike missiles on the bow which I think look neat.
Of course the parts are not in the kit so I am going to have to come up with a workaround. I have purchased a set of Orange Hobby SM-1 launchers and will see if I can convert them. Shouldn’t be that hard at this scale. We shall see.
Excellent choice Rory, and it’s great to have a floaty thong on the build. And this one is pretty unique being this new style … Looking forward to it
Few more bits done. All the suspension is now on, as are the props. All went together great with no issues.
Will get a bit more done tomorrow as well as a bit more on the Pantsir …
I finally managed to start assembling the lower hull. I was surprised at the amount of clean up required and the overall quality is not very good.
This particular sprue has a molding problem where the parts are not symmetrical almost like the molds were misaligned during the mold process if that makes any sense. And I do not have the skills required to deal with this properly.
That’s a shame there are some fit issues. Hopefully you can sort them out to make it good … Which parts are not right ? The drop arms ? Wheels ? Sprockets ?
I will do my best to sort it out, most of the parts have this problem where the two “halves” of the parts are misaligned. It’s not much but I know its there… I can try to take a picture of If my crappy camera allows me
Mine also has a fair bit of this, and you’re right, it’s as a result of misaligned molds. Gets worse with the age of them too as they wear out.
Depending on the part and the amount of slip, you may need to add material with say, putty, or subtract with sanding/shaving or a combination of both.
Just take your time, and focus on making the shapes approximate rather than perfect because you might end up overworking the price and be left with a nub or a weak spot at the end.
It is time for track assembly which is not my favourite part of the build taking in consideration lot of cleanup.
Sprue bros has 15% off all trumpeter stuff this weekend for anyone looking to join this campaign
Thankfully all the wheels hit the floor lol…
All the running gear is done so that’s it for the lower hull… Upper and rear next
Finally managed to finish assembly of the lower hull and it is time to start planning the painting process. It will be a tedious process as I’m doing it by brush but I will focus on a neat paint job in four big steps: lower hull-upper hull-turret and then road wheels in between. Paint in batches and assemble the next step as I wait for the paints to dry. I think I will use revell enamels.
I decided to go for an Egyptian tank but realised that the revell 16 sand yellow that i have at home would be too yellow compared to the much lighter sand colour shown in pictures of the actual tanks. I only have a satin white (enamel) to mix in. Would satin and matte paints mix or end up looking wonky?
Also, great progress on everyone’s builds! I’m excited to see a ship being built as well, I’m getting more and more into naval warfare as I’m growing older.
So… things were going absolutely swimmingly and then my appendix up and decided it wanted an immediate divorce.
50 some odd hours of hospital time later and we’re back at it.
Started work on the crane assembly. This will also slow things down considerably. The fit of the rest of the kit has been quite good so far, sadly the same cannot he said here.
There are substantial gaps, bordering on trenches between the halves that make up the various parts of the booms. The problem seems to be that the part halves curve/taper inwards slightly rather than meeting at 90 degrees. So out comes the putty and some patience.
I’m also going to drill out all the plastic hinge pins and replace them with some brass rod so that the crane will (hopefully) be able to articulate within at least a certain range.
Once this is done, that’ll just about cover the build and it’ll be time for paint.
Wow, having your appendix taken out between steps 3 and 4, good thing it was mentioned in the instructions  hope you’r feeling better.
Hey thats a bummer about the hospital time Don. I hope you are ok now and fully on the mend. NIce progress on the crane and sorry to hear its giving you some issues… its nothing you wont overcome … show no mercy to it …
Good progress Mike, and its seems nicely detailed with that engin. I take it that it comes with figures ?


