Hey lads, coming to y’all with yet another question
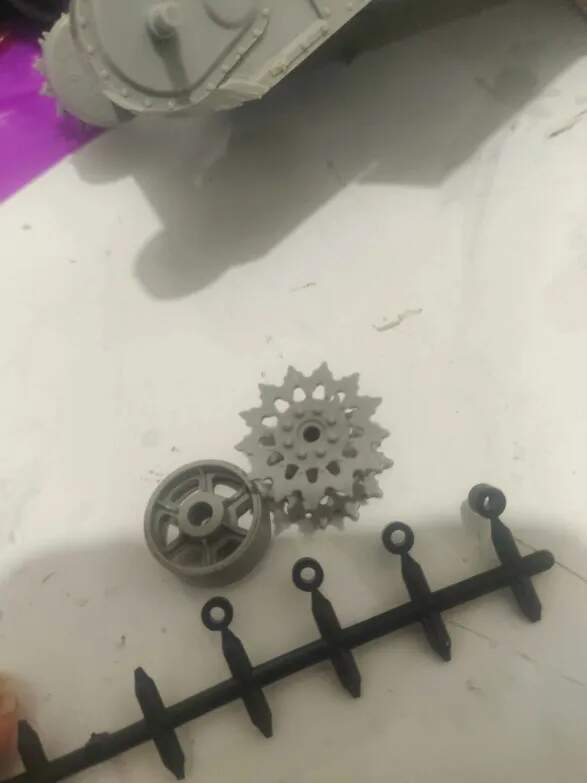
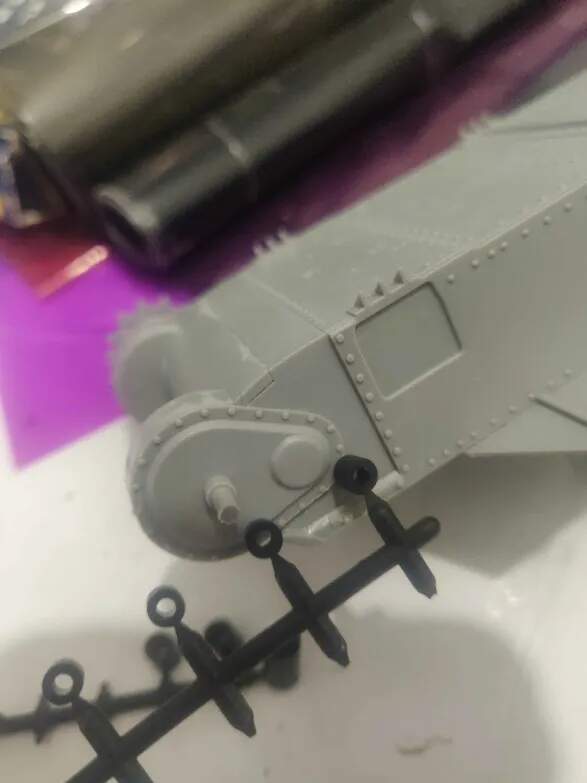
So I just started with me new Takom M3 Lee kit, and… I found out that while the wheels are workable, the most important part of the assembly, the sprocket, is not. It needs to be cemented shut.
Same for the idler wheel.
Needless to say, without a moving sprocket, the tracks won’t run.
But, I might have come up with a solution
I have some spare leftover poly caps from other kits.
What I wanted to ask is, do y’all reckon I can bore out the idler and the sprocket to house a poly cap? Will that make them workable on their shafts?
I will also need to bore out the poly caps themselves, none of the ones I have are a perfect fit for either the idler and sprocket’s nor the shaft they connect to:
So, what do y’all think? Will boring out the poly cap and wheels with a pin vise and attaching them to the shaft make it workable? Or would it not work and should I not bother with messing with this?
I would not bother with making those two (well 2 x 2 = 4) workable.
I consider workable tracks to be a gimmick.
Yes, I know, in same cases it makes installing them slightly easier (unless they disintegrate because of not being glued, it does happen).
Unless you plan on pushing your model across the desk making wroom-wroom noises?
The workable track can easily be adjusted to the sprocket wheel position.
The track will hold the sprocket and idler in position so they don’t really need to be glued so you could leave them unglued/loose. They will stay in place, well, unless you plan for some wroom-wroom action …
If the poly caps are loose enough to permit wroom-wroom the wheels will be wobbly.
If you get them tight and not wobbly I think the wroom-wroom will be impossible.
A broken track is always an option when wroom-wroom is perpetrated …
To make it really workable would require metal axles and real bearings (roller bearings or plain bearings) to prevent failures ..
Yeah workable running gear is kind of a gimmick, and while I will admit that I do like to make them go vroom-vroom sometimes (indeed, at the risk of the tracks dissolving), it’s definitely more of a novelty when they’re just sitting on a shelf for 99.99% of their existence
I suppose I like workable tracks because I find them easier to assemble than individual and link-and-length tracks, and also I like the realistic slack
But, I guess none of this really matters if the poly caps won’t fix the situation!
Anyway, I suppose that I wouldn’t mind having my M3 Lee not workable, and this whole thing was more of a sunk-cost fallacy on my part, since I spent money on workable tracks, that are kind of useless now, haha.
Thanks for your input!
Well, you still got that. Leave the sprocket loose and roll the track on.
The sag will still be there, the track will slide over the idler to form the slack.
That’s because the Takom kits are set up for the link-and-length track they come with With the workable track you have, just leave the sprocket loose until you’re ready to install the track, and then just push it on. It will probably stick well enough without glue.
The main advantage of workable tracks is that they’re much easier to install after painting than the kind you have to glue to the model.
Which, for an M3 medium, should be pretty much zero
This is from page 102 of TM 9-750 Medium Tanks M3, M3A1, and M3A2 of 9 May 1942. Translated to 1:35, sag between the front two return rollers should be between one-half and three-quarters of a millimetre — in other words, just pull the track tight around the wheels.
I am building the Dragon Ersatz M10. It has individual links. I leave the sprocket and idler loose, and in position, along with some of the road wheels, to get the lengths right for top, bottom, and wrap arounds. After all has dried, I slide the unit off, remove sprocket and idler and paint, Later when other painting is done, I just slide this all back on.
Yeah, I’ll just leave the sprockets and idlers as they are, if they ever give me trouble, I’ll just cement ‘em shut
I just don’t understand…. Why go through all the trouble of making the entire VVSS assembly workable, but then not make the sprocket and idler workable…
As per the previous post What I want to add is that it is indeed pointless on the Takom M3 medium tank kits, not because the feature is useless but because they have link-and-length track, which means the adjustable suspension is only useful if you replace it with separate links or workable track. MiniArt’s M3 mediums also have moveable suspension but come with the track that @swagster2000 is going to be sweating on and/or swearing at
Right!!! I completely forgot dioramas were a part of this hobby
Well, still, how hard could it be to make the sprockets workable! Even do that stupid end cap that I hate!
Sheesh, nevermind then I guess! Without aftermarket workable tracks, you can’t even make a diorama, but if you need to get aftermarket workable tracks anyway, why not make the whole thing workable!
Go figure…
I hope the rest of Tako’s kits aren’t as misguided, I have a two Merkavas, an M48A5, and a Maus to build from them.
Anyway, regarding the workable tracks!
Yes! I am currently sweating and swearing!
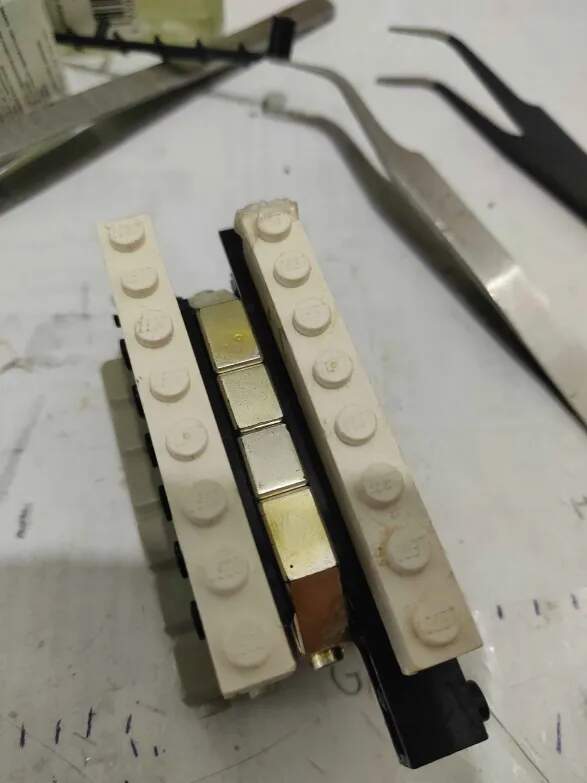
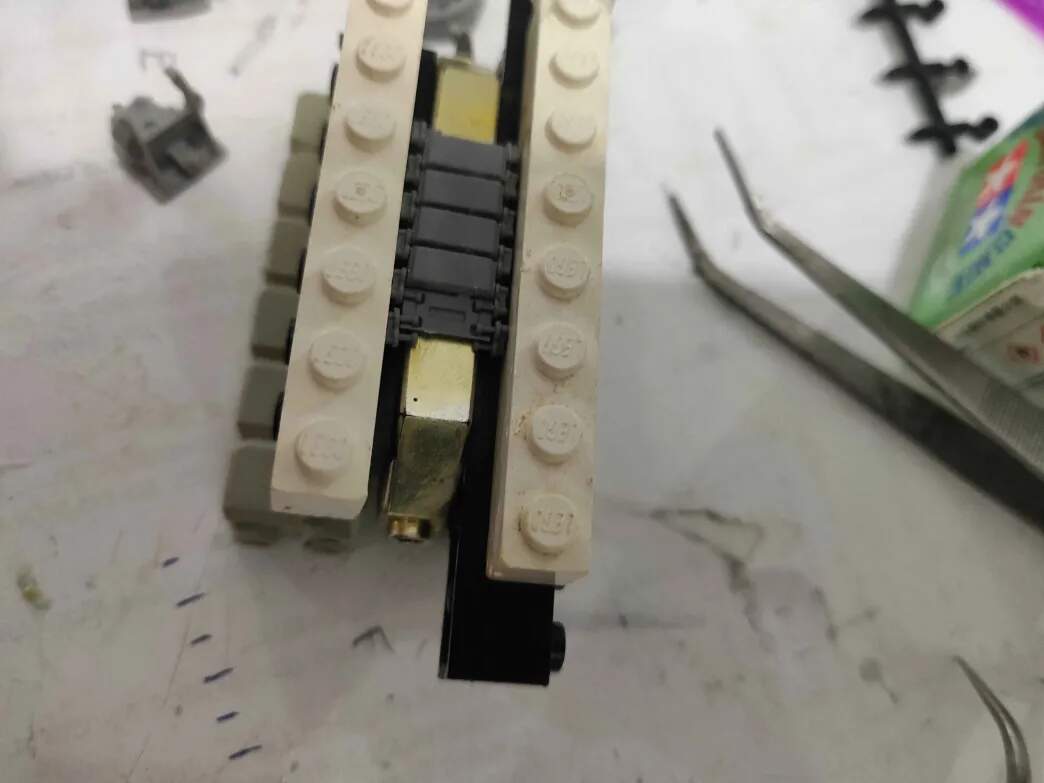
However, I upgraded my jig, behold!
That looks the business, yep Like I said in the other thread, the main thing you want is for the jig to prevent the end connectors falling sideways, and your jig looks like it does exactly that. I wouldn’t have guessed Lego would work, though
Yup it does! And indeed, the end connectors are the actual devil in the details here, literally.
But, with enough glue and childhood memories, anything is possible!
I just.
Don’t have any wood.
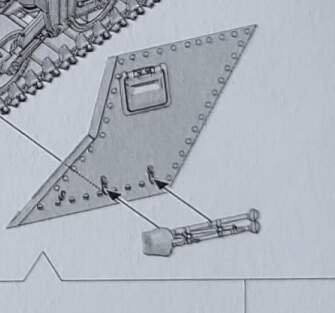
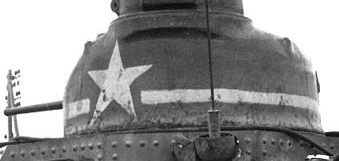
Regarding these markings on the Lee’s turret, I’ve seen several coloring options, a yellow band with a yellow star, a yellow band with a white star, a white band with a white star. When was which used, exactly?
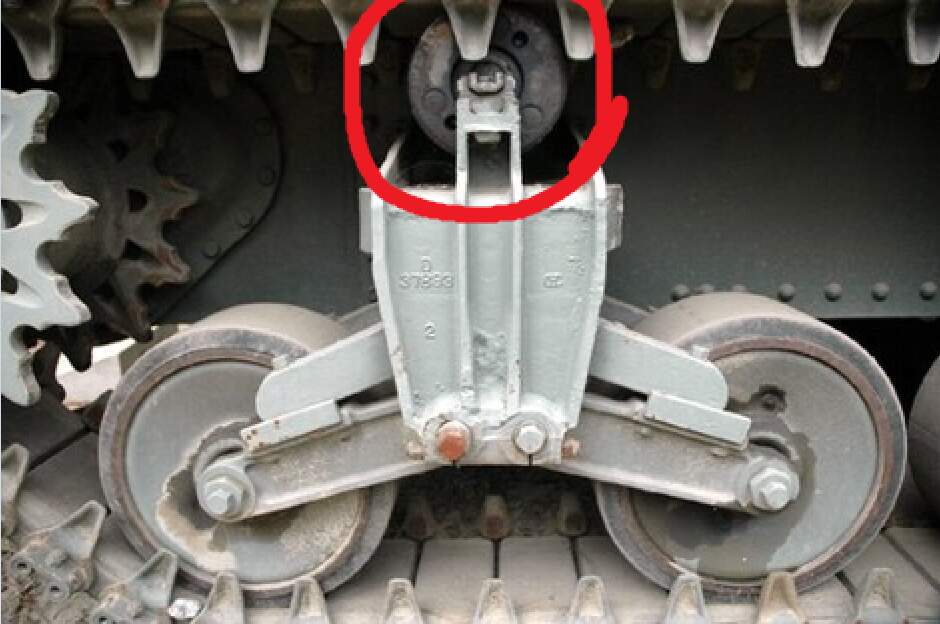
3. It seems from what I researched that generally the entire VVSS assembly was one color, the base color of the tank, save for the rubber of the wheels, and the color of the actual springs. Even the upper return roller on the early VVSS was the same color as the tank. Question is, would the inner paint on the wheel polish off and become a shiny metal color eventually, like the idler (and then rust)? Or should I color it just a solid olive drab?
A tripod for an M1919 machine gun. It would be olive drab like the tank itself. The kit part looks like it has a canvas cover over it, which would probably be some kind of khaki or olive drab colour.
They varied with time and place Basically, in the early part of the war they were usually yellow, but later they were white. For an American tank in North Africa, go with yellow.
Probably not with a rubber track like the T41 that was on most M3 mediums. Paint would wear off the metal rims of the roadwheels and idlers because the guide teeth rubbed against them, but not so much the return rollers, I think. The outer face, that touches the inside of the track, likely didn’t suffer as much because it always ran against the rubber inside of the track.
With all-metal tracks, though, which were fitted to some M3s (and a lot of Shermans), paint would come off much more rapidly.
The inside of the track will have dust, sand, dirt on it and all this fine grained material will act as a polishing powder.
Dark green arrows: Rubber on the wheels polish the track inside (rubber vs metal) to a very shiny surface.
Blue arrows: track connectors get polished by the sprocket wheel, steel vs steel.
Yellow arrow: The guide teeth get polished by the inner edges of the road wheel. Presumably by the metal parts of the road wheel. Depending on the geometries it could also be the rubber.