Up- Detailing the 1/16th. Sd.Kfz. 251 from Das Werk

I am starting the up-detail of the das Werk 251 halftrack.
Here’s the box art , as you all recognize it.

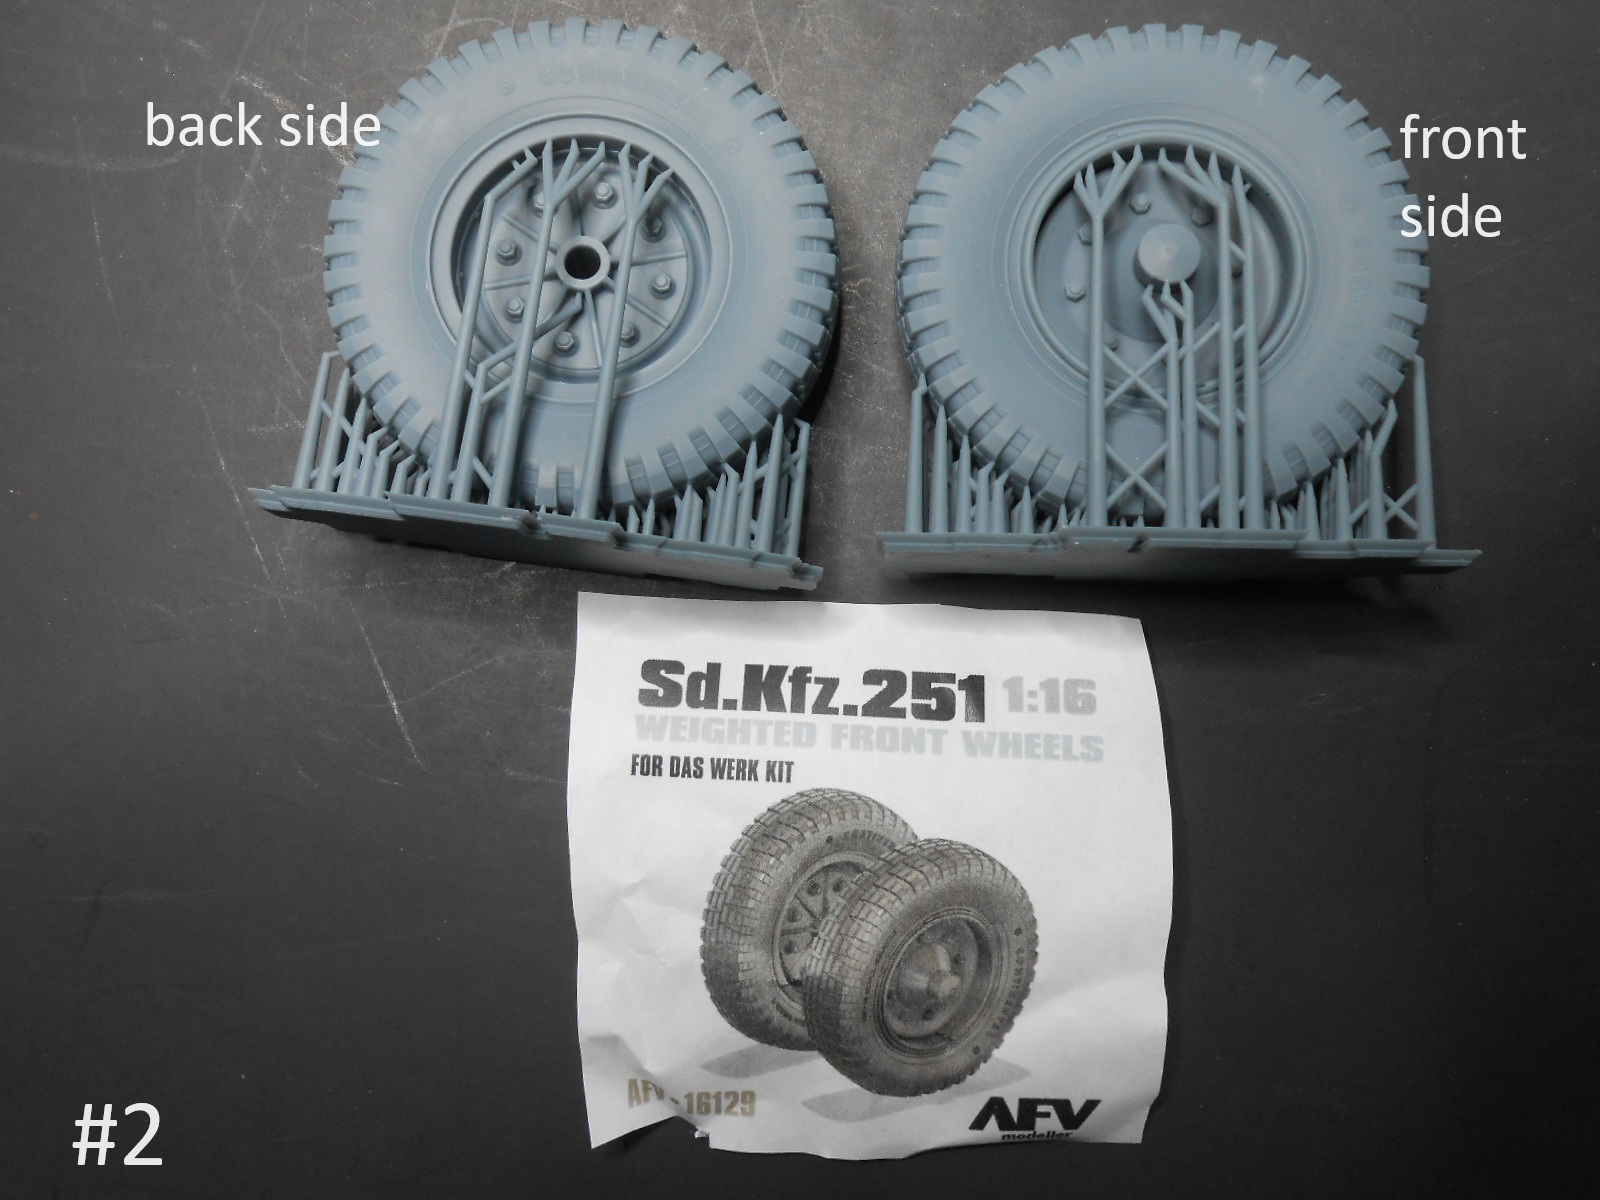
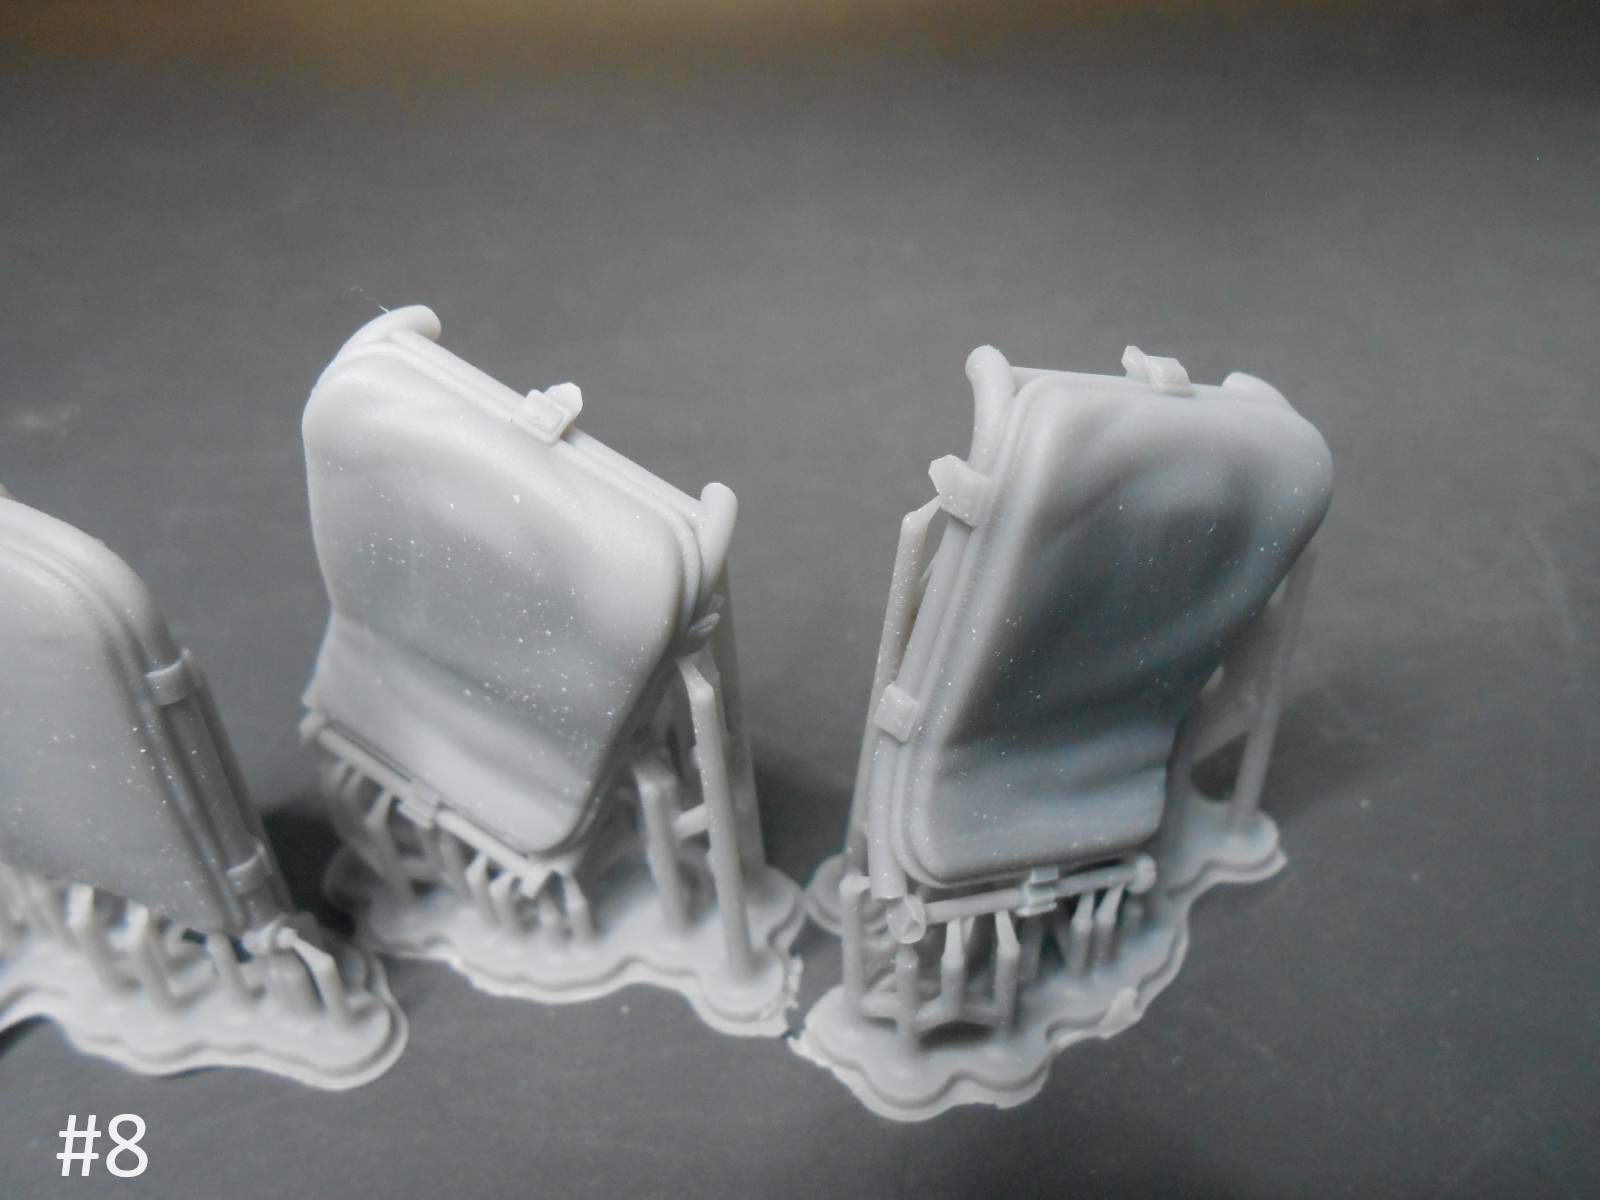
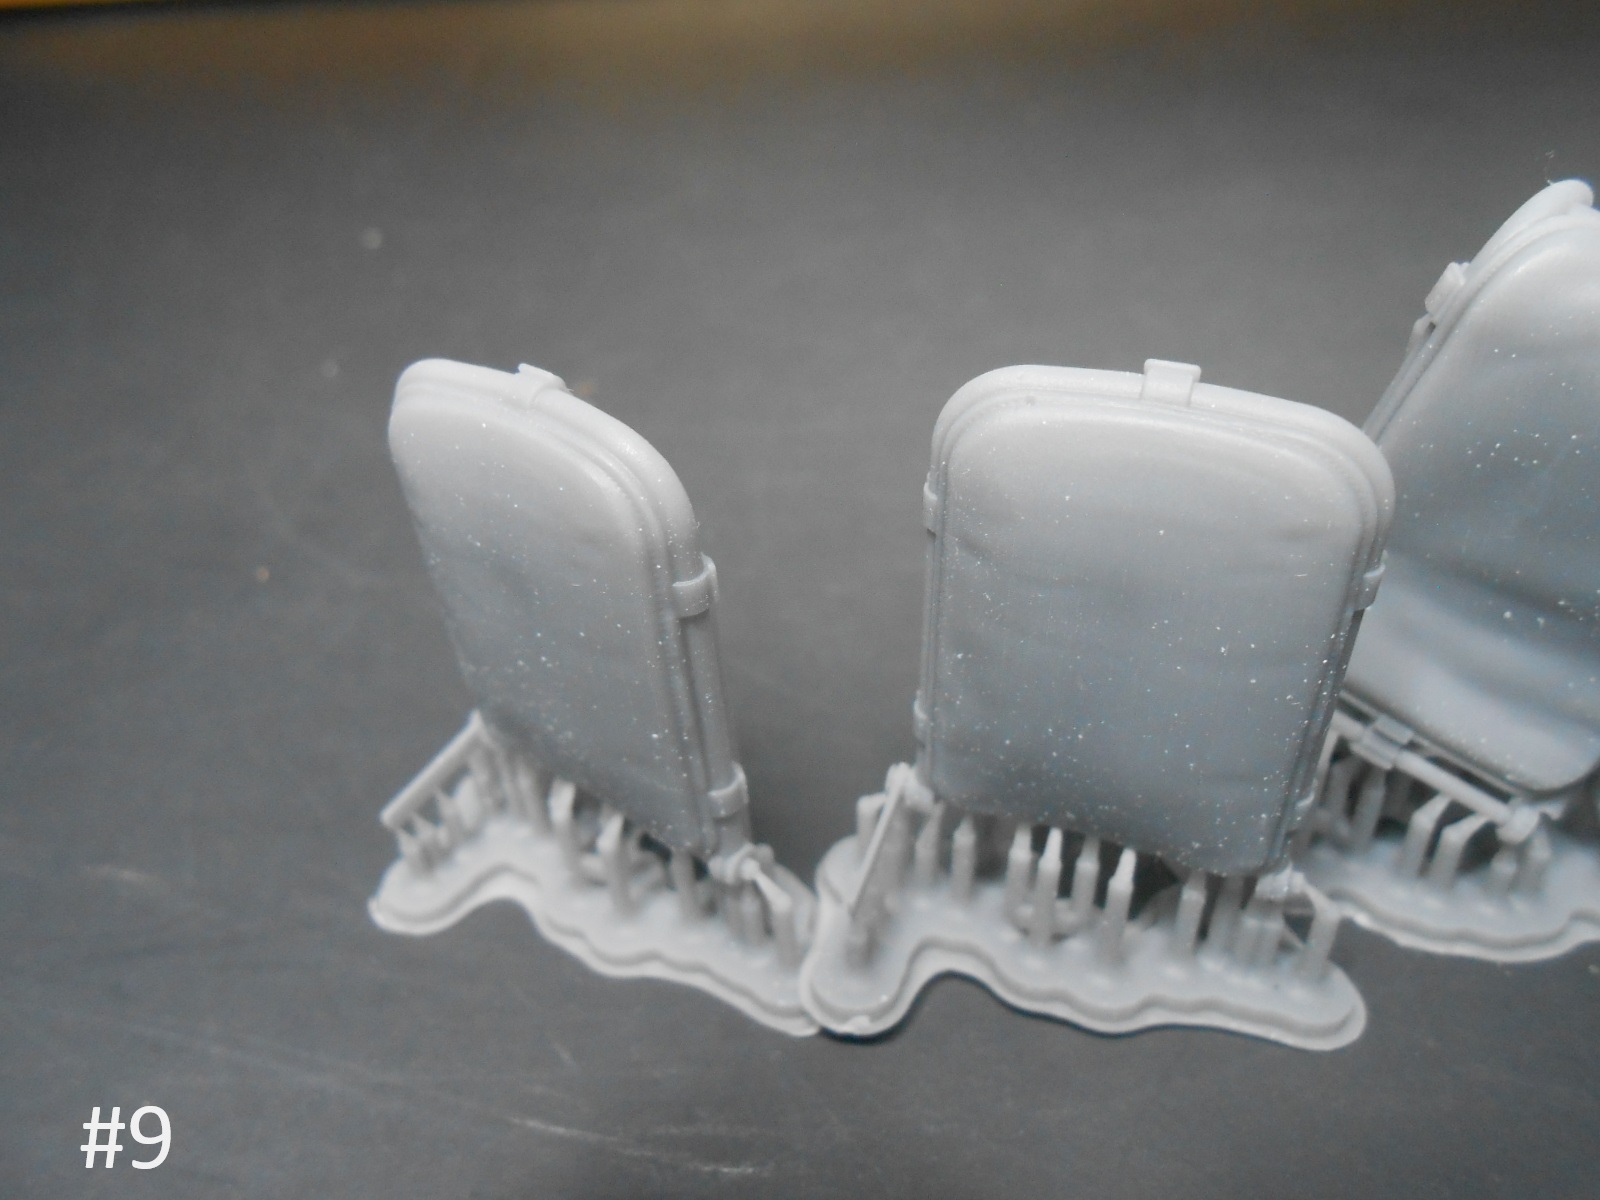
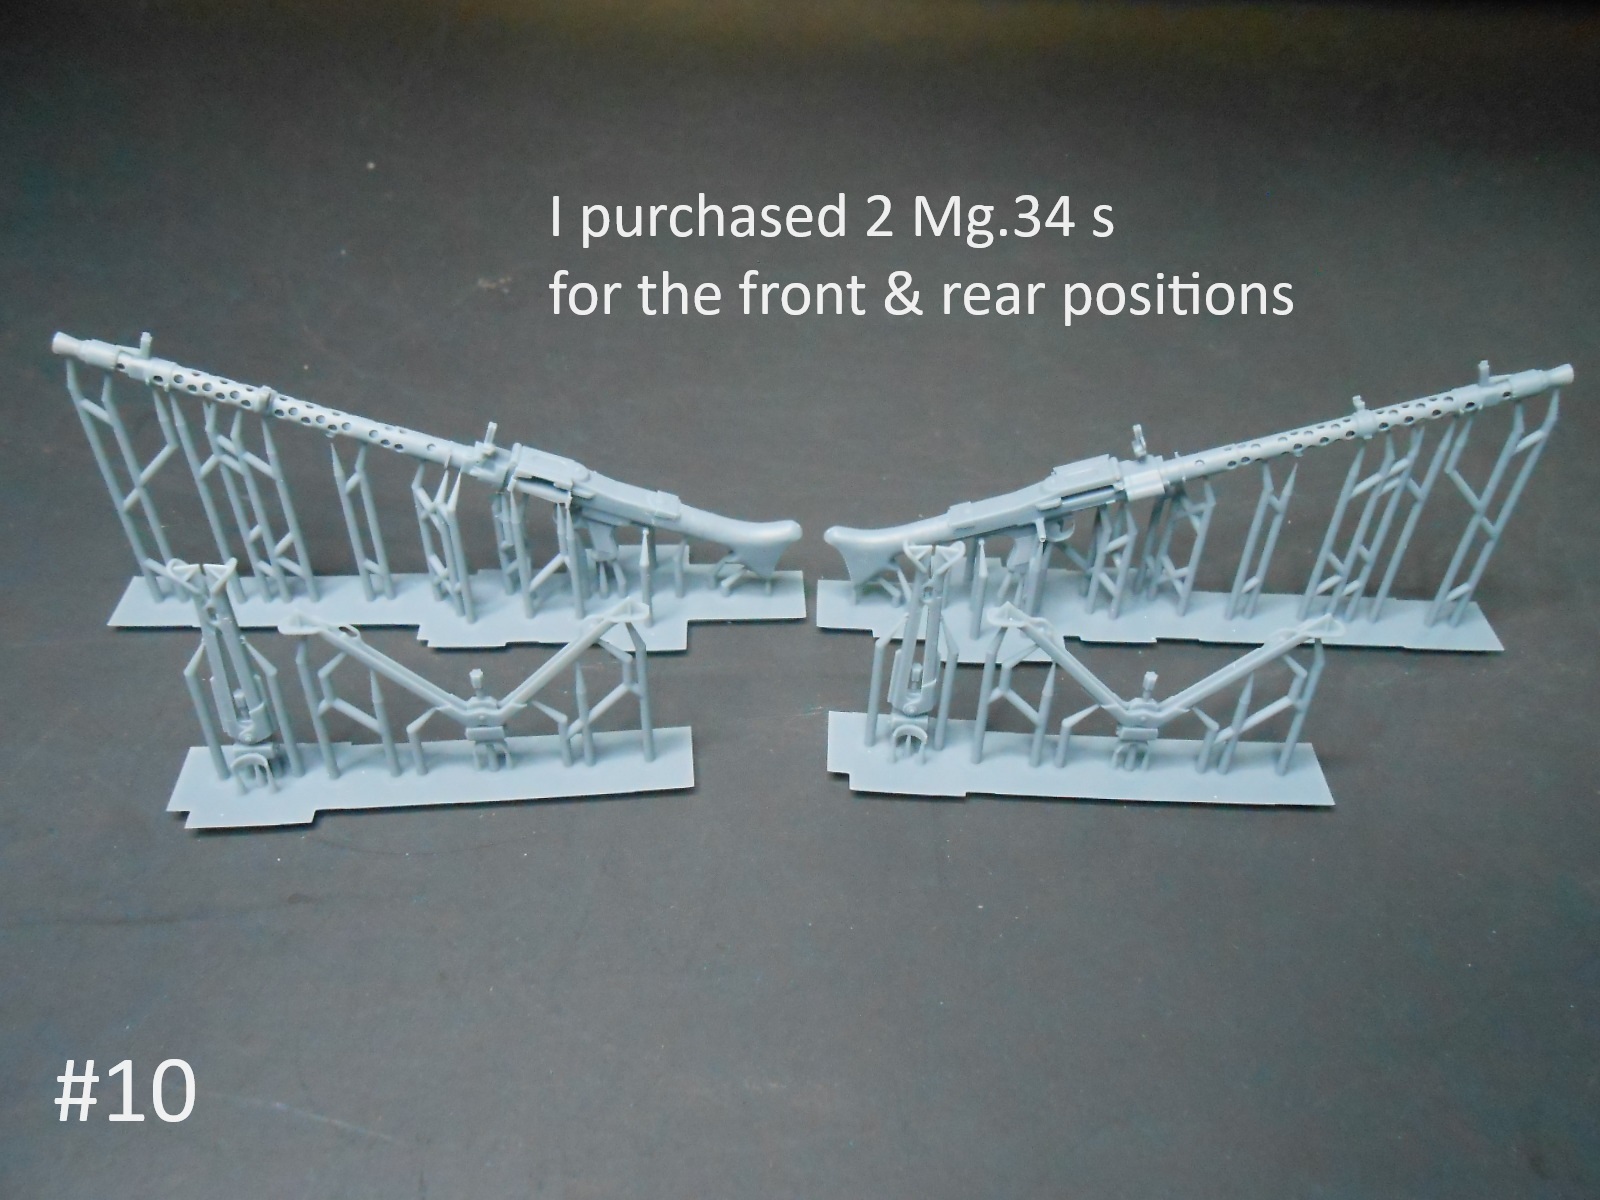
I have replacement Seats , Wheels and Mg.34 Machine guns from AFV Modeler on the way. I’ll be ordering the Radio and some other parts later if everything arrives and I don’t get riped off.
Regards
Donald

7 Likes

Very interested to see some side by side comparisons of the kit and after market parts if you have the time and inclination to post them please?

2 Likes

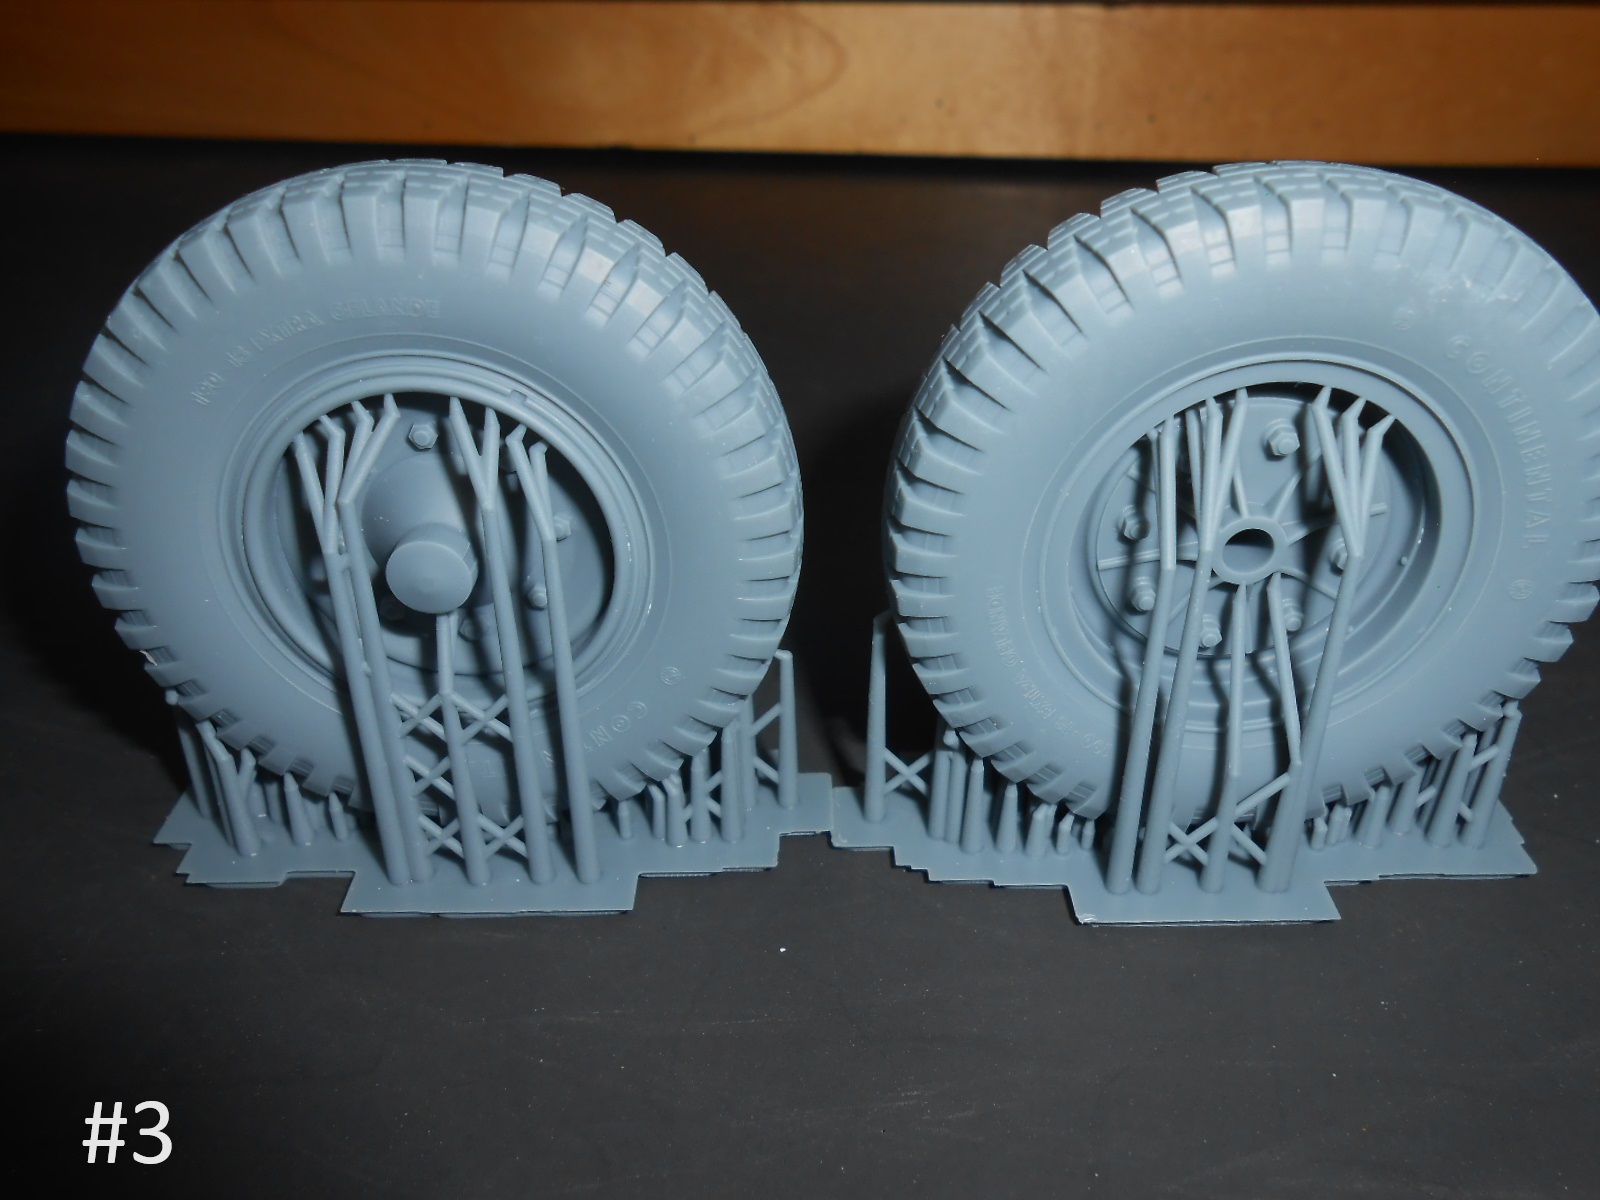
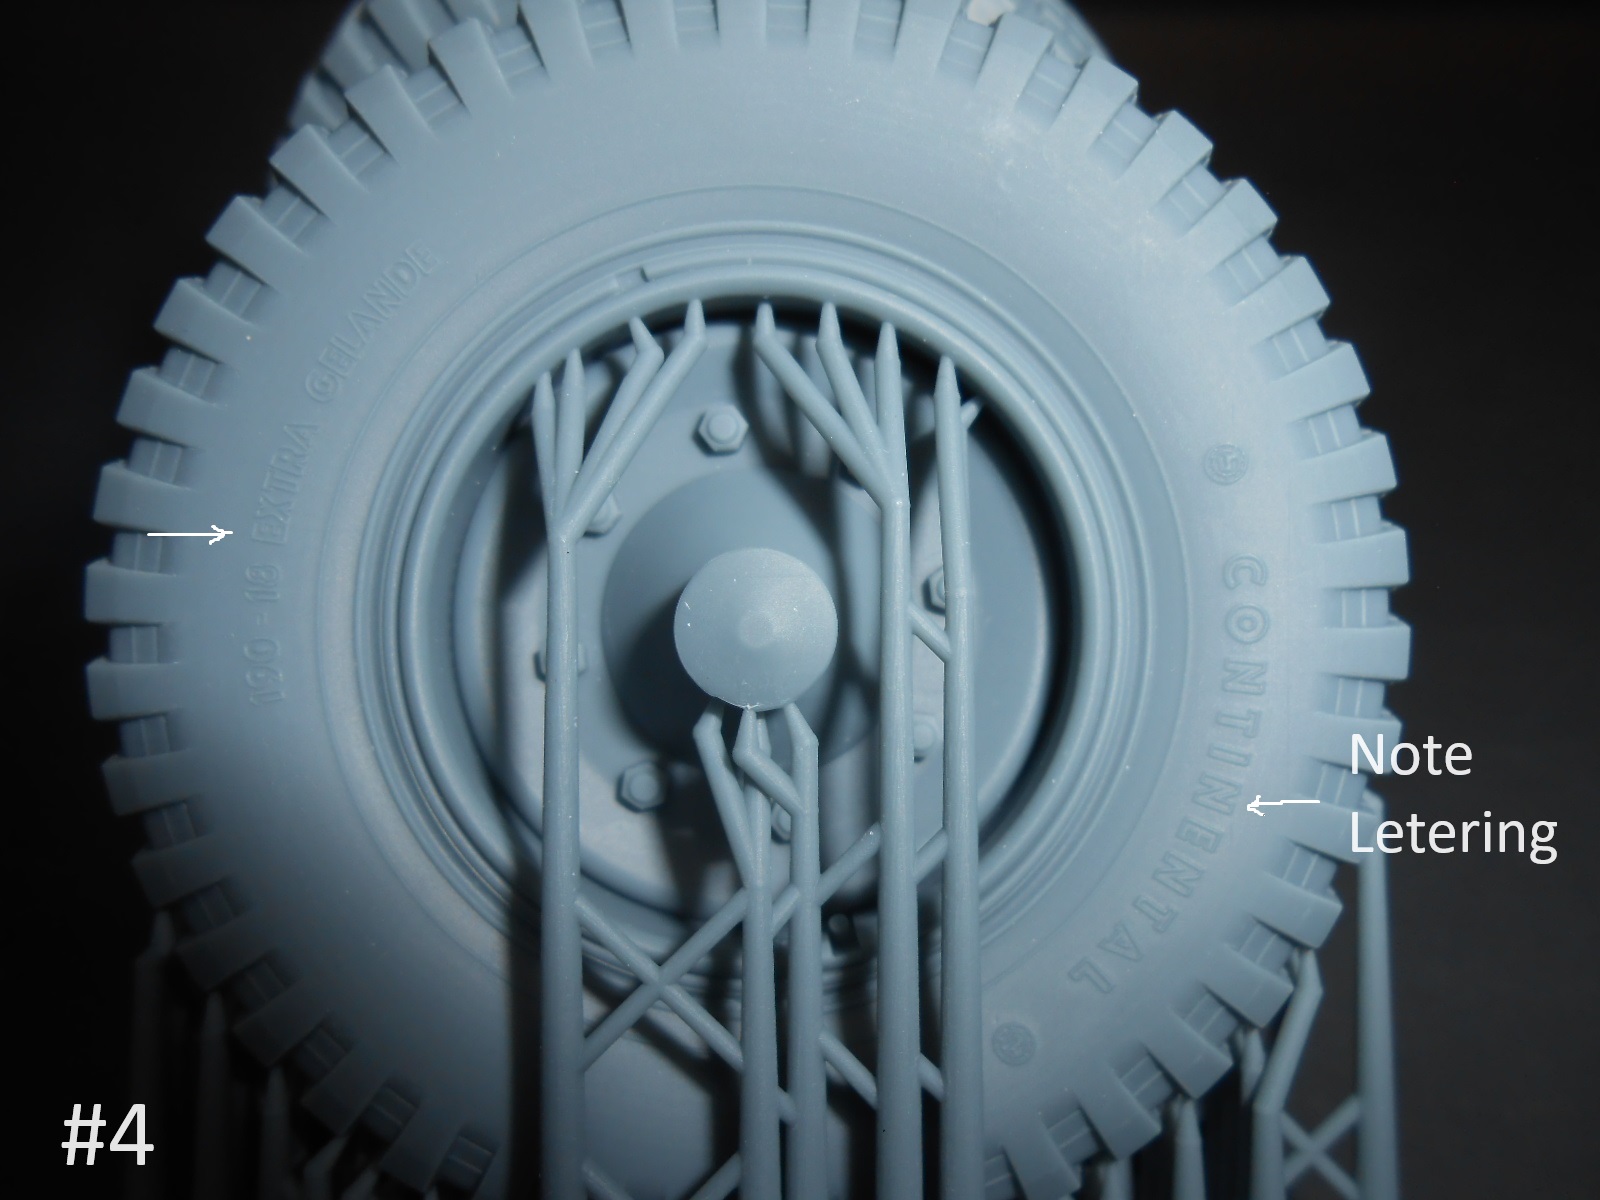
I just received the parts and took the Pics. They are coming next
I’ll post side by side pics as I use them.
Now I just have to order the rest.
Regards
Donald

3 Likes

Here are the AFV Model parts that I currently have.


I’m working on the frame now.
Regards
Donald

8 Likes

Cheers! Hope you enjoy the build, it looks like it’ll be good fun :sunglasses:

1 Like

Donald, I’m working on this too right now, it will be very interesting to get your thoughts on the kit. IMHO some parts are amazing, some not so. I got the Trumpeter one too, it was cheap on sale before the DW was released, they are worlds apart and a lot of components vary massively in dimension and detail.

Best regard Keith

1 Like

Thanks Keith.
I have a little assembly finished.
First the Frame layout


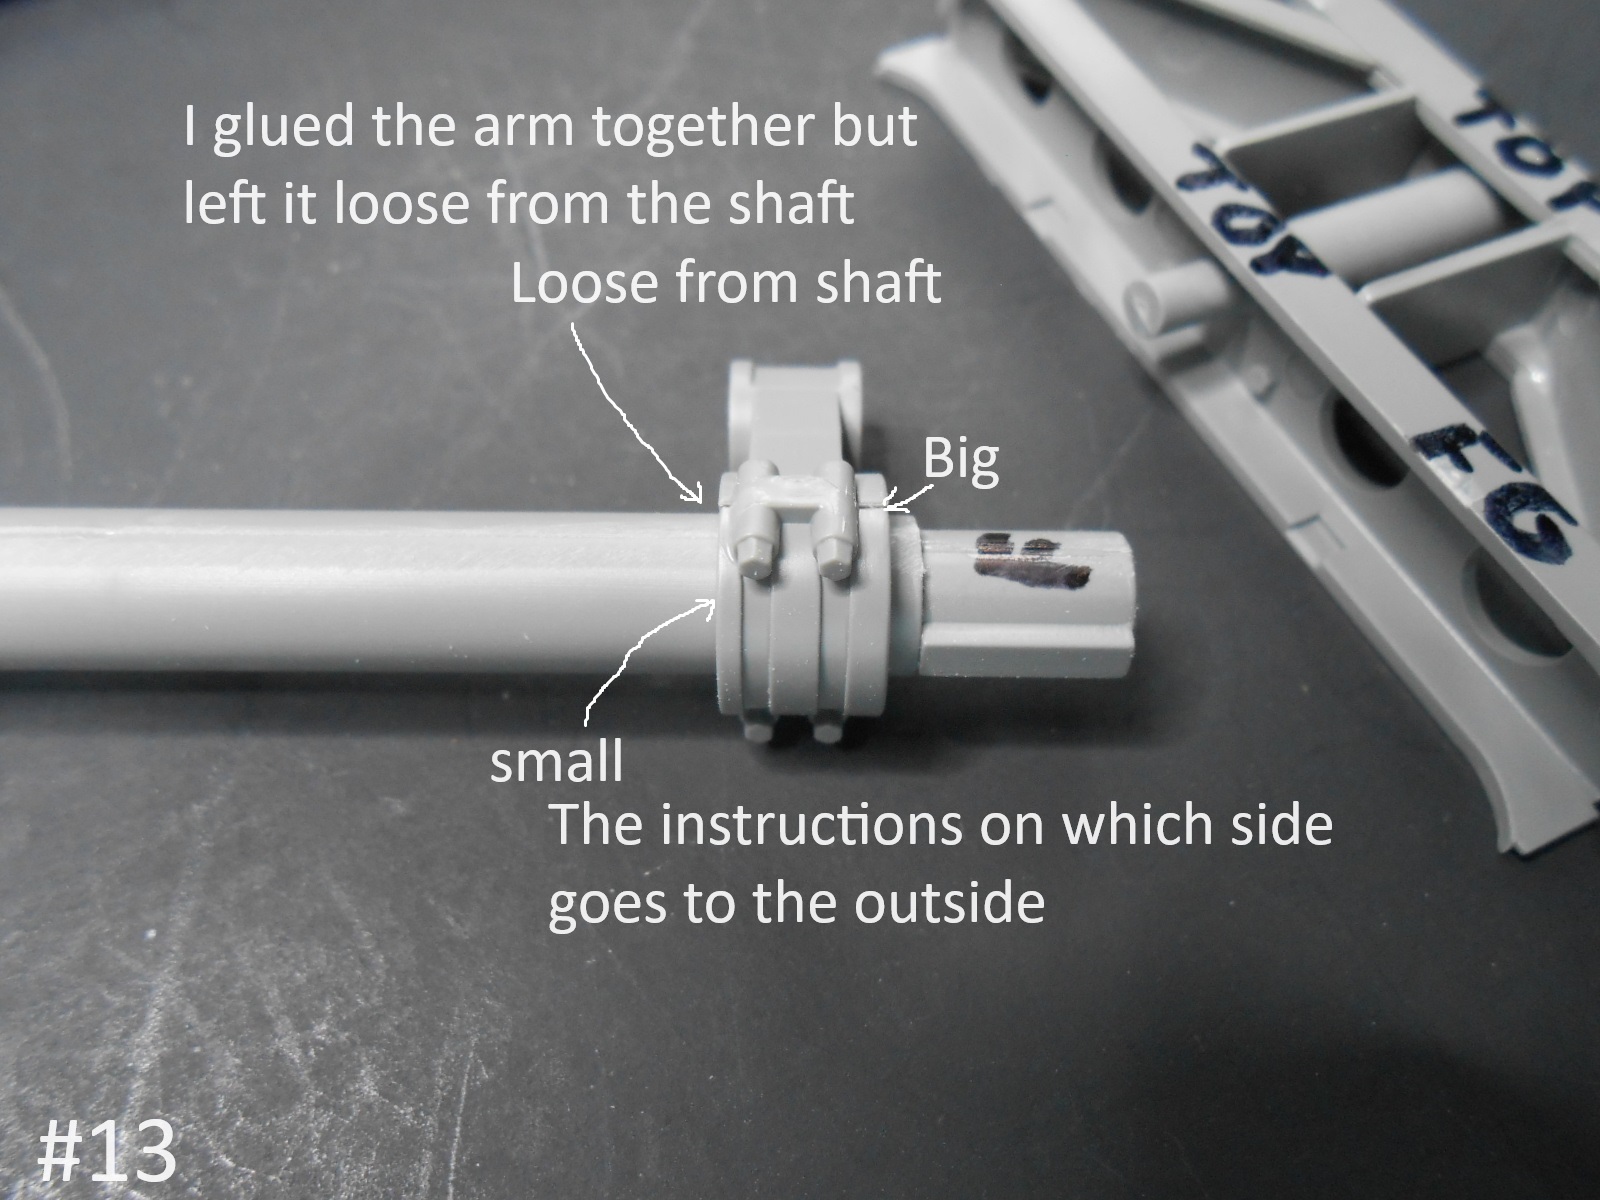
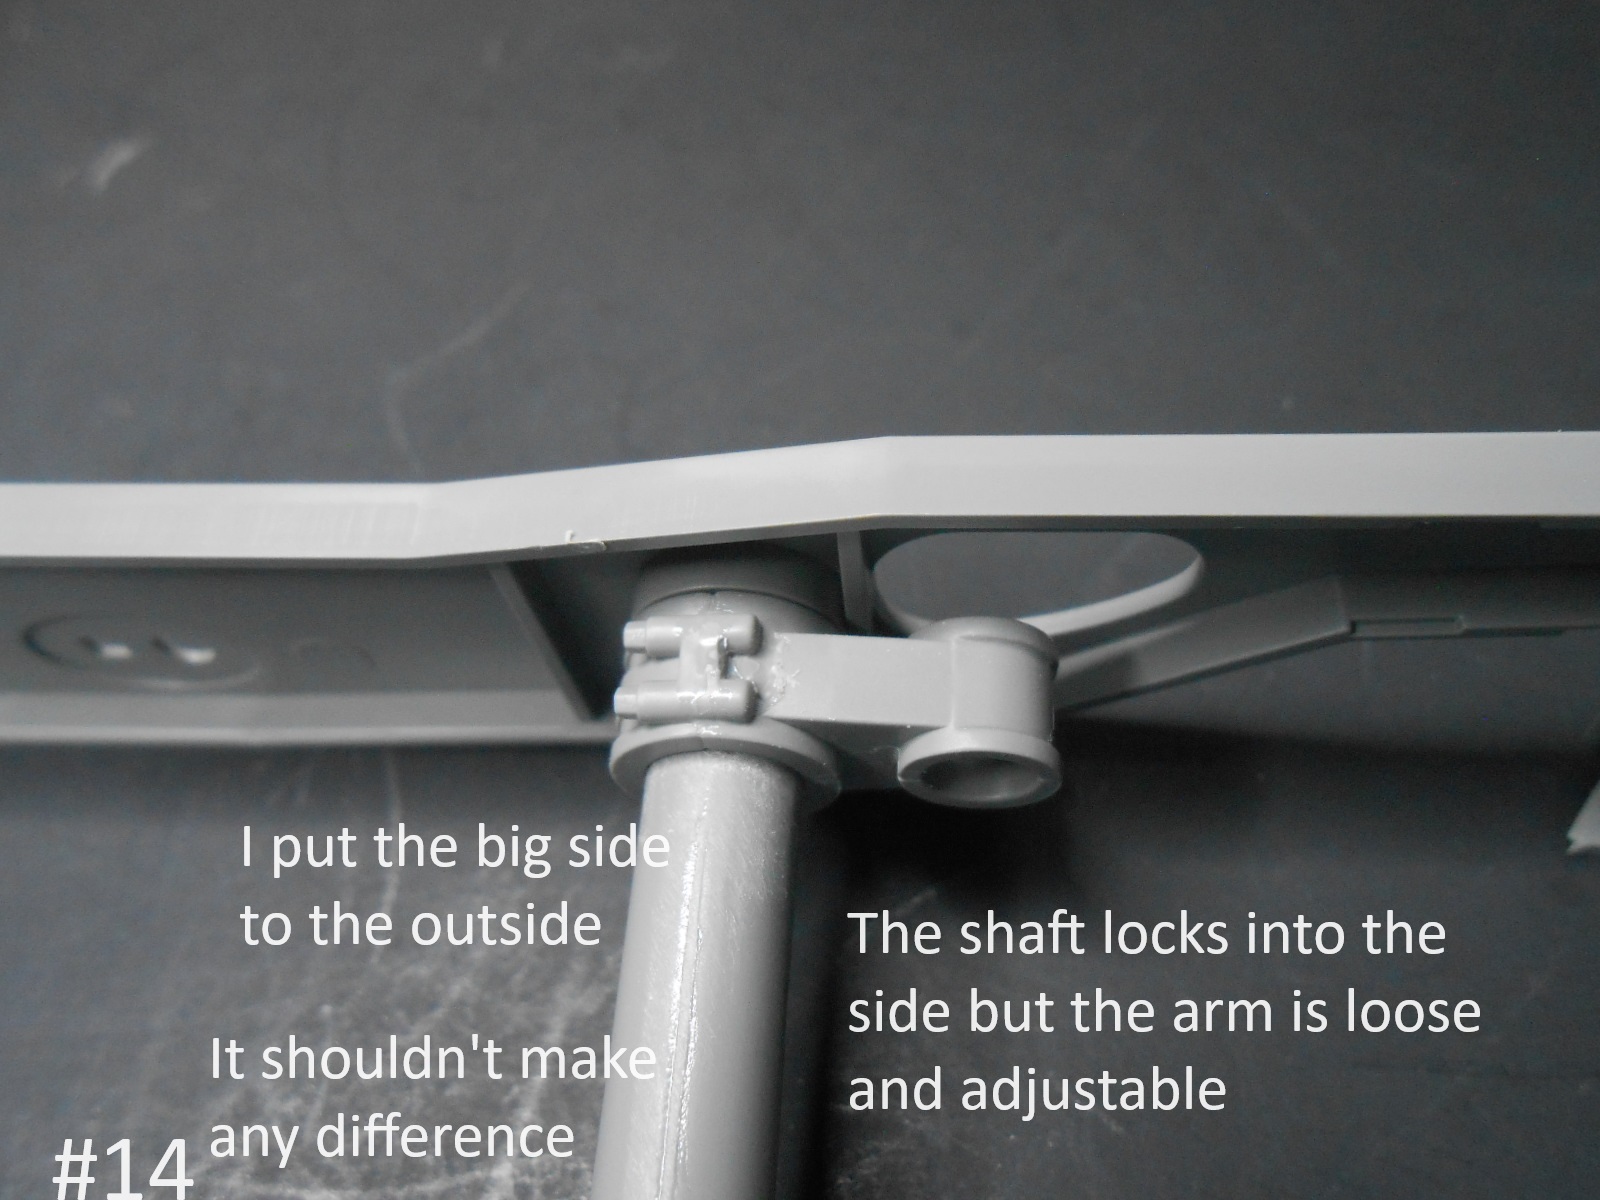
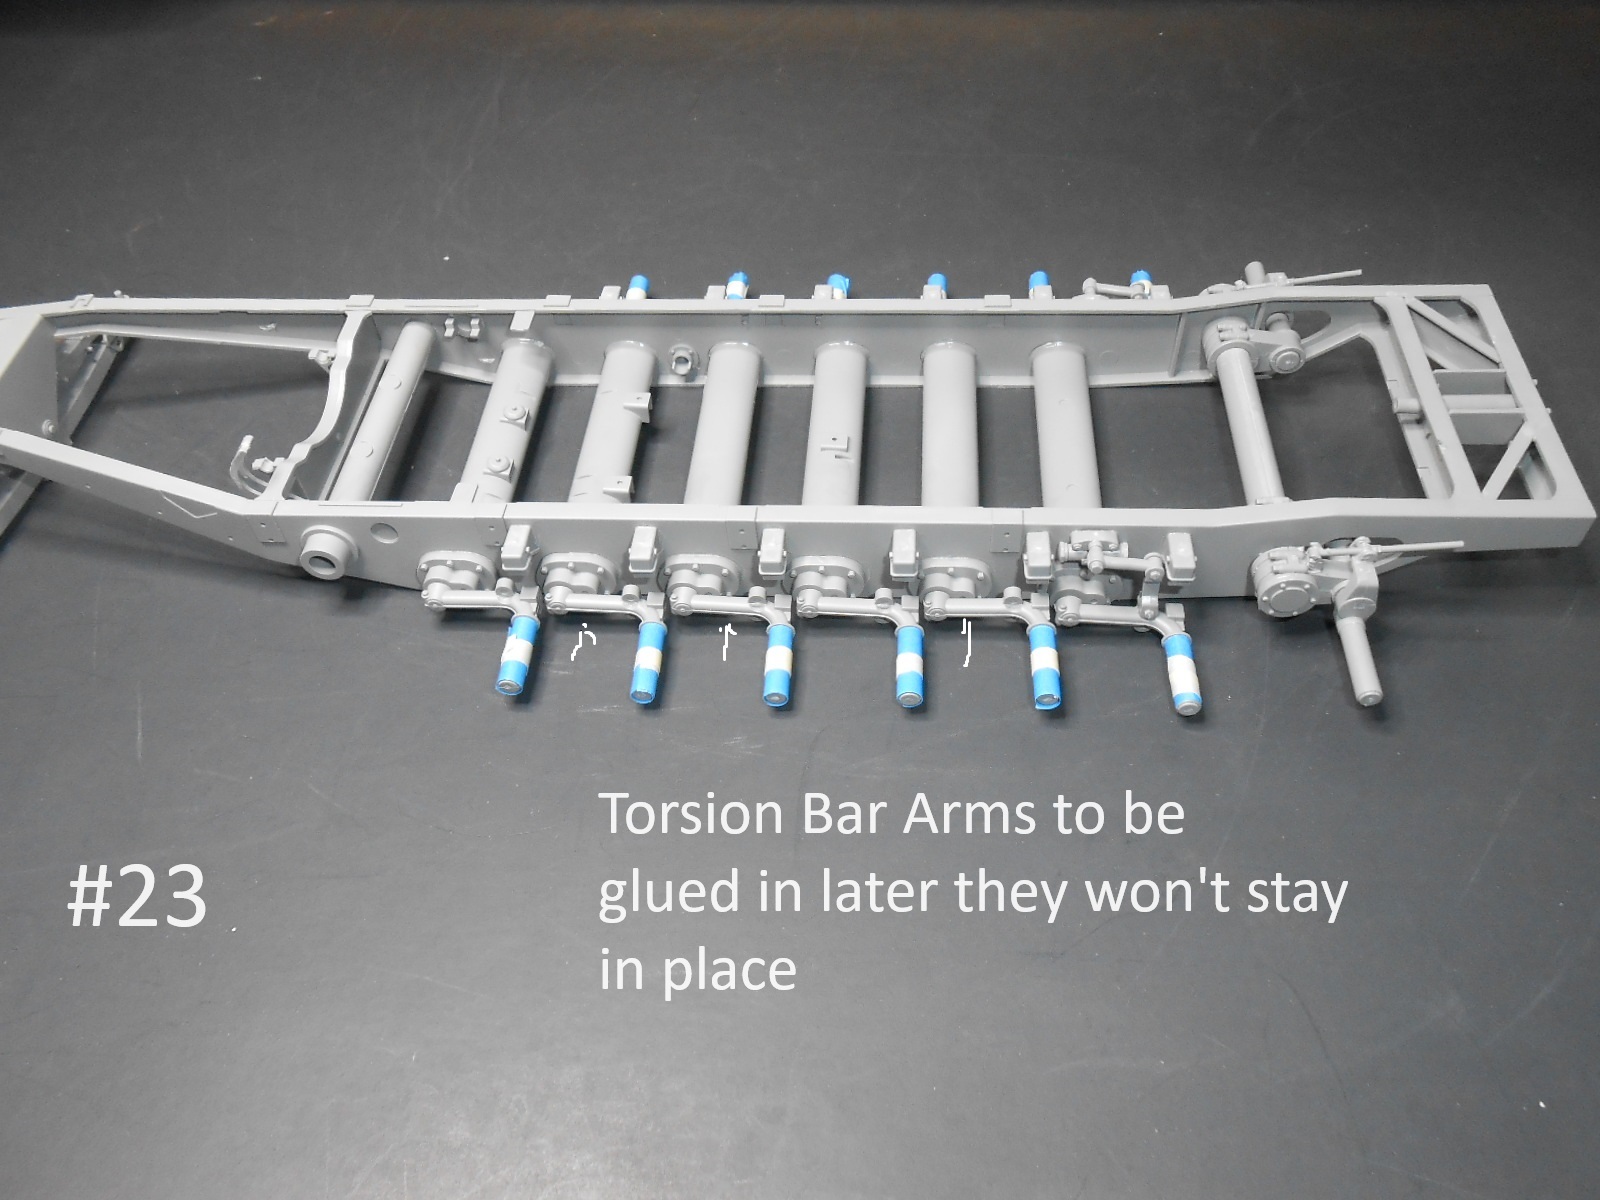
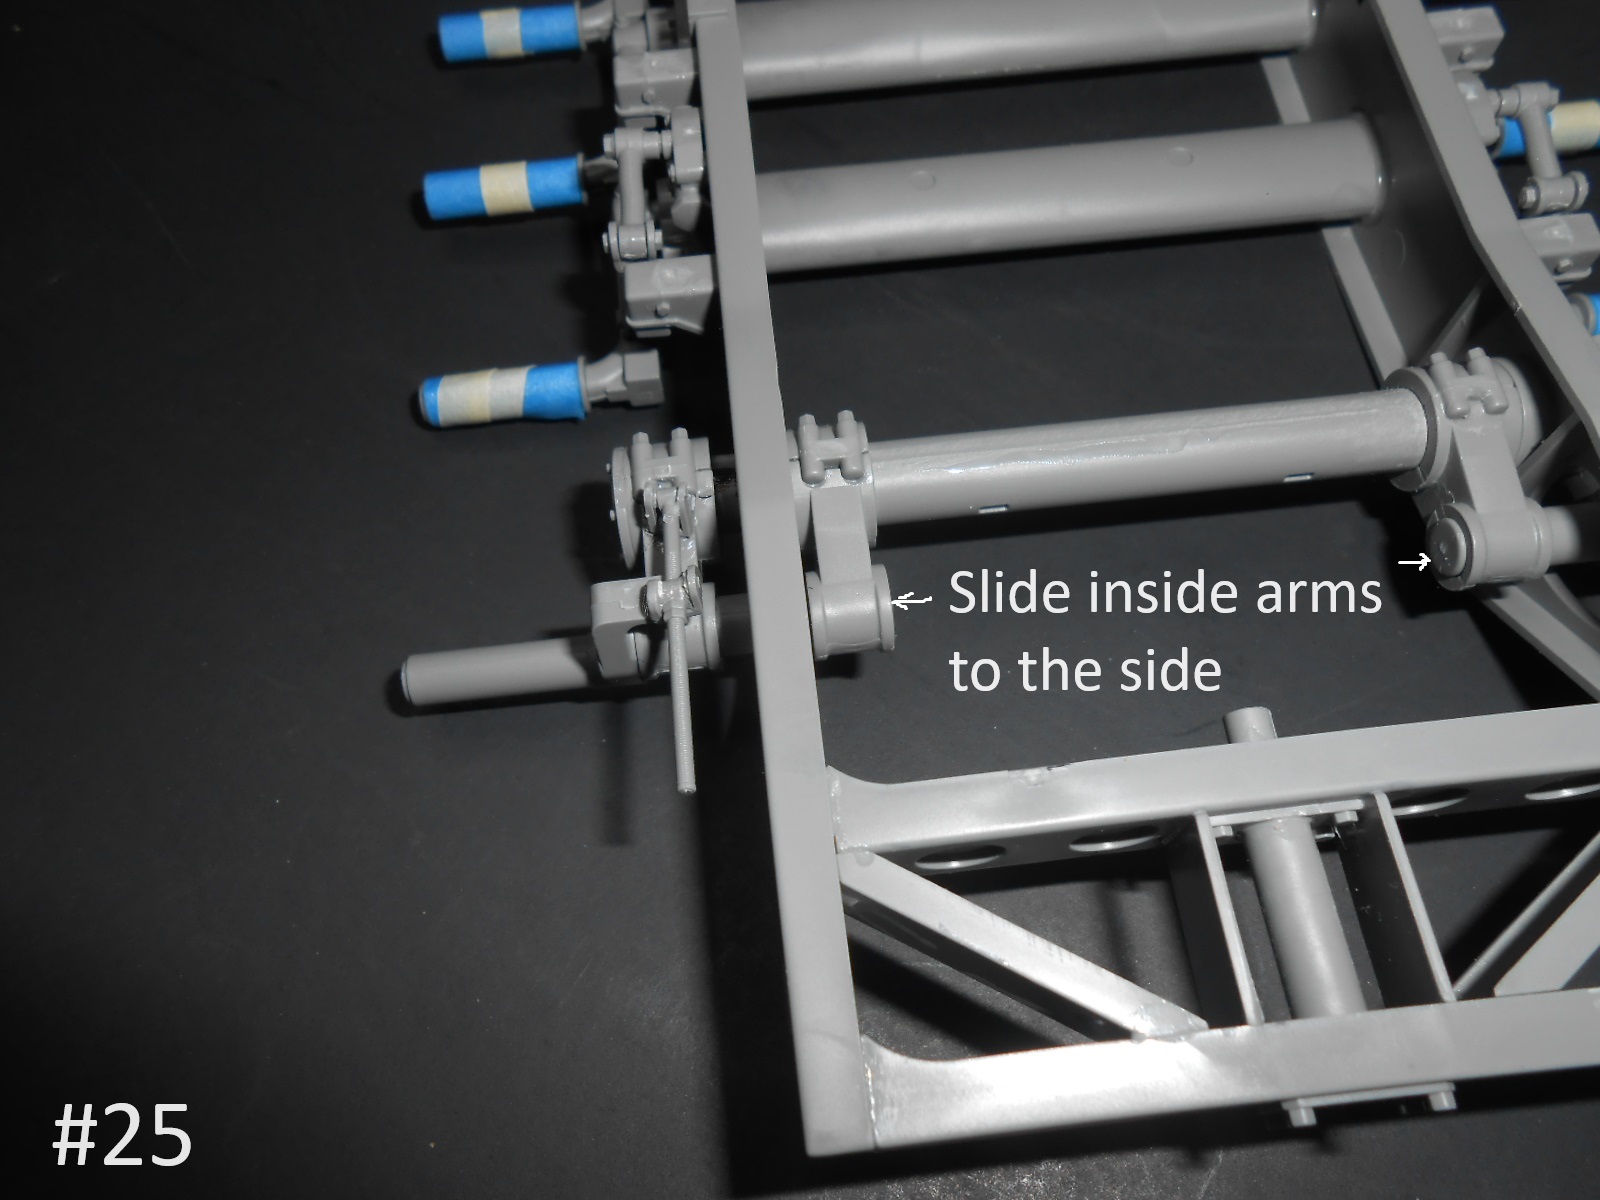
When you get to the rear , I left the 2 arms that go on the last shaft loose to make them adjustable , an arm from the Idler attaches there , this should make the Idler adjustable ?

It’s hard to tell from the instructions if the narrow or wide part of the arm goes to the outside.

The hole in the final cross brace should have the flat spot on top.

Finished for today
Donald

4 Likes

Yes the instructions keep you thinking all the time. those idler arms are a perfect example. I did as you did I fixed them in place once the idler assembly was constructed and in place.
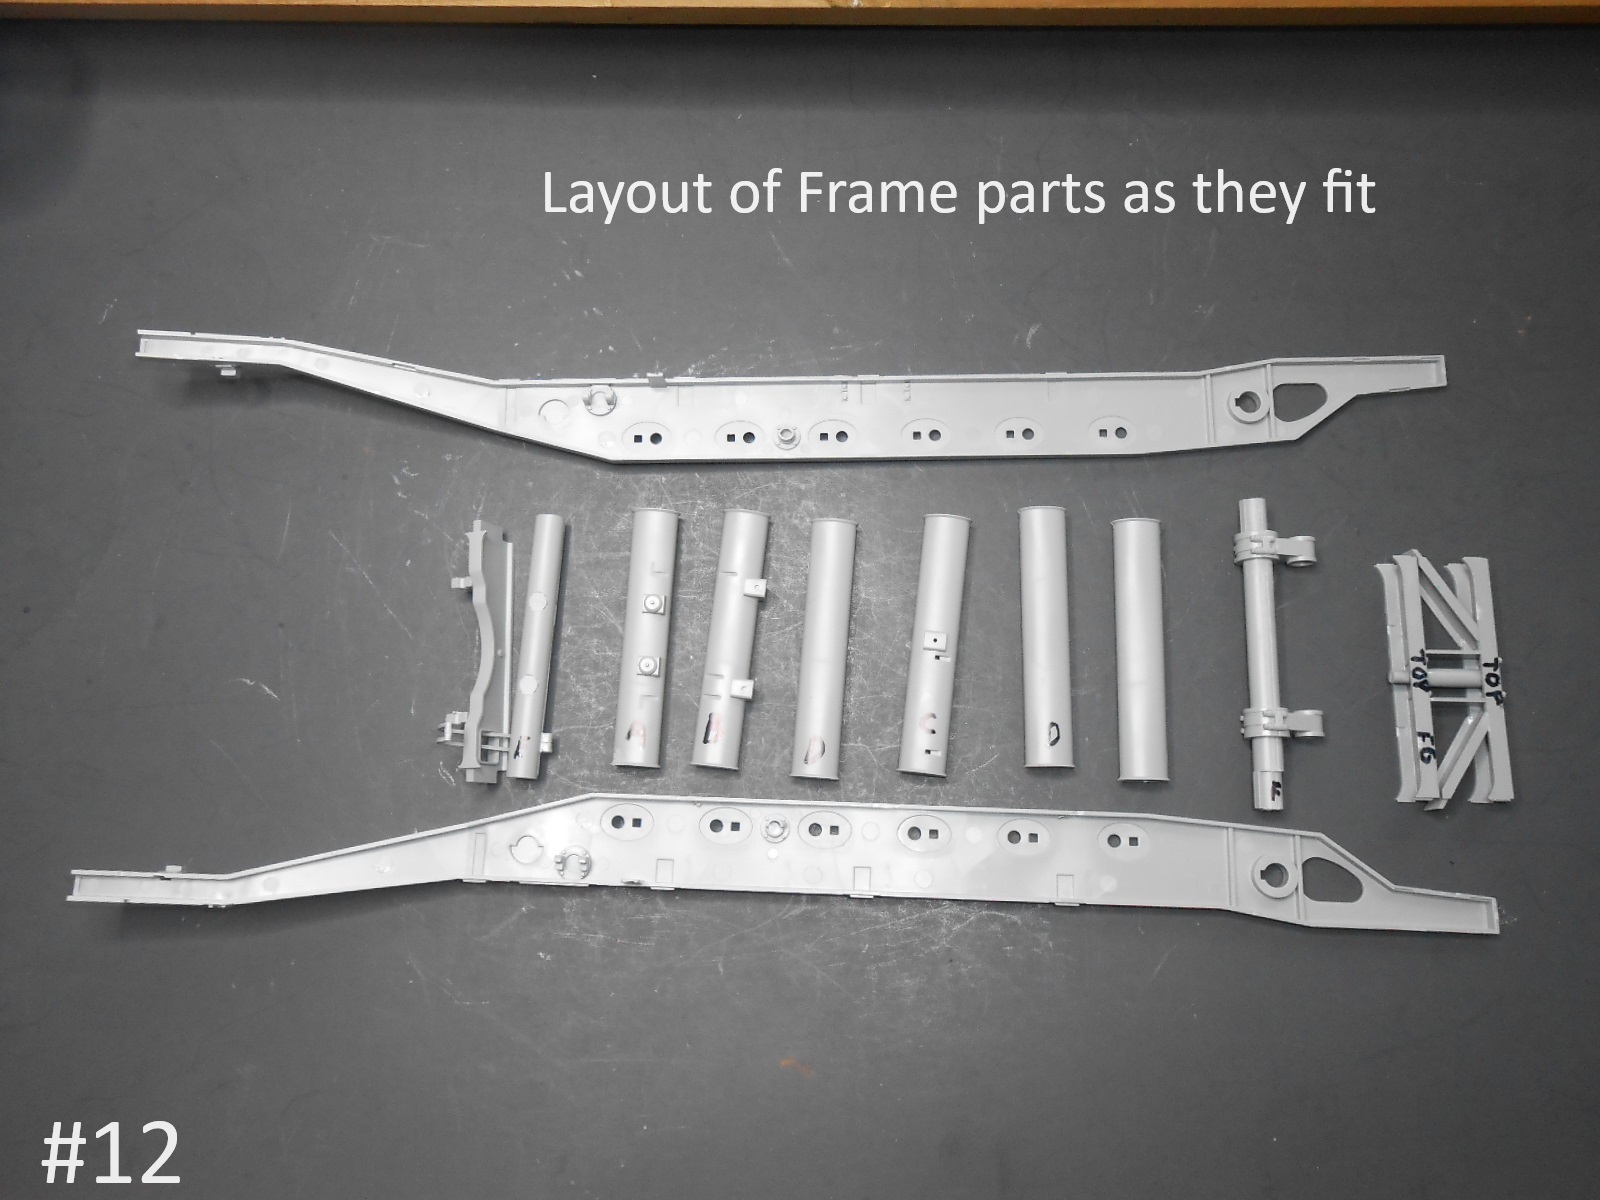
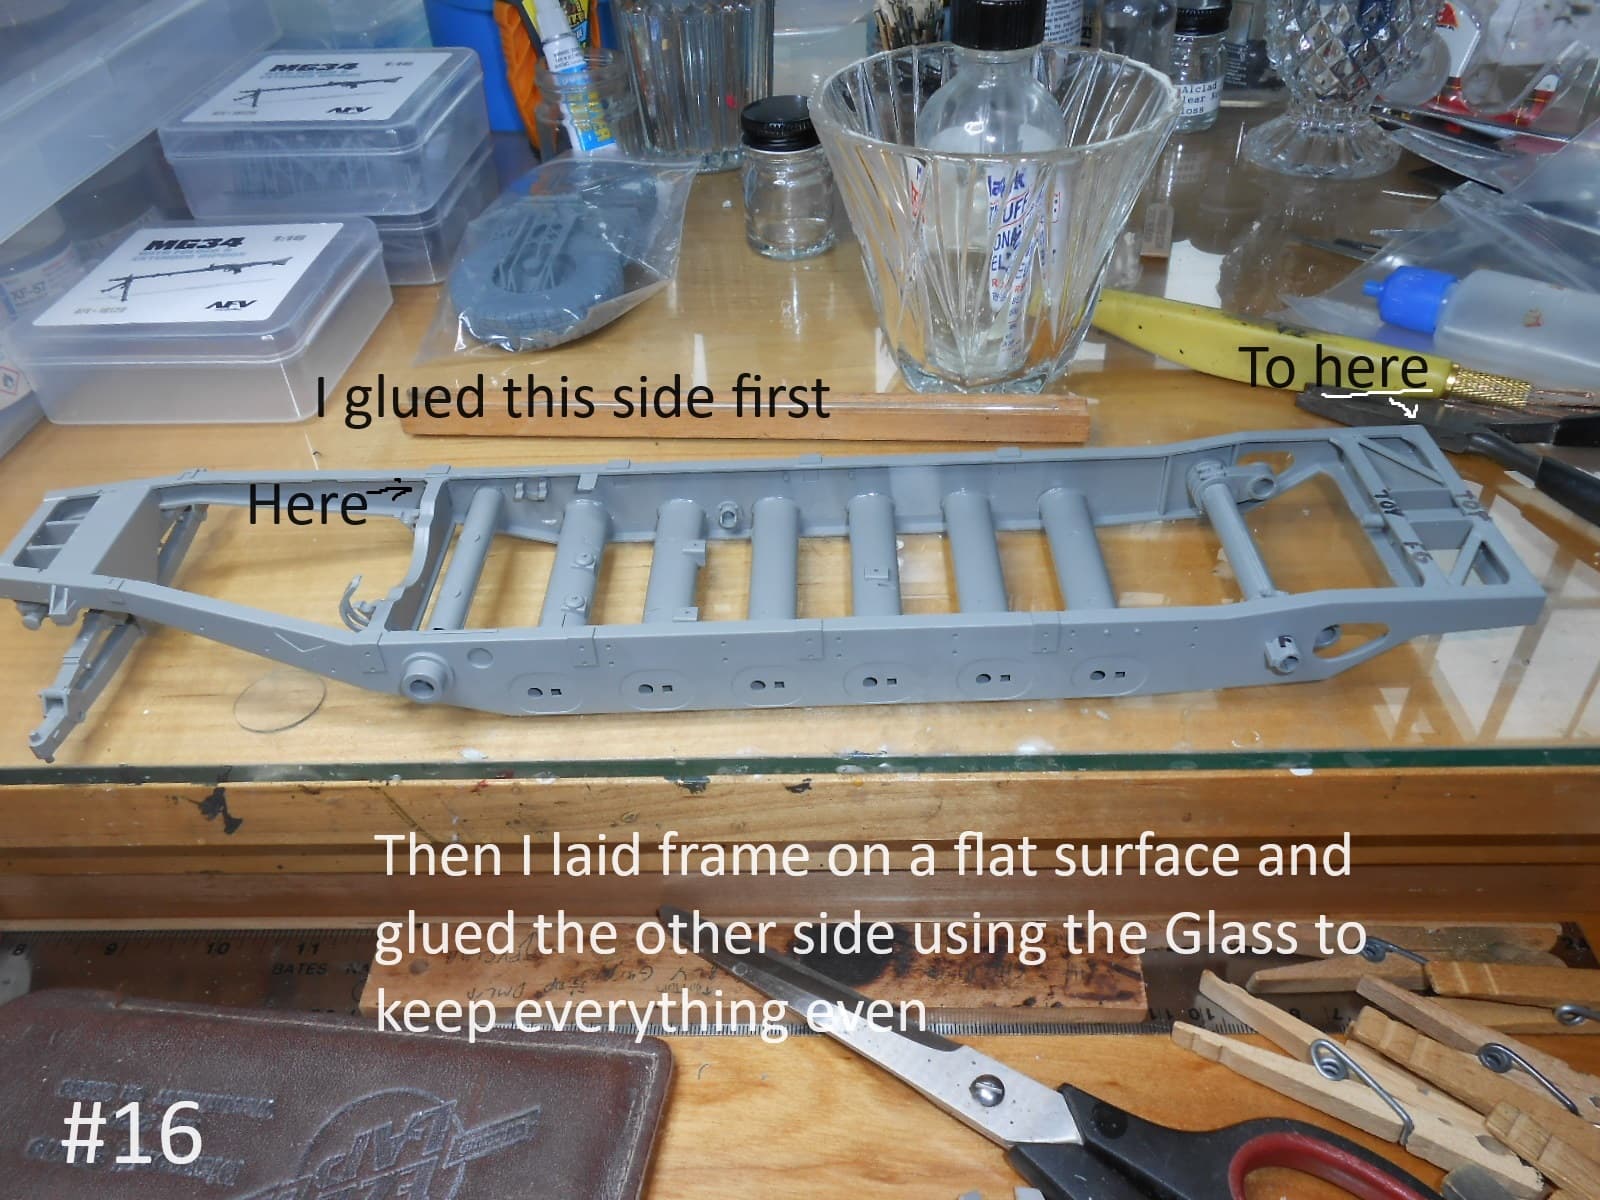
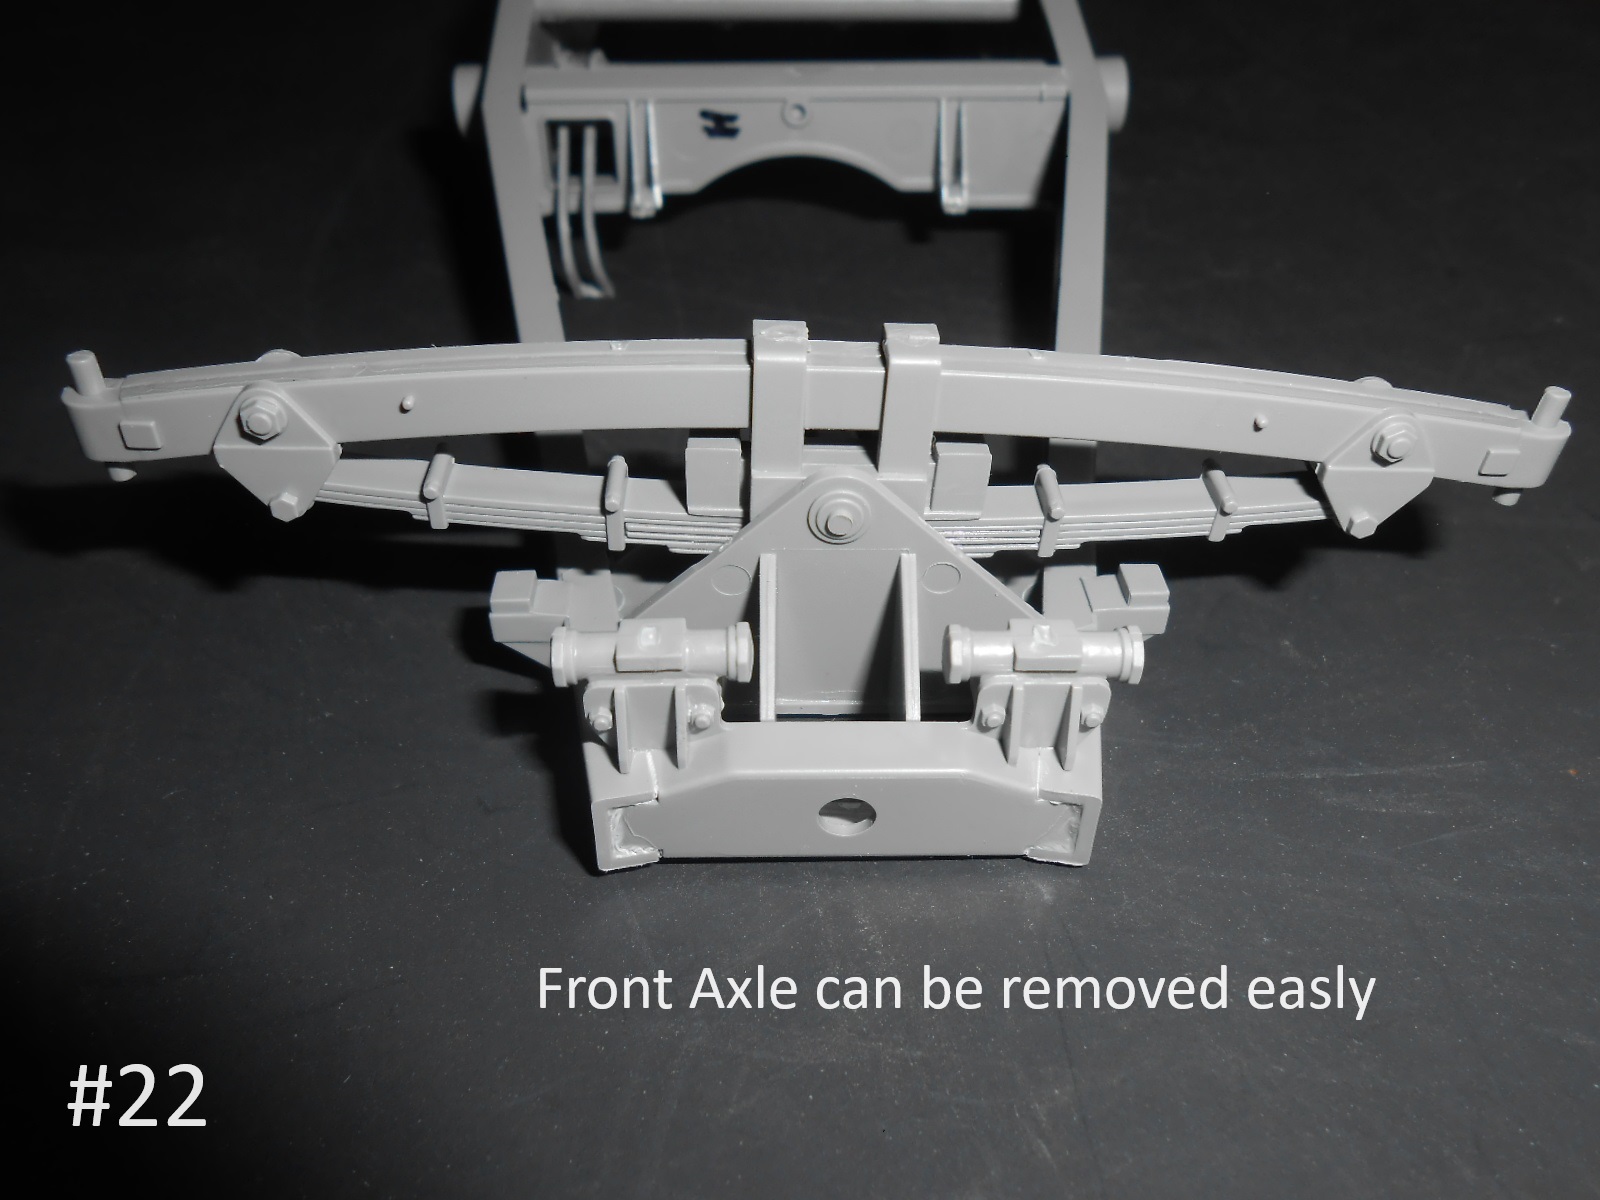
the front crossmember and suspension mounting is another, I found starting at the front and working back worked for me (by that time I had the chassis together any way.

Cheers Keith

The instructions aren’t very clear on where parts A3 / A4 /a5 go,
The next set of pics. will show and try to explain how I assembled the Frame.


You know from my looking at the Steering parts , with a little alteration , the steering may be able to be made workable.
Regards
Donald

4 Likes

I have the Torsion Bars and Idlers installed.


That’s all for now.
Donald

4 Likes

If you want the Front End movable , Here’s how I did it.


This wasn’t too hard.
Regards
Donald

4 Likes

Nicely thought out Donald.
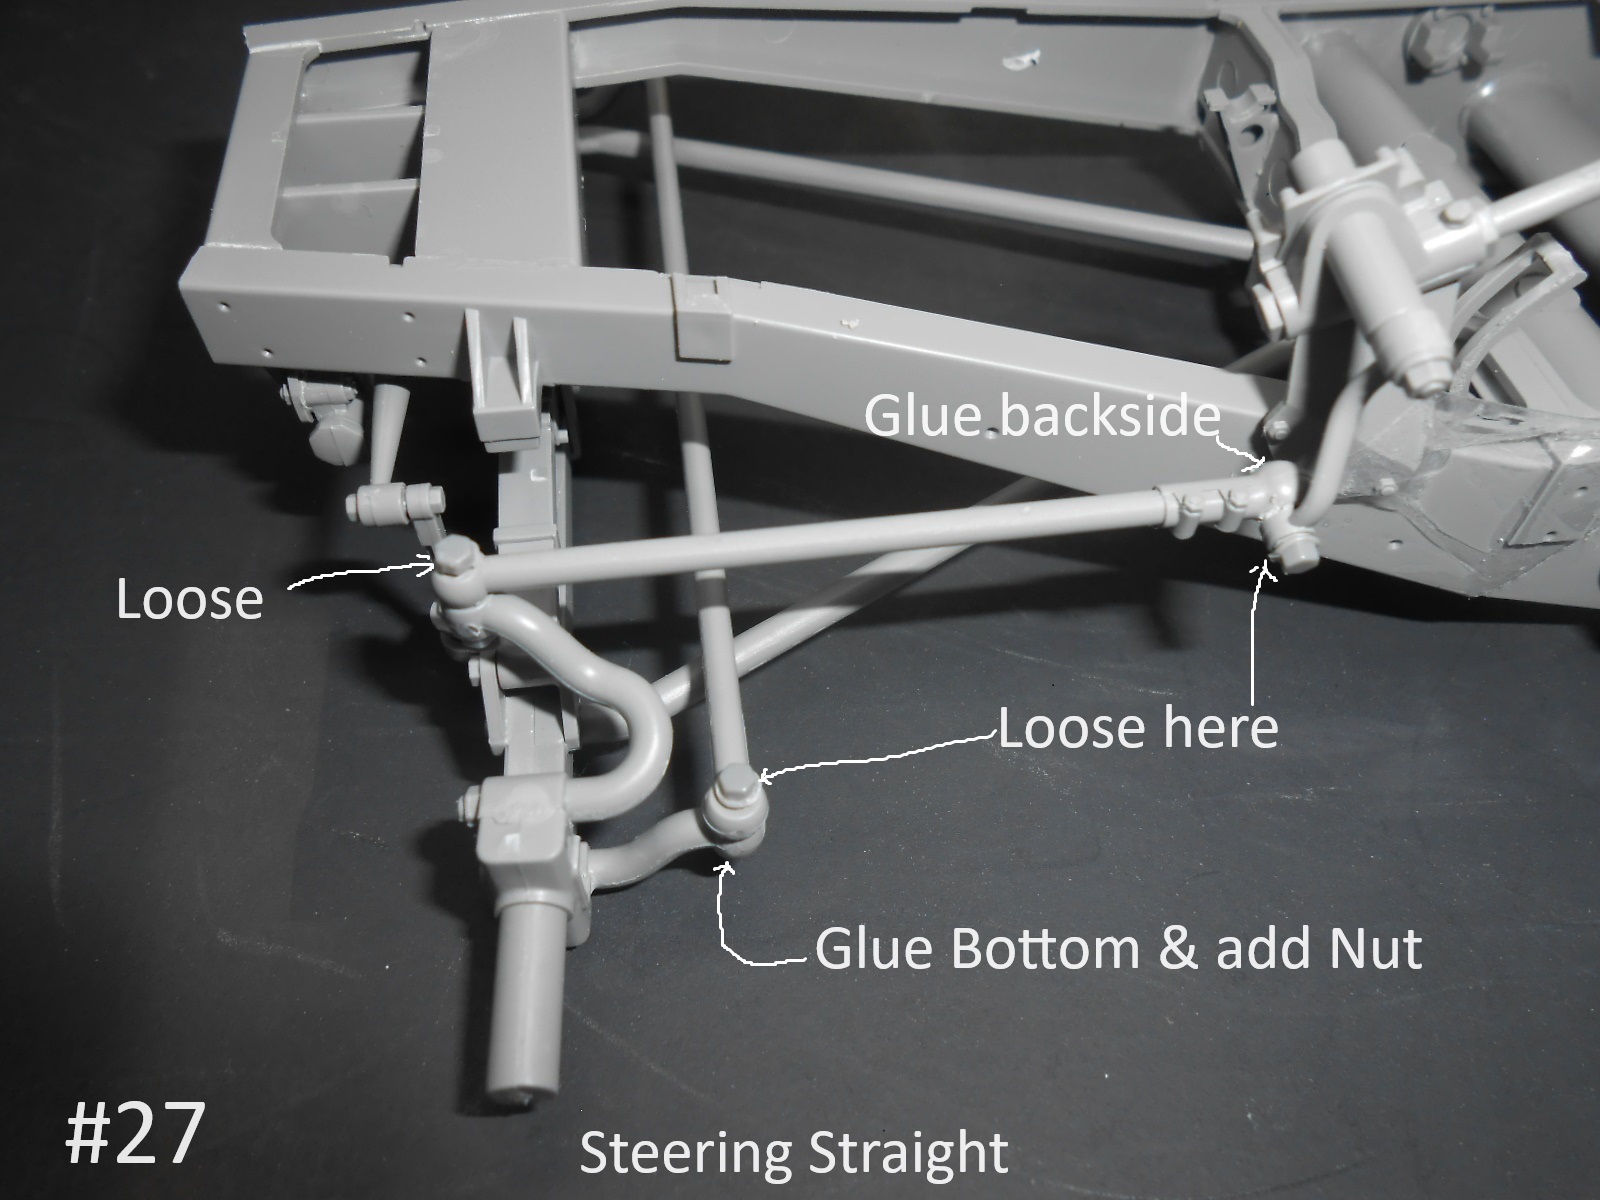
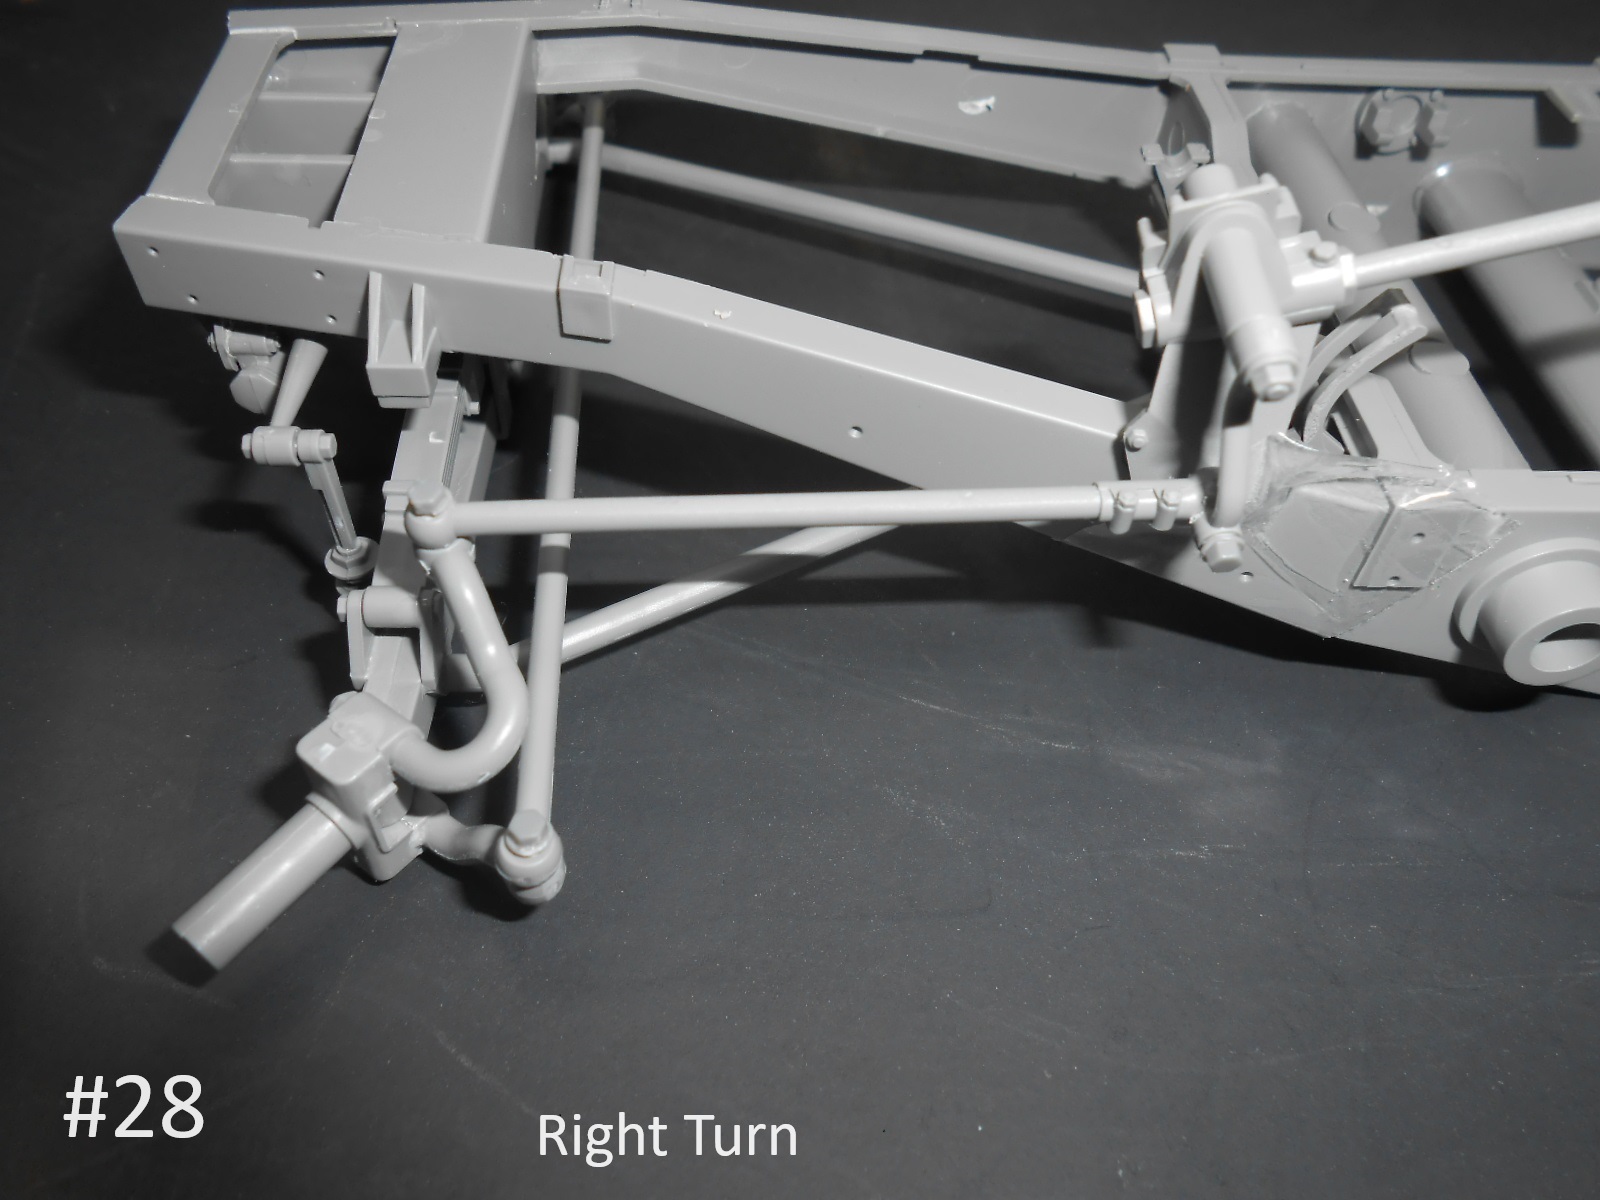
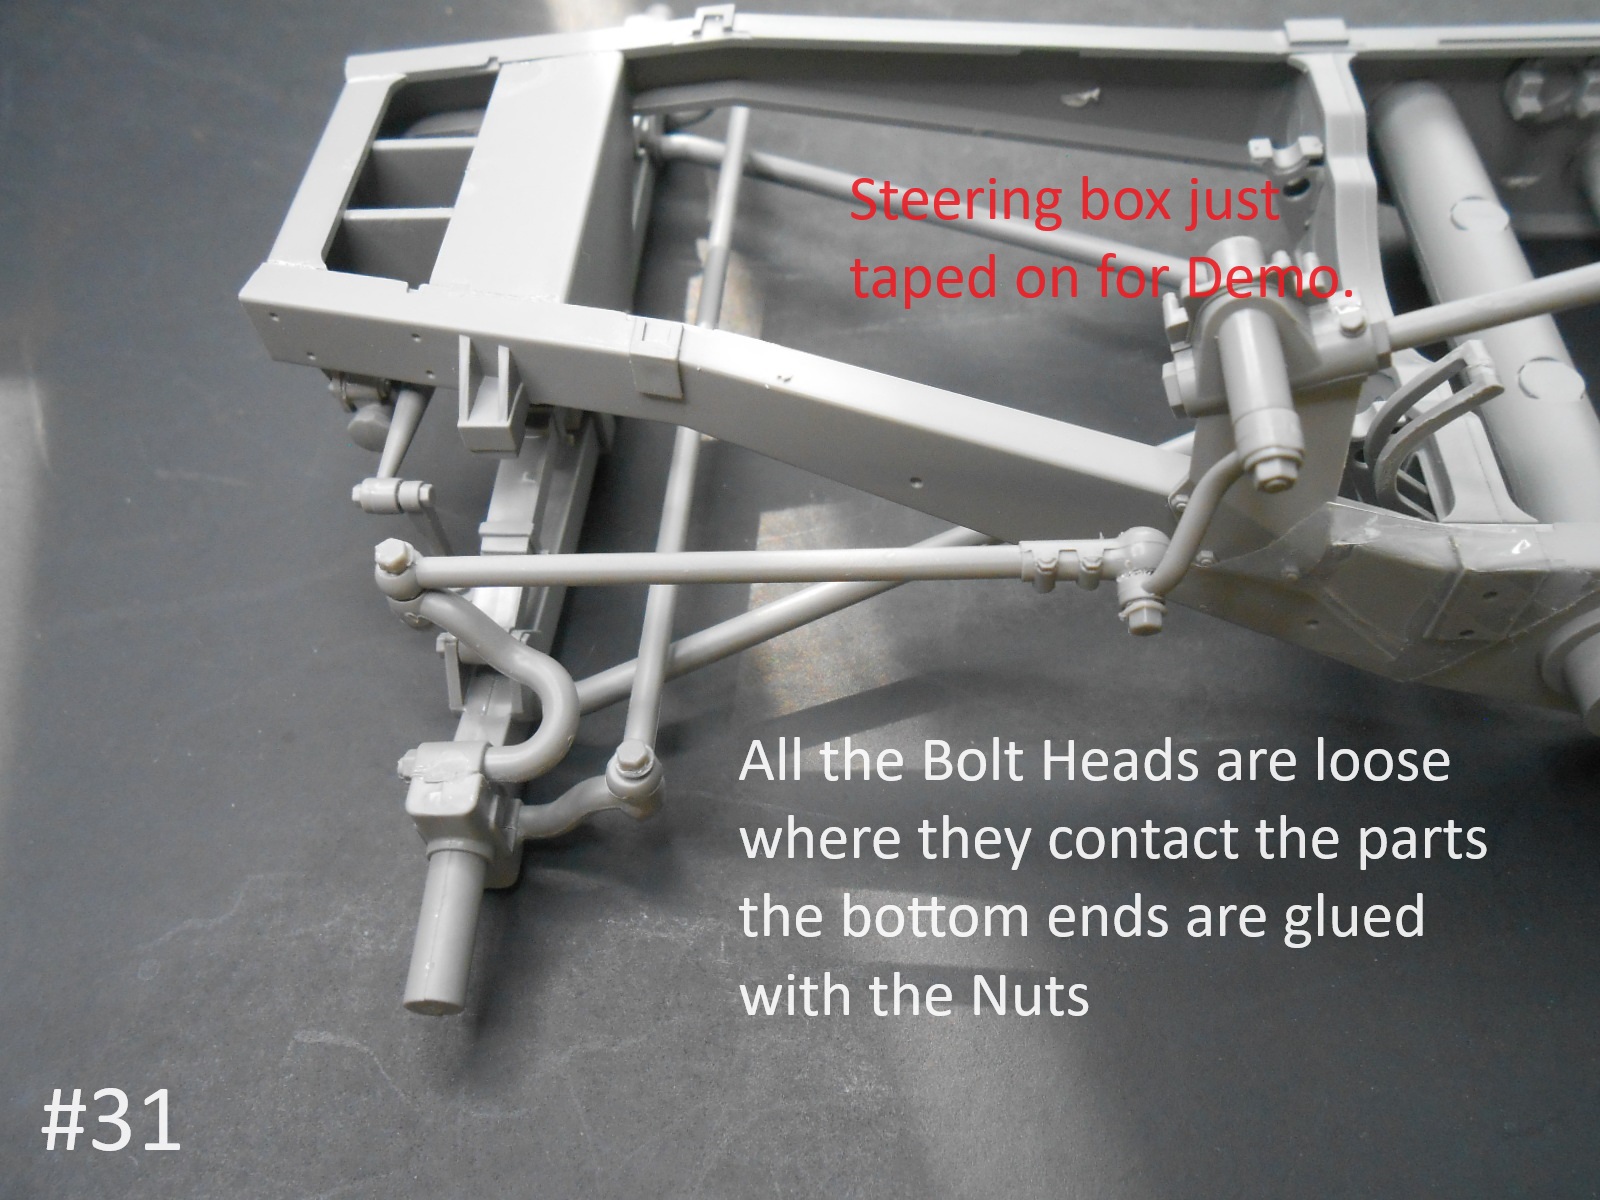
I set mine at a slight angle, I did intend to have it workable but after some confusion with the steering knuckles assemblies I felt they would set if I left them so opted for a slightly off centre offset. I think if I get another I would do them in a different way.

Keith

1 Like

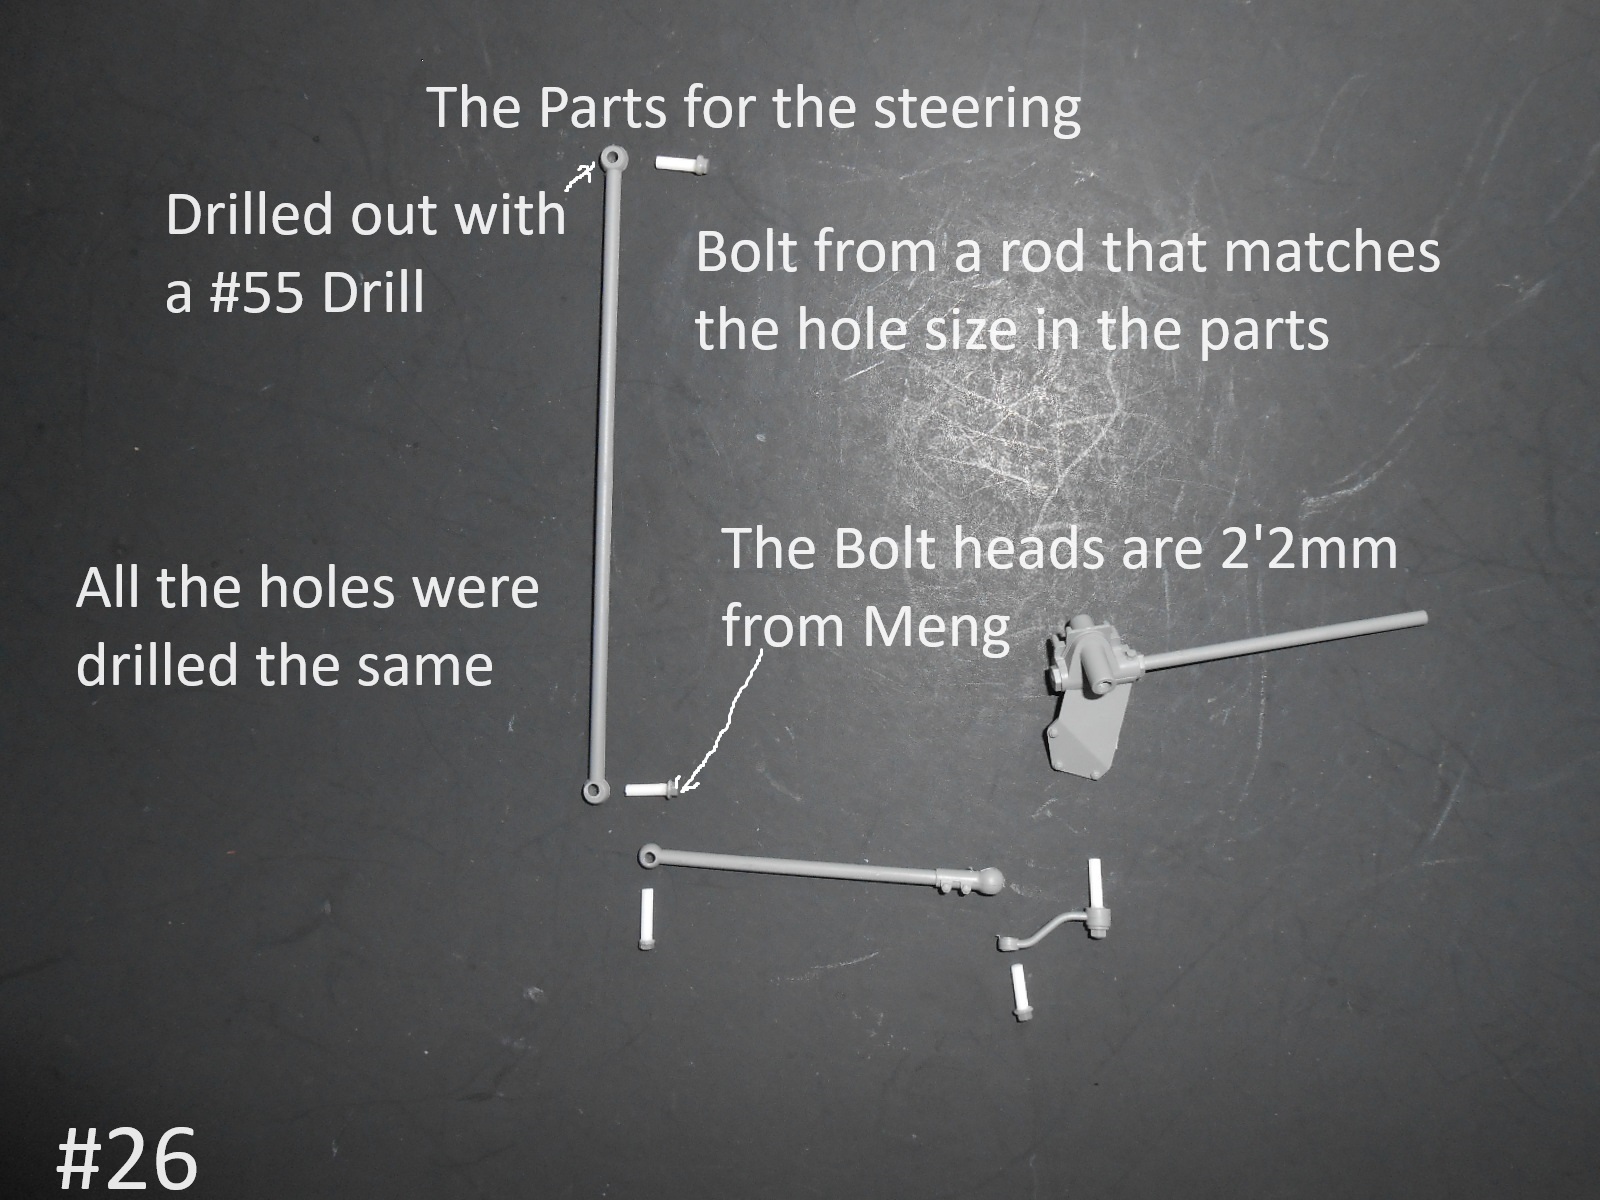
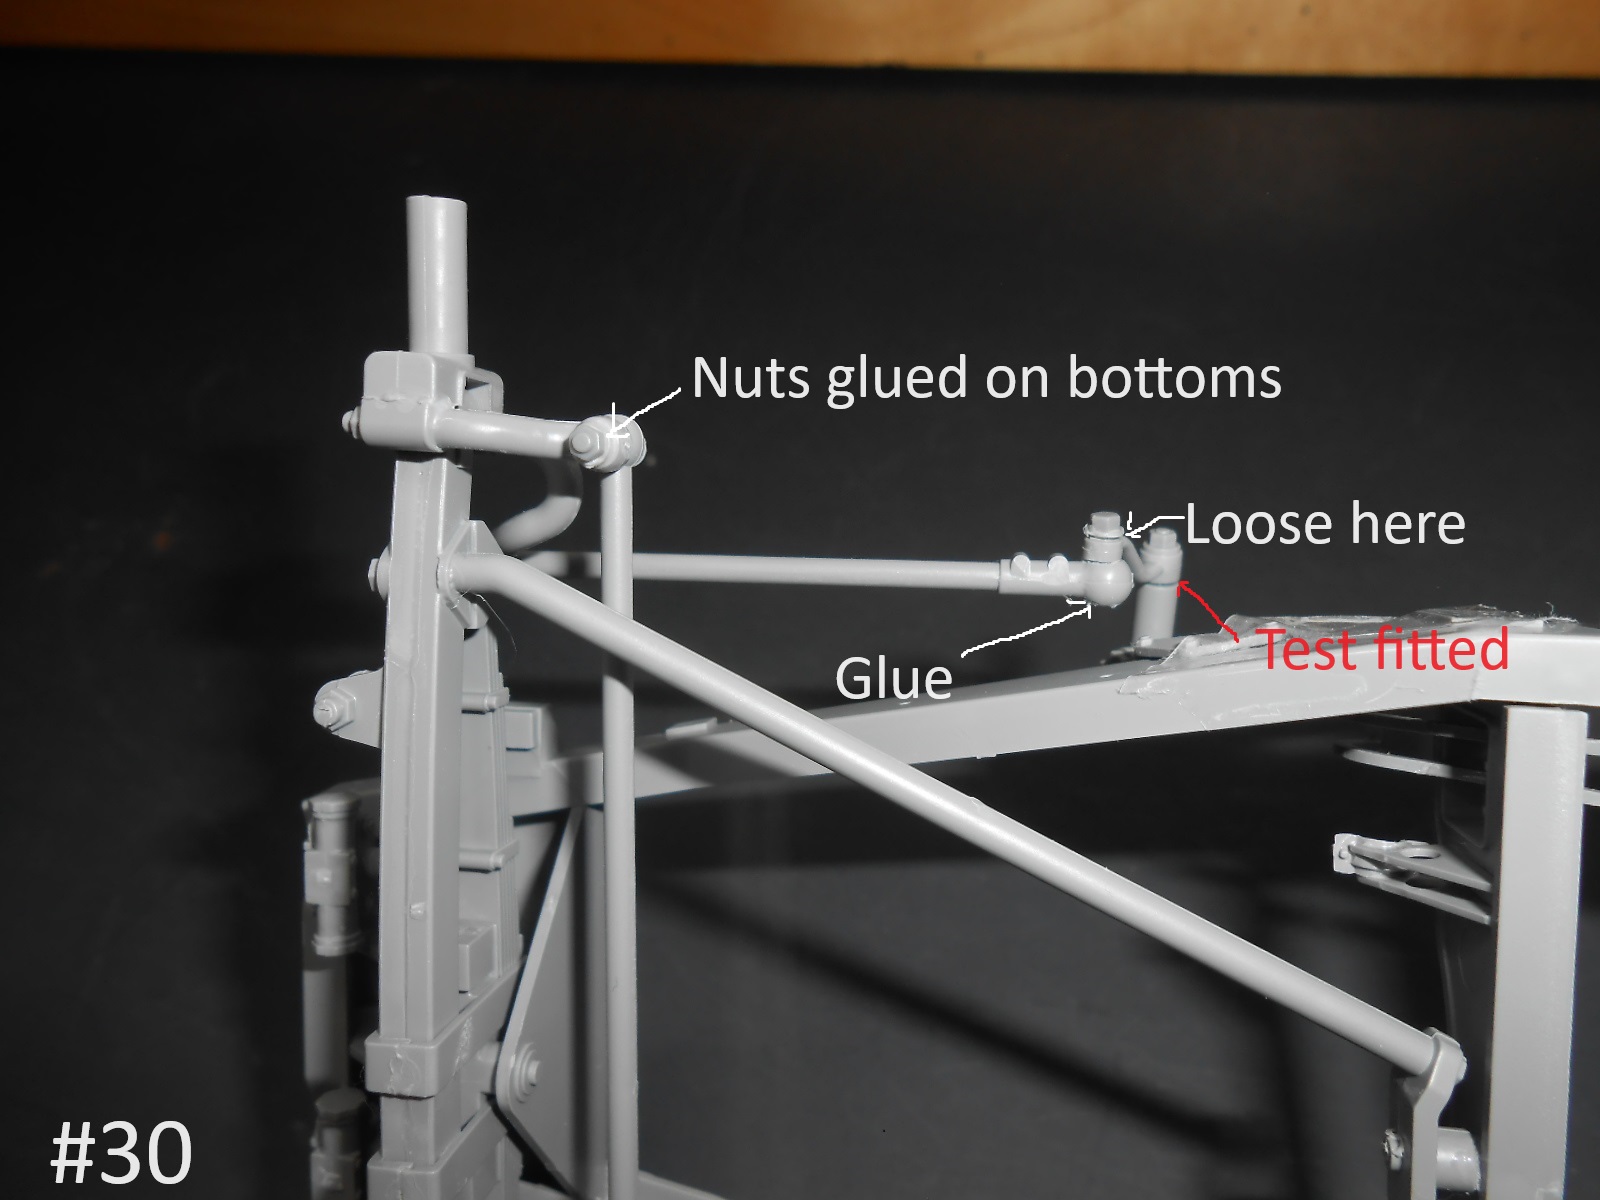
The parts come with short pins , if they had molded the pins longer you could have hot melted the ends after assembly then added a nut on the ends.
Regards
Donald

2 Likes

I did a little painting.


Just a short one today.
Donald

5 Likes

I have the lower parts installed.


The Gear Box for the Sprockets doesn’t look quite right to me.

Finished for today
Donald

3 Likes

Looks right to me according to my reference book anyway, I hope it is as its the same as mine :slight_smile:

Keith

1 Like

Working on the engine now.
I used the frame to line up the engine mounts.


Regards
Donald

4 Likes

I thing I got this right , there are 2 arms that as far as I can see don’t go anywhere.


Finished for today
Regards
Donald

6 Likes

Hey Don, as small as the figures are on the instruction sheet(s) its a wonder you can make out anything! Good build so far.

1 Like

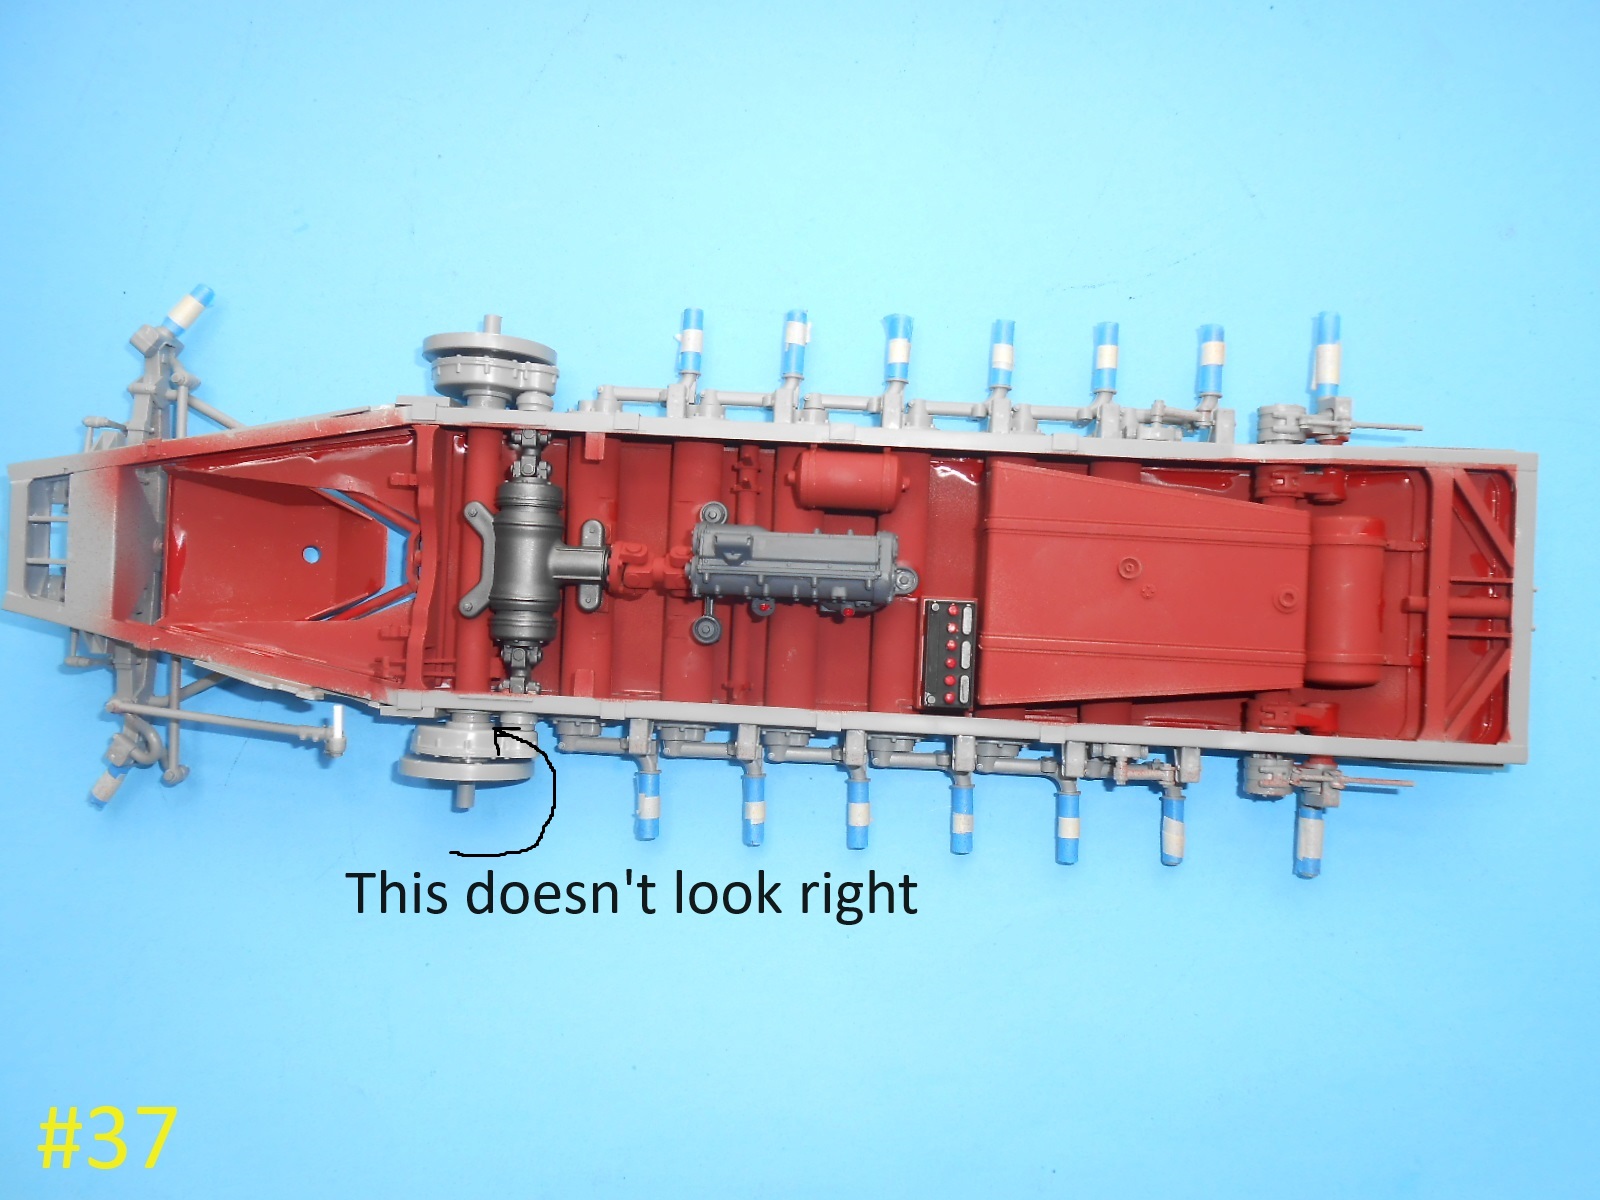
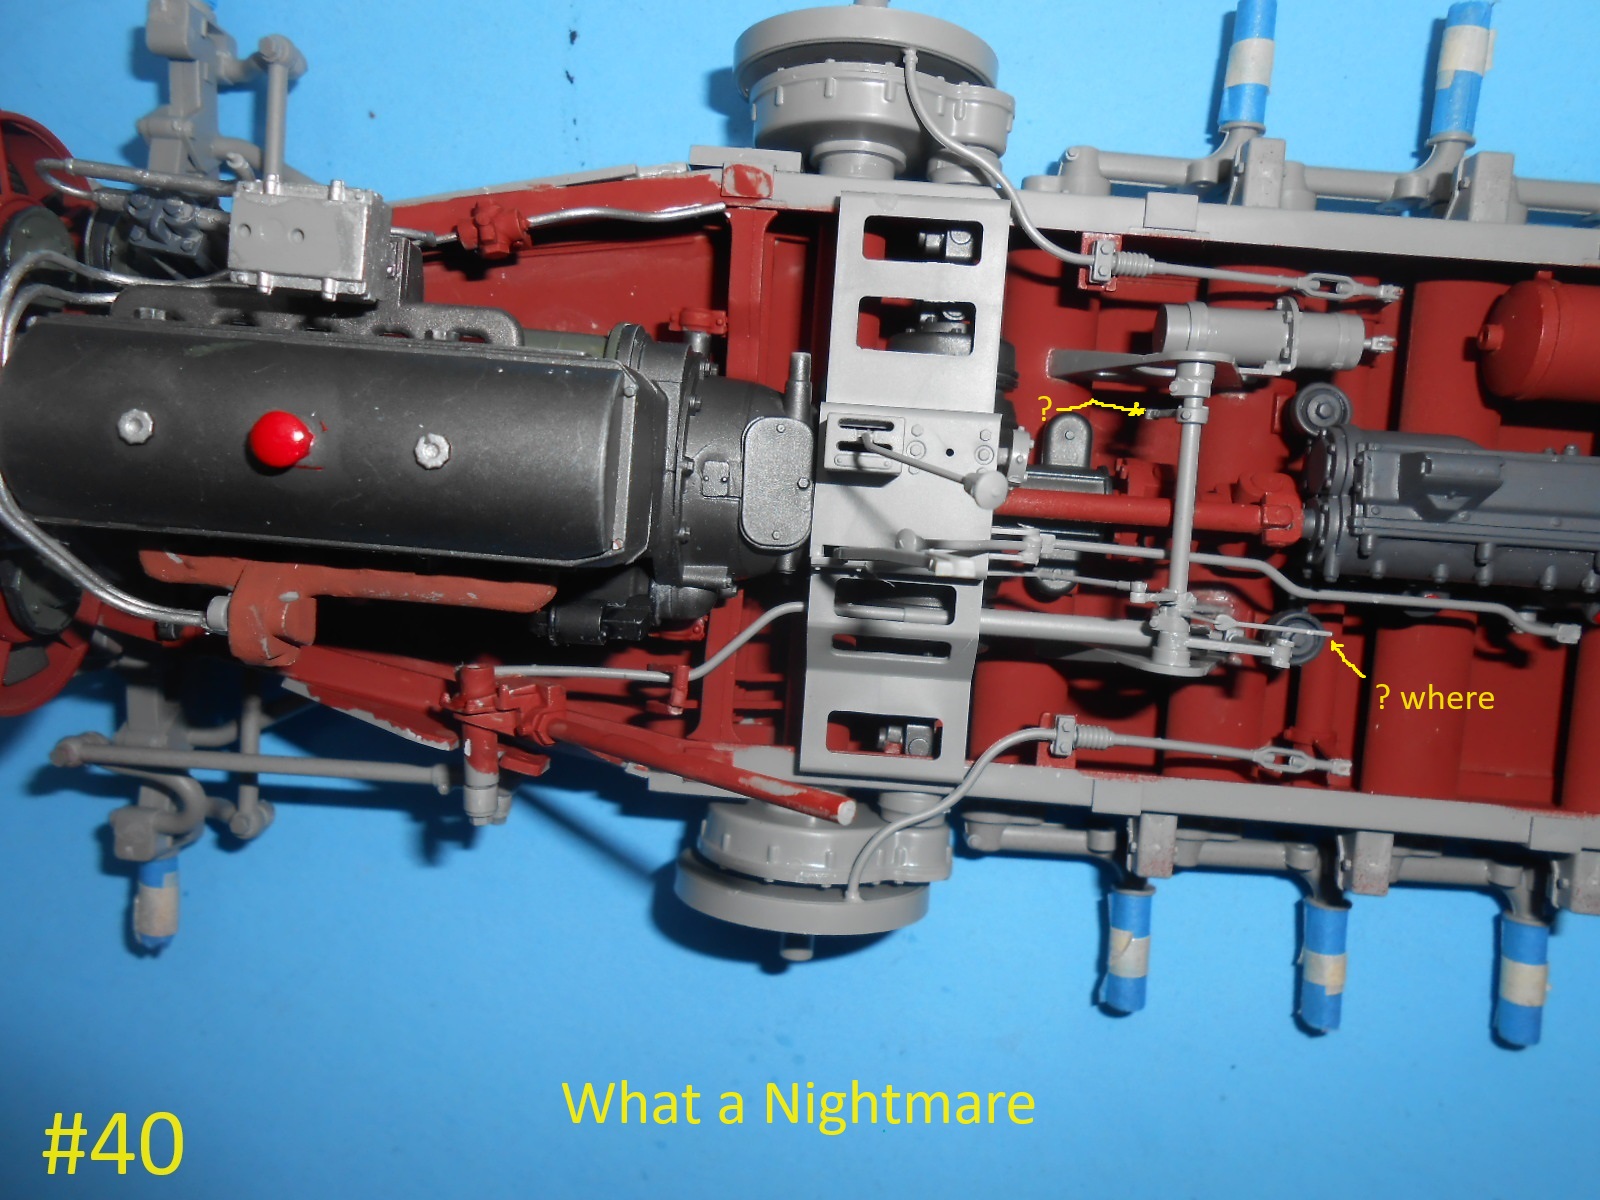
And it’s not really clear sometimes exactly where everything goes.
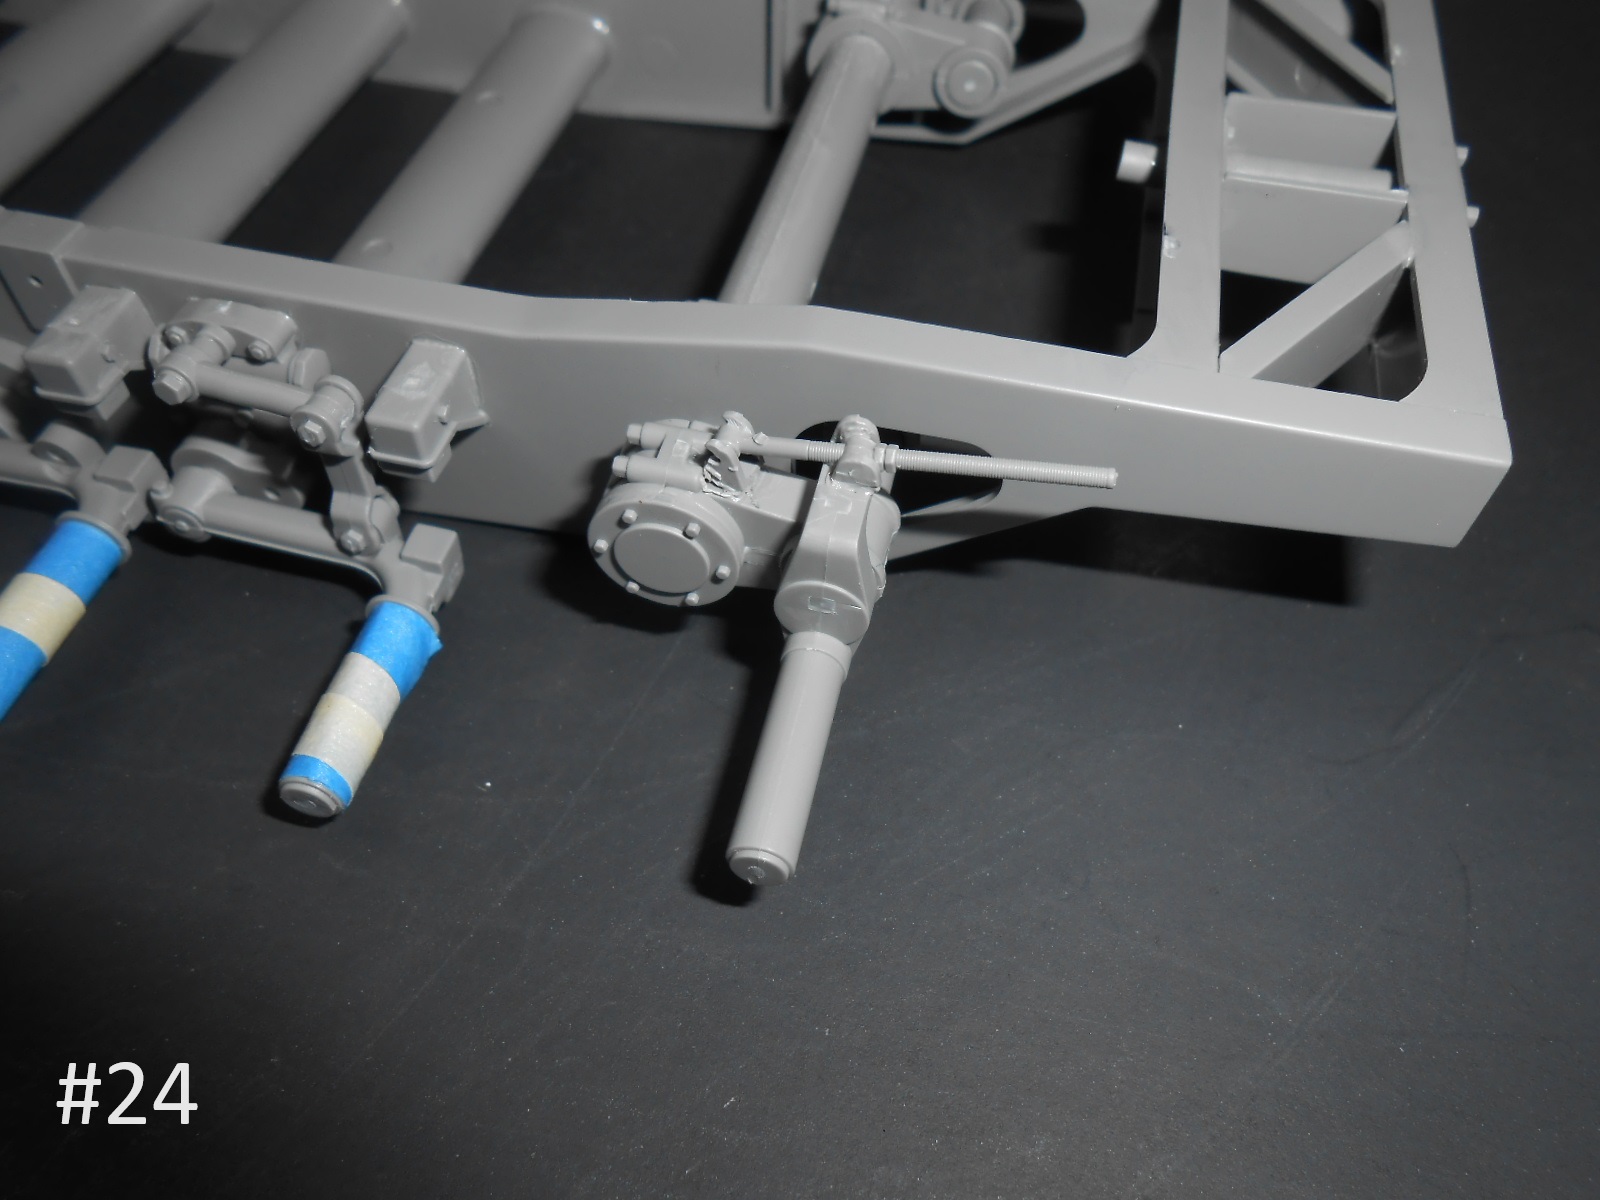
For example there’s a rod thar goes from the middle goes around the engine over toward the steering gear box then where ?
Regards
Donald

1 Like