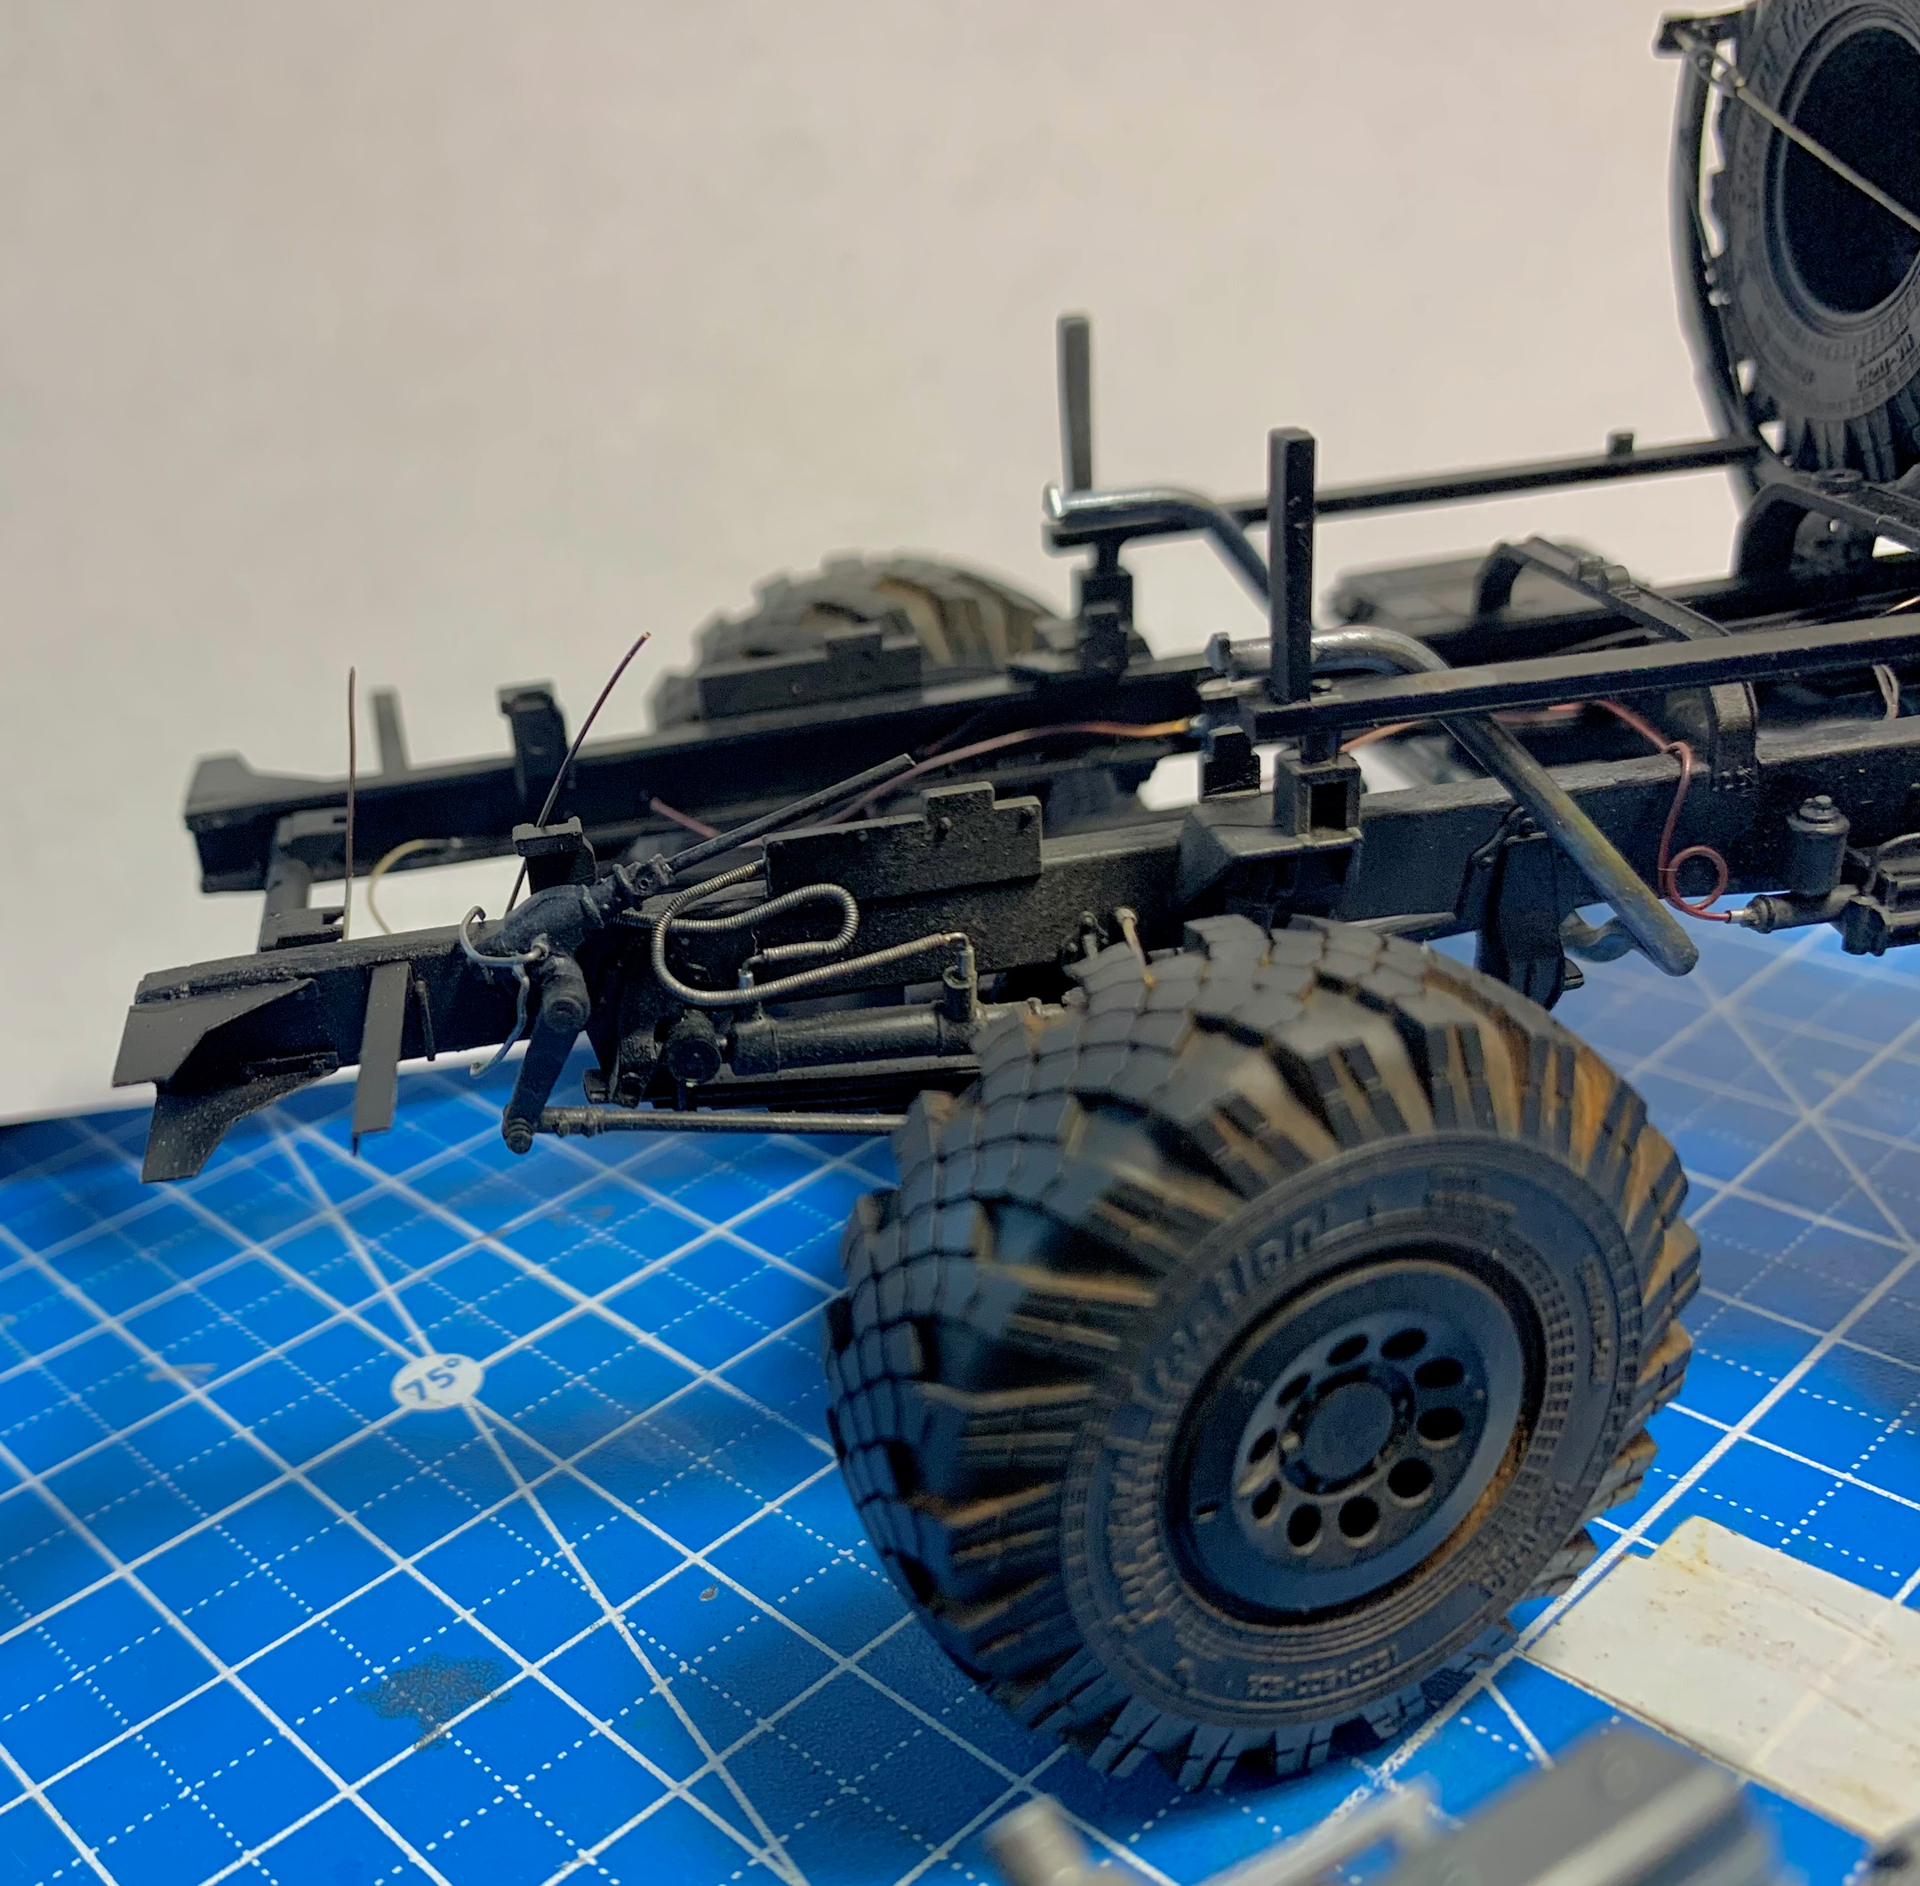
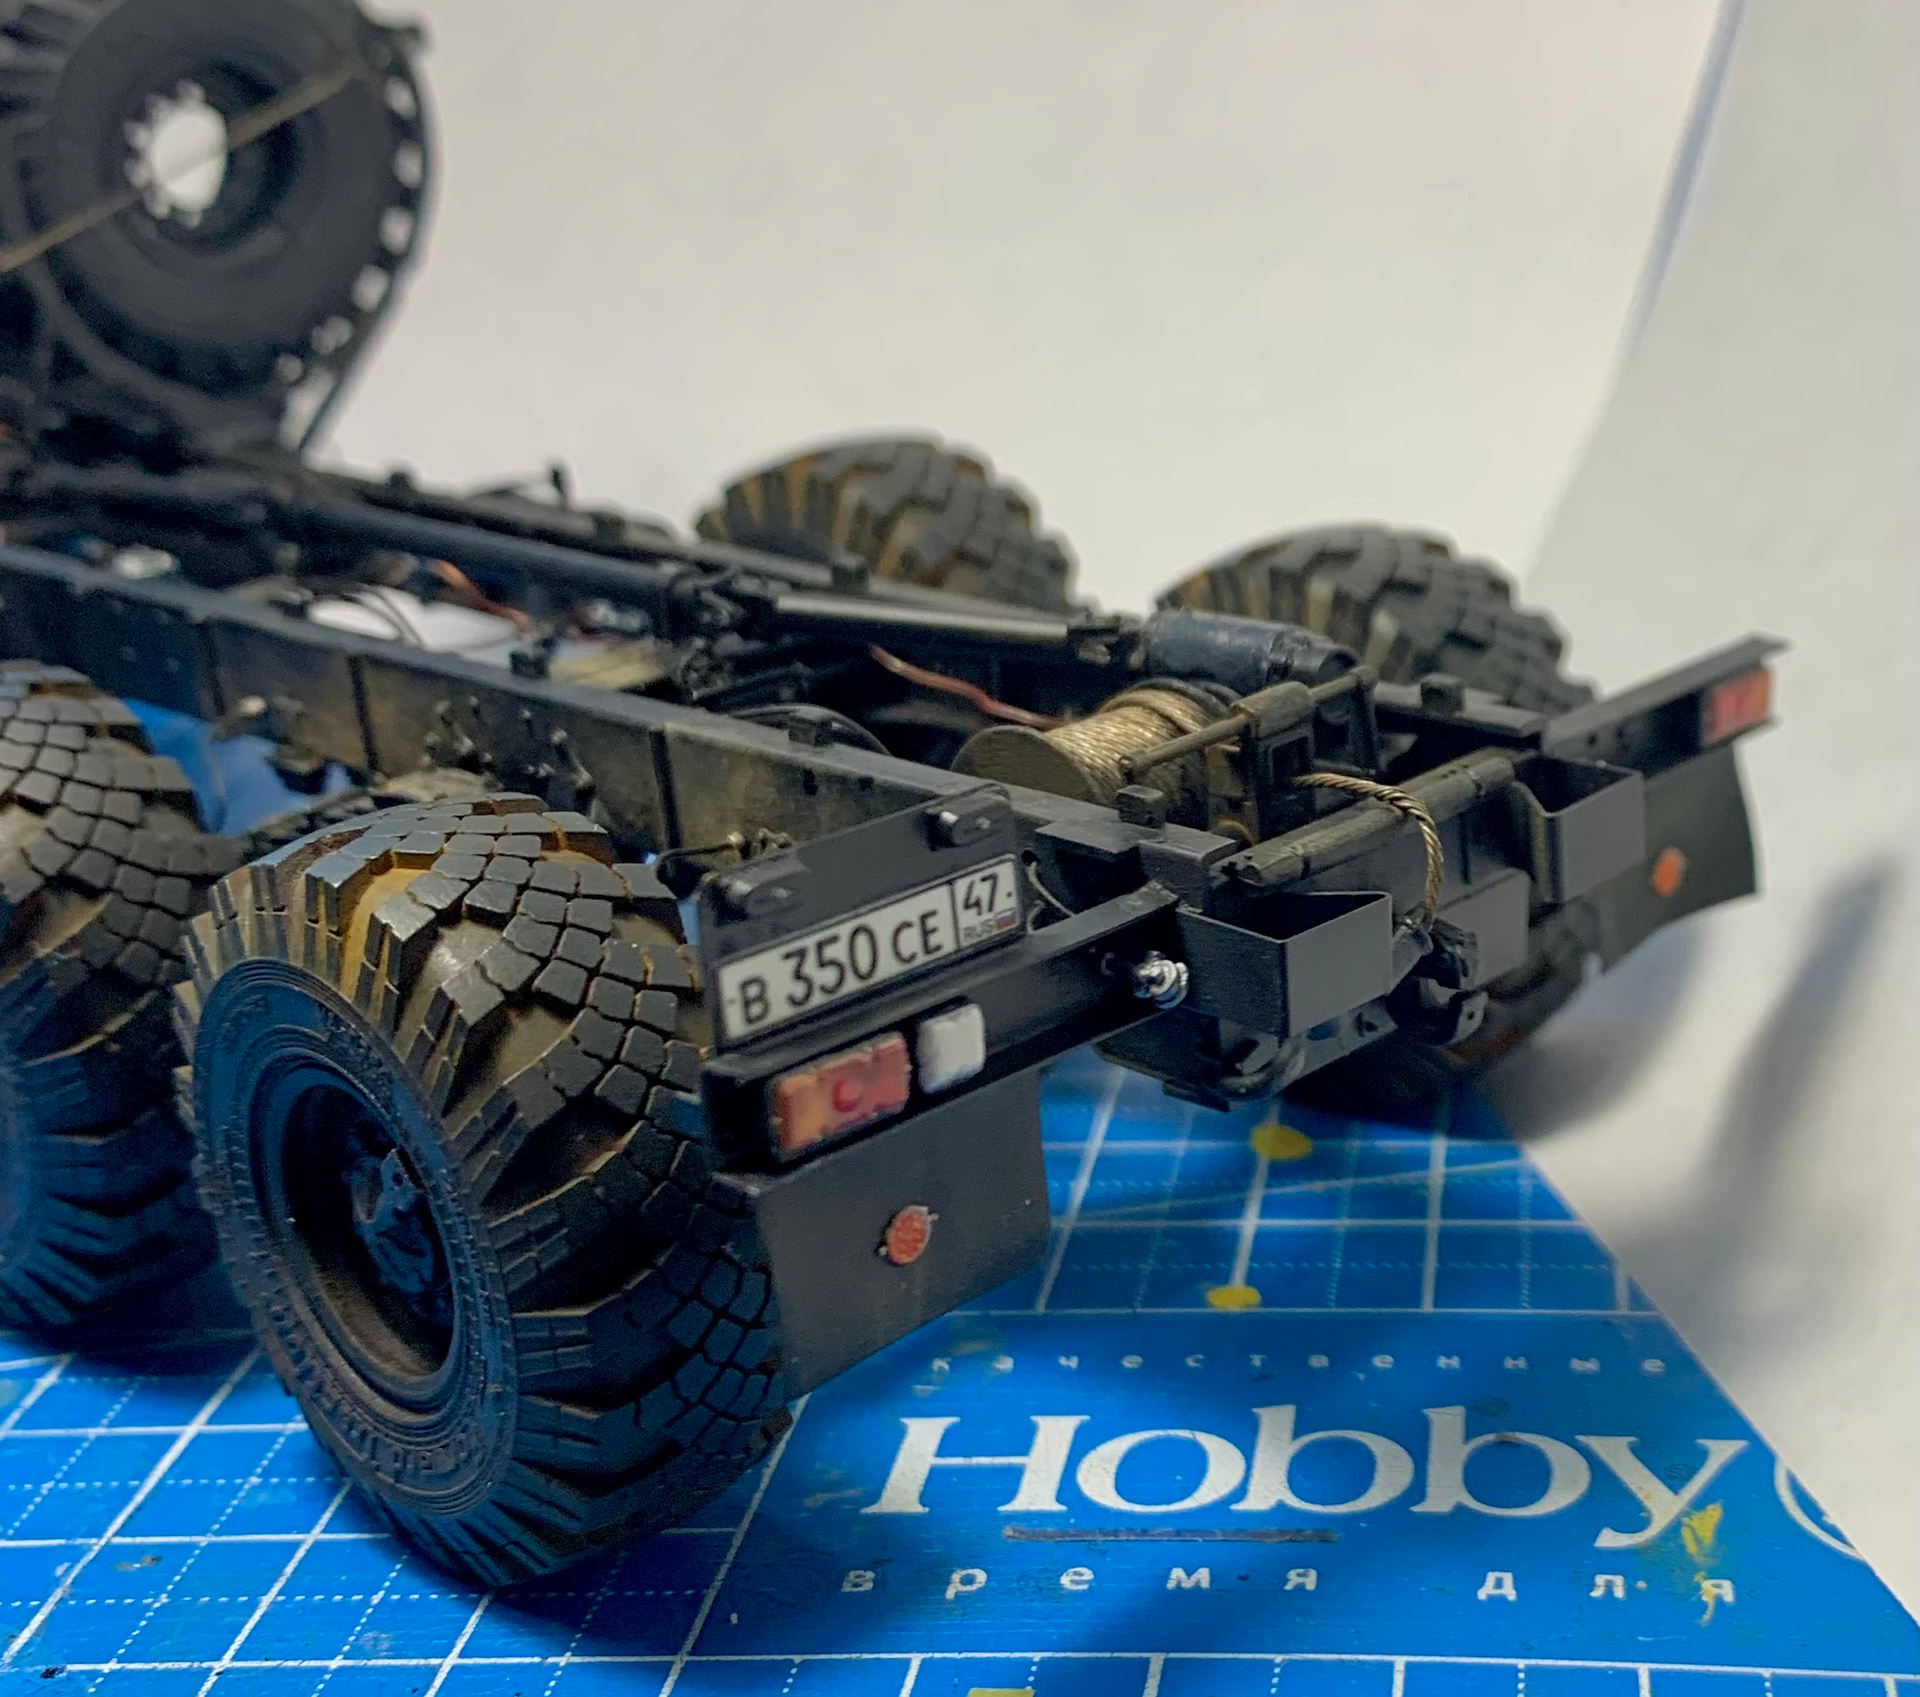
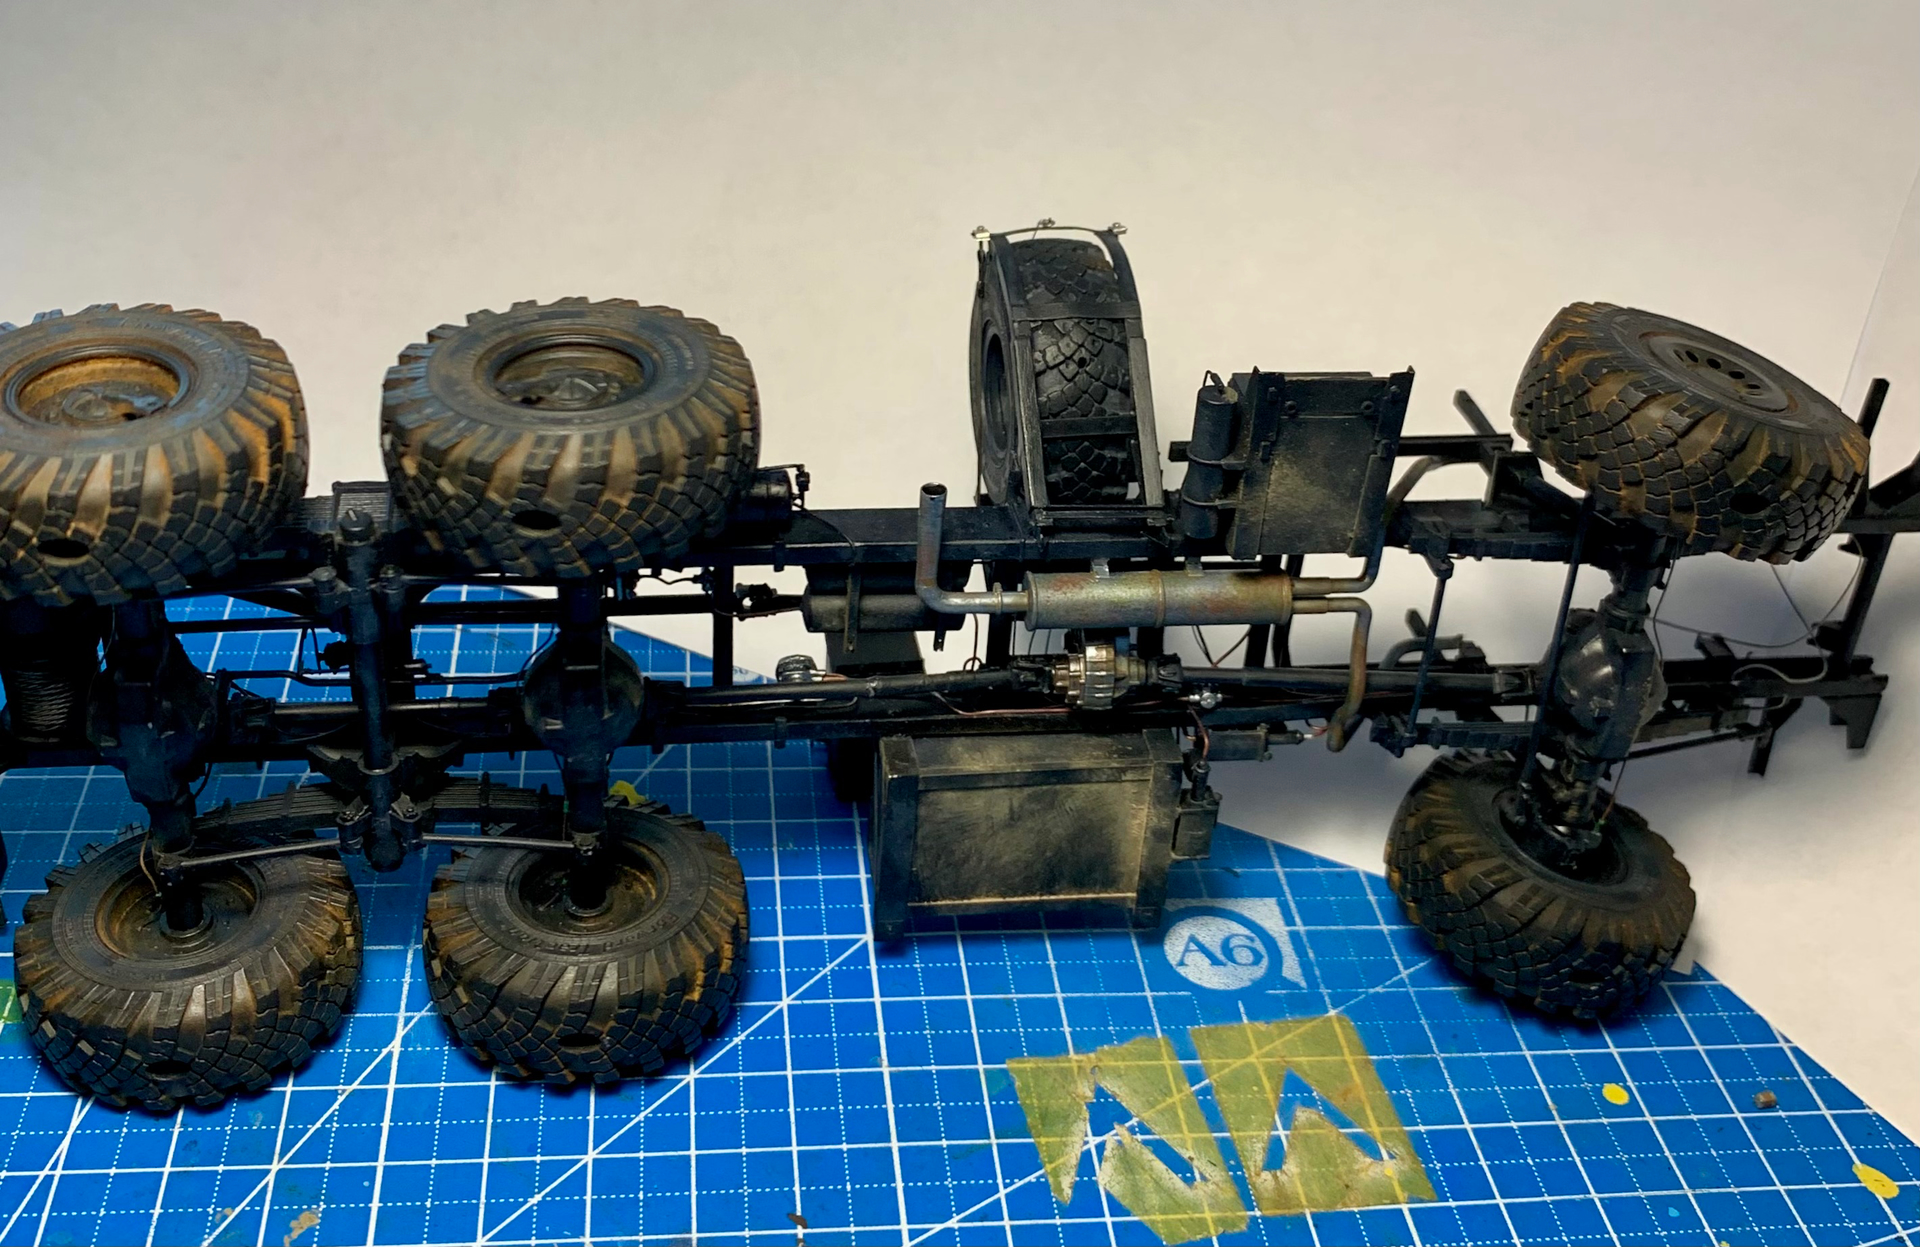
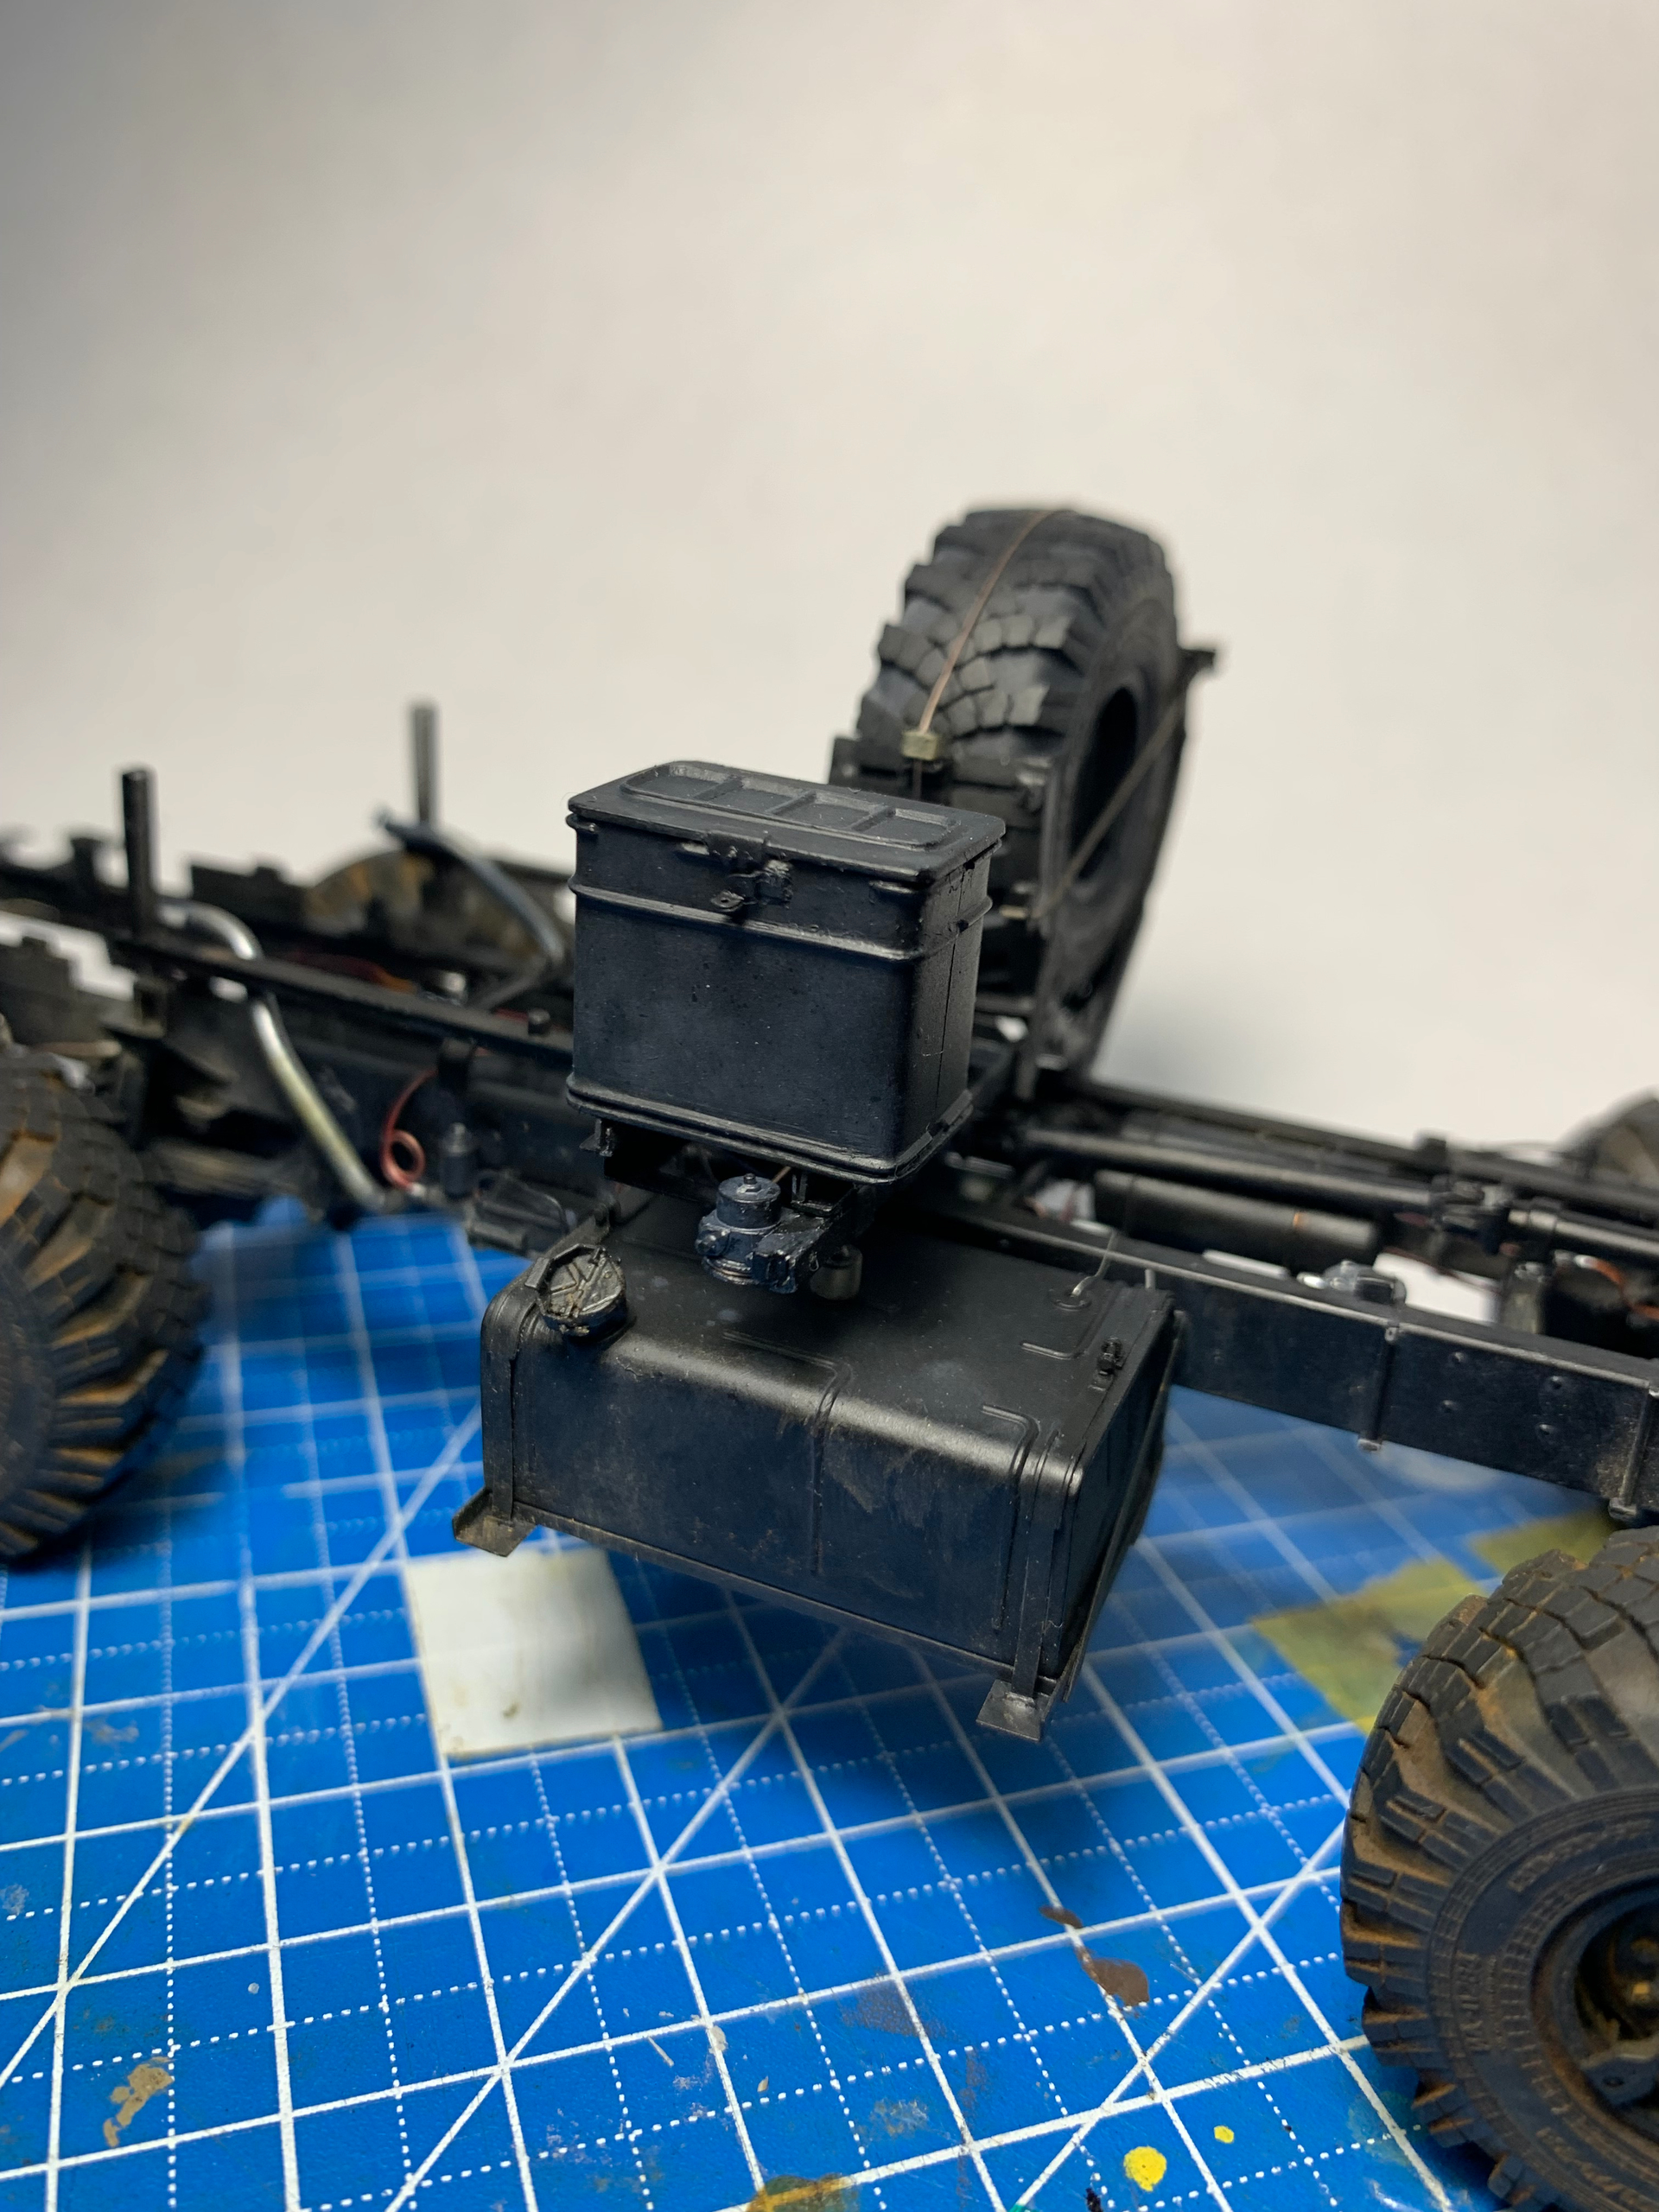
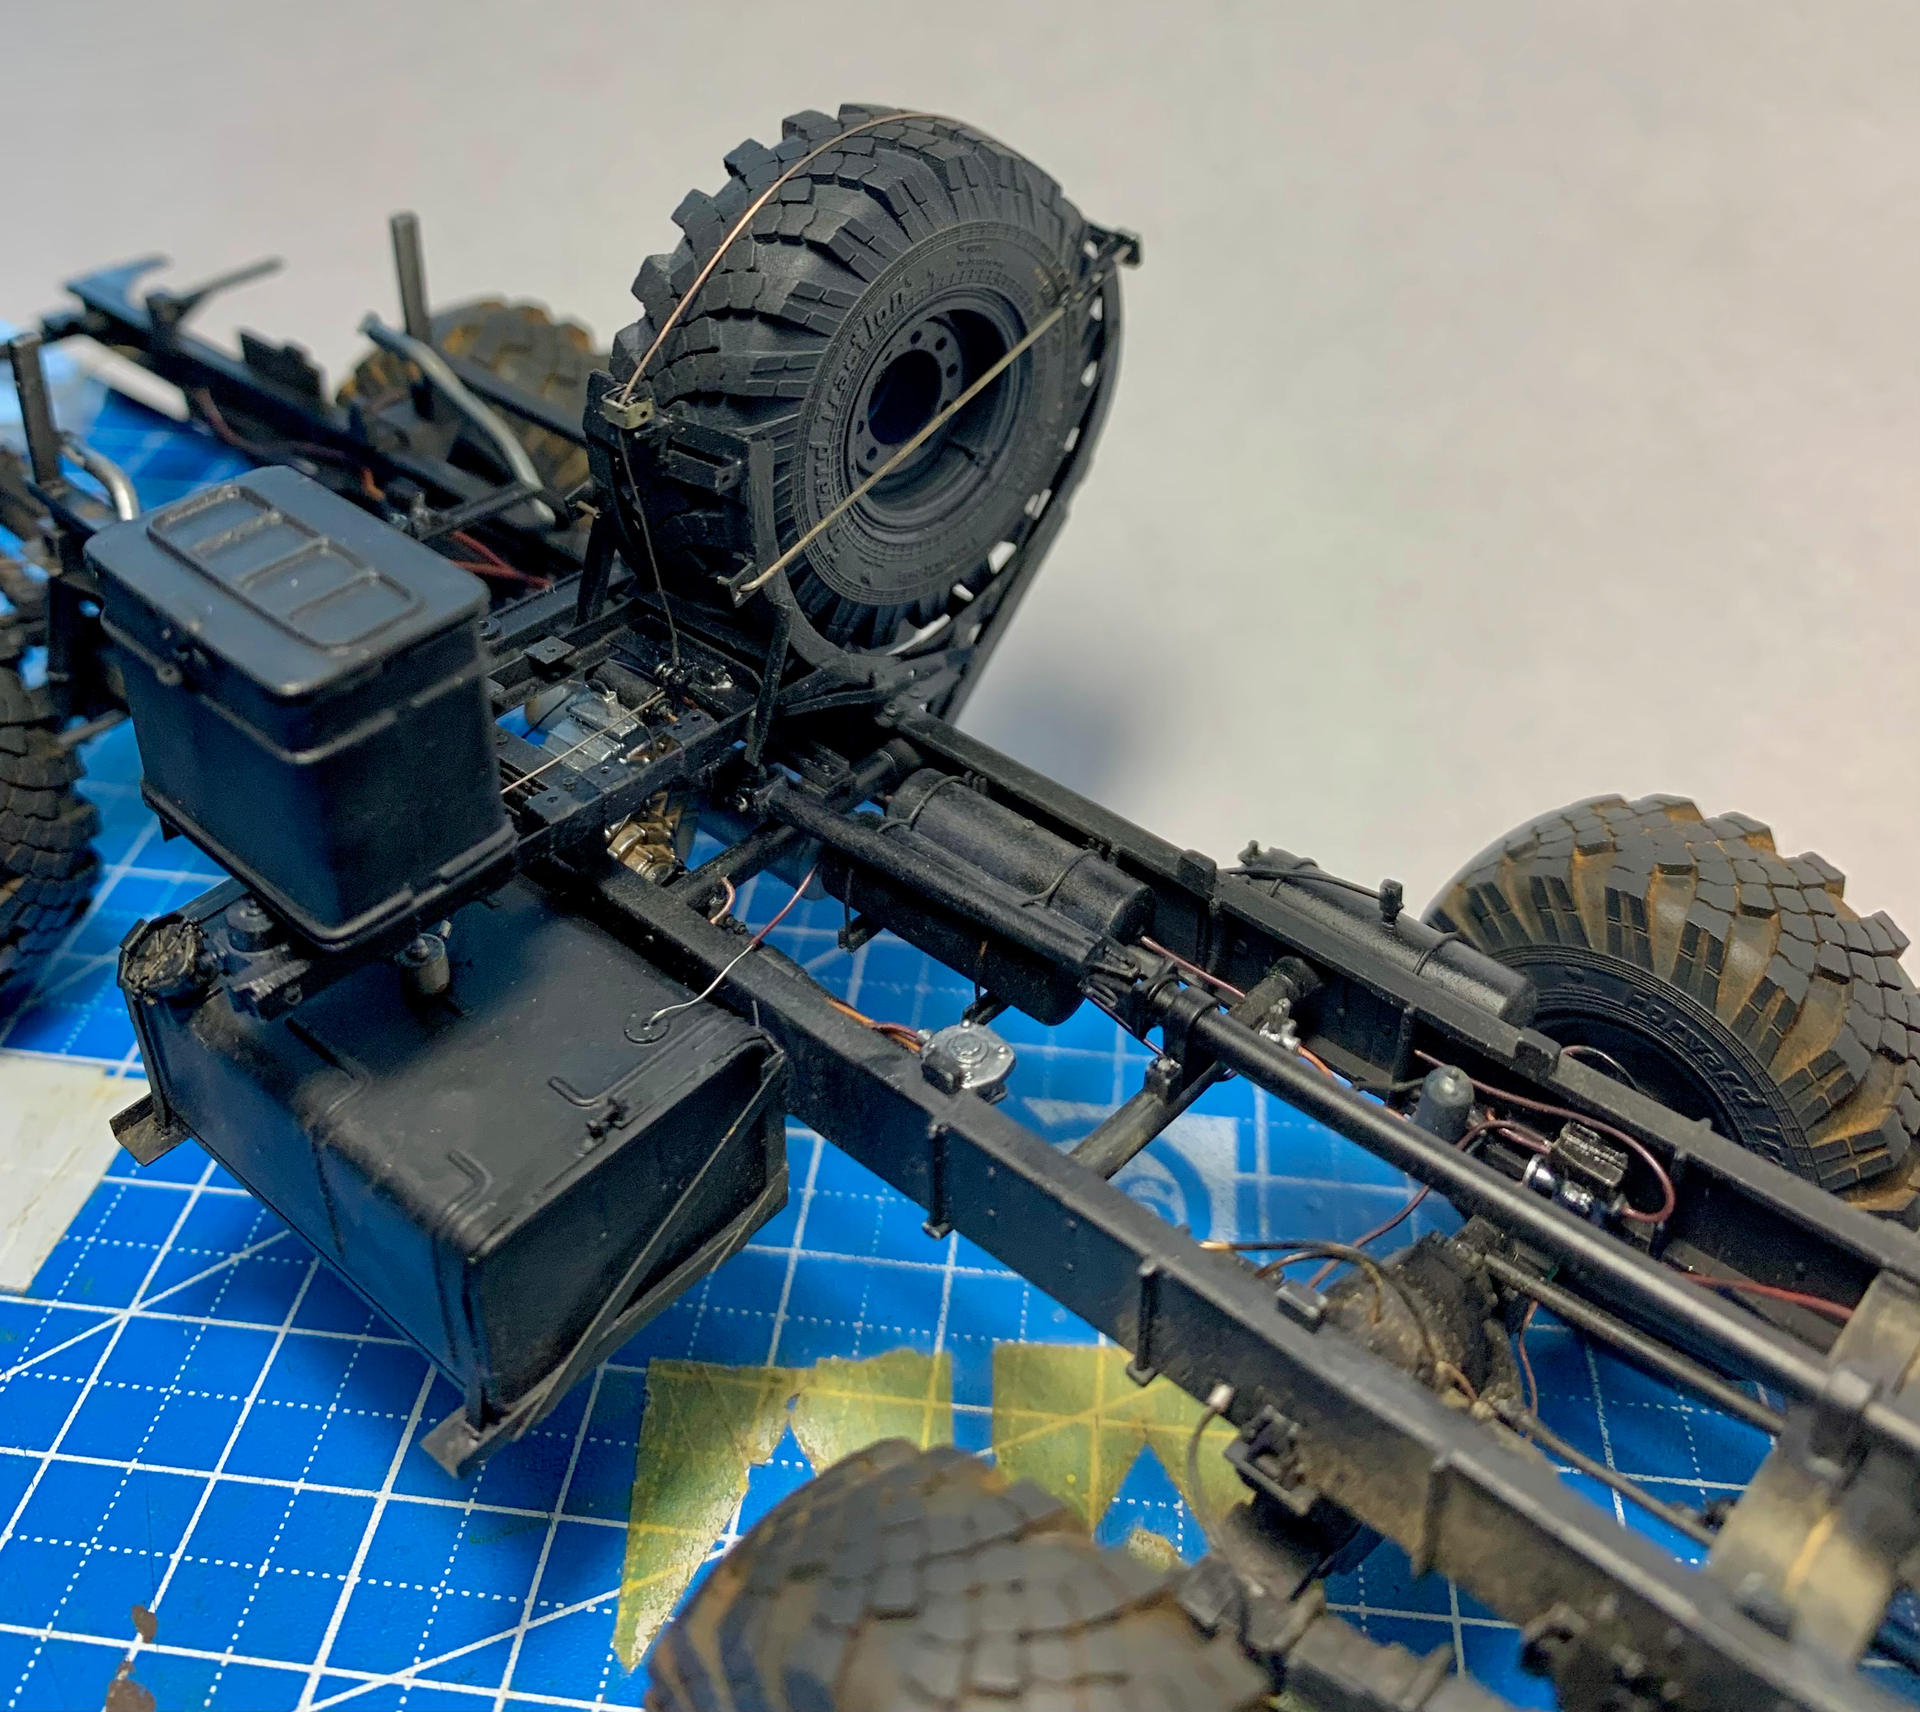
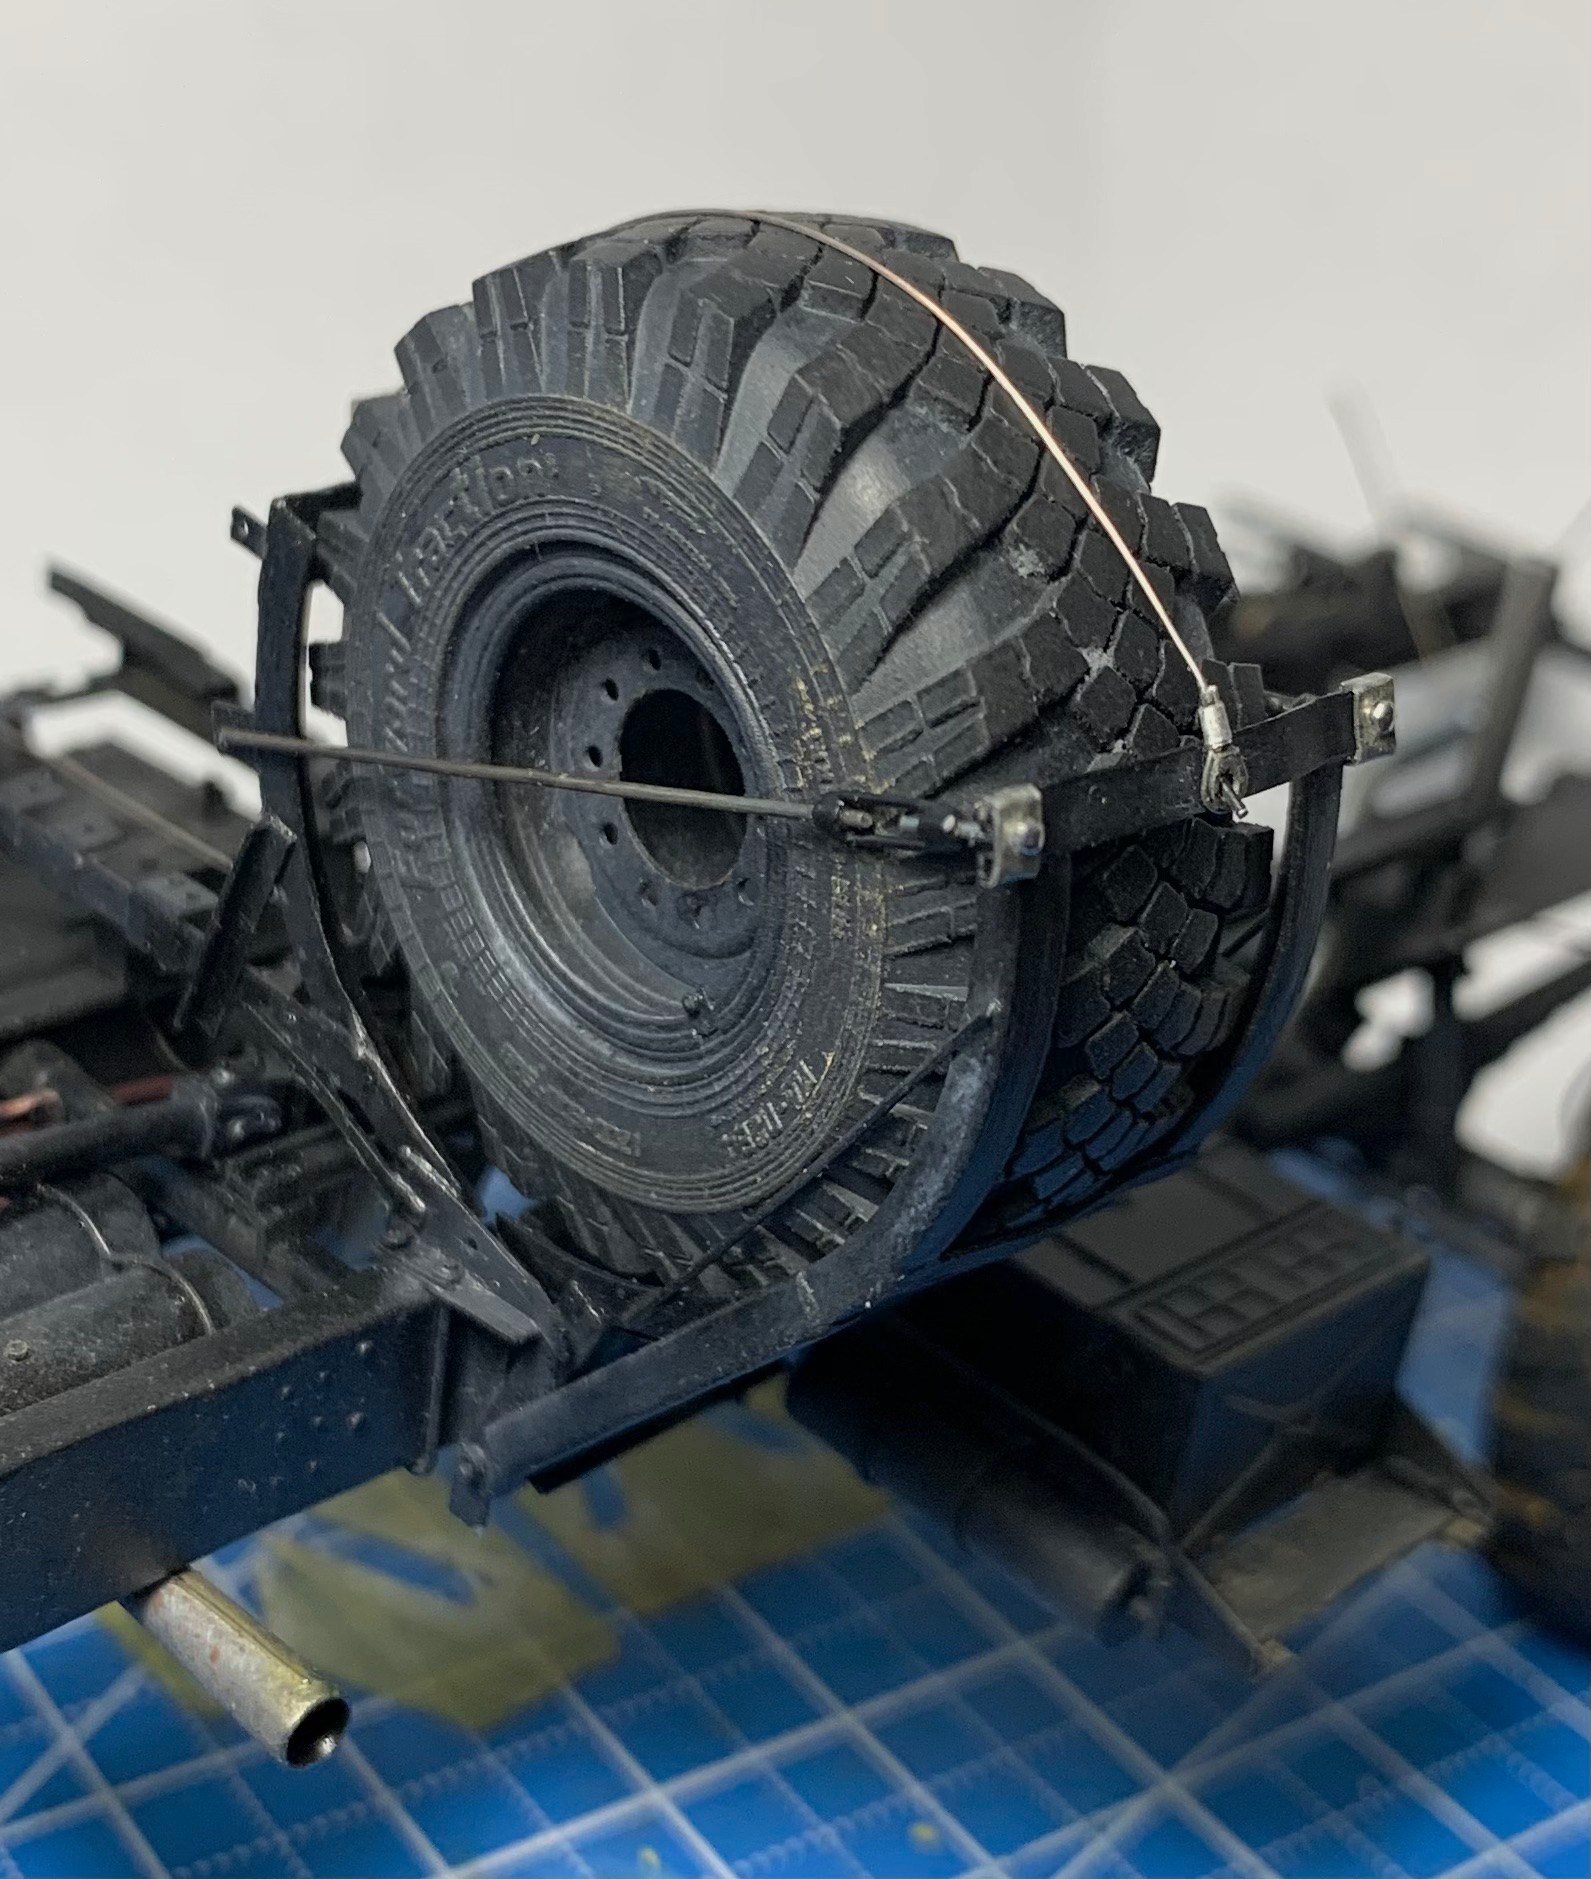
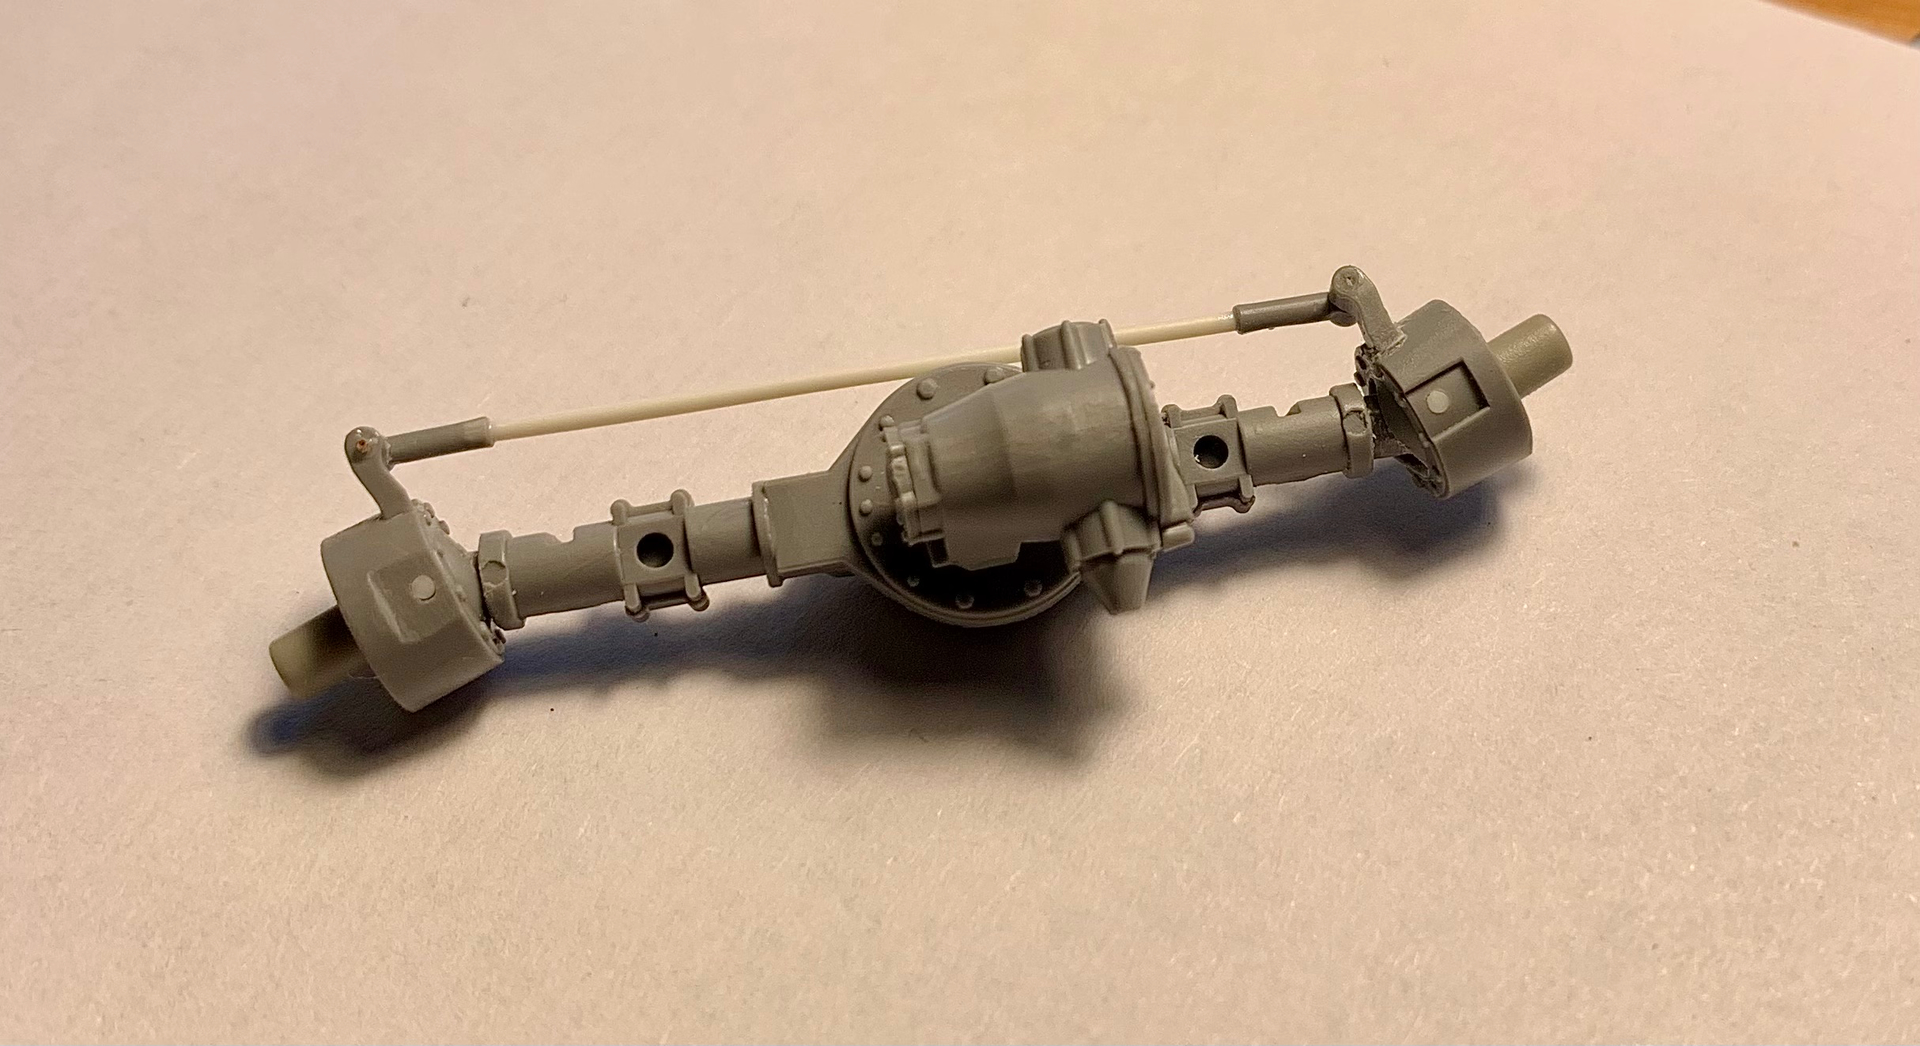
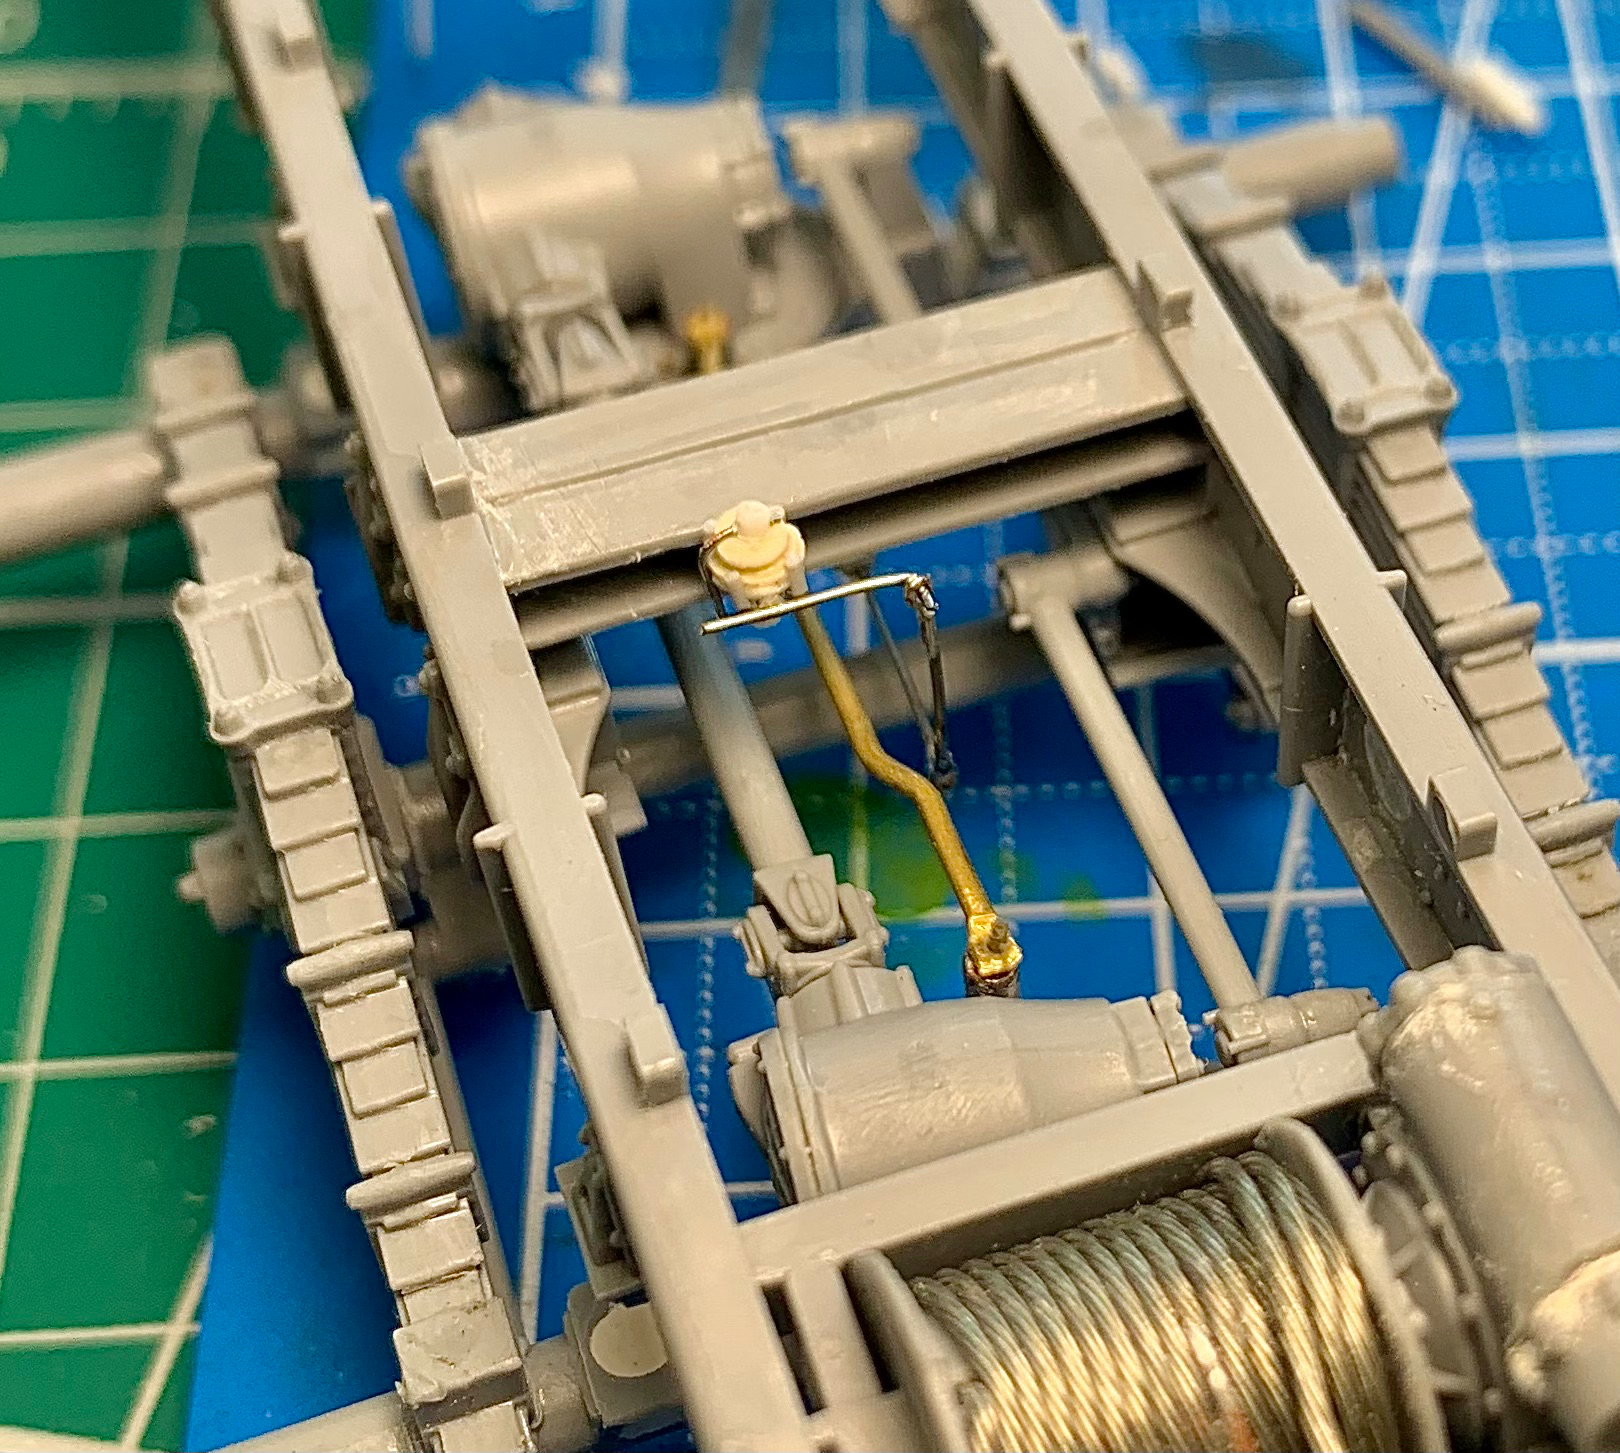
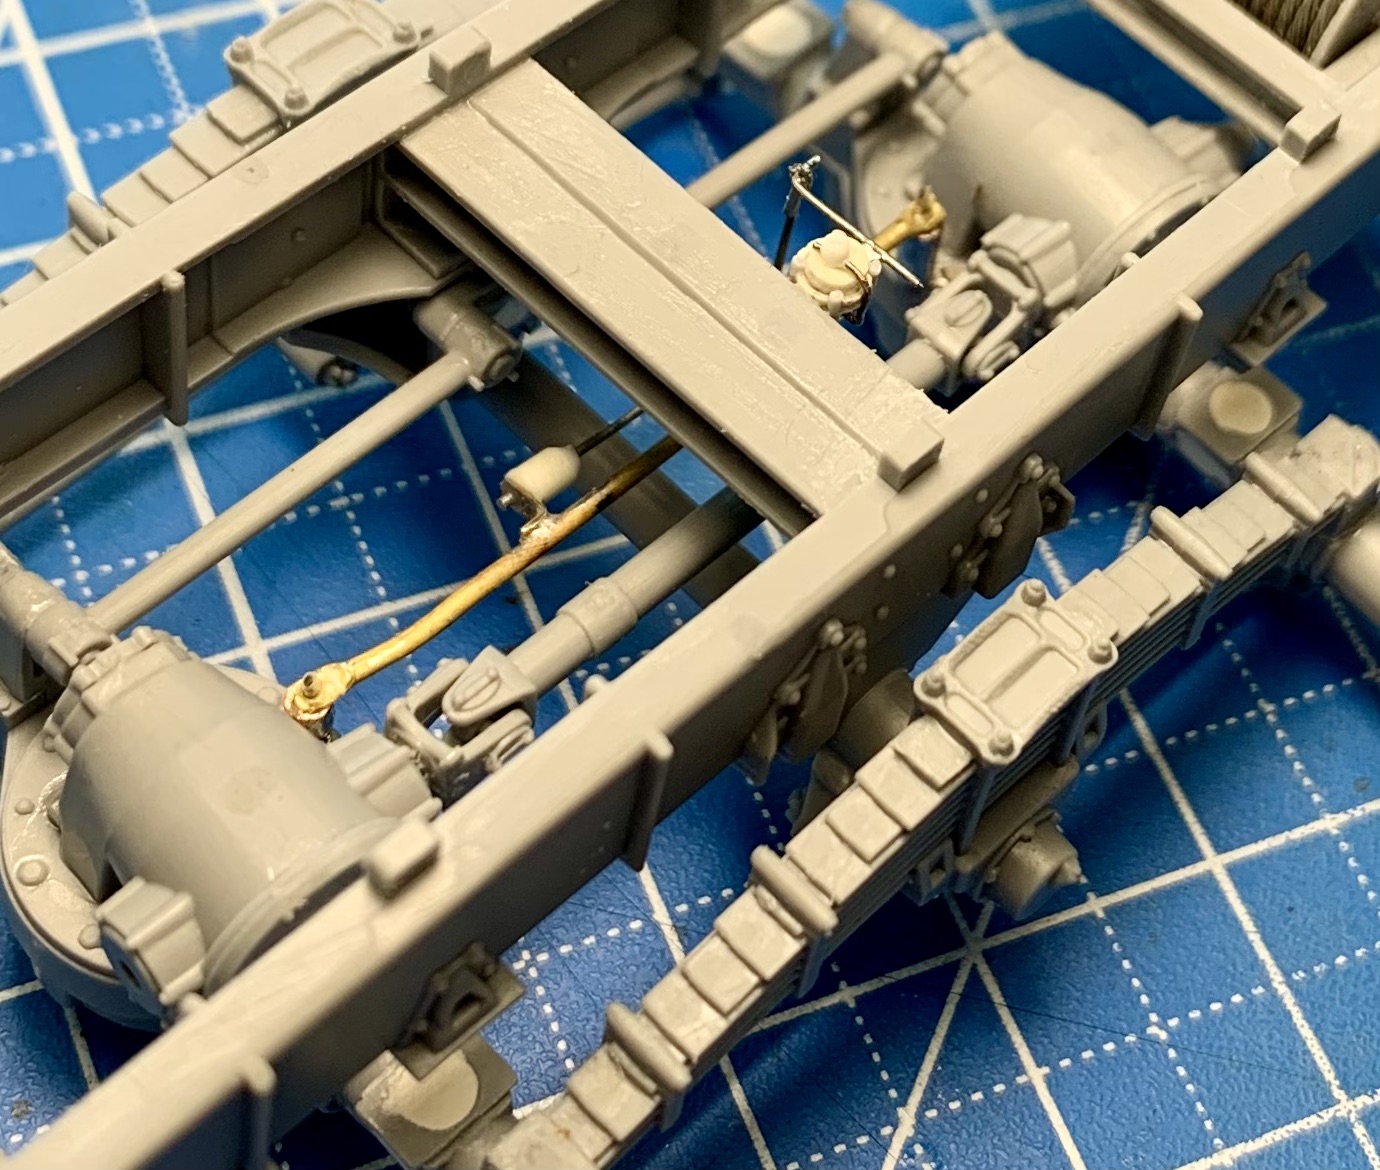
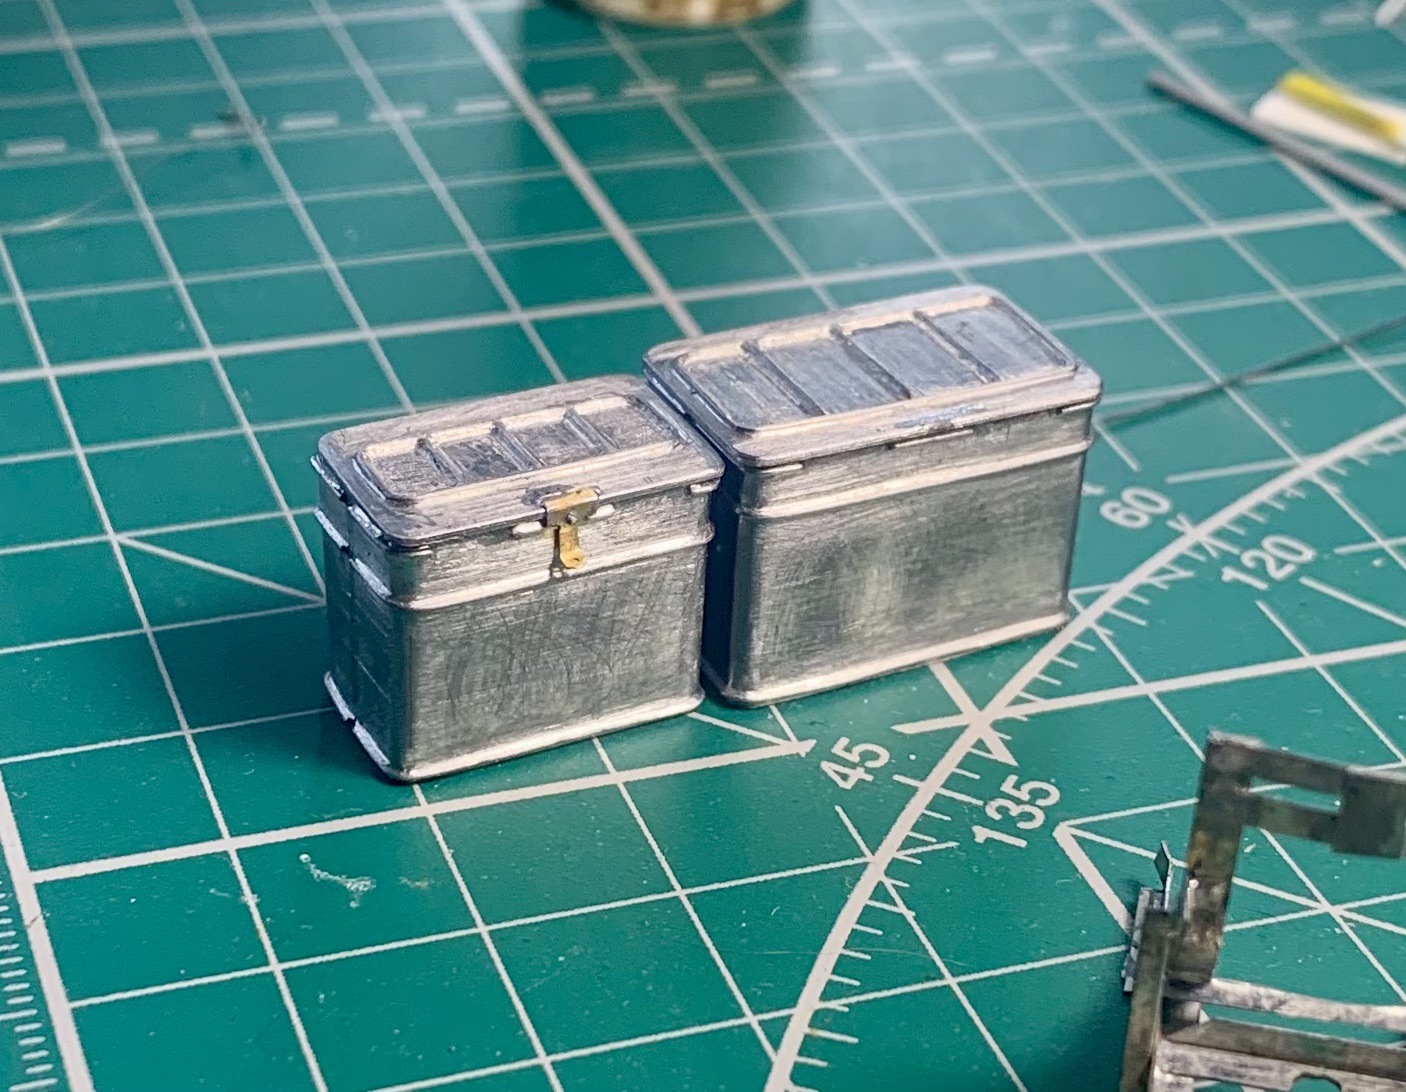
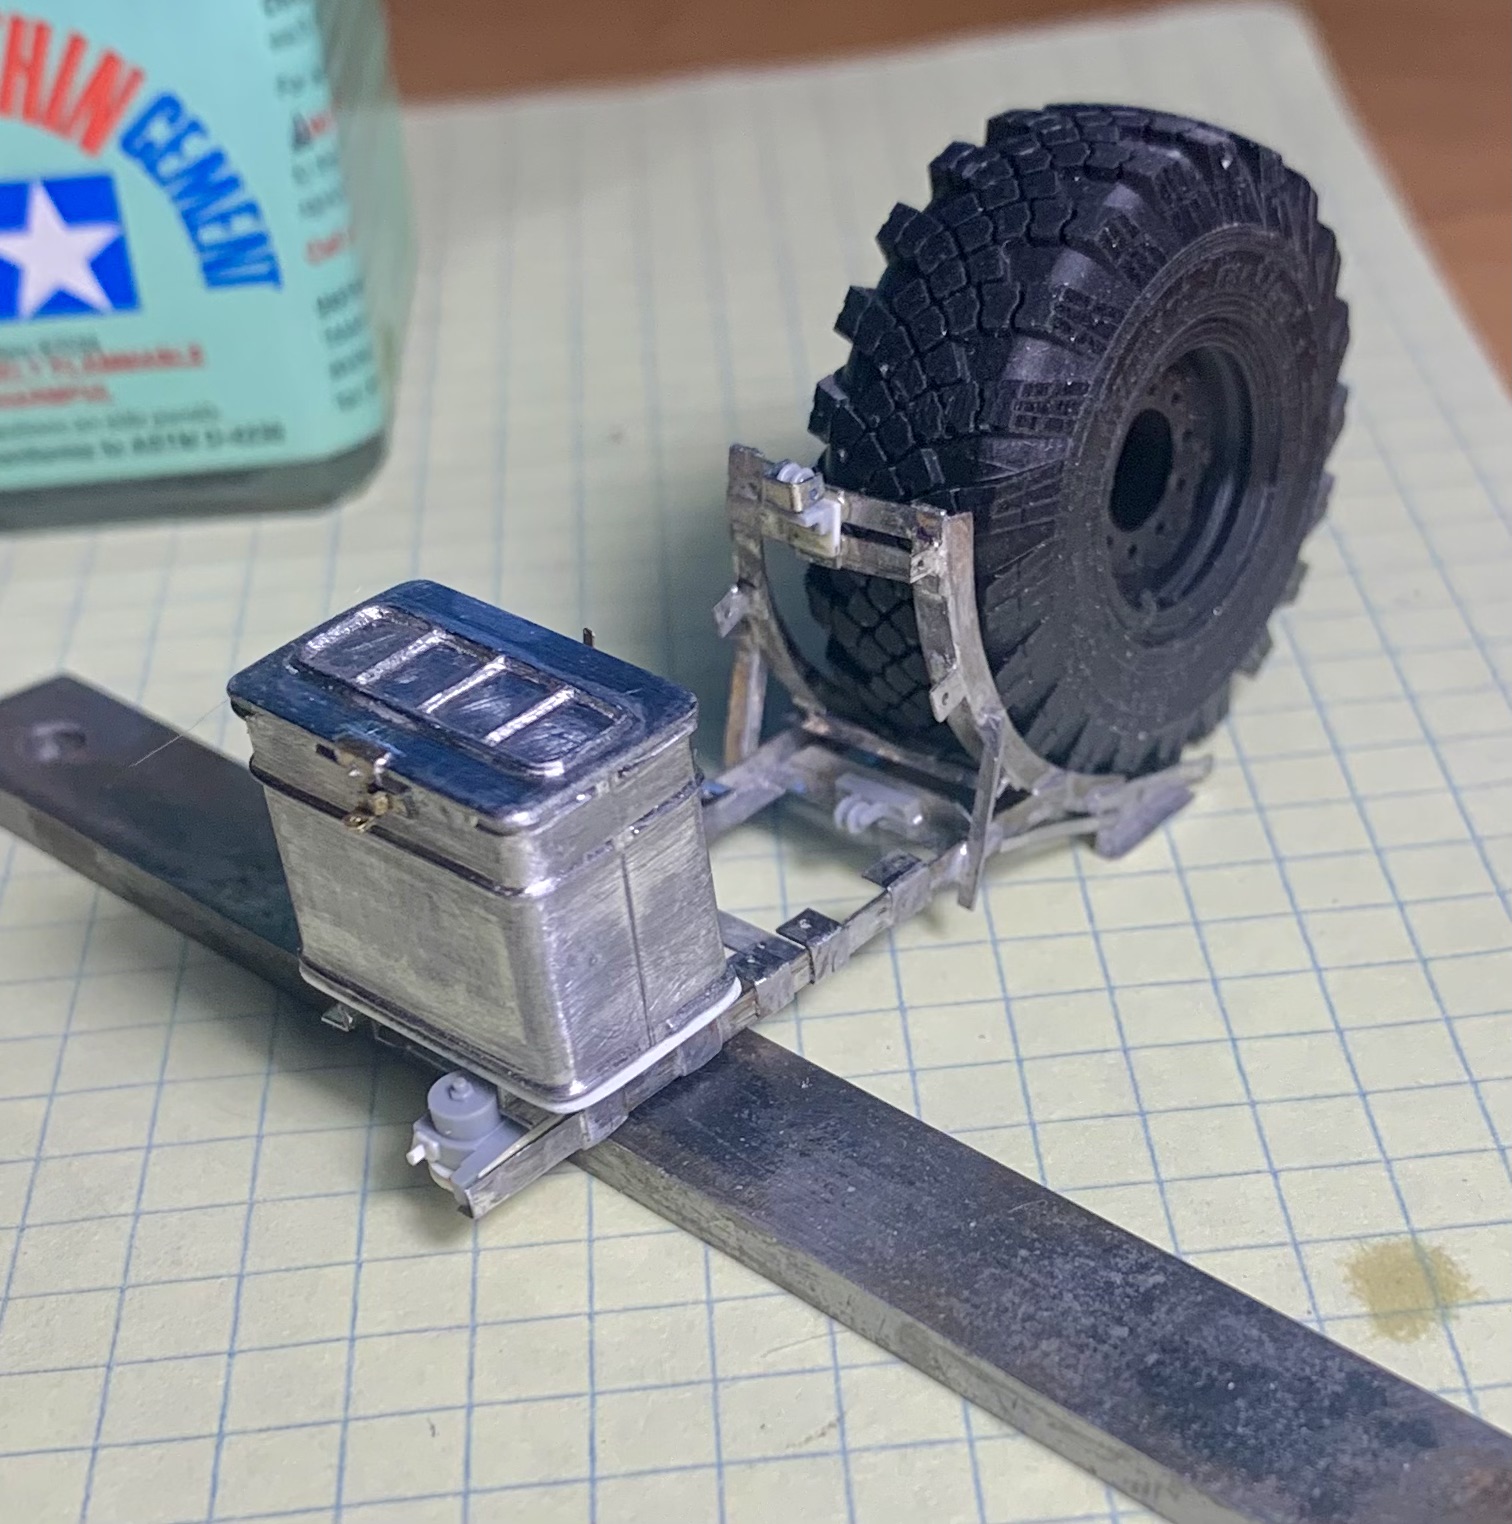
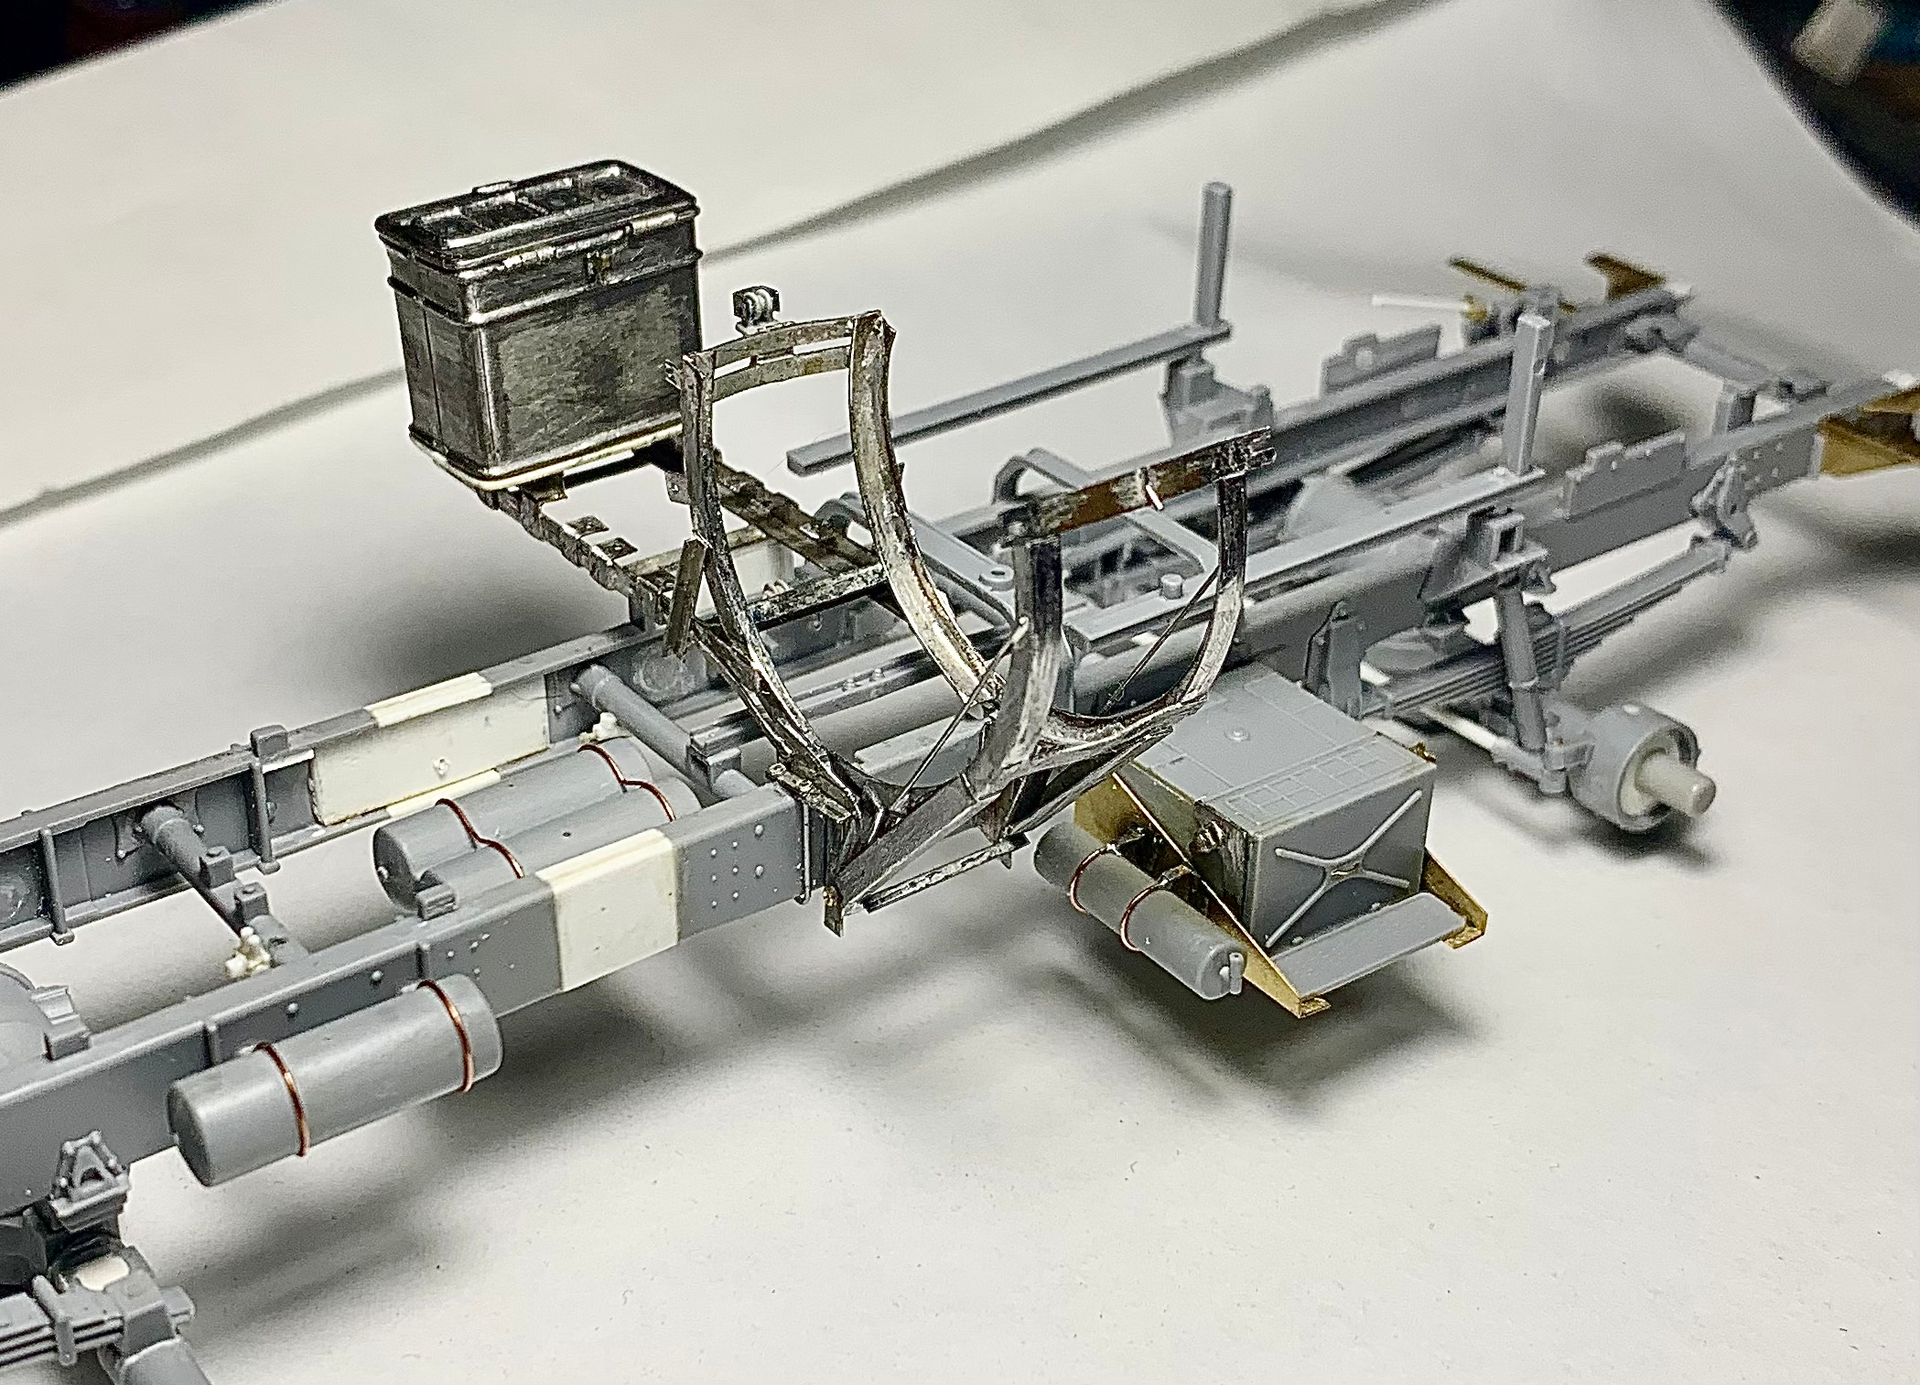
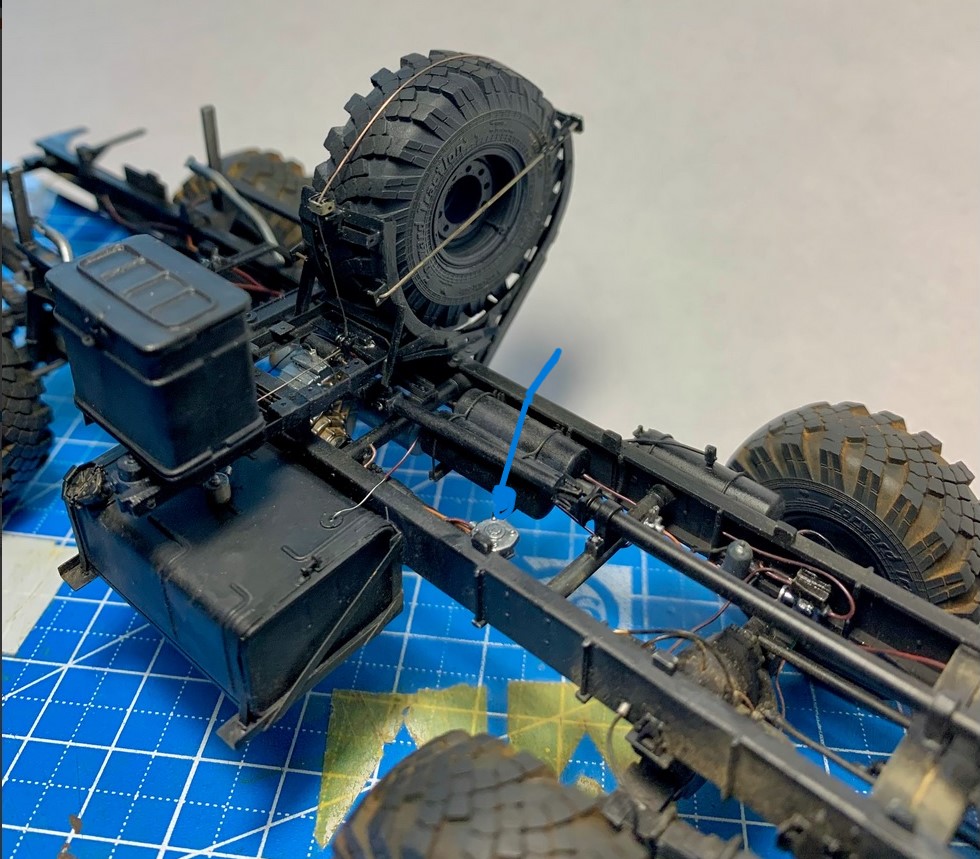
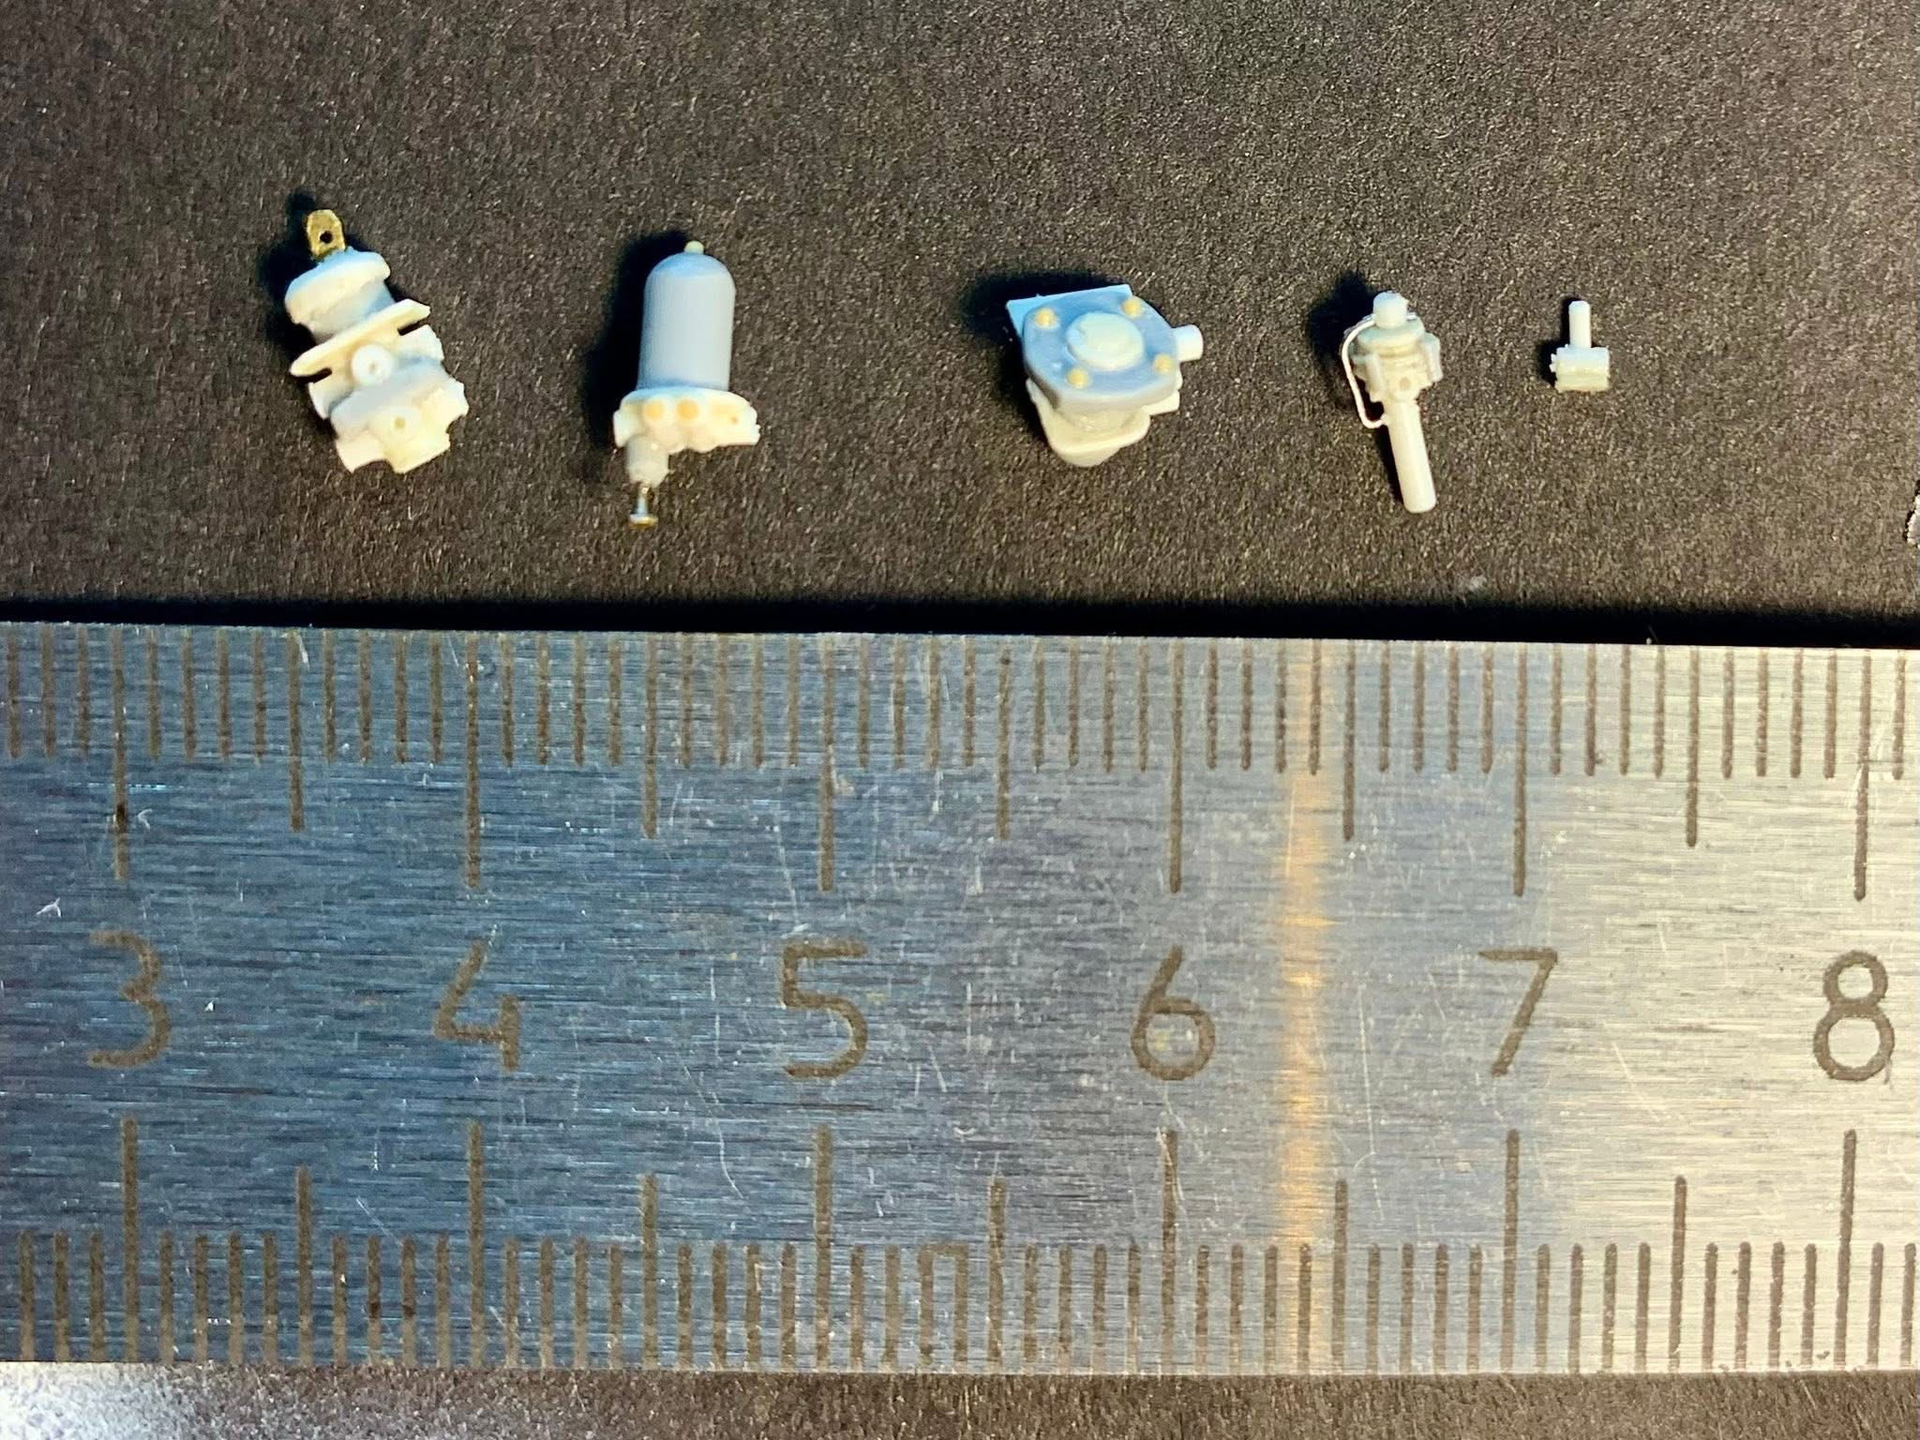
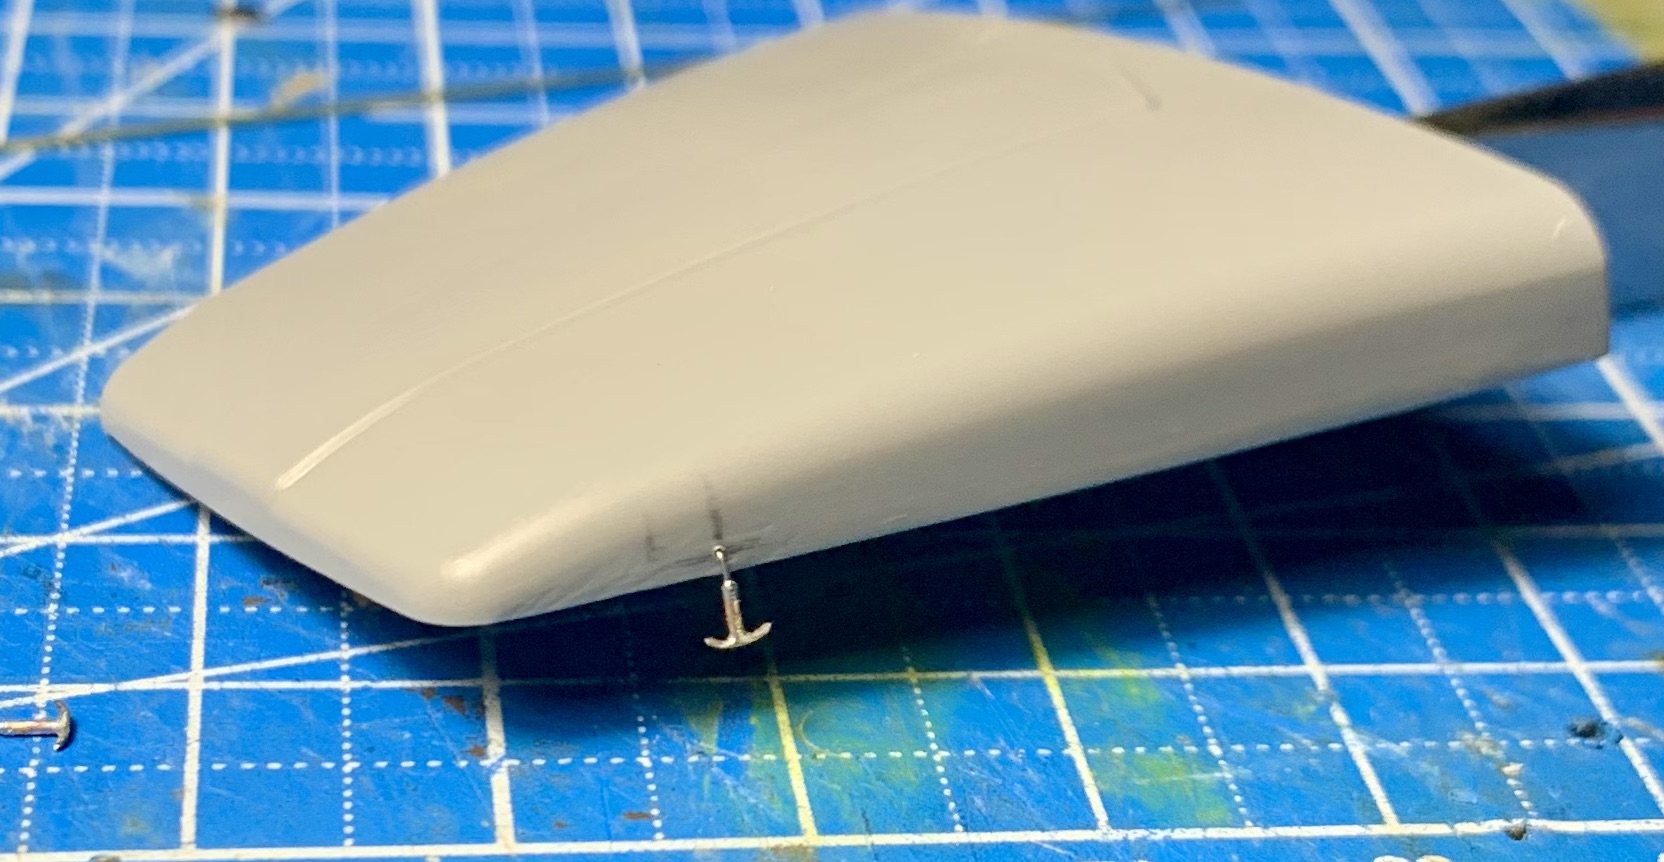
Hello, colleagues! The Ural 4320 model from the Zwith “minor” modifications: - the frame has been extended to 3800 mm. - a spare wheel mount has been made. - a new spare parts box has been made (I had to make two because I made a mistake with the size). - new mounts for the tail lights have been made. - small parts have been added to the frame (valves, regulators, etc.). - wiring has been added. - the front axle is pivoting… Only the frame is ready for now.


13 Likes

Simply incredible! Amazing job!
4 Likes

What was your process to build this?
2 Likes
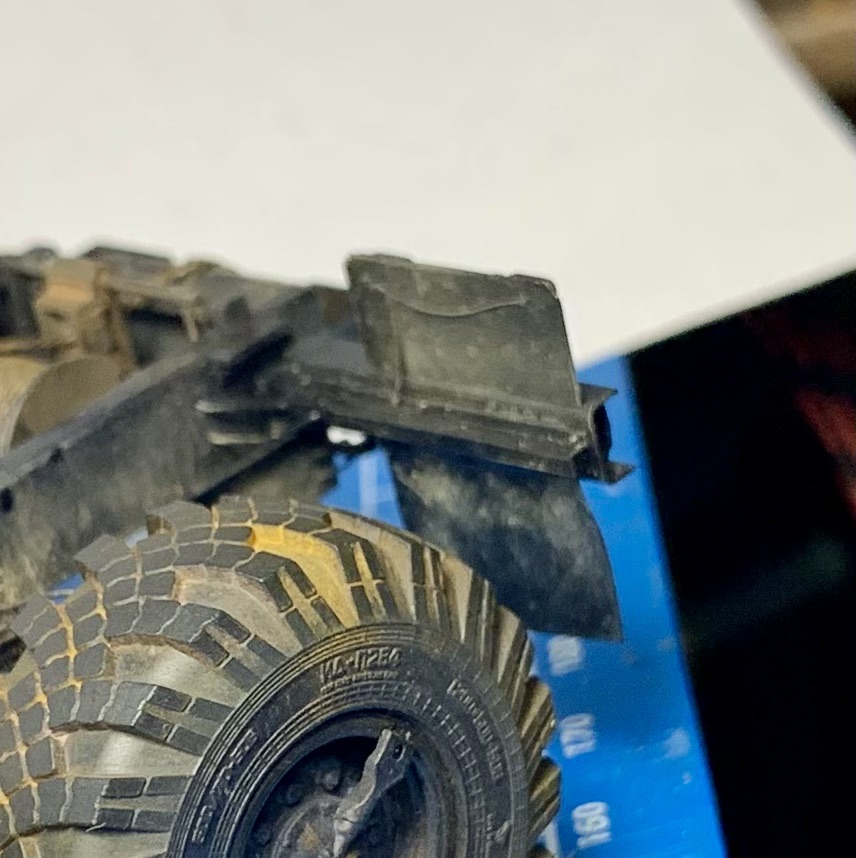
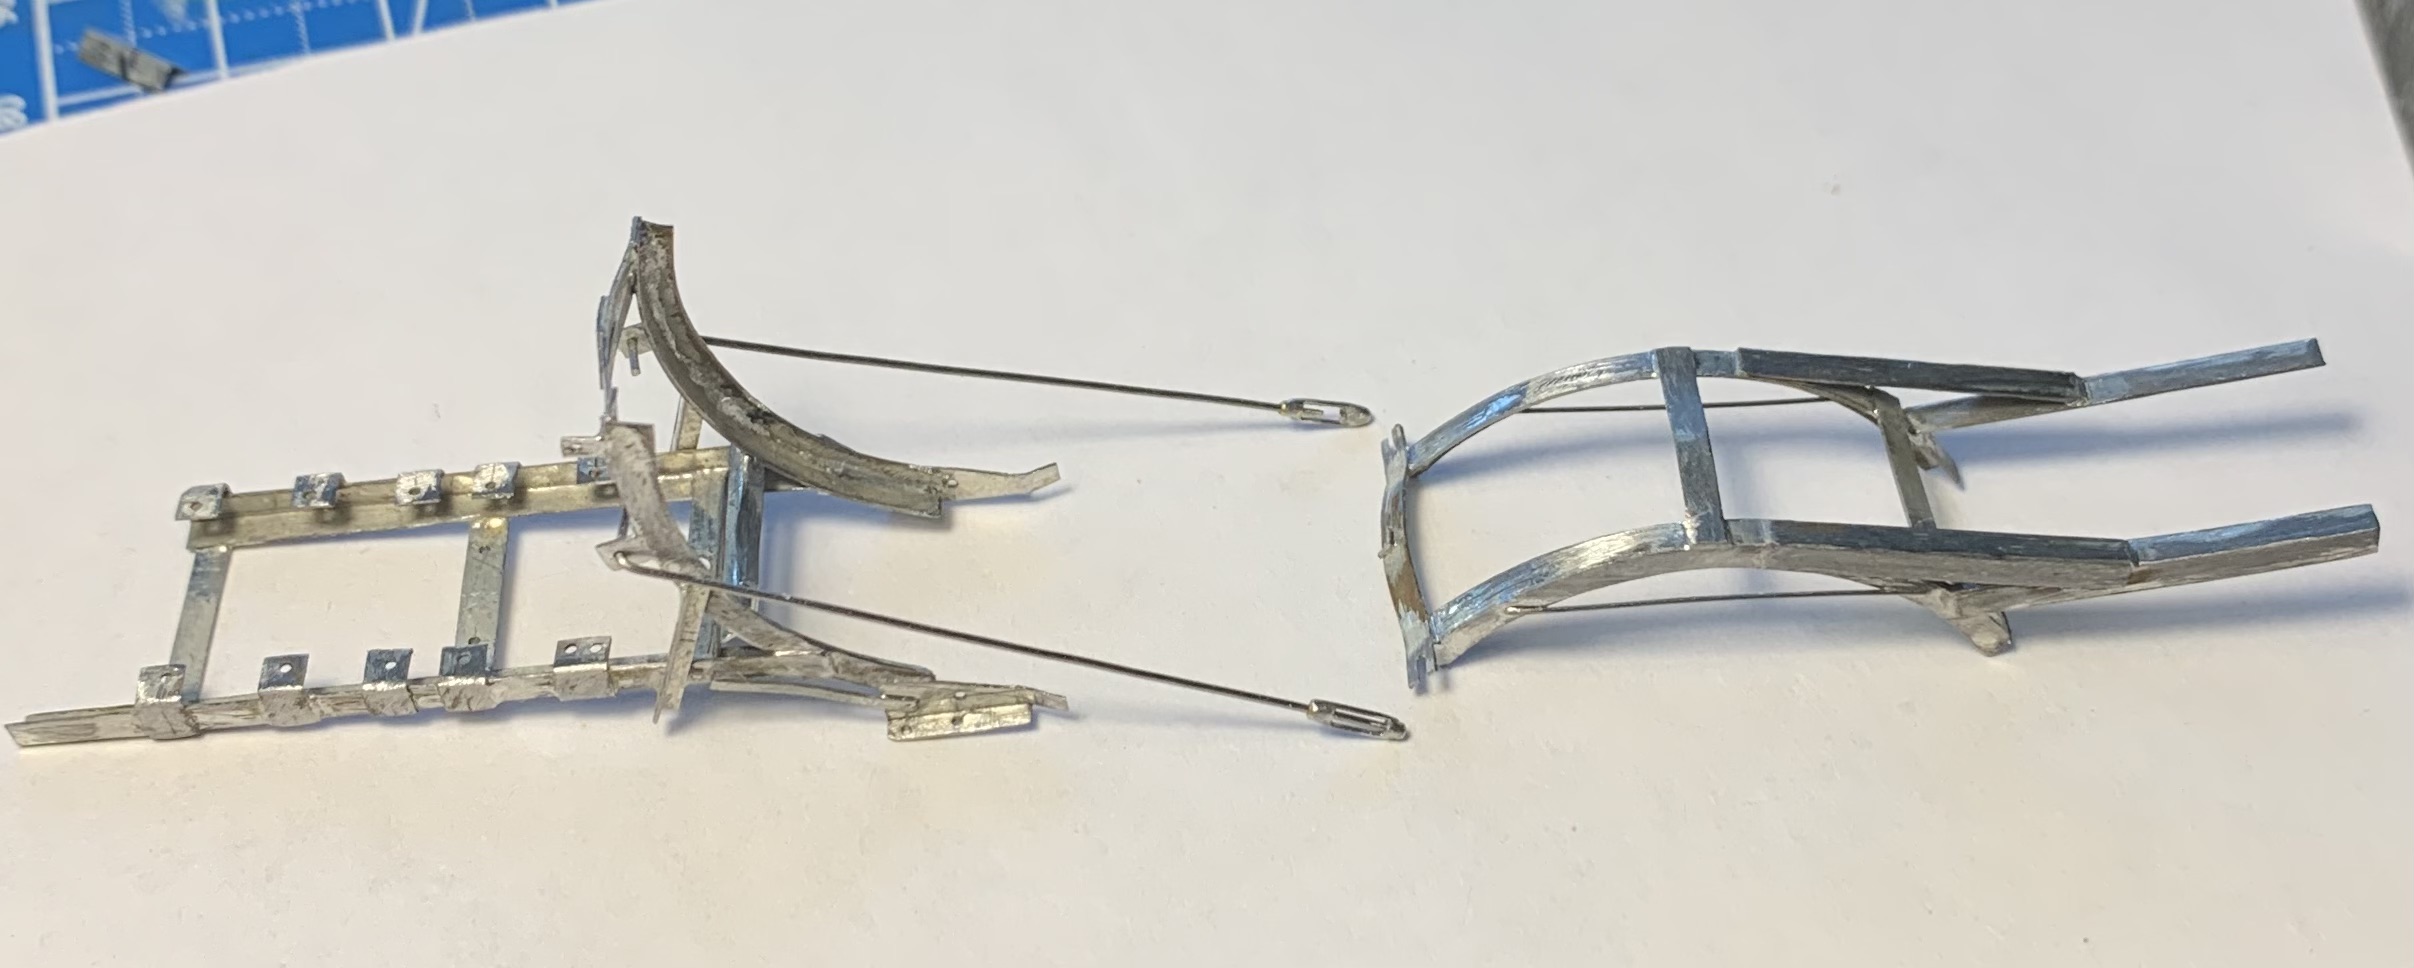
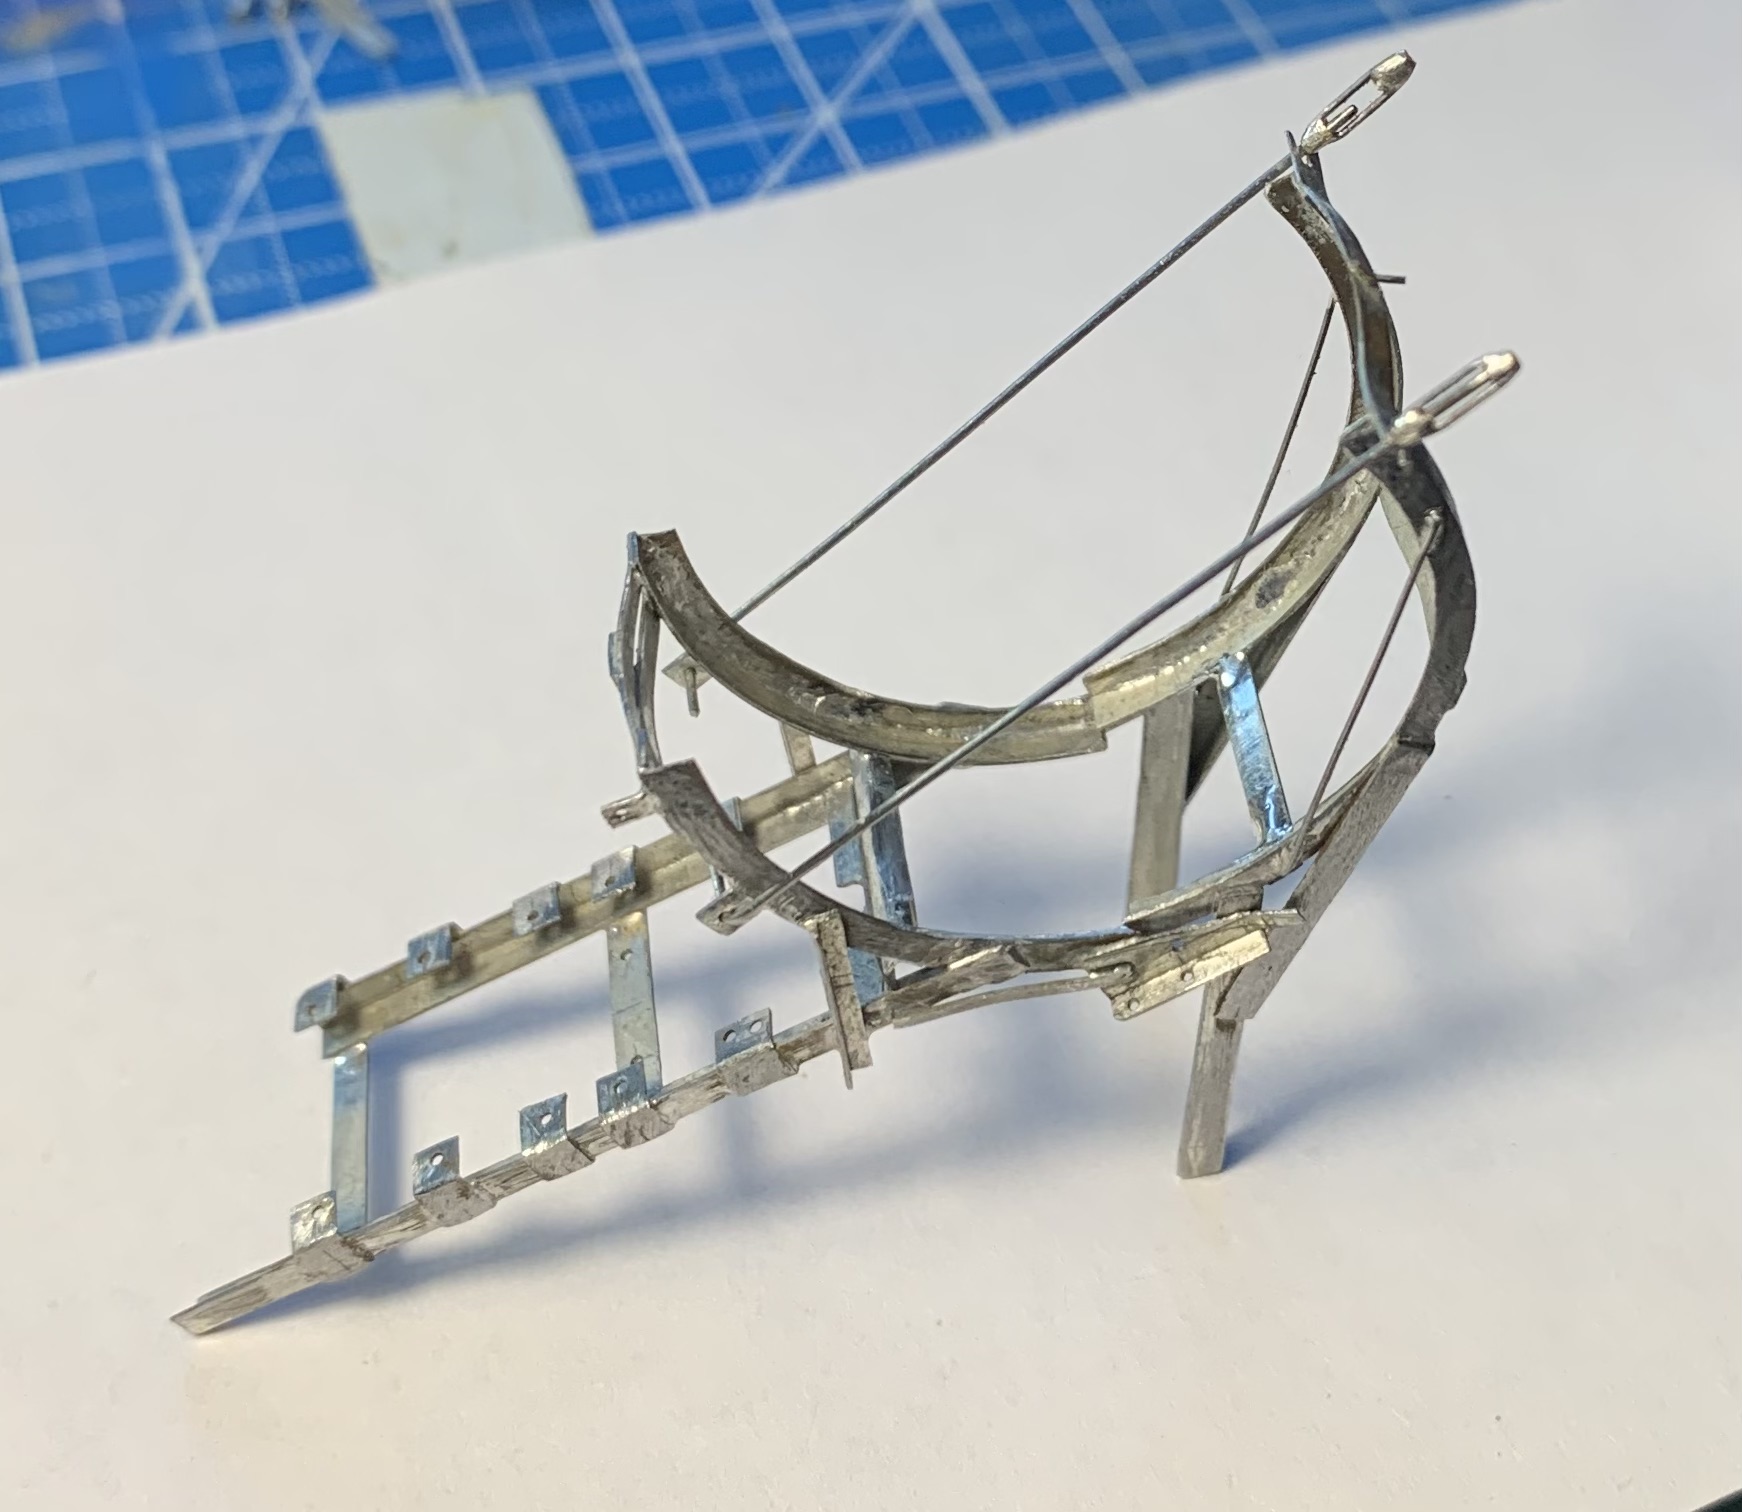
As for the spare tire holder, I used a plastic mount as a basis, but taking into account that a different width wheel will be used. Photo from the Internet, 0.2mm metal + soldering iron.
6 Likes
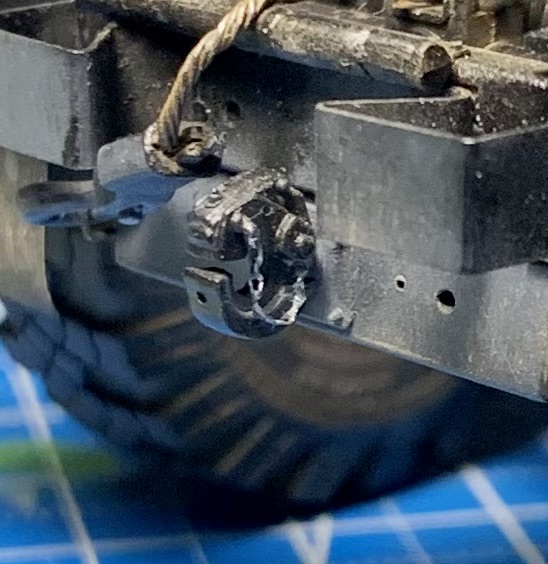
Absolutely fantastic work, it couldn’t be better. The replica of the brake system, especially the WABCO valves, is amazing. Do you have practical experience or did you build it from pictures? You might need to add a second coupling head to the rear crossmember, since you’ve installed a two-line trailer control valve on your model. Here’s the valve I’m referring to. I’m very excited to see how the build progresses.
9 Likes
Thank you Joachim ! I didn’t go into detail on this model to ensure 100% compliance with the hoses and wiring. I took the main components from this diagram.

6 Likes
Vladimir, those brake valves are fantastic! Do you make them yourself? If so, make more and sell them on eBay. I’d be your first customer. They’re exactly the same as the original valves. Enjoy your continued building.
Regards, Joachim
5 Likes
That’s some serious work, man. Incredible.
3 Likes

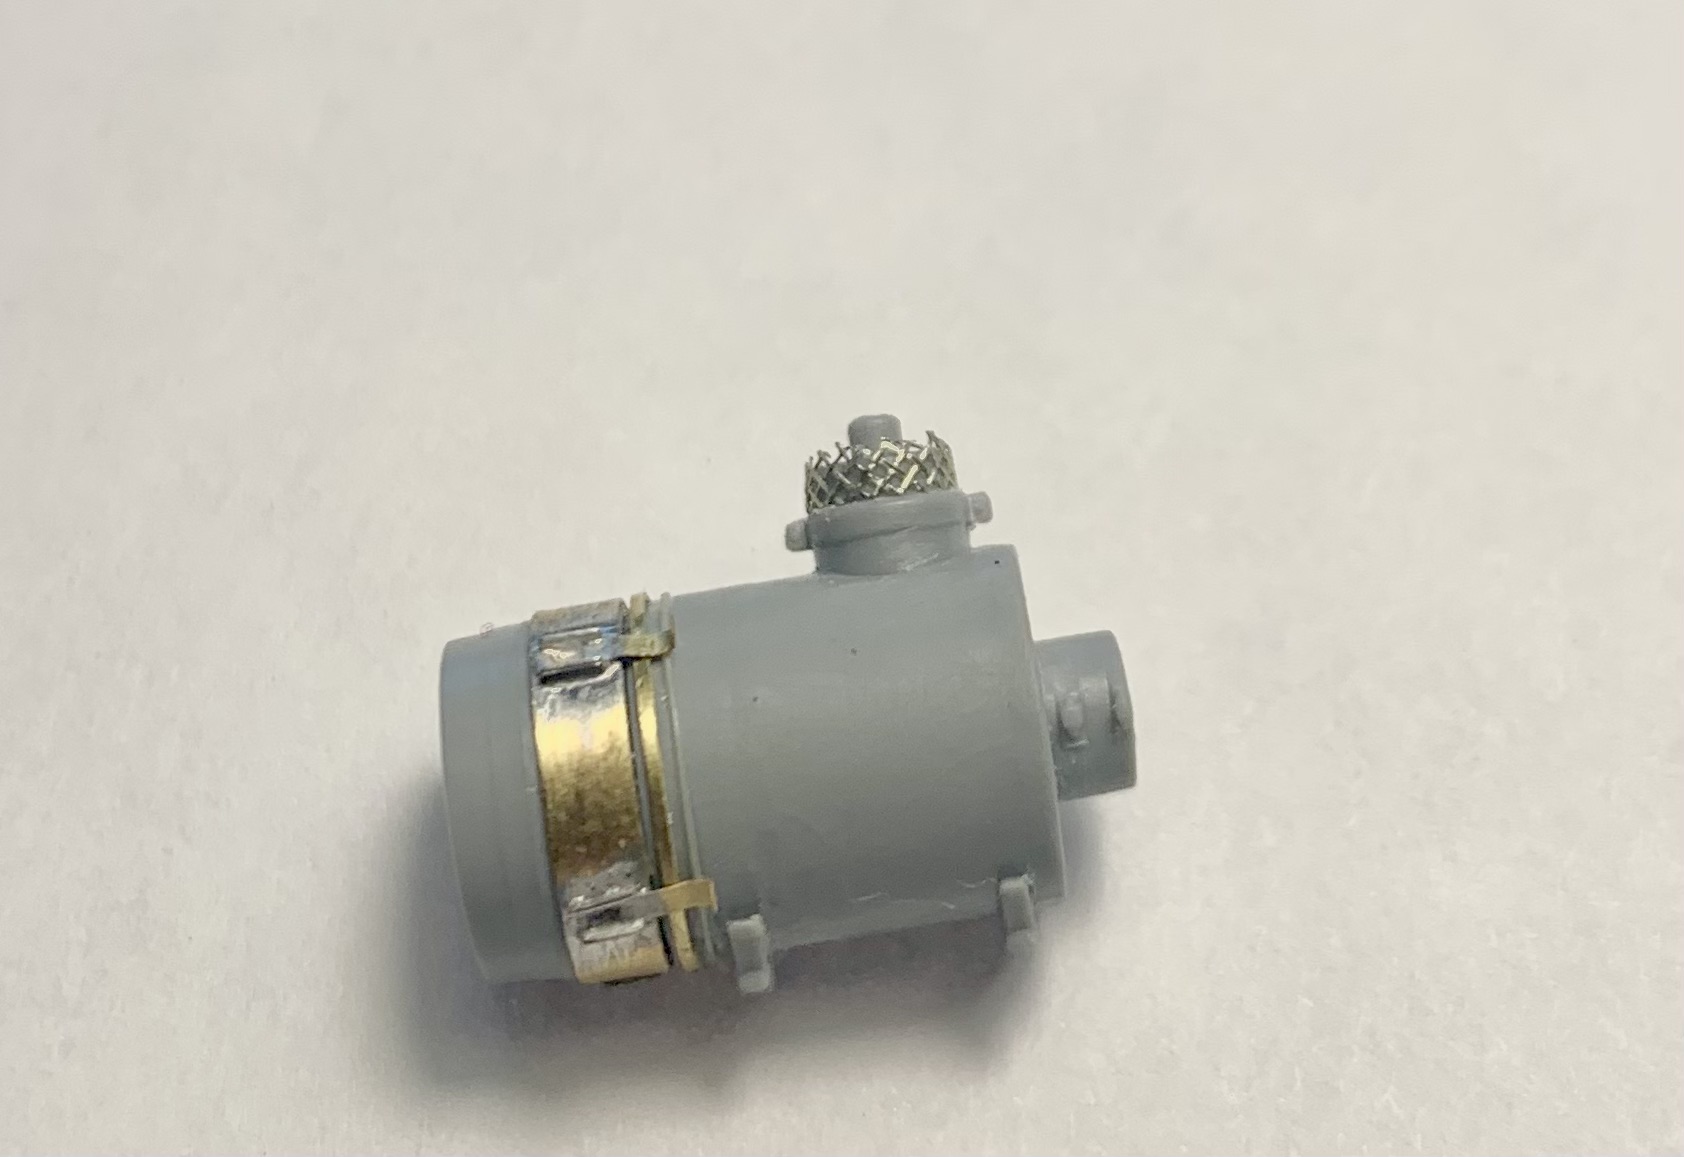
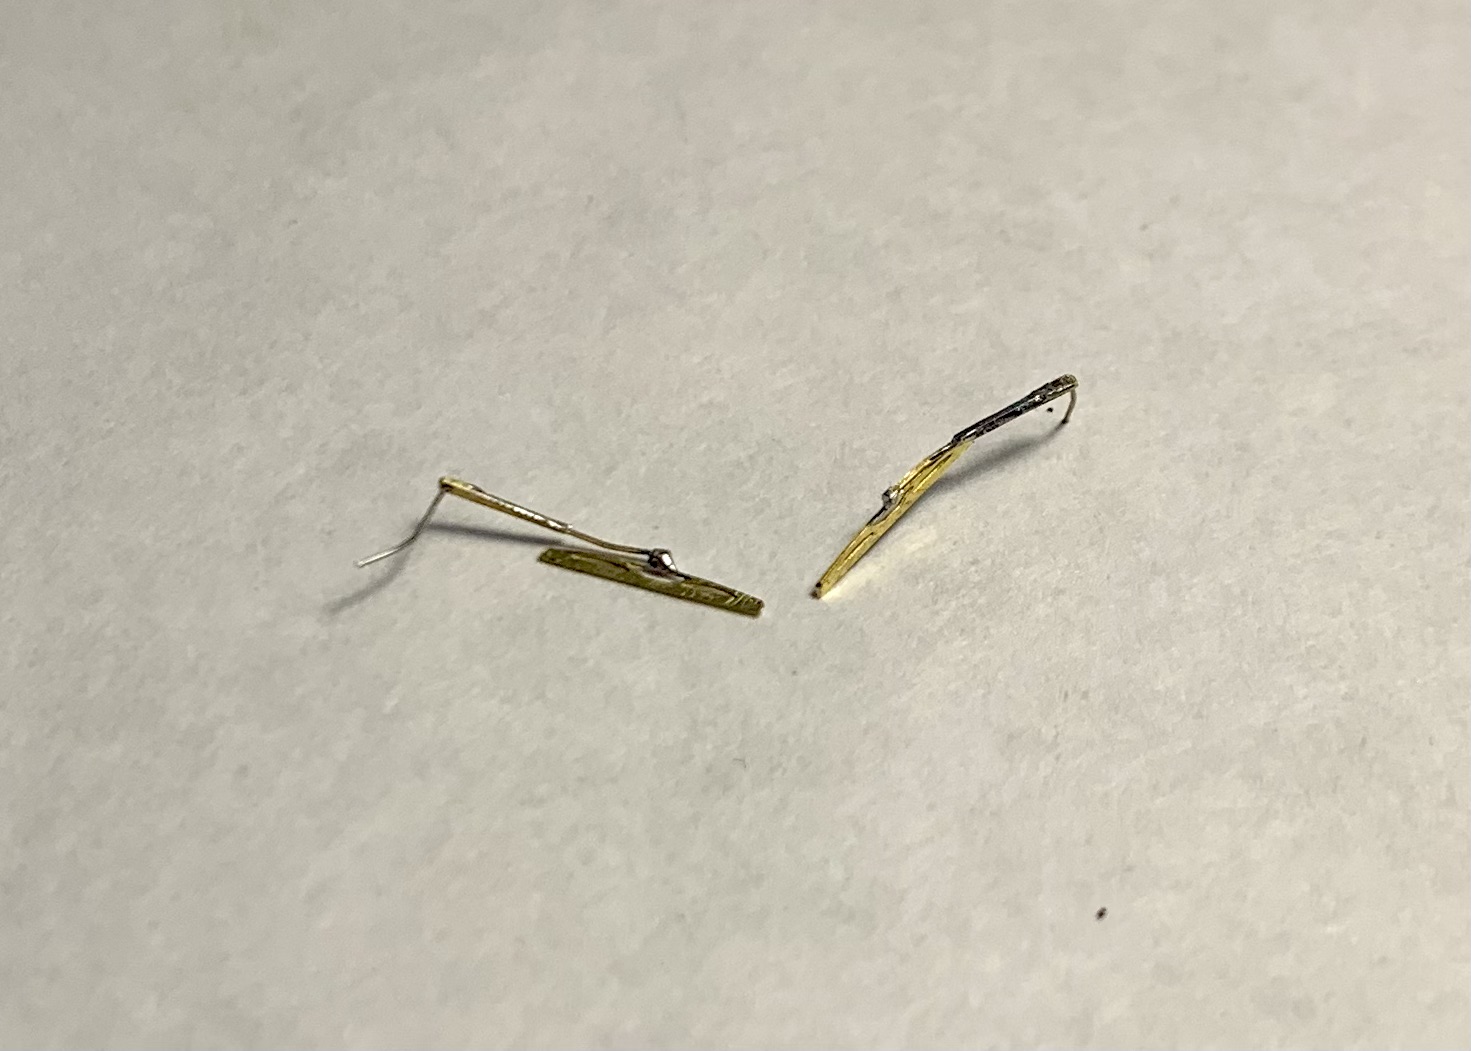
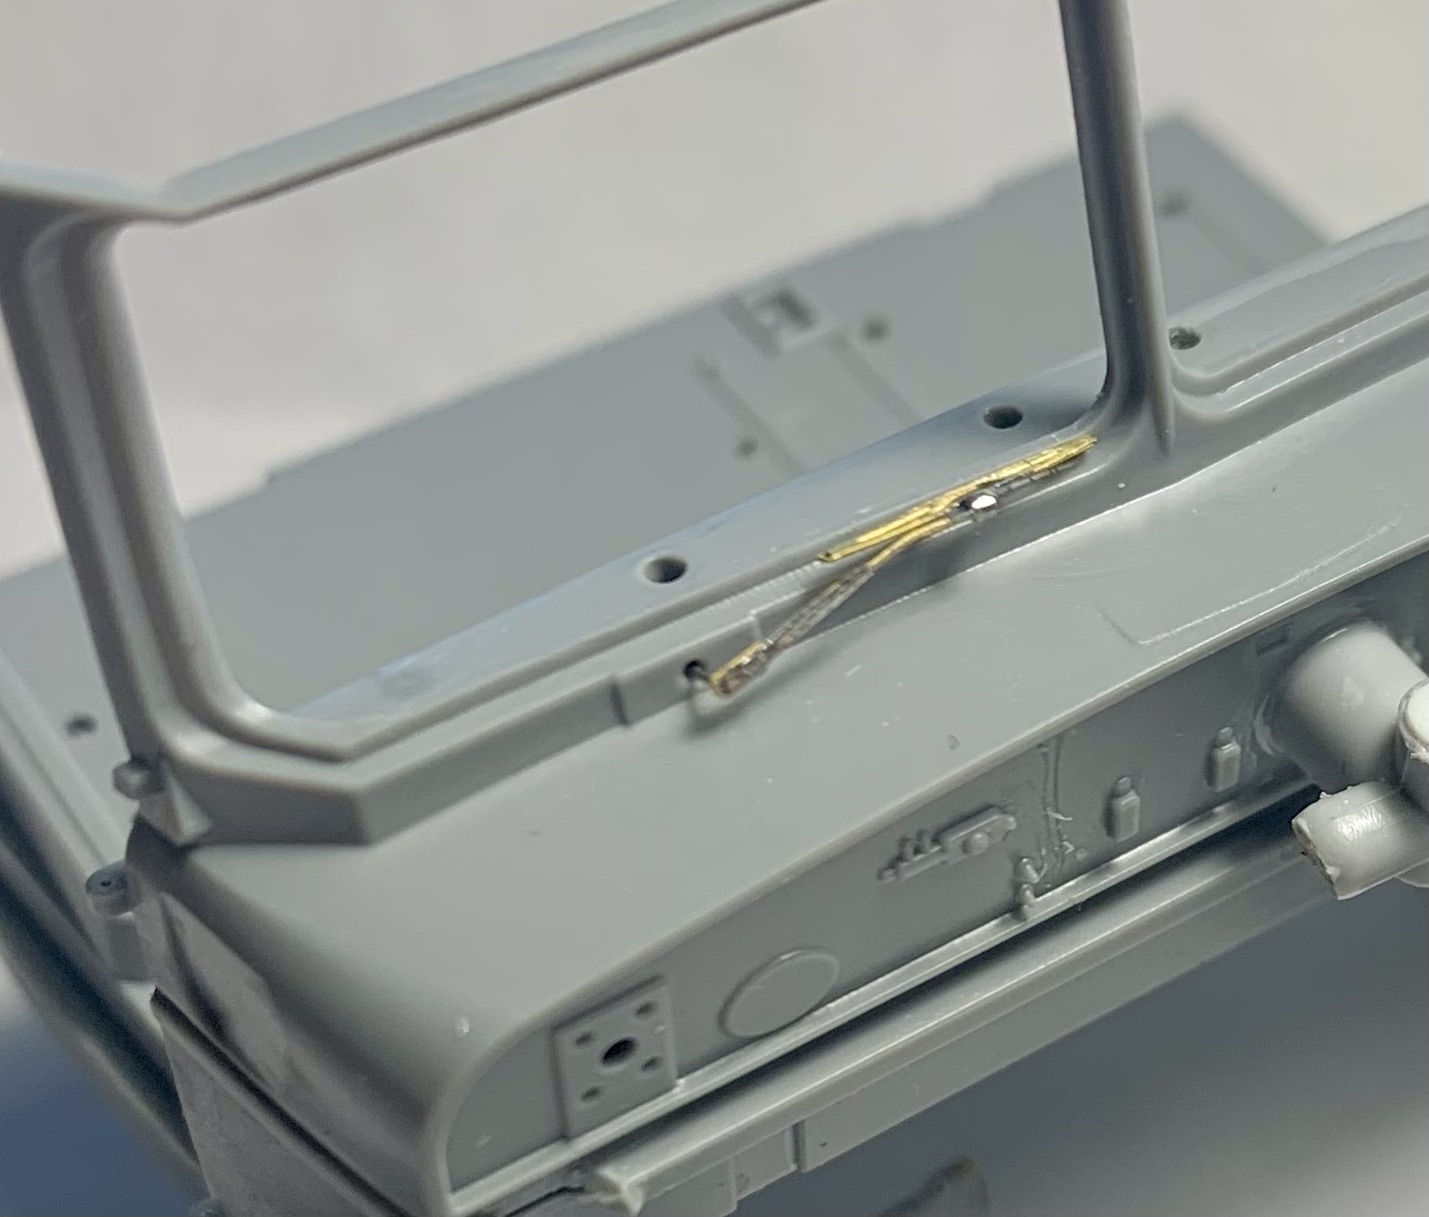
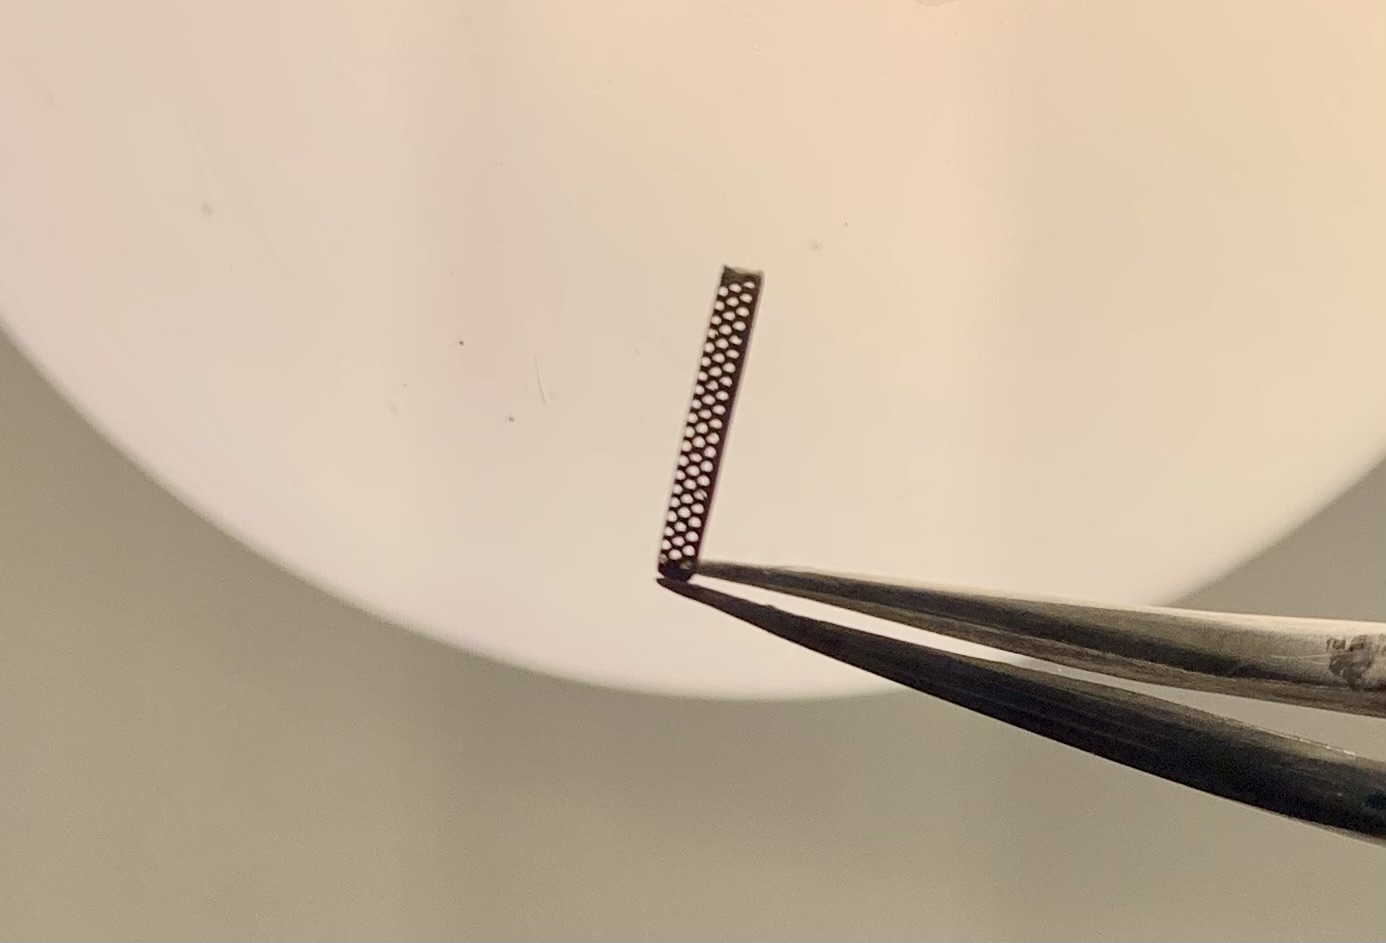
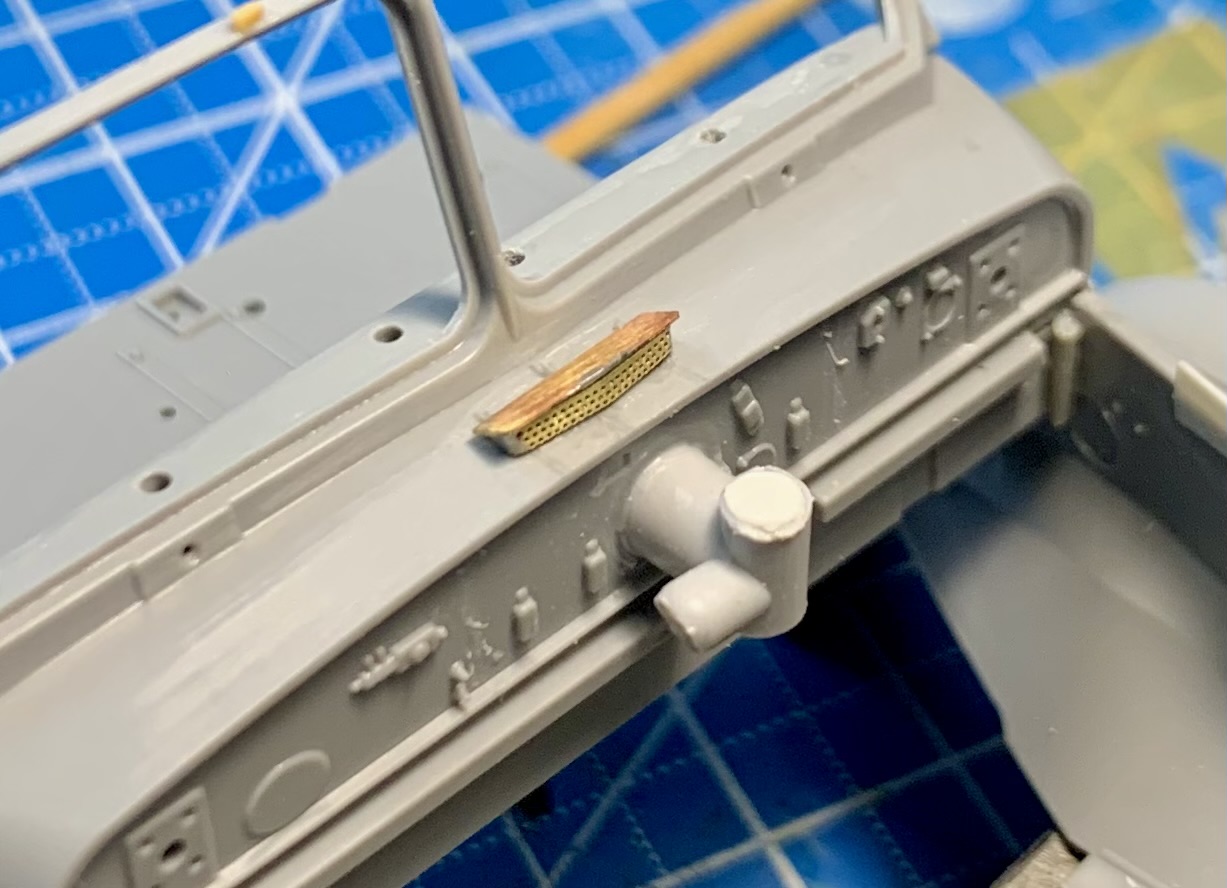
A few homemade parts. The plastic ribbing on the filter was removed, new plastic and metal rings were made, and a mesh was added. The windshield wipers are etched with some modifications.

9 Likes
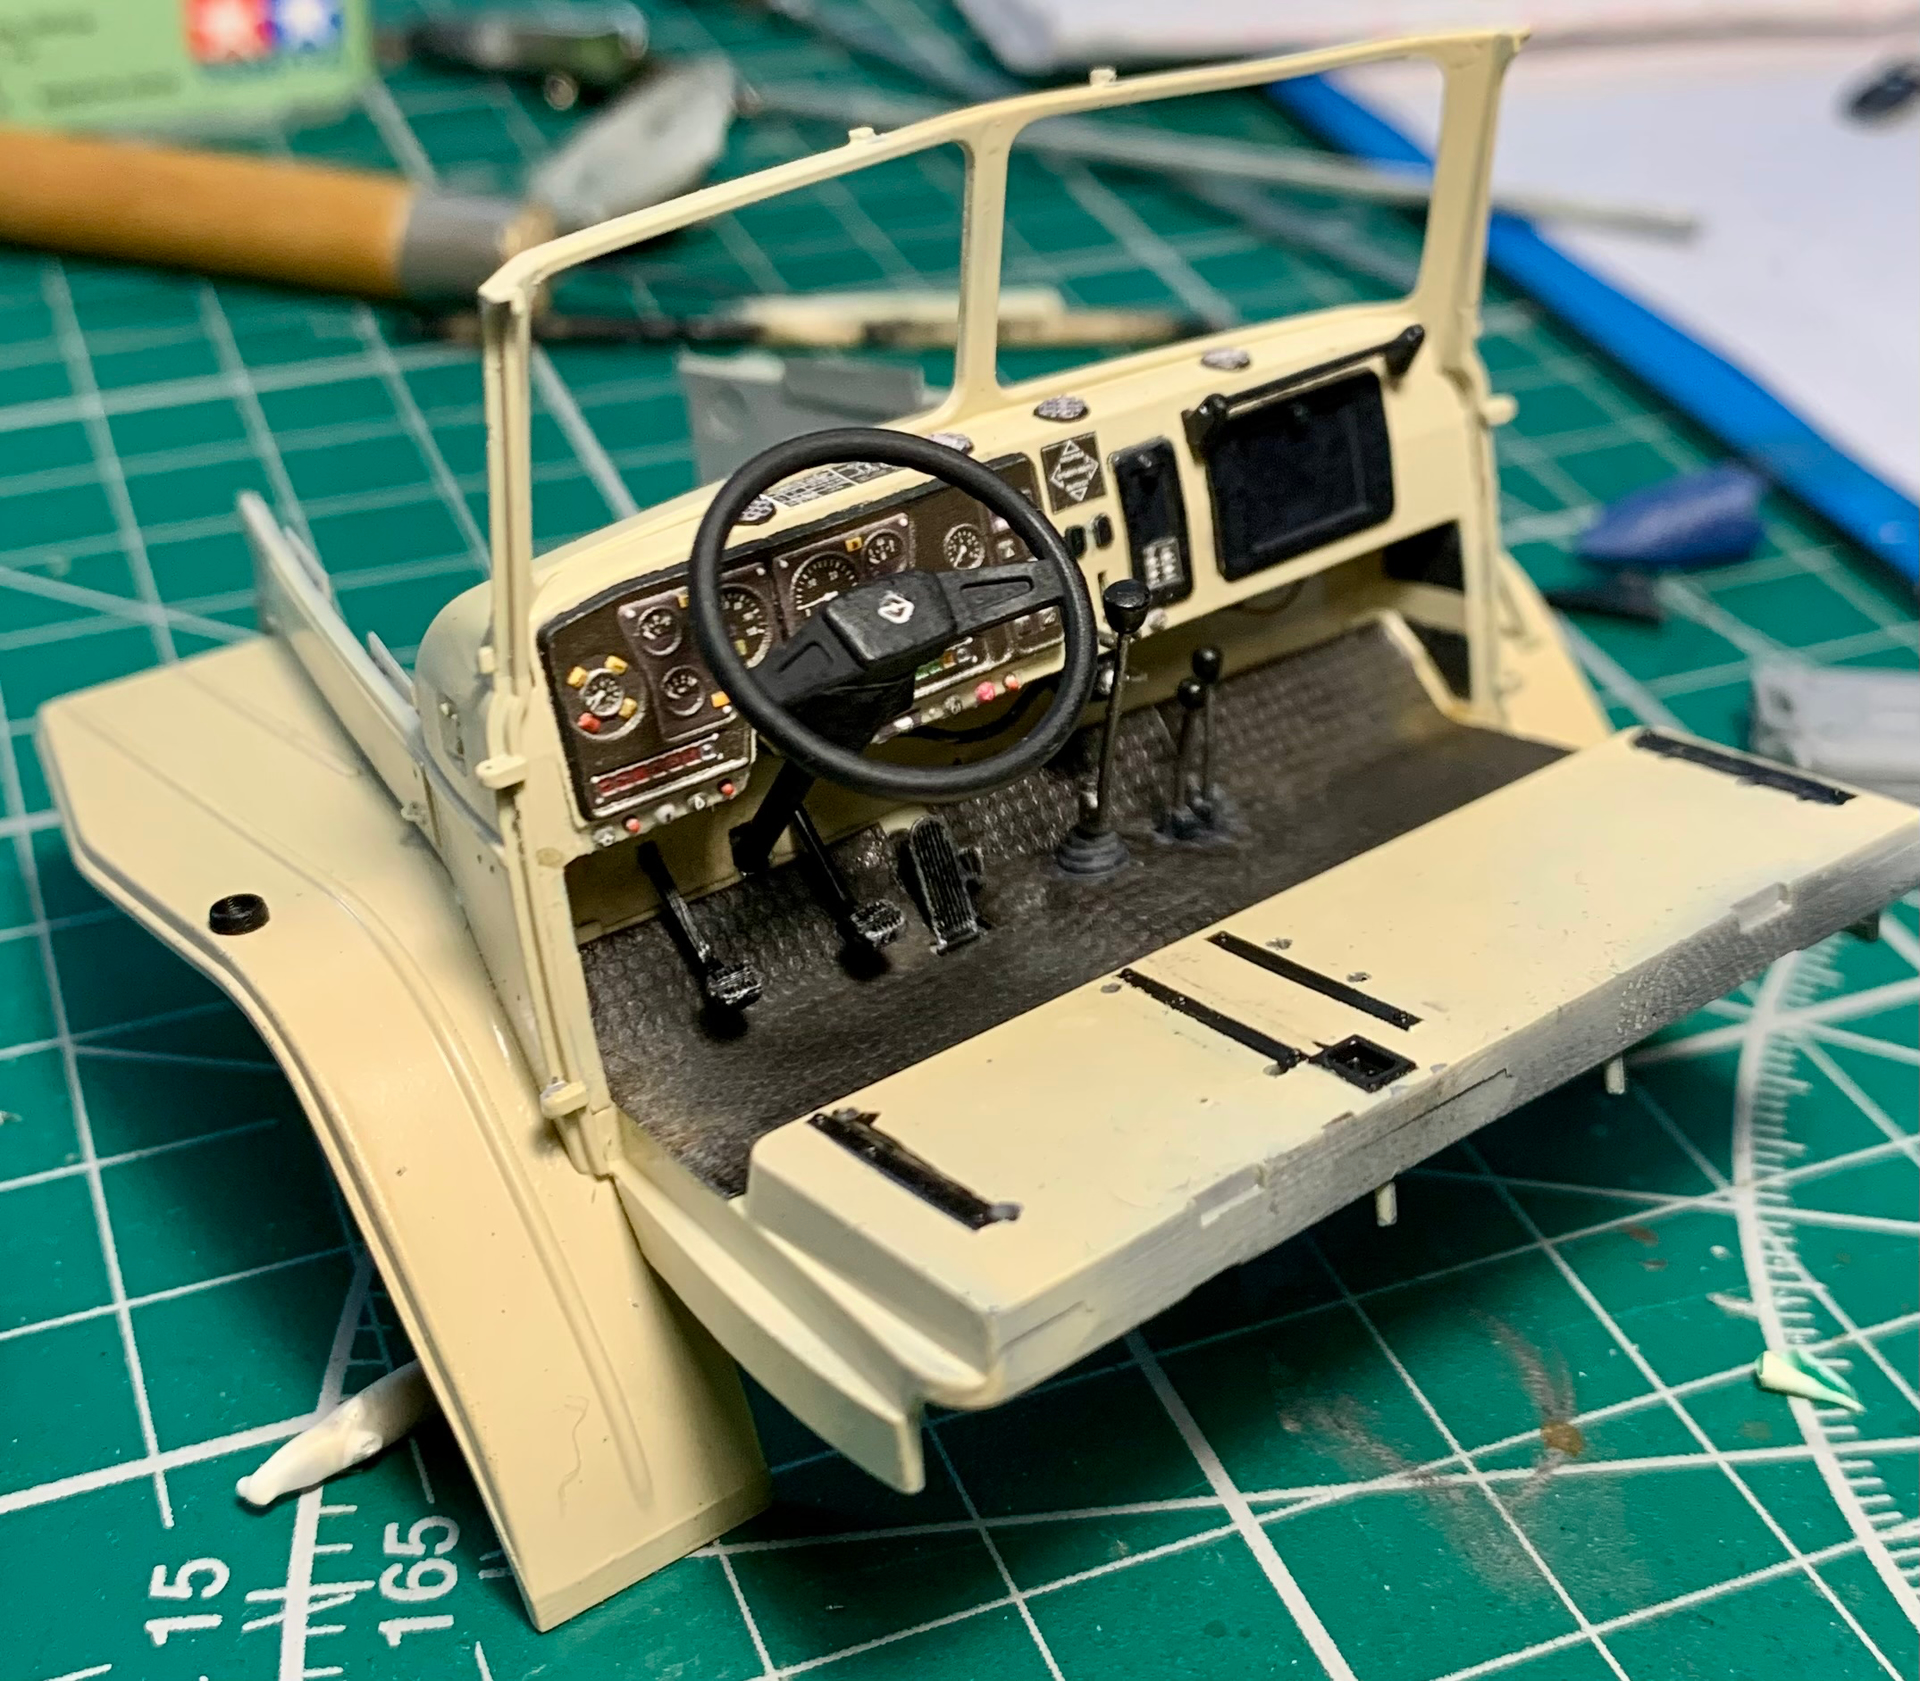
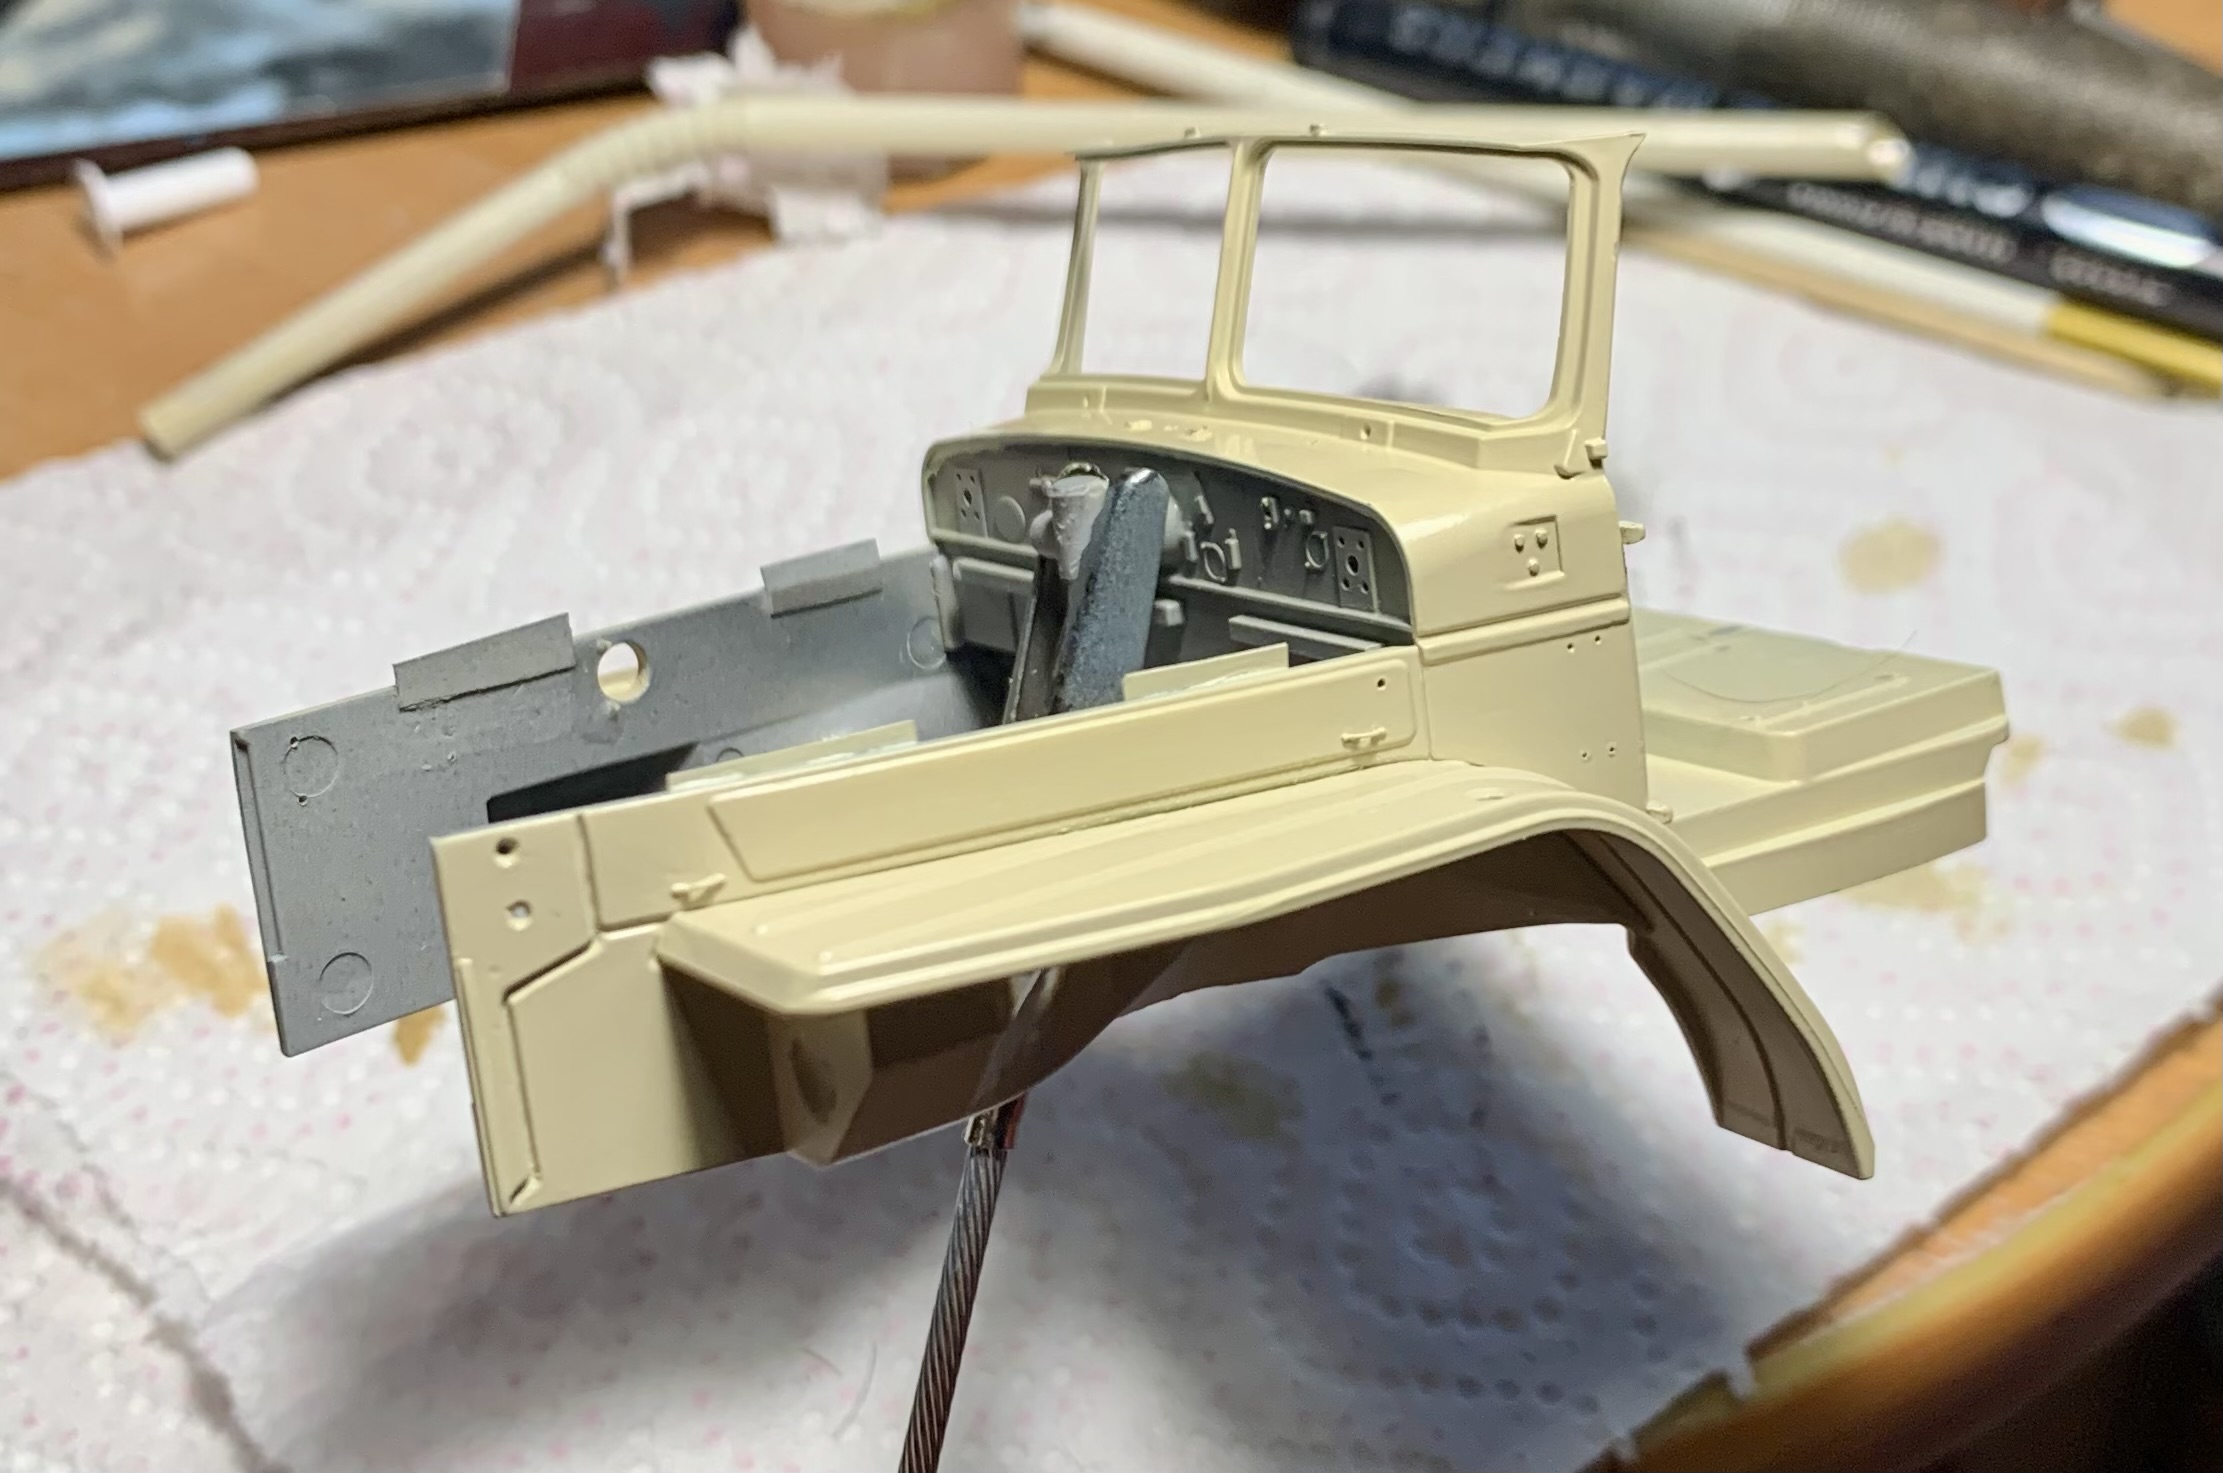
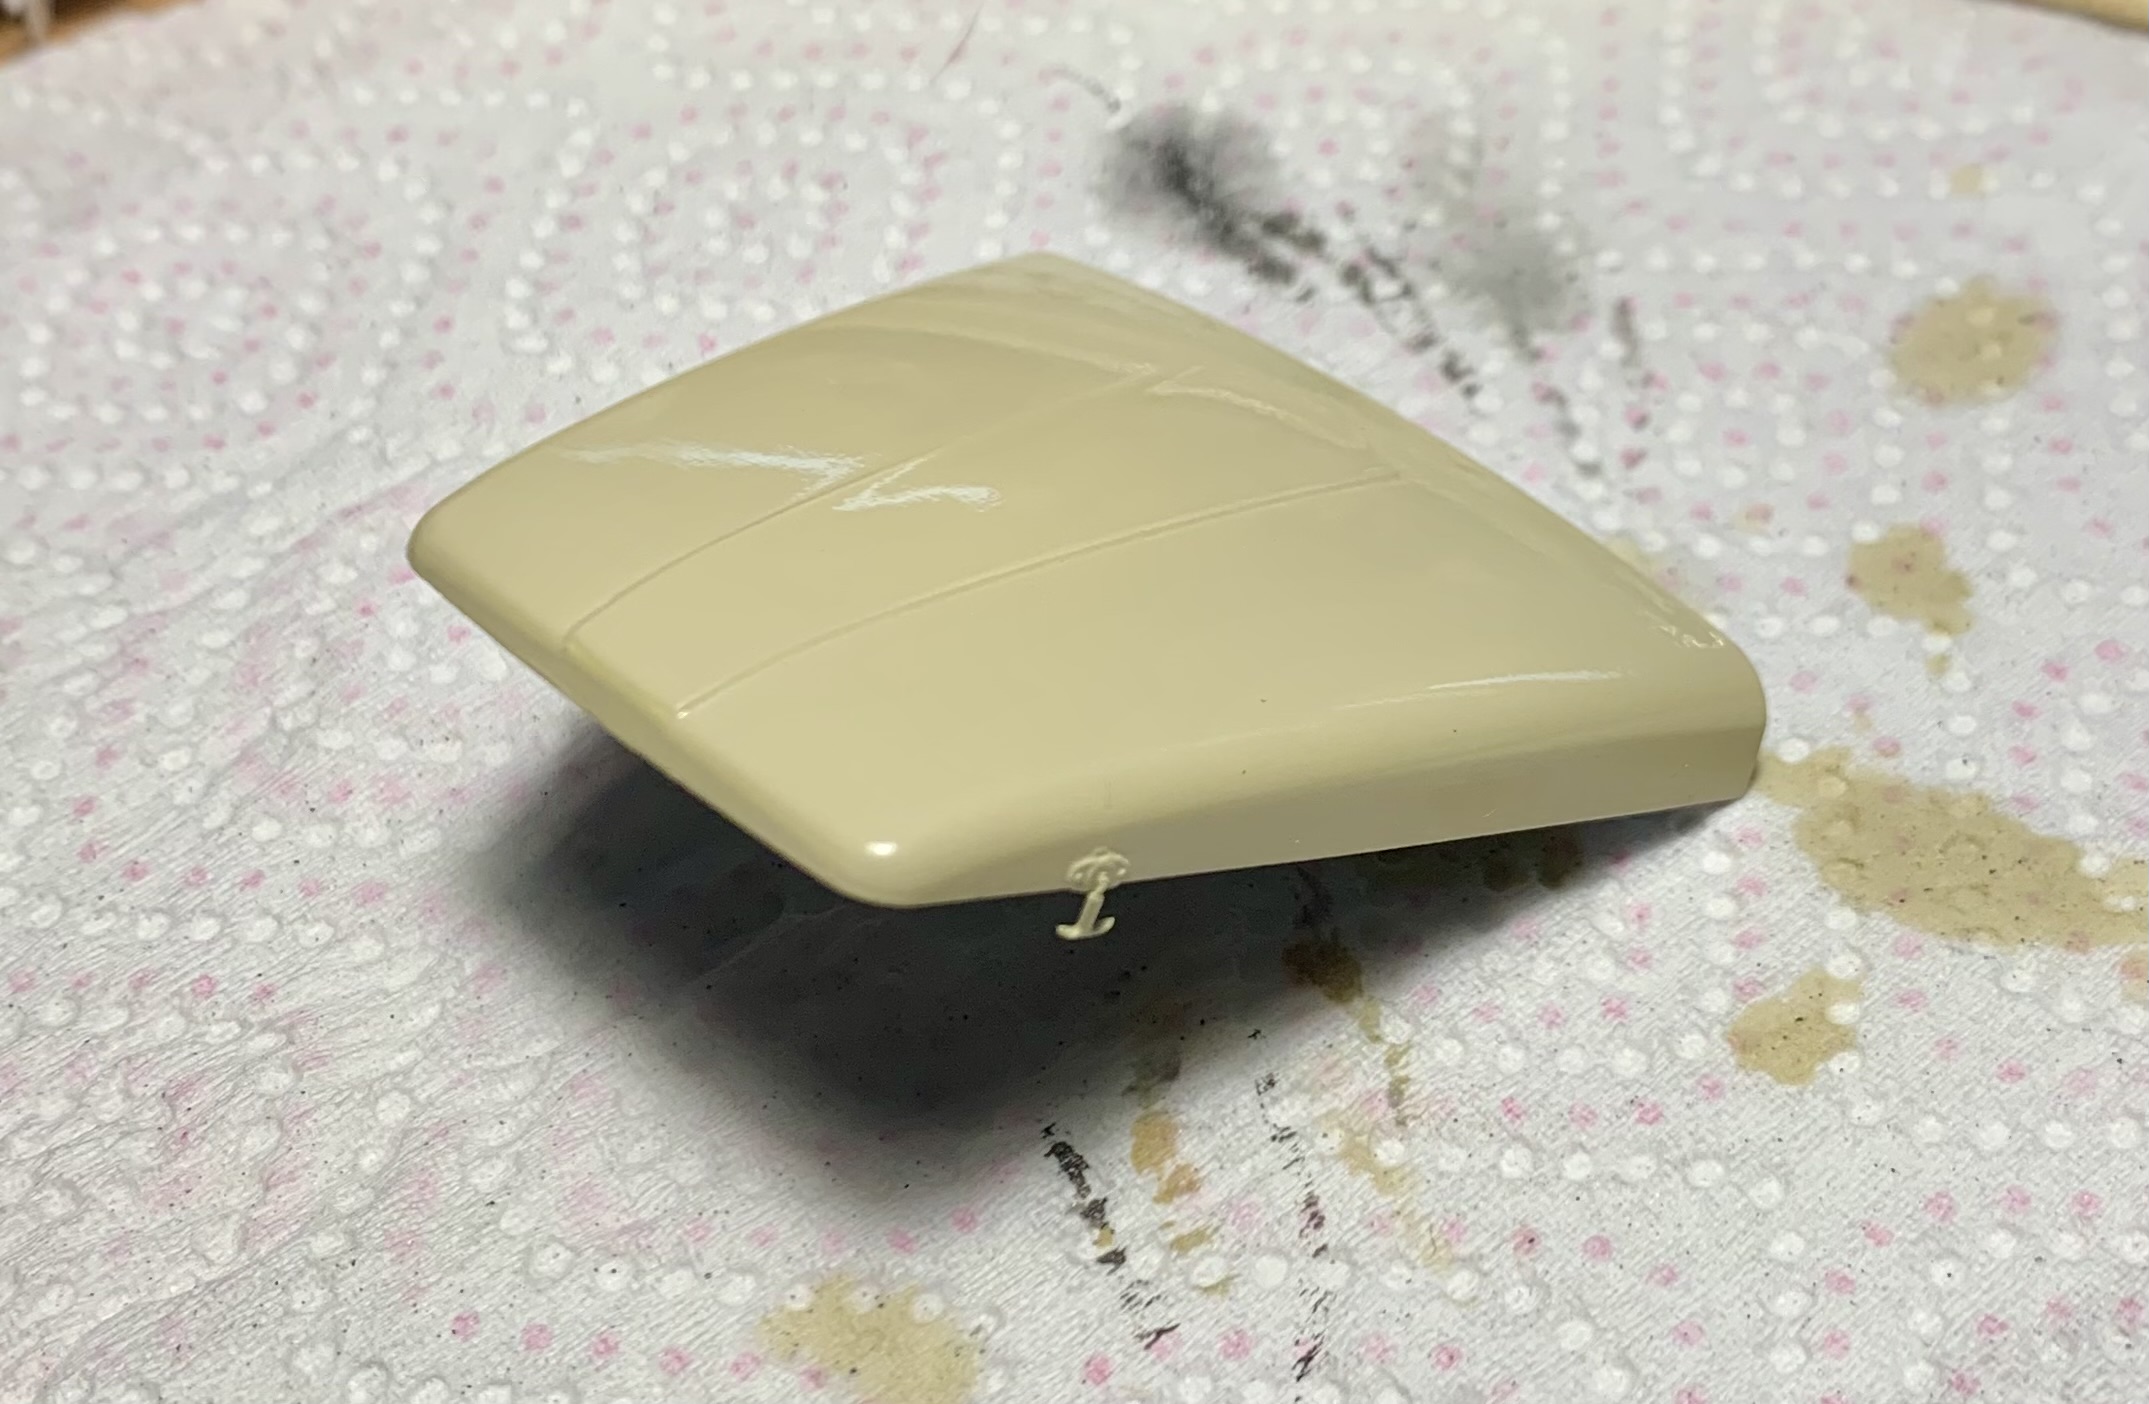
I started painting. Color: Beige 235. Next, a semi-gloss varnish and, perhaps, some weathering marks.

8 Likes
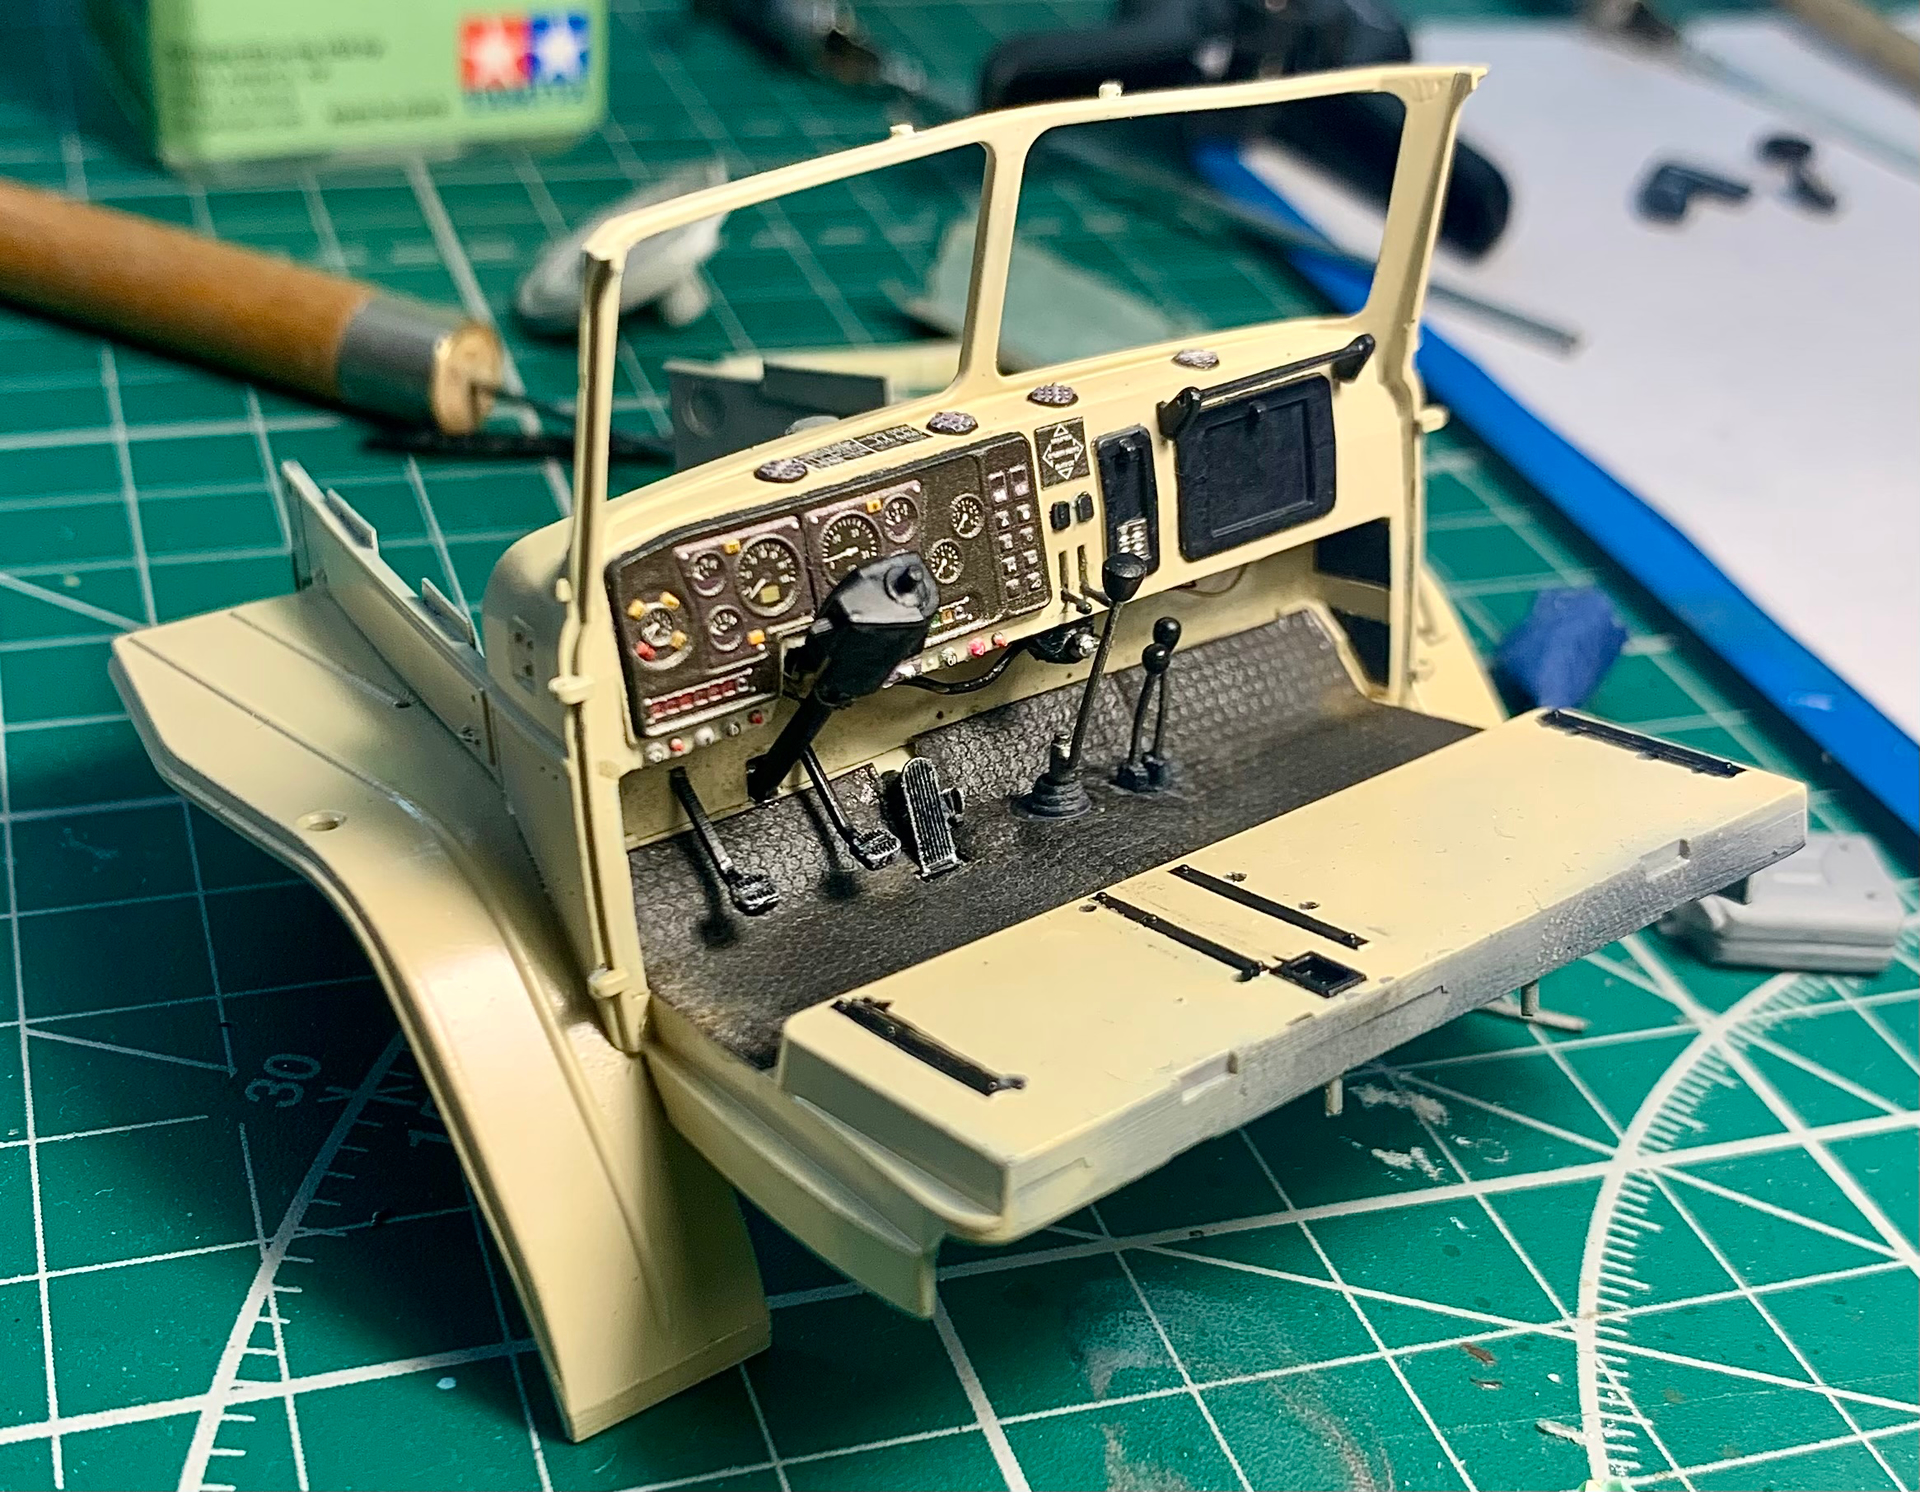
Before the steering wheel obscured all the details. Hand-made interior elements + added a cardan shaft to the steering column + Emboss 3Ddecal.

14 Likes
Absolutely amazing! Now that’s what I call model building!
Best of luck and have fun with the rest of the model build.
Best regards, Joachim
4 Likes