Vietnam tanker truck - question, please help

Hello everybody!

@PzAufkl - thanks a lot for your comment! I’ll check those grabhandles on the real truck again! Thanks for the link, too!

I didn’t write recently, because building this model went over to 3D:

image.png.f0c9cd8f9fb04e6c47b20280cf50c660.png

image.thumb.png.10d71f13e82a49dde0592b474c1f9aa1.png

image.png.27c8894159cd097f1dddfed952aefd8d.png

But soon I hope to be done here and then I’ll just wait for the prints…

Thanks for looking and have a nice day

Paweł

5 Likes

I read along the top of the tank, and there are 3 markings for various inner compartment sizes. So possibly it can carry more types of fluid…

2 Likes

Hello Carl!

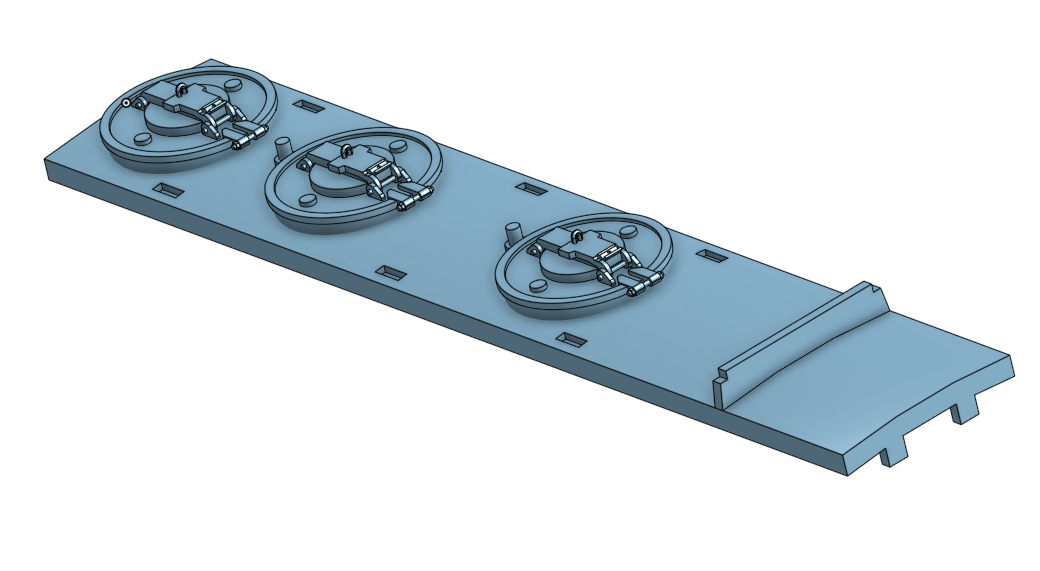
I also noticed the markings - I even designed the tank top with three manholes (see below) - and I still don’t think they simultaneously carried water and fuel - but I don’t have a way of knowing for sure.

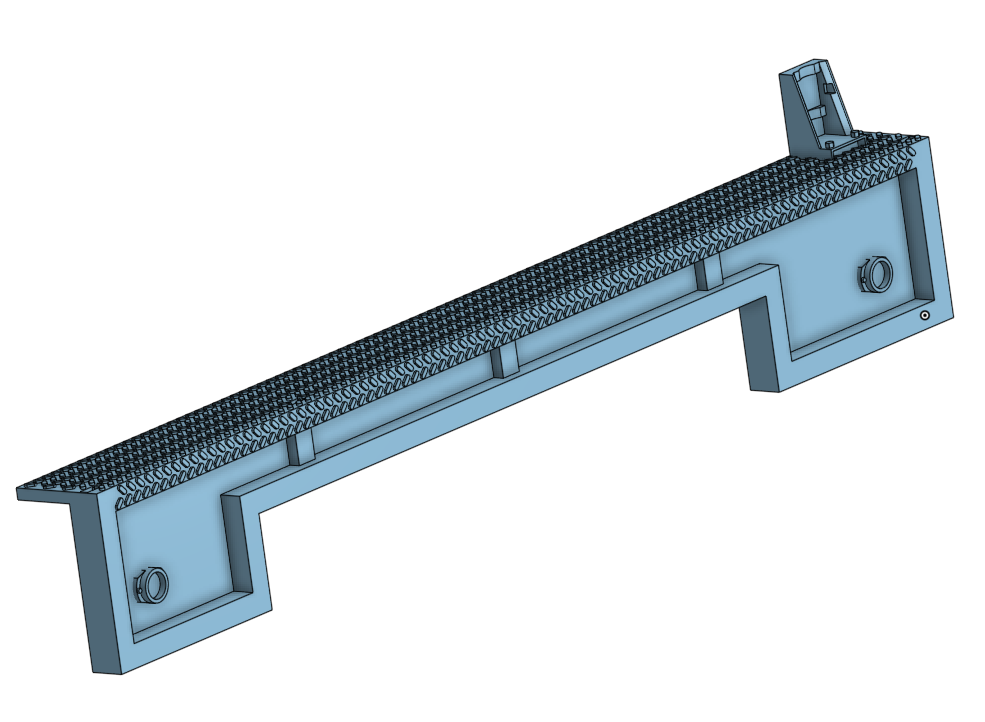
I have another update: The real fun begins now - I got my 3D printed parts from the printer today. Here’s how they look like:

The thread-plate looks a little coarse in 3D and in close up, but in person it’s just fine. There’s a whole jungle of supports there - removing them is a bit like solving a puzzle, that can be fun, too! I hope to post some assembly photos soon!

Thanks for looking and have a nice day!

Paweł

7 Likes

Very nice. The 3D parts look great.

2 Likes

That just doesn’t seem plausible. Too much of an opportunity for cross contamination. It only takes a drop!

4 Likes

I would think possibly mogas and diesel would be thought. Wayne

3 Likes

Hello everybody!
Thanks a lot for your comments!

Let’s get back to the real world (from 3D world) - I put the wings on the frame:

chassis06.jpg

I printed them with the supports that help to keep them straight. After the glue (CA) sets, they will be cut off at the red lines.

Then I dry fitted the parts:

chassis07.jpg

Looks like everything fits, yay!

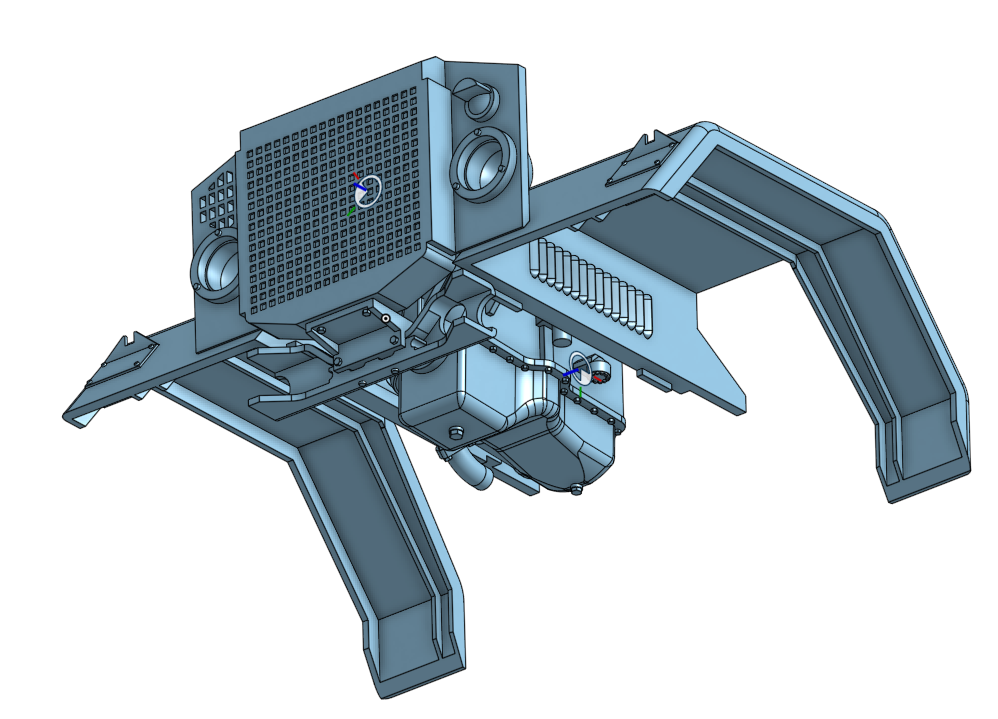
In this case I can start putting everything together:

chassis08.jpg

The photo above also has the 3D printed steering gear and the front exhaust pipe made of 2mm soldering wire and also muffler made of leftover sprue and plastic sheet.

Now I’ll try to fit some more parts - thanks for looking and have a nice day

Paweł

6 Likes

Coming together awesome. Great job on the 3D parts.

1 Like

Hello!

@HeavyArty - thanks a lot for your comment and for your kind words!

Took a little longer than I thought, but I’ve got another update - I was working on the chassis and also on the cab:

chassis09.jpg

chassis10.jpg

chassis11.jpg

As you can see I’ve replaced the bumperettes with sheet metal to hopefully make them look better.

Similarily I’ve had an accident with the step boxes and I repaired them with other sheet metal:

boxes01.jpg

I also started working on the tank. First I had to cut off the later sides:

tank01.jpg

Then I had to do some fixes and tweaks:

tank02.jpg

I’ll soon have everything ready for the 3D printed older sides.

I was also working on custom decals and now I’m waiting for them to print.

That’d be it for now - thanks for looking and have a nice day

Paweł

5 Likes

Hello everybody!

A small update - at last I got my 3D prints:

tank03.jpg

After dry fitting them:

tank04.jpg

I’ll try to add the control cables for the valves, although it’s going to be tricky, as not everything fits right.

I was also working on the cab:

cab01.jpg

The lights on the wings are old stock (Shapeways - my design!):

cab02.jpg

And I made the dashboard:

cab03.jpg

Thanks for looking and have a nice day!

Paweł

10 Likes

It’s coming along great. I need ti start on my M50 water tanker soon.

1 Like

Hello Gino!

I would like to see you build that one for sure!

And I made a breakthrough on the tank. First I patched the front bulkhead:

tank05.jpg

Here is my rendering of the control cables - I was not sure about fastening the cable guides, so I just made them “float”:

tank06.jpg

This shot shows off the 3D printed parts and plugged holes for the hose hooks:

tank07.jpg

Other side:

tank08.jpg

I still have to fill and sand the joints. I also plan to restore all the small details, like the hose compartment doors, tarp hooks and so on.

And here’s one more dry fit shot:

assembly01.jpg

Thanks for looking and have a nice day!

Paweł

7 Likes

Looking even better. Nice job on all. I’ll build the M50 eventually. It has a few more projects ahead of it.

1 Like

There’s a nice Mexican restaurant about an hour’s ride from me, and there are dozens of these tankers that would not be too far out of the way, if you want some underside details. Always looking for an excuse for a nice ride. And the food of course…

2 Likes

Late to the party, but seriously enjoying the build! As for water burning, ask the folks in Cleveland…

1 Like

Hello everybody!
thanks a lot for your comments and sorry for taking so long to answer!

@HeavyArty - thanks a lot! Good models take time, eh? and it also includes thinking about building them!

@18bravo - such a restaurant is a treasure to have! Interesting photos, too, although most of them are the newer variant trucks.

@barkingdigger - like thay say, better late than never! Good to have you on my thread and thanks for the interesting article!

And I have another update here… I’ve soldered the hose rack out of thin copper sheet metal:

tank09.jpg

I also added other details - most tricky were those tarp hooks I made out of really thin copper wire:

tank10.jpg

Before installing the tank on the frame I dirtied it up… That fine fine dust… And it gets everywhere!

tank11.jpg

So as soon as I install the tank on the frame I want to start painting everything OD.

Thanks for looking and have a nice day

Paweł

4 Likes

He has a valid point. :rofl:

2 Likes

Hello everybody!

I have another update:

I started painting - this is how my model looked like before preshading:

paint01.jpg

Preshading of Humbrol 113 brown went on top of that (in the heat of battle unfortunately I didn’t make a photo) and then OD - Humbrol 66 on top of that. This is how it looked like afterwards:

paint02.jpg

I also installed the mudflaps and step (yet to be painted) and started to apply the decals:

paint03.jpg

Now I’ll put in some more work in the decals and painting - thanks for looking and have a nice day

Paweł

10 Likes

That is looking great. Awesome job. I need to do the M50 water truck soon too.

1 Like

I can almost hear the diesel Kaiser multi-fuel engine chugging along as the tanker goes from one end of the base to the other. Having driven Deuce and a Halfs for the first three years of my time in the military, the sound is very familiar to me.

Outstanding work so far. :+1:

1 Like