Success… Well it is in my book…
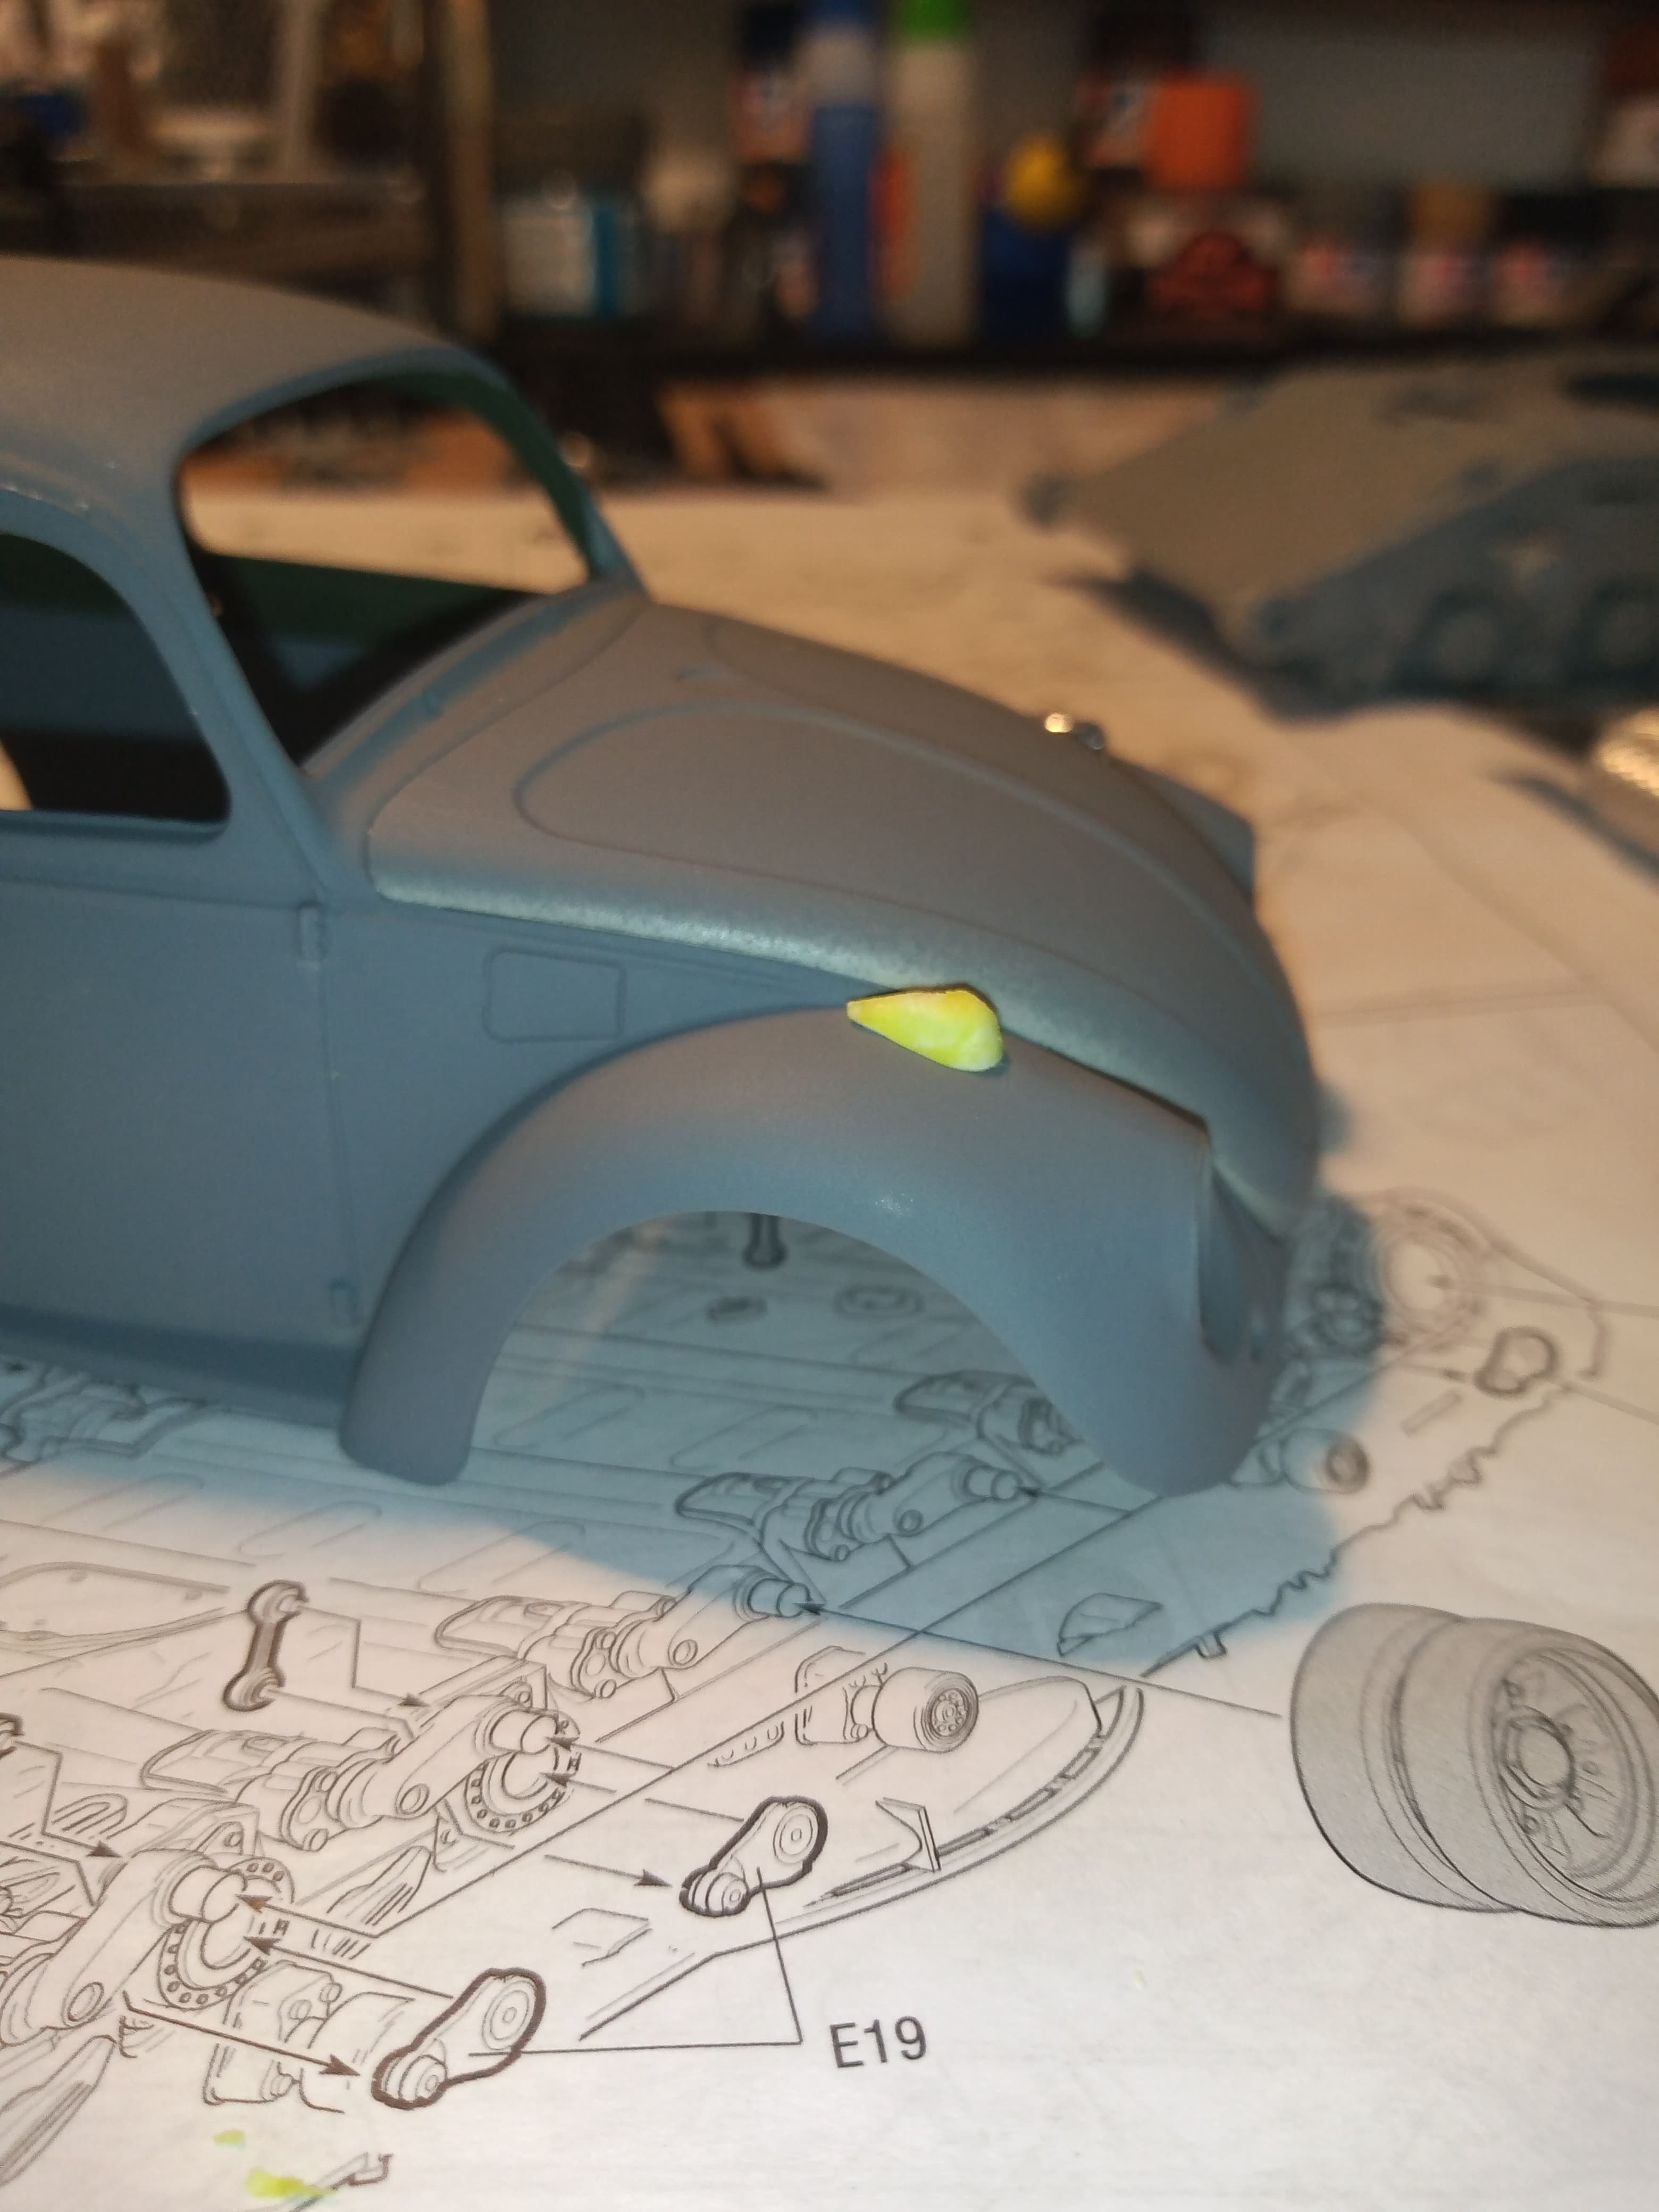
The plaster of Paris cast came out pretty well … Only needs a careful sanding on the edges.
Cast and kit one fitted. Cast one still has a bit of play doh residue on it but that will sand off or rub off if I use some more doh on it.
Will seal it with some fine CA later and secure straight to the wing in case I lose it lol
7 Likes
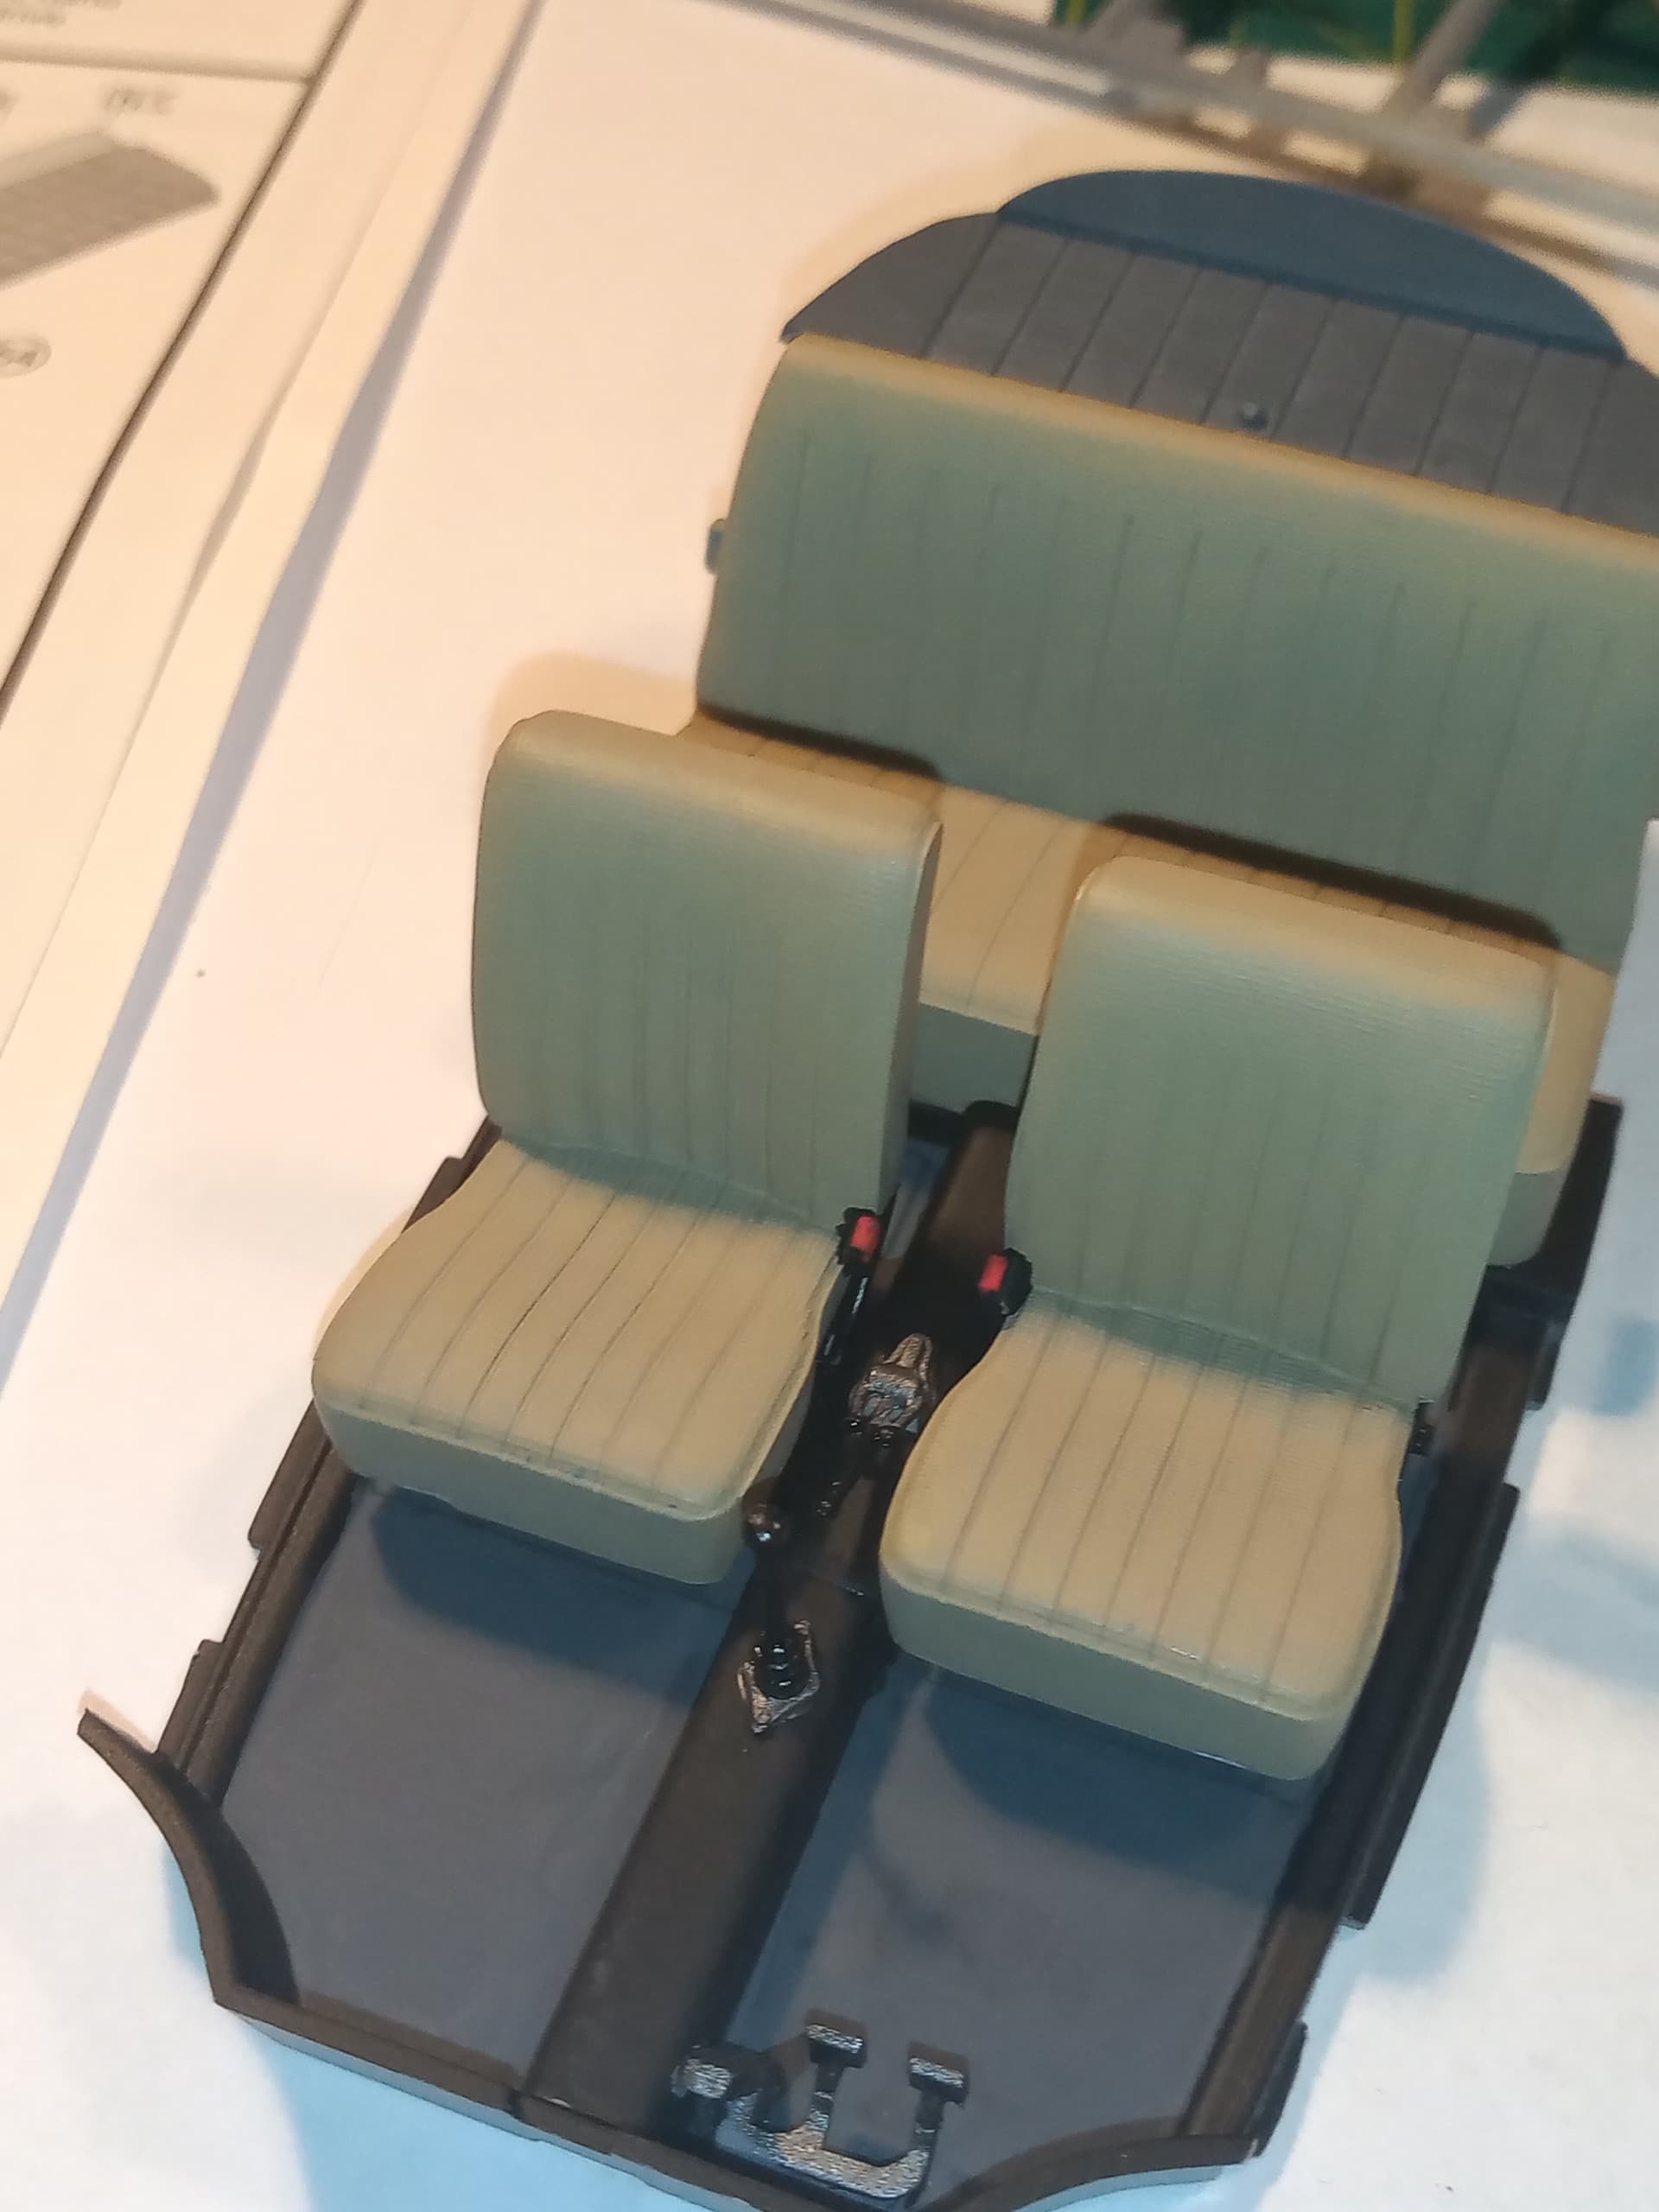
Few bits done on the Vdub…
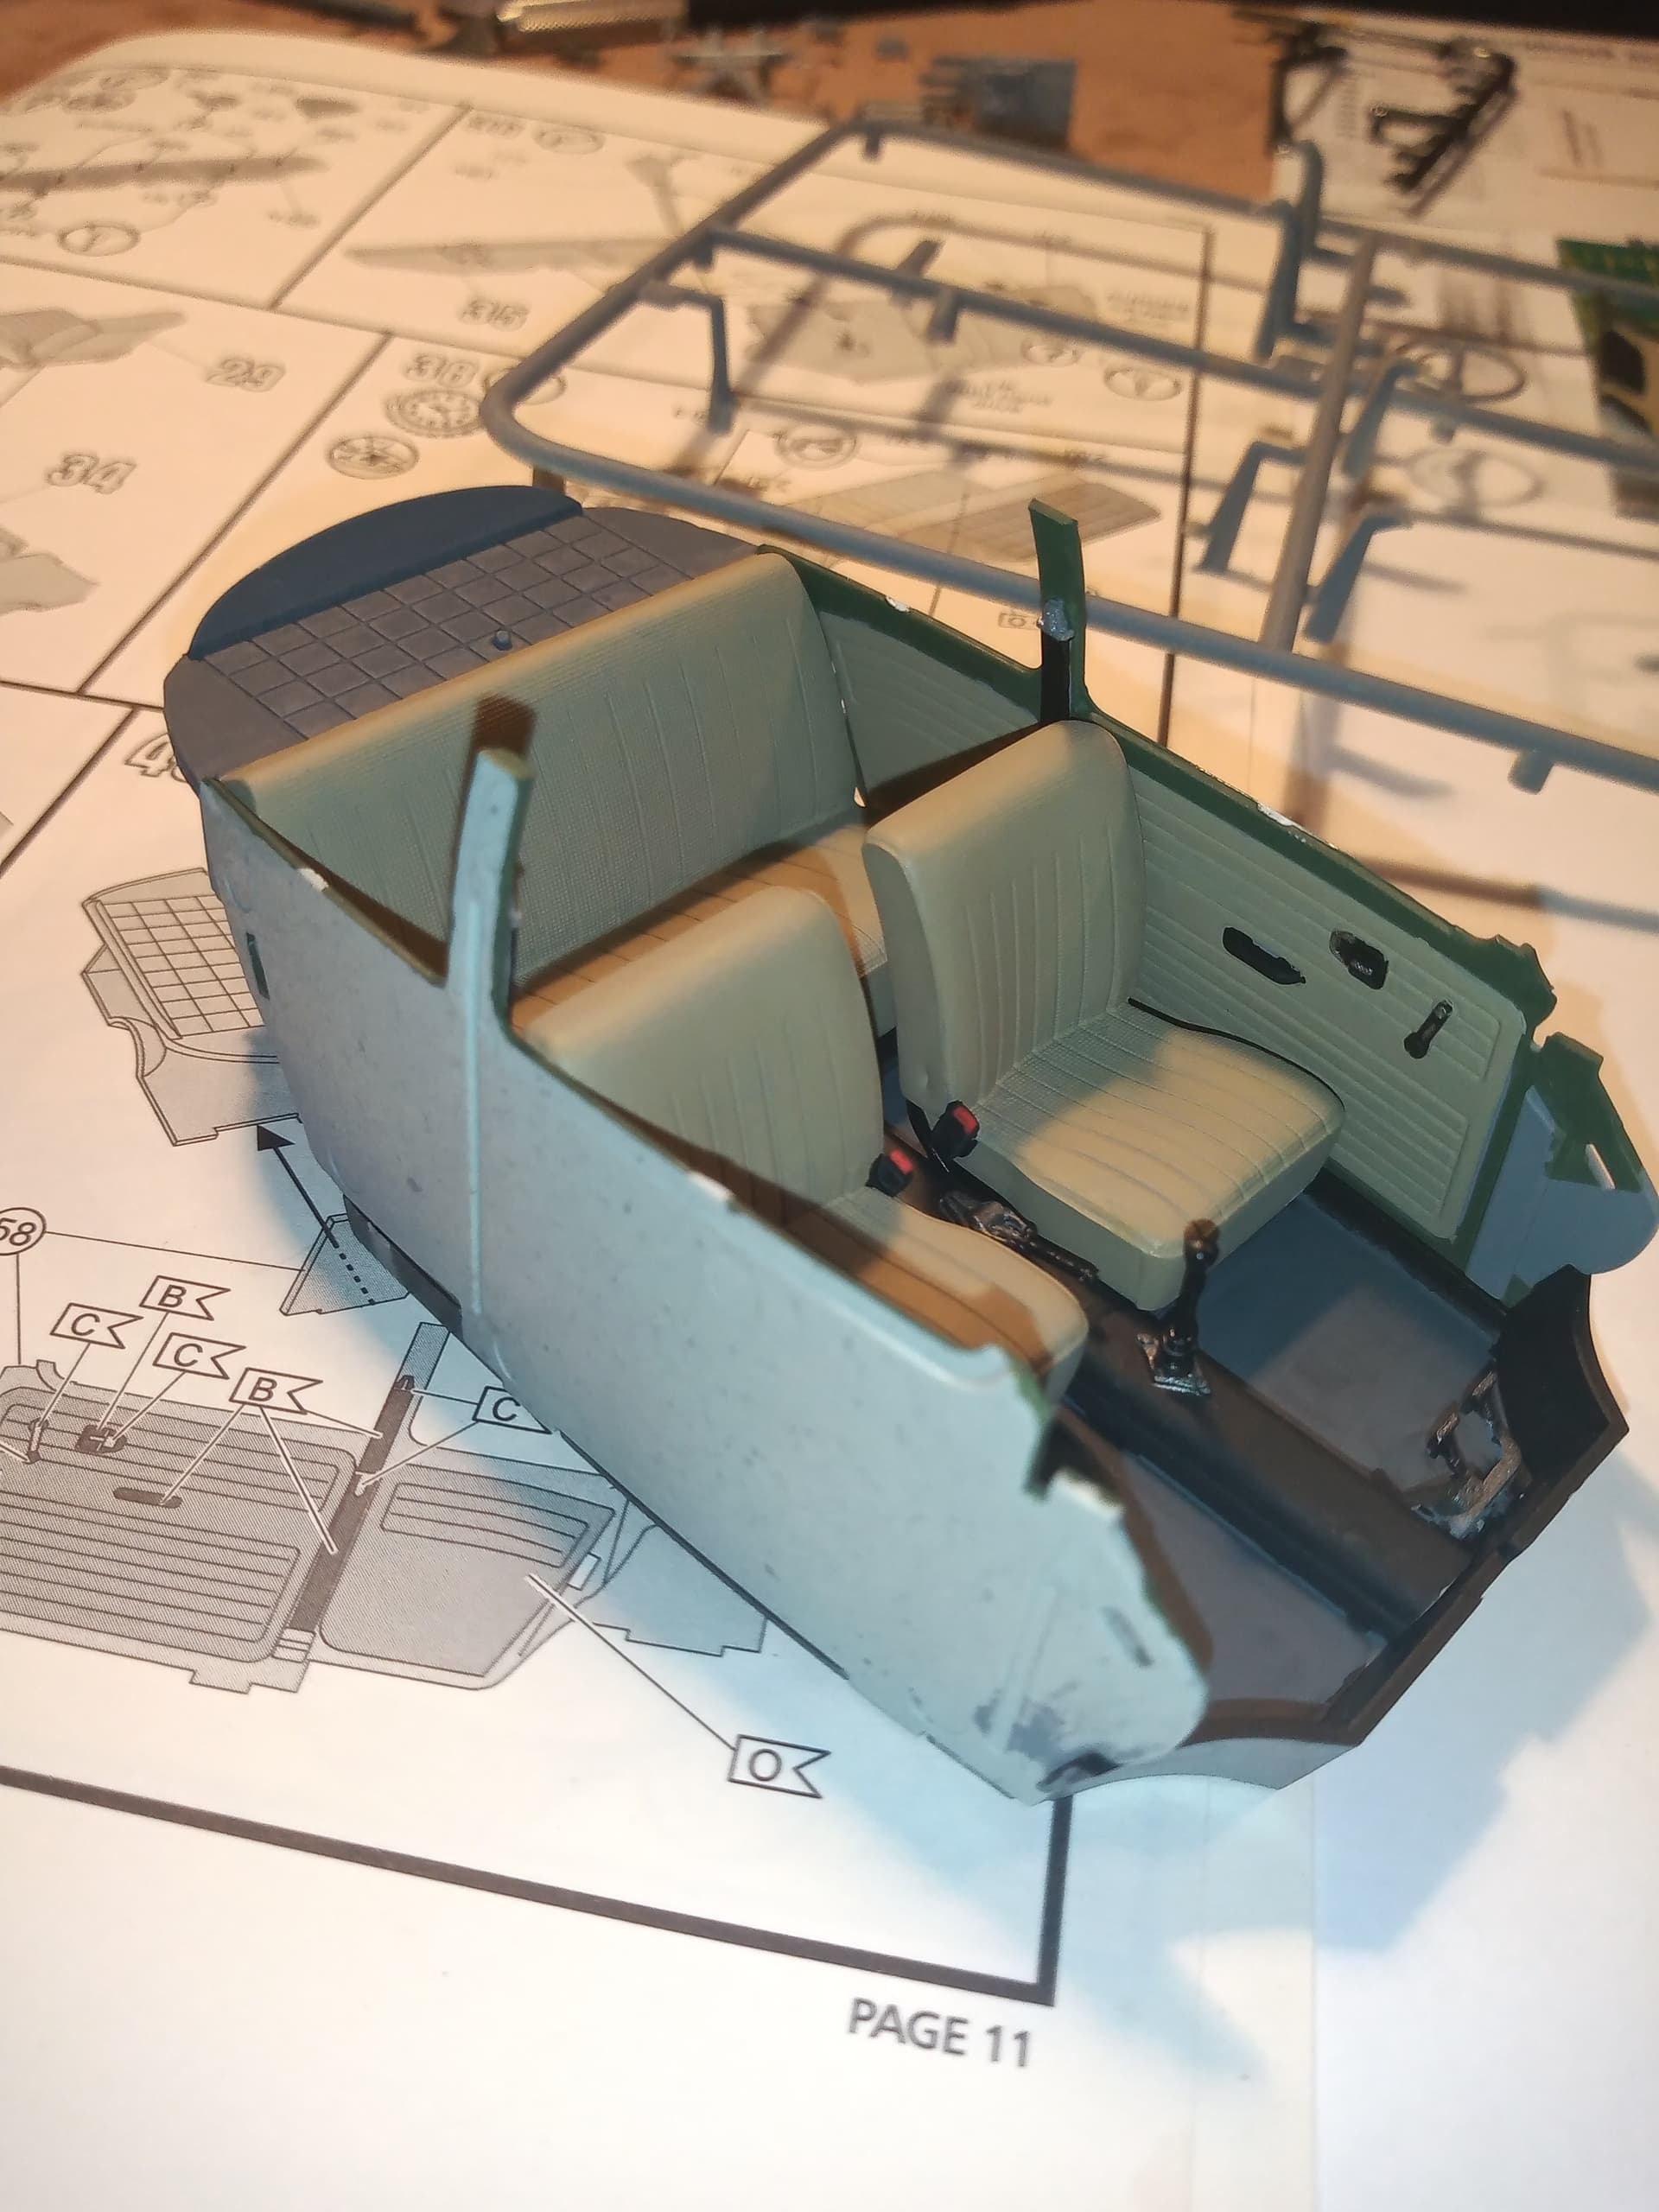
Put the majority of the cockpit together.
Need to repaint and add a few more bits then that’s done and out the way.
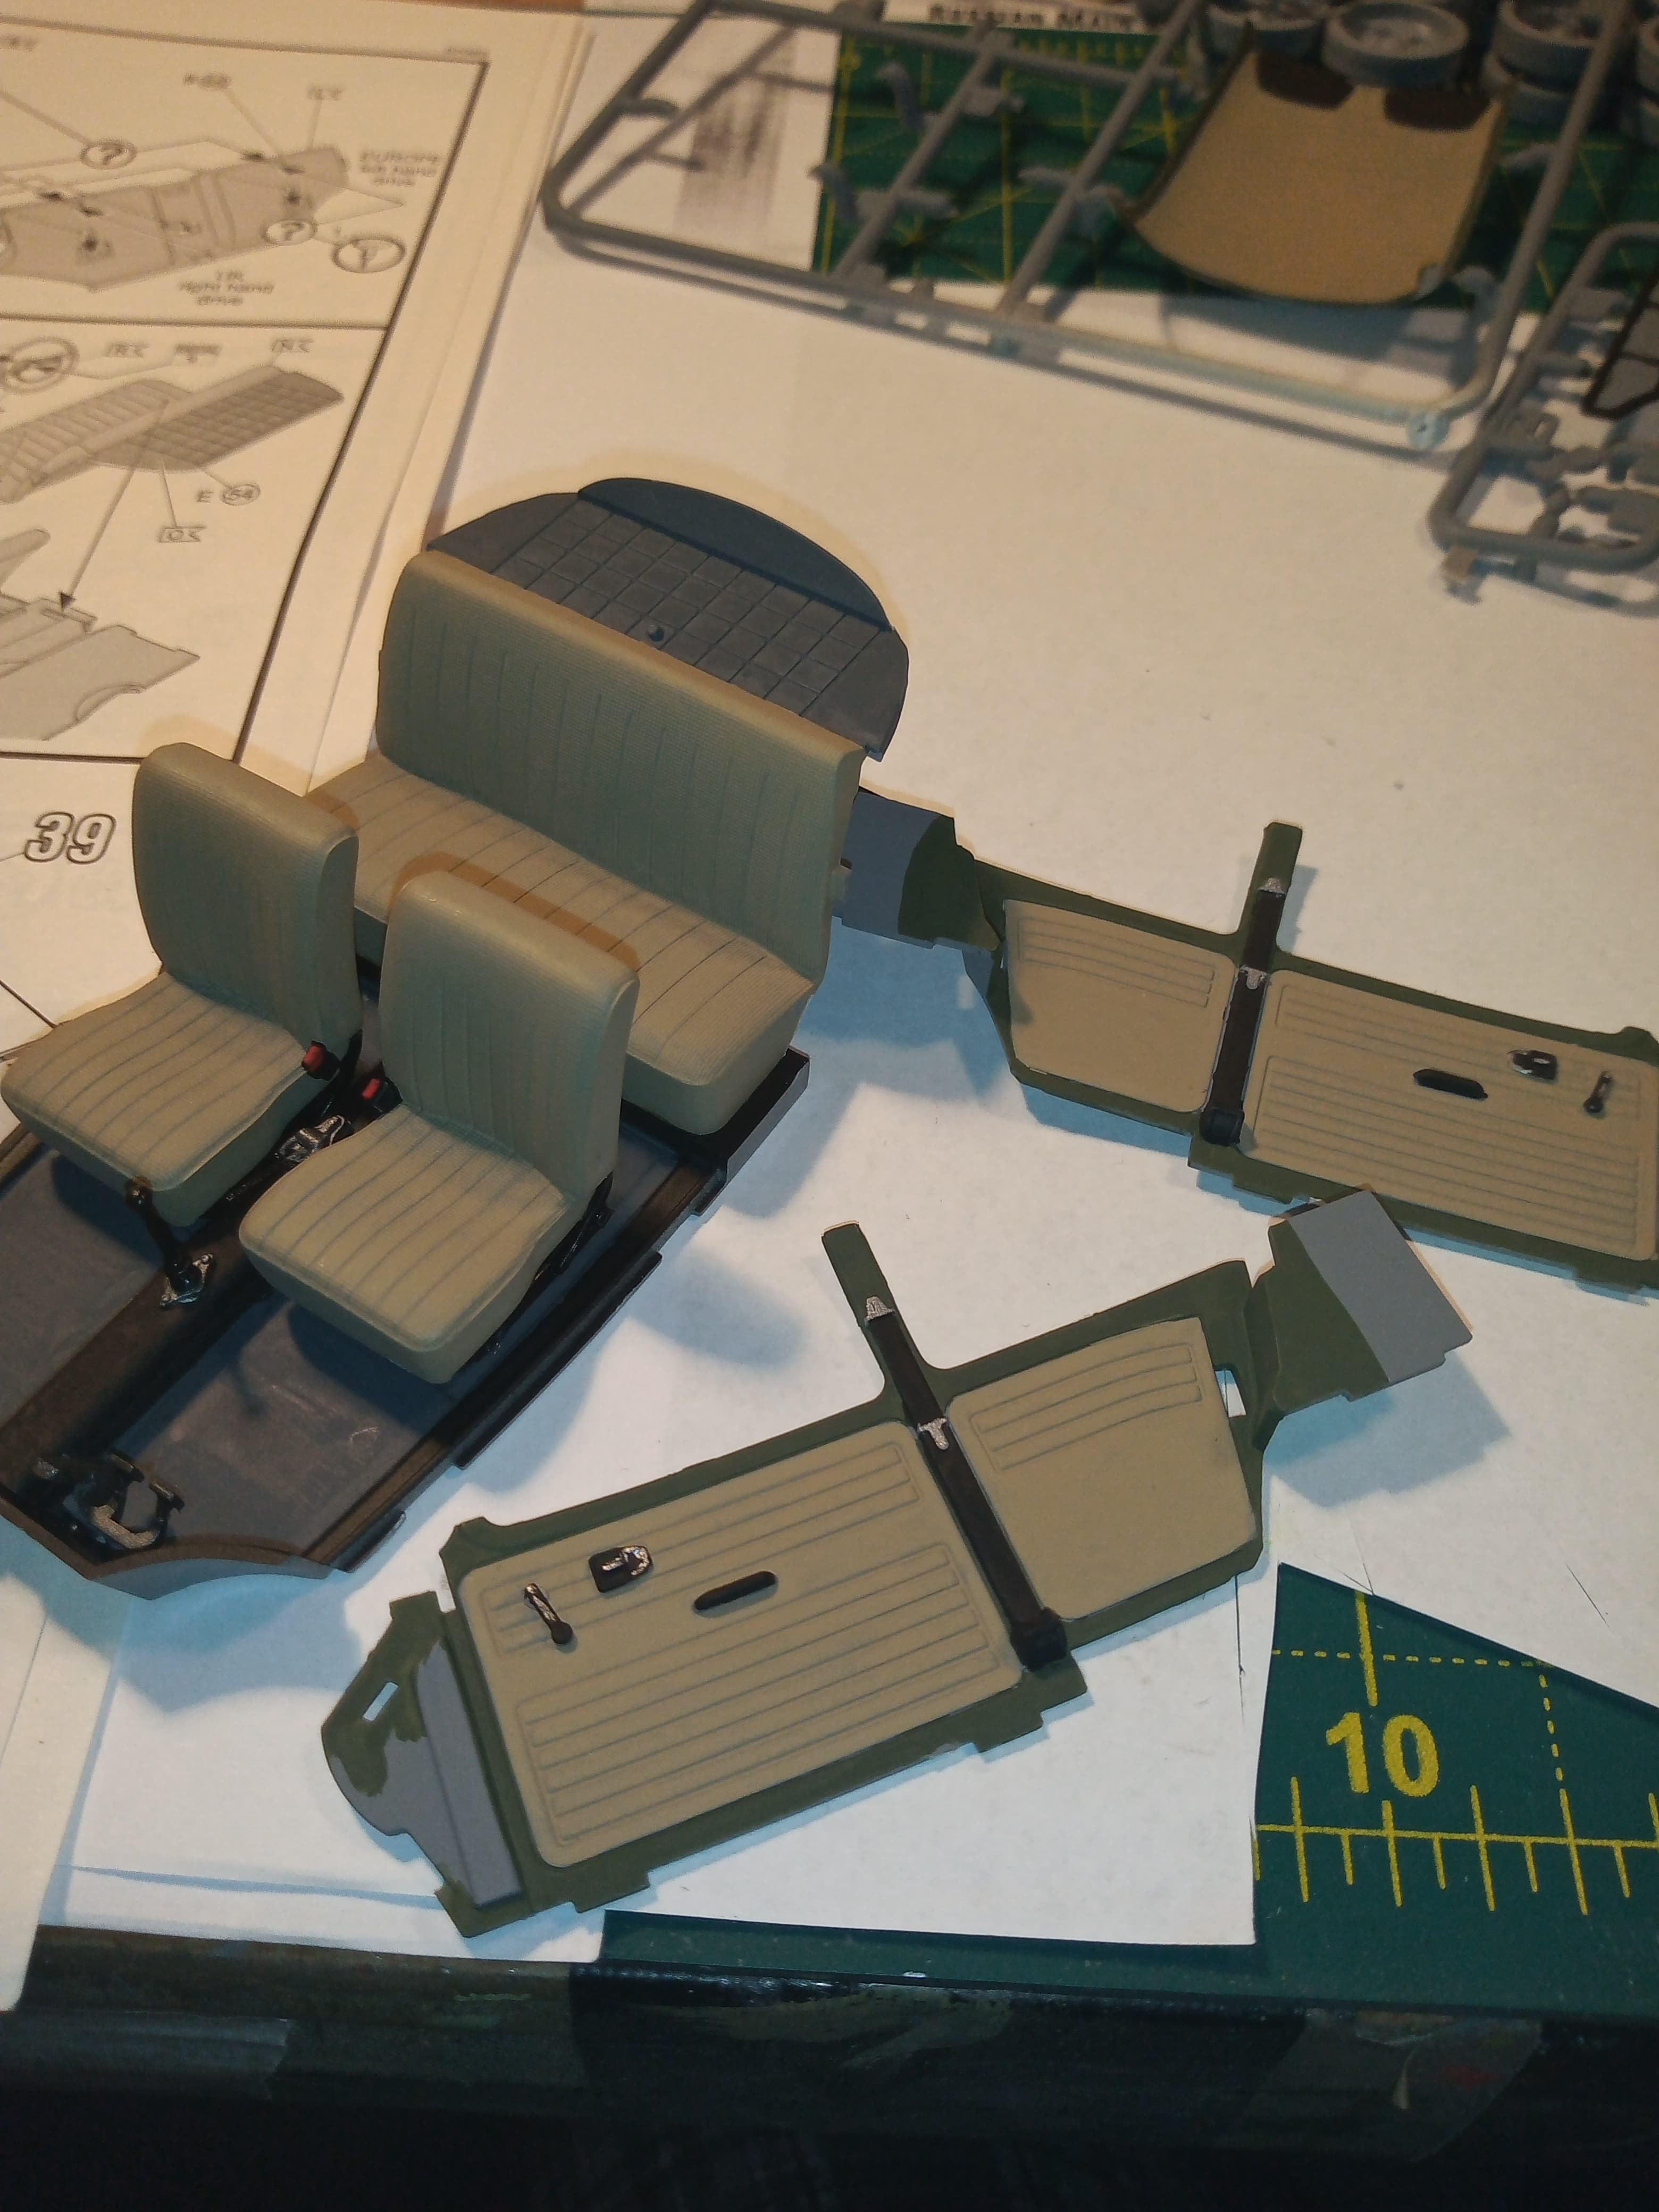
Door cards.
And dry fitted…looks ok …
6 Likes
I was going to leave it a while longer, but I think there may be one or 2 Sherlock Holmes out there who may have guessed where this Vdub is going…
So to stave off any inadvertent spoilers from anyone, I will now reveal all.
It’s going to be Berlin Brigade scheme.
Images are from online sources and for info, discussion and reference only.
This is the one I will be going for.
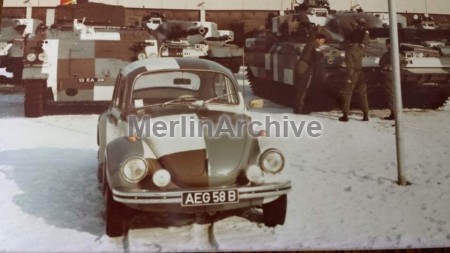
This one is circa 1982, and there are a few versions as to why it was painted, which I will elaborate on tomorrow.
The only other image I have seen or been given is this one, it’s from a demo and a different car, but I will be tapping into this one as a reference for the rear painting
Hopefully you can understand my point about the year of car not being the biggest issue, as the final paint scheme will be the big focal point…
4 Likes
Cool idea! Are you going to add the turret?
Ken
Hi Ken, no turret on this one. That one was just knocked up I think as part of a display. I will be aiming for the image of the one on the tank park in front the 43s and Chieftains.
Anyway… The back story to the cars as I have had it told to me.
The original one (tank park picture).
-
The car belonged to a wife of one of the Troop Sgts and it was “borrowed” without her knowing and resprayed in the new Berlin scheme…which she was really not amused by … ???
-
The car was the privately owned one by the Commanding officer and he allowed it to be resprayed.
I’m not sure if by Commanding Officer they meant the Regimental Commander of the main Regiment based in BAOR W Germany, a Lt Col, or the Berlin Sqn detachment Commander, the Sqn Ldr (Maj)
The car is a privately owned one as it has full BFG plates on it and not military ones.
Also, I tend to think the 2nd reason is more plausible as Comd Officers, be they Lt Col’s or the Sqn Ldrs do tend to have some eccentric ideas … Even more so in the early 80s…even more so the Sqn Ldr element if it’s the same Maj who devised the cam in the first place.
I will try and find copies of the Regimental journals and see if they shed any light.
Nice one John! I suspect that the owner was the Sqn Ldr, sort of a case of putting his money where his mouth was so to speak, to prove the concept. I knew him quite well (when he was a Captain at a Div HQ; I was his Clerk!).
1 Like
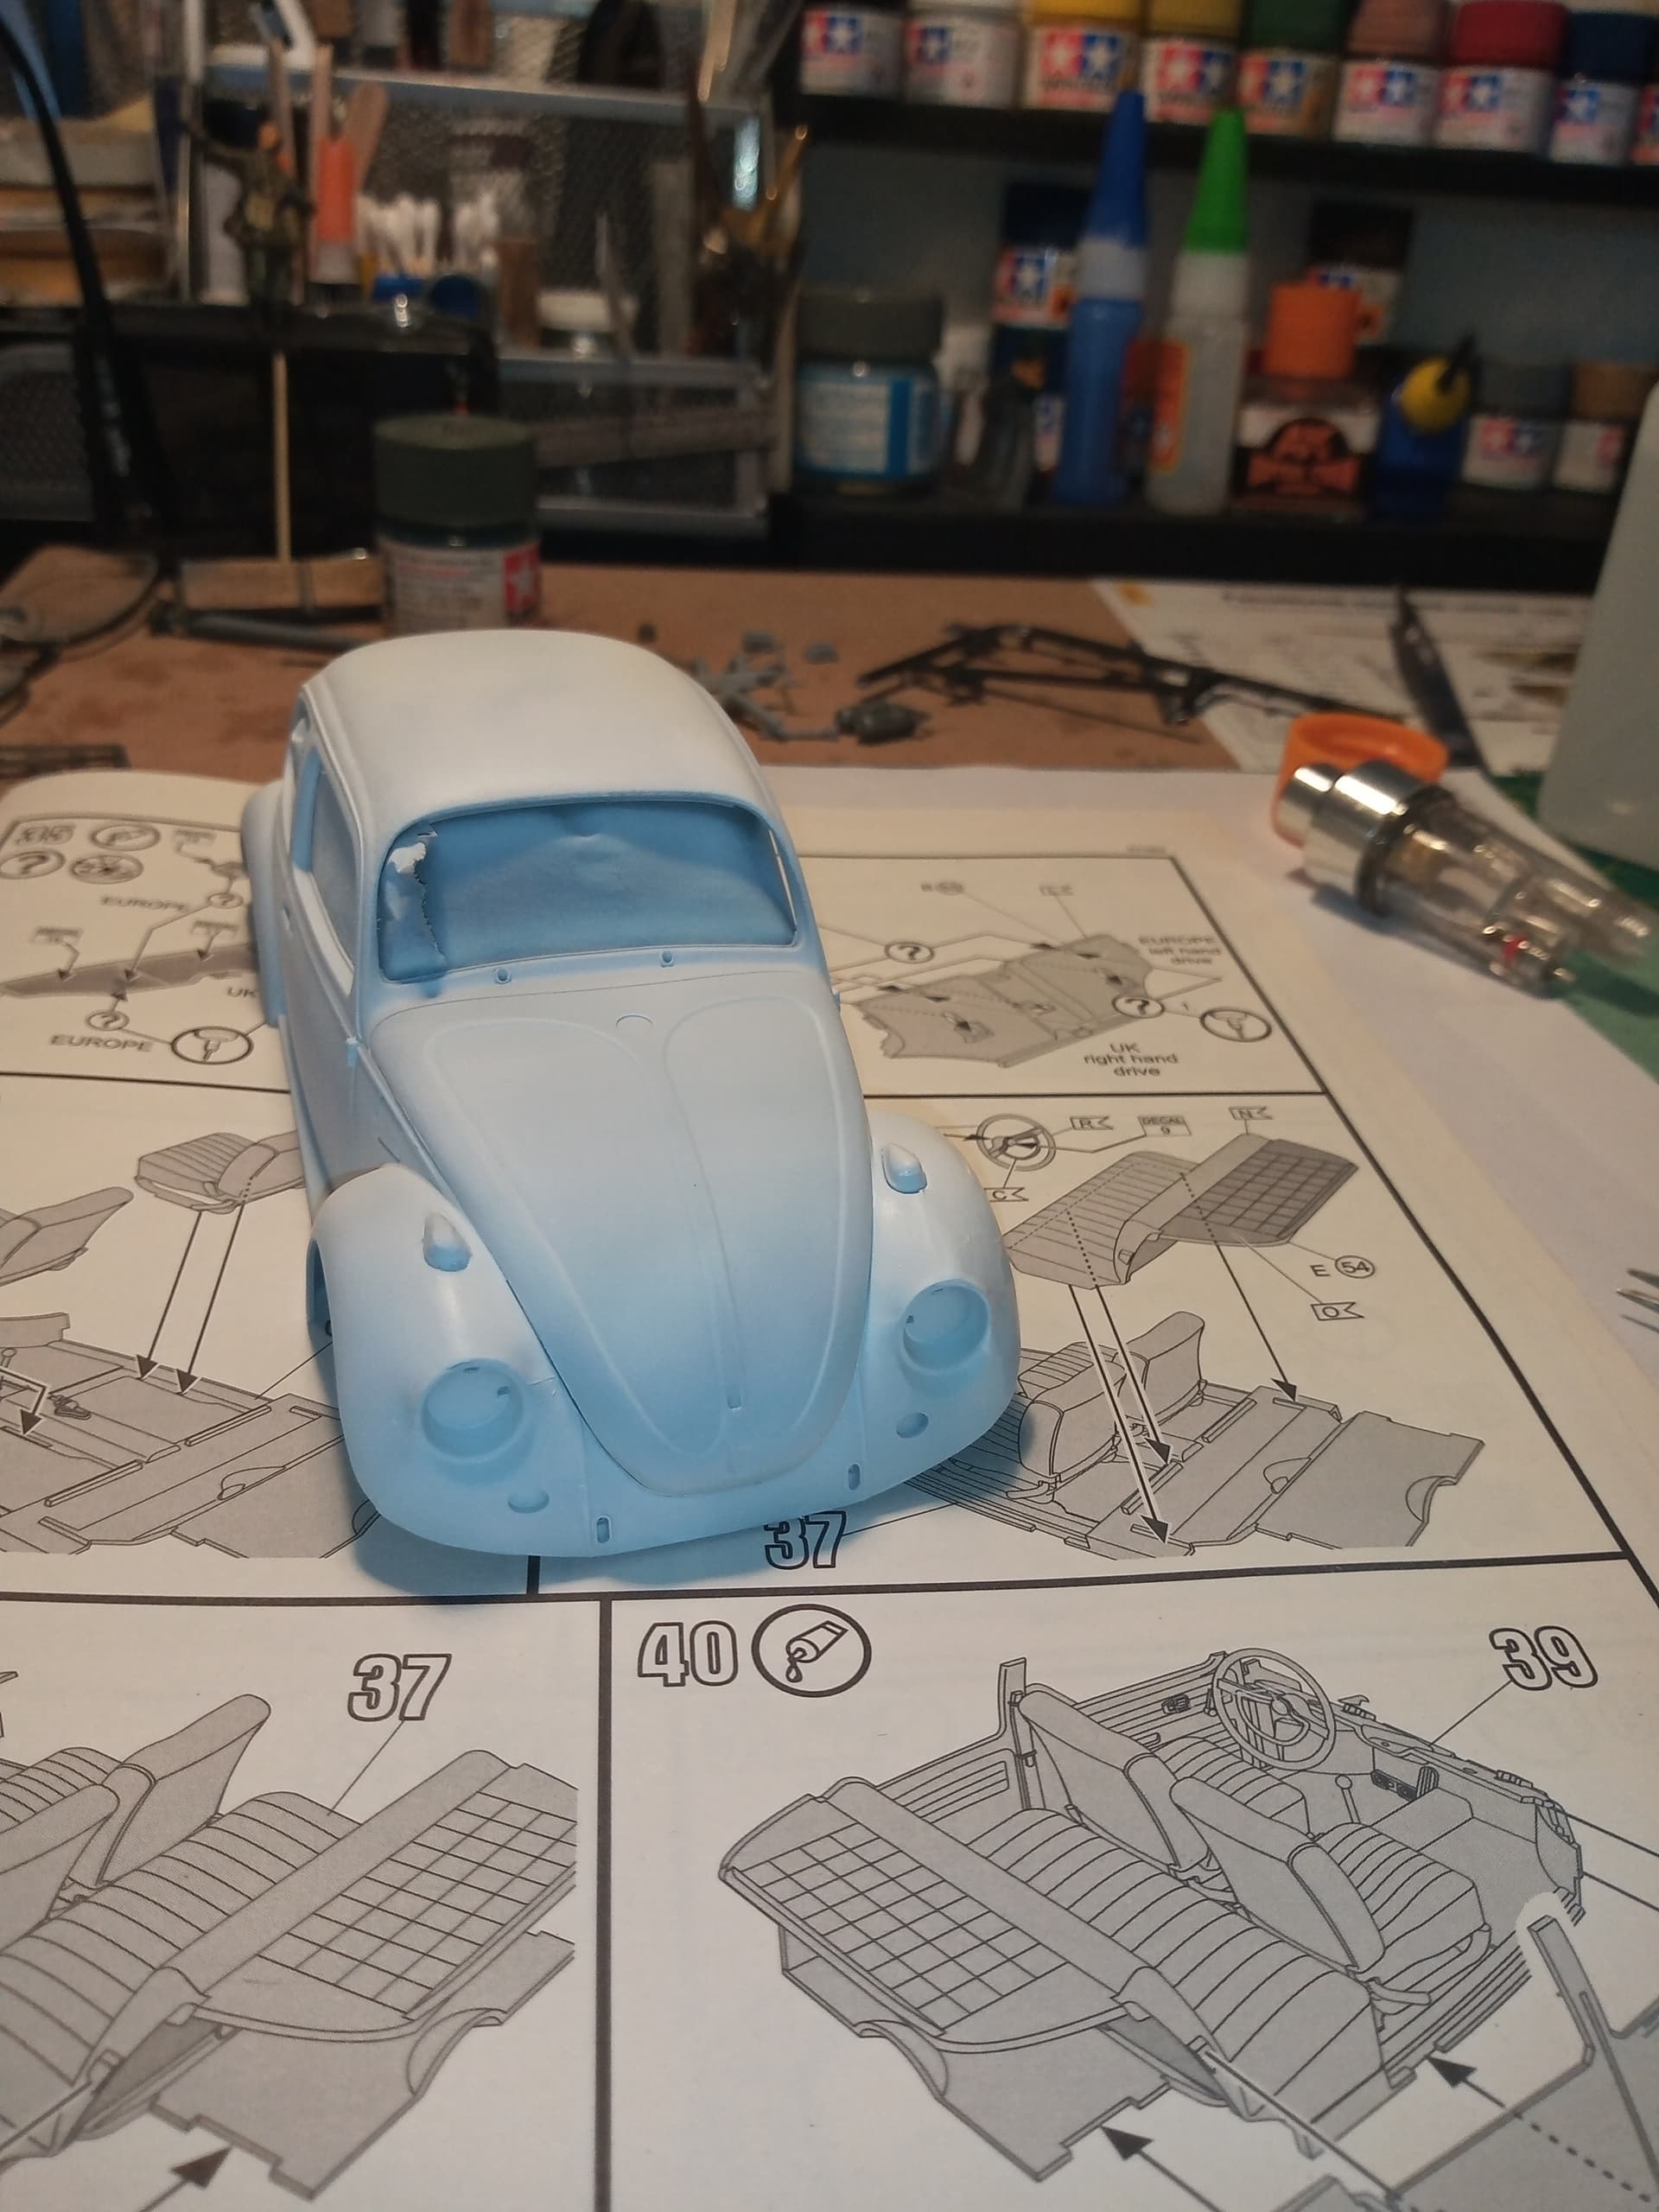
Base white coat down. Eventually 
I did one coat, then promptly dropped it, straight on its roof which then collected about 30,000 bits… So off with that roof coat and one front wing …then primed again and repainted lol…
Used AK flat white mixed 50/50 with the normal cellulose thinner and about 10 good drops of Tamiya retarder lacquer thinner.
Will give that at least 24 hours then decide on the grey and the masking areas…
7 Likes
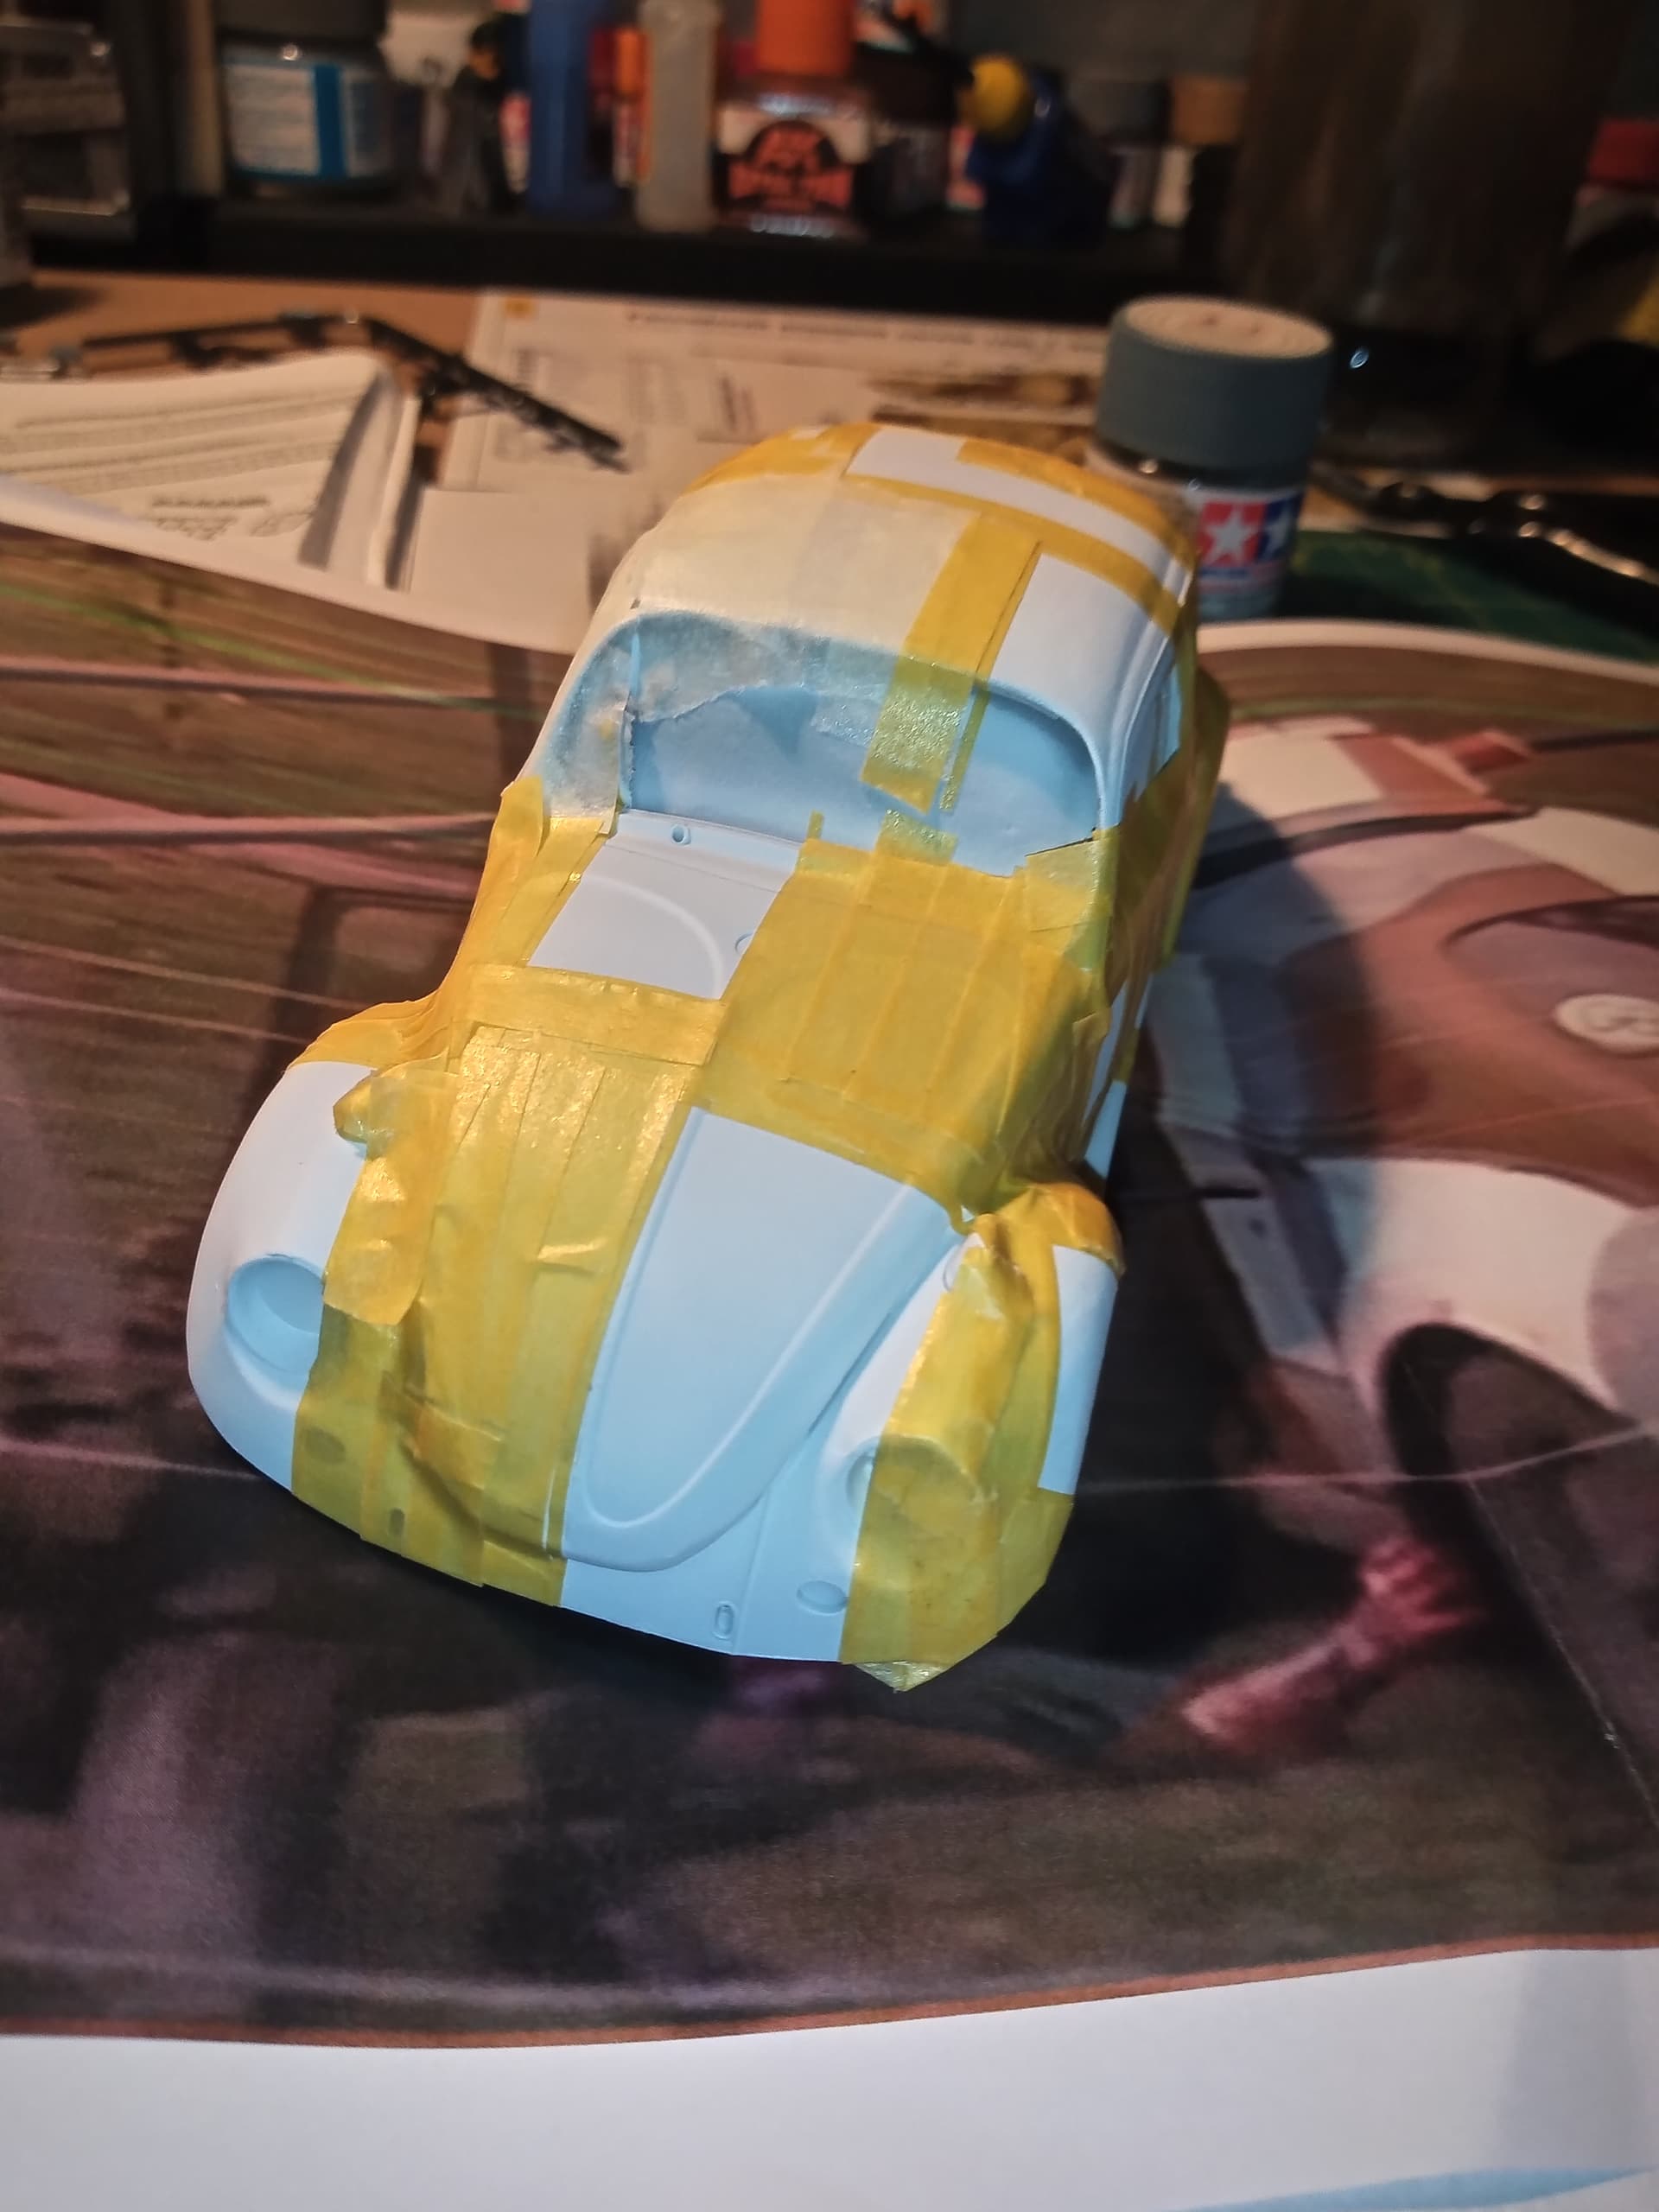
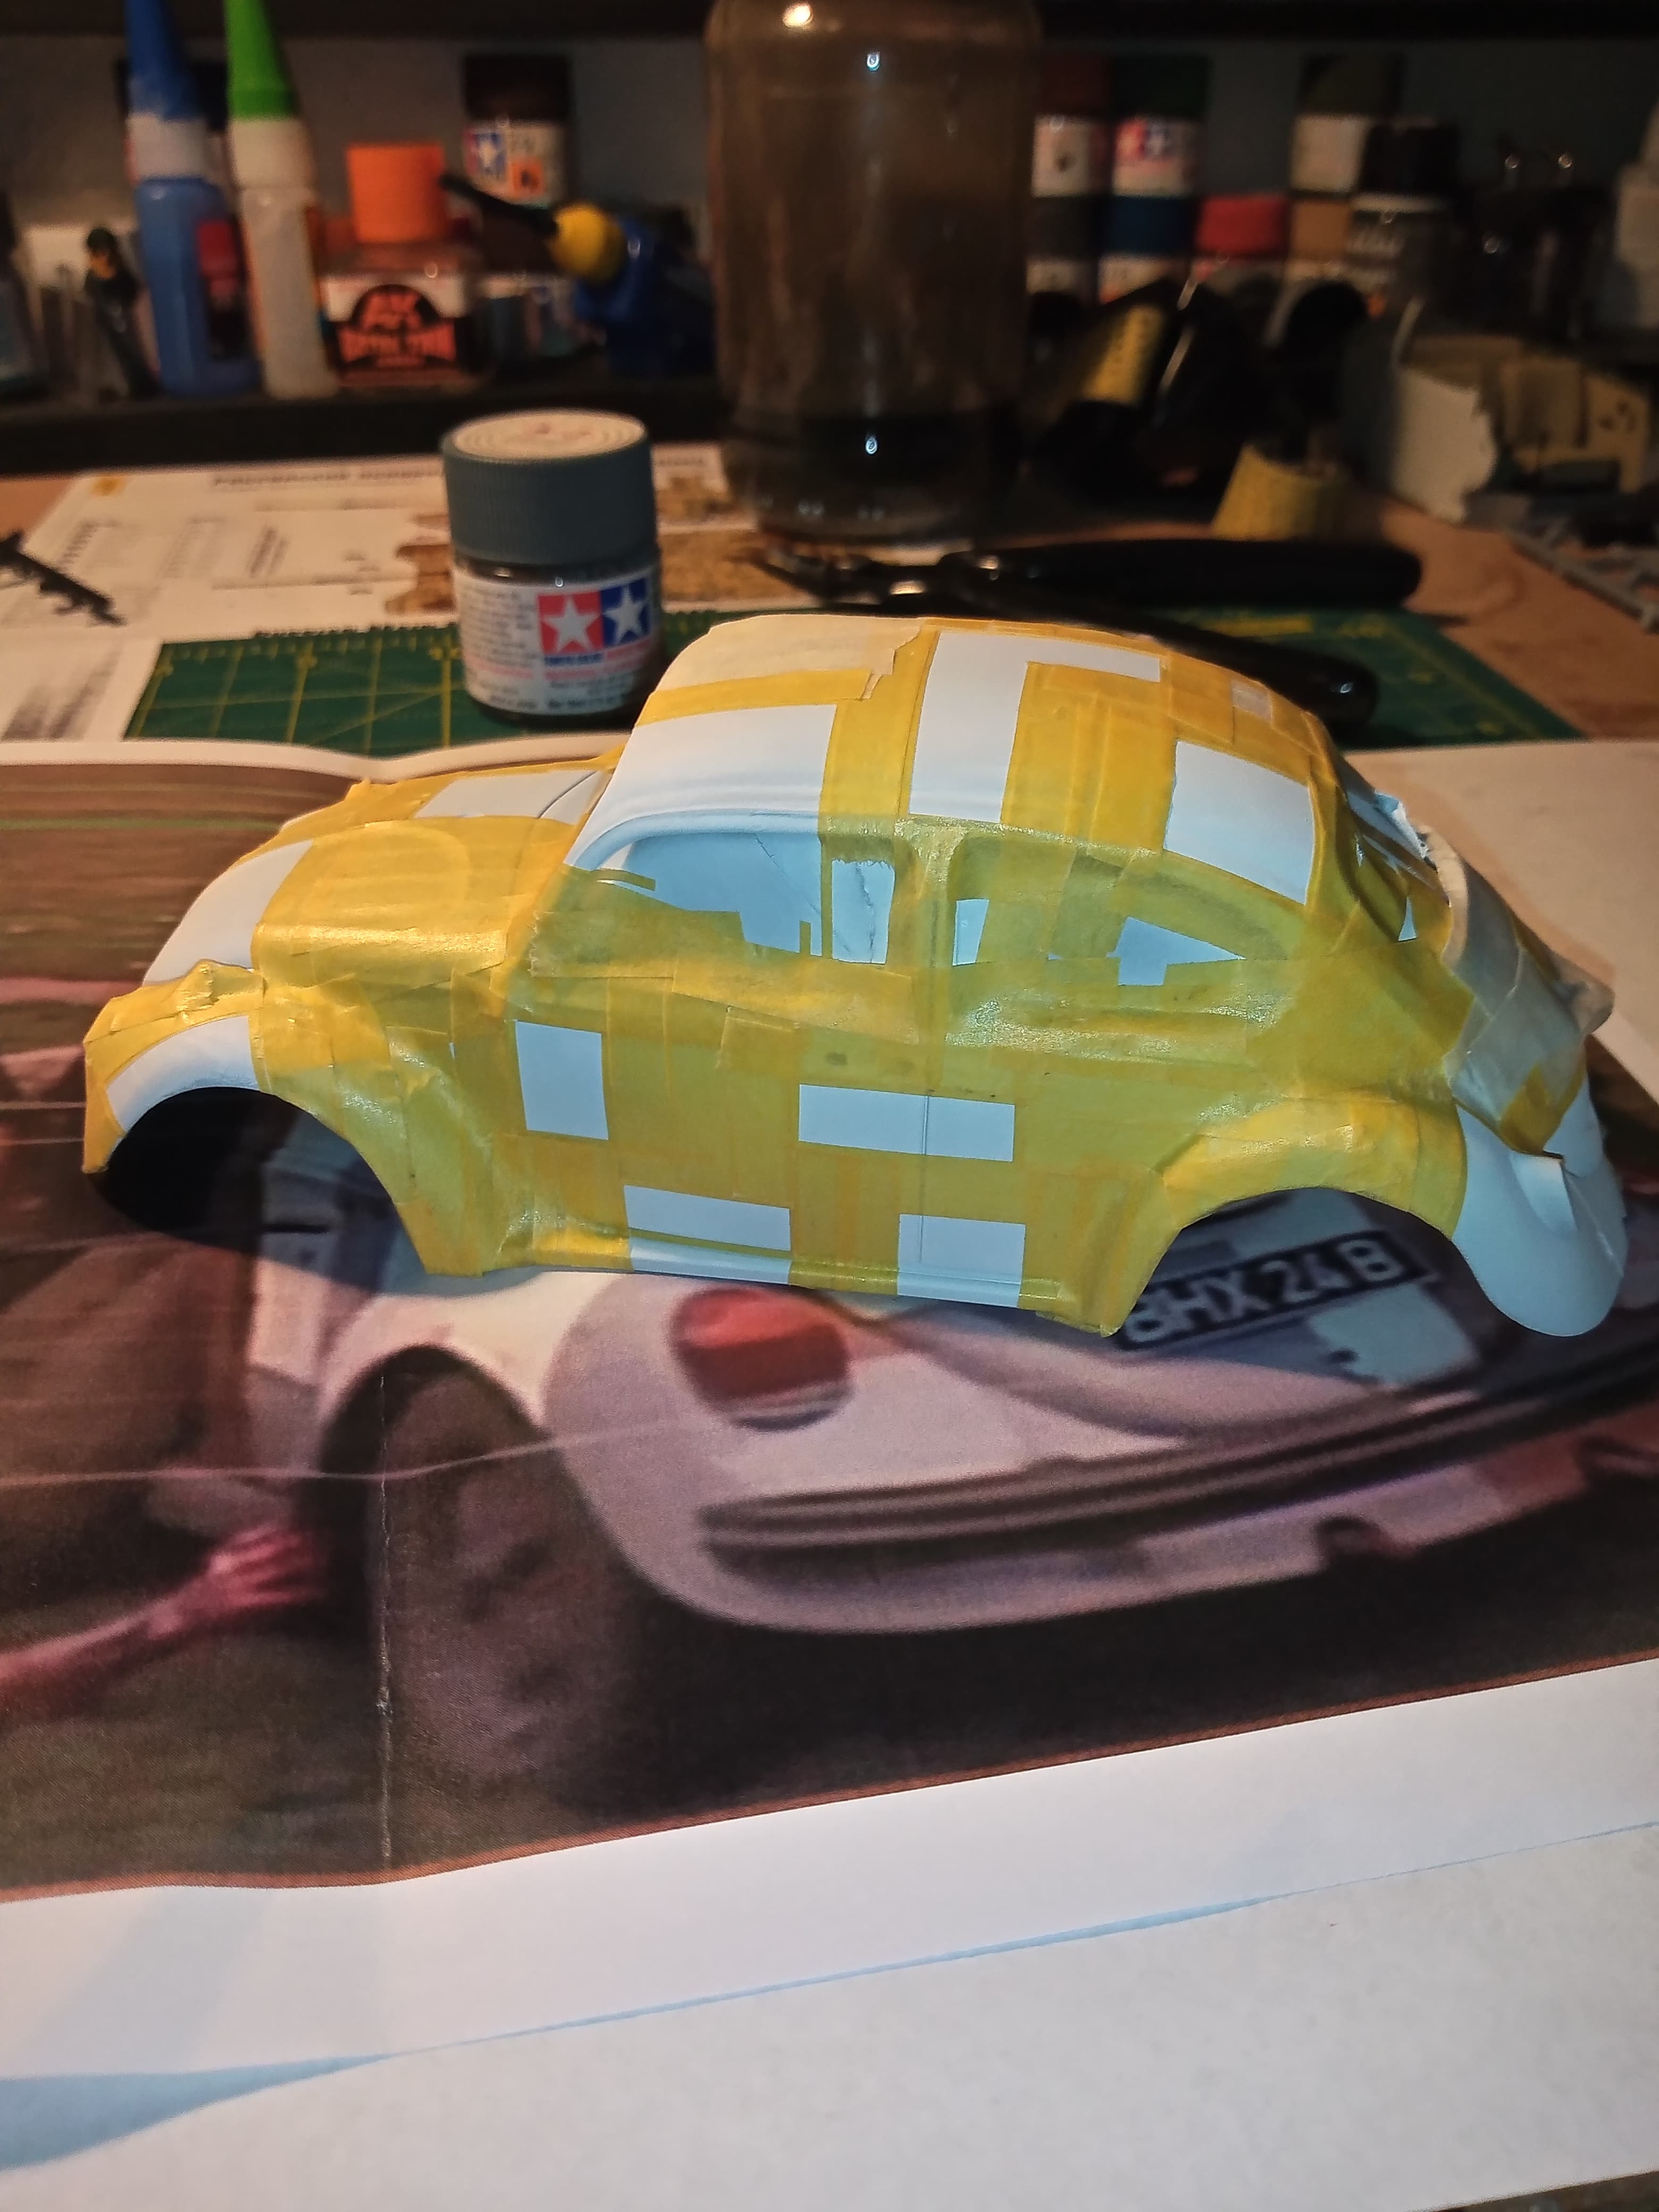
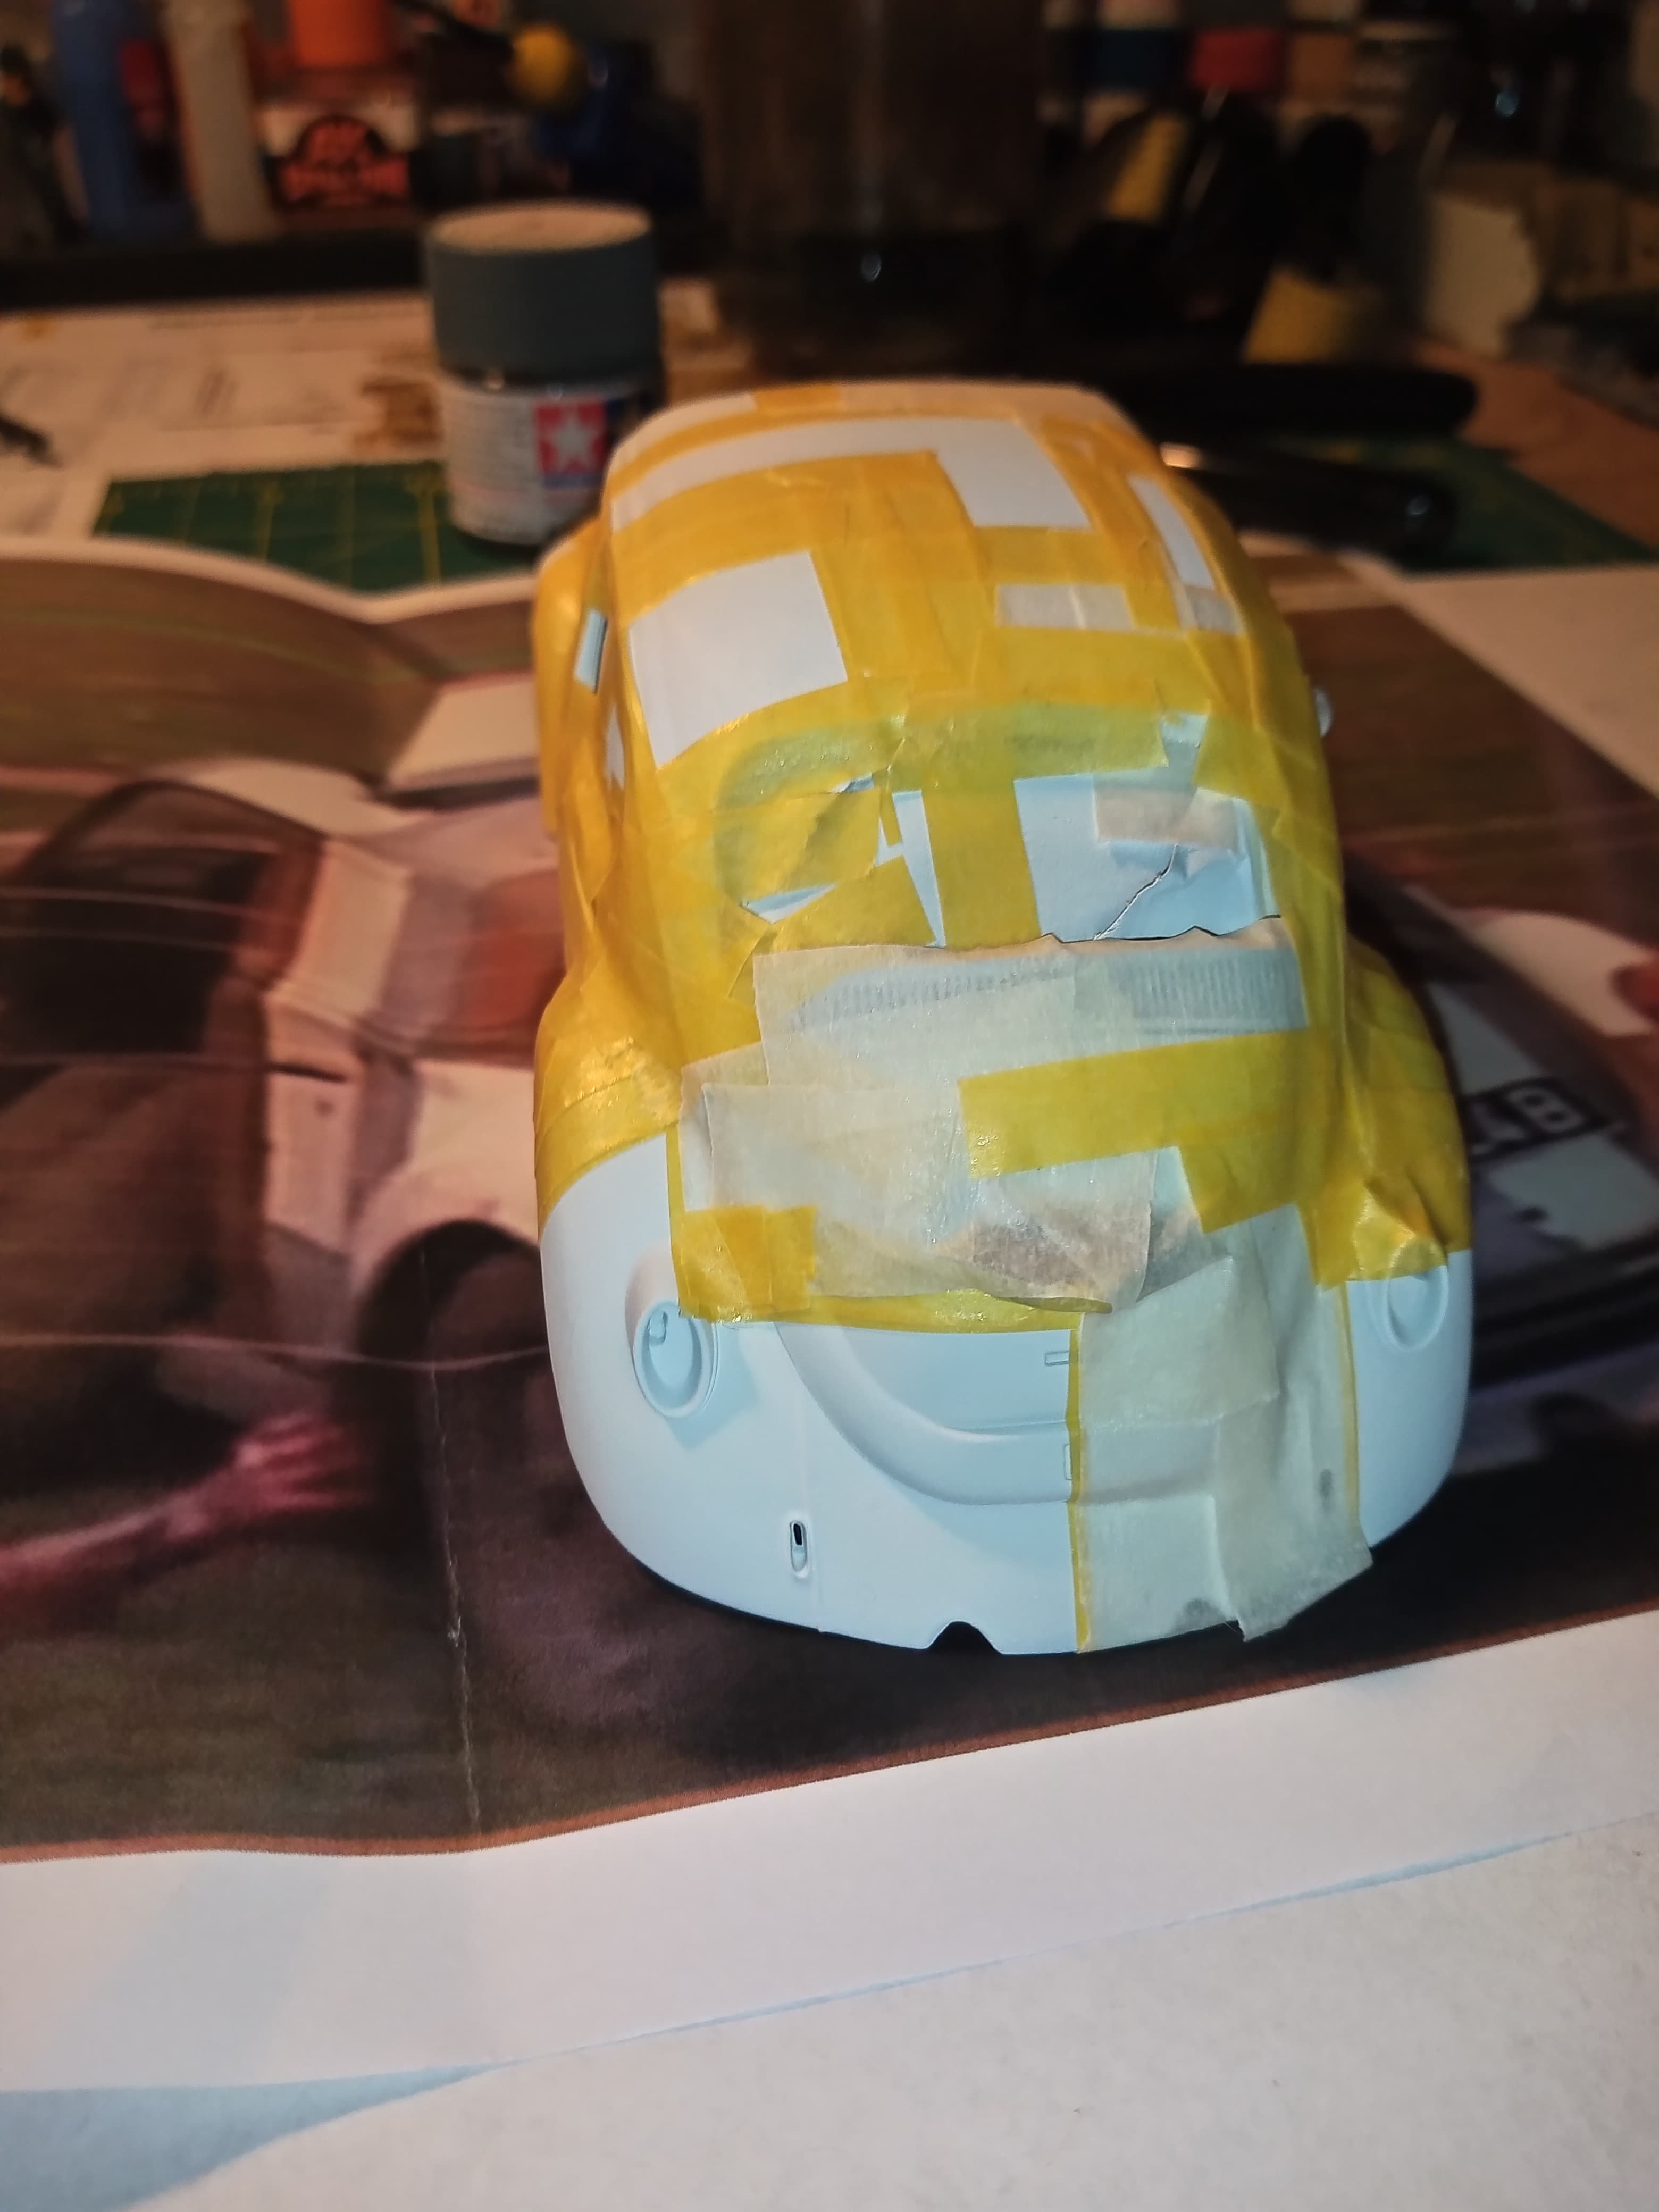
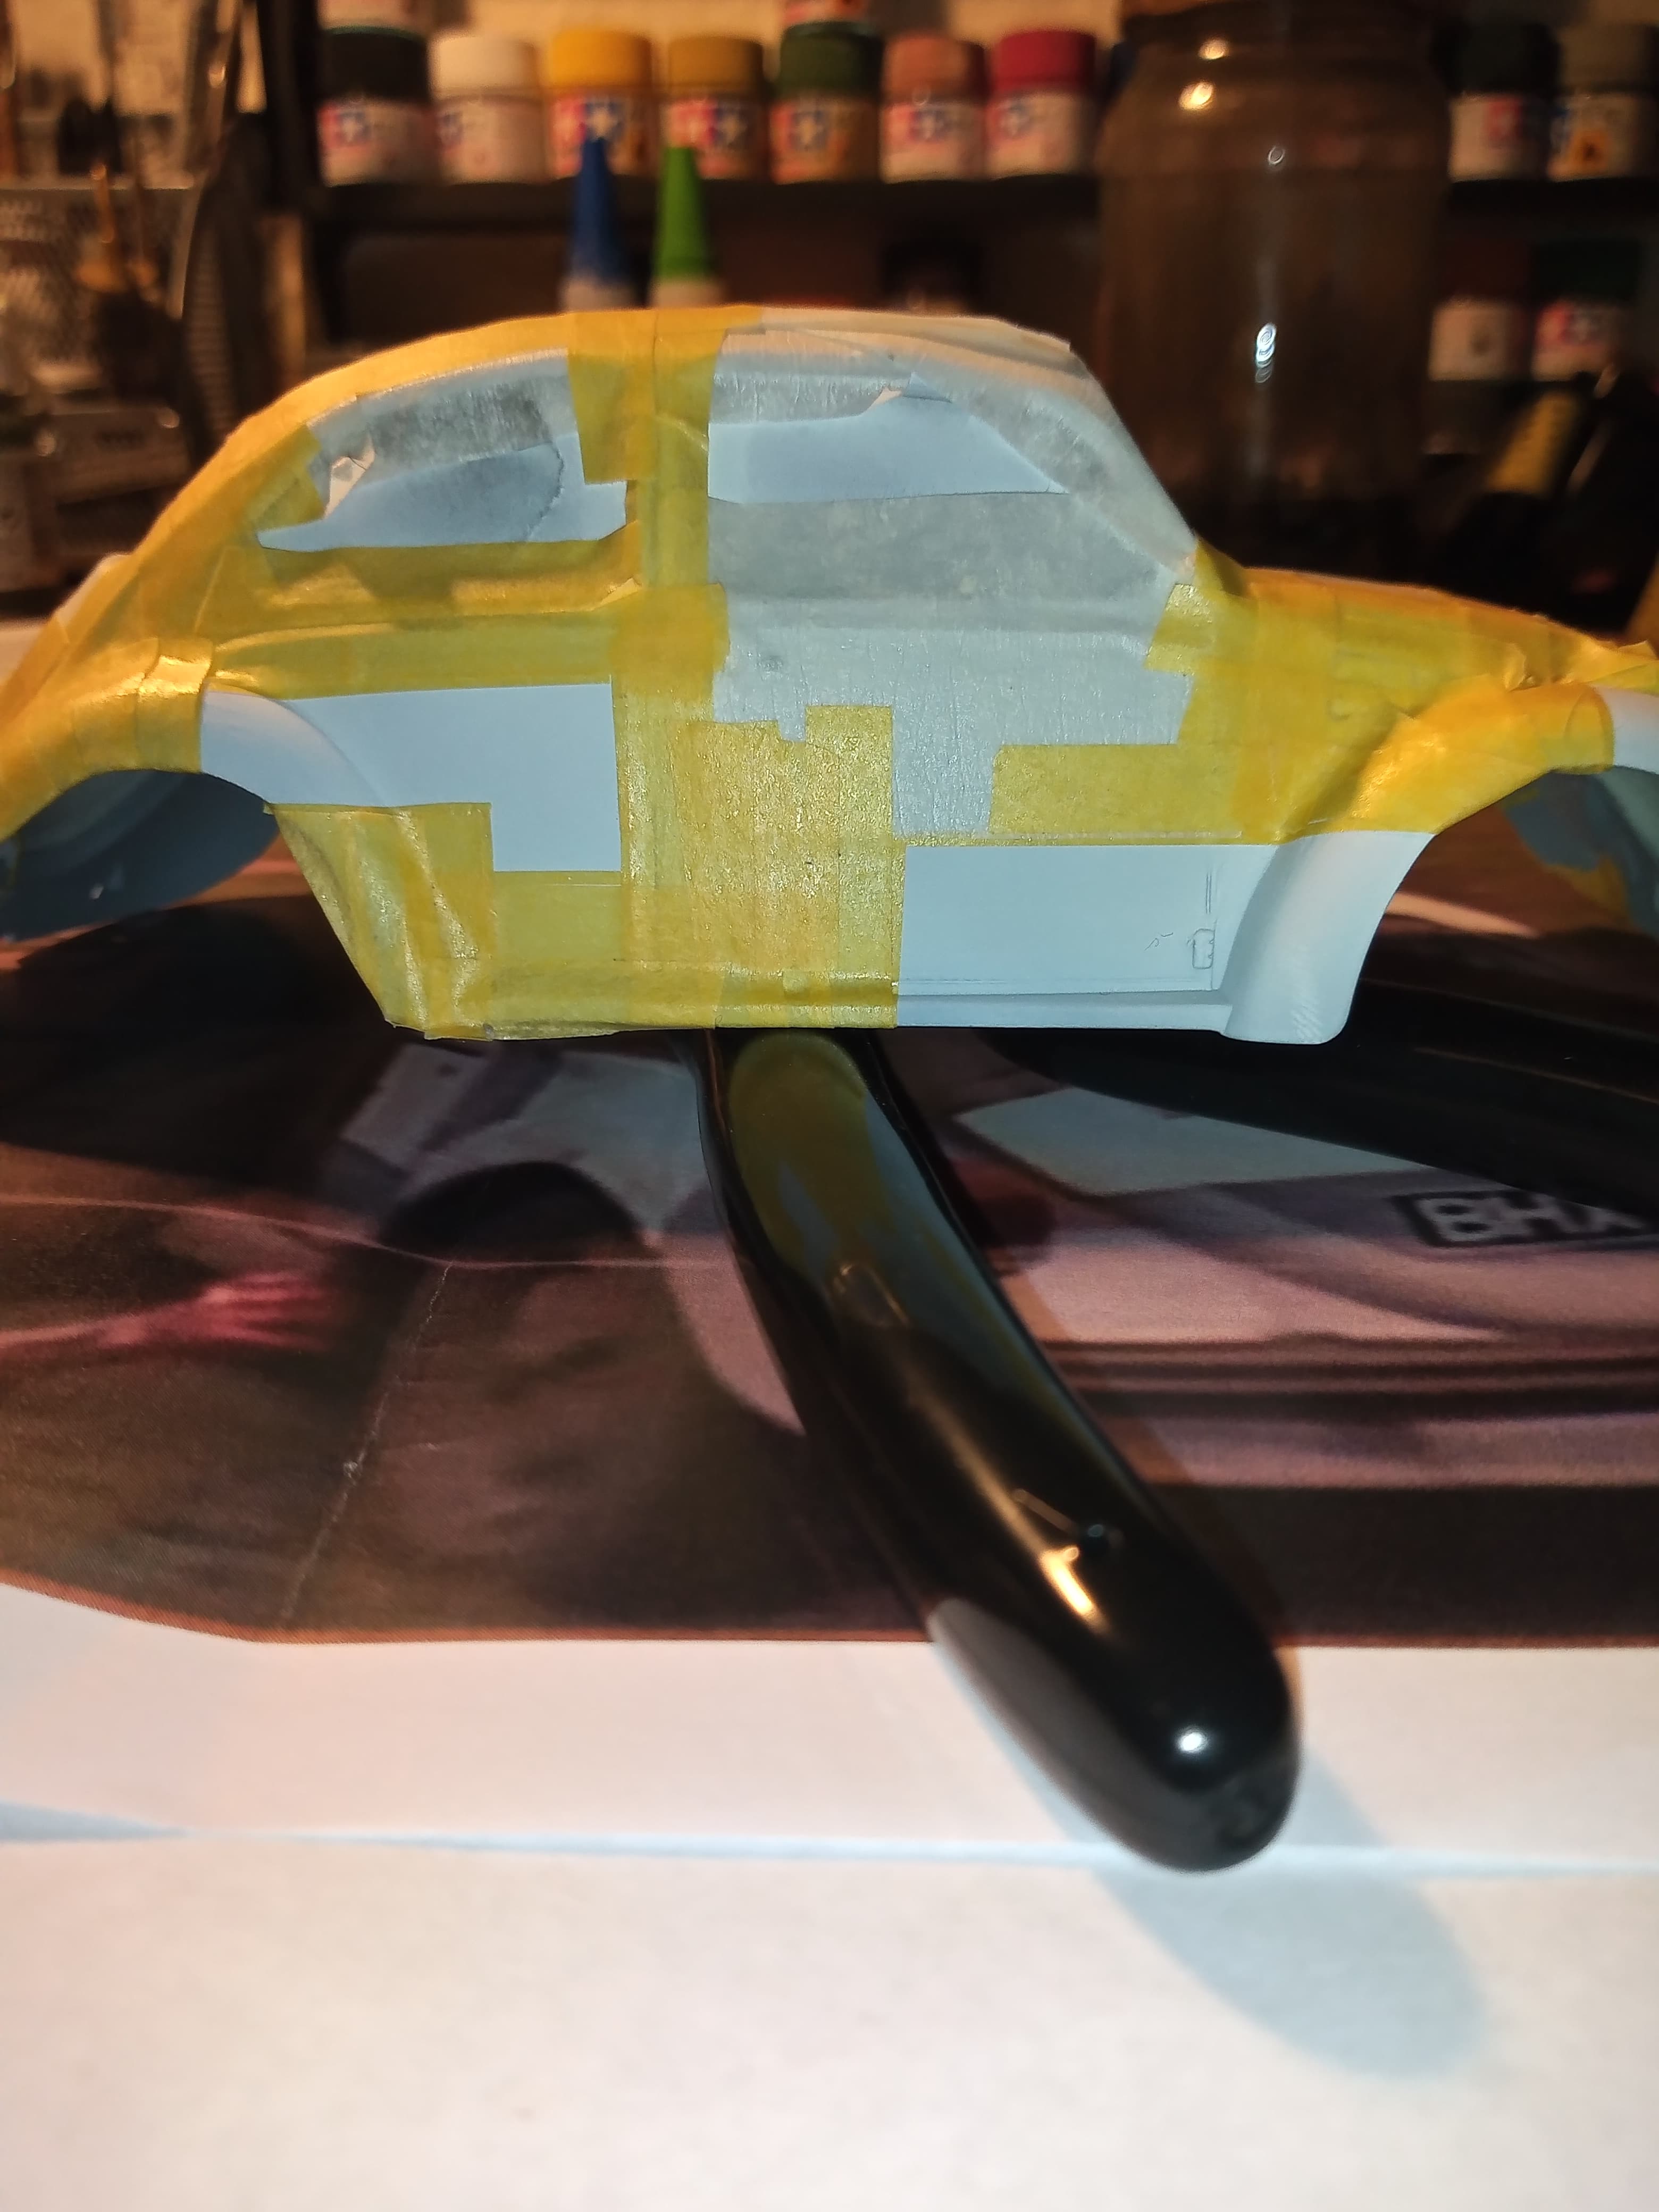
After a lot of Tamiya masking tape …
I am ready to do the grey areas.
@iwatajim & @Catsrcool and anyone else who’s done the Berlin cam… I salute you lol …
Thank god this is just a small Vdub with a lot of flat surfaces instead of a Chieftain or even a 432…
Will sort through a couple of greys that I have narrowed it down to, and then get that sprayed on.
Still need to make the decals and 2 spotlights… I will be using the flame thrower tanks from the US weapons set for those… 
9 Likes
Waste not, want not…
Looks like a mummy at the moment…
1 Like
Just another little trick that you probably know already - but for others who don’t:
Now that it’s masked for the next color, spray a very light coat of clear along the edges of the mask. That way the next color won’t bleed under the mask.
2 Likes
That’s one cool looking beetle on one of my all time favorite camo patterns!
1 Like
Another one I did not know, or had forgotten about !!! However, as I have yet to paint, I will certainly try that one out before I do the grey coat
And thanks Colin, Richard and Peter
2 Likes
Nice masking job John. Look forward to seeing the results and what grey you go with.
1 Like
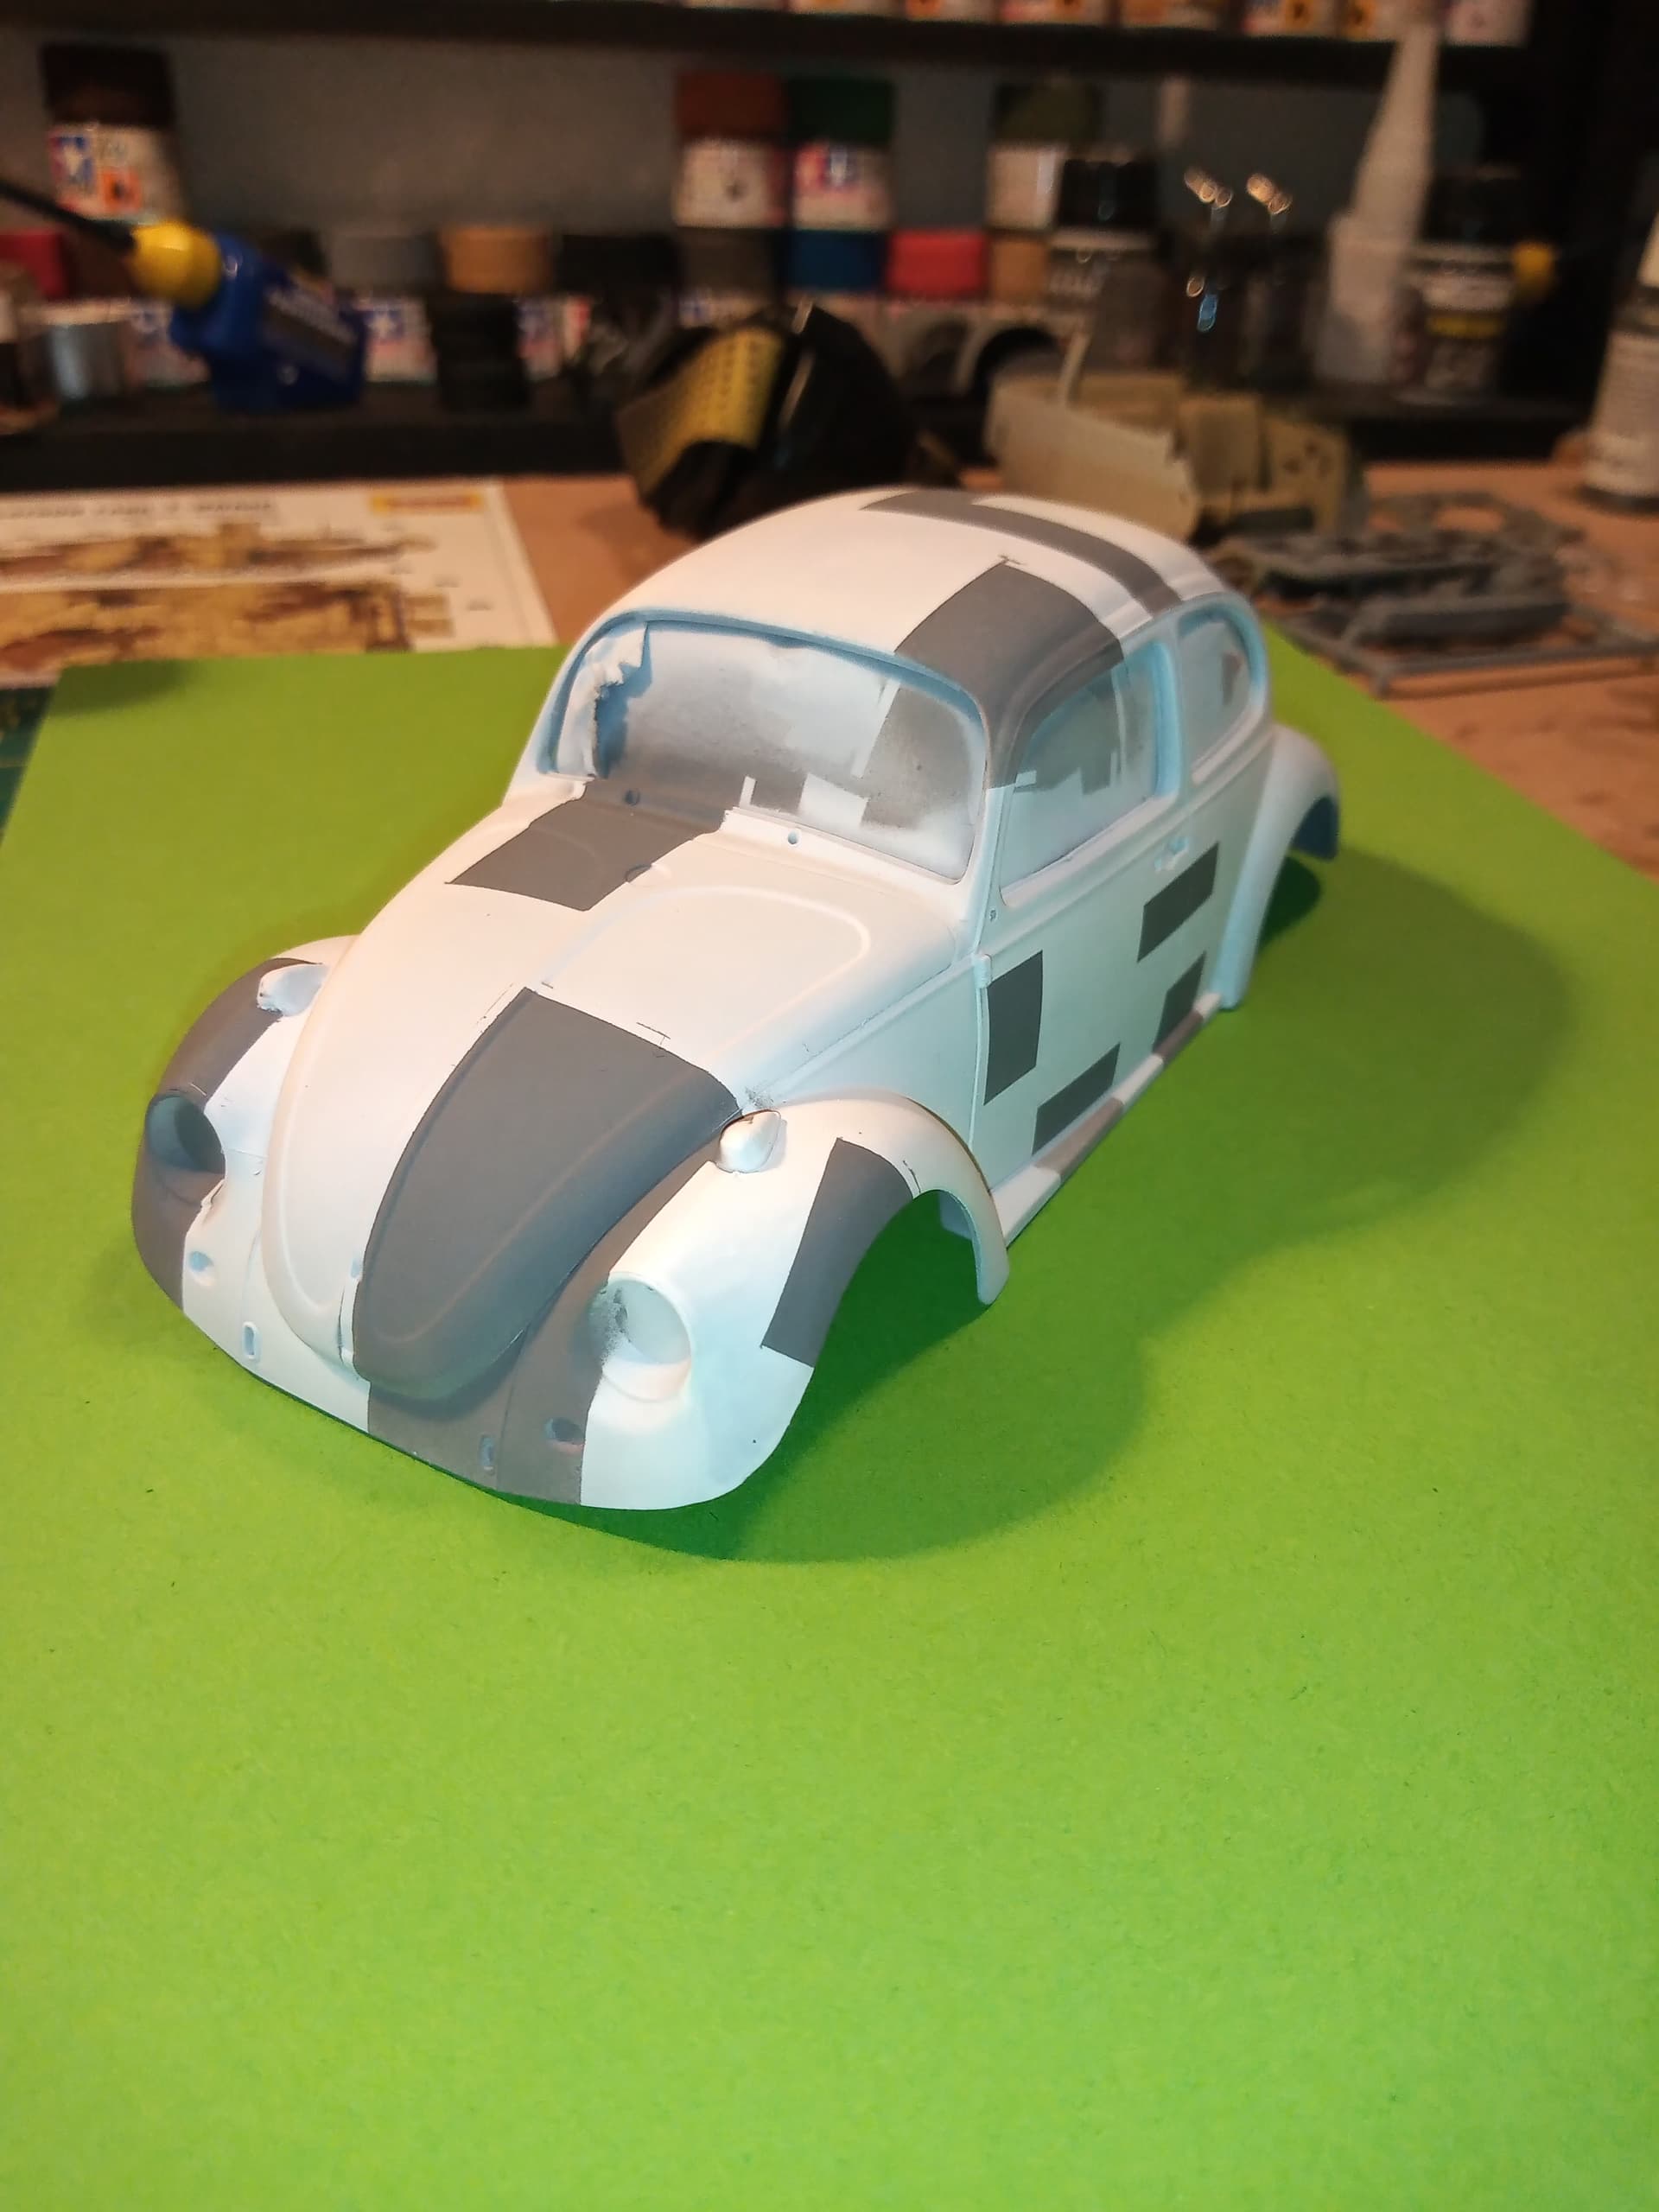
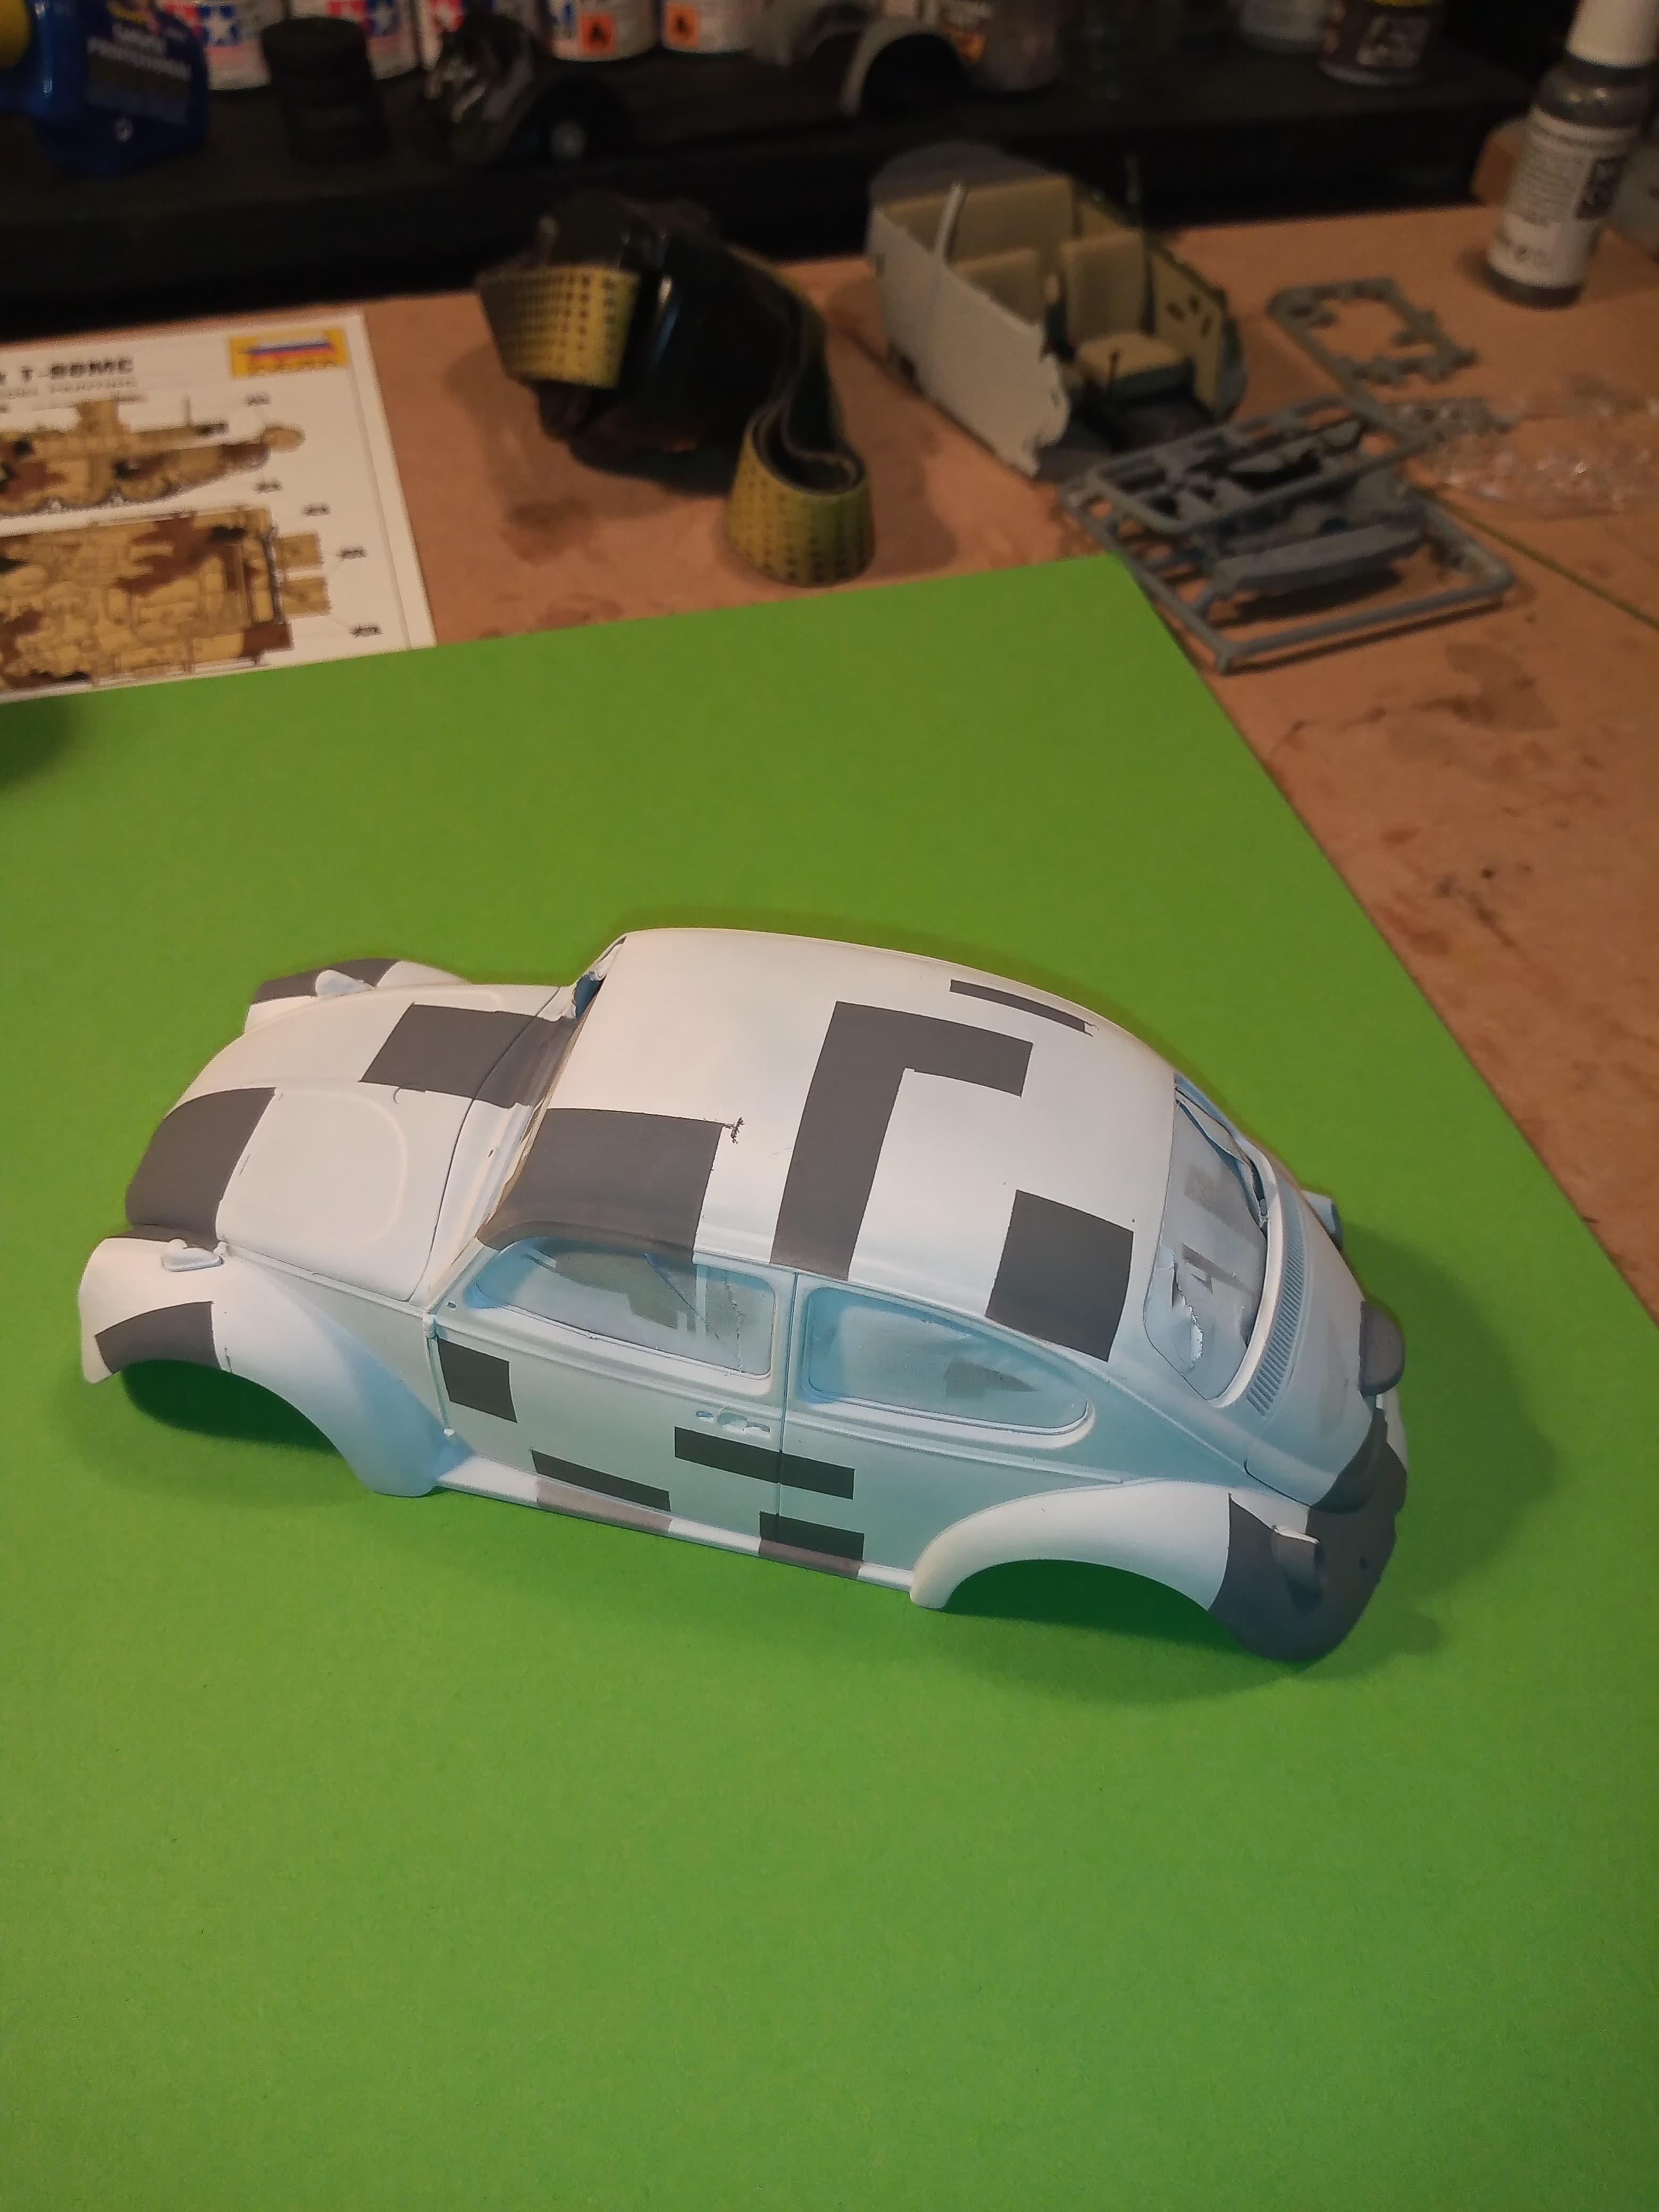
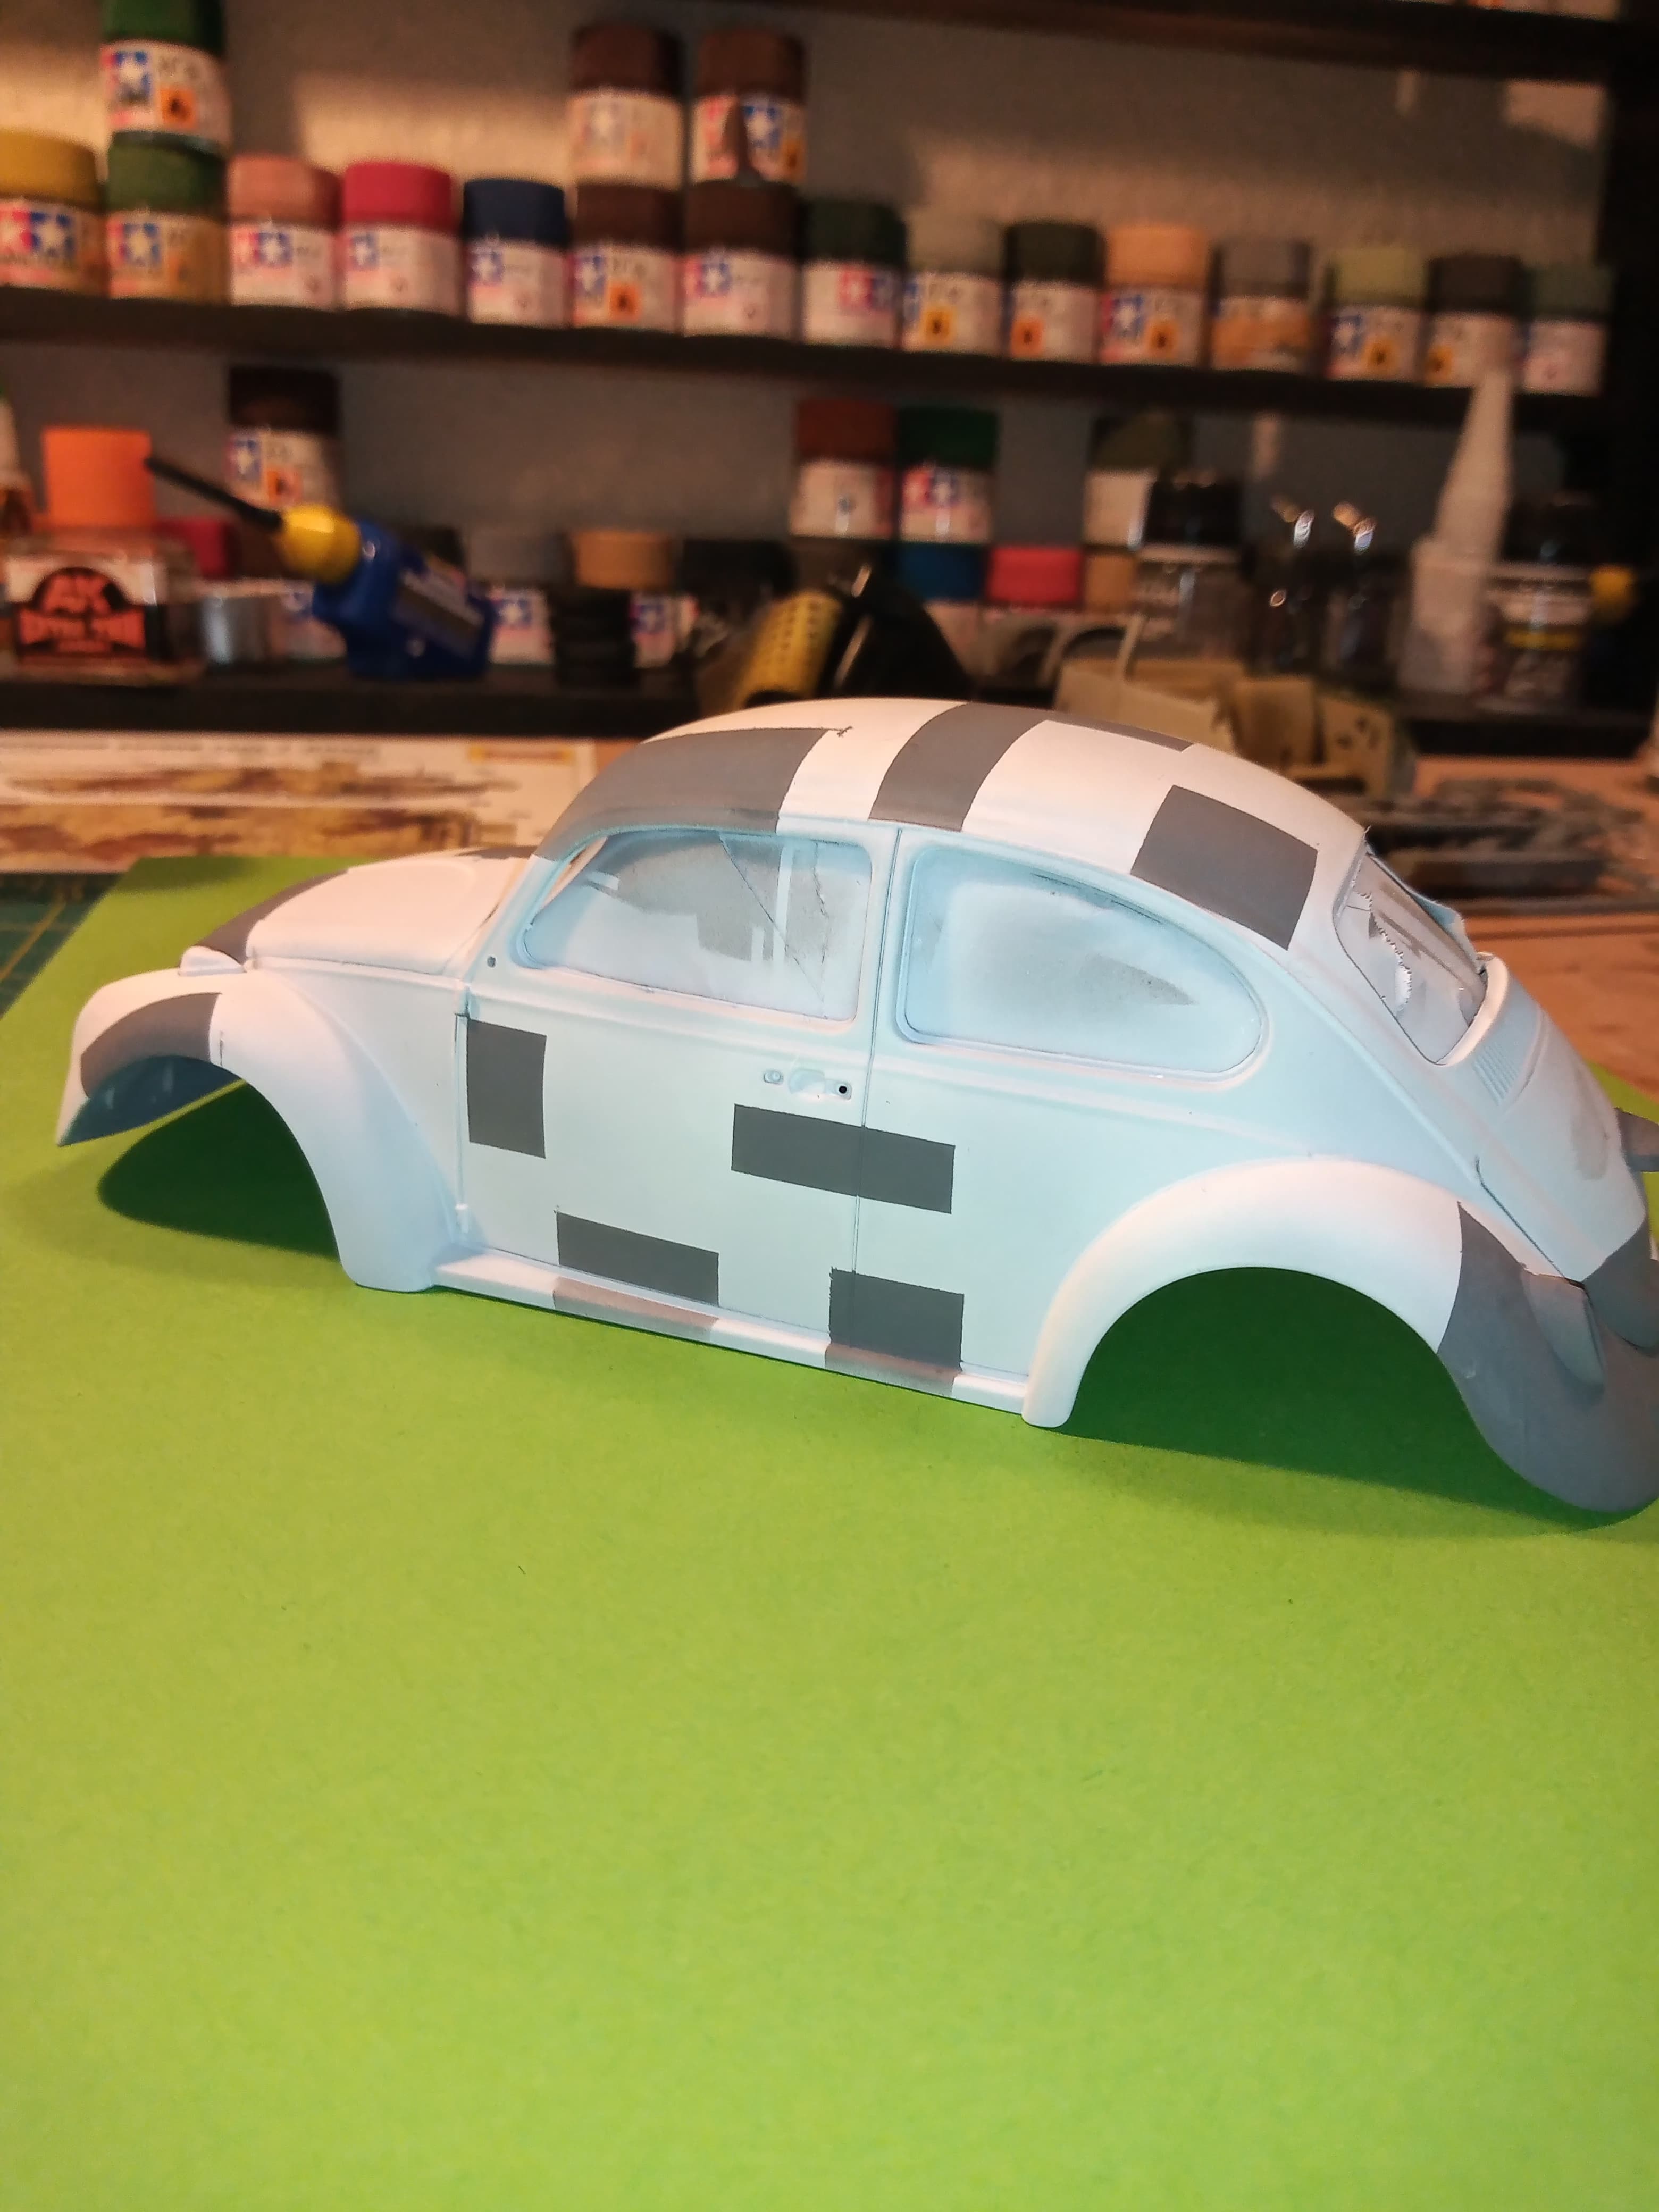
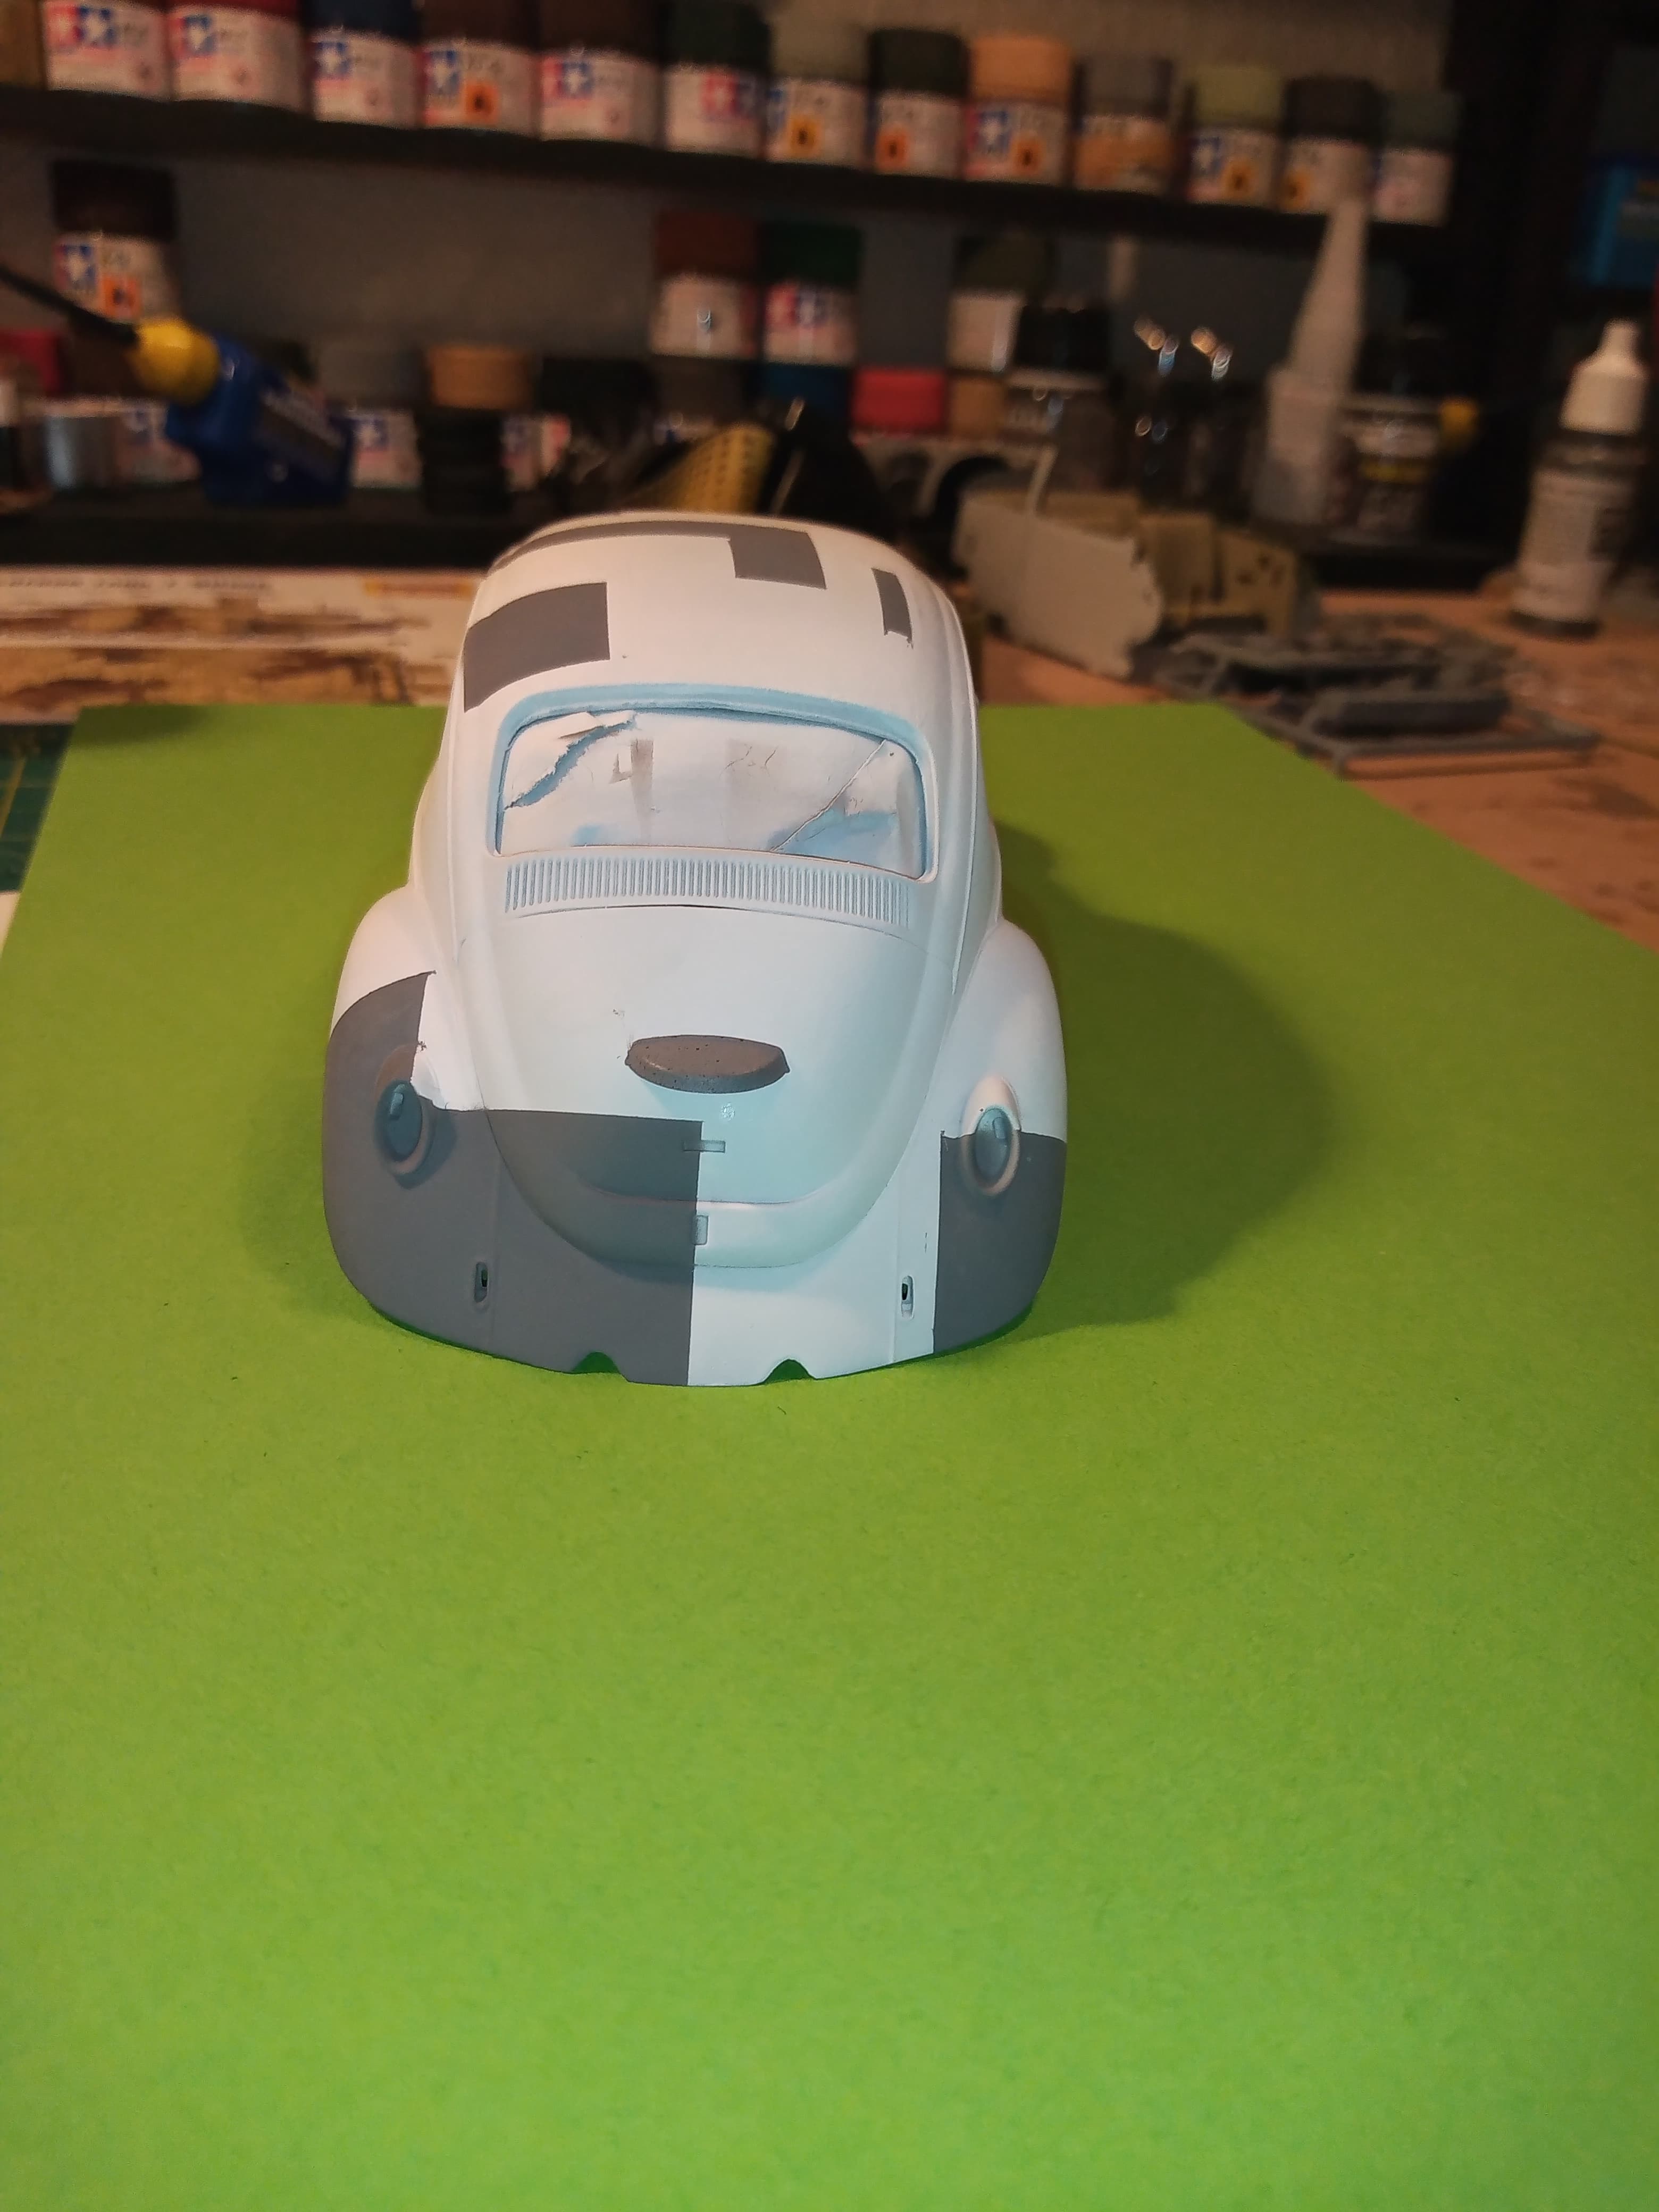
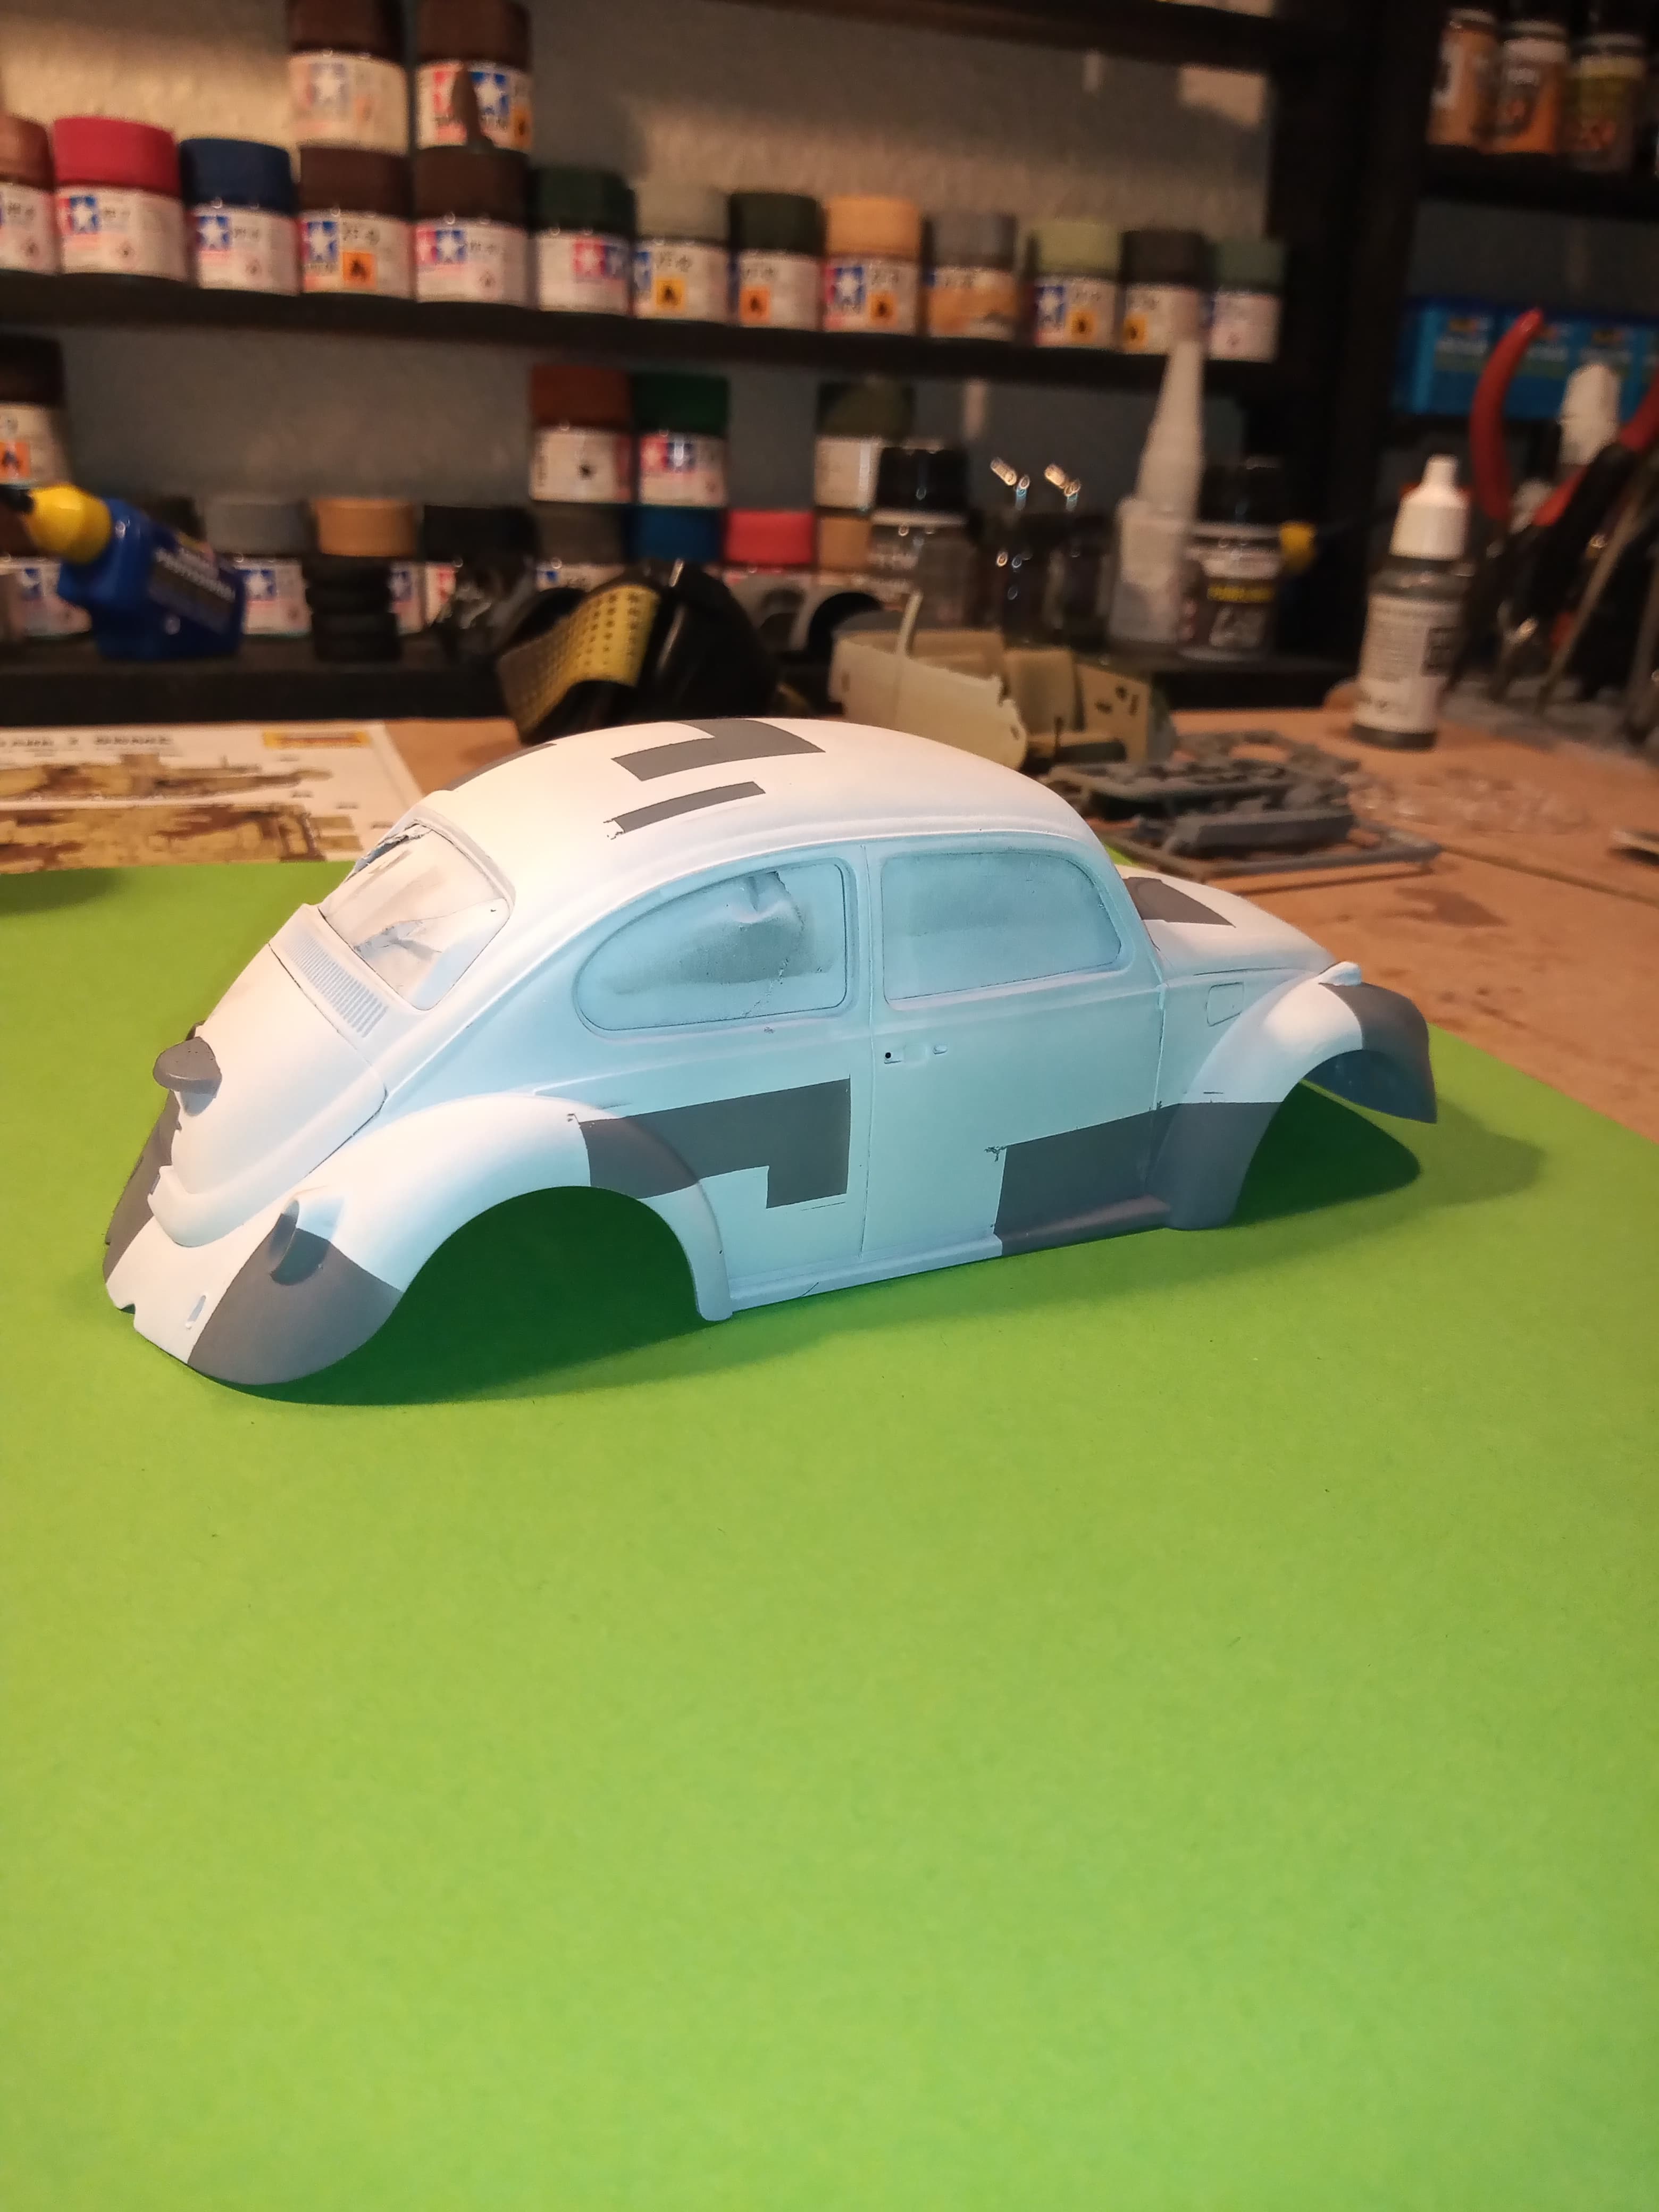
Well here we are with the grey applied.
I must say, it’s the first time I’ve done masking like this, and although time consuming, it was worth it.
I was dreading taking the masking tape off, but pretty happy with the results.
In all there are about 8 very small areas where there was a bit of bleed coming through or I didn’t mask it properly…most likely a bit of both.
Thankfully, those bleed areas are all going to be covered by the brown when that goes down, so again, I’m am content with that.
I have it on good authority that the early grey and brown differed slightly from the paints used in the later years, so I am happy with the colour as it is.
For the grey I used Tamiya XF 75 IJN Grey, thinned 50/50 with a few drops of Tamiya retarder added. Will give that a day to form up, then start the mask for the brown and start painting the chrome bits that need doing… And then the spotlights and decals to make.
Edit. I noticed the grey does look darker than what it is in real life, I think its just the light I was using at the time.
12 Likes
That’s cracking looking now John! On the curvy shape it would be tricky to mask so hats off for getting the shapes looking nice and straight.
Looking good John. Interesting how you are going about the masking. Having to re-mask what you already had.
When I spray multiple colours, Like the AT-A9 Caunter scheme, I spray the base colour first, then only mask those areas where the base is being preserved. Then I spray the next colour roughly where that needs to be (it does not matter if you spray over where the 3rd colour will be a little) then when that has cured mask those areas leaving only the areas the the last colour is to go. I only remove any masks when the full paint scheme has been laid.
2 Likes
Yeap, totally get that, as its my first time doing anything like this it was a bit of a learning curve of how to address it, so all these tips and suggestions will be used in any future paint schemes as they all make sense. when I masked this one, I used 1mm Tamiya masking tape to define the block areas, then larger sizes to fill in between. I thought the 1mm gave a more clean line on the outline of the blocks.
3 Likes