Looking good. Thanks for the in-progress pics.
Cheers!
chuck
Looking good. Thanks for the in-progress pics.
Cheers!
chuck
Thanks for your kind comments chuck!
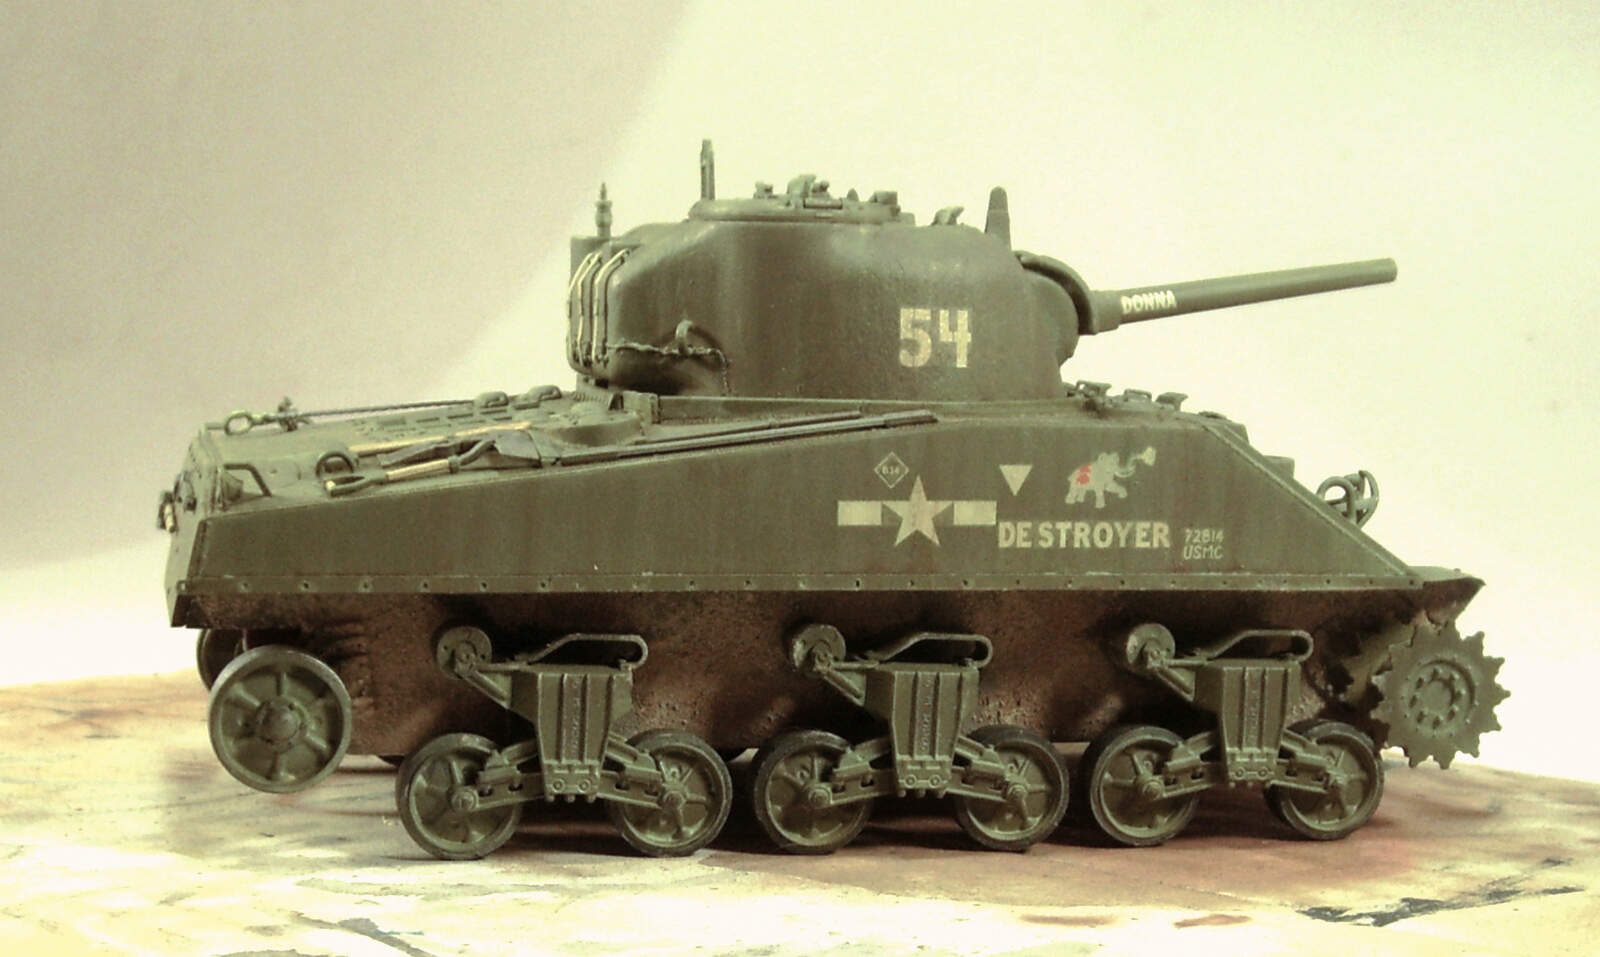
Update:
Working the mufflers applying A.MIG-3525 Oilbrusher Red-tile, following with MIG Old-rust P230 pigments and finishing with touches of Standard-rust P025, finally apply A.MIG-3500 Oilbrusher Black and black pigment on the pipes.
Regards!
Rodolfo
Hello!
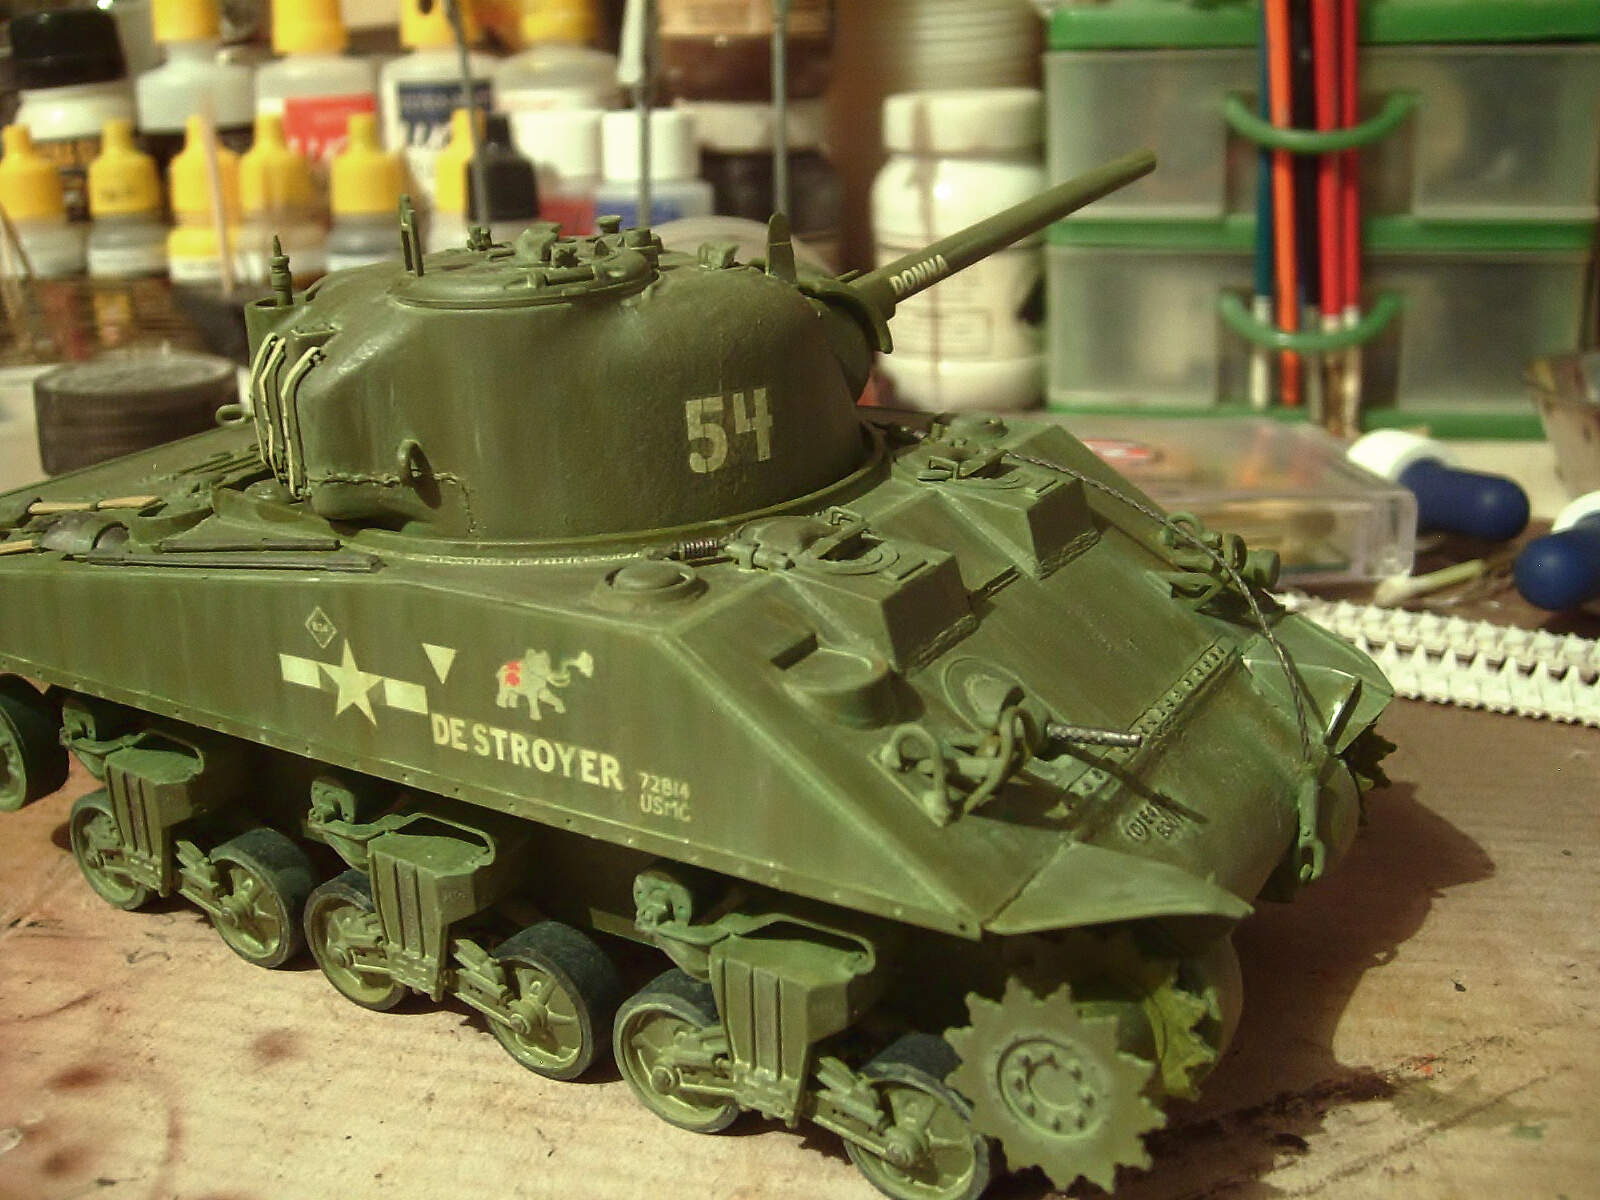
More pics!
Streaking using Humbrol # 103 Matt Cream, # 93 Matt Dessert Yellow, # 34 Matt White and # 102 Matt Army-Green, all with Humbrol Enamel Thinner.
Regards!
Rodolfo
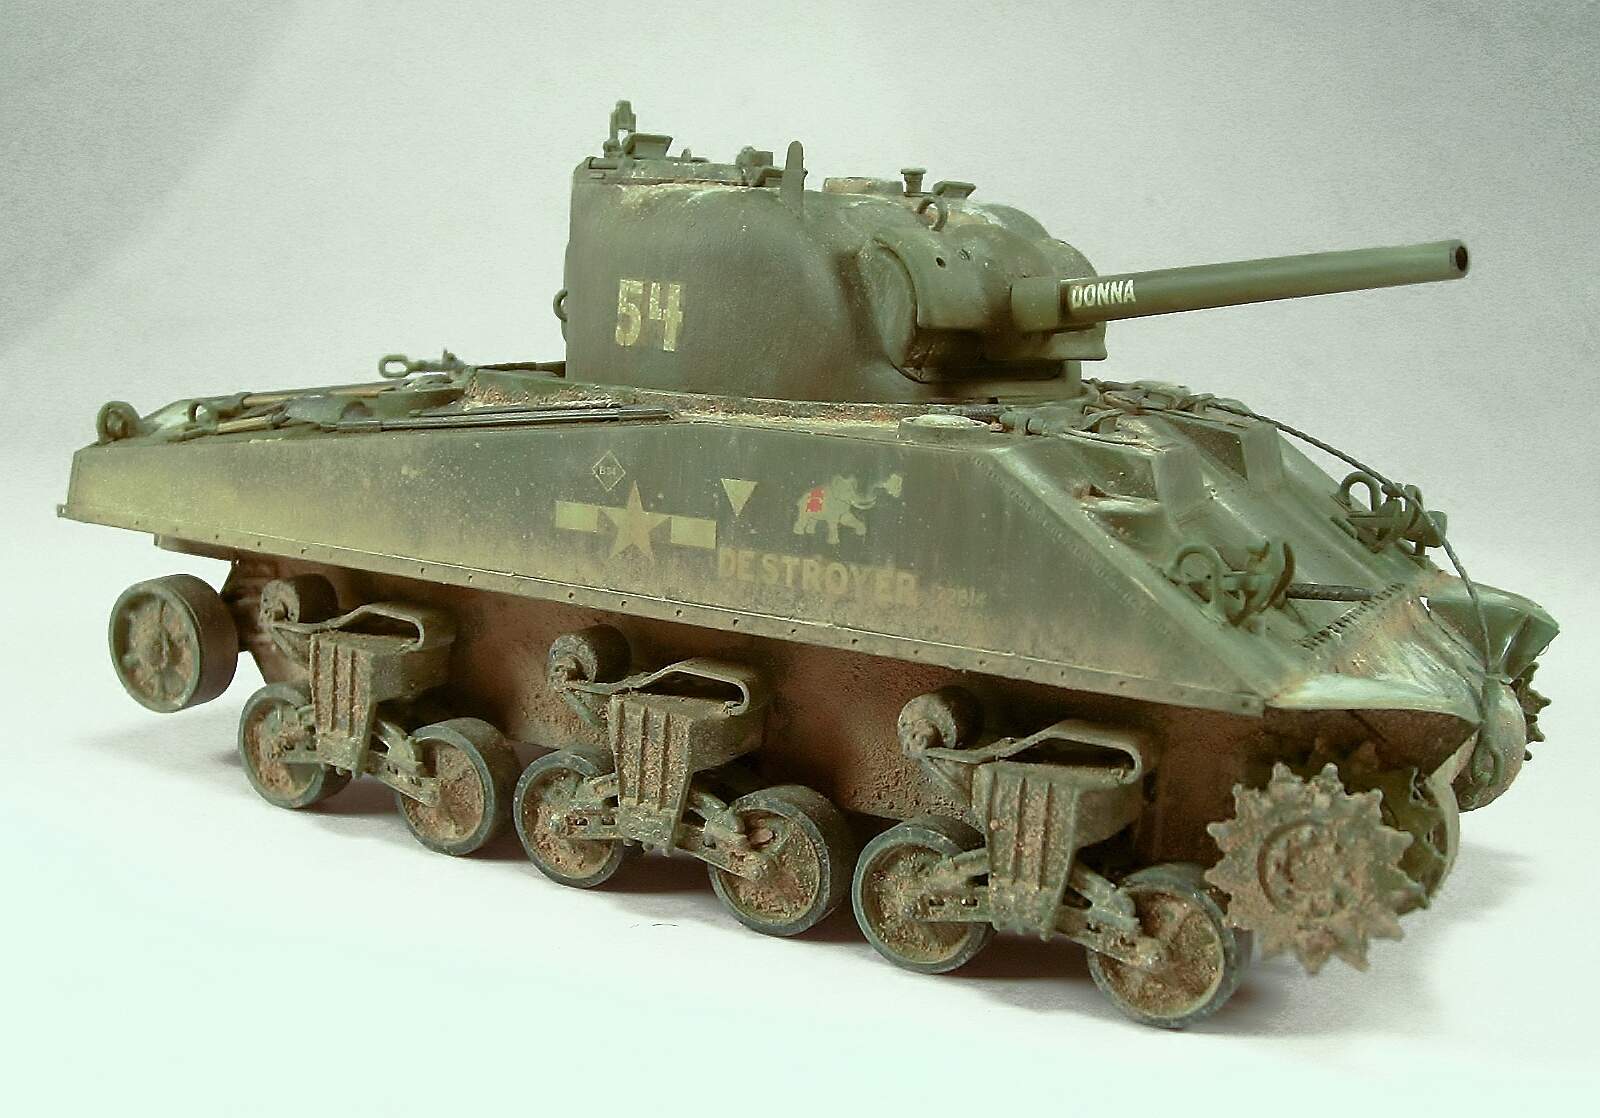
Hello friends!
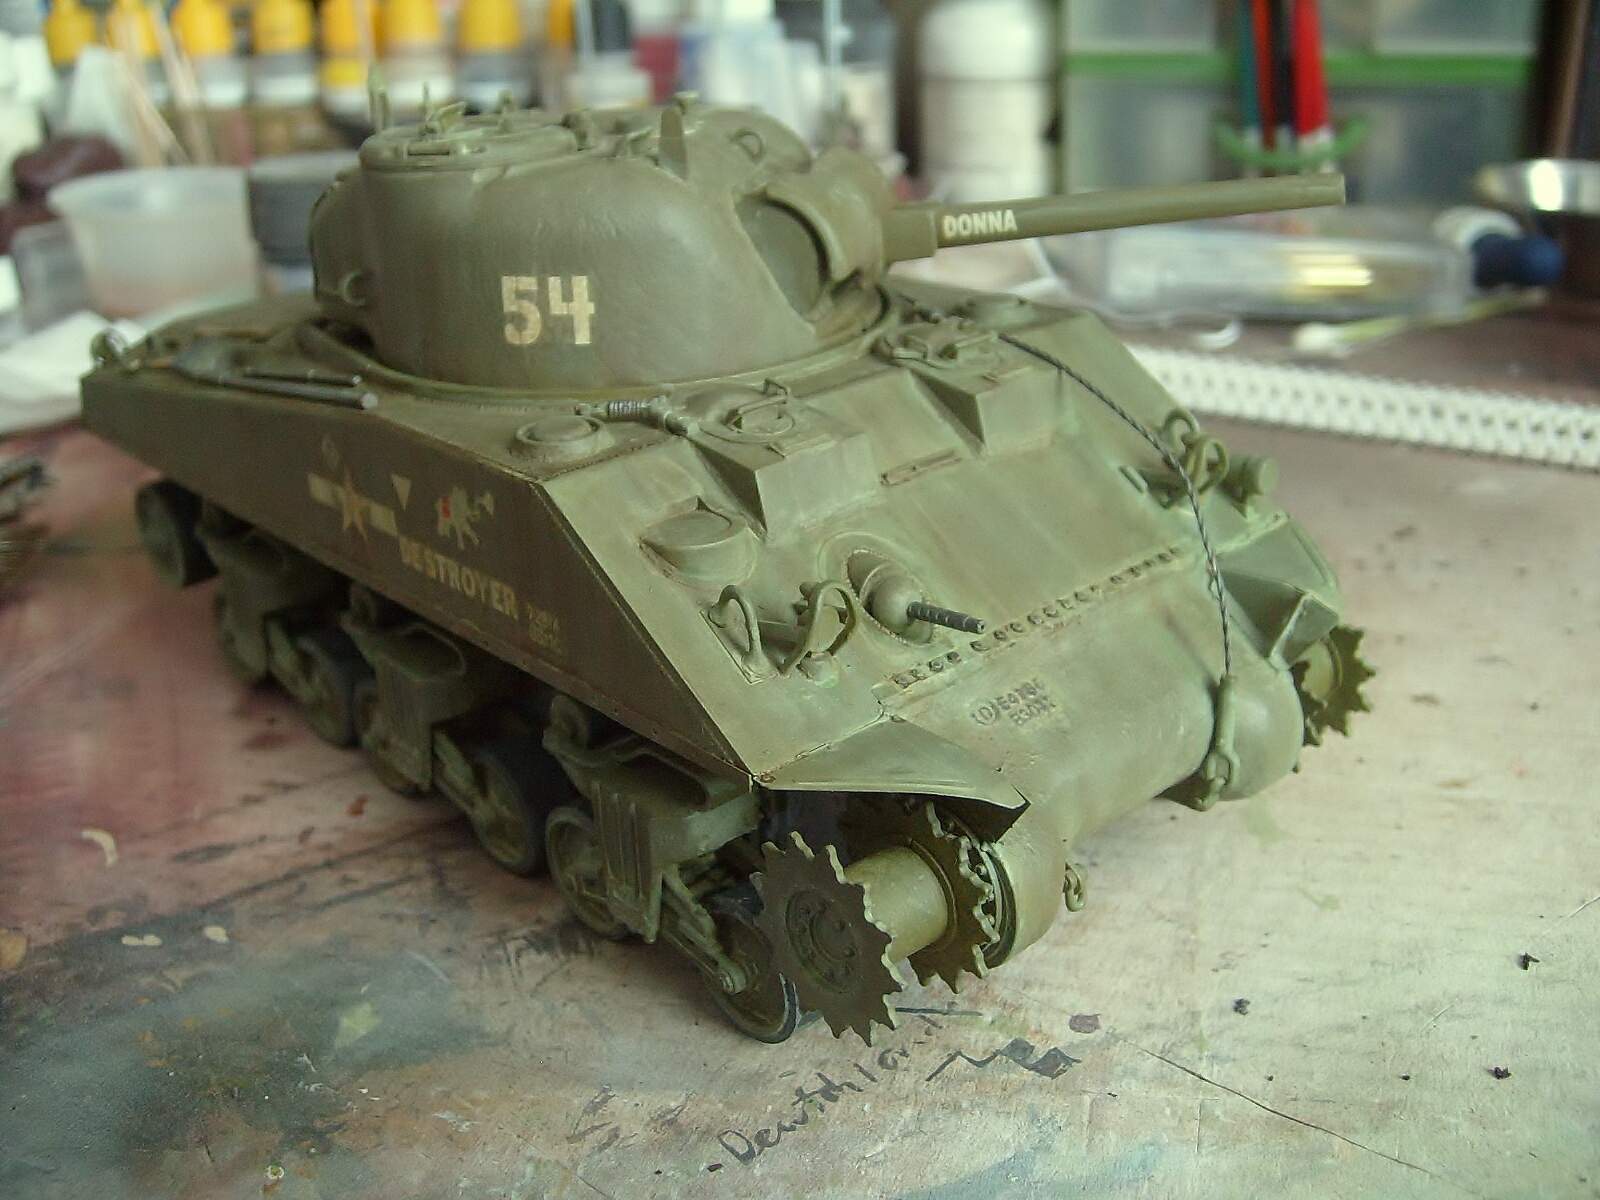
More…
I have added an additional wash with A.MIG-1000 Brown-wash and then Streaking with A.MIG-1203 giving the tone I was looking to have.
Regards!
Rodolfo
The rain marks and overall weathering looks great
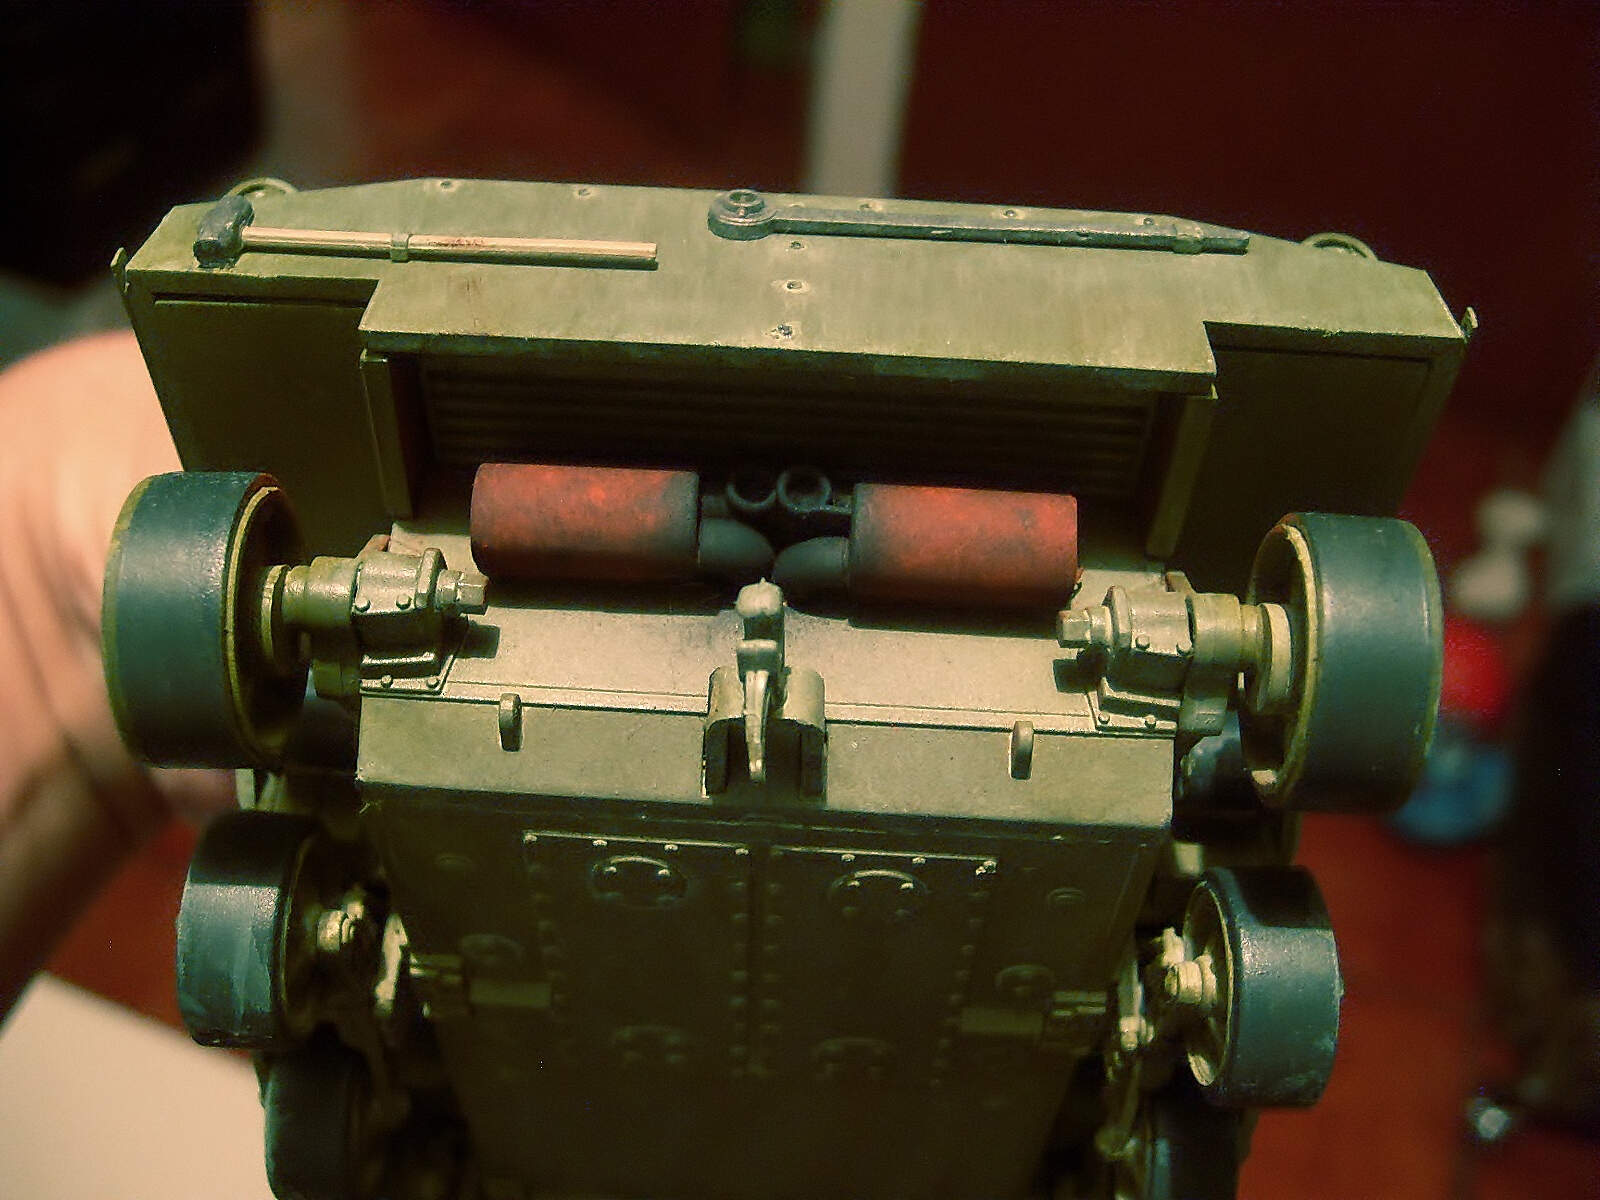
Before you get to much farther along the rear idler wheel does not have rubber on it so it should not be black. They were all steel.
Yes the statement from @M4A3E8 is good advice. We have all seen people do those as rubber, usually based on black and white reference.
A good way to achieve the steel effect is to rub it with graphite and polish gently with a cotton swab.
Thanks for your kind comments!
@M4A3E8 - Thanks for the advice, the instructions say to paint flat black, I already repainted them .
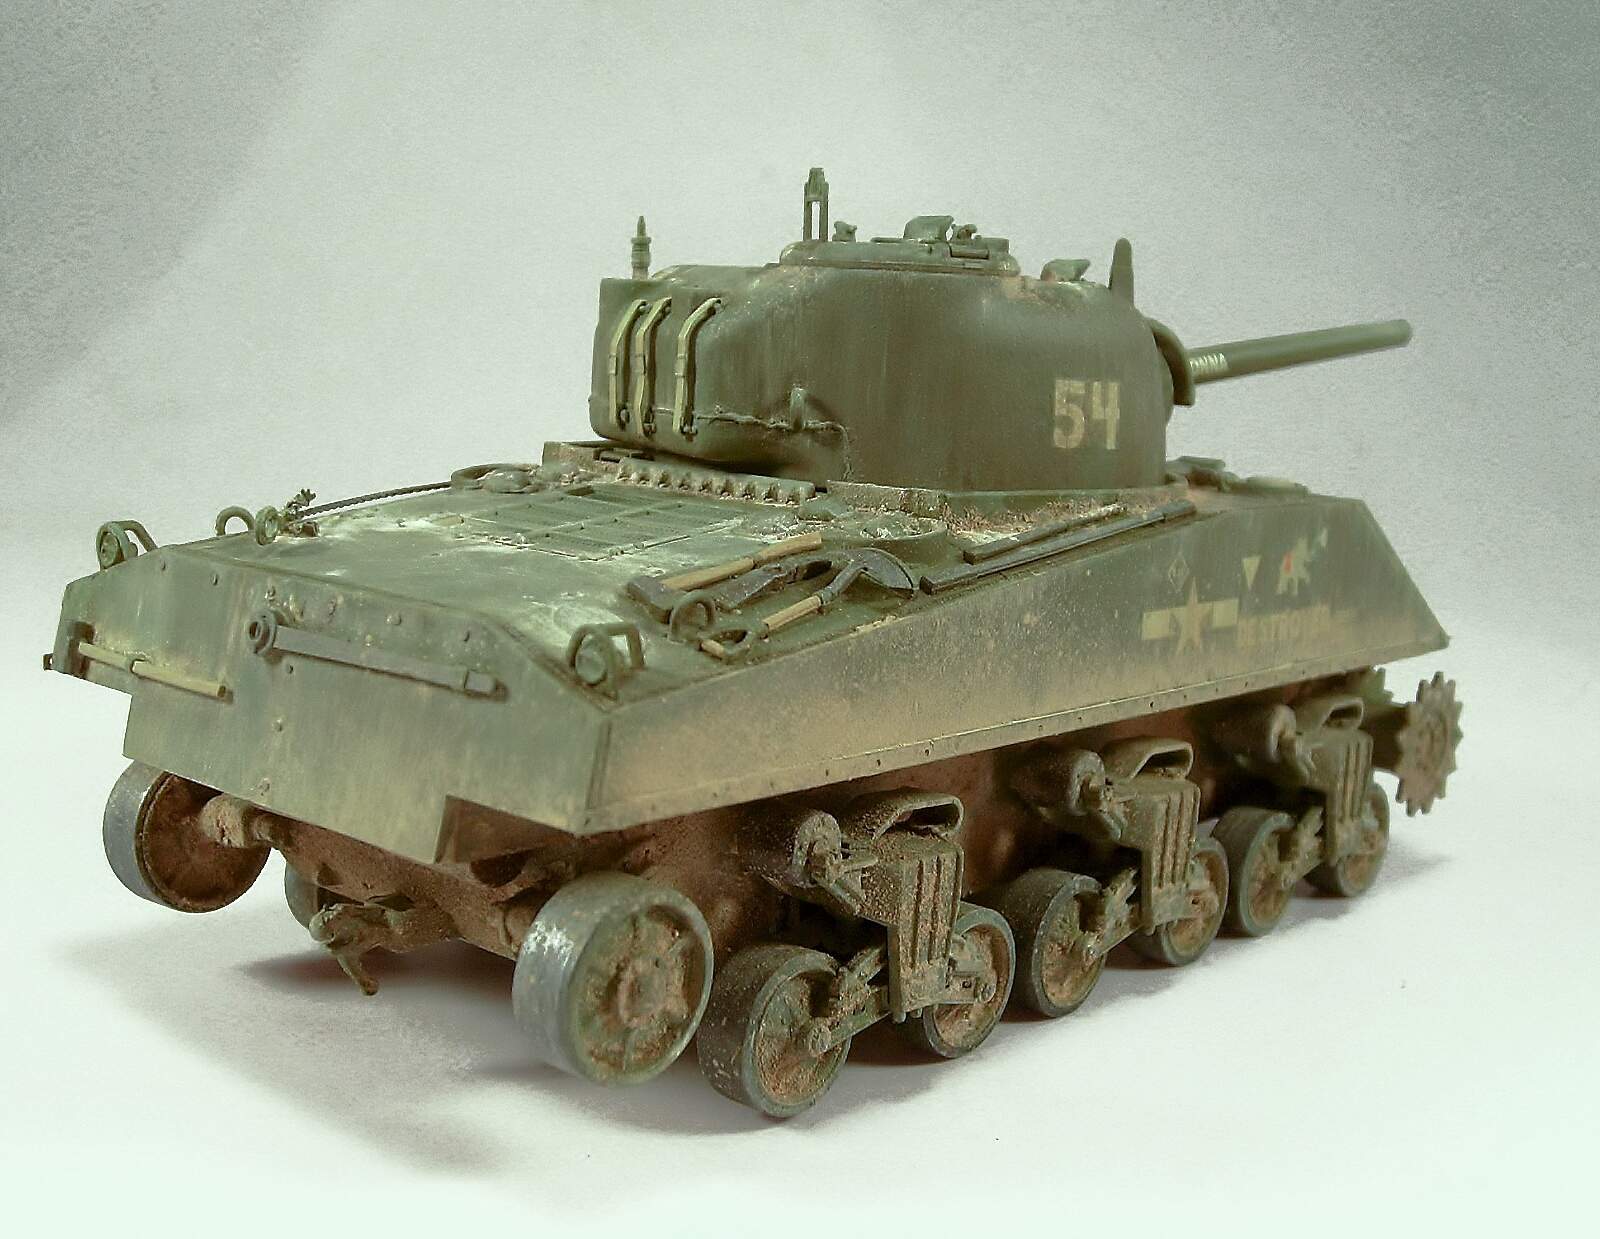
More pics!
Working mud on the chassis with a little A.MIG-1751 Splashes soaking the surface and adding a mixture of white pigment and brown sienna.
Regards!
Rodolfo
Remember , return rollers were in steel as a large number of support rollers
Coming go along nicely Rodolfo. Great job on the weathering!
Thanks for your kind comments friends!. Return rollers are painted with steel and finished with graphite.
More…
Working the mud on the bogies and wheels adding a pass with MIG / Enamel Odorless and then sprinkle a mixture of white pigment and brown sienna and finally fix it with AK Pigment Fixer Enamel Fluid.
Regards!
Rodolfo
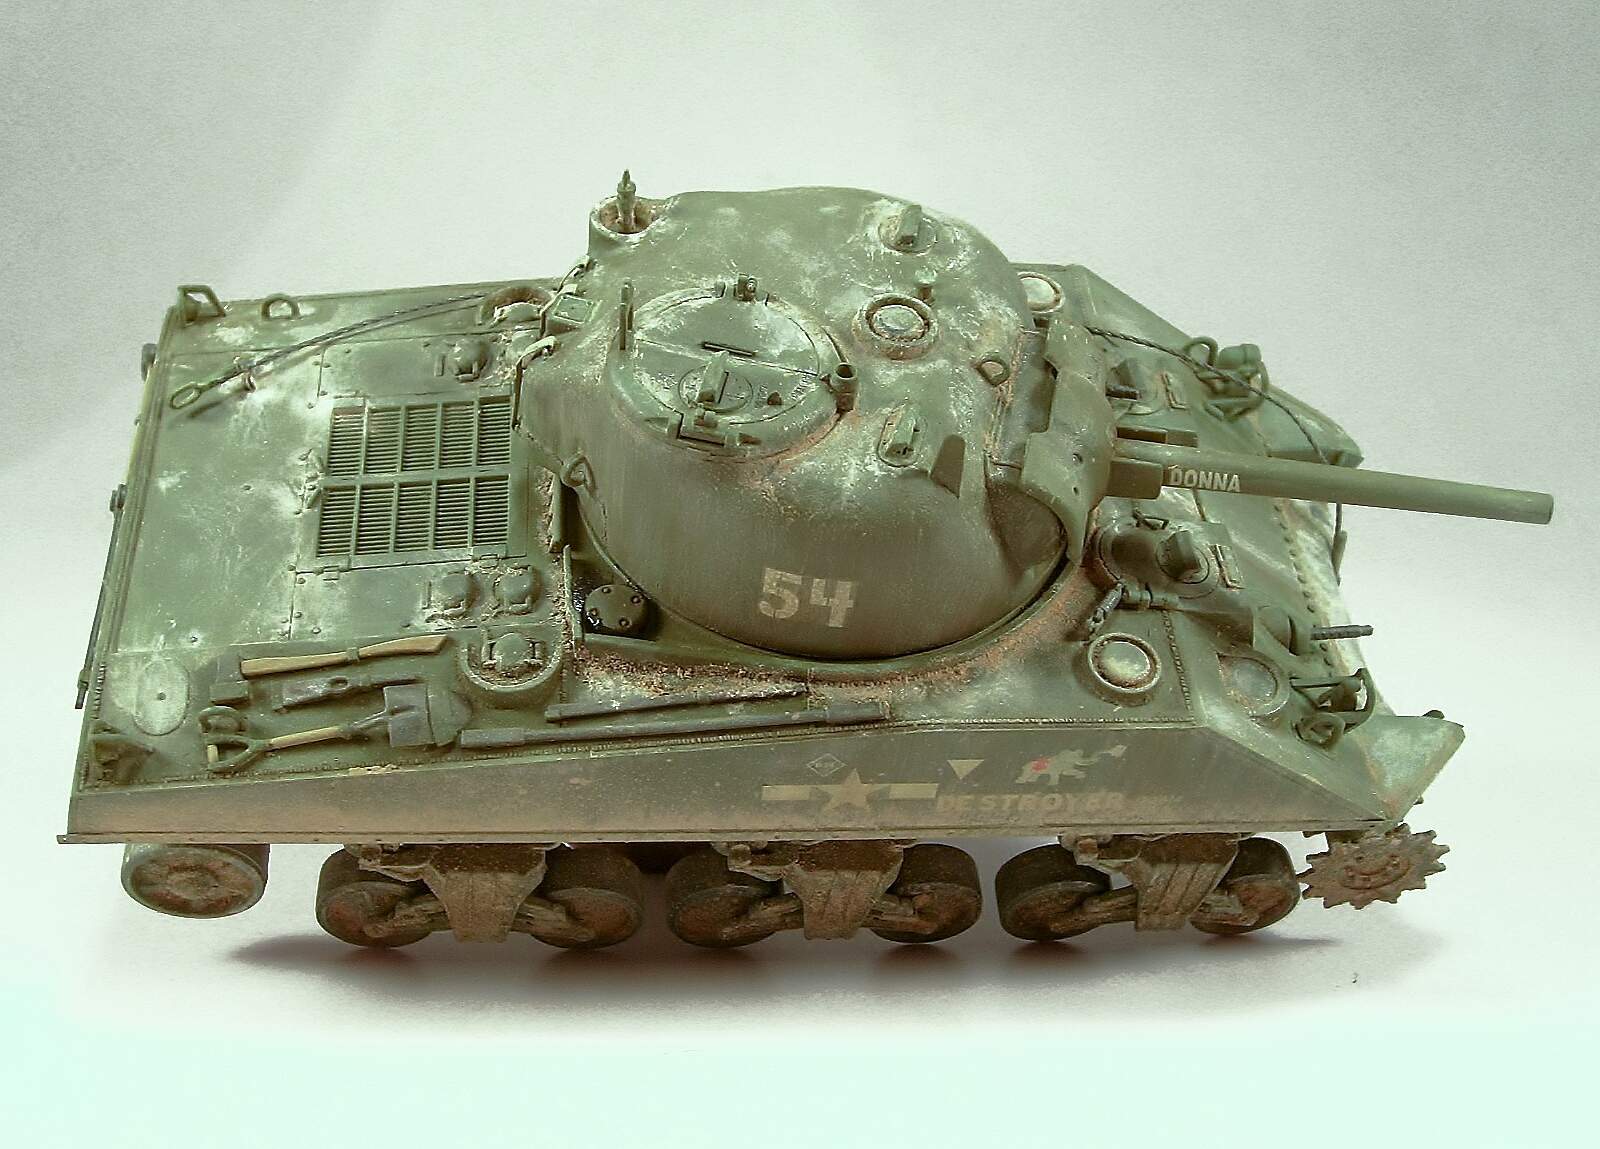
Hello friends!
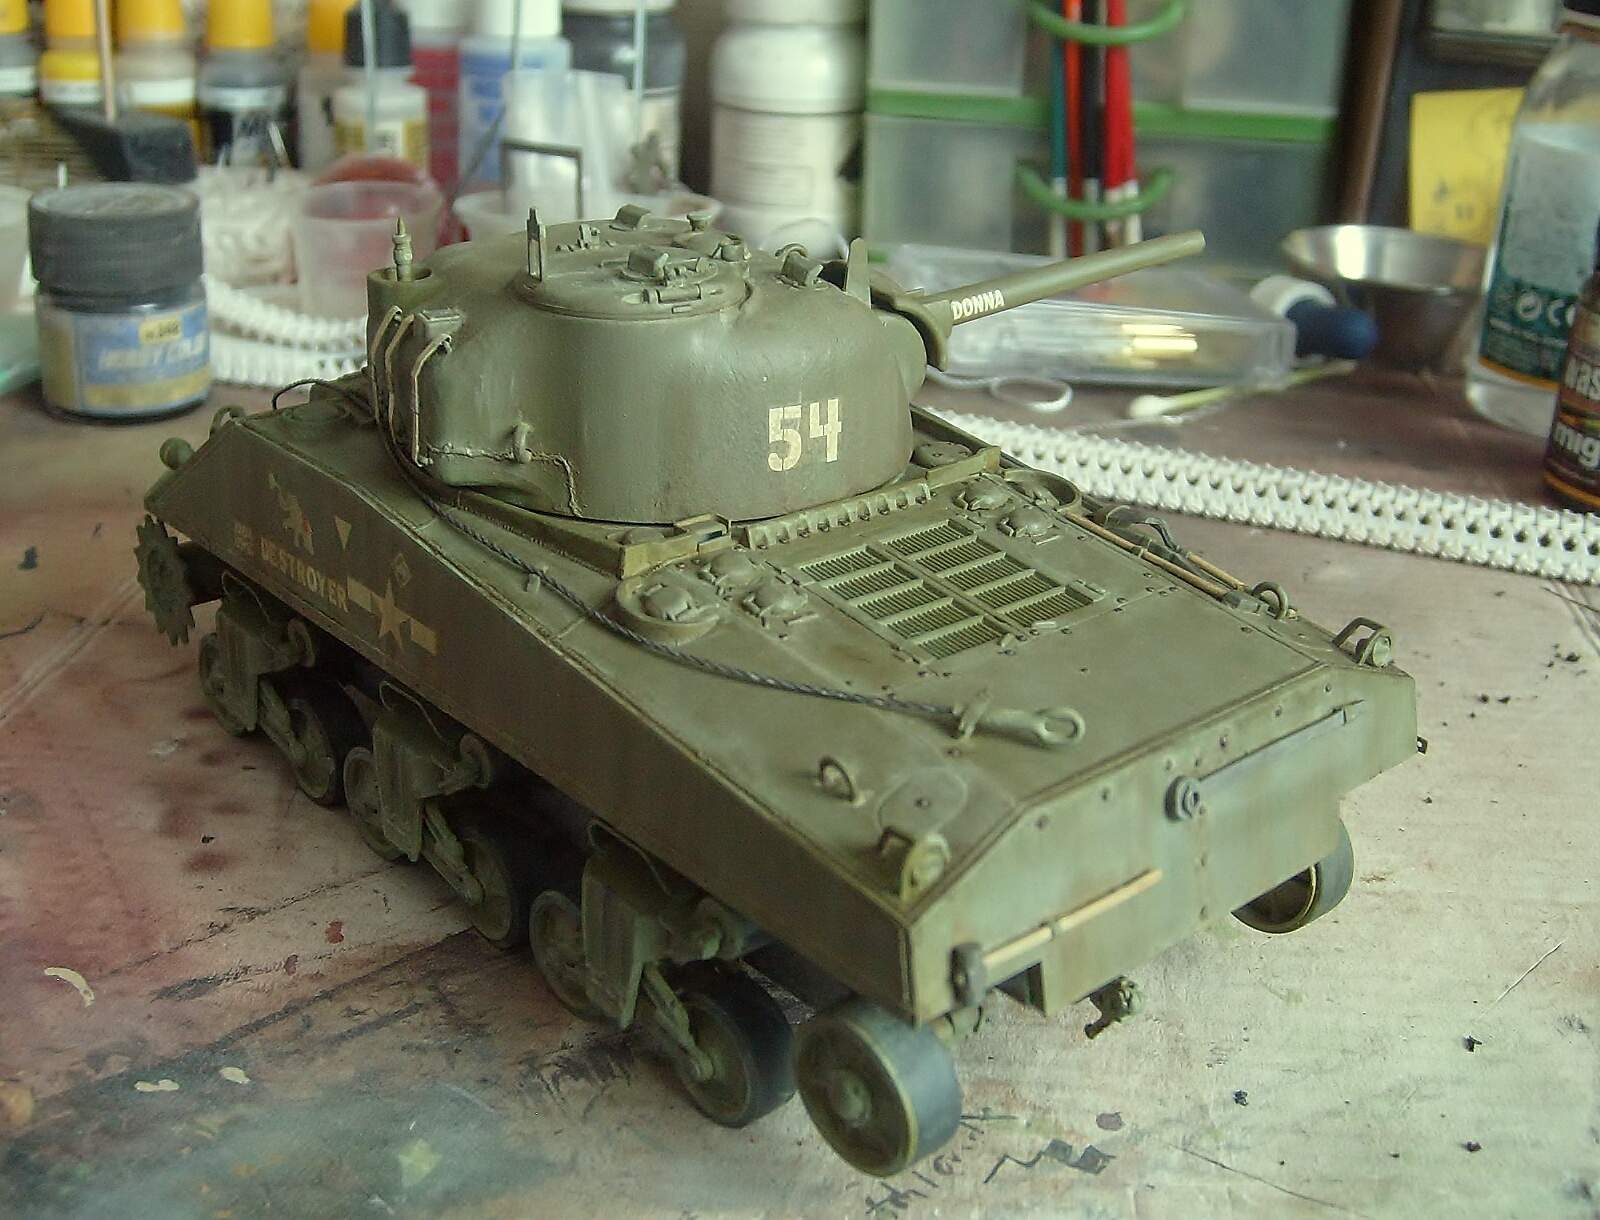
More pics!
Working the mud on the rest of the tank adding a pass with MIG / Enamel Odorless and then sprinkle a mixture of white pigment and brown sienna and finally fix it with AK Pigment Fixer Enamel Fluid.
Regards!
Rodolfo
Hello friends!
Work finished!, you can see it at: M4A2 Sherman, Co. D, 1st. Marine Amphibious Corps
Thanks for see my WIP.
Regards!
Rodolfo
Congrats, the build looks great.
What’s your next project?
Expert work! You inspire me.
Thank you very much for your kind comments friends!. My next project will be the Jagdtiger Early from Blitz by Takom 1/35.
Regards!
Rodolfo
great effects
don’t forghet lights and oil stains
Thanks Ryan!
I applied the lights during the paint process and added oil stains in the final process because the model was finished 7 days ago, you can see it at: M4A2 Sherman, Co. D, 1st. Marine Amphibious Corps
Regards!
Rodolfo
Nice work Rodolfo. I have this kit too, though still a WIP, & have picked up on a couple of things to keep an eye out for.
Just one constructive, & please accept it in the manner intended…nice work on recreating the mud, however a bit of research never goes astray with a build.
The battle at Tarawa, which was a coral attoll, didn’t fair well for the U.S., with most of the armour not even making it ashore. There are pics online of many M4’s wedged in the sand just off the beach
Hello Shaun!
Thanks for your comments and advise. I have seen some pics with Shermans that did arrive to ashore and I based myself on it. If I had made a diorama, maybe I would have made it half sunk in the sand.
Regards!
Rodolfo