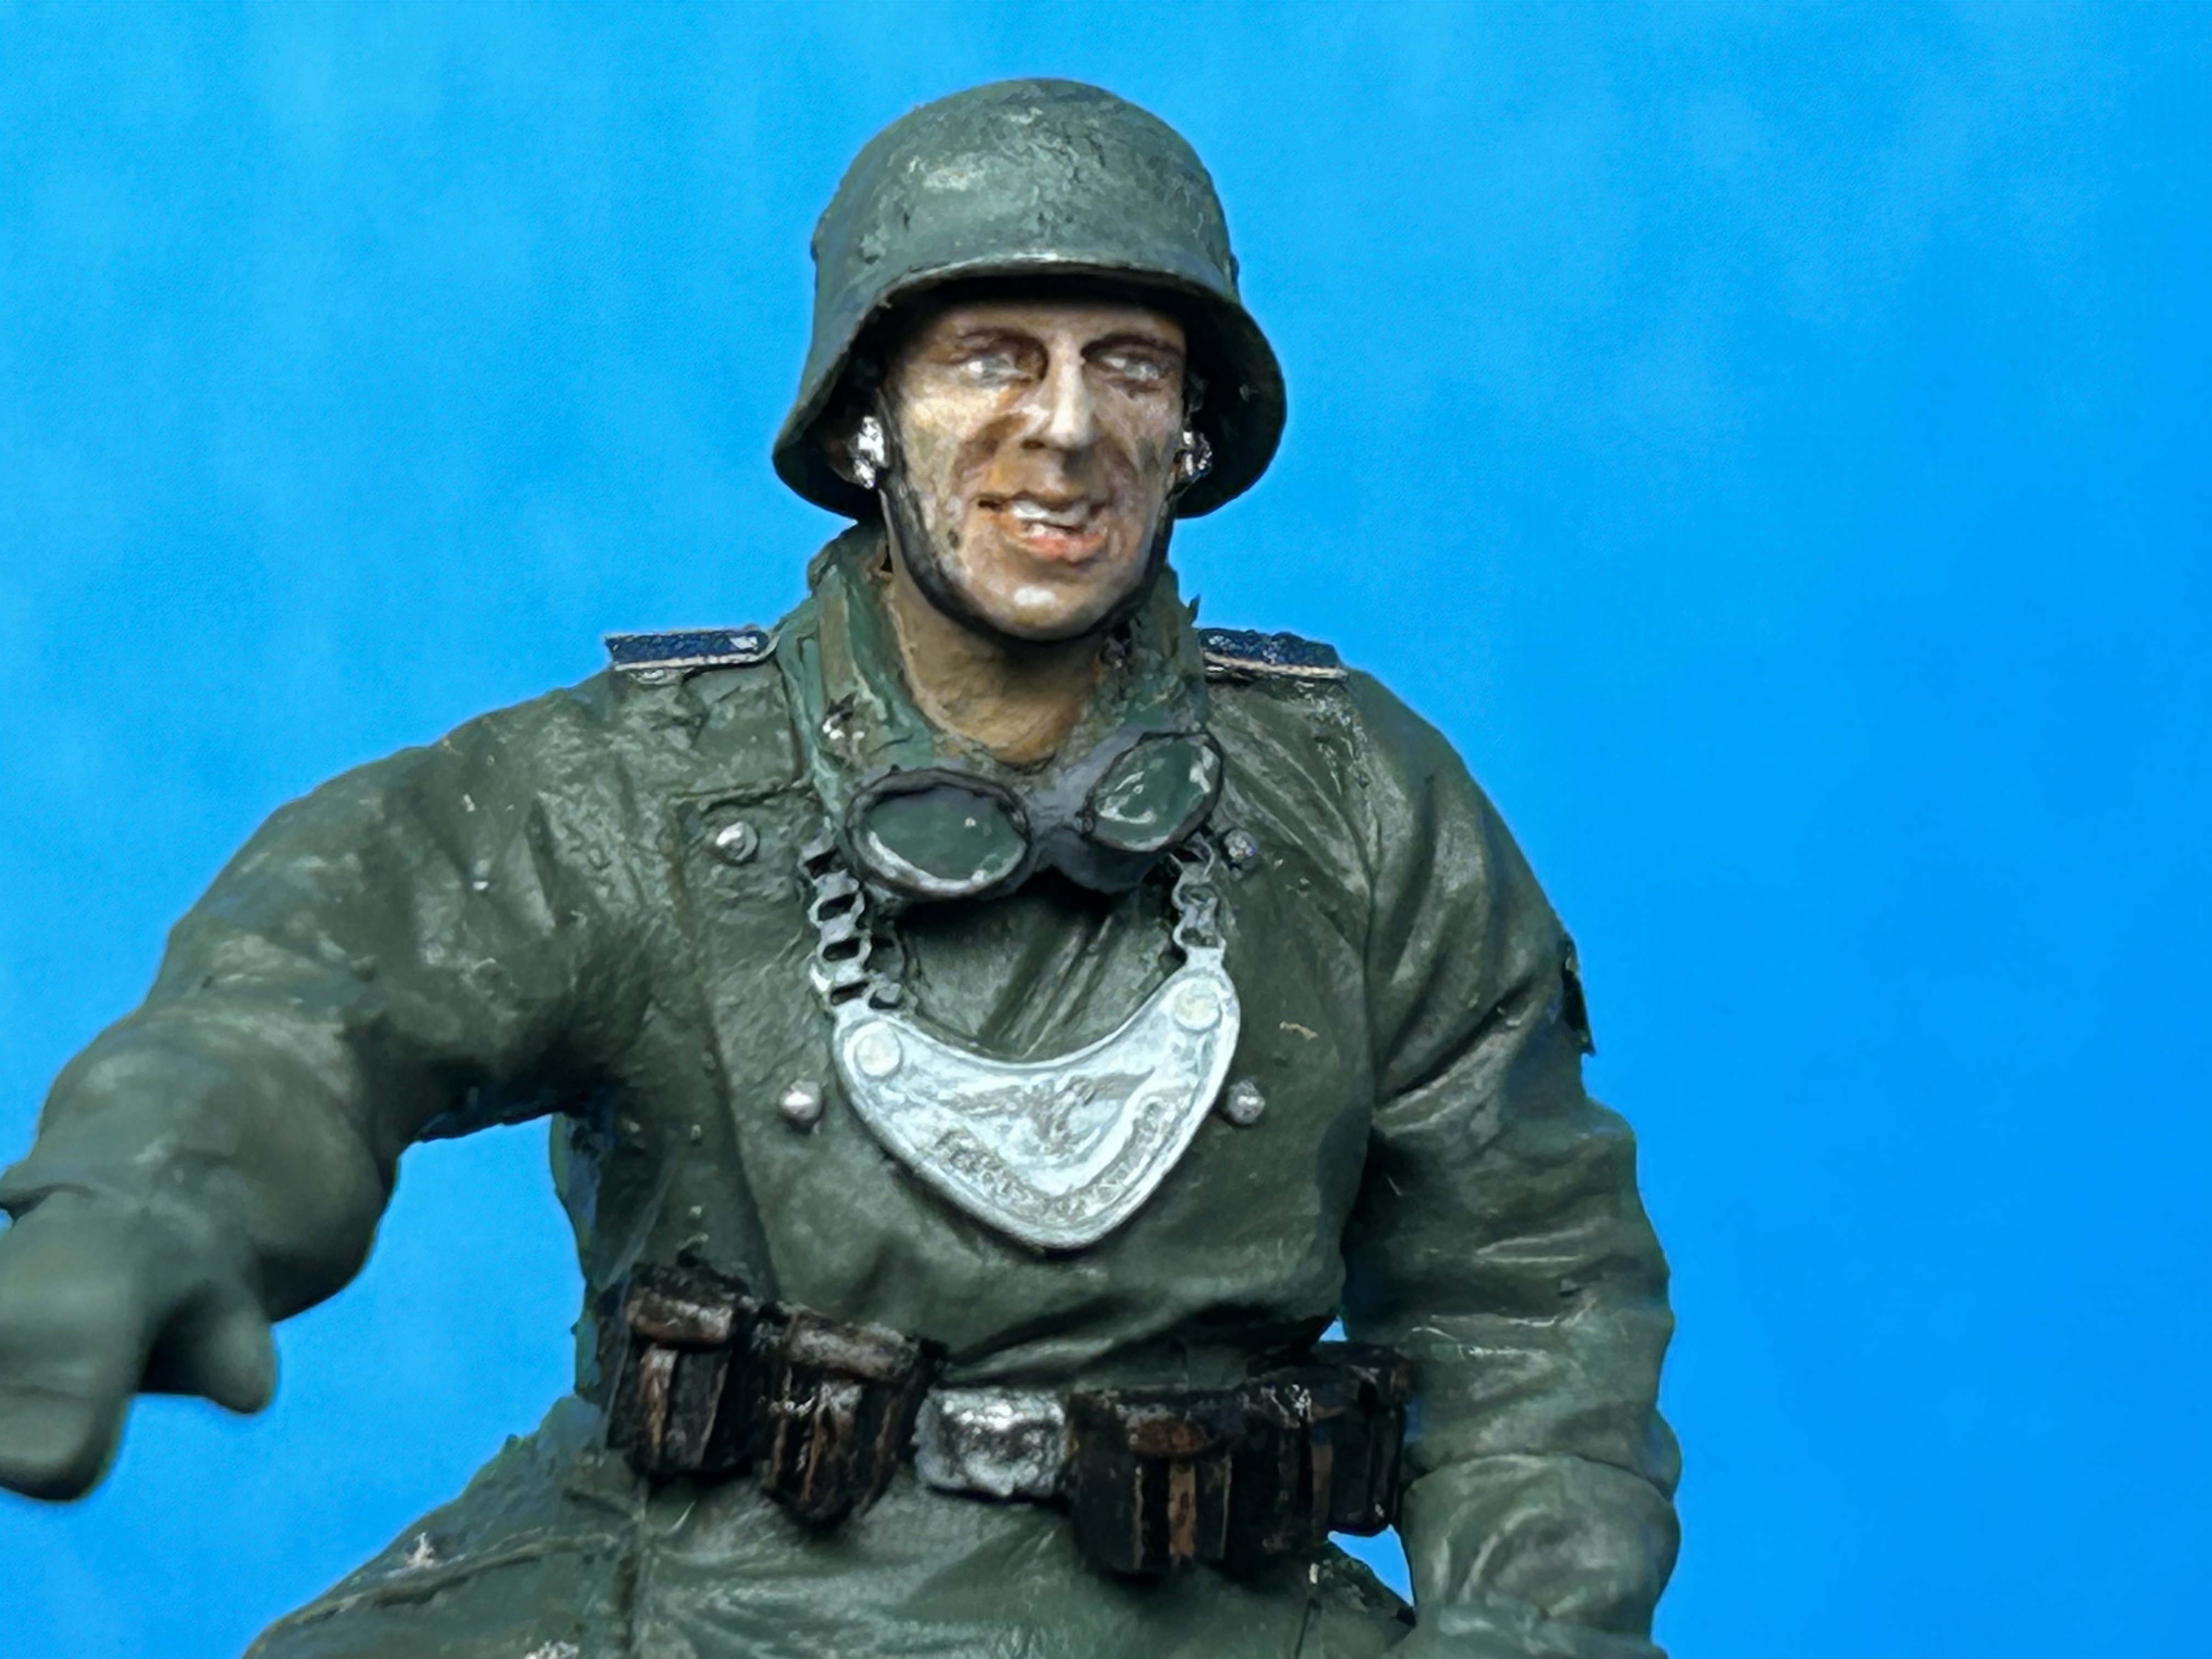
After looking some tips (again) on youtube, I tried a head in 1/35 for my Feldgendarmerie vignette.
Still not there but also proud of getting somewhere
15 Likes
You did it ![]() , my bucketlist has grown with a plane with antennas,
, my bucketlist has grown with a plane with antennas,
Like a He 219
2 Likes
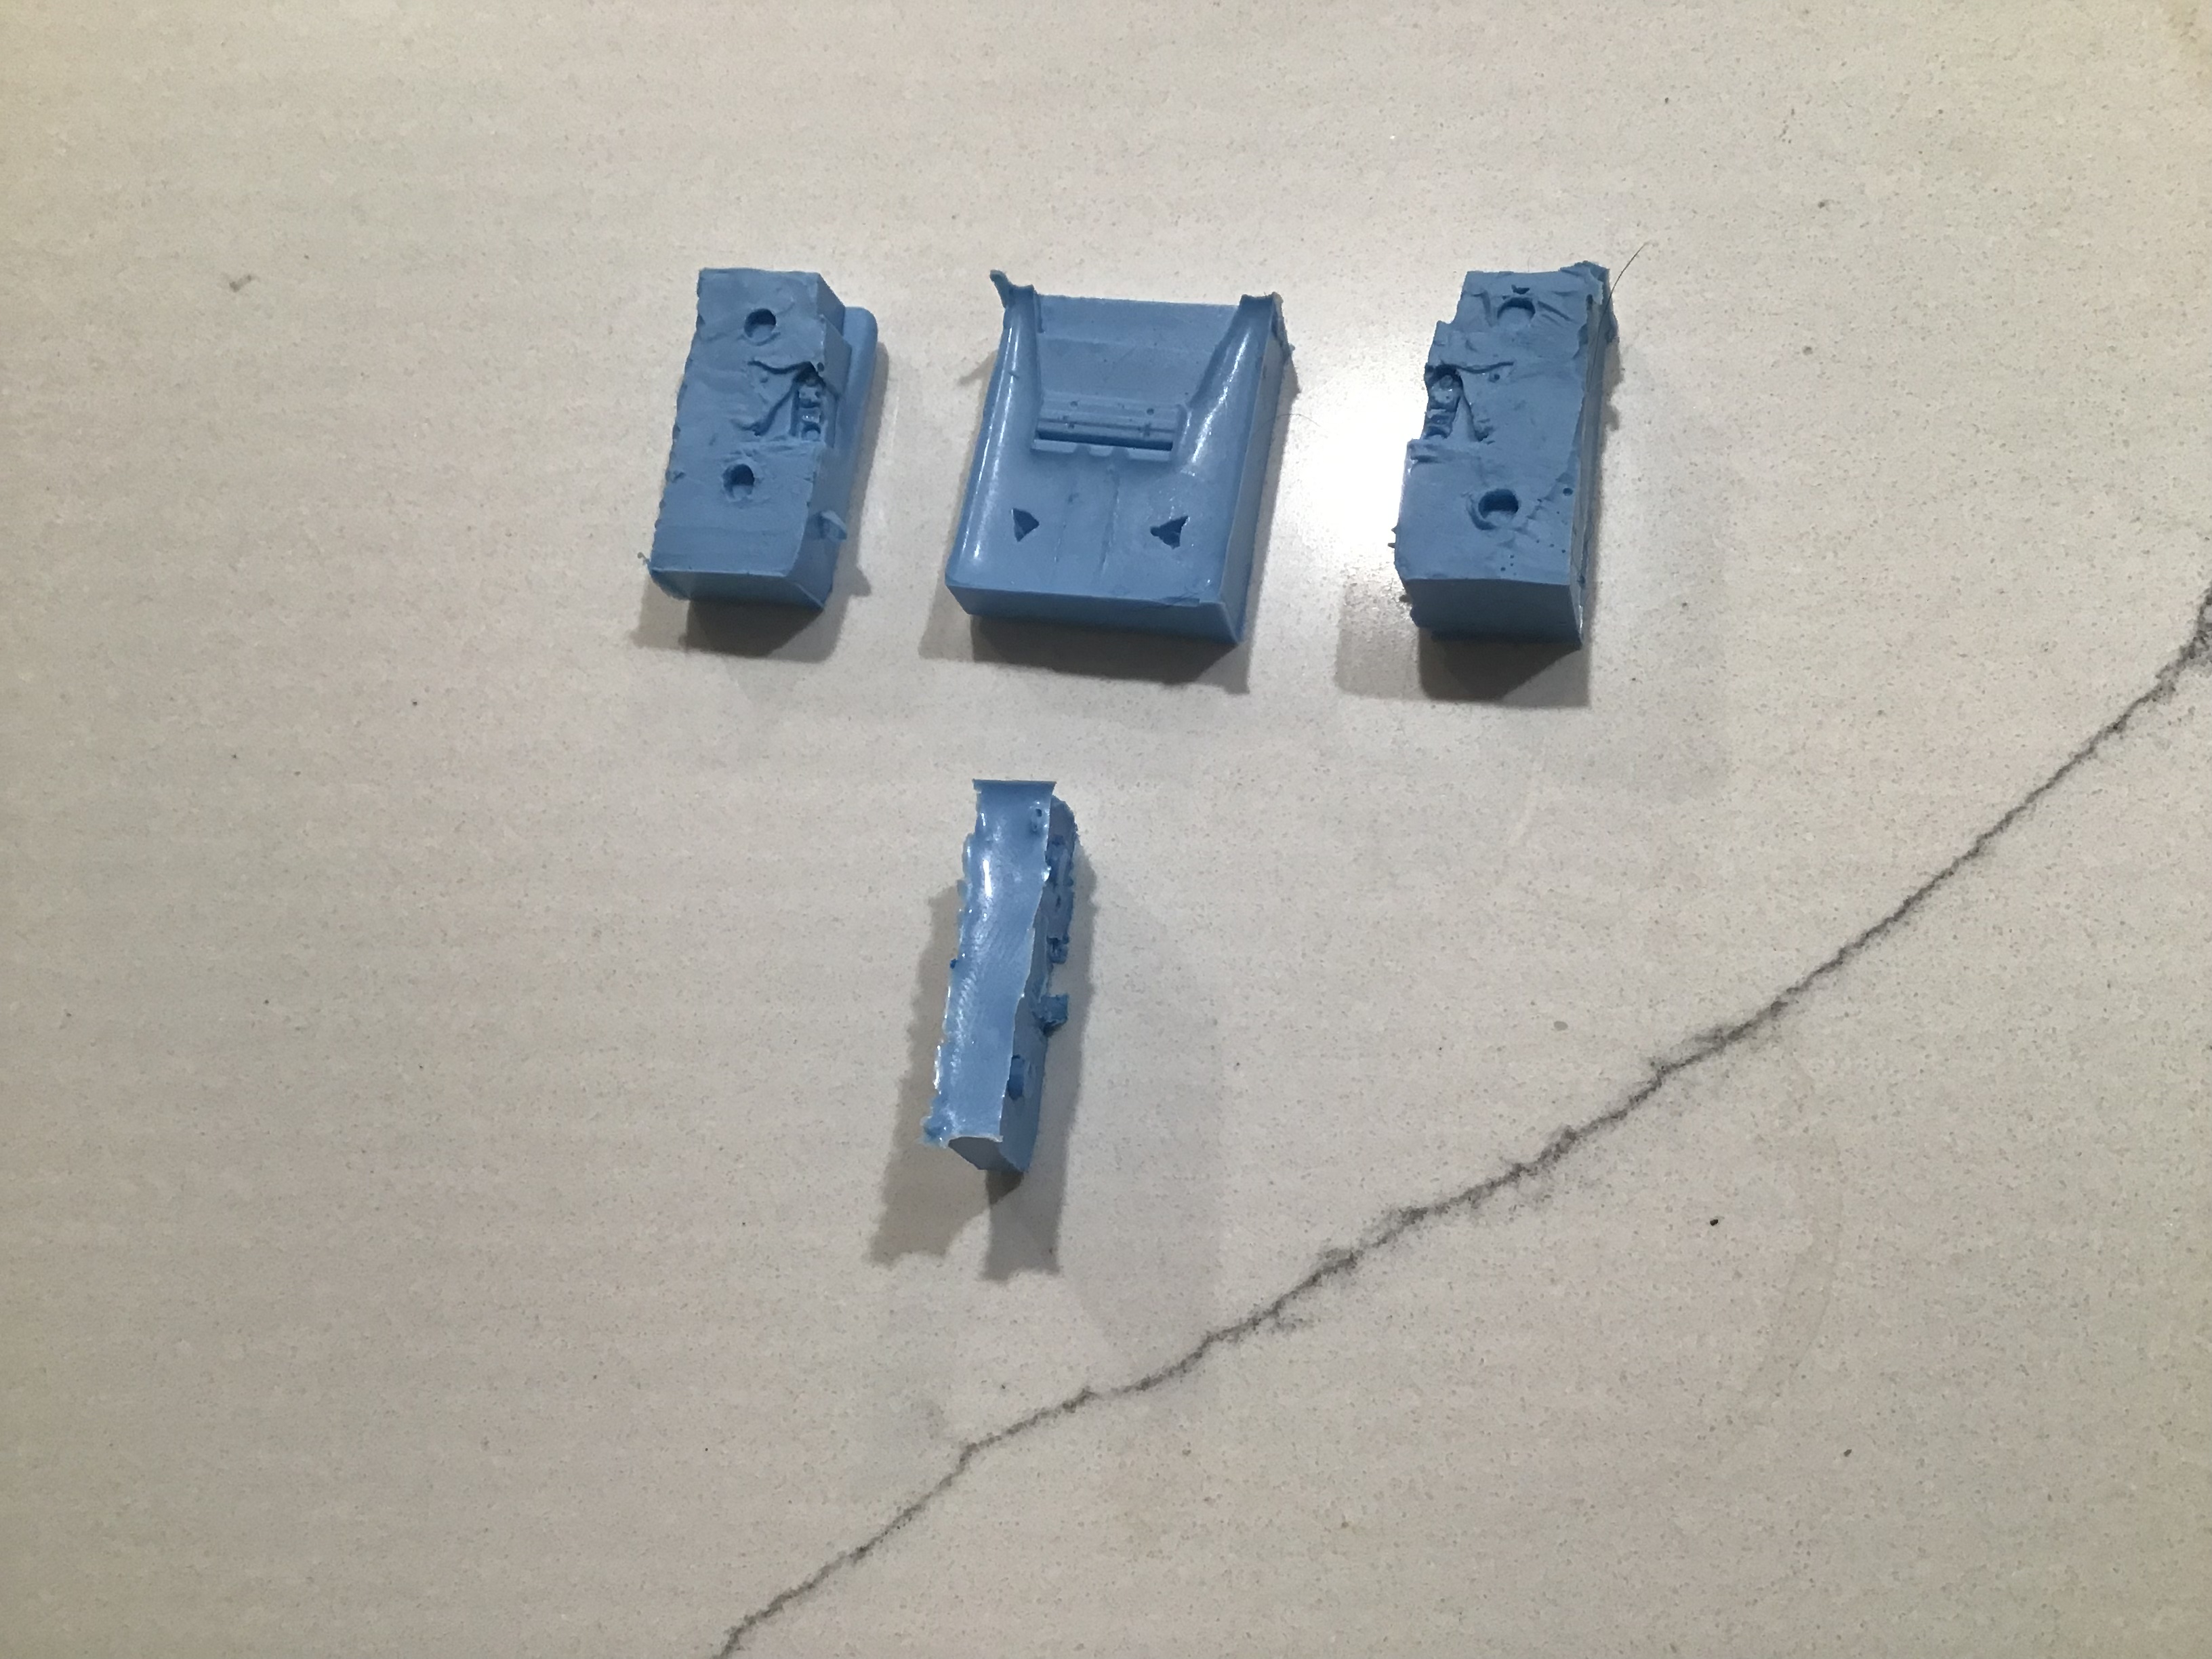
Began work on tracks - master made and mold started . Pushing my luck trying to cast in one piece with a shape so complex . Fingers crossed.
10 Likes
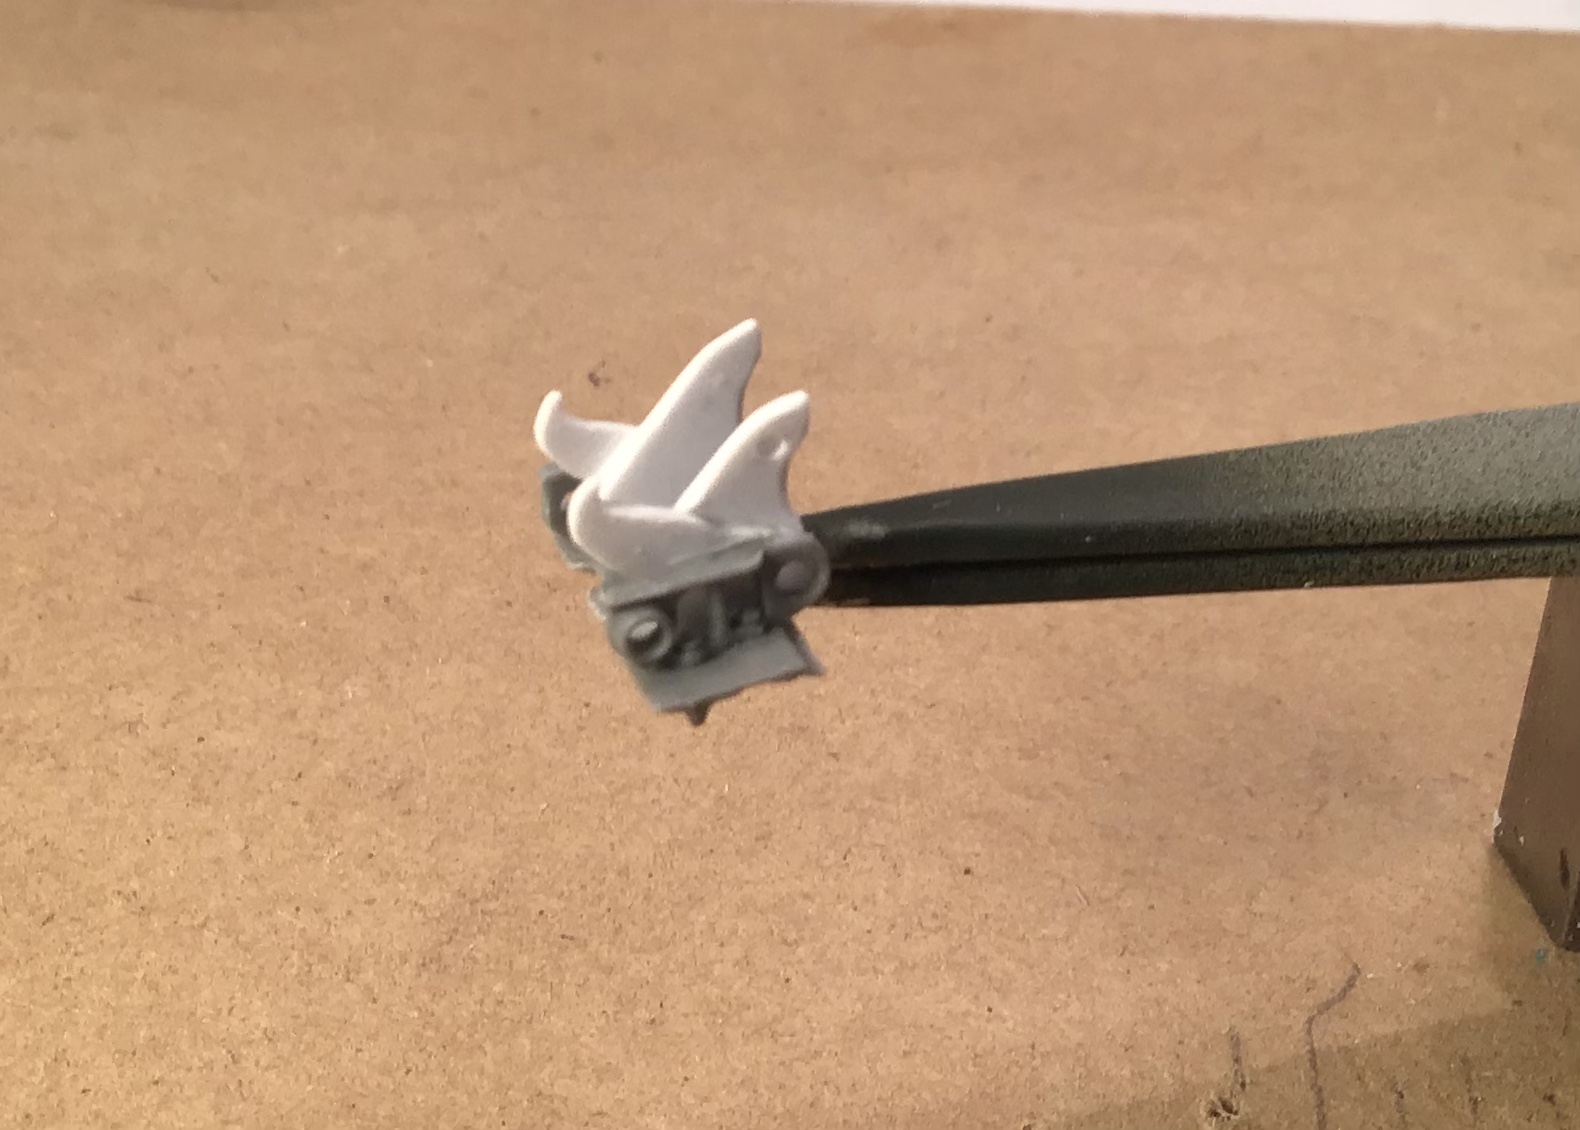
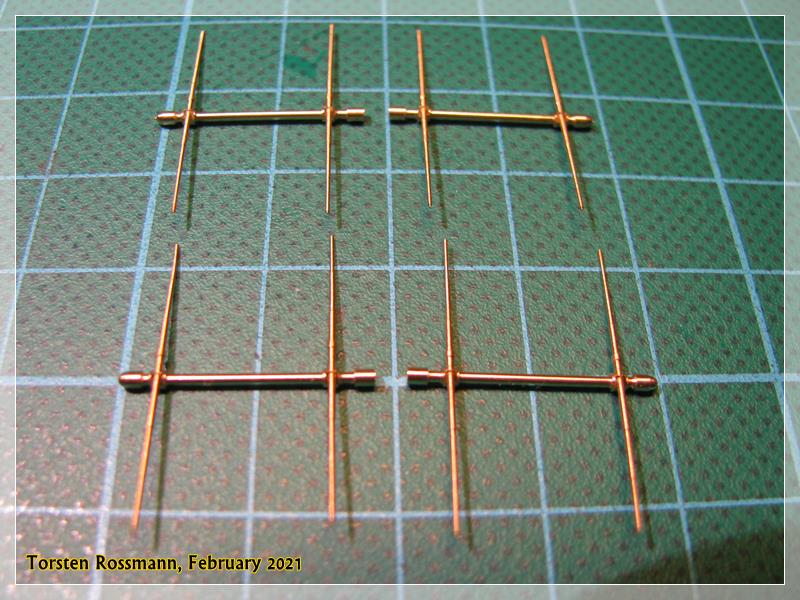
Today: More work on the radar antenna arms (2 of 4). ![]()
Vertical position.

… and at 45° for better TV reception. ![]()
![]()

—————————————————————————————————————————
On an unrelated side…
Removed 3D print connectors from Reedoak 1/35 AH-64 Pilot and Gunner last night. Very easy, the connectors practically melted themselves off! ![]() …
…
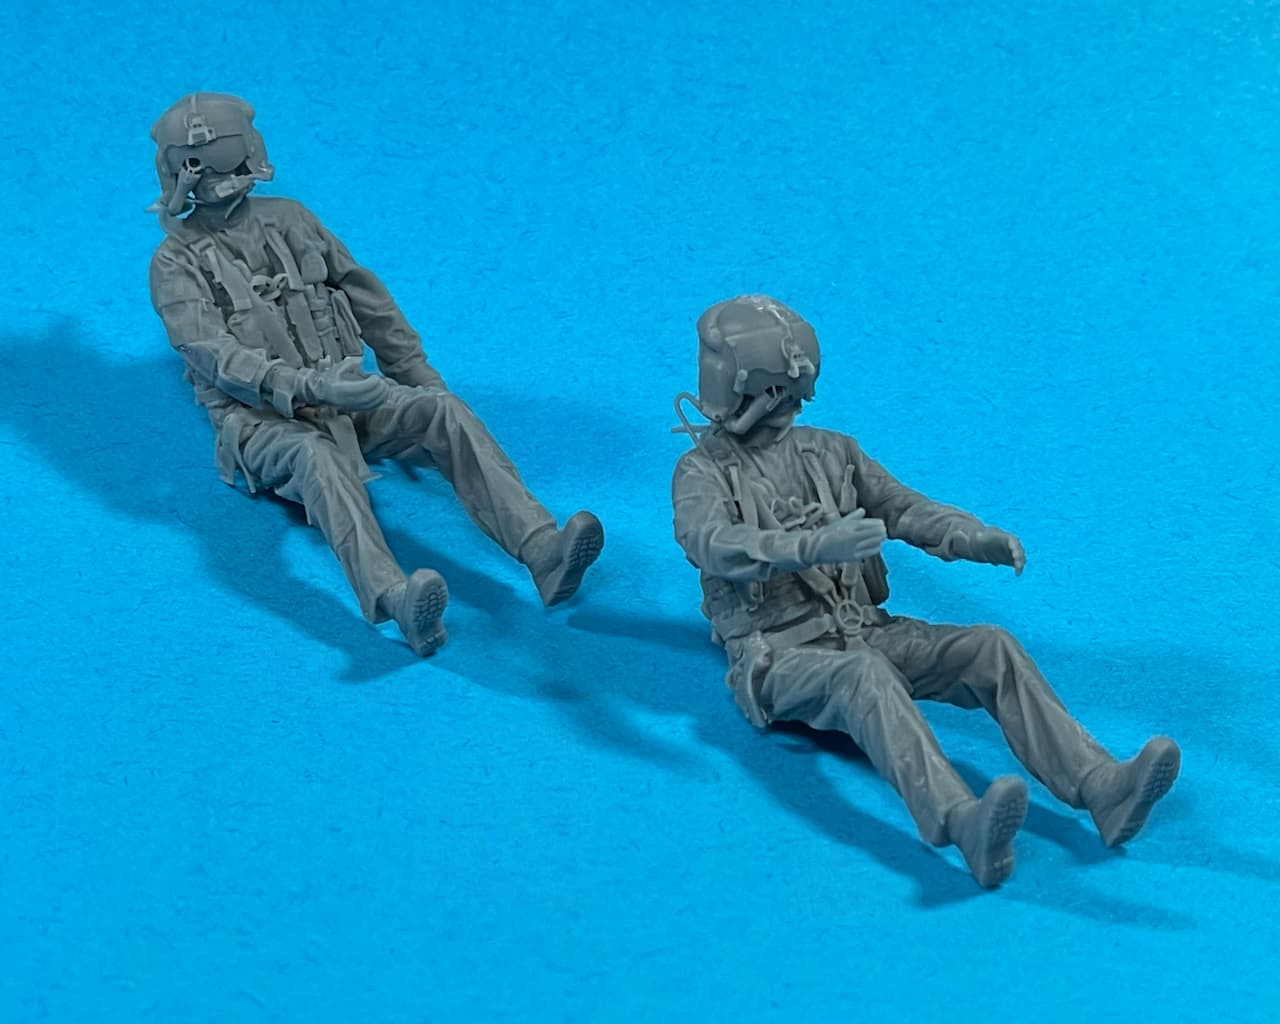
Hey! Watch it! …![]()
![]() … You watch it!
… You watch it!
—mike
11 Likes
Looks great
Do you have a source for the nuts and bolts?
Warm regards
Grumble
2 Likes
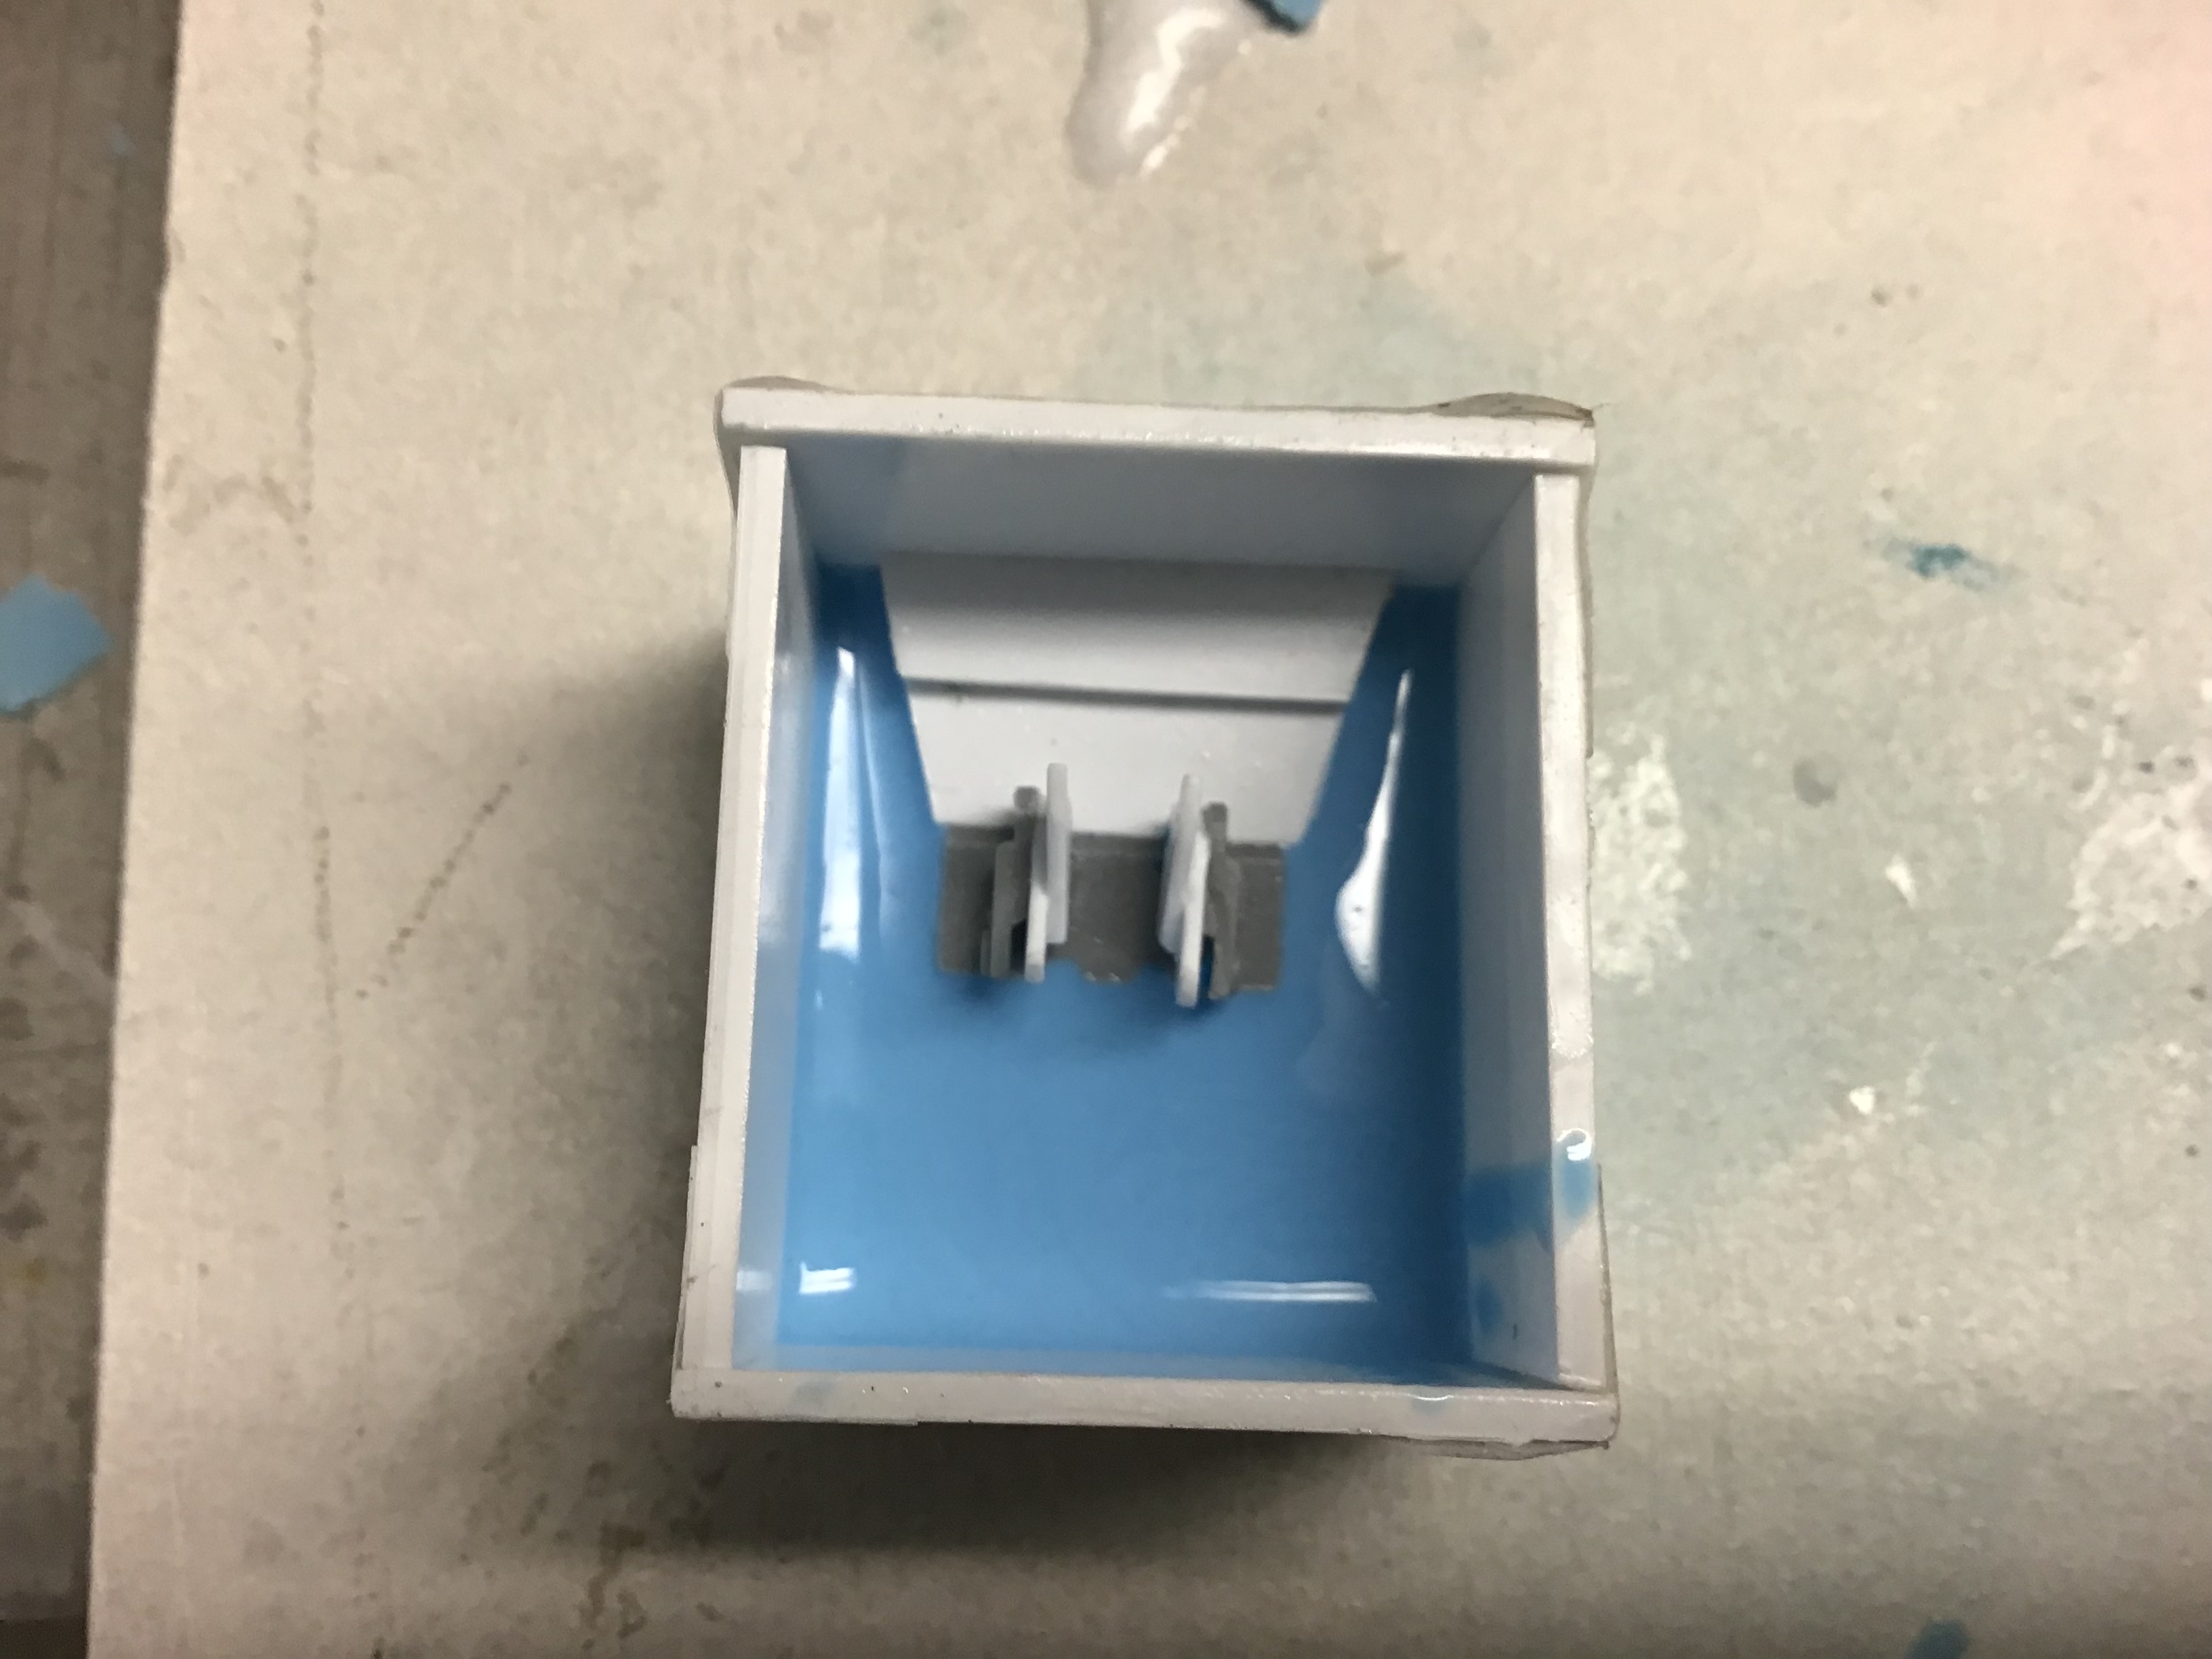
I’ve begun mocking up the diorama for my model:

Based on this photo I found:

If you can find any other similar photos of a dirt country road with bushes/trees on one side, I’d love to see them.
9 Likes
Go for it, TeeAge. It was easier than I thought …

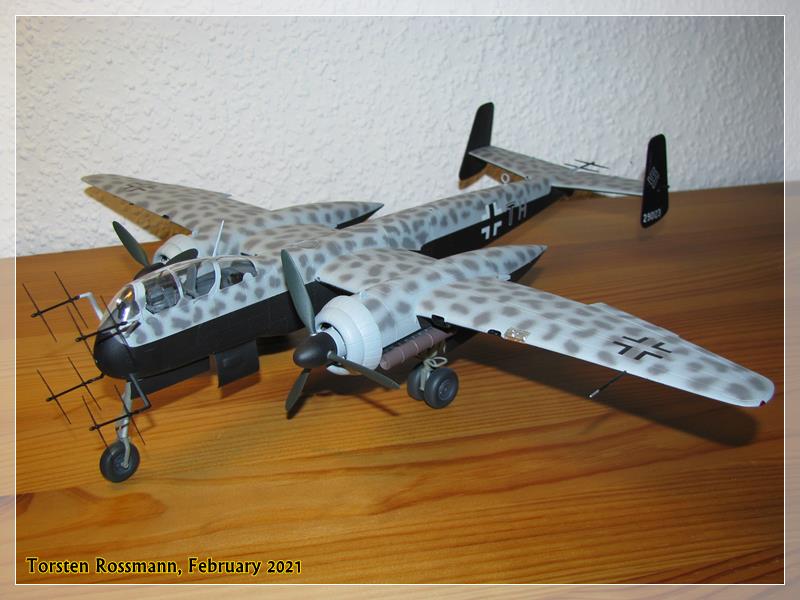
Kit is Tamiya 1/48, FuG 220 is brass made by Modellbau Schatton. No glue needed ![]()
11 Likes
Three days without work now, some time to go on. I come closer to start painting, the engine and other parts, that makes me nervous. I’m not that safe with my airbrush, I hope I feel better with it by using it.
Wish you all a nice and productive weekend✌
2 Likes
Yesterday’s hobby time…a great time at The Gaston County Model Builder’s meeting. Very fun to actually talk hobby face to face again.
Cancer Man asking Got a light was most popular.

Home made drill press, excursion module from 2001: A Space Odyssey and another space ship. The 2001 model was one of Lunar Models horrible resin kits with lots of mold shift and air bubbles. The builder did an excellent job sorting the model.

The Ukrainian ![]() Airforce was well represented by this Su-24 Trumpeter kit
Airforce was well represented by this Su-24 Trumpeter kit ![]() with an aftermarket resin cockpit.
with an aftermarket resin cockpit.


The 2nd best, last place army in Ukraine, the Russia ![]() army wasn’t left out either. The kit had lost it’s missle trailer so the truck was sold as “spare” parts for a few dollars. An intrepid modeler took the challenge.
army wasn’t left out either. The kit had lost it’s missle trailer so the truck was sold as “spare” parts for a few dollars. An intrepid modeler took the challenge.

A pair of award-winning cars were present. The light blue car is an ancient Jo-han kit. The builder spent several years rounding up replacement parts and rebuilding the kit. Won a merit award. The woody won 3rd place in it’s competitive category. The tractor is a Green Acres inspired scratch build.

The T-34/76 1942 was my attempt at winter white wash back in 1993. The Pz IV H an out of box build from 1997.

14 Likes
@ Sean (Grumble),
Here’s a link: ‘Scale Hobbyist’
These make removing the nuts and bolts from their carrier a breeze:
‘Excel 3/8" small Chisel Blade 5pcs’
Also, there’s no need to use CA glue. I usually just put a tiny dab of ‘Tamiya Extra Thin Cement’ onto the receiving surface.
—mike ![]()
1 Like
Thanks my friend.
Warm regards
Grumble
2 Likes
Finished the mold - made second half in three pieces to minimize trapped undercuts . Don’t know how well this will work. Poured first track link this afternoon. Tomorrow morning will tell the tale .

9 Likes


I’ve cut out the block of foam, so that will be sitting for a week or two, lol. I don’t know what to do for the overhanging grassy hill-type thing in the photo I am referencing. I don’t have a hot wire cutter, and the block would be odd to cut thinner than it already is. I do have air-dry clay, though, but that would become a large block.
1 Like
I’m looking over the photos I took today, and boy, do my figures’ faces need work:

8 Likes
Got the clear gloss coat down on my Meng RR AC on Friday. Applied the decals on Saturday. Hit them with Micro Sol. I’ve hit the turret decals 3 times with Micro Sol so far, probably have another 3 applications to go before the decals shrink down over all the rivets. These turret decals were a bit of a challenge to get right.
While I waited for the Micro Sol to work, I broke out the Value Gear assorted anonymous stowage bags and picked out the items that would perfectly fit the car’s horizontal surfaces. Lots of brush painting ahead!


This is a 4 part decal -

14 Likes
Those decals like very tricky indeed and that was before you mentioned the rivets! They look like they are sitting down nicely though- you can clearly see the rivets on the roof.
3 Likes
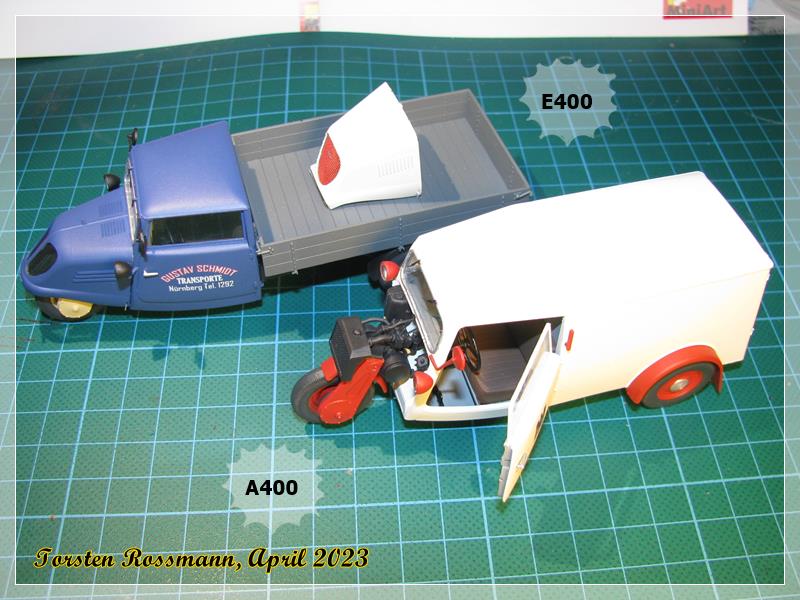
Just finished my first ever civil automobiles, Tempo A400 Lieferwagen and Tempo E400 Hochlader Pritsche in 1/35 from MiniArt. Just in time for our model show next weekend … ![]()
9 Likes
Continuing with my commision build MiniArt T-55 for the Tank Museum. A challenging kit for me. No bad fitting issues, or anything like that just sheer volume of detail and parts.


Marked up the turret to try to get a reasonable placement of the etched brass grab handles!
15 Likes
Ooh, guess you have to be extra careful when building this thing. Good luck, brother, the build already looks amazing.
3 Likes