Fantastic-looking build! Your effort is really paying off.
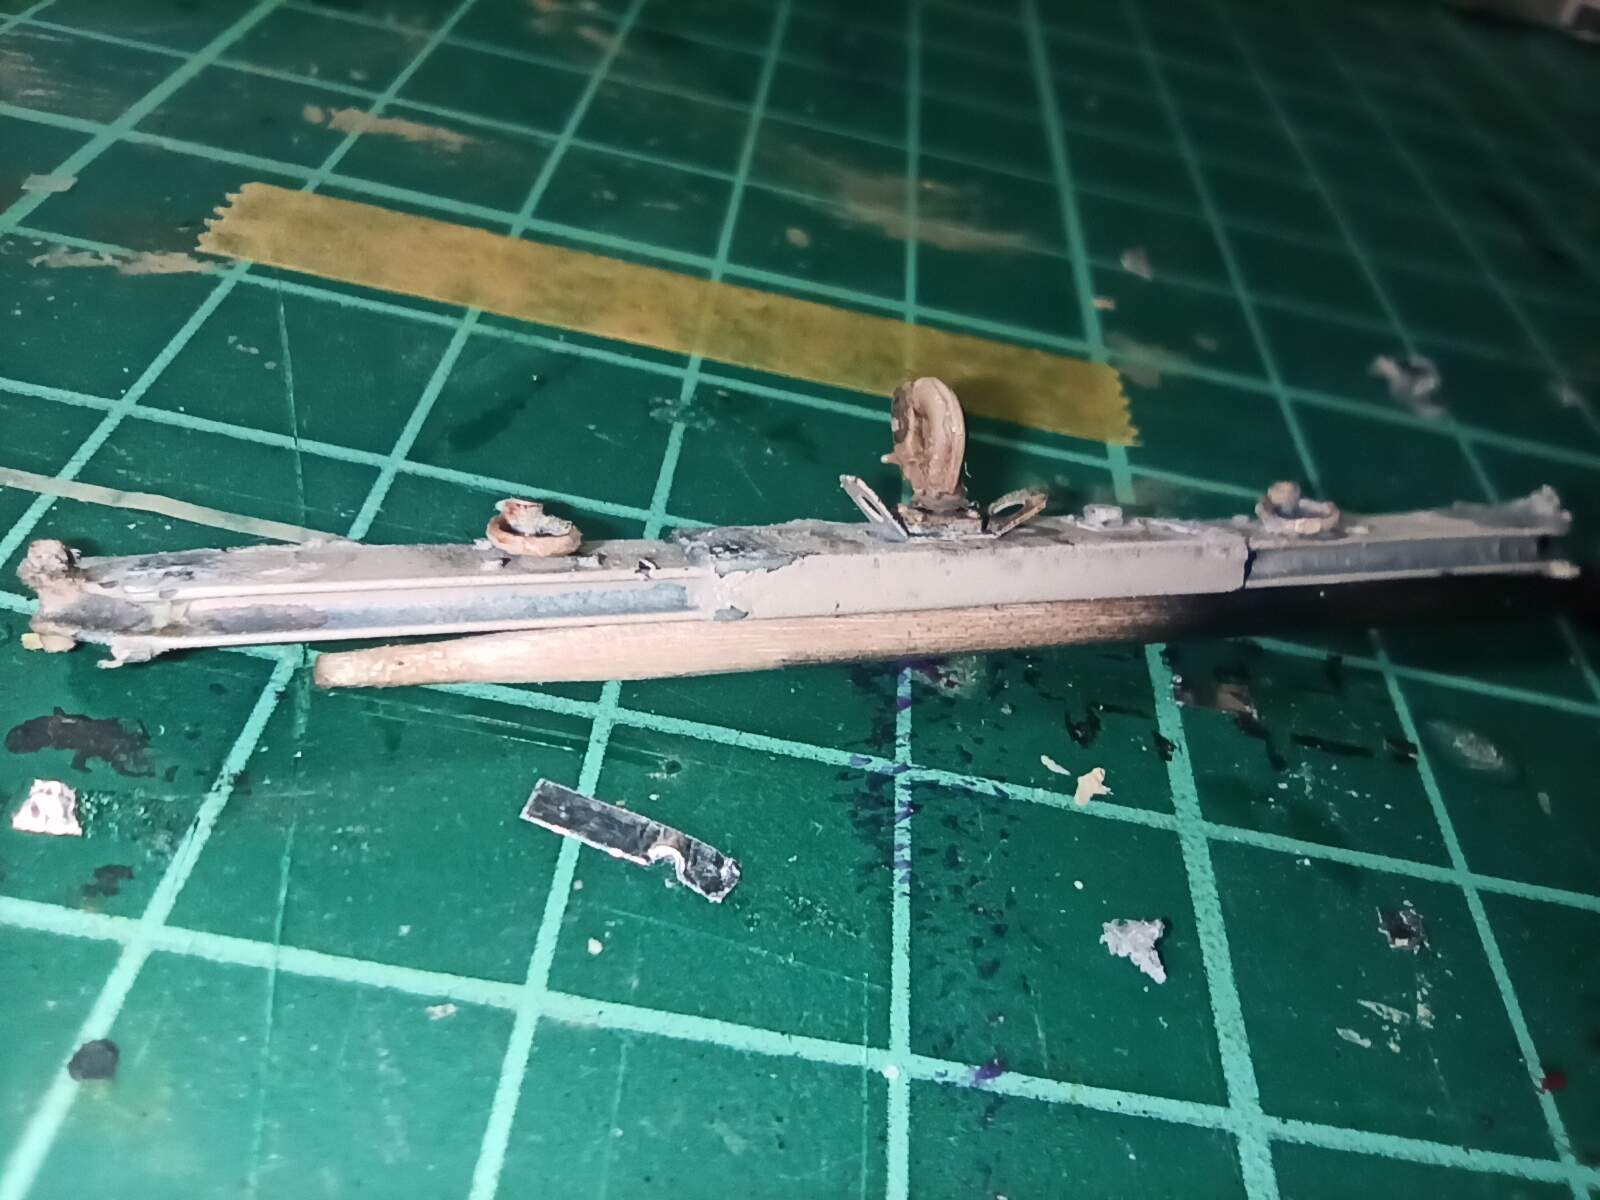
It might be my old eyes playing tricks, but the barrel on the resin .50 cal looks slightly bent. Is it too late to replace it with a turned brass barrel?

Fantastic-looking build! Your effort is really paying off.
It might be my old eyes playing tricks, but the barrel on the resin .50 cal looks slightly bent. Is it too late to replace it with a turned brass barrel?
Thanks for your words!!!
And no, your eyes are not playing tricks, the barrel is sighty bent. I have not tried to apply some heat with the hair dryer, but maybe I will.
Thanks again!!
I’m no expert on Humvees but that looks very convincing to me, a lot of work beautifully rendered 
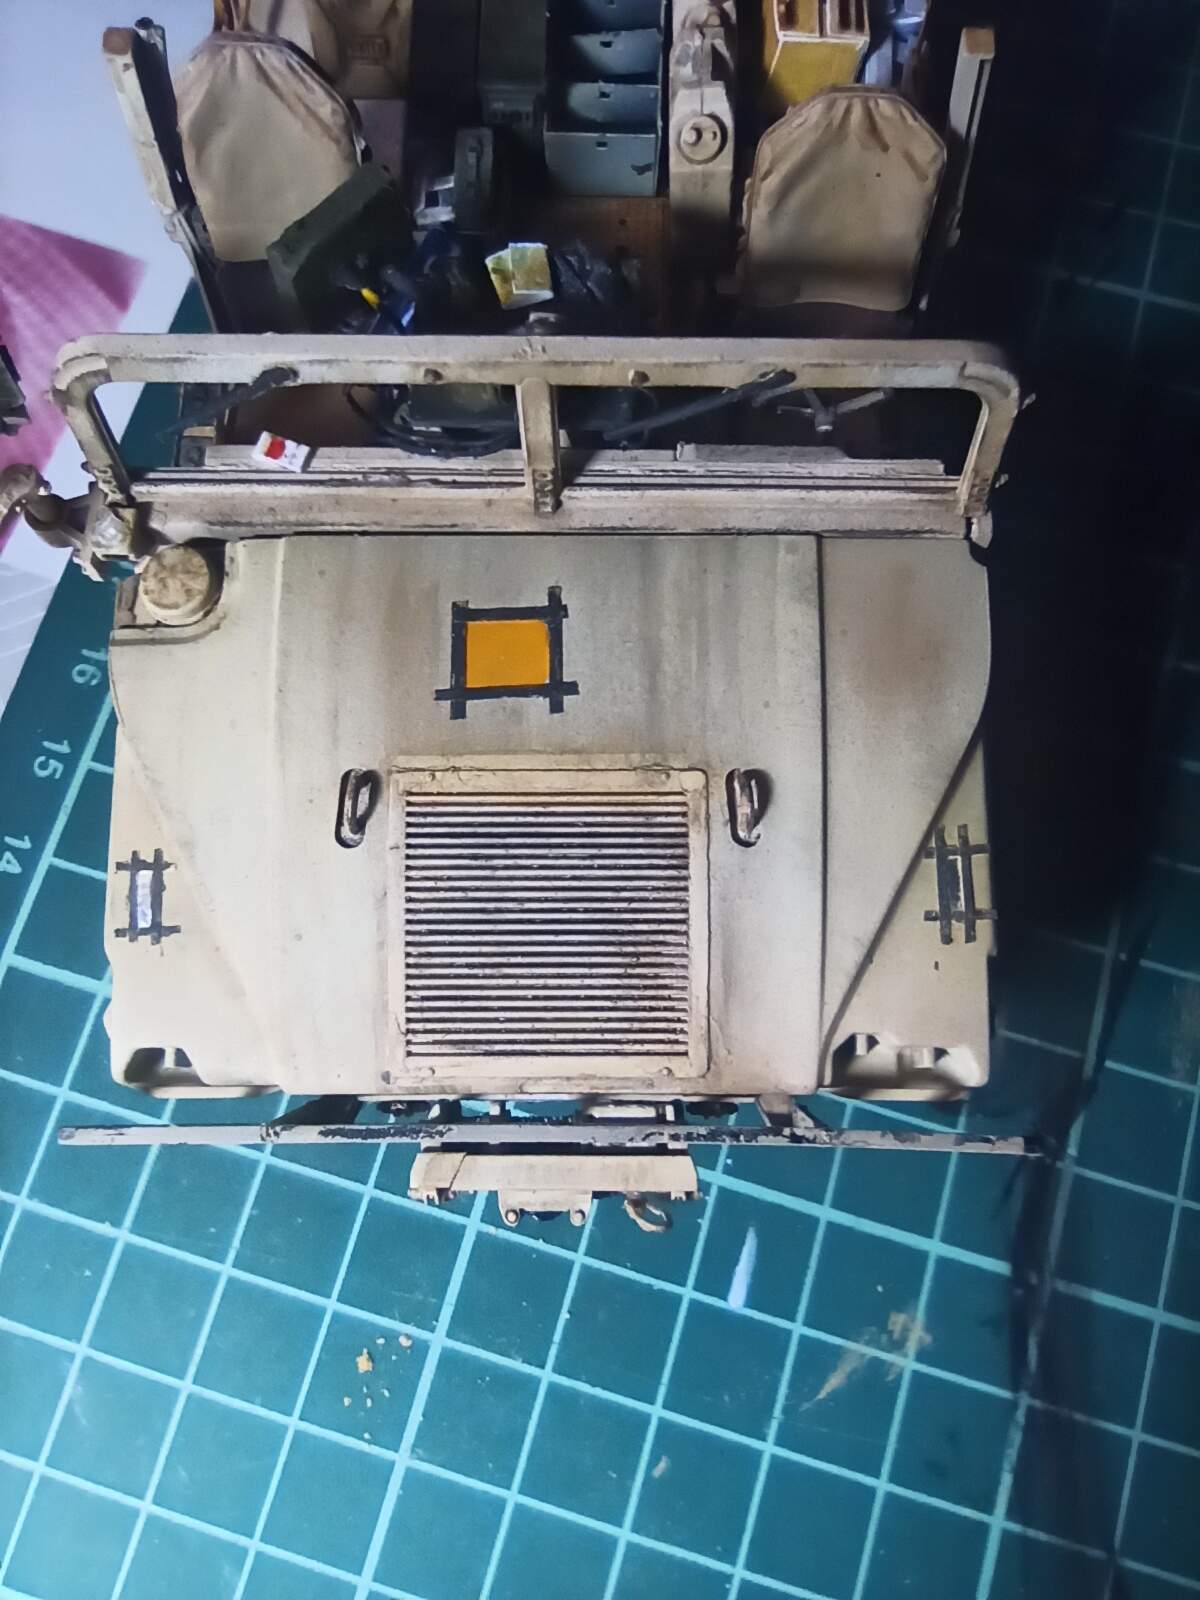
Thanks, Tim!! Very appreciated. I have to add some details on the Humvee yet. As 18Bravo told me in a previous post, a piece of glint tape adds a nice touch,
Thanks again!
Outstanding work! Good to see you posting again. And yes, use the glint tape as described and you can’t go wrong. It’s even shown in one of the photos above. One more nice detail that would look cool - a number made from hundred mile an hour tape. Since you don’t have doors, it would also be found on the back of the stowage box on the rear rack.
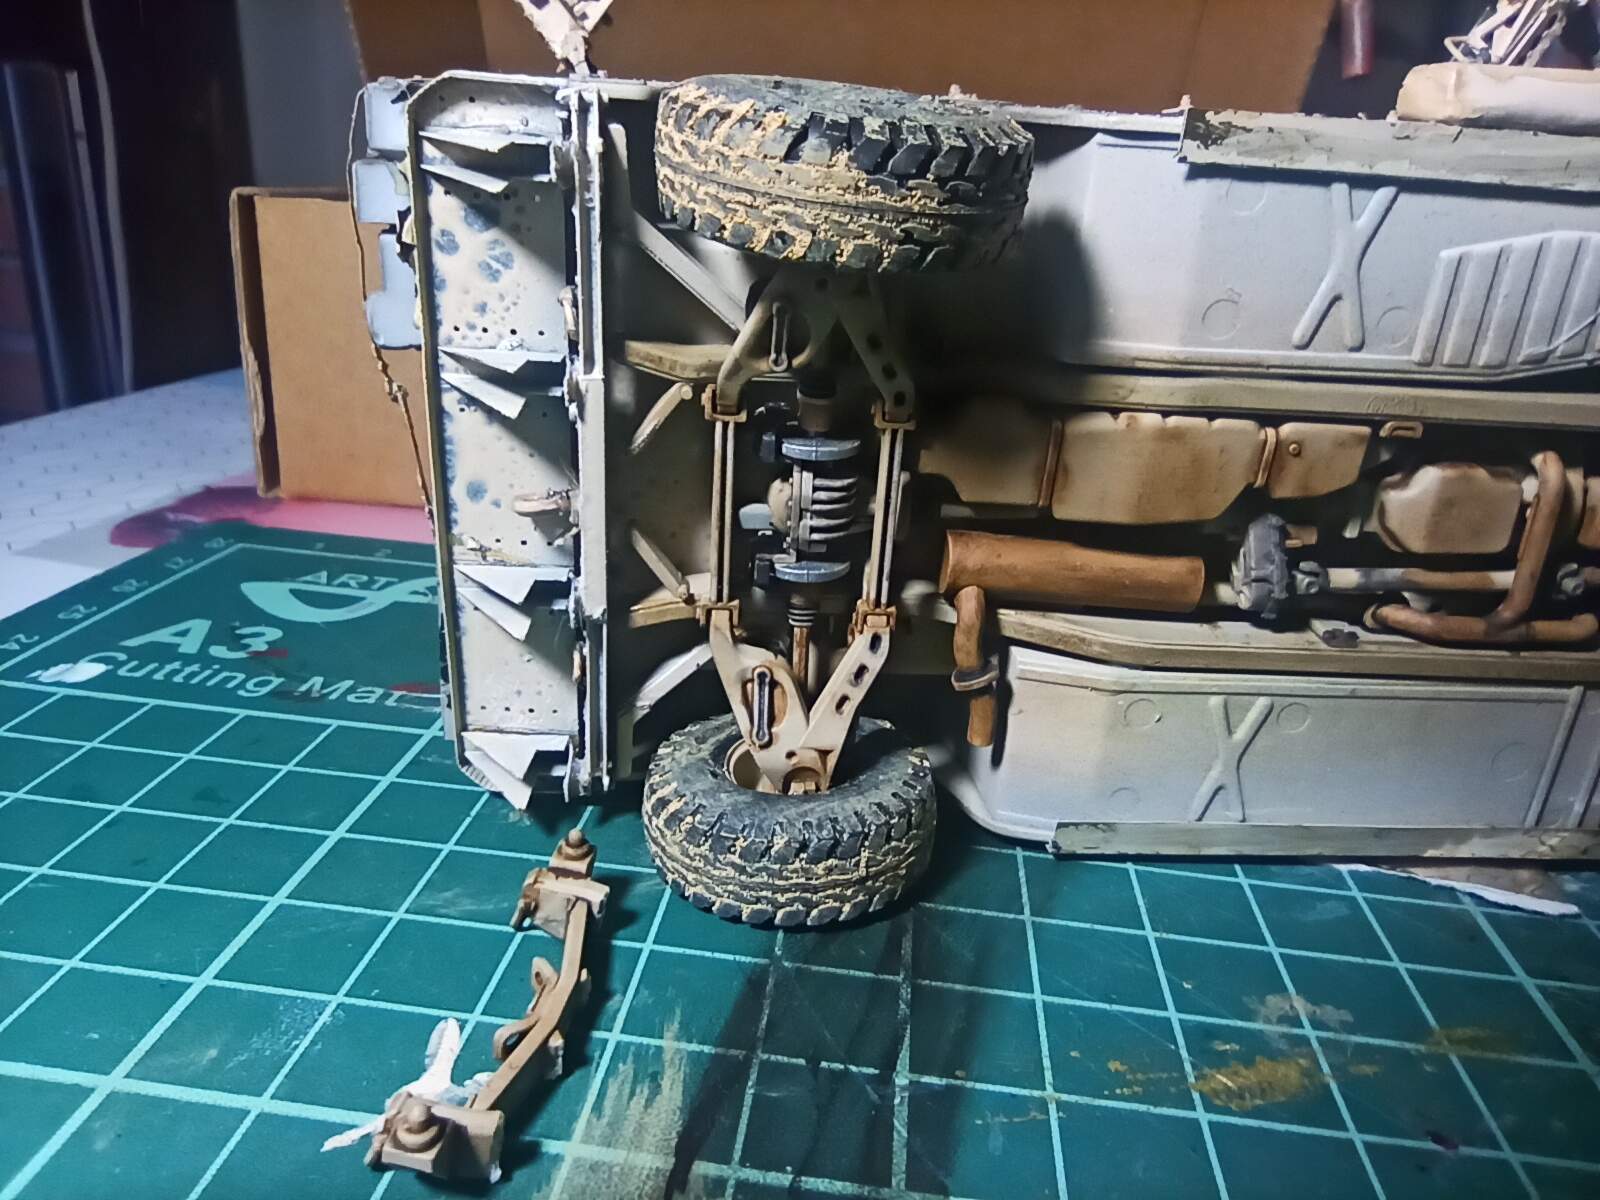
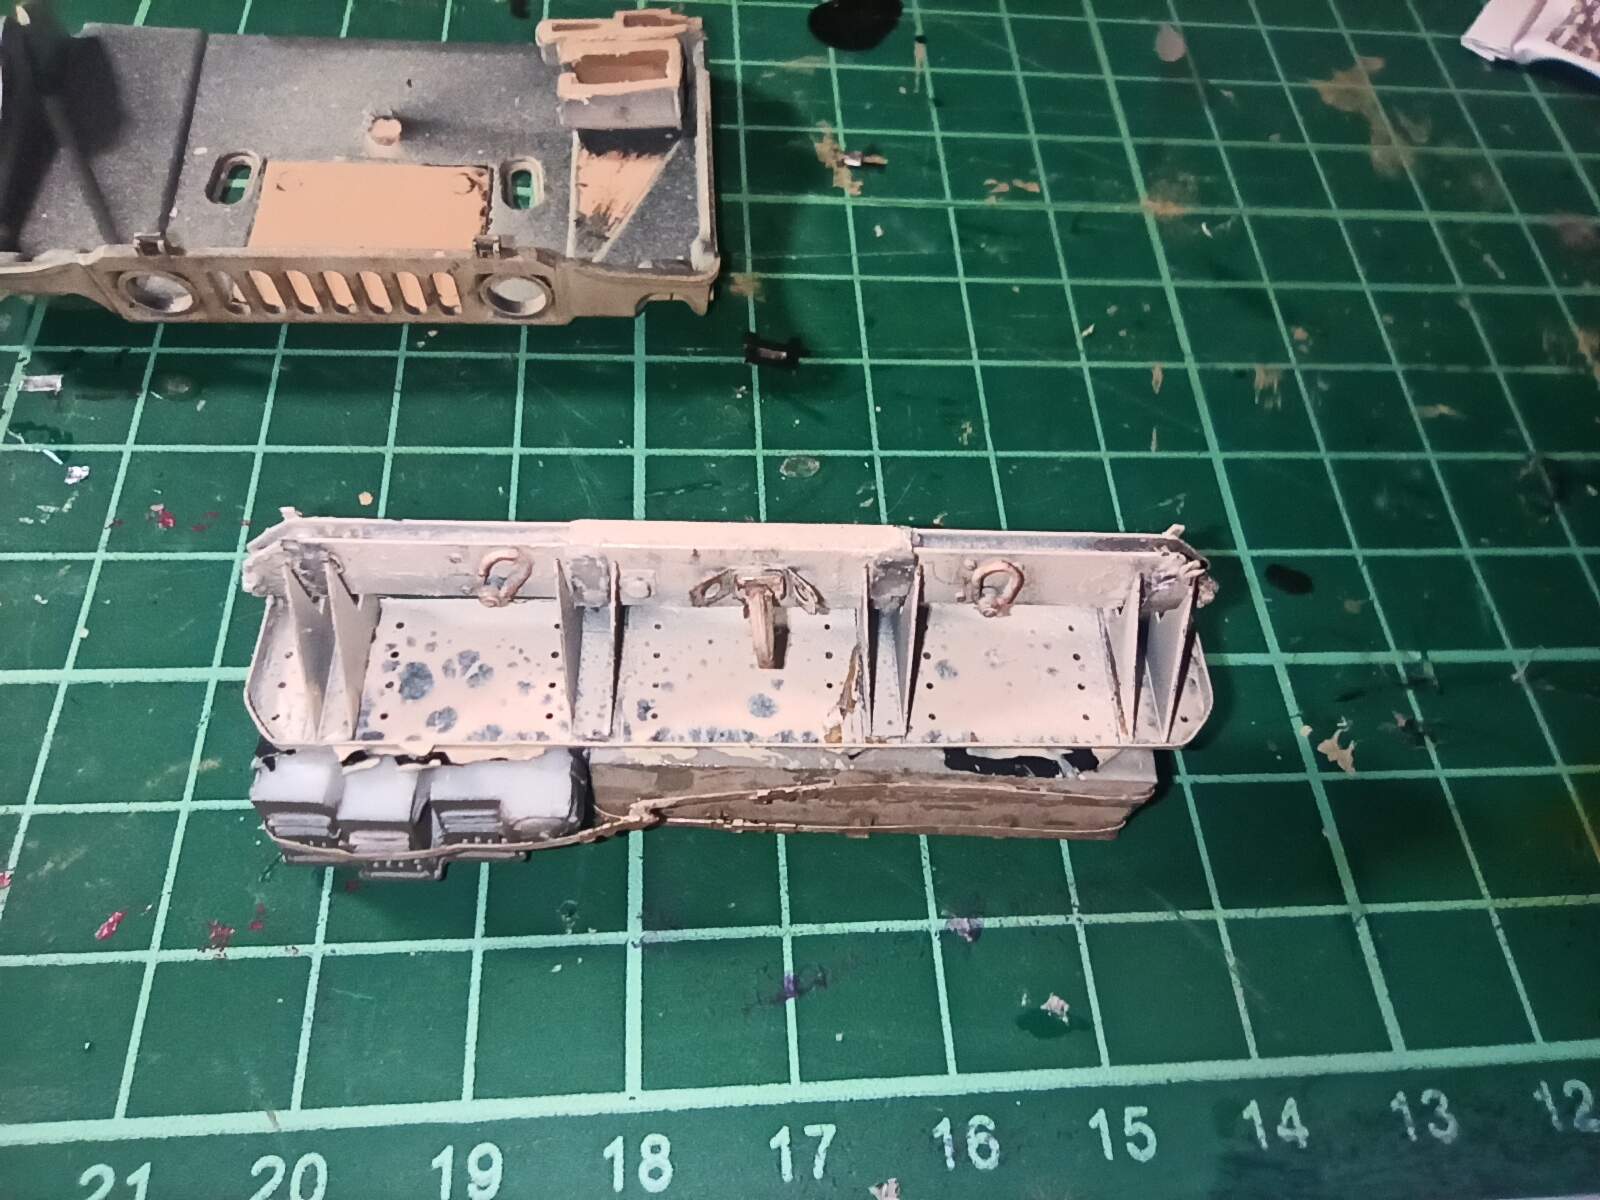
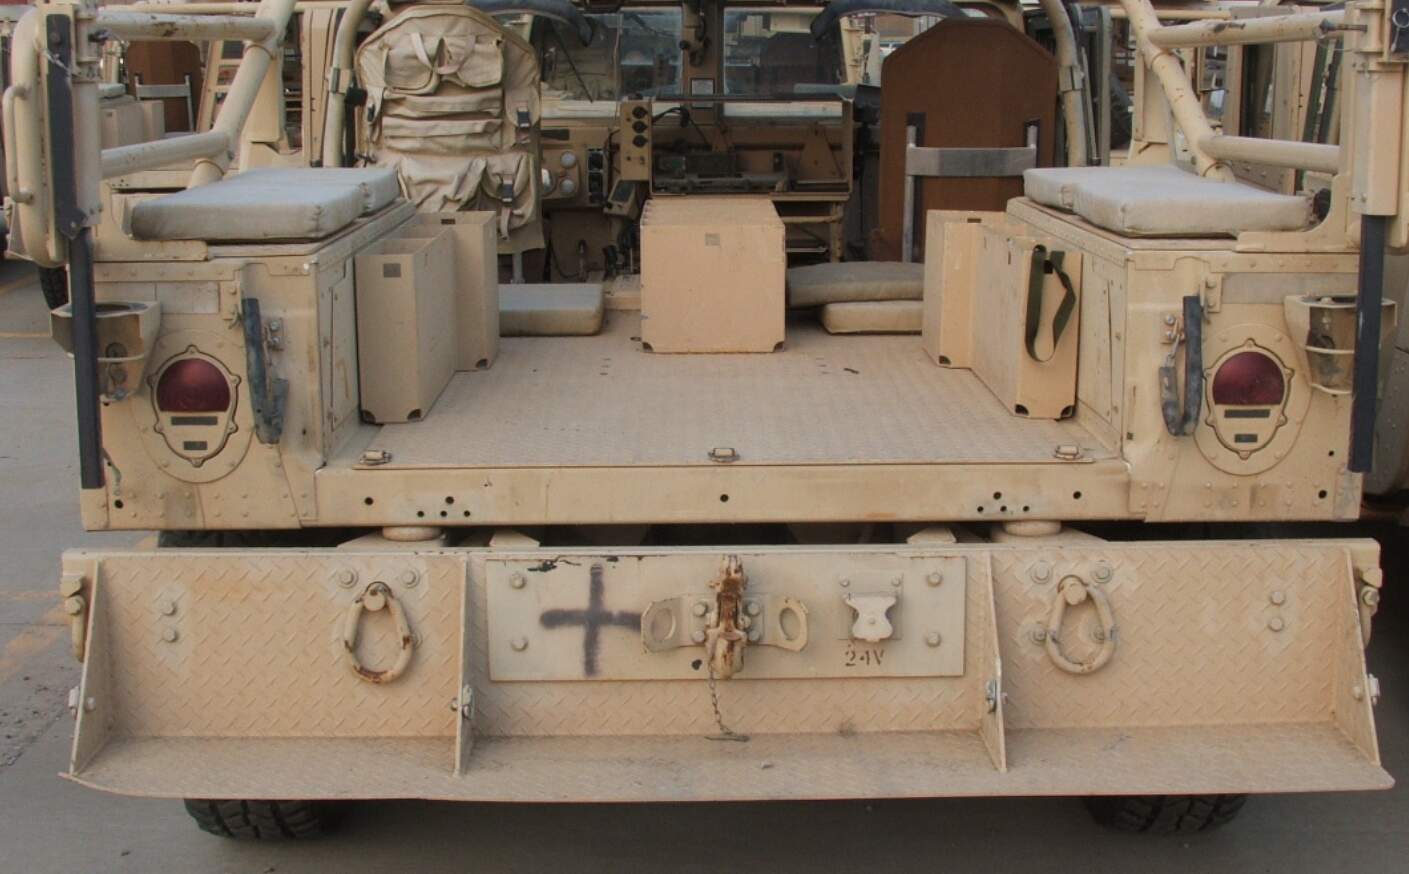
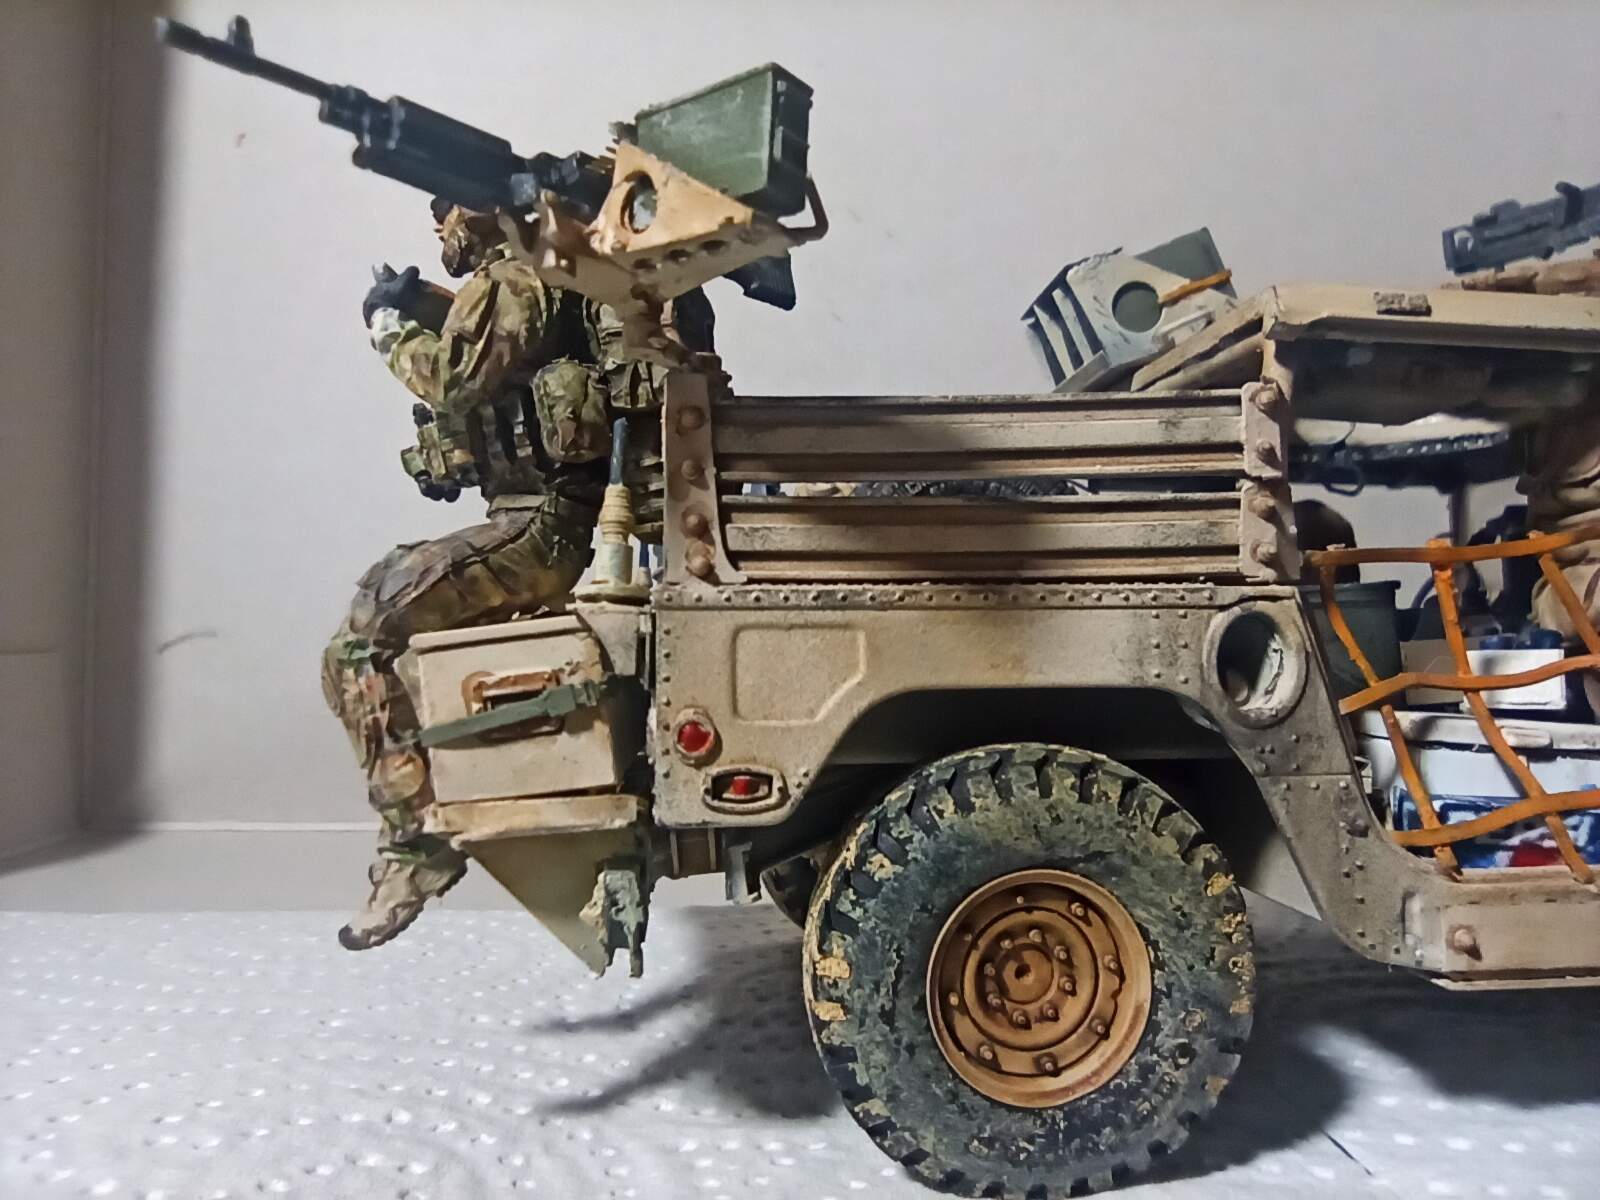
Ah, I just noticed something. There is something amiss with your rear stowage rack. The triangular supports aren’t attached to anything - they’re just sort of hanging down. They may be a little too large and have to be remade, I’m not sure. The rack could be mounted two ways - with the mounts facing up or facing down. About fourteen years ago I posted photos of my own Victors that you see in the photos above. Everything had to be scratch built back then as no aftermarket was available. In fact what did become available from a few companies was due to measurements I took. These photos I posted under the name of Matte Black as I was instructed to stop using my name in “Blogs,” even though I barely knew what that term meant back then. Here’s a photo of two of the Victors I was building showing the two different shelf arrangements.
My scratch built bumper before adding PE treadplate that I had to have shipped halfway around the world:
So… now I’ve identified the problem by looking at my own build - you appear to have attached the shelf directly to the vehicle. The shelf actually attaches to the bumper via those triangular supports.
Sadly, a little more work for you, but I know you’re up to it.
This may show it a little better:
Rob, good to read you again! Thanks for your words and your tips. I’ve got an adhesive tape (a silver tape used to seal air aconditioned and vent pipes, I don’t even know its name in spanish, something like isolating tape) for the glint tape. For the number, you mean in the big brown box on the rack, right?
I don´t know the right size for the triangular supports. They are from the Legend kit, which you told me it has a more reliable measurements.
About the rear shelf attatchment, it’s not like yours because I had to remove one piece from the lower side (rounded in red on the picture) for some fixing issues. I don’t remember what was the problem exactly, all I remember is that pieces didn’t come together. This evening I’ll try to shot some photos to show the lower side.
If it’s not very tricky to solve it, I’ll go for it, as I’m not very satisfied with the whole rear set (storage box, shelf…)
Regards!!
The first problem is that the old Tamiya kit (which I used as well) does not come with the bumper. Only newer kits like the Bronco M1114 or the Academy M1151 have them. So you’ll have to scratchbuild the rear bumper as I did. Then the mounts will fit correctly and should also put the shelf at the correct height.
They’re the right size - another company (Pro Art Models?) made a very nice conversion but the mounts were too small. Hardly noticeable underneath the shelf, but if you chose to invert the shelf the mounts would be easier to see and were far too small.
Do I see Heineken?
Dude, I had everything. Even a bottle of Grappa I got from some Italian SF dudes. I had one shot with my Afghan officers one day when we were having a rough time with the BANA we ran. The next day I needed another. I told them to go in their hooch so we could get another “belt.” They looked at me expectantly, waiting for me to produce another bottle. They had killed it the previous night. We’re talking magnum sized.
What you don’s see in the photos is the Paulaner. It’s brewed in Bavaria. The Germans I visited on a regular basis were from the north and hated it. I asked them if I could grab some. They said yes, take five cases. Every day. Thankfully we drank most of it before combat operations started.
Nacho, waiting to see what you do with those plans I sent.

Good story.
I know paulaner as I was in Bavaria and northern Germans must have sh** for taste.
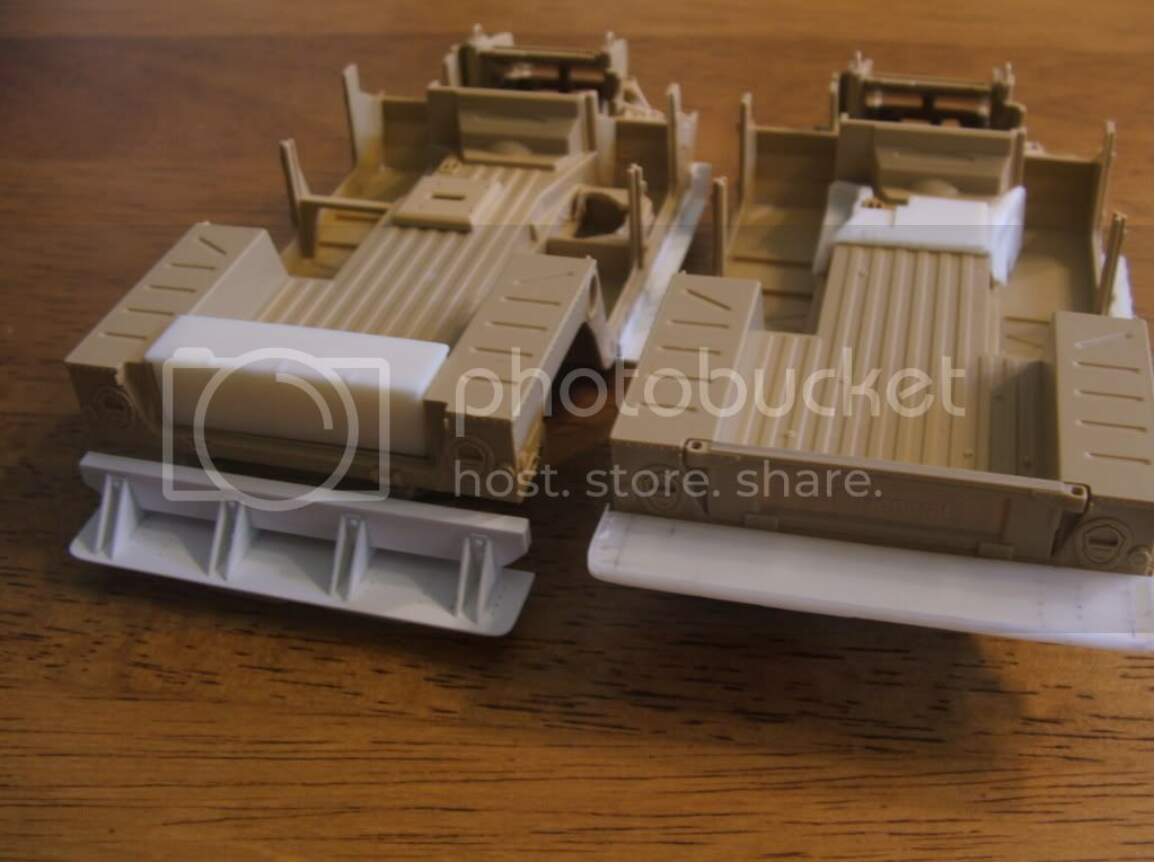
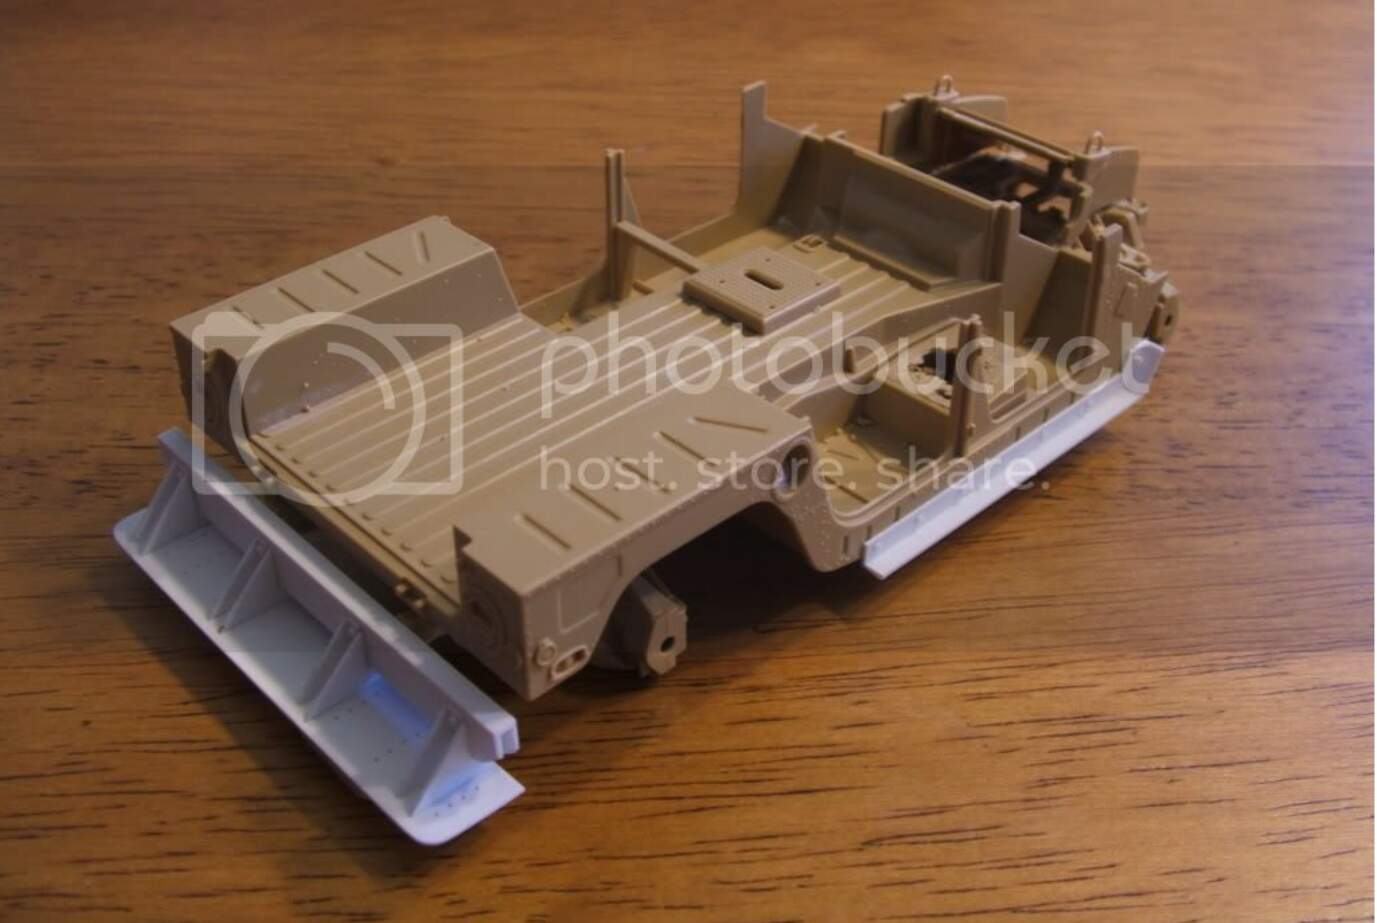
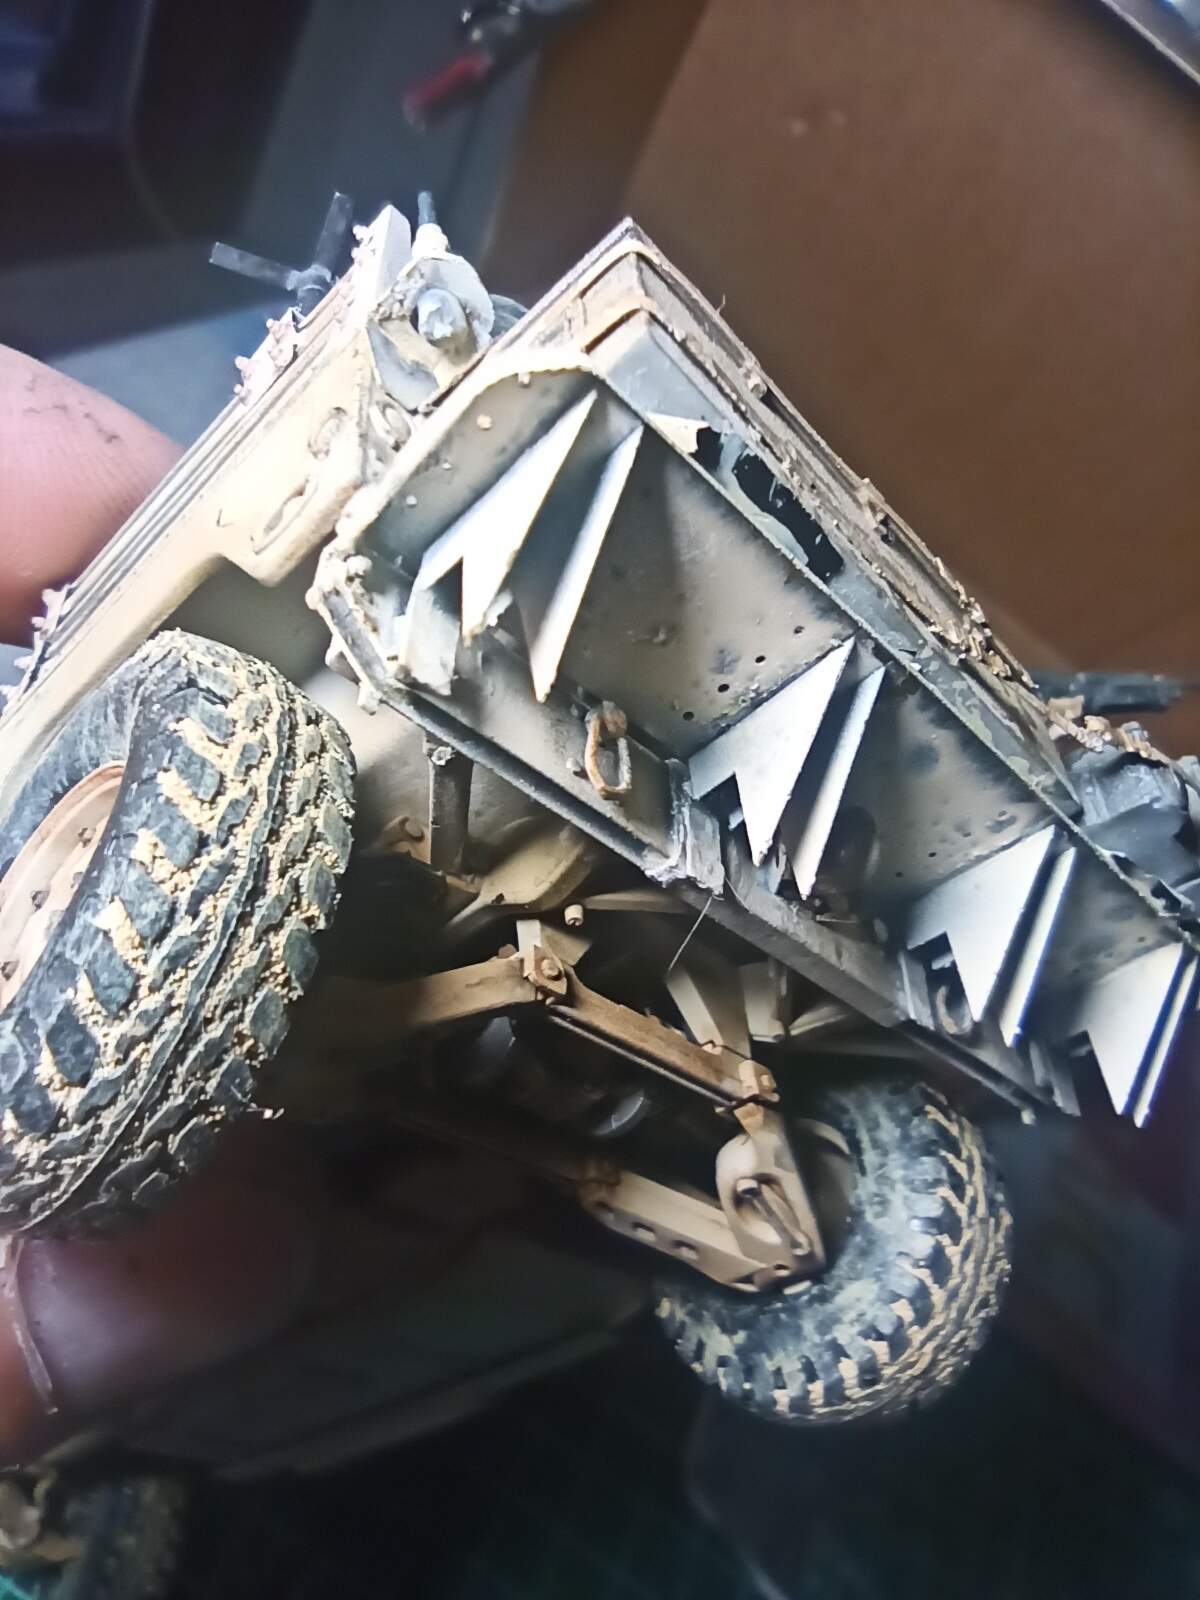
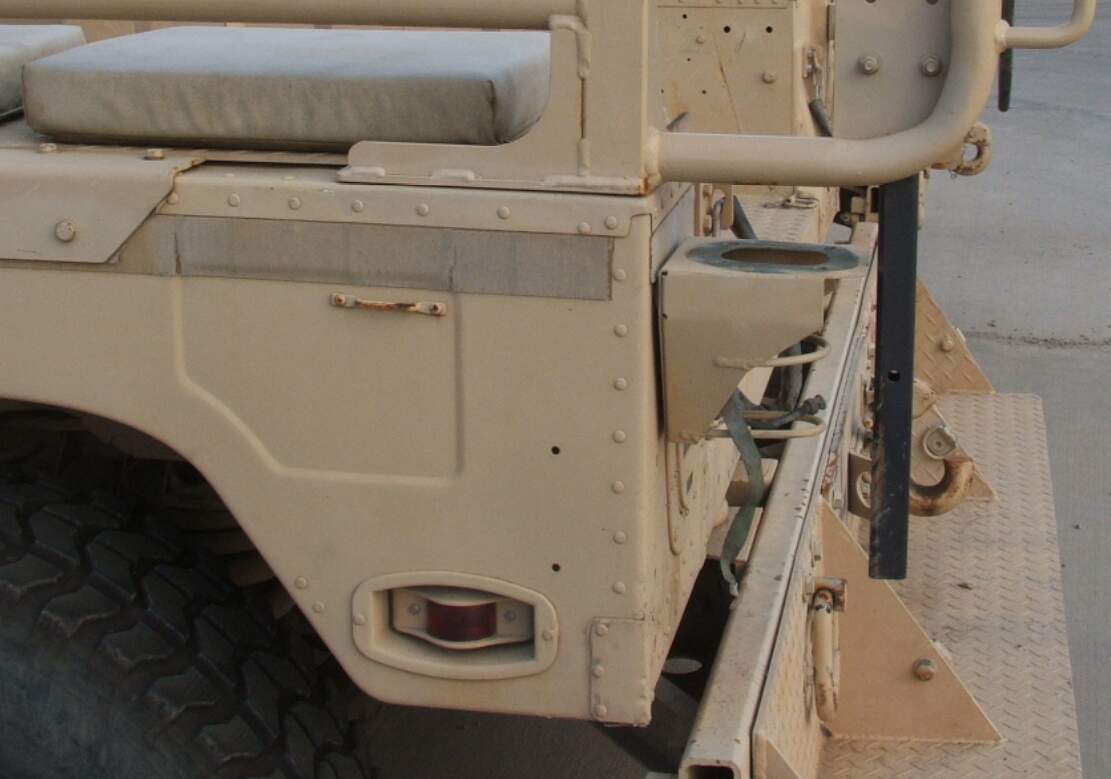
So, I said yesterday, I took some pictures of the lower side and got an idea of what Rob told me about the rear shelf. This is what I had, and you can see what is the piece I had to remove.
As you can see, the bumper is ‘under’ the chassis and not aligned. Another view:
I think that the right position would be this:
So I have disassembled the rear rack to start it over.
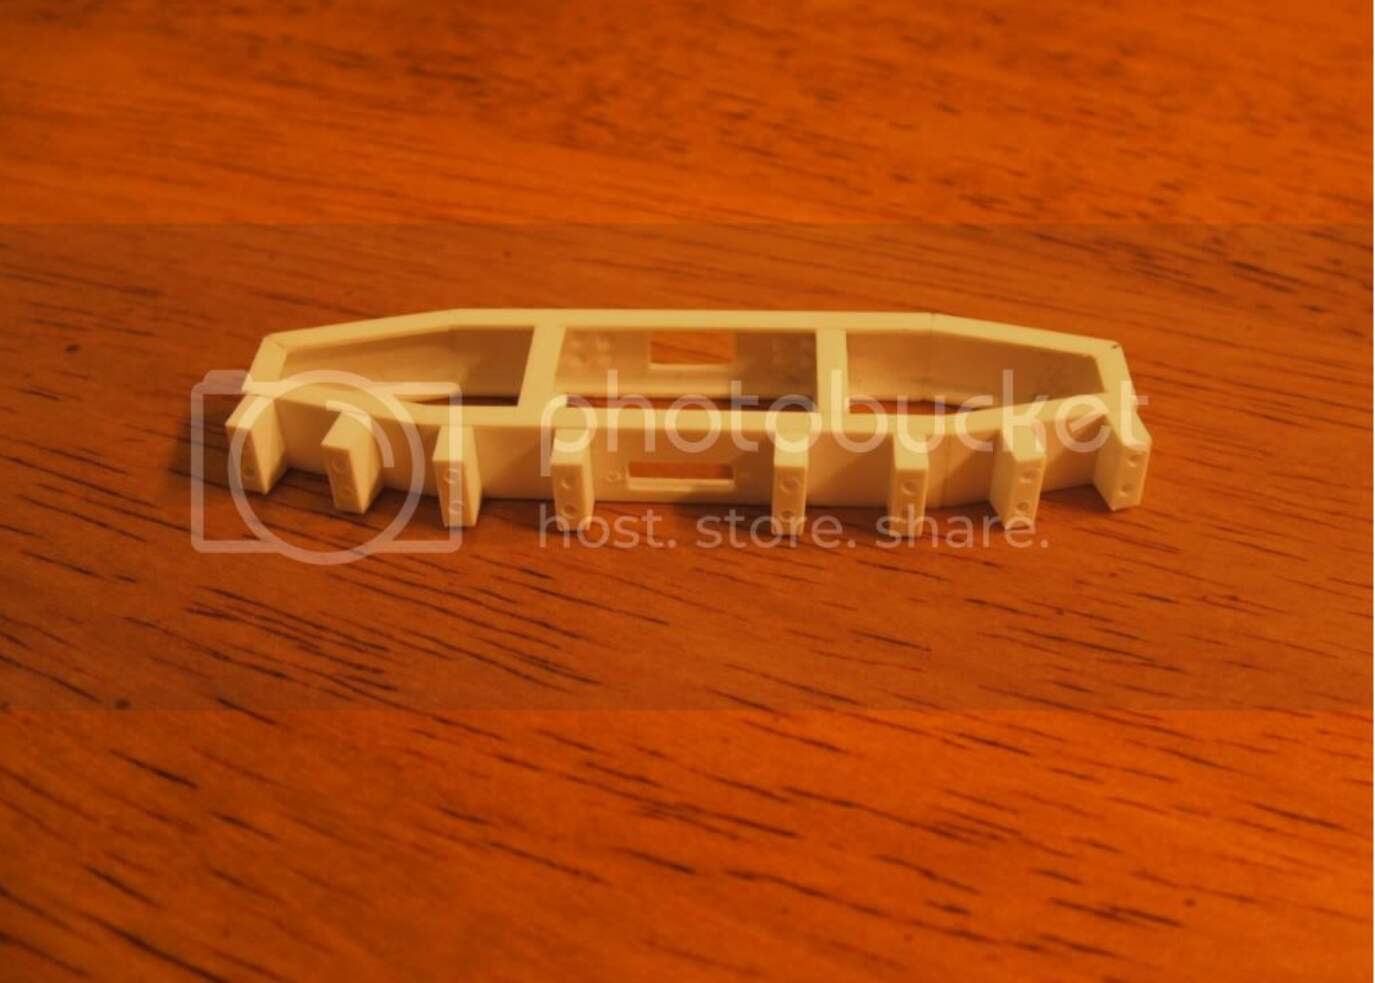
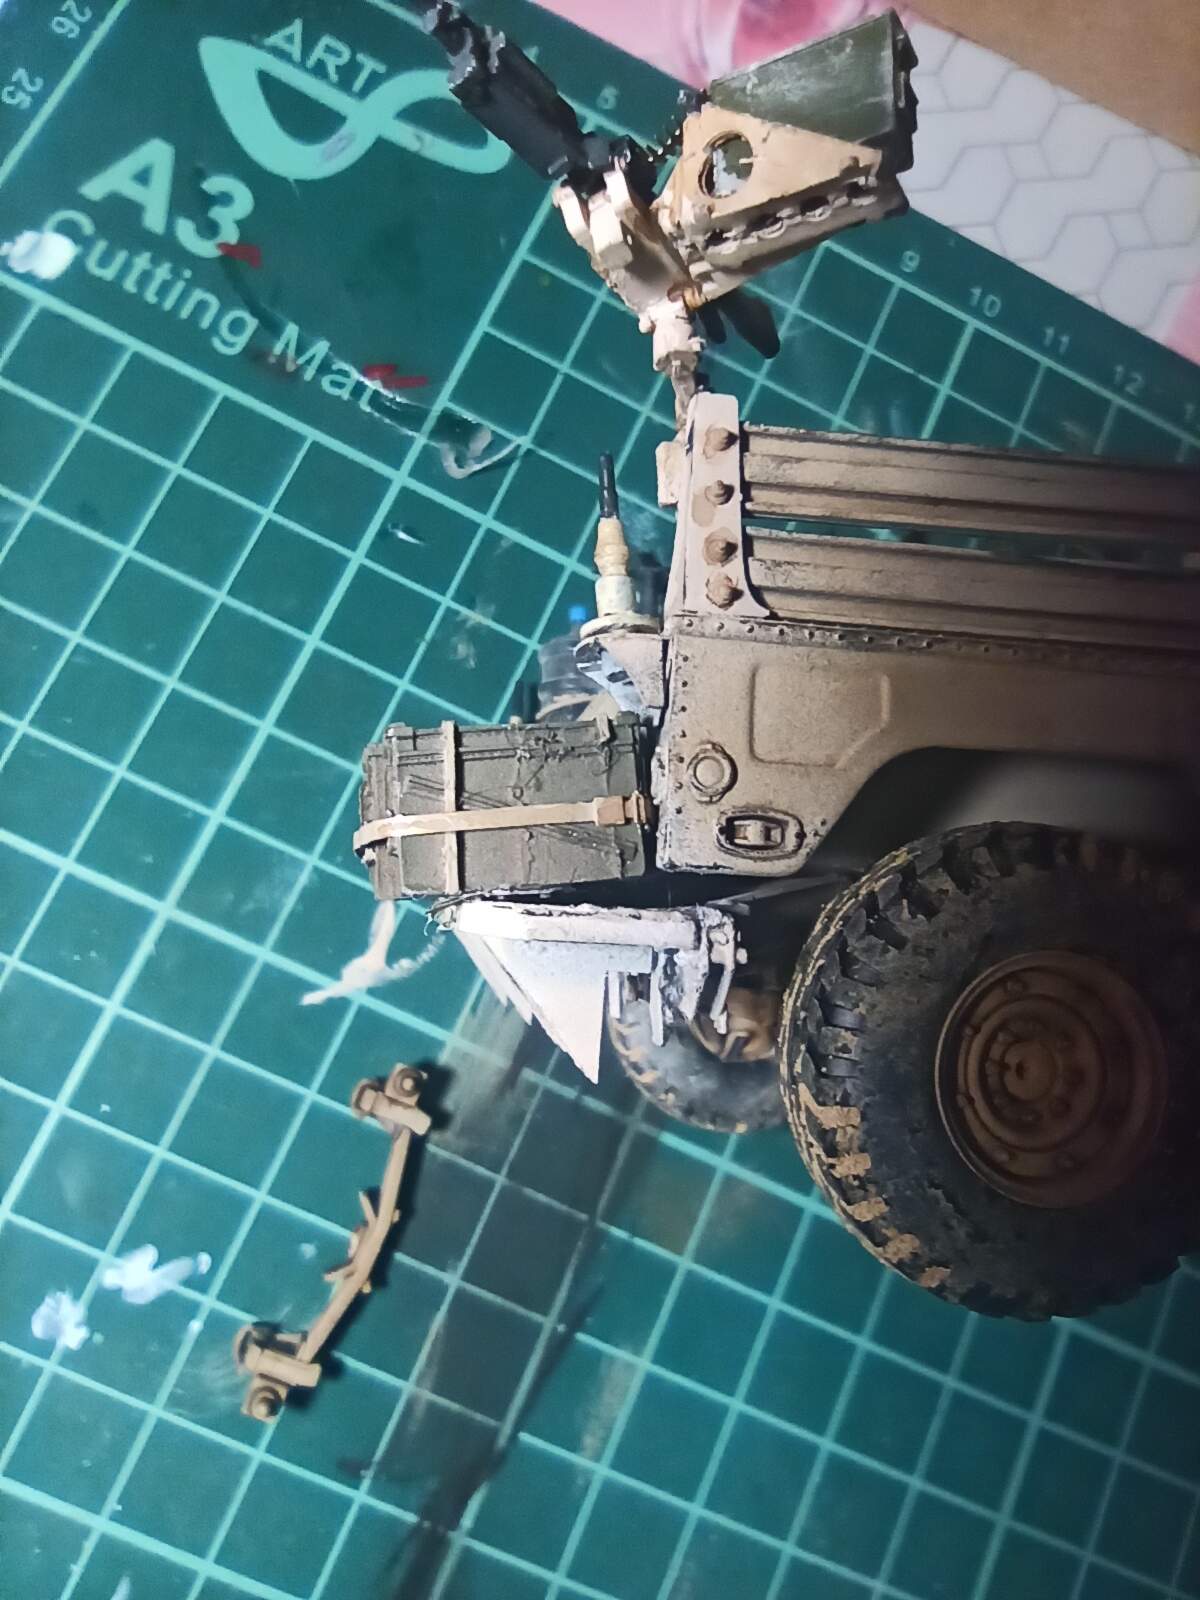
Rob, as the plans you sent to me, I realized that maybe you mean this piece.
If so, I have already made, as it came with the conversion kit, hahaha.
But now, I have 2 doubts about the rack assembly. Is the rack fixed directly to the bumper as I had it before? Or is the bumper fixed between the triangle’s spots? Like this picture:
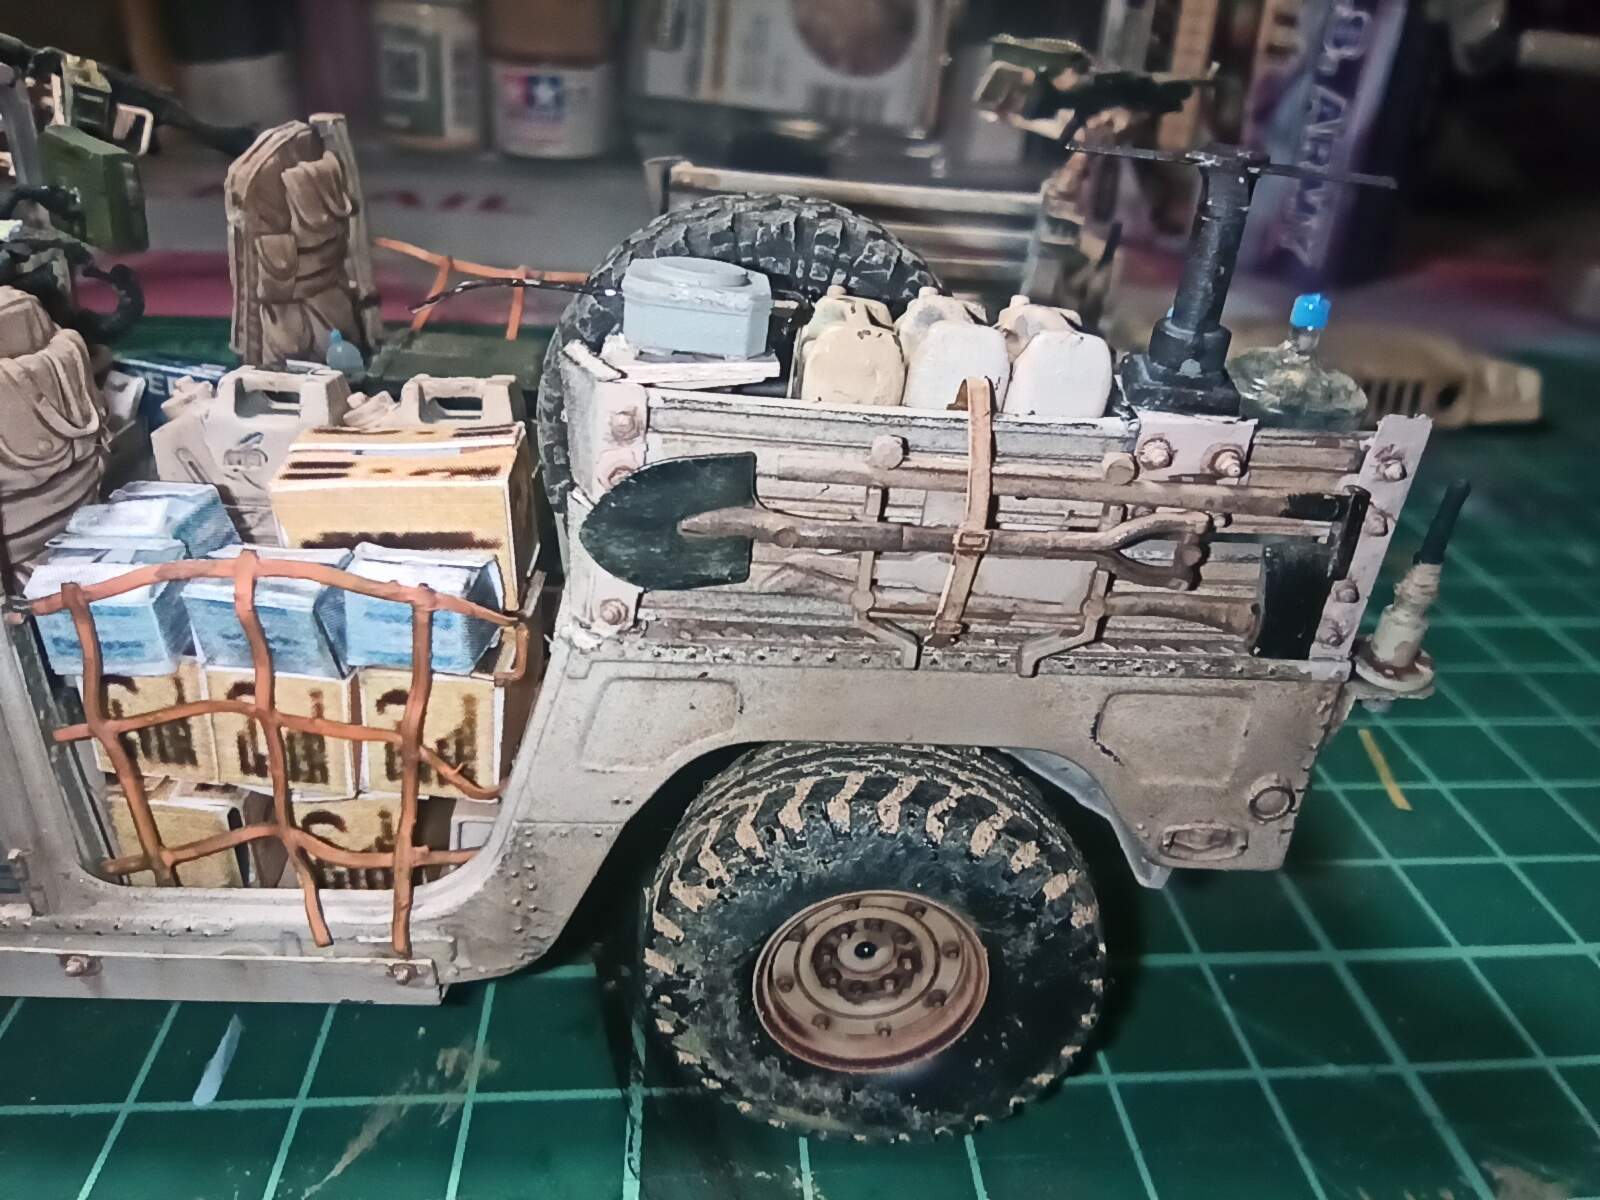
This is about the rear rack, but meanwhile I mounted and painted a ‘pioneer’s tools’ as Tamiya call it on the instructions. Basically a shovel, an axe and I don’t know what else.
And finally, the glint tape.
That was all for yesterday. I hope to fix some rack’s issues today.
Regards!!!
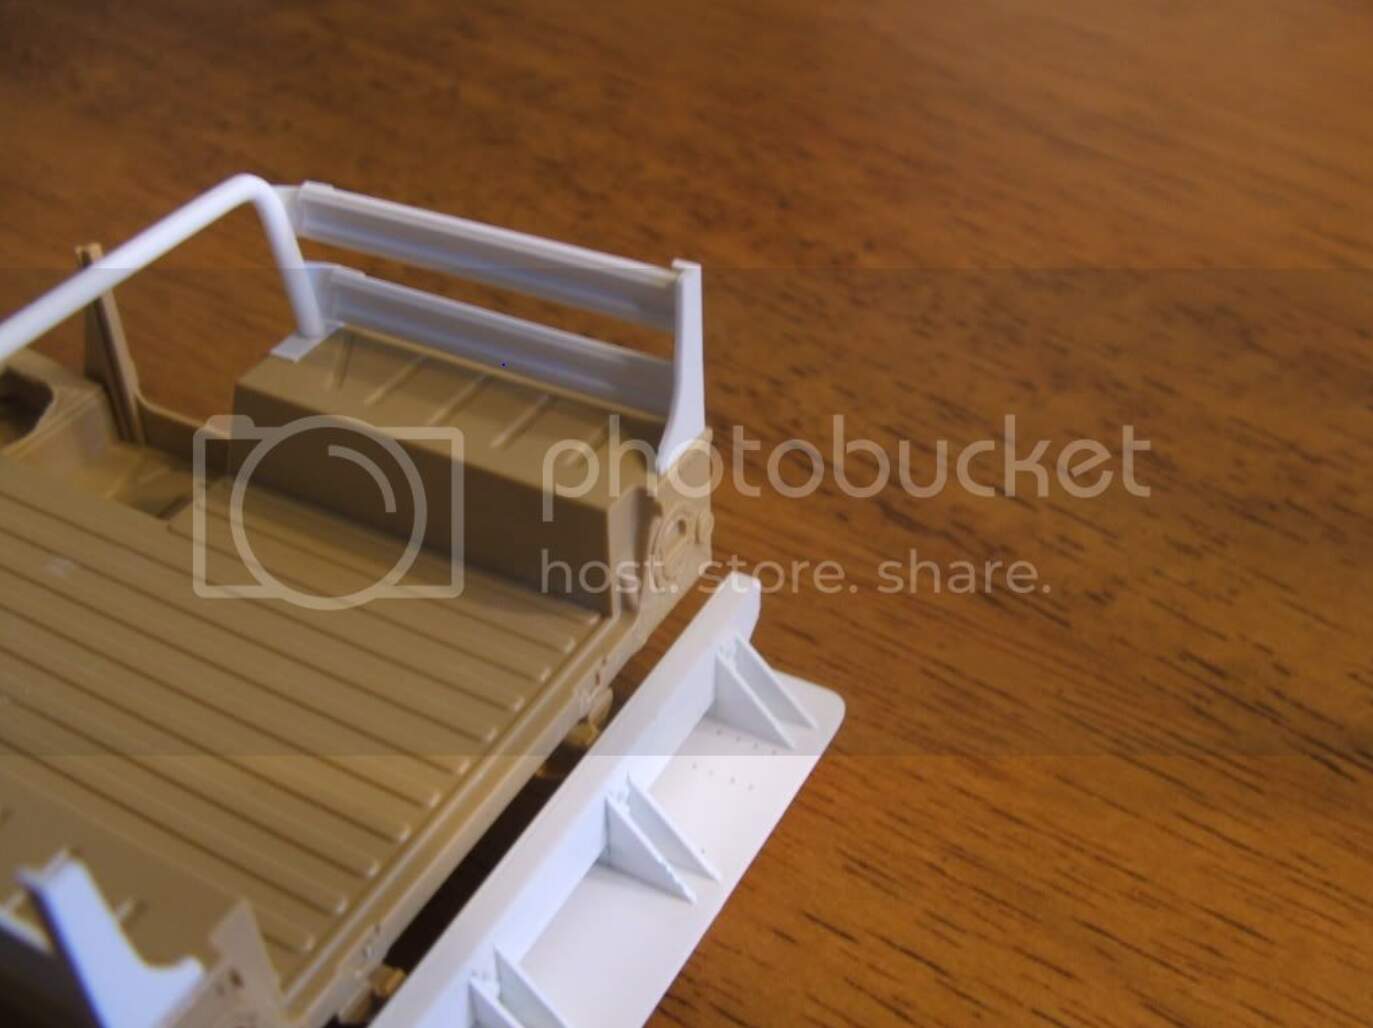
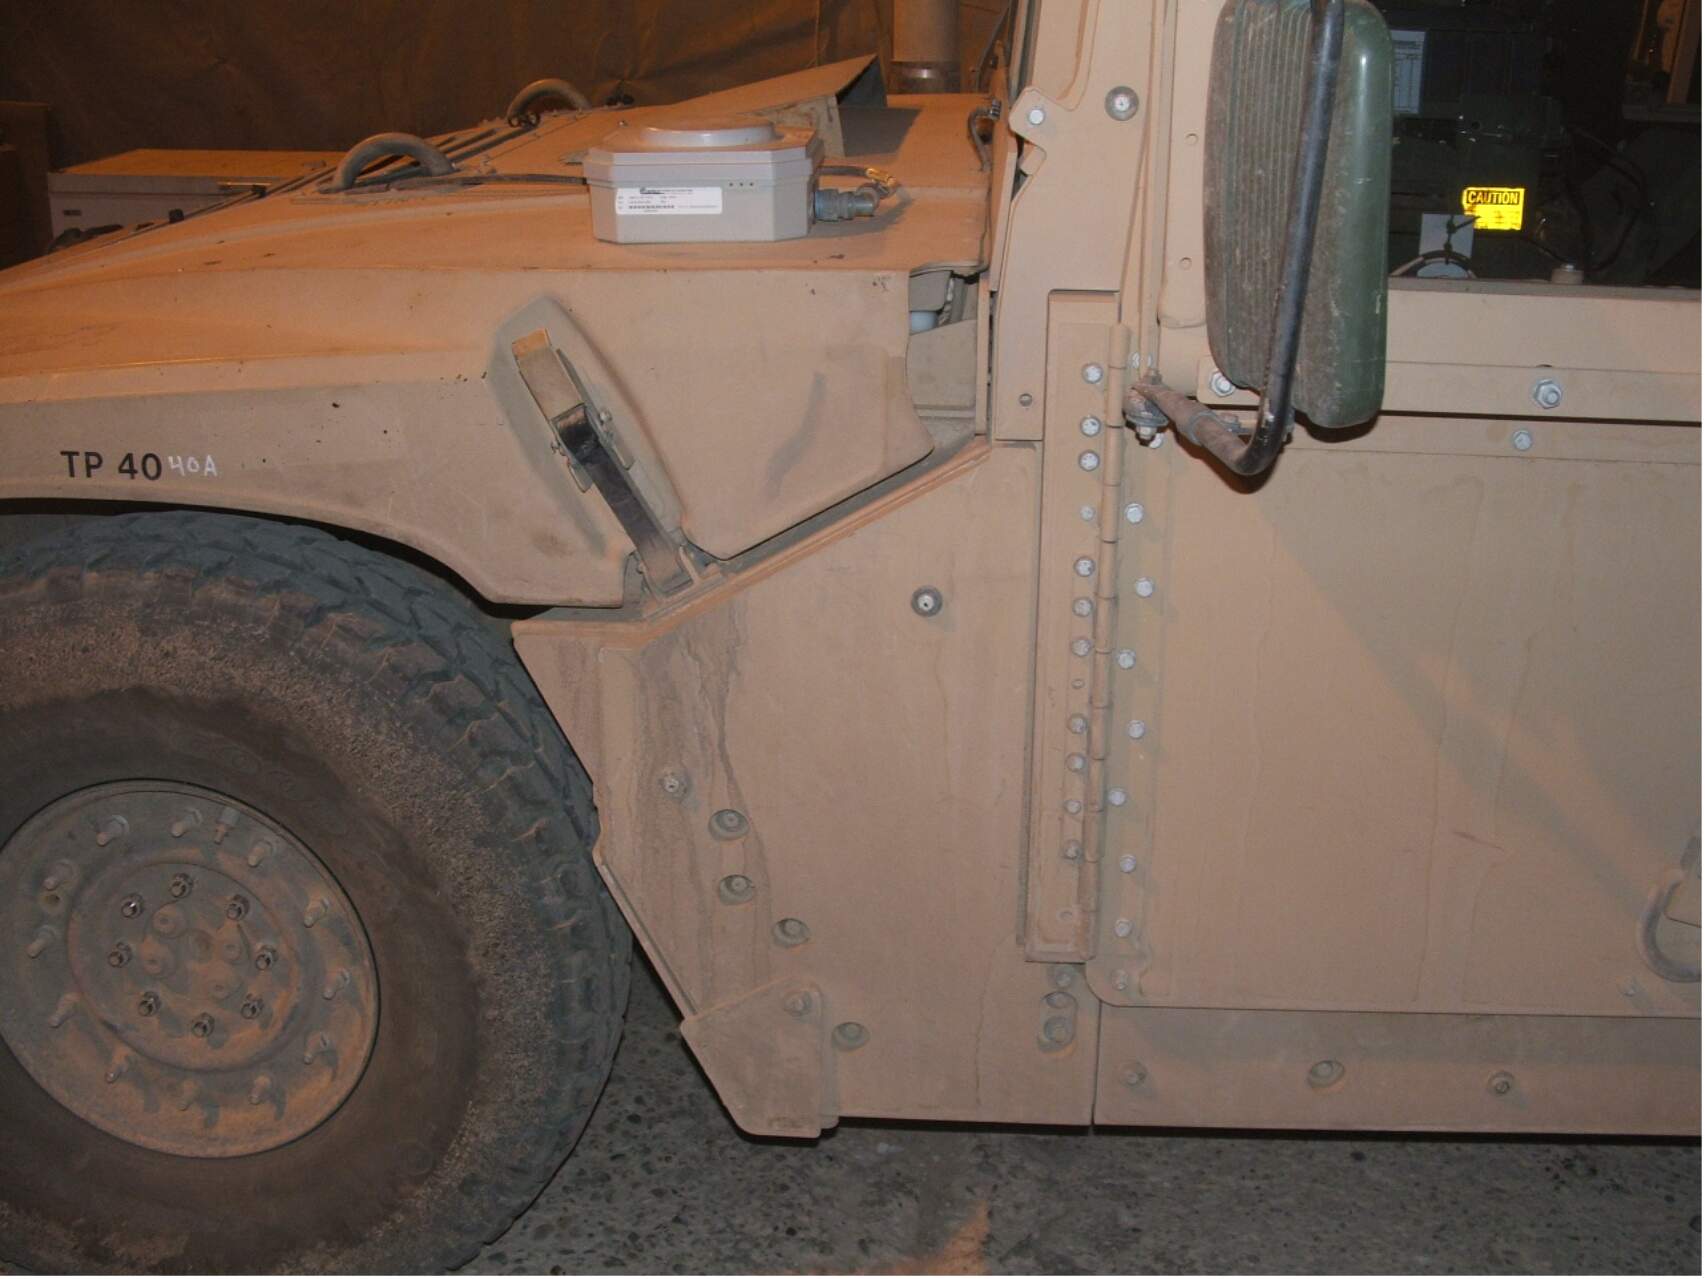
That is indeed the bumper. I couldn’t even see it in the photos as it was so far out of position. Yes, bring it rearward, and possibly upward a bit. If you don’t find photos of the exact position I’ll send some when I get home today. The notches on the triangular support fit nicely right onto the bumper.
As for the pioneer tools, I personally have not seen them mounted like that. But I haven’t seen everything. Yet.
The glint tape looks just about the right size.
Everything is looking good!
Ok, Rob, thanks for the clarifications. If possible, send the pictures. Today I’ll make the front glasses and some backpacks to hang them up on the right panel (opposite to the pioneer tools)
As for the pionner tools, you make me doubt now!! I thought it was a nice touch.
Thanks again!
Leave the tool s if you like. I’m sure other teams kept them in different locations. I mean they had to be somewhere, right?
Even though the shelf is mounted upside down here,(and it’s different - something I’ll need to redo at some point) the photos show the relationship of the bumper to the rear of the vehicle. We used this setup for rapid infil with troops standing on the platform. The side armor (along the lower edges of the vehicle( was reversed as well to give additional standing room.
Ah, one thing to notice to go along with the earlier conversation - no rust or chipping whatsoever, except for the steel tie down at the left rear.
Thanks. I can see clearly how it’s mounted. By the way, I have disassembled all the rack set to start it again. I have even removed the paint.
RegardS!!
Some updates. I have done again all the rear rack and set it as (I thought) Robert told me. But now, reviewing the last pictures he posted here, I have realized what I have done wrong, so I’ll make it (again) this evening.
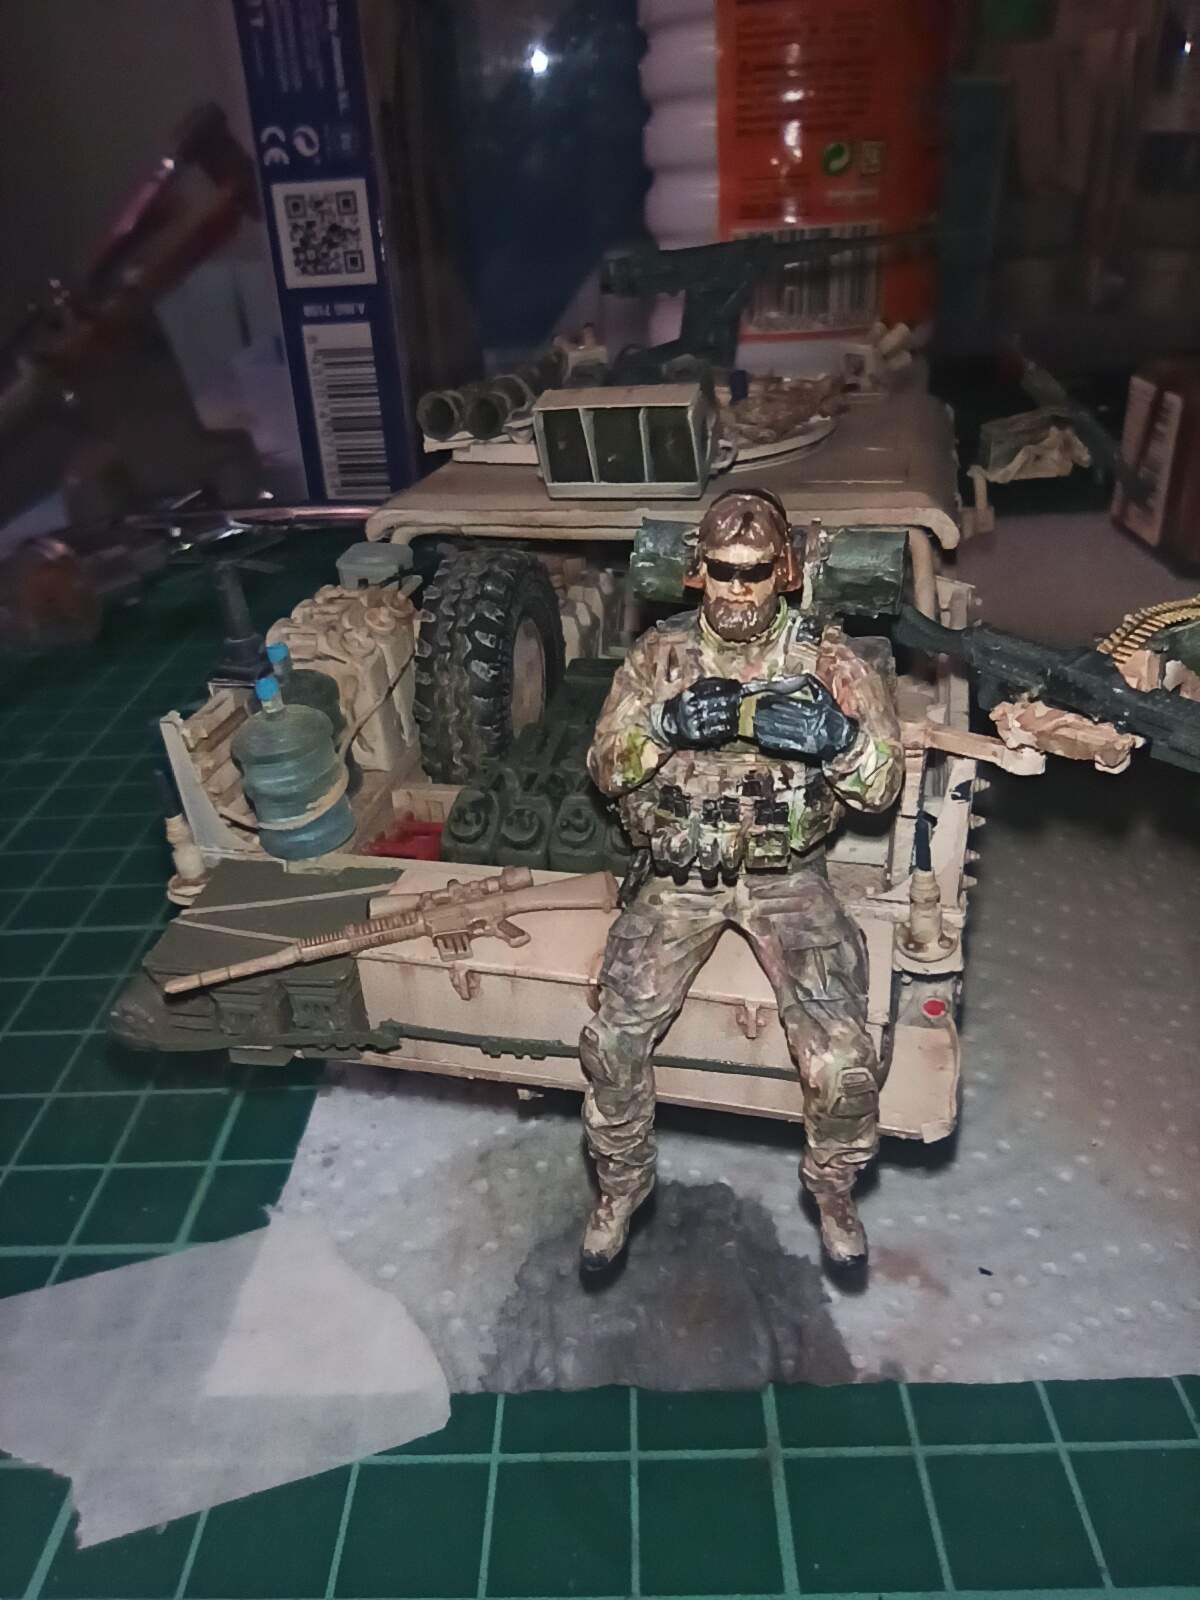
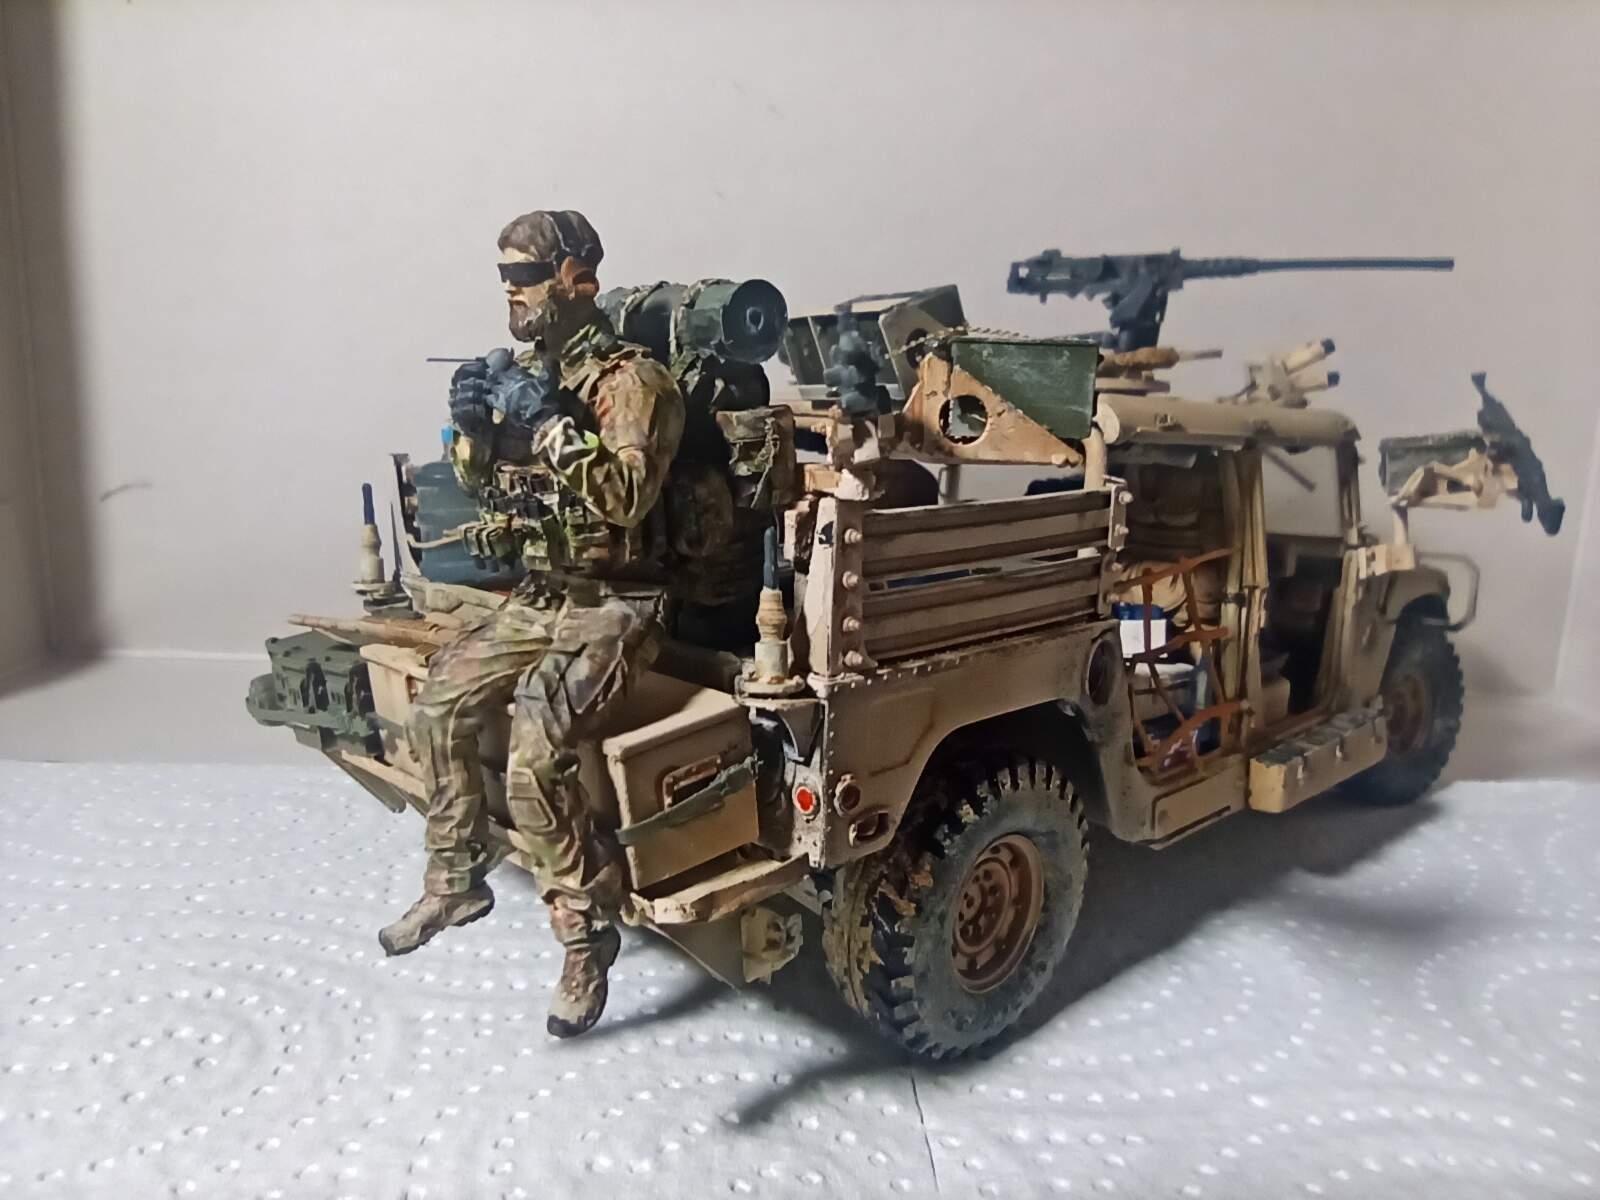
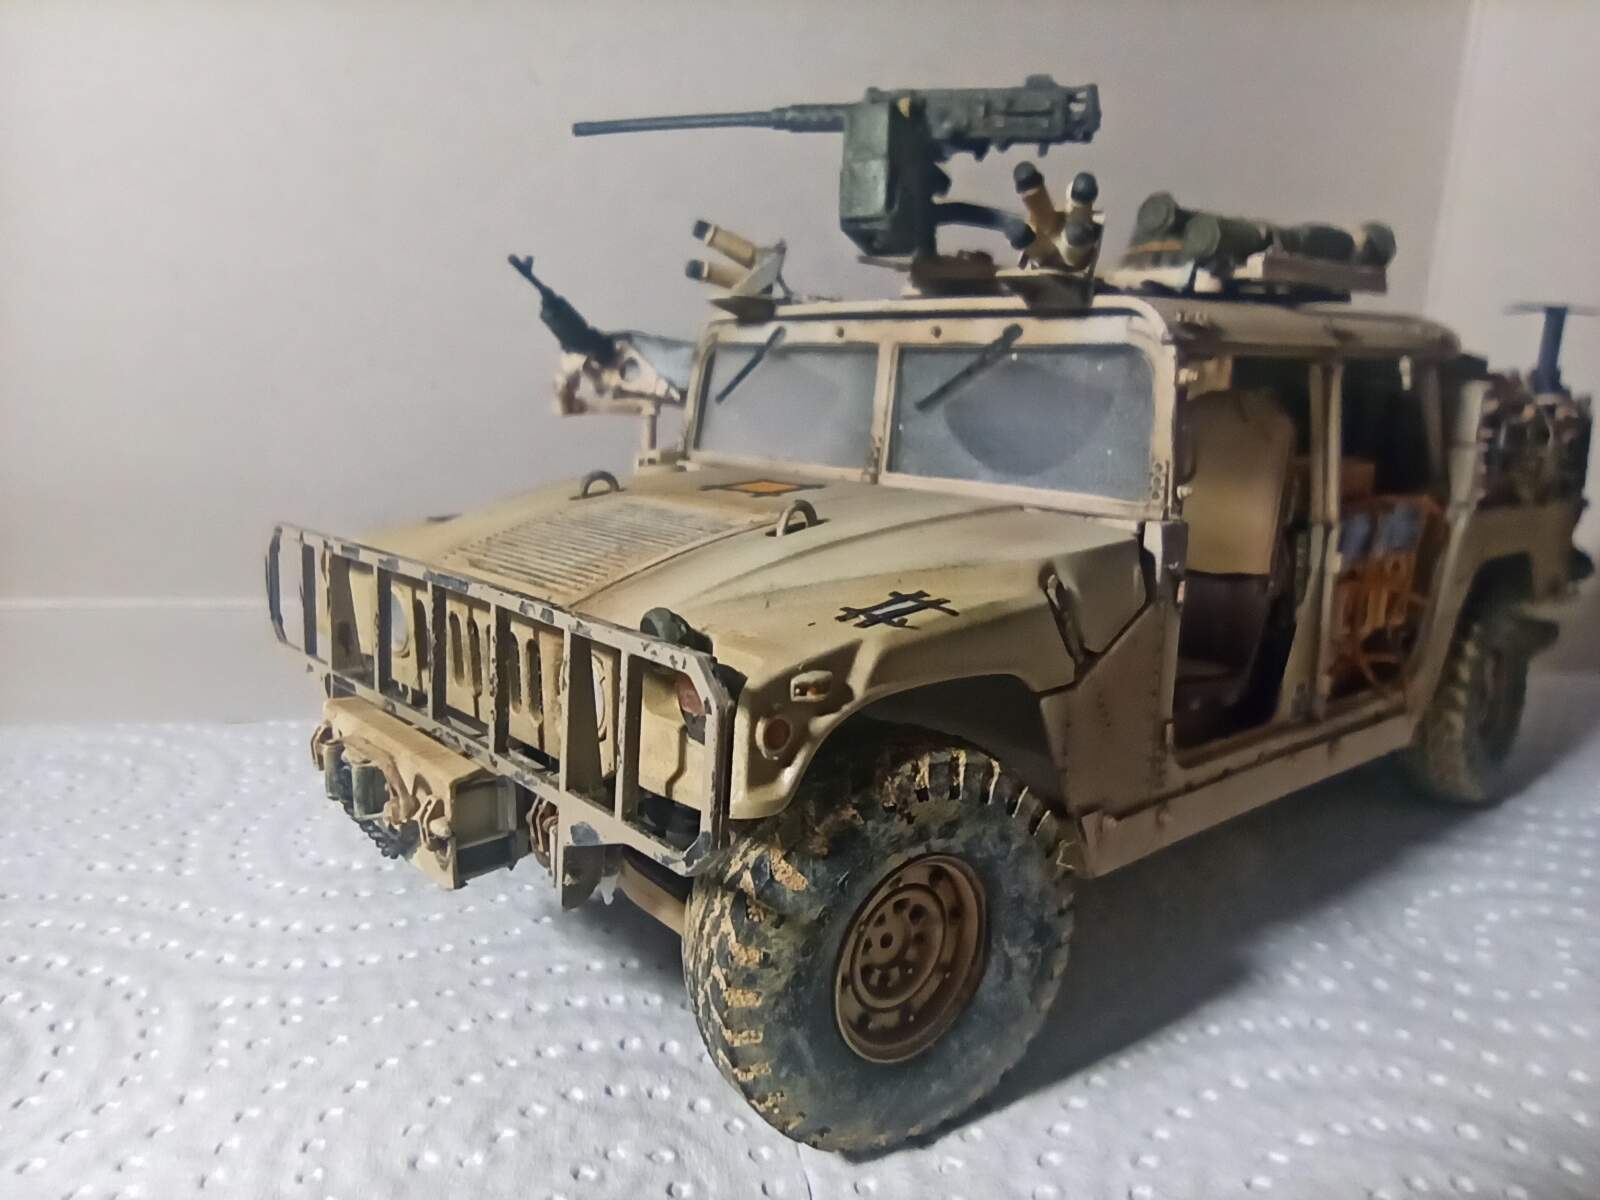
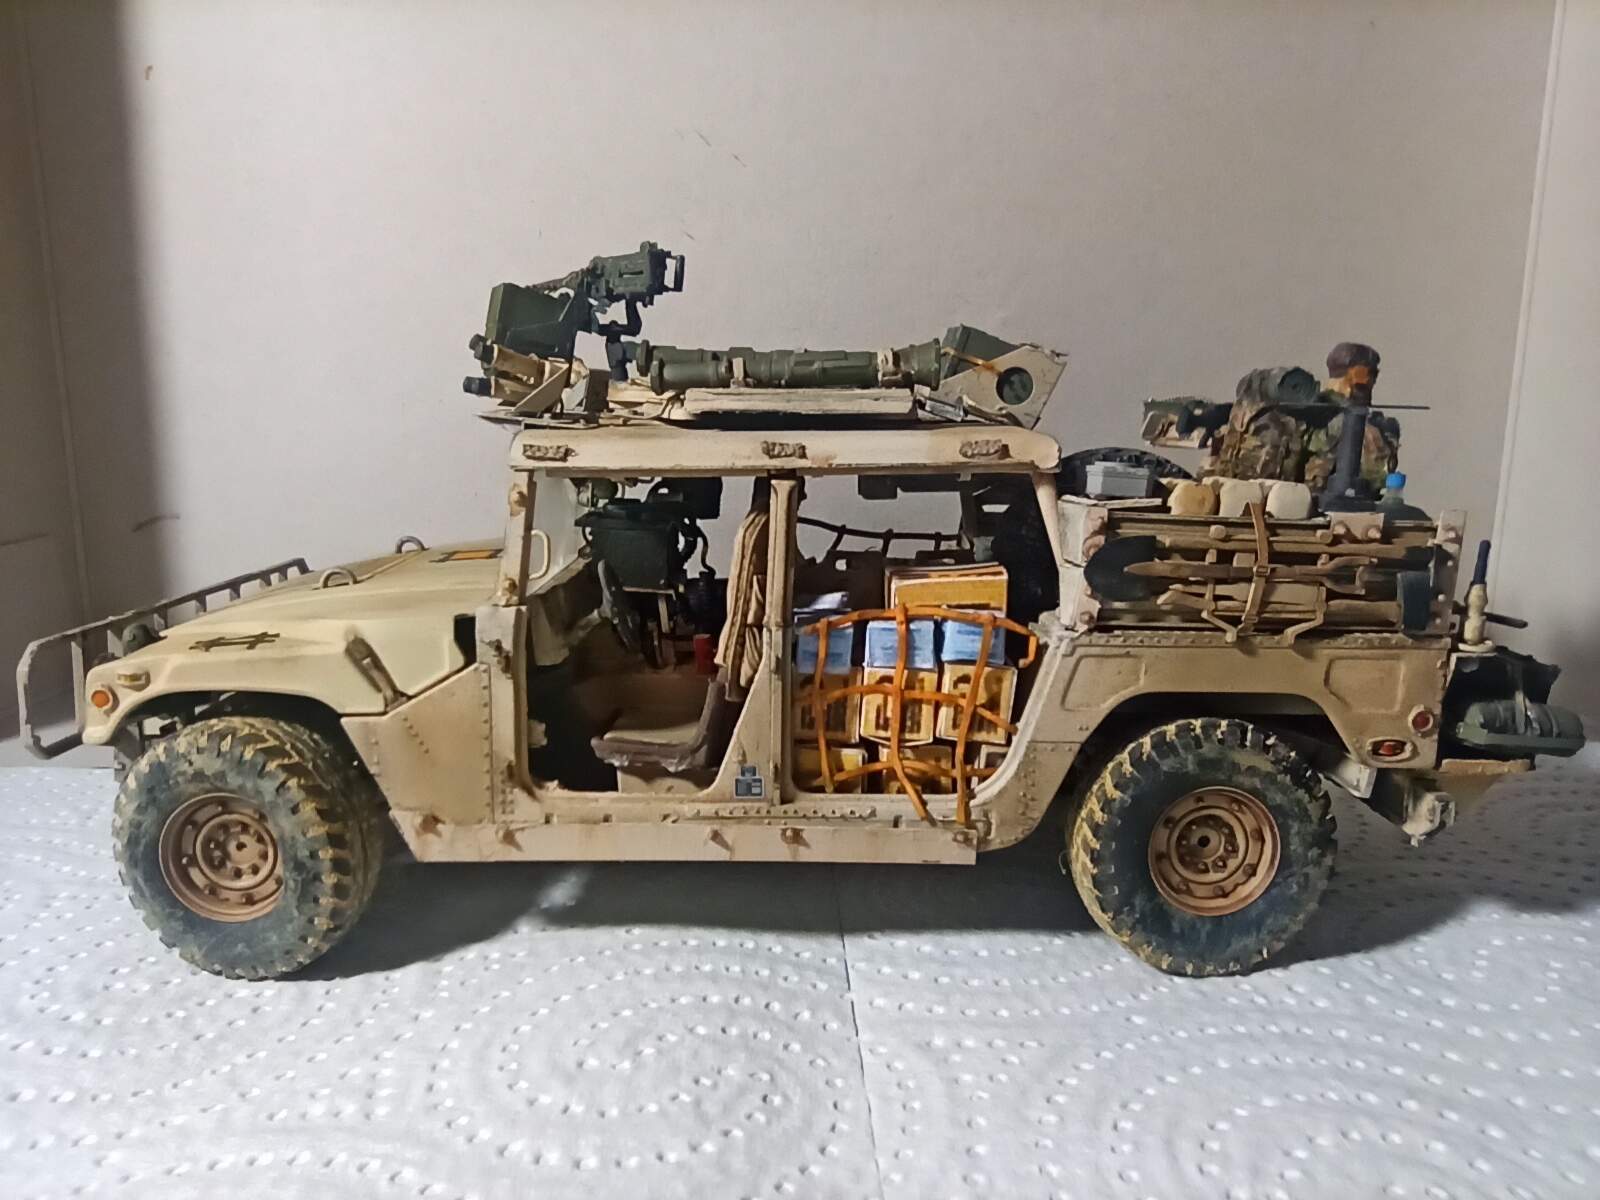
This is how it is now. The soldier is already glued on his final position.
And some other details I added to the kit. The windows and some brass on and into the humvee.
Regards!
Call it done!
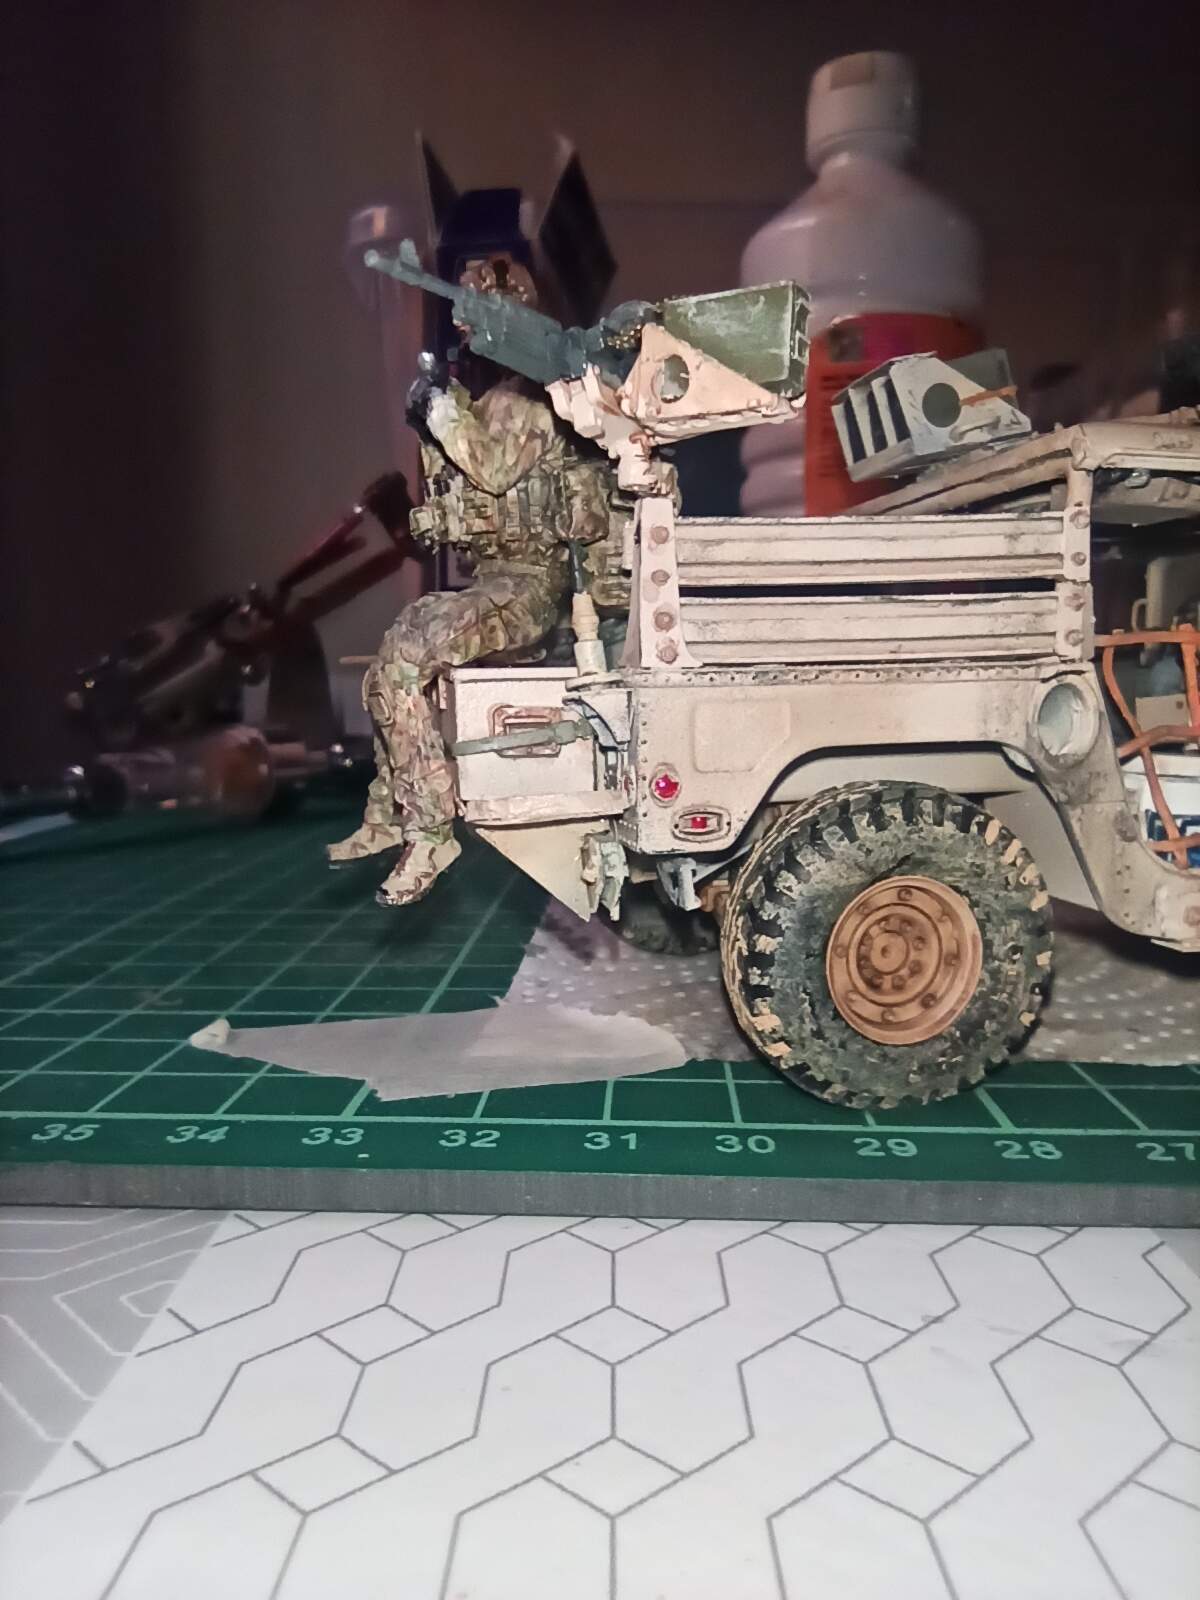
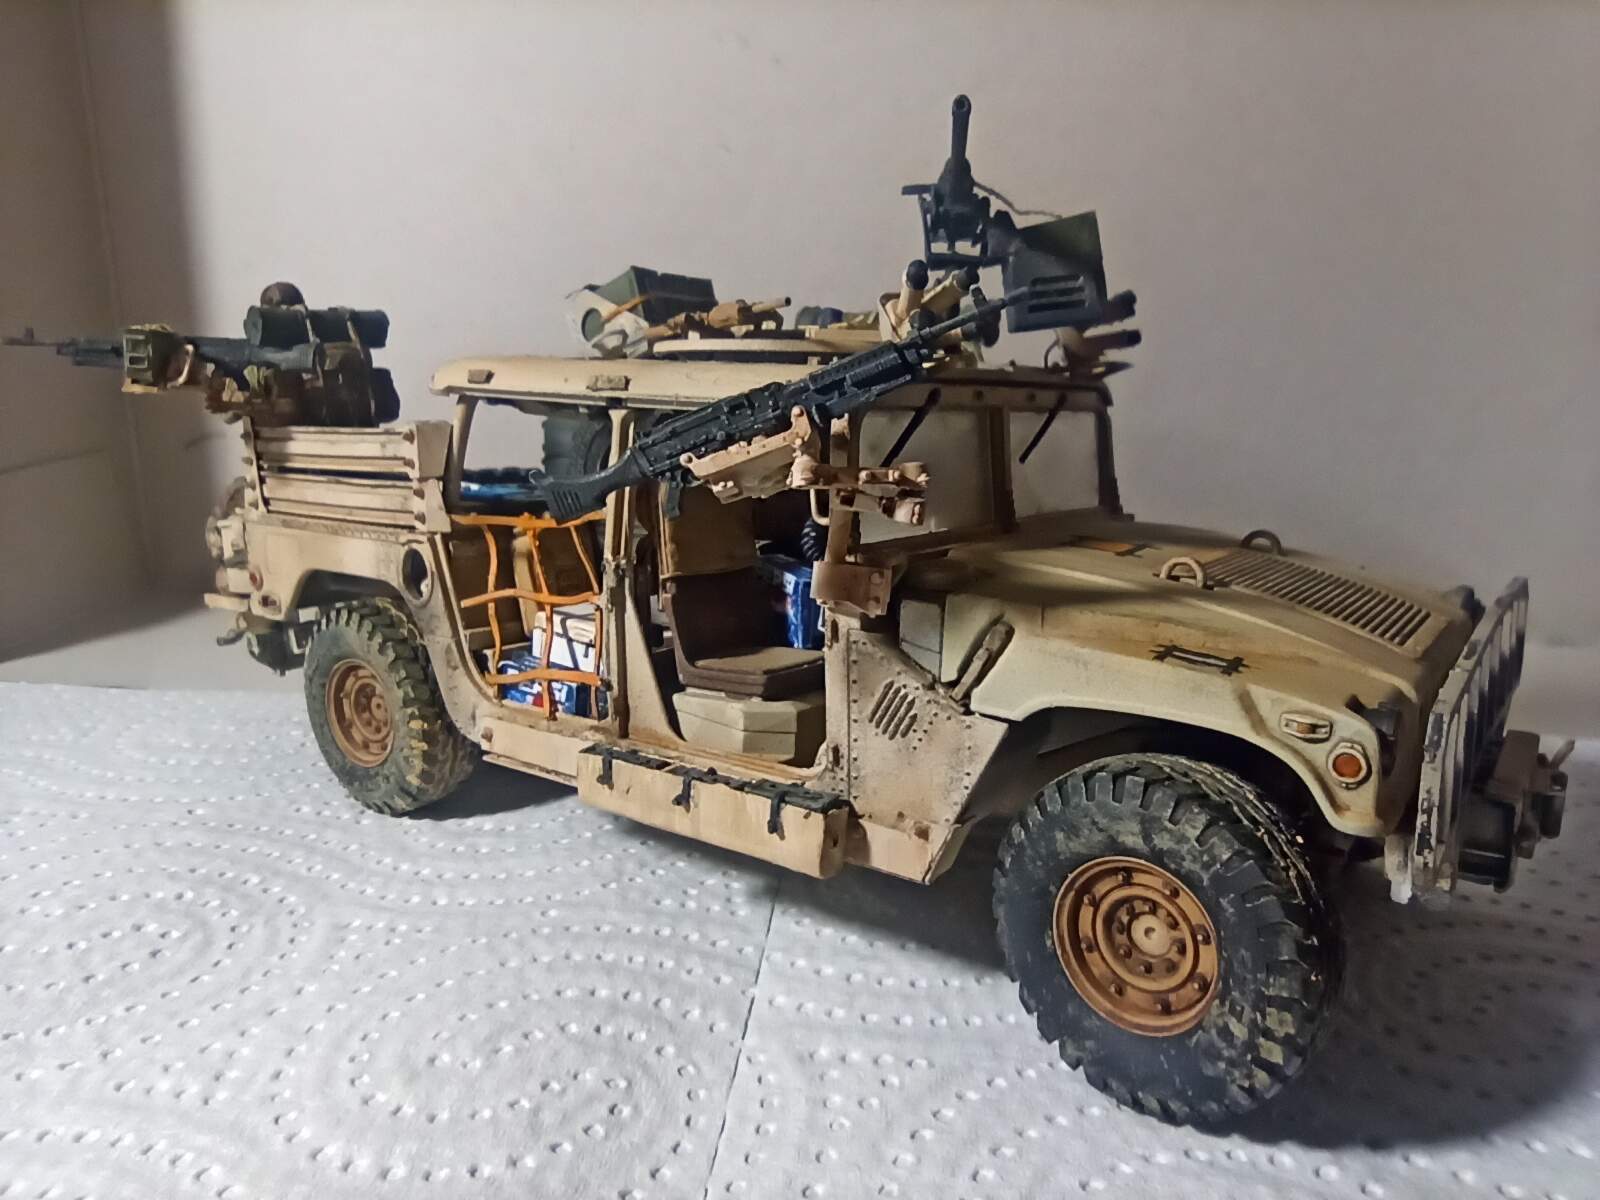
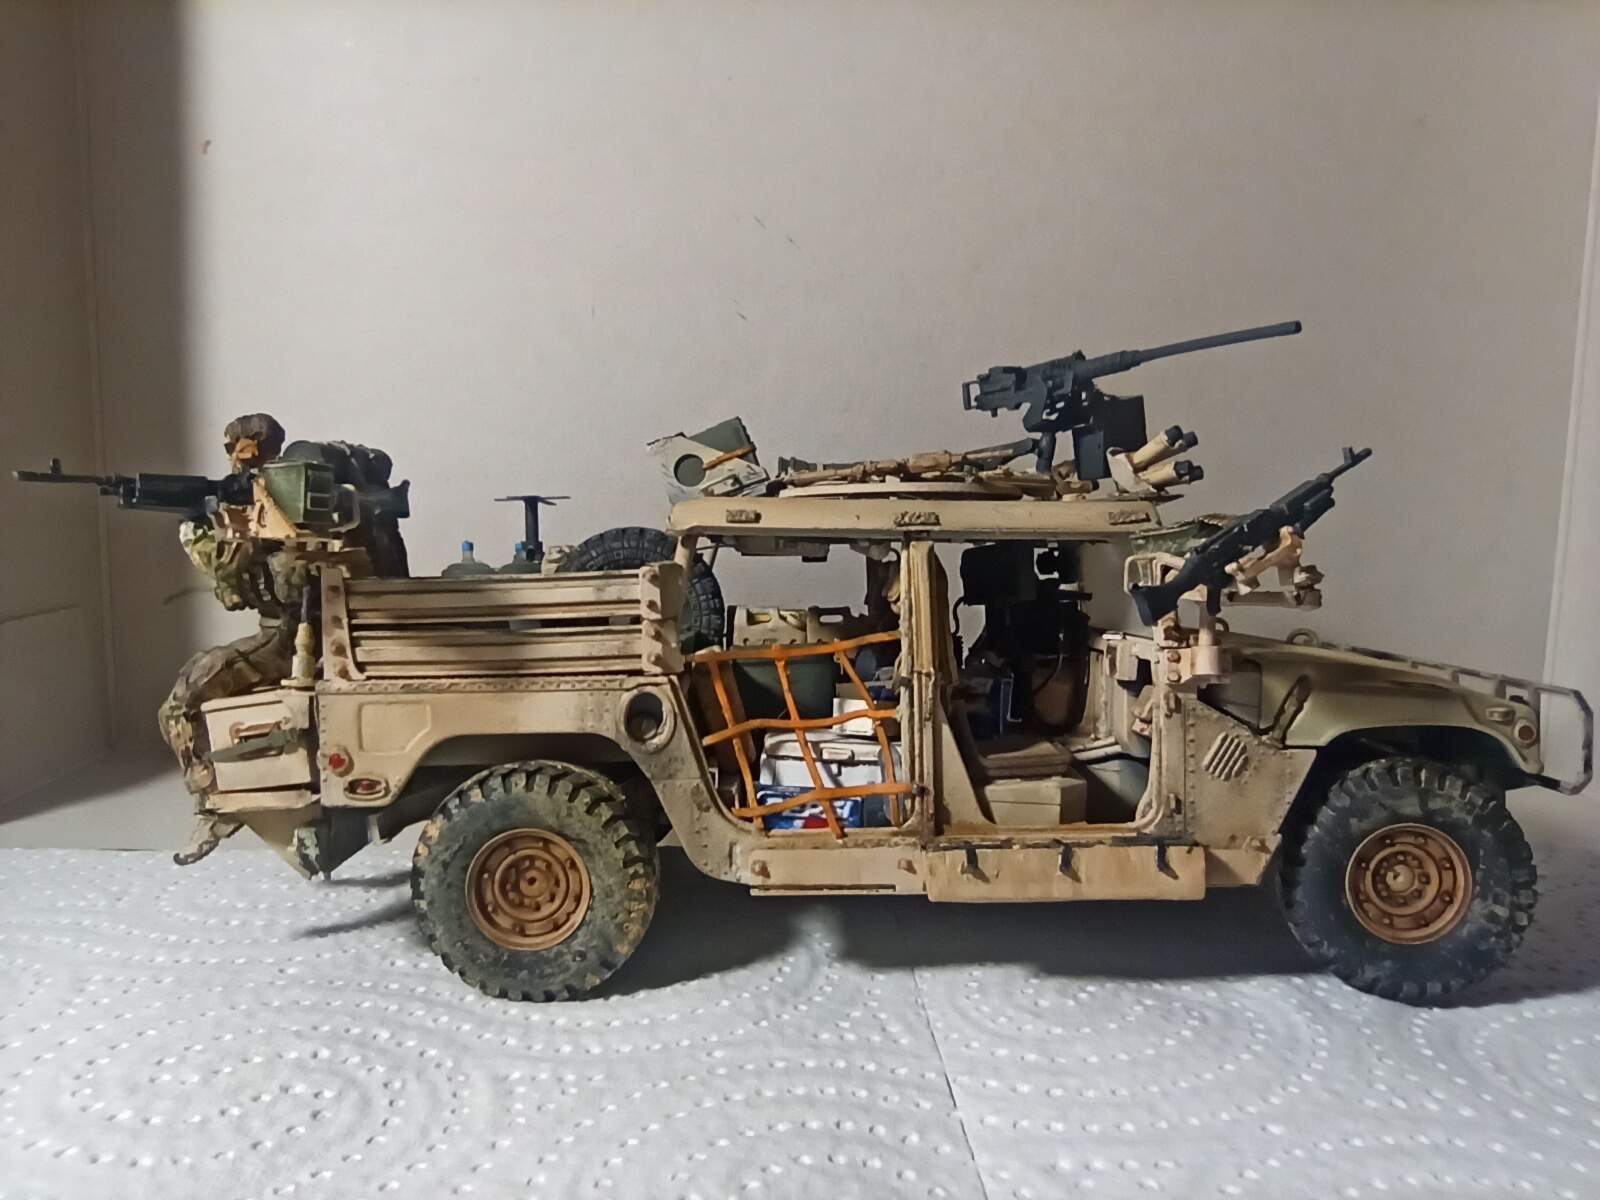
The Dumvee it’s finished (I think). I’m going to start with the gunner figure. Just a bit of pigments on the wheels when I glue it on the diorama.
Some pictures:
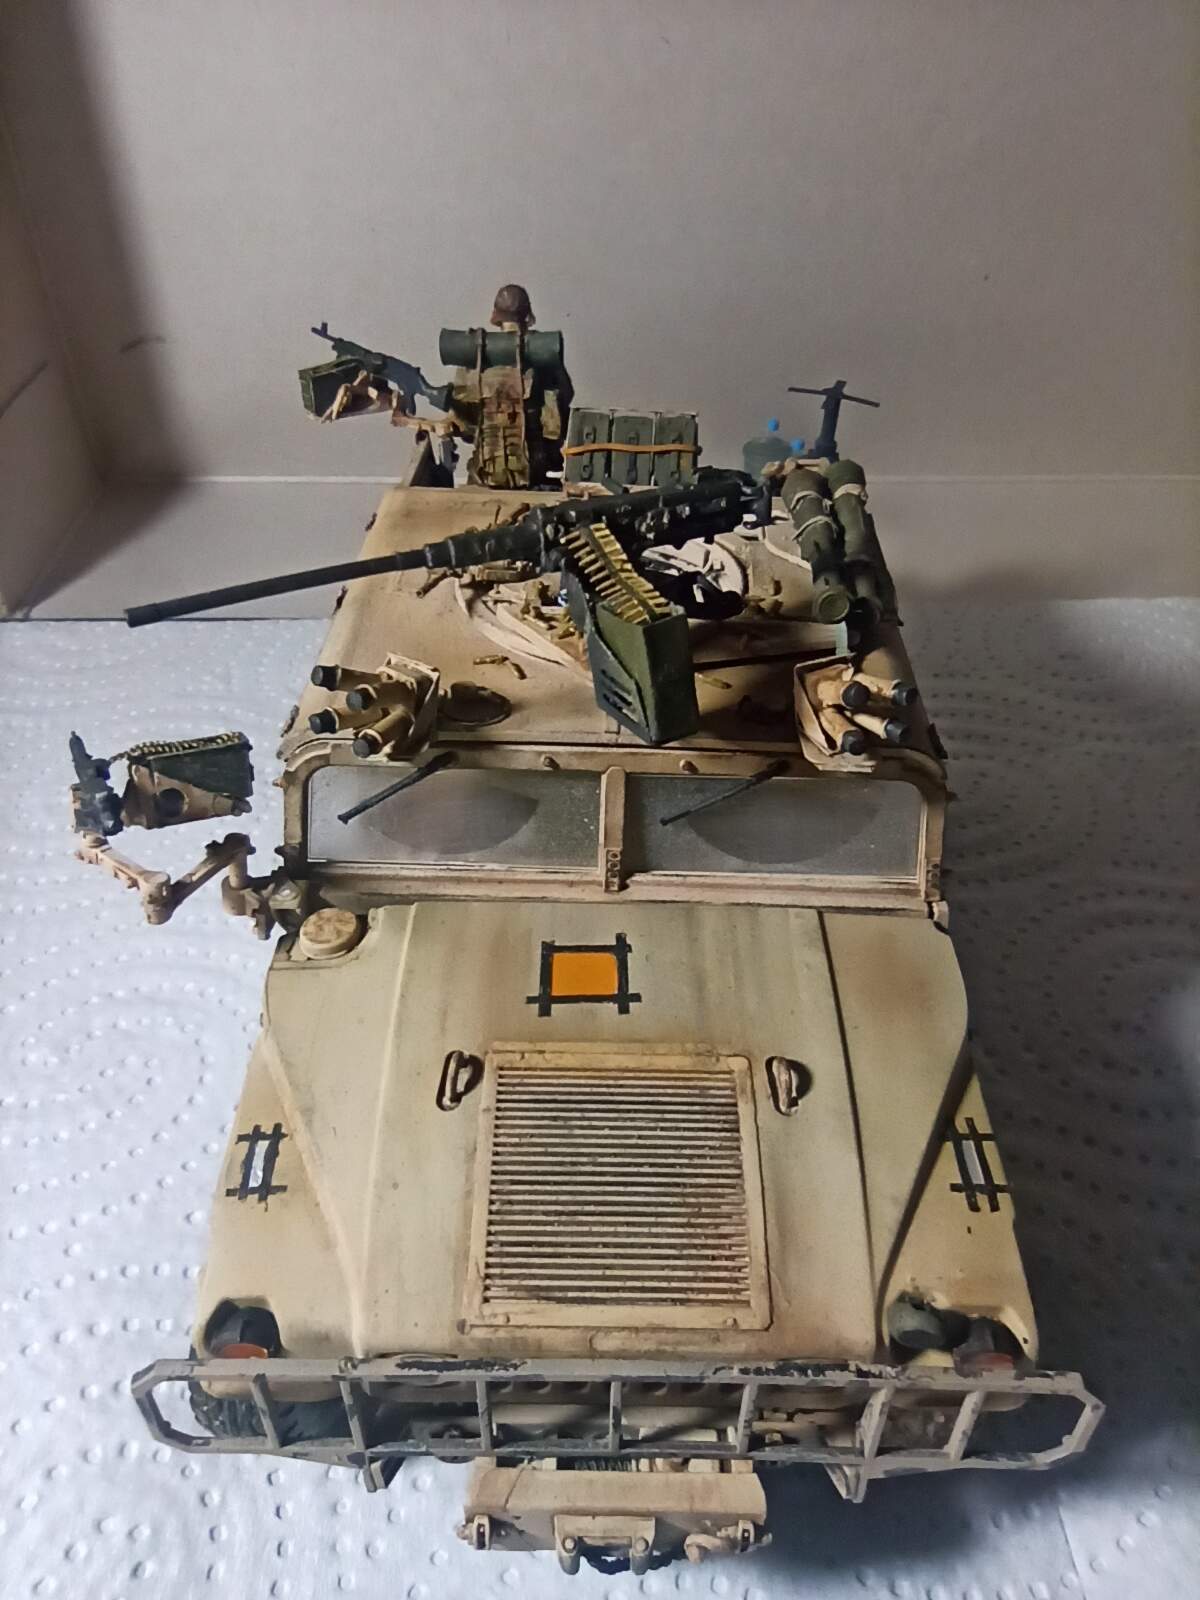
Damn, I forgot. I have to add something on the hood. Some straps maybe, or a backpack, a .50 Barret… More ideas???
Now that looks superb Nacho! No idea about accessories on the hood but some unidentifiable spilled fluid or even bird-poo on it might help
Looking good! I’d leave the hood alone. The only things I’ve seen on the hood on GMV’s are on the MARSOC variant, where they store their BII (shovel, pickaxe, etc…)
The driver has limited visibility as it is, with the comms equipment andFBCB2 screen to his right, not to mention the gun if there is one mounted. Items on the hood only help to obscure his vision even more.
There are exceptions of course. This was one of our gun trucks:
The antenna was mounted in a less than optimal spot - it needs to “see” 45 degrees upward in all directions, especially to the south where all of the satellites are. If we were heading north it was blocked by the truck itself and the gun turret. Our commo guy eventually moved it. I suppose it you really wanted to you could place an X-wing further forward near the corner of the hood.
Oh, and your ammo storage on the back of the turret has begun to sag. Should be parallel to the roof.
Still, all in all a very nice build.