I was just wondering if anyone knows of any kind of tools for the bending of small diameter copper wire for things like headlight conduits…I use pliers and they are awfully sloppy…Is there a tool I could use for this purpose to make things easier and more precise or will i just have to keep practicing bending them with my pliers and hopefully one day i’ll get it…If anyone has any kind of technique you use or just advice in general feel free to share…
I know there are wire bending tools/jigs you can buy, but they are meant for replicating grab handles of different sizes. If you’re not making something complex like compound curves, you could build a jig out of some plastic card, form it off the model, then trim and drop in place. I’ve only had a couple wire bending projects for my builds, but I got them done with a pair of needle nosed pliers and some guesswork, so I can’t help too much.
Don’t know what kind of wire you are using but some wire is easier to bend than others. Brass is easier to bend than steel wire especially if yo anneal it, i.e. heat it in a flame till it becomes discolored. Copper wire is is softer than brass and you don’t have to anneal it. Then there is always soder. There are various sources for each and they all come in different diameters. Good luck.
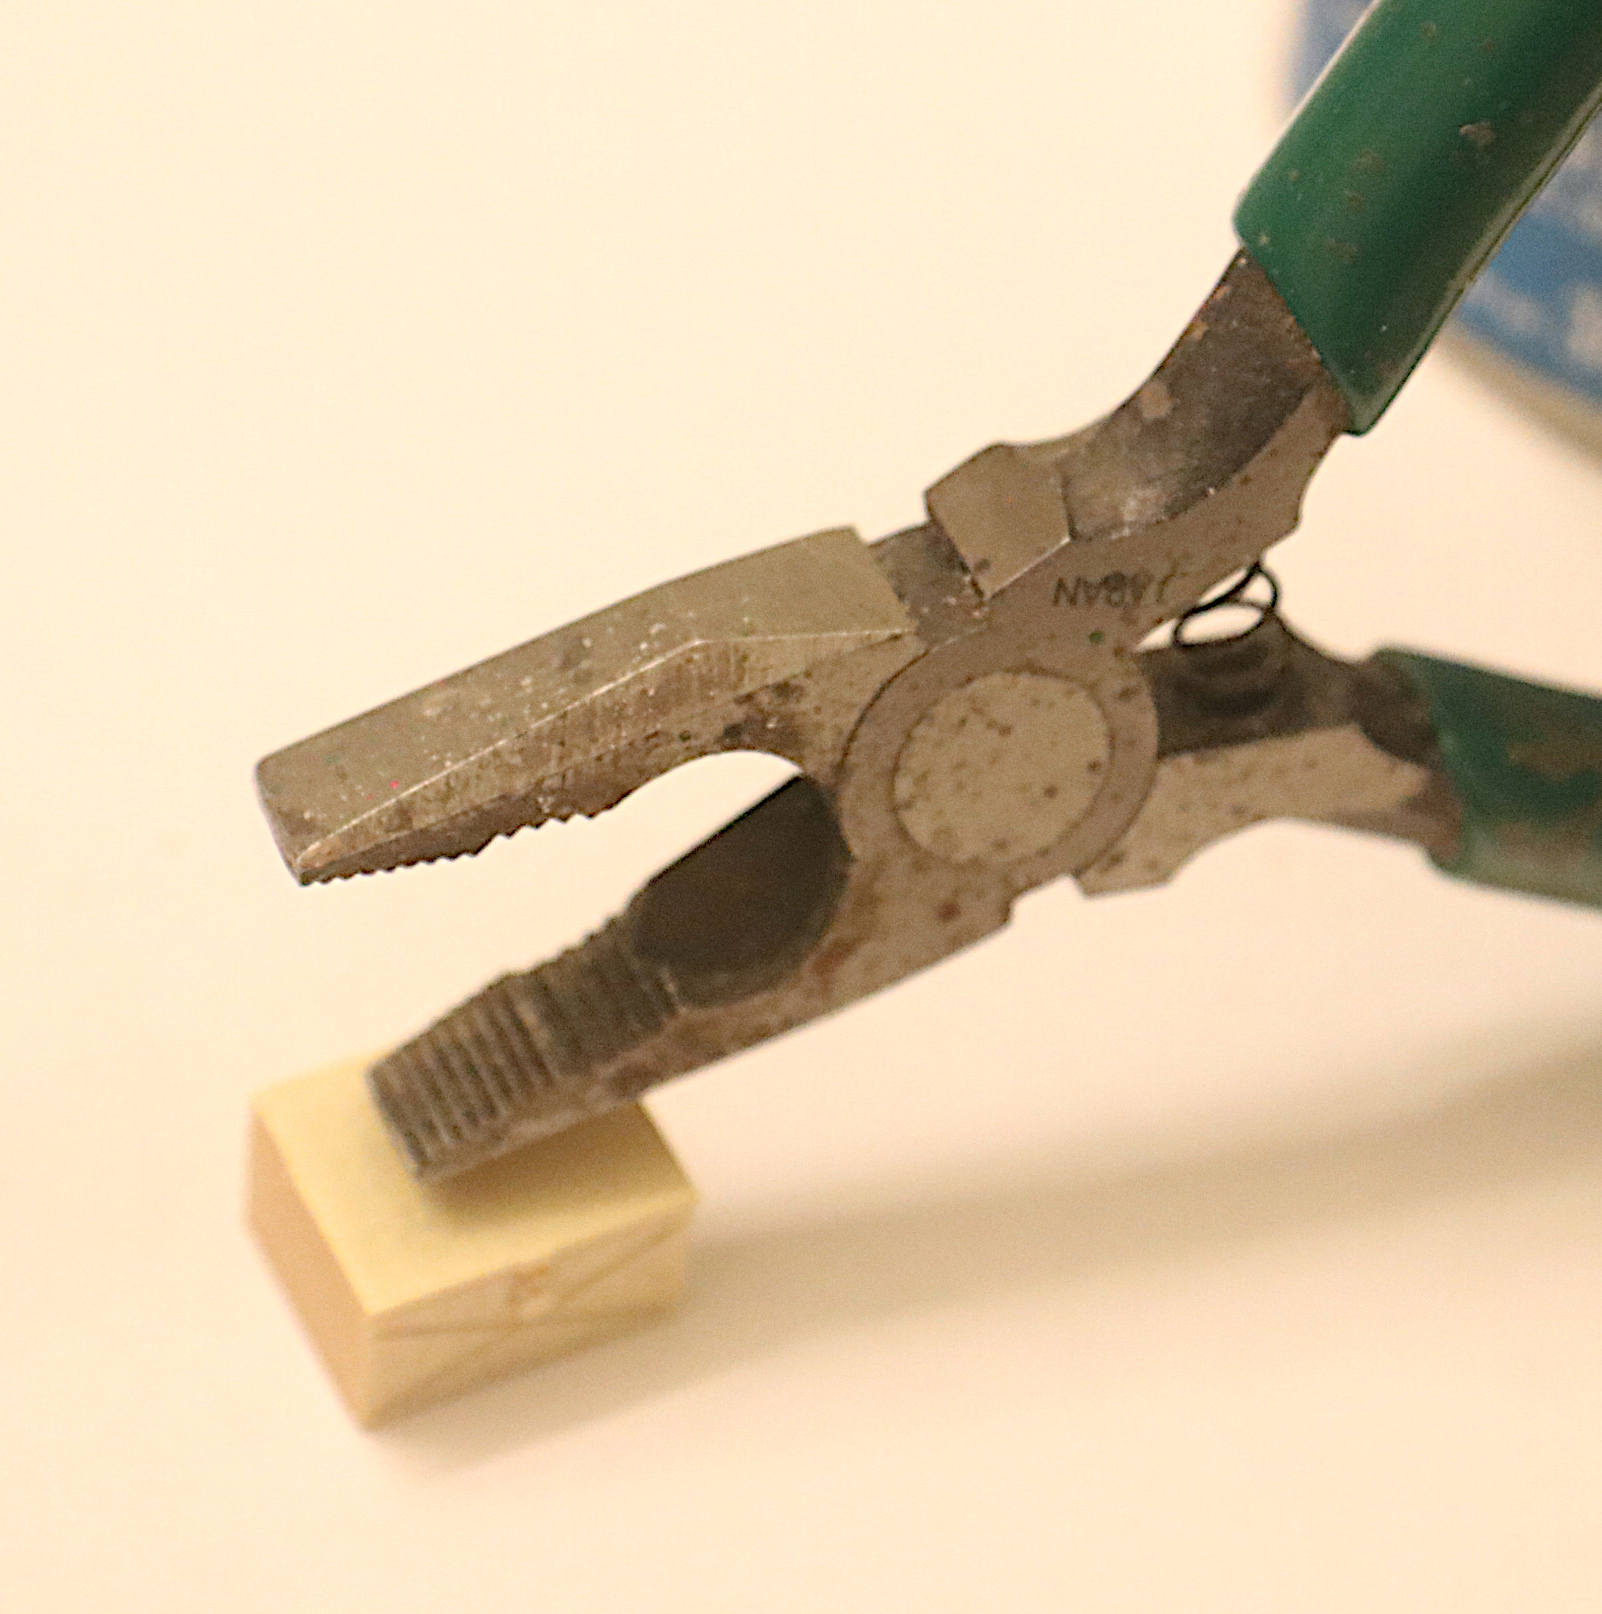
I’ve been using one of these for years. The jaws are flat and come to a very sharp point! You can make some very tight and sharp bends.
Micro Mark has a number of plier sets which I’ve found fairly useful - 4-piece Metal Forming Plier Set & https://www.micromark.com/Xuron-Micro-Bending-Plier - this latter one is good for making footman loops, delivers a consistent 90 degree bend.
Mal
Also shops who sell tools for jewelers have a multitude of different pliers for that kind of jobs
I have a couple of different types of wire bending pliers I got at a hobby shop in Japan which I use frequently. You should be able to find something similar online at Micro-Mark or Small Shop.

Pliers are about the best tool, but you can get sharper, tighter bends if you combine the pliers with something like a steel ruler to press the wire against. (Sometimes with just fine, thin wire, I’ll use my thumb nail.) Hemostats are also useful for smaller work. You can usually get them in sizes smaller than the smallest pliers (even the jewelry makers plier sets).
It also helps to anneal the wire using a butane torch or other flame. The softer wire will be easier to bend and also take tighter bends.
You can also use a PE bending brake to form brass wire. Sometimes it’s useful to have the wire clamped down as you work on subsequent bends or you’re using the different forming surface shapes on the brake.
Finally, for complicated shapes and / or shapes you might want to replicate (to make two or more, identical parts), building a forming fixture out of brass rod and or structural shapes is the ticket. If the wire to be used is thin and has been annealed, you can sometimes get away with building the fixture out of styrene stock, but this will only stand up to a couple of uses before it starts to deform.
Styrene forming fixtures do work very well for repeatable bends using lead wire or solder, though. If the final structure on the model will be for a non-stressed application, consider lead wire / solder vice brass. It’s much easier to work with if you can be careful enough with the finished parts to not inadvertently damage them on the model.
Here’s an example of a brass forming fixture that I made. I needed a bunch of cantilevered coil springs for an engine model. Weird shape and highly visible on the finished model, the wire also had to be pulled hard and shaped neatly. Making them as nearly identical as I possibly could was also essential for me. The time needed to build the fixture was well spent.
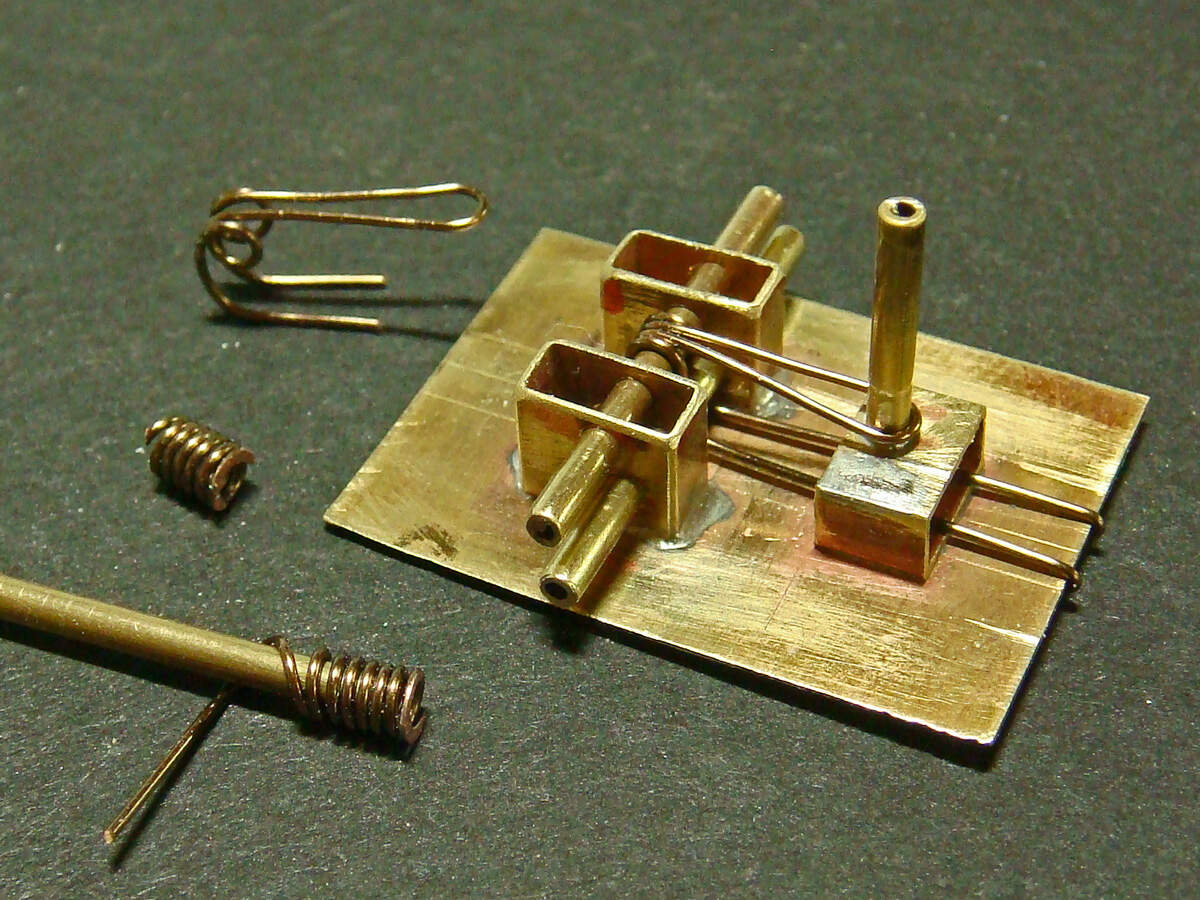
On the bending fixture, the two horizontal tube pieces are removable. They are slipped into holes as the wire is bent, and then removed from the holes to release the formed spring. (Which is then trimmed to size on its ends.)
You can see that I also needed a number of simple coil springs. I used a piece of brass tube to bend these around. The brass tube allowed me to trim and shape the end of the coil that would be visible.
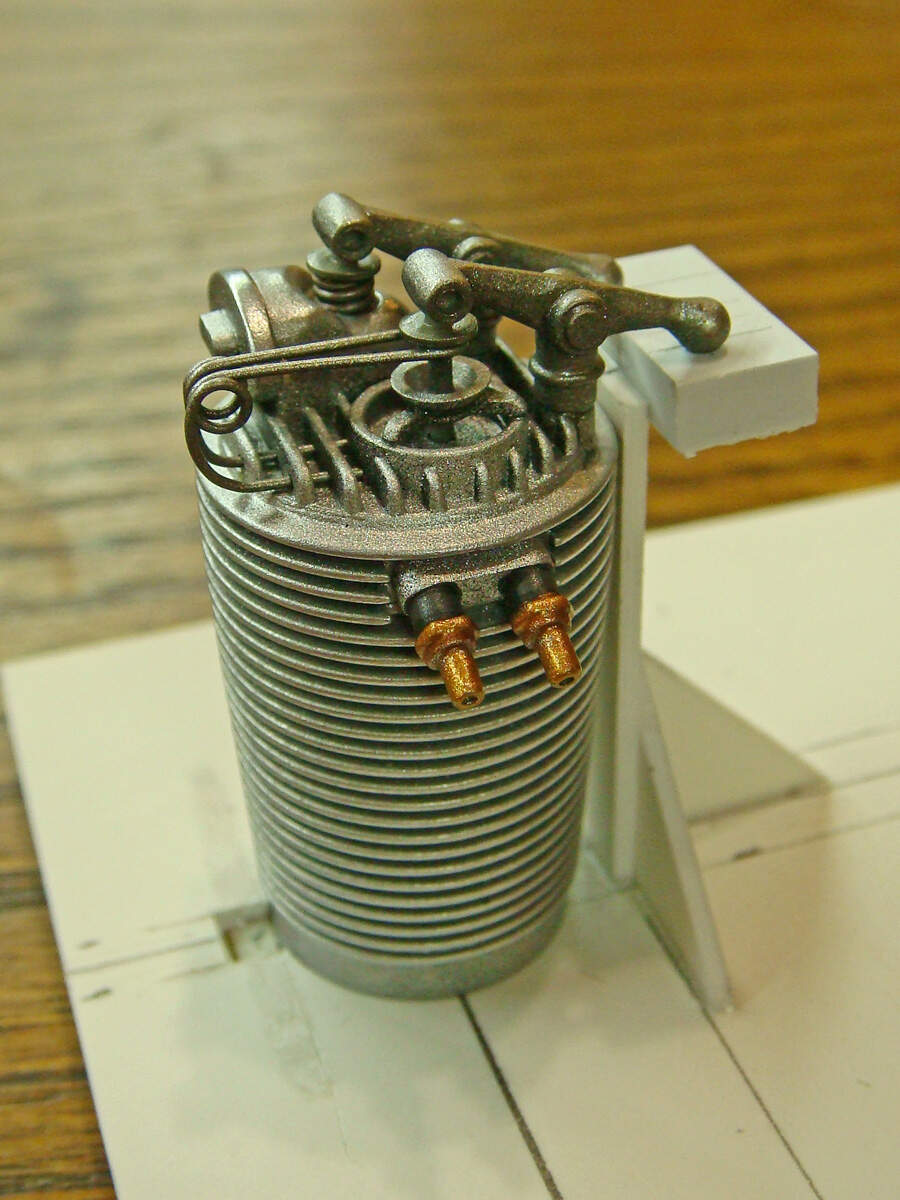
Here’s a pic of the brass wire valve springs installed on one of the model cylinder heads. (And in this photo, you can see the styrene cylinder assembly fixture I made to hold all of the valve parts in alignment as the heads were put together.)
These fixtures and jigs don’t have to be pretty, they just need to be functional and precise at their critical areas and points…
2 Likes
I use the Micro Mark 4 piece tool set referenced by @AfvAficionado . It works great for brass strips also.
I use my Herters pin punch set that I normally use for gunsmithing quite often to work w PE bends and bending wire. I’ve found some of my best tools are already in my hobby room or garage. I just have to think outside of the box. I’ll admit I’m not as skilled as SdAufKla in making jigs but that certainly makes one expand their horizons with being able to picture the jig layout to achieve the results you need, that’s where I can’t always translate the idea to plan lol.
Don’t sell yourself short! It gets easier with practice (and failures!) and each time you make a fixture or jig you’ll learn something new. Half the battle is just knowing that something’s possible. I figure that if some manufacturer could make the original item then it’s at least possible to replicate the item somehow.
I admit that the cantilever-coil spring design on the Clerget rotary engine had me puzzled for some time. I made up a number of test springs to see if I could get repeatable and consistent geometry and dimensions just hand bending the wire. I could get close, but not perfect. However, the test bending by hand gave me some clues about the sequence of the bends and how a form would have to work. With a better understanding of HOW the form would have to work, I could finally envision what the form would look like. The test springs gave me models to take the dimensions from.
Actual fabrication of the bending form was just a matter of careful cutting and drilling the parts and soldering them together. The sequence of fabricating the individual parts was the same as if I had been scratch-building the thing out of styrene stock. Layout and soldering are the same as for building brass PE assemblies.
Alignment and assembly fixtures, forms for bending and shaping parts, and jigs to hold parts and tools in the proper orientation while working are all very useful to add precision to model making. They don’t have to be elaborate or pretty, they just need to get the job done. Start small and simple and as you fabricate these homemade tools, and you’ll begin to see more and more opportunities to use them.
I’ve found that taking a few minutes to make up even a simple, crude but accurate fixture, form or jig can save time and frustration even for fabricating just single parts. Spending a lot of time trying to make a part that won’t come out just right, and then doing it over and over is time consuming and frustrating. I’ve learned that taking the time and effort to make a homemade tool to do the job right the first time is less frustrating, usually produces more precise results, and often as not actually saves time.
When it’s time to make a number of identical parts or assemblies or to assemble a number of parts in some sort of precision alignment, I don’t even hesitate anymore. I always start off trying to figure out how to make some sort of fixture, form or jig to get repeatable and consistent results.
2 Likes
Hint Coming from Personal Experience:
When using needle nose pliers to bend shapes while dealing with small gauge wire – Use the type of small pliers that have the tapered, round conical points and not the square jawed type. These will let you form small loops and curves of various diameters.
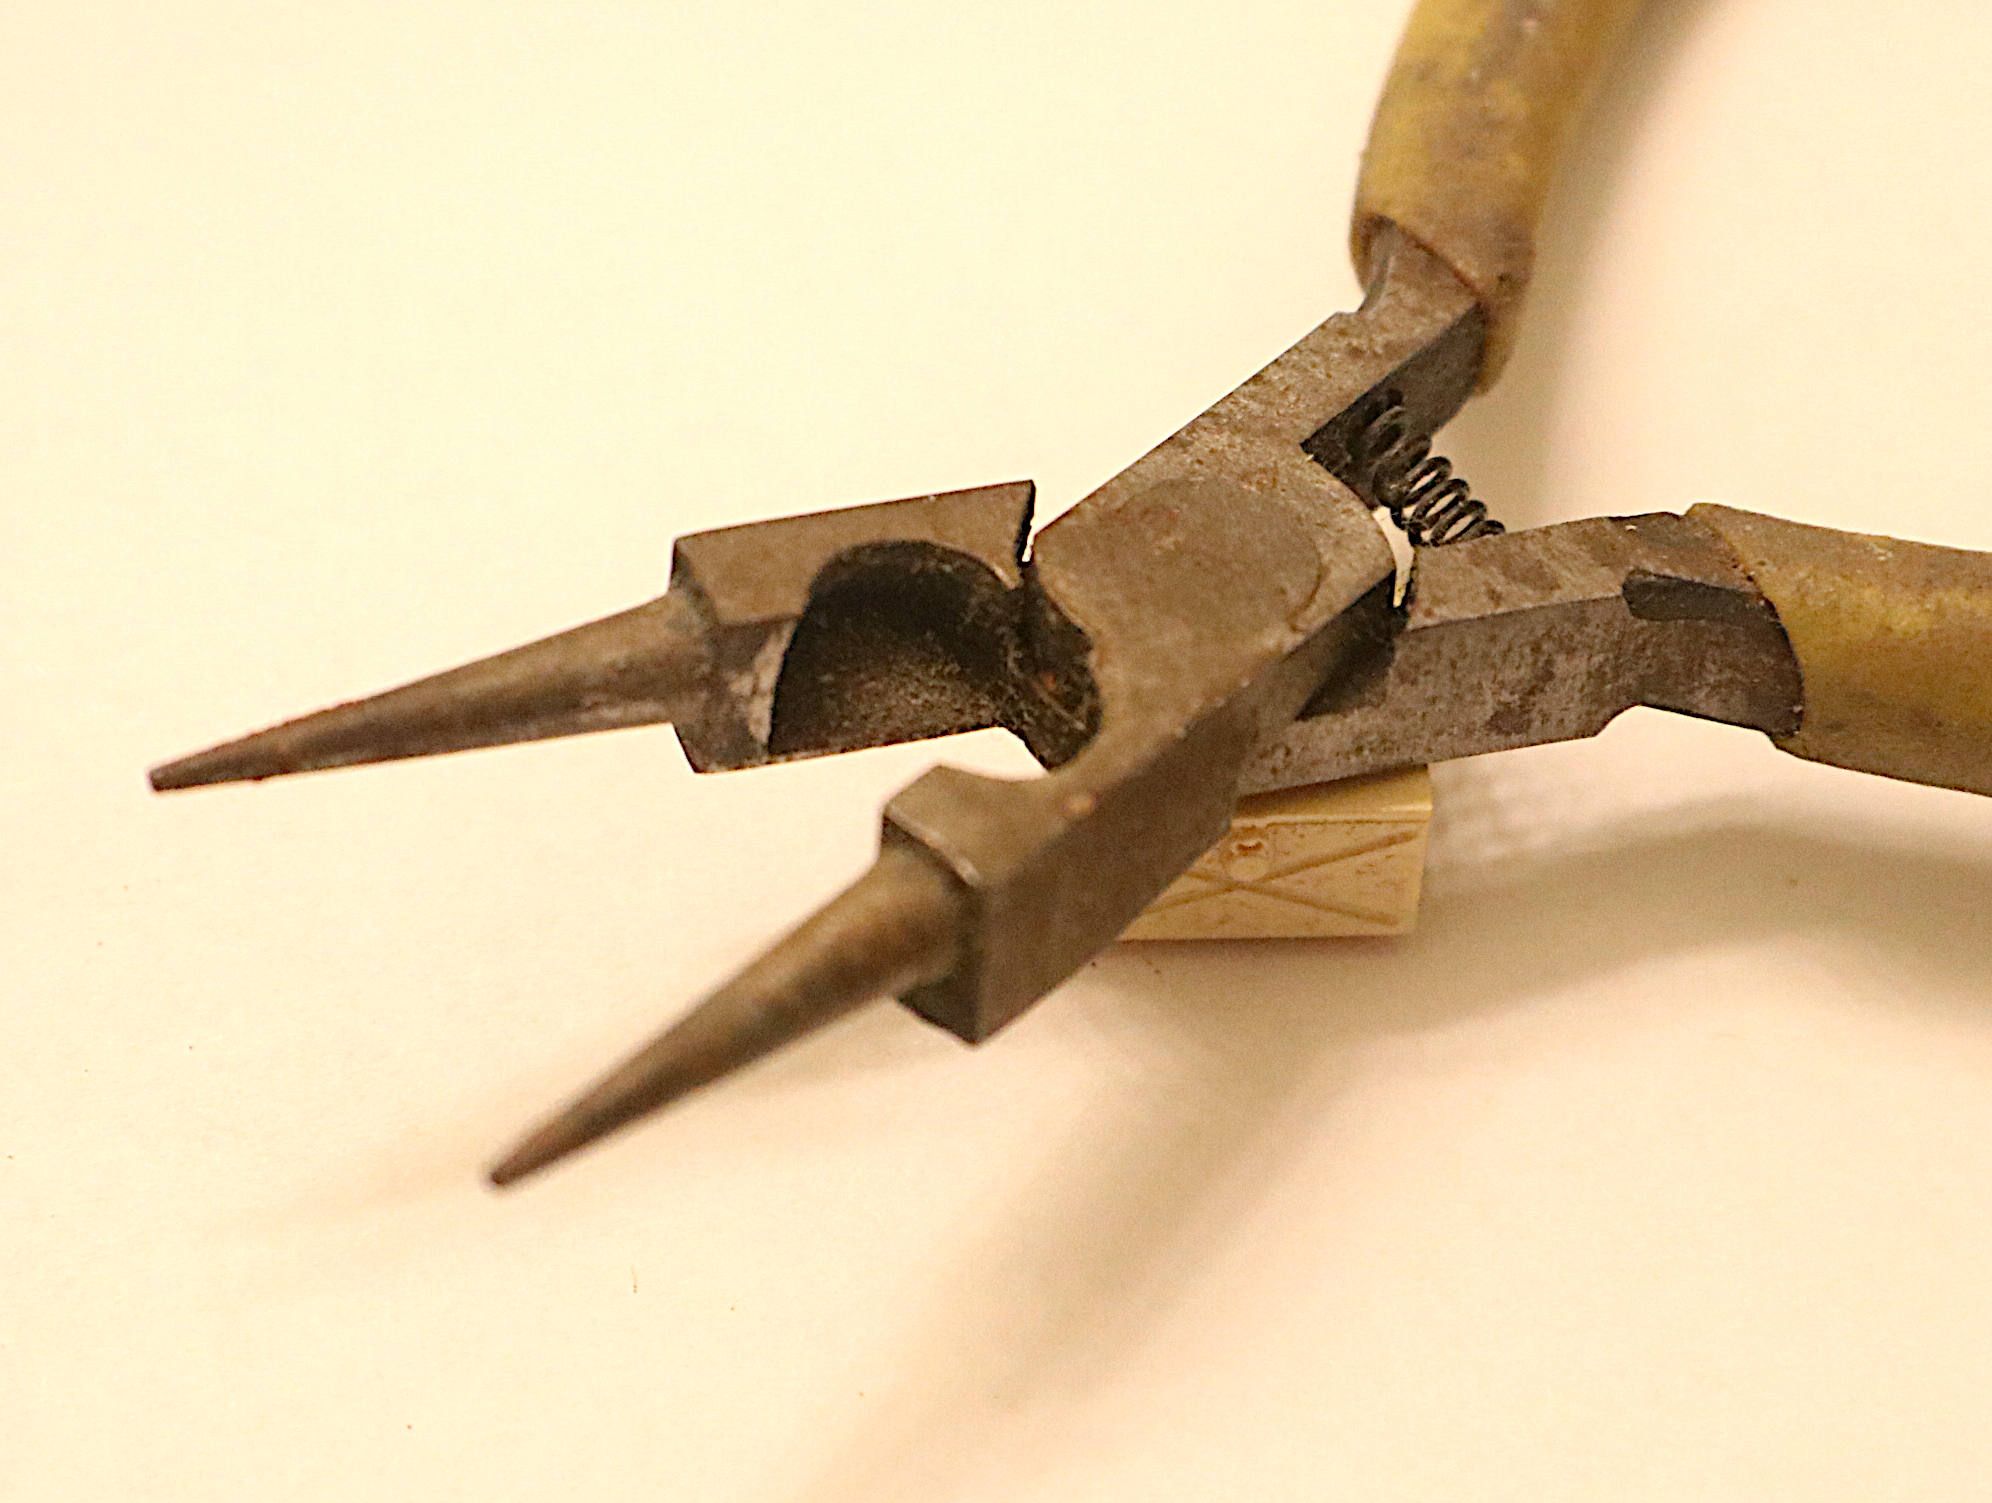
Years ago these used to be referred to as “Rosary Pliers” as something very similar was used to make the many small loops and curls required in the making of the Catholic Rosary.
Most of these style pliers (as seen here) also incorporate a side cutter as well - again very handy when dealing with small diameter wire.
1 Like
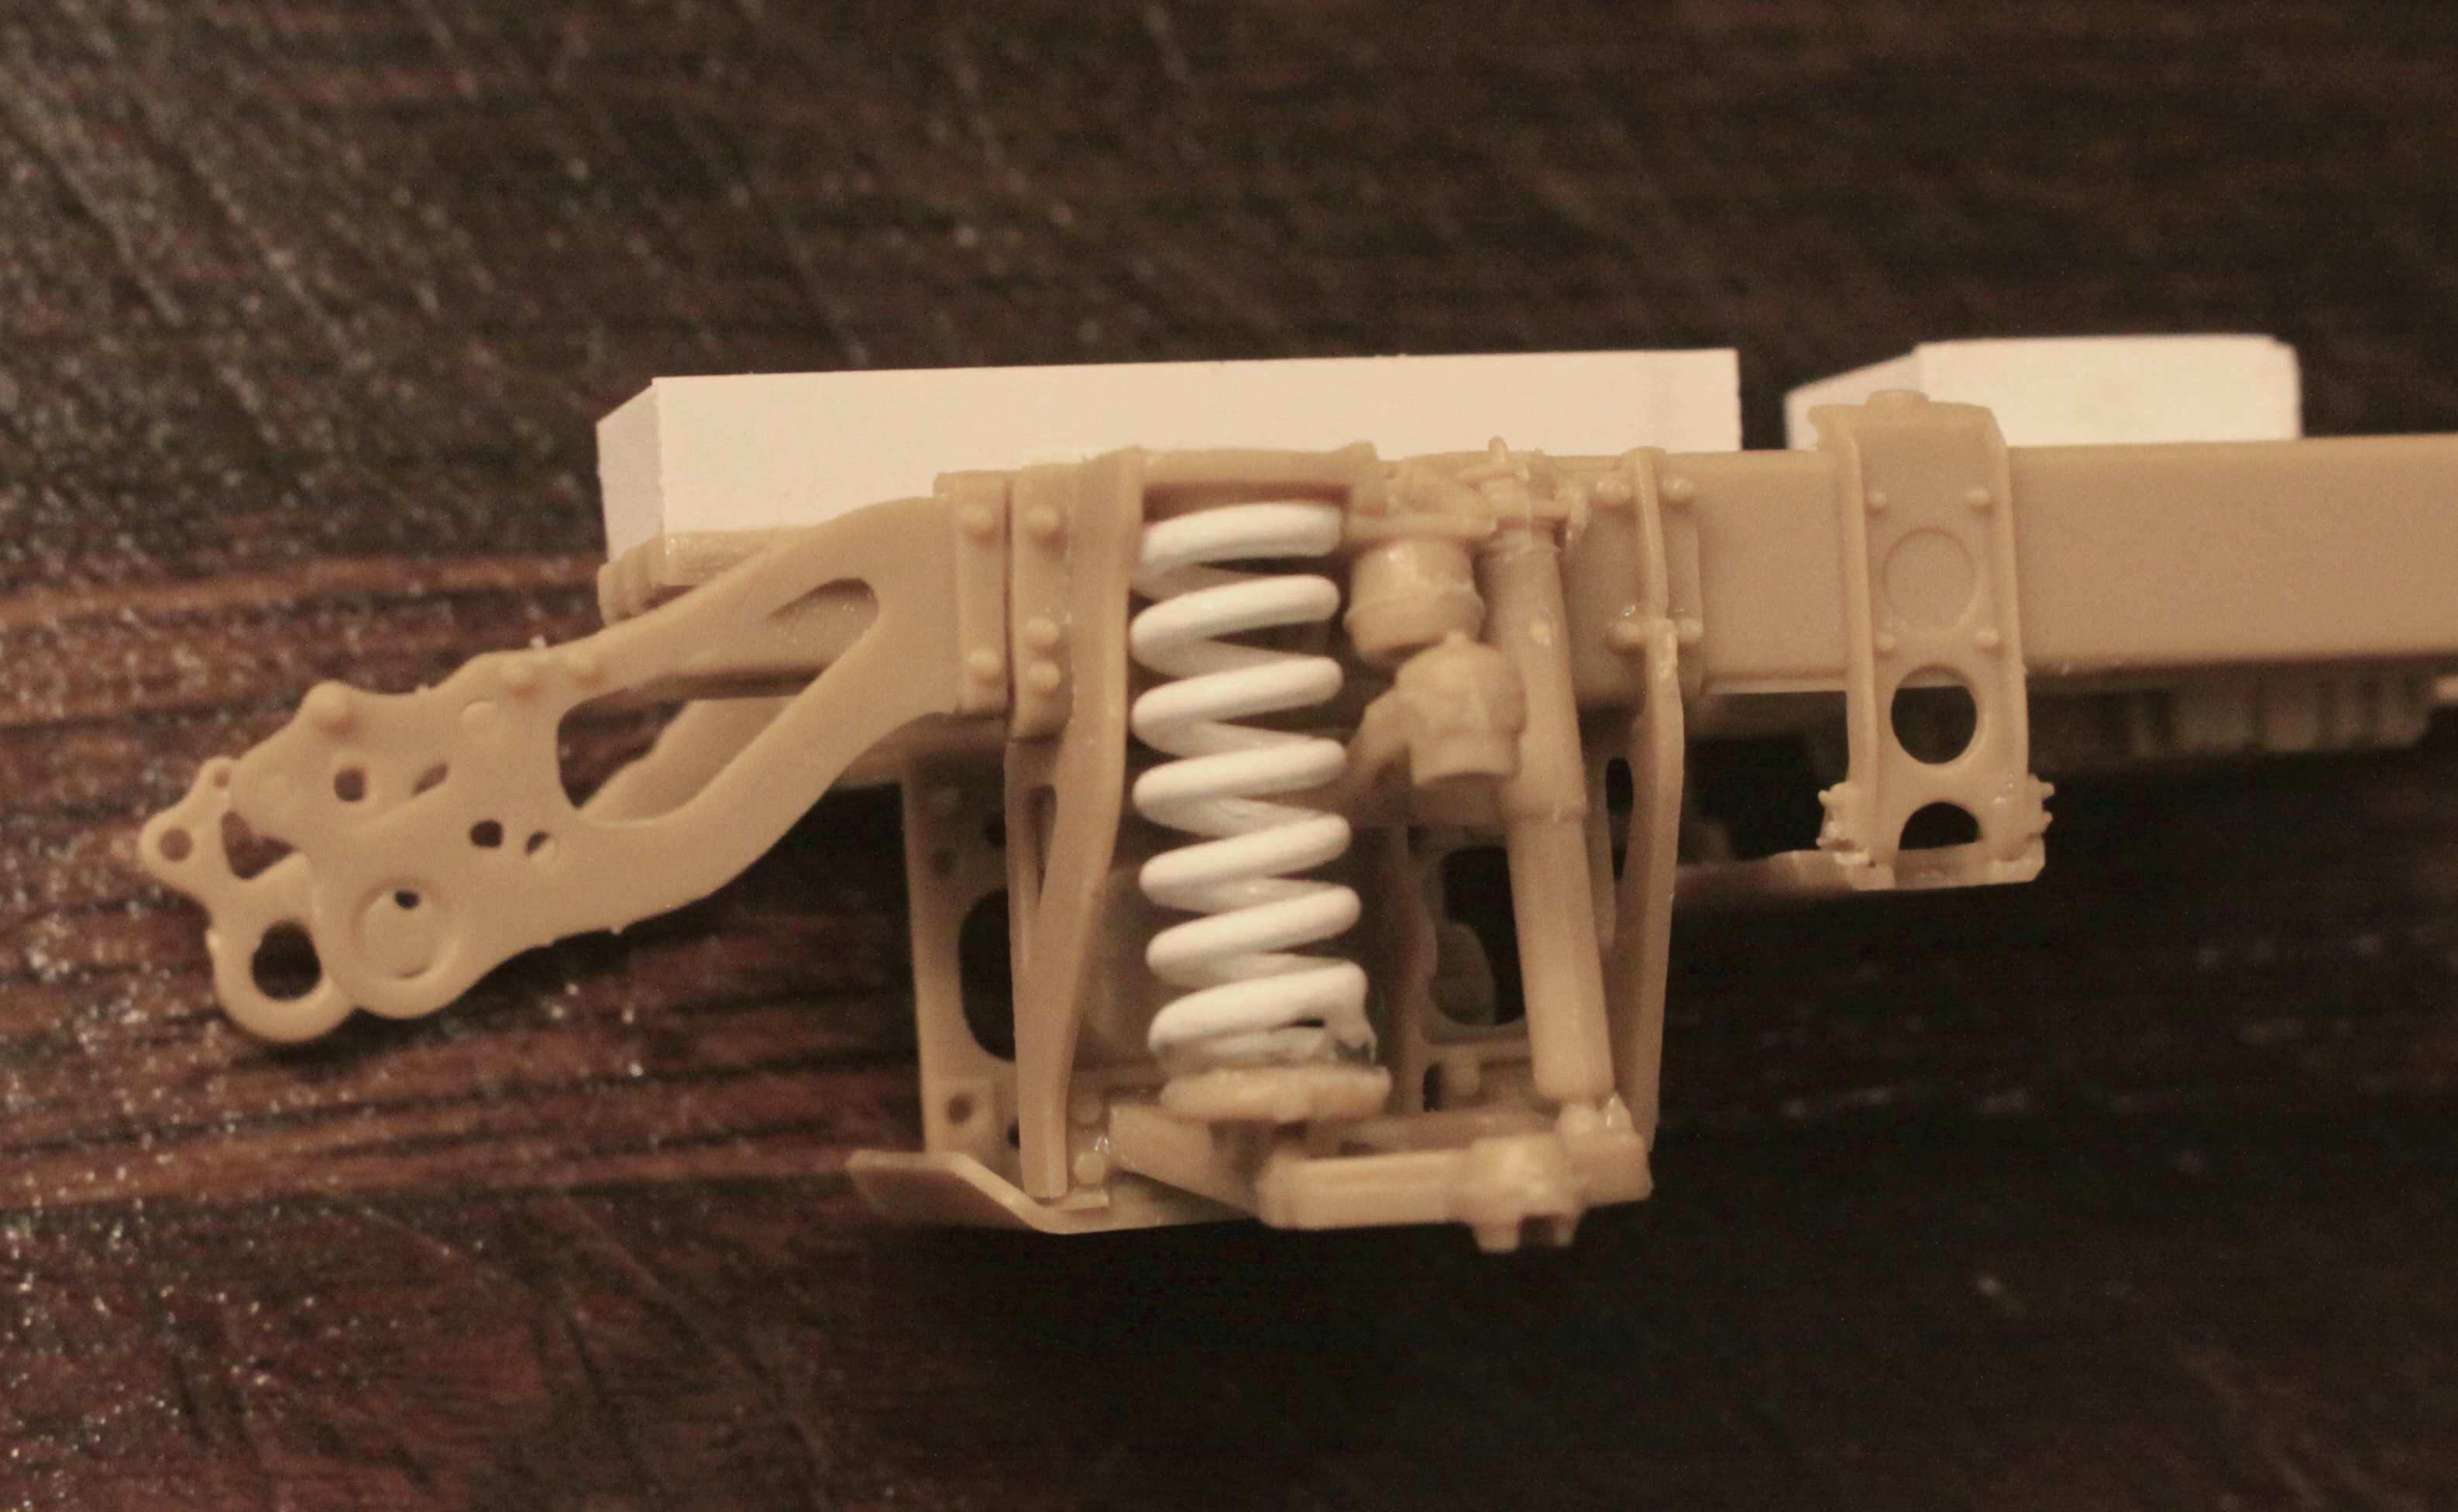
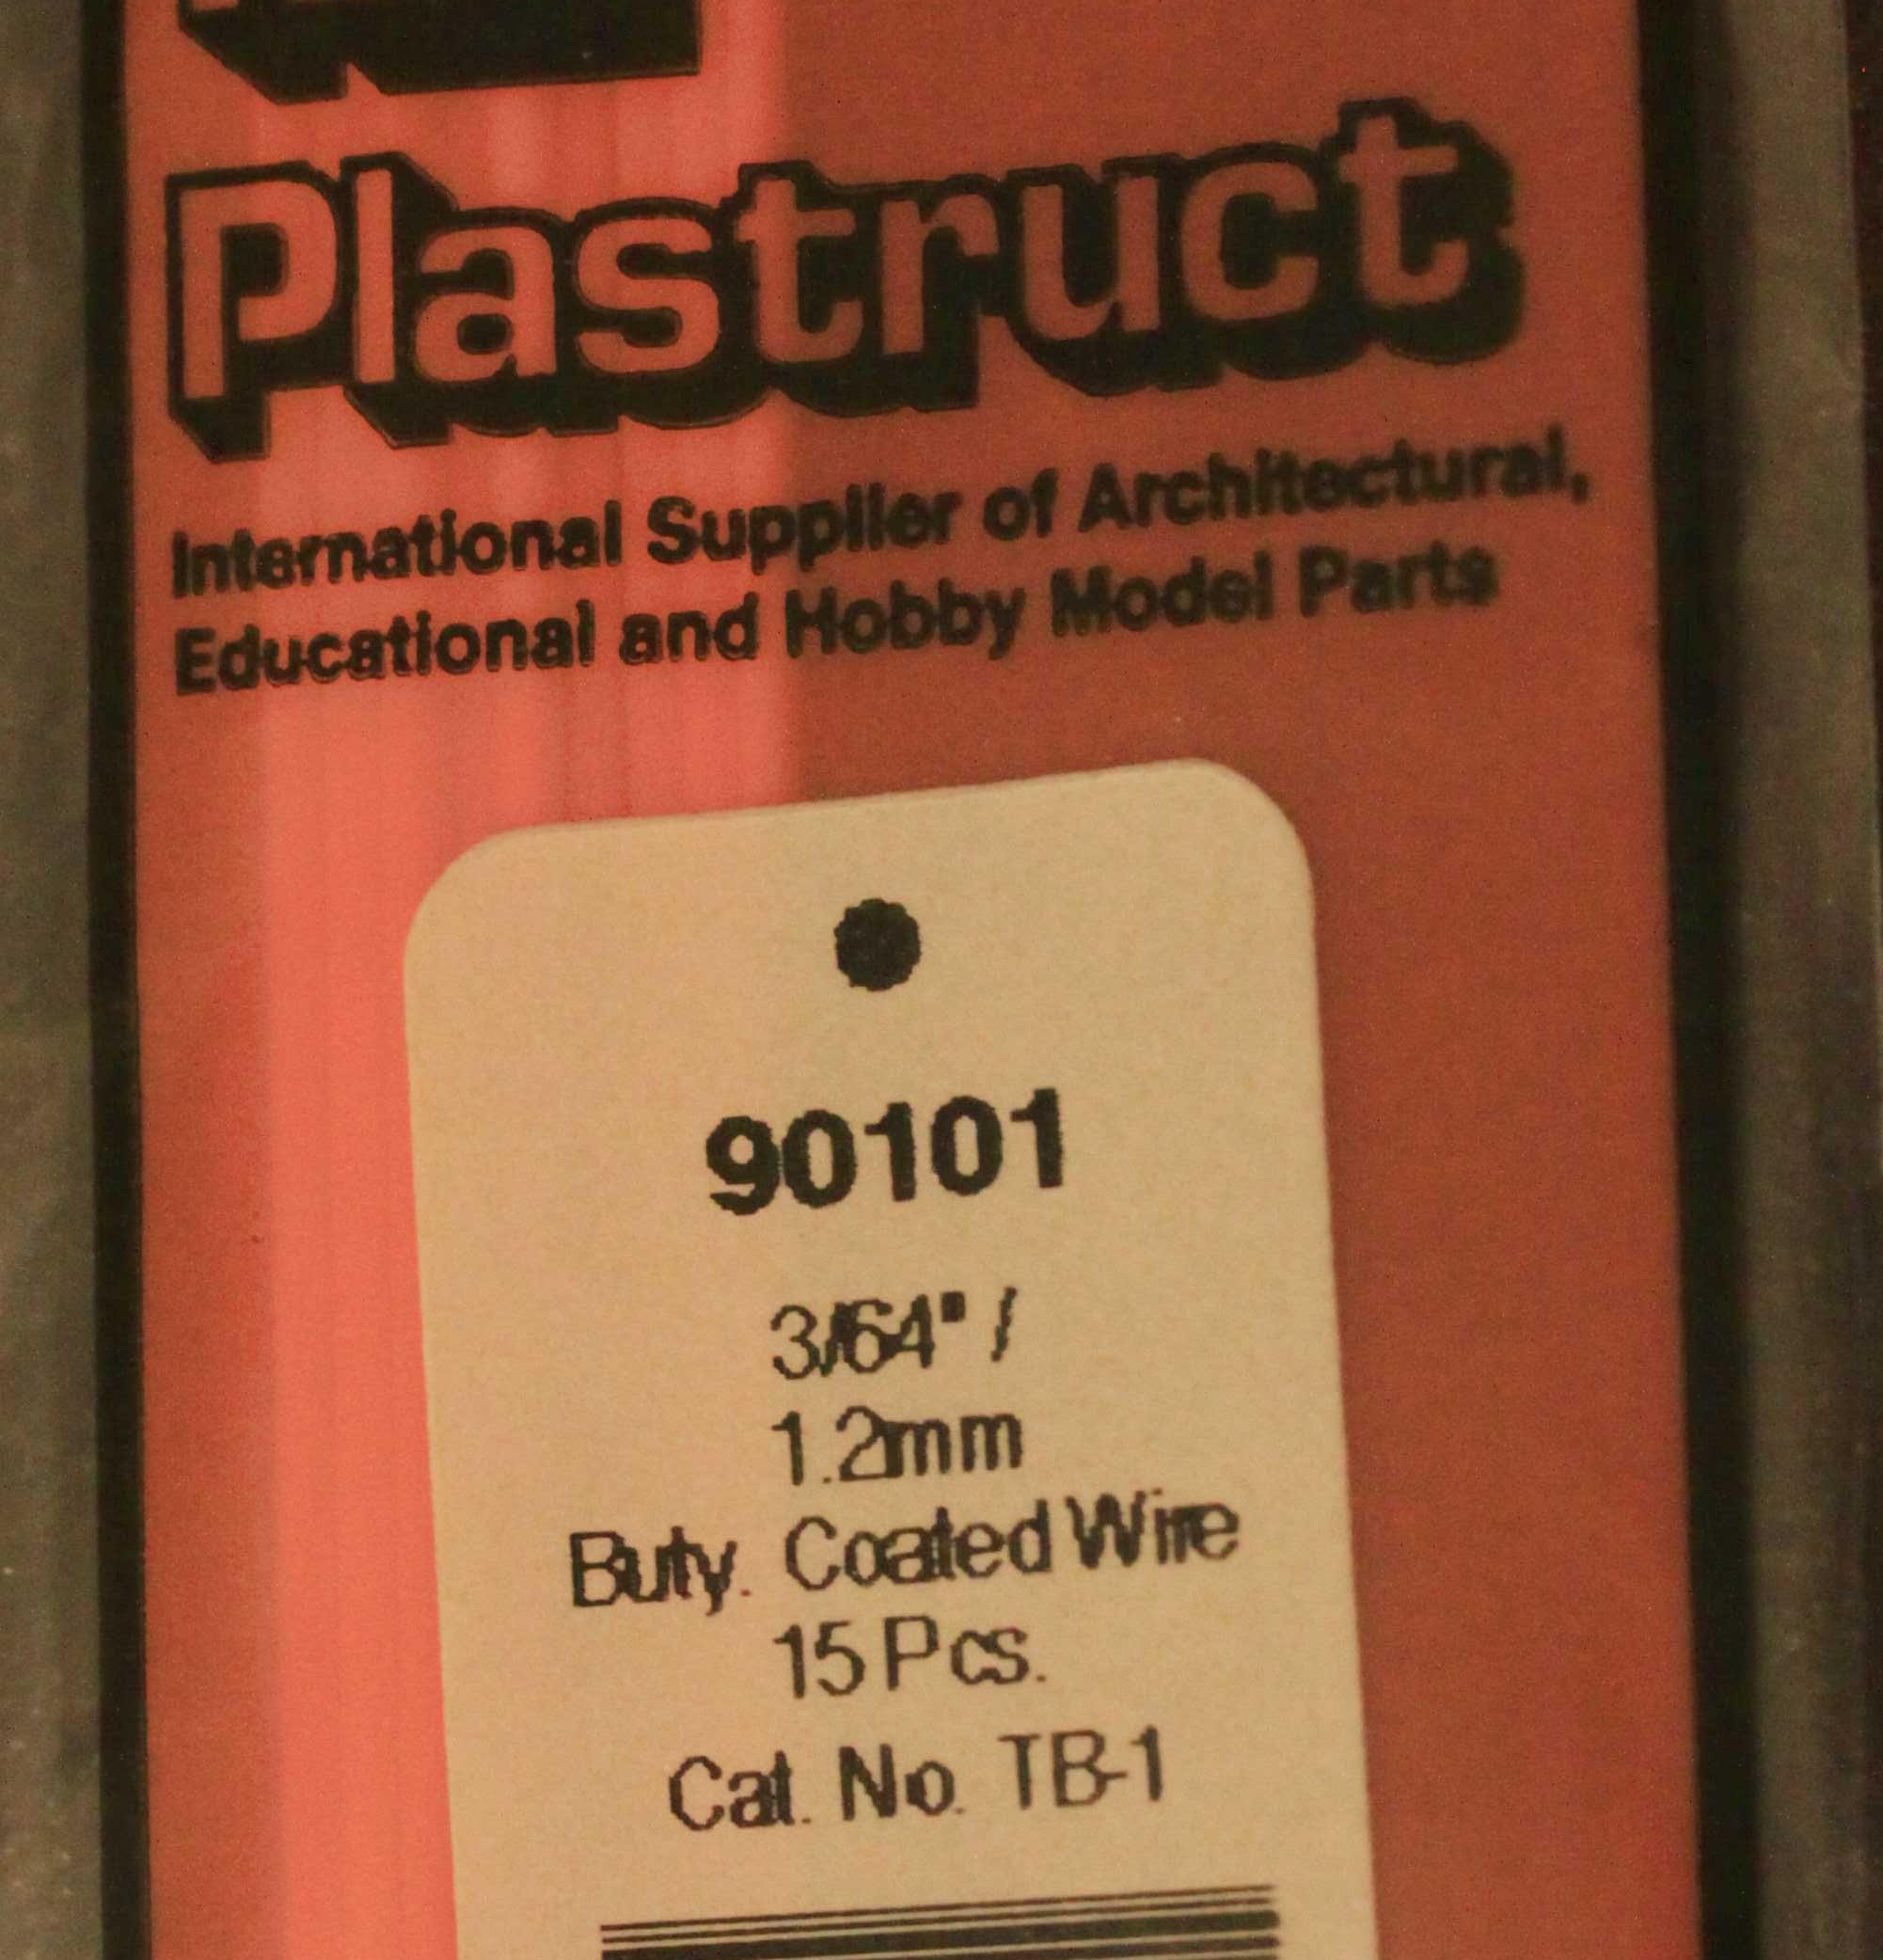
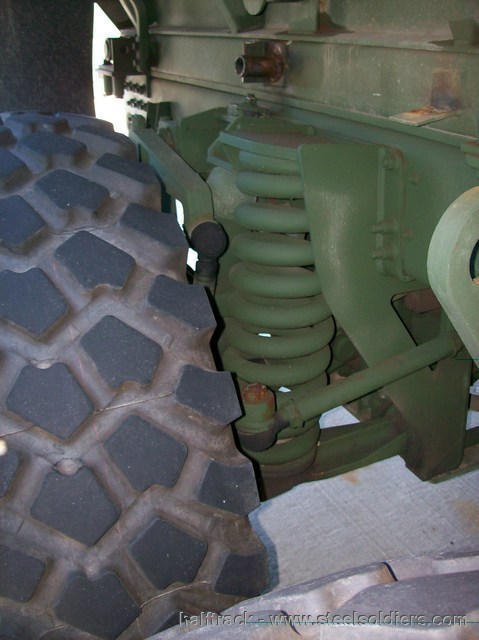
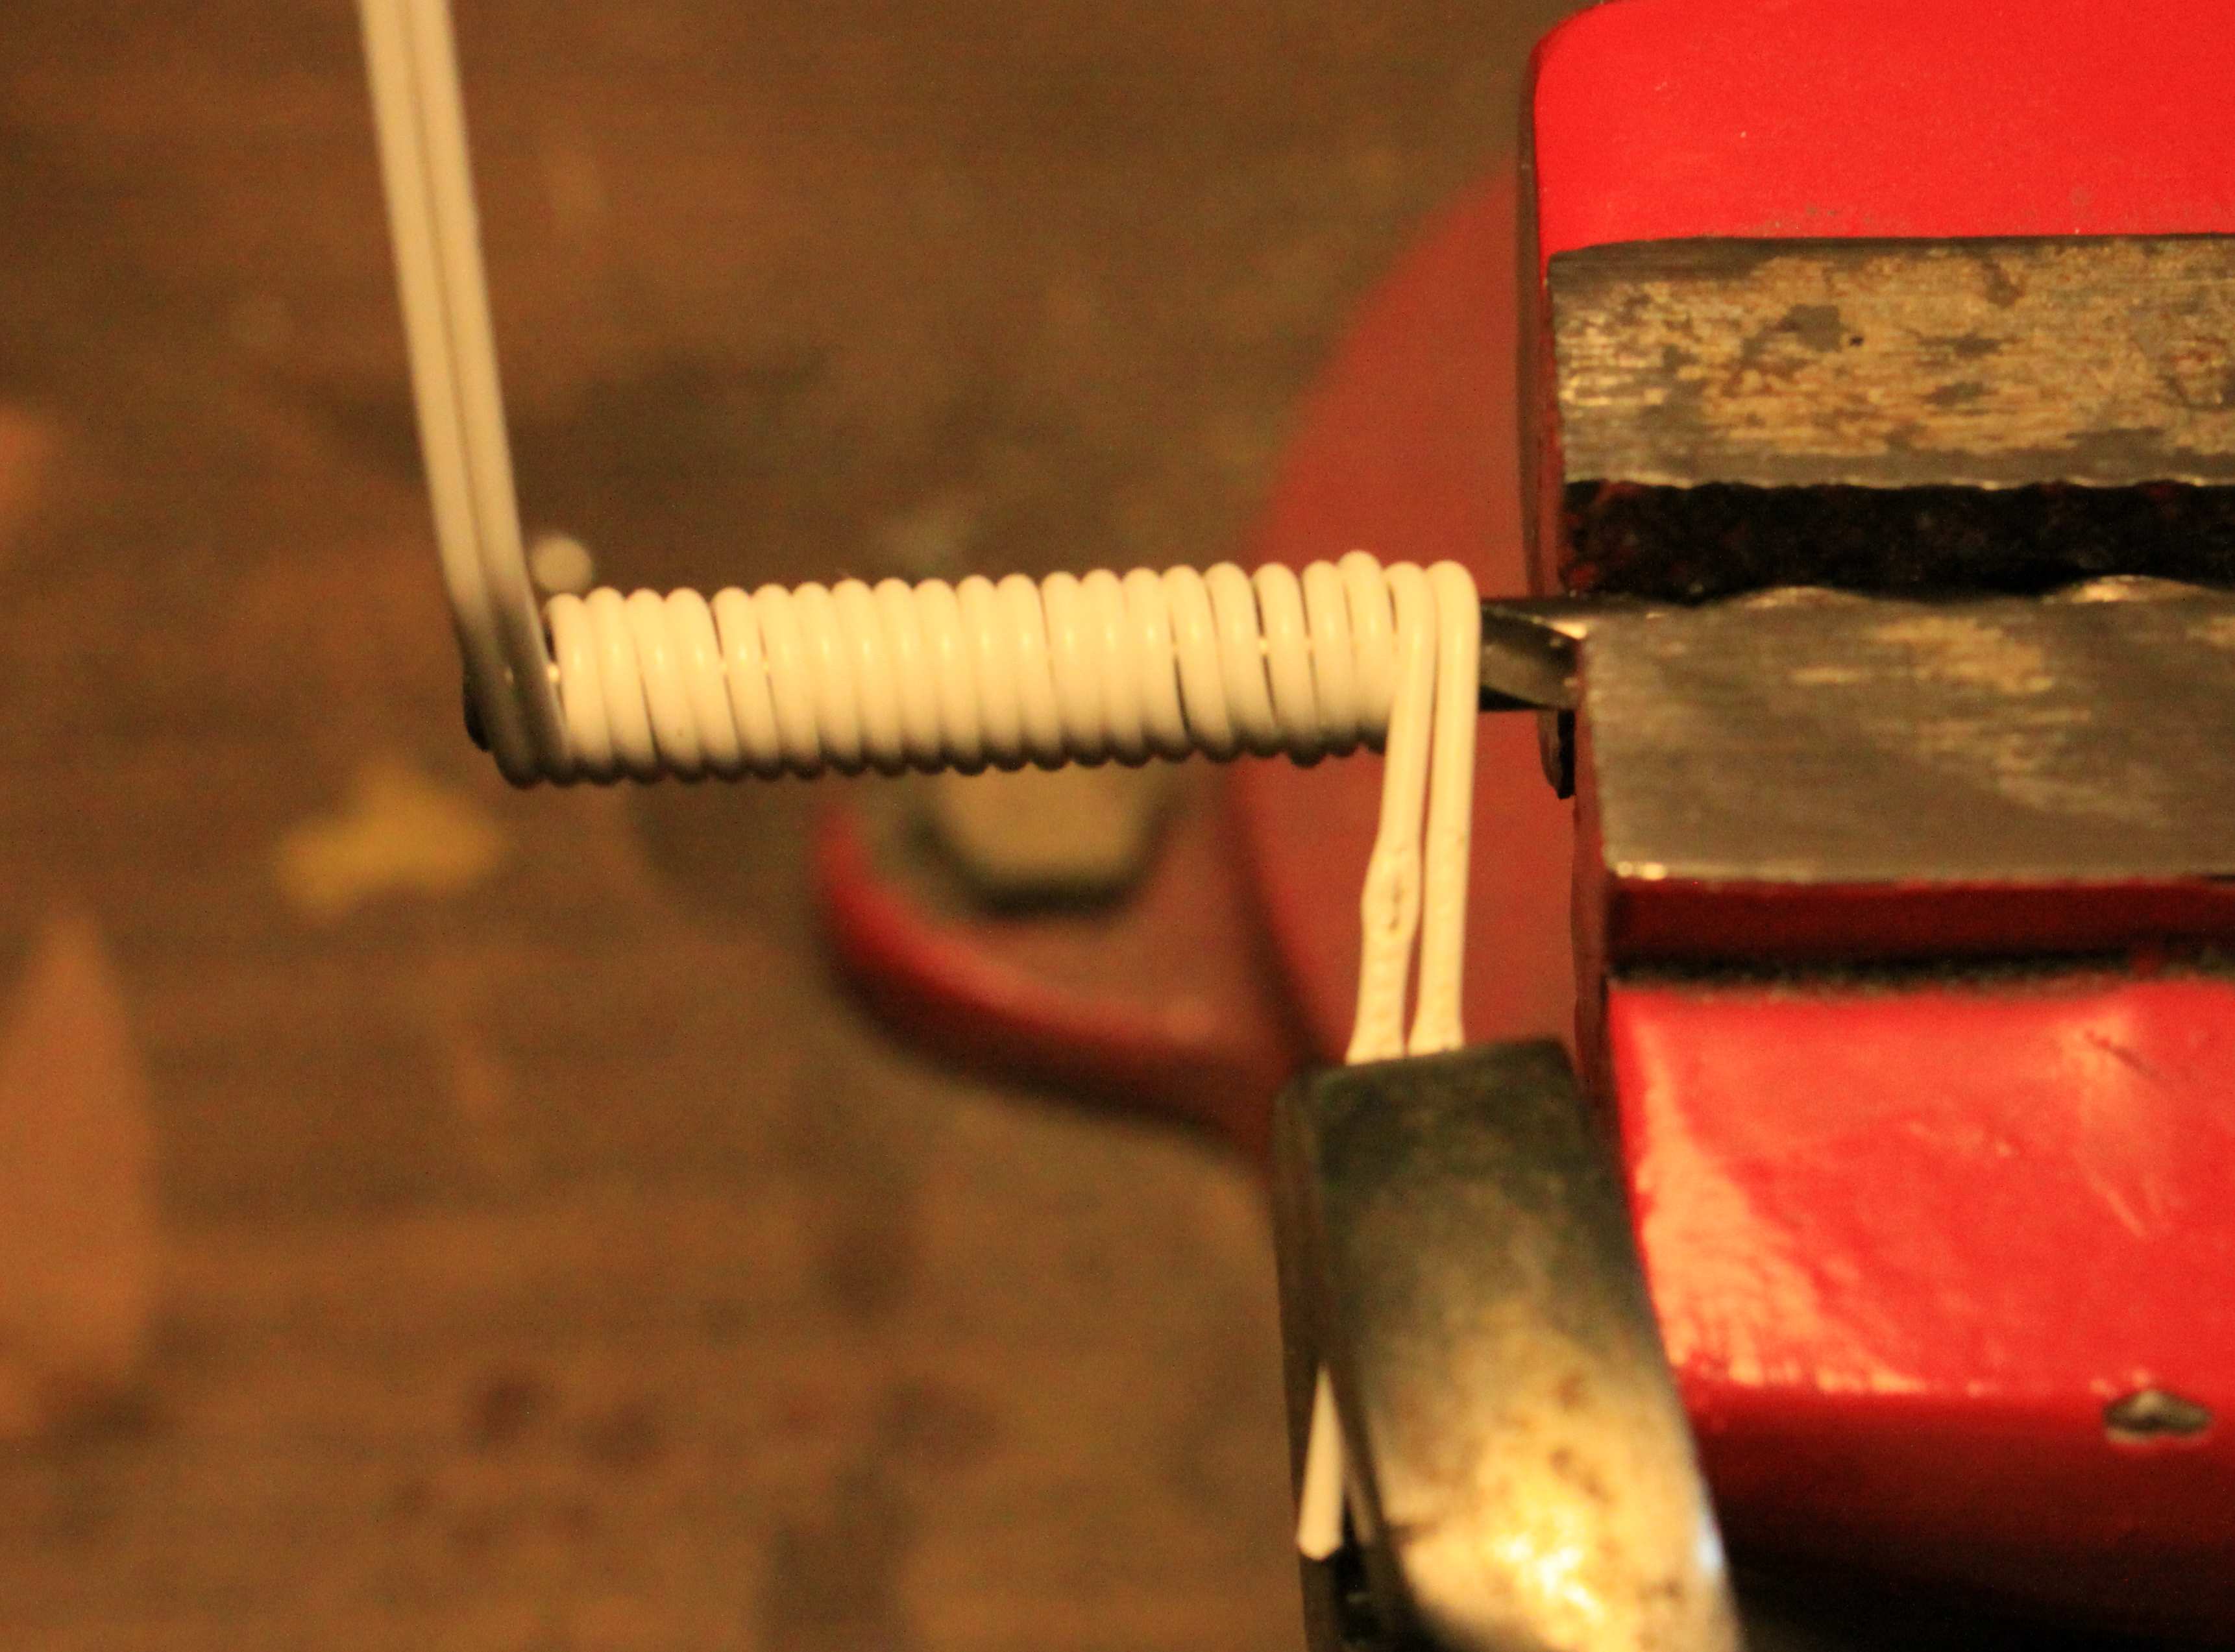
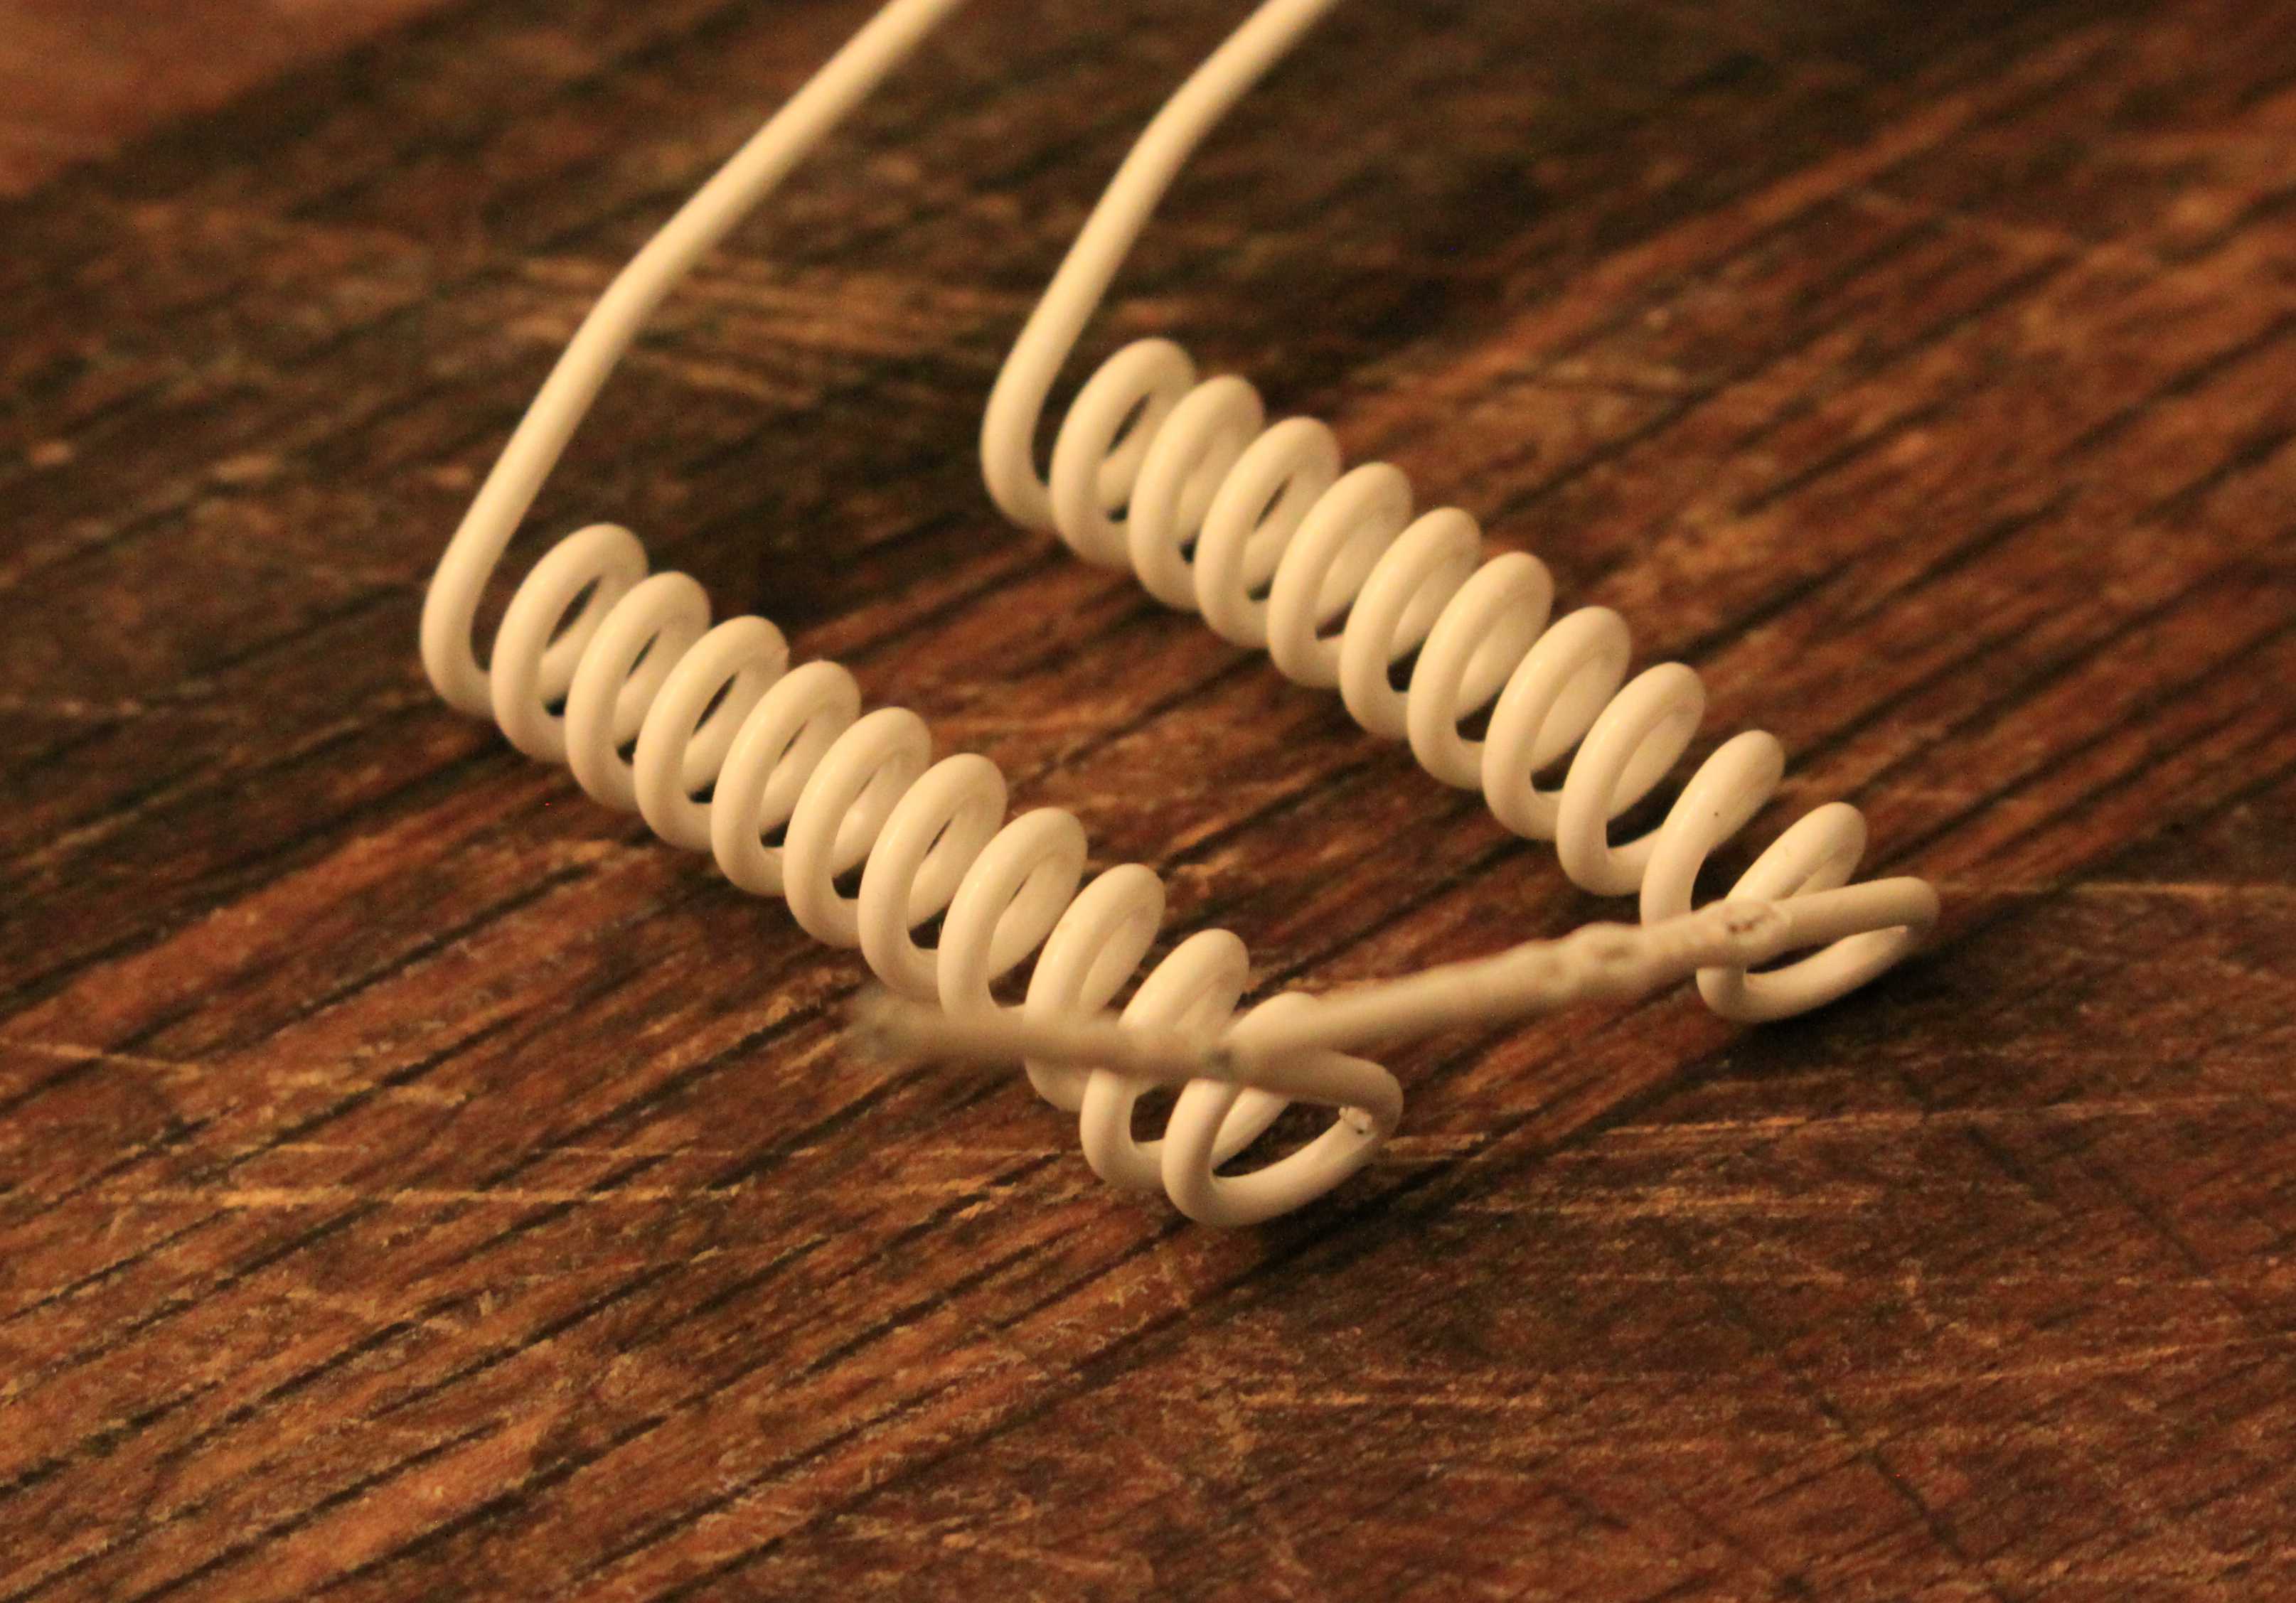
Specific trick for bending suspension coil springs:
For ages I would try to bend/roll larger coil springs for use in the Oshkosh ~ HEMTT and MRAP suspensions. I would always try and roll a single wire into a spring shape (using plastic coated wire) and then try to expand (stretch) the coil out for a more realistic coil spacing. This always failed to produce a uniform realistic looking spring.
Then I hit upon a trick for creating the uniformity required: Roll two wires together at the same time so one acts as a uniform spacer for the other.
When finished, the two coils are easily separated and then have the desired shape, uniform coil spacing and look of the real thing.
4 Likes
So simple and so effective, thanks for sharing
1 Like
Only use the square jawed type pliers when wanting to make near perfect 90 degree bends in wire.
The width of this particular type small plier is near perfect for quickly putting TWO uniform 90 degree bends in small dimeter wire when wanting to make a model hand grab, railing or ladder step.
These also come in very handily when making small 90 degree bends in PE etch.