I’m up to the stage where I’m putting the various hatches into this RFM interior kit. It’s a real shame that RFM haven’t gone that extra bit and made the hatches workable. As it is you have an option of gluing them open or shut. What about both? So my question is. Can anyone point me to a site, youtube or whatever of making working hinges for the hatches?
I think I maybe able to drill the brackets and use fine wire. But why reinvent the wheel when someone has already done the thinking bit!!
If you want them workable just to have them workable that’s cool, but you could also leave them unglued and just position them open/closed whenever you want?
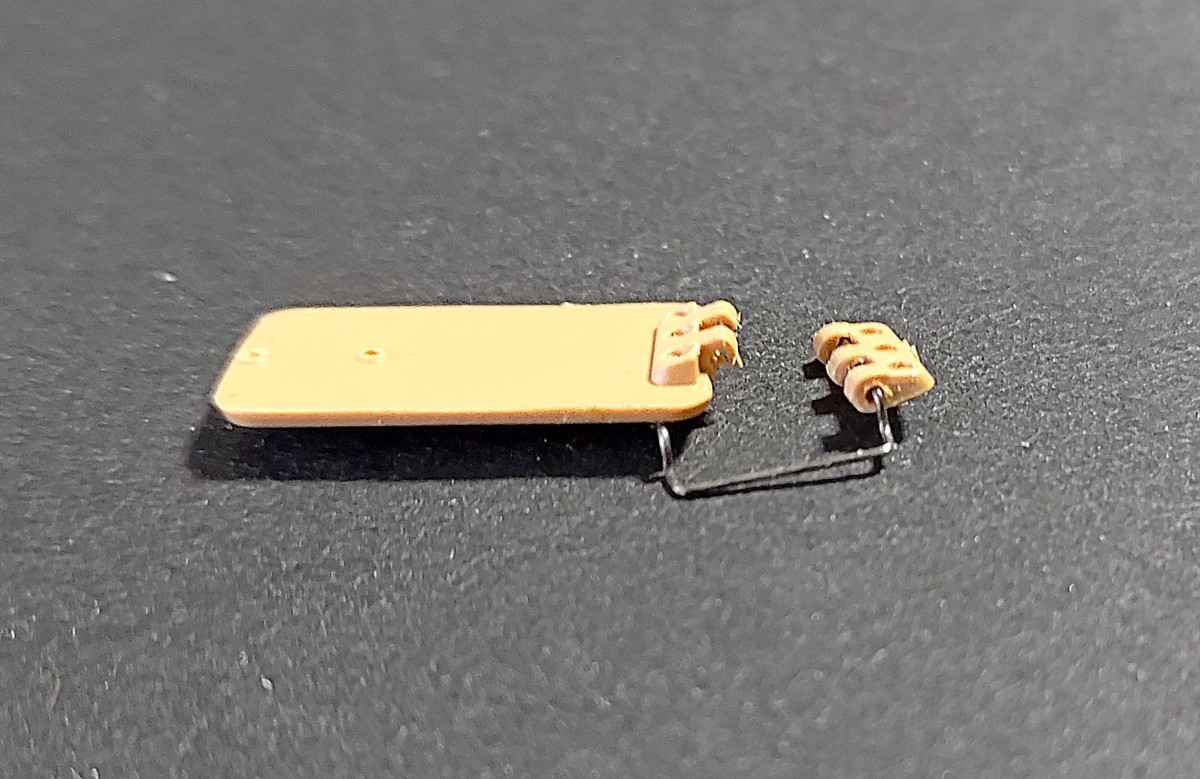
I got one done with a 0.04mm drill bit. Tricky drilling a straight line through 5 parts. Threaded a fine wire through. Great! Beer time. Oops. The RFM plastic is so soft that the wire simply cut through the thineg. Darn. So back to the drawing board.
If all else fails I will leave them loose as suggested.
I had a sleep and re approached the job. Here’s what I concluded. First I drilled the holes OK. 0.04mm drill. Used a wire grab handle from a HO scale train parts supply. Worked fine. But after a few open and close cycles the hing on the hatch cut through the plastic.
Two issues. First the RFM plastic is to soft. Second the geometry is all wrong. The hatch sits ‘in’ the opening while the hing is on the deck. So as the hatch opens it wants to rise. That’s what is doing the cutting of the plastic. It looks like it should work but it didn’t for me. I also think the plastic is too thick to clear the other part. Filing it down will only make the plastic weaker.
Here’s an image. Not a good image because it’s just a phone camera.
There is a cross sectional drawing in either the Panzer Tracts book on the G or the Spielberger Panther one (possibly both). That might help with the geometry. I’m using it to draw the sprung arm mechanism which helps it to open as my ability to scratchbuild four identical parts for that is questionable.
I think you can recover, though. I’d suggest filling the drilled holes with styrene rod or tapered plugs made from stretched sprue. Allow these to dry fully hard, at least over night.
Clean up the hinge areas and then re-drill the holes.
Try marking the center of the holes with a punch. The drill halfway through from each side. This way the start of each hole will be correctly located, and any error where they two holes meet in the middle will be “hogged out” by the overlapping angles. It will also be hidden once the hatch is assembled.
Consider drilling the holes on the hatch slightly larger than the hull hinge part to allow for some “play” in the movement. This should help with any remaining slight misalignment in the new holes and pins.
Thanks guys. The holes were better than they look. The plastic ‘stretched’ as I struggled to get them to align. I did miss the centre and thats maybe why the bind that caused to eventual break out.
Maybe a styrene tube cut into 5 sections with the pin already in it. Then remove the RFM hinges and replace with the already assembled hing. Maybe!!