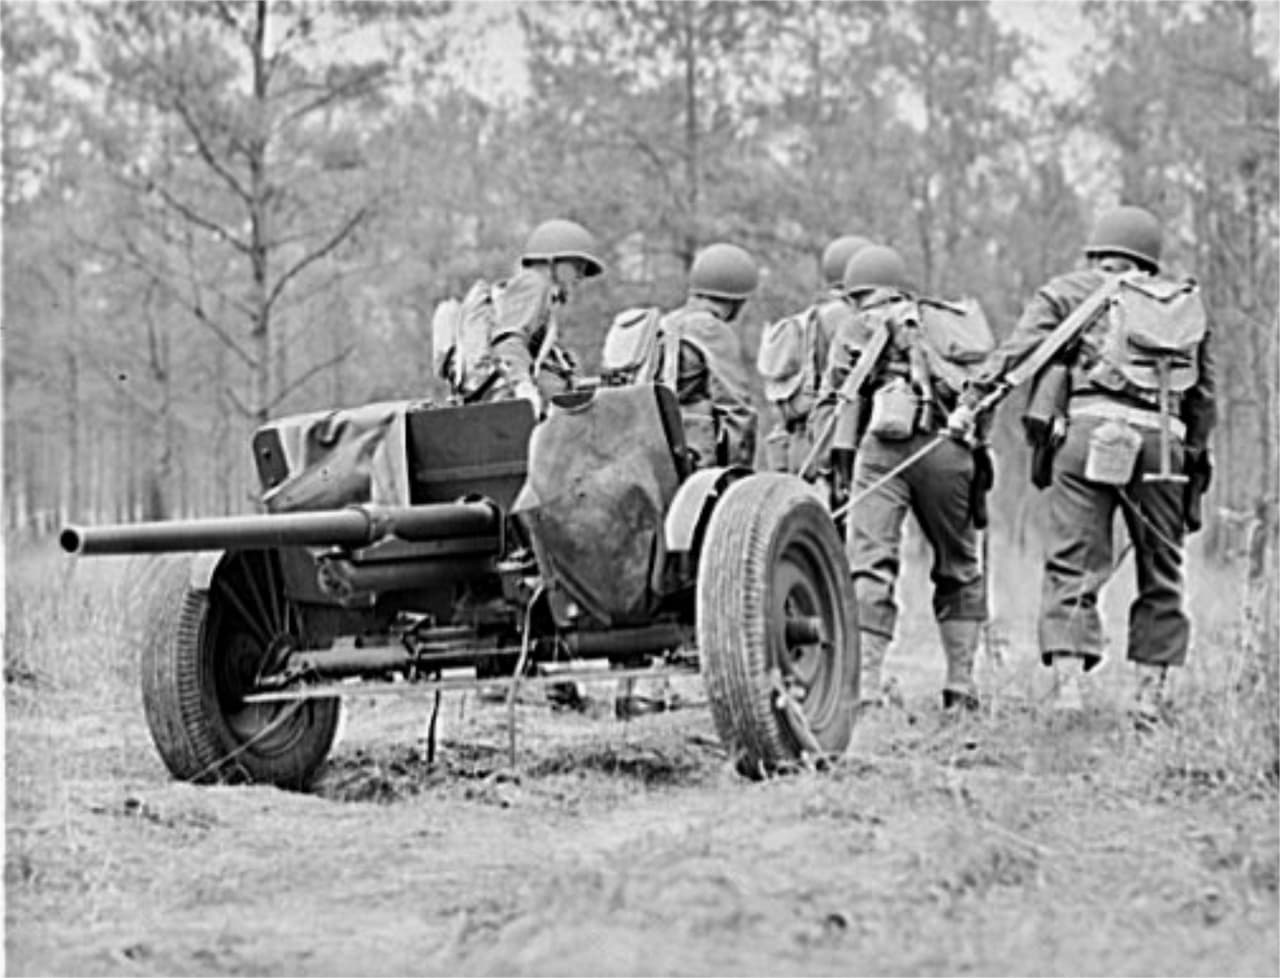
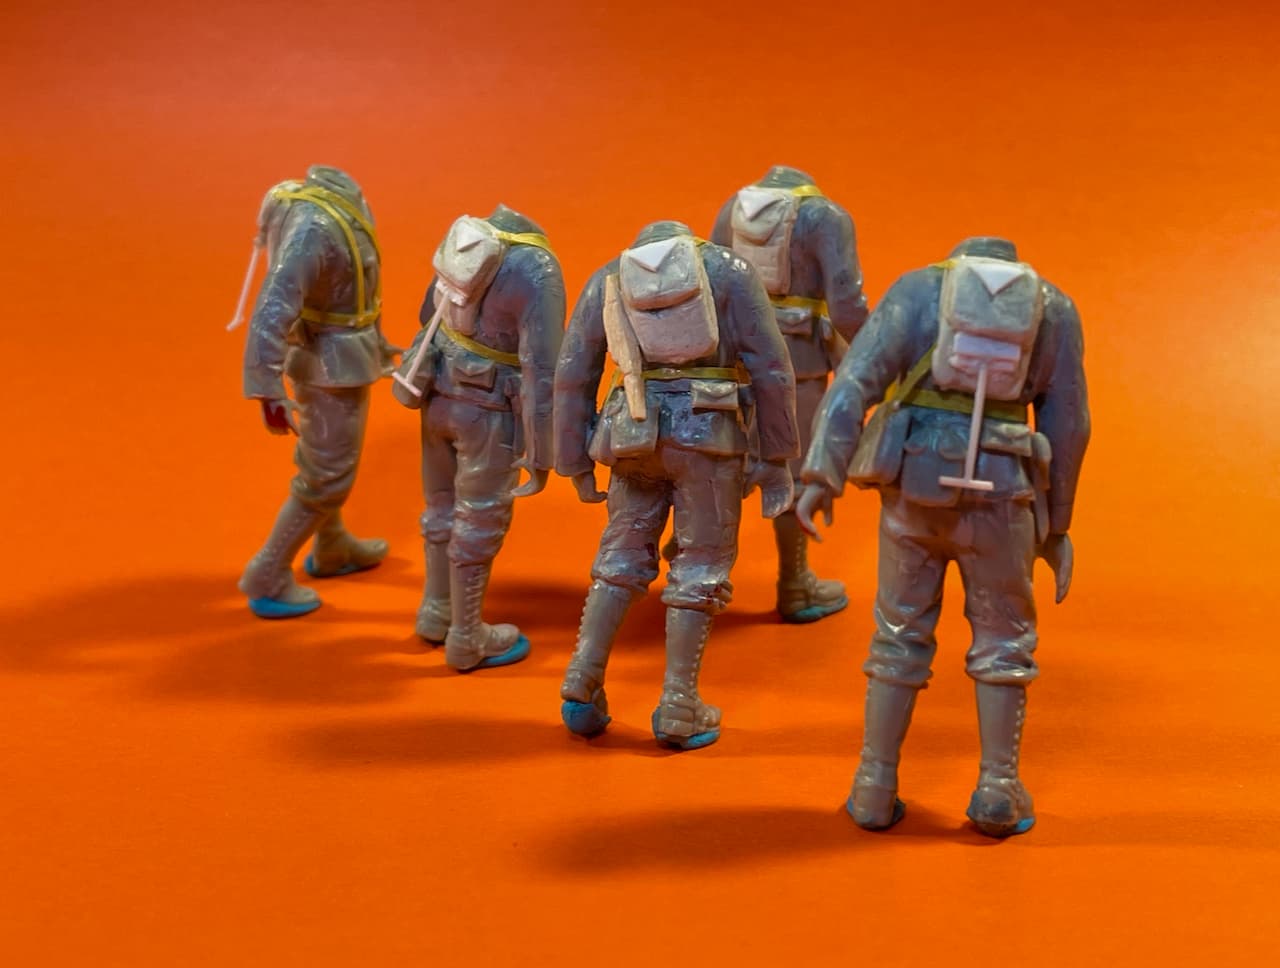
Nice sculpting that gear on their back. Now I’m thinking about maybe making gas mask cases that they wear on their waists. Similar to the ones your figures are wearing.
2 Likes
Nice work man. The brick sizes look scale as well ![]()
1 Like
Thanks for the ref images.
3 Likes
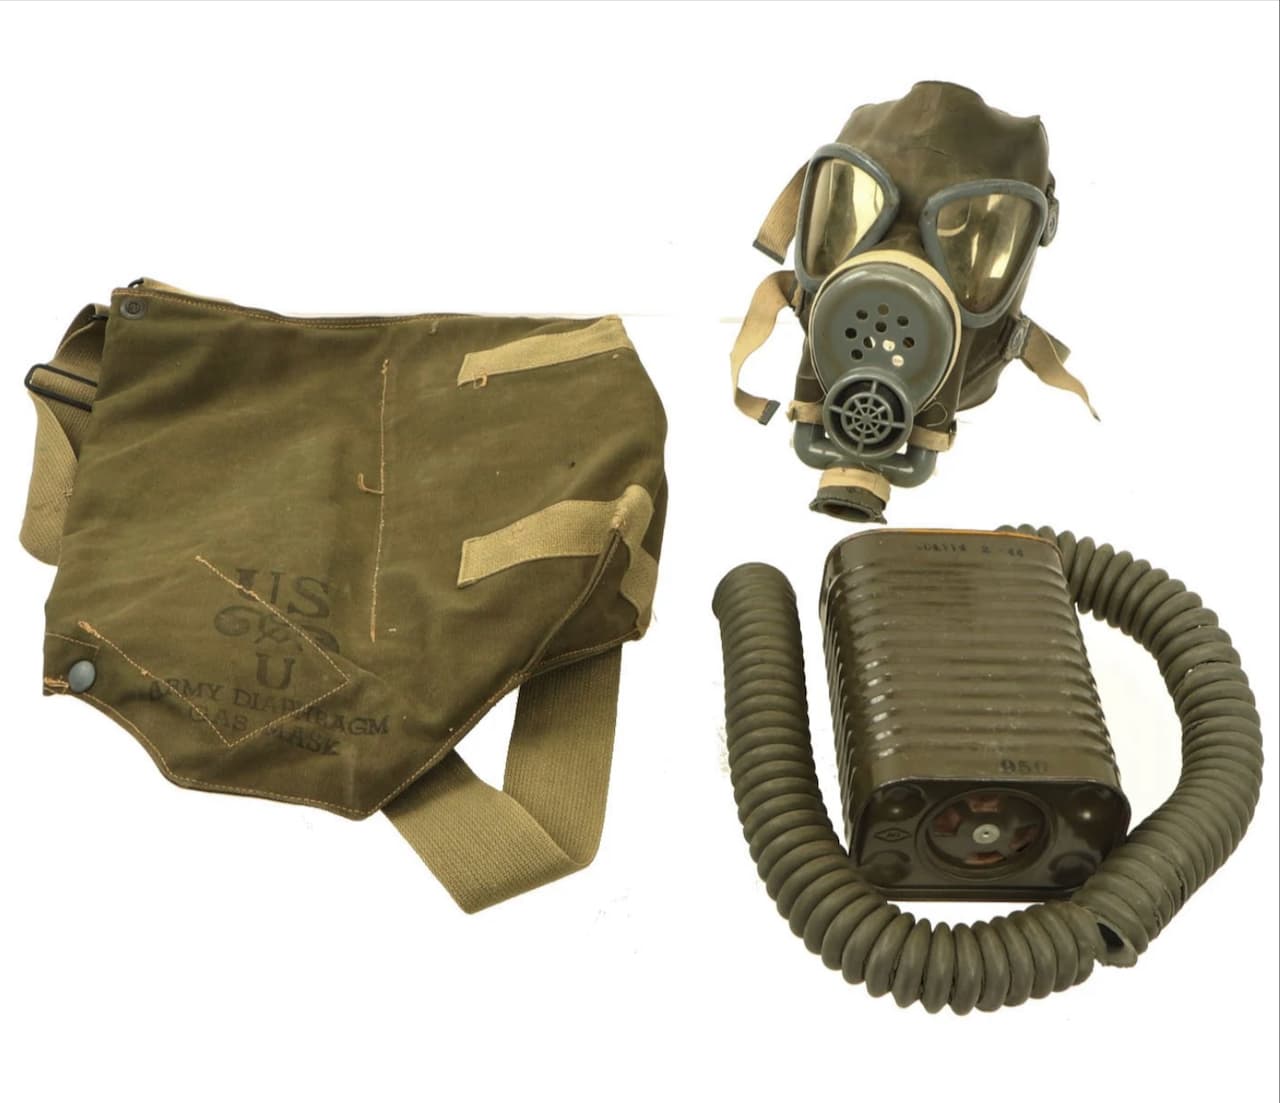
Keep in mind, many threw away those gas masks at the earliest opportunity. Some just kept the bag to carry whatever they felt was more important.
3 Likes
My step-father told me that he and the other guys threw their masks away after they landed for D-Day. He said it was one less thing to have to carry.
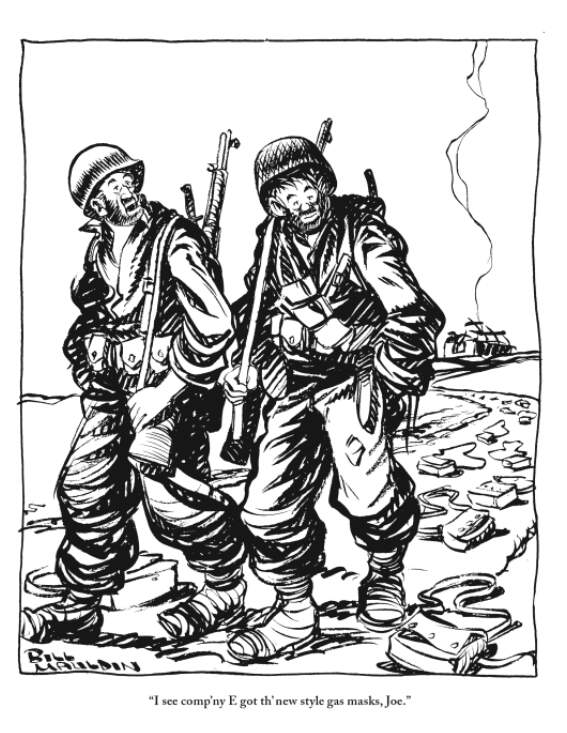
Which reminded me of this Willie and Joe cartoon.
5 Likes
Mauldin was always on target.
3 Likes
Hi guys. Getting a little bit closer. Here’s today’s update:
Entrenching Tool Warfare!
Added pack details plus web gear.  Got out the Evergreen and scratched-up new tools.

Hornet Heads and Hands coming up soon. 

D’oh!
5 Likes
Hello fellow figurers! As promised, here’s a little sump’n, sump’n…
Hornet Head SBS… Or, This is gonna’ hurt Joe more than it hurts me!
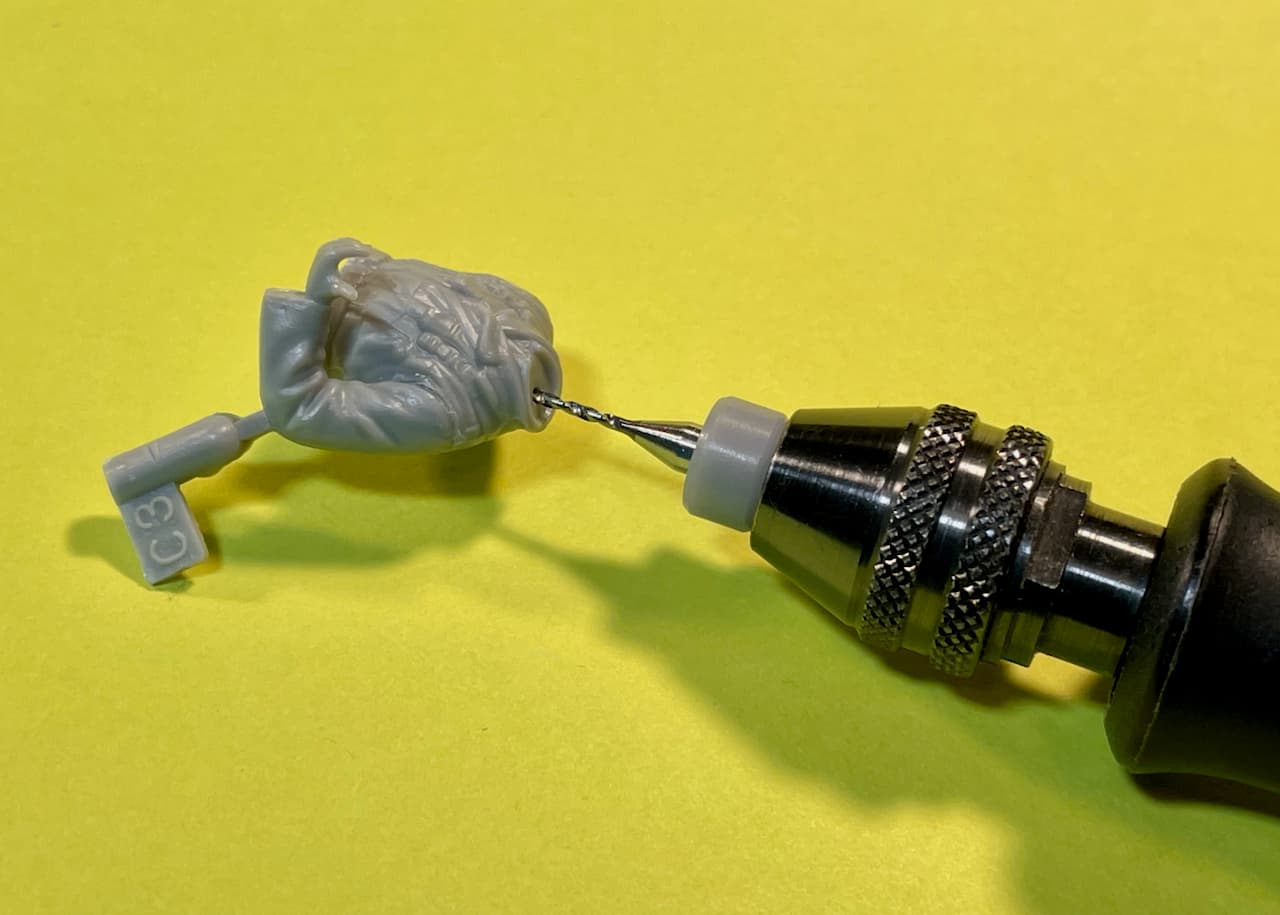
Step 1: Make a pilot divot using a No. 11 X-Acto blade. No need to go very deep — just enough to prevent the-drill bit from skating out o control in Step 2.
• Careful not to break the tip off in the figure. I often use an older blade for this purpose — less tendency to break.
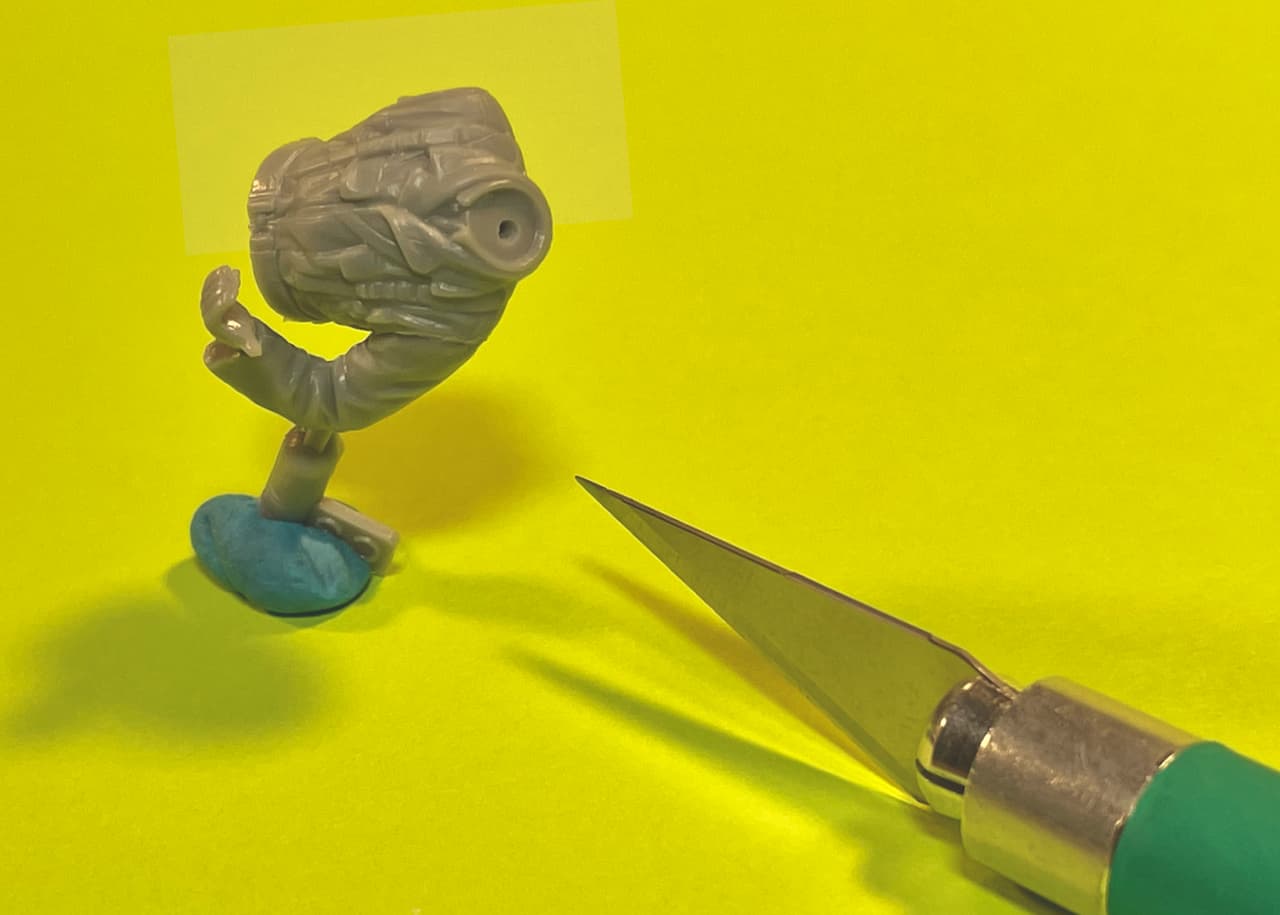
Step 2: Drill a hole approx. 5mm deep using a Tungsten Carbide Drill Bit.
• These drills cut so much better than standard variety bits. Careful, they are extremely brittle and can snap when you look at them the wrong way.
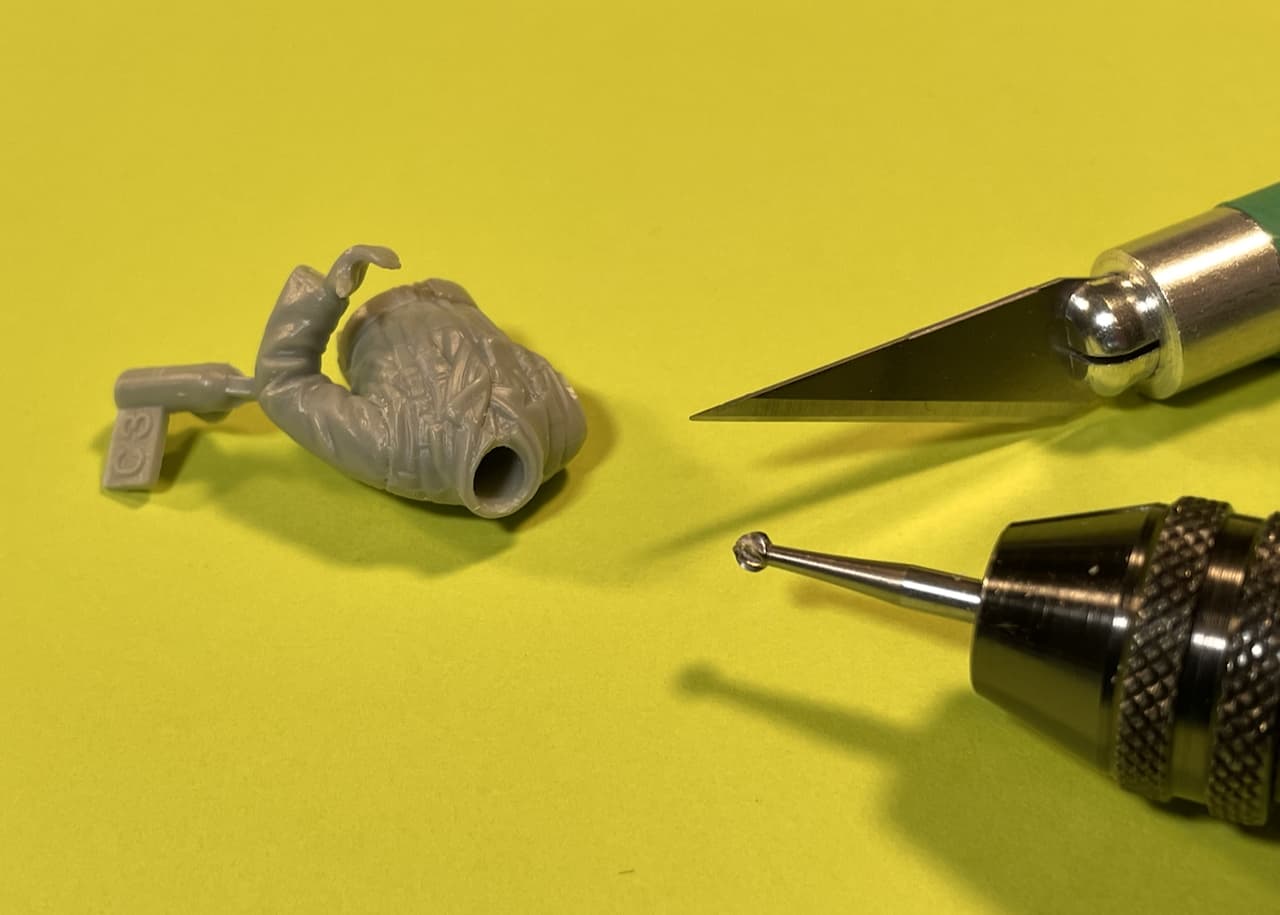
Step 3: Start opening the cavity using a ball-shaped Dremel (No. 109) Engraving Cutter 1/16"
• Don’t go too close to the collar edge just yet.

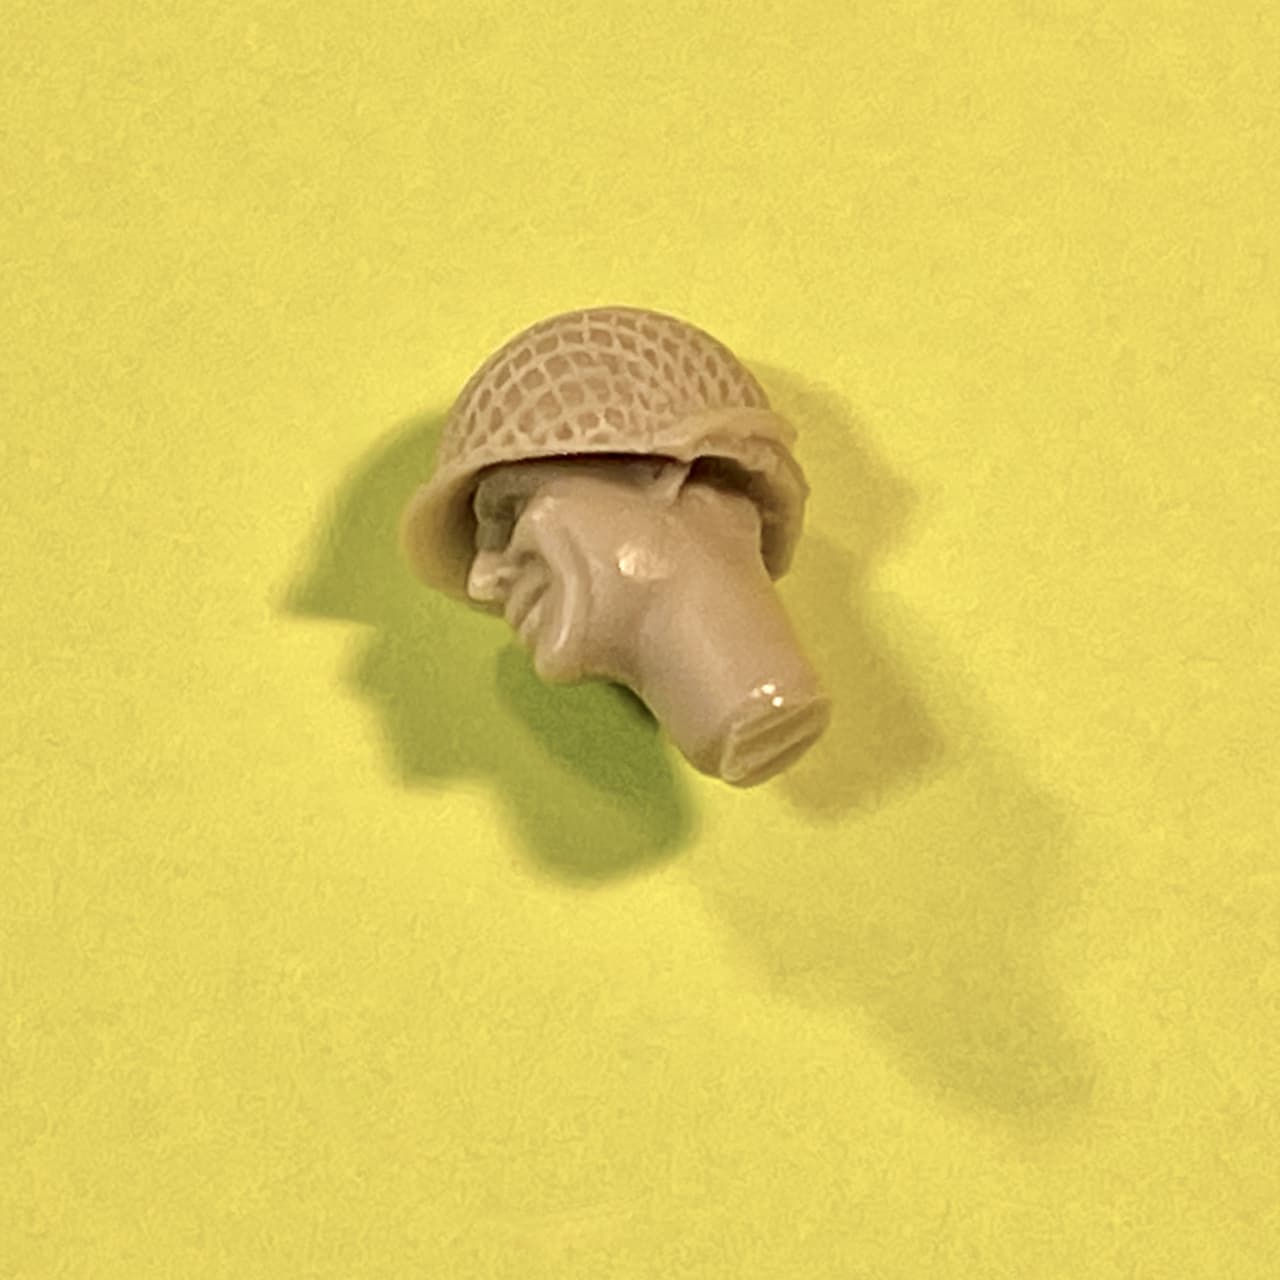
Step 4: Clip the Hornet Head from its sprue connection.
• Leave plenty of "Giraffe-Neck for now. Later, if needed, trim more neck and round-off the stump to allow for head tilting and/or turning adjustments.
Step 5: Mate the cavity size to fit the Hornet neck. Use the No. 11 X-Acto blade to carve up to the collar. Under-cut the cavity very slightly with the Dremel Engraving Cutter. A small rat-tail file can be helpful here as well.
• Easy dose it… take small bites and dry-fit as you go.
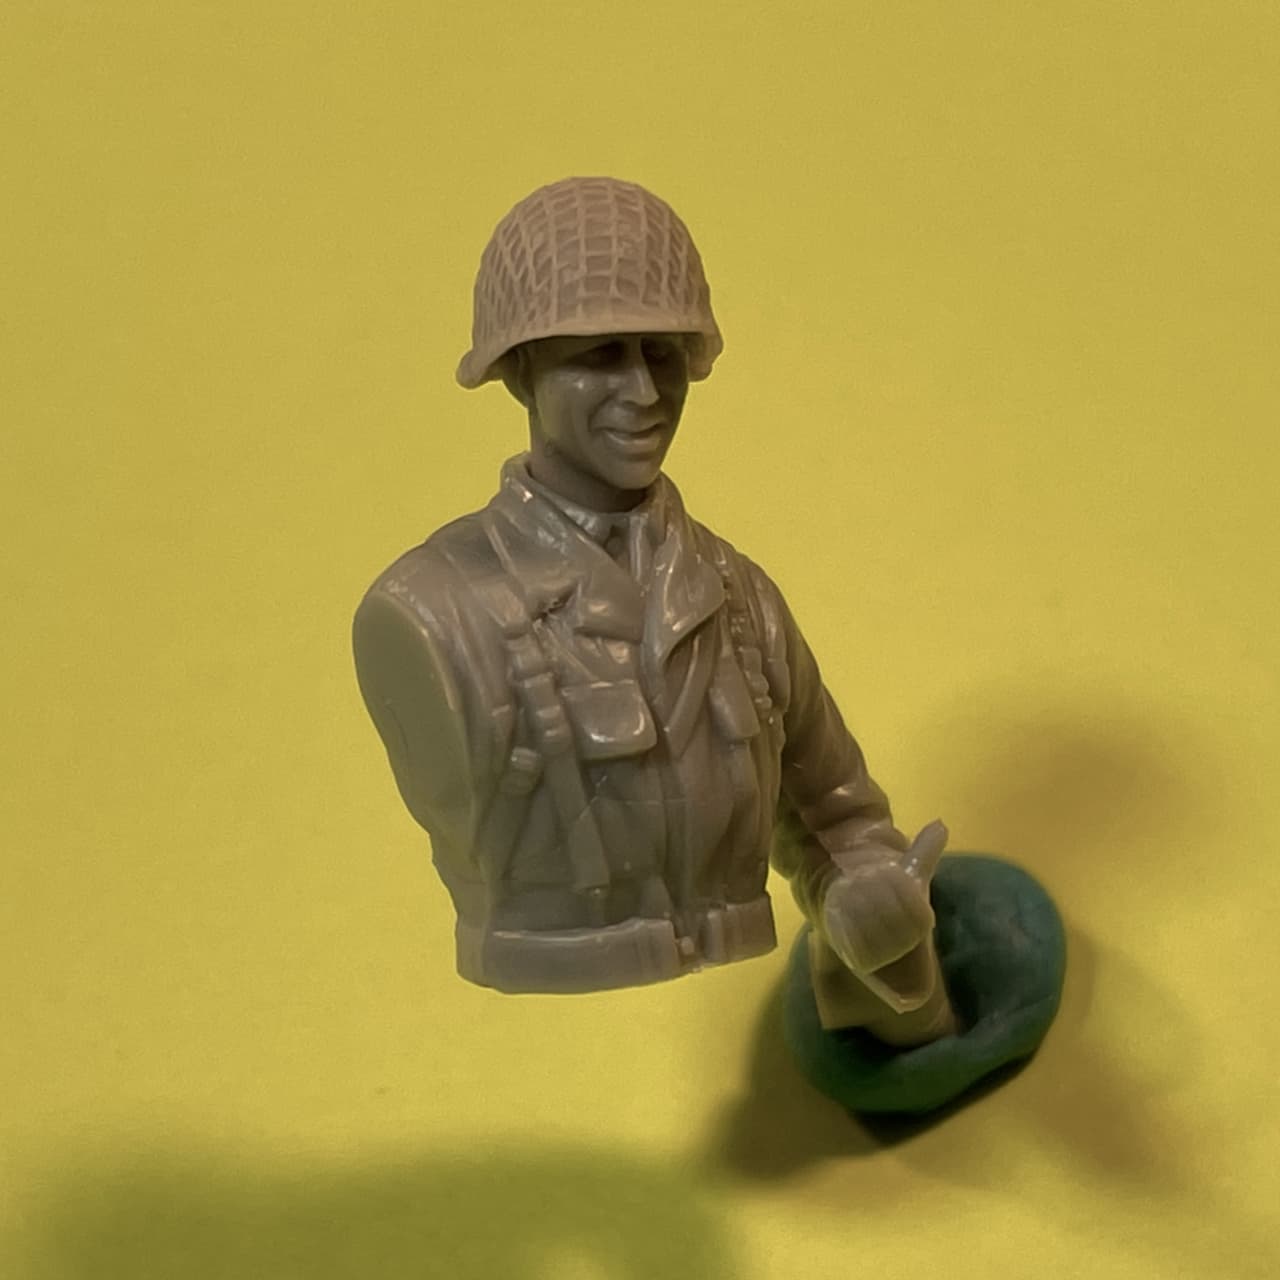
Step 6: Plop Joe into his foxhole. And with minimal effort, this Hornet Head fit perfectly snug!
• If I was painting this figure for real, I’d allow a little more wiggle-room for paint tolerance. In that case, carefully sand the stump, then pack a tiny bit of Blu-Tak into the cavity so the head doesn’t wobble out of control when dry-fitting.
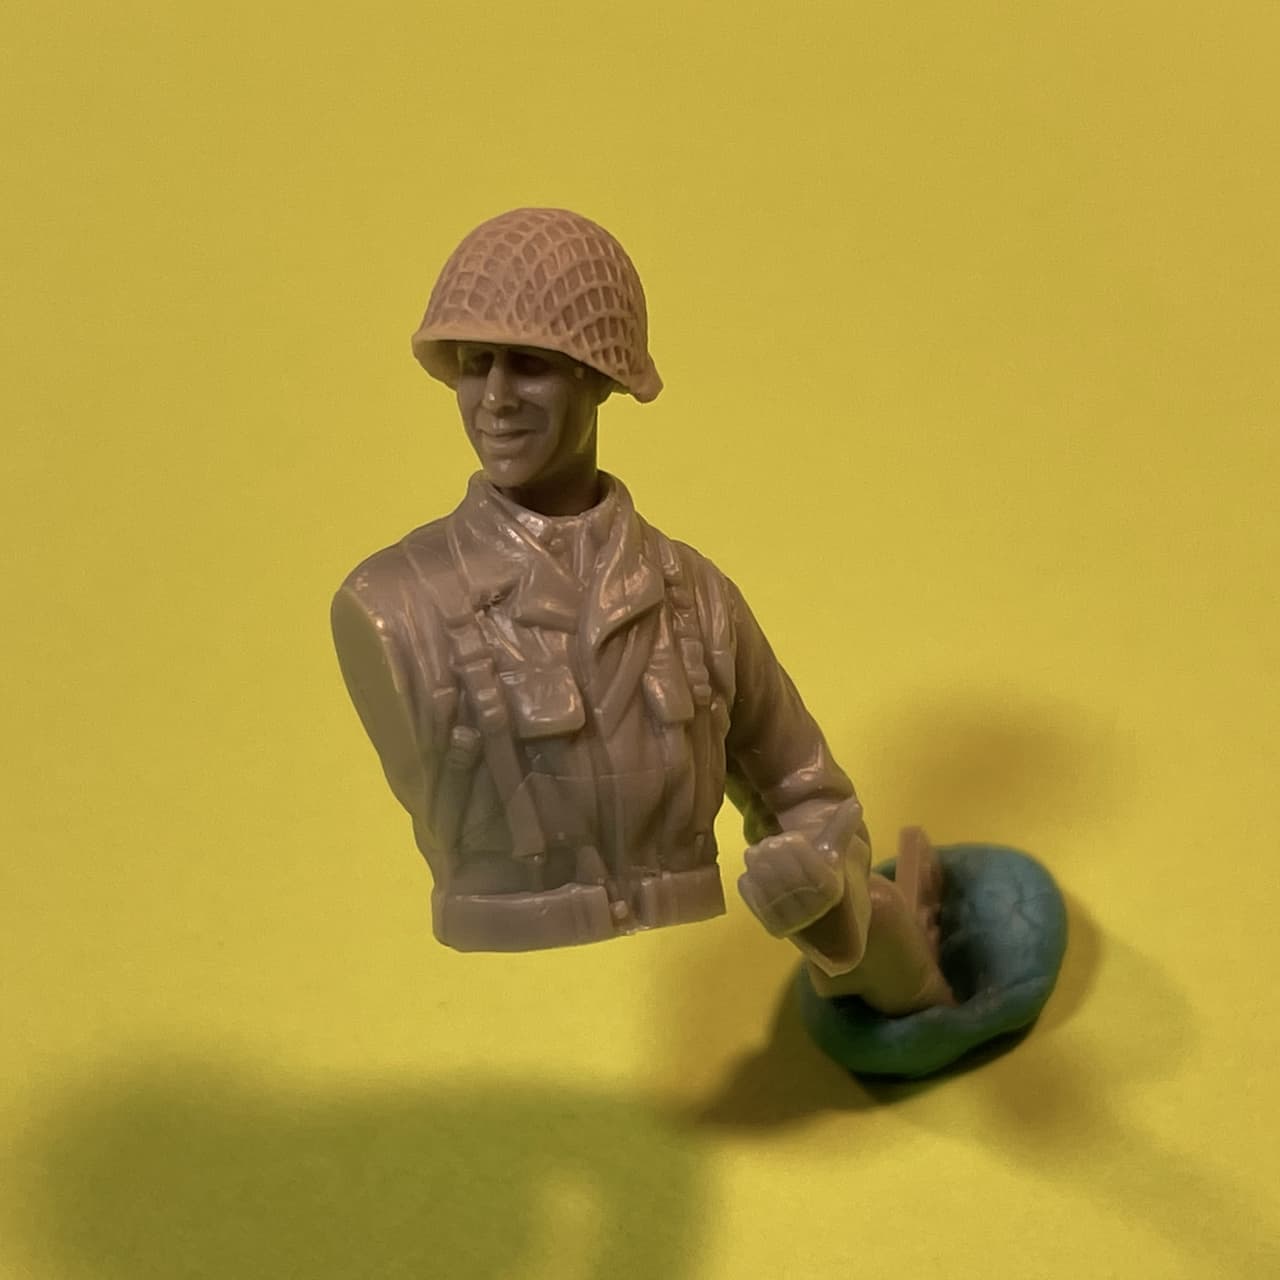
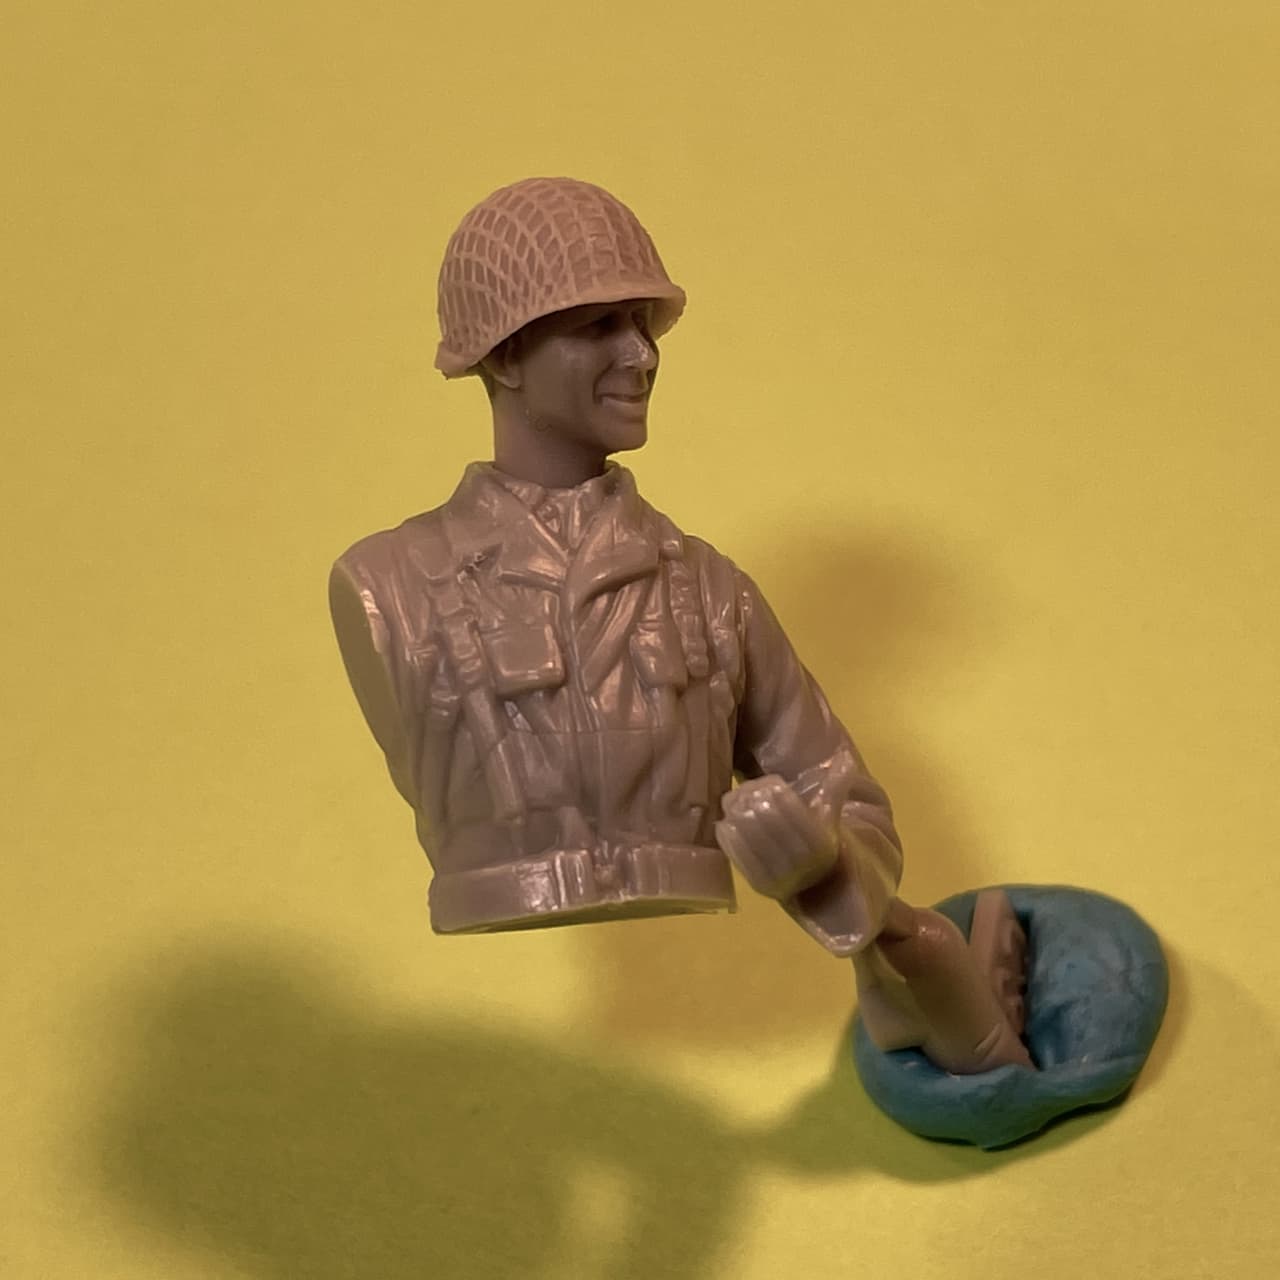
Eyes, RIGHT! … Eyes, LEFT!
On that note: While striving for realistic character interaction, I rarely ever glue the heads in. I leave the heads adjustable so as to position them for good eye contact when placing them into a diorama.
Hornet Hand fitting to follow soon. Stay tuned…
HTH. Happy figuring! ![]()
8 Likes
yeah sure, he’s grinning now…
![]()
3 Likes
Thanks Mike for the great tutorial on Hornet Heads !
2 Likes
I don’t know how these campaigns work, is it too late to join? Its been a long time since I built anything and even when I did I never managed to successfully complete a figure. Some of the work already on show is pretty intimidating but I would like to try my hand again there are so many more resources now.
Tom
4 Likes
Yeah, get in here man!
2 Likes
Welcome Tom! Have some fun during your stay 
G.
1 Like
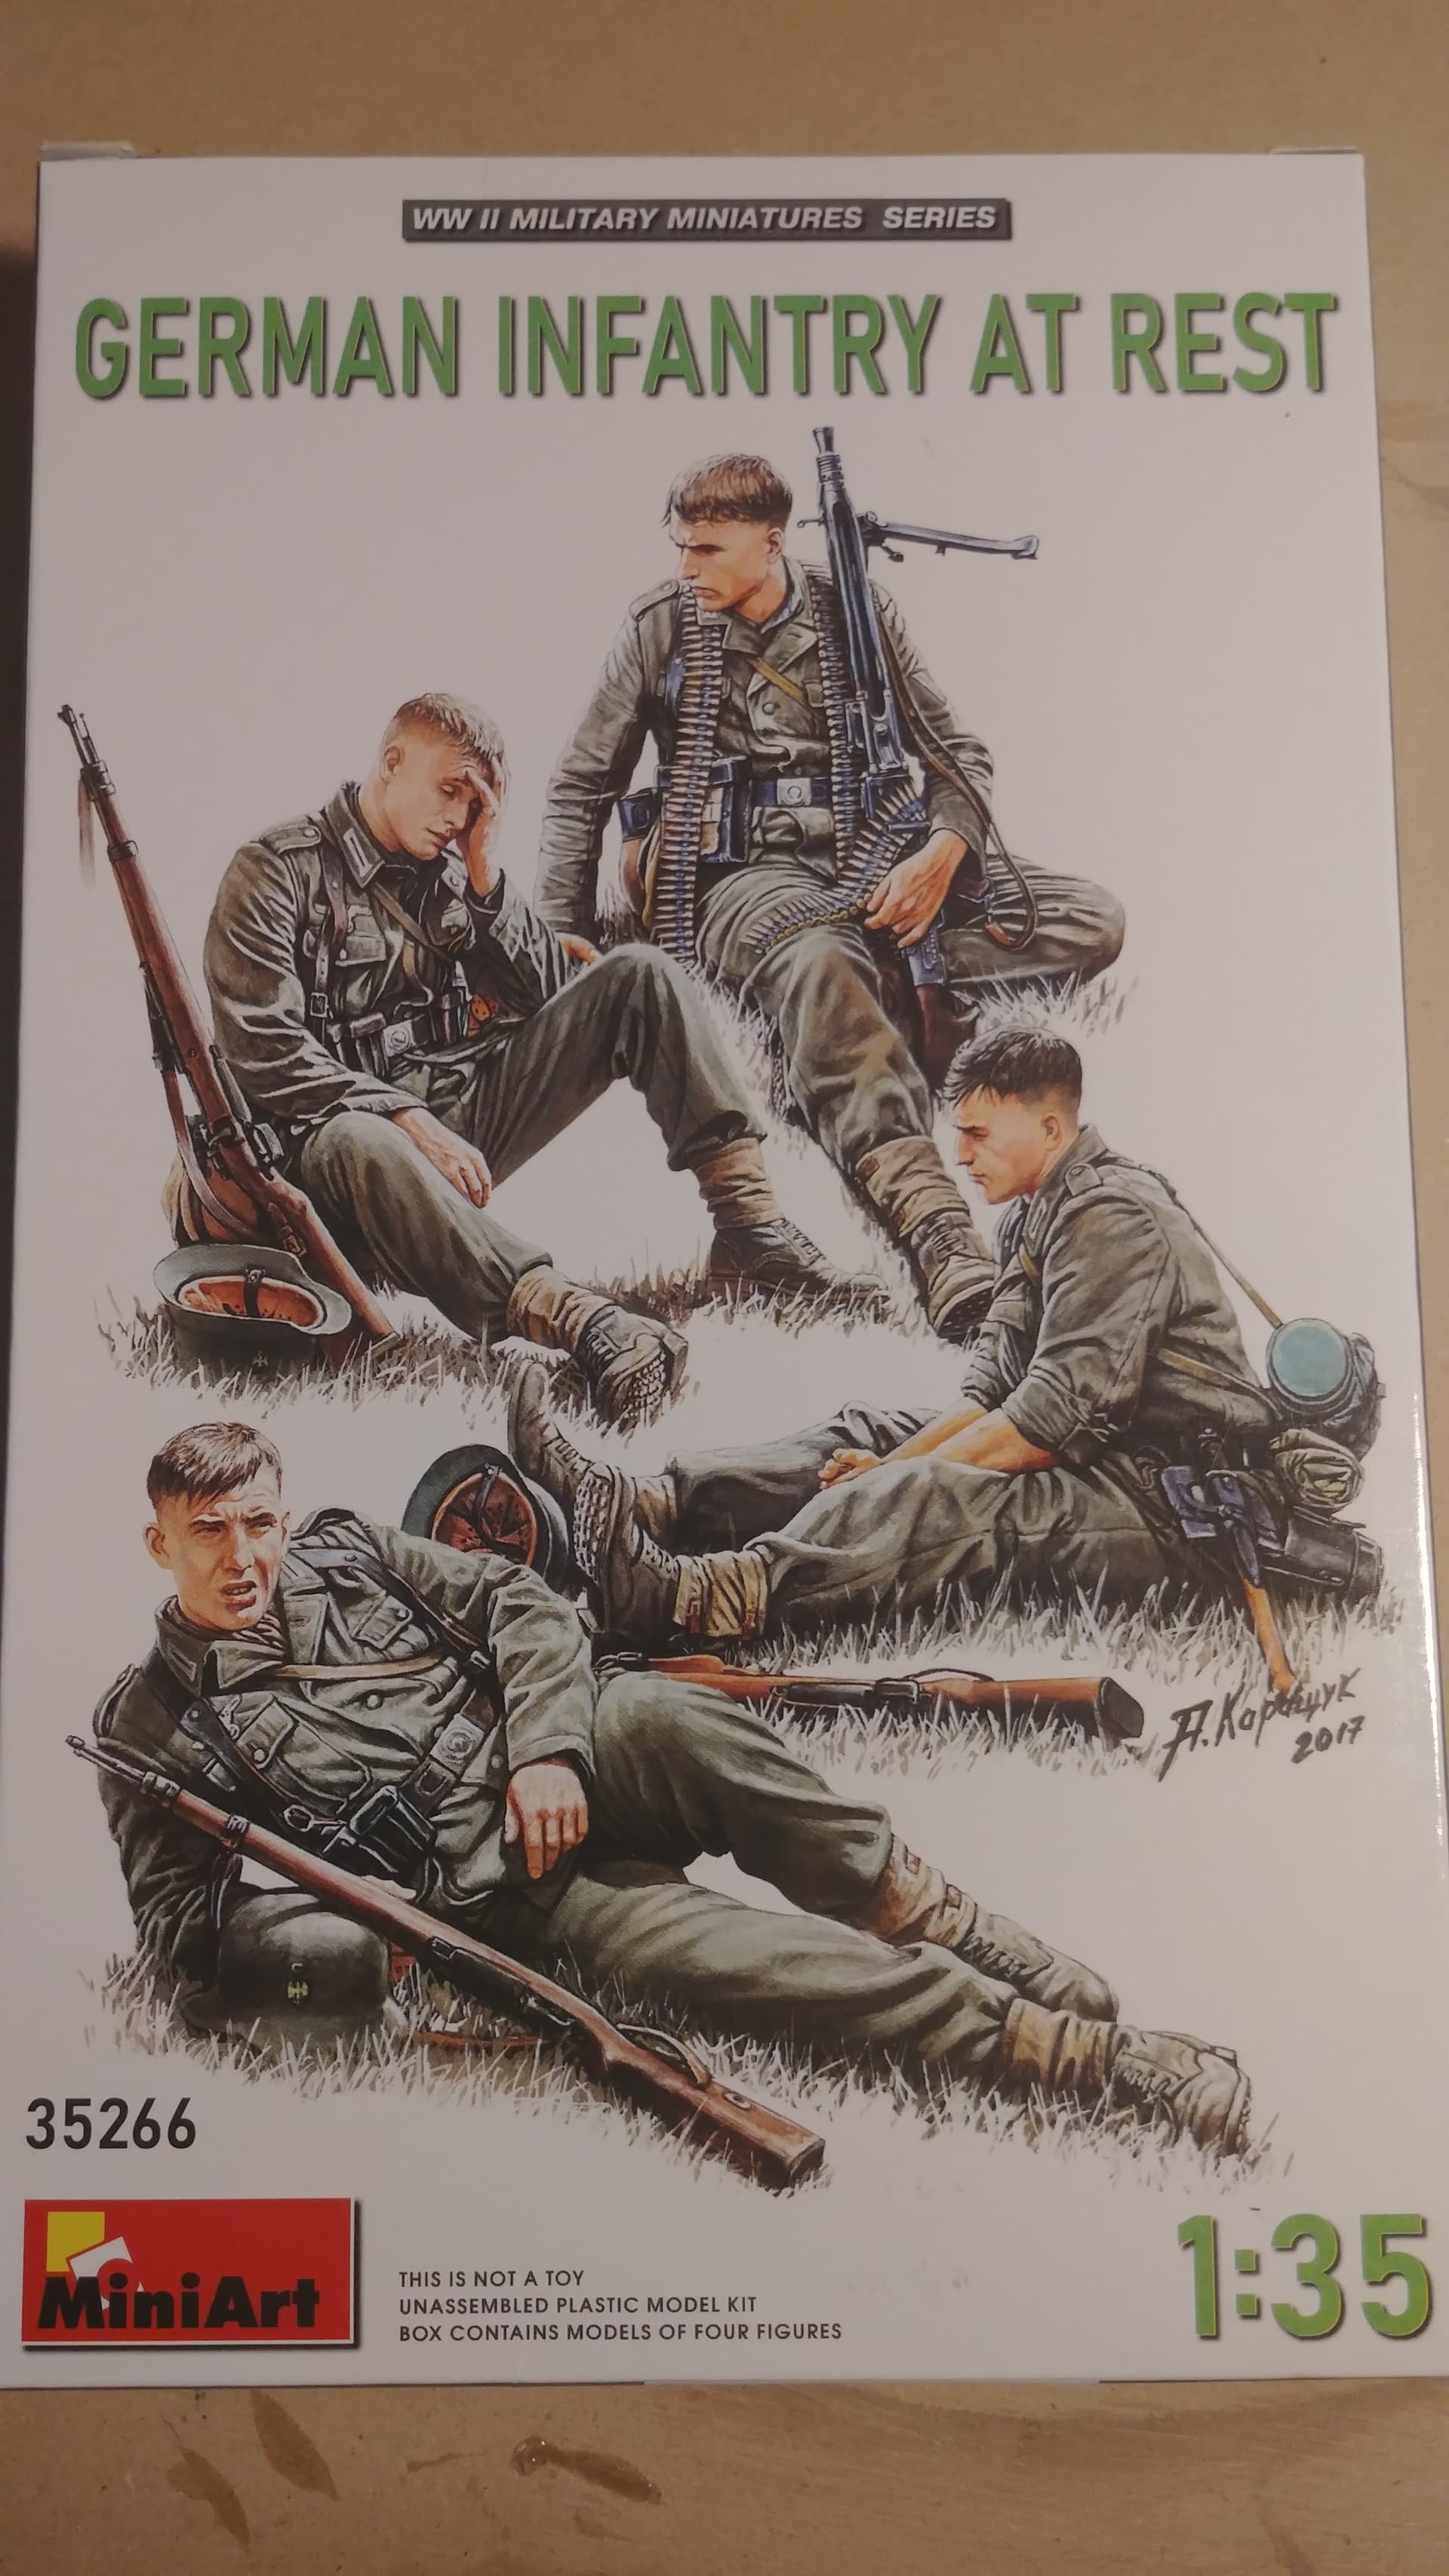
I’m going to give 1 or 2 of these a go, they look like nice figures compared to the 70/80s Italeri and Tamiya I remember. Hopefully I can do them justice.
Tom
5 Likes
@ Ivanhoe6. You’re quite welcome! Glad you enjoyed the tutorial.
@ Haggisbasher. Welcome aboard! Looking forward to your work.
1 Like
First, welcome to the campaign Tom. We just started 23 days again so your good to join and we go till September so plenty of time. As for how it works, folks post one photo of the plastic in your case, then at least one in progress photo along the way but we like to see more and one completed photo on this thread. You can post more in progress in this thread or create a new thread in this campaign group. That is up to you, my recommendation is in this thread if only planning on doing a few photos total.
2 Likes
Thanks
I will definitely post some pics of my progress Hoping to start basic assembly and clean up tomorrow.
Tom
3 Likes
It’s done!
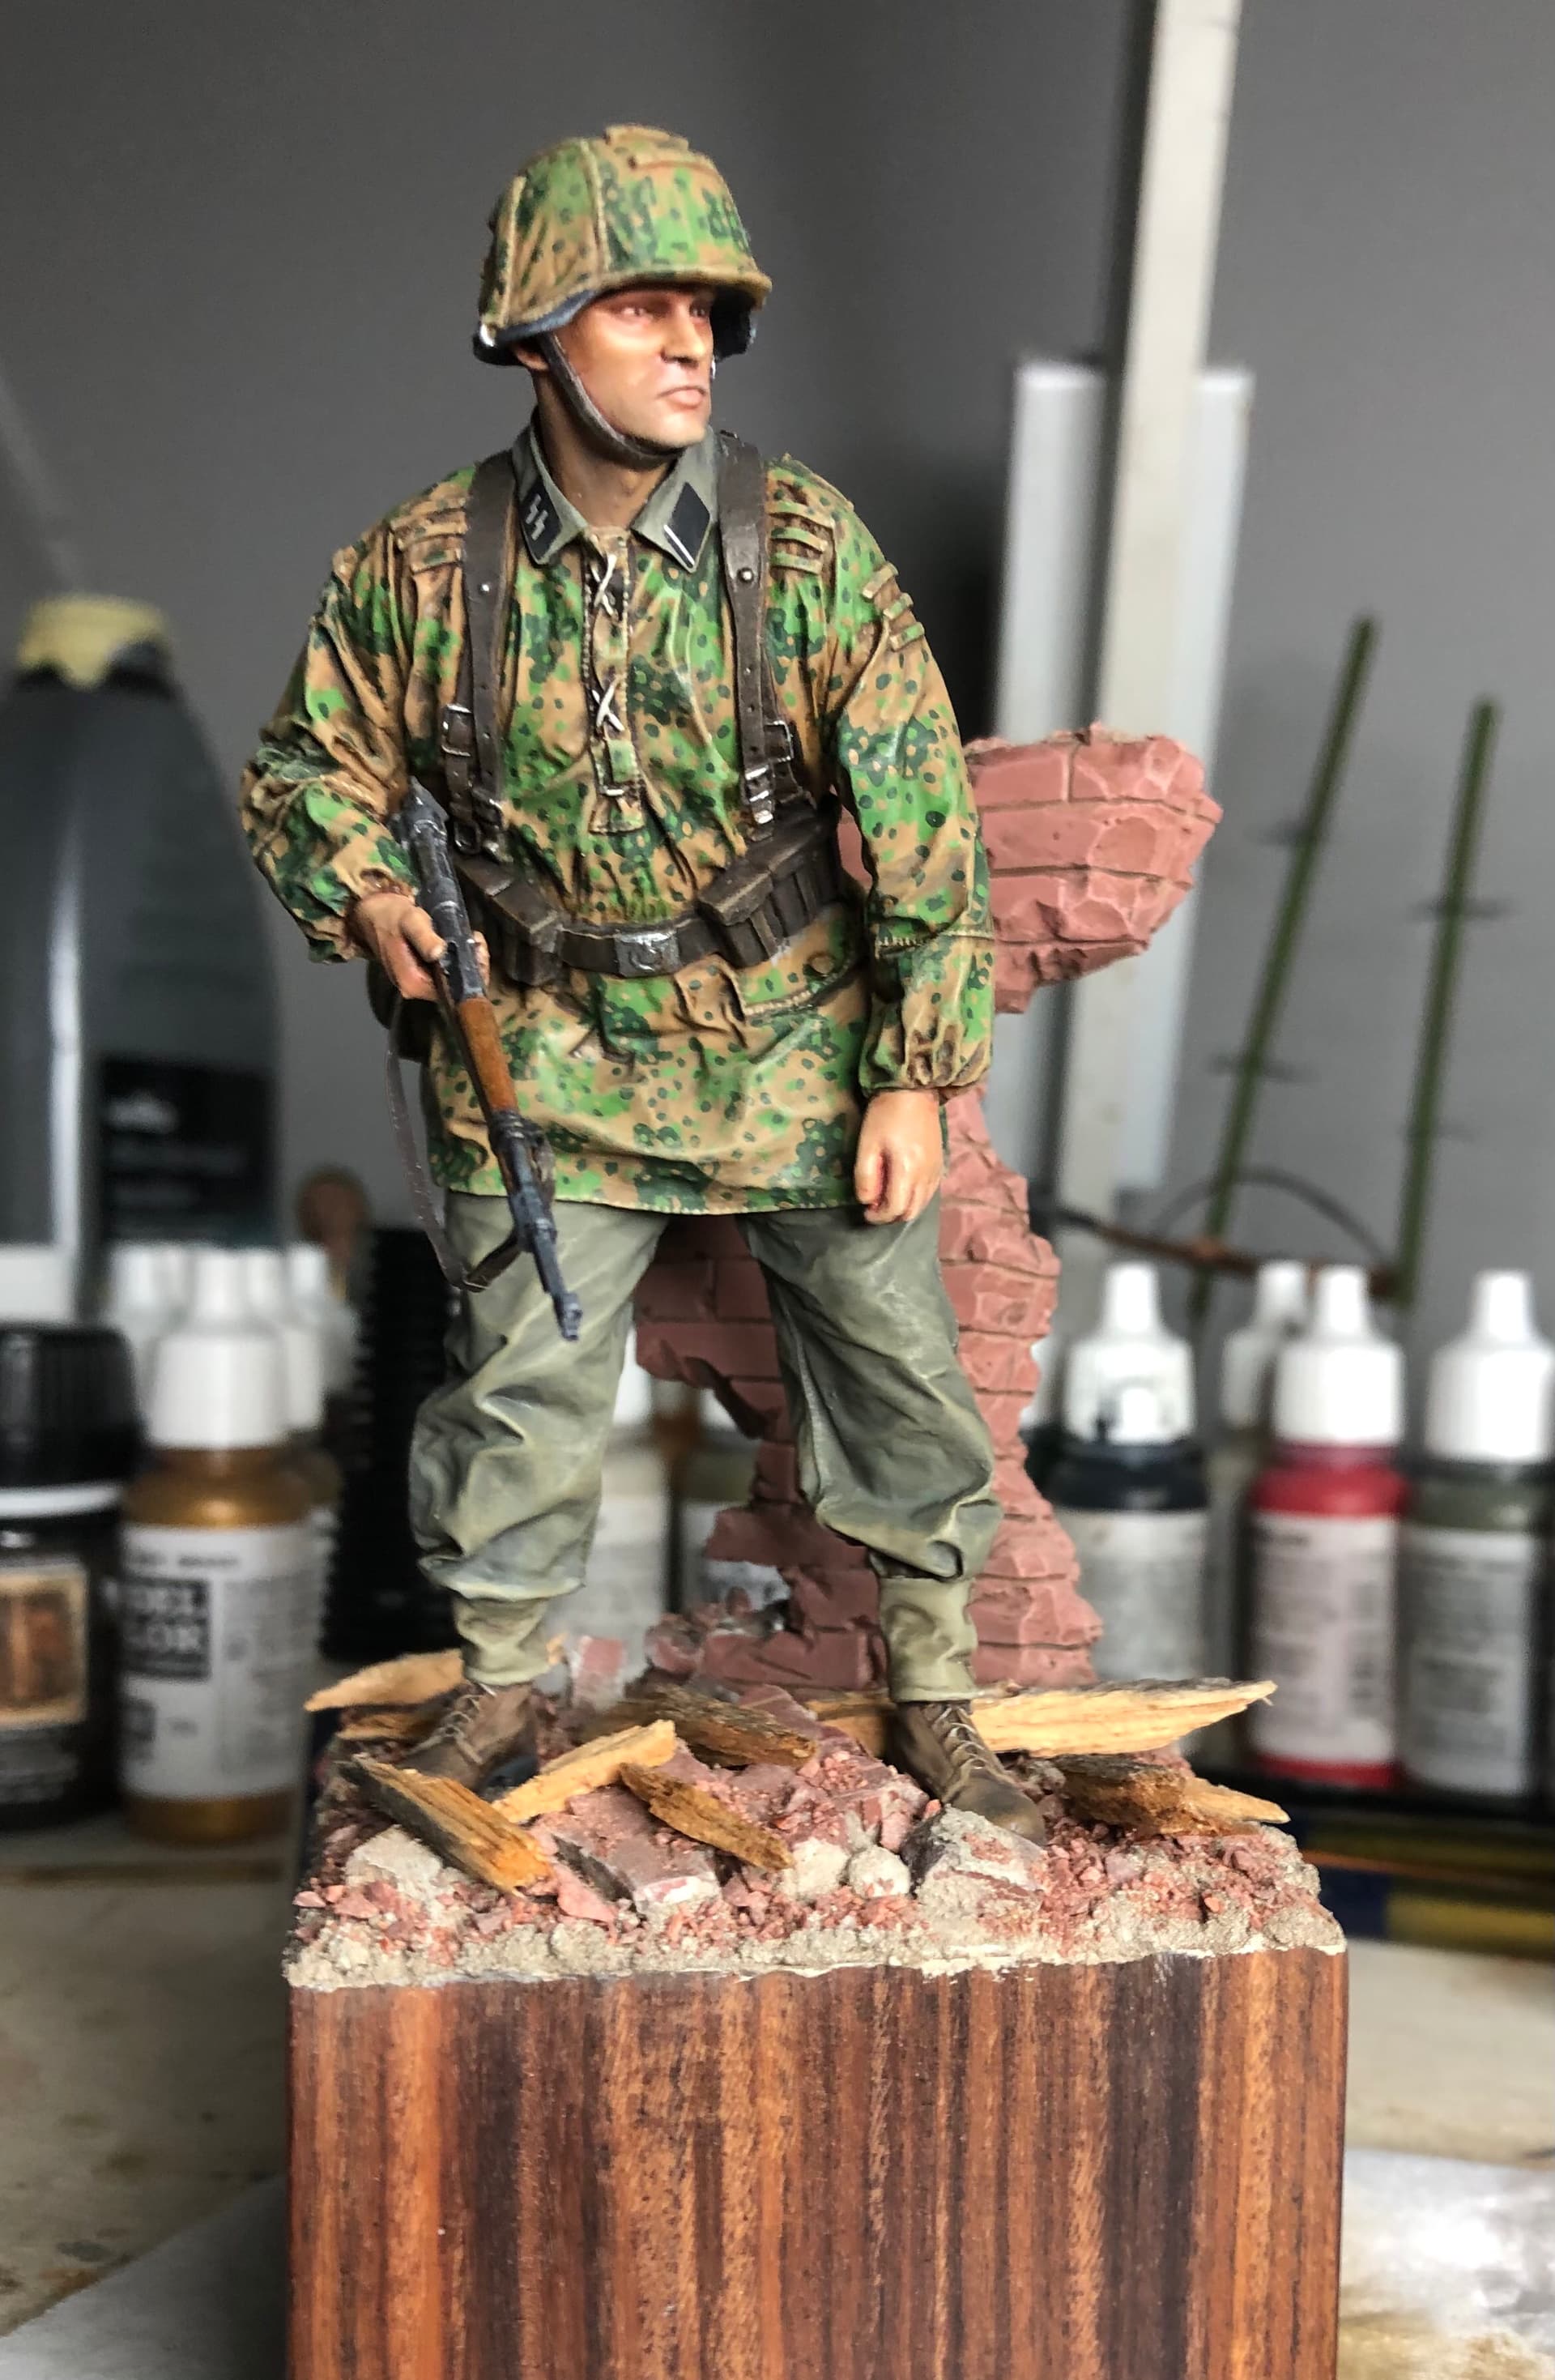
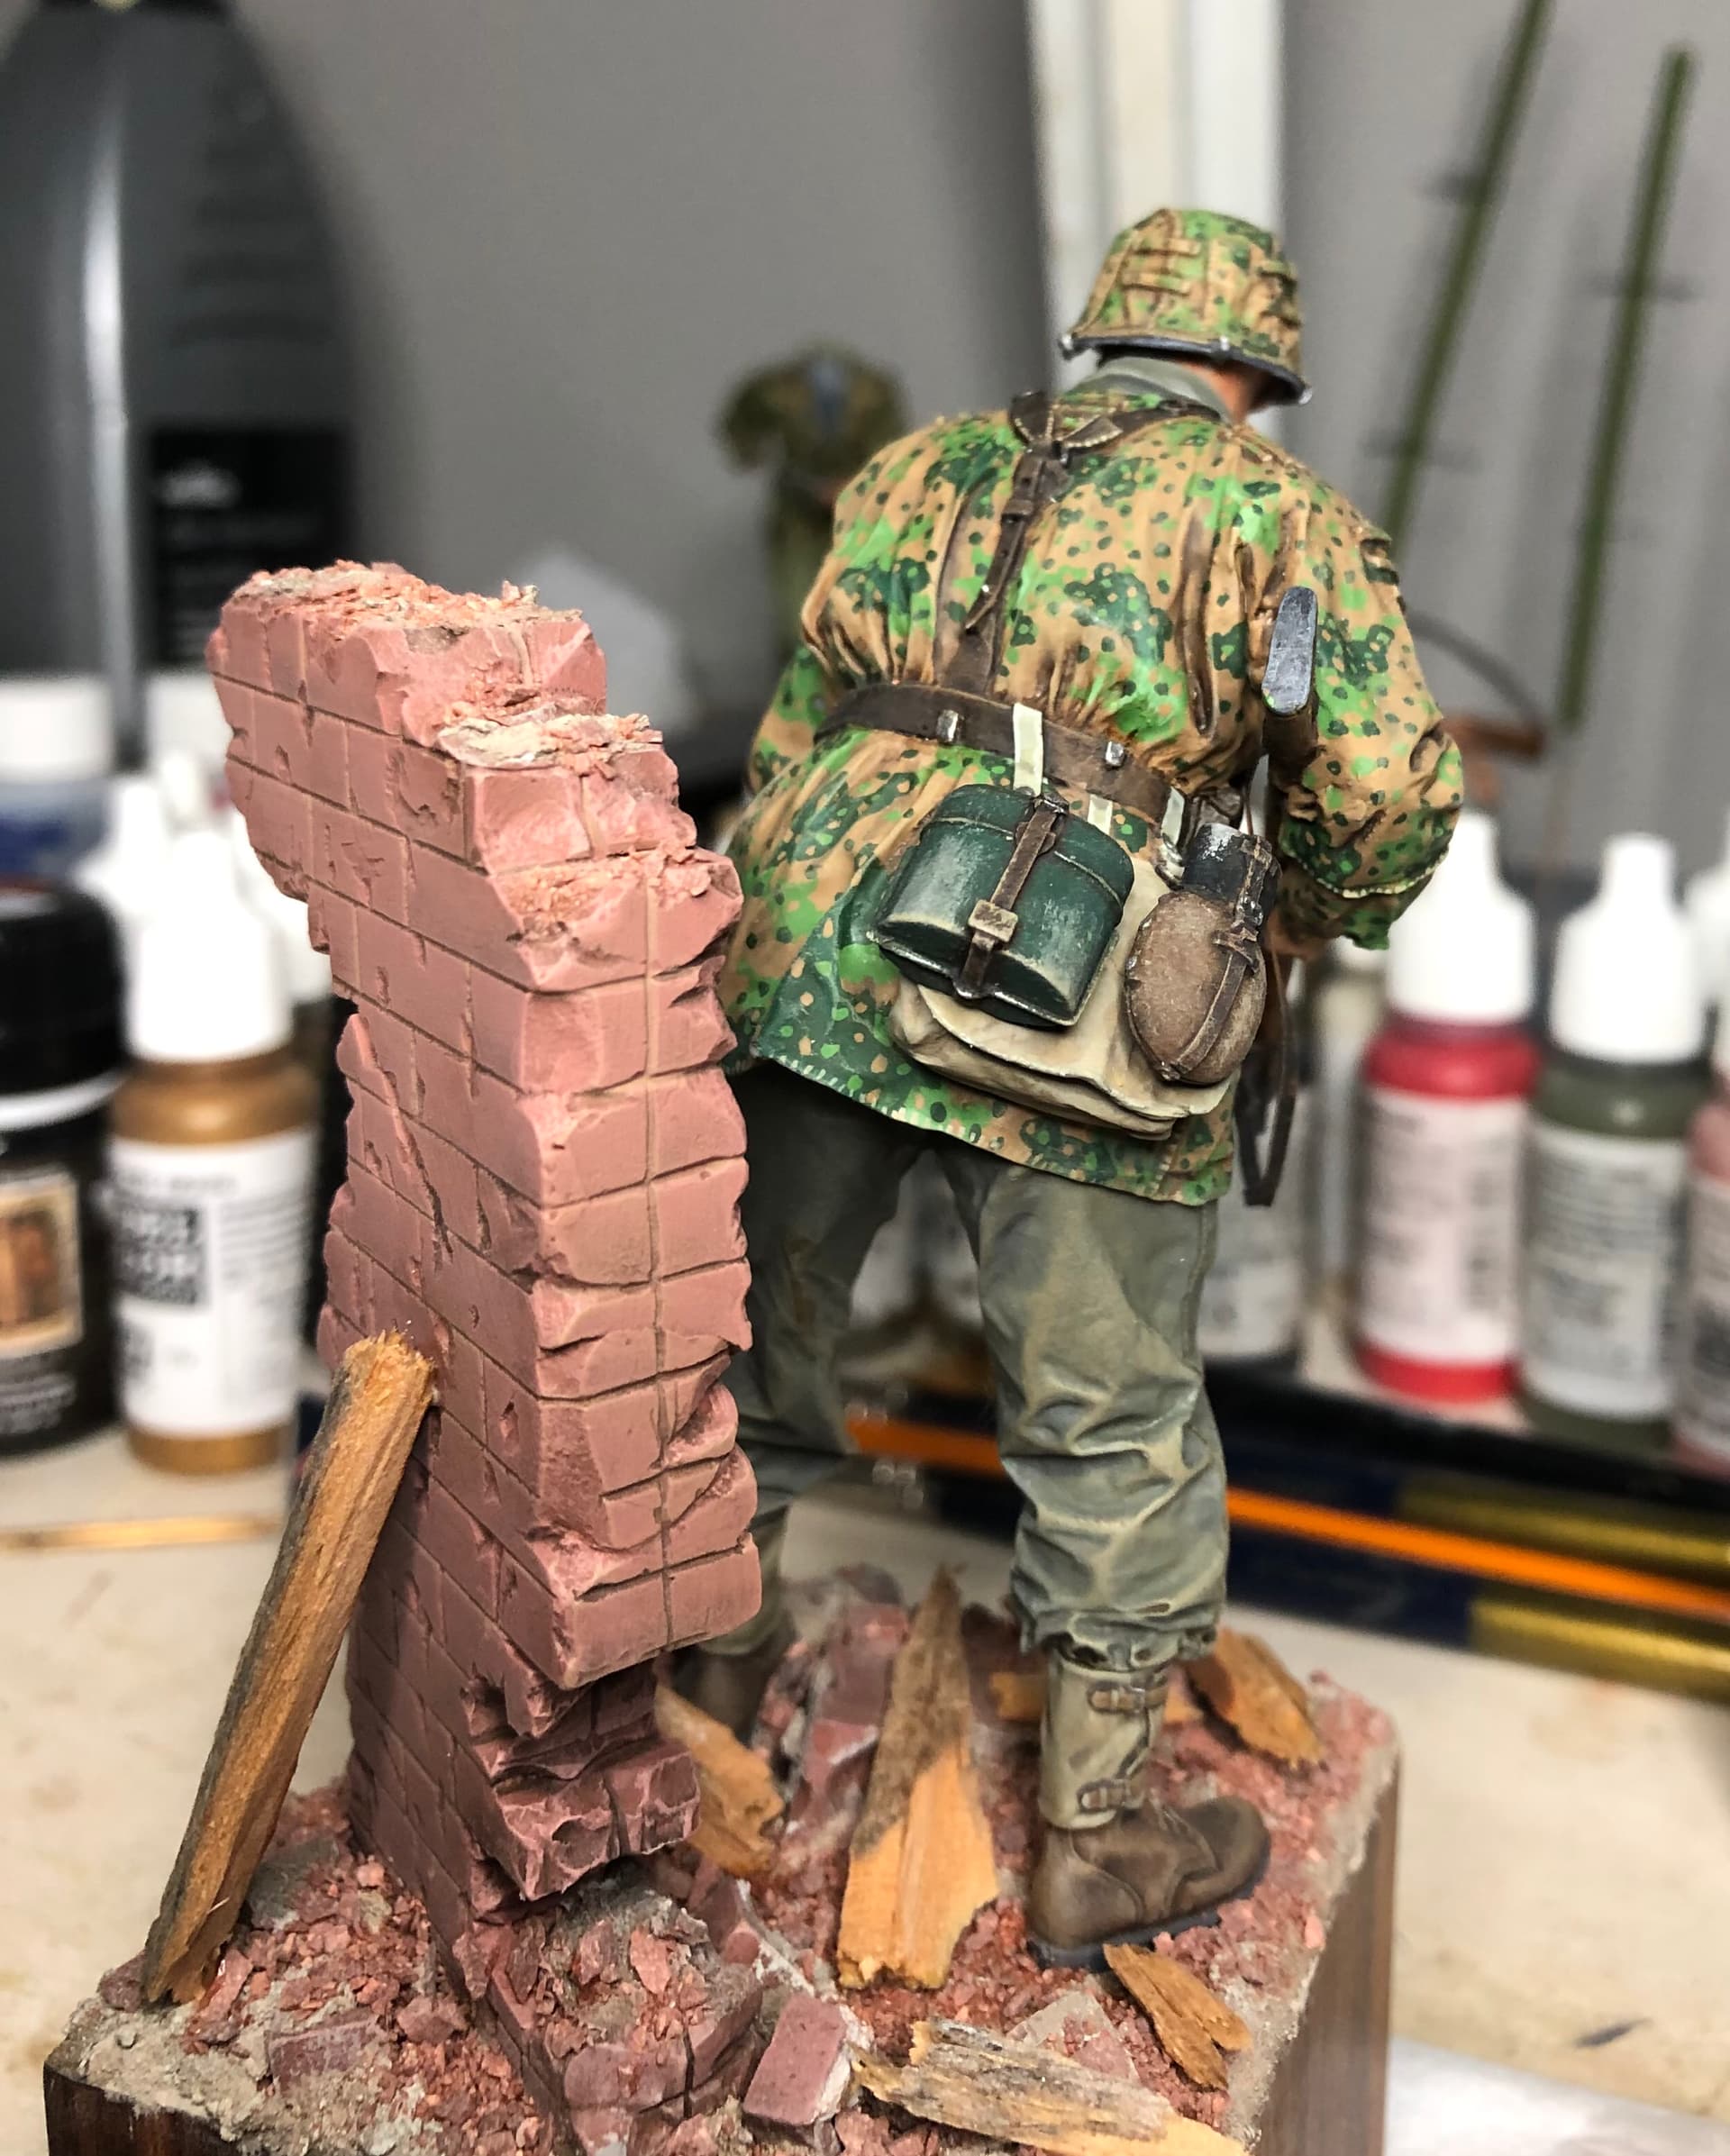
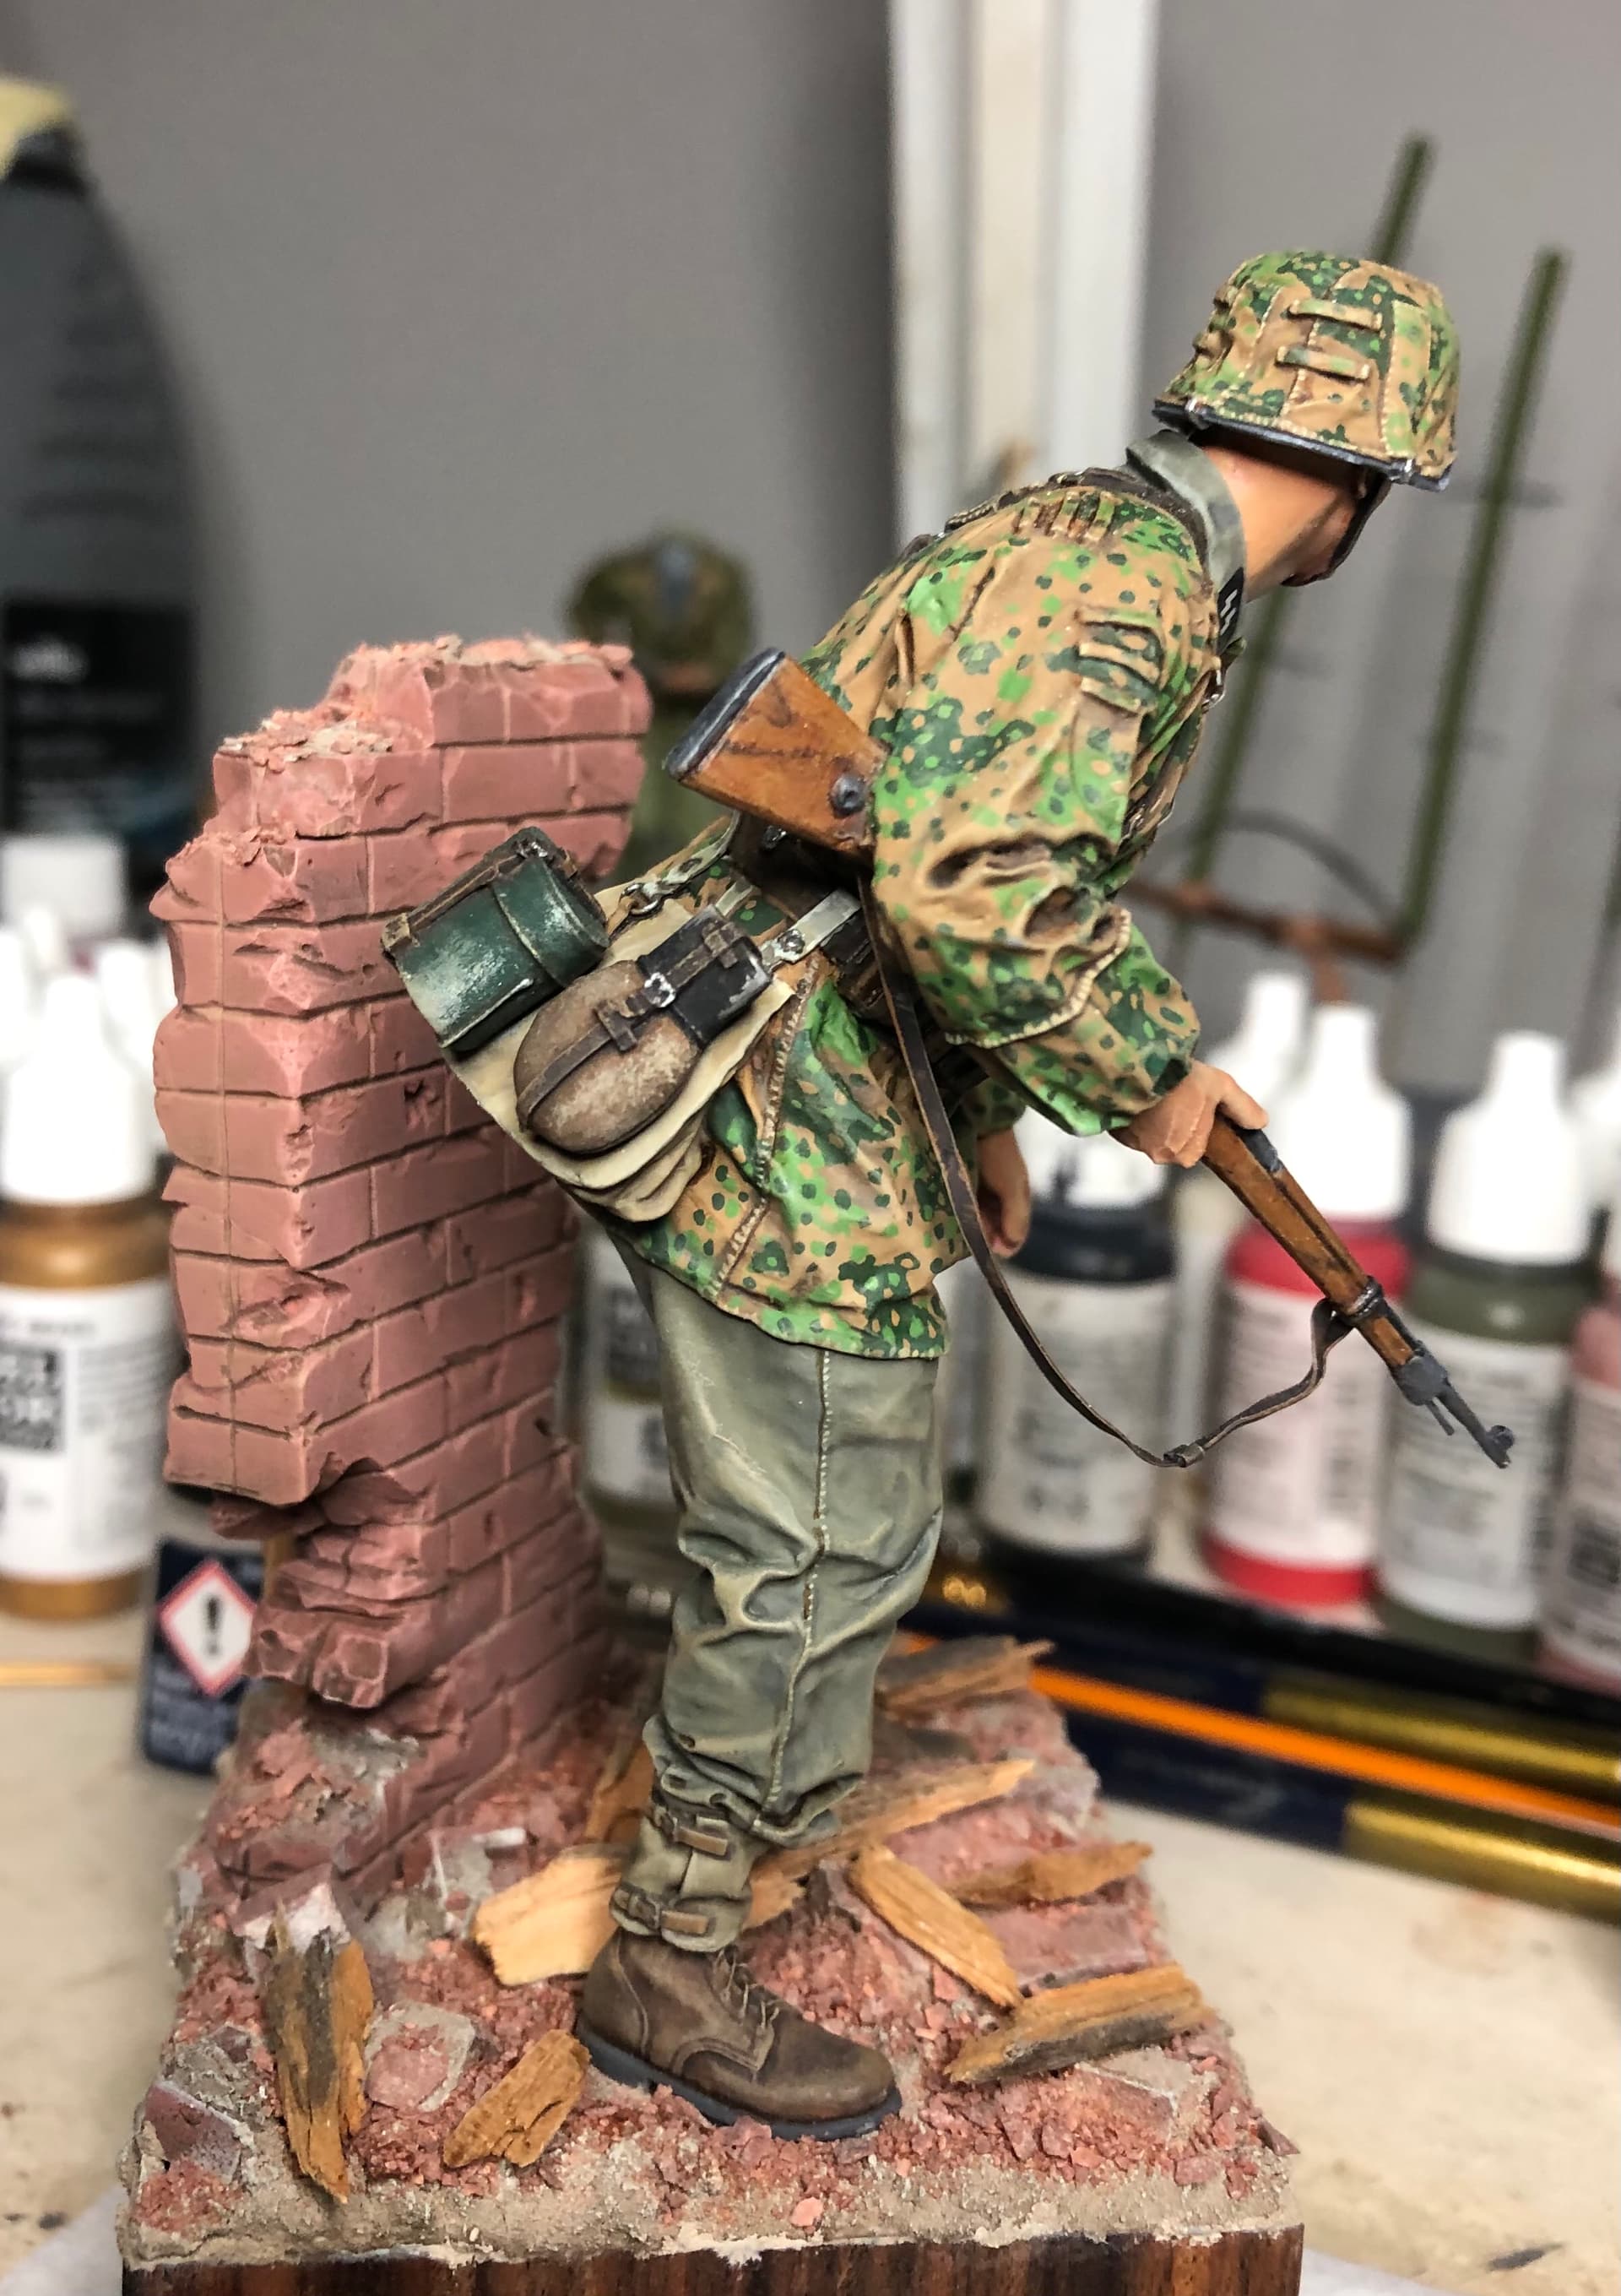
Sorry they’re only phone pics. I’ll try and get some better ones soon.
Now, what’s next……
G.
9 Likes
@ Lazarus. Nicely done! … Looks like he’s cautiously rounding the corner. Be careful whenever you enter your display area, you might get shot!
Hmmm.![]() You can paint all of my US GIs, Germans, Russians, and Civilians for me!
You can paint all of my US GIs, Germans, Russians, and Civilians for me! ![]()
1 Like