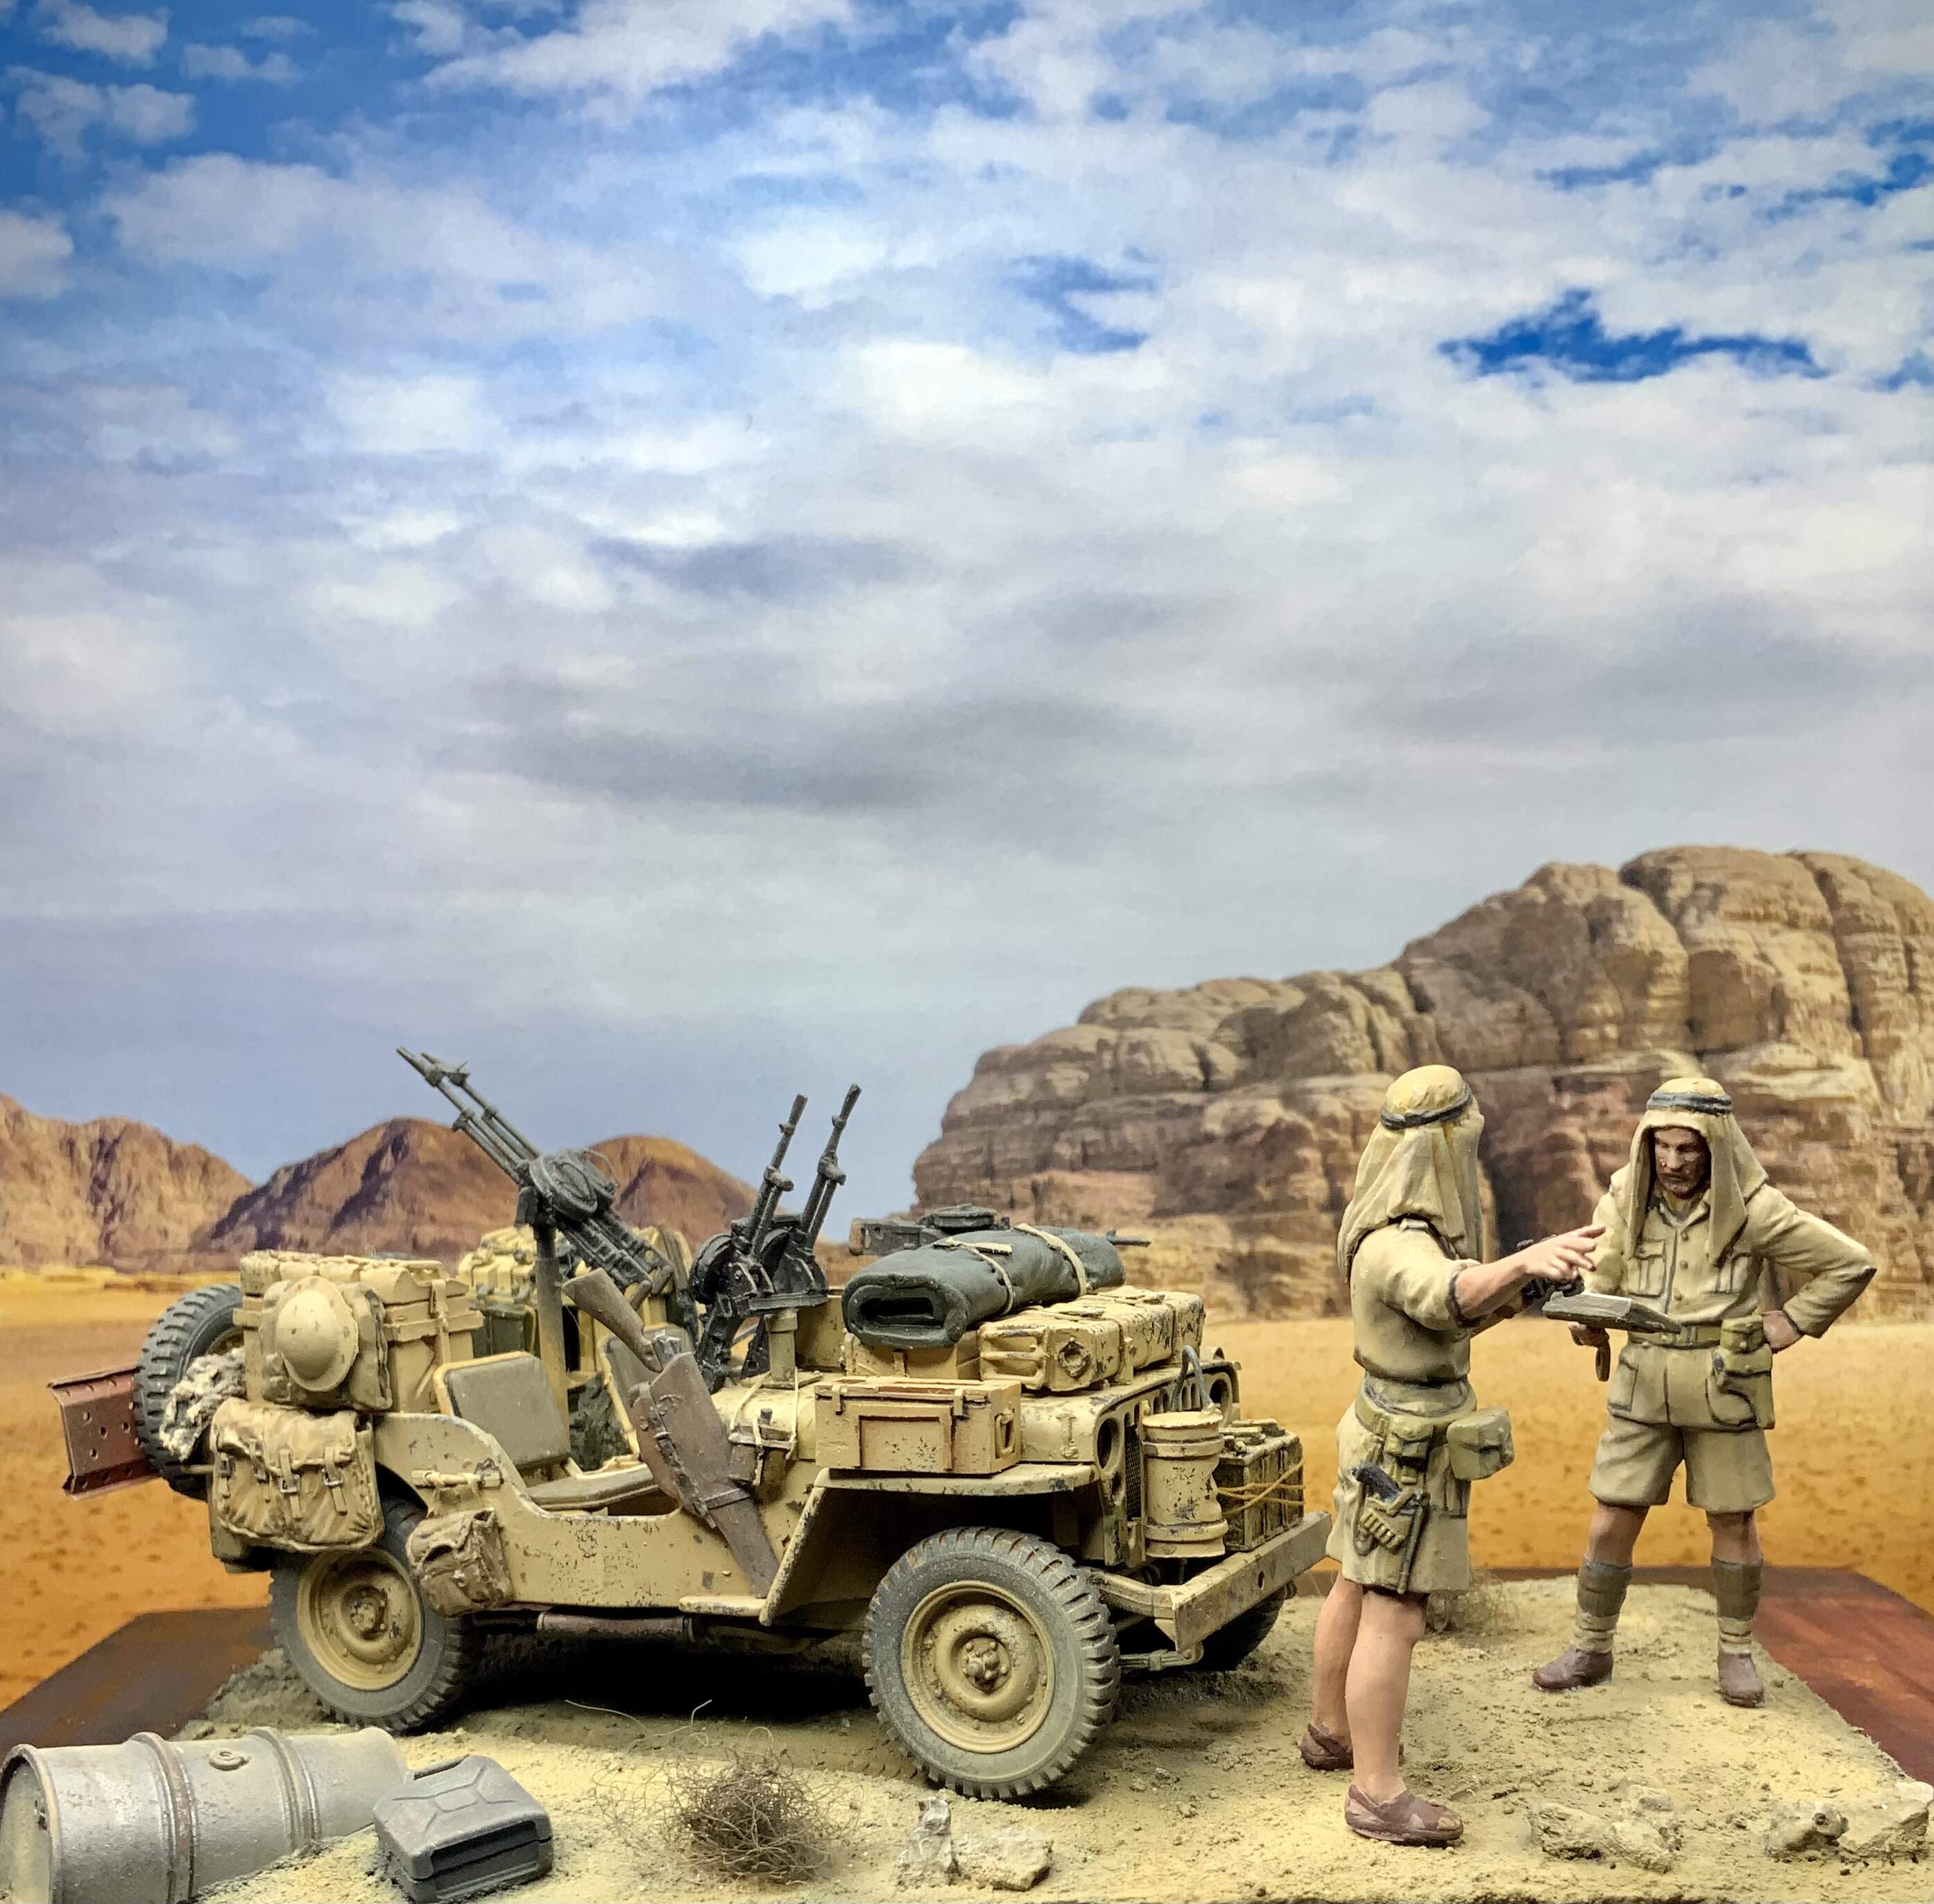
I have not made a build thread in years on this page and thought it was about time to do that again… I’m usually not a WW2 guy, except for some planes, but the BBC show “Rouge Heroes” inspired me to build a SAS Willys. After all, the SAS raider vehicles is pretty much like the gun truck I ran in Afghanistan almost 20 years ago.
I have built a SAS Willys jeep before, during a deployment in Lebanon in the late 80ies. It was the Tamiya kit and I remember being pretty proud of it, even though it was hand painted in bad light in a dirty container on a UN OP. This time I thought I should be a bit more advanced.
I started out with the newer Tamiya Willys as a base for the project. It is a better kit than the original SAS Willys, but in hindsight I should have opted for the Dragon Desert Raider release. I also had a Eduard PE kit for the Jeep and a Black Dog SAS conversion kit to make it a proper desert raider…
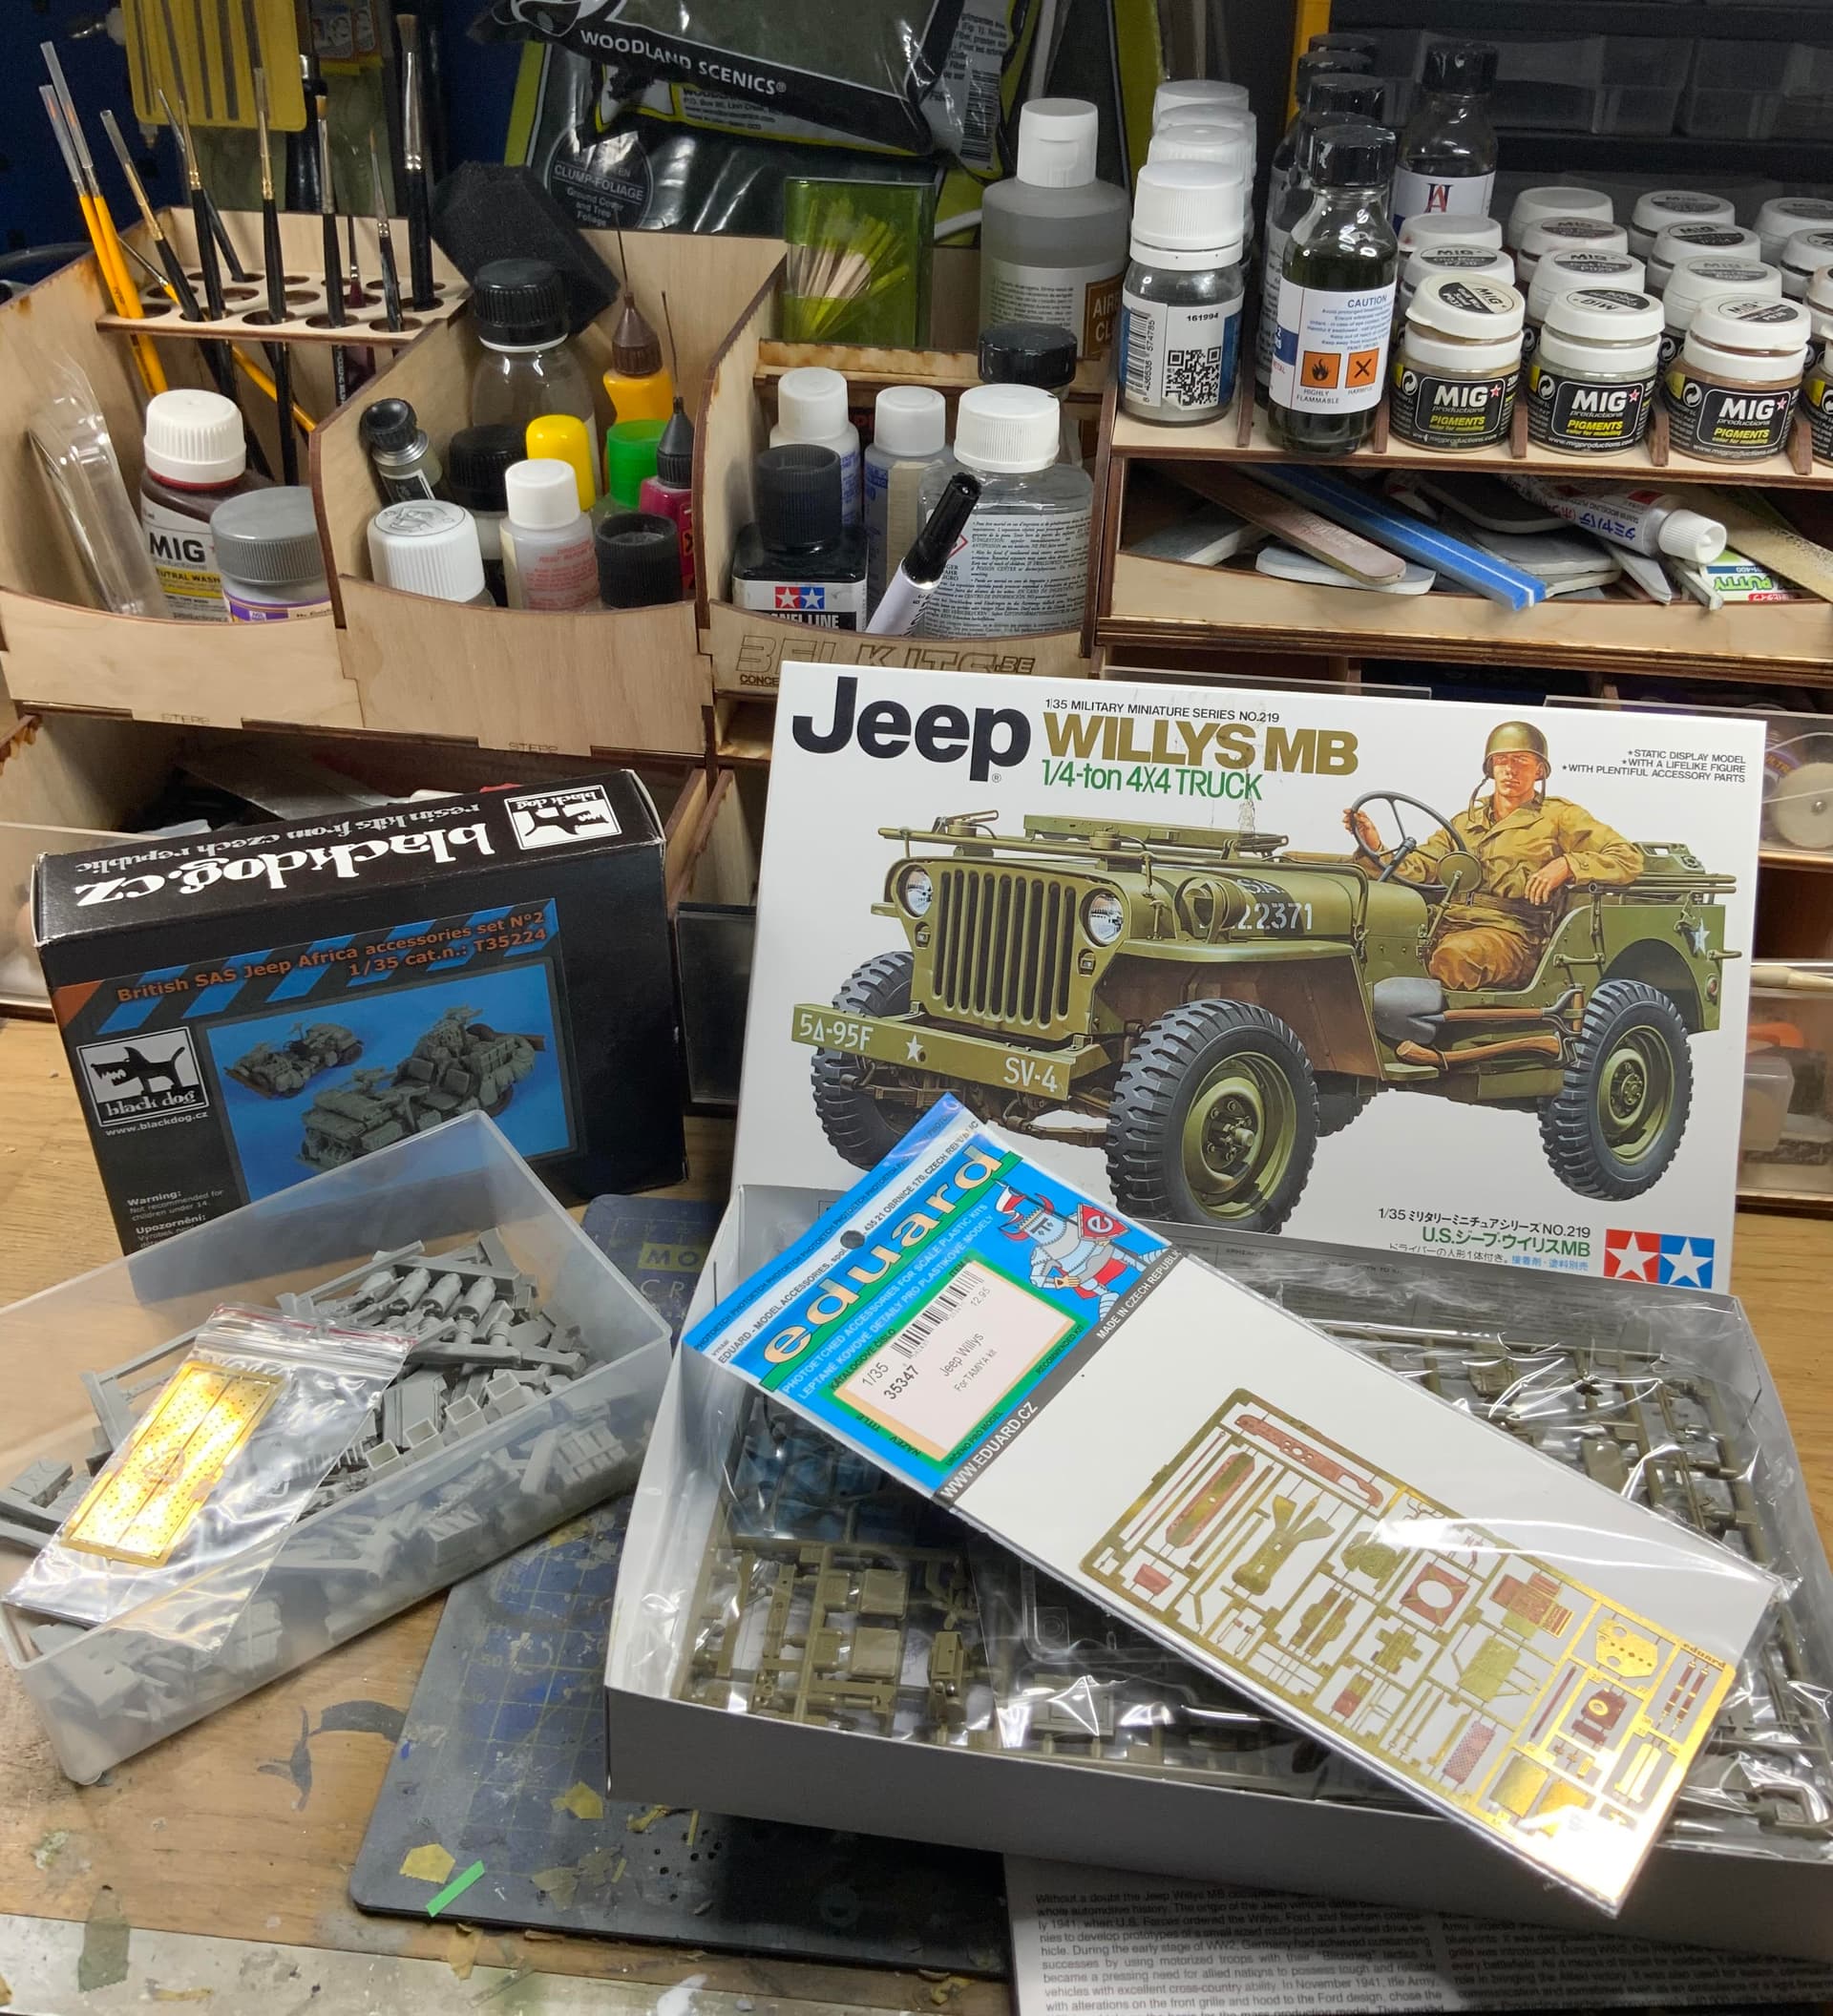
Before you run out and spend your money on the Black Dog kit, please don’t. It is of very low quality when it comes to moldings. The parts are very brittle and a lot of them were broken out of the box. Only good thing I can say is that it is probably enough parts to build two vehicles (if they were not broken…).
The building of the Jeep was pretty straight forward. As most Tamiya kits the fit is “shake & bake”
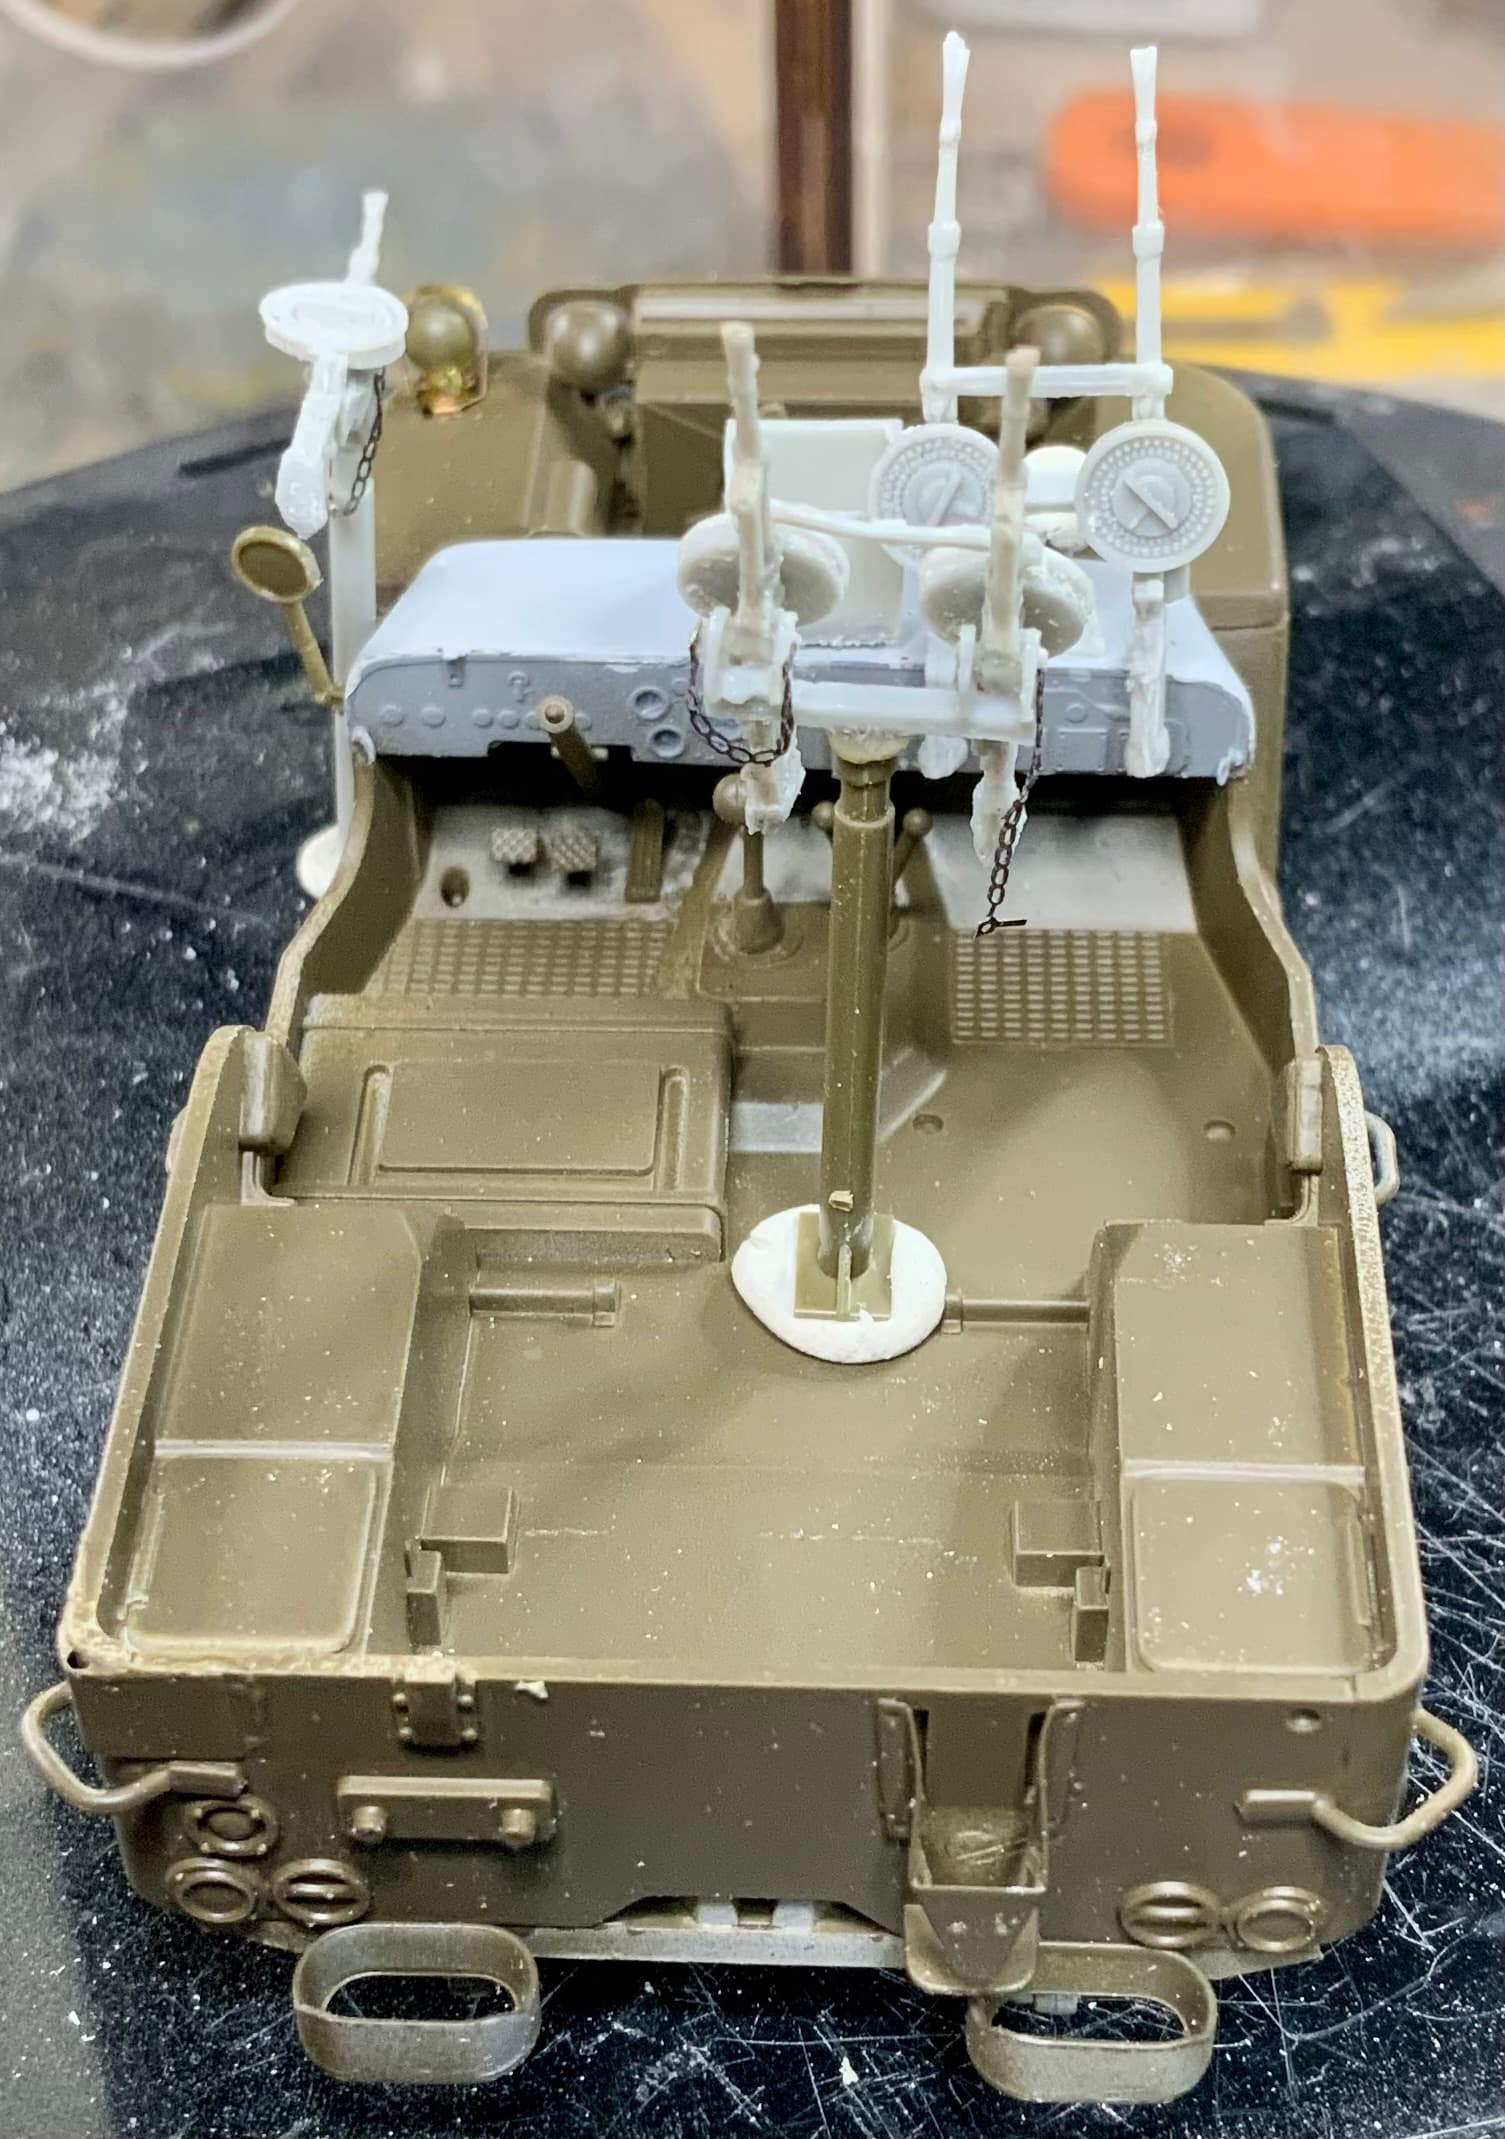
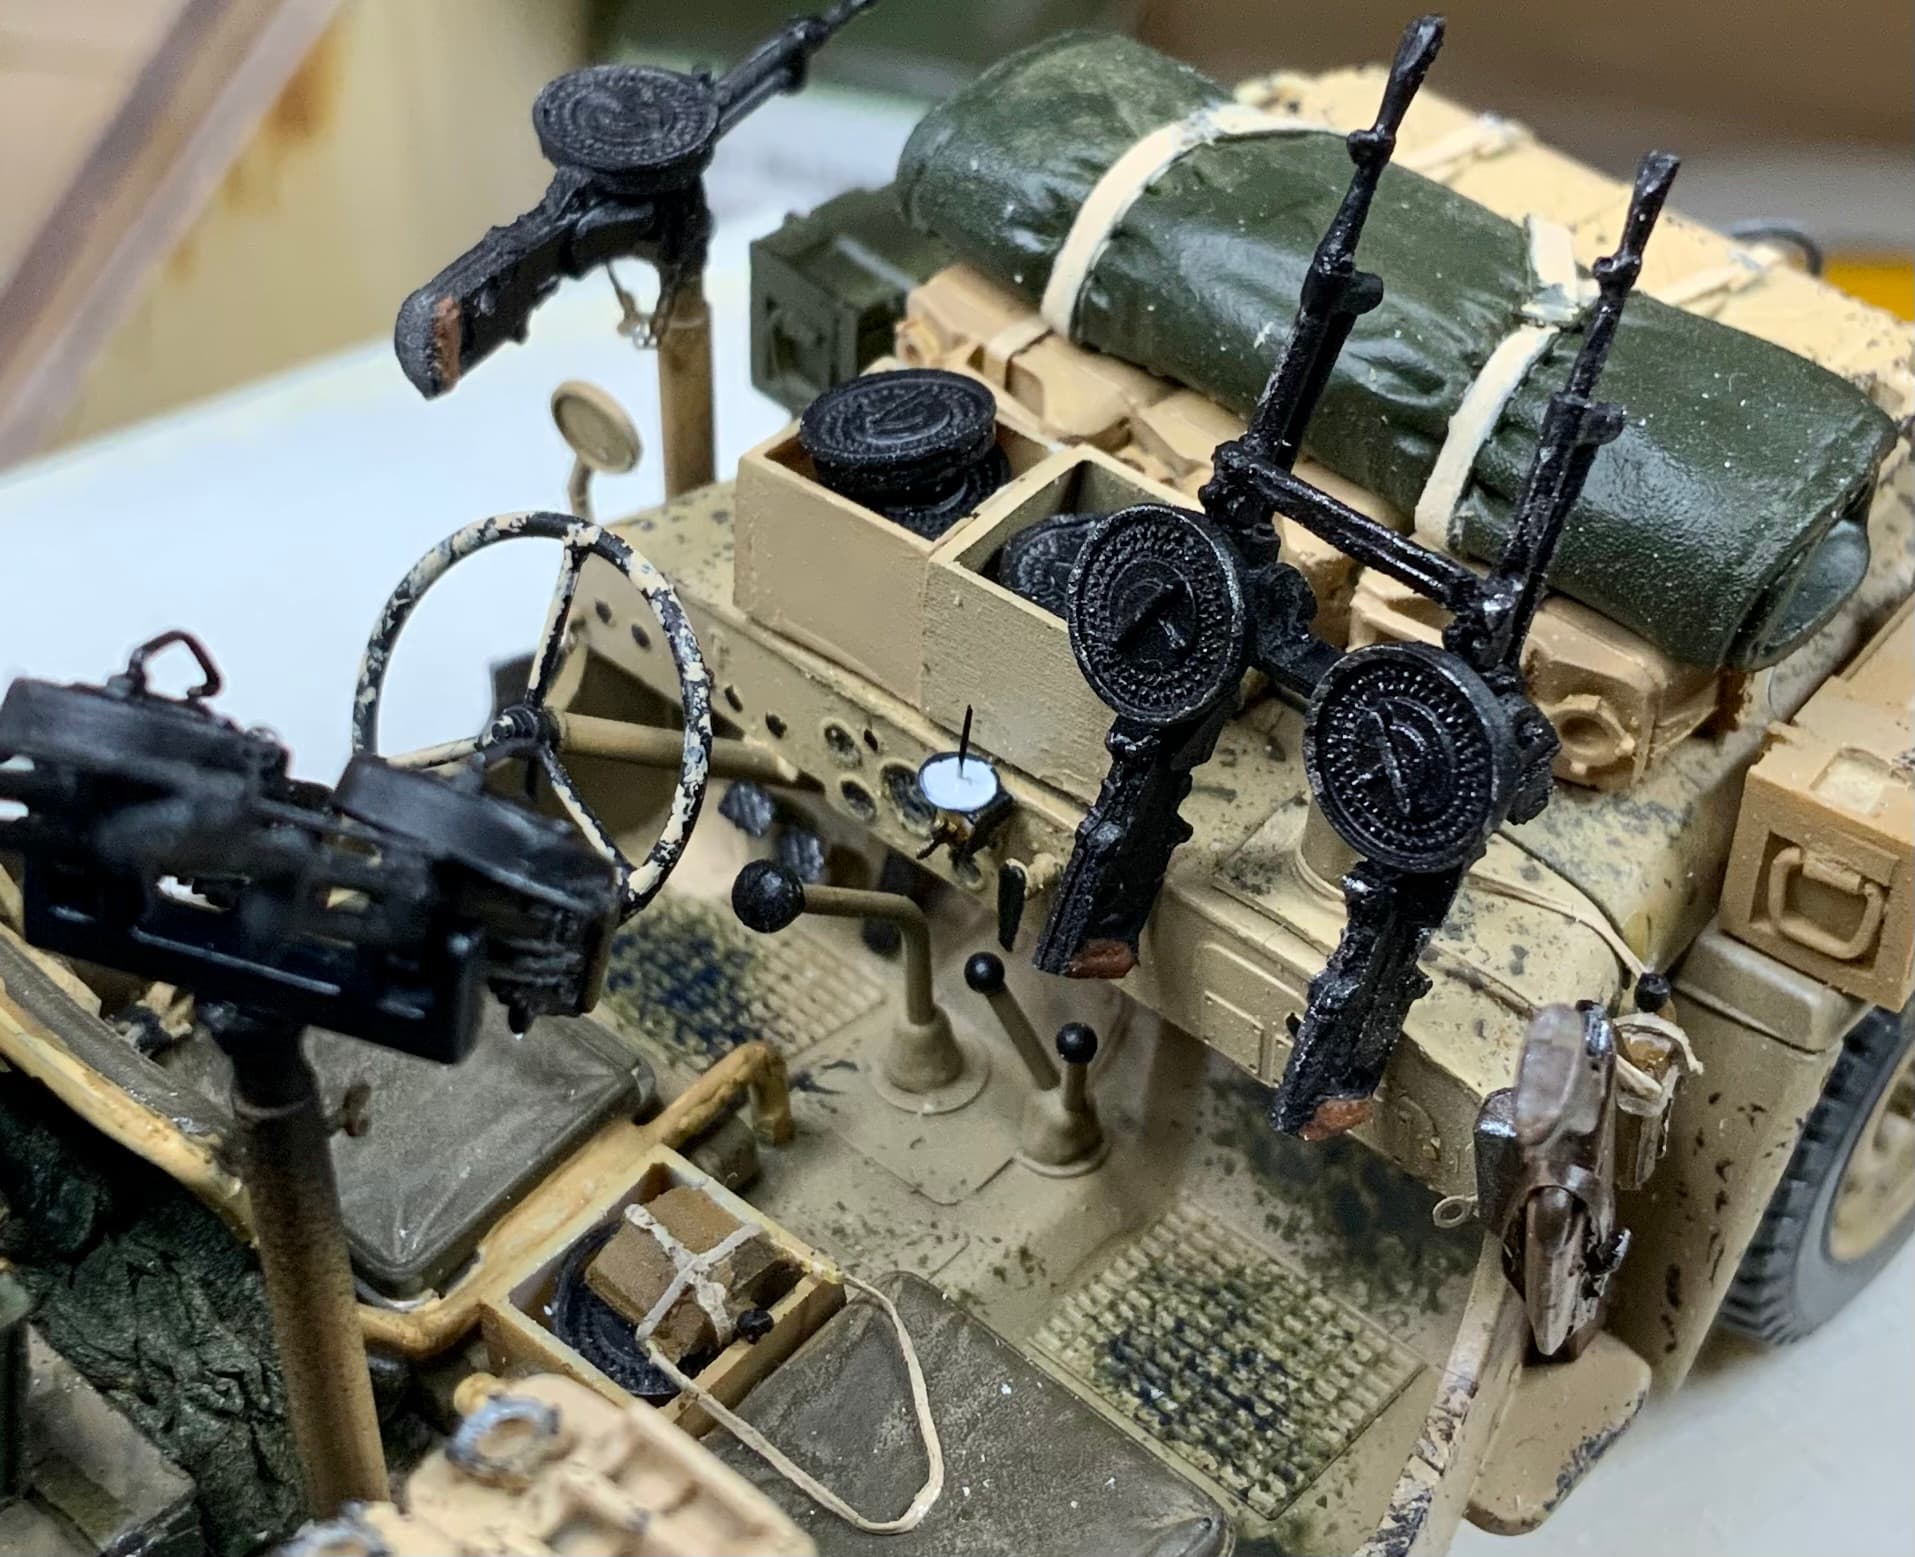
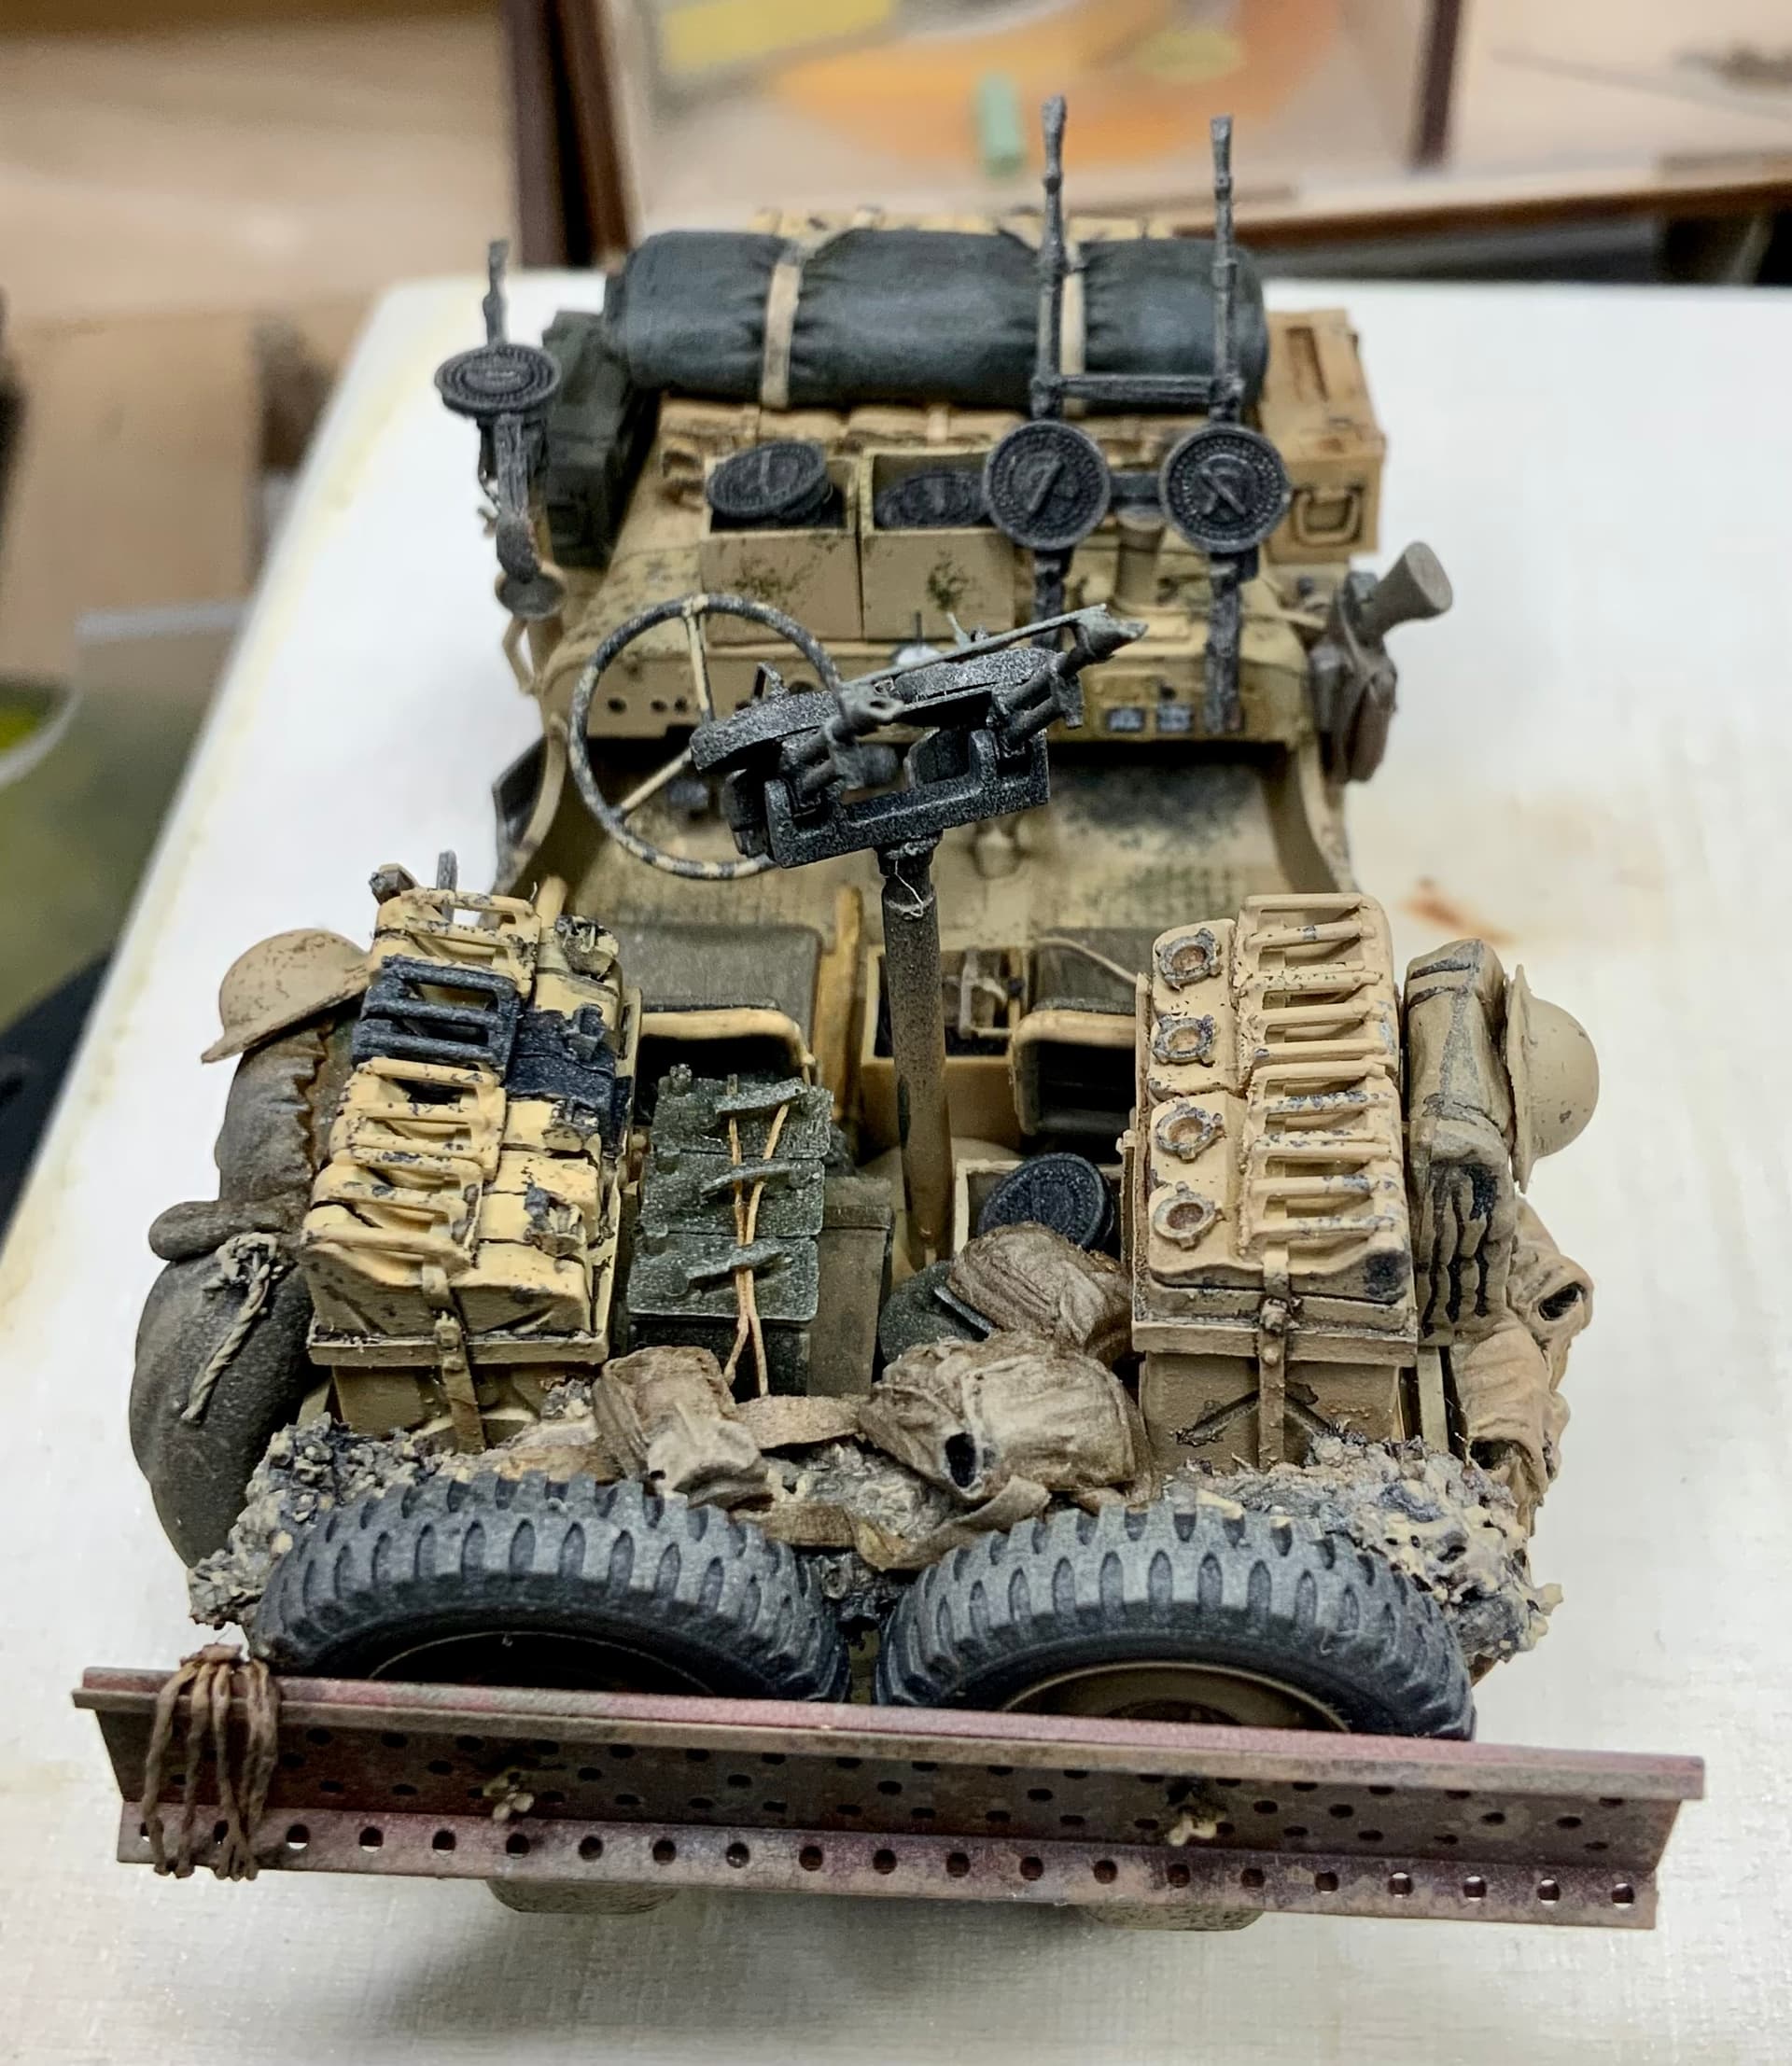
I did not do much work to the engine since the hood is closed and nothing can be seen. I used some PE for the cooler though. Dashboard is PE and the film with the dials make the dashboard pop.

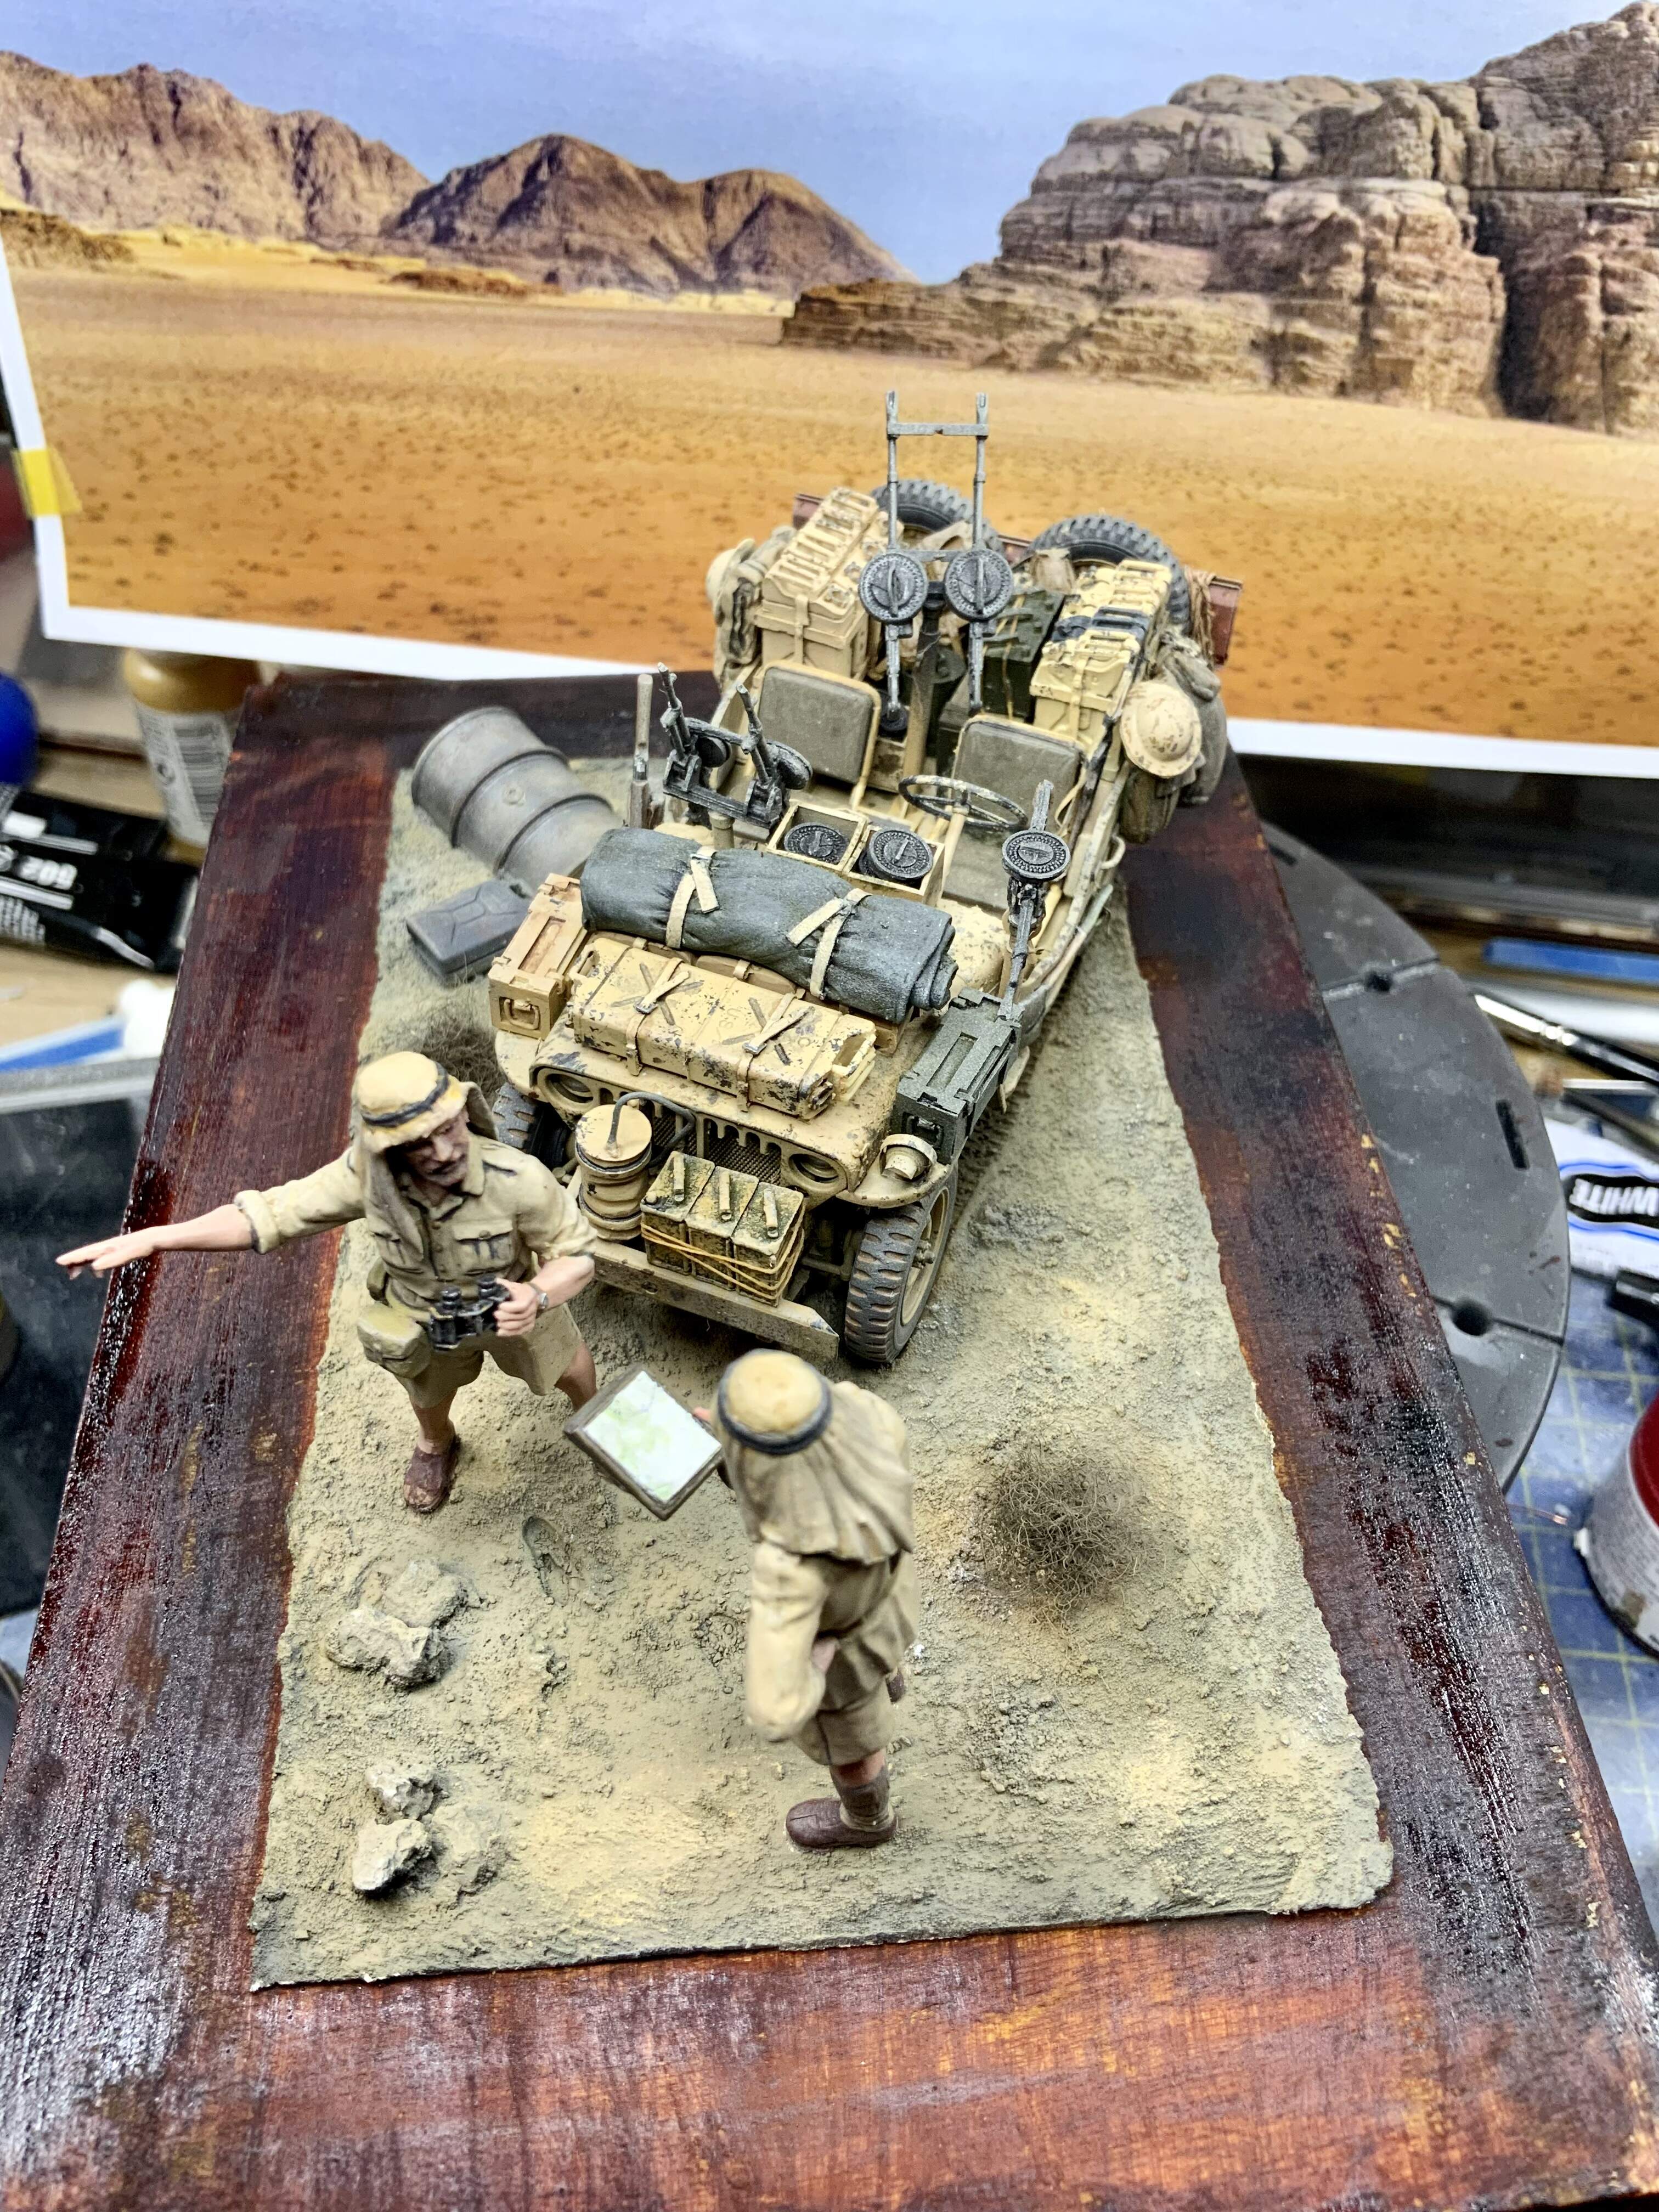
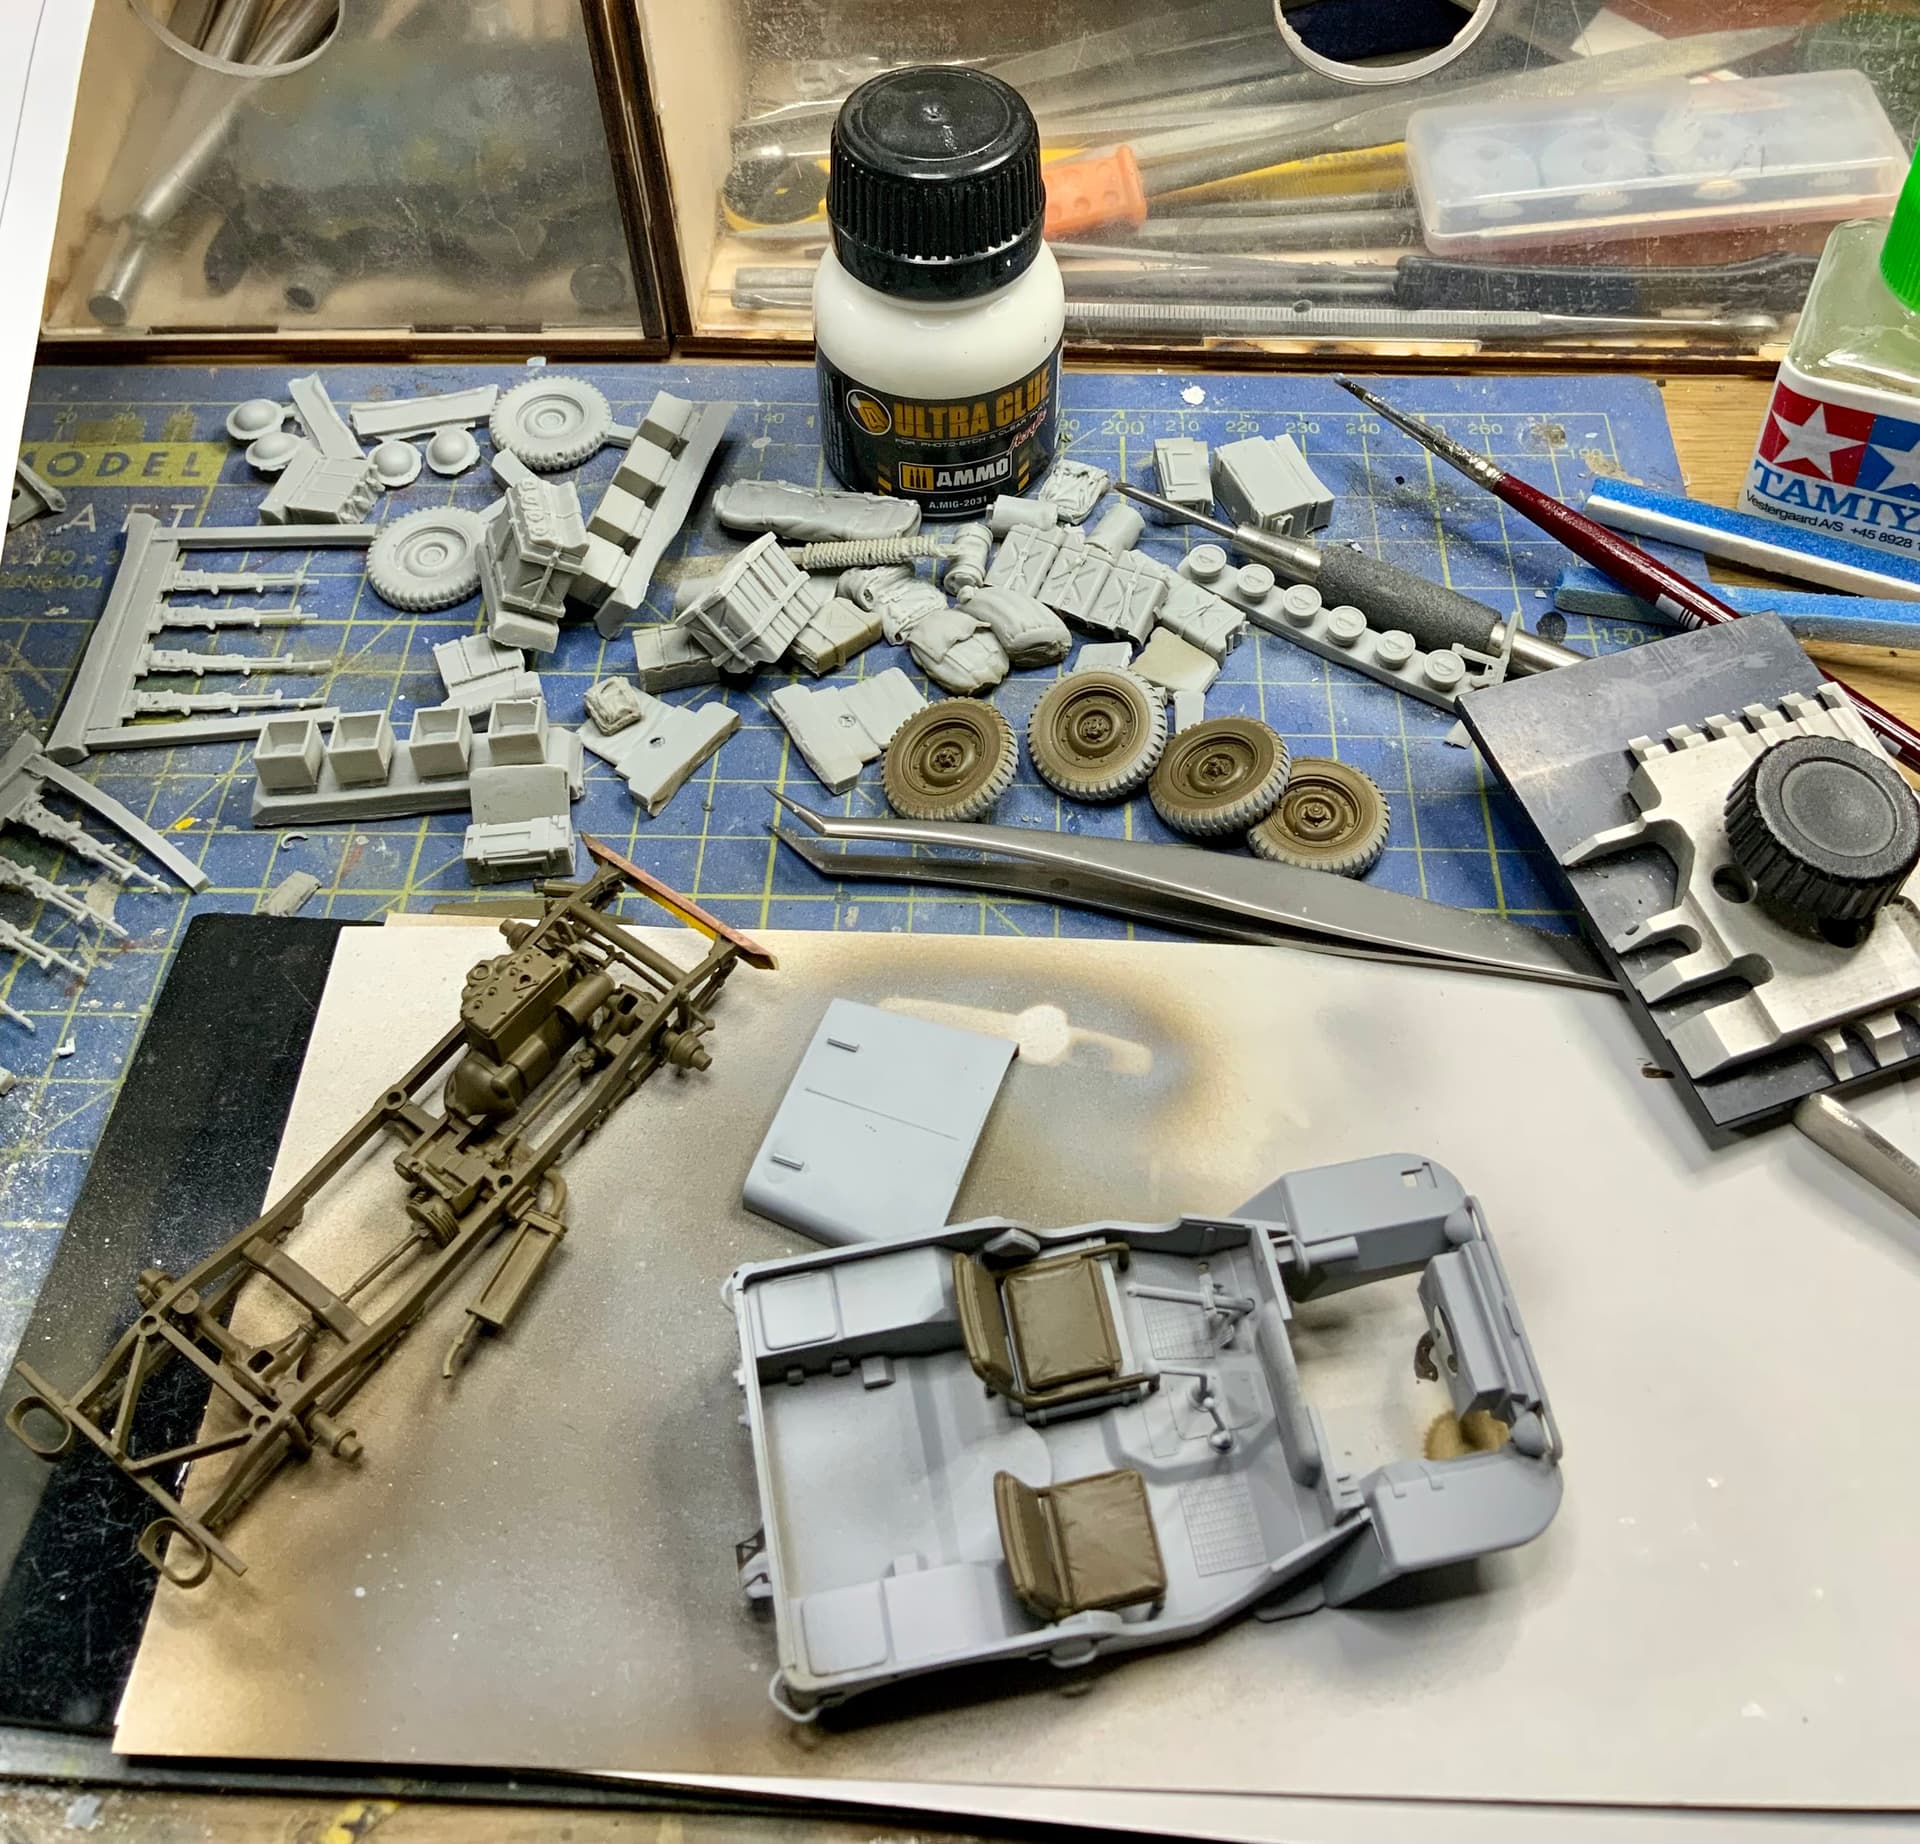
These pictures are at the “mock up stage” to get an impression of how the model will look.


BTW, I used Ammo Mig Ultra Glue for the PE. Never again super glue! I was really impressed by the Ultra Glue, giving me time to place the PE properly and when cured the bond is really solid.
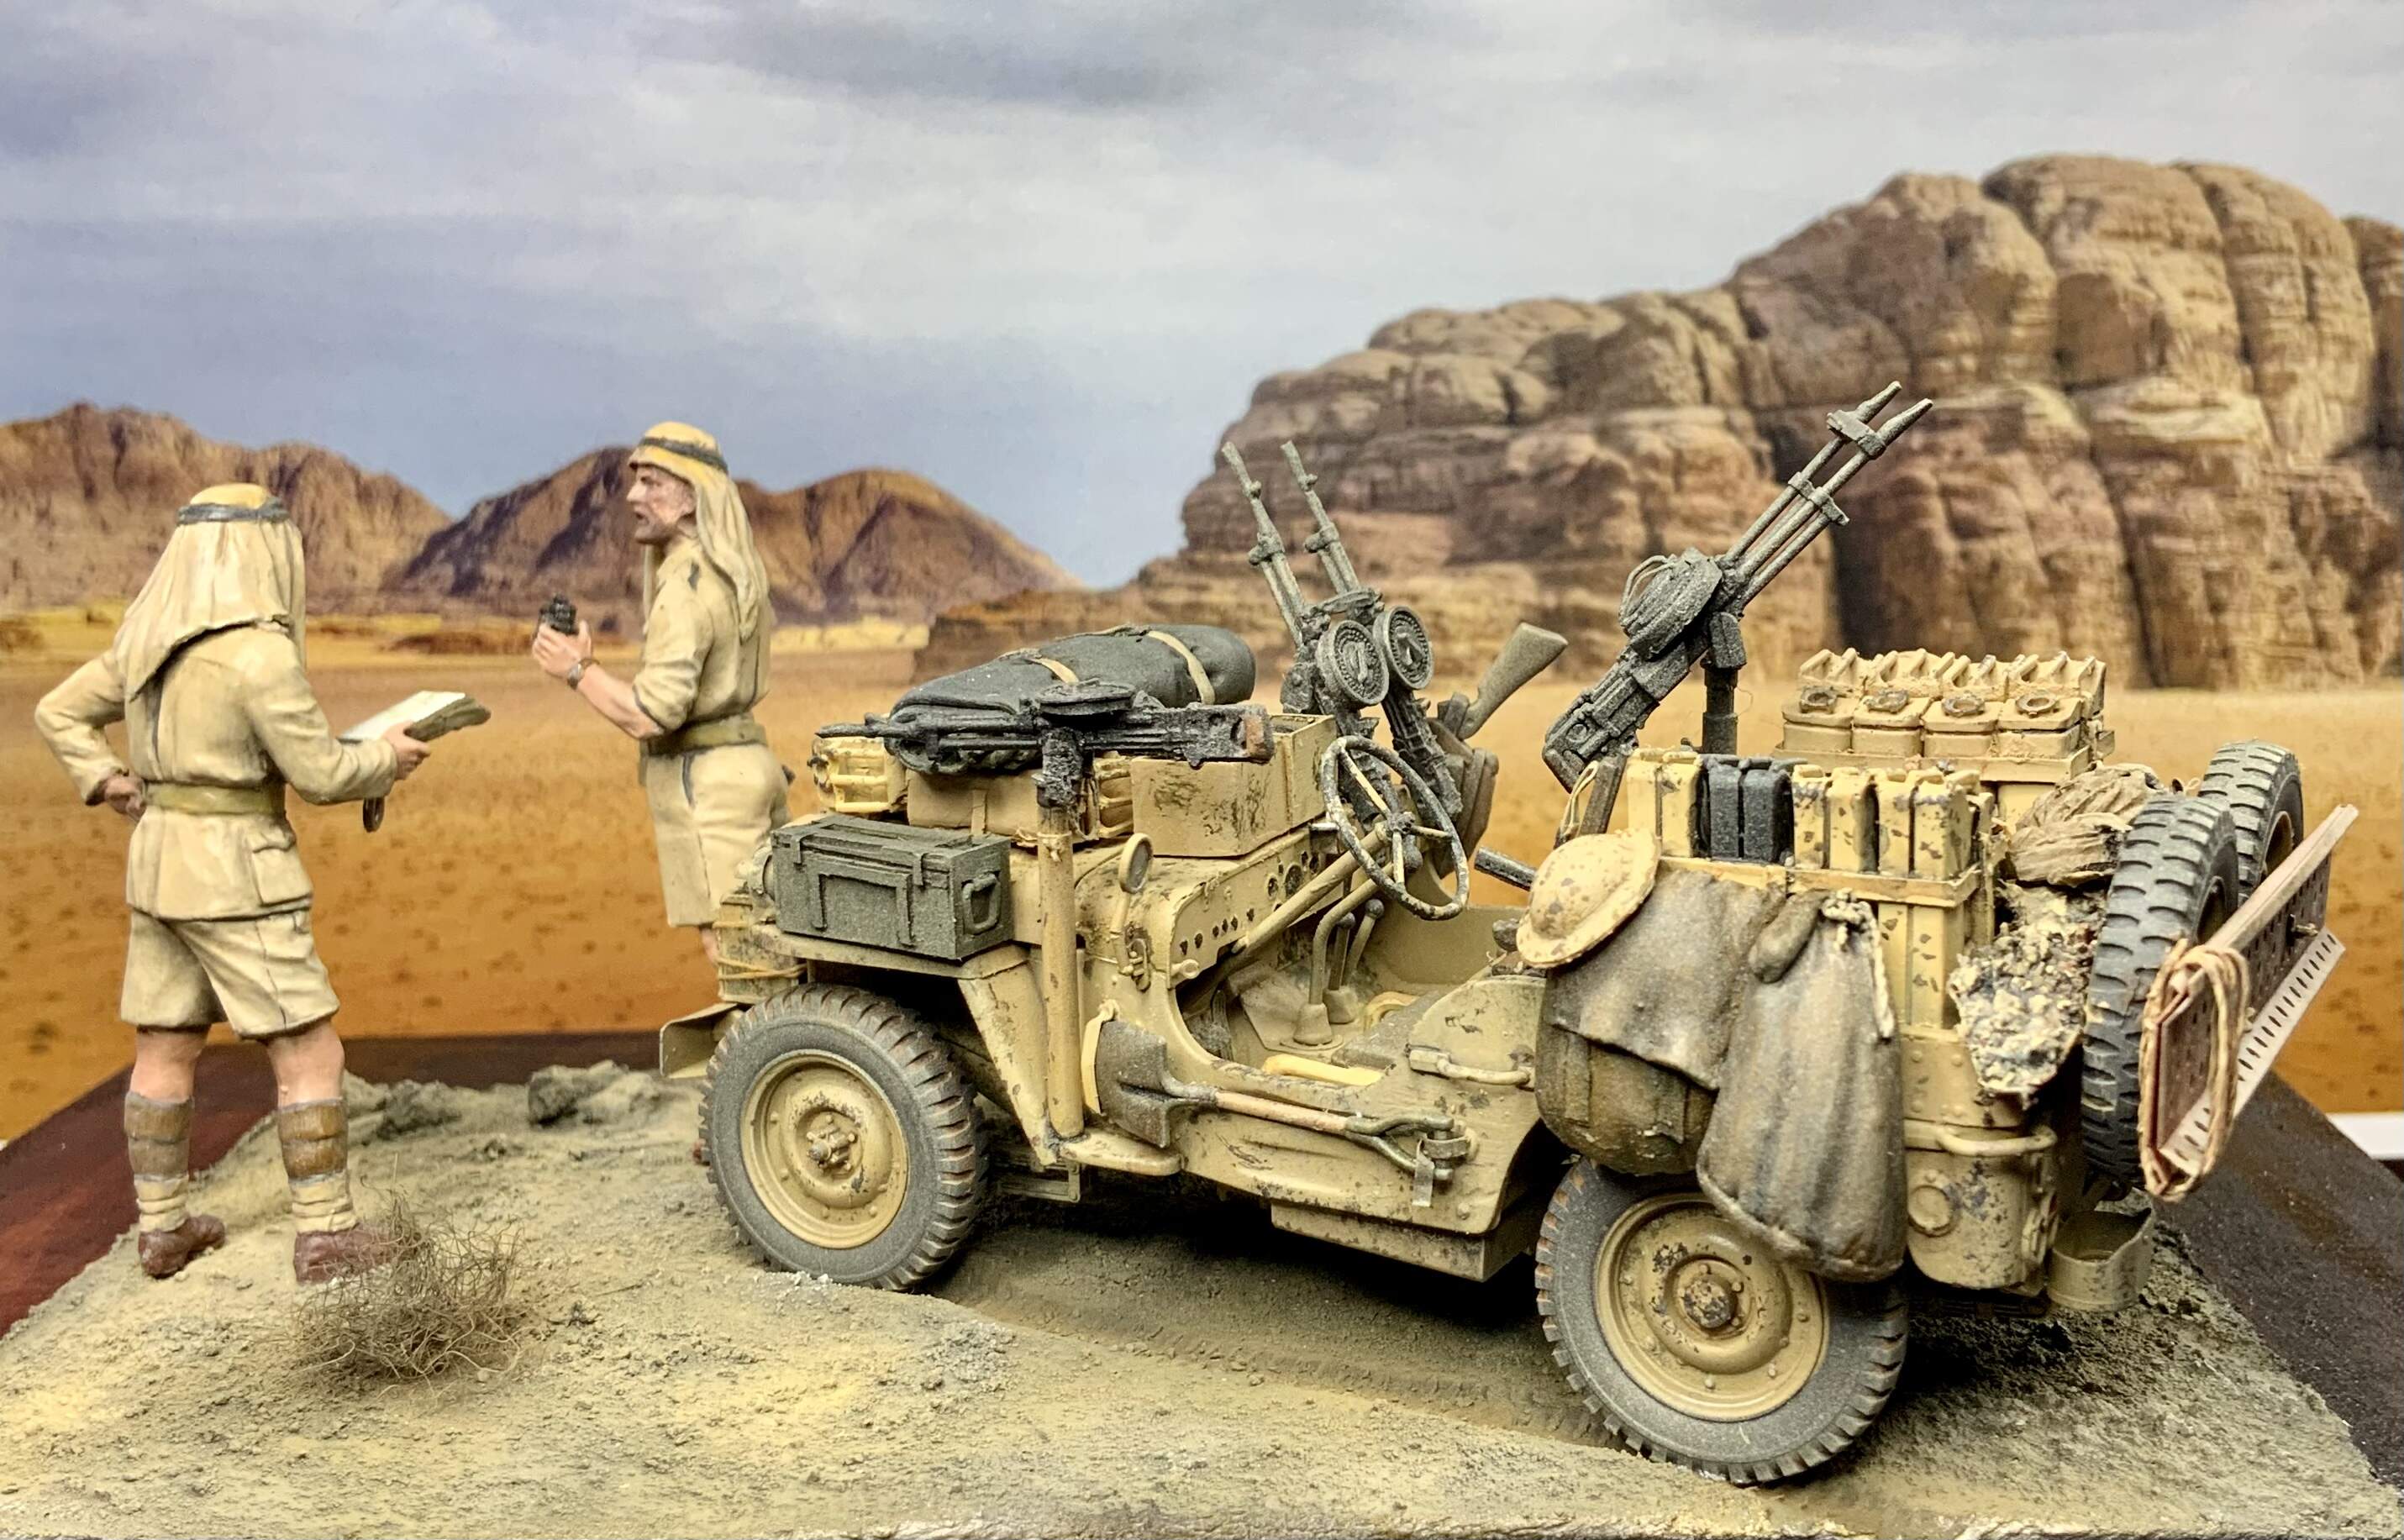
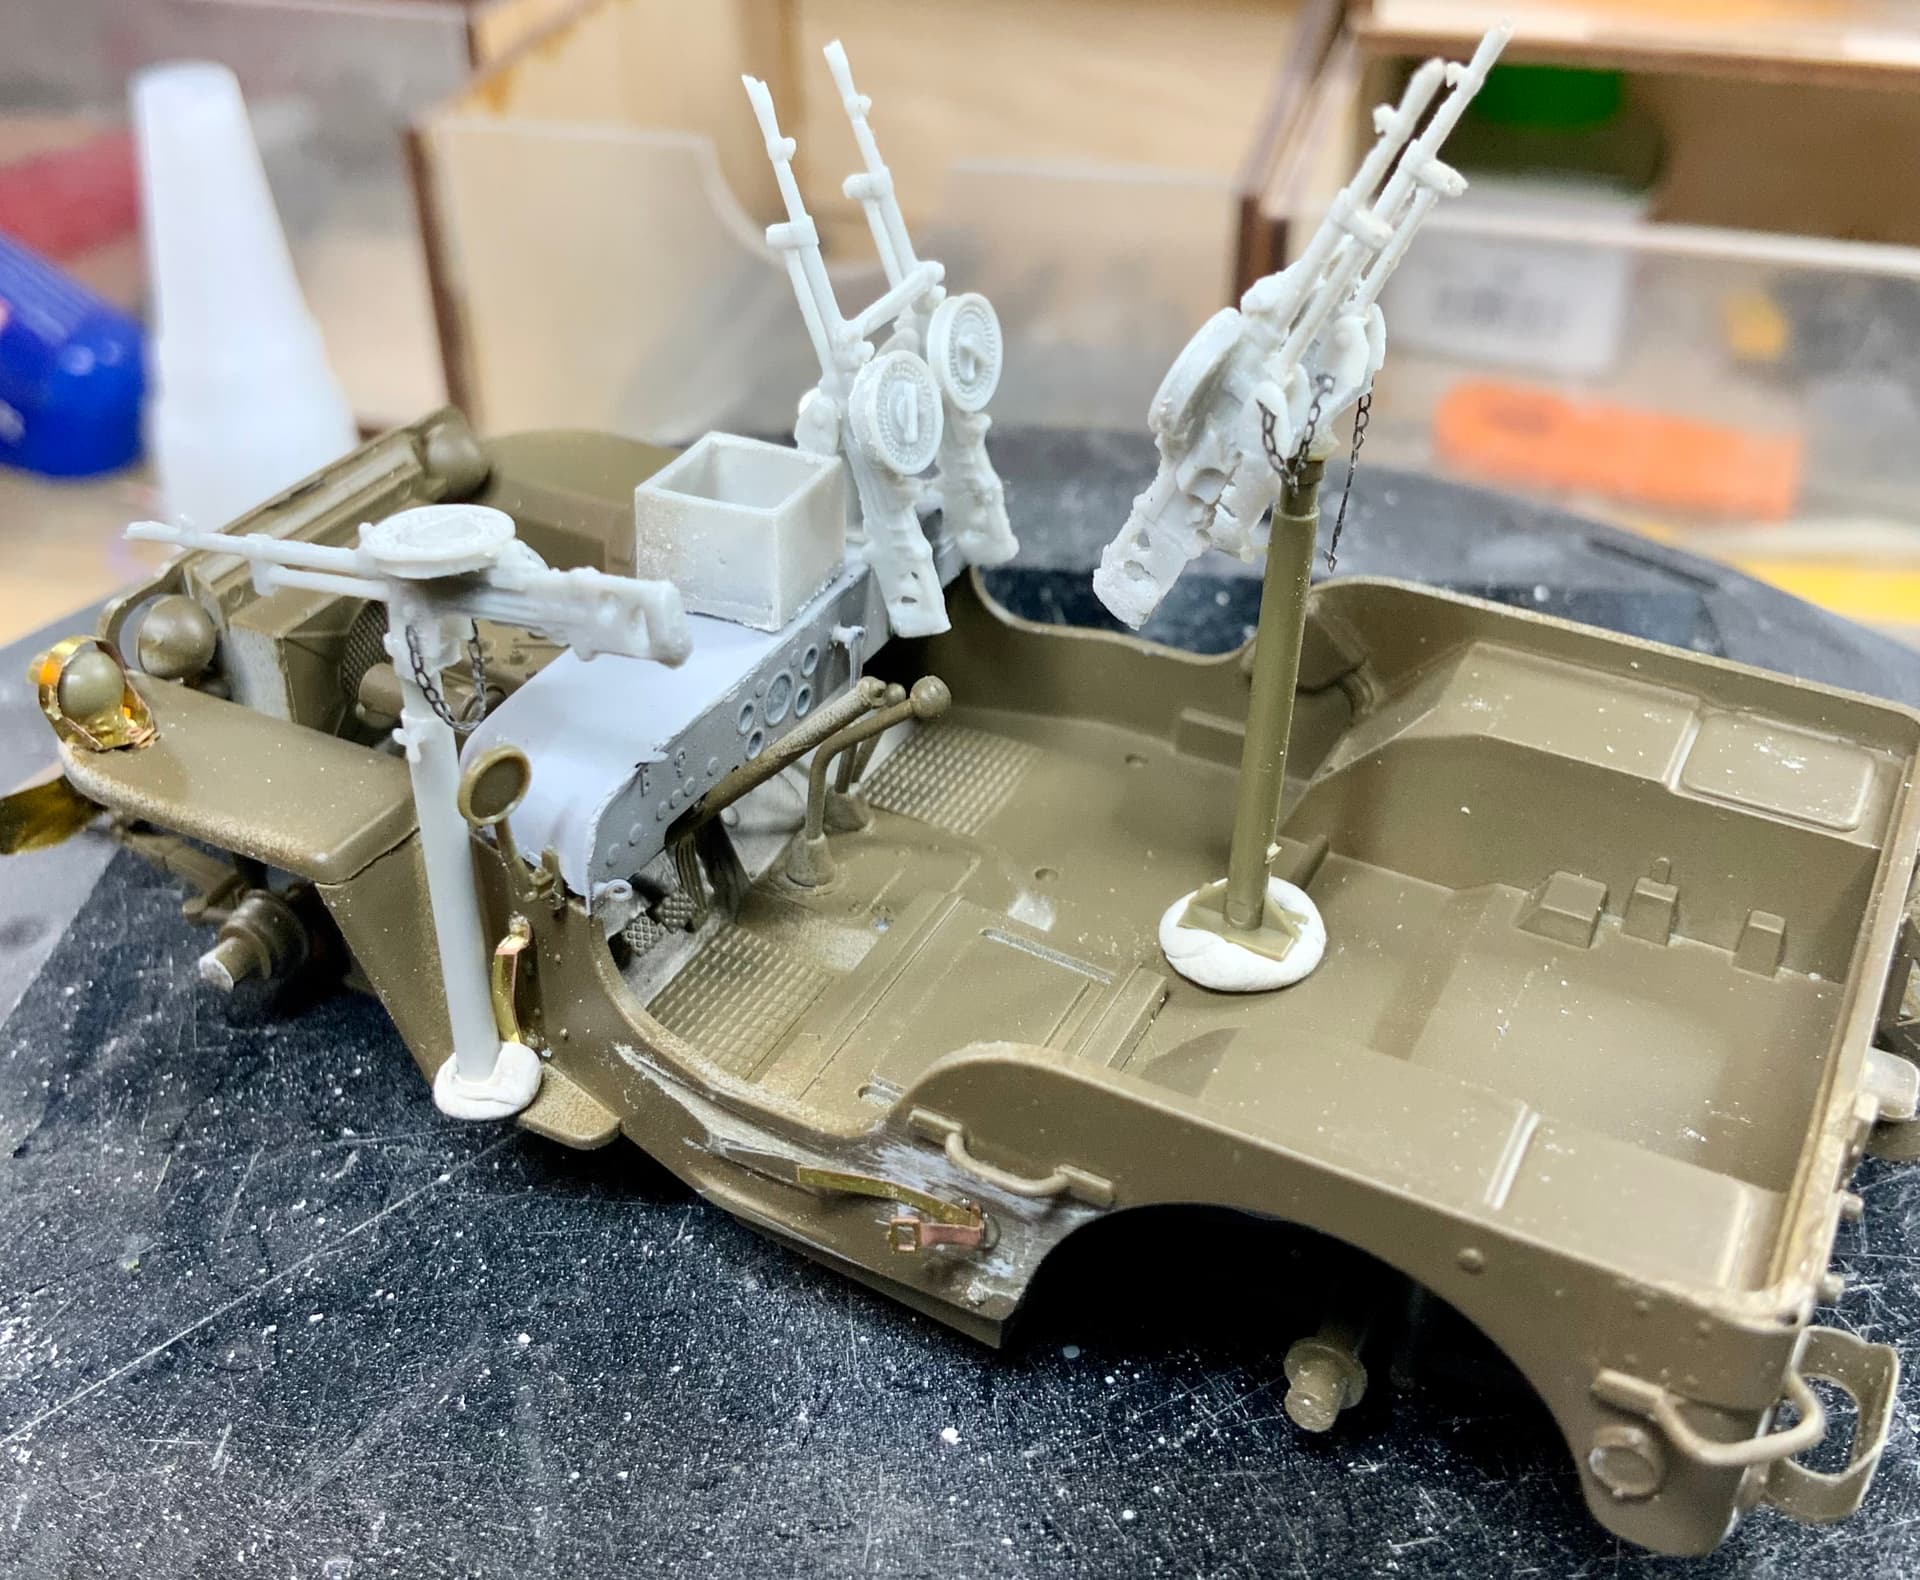
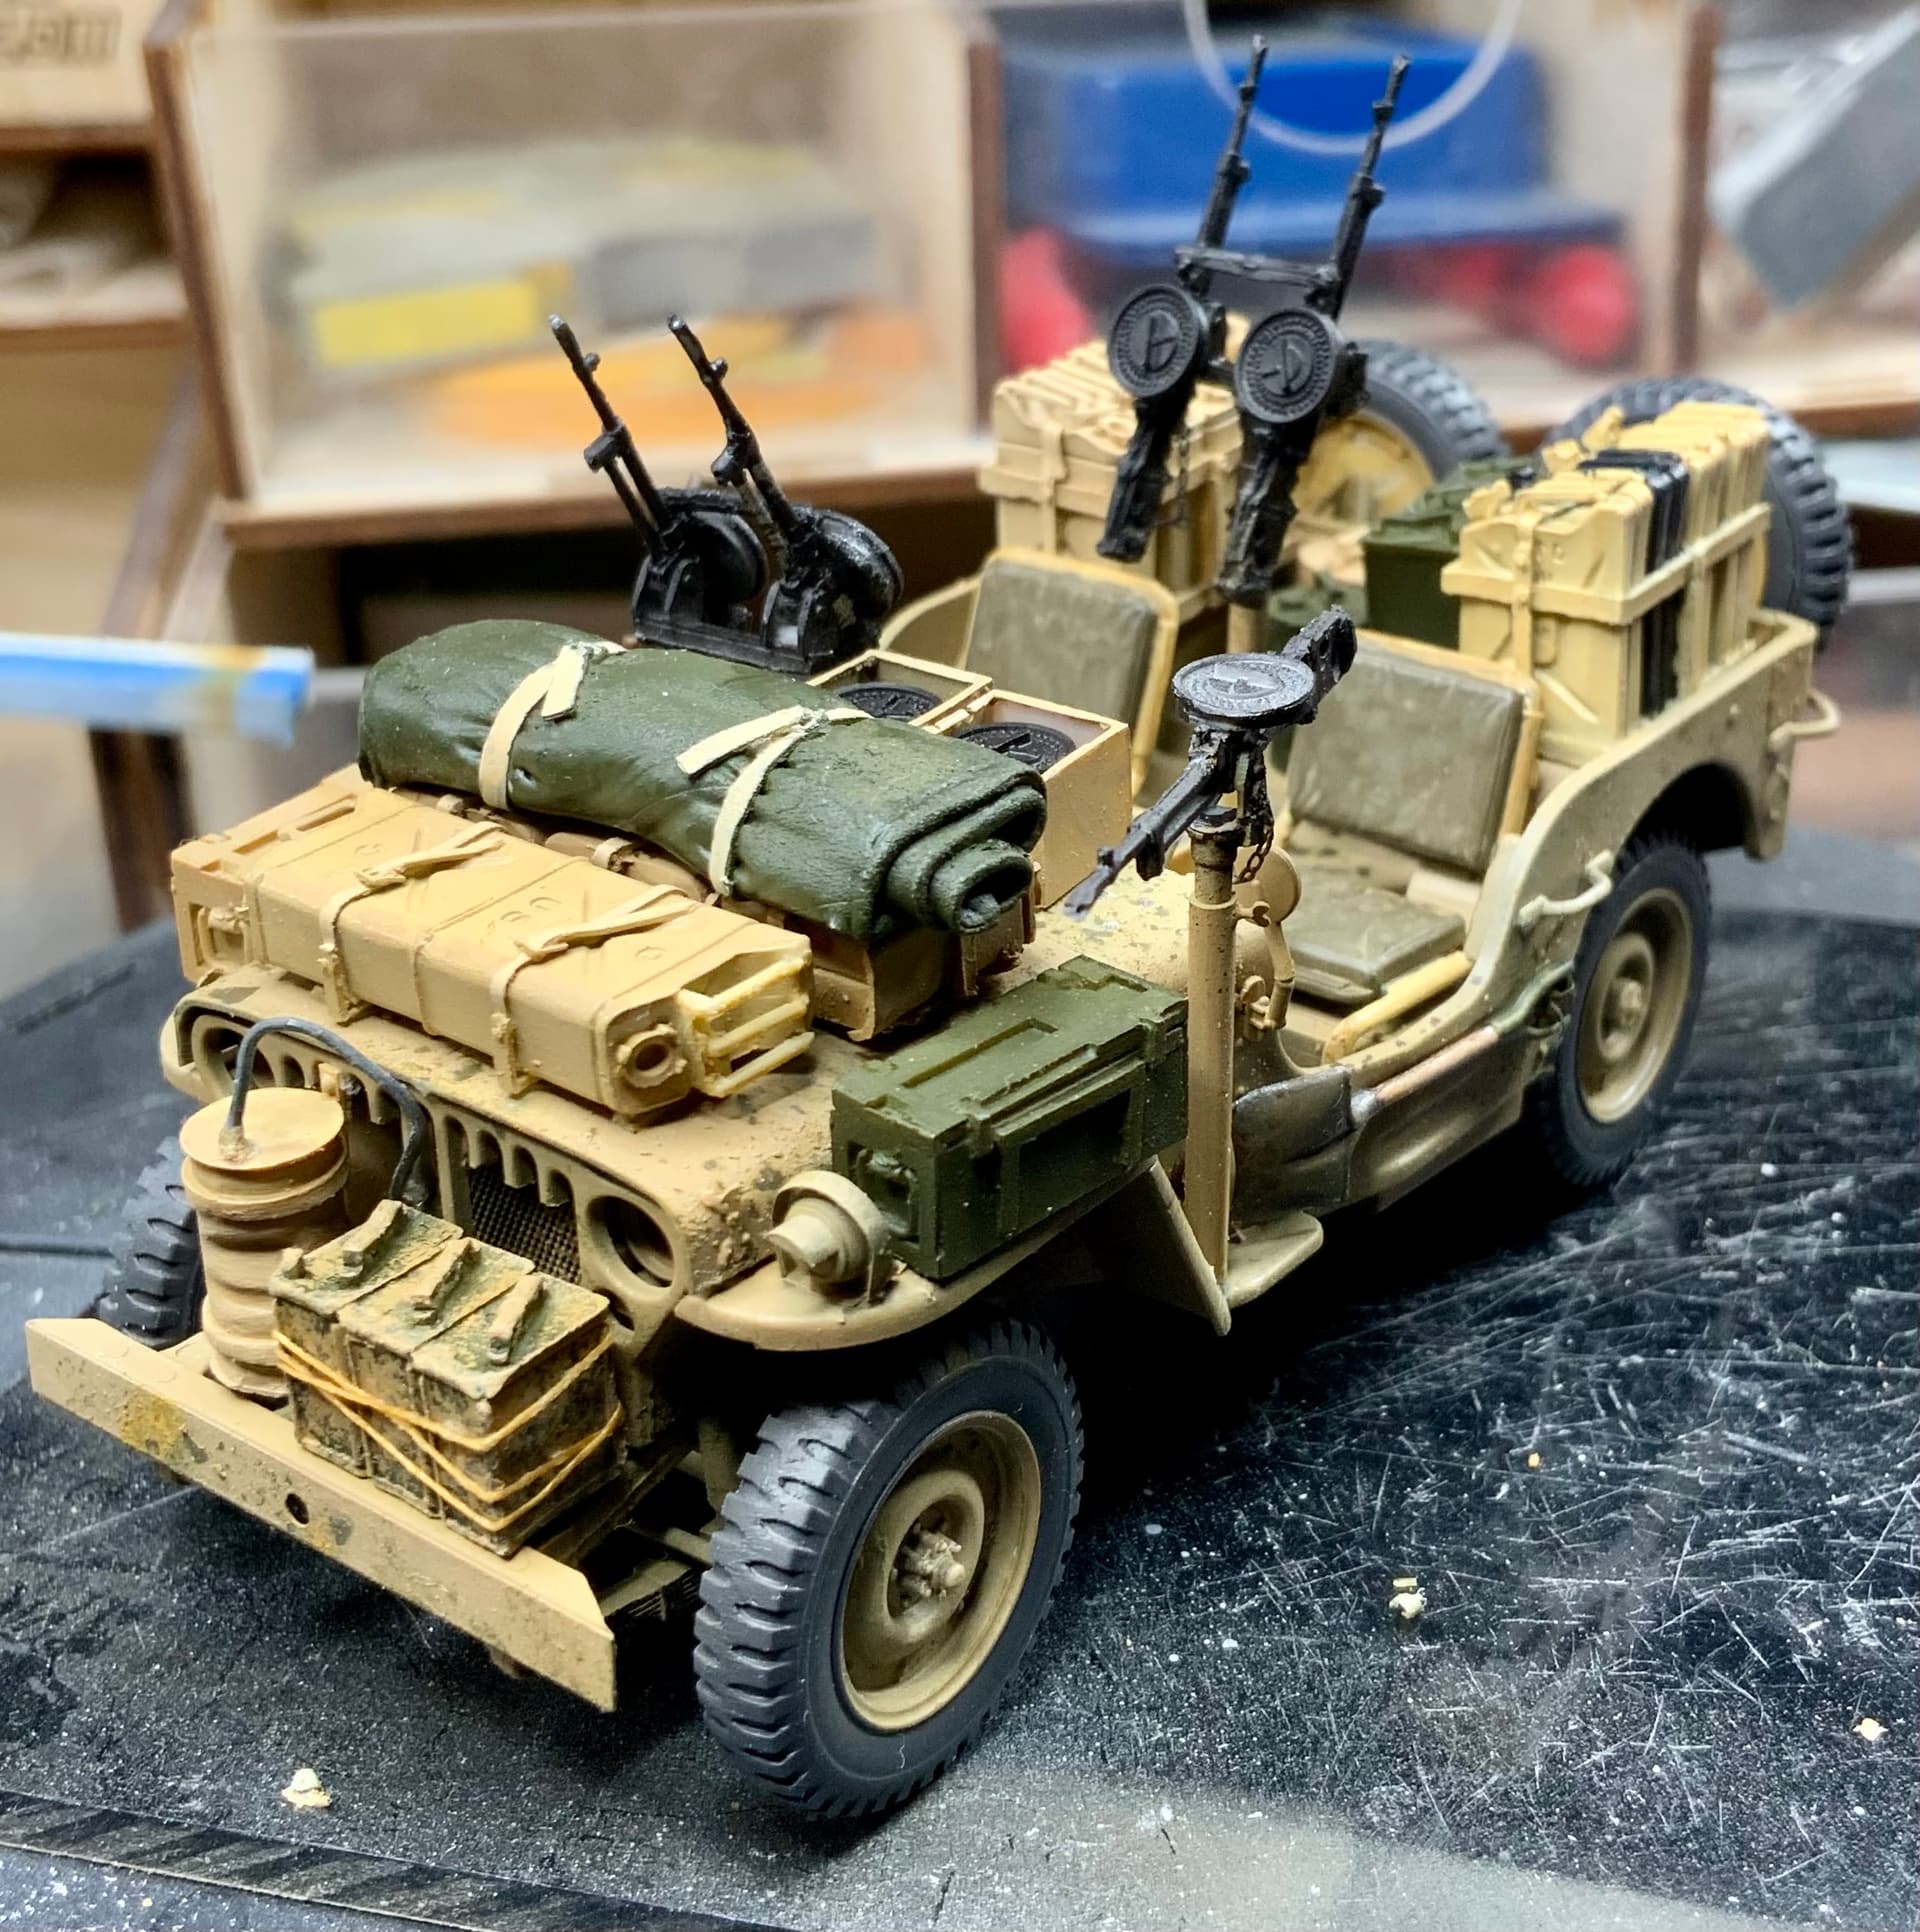
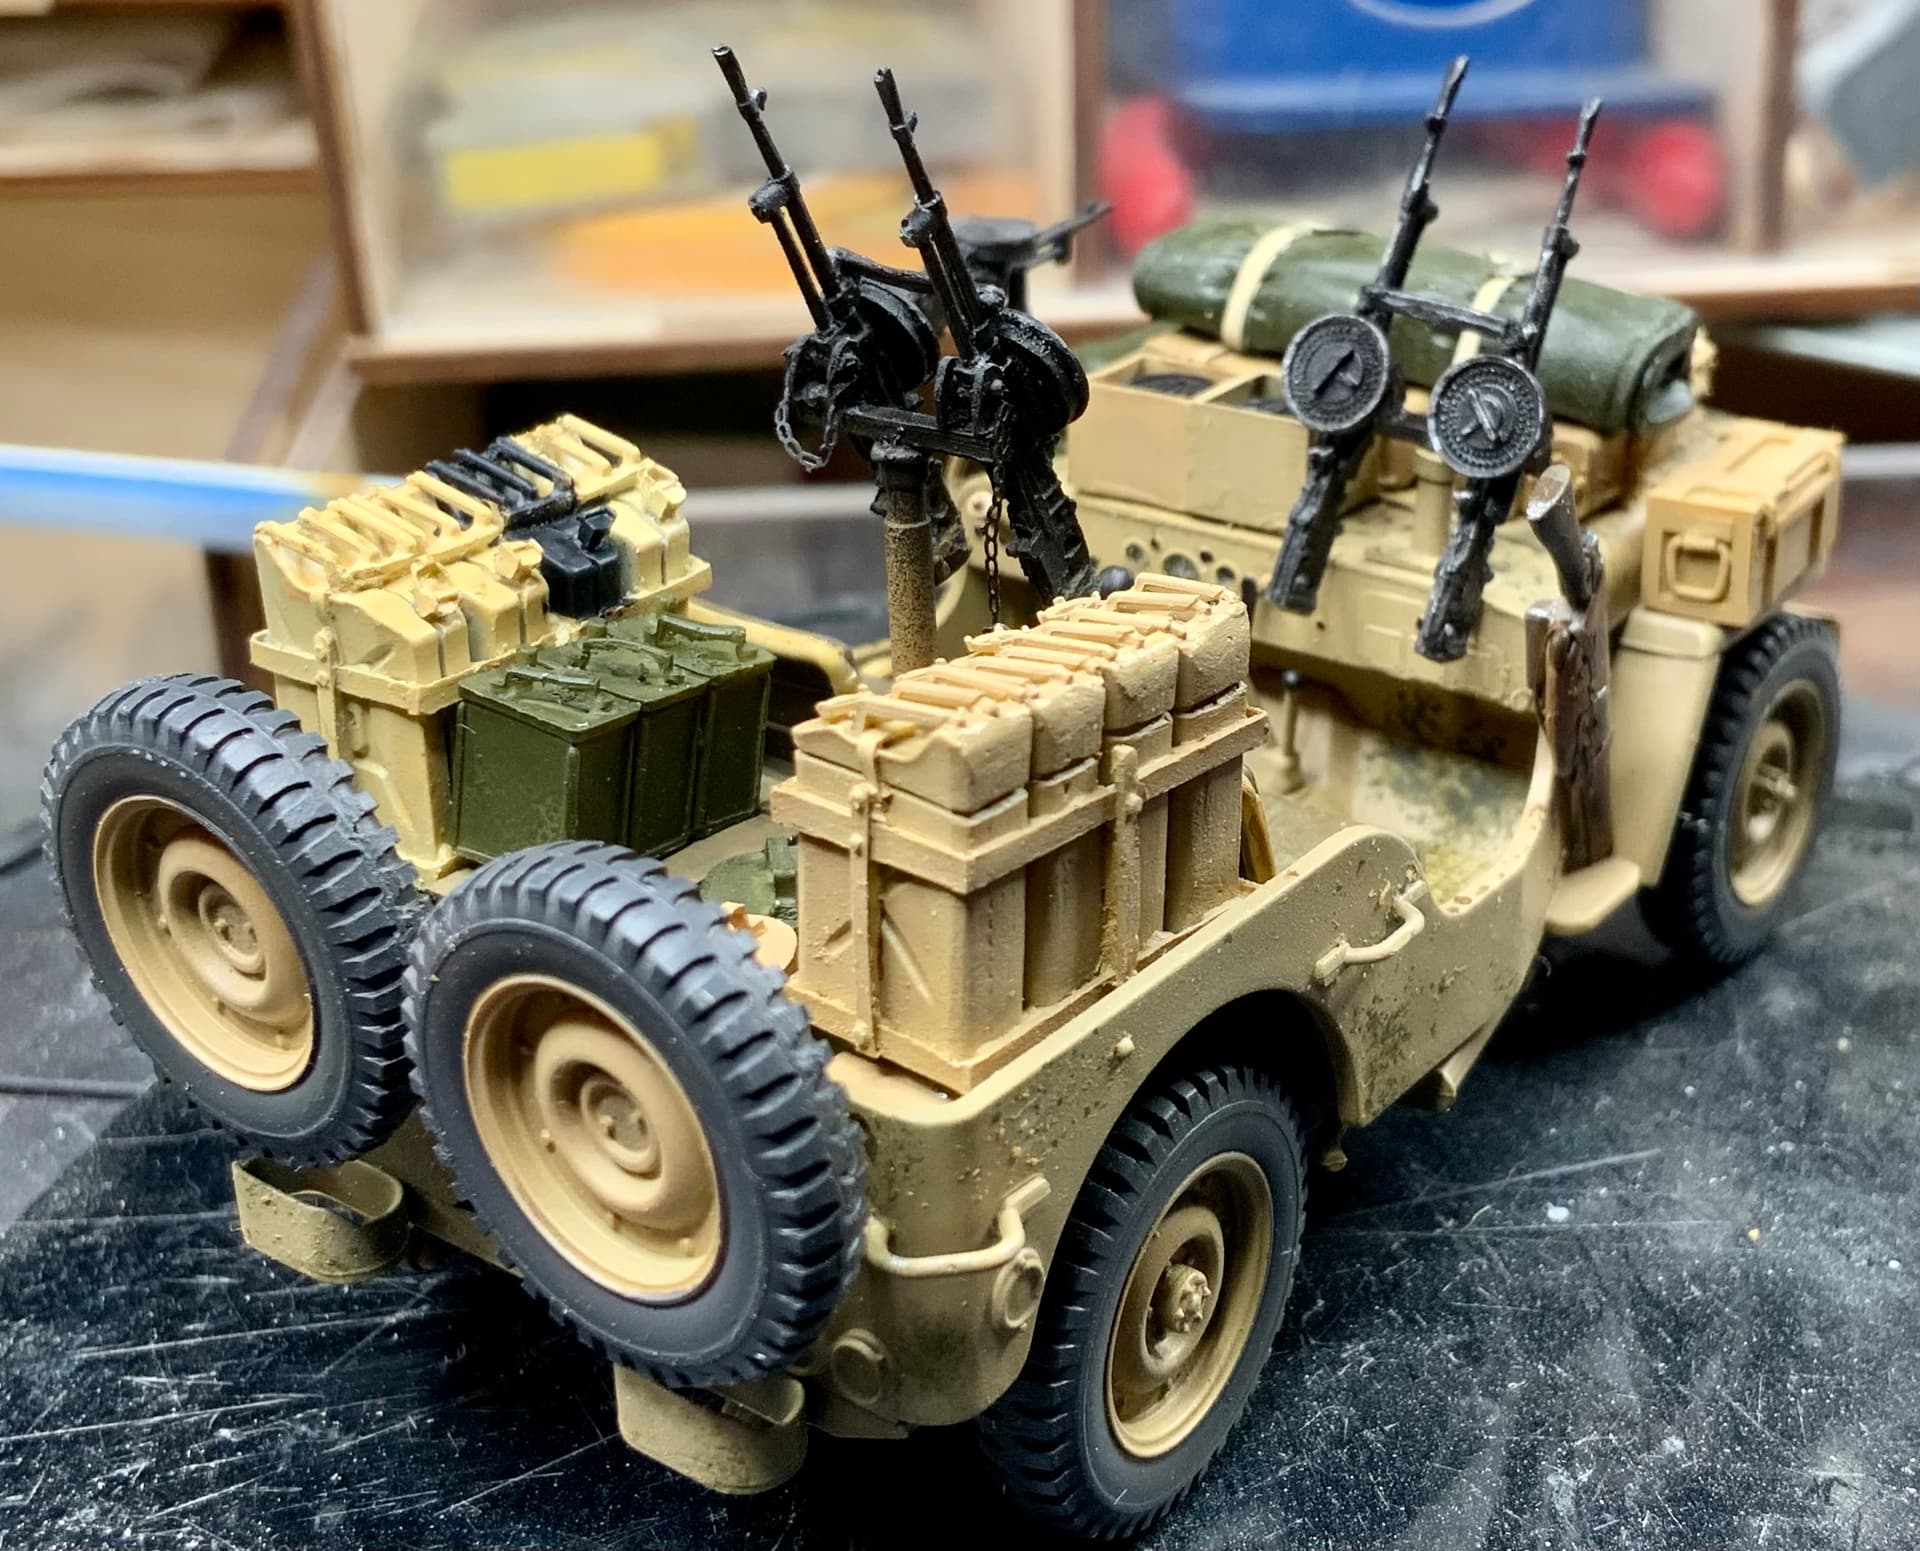
My next step was the guns. The Black Dog kit has a sh…load of Vickers K, but most of them were broken and it was a puzzle to find enough guns and barrels to make the five machineguns I needed. Later I managed to break the twin machineguns behind the seats. Luckily at that time I had received Dragons memorial SAS kit with three vehicles so I borrowed a set from them… I also used some spare PE chain to make them a bit more interesting.

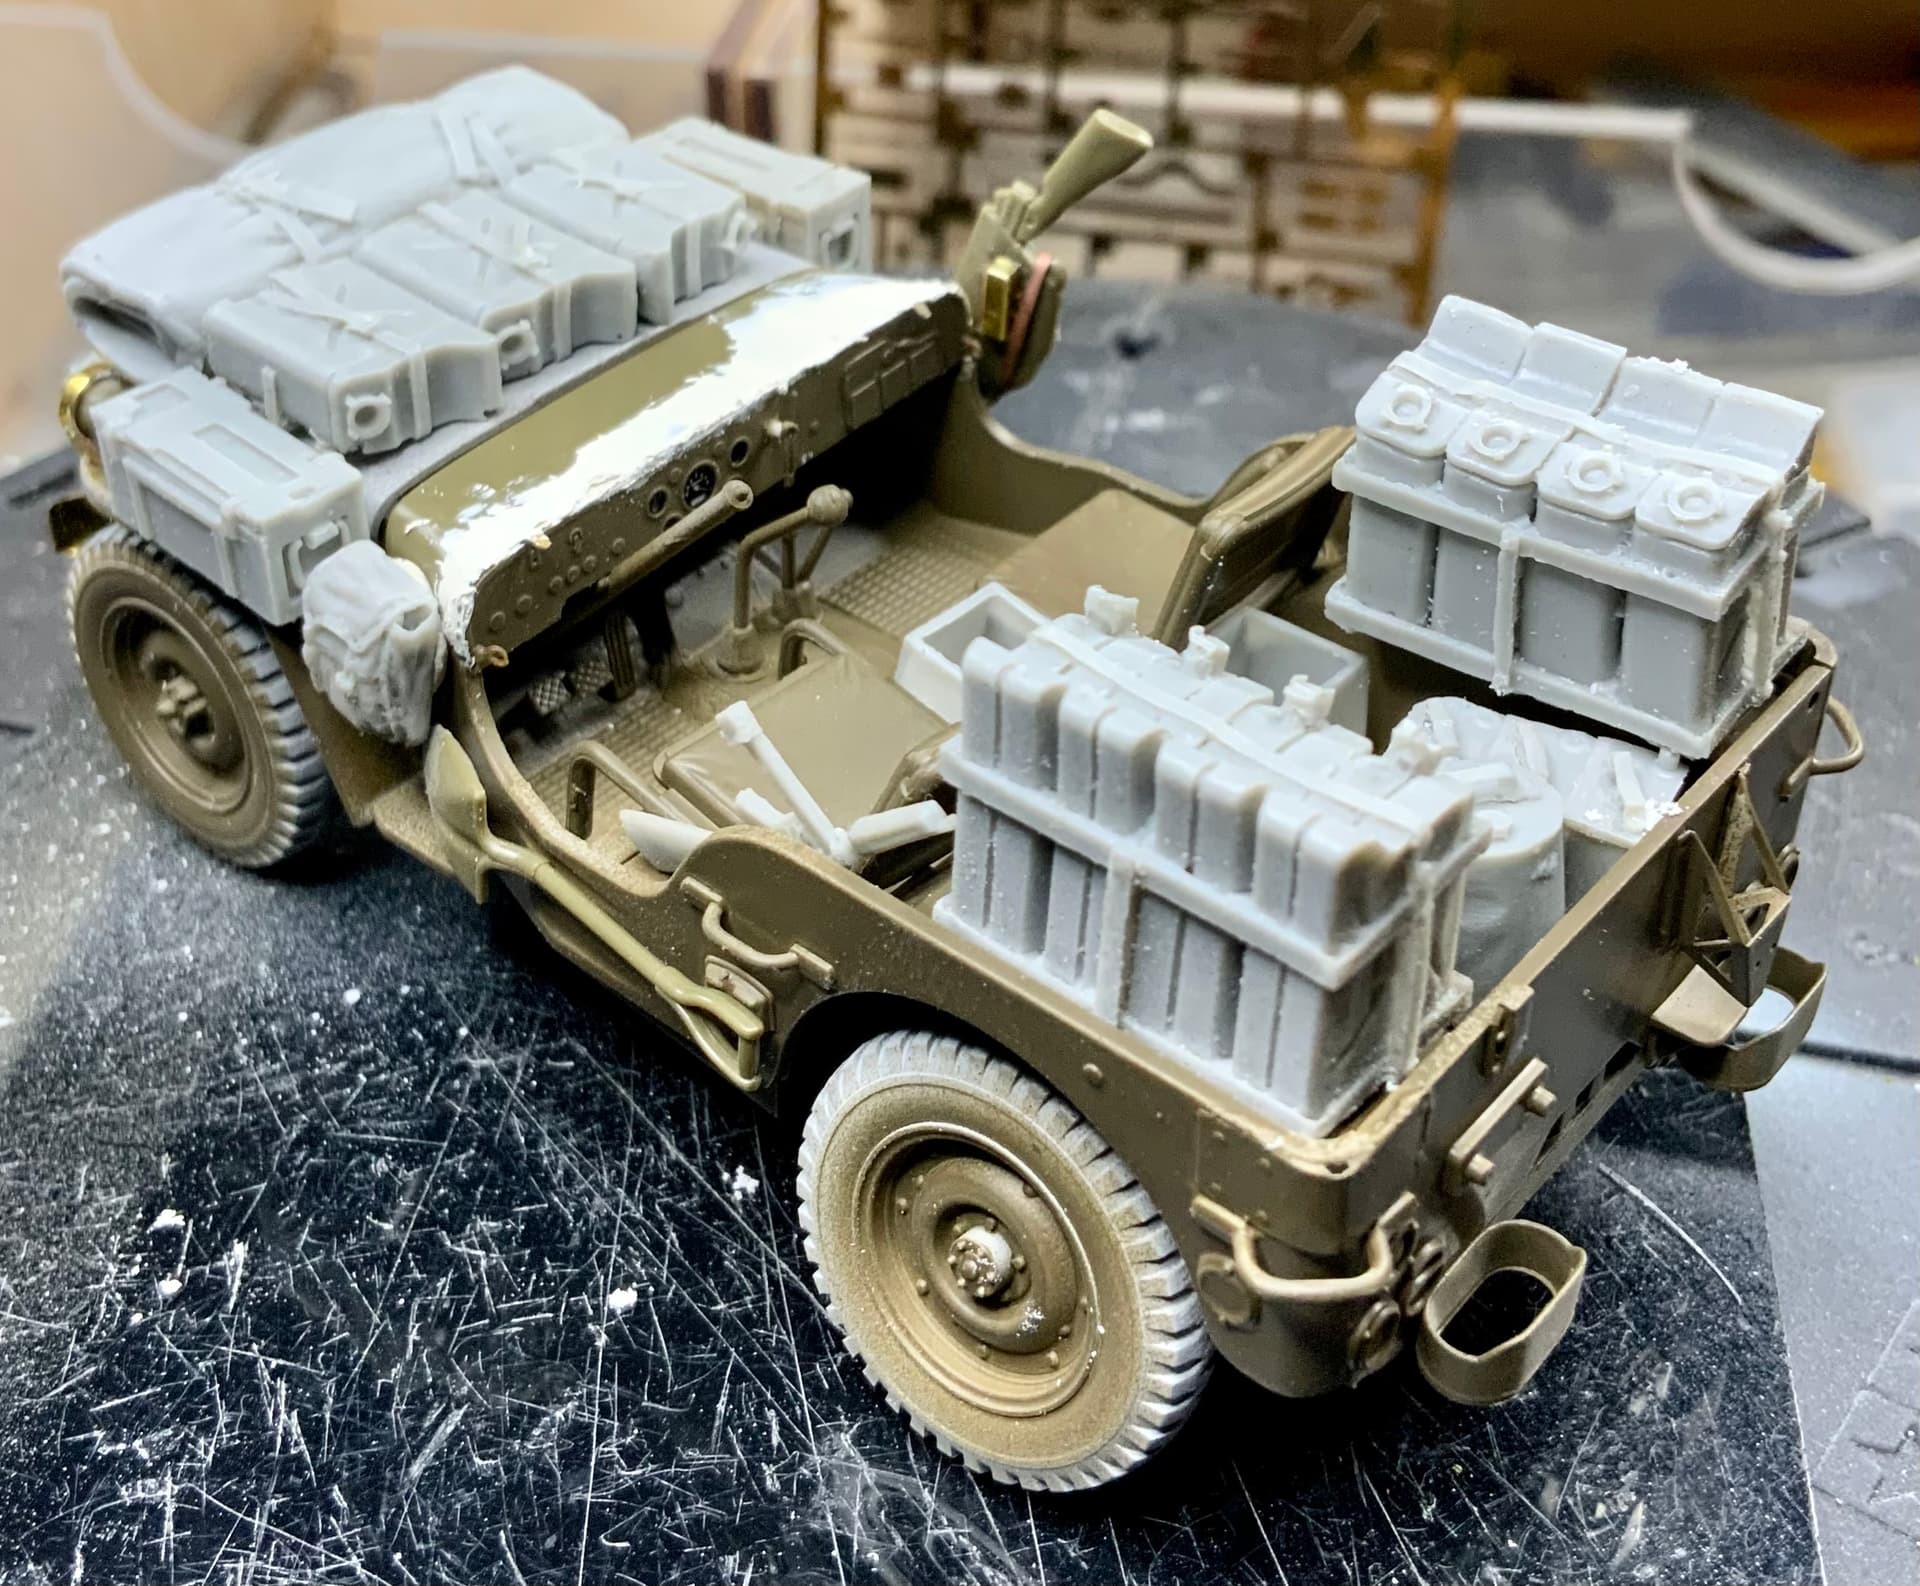
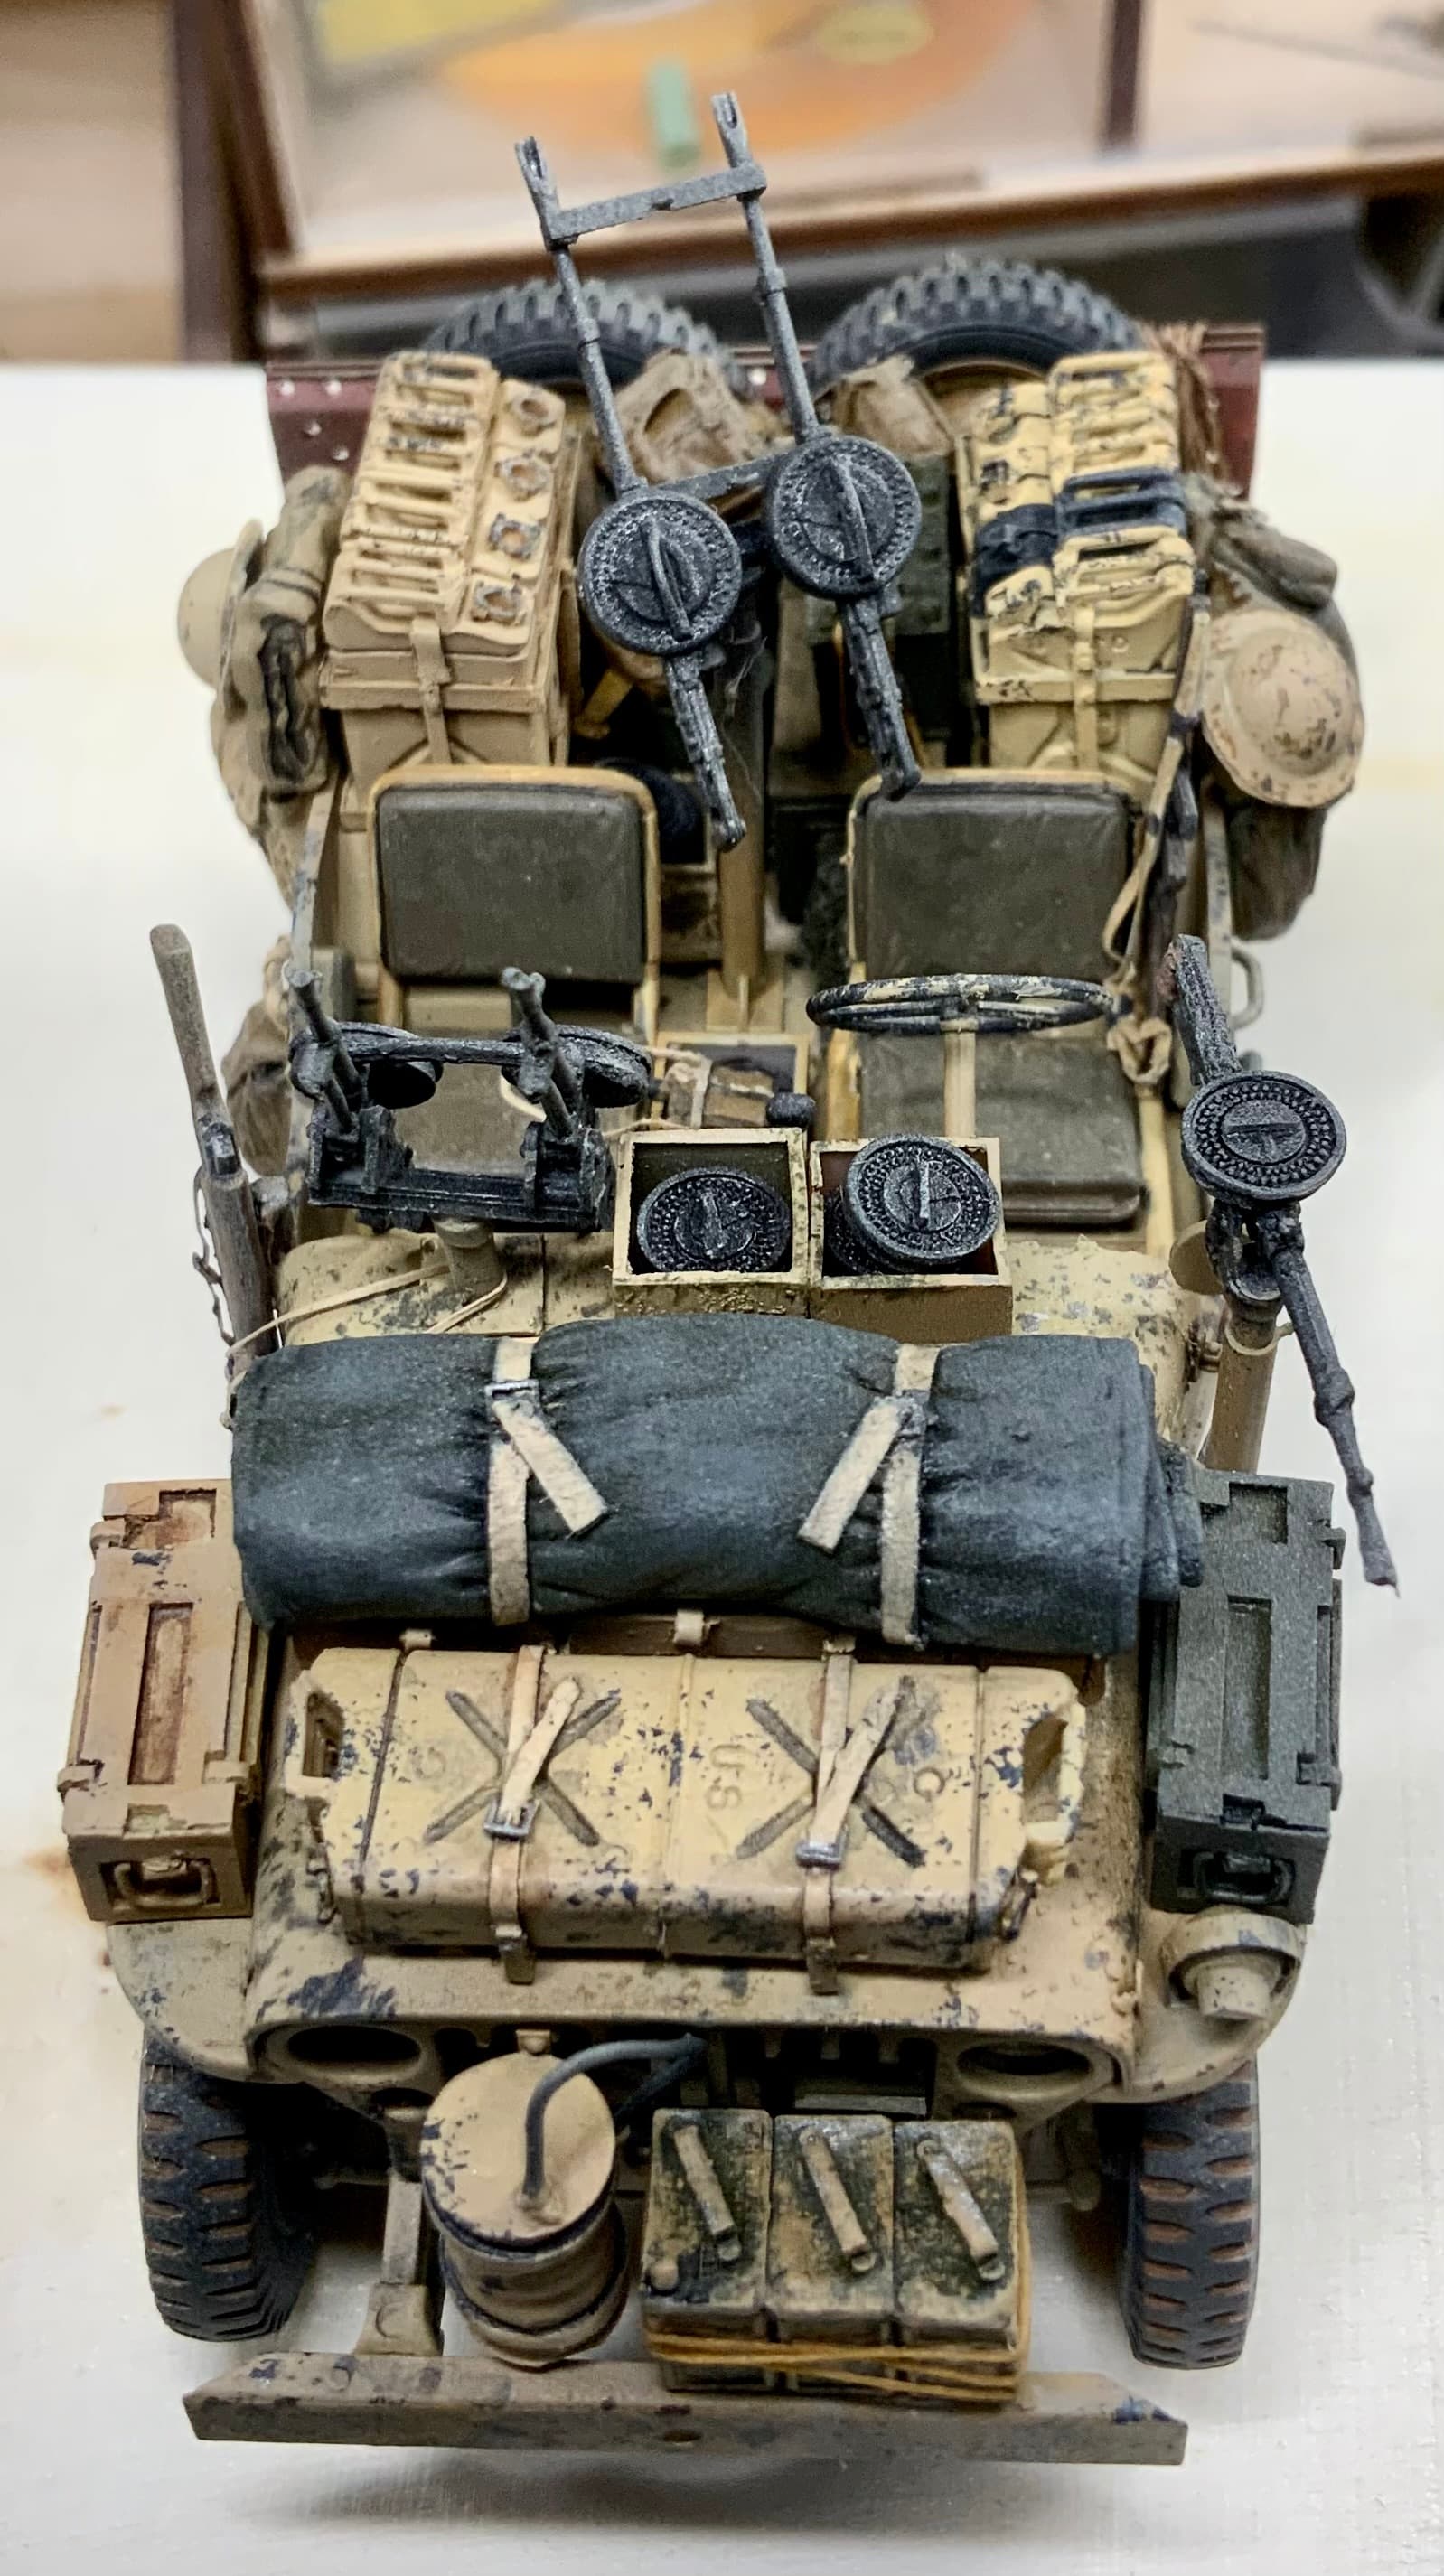
Then it was time for some stowage…
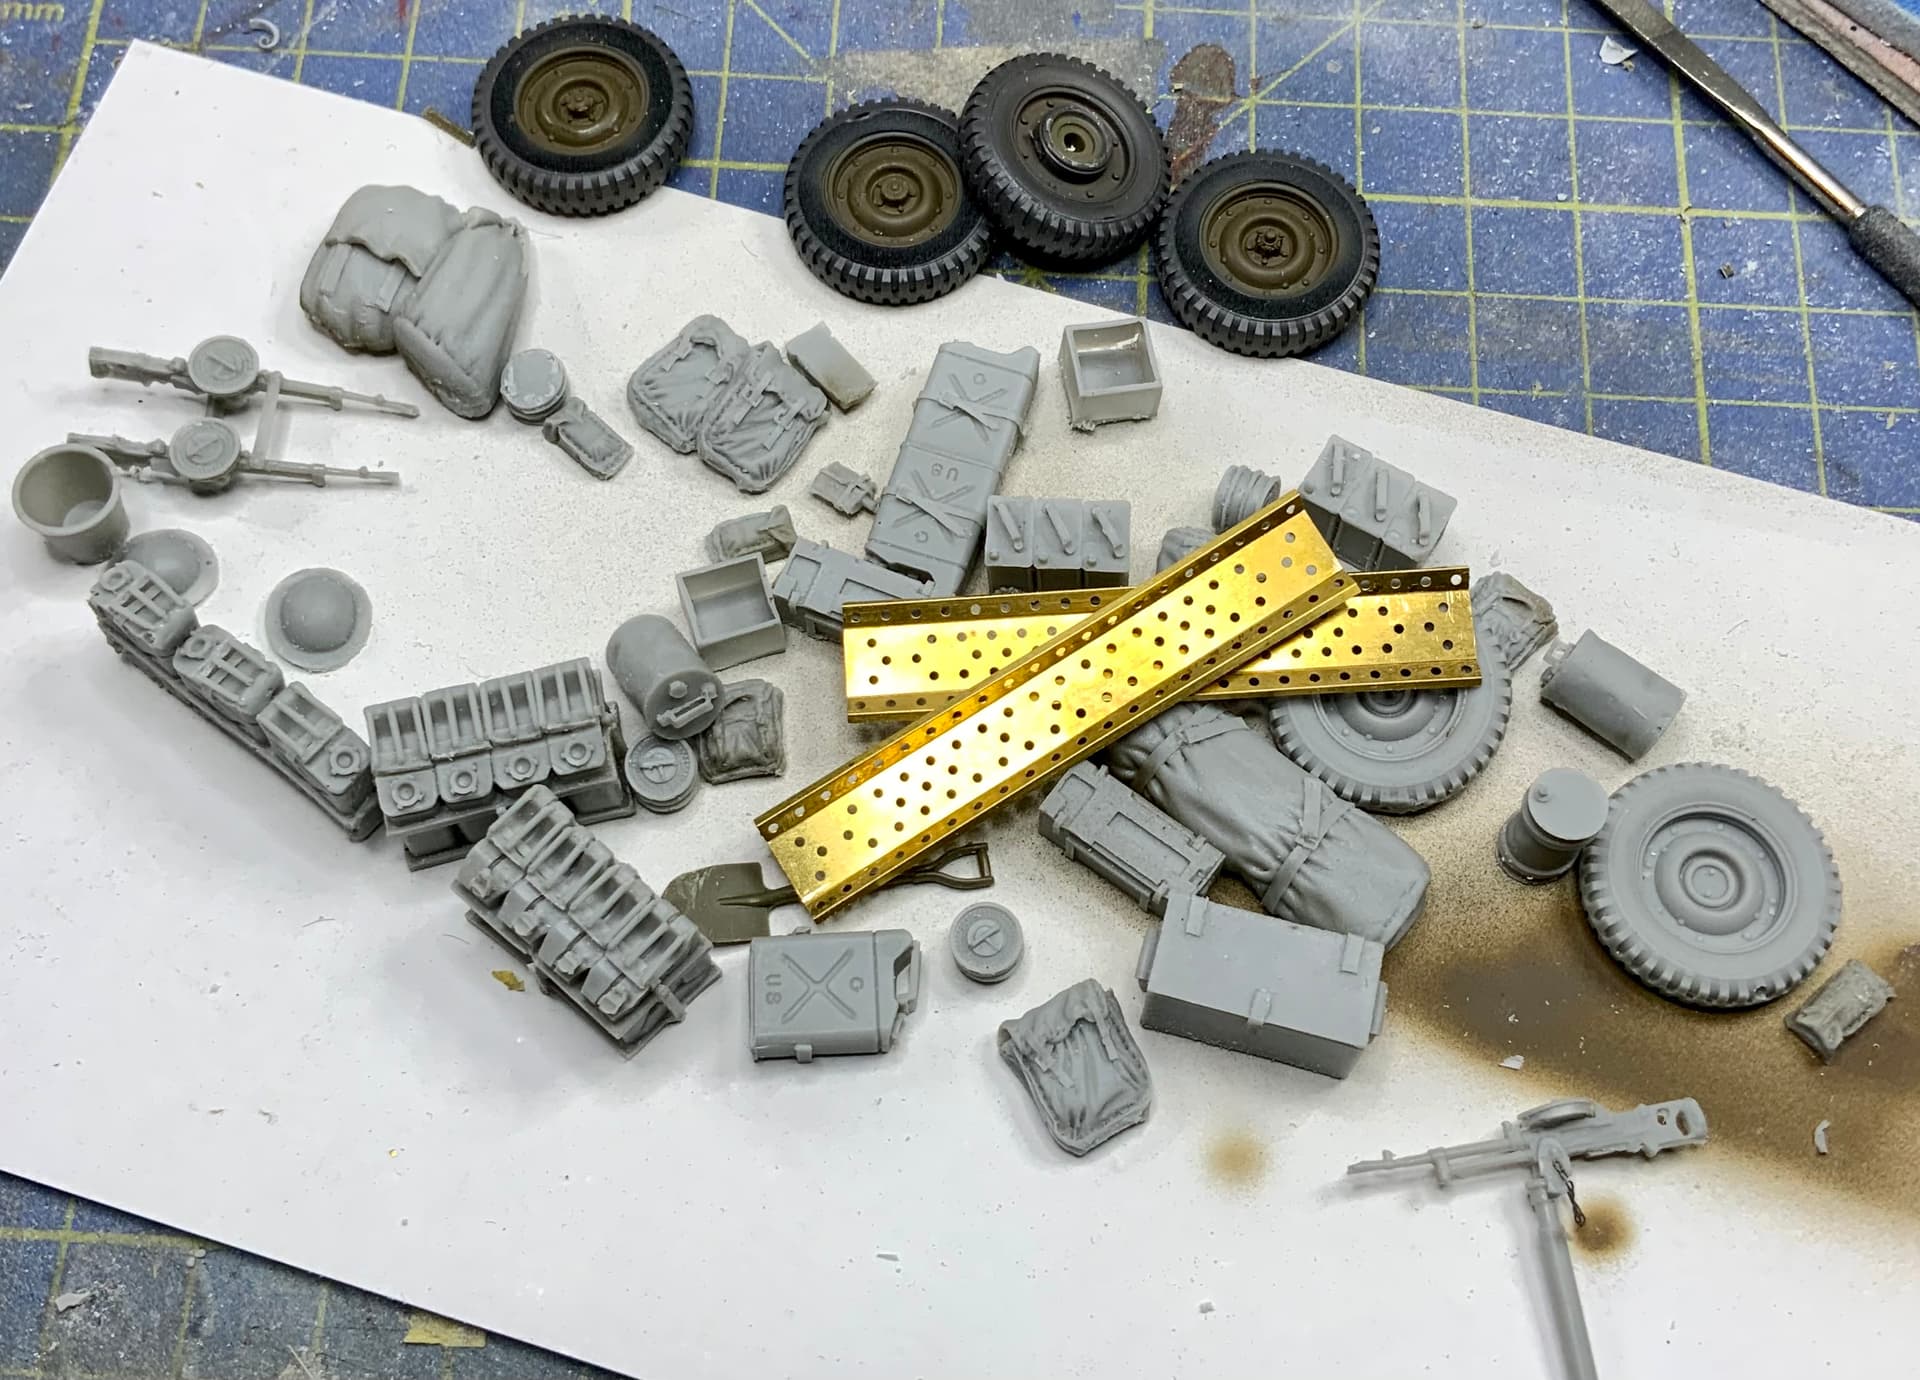
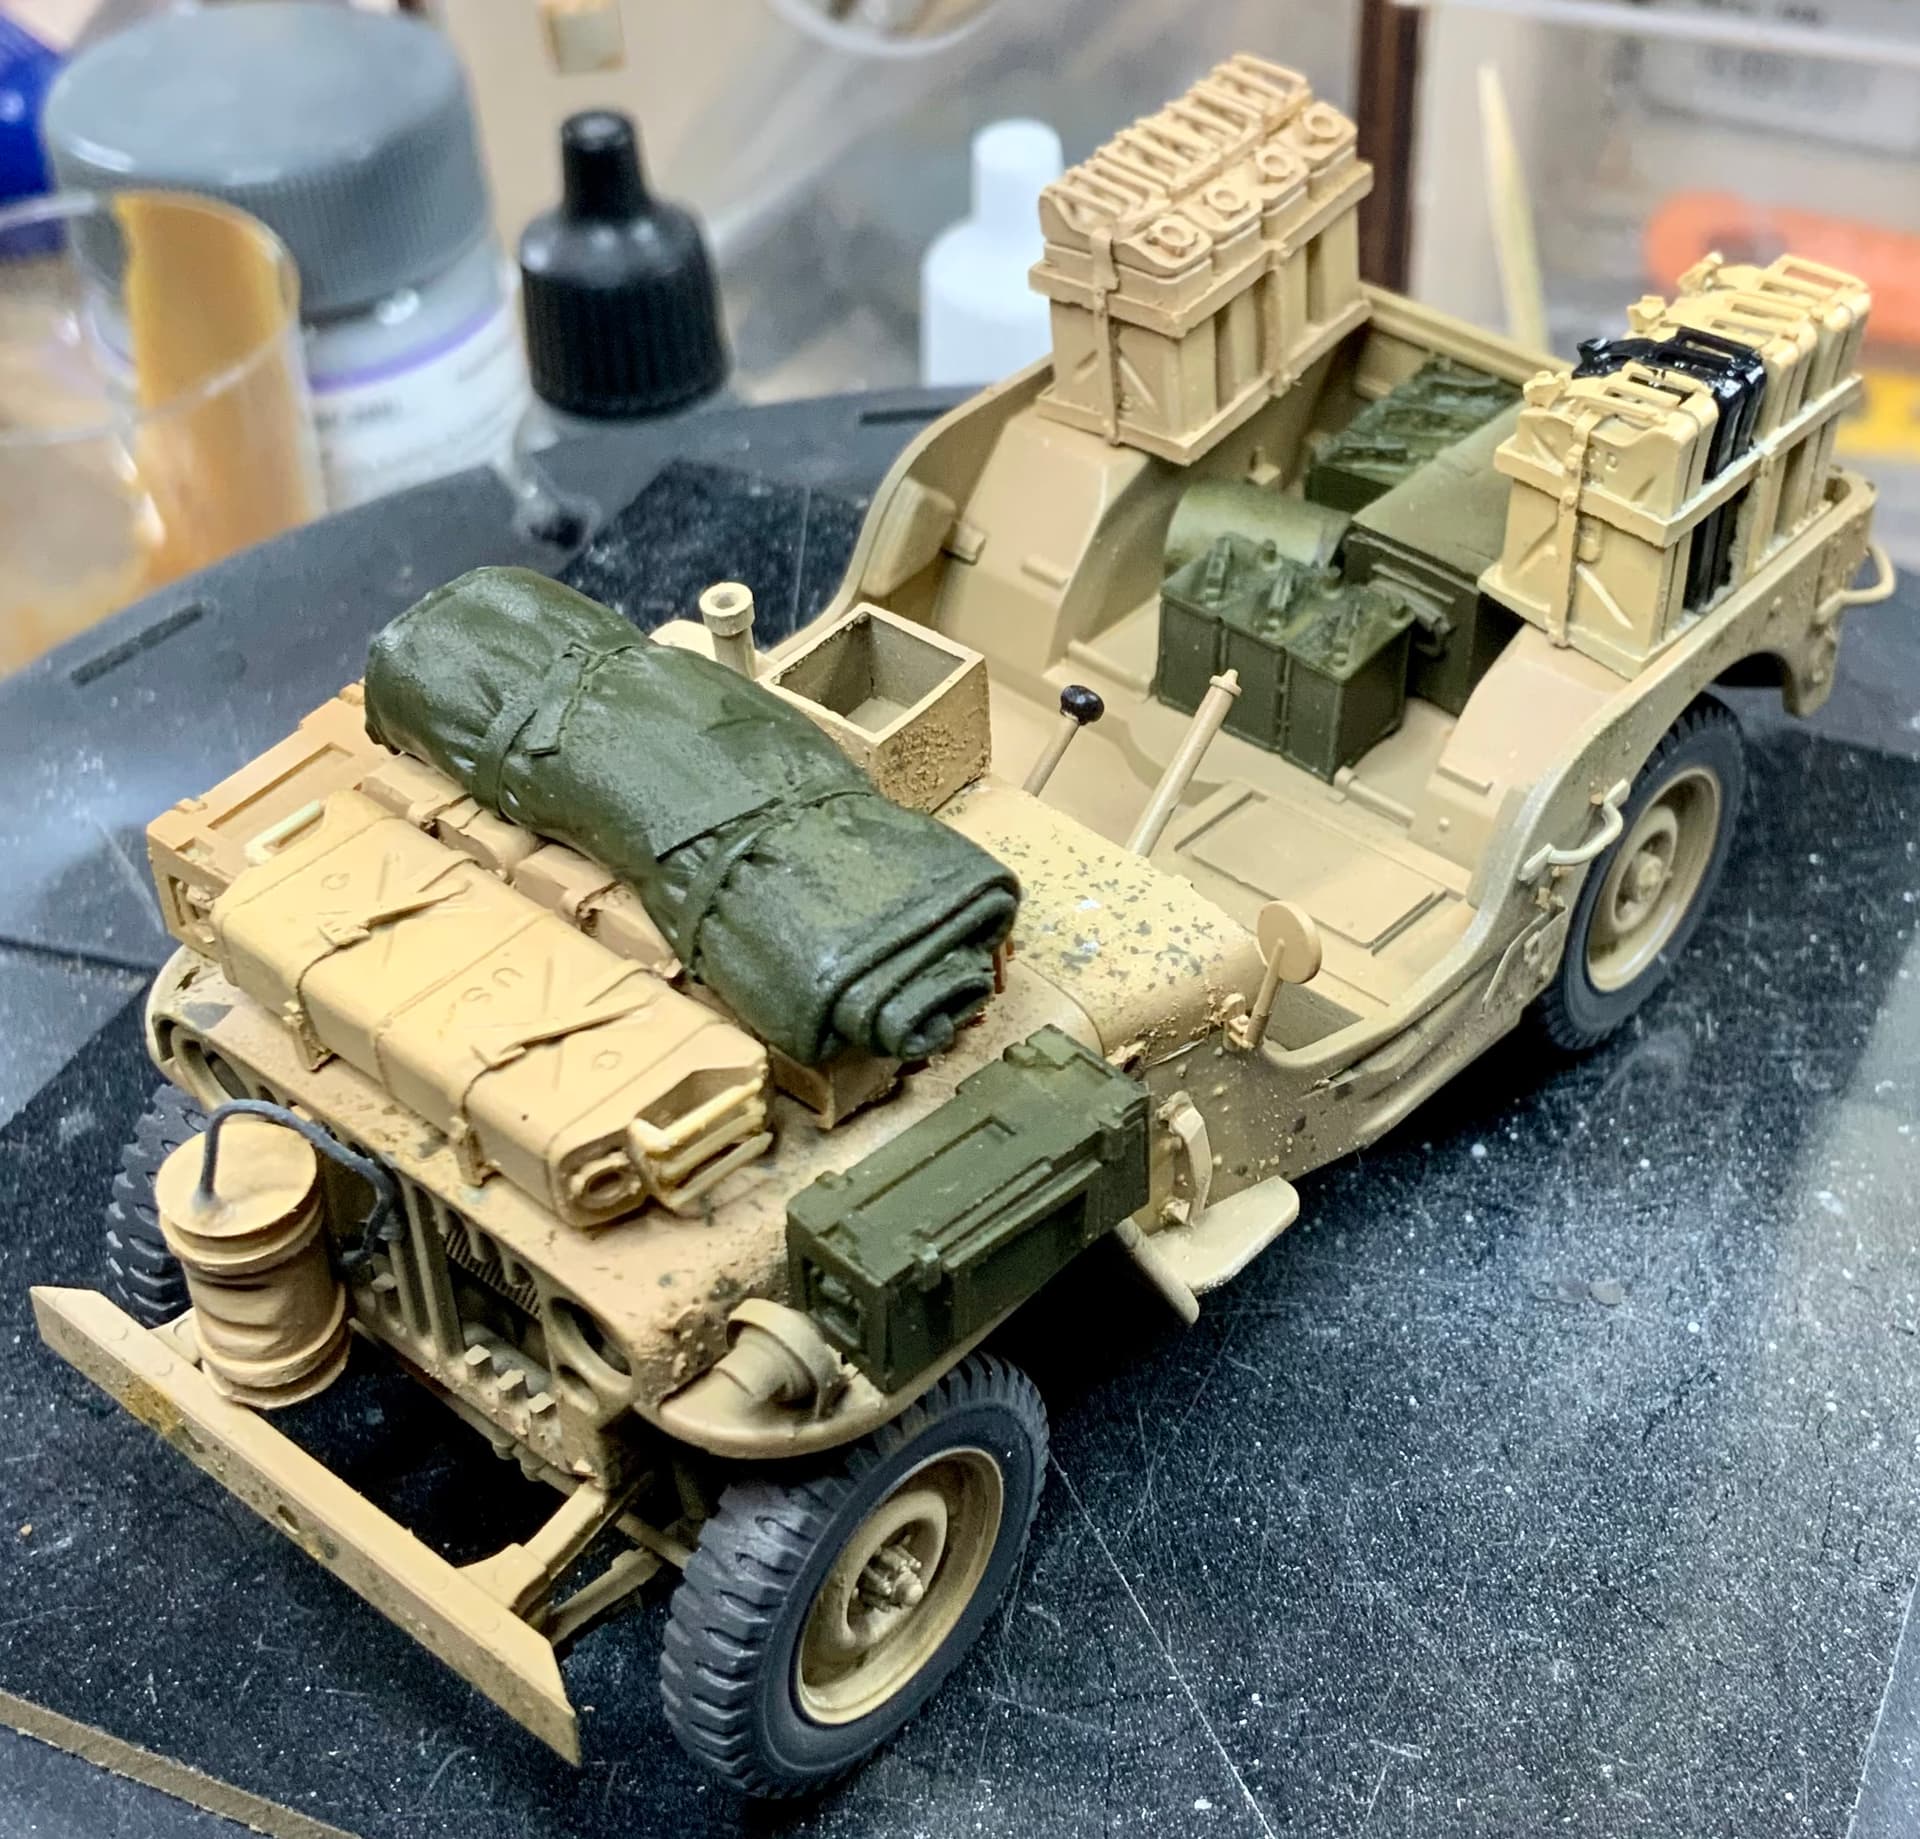
I painted the vehicle in various colors from Tamiya, Vallejo, Meng and Ammo Mig. Base coat was Tamiya desert yellow. Stowage was painted with all sorts of colors but mainly in olive drab and desert yellow variants. I also tried som salt chipping, but went back to the sponge and paint brush methode.

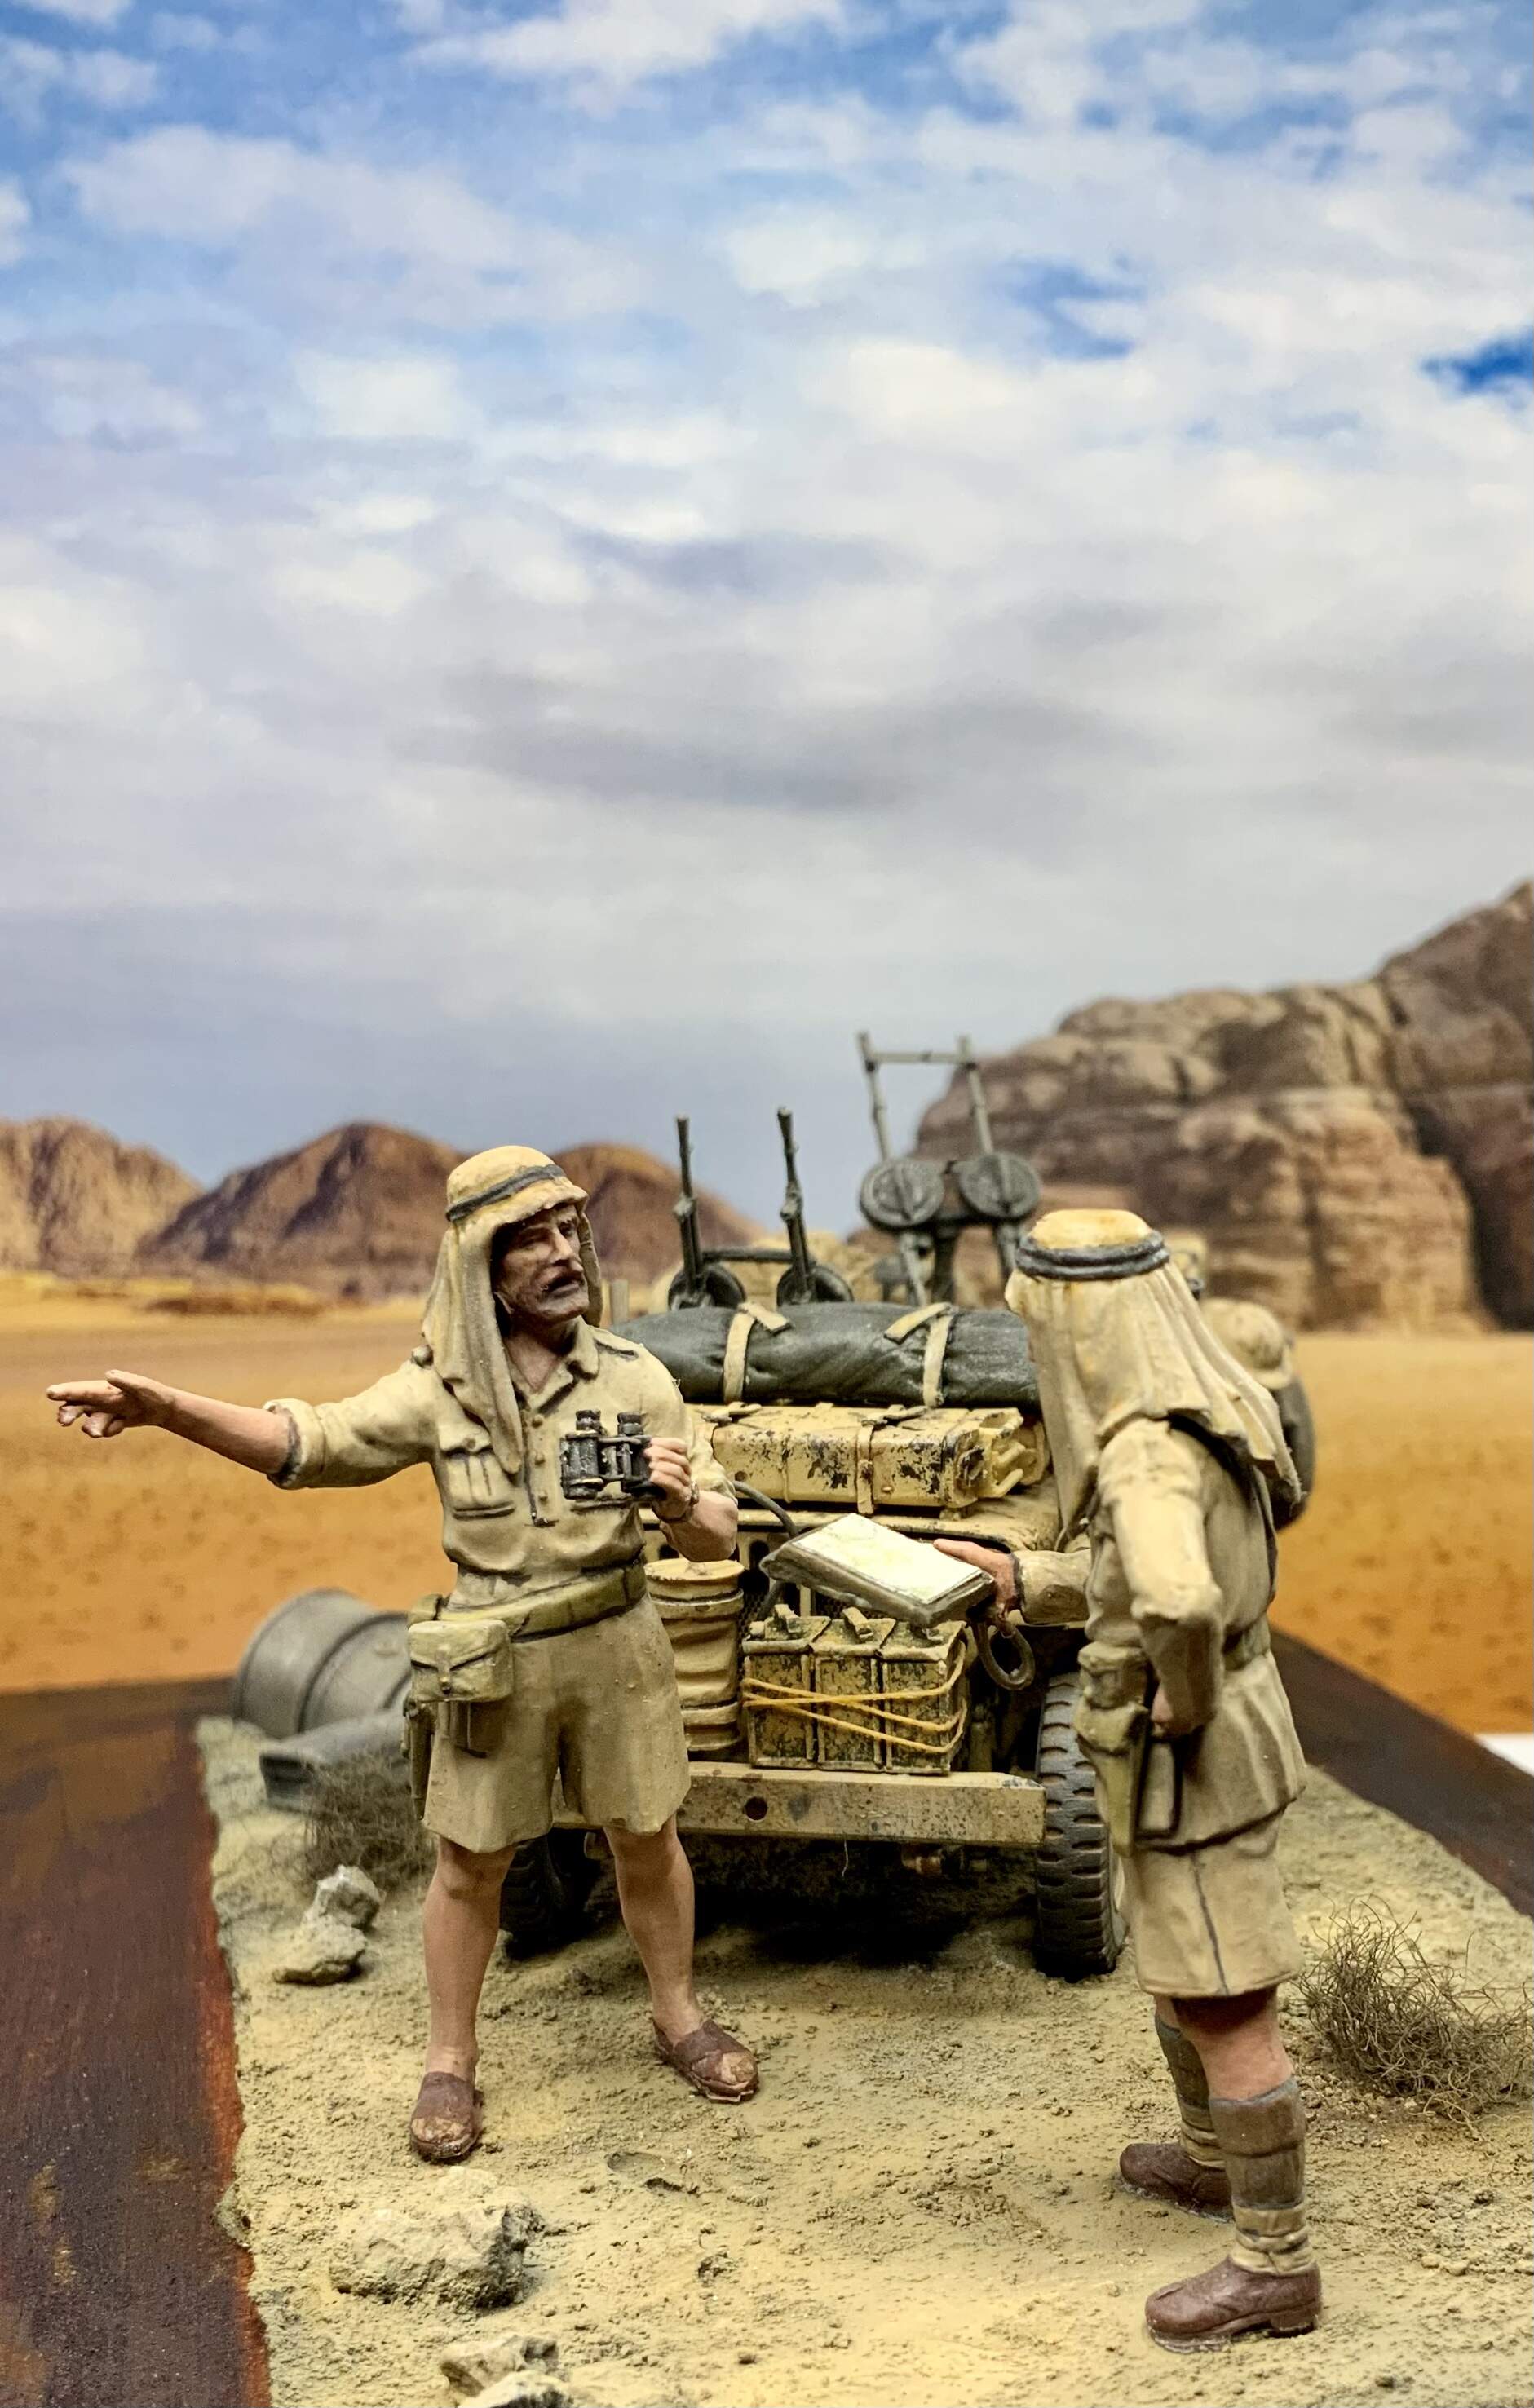
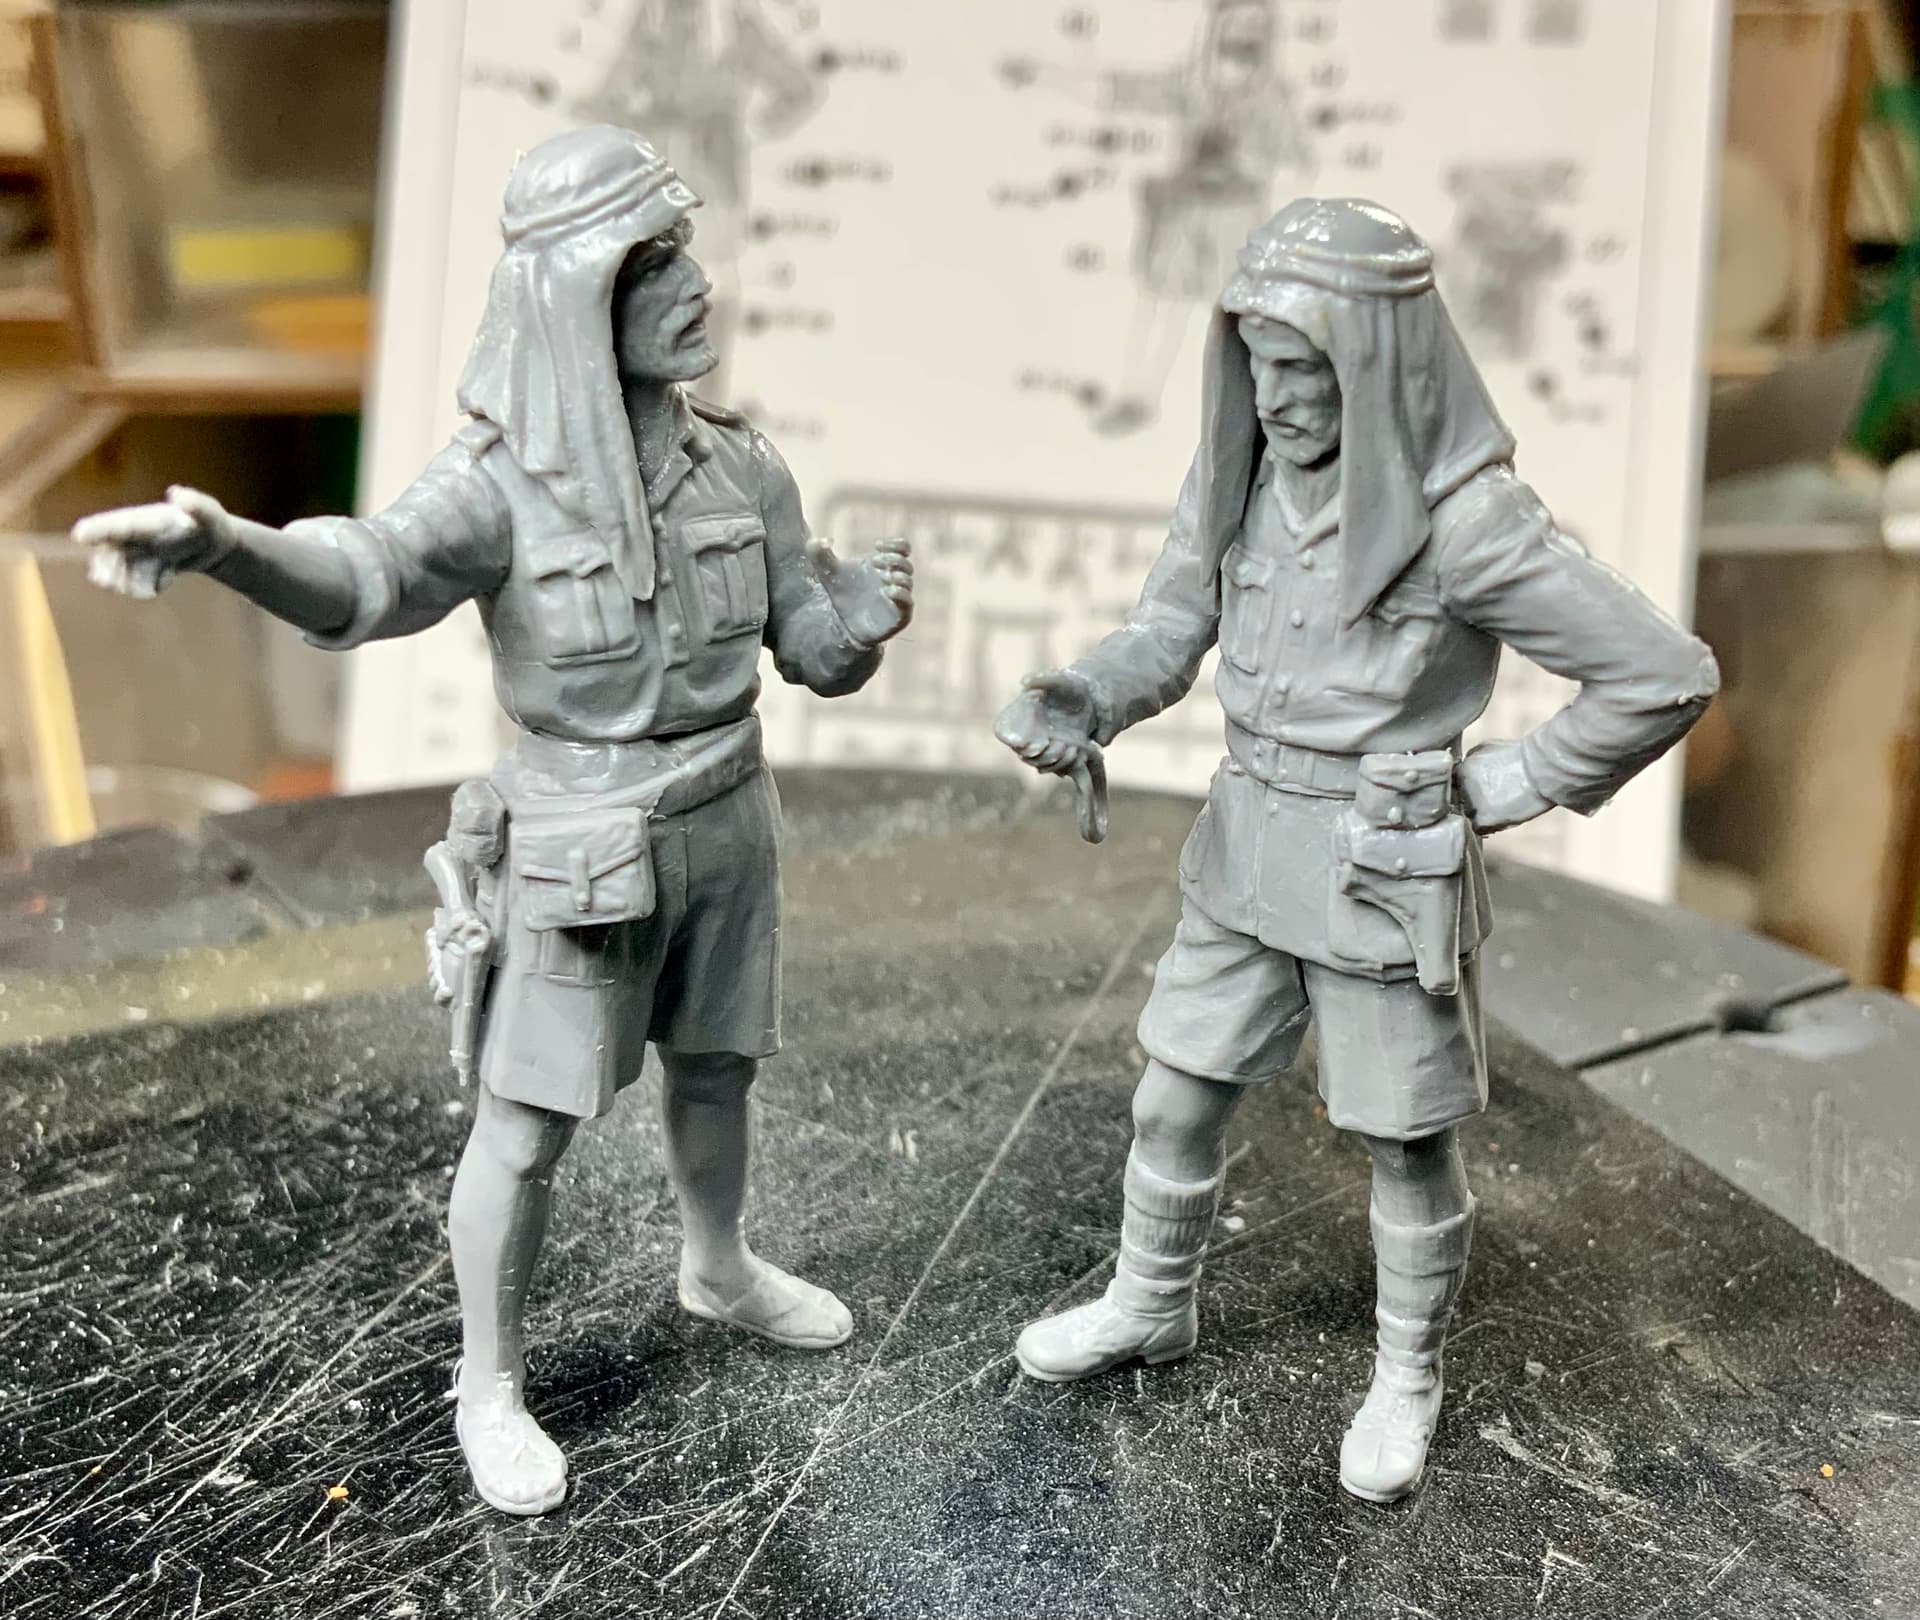
The Jeep will have a base and a crew. I will use MDs LRDG figures as crew. They are of good quality and regarding my figure painting skills, buying expensive resin figures are a waste of money.
Then it was time to install the guns. I painted them off the vehicle and secured them with superglue.
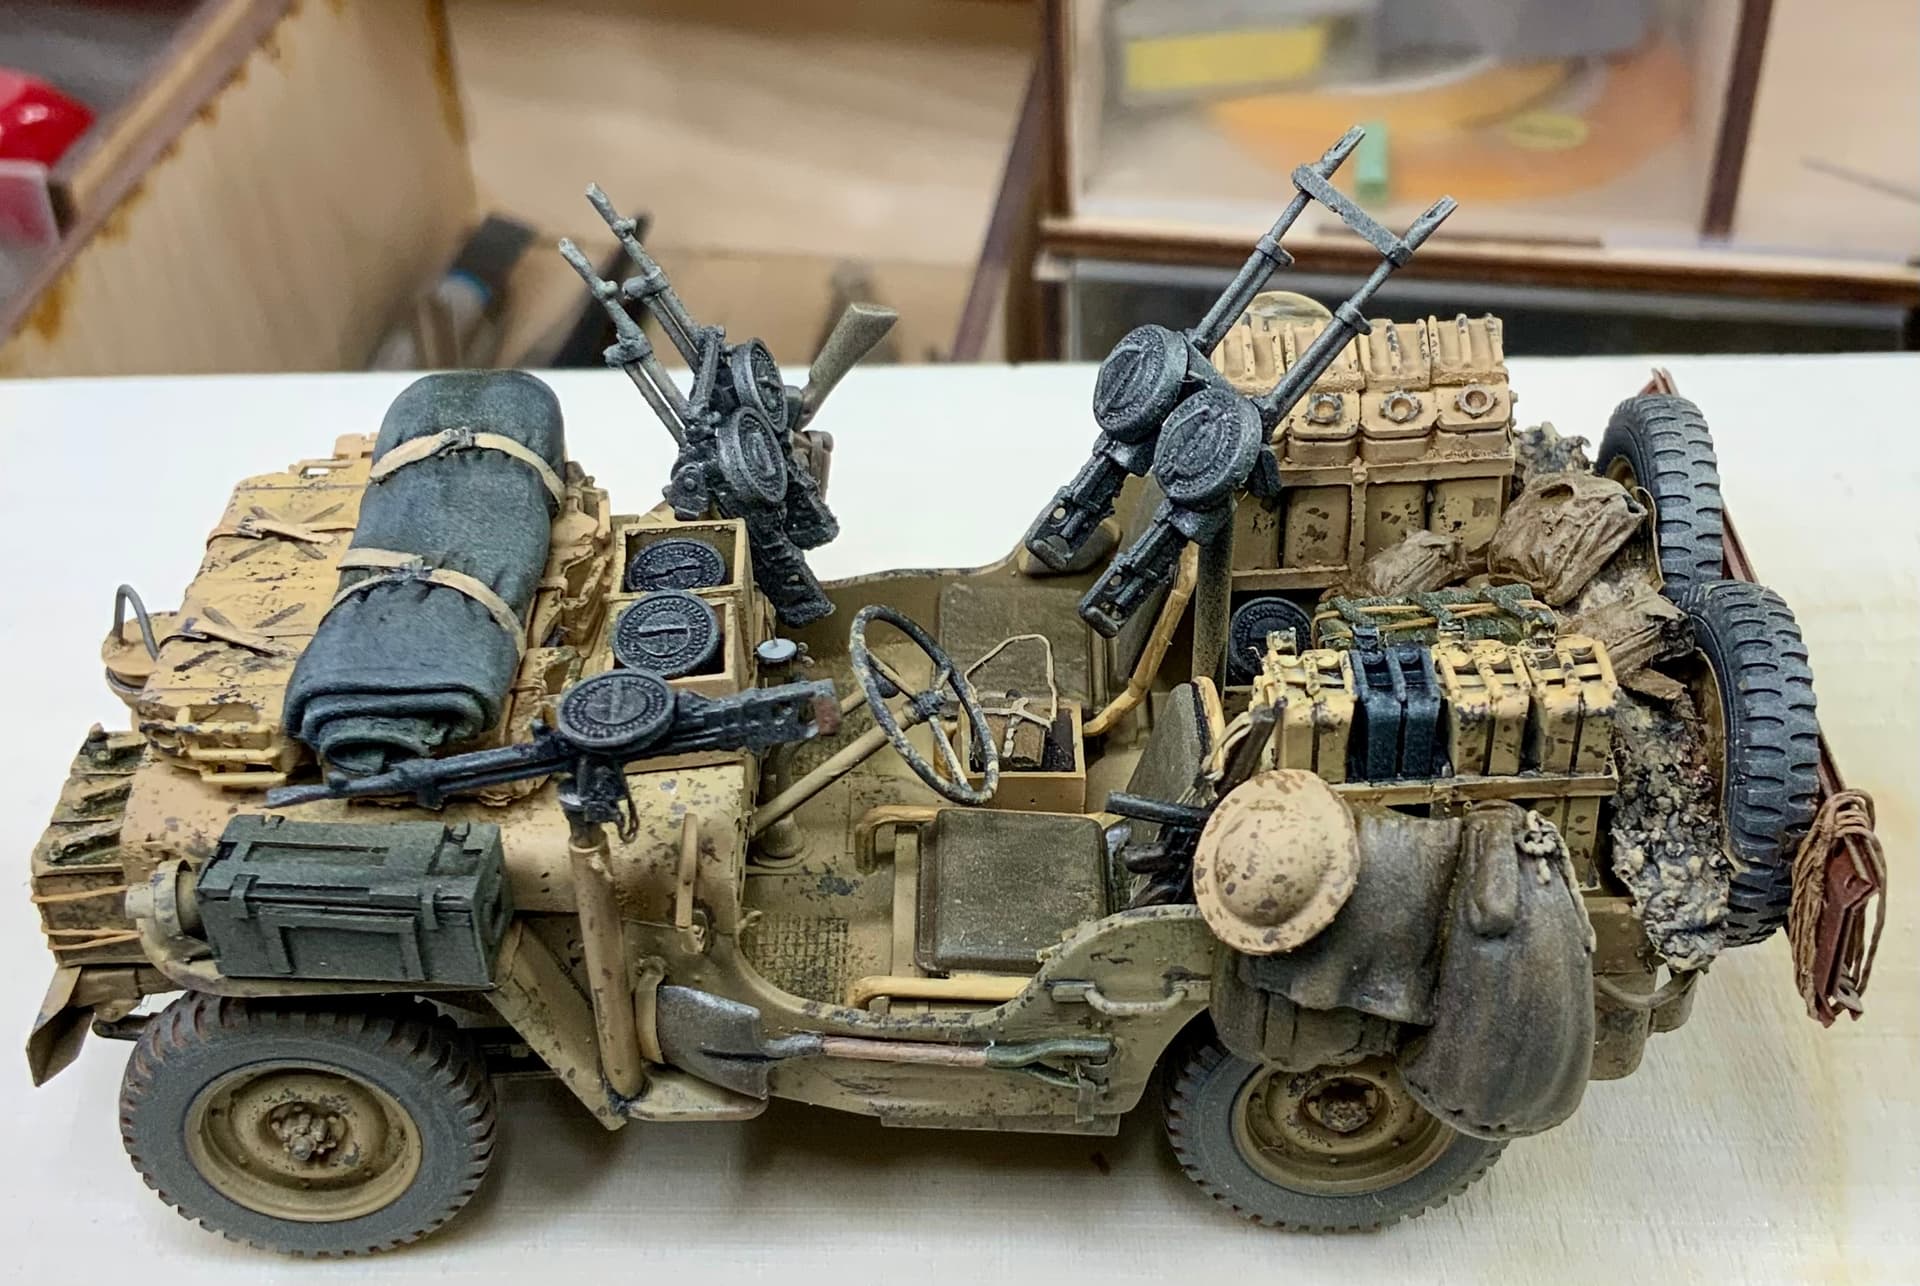
After gluing the sand channels I thought the space between the spare tires and jerry cans looked a bit empty, so I made a camouflage net from Kleenex, tea leafs and diluted white glue. It is unpainted on the picture but it smelt nice.

It was at this stage the rear machineguns broke…
I also “tricked out” the drivers Thompson SMG with a homemade sling made from thin strips of Tamiya tape.
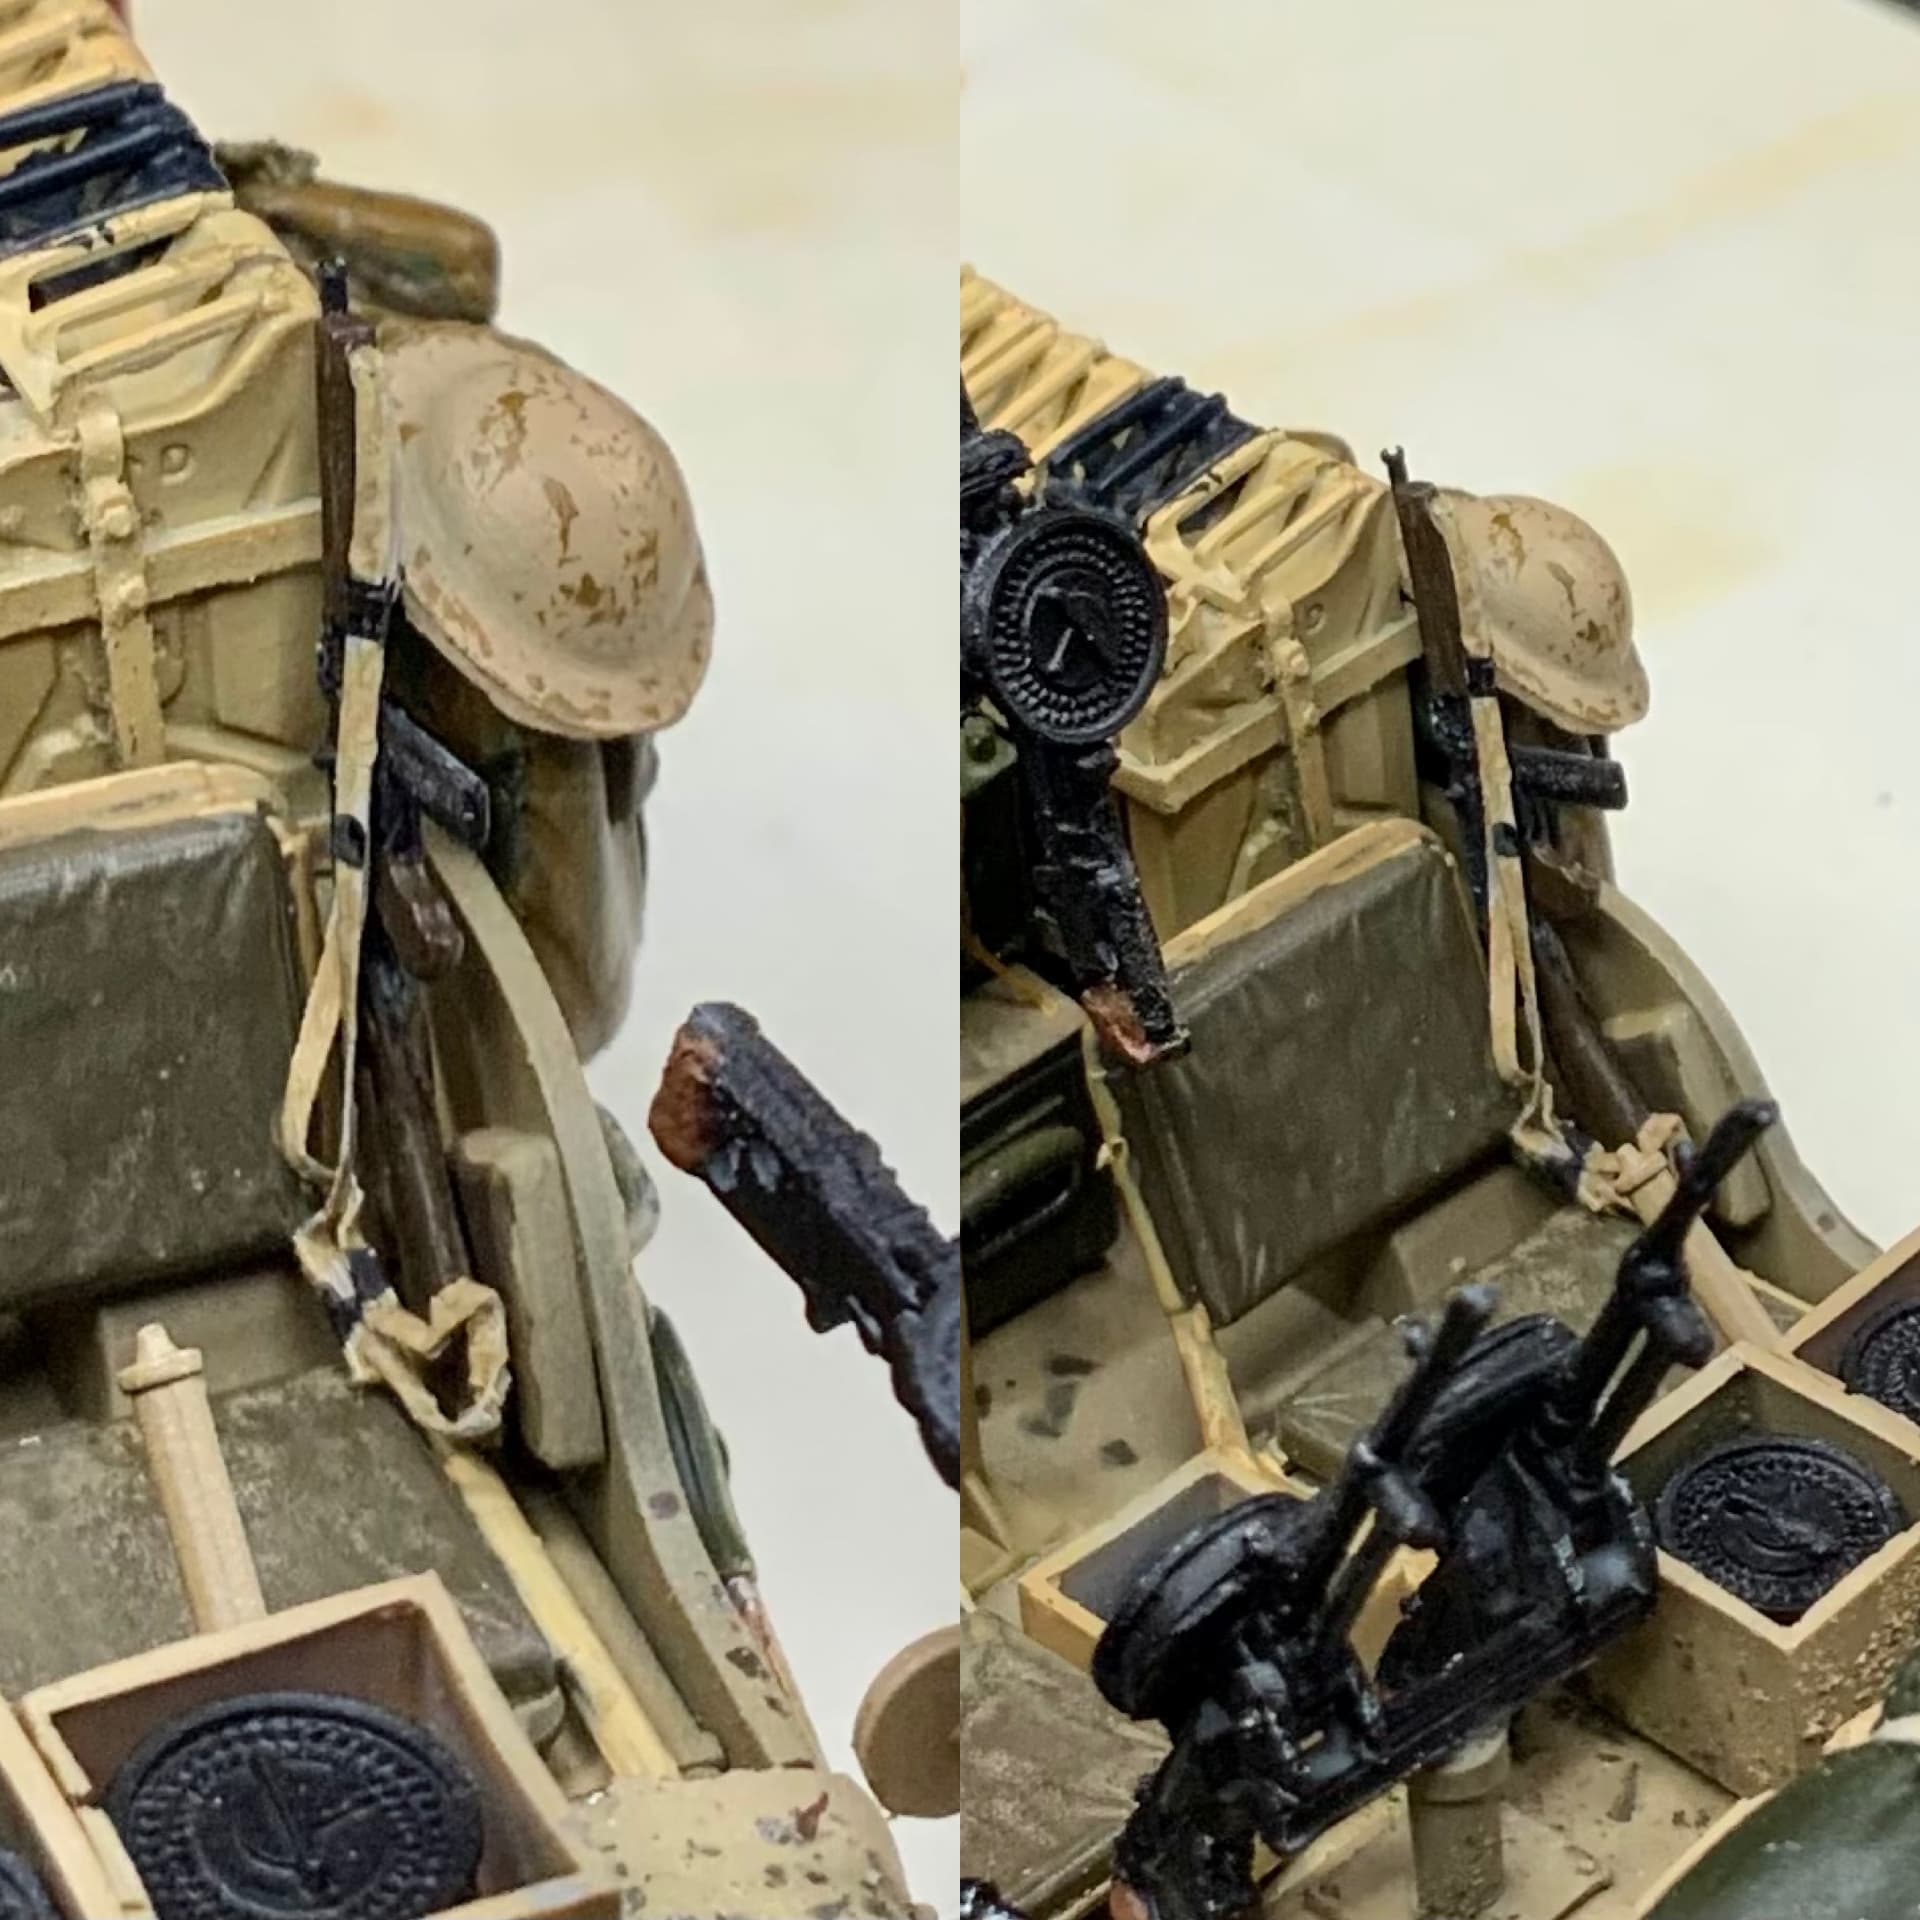
I made some straps for the canteens and some of the bags as well.This picture has the new Dragon Vickers K as well.
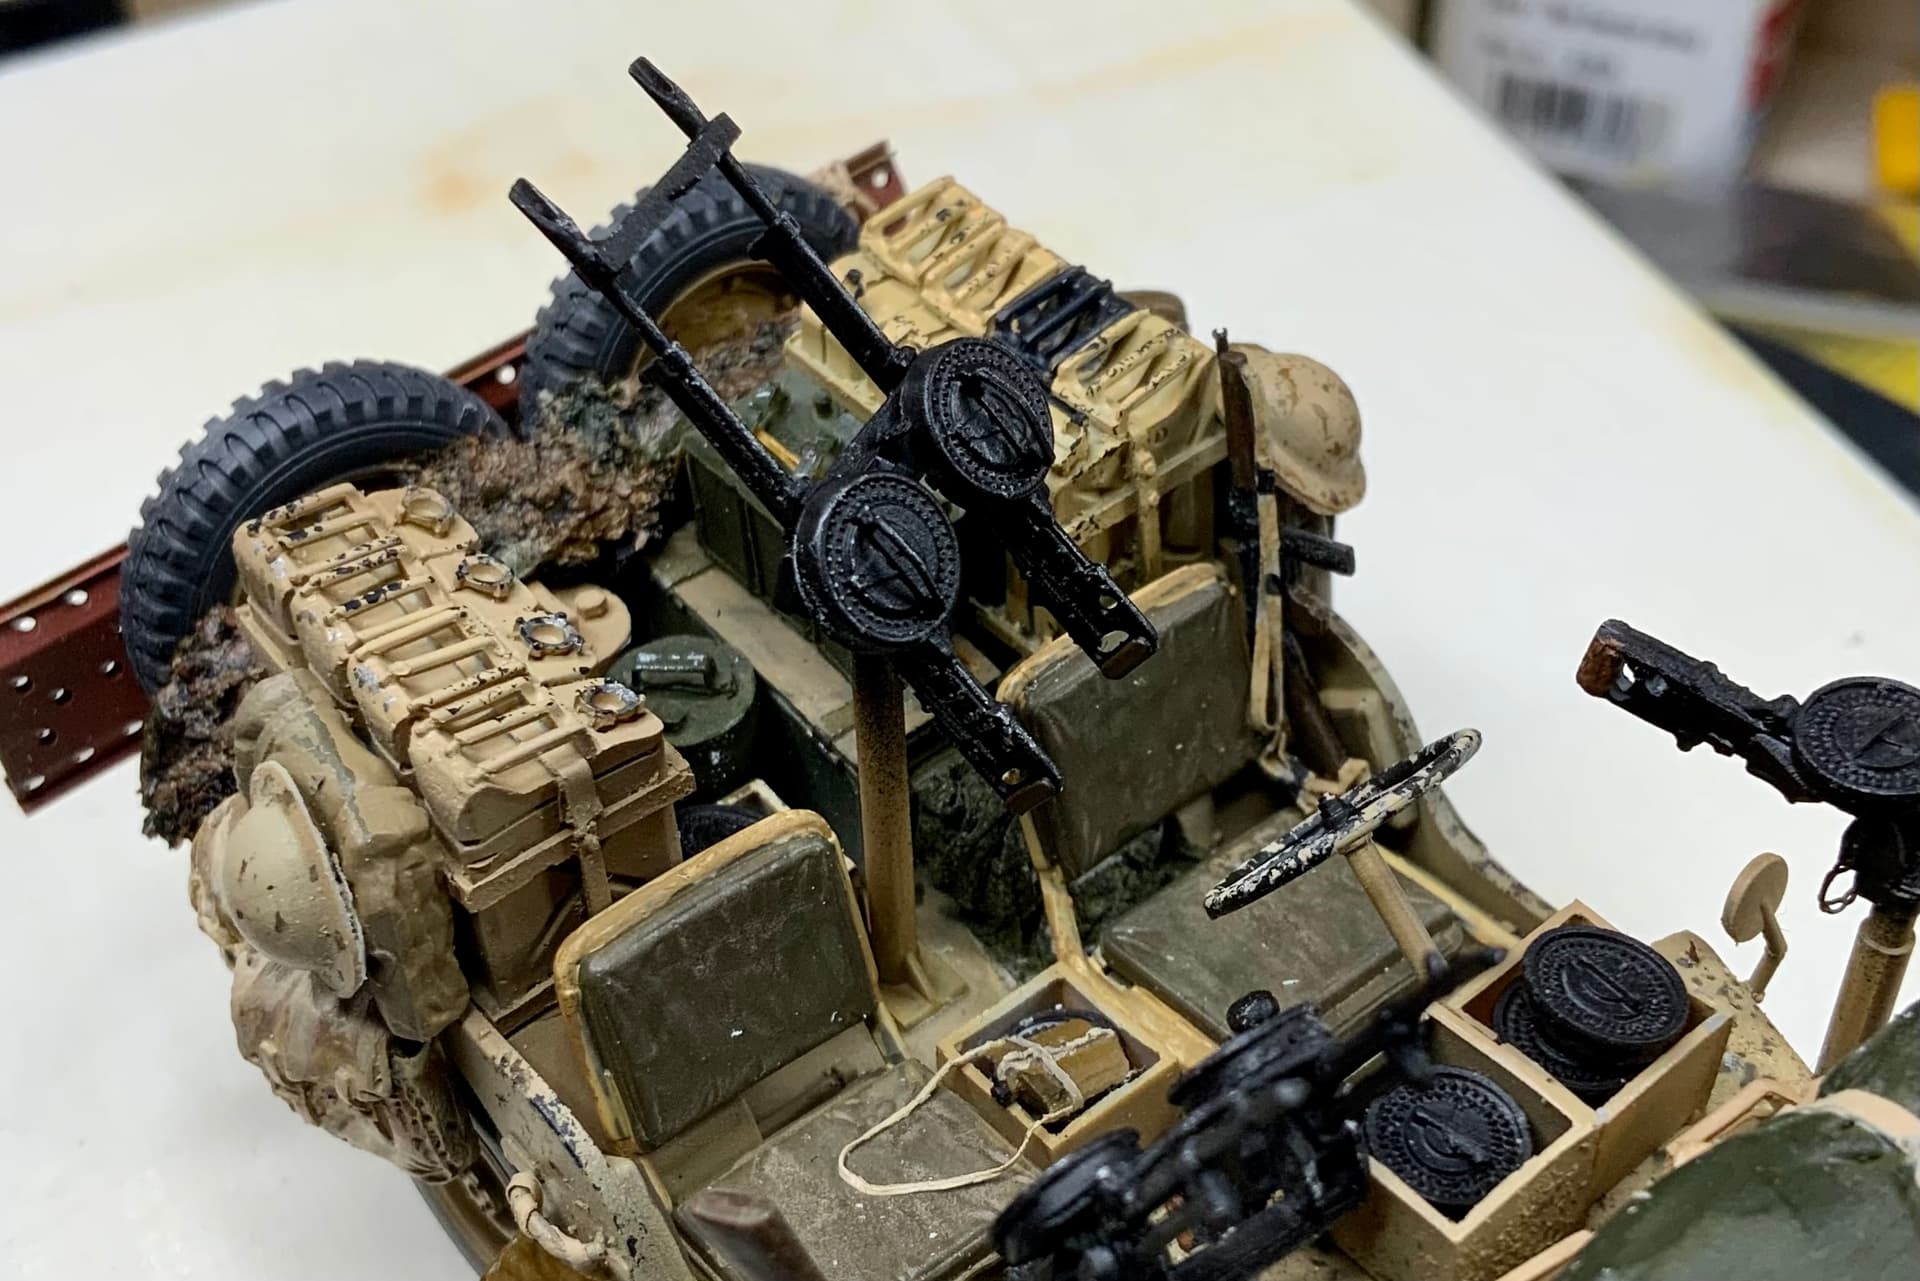
I could not find a part looking like a sun compass in the Black Dog kit so I scratchbuilt one using a tiny piece of styrene with a spare PE part and a little wingnut.
At this stage the vehicle looked like this
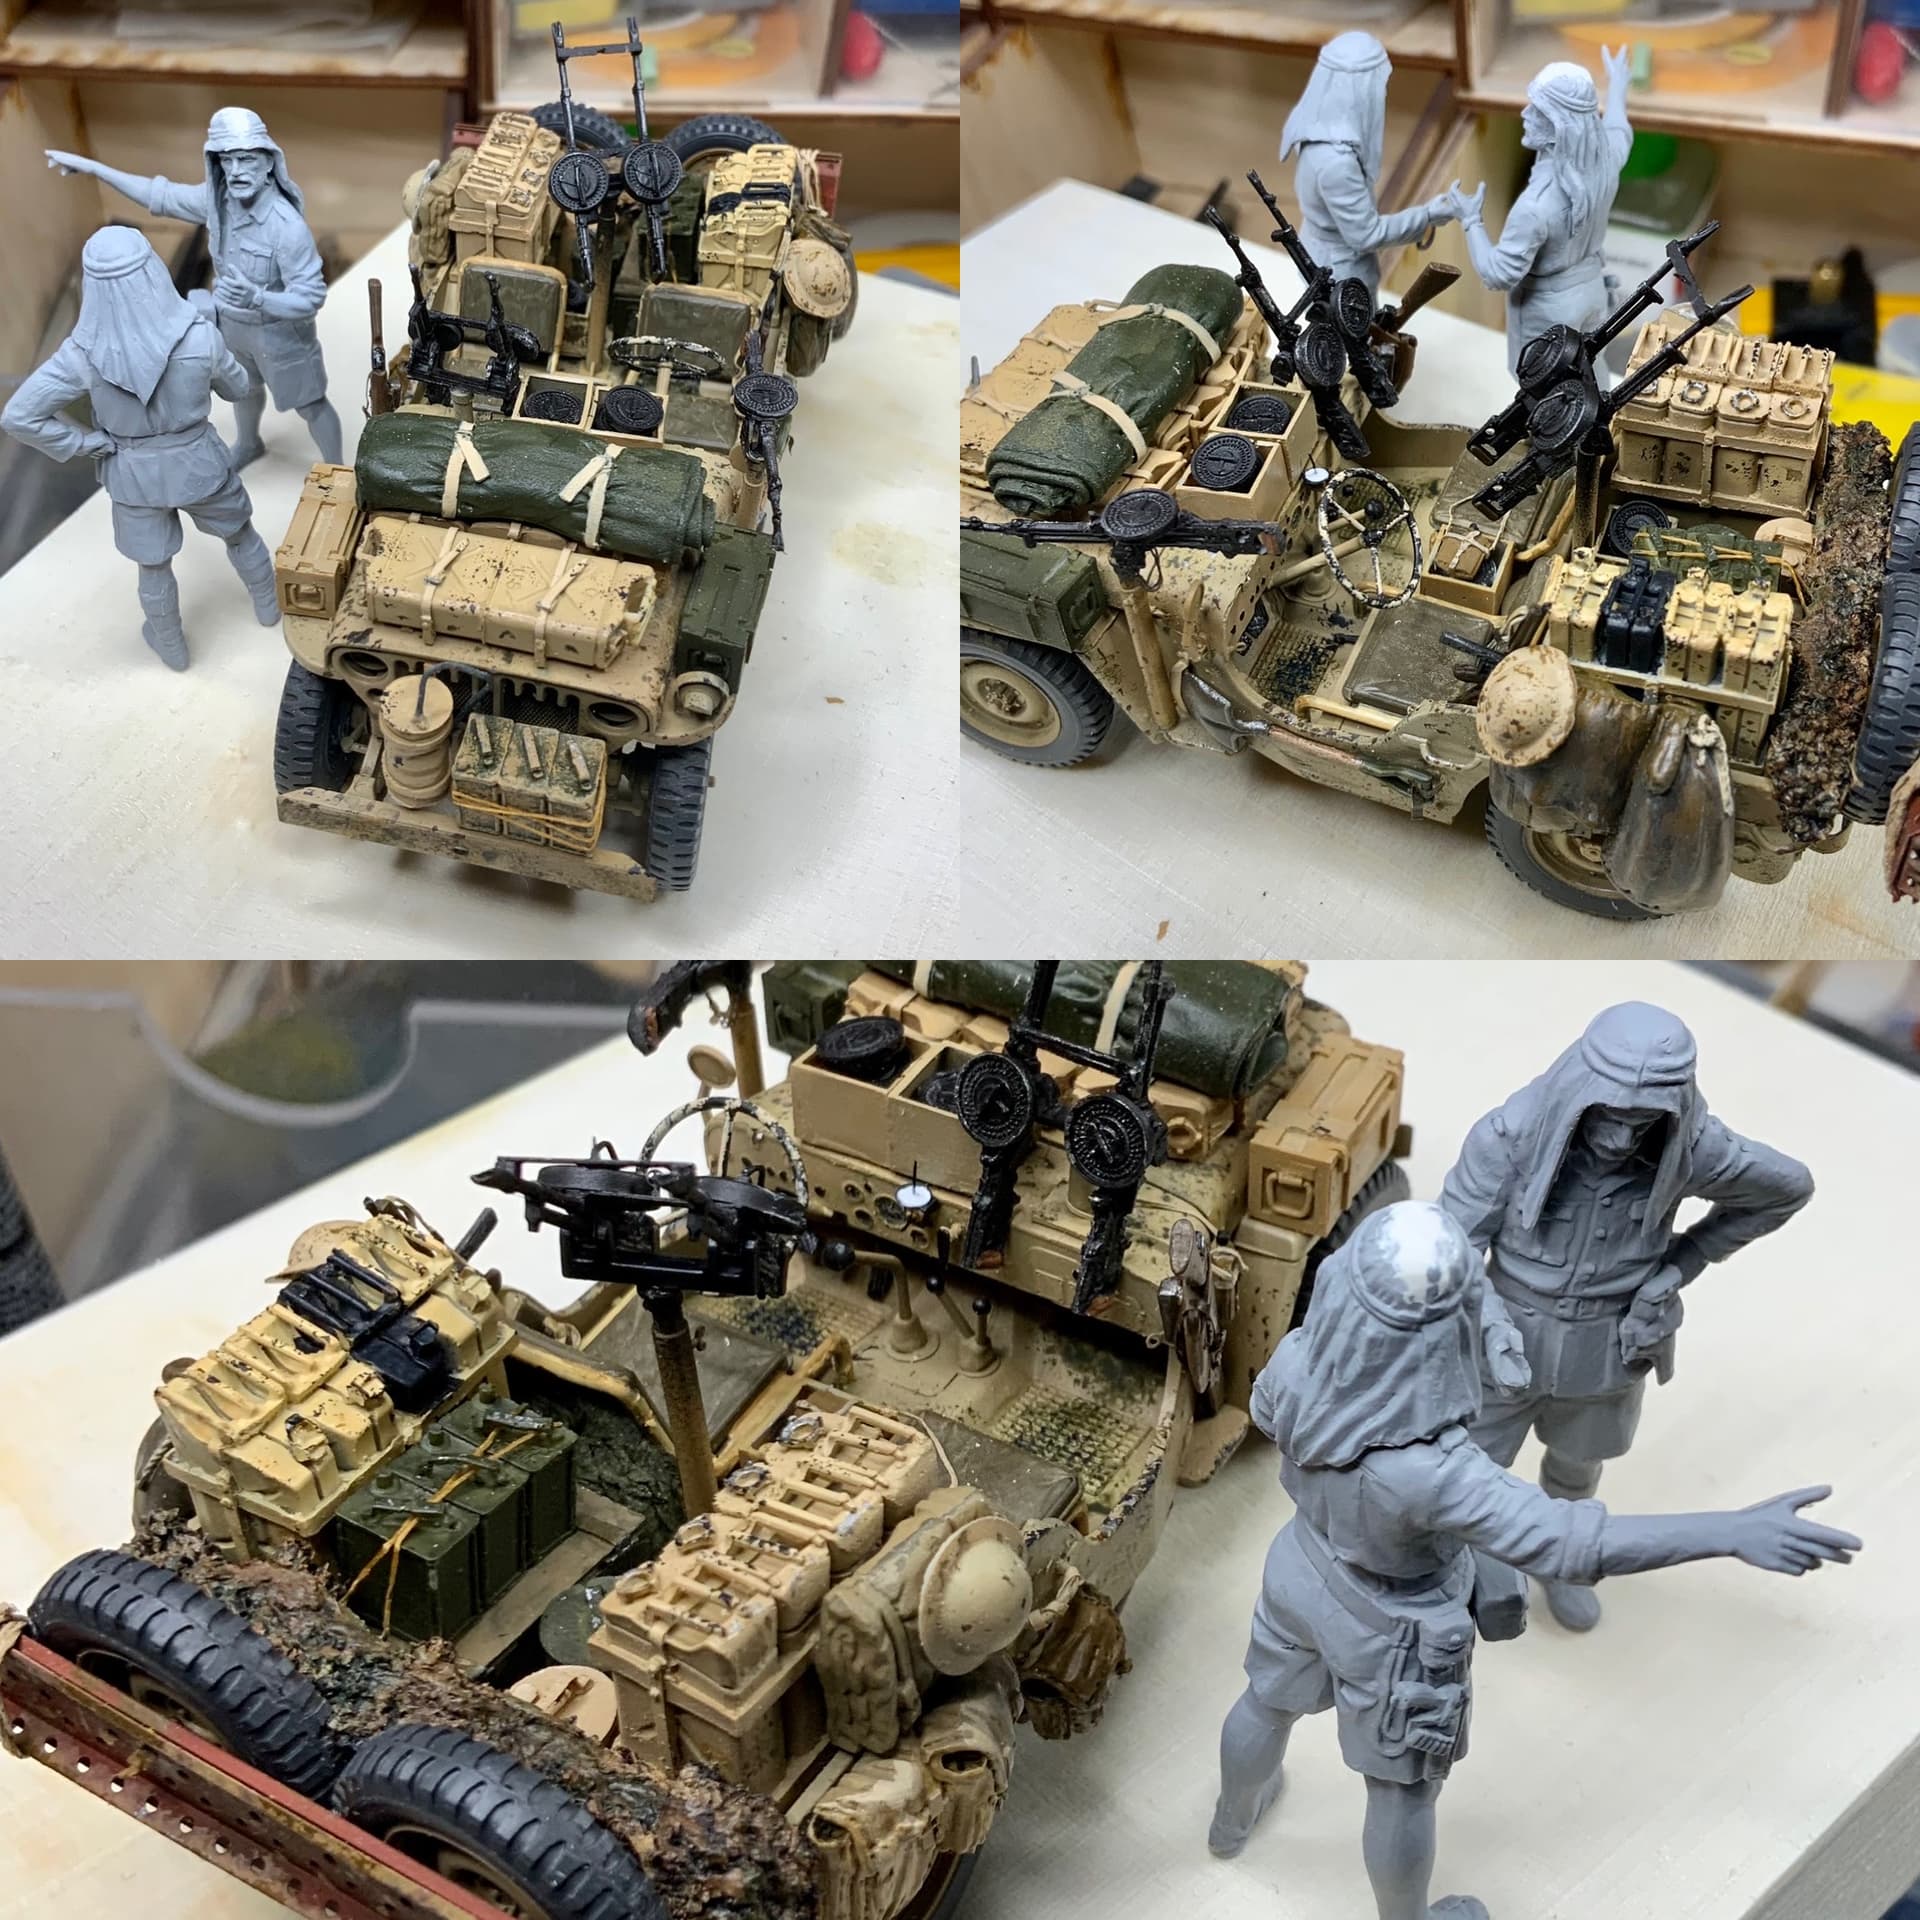
Last thing I made was a British webbing from parts of the Black Dog kit, Tamiya tape and some spare PE parts. My SAS operator was obviously not very impressed…

So after the last detail painting, oils, washes, light dusting with Tamiya buff and a dull coat the vehicle looks like this

Figures and base will be finished in a couple of days (no promises made…)
Best Regards
Erik