So I went to the Post Office this morning to find this biga** box (relatively) waiting for me. Man oh man this bad boy looks sweet and it is huge, bigger than I expected it to be. I’ll have pics tomorrow - after the camera’s battery packs are charged. The plastic is a weird green color, like Revell uses on some of their Armor kits. They’ve molded the anti-slip for you, it caught my eye when I turned the upper hull over. There’s not a lot of PE (thank you, God), and the instructions look pretty clear, there are also notations in the diagram in a different color ink “NOTE! Part Attachment Points!” when there is the chance you might get confused, and there are arrows showing you where on the model parts and sub assemblies are supposed to go. Can’t wait to start slapping this together.
I’m going to humbly take a bit of credit for that.
Look forward to seeing the build.
Ah, that answers the question that came up when I noticed the “18Bravo” marking I noticed on the box art. Strong work, Brother!
I’ll follow a build; did you seeToucan do a few upgrade sets, too? Wheels, packs, and cables for the axels.
I’ve solved the mystery of the vehicle marking choices, you can pick one of four, all from 3rd Tracks attached to BLT 1/5, 15th MEU. I was fairly certain there was some connection between the choices and 1/5 given the battalion’s motto Make Peace or Die on the splash board of each choice.

Here’s a pic by LCPL Peyton Kehle taken during the 15th MEU’s arrival in Okinawa in June 0f 2024 named Cerberus. Started construction of my build yesterday afternoon, so far no real issues aside from some I caused myself. Pictures of the progress later today.
That pretty much describes my time at the Harmony Church School for Wayward Boys.
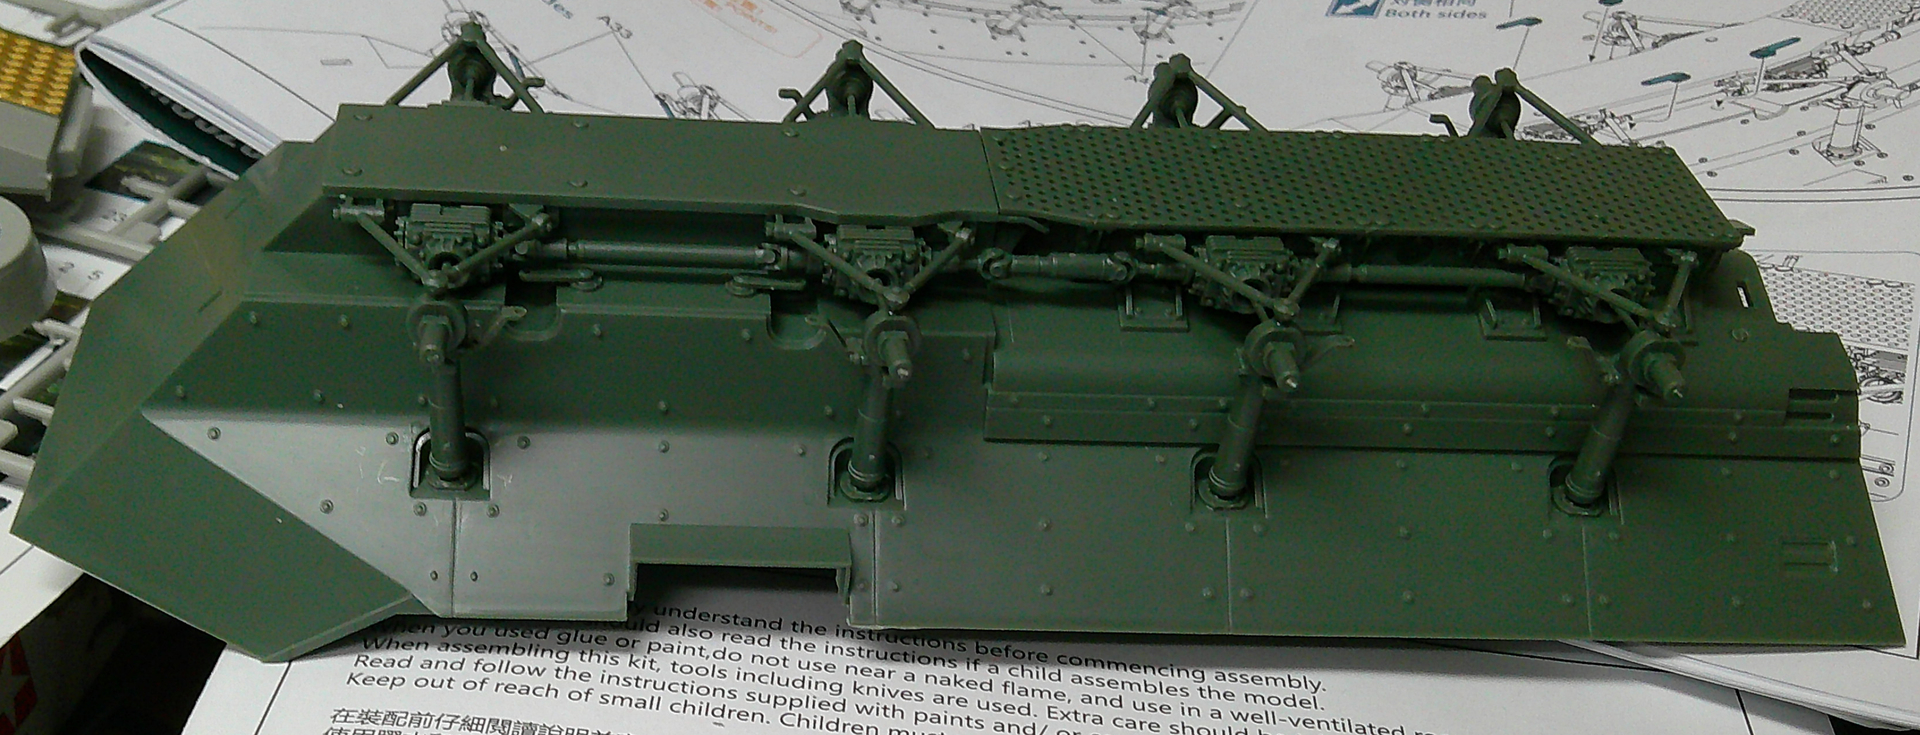
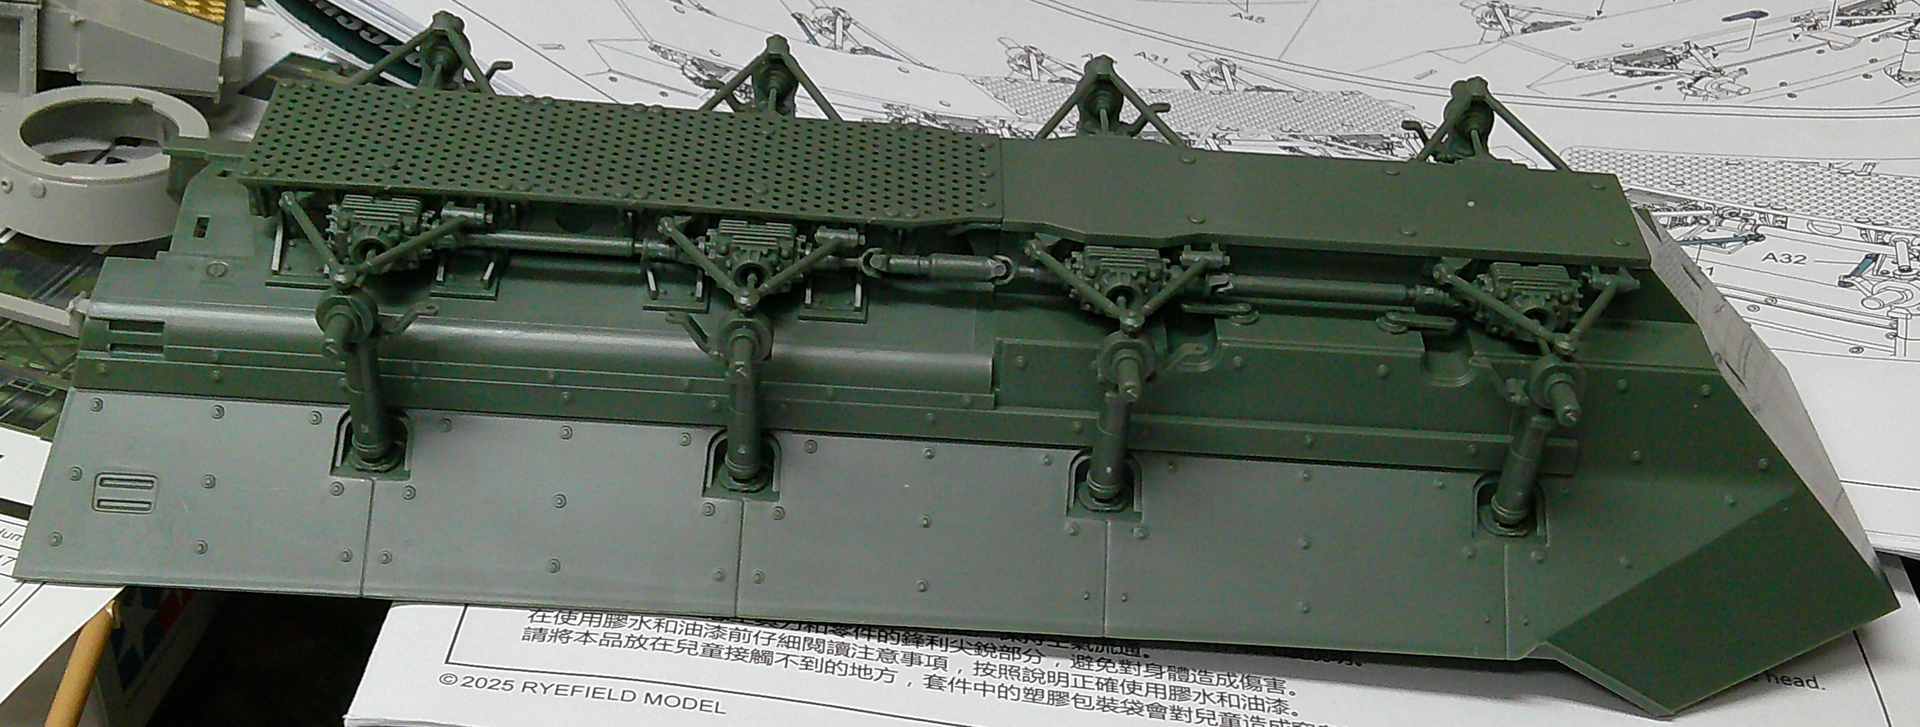
As promised, this is one sitting of progress - Suspension, Steering, Drive train, and hull underside complete, this encompasses steps 1 through 8; just waiting on the brake rotors to dry to attach them which will be the entirety of 9.
A suggestion for anyone building this kit, Step 7 has you add part A46, 4 of them, they’re linkages on the hull bottom for the front wheels. Save yourself a bunch of fiddling and attach them BEFORE you attach the drive train (this is Step 4), it can be done with the drive train attached, but it’s a PITA. And Re. the drive train, try to stay focused when you are putting them together, if you get distracted and don’t go step by step in assembling them - they will not line up…ask me how I found that out. D’OH!!! Like I said before, no issues so far, other than of my own making.
More tomorrow!
How is the fit so far?
The fit thus far is great, no issues to speak of. I have noticed KO pin marks on the inside face of the ramp, but since there is no interior that’s going to be unseen anyway. It’s been a fun build so far. I noticed also that the PE comes pre-colored which is a pretty nice touch. The only thing I would question is using plastic caps to secure the wheels to their axles instead of the vinyl caps you get from AFV/Academy/Tamiya. Built the wheels but haven’t attached them, I left the caps loose inside the wheels halves, but I don’t plan on running this around the floor making vroom-vroom noises, muscle memory I guess…