Ed, I think RLM 74/75 is the way to go. The green you overlaid is, IMHO, a bit forced. Aside from the very correct observation made by TopSmith, all kit manufacturers provide the 74/75 scheme on the upper surfaces of this aircraft.
Sorry, my answer was a bit incomplete. Actually, I wanted to say:
It’s very true! But in the absence of an original palette to compare with (the samples we see online are never the absolute truth, also due to the different response of our monitors) we have to trust the paint manufacturers a bit.
But that’s another problem
I’ve set this kit aside for a while, one thing I want to allow the paint to settle before I molest it further, secondly…I’m using the complex and (relatively) expensive kit to slow myself down.
Is there a consensus that I should have a medium gray with dark gray upper surface, or something like what I did originally?
I’m finding this difficult to photograph, but I think this shows the difference in my references…
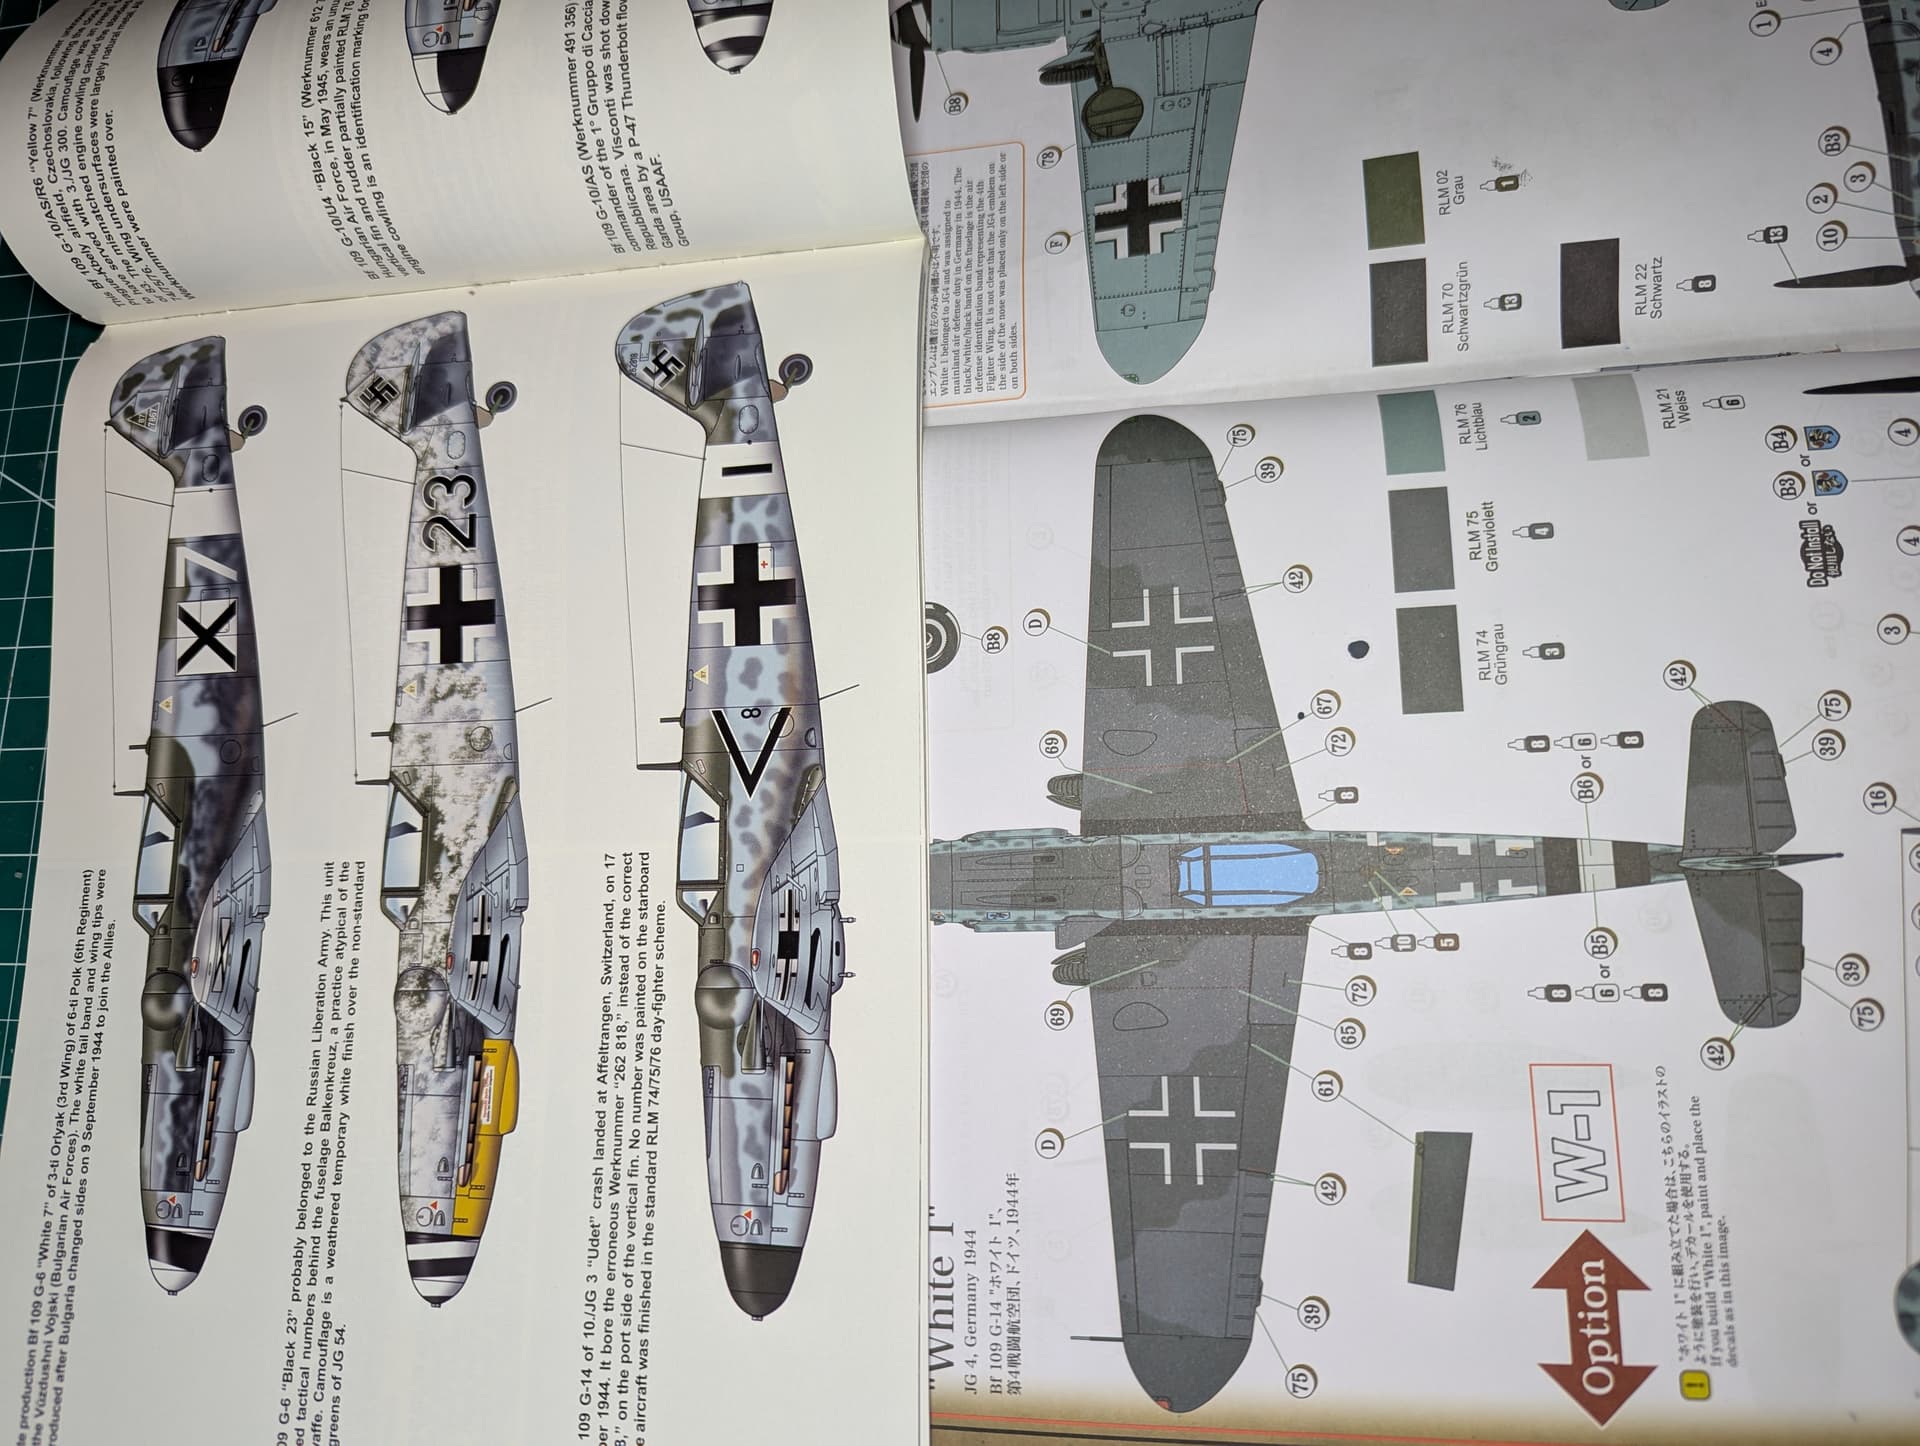
Let’s see if I understood correctly. In the upper part of your photo you showed the page of the Squadron Signal volume that you are using as a reference, while in the lower part you showed the coloring instructions contained in the kit. And your doubt concerns the color differences that you apparently notice (for the upper part of the aircraft) between the two schemes. Is this correct?
OK I assume that this is the doubt. If it is not please clarify it for me.
I would stay calm ED, Squadron Signal also clearly indicates RLM 74/75/76 as the coloring scheme. In the kit instructions (even if it is not visible in the photo) it is also present 74/75/76 if I remember correctly what you said. So the consensus is without a doubt 74/75 on the upper surfaces. Again if I understood your doubt correctly, Squadron Signal shows a gray tending towards green and this is what led you to spread the green on the gray, but I would not be fooled by this. Printing processes are never perfect in reproducing colors…
Dan
Way back in 1990 I built this model, when my modeling skills were still in their infancy (not that they are any better now ![]()
![]() ). And when kits certainly didn’t have the quality they have today.
). And when kits certainly didn’t have the quality they have today.
As you can see, the upper surfaces are in the pattern that you’re so worried about, two shades of gray 75 and 76.
I hope I’ve been helpful.
4 Likes
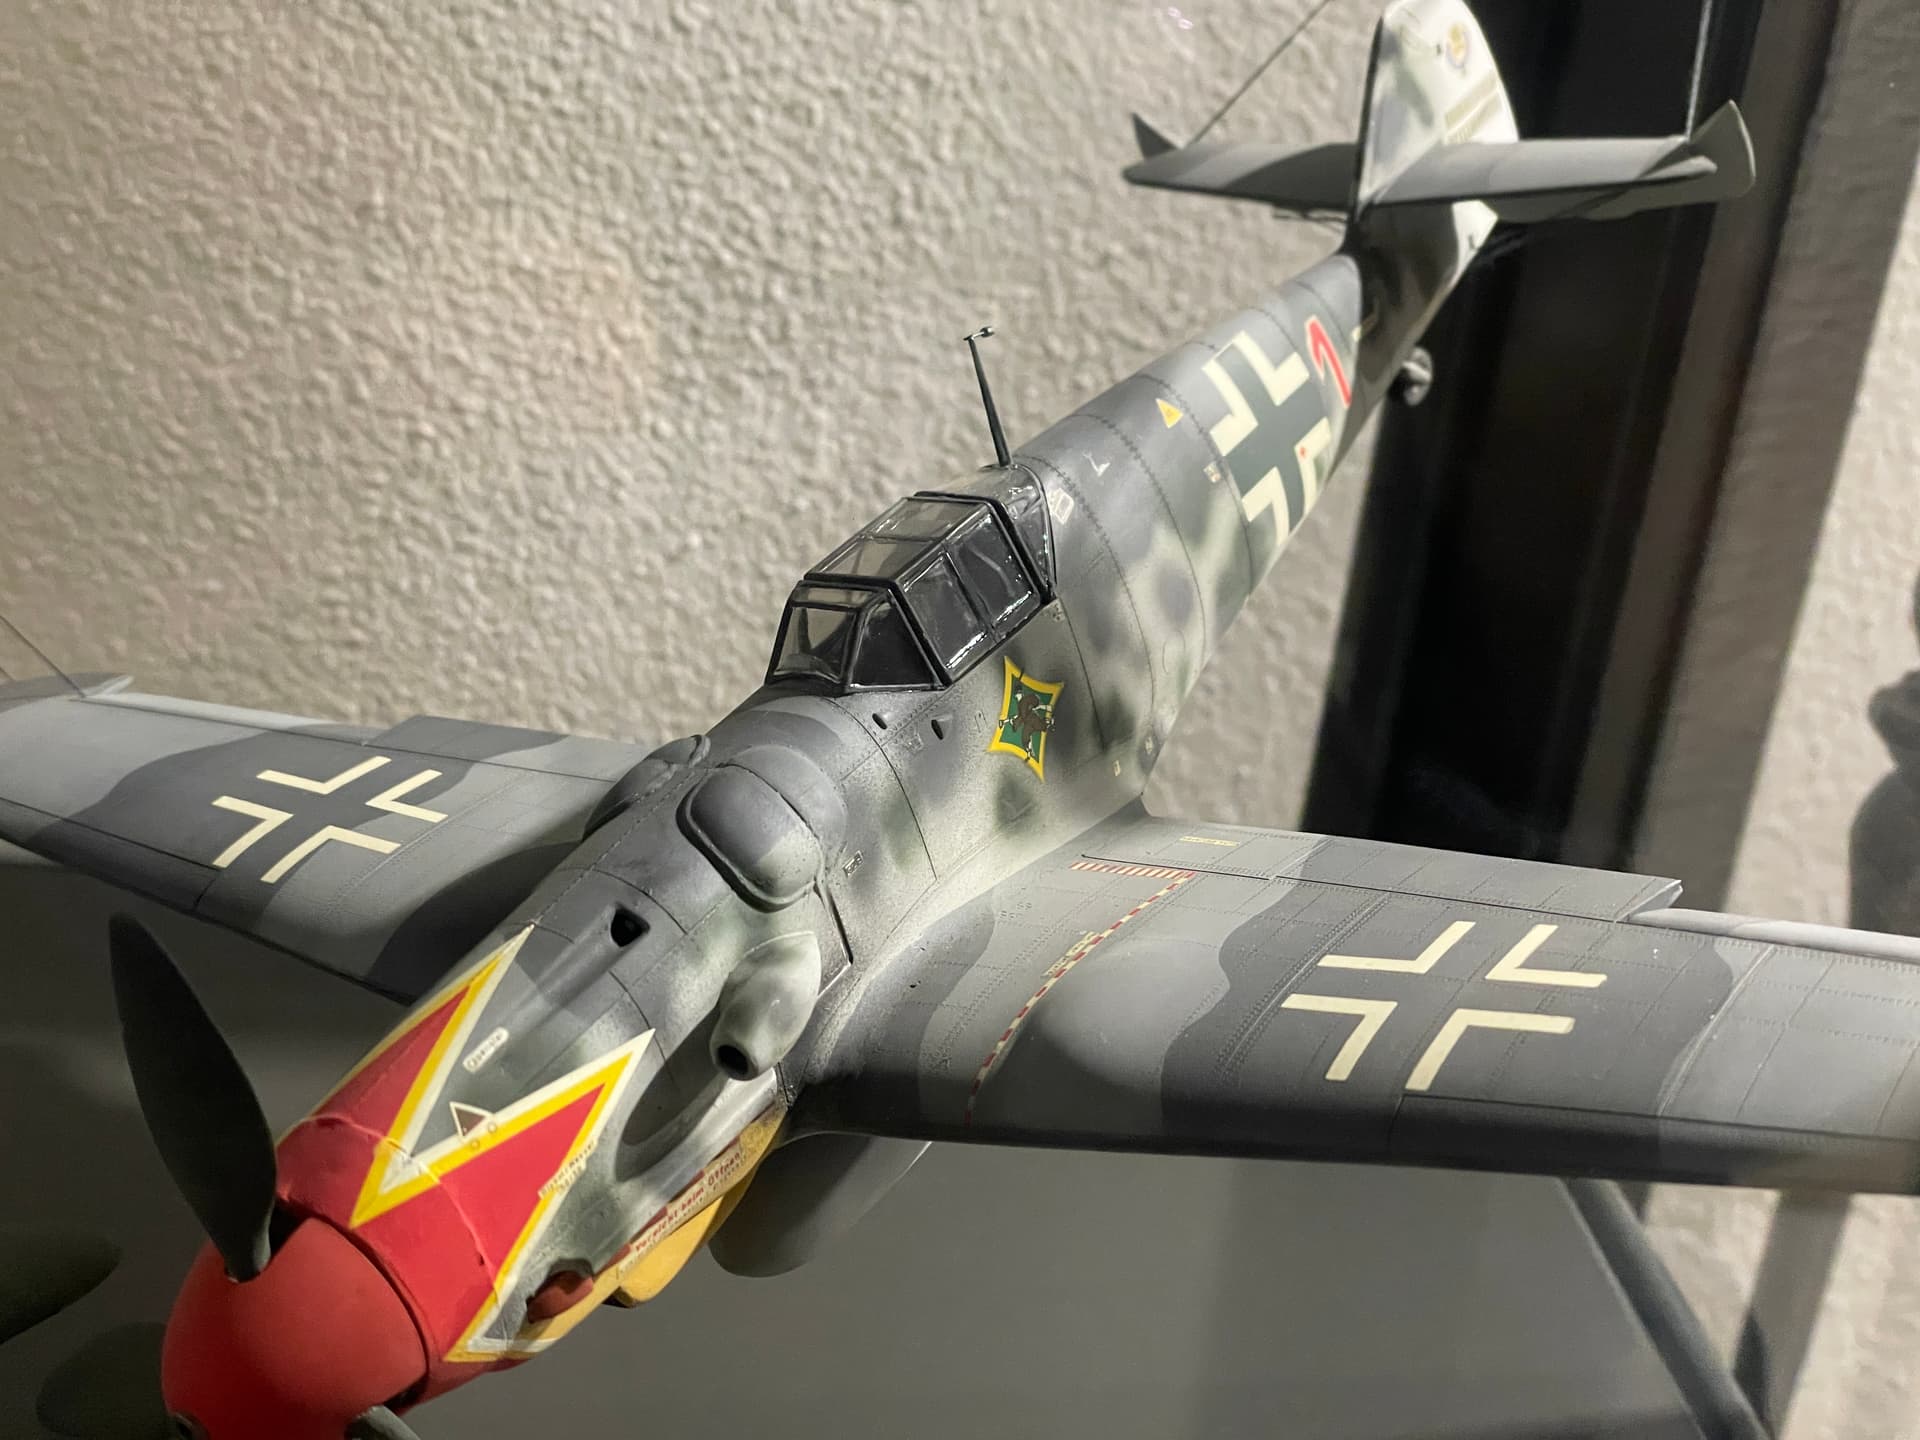
I fixed the paint, went back to the dark gray but left a hint of green in there since the color’s name has “grun” in it ![]()
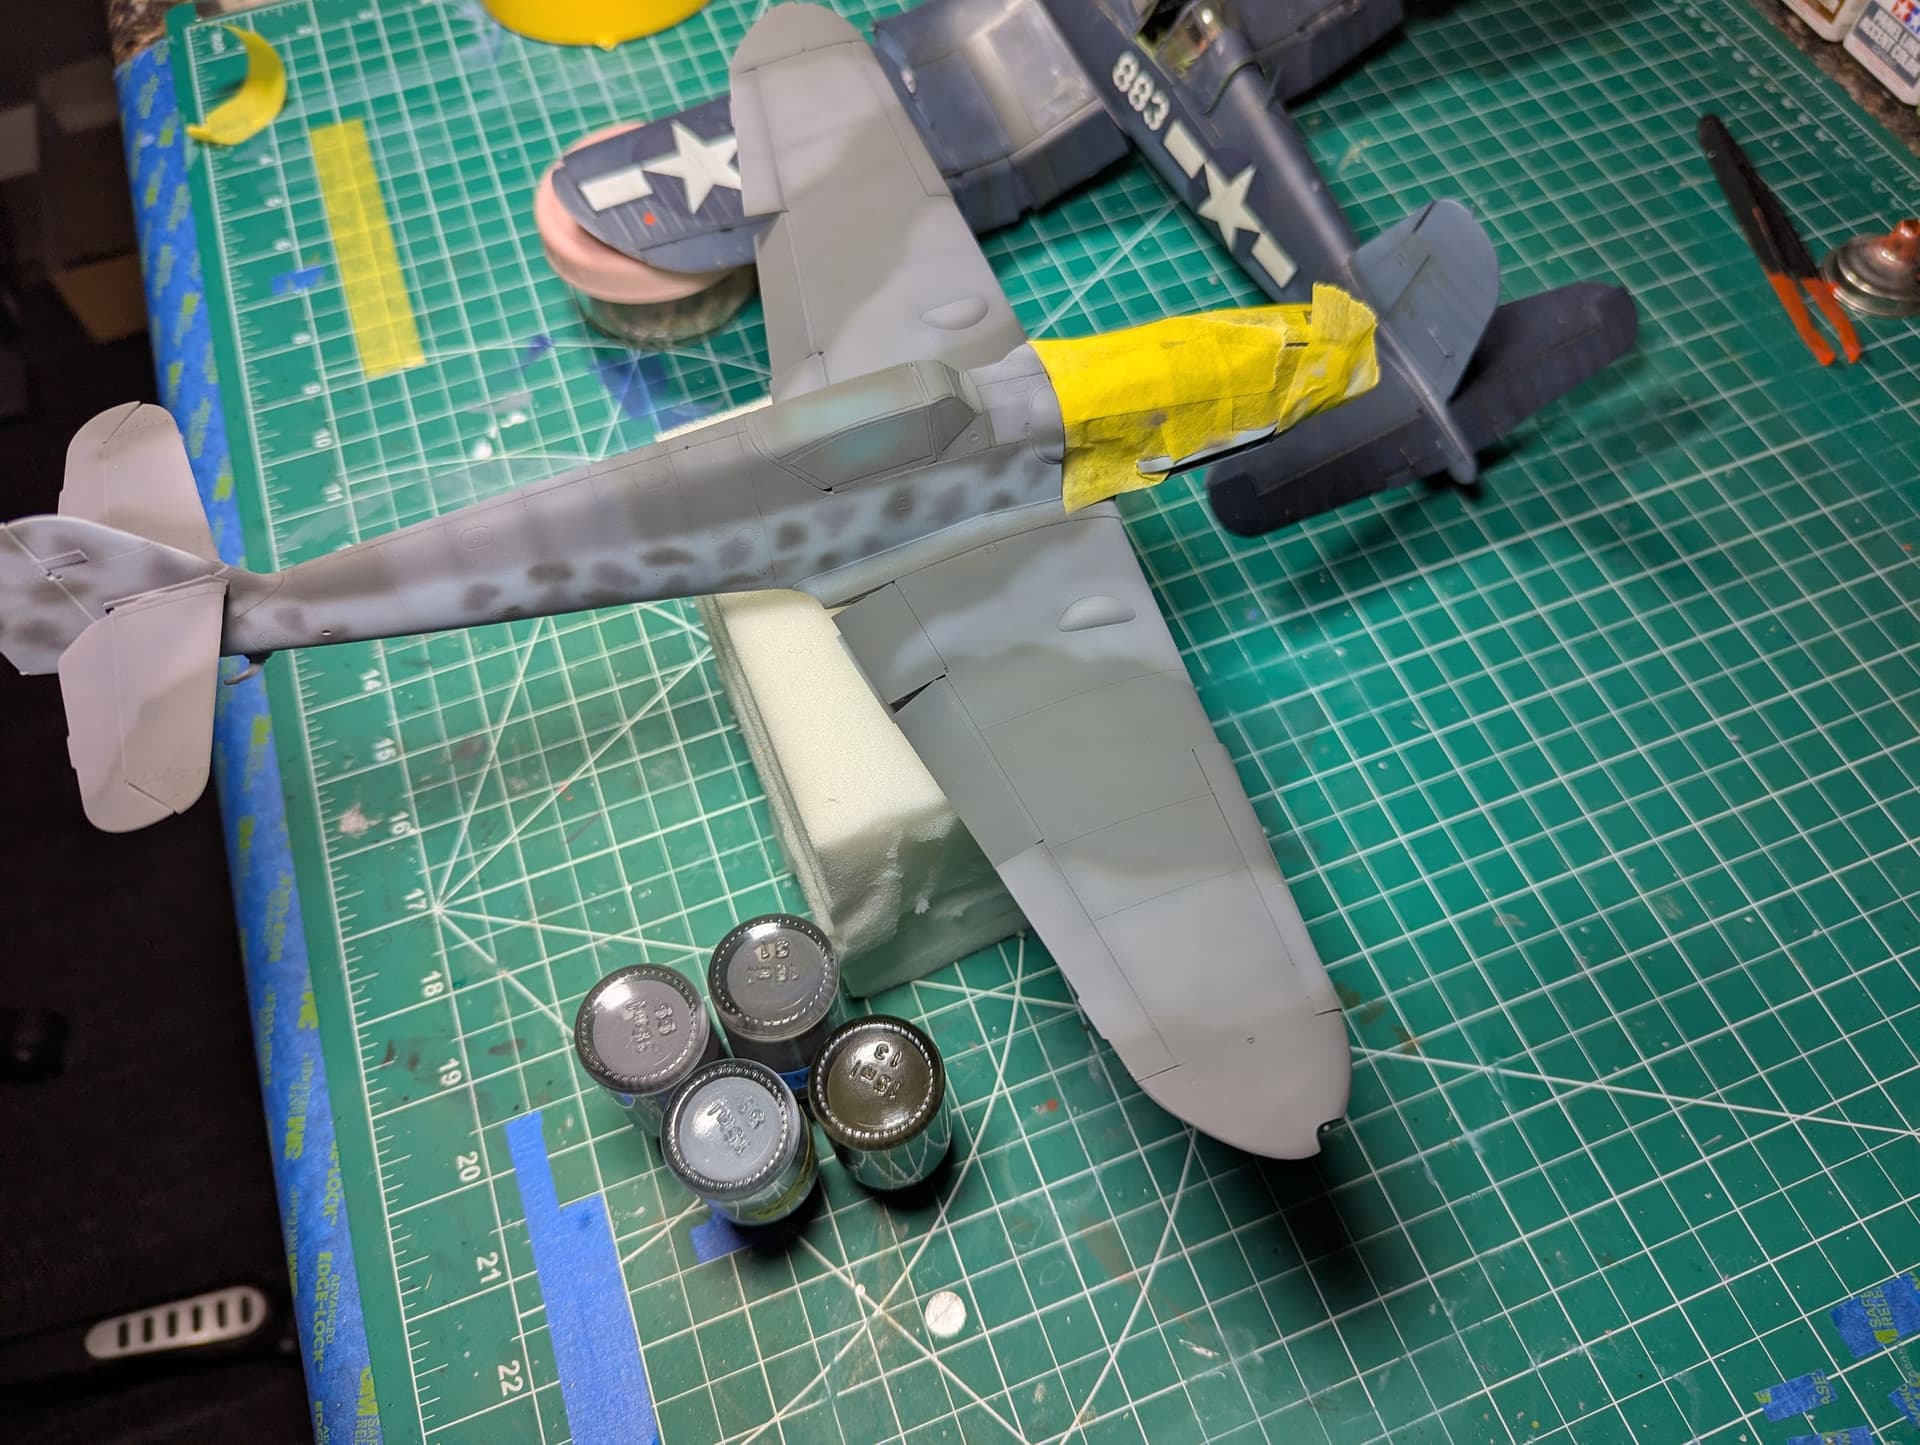
You can see my little glass bottles of mixed paint there, shows the significant difference of the dark green and dark grey side by side. I was happy with the change so I went ahead and added the mottling. The large gap at the rear of the fuselage will be covered by a much wider than normal “defense” band that practically covered two of the panels entirely.
I decided to lock in the changed and protect the fragile (Tamiya XF sprayed thin) paint with a clear coat, so I headed to the garage with her. Then I broke it!
Quite literally dropped it onto a concrete floor from above waist height.
Damage is bad but could be worse…
- Engine broke loose from 3 of the 4 mounts
- Oil tank broke off
- Rudder broken off
- My puttied seams at wing roots opened up
- Both machine guns and their mounts broken off
All of the items listed above can be repaired, I have not the heart to check the paint, but two items I consider more serious are two parts that broke off and I cannot find, the antenna that mounts to the hinged canopy and one of the machinegun mounts. To find them I used my shop-vac, but stuck a piece of panty-hose into the hose to act as a filter, after a few passes all I picked up were metal shavings saw dust and some dead bugs. Guess I’ll have to move my hotrod out to the driveway and relocate my stack of lumber and keep trying, but it doesn’t look good. Maybe I’ll get lucky, they did not vaporize so they are there somewhere.
I put all the parts back into the box, wrapped the main assembly in a towel and stashed it in the closet. I’ll decide what to do after the emotions fade a bit.
1 Like
Always darkest and coldest before dawn. Sounds like a couple of hours and you will be back where you were. May need a divining rod to find the missing parts.
2 Likes
Damn! I understand you, it happened to me in the past. But unlike you, I think that the “vaporization” of the little pieces that fell on the floor is a real phenomenon ![]() , since after having passed the broom, then the vacuum cleanert the same way you did, then even the tongue on the floor (which has never been so clean again!), the little pieces were never found. So I understand the frustration but, cheer up, everything can be remedied (not least by ordering the replacement sprues containing the lost pieces). I did it with a Hasegawa SH-3H SEA KING, started in 1995 and resumed (in the conditions you can imagine) in 2021. Normally the store where you bought the kit can do it.
, since after having passed the broom, then the vacuum cleanert the same way you did, then even the tongue on the floor (which has never been so clean again!), the little pieces were never found. So I understand the frustration but, cheer up, everything can be remedied (not least by ordering the replacement sprues containing the lost pieces). I did it with a Hasegawa SH-3H SEA KING, started in 1995 and resumed (in the conditions you can imagine) in 2021. Normally the store where you bought the kit can do it.
Dan
1 Like
Thank you for the kind words and the humor. My wife asked what I was laughing at and I decided not to tell her it was about a guy licking his carpet!
I’m not giving up, just healing from the trauma, LOL. Worst case possible, I’ll fabricate the missing bits and bring it to the finish line.
I thank you for all the guidance you have provided!
2 Likes
I didn’t say or do anything that you wouldn’t have done yourself even without my intervention in the discussion.
Rather, I’m happy to have made you smile together with your lady
![]()
Dan
1 Like