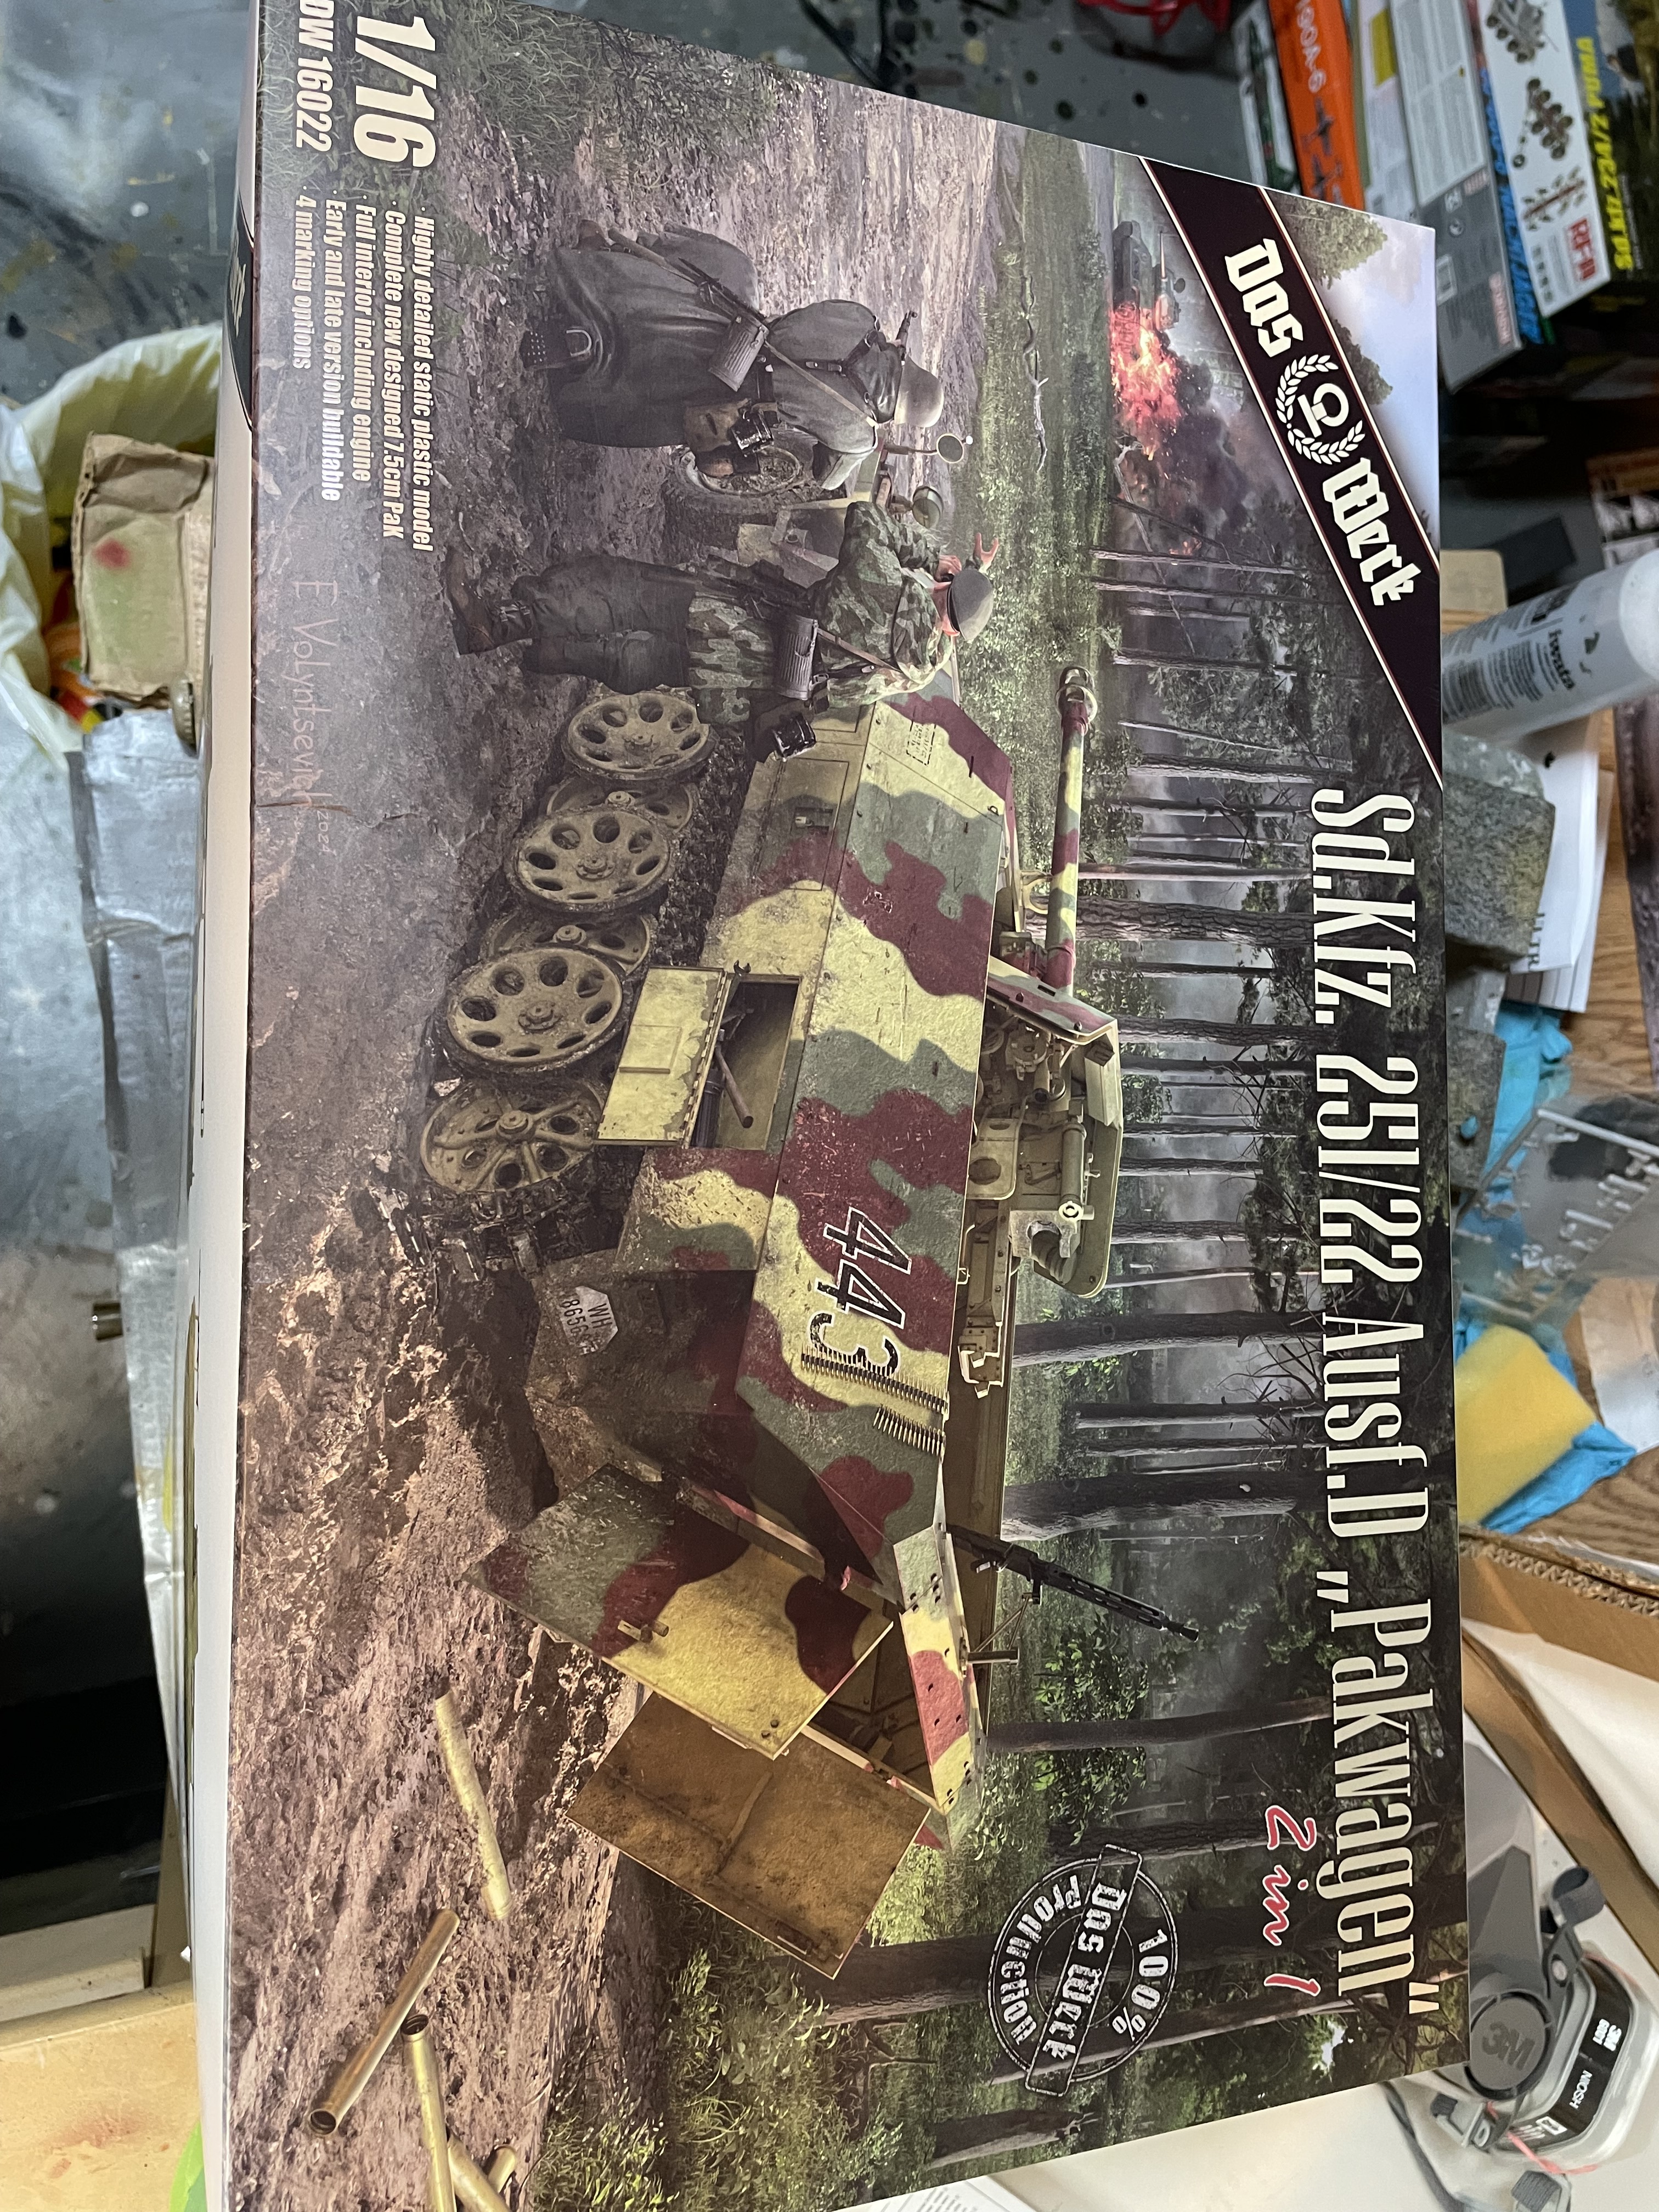
Well, just about done attempting to make a silk purse out of a sows ear (old Alan Bishop) so I thought I’d try out something new for me, a 1/16 scale kit. I’ve always liked the Pakwagen and scored one at our modelling club contests silent auction for about half price. Hopefully there will be some interest as it comes together, hopefully I can do justice to it!
8 Likes
I look forward to seeing this progress.
1 Like
Get on it!
1 Like
On it! The first steps are parts that are likely never to be seen again, parts of the running gear and bottom of the hull.

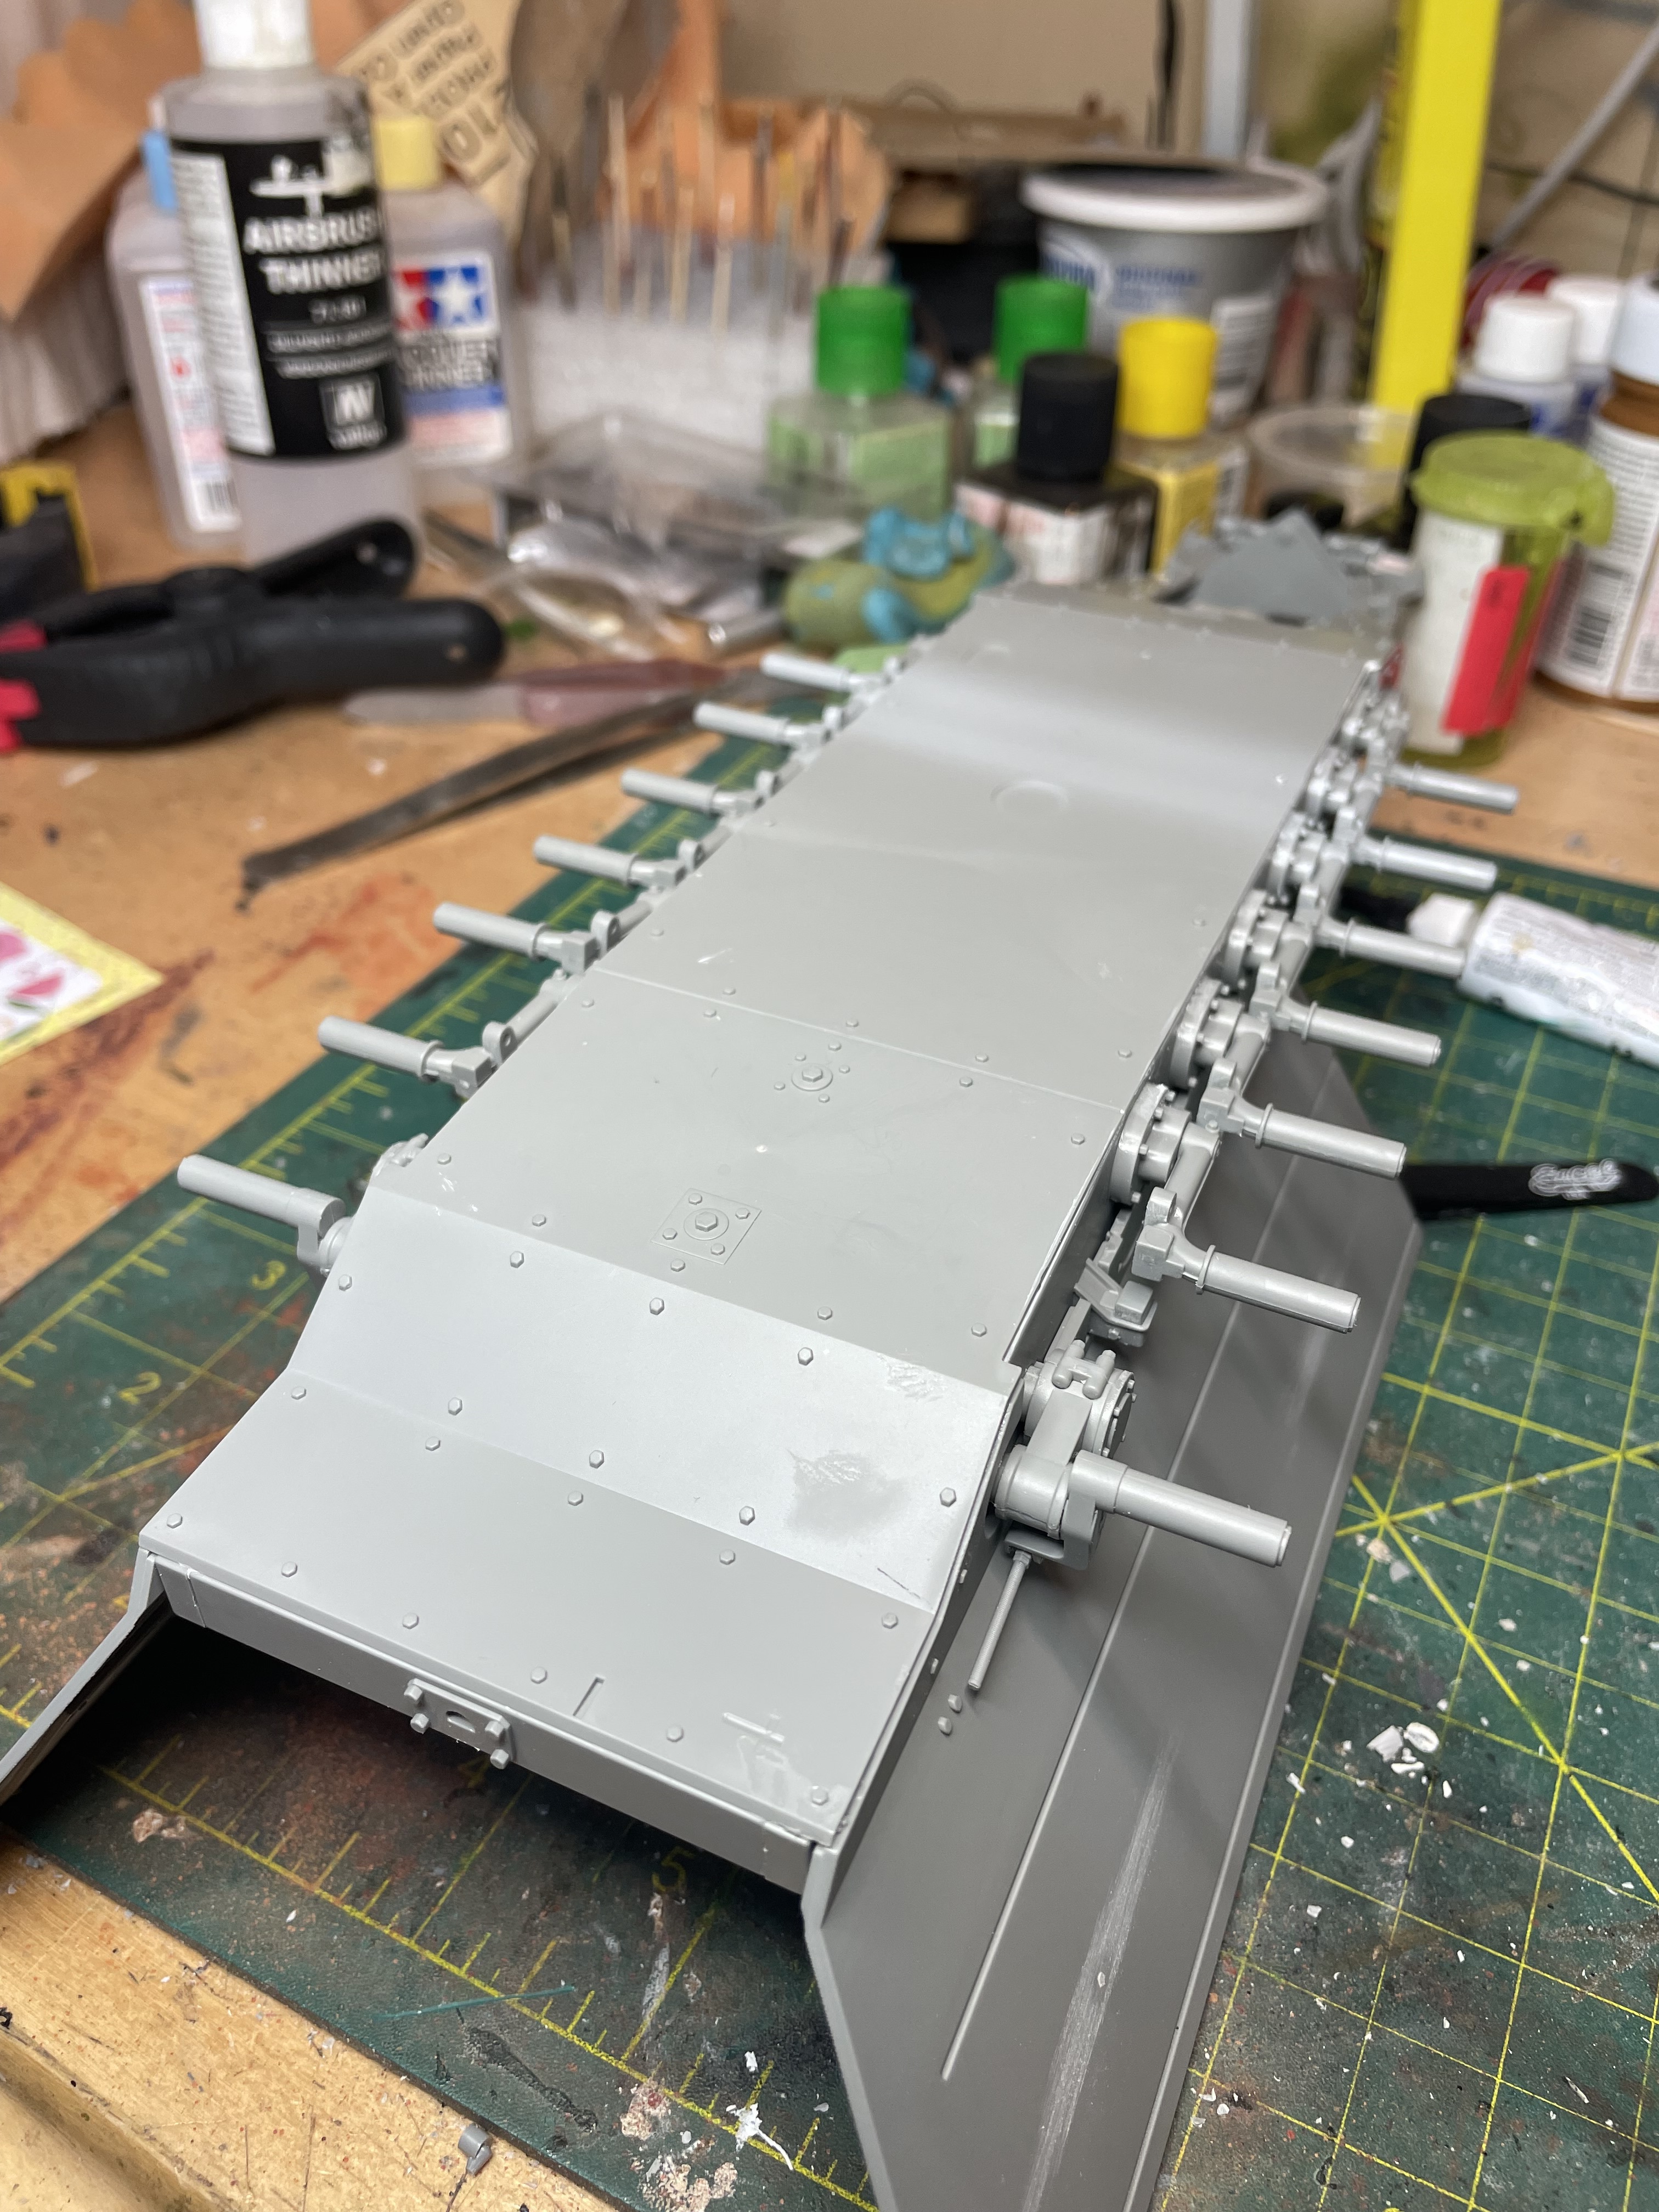
The fit is good, small sprue gates and no flash , just took a bit of fiddling to get everything to fit when all put together, could have used a 3rd hand.

The front is a bit warped and needs some extra persuasion to hold things in place while the glue dries.
Looking at how big this thing is I think I’ll have to clear up some more space on my workbench to ensure it fits!
7 Likes
Steps 3&4 are the lower crew compartment sides. Blanking plates are provided for some cutouts and there are 5-6 push pin marks to be filled and sanded down. The instructions show some internal braces installed but don’t show how to install them or what part numbers they are…![]() Edit: I think I found them in Step 17 for installing the cannon mount. Must be a carryover from the regular version.
Edit: I think I found them in Step 17 for installing the cannon mount. Must be a carryover from the regular version.
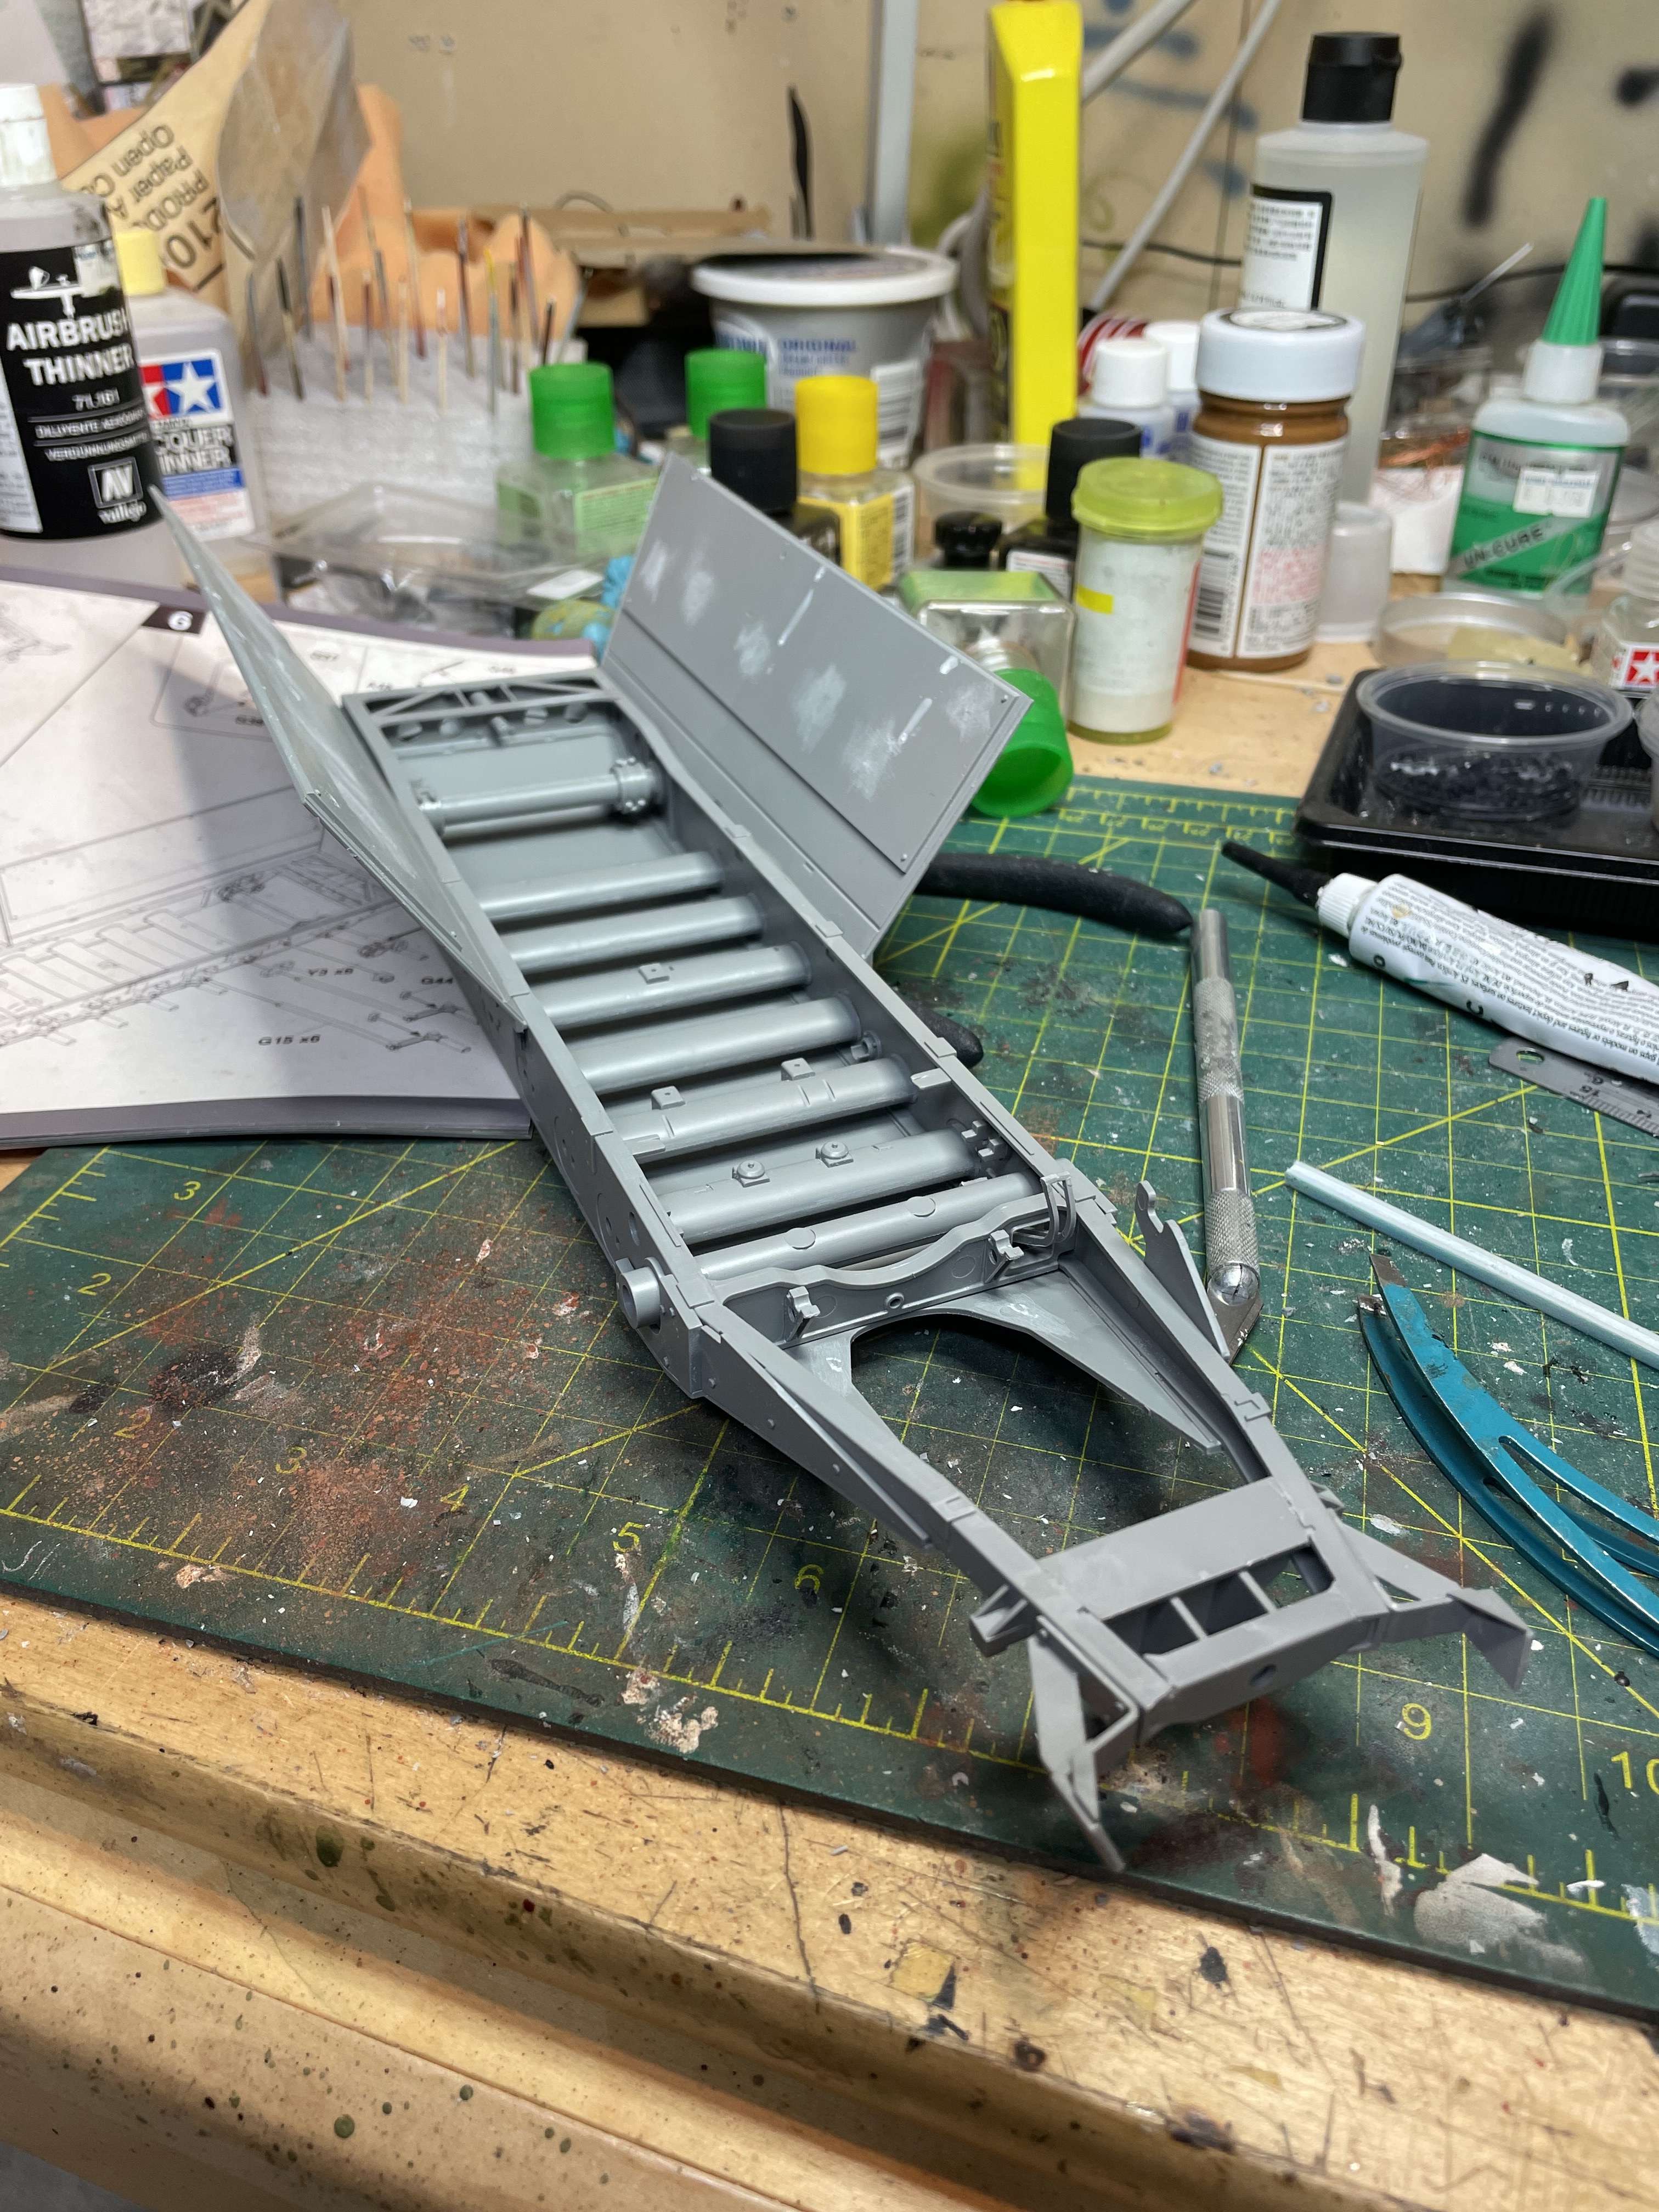
Next is the suspension for the tracked section.
5 Likes
5 Likes
You’re selling the kit! Looks good. Have you seen all the 3D items that AFV Modeller makes for the 251?
2 Likes
Thanks Dan! Yes, I have seen them, very tempting but very pricey, I’m saving up for some of their stuff for my Pz. IV J.
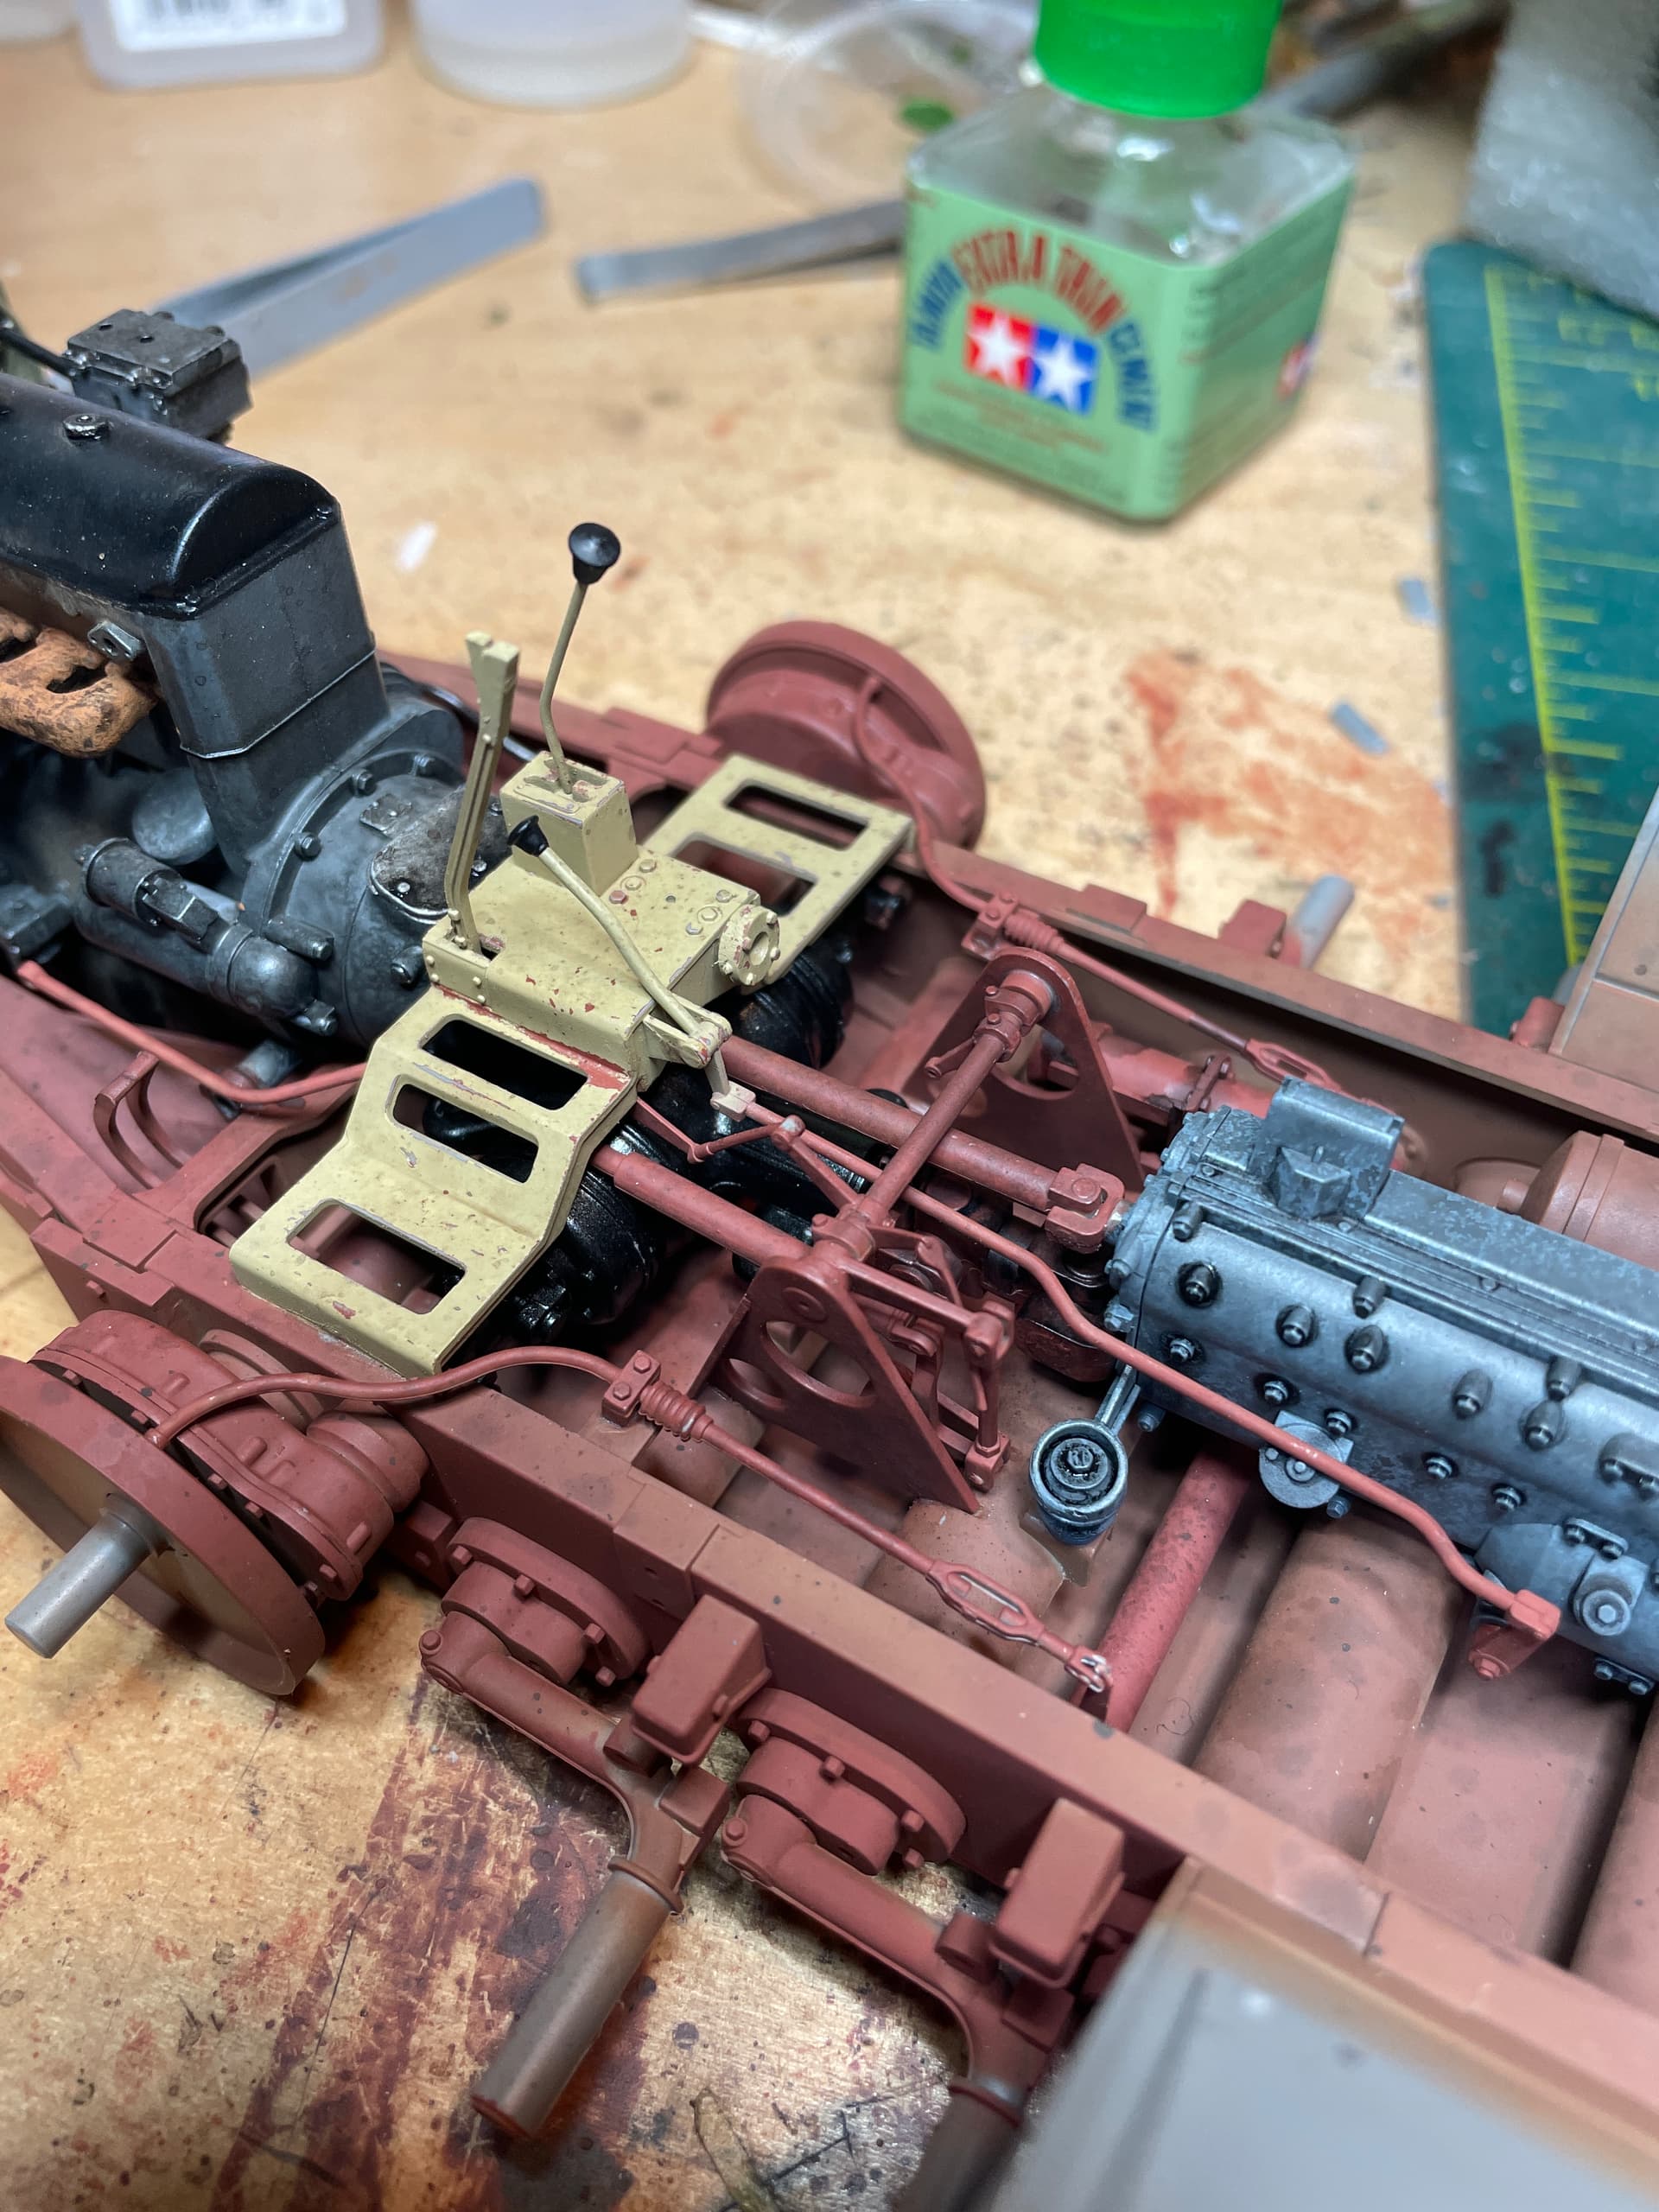
Meanwhile, I got the front suspension together, it was a bit fiddly and the instructions require some close study to make sure you assemble it all the right way.

At first I thought it would be steerable/articulating but no, it has to be cemented in place, although some modifications to the mountings might be possible to make this happen.
4 Likes
Got the road wheels cleaned up, think I will paint them and the rubber separately.

Also installed the fuel tank and a couple other small tanks, time to get some red oxide on their before starting the engine.

5 Likes
Working on the engine, it is very detailed, should look good when all together (still a ways to go!), painted and weathered.
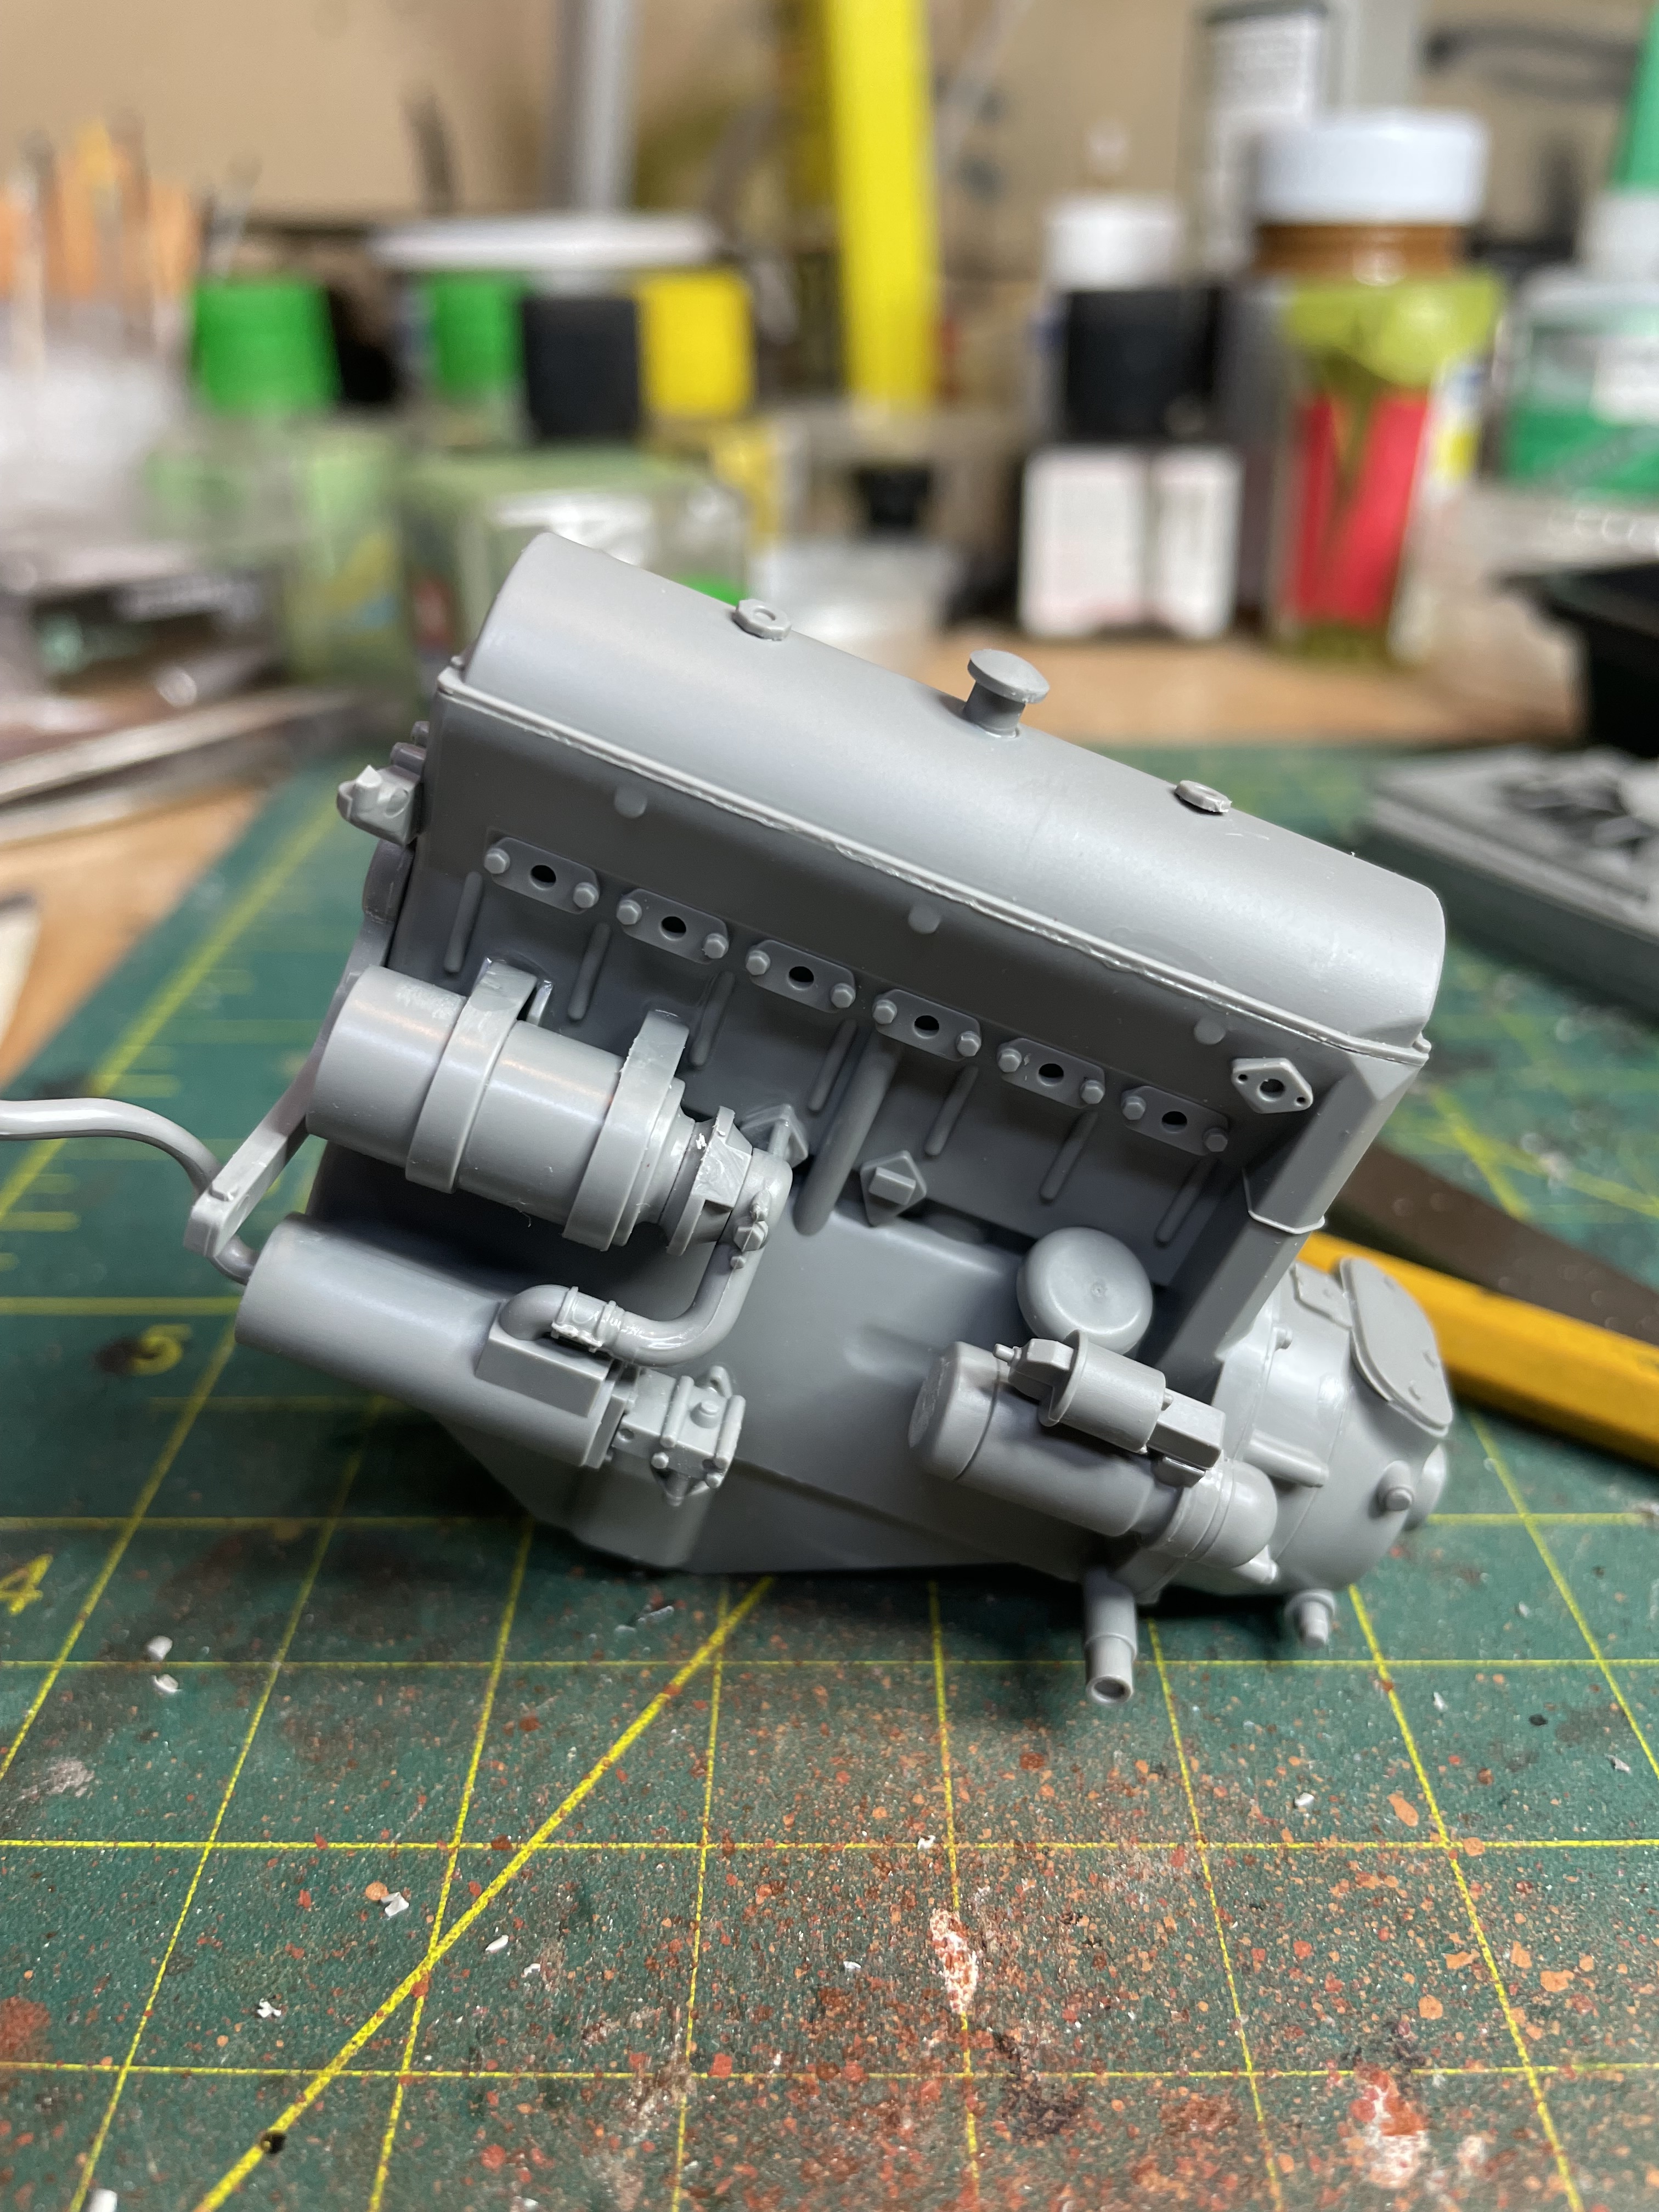
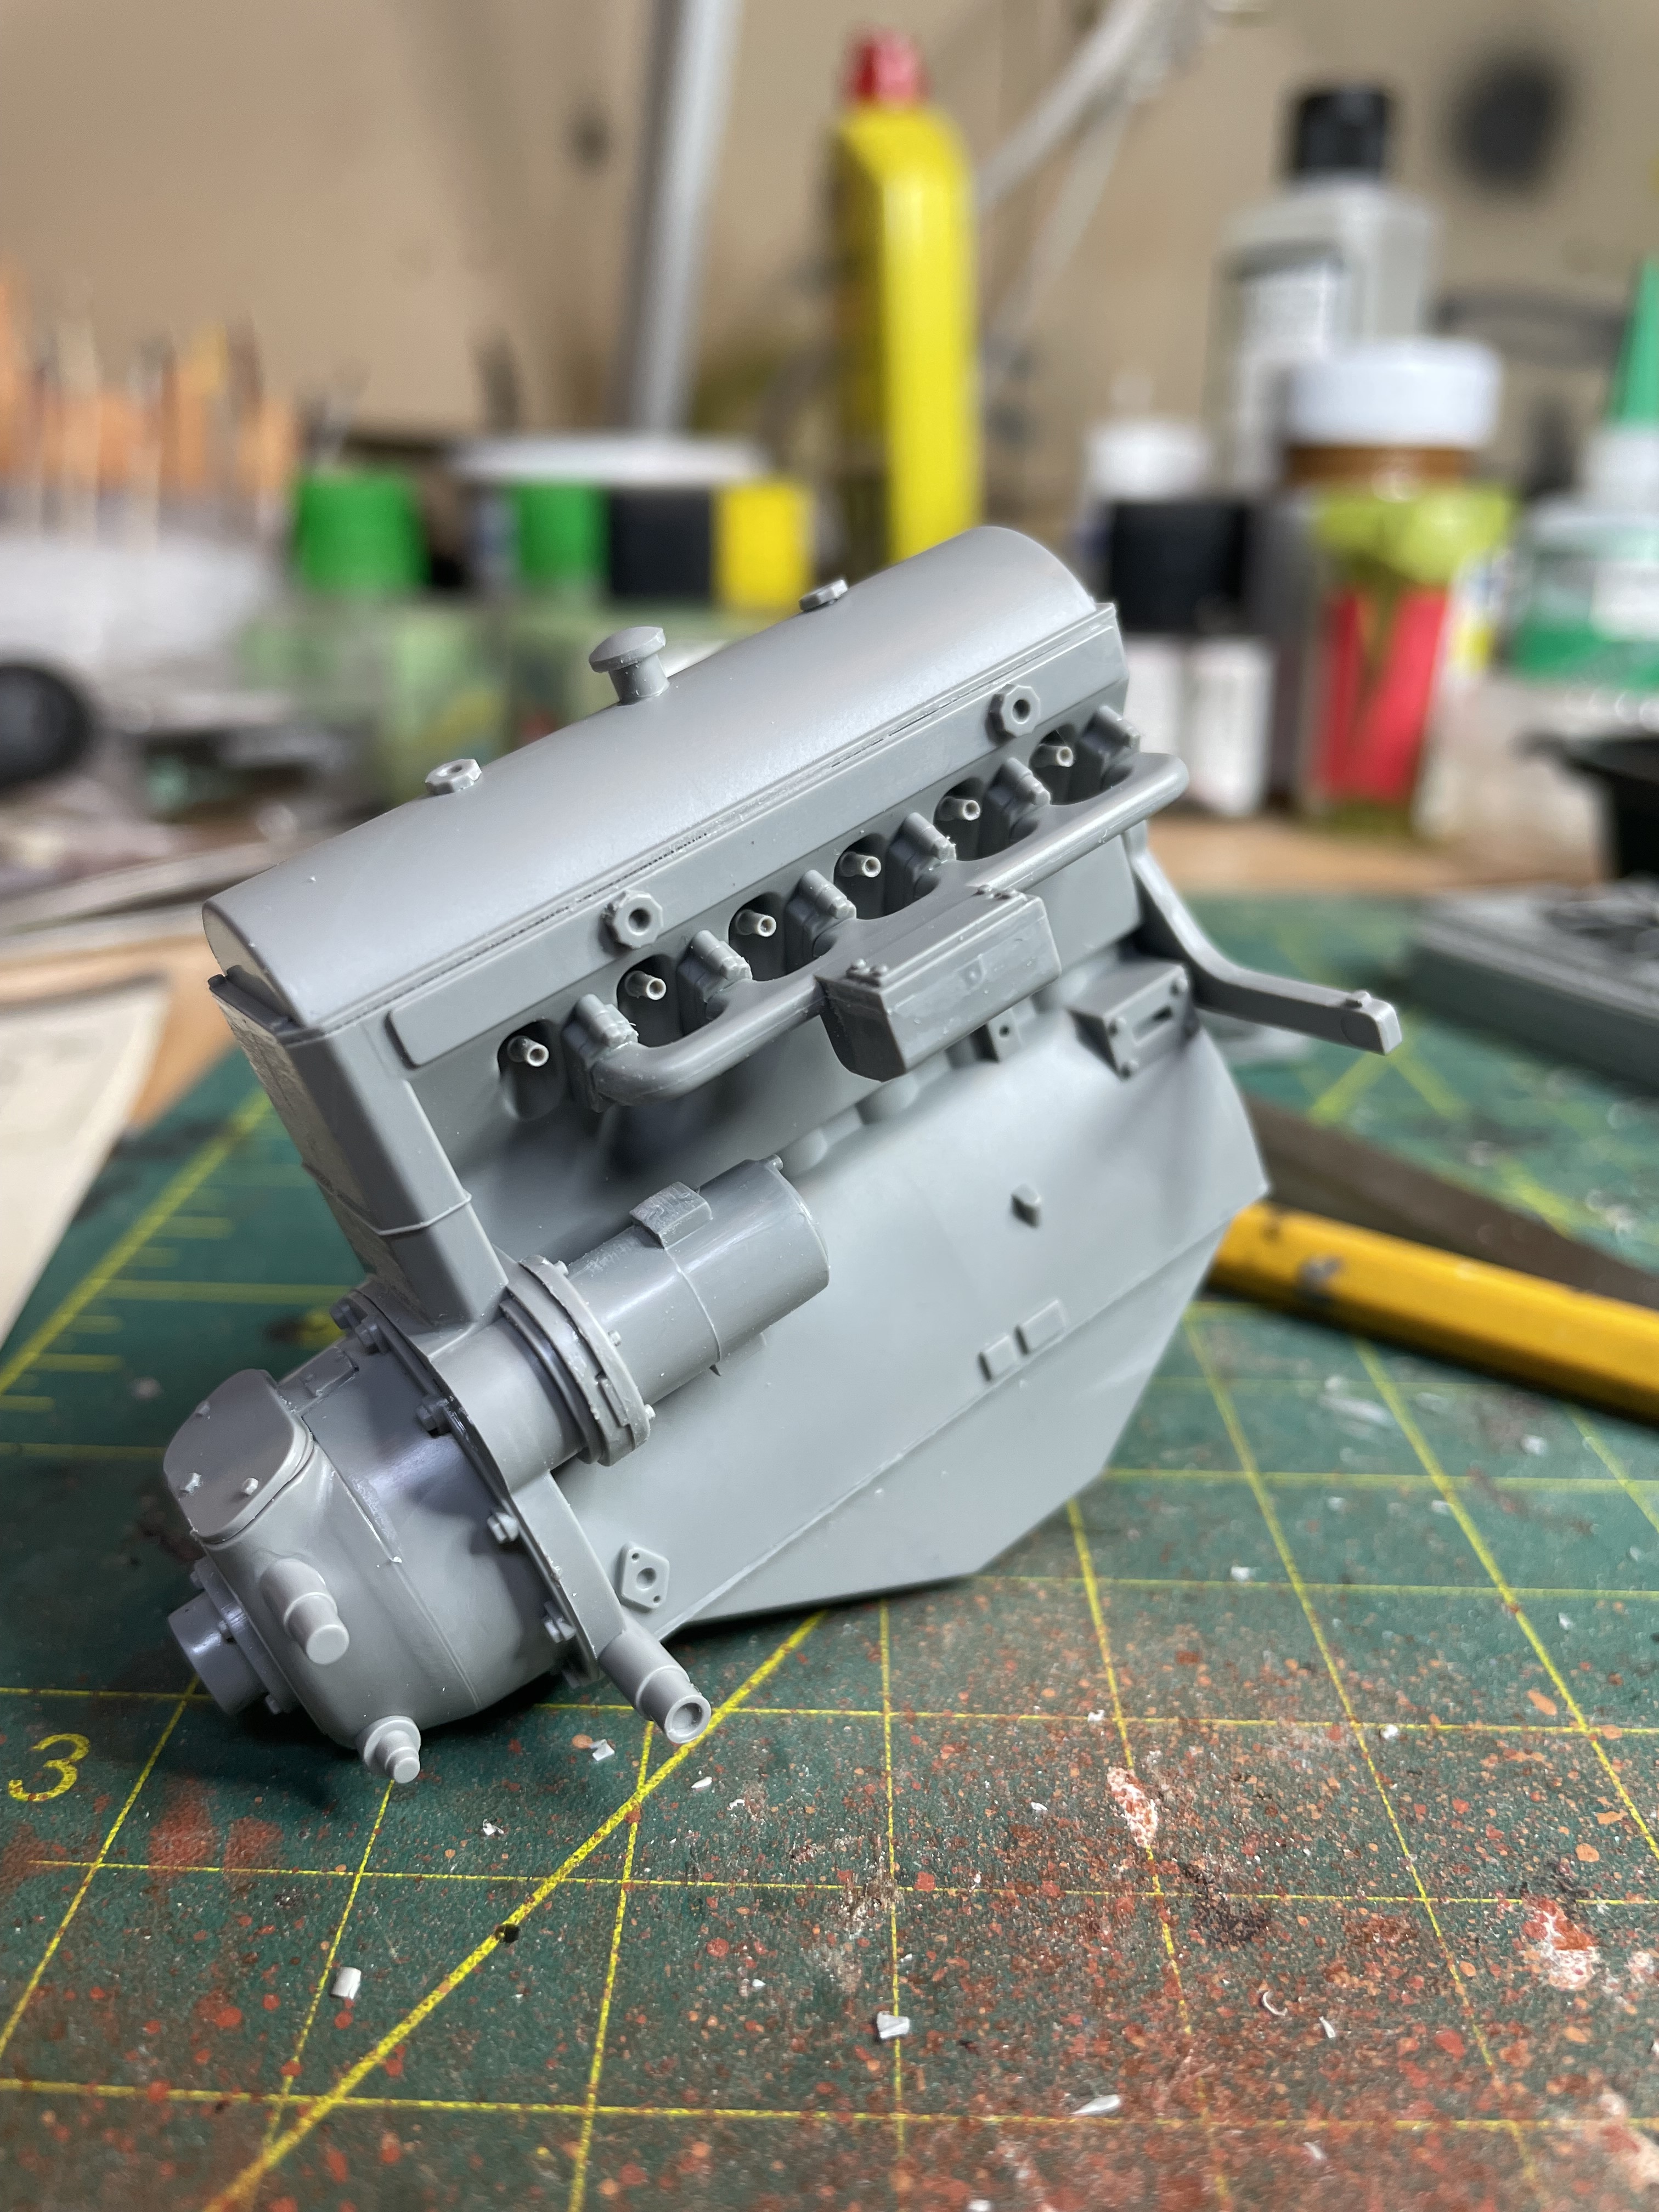
10 Likes


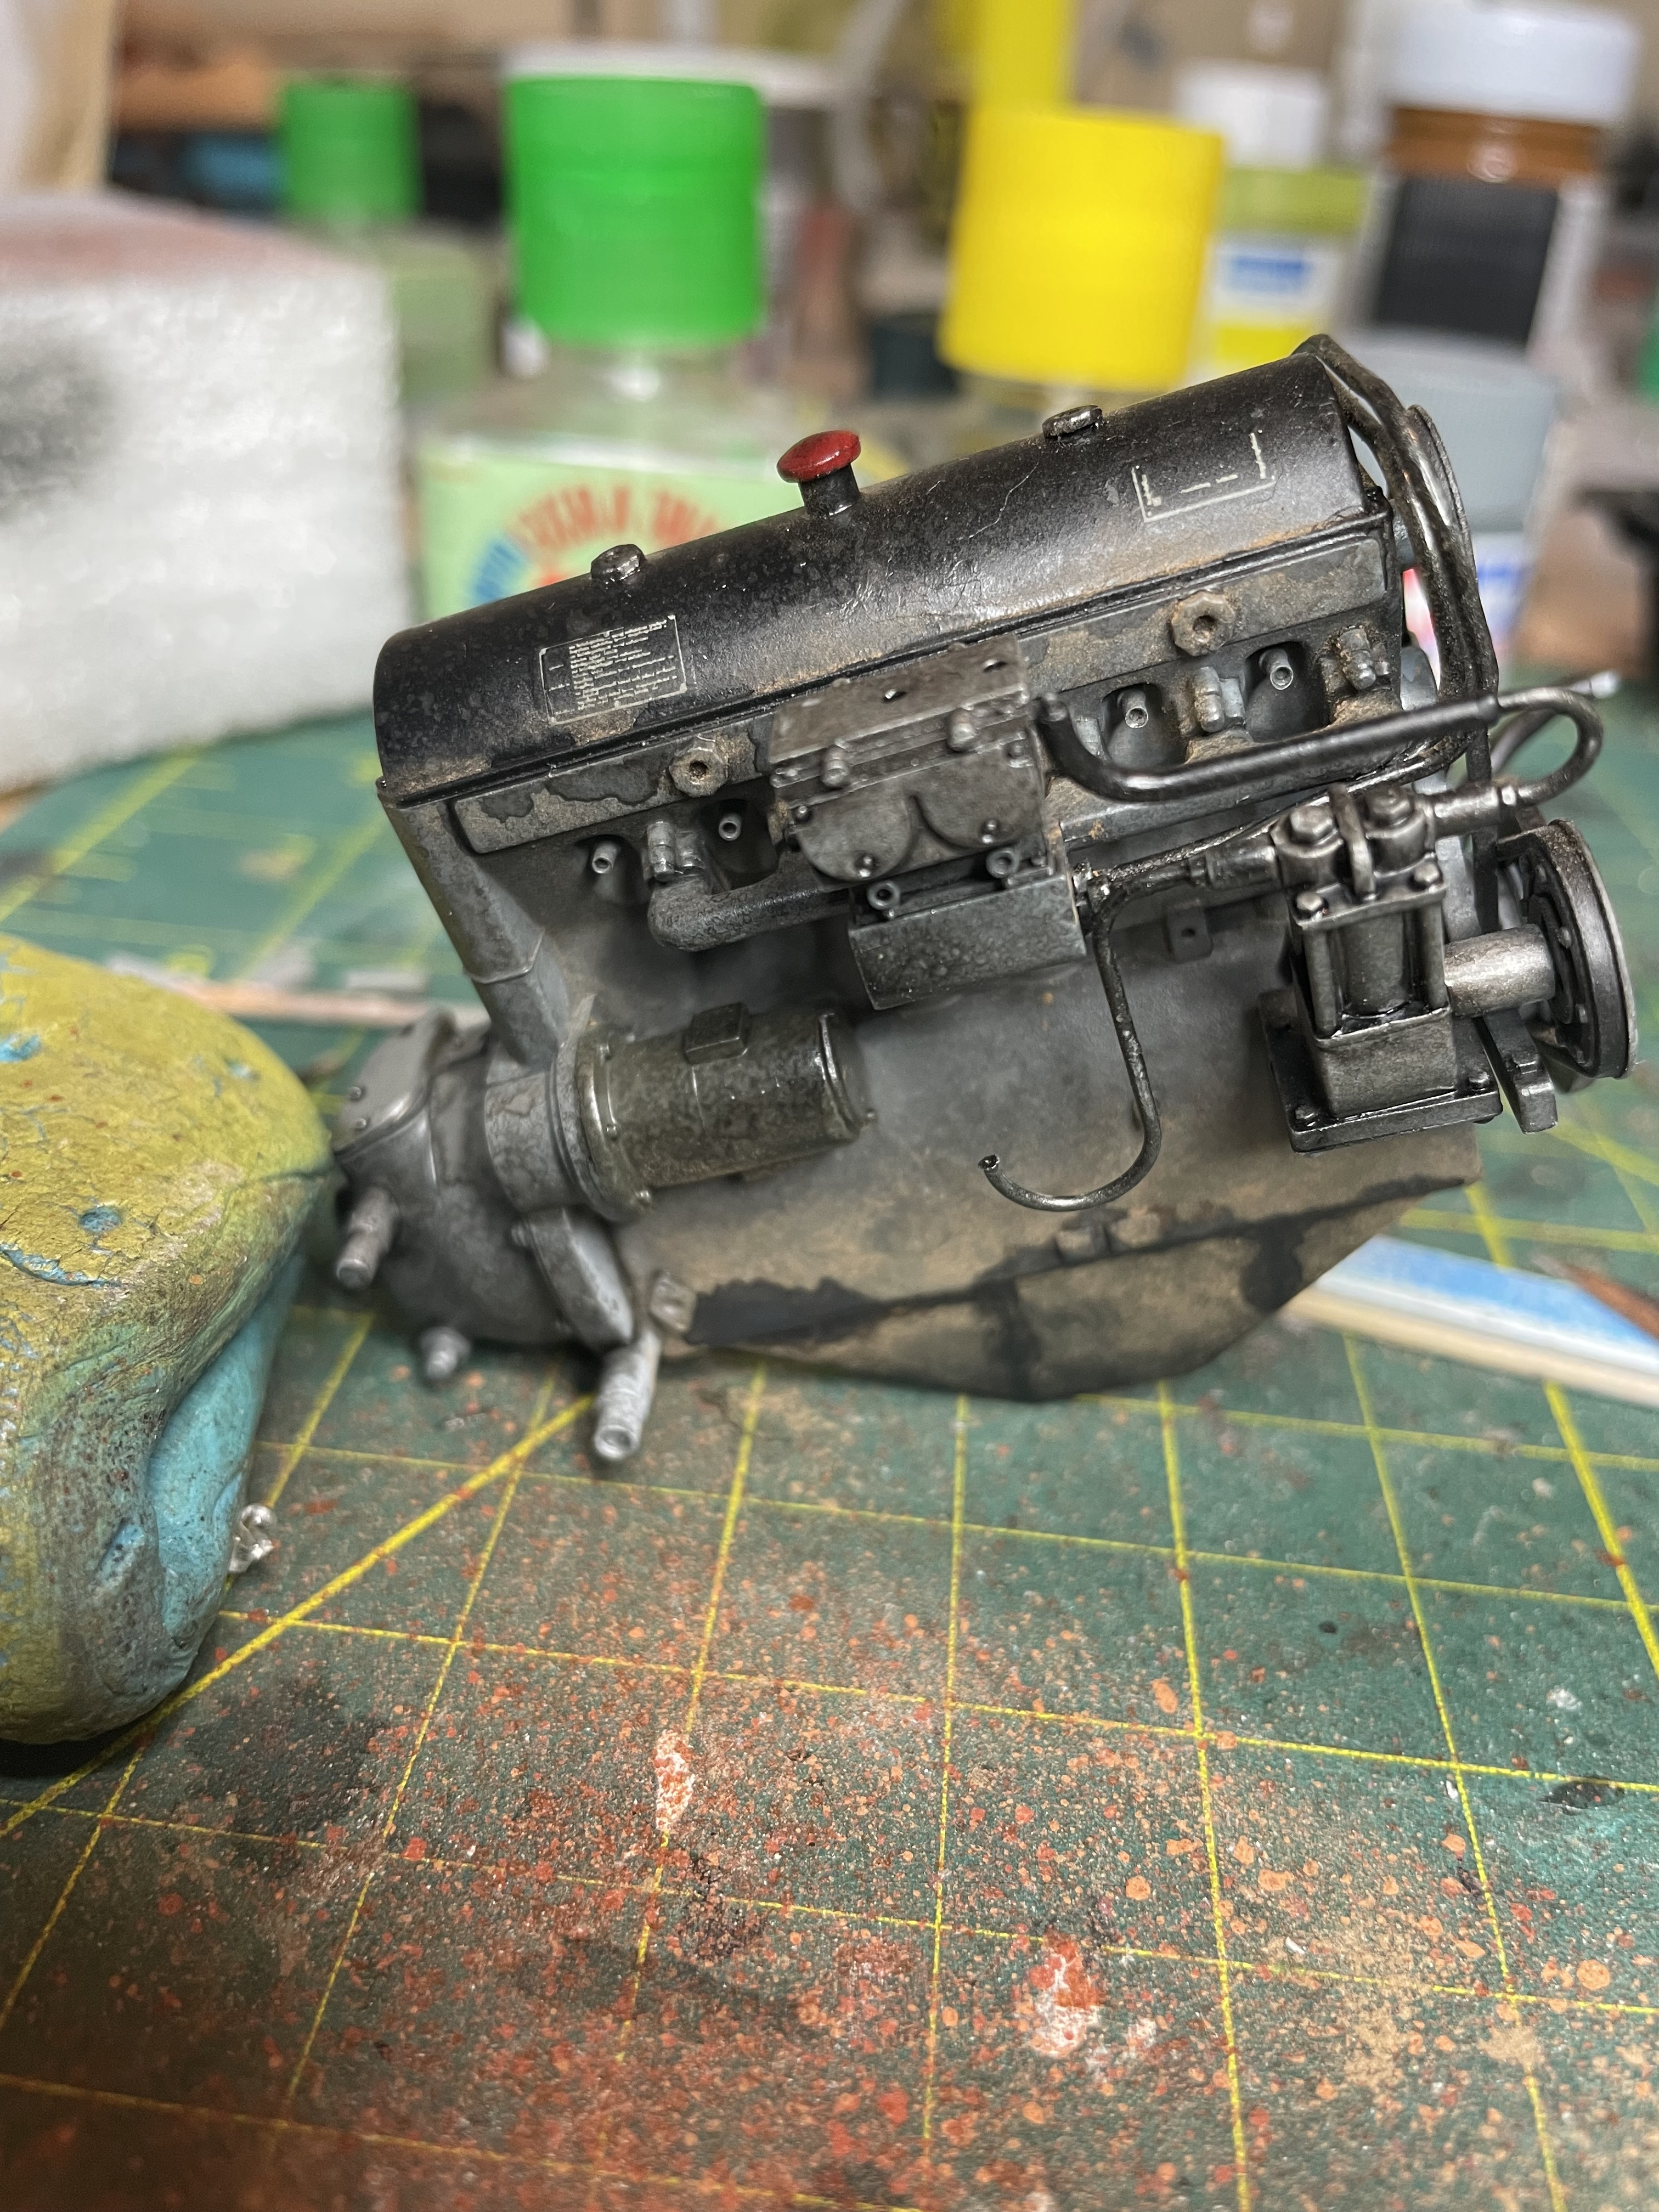
You’ve got a sharp eye! I wasn’t sure anyone would notice those bolts, but I thought they’d help add a bit more realism. Do you usually add little touches like that in your own builds too?
2 Likes
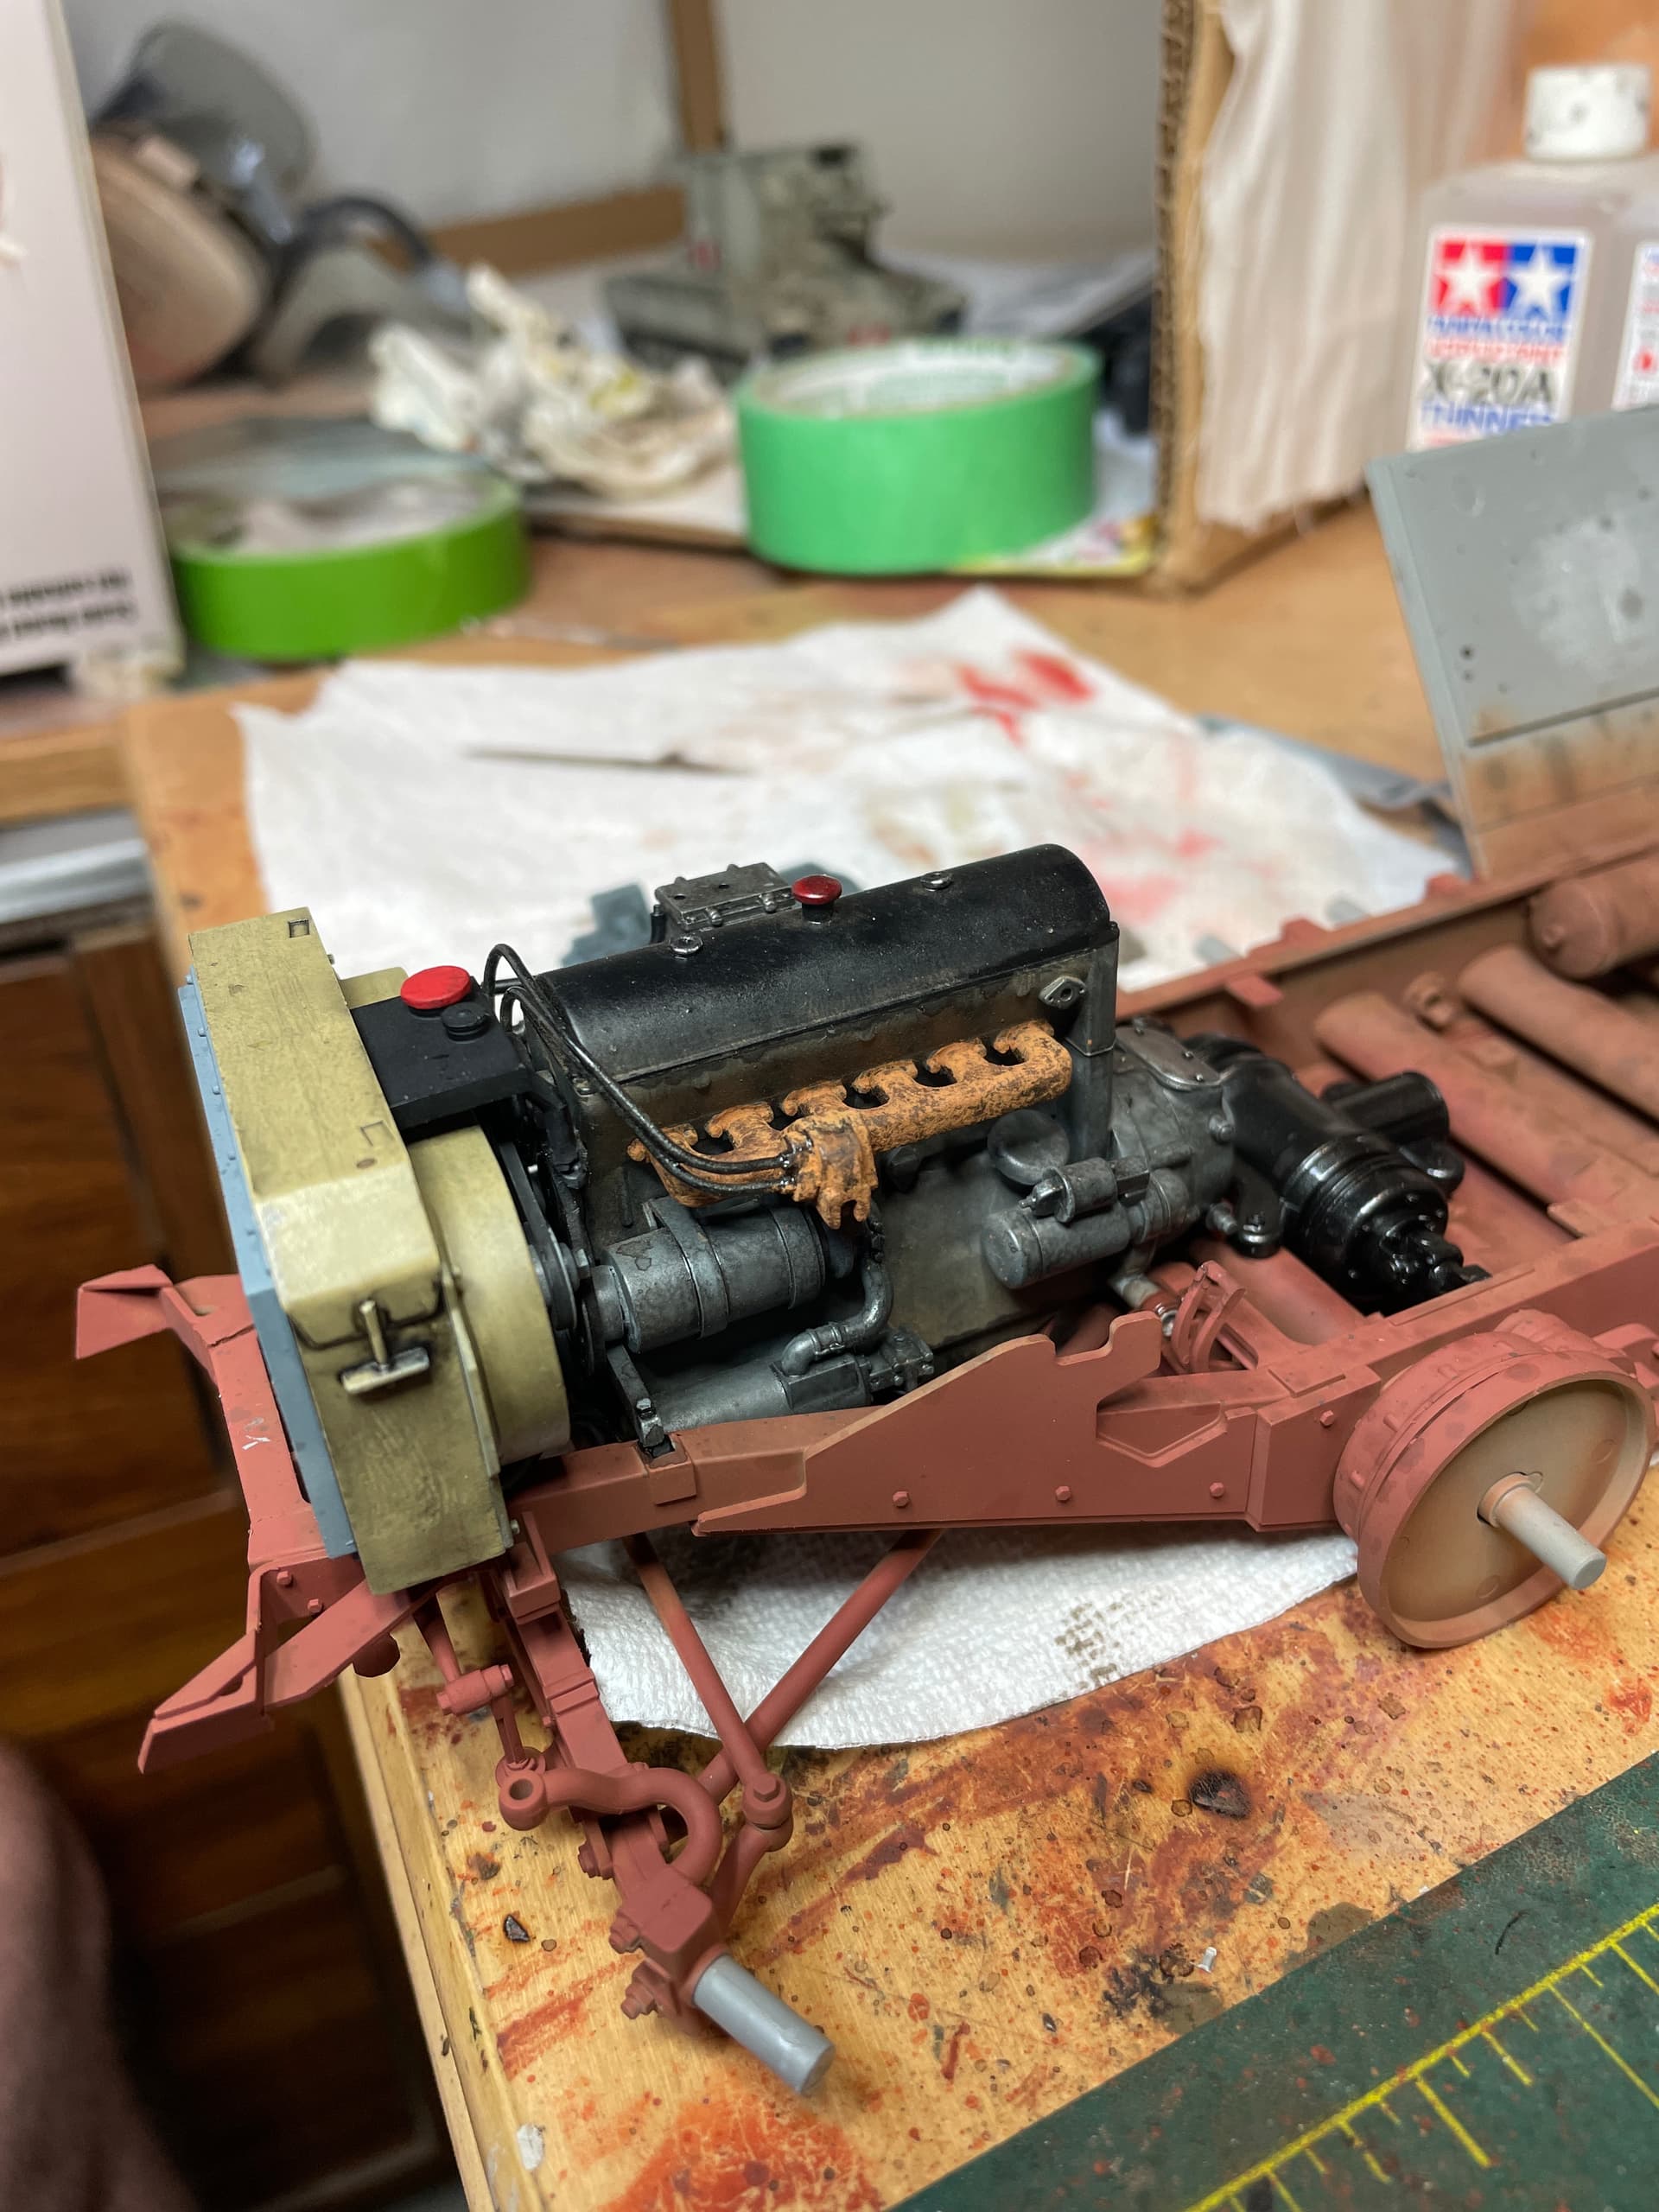
A little bit of progress, mounted the engine and radiator on the chassis and ordered some sagged wheels from AFV modeller.

7 Likes
The gear linkages are a whole bunch of very fiddly bits, took some time and patience to get them to fit together correctly.
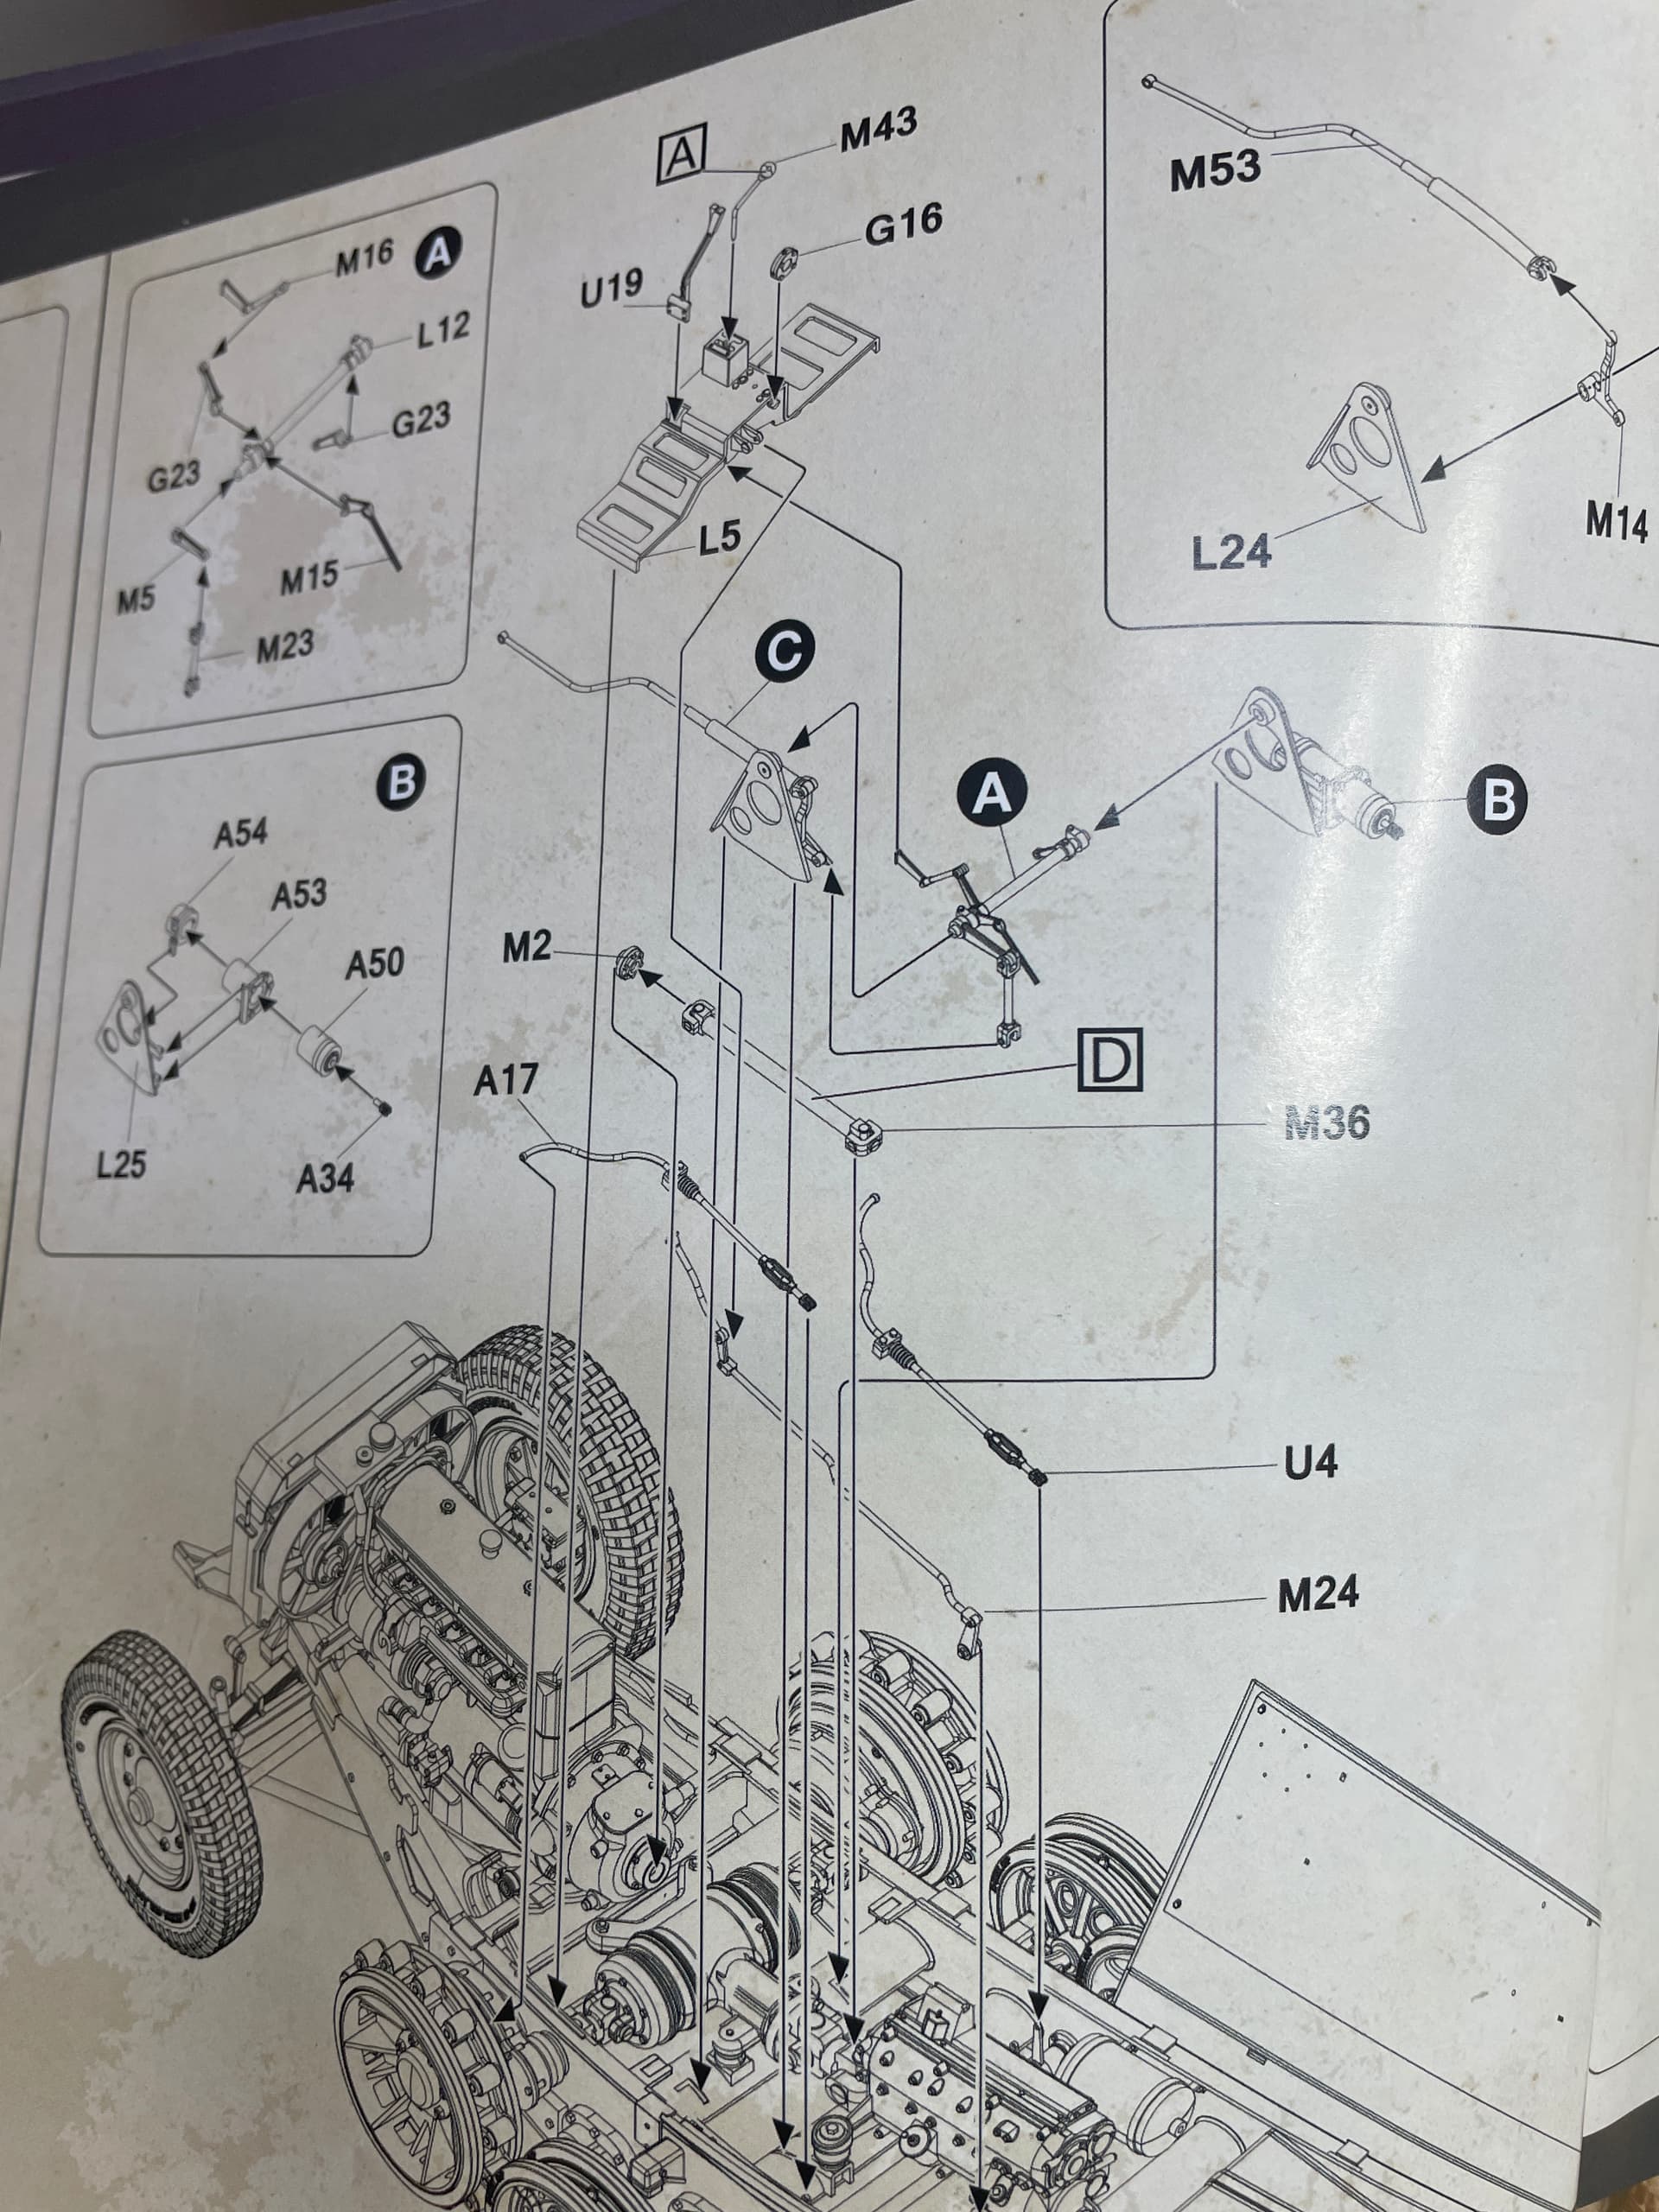
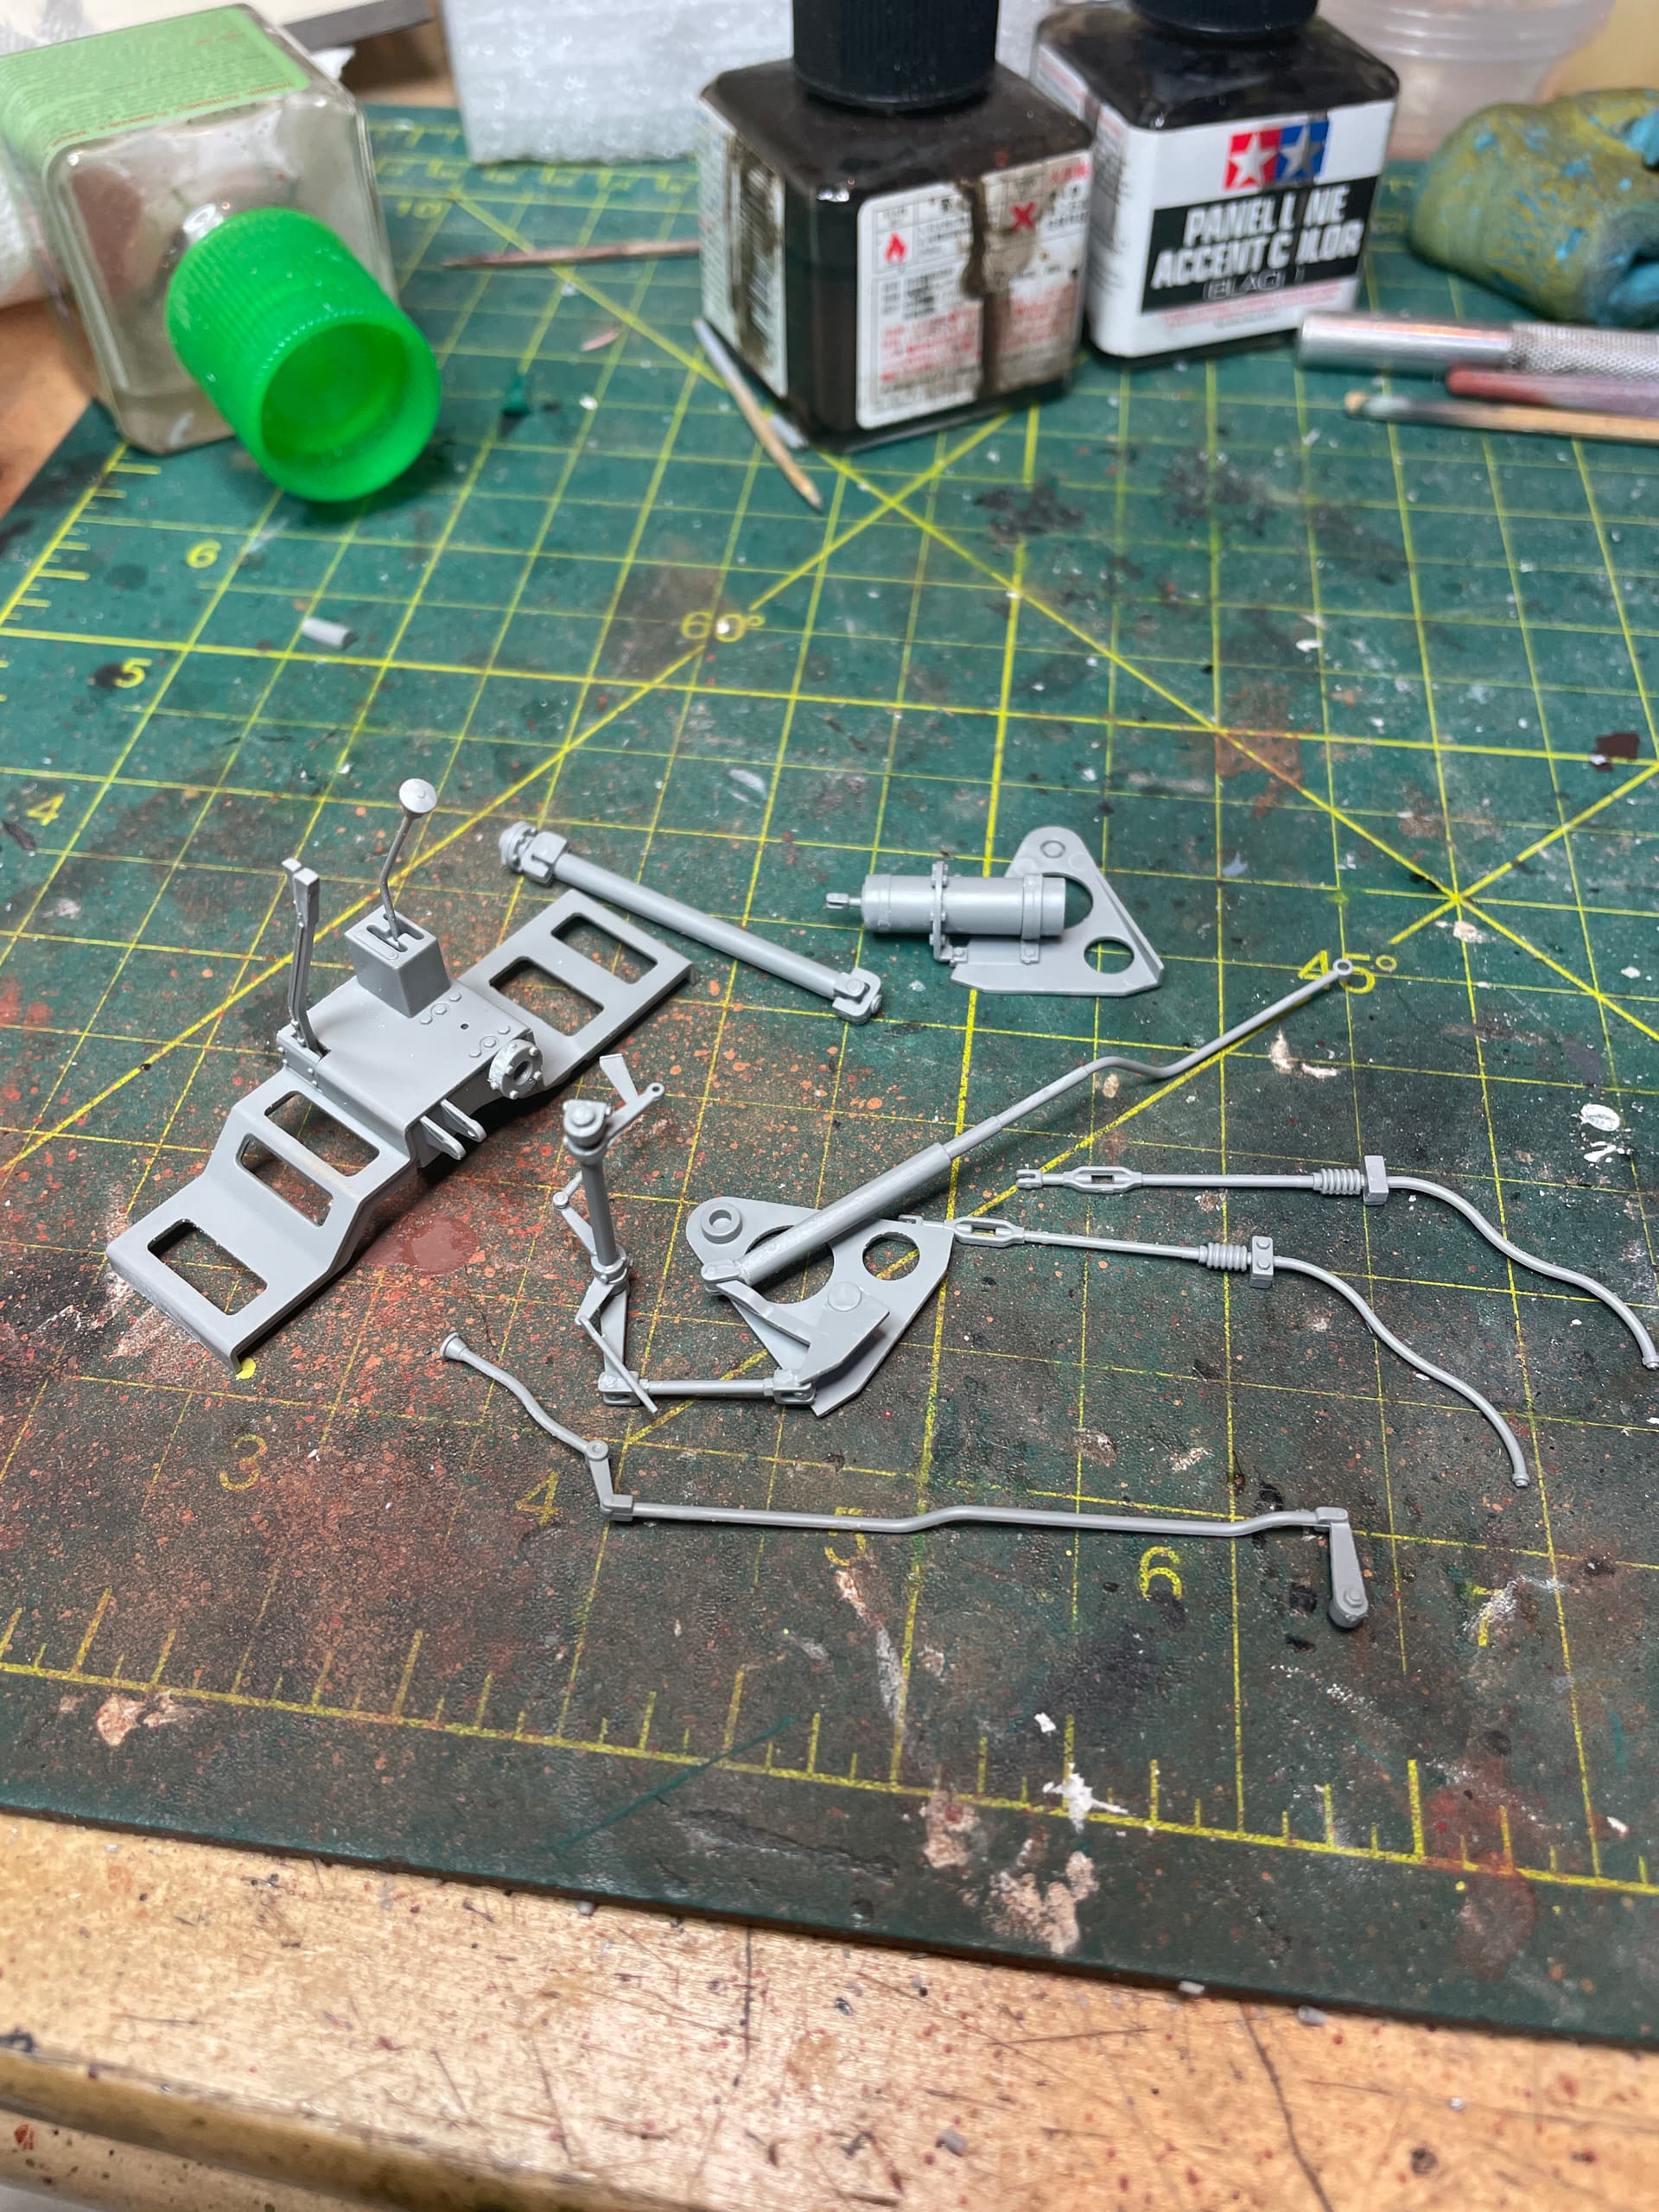
Now to prime, paint and install😬.
5 Likes
Looks like a nice kit.
1 Like
Yes, it is very detailed and is fitting together pretty well so far, instructions require some careful study at points.
1 Like
I love all the 3D items that AFV Modeller is making for the 251 and 250 recently, but $$!
1 Like
Yeah, they are pricey!
1 Like