Currently in the planning stage of a Diorama involving a splashed Kamikaze plane using this kit by Hasagawa. In fact my first of their kits I’ve ever built.
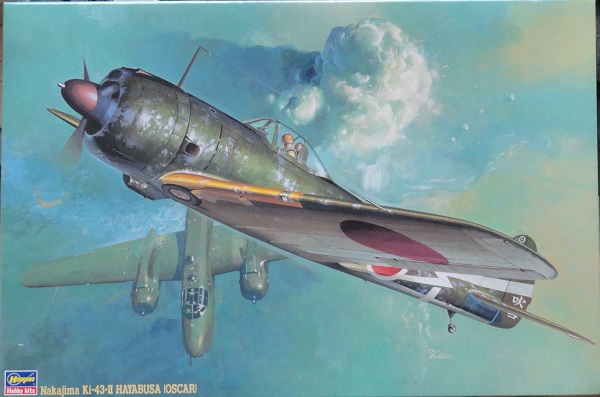
the kit, though recently repackaged is a 1970’s era kit.
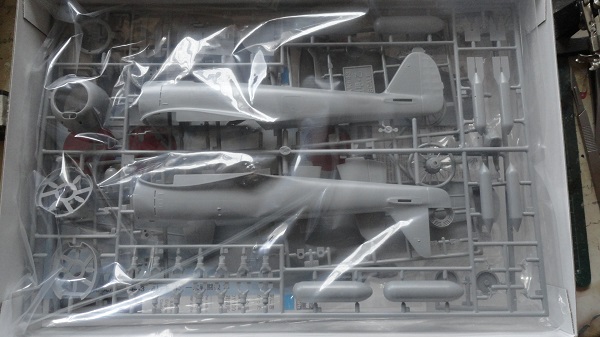
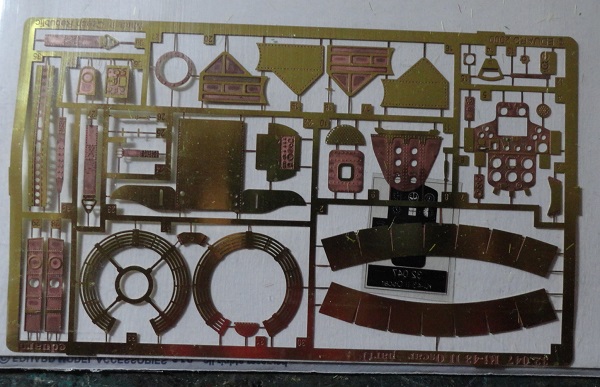
I’ve also got the Eduard set for this, so the engine will look well detailed.
3 Likes
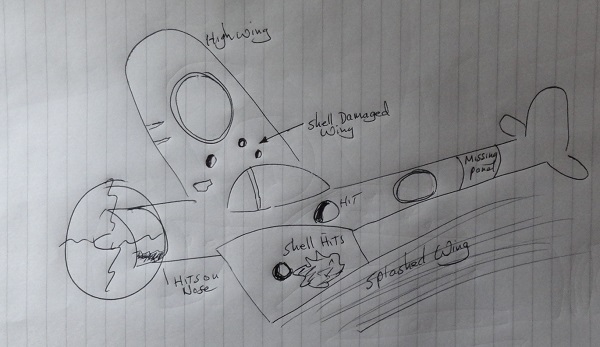
please excuse my limited drawing skills, option A, the port wing just dipped into the sea creating a furrow in the water surface, the airframe will show extensive shell hits and shrapnel damage. the Diorama is set around the Okinawa campaign, where Ships of the US Pacific fleet and ships for His Majesties Royal Navy found themselves targets of these Kamikaze missions. At this stage in the war, proximity fuses were being fired from 5 inch shells.
3 Likes
I just finished one of these recently. My caveat is to inspect the decals closely. Mine disintegrated as they were pulling from the water and aftermarket sets are ridiculously hard to find, so you’ll be forced to mask them.
1 Like
That looks like a really fun, interesting build!
Defiantly following.
1 Like
option B, the belly of the plane has just struck the water, the damage in this option is far greater with the port wing ripped off, the fuselage has separated mid way along the tail, with the empennage tilting upward but with internal structure exposed at the break. The nose will have extensive damage to the cowl. As will the Starboard wing leading edge.

I like both options.
I think a mix of them would look cool, like with it most based of Op.1 but with extensive damage to the nose and engine. I also like the idea of shots through the canopy.
1 Like
Thanks for the heads up on the decals, I’ll be extra careful with them when the time comes, or I’ll but masks and spray them.
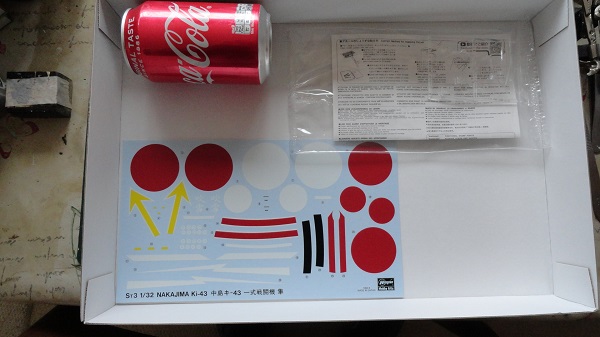
the decal sheet is big, but then again it is 1/32 scale.
that’s an interesting point of view, I may end up with that as option C.
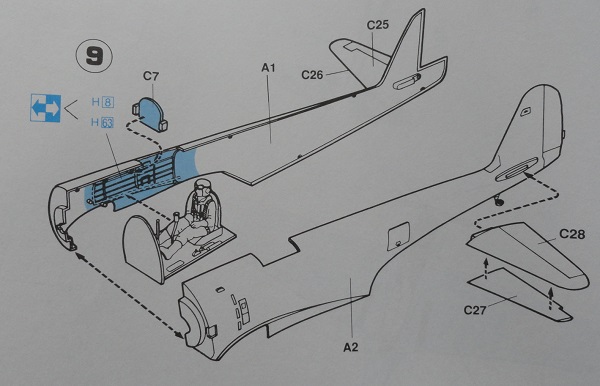
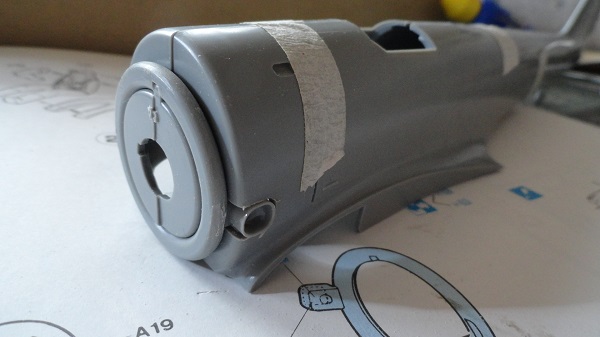
looking for images of the internal structure I will have to scratch build, as the kit is no help there,
the kit looks pritty basic in this area, despite it’s scale.
2 Likes
A fun idea is masking the area they will be then adding some chipping fluid and if they are near a battle damaged area you can chip them away for a really nice effect.
1 Like
it’s very interesting viewing the footage of these incidents, reported as being the most stressful the ships gunners and damage control crews could have imagined. But it’s interesting to see how the aircraft behave under the most intensive barrage of anti aircraft fire.

2 Likes
you have a remarkably good idea there, markings always look good when they are painted, I could even use the decals as masks.
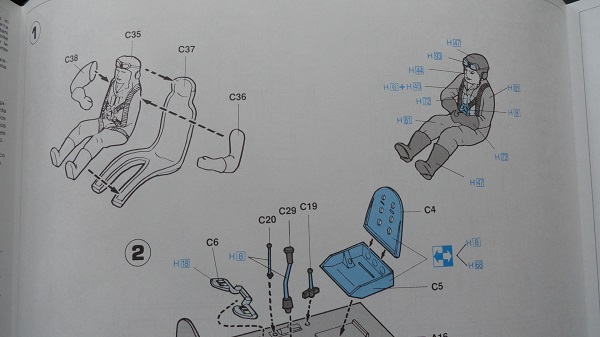
the pilot figure may need a new head, he doesn’t look Banzai! enough.
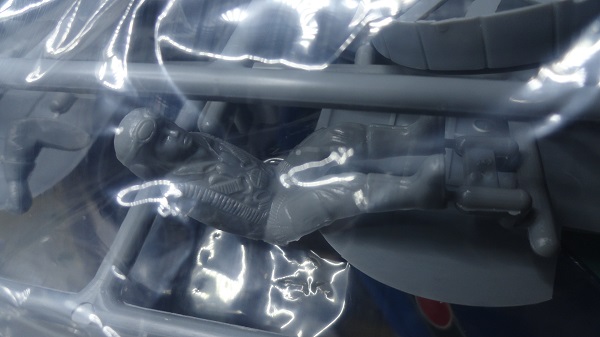
I could use an Airfix 1/32 figure’s head instead, they are very Banzai.
Ha! Your right he dosent look Banzai enough.
If your going to be showing the plane going down you could also have it like the pilots been hit by shrapnel or a bullet.
1 Like
the chances of the pilot escaping injury must have been remarkably slim, in fact I can imagine some of those that fell short must have been due to the pilot passing out through blood loss, or being dead at the controls. So I agree with your suggestion of pilot in flight mortality.
1 Like
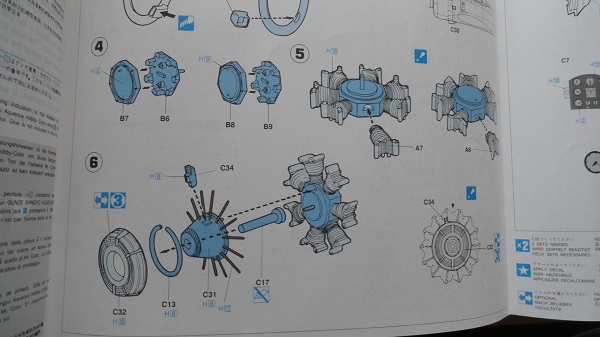
I’m making a start on the engine, including the PE, stay tuned for updates folks, we’re in for an interesting flight.
1 Like
If my late father in law were still with us he could give you some insight - he was aboard the USS Maddox DD 731 off Formosa when she was struck by a kamikaze . IIRC the aircraft struck the Bridge killing 7 . After repairs the Maddox went on to cover the landings at Okinawa . Years later she fired the opening salvo against a North Vietnamese
gunboat , thus beginning our involvement In Vietnam.
1 Like
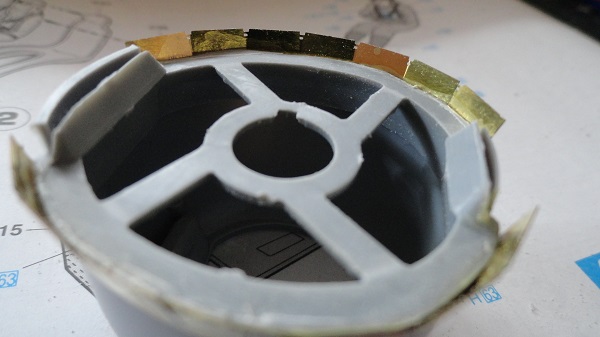
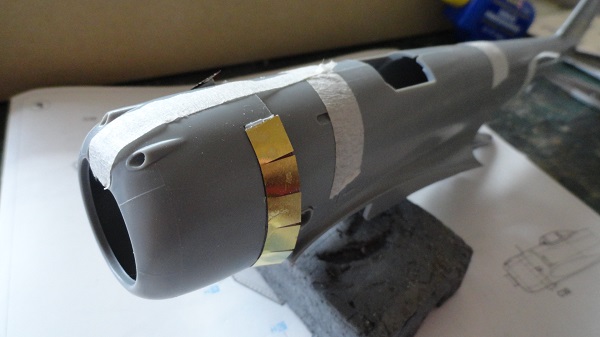
the Eduard set provides brass ventilation flaps to replace the kit plastic thick molded ones.
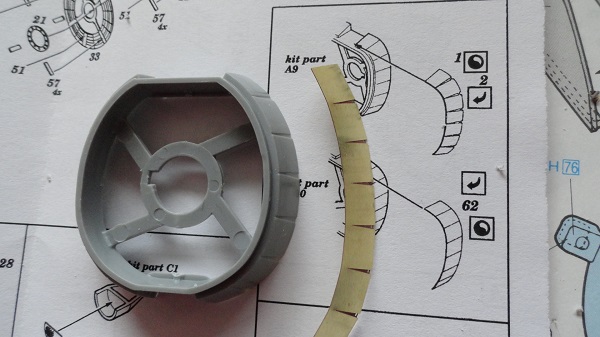
but there is no suggestion of removing the plastic one’s, just laminating them with the PE, I’m not doing that, it’ll just make them thicker and what’s the point in that, so off came the plastic flaps sanded back at their base to “let in” the brass parts.
2 Likes
I think we’ve all taken family members who served in The second world war for granted that they’ll always be here, I wish I’d asked my Grandfather more about his time in the RAF in the middle east, all I have are some faded Black and white photographs.
the front of the fuselage needs modifying to allow the bigger squarer type two exhausts to fit.

the mini hobby saw made short work of removing the original exhausts from the exhaust collector ring.

1 Like
the trial fit of the exhaust, everything needs to be assembled with masking tape, then taken apart again for some parts to be modelled as damaged.
the cowling trial fitted to check for fit. This area is going to be heavily damaged by .50 and 20mm.
3 Likes
Looking good so far!
This is a really good video on how to do bullet and shrapnel damage.

1 Like