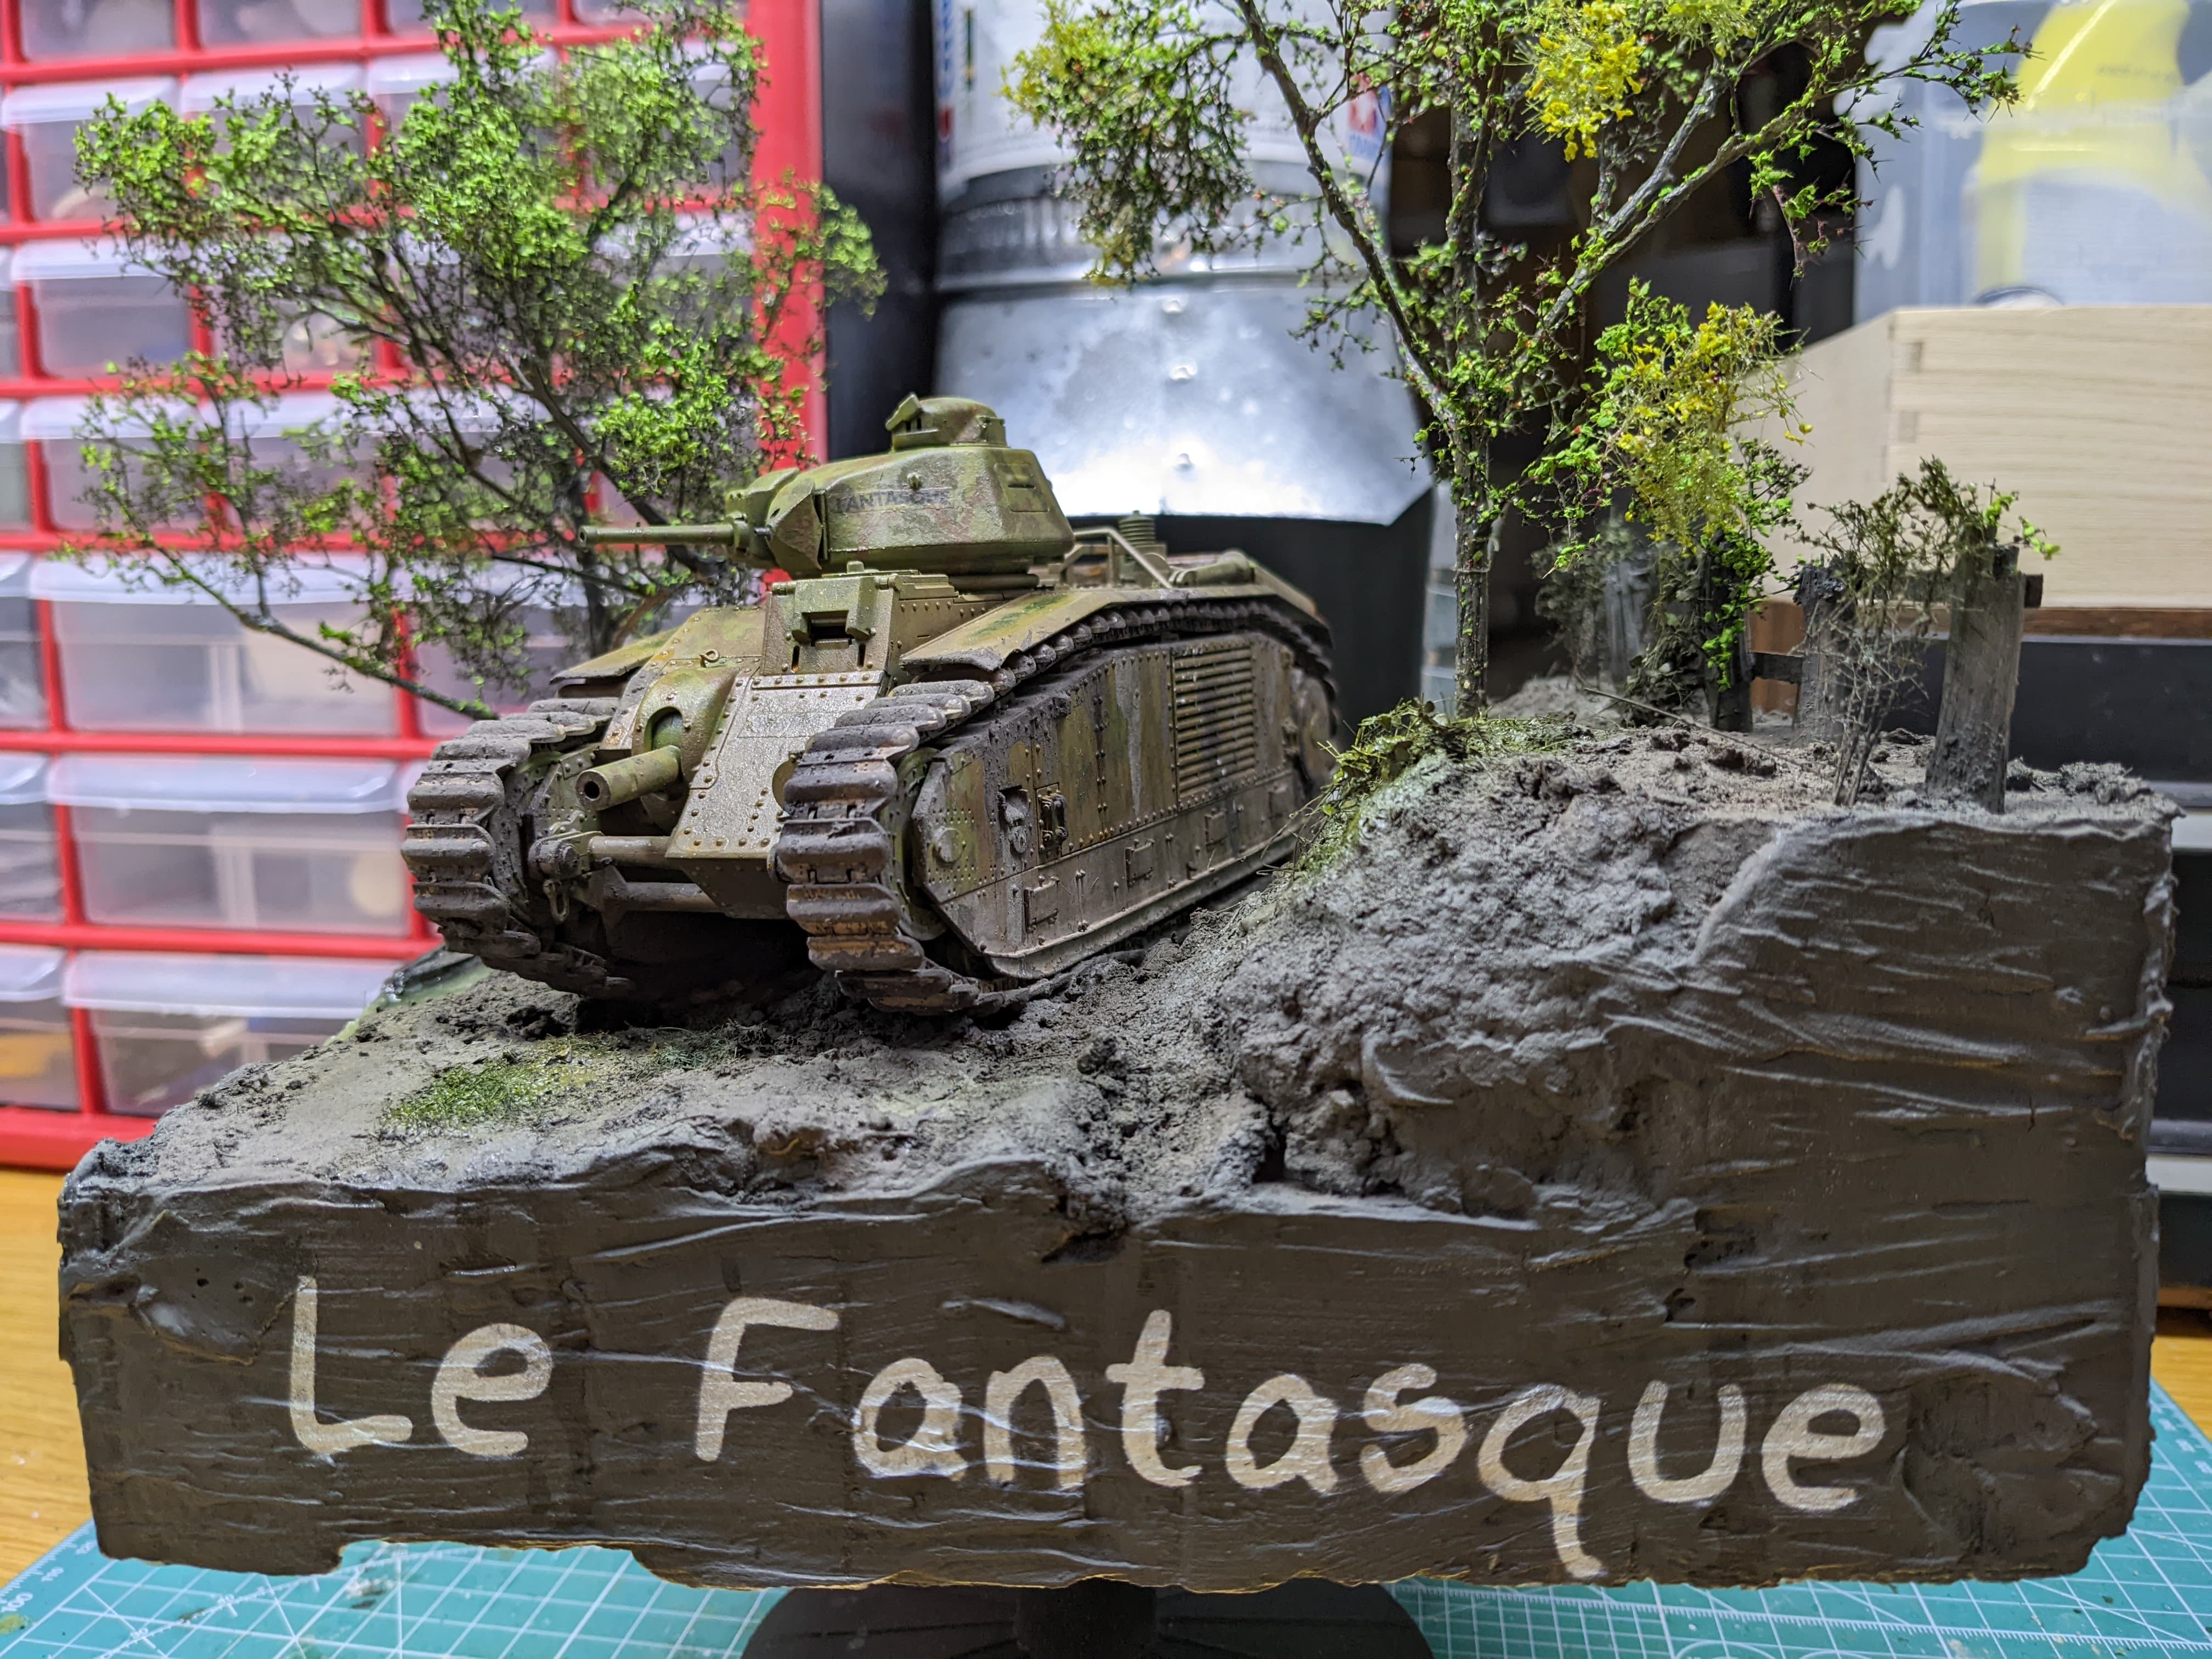
1:35 Char B1 bis

That looks fantastic! Great work on the cammo. Certainly an interesting and unique looking beast!

I pulled out the Revell reissue of the Matchbox 1/76 Char B earlier. They included this as one of the marking options, but the painting guide is not very useful. You’re build has made it a lot clearer and I’m half tempted to do it.

3 Likes

Great to hear @phantom_phanatic ! I’d love to see you build that. It’s definitely a fun tank to paint, and there are lots of possibilities for a diorama.

1 Like

Wow! Excellent work on the camo!

I’m still on the chase for one of the Matchbox issue versions. Yeah, I am a snob…

1 Like

I was looking for something to do in the Micromachines campaign, this might be the one. I think it does need some appropriate scenery to drop it into to show off the cammo effectively.

1 Like

Hope you find one. Always liked the original boxart on the Matchbox Char. To this day it’s still one of my favourite kits by any manufacturer.

1 Like

A bit dark for my taste but kudos for a really nice rendition of the "forest. :+1: :+1:

1 Like

Dennis your camo is Tree-mendous!

2 Likes

Dennis,
That is a real beauty!! In only a few weeks if I am reading this correctly; amazing!

Cheers,
Rick

1 Like

Tank is done!

(You know I always say that and I inevitably am pin-washing a month later, but whatever.)


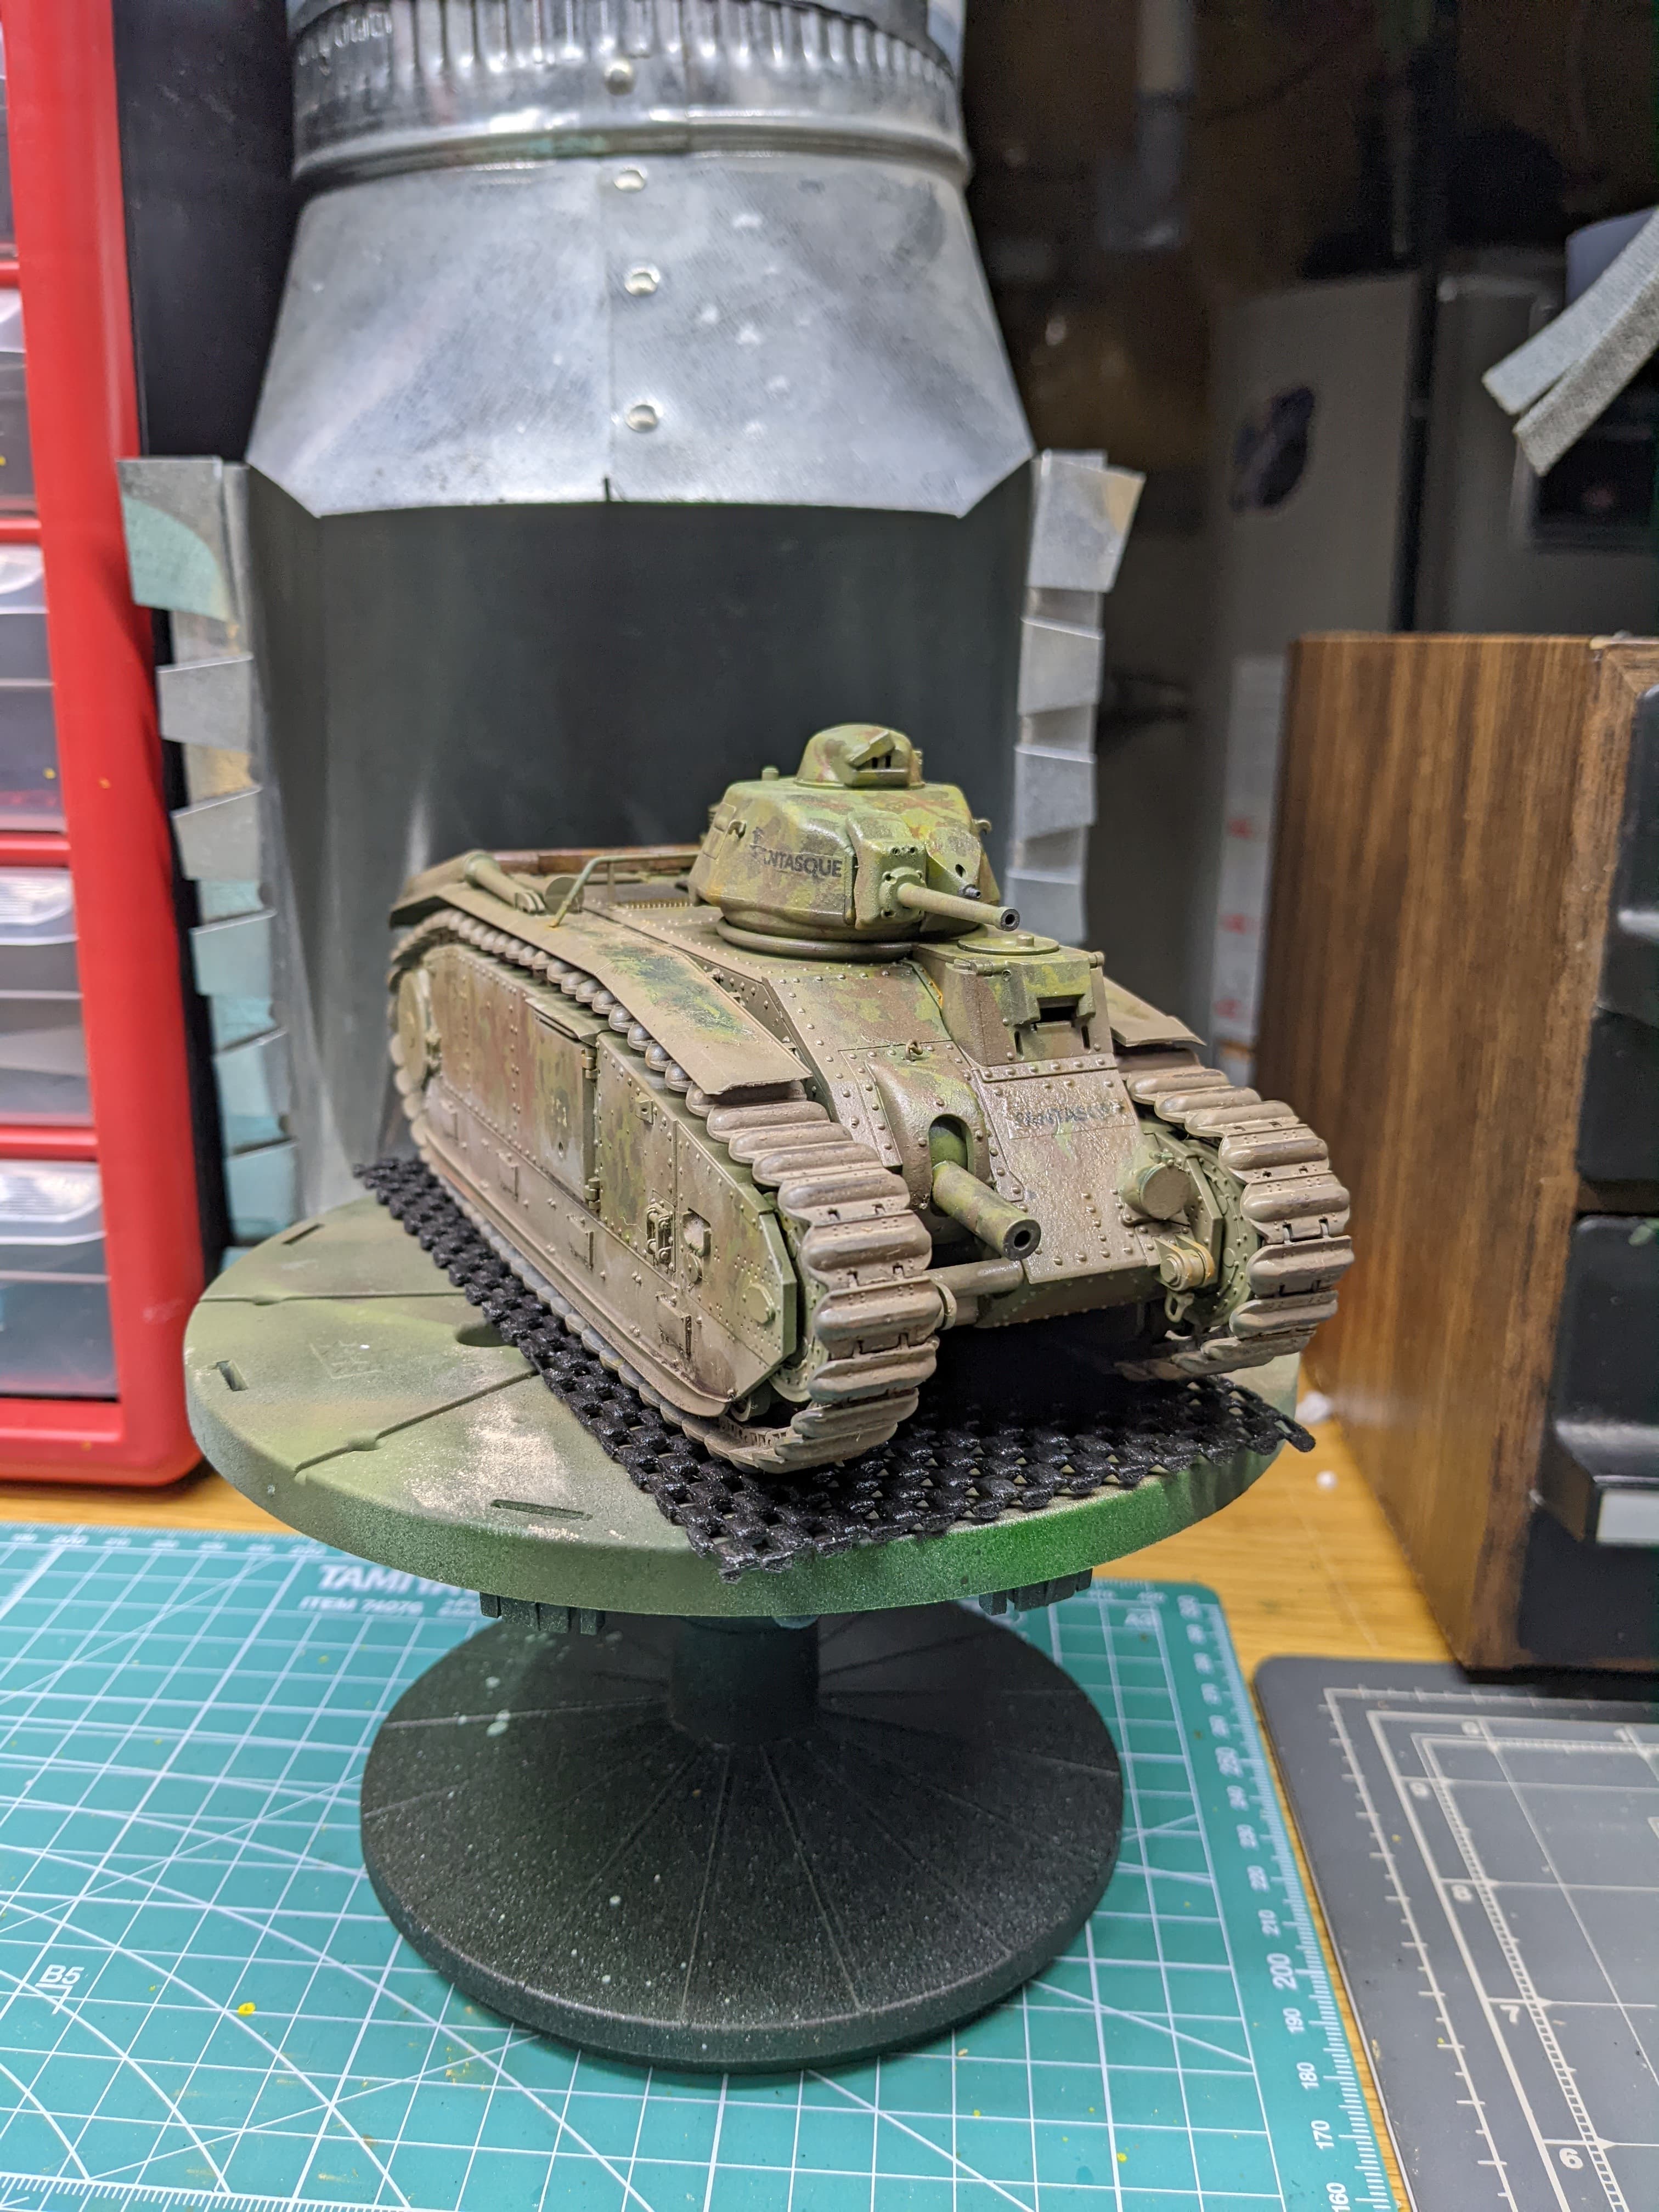
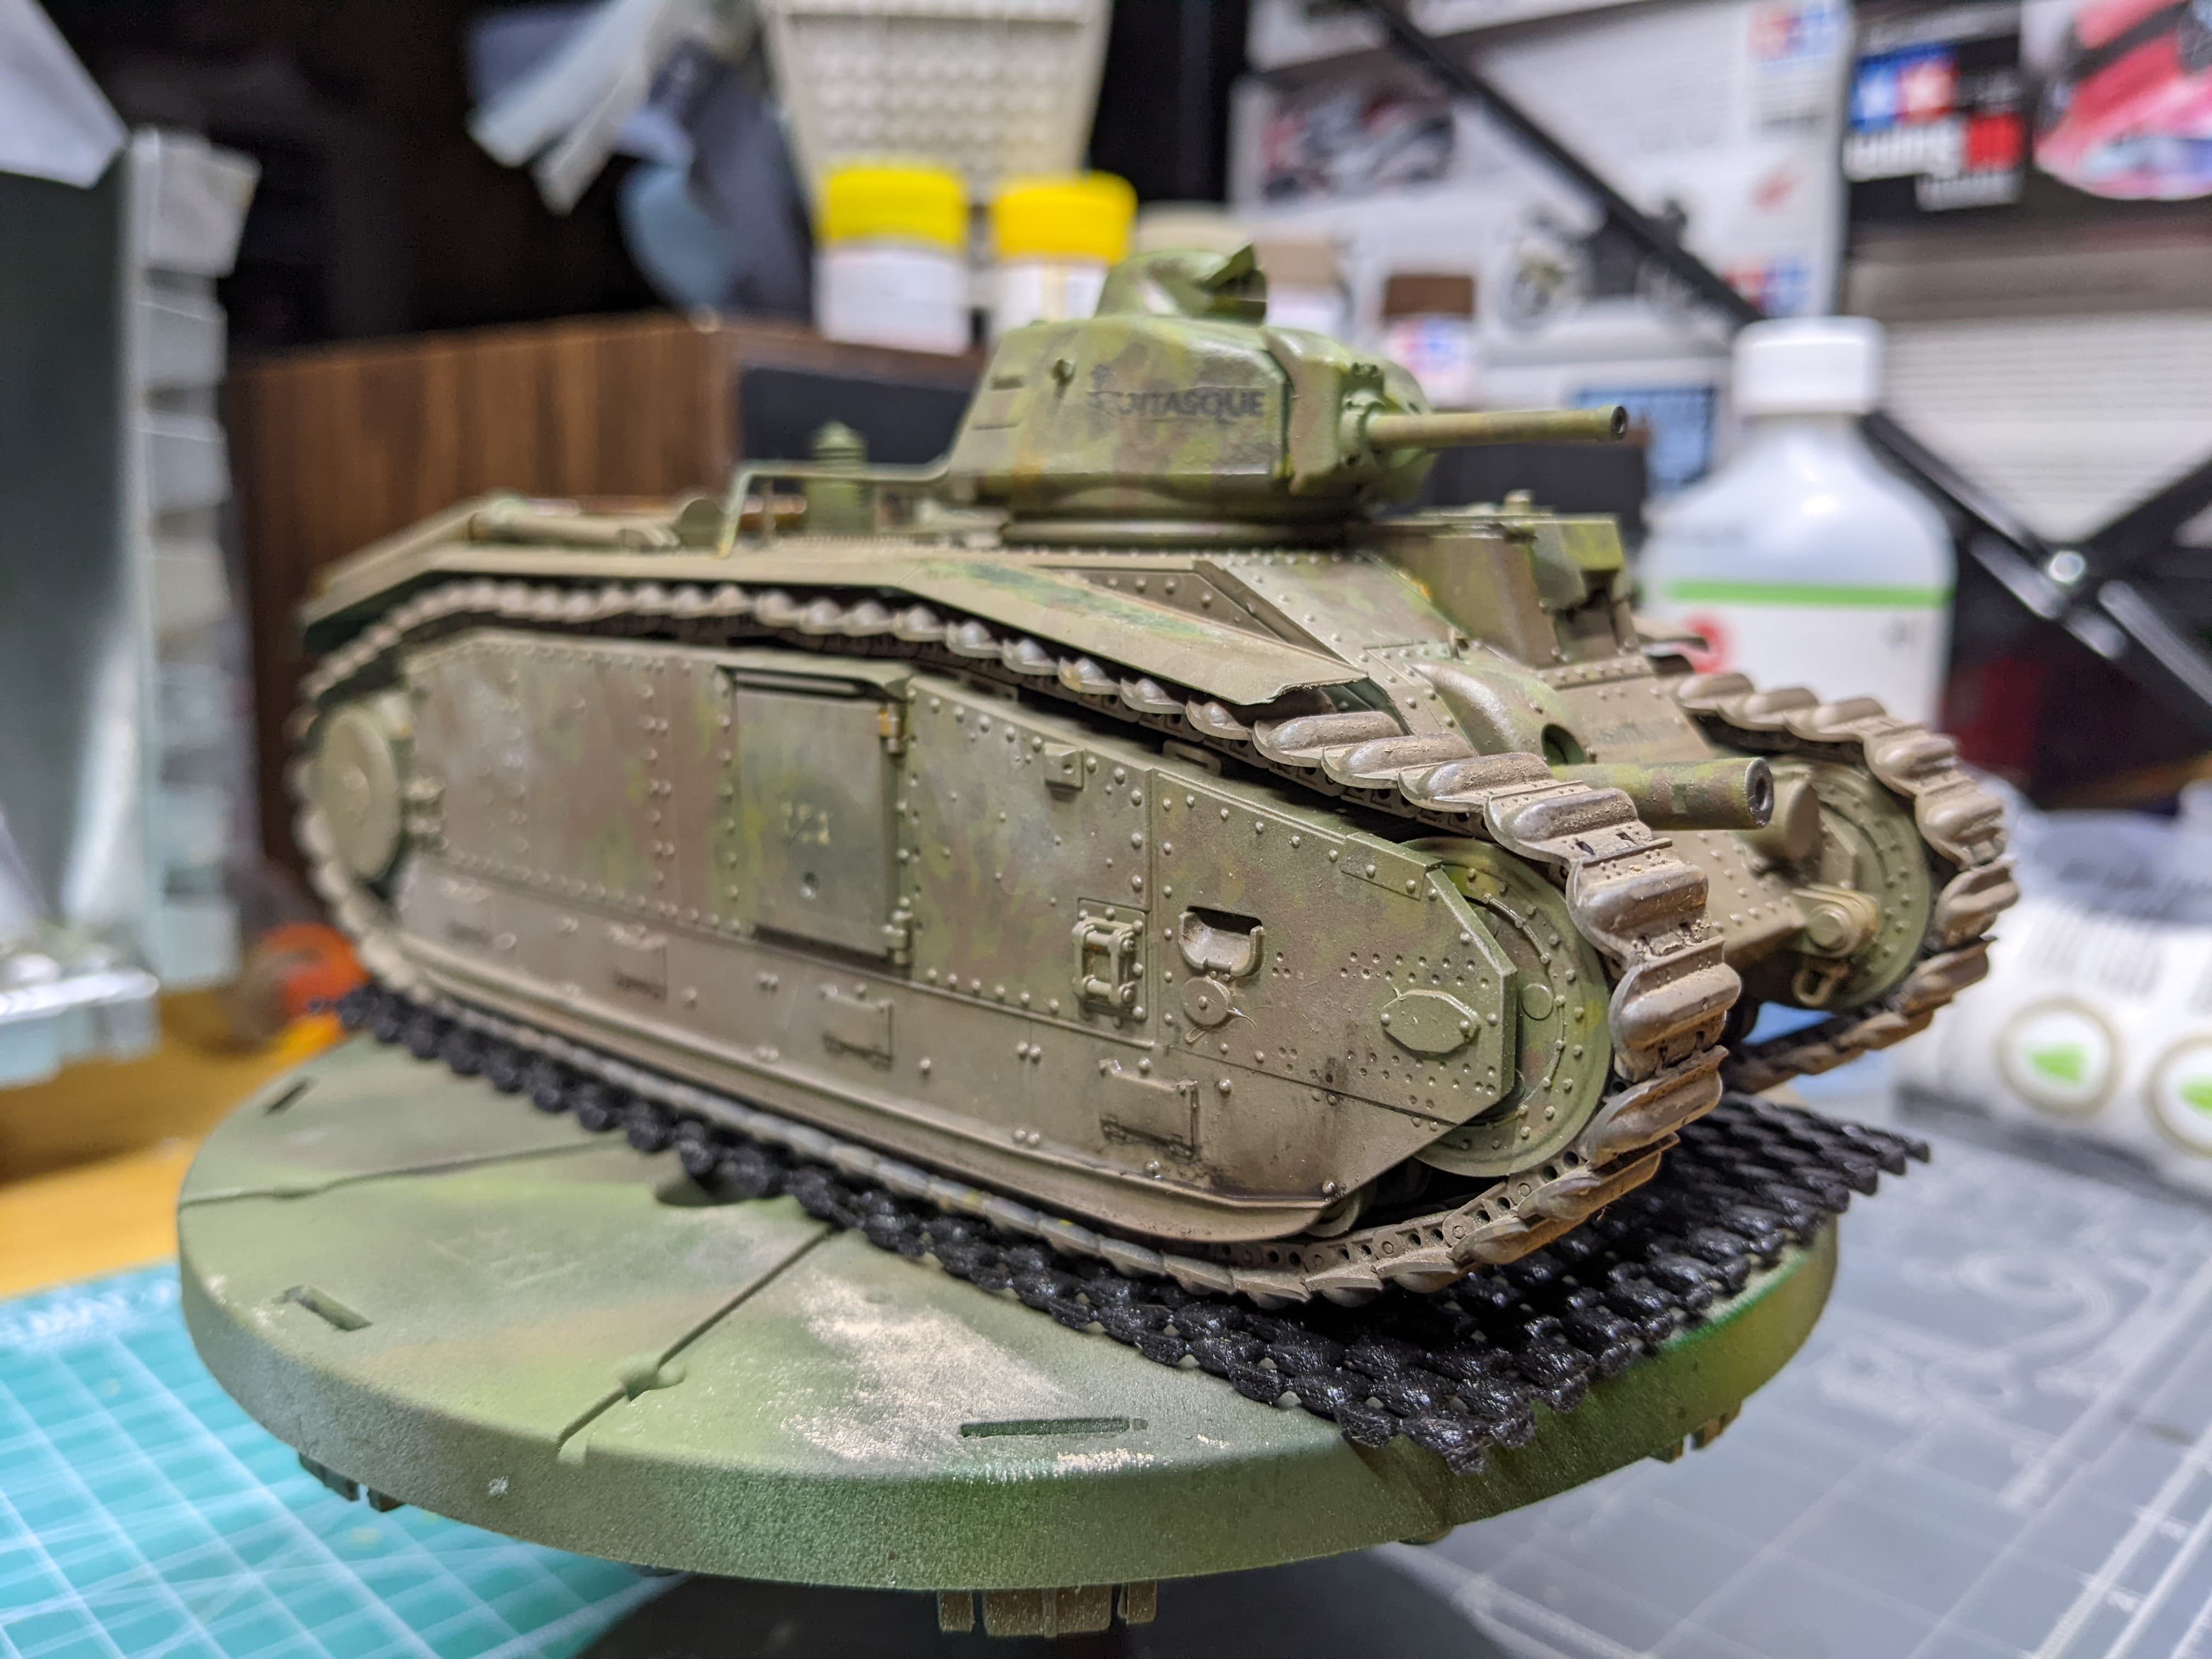
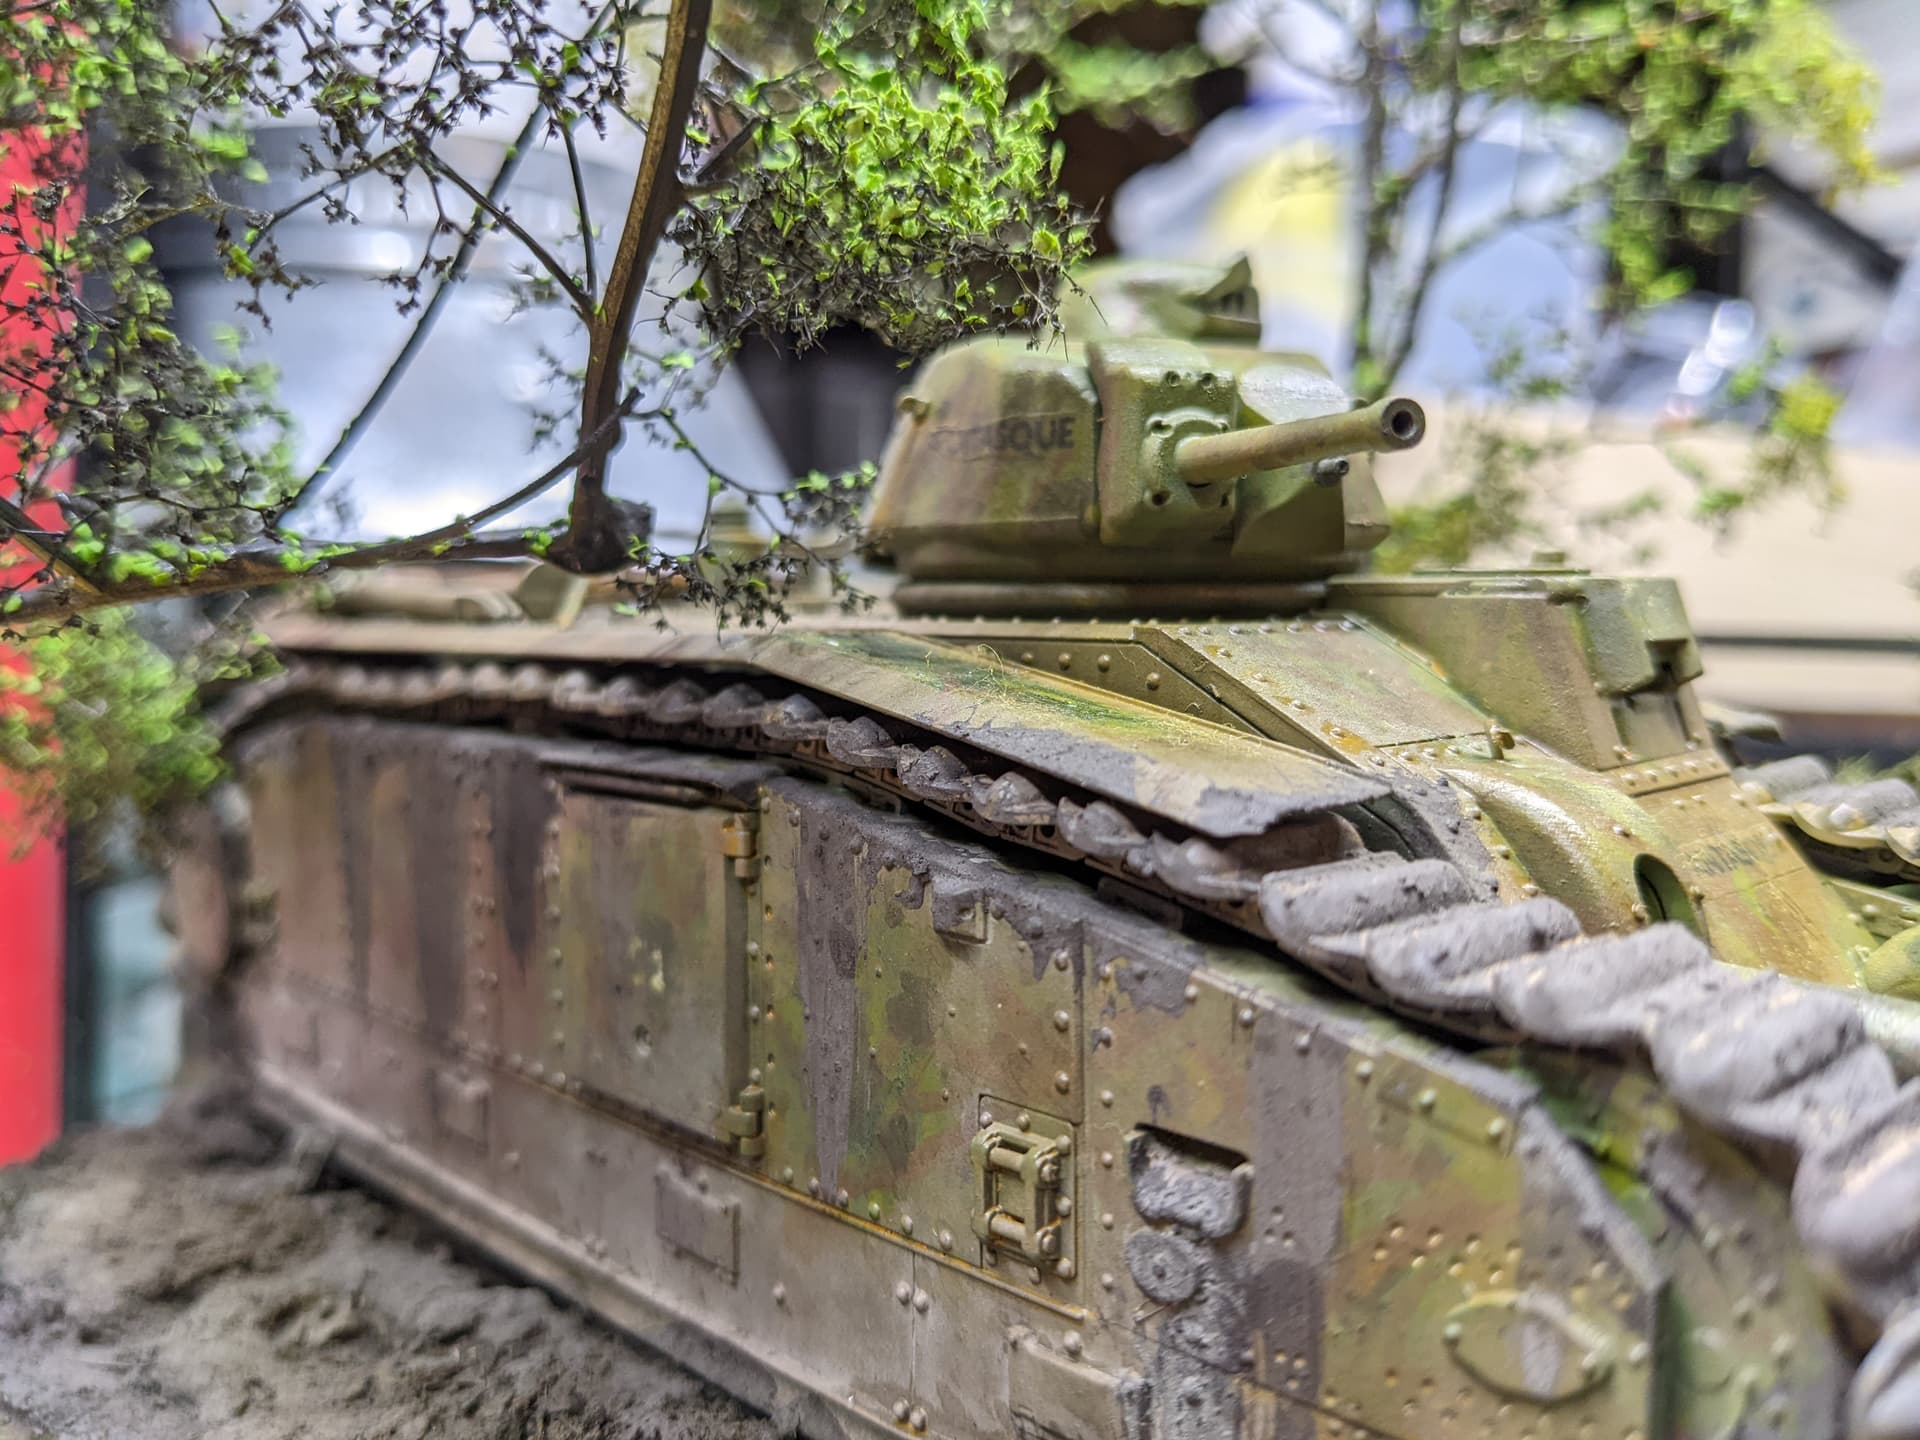
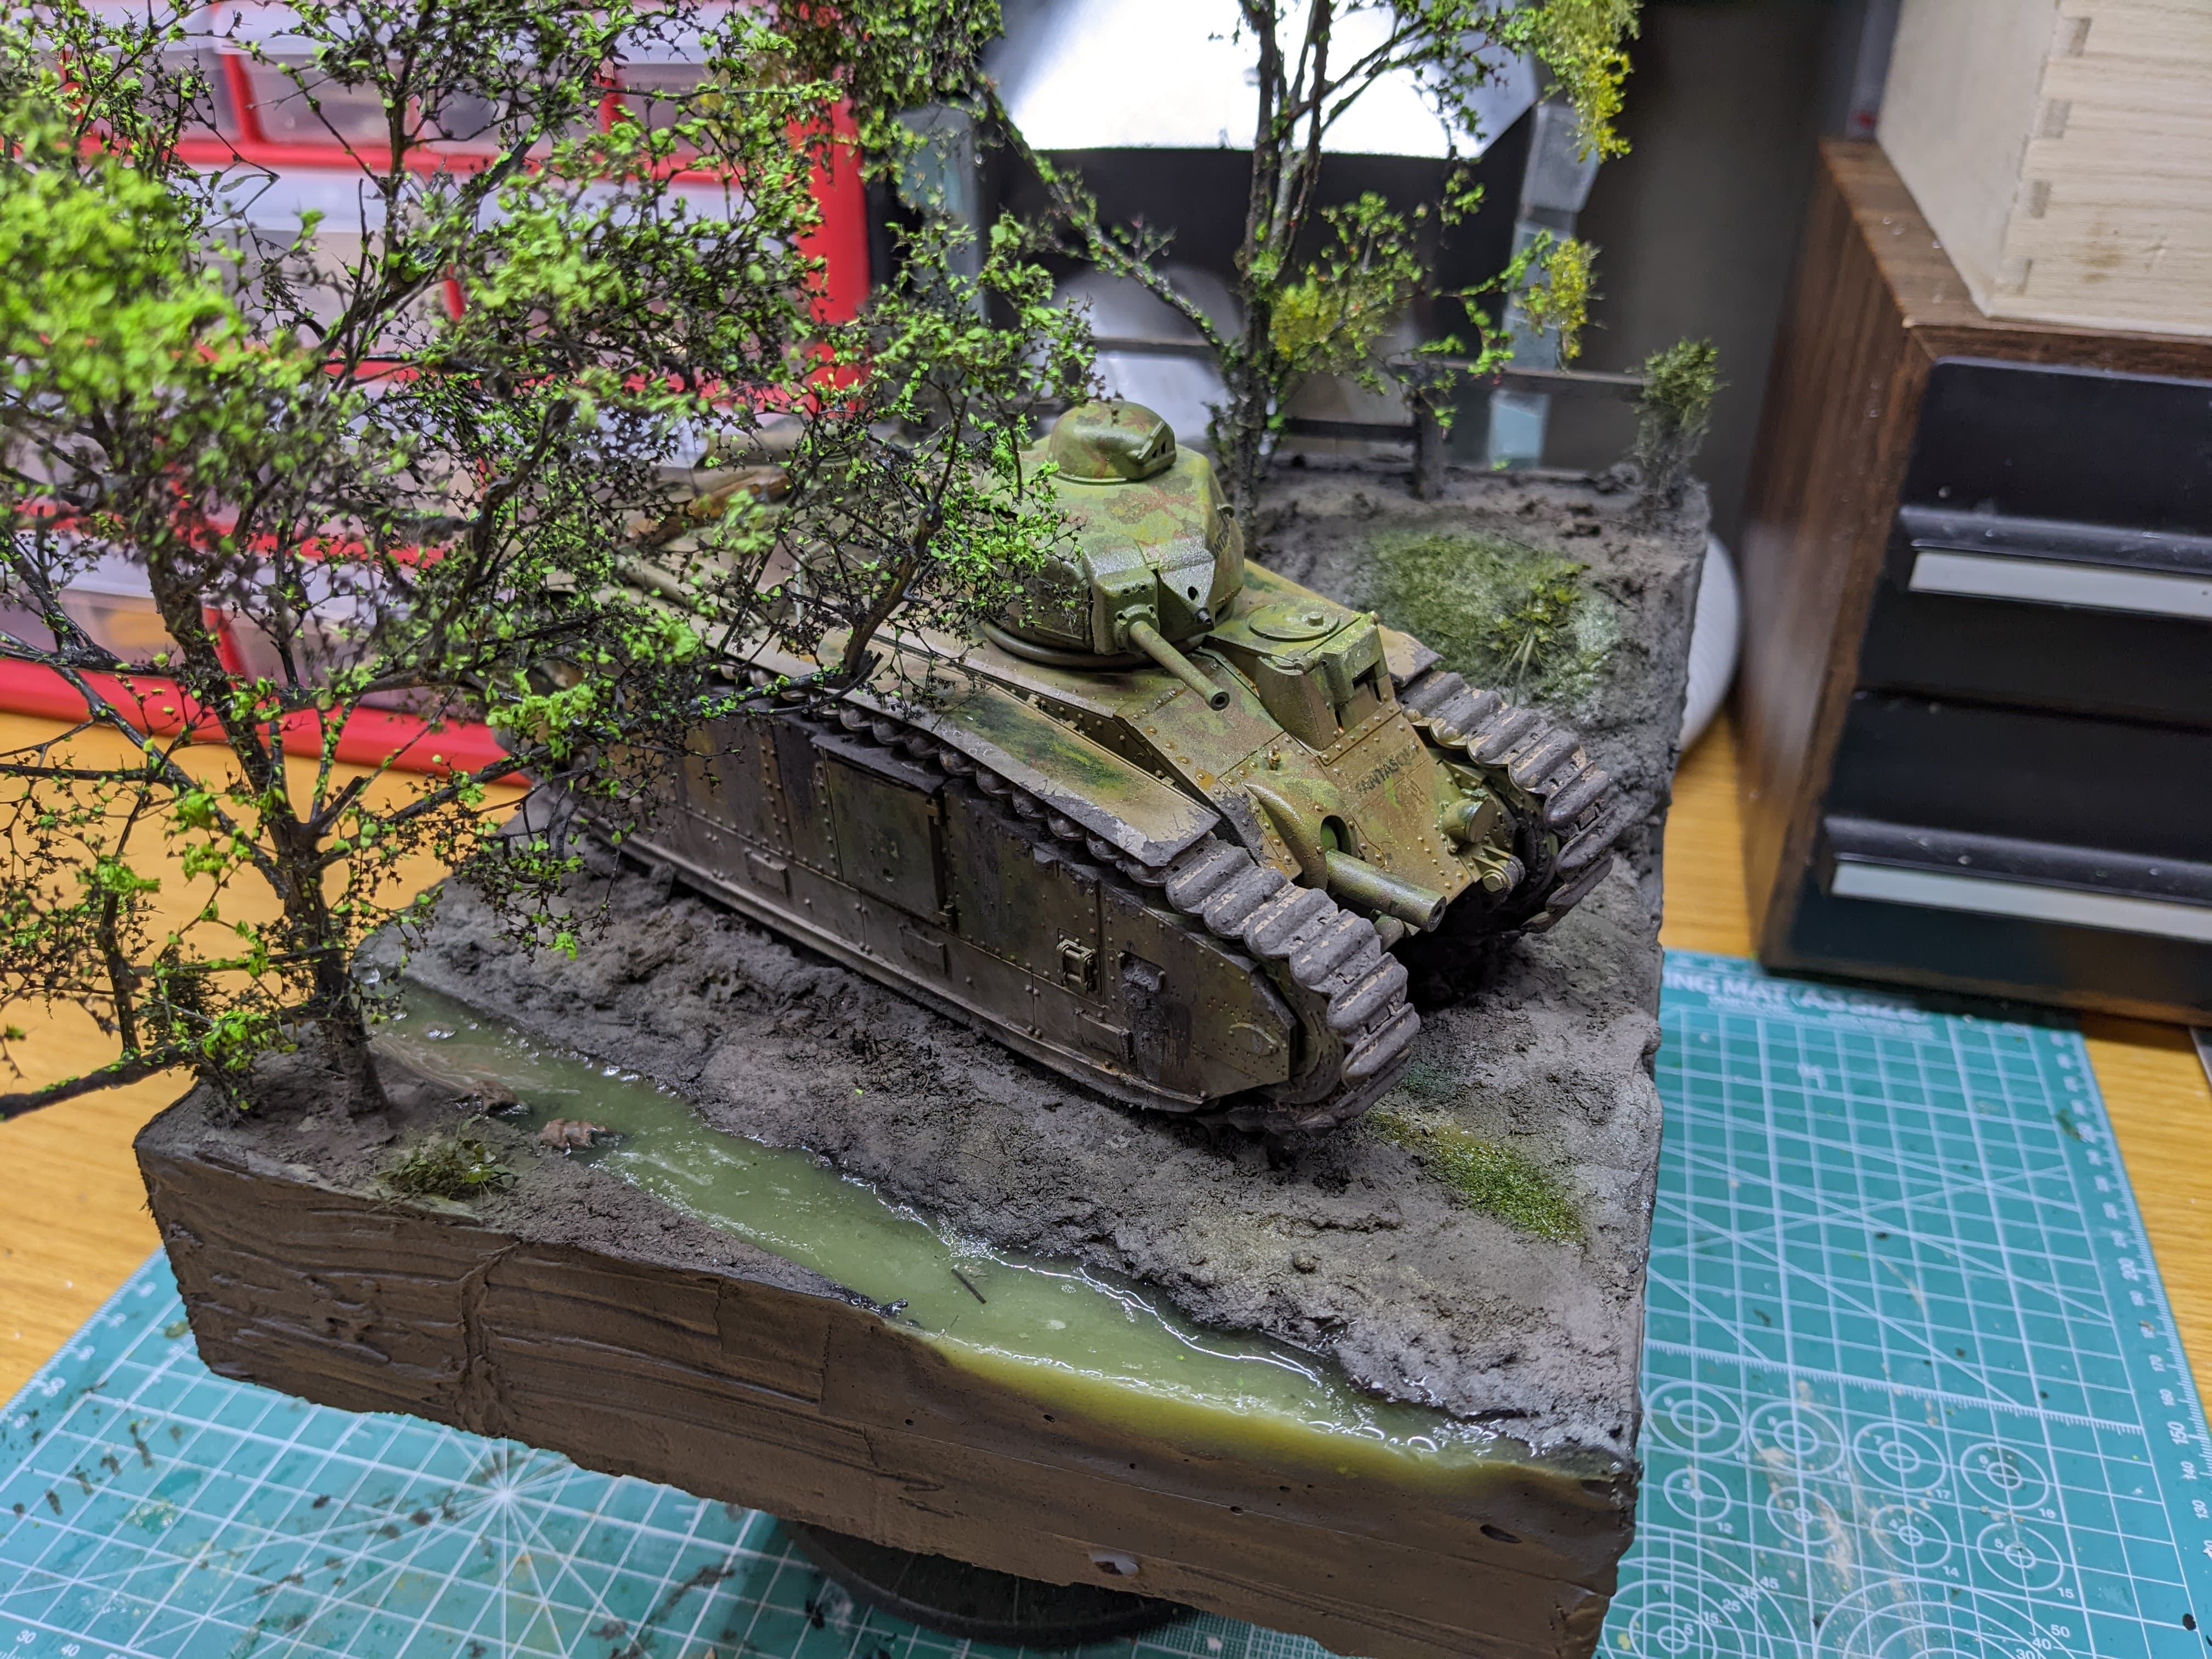
Weathering this tank was a bit of a conundrum.

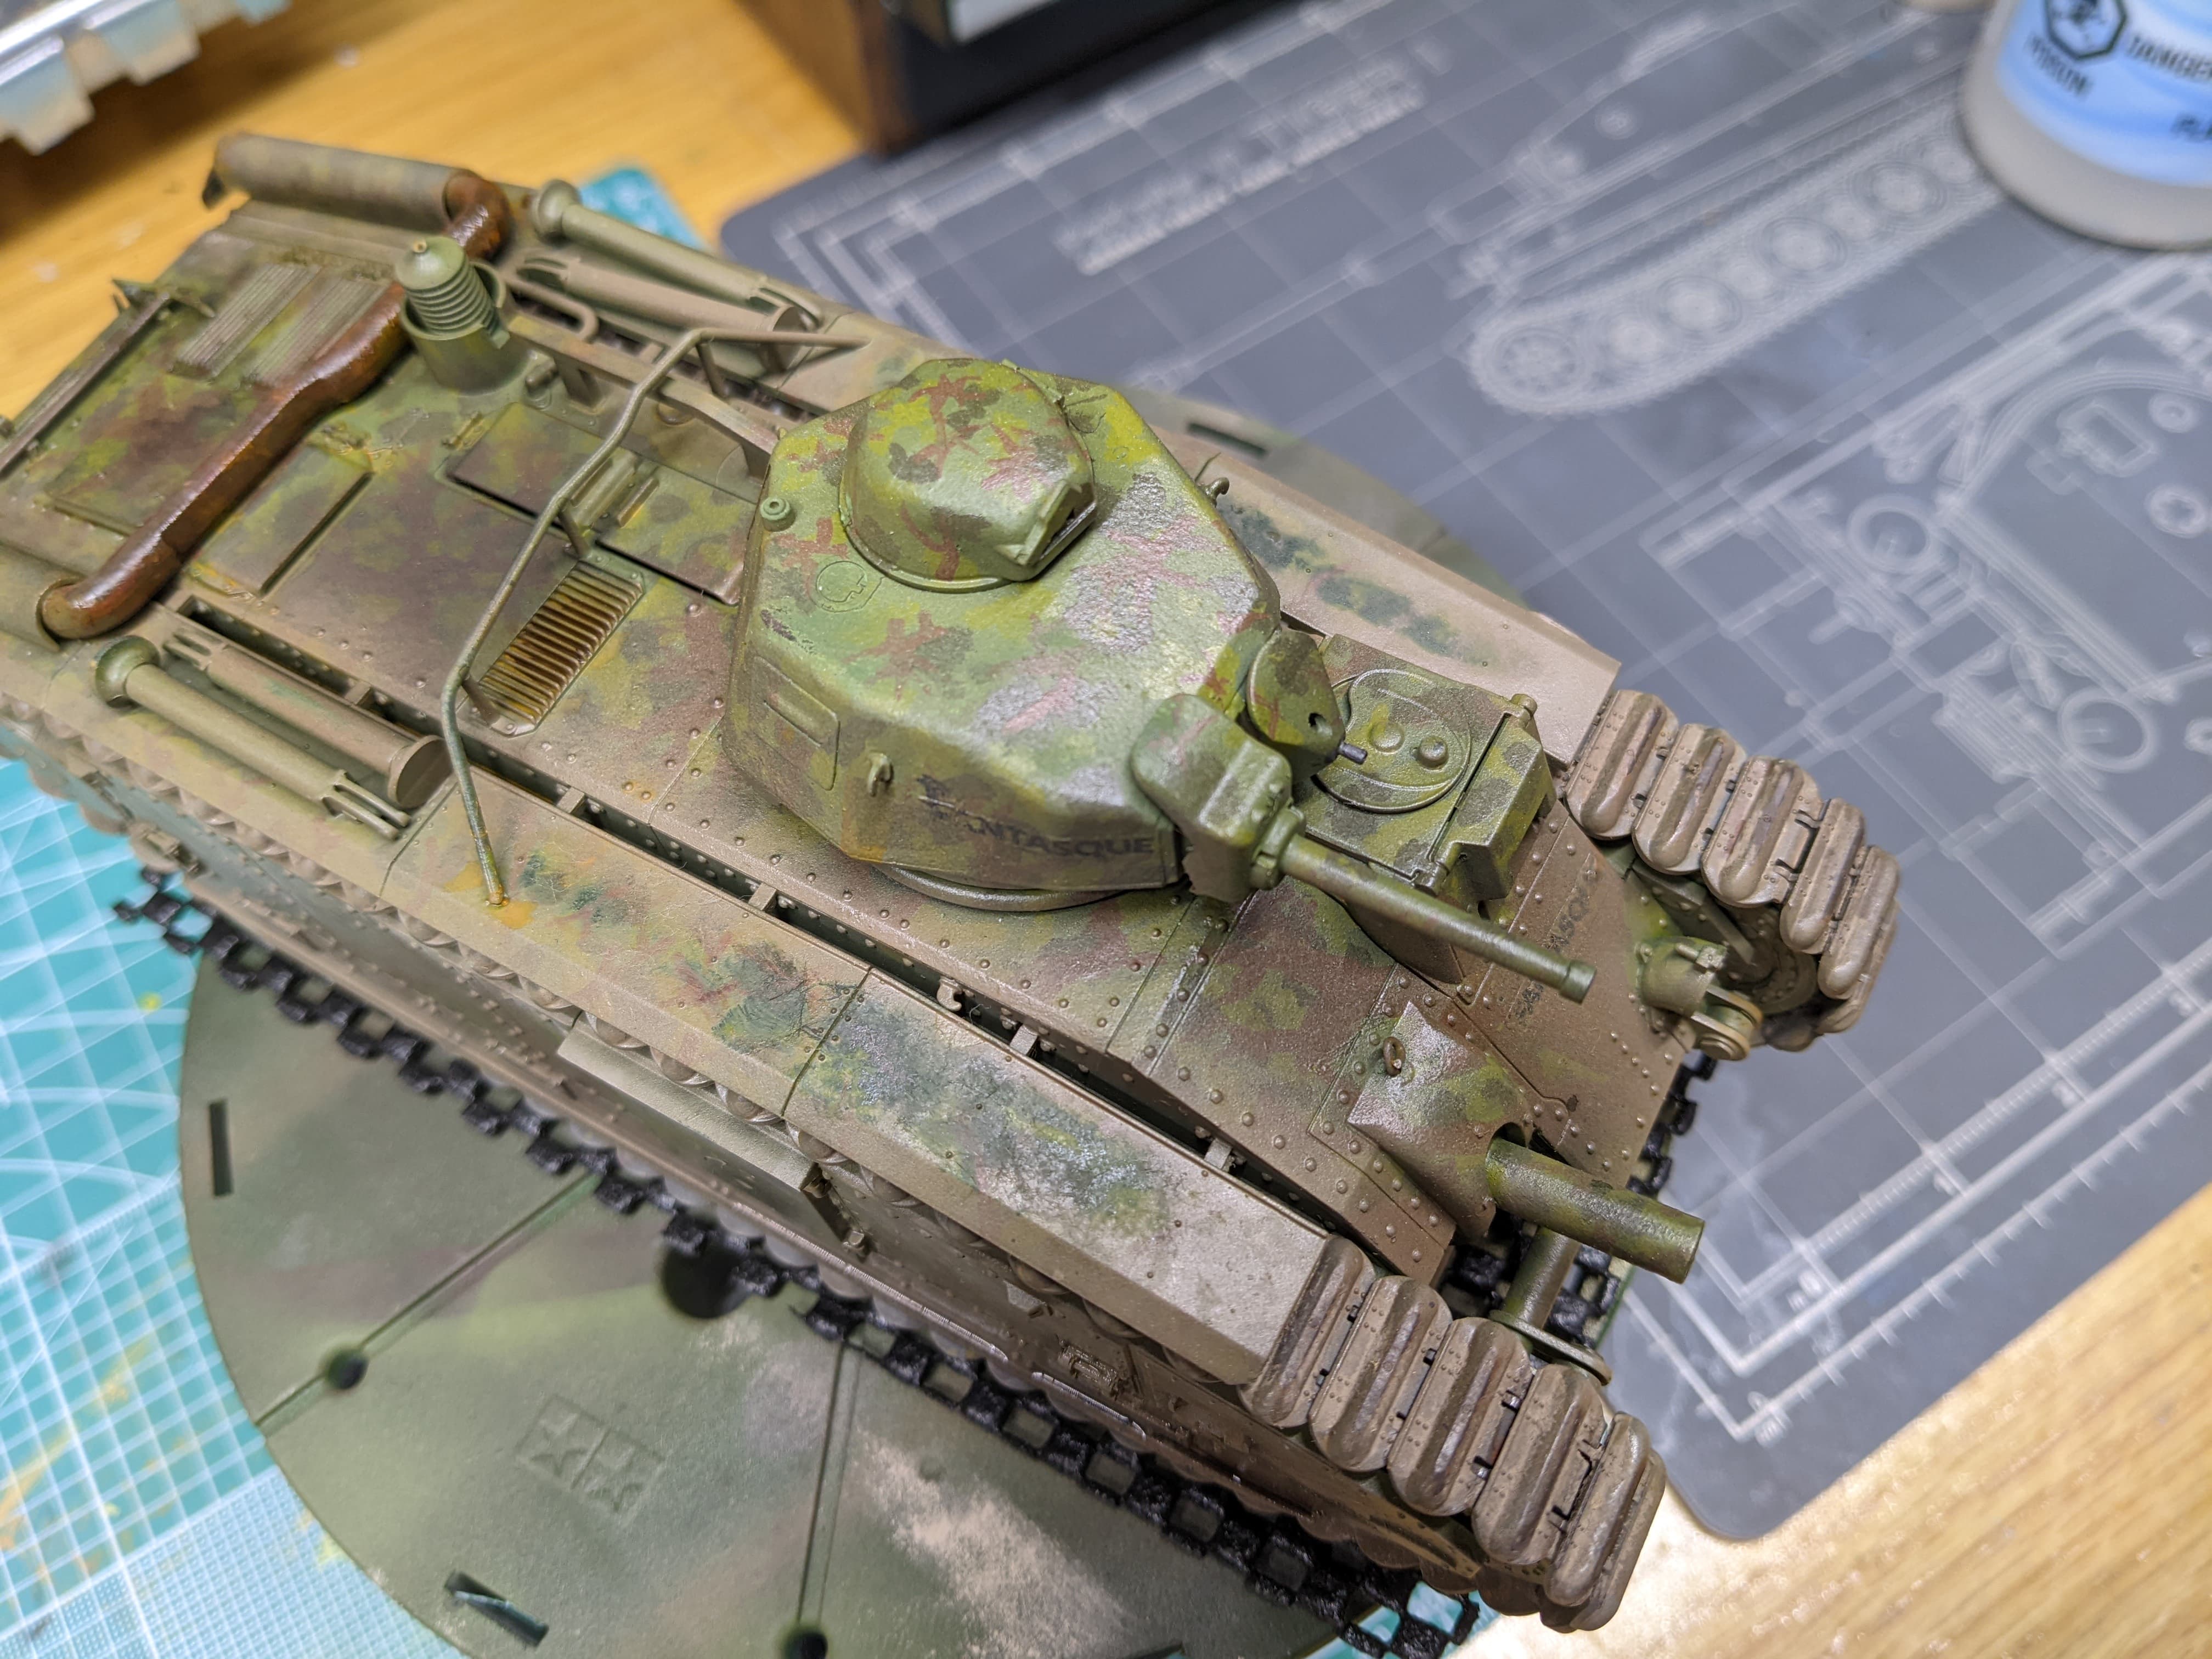
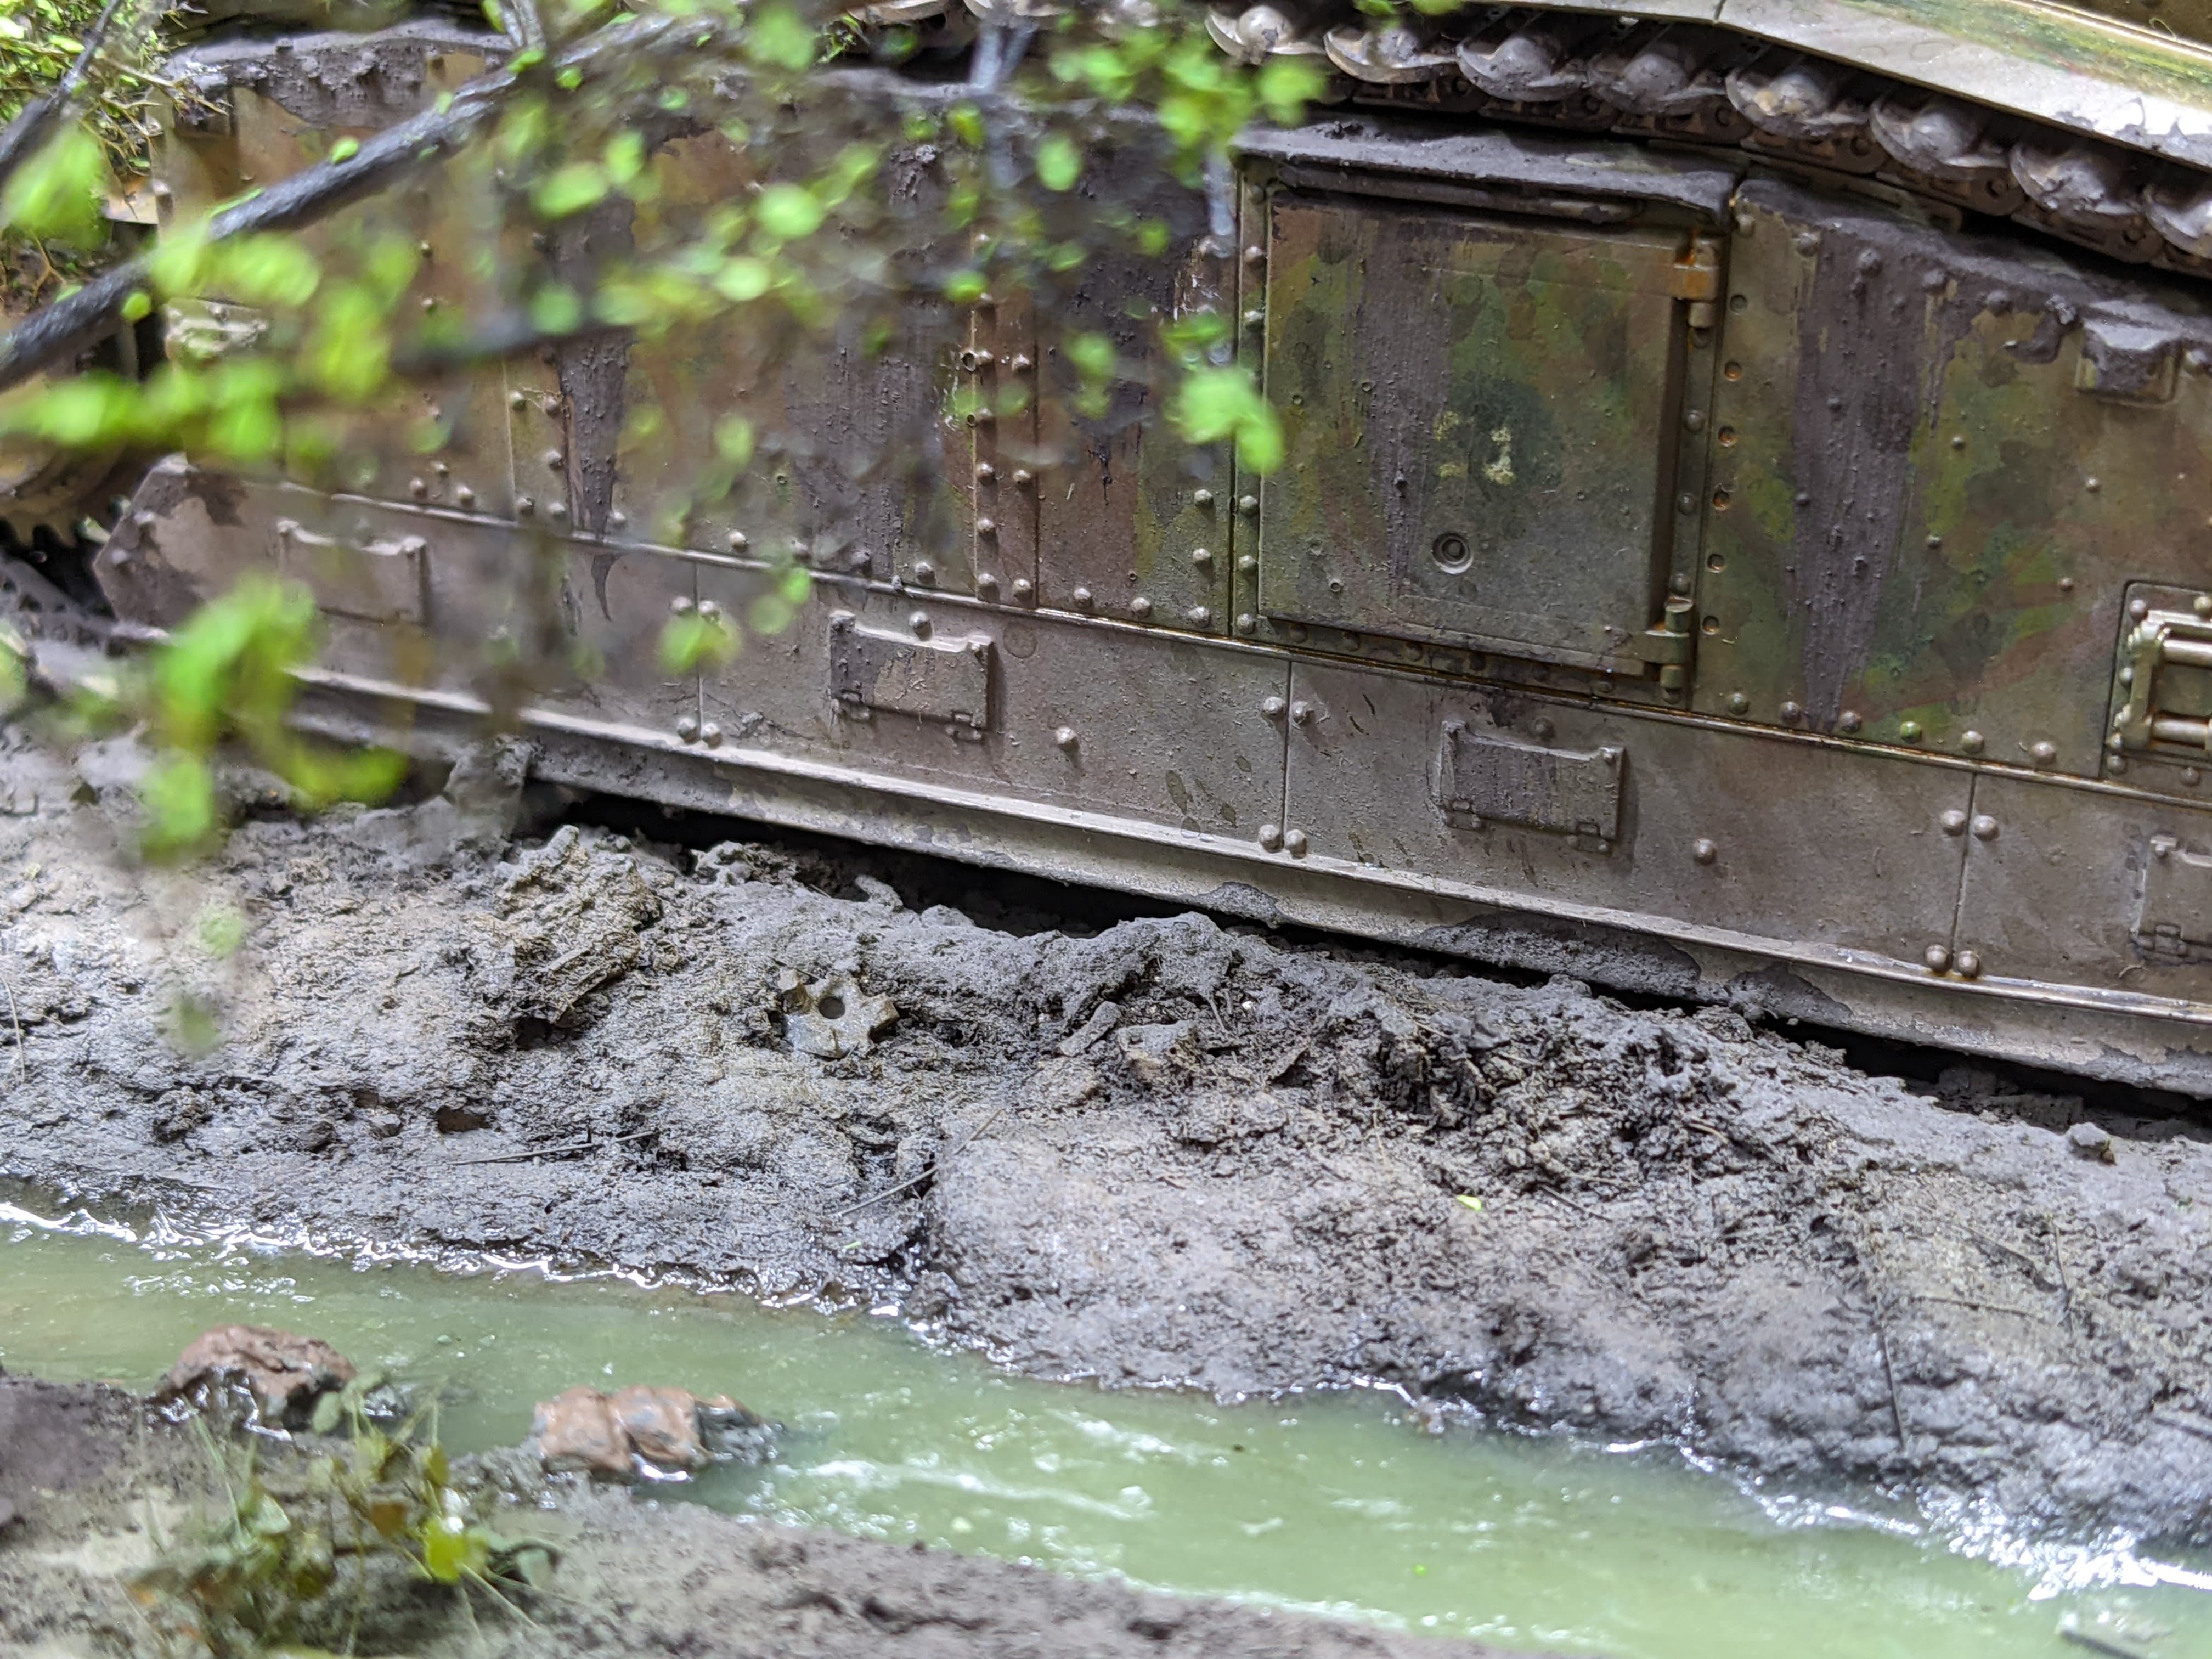
On one hand, I obviously want to make it look like it’s been well-used and worn by the elements. On the other, I also plan on putting this in a diorama, so I wanted to hold off on putting anything like heavy mud on it, so that I can better unify the tank with whatever terrain I use.

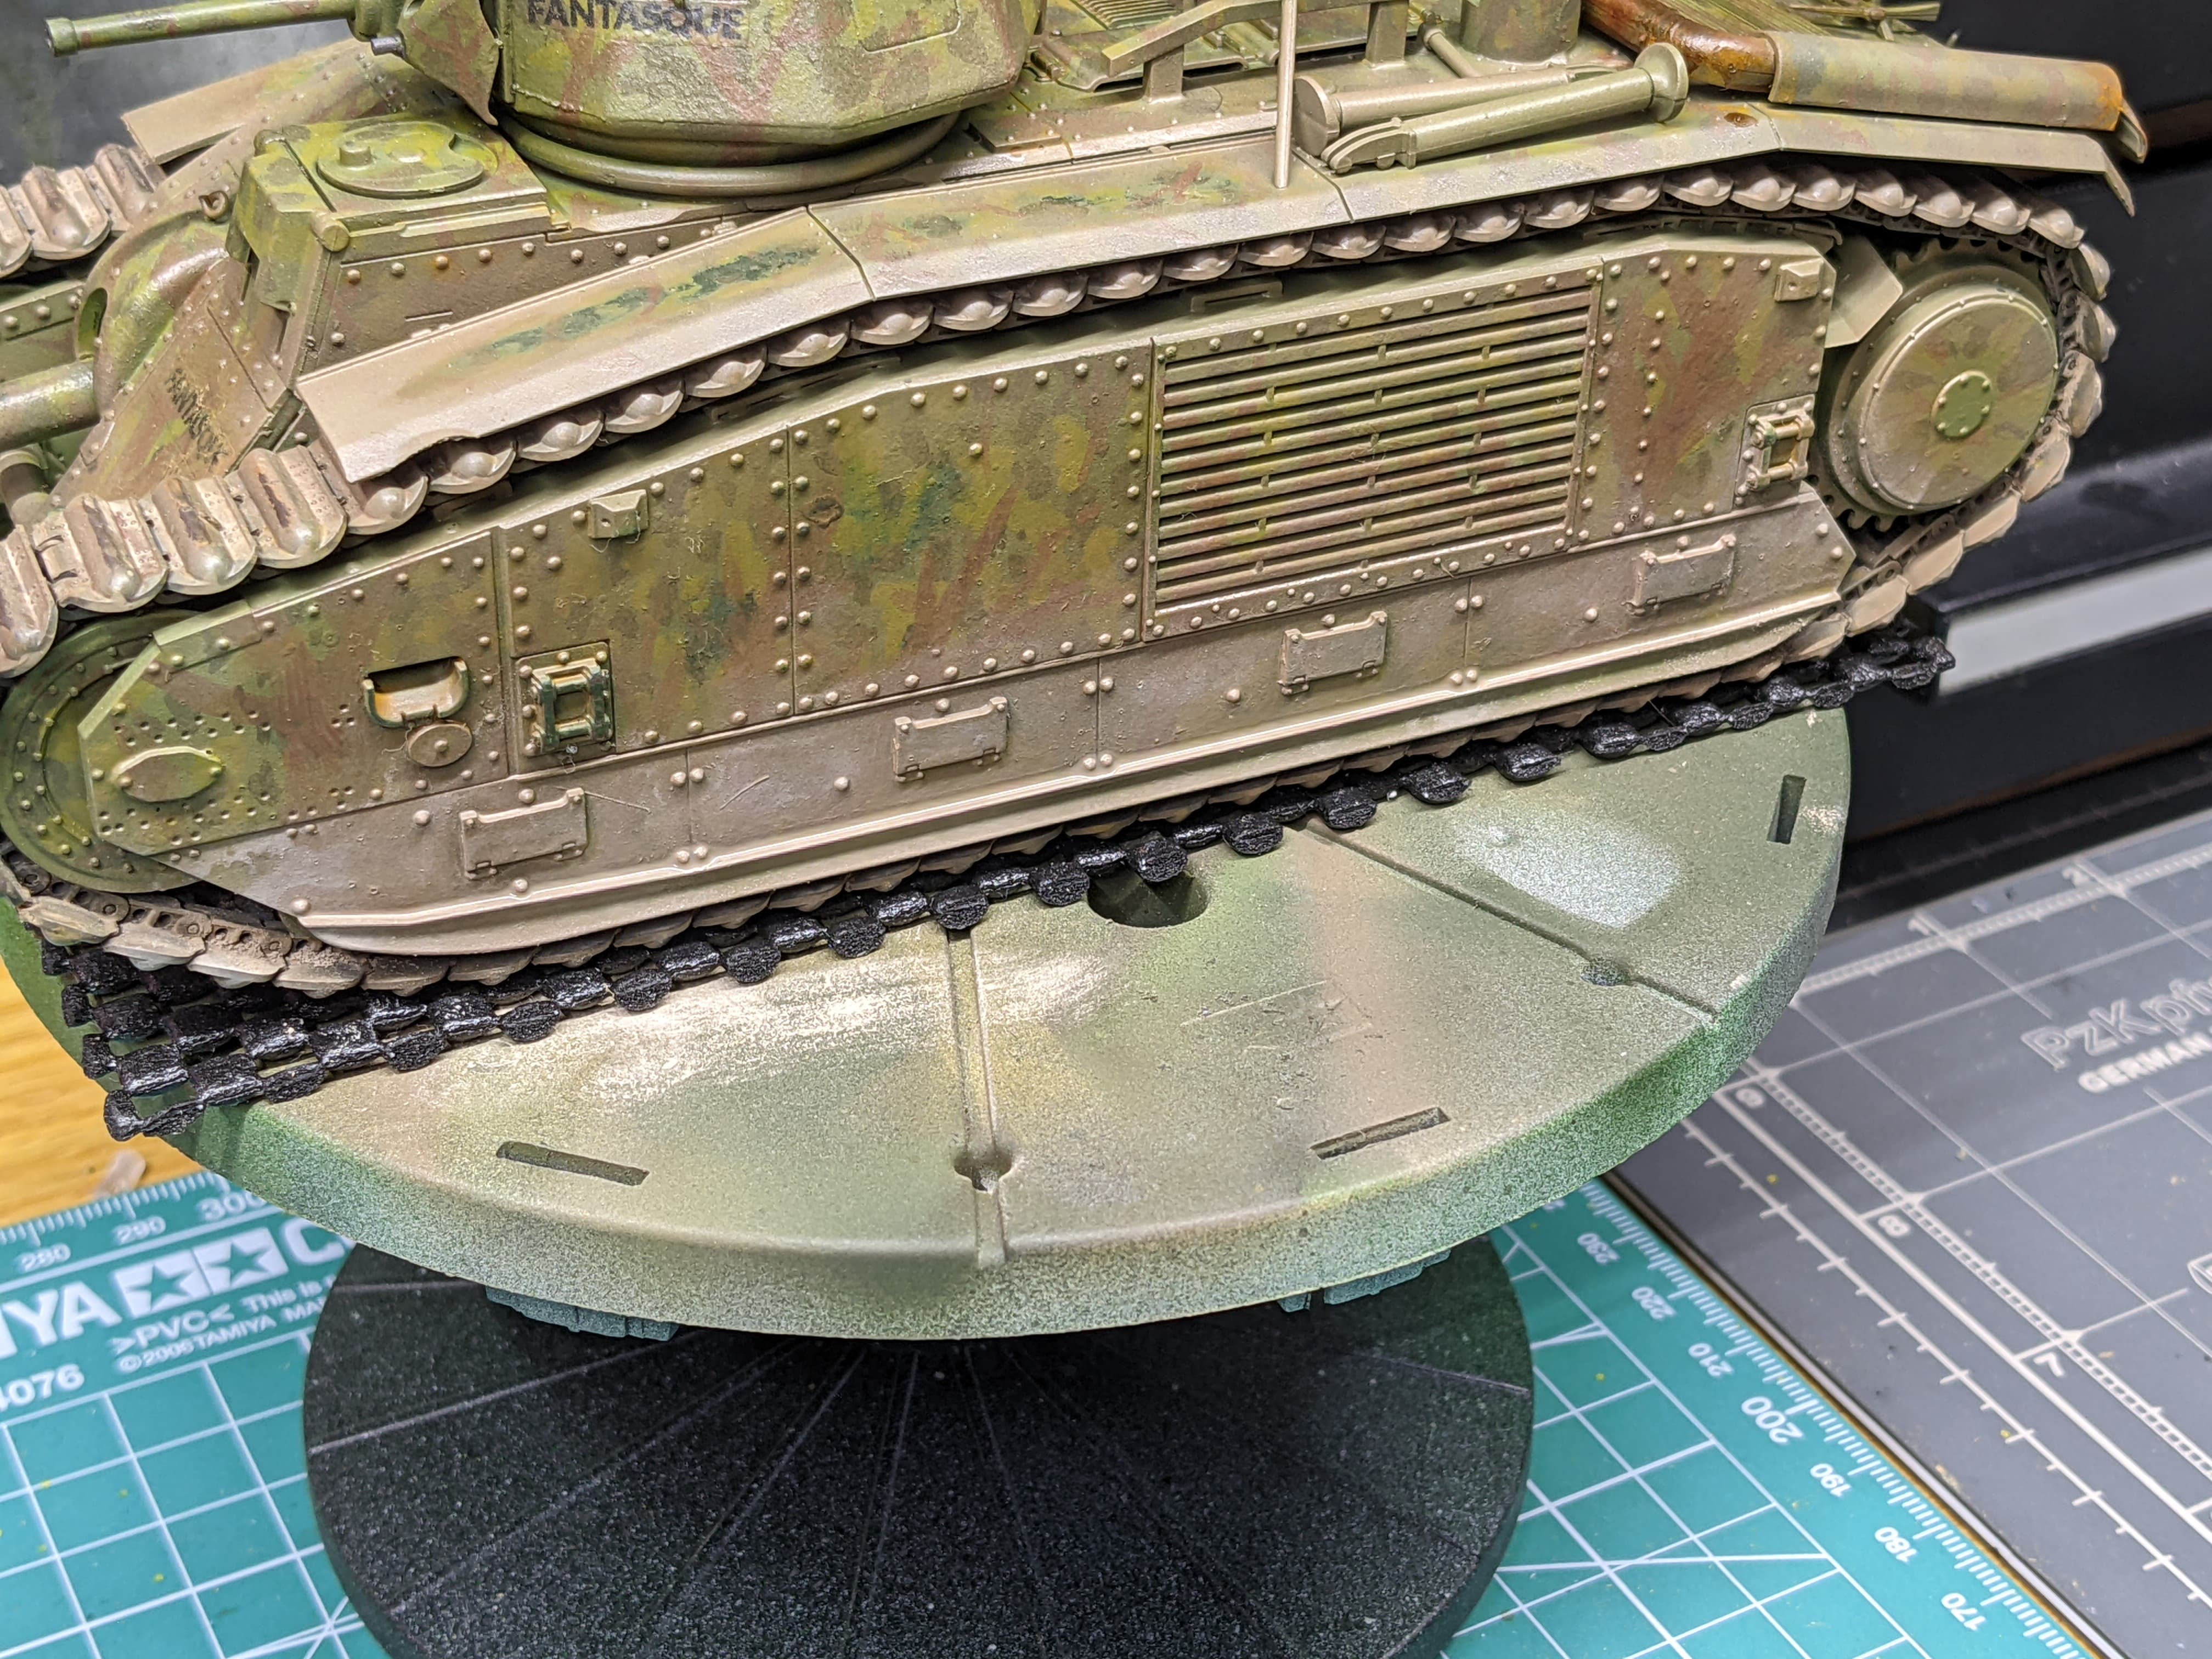
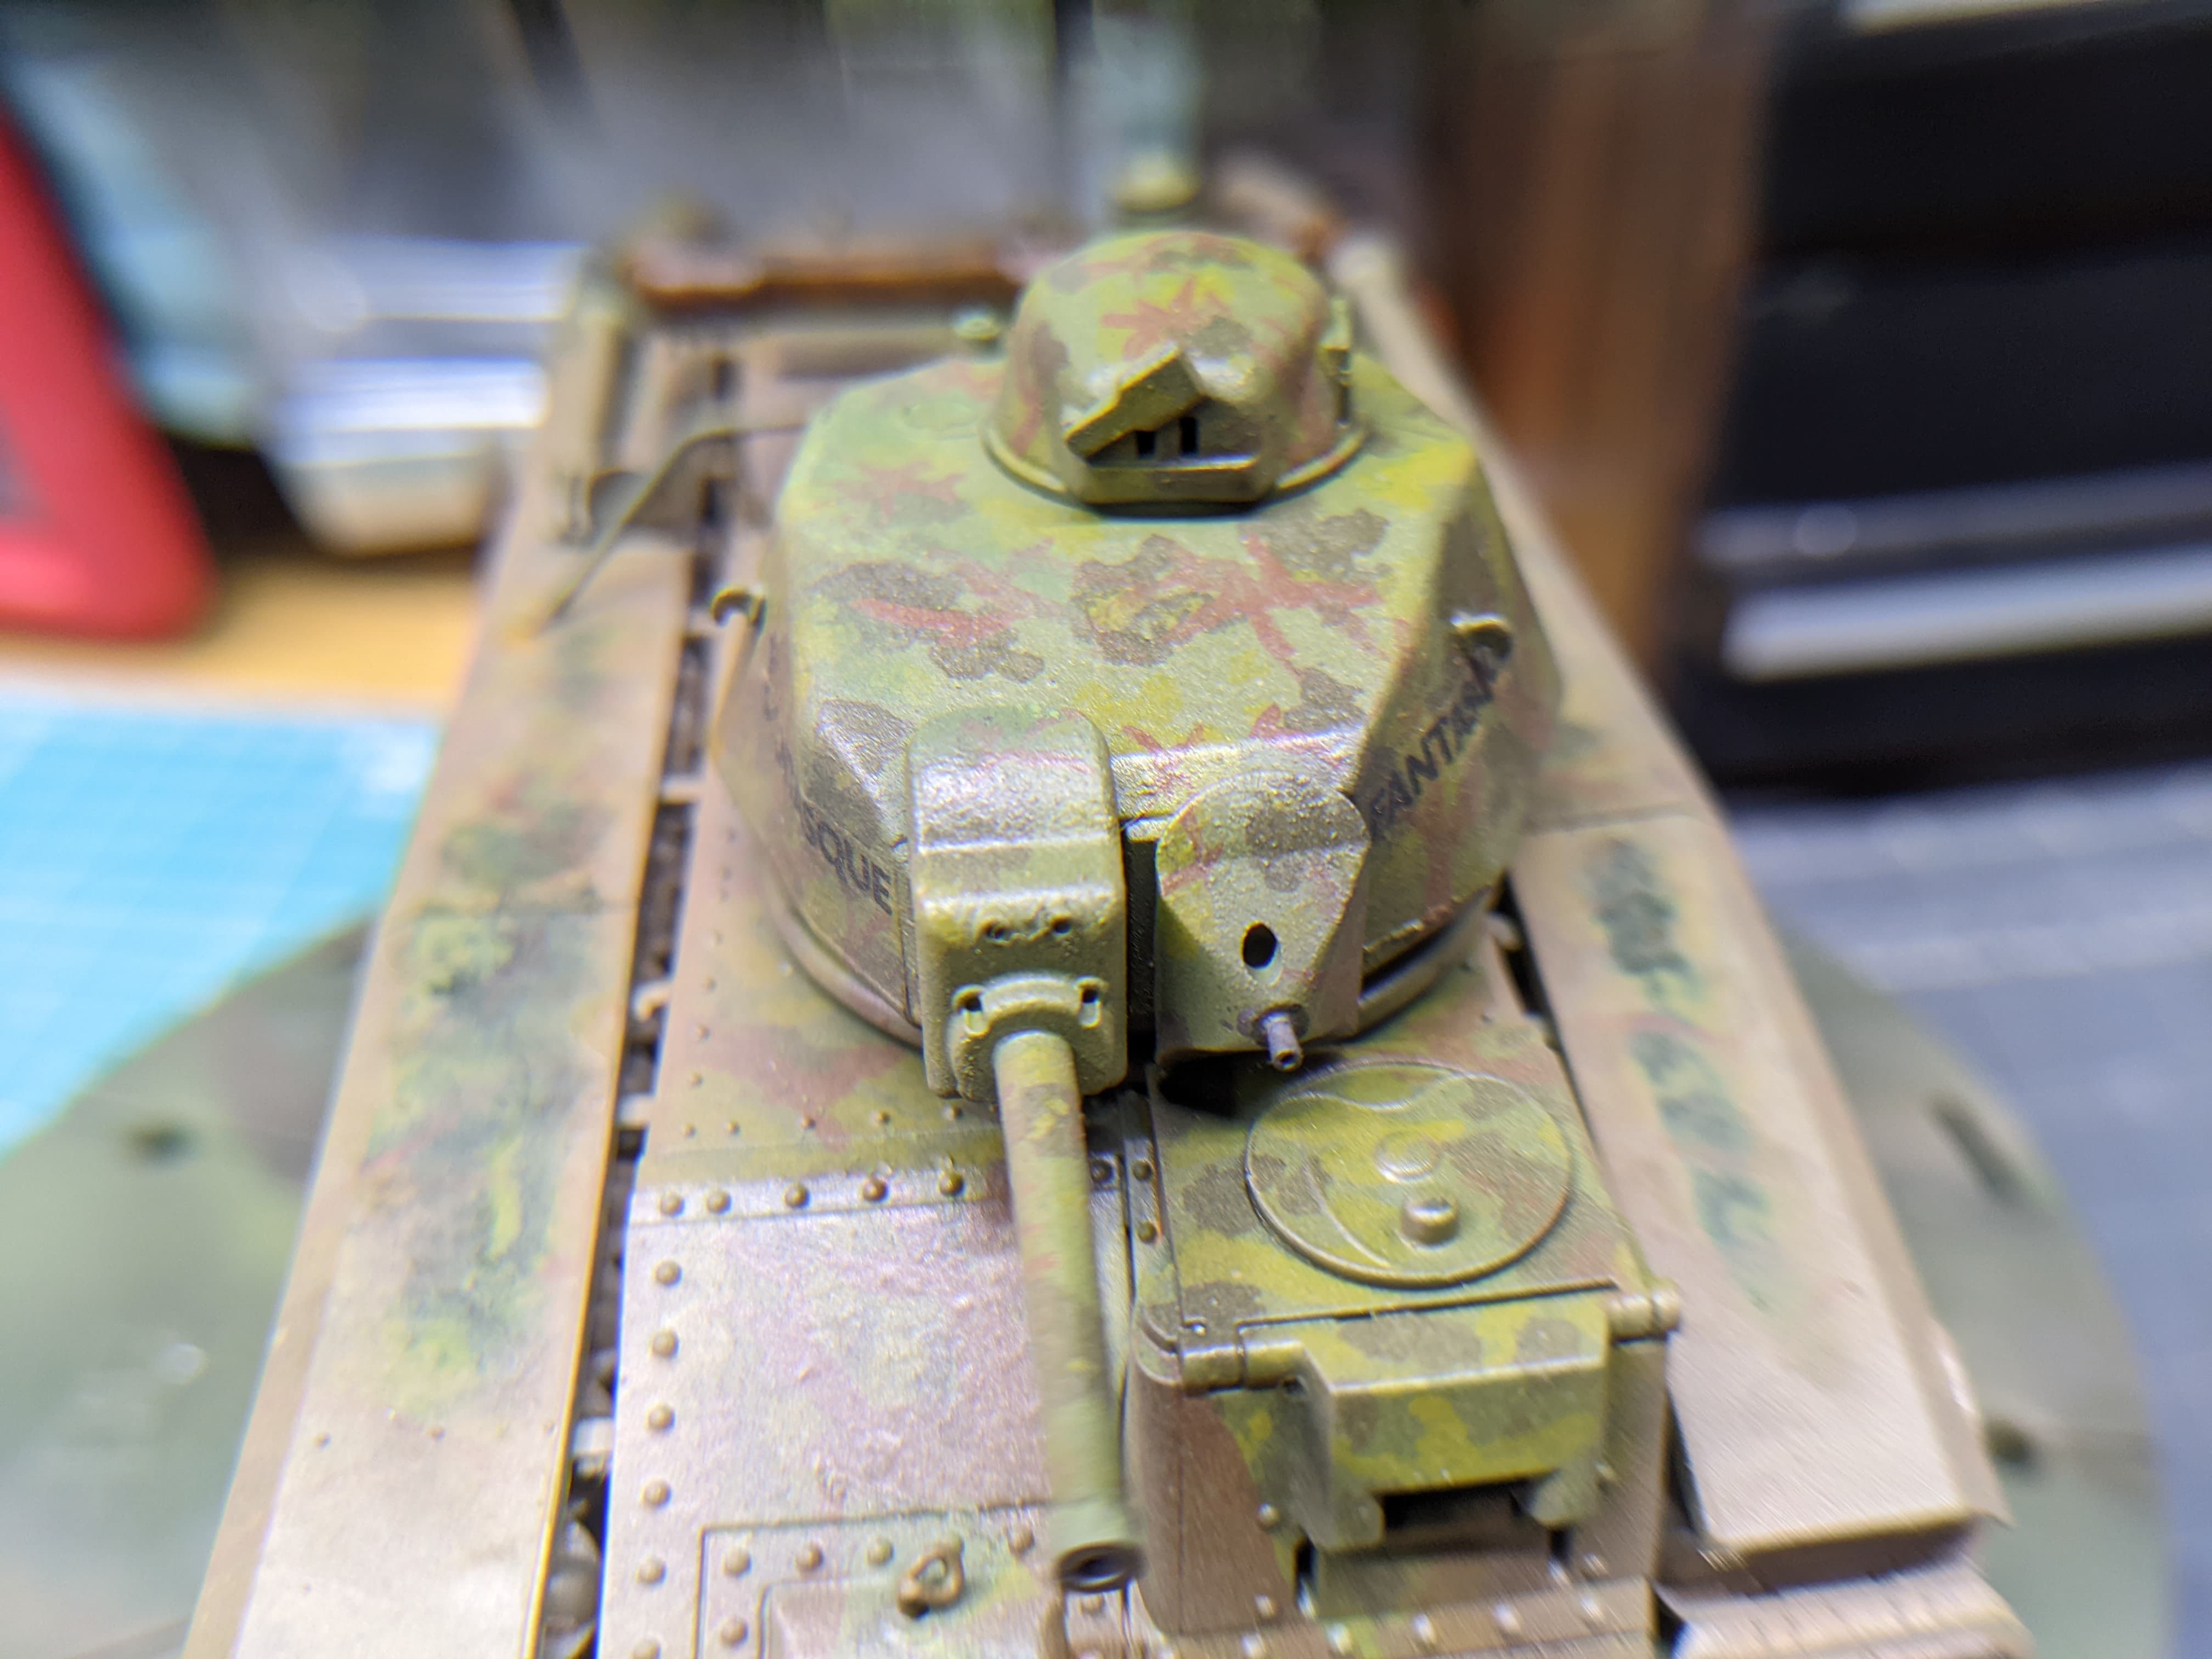
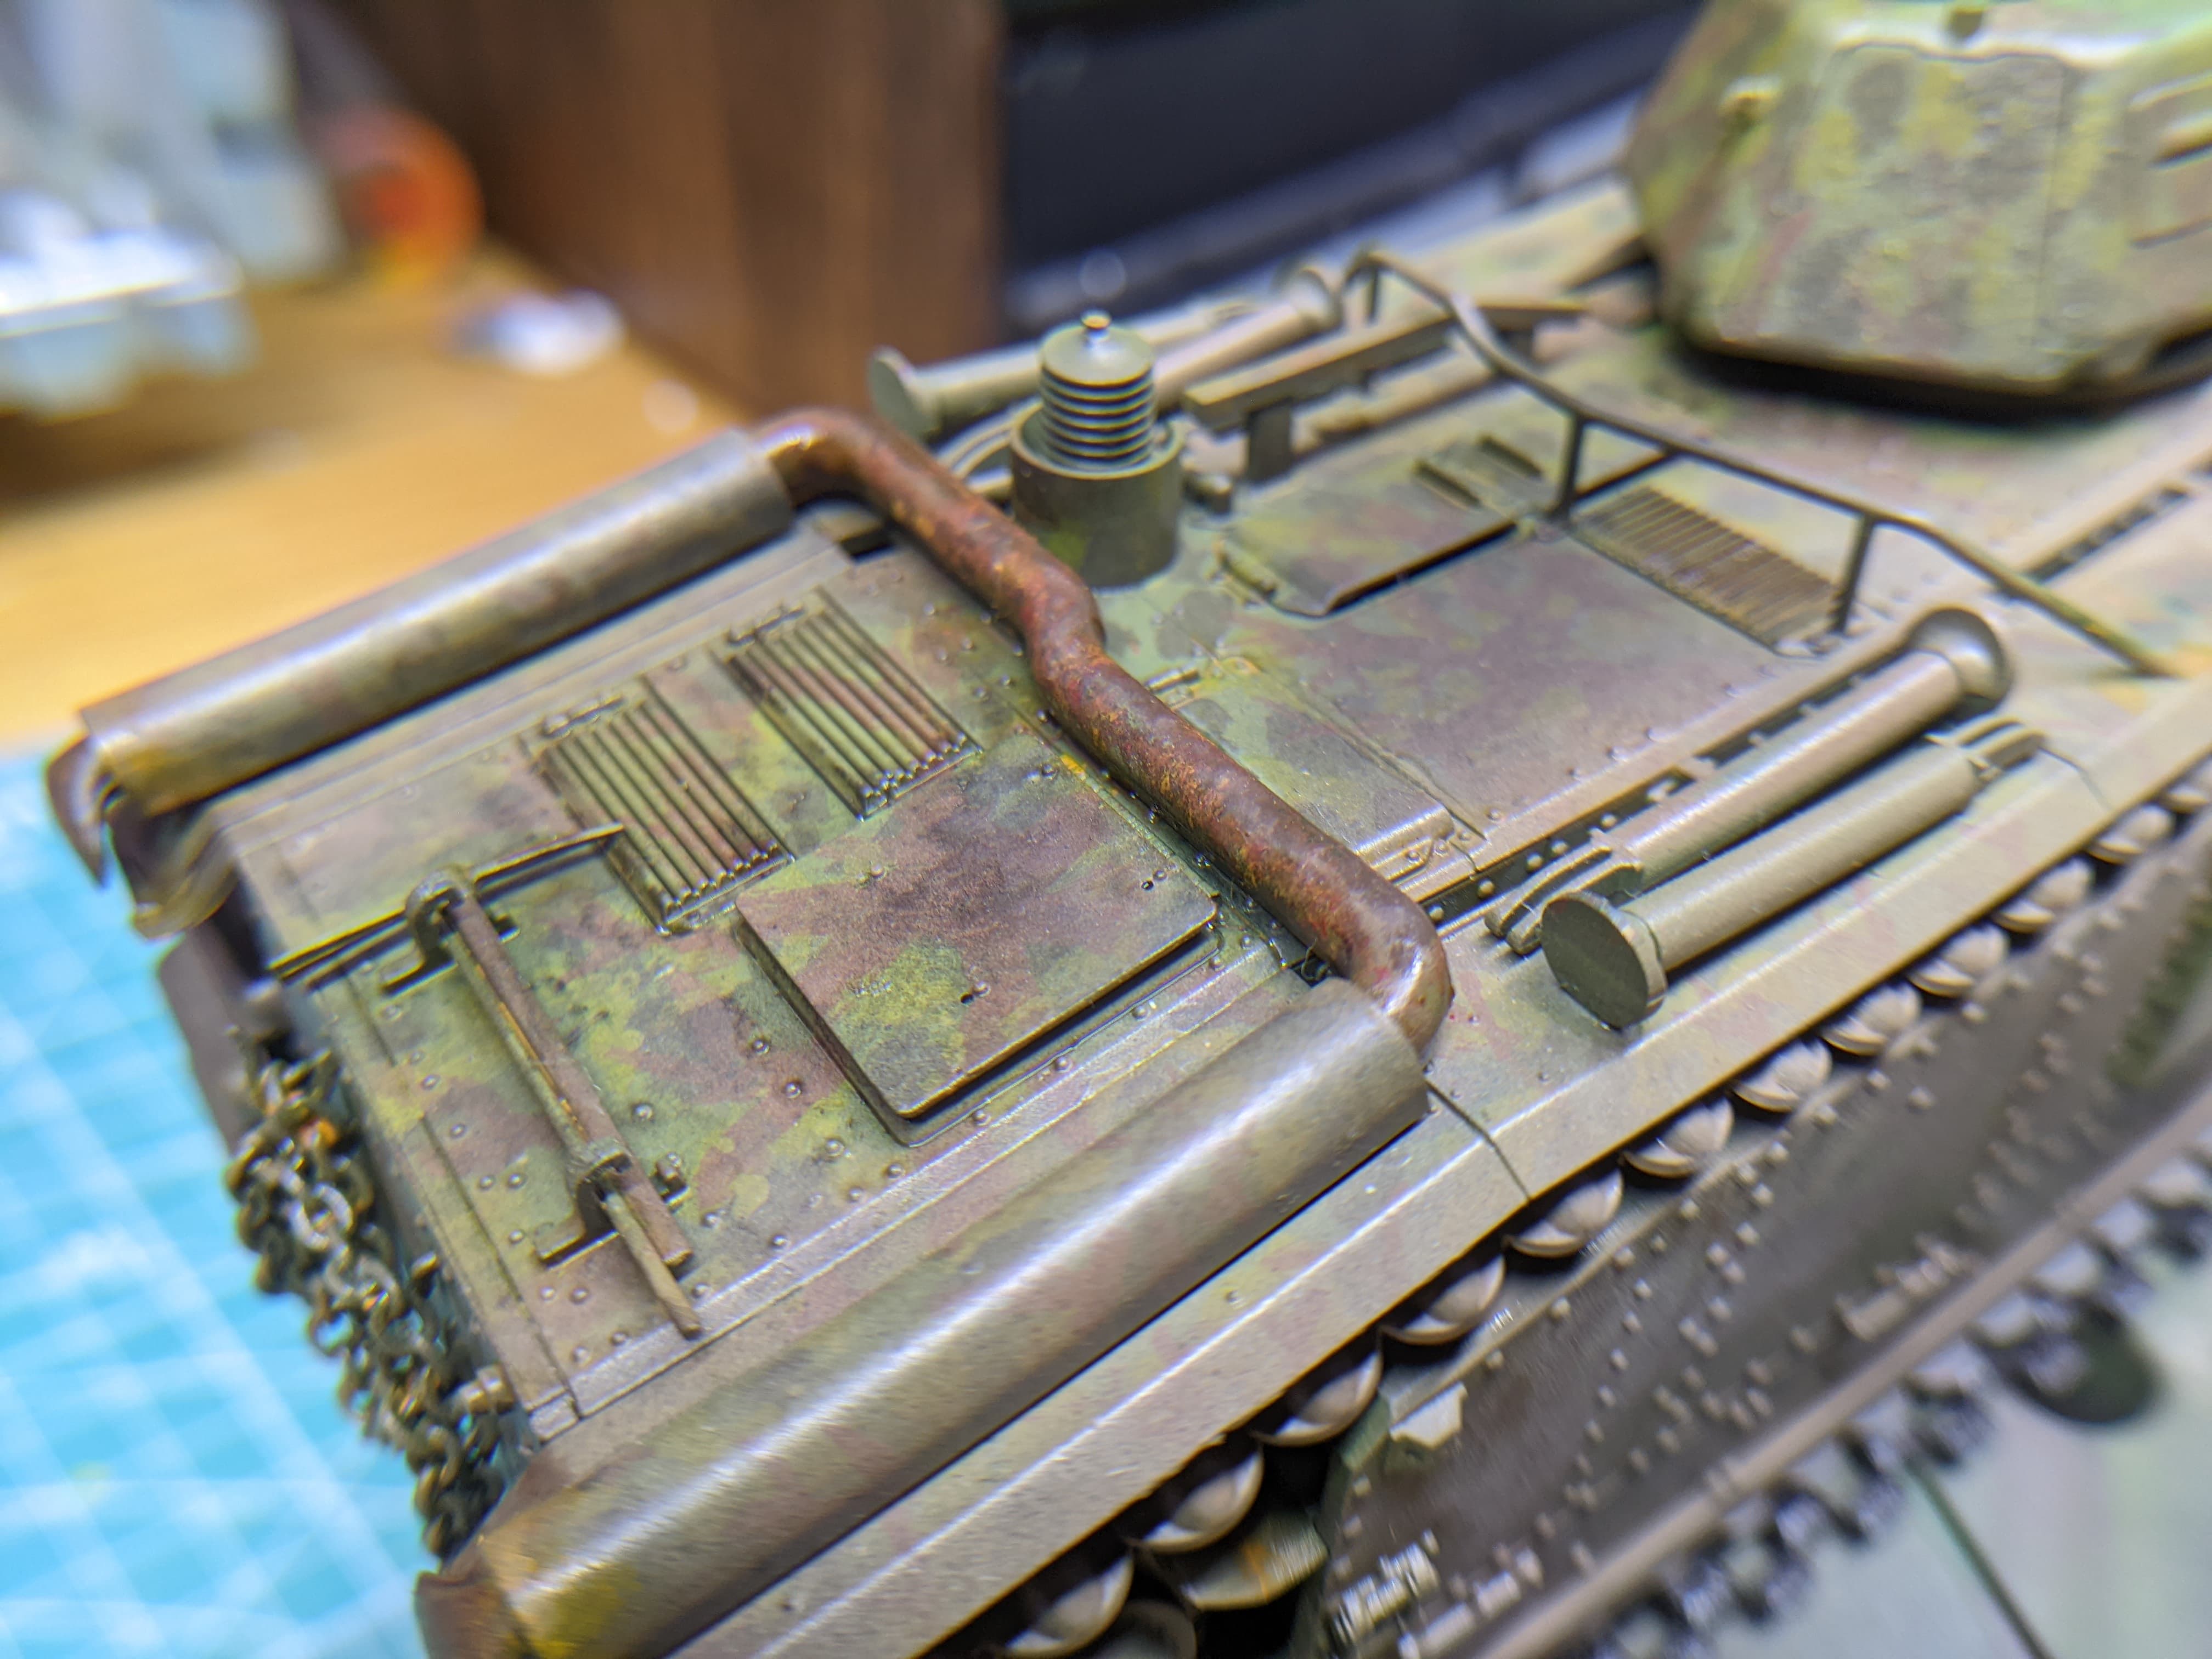
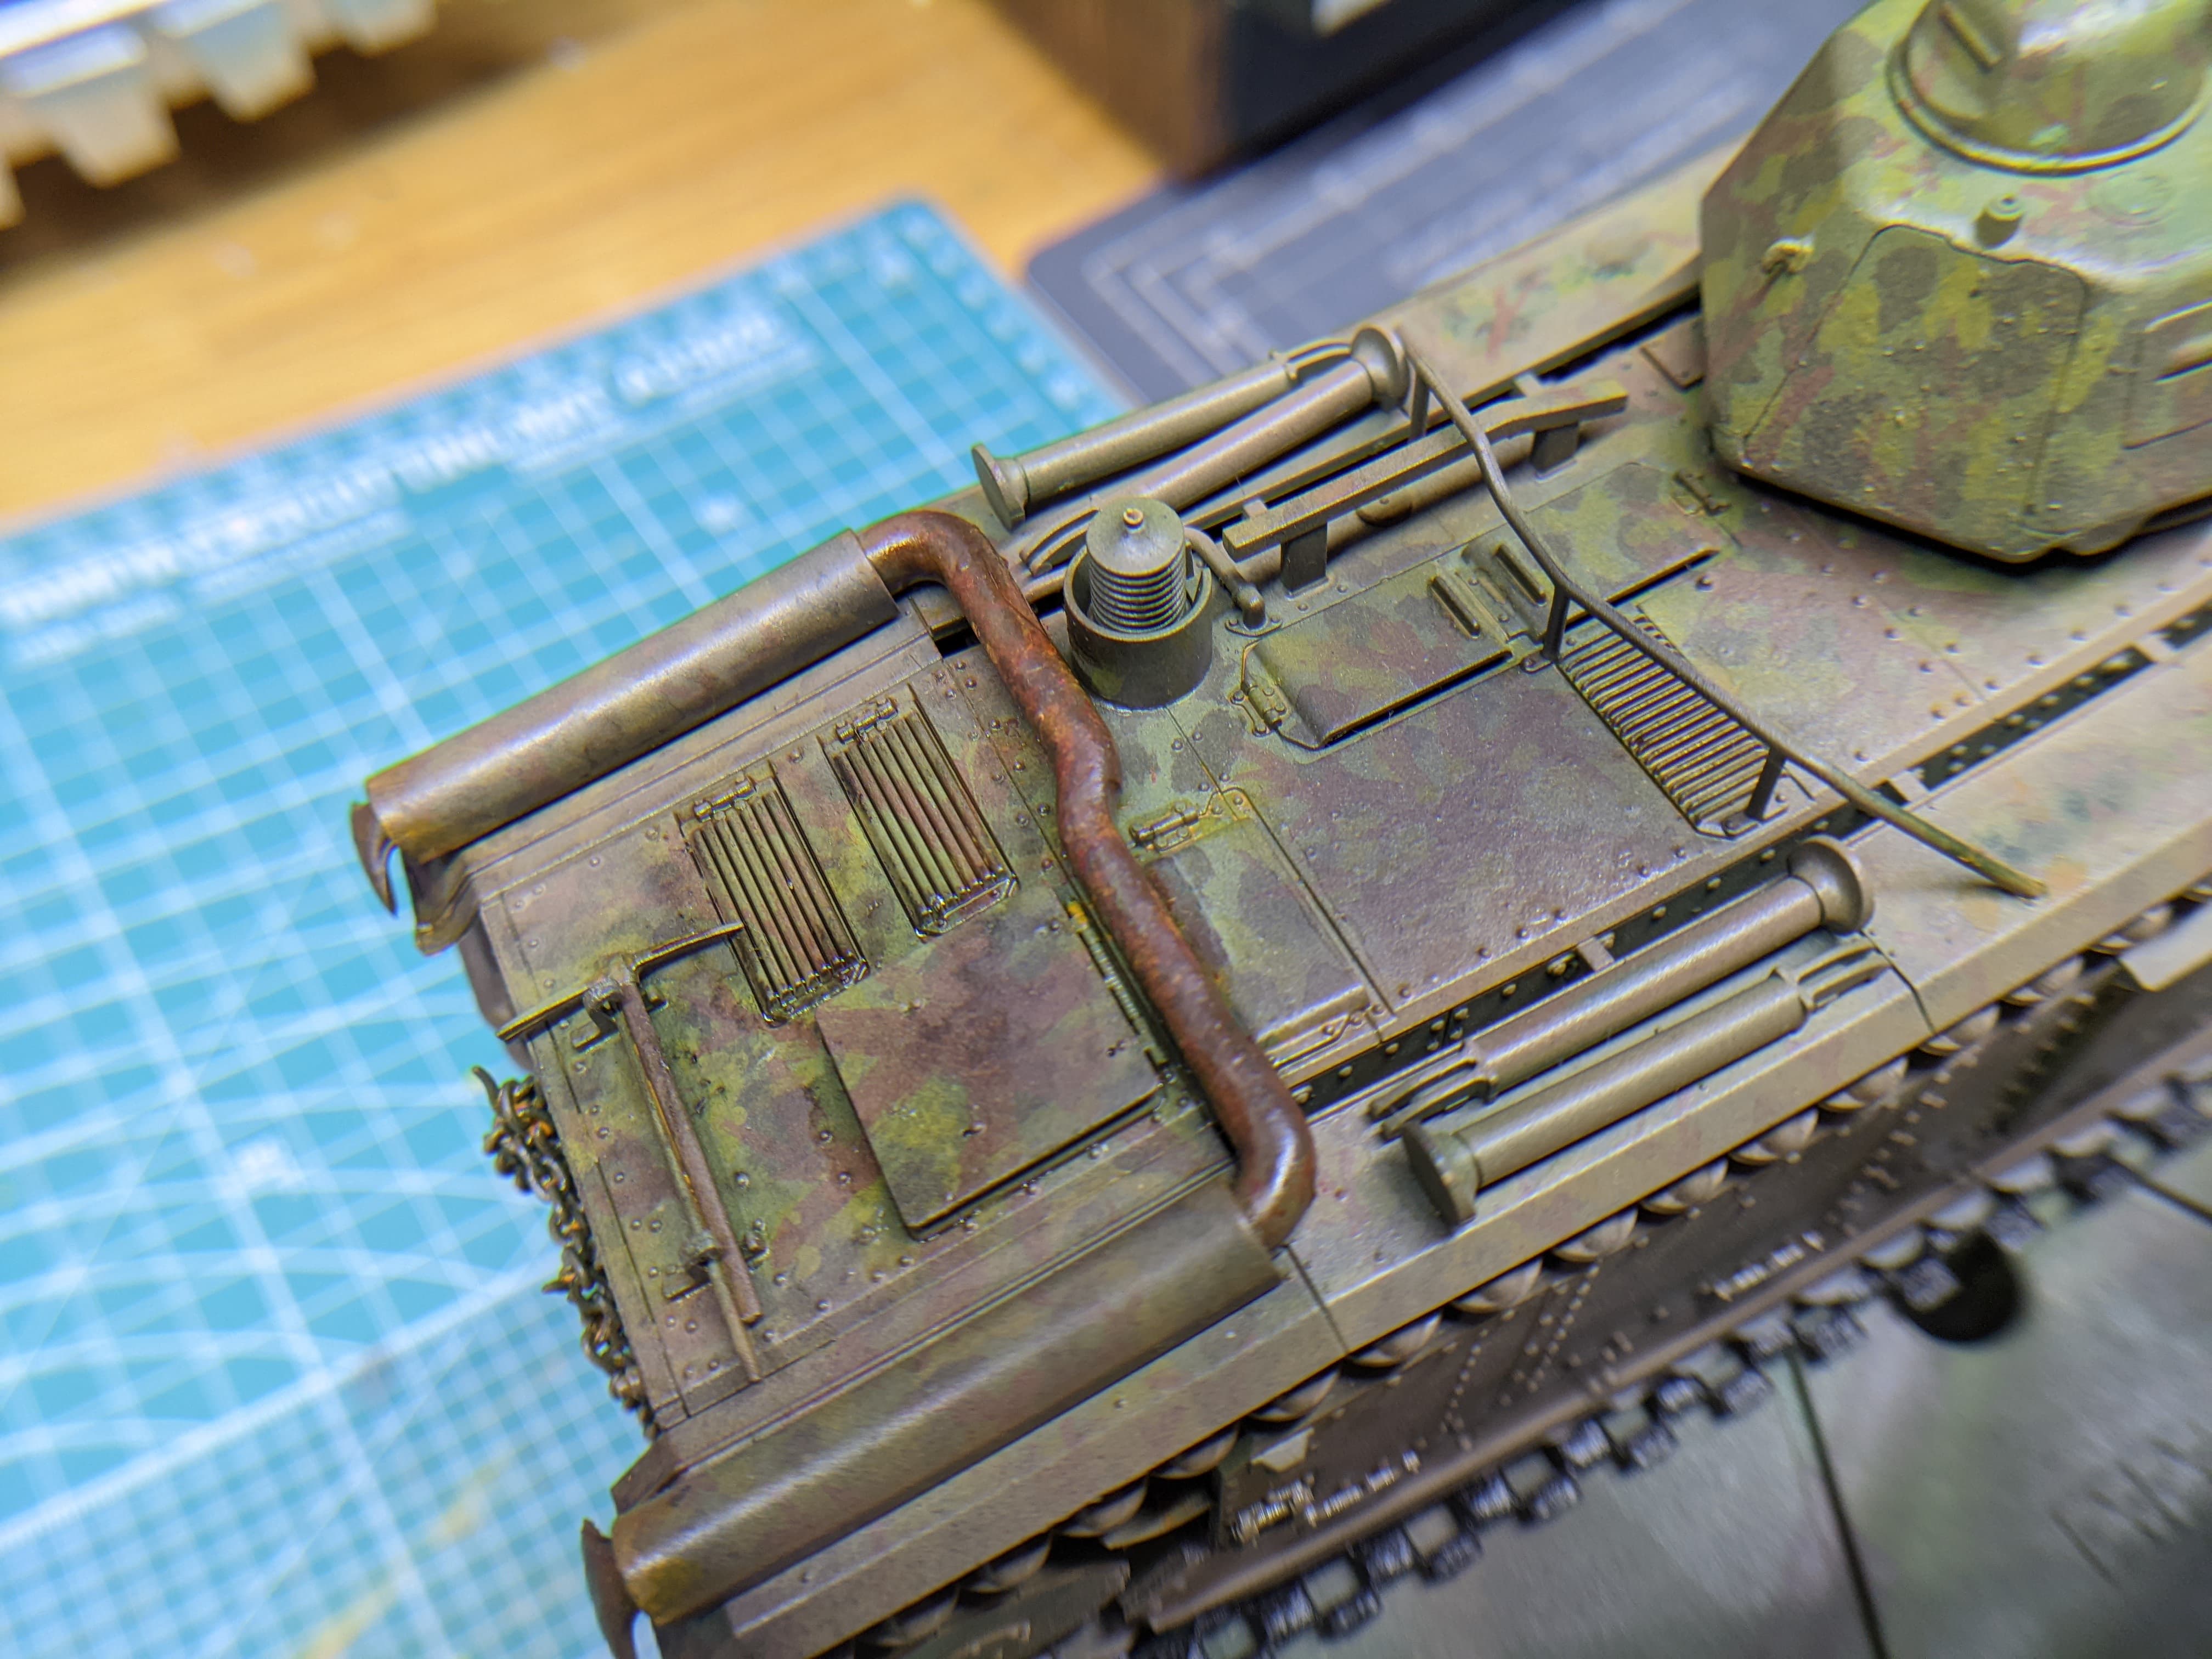
My compromise was to use my method of airbrushing dust (done with brown and buff colours), and to otherwise mainly filter the tank with a yellow tint to make it more colourful. This way, I can put mud etc on later.

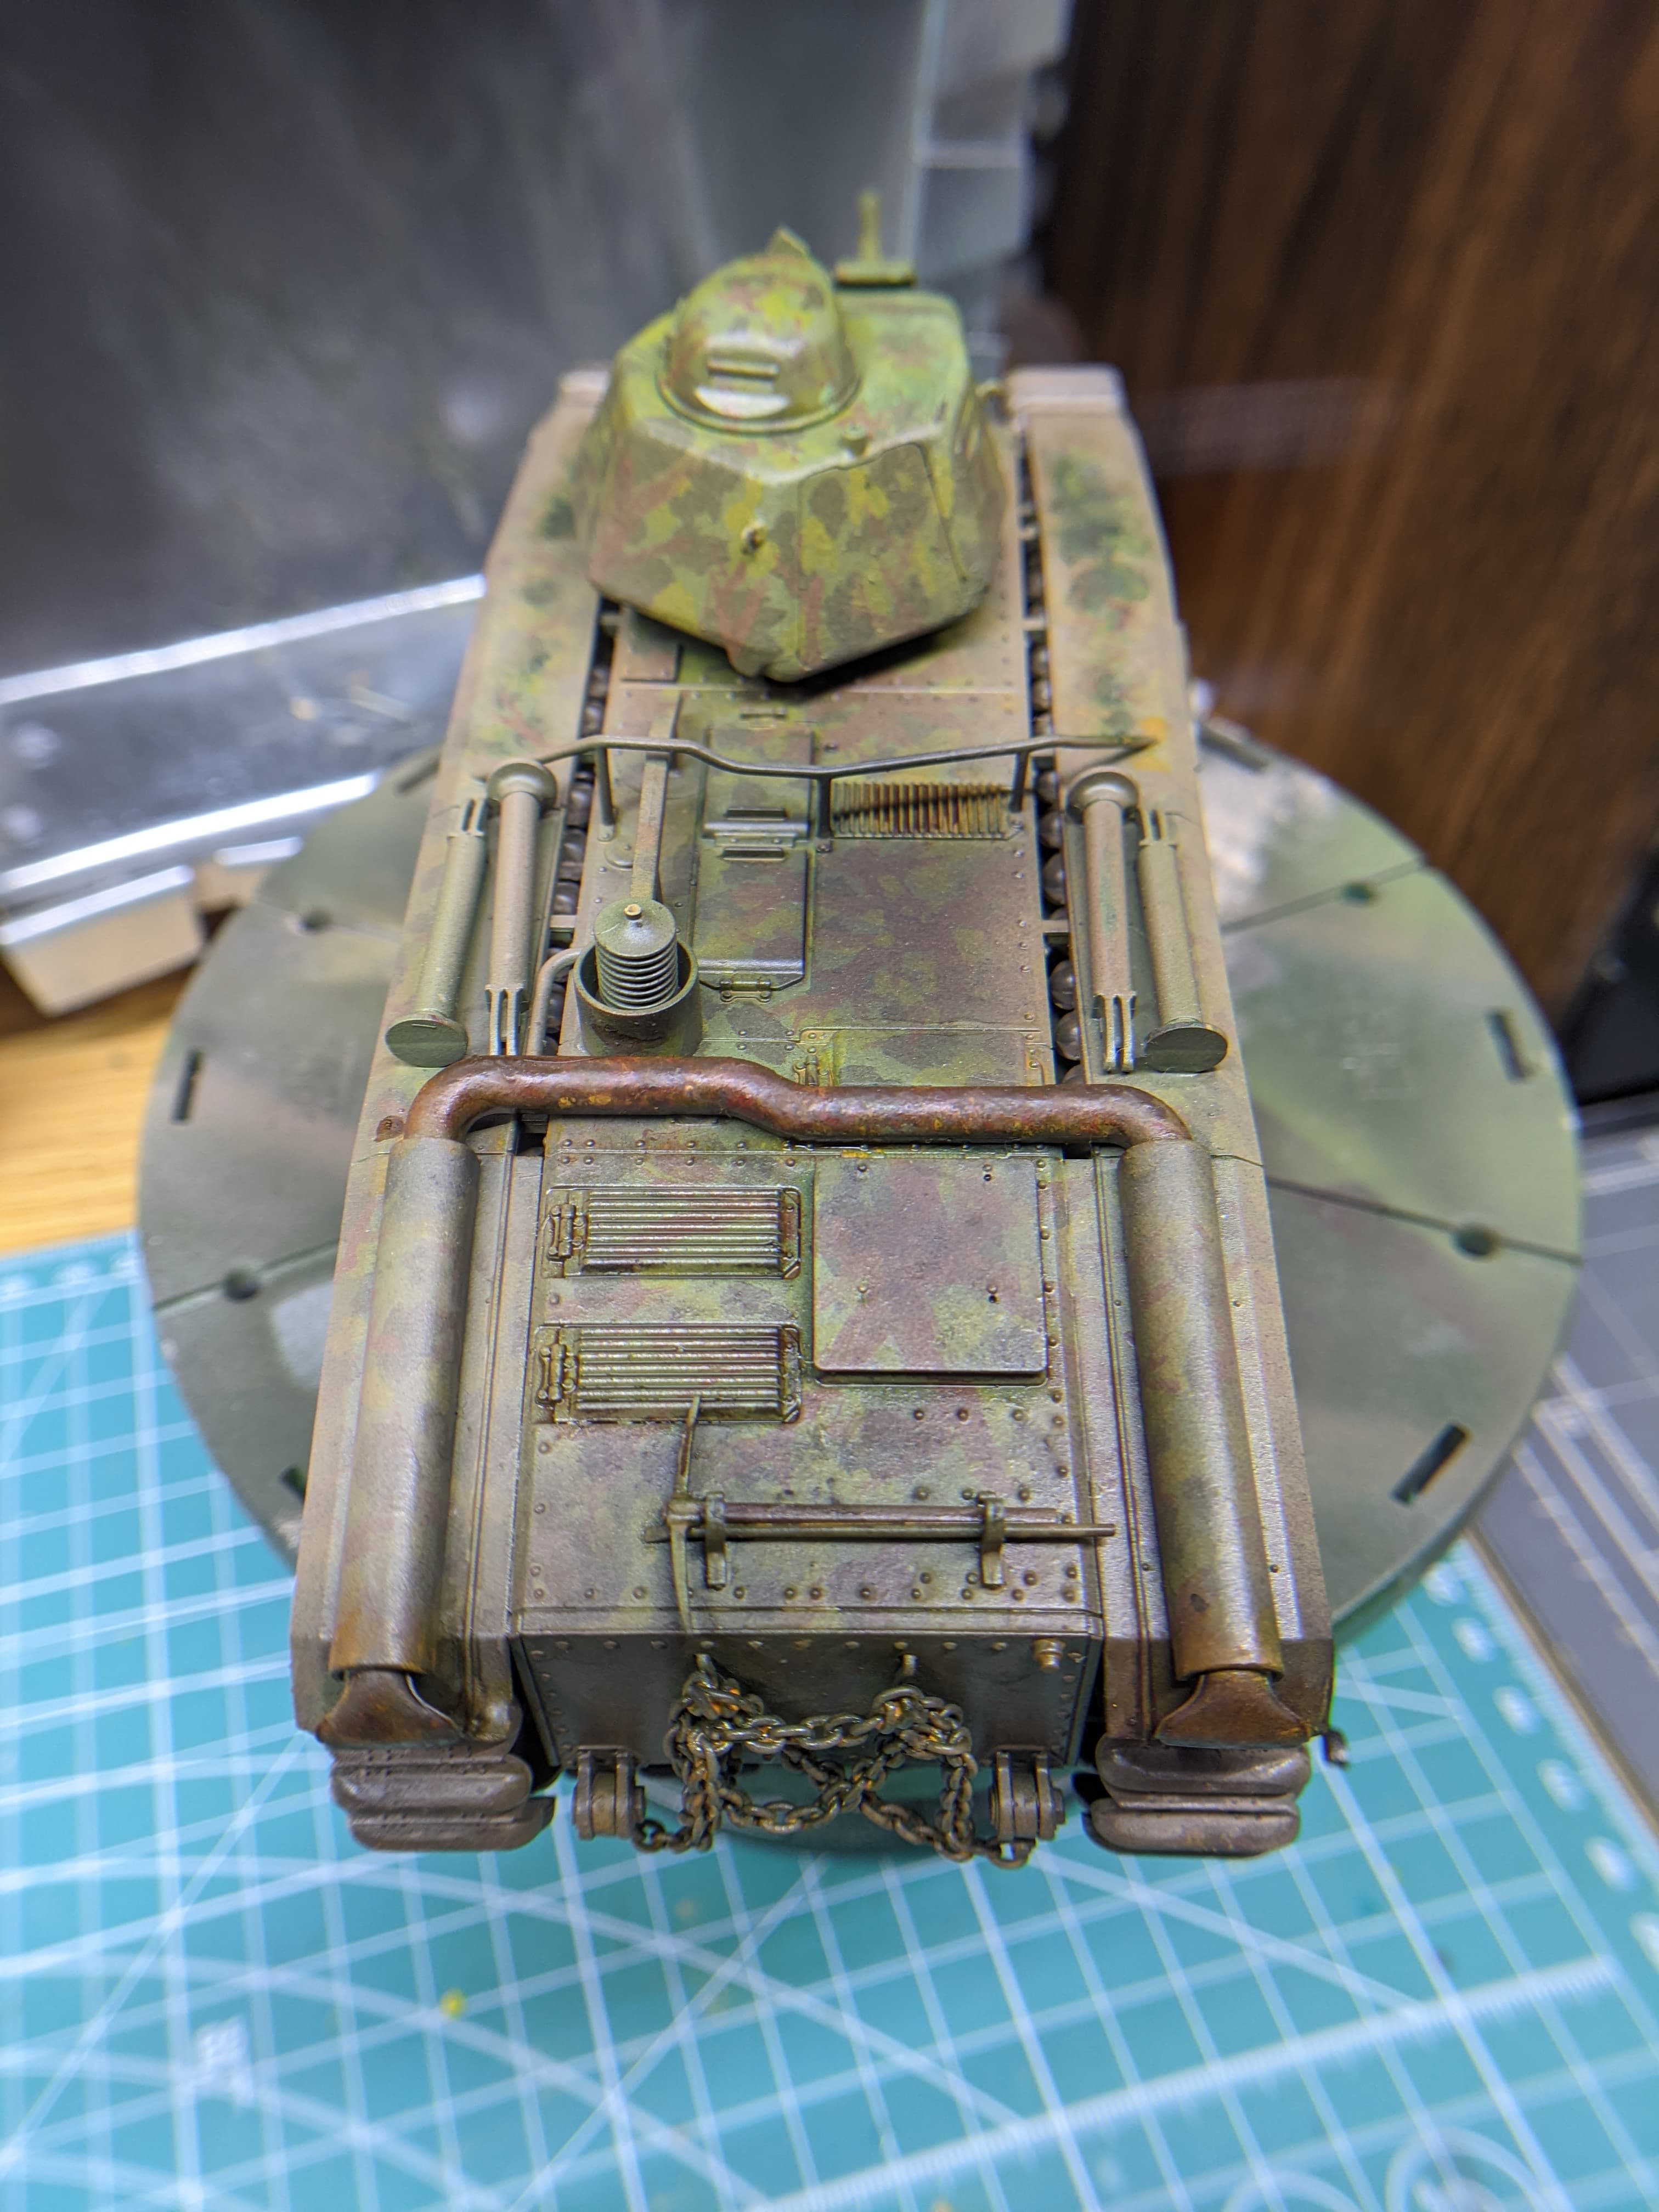
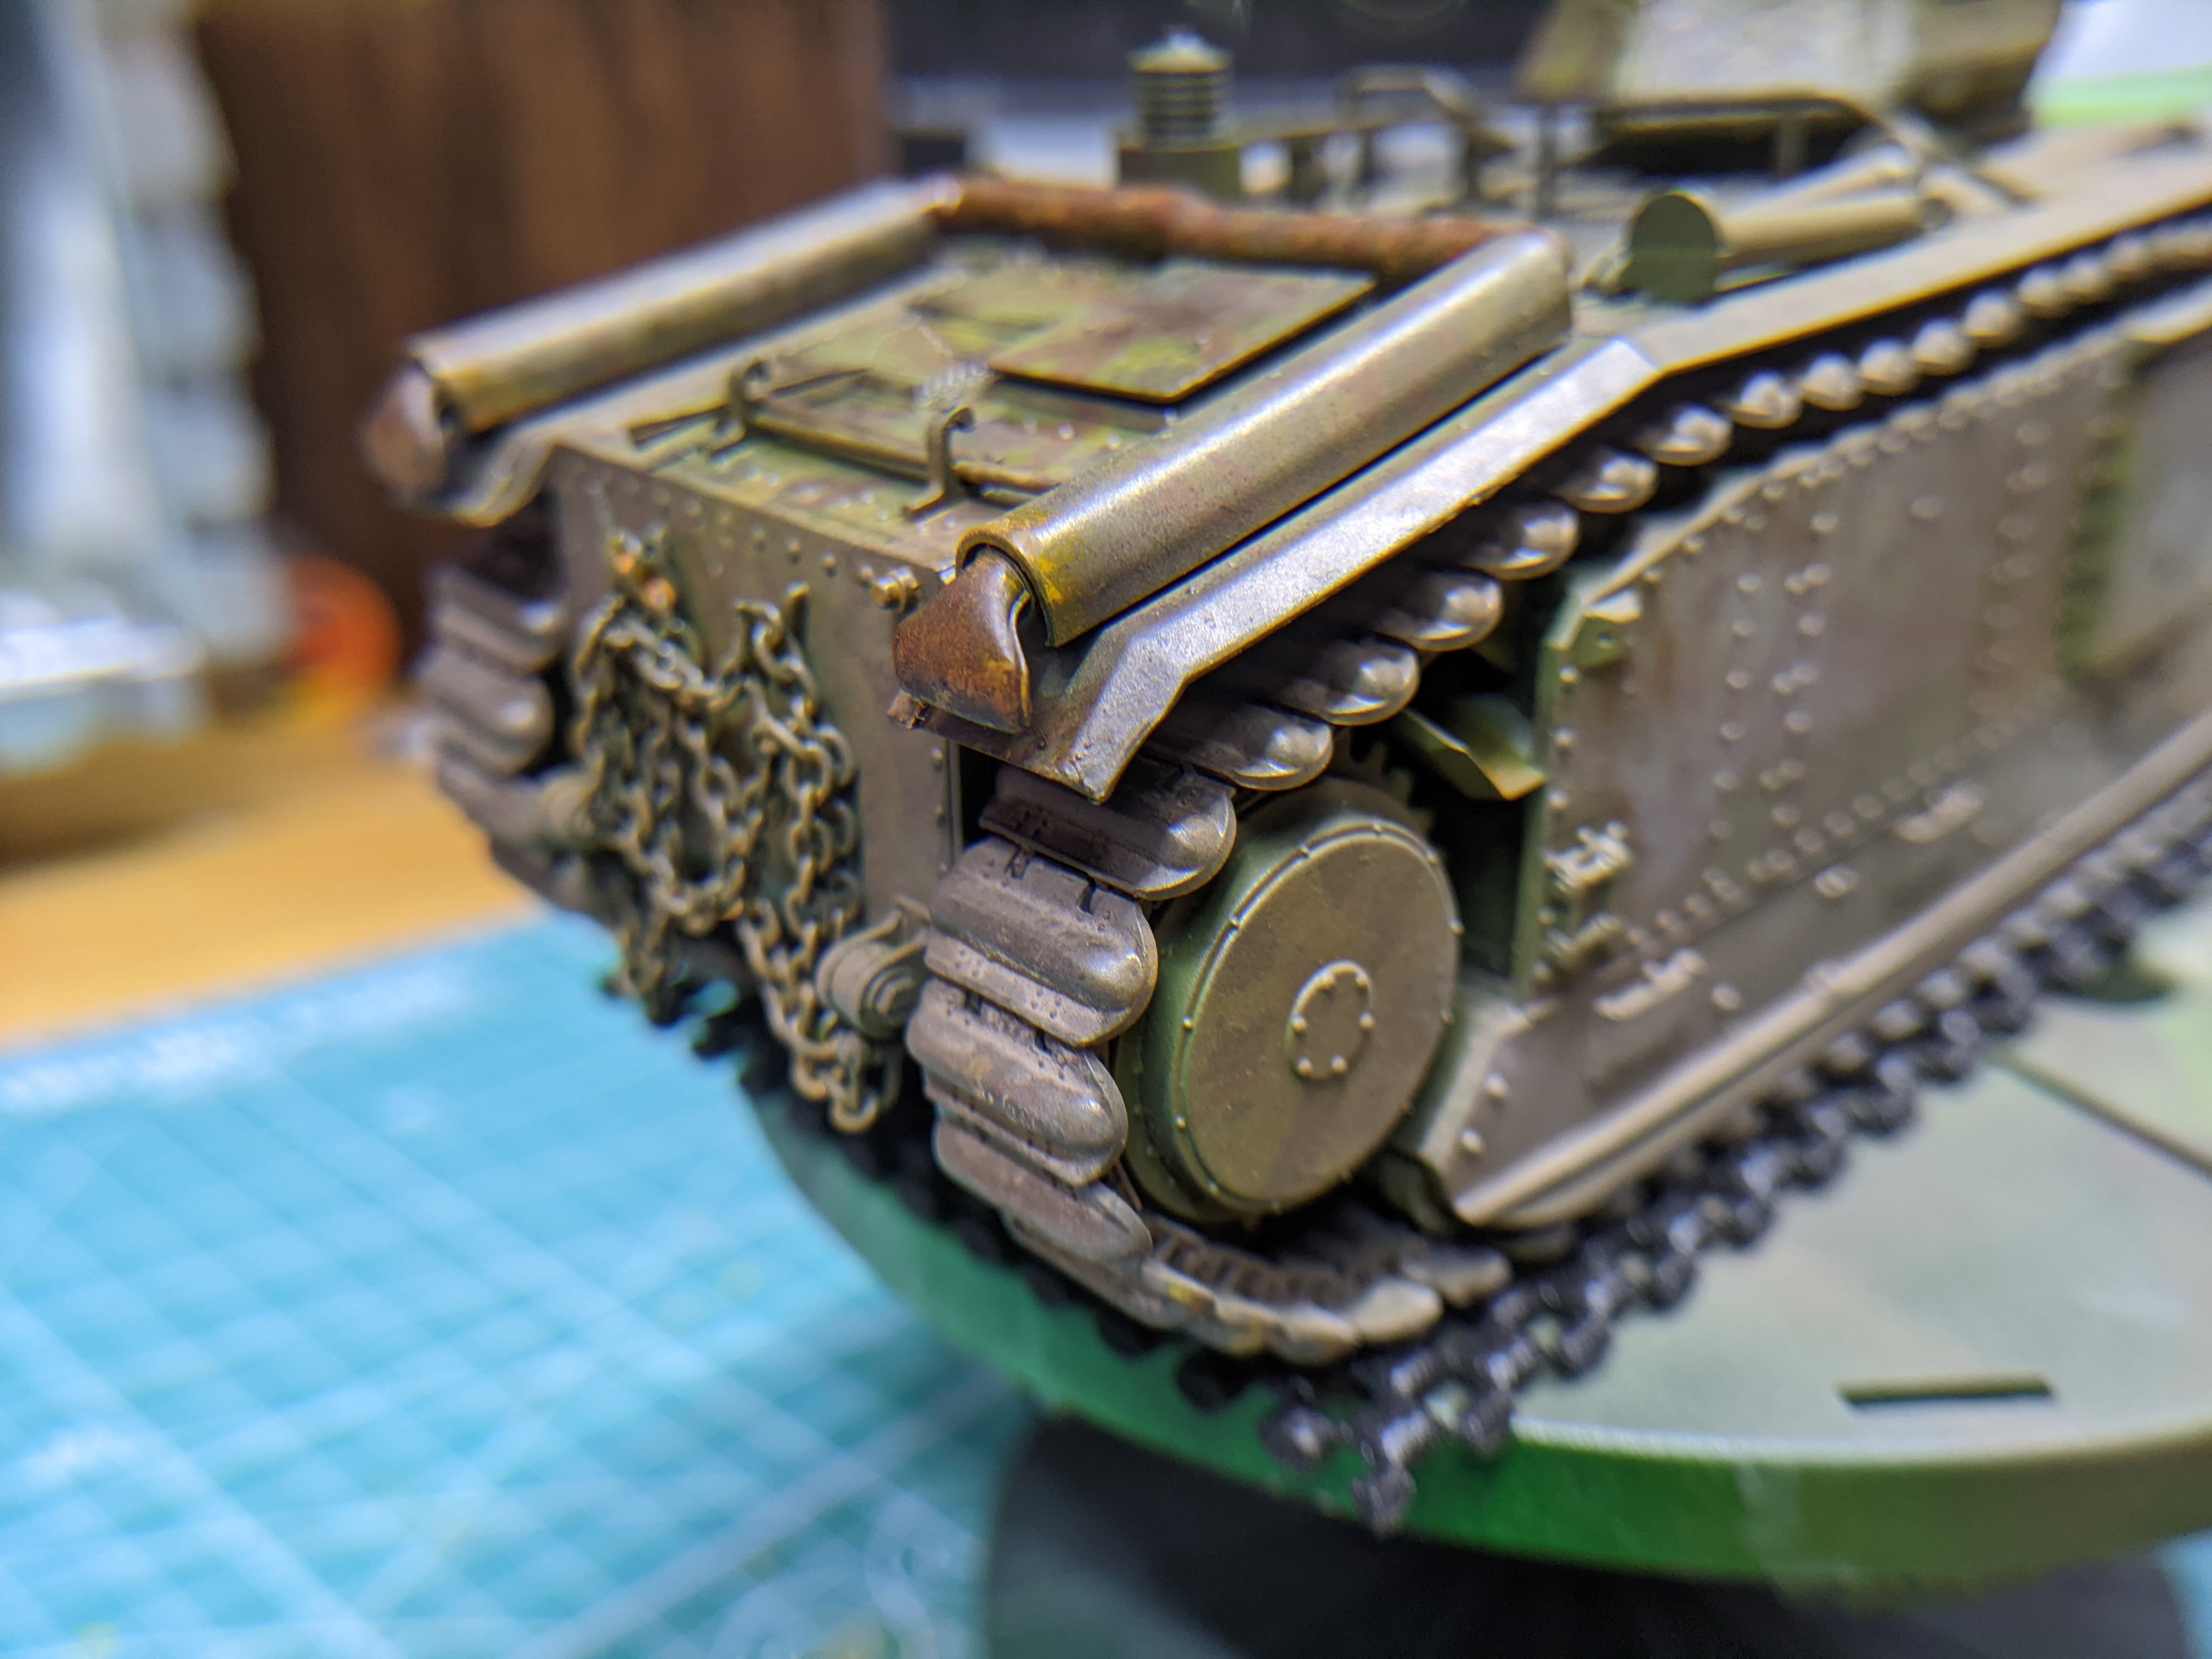
Otherwise, the main focal point us the unique exhaust. I’m experimenting with acrylic rust tones, and I’m pretty happy with how it turned out.

Now, I’ll let everything dry, in anticipation of the diorama base. Generally, I really enjoyed this kit. It’s typical Tamiya, with the build being easy and VERY fun. The detail was definitely not bad, but adding the pigtail lifting point and rivets around the 75mm housing, as well as metal texture do improve the final result considerably. The tracks were definitely the high point of the kit, and I’m glad I was able to get photos of them before getting buried in the dust.

In regards to the paint job, I took some liberties, but that’s okay with me. It was a fun canvas to paint on! I didn’t expect to use as much dust as I did, but I want the final diorama to express the irony of how even the most intricately-camouflaged tank can turn out to be the most easily spotted. That means treating the tank just like in real life, where the accumulation of mud and dust completely negated the value of the camouflage pattern. You can see in the photos I’ve posted how this sticks out like a sore thumb unless it’s perfectly clean. I still wanted to keep some areas colourful, so I removed dust with IPA.

Anyways, another long update. I’m far from done with this project, but it’s coming along!

Take care,

Dennis

12 Likes

Beautiful finish Dennis this one came out excellent!

1 Like

Really nice Dennis. It must have been a bit of a choker deciding how to weather the tank after all that careful painting with the camouflage!

1 Like

Looks great Dennis. A very different look to the usual for sure.

One thing if I may, and a bit of obscure knowledge to be sure, but the antennae rubber boot was an orange brown colour and not painted the vehicle colour.

Whilst none of the display vehicles have an original mount, it is common to see in illustrations of French tanks.


image

Eschelon got it right:
image

The French Trackstory Publications:

4 Likes

Thanks @petbat ! I’ll fix that after work.

1 Like

That is a very nice finish! Very nice coloring! :+1:
And indeed, if planning to place it in a diorama, it is best to wait with adding mud etc to blend it in better.

1 Like

Dennis,
That looks great! Hope you keep posting this beauty when you start work on the diorama! Love the exhaust, it looks perfect to my eye.

Cheers,
Rick

1 Like

As far as I know, the weather in the first half of may 1940 was rather good, so there would be no reason for mud… Unless you plan to depict it in another peroid… Then: go ahead :slight_smile:

2 Likes

Hi
Greatly inspired, I love fancy unusual schemes.
NB. Check dirt on the top edge of the sprocket, if it falls off the track bottom then that facing upwards would be dirty too. I think a slightly dustier layer on the bottom edges lightly added onto the side hull and top surfaces would be a benefit.

Cheers
Andrew T

1 Like

And just like that, months later, the project is done! I tried to make a little scene for the model.


14 Likes

Looks great Dennis!

1 Like