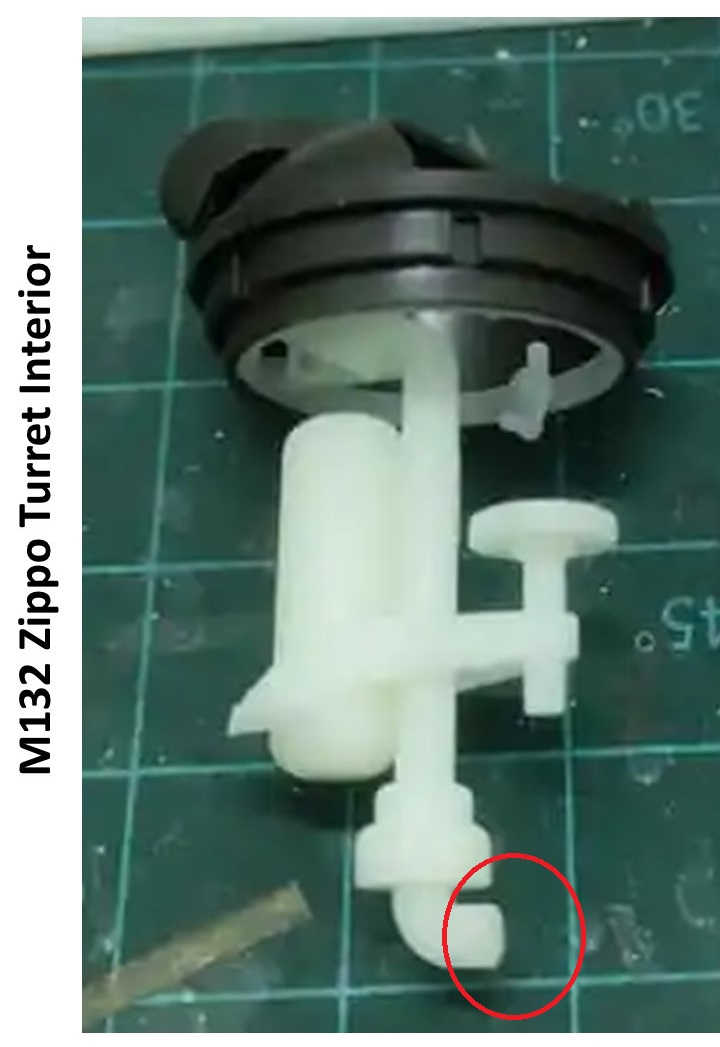
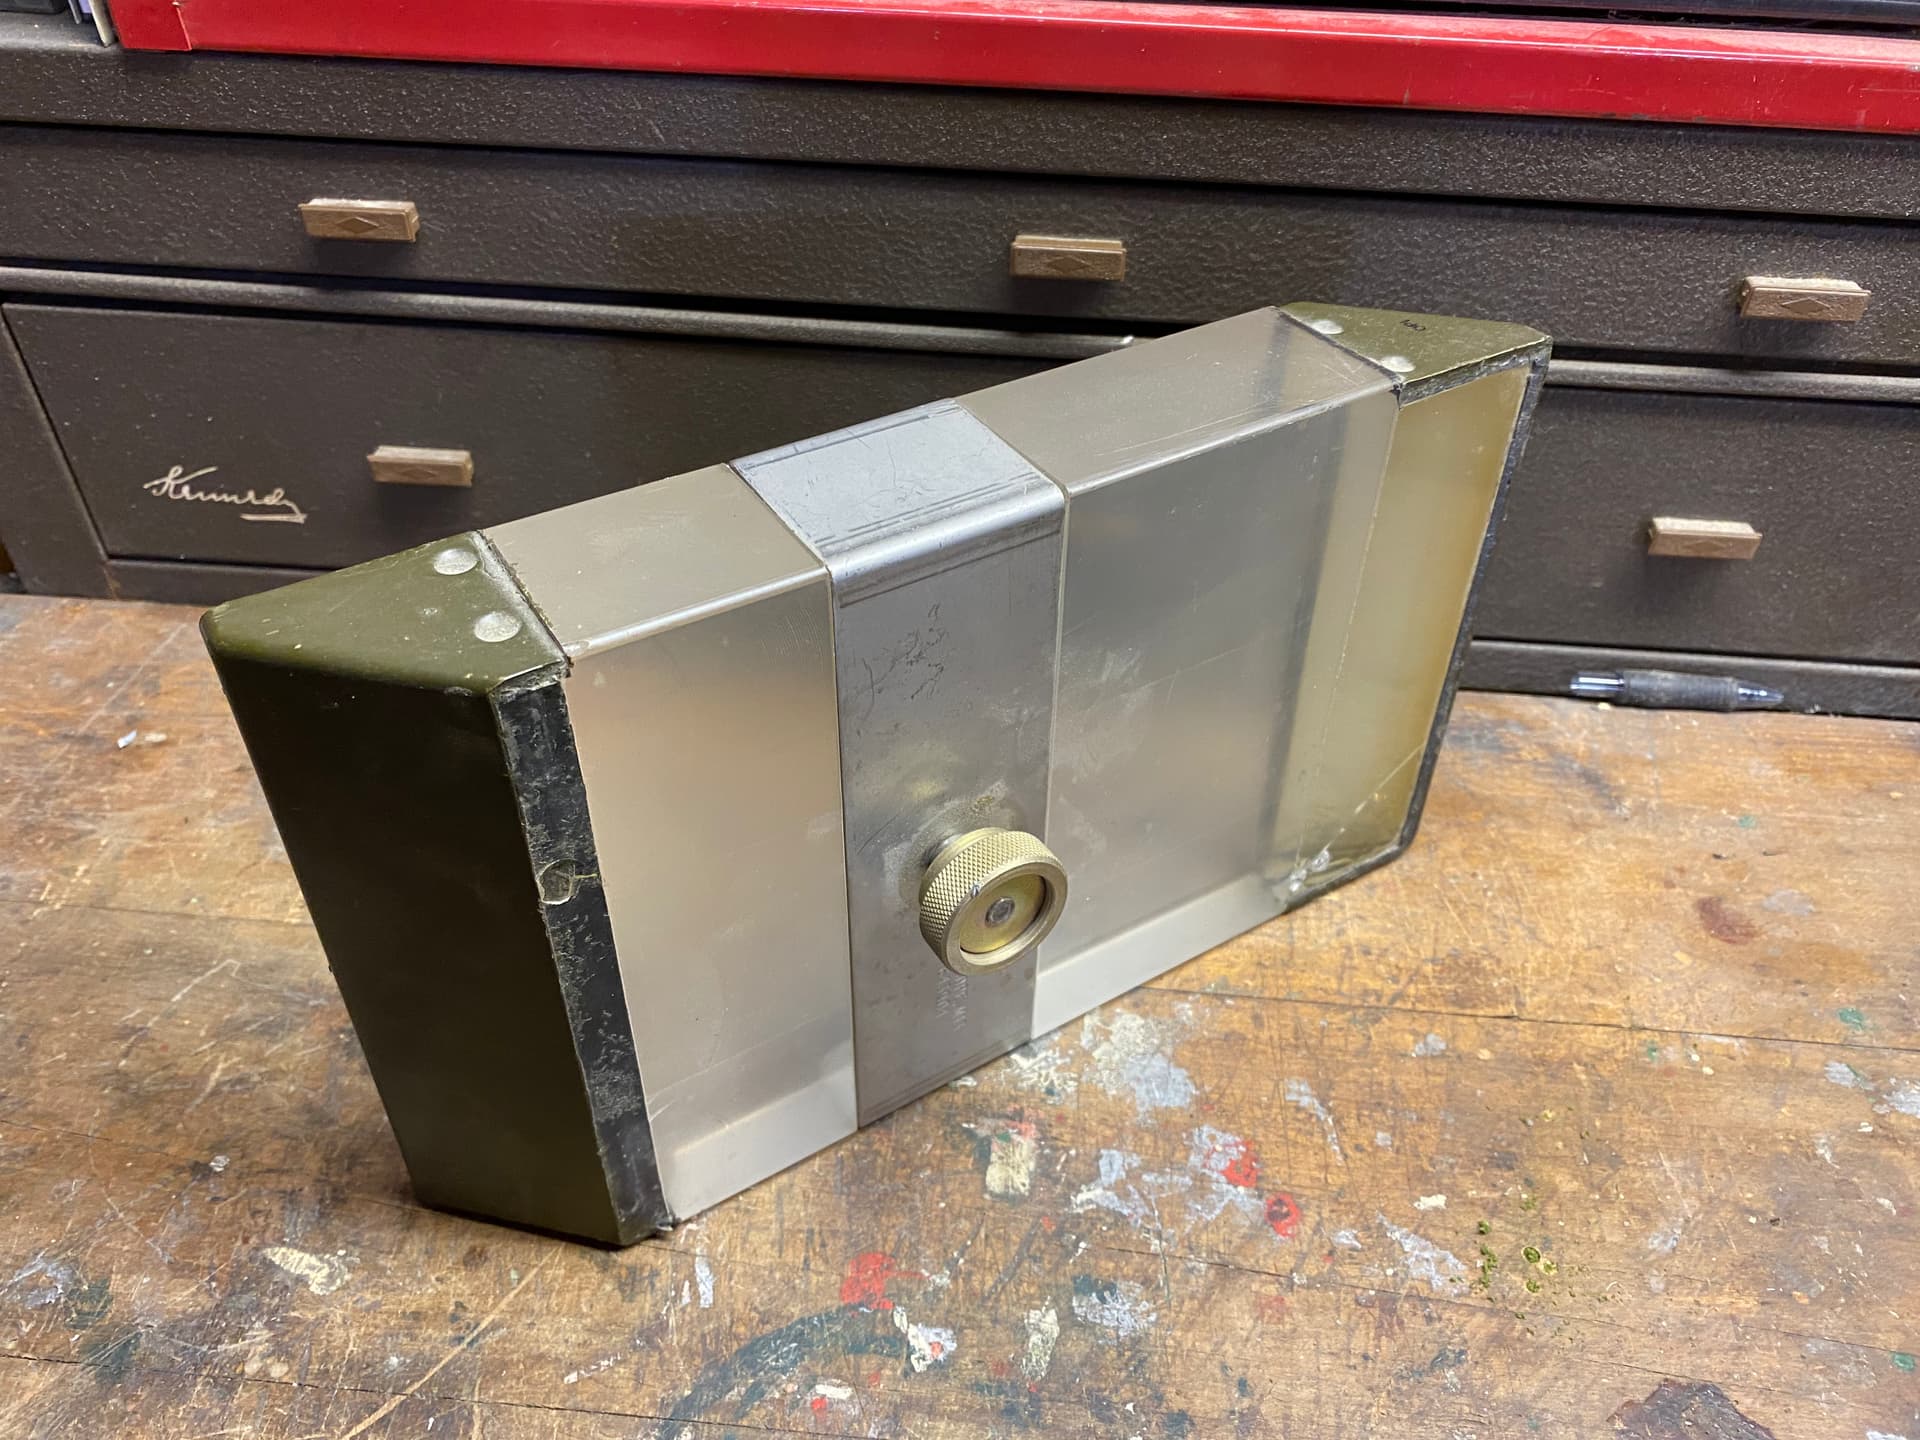
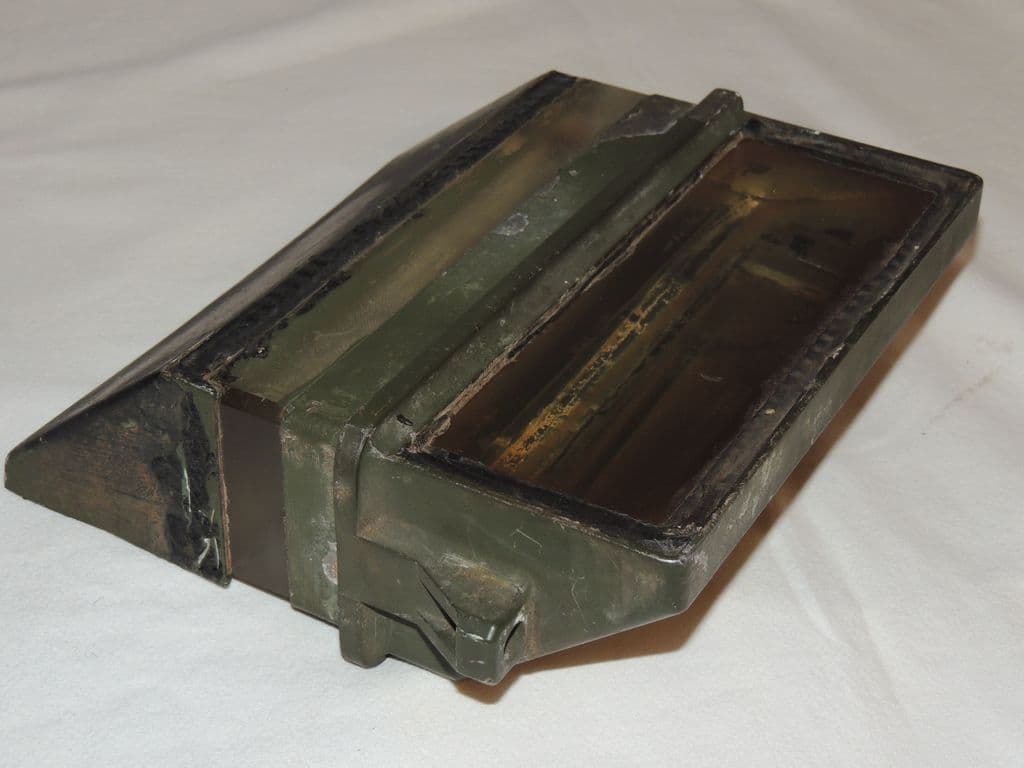
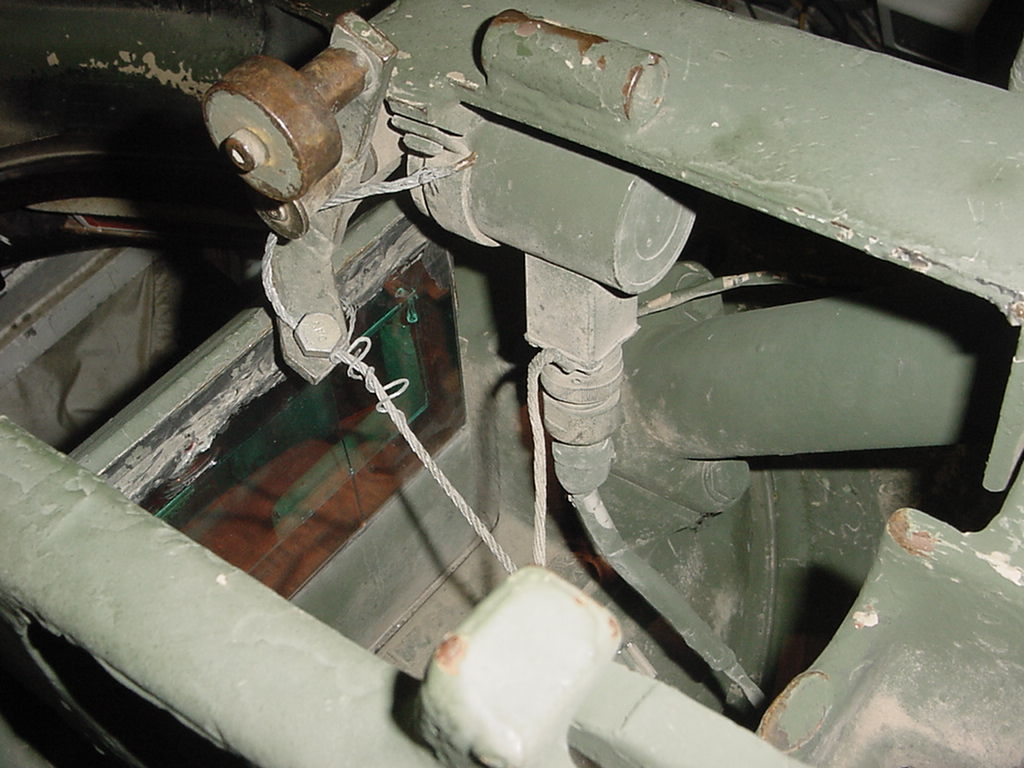
This is from an resin conversion set from Vietnam. The circled end attaches to the large pipe coming out of the front of the tank parts in the kit. The ring above the angle allows the turret too spin on it and stay connected to the pipe to feed the napalm mix to the nozzle above.
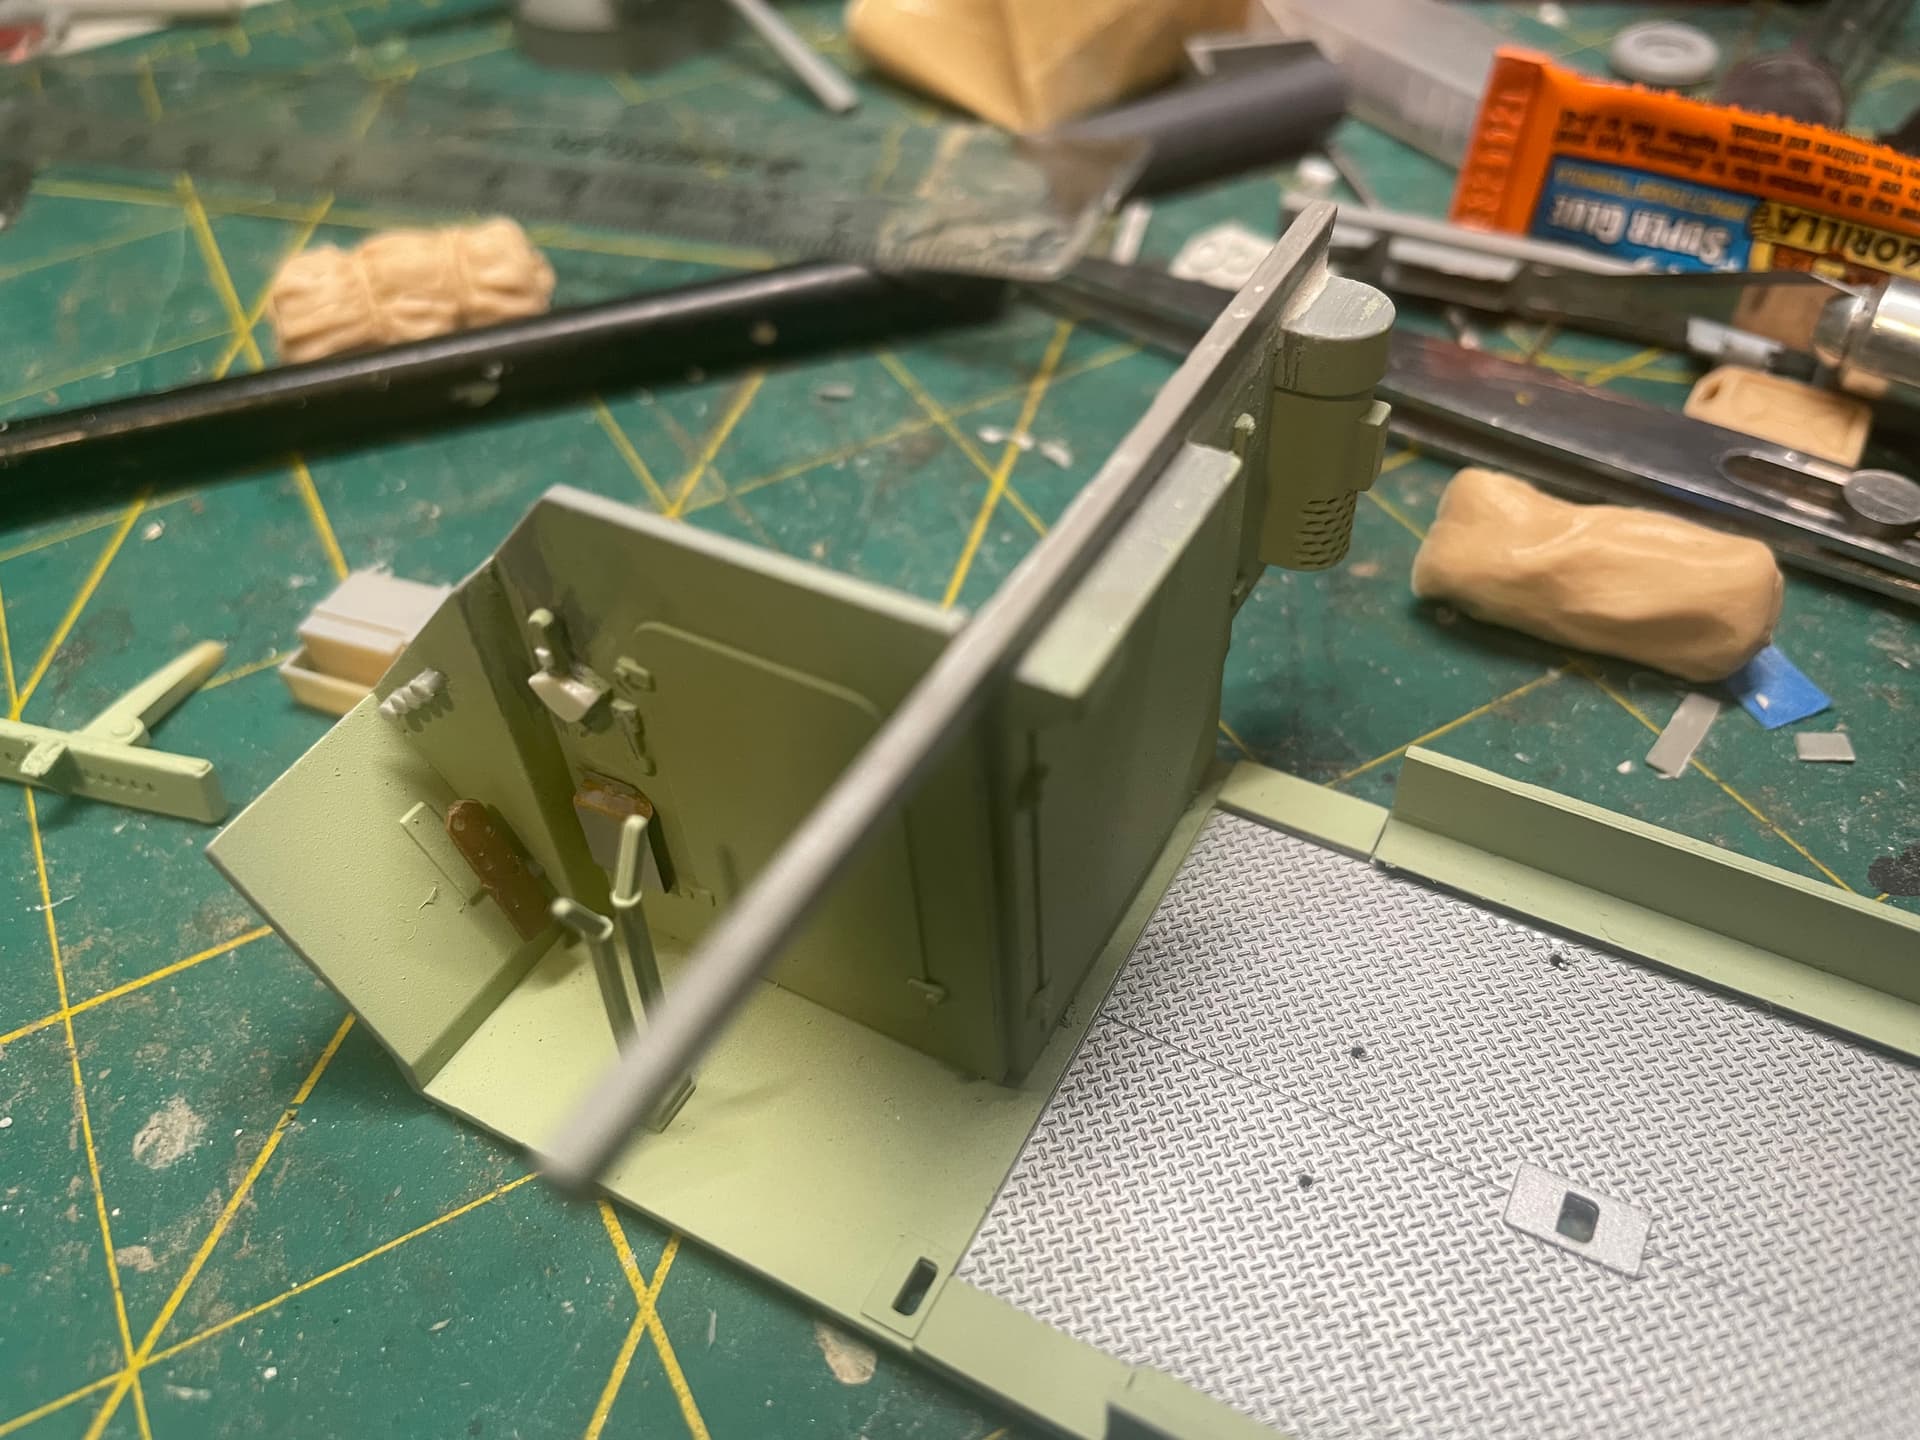
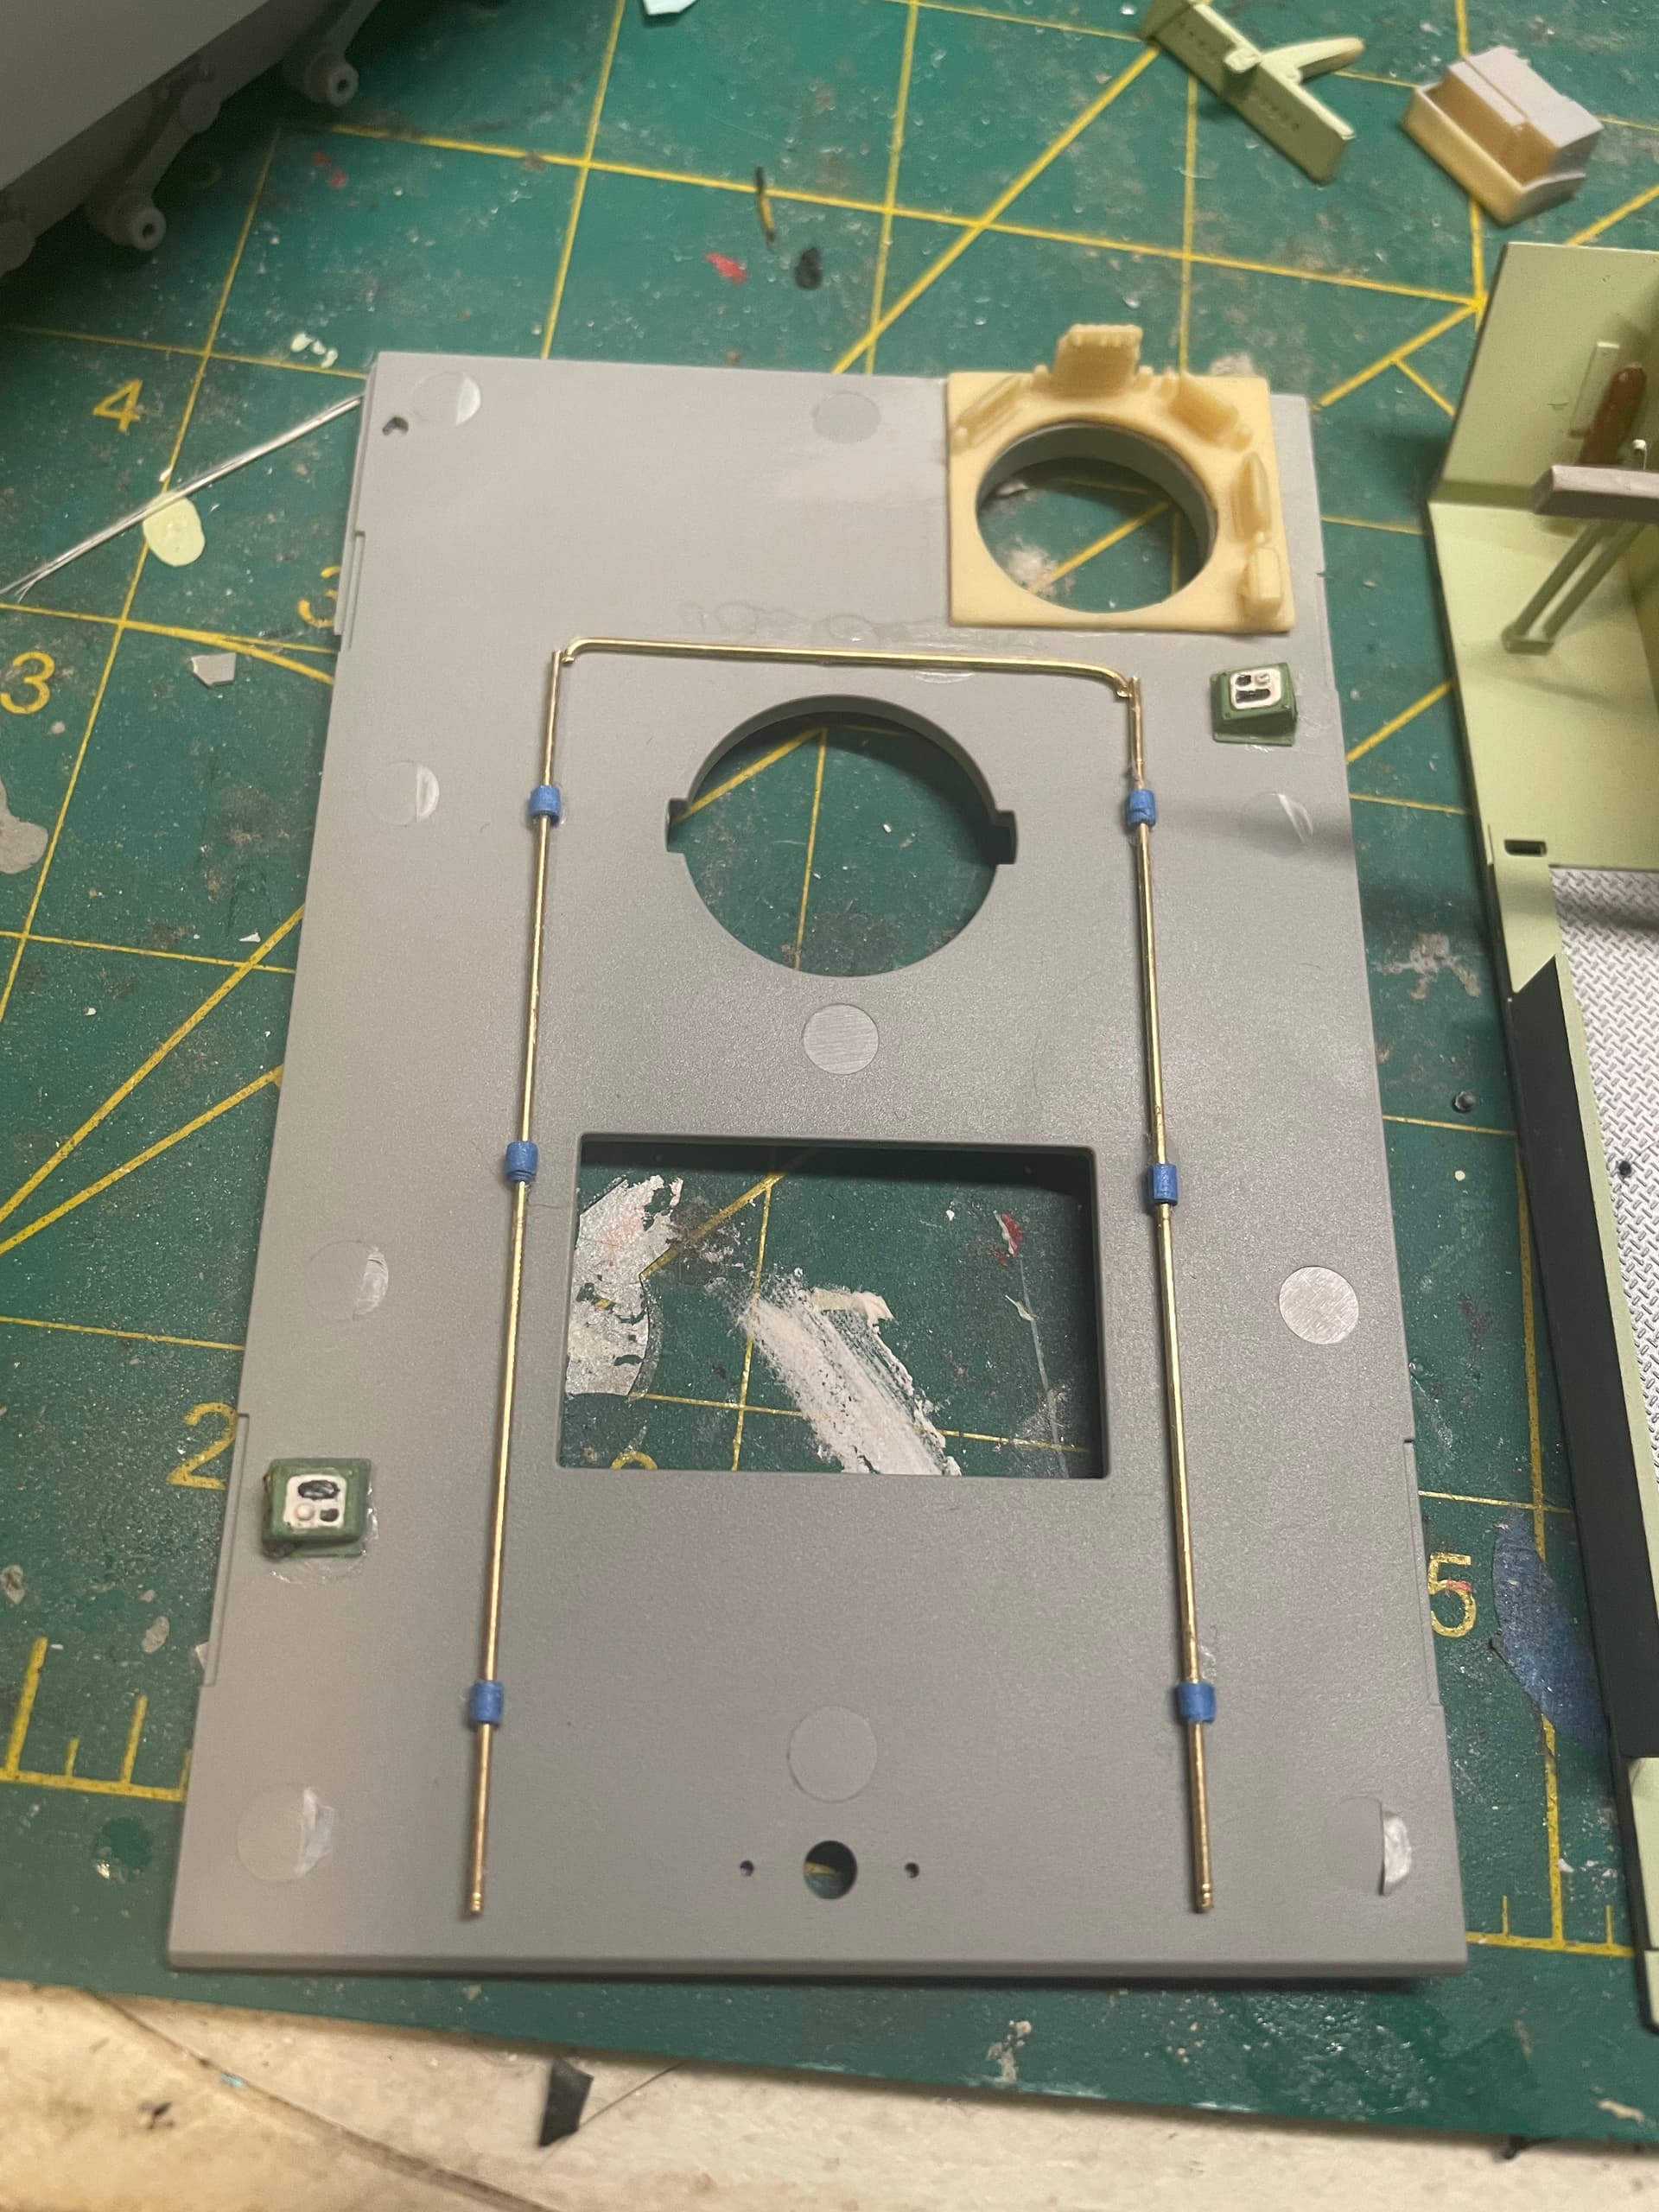
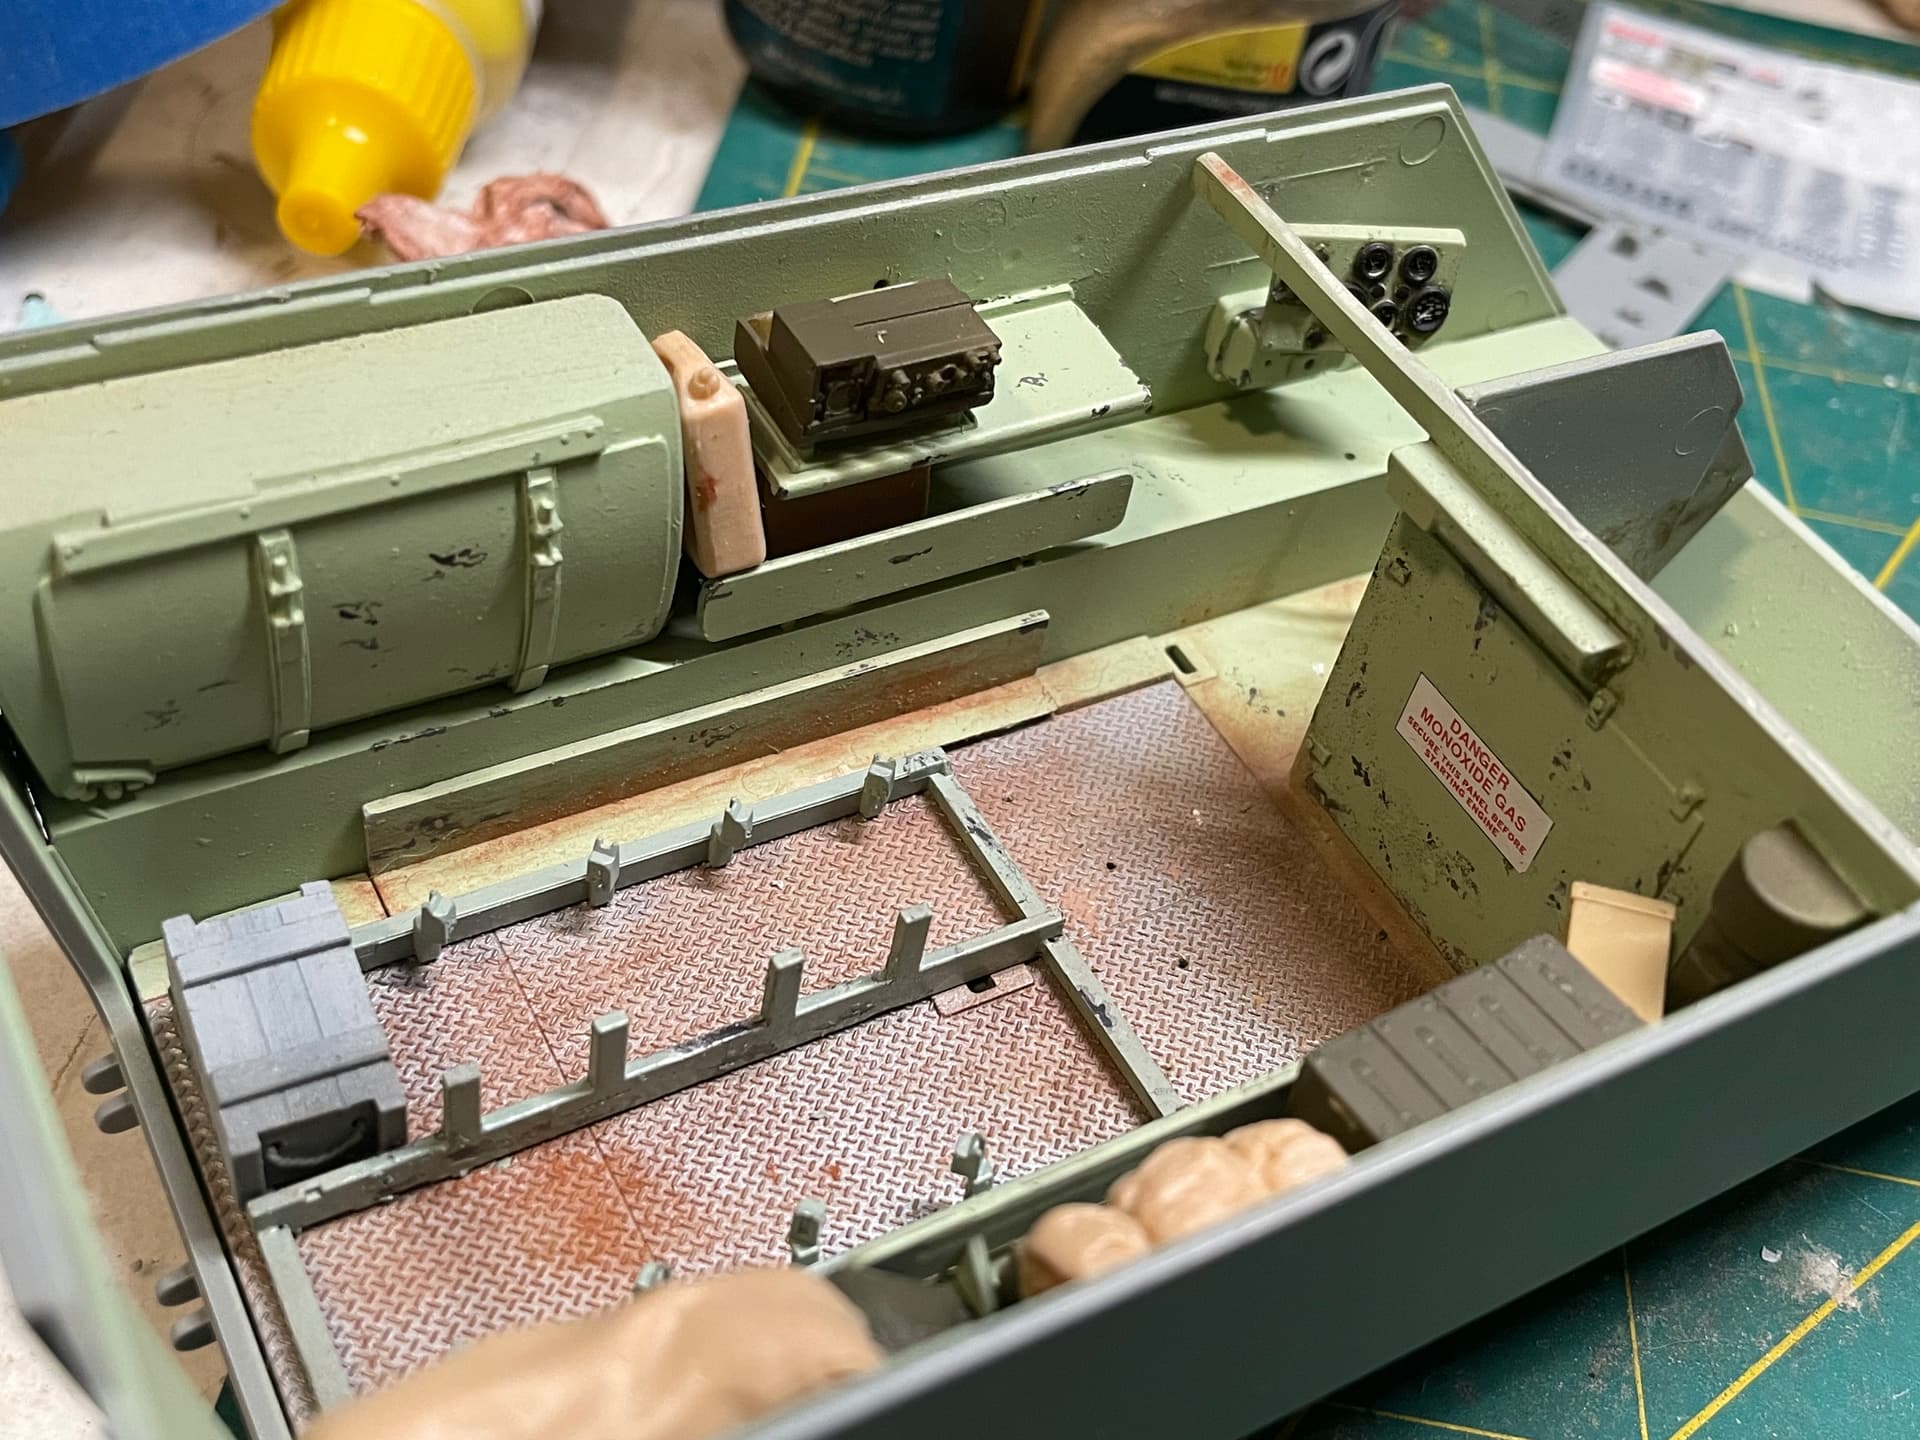
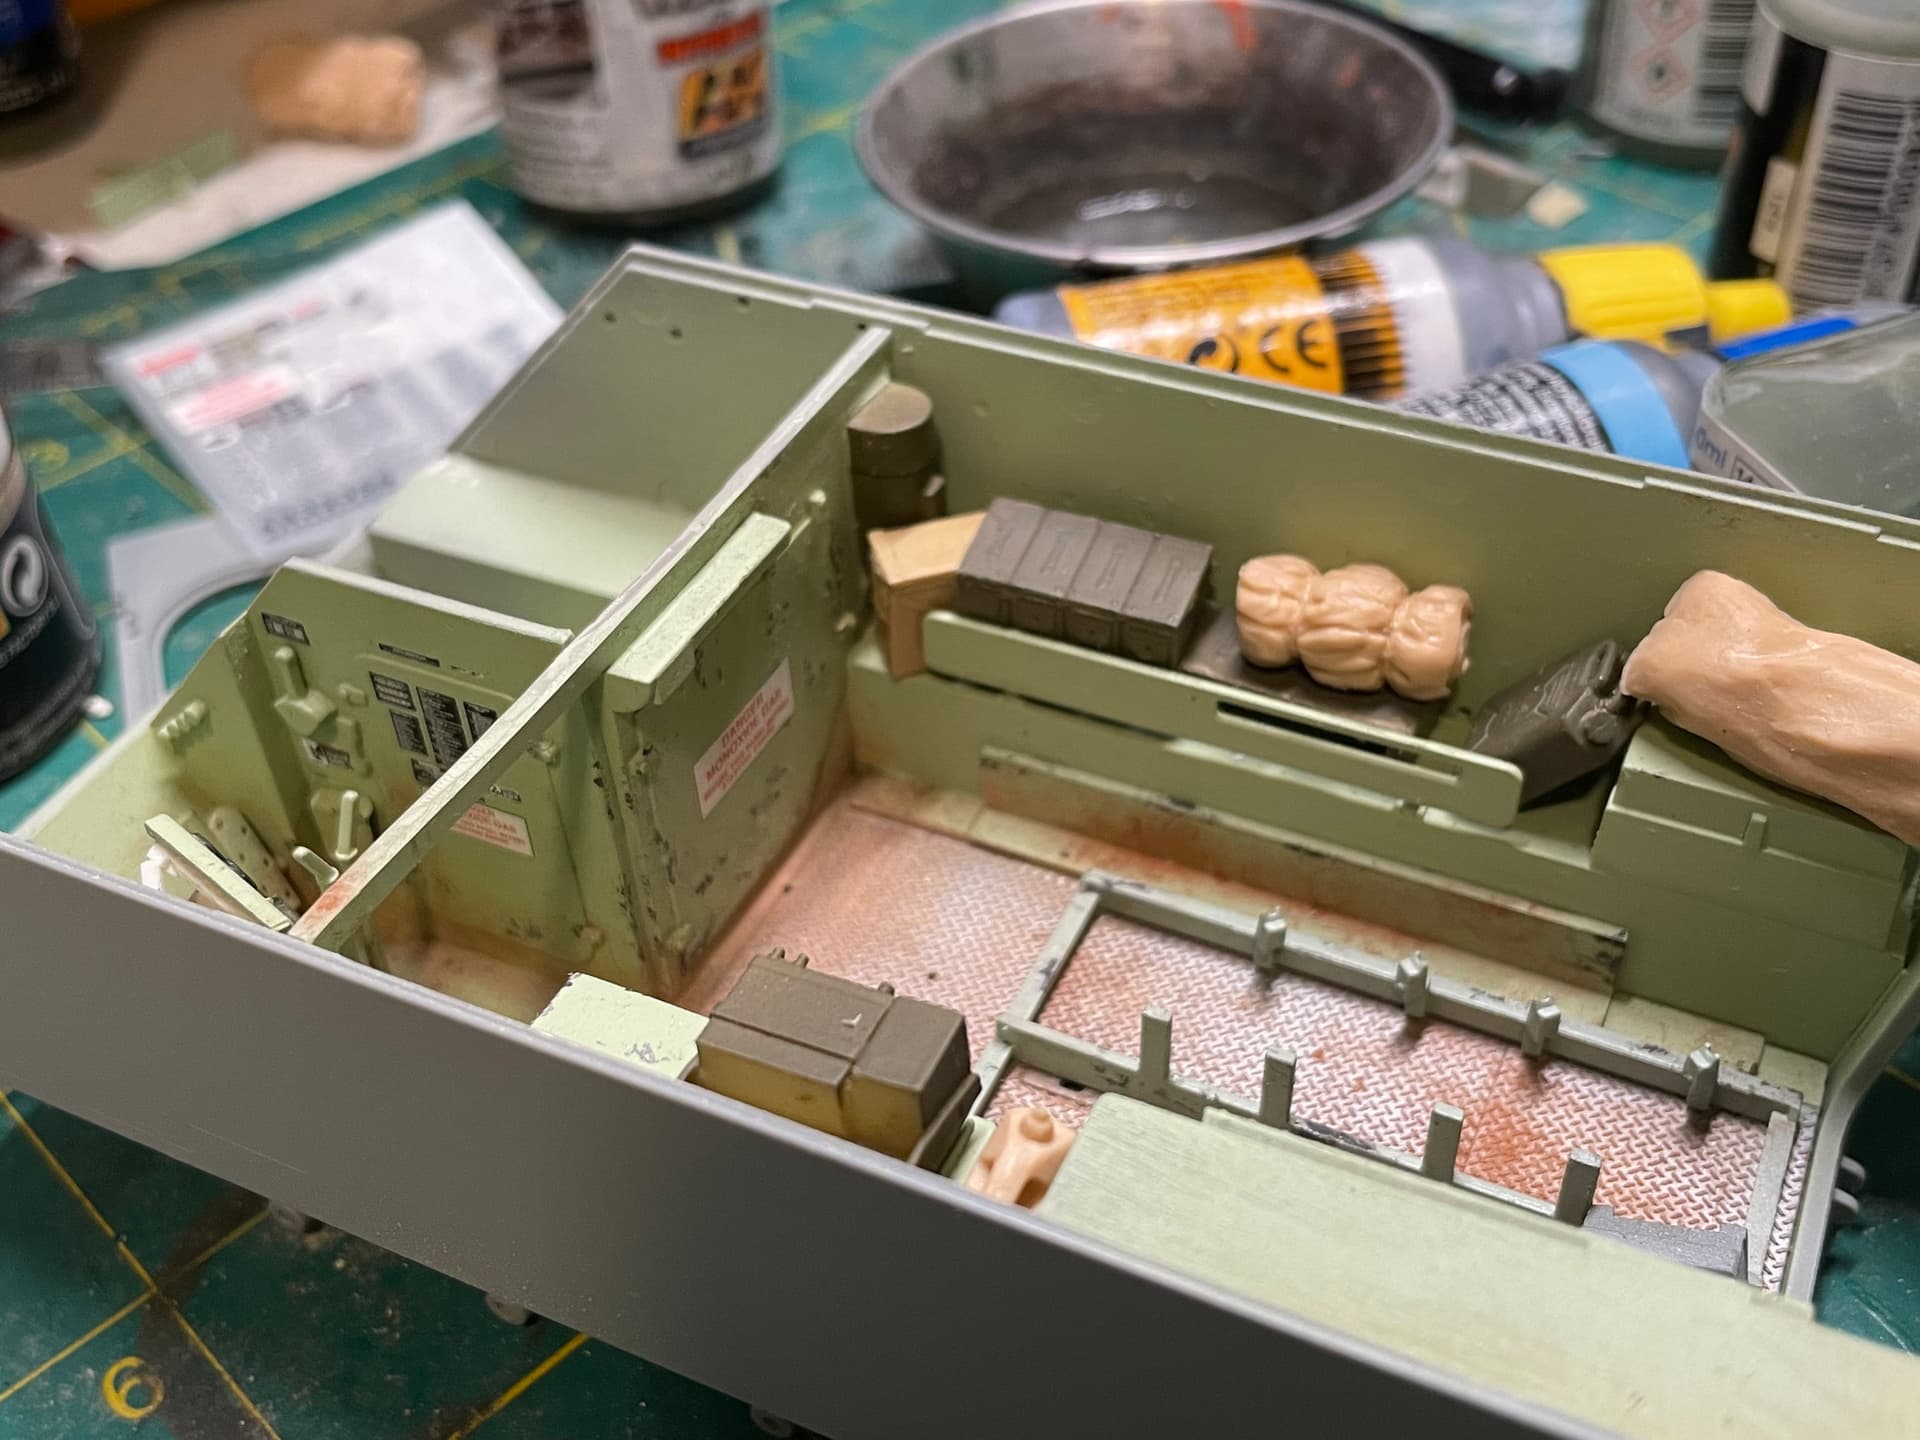
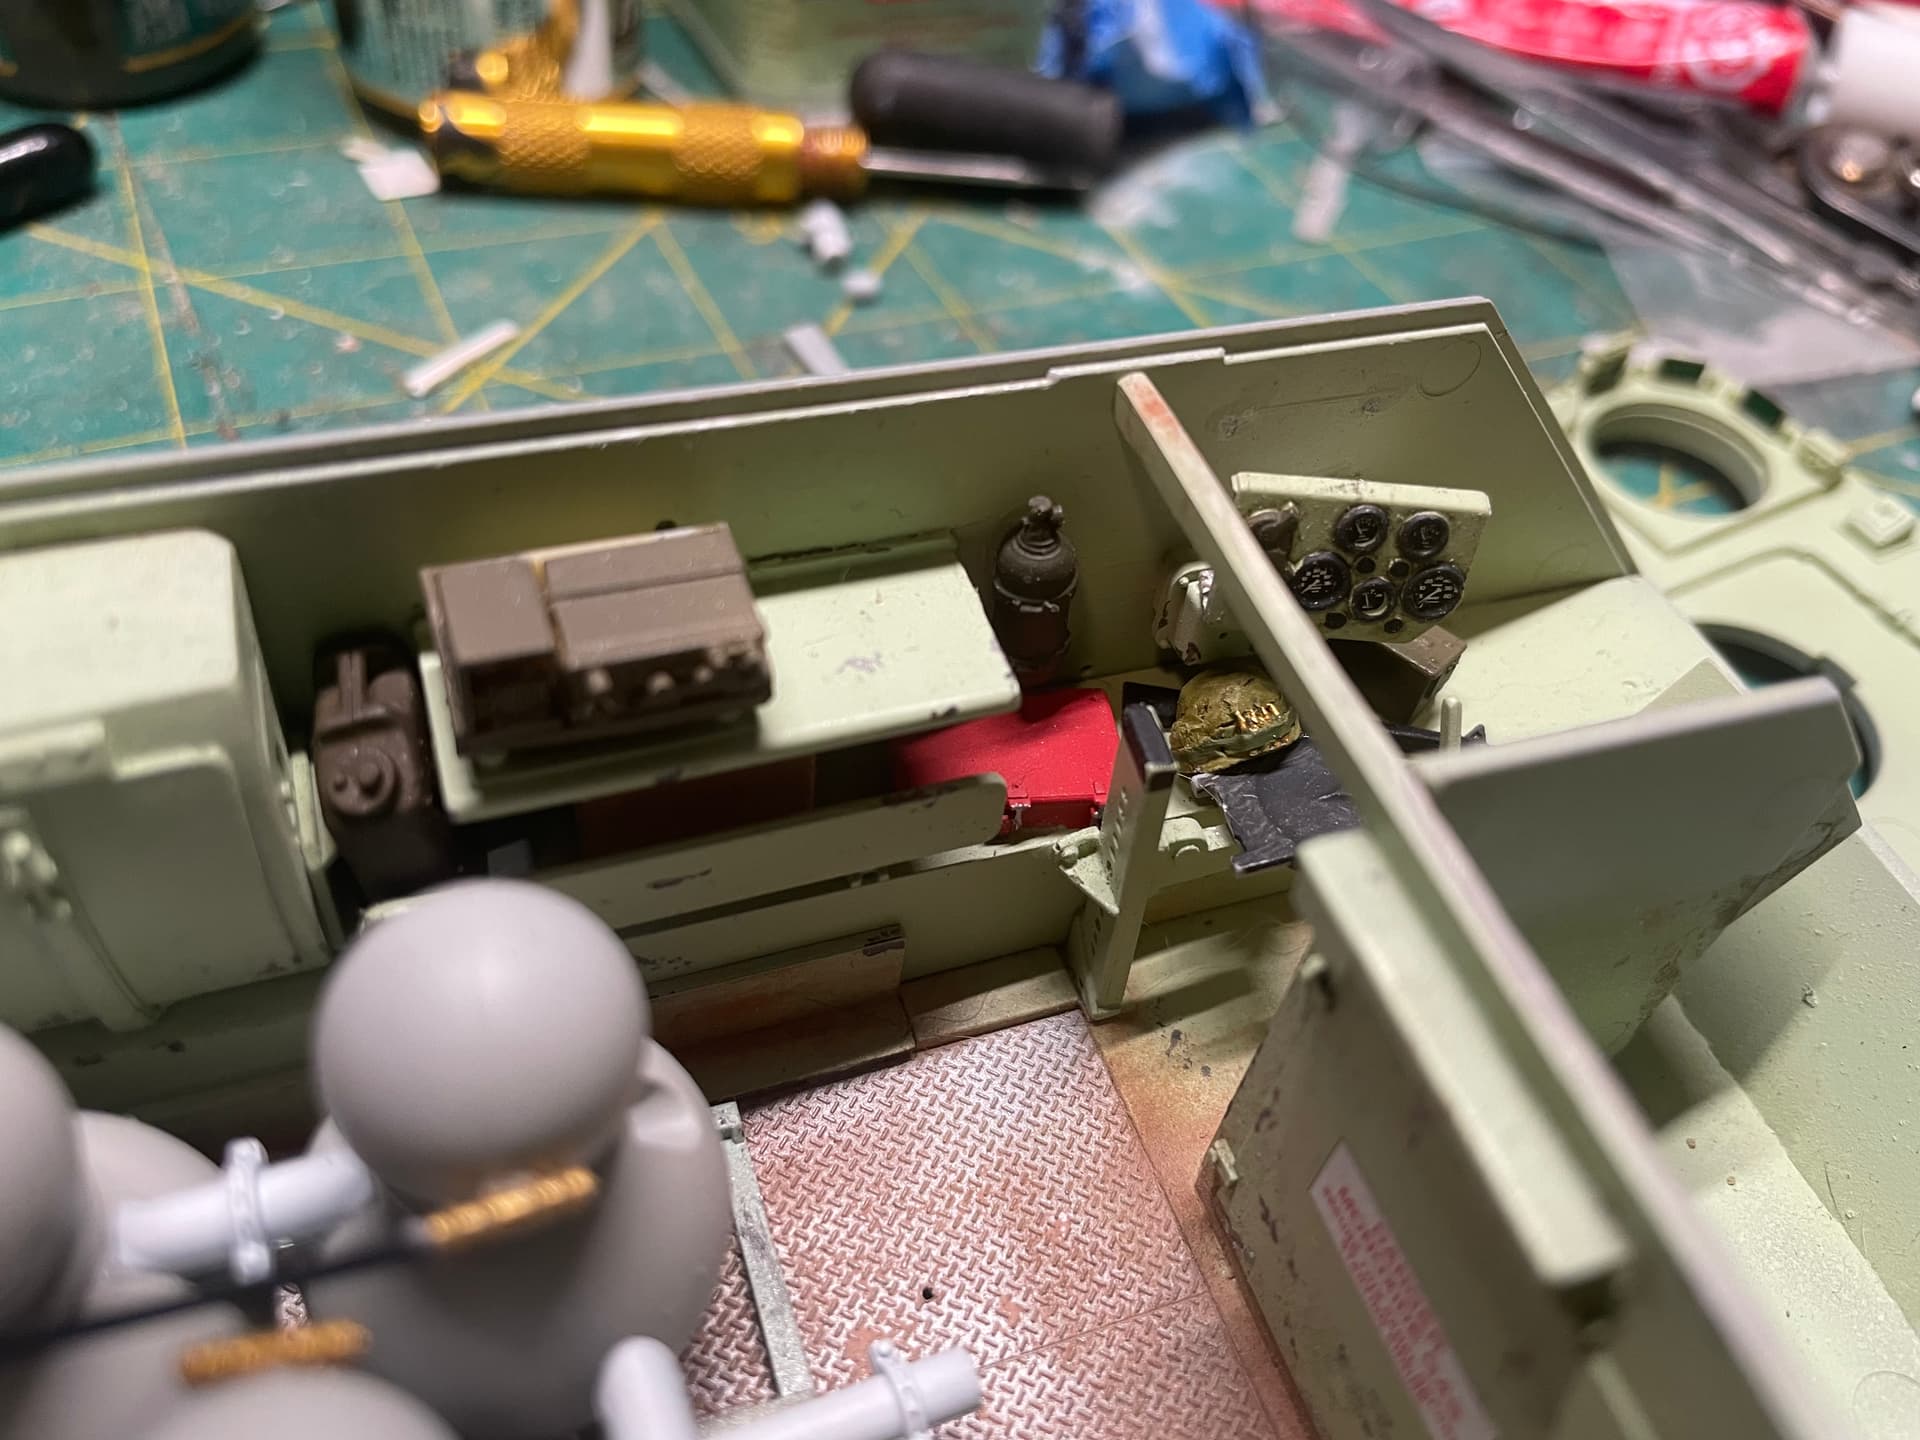
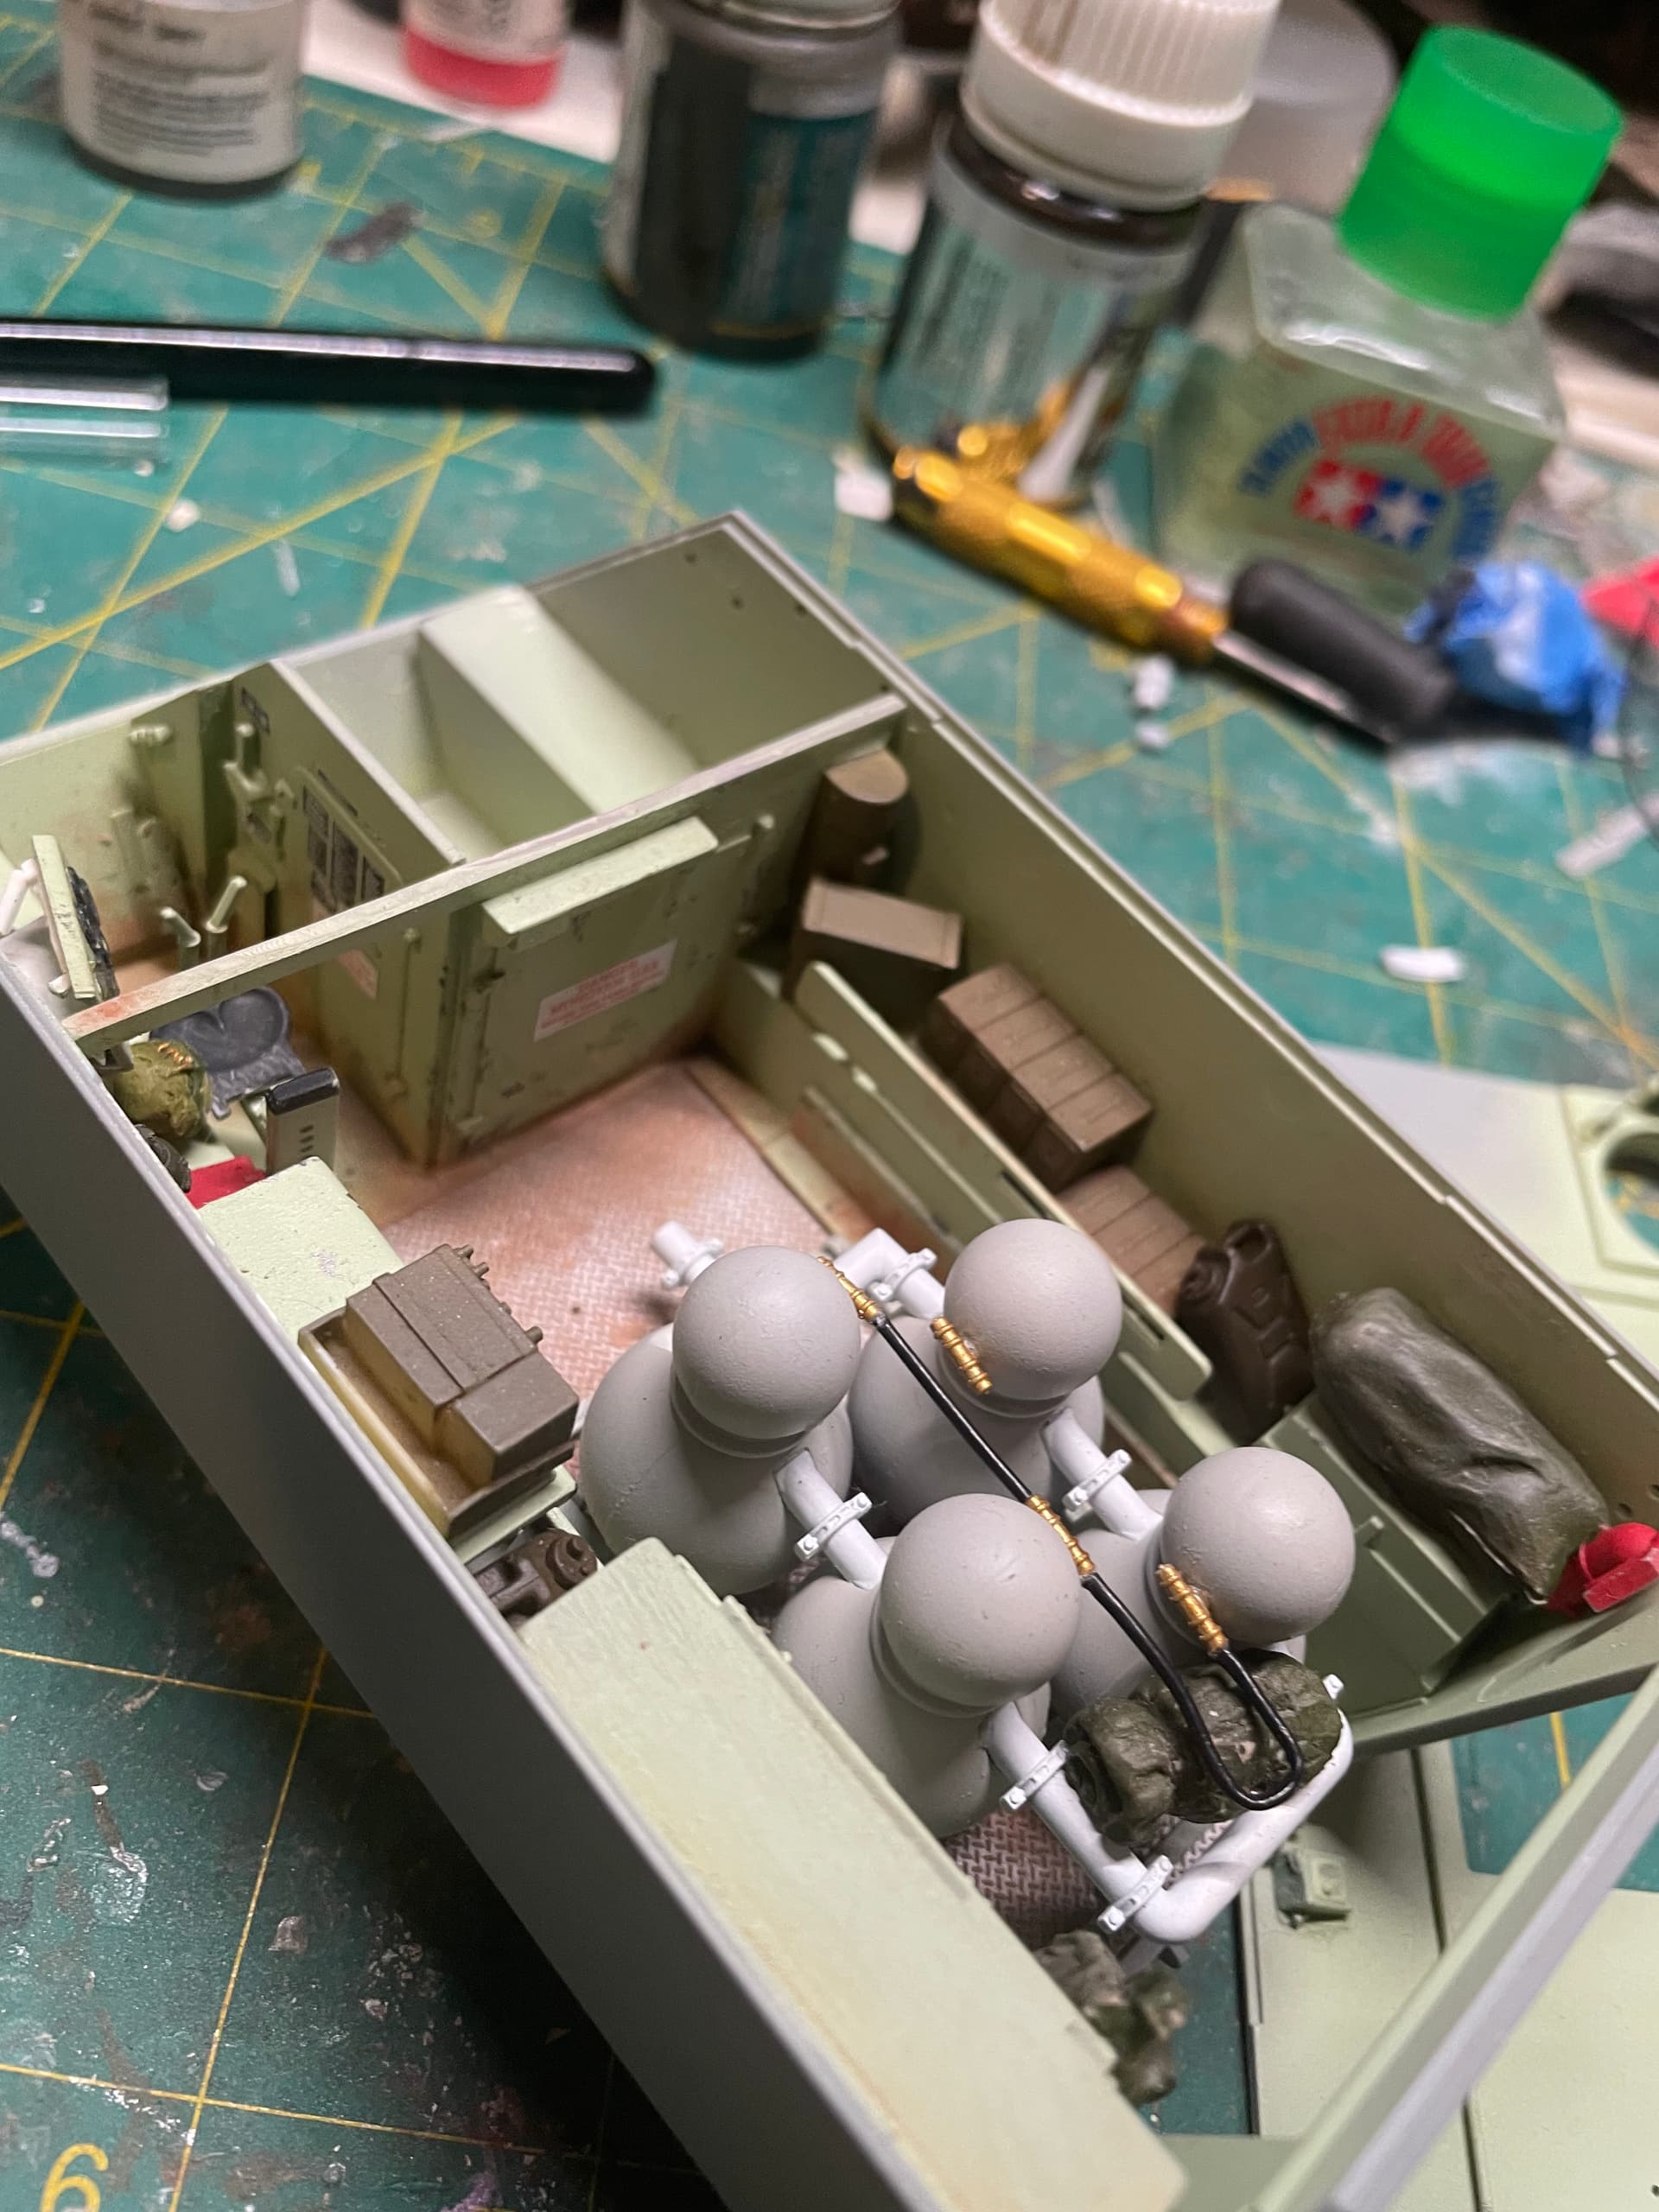
Thanks for those pictures…They are definitely better than nothing! I guessing the commander seat is attached to the turret cause looking at the kit, the commander seat is completely omitted. Anyways i reworked the interior from some pieces i had from the verlinden set and this is what i have… please feel free to comment
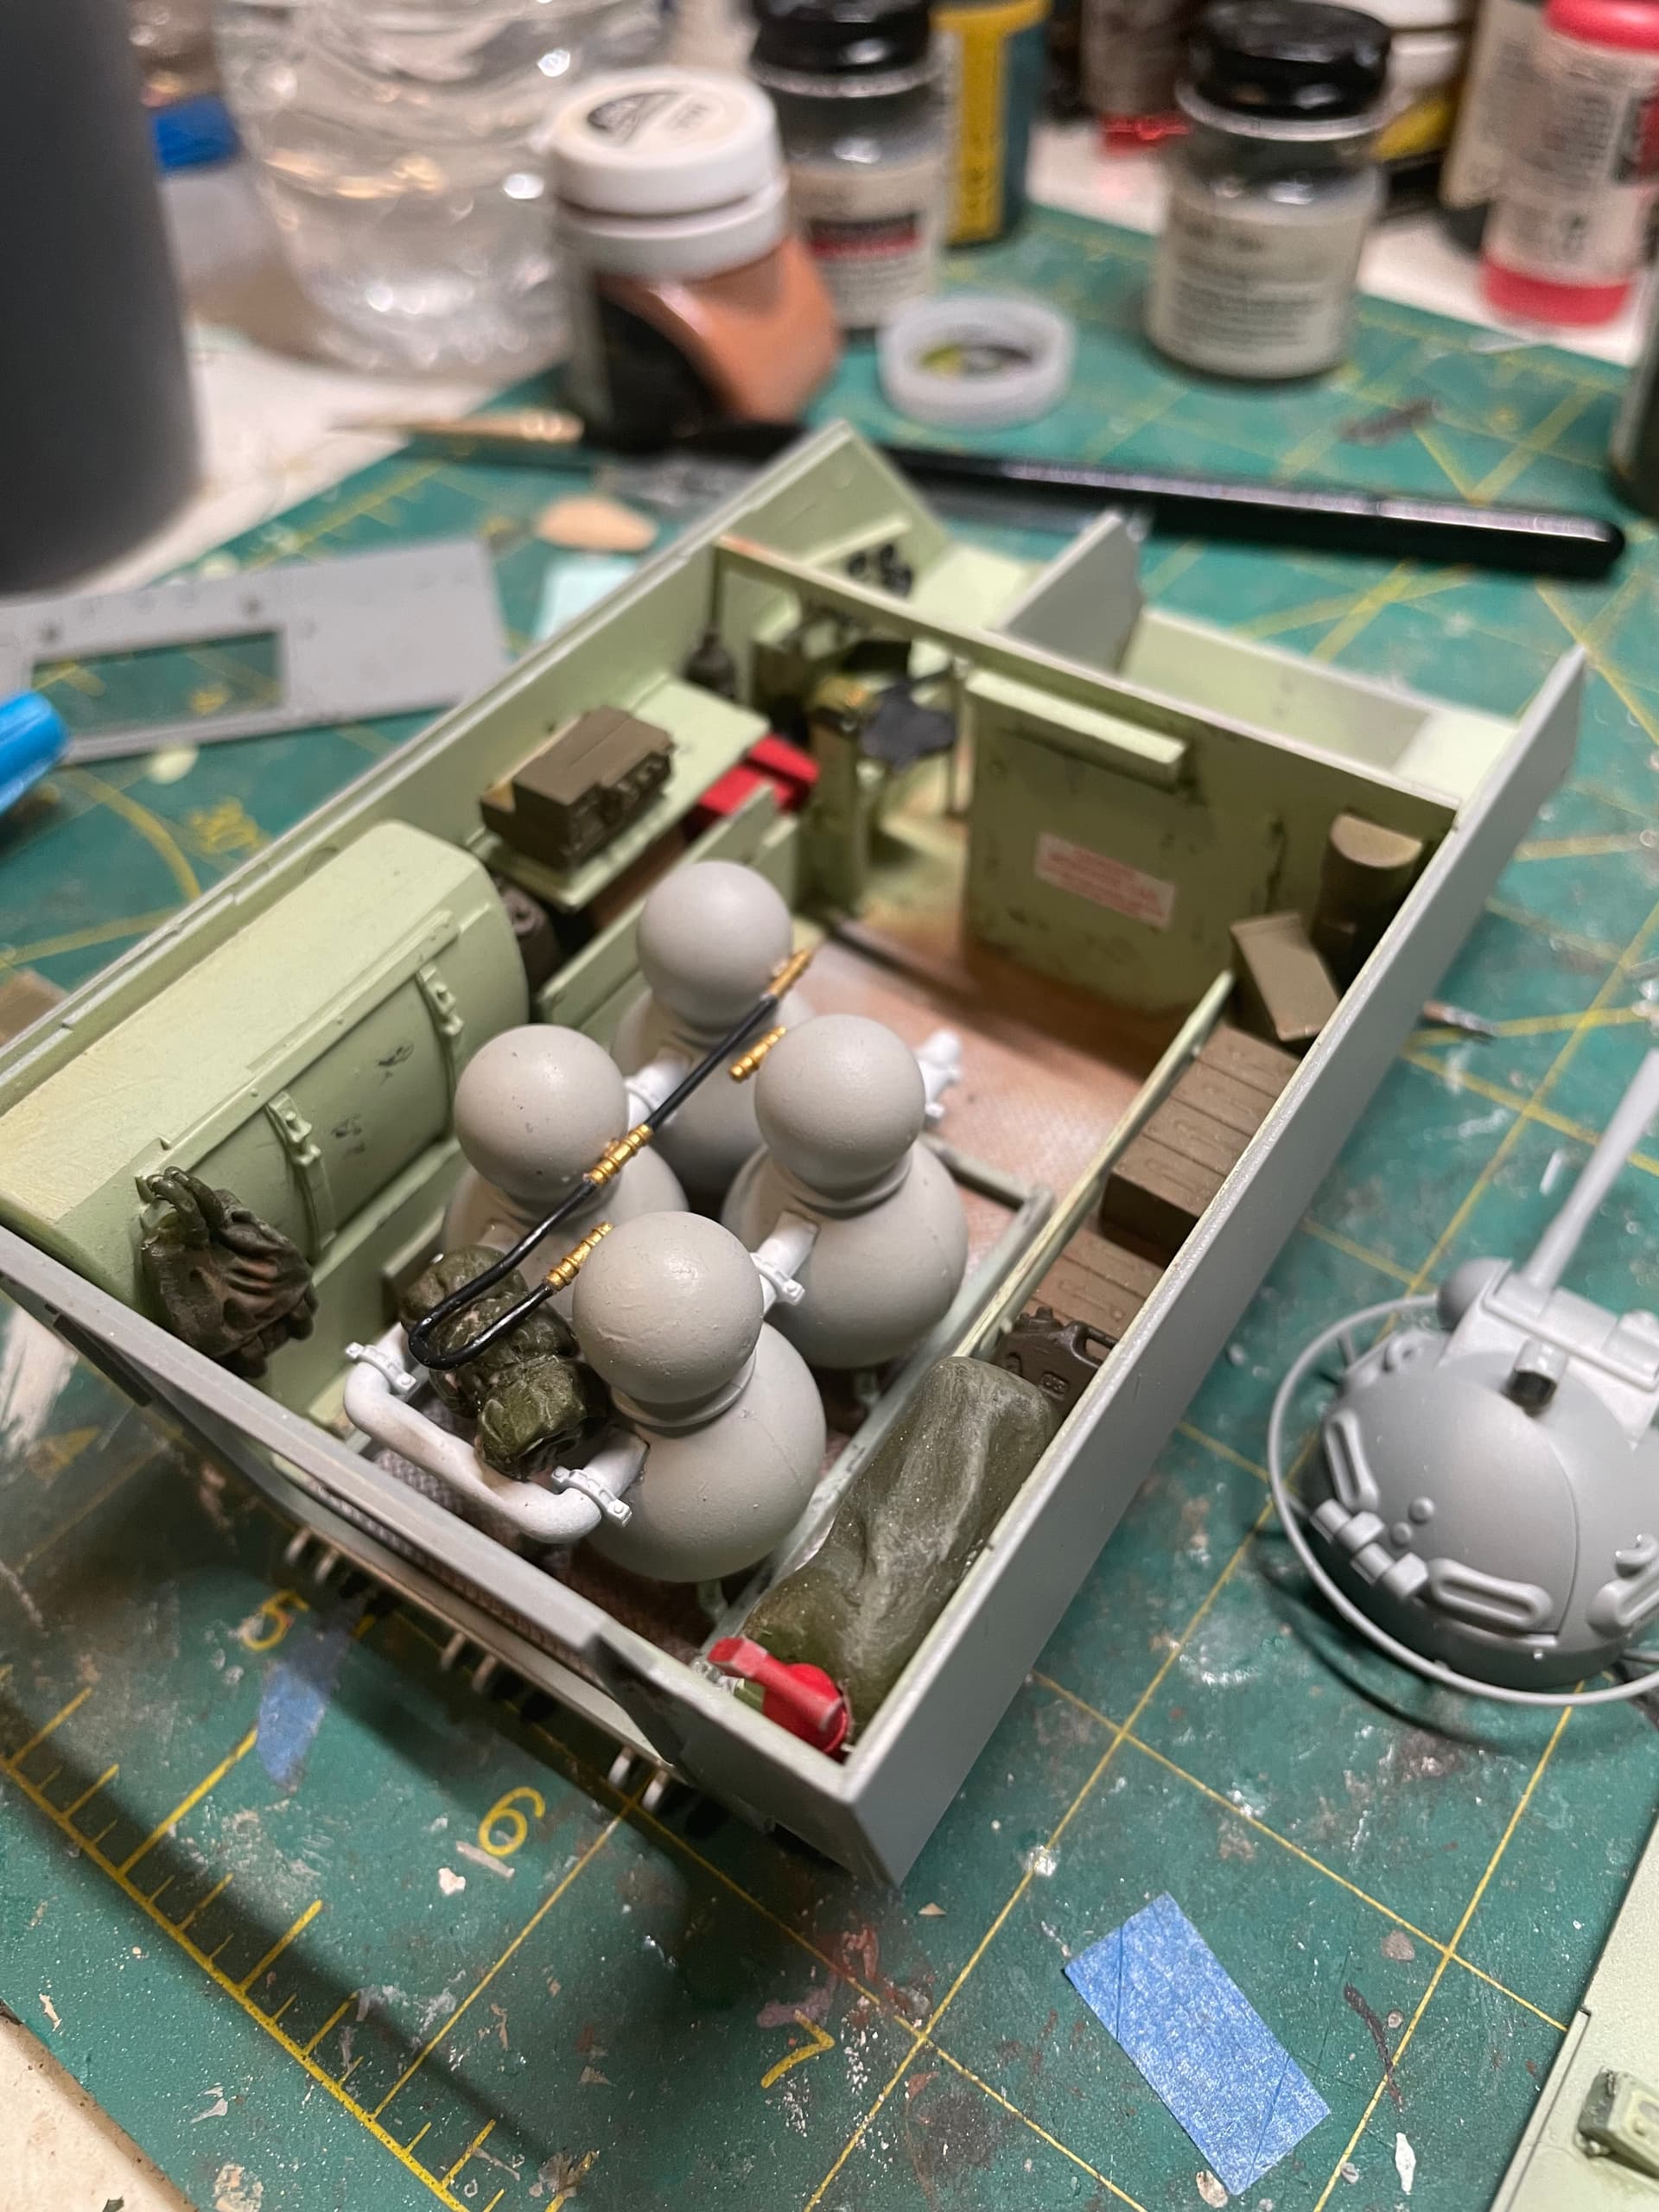
Just to let everybody know i never built an m113… i tried once and i never made it past the interior. I have a couple of questions, what color is the drivers instrument panel? And I’m assuming there is a lot of paint chipping inside because of looks like everything is just tossed inside?
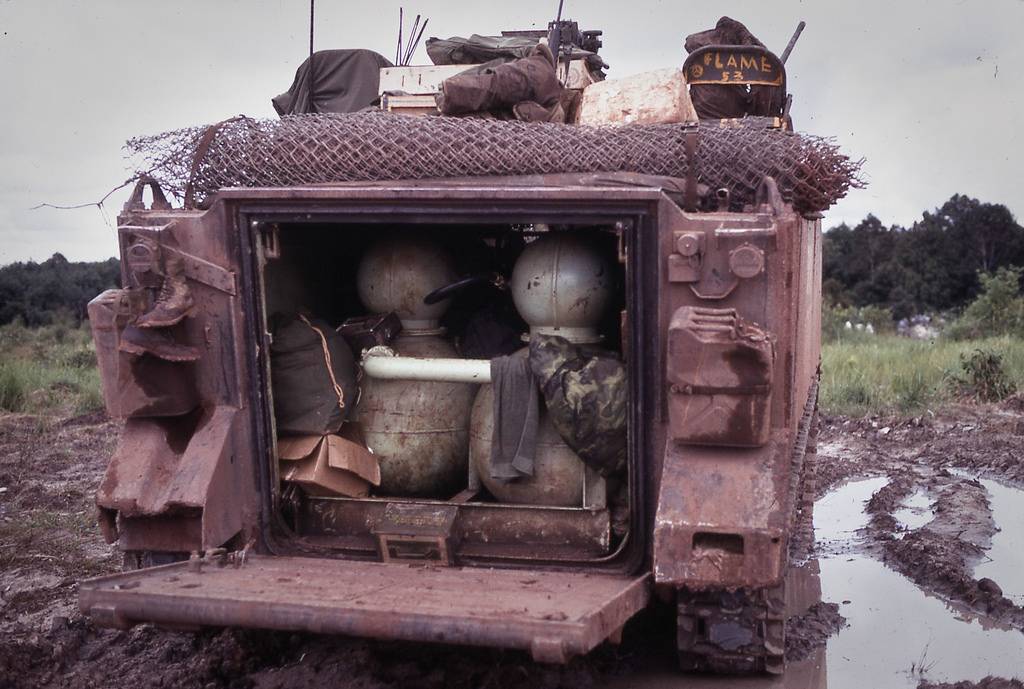
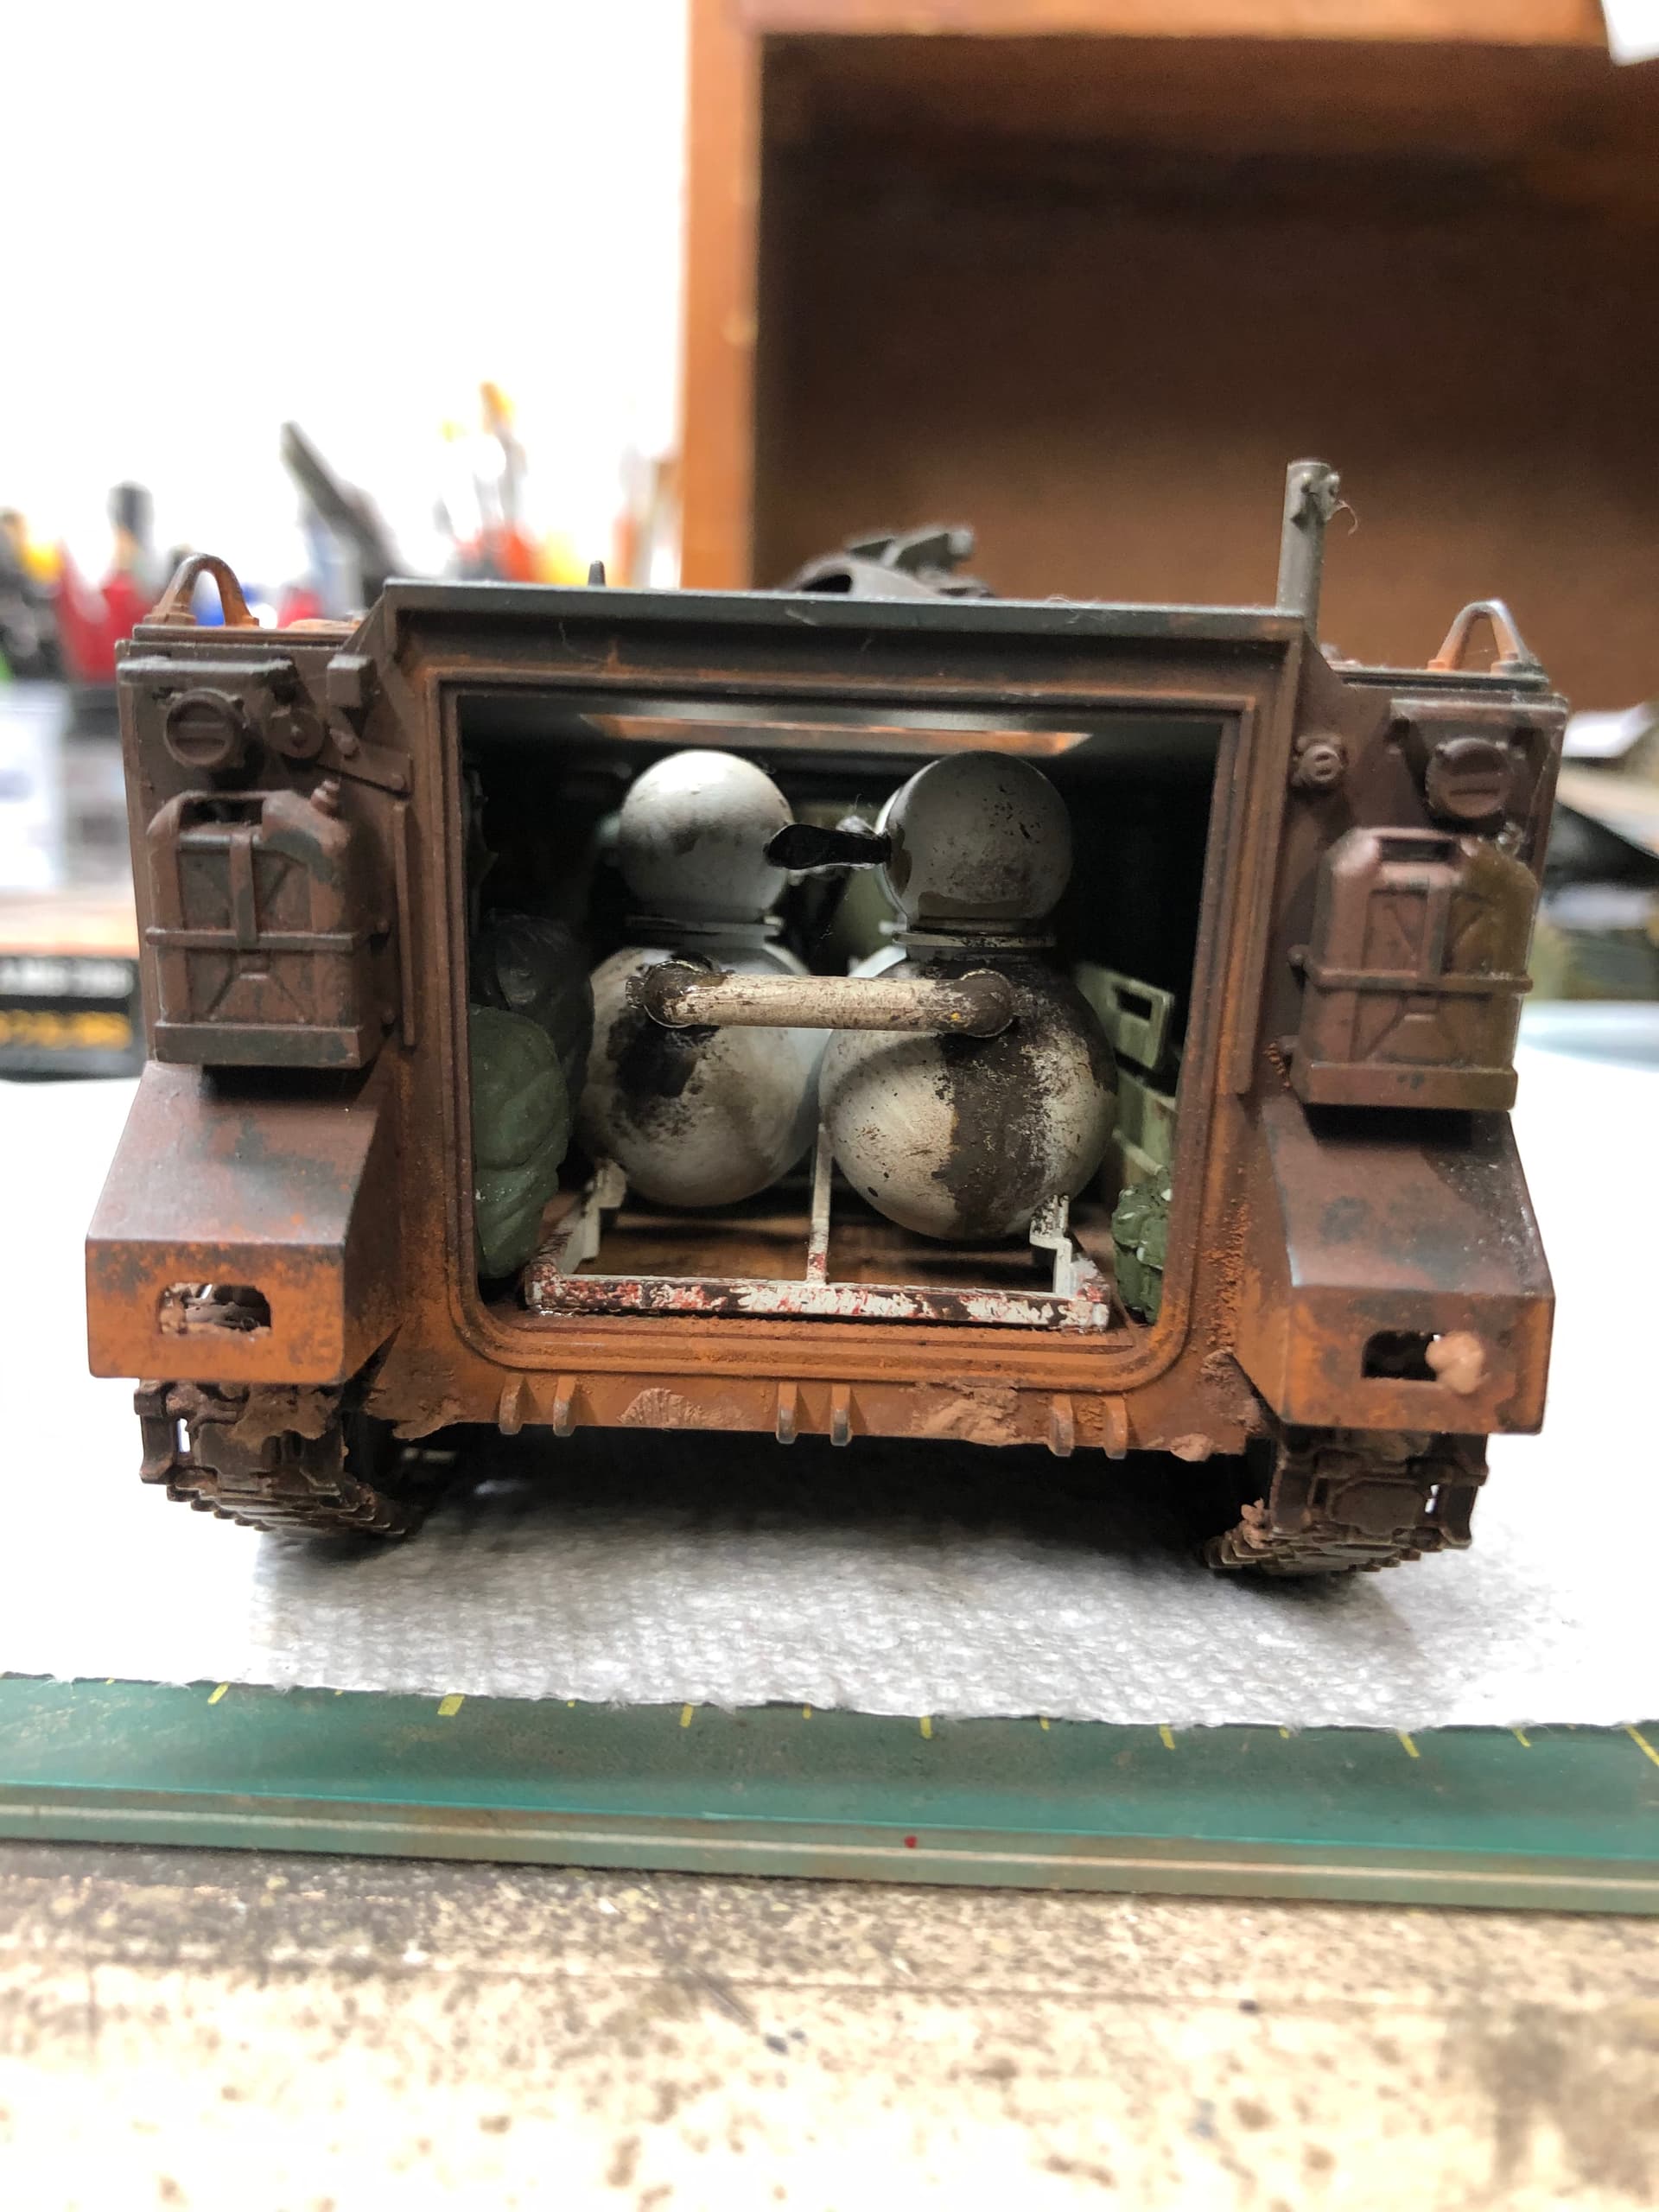
Do the fuel tanks look light gray or white? and is the skid that the flame equipment sits on is the same color as the interior. I know the pipes are white but I’m unsure of the rest of colors… any feed back is welcome
I started that kit about a year ago, need to finish it up, I did not go crazy because of my lack of interior photos Needs to be finish weathered and the M-60 gun shield, ect ect,… someday I’ll get back on it
Thanks for the pictures heavyarty! And nice weathering on your tank! What color do you make the flame tanks and yea the interior really sucks… i did some scratch of the interior
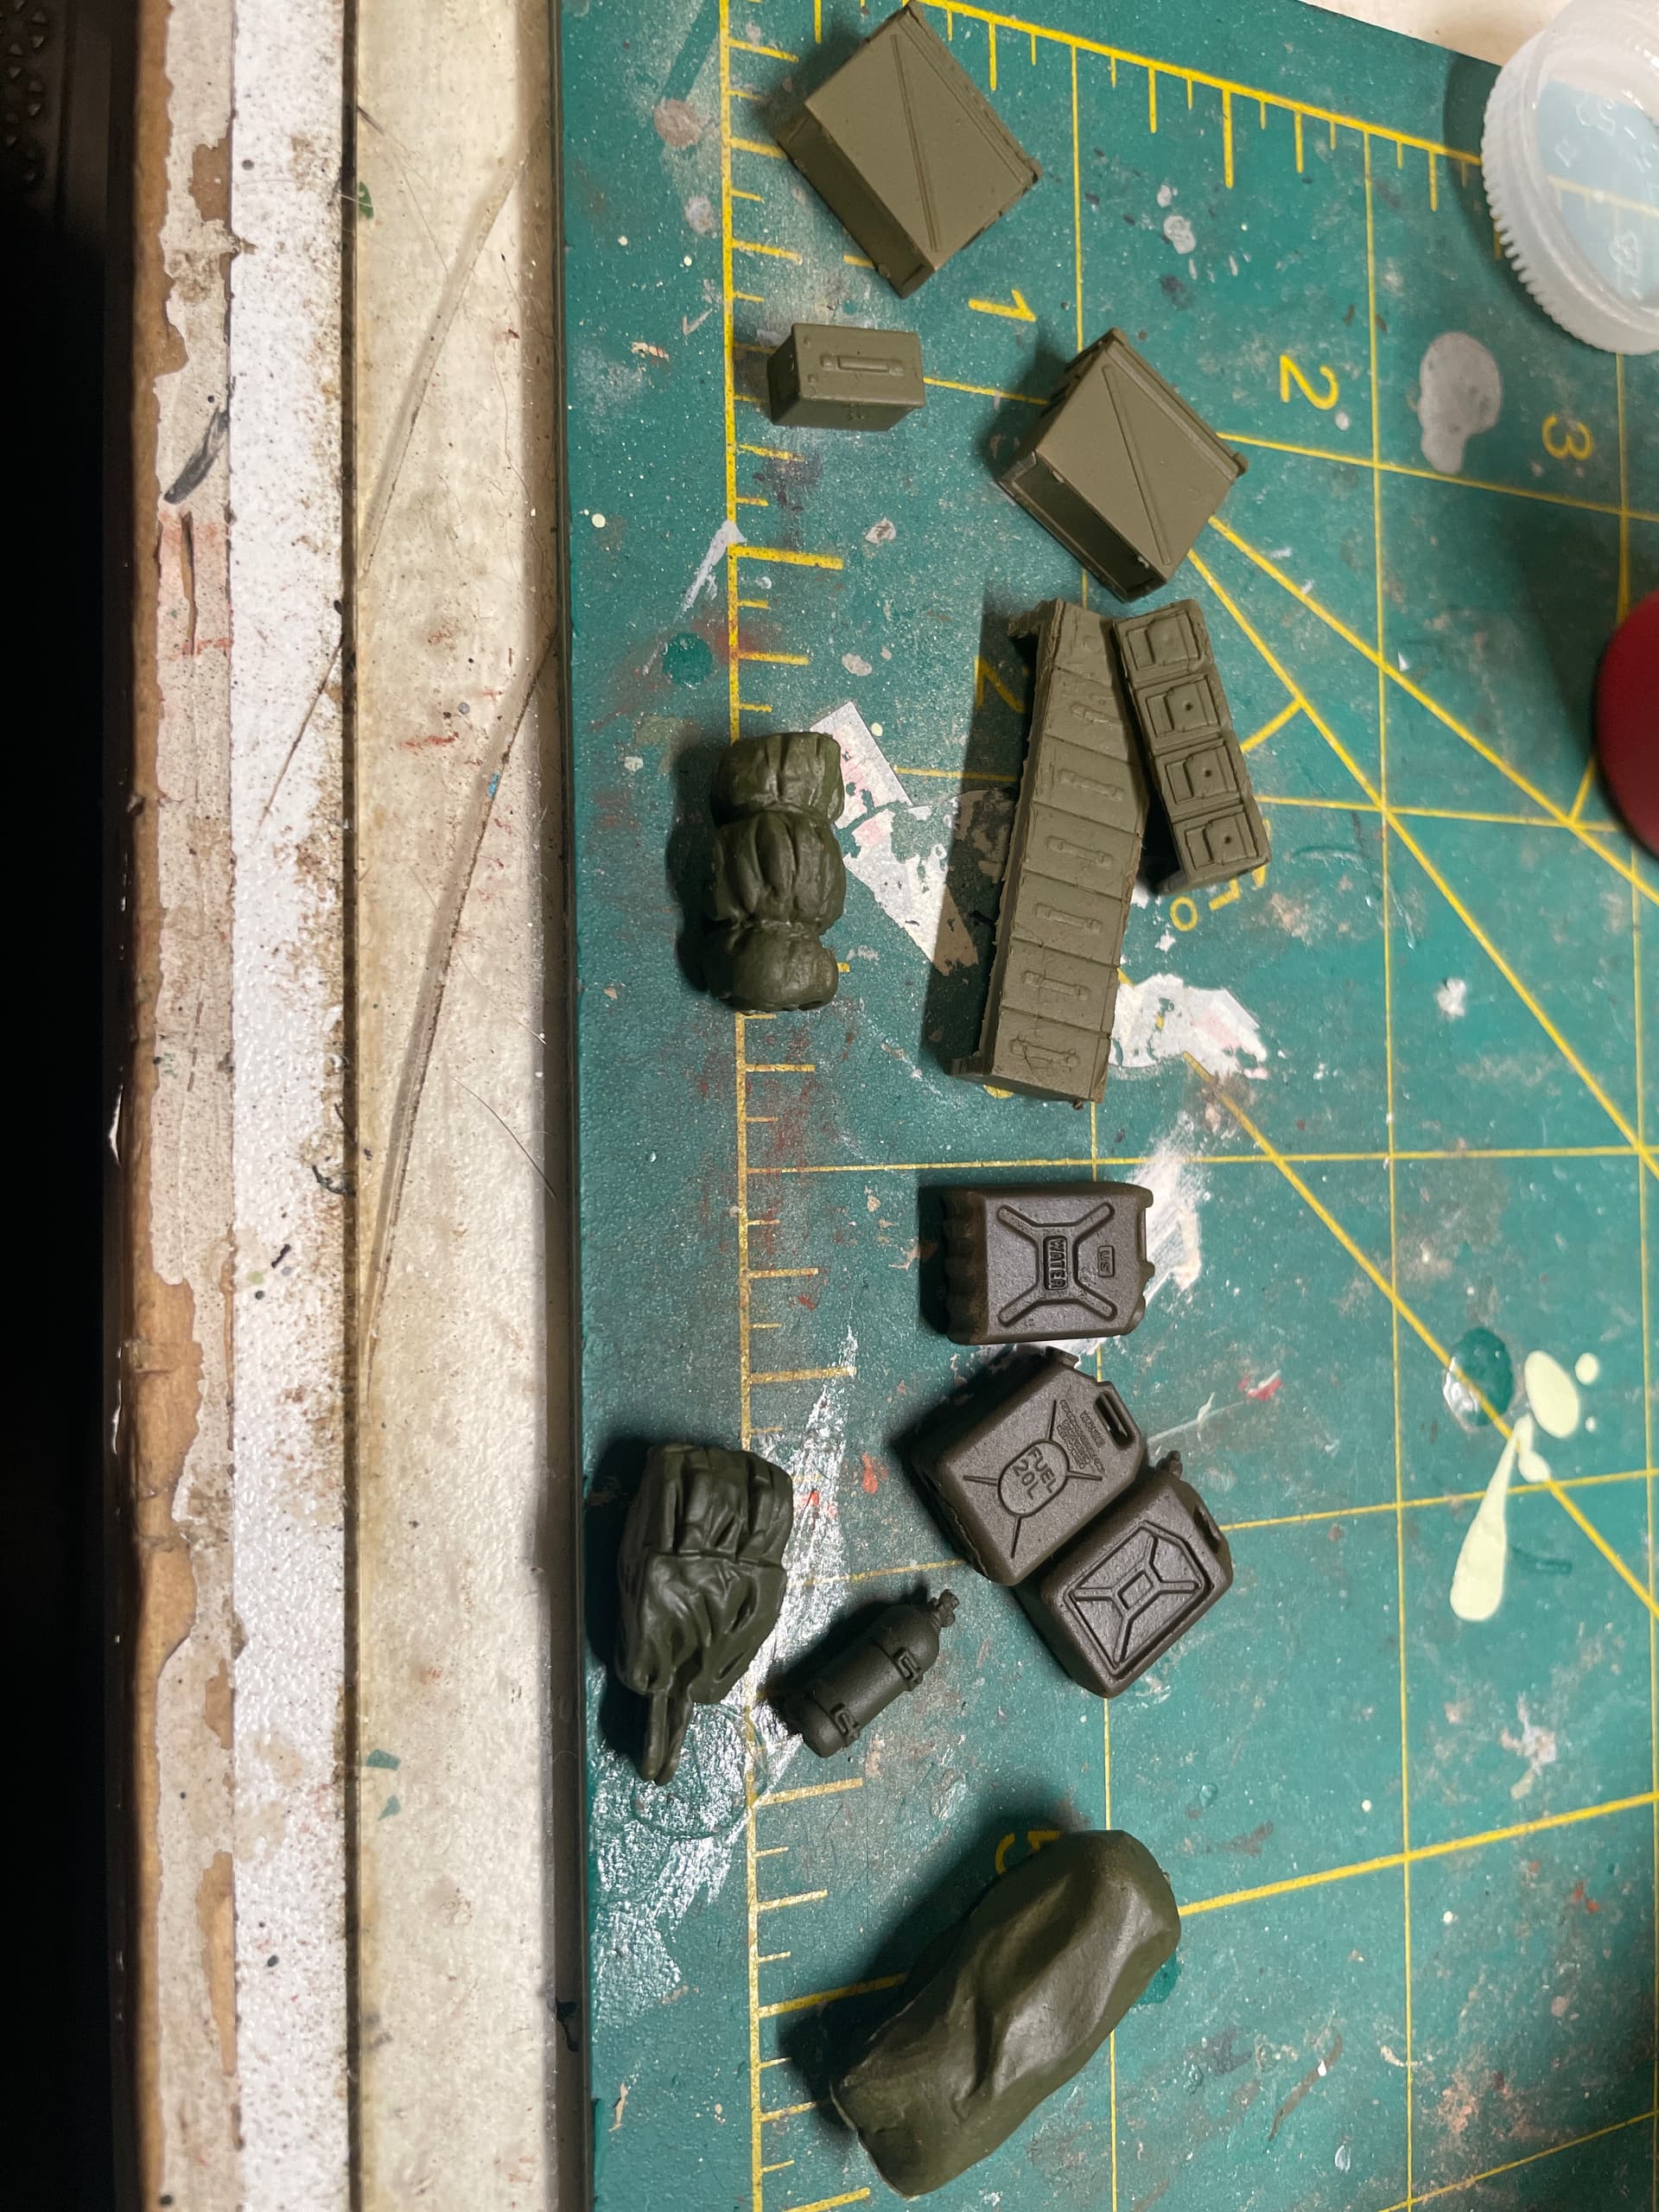
The shades of green are fine. The water jugs would be black. Only the far left water jug is correct for US in Vietnam though. The center one is a later plastic fuel jug (introduced in early '80s) and the right one is an Israeli water jug.
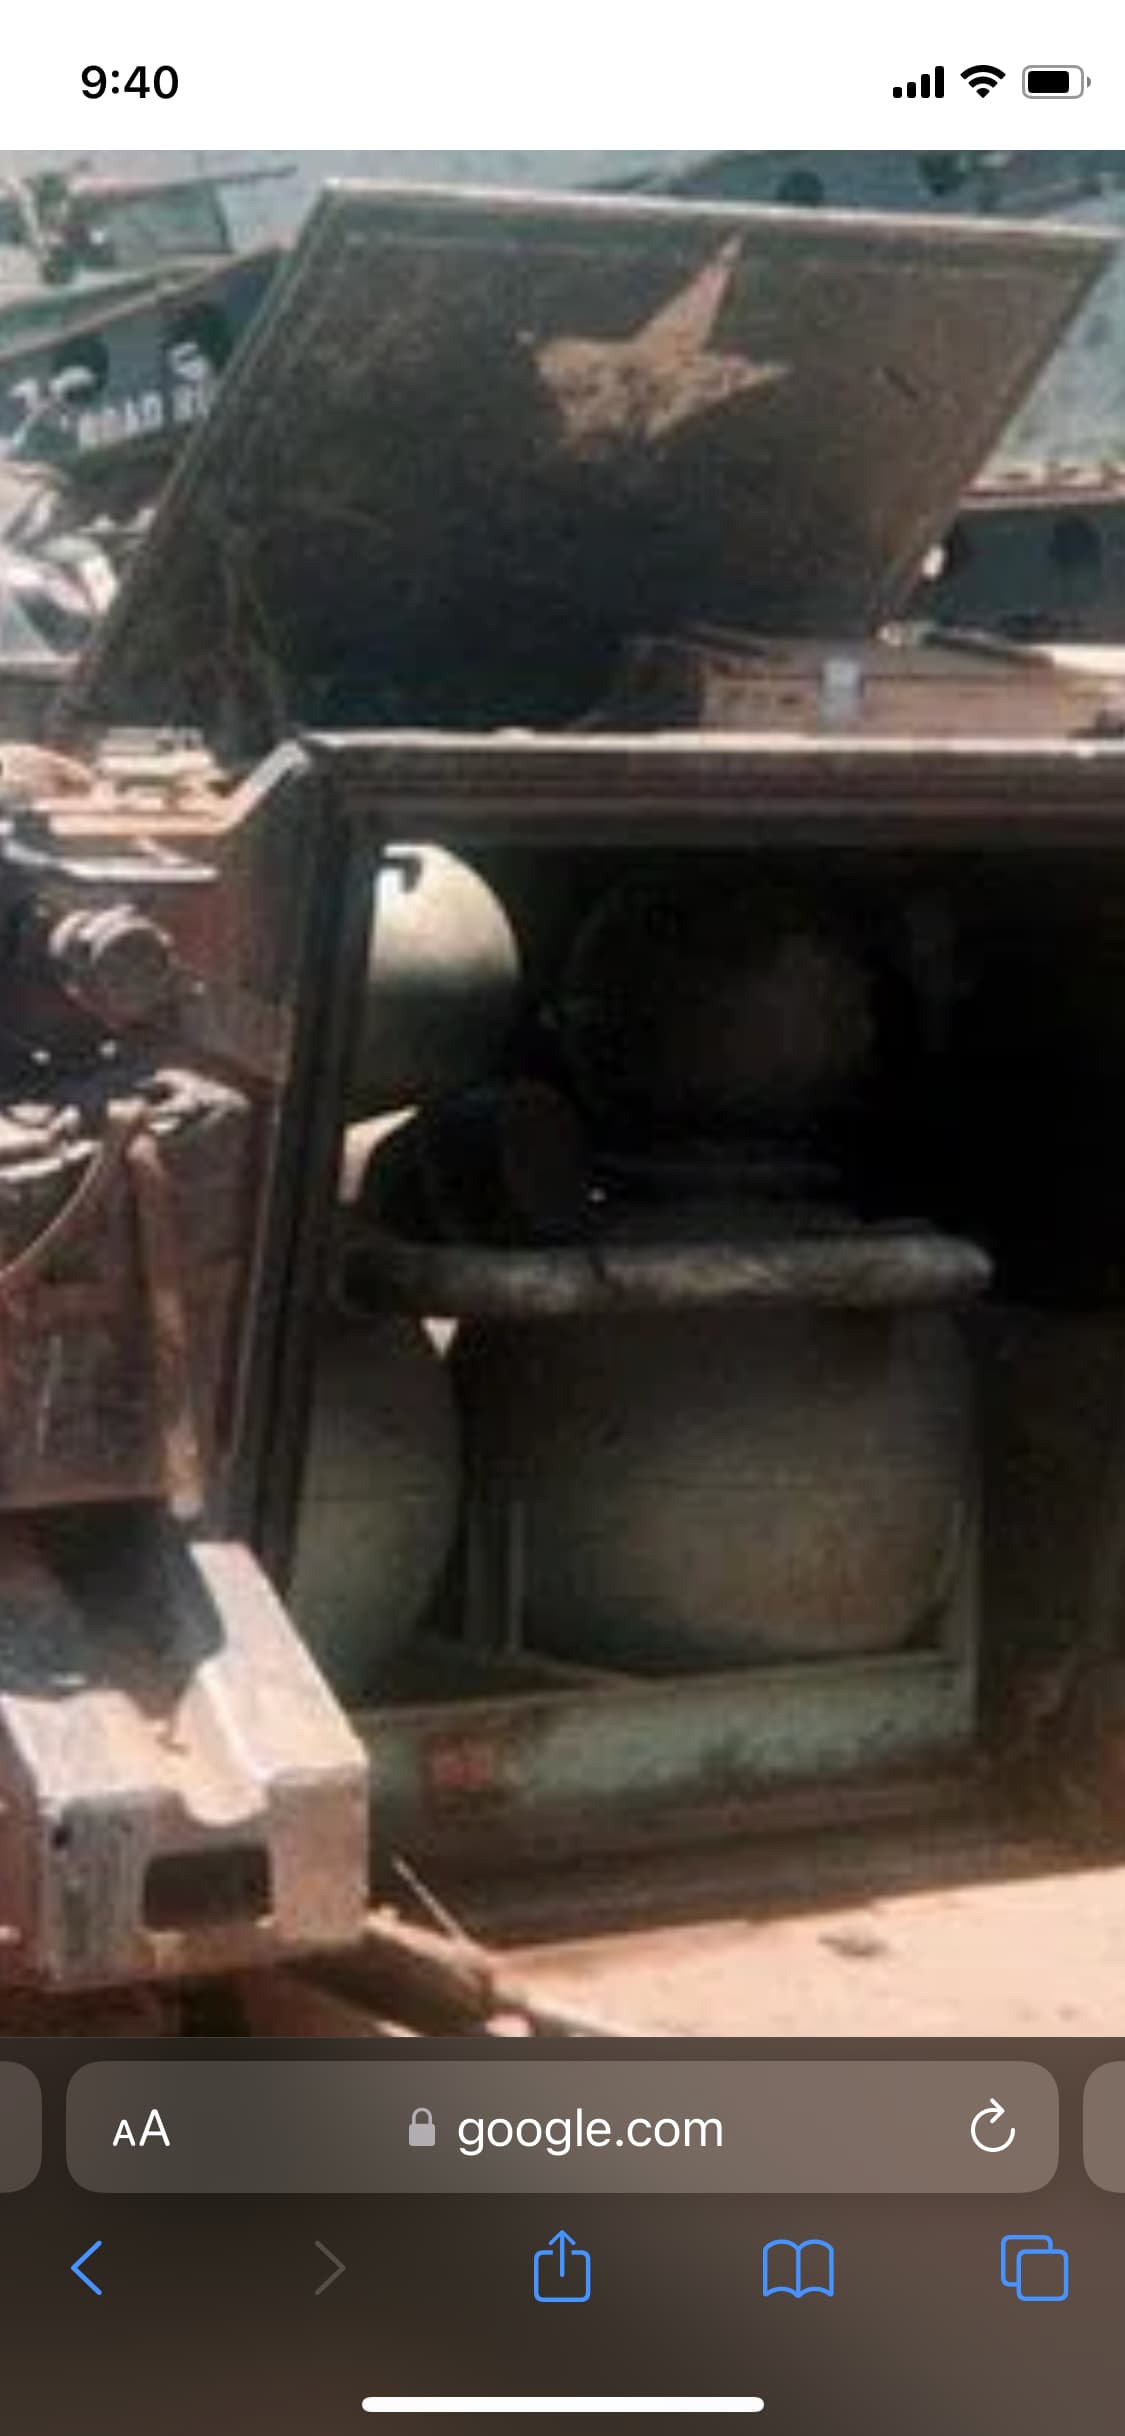
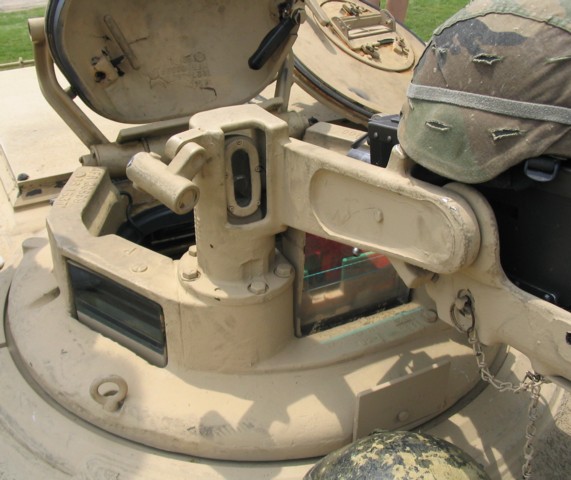
I’ve seen M113’s with white painted interior and also the light green color. Where the cutoff point was I don’t know. The floors were painted, but soon had bare metal showing thru. Zippos were usually parked by themselves as nobody wanted that fire bomb close to them. In the bush the doors were normally closed all the time.
gary
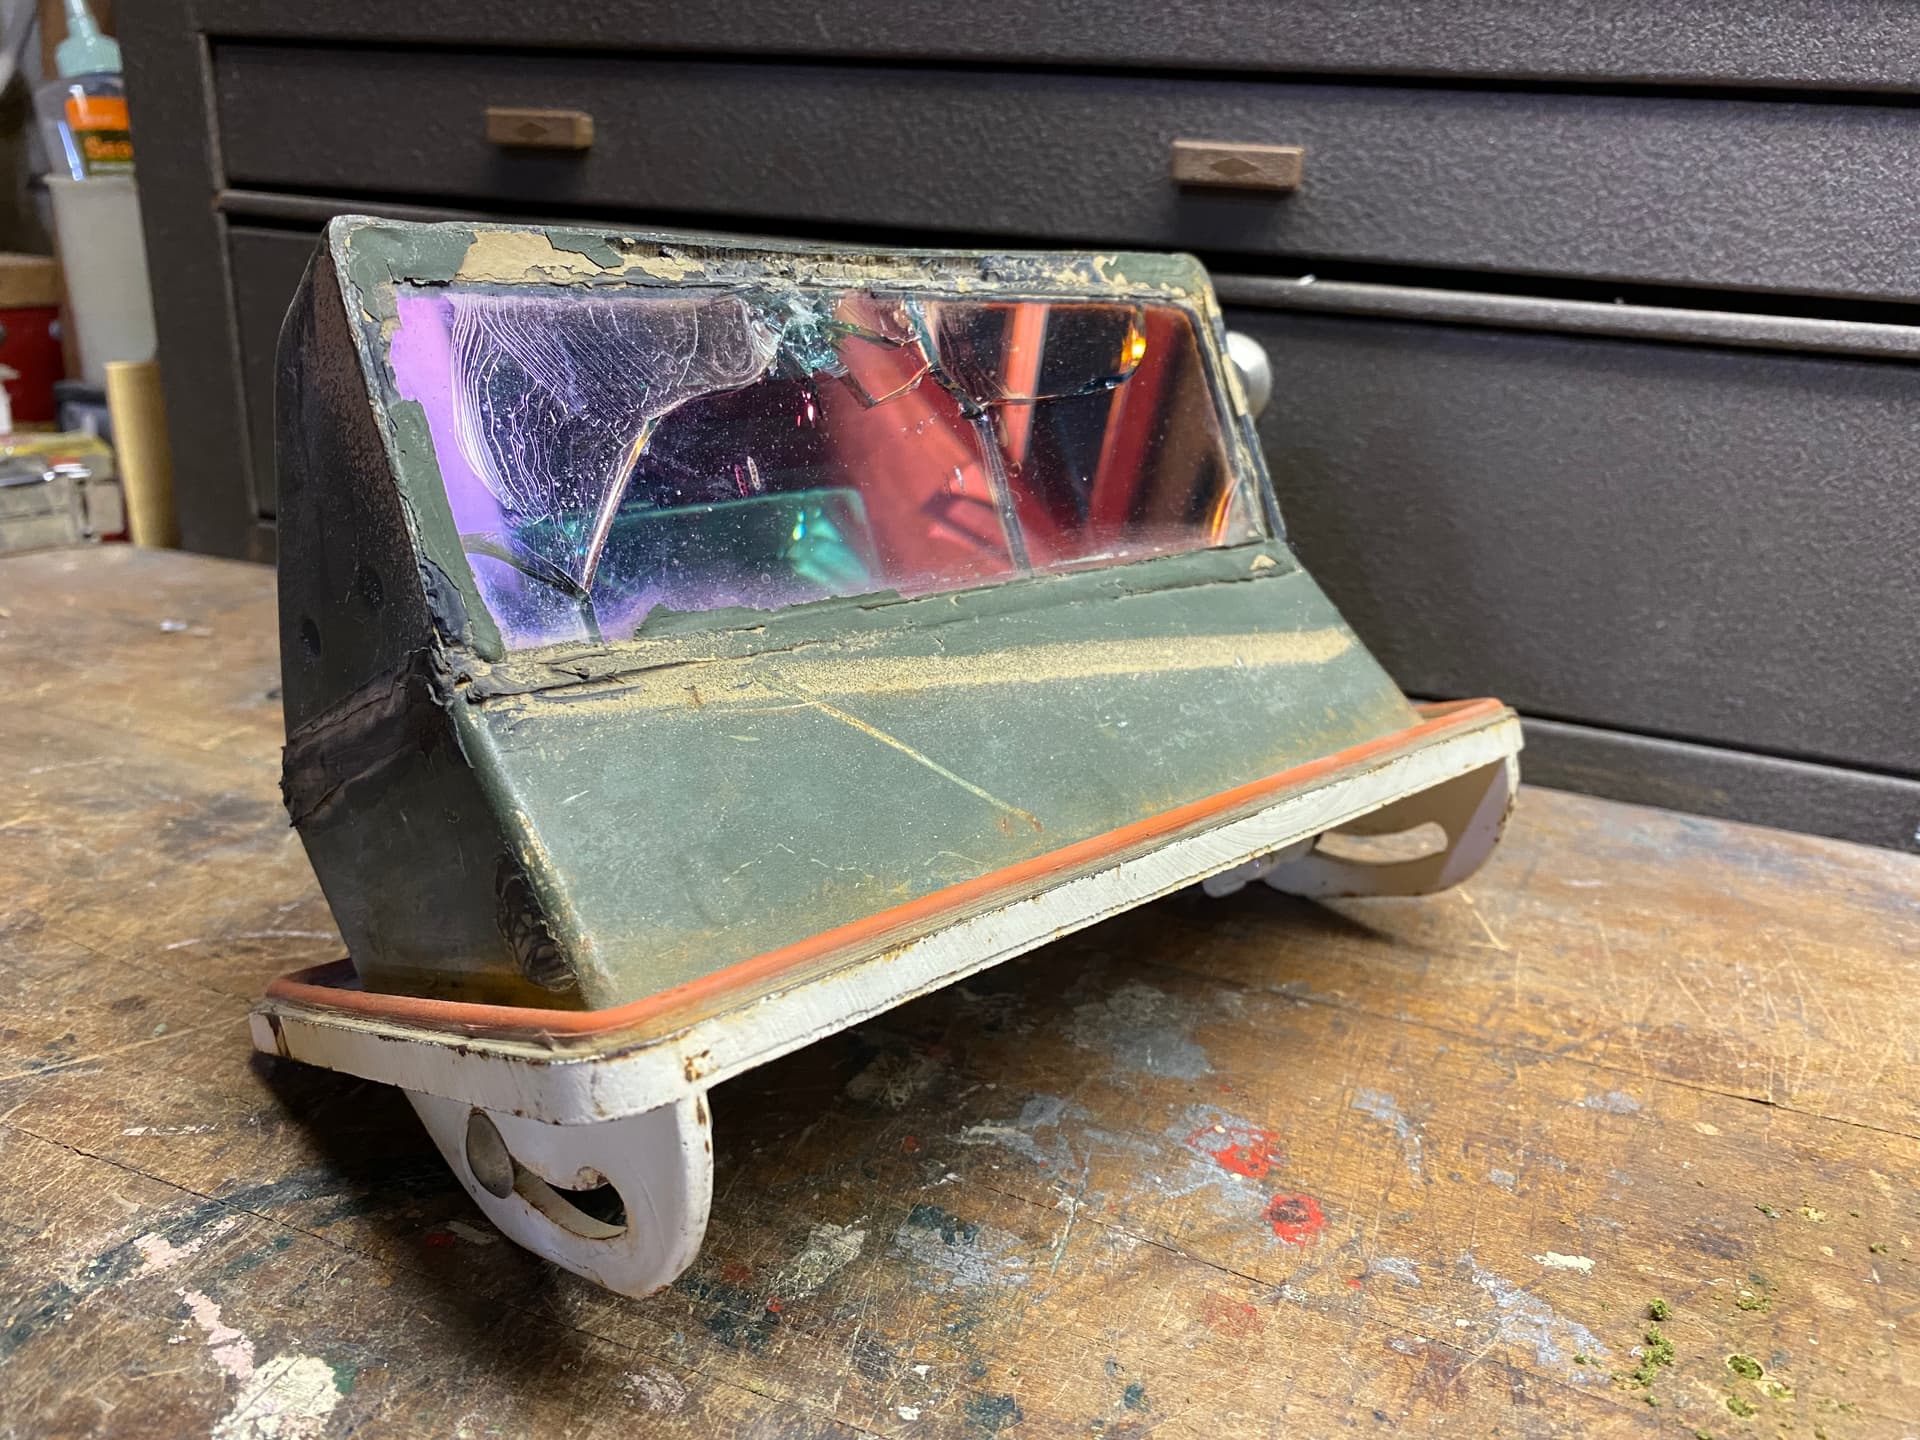
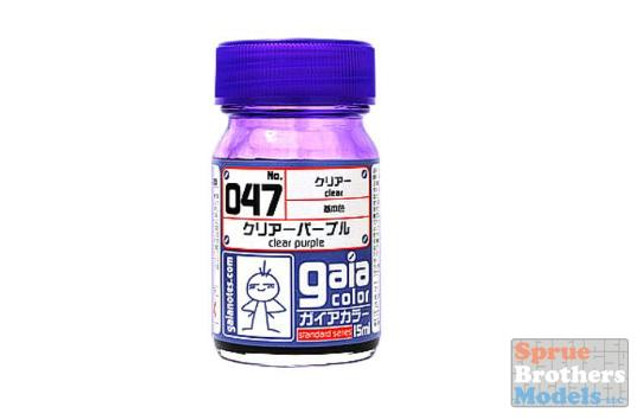
A dark green/black color. They were not anti-laser coated in red until the '90s. I would paint them black first, then a couple coats of clear green, and finally a couple coats of clear gloss. This gives them the proper dark green color that thick glass has.
I usually use just black, with a gloss coating. The problem is that periscopes, unlike direct vision blocks, are not thick glass.
They are made of plexiglass/perspex, with just a thin layer of glass at the ends. The plastic does not have a green tint to it.
Another option is to paint the lense gloss black then paint over that with a light coat of clear purple, this for the exterior periscope, the interior lense would be white with clear green, again a light or diluted coat.