Maybe use a white background, but very nice work. Wayne
Sweet! Looks great!
That is fantastic work
1 Like
Welcome to the “Dark Side” Young Gun, the finish on the gun stock is perfect, next you’ll be hollowing out back packs and filling them with letters from home lol. “Mail call”!
Cajun 
2 Likes
In @HeavyArty second Nancy photo, taken I think from some movie footage(?), am I right in thinking the passenger standing is wearing headphones and it’s cable is attached to a PRC-25 hanging on the rear cab board to the left of the driver as we look?
Started building this ages ago and noticed this detail.
Fantastic build, by the way @Panzer_modeler, inspiring me to get back to my build!
2 Likes
Once you start down the path of non aftermarket modifications, the light side of the force is lost to you and all that remains are the ways of the styrene sith…welcome to our side Darth Panzer
2 Likes
Thanks guys!
am I right in thinking the passenger standing is wearing headphones and it’s cable is attached to a PRC-25 hanging on the rear cab board to the left of the driver as we look?
What!?!?!?!
@robh how would it be attached? Im only asking cuz I need to now add this to my build now… ![]()
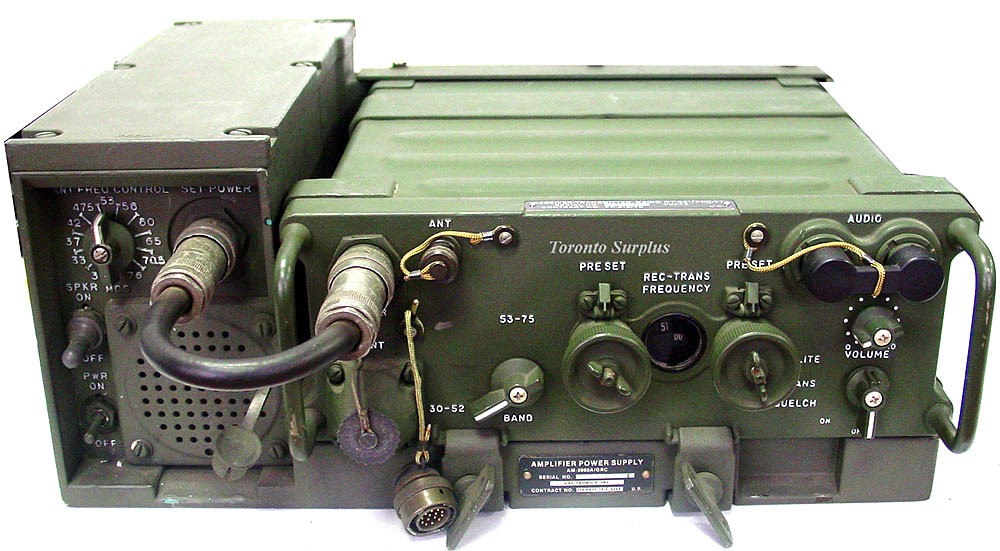
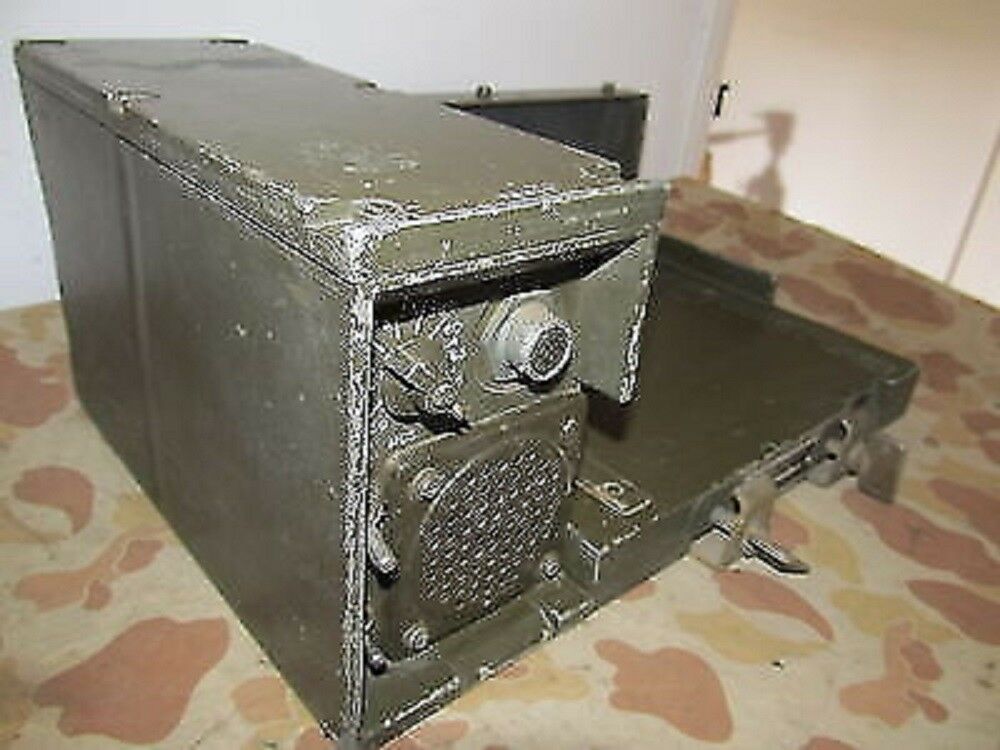
The AN/PRC-25 radio has two posts to connect a handset, speaker box, or headset to. You can see them below, labeled AUDIO.

The headset hooked up to both posts so you could listen and talk.

Or there was a version with only one connection to just listen and a handset had to be connected to the other post to talk.

2 Likes
Thanks Gino! Great pics. How do you think it was mounted on the truck?
I haven’t seen the photo mentioned but here’s the two most common ways . . .
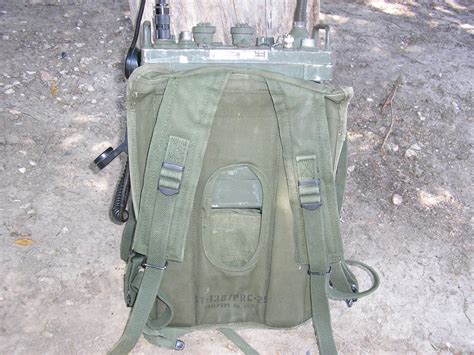
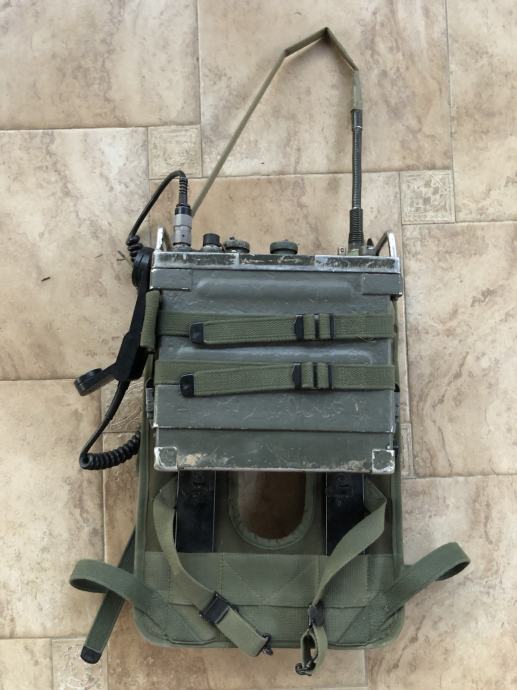
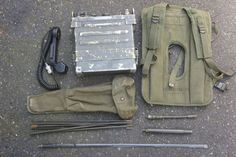
. . . hope those help some. You can make the pack harness from two part apoxie and lead foil straps, (you can source lead foil from the neck of an empty wine bottle).
Cajun
Thanks Terry those pics are great!
I actually got the parts for that from @Seanmcandrews so I wont have to scratchbuild it!
No I havent stopped the project, Im just working on a buncha parts at once and isnt very picture worthy. A example is I carved off the .50 ammo cans off the quad and will be replacing them as soon as my 1/35 .50 flexible ammo belt arrives.
I also stripped, repainted the wheels and removed some of the dried mud. In the end they will be treated with Danger Close S. E. Asia pigments.
Im also prepping the base for it. Not sure if it will be wood or the plastic one from my display case.
Would slightly stained wood look better?
Lovely work Ezra, and some very neat individual add ons. I have been watching all through the build and it was great watching it develop. I really like the M79 and how you opened it up. a very real realistic look to it now. Weathering and paint are really well done so you should be rightly chuffed with what you are doing and what you have achieved with it. Top marks kiddo 
This is coming along nicely
Just when I think I’m starting to get my act together I come into a thread like this…
Super excited to see this one finished Ezra.
1 Like
Thanks guys!
Weathering and paint are really well done so you should be rightly chuffed with what you are doing and what you have achieved with it.
Same goes for you Striker build John!
2 Likes
Ezra, did you ever finish this one? It was coming along great, then nothing.
not seen Ezra, Don @Canmedic or Dennis @DennisatAutoloader for ages …
3 Likes
He’s discovered girls. ![]()
![]()
4 Likes
2 Likes
Then he is lost into the Abyss lol …
3 Likes