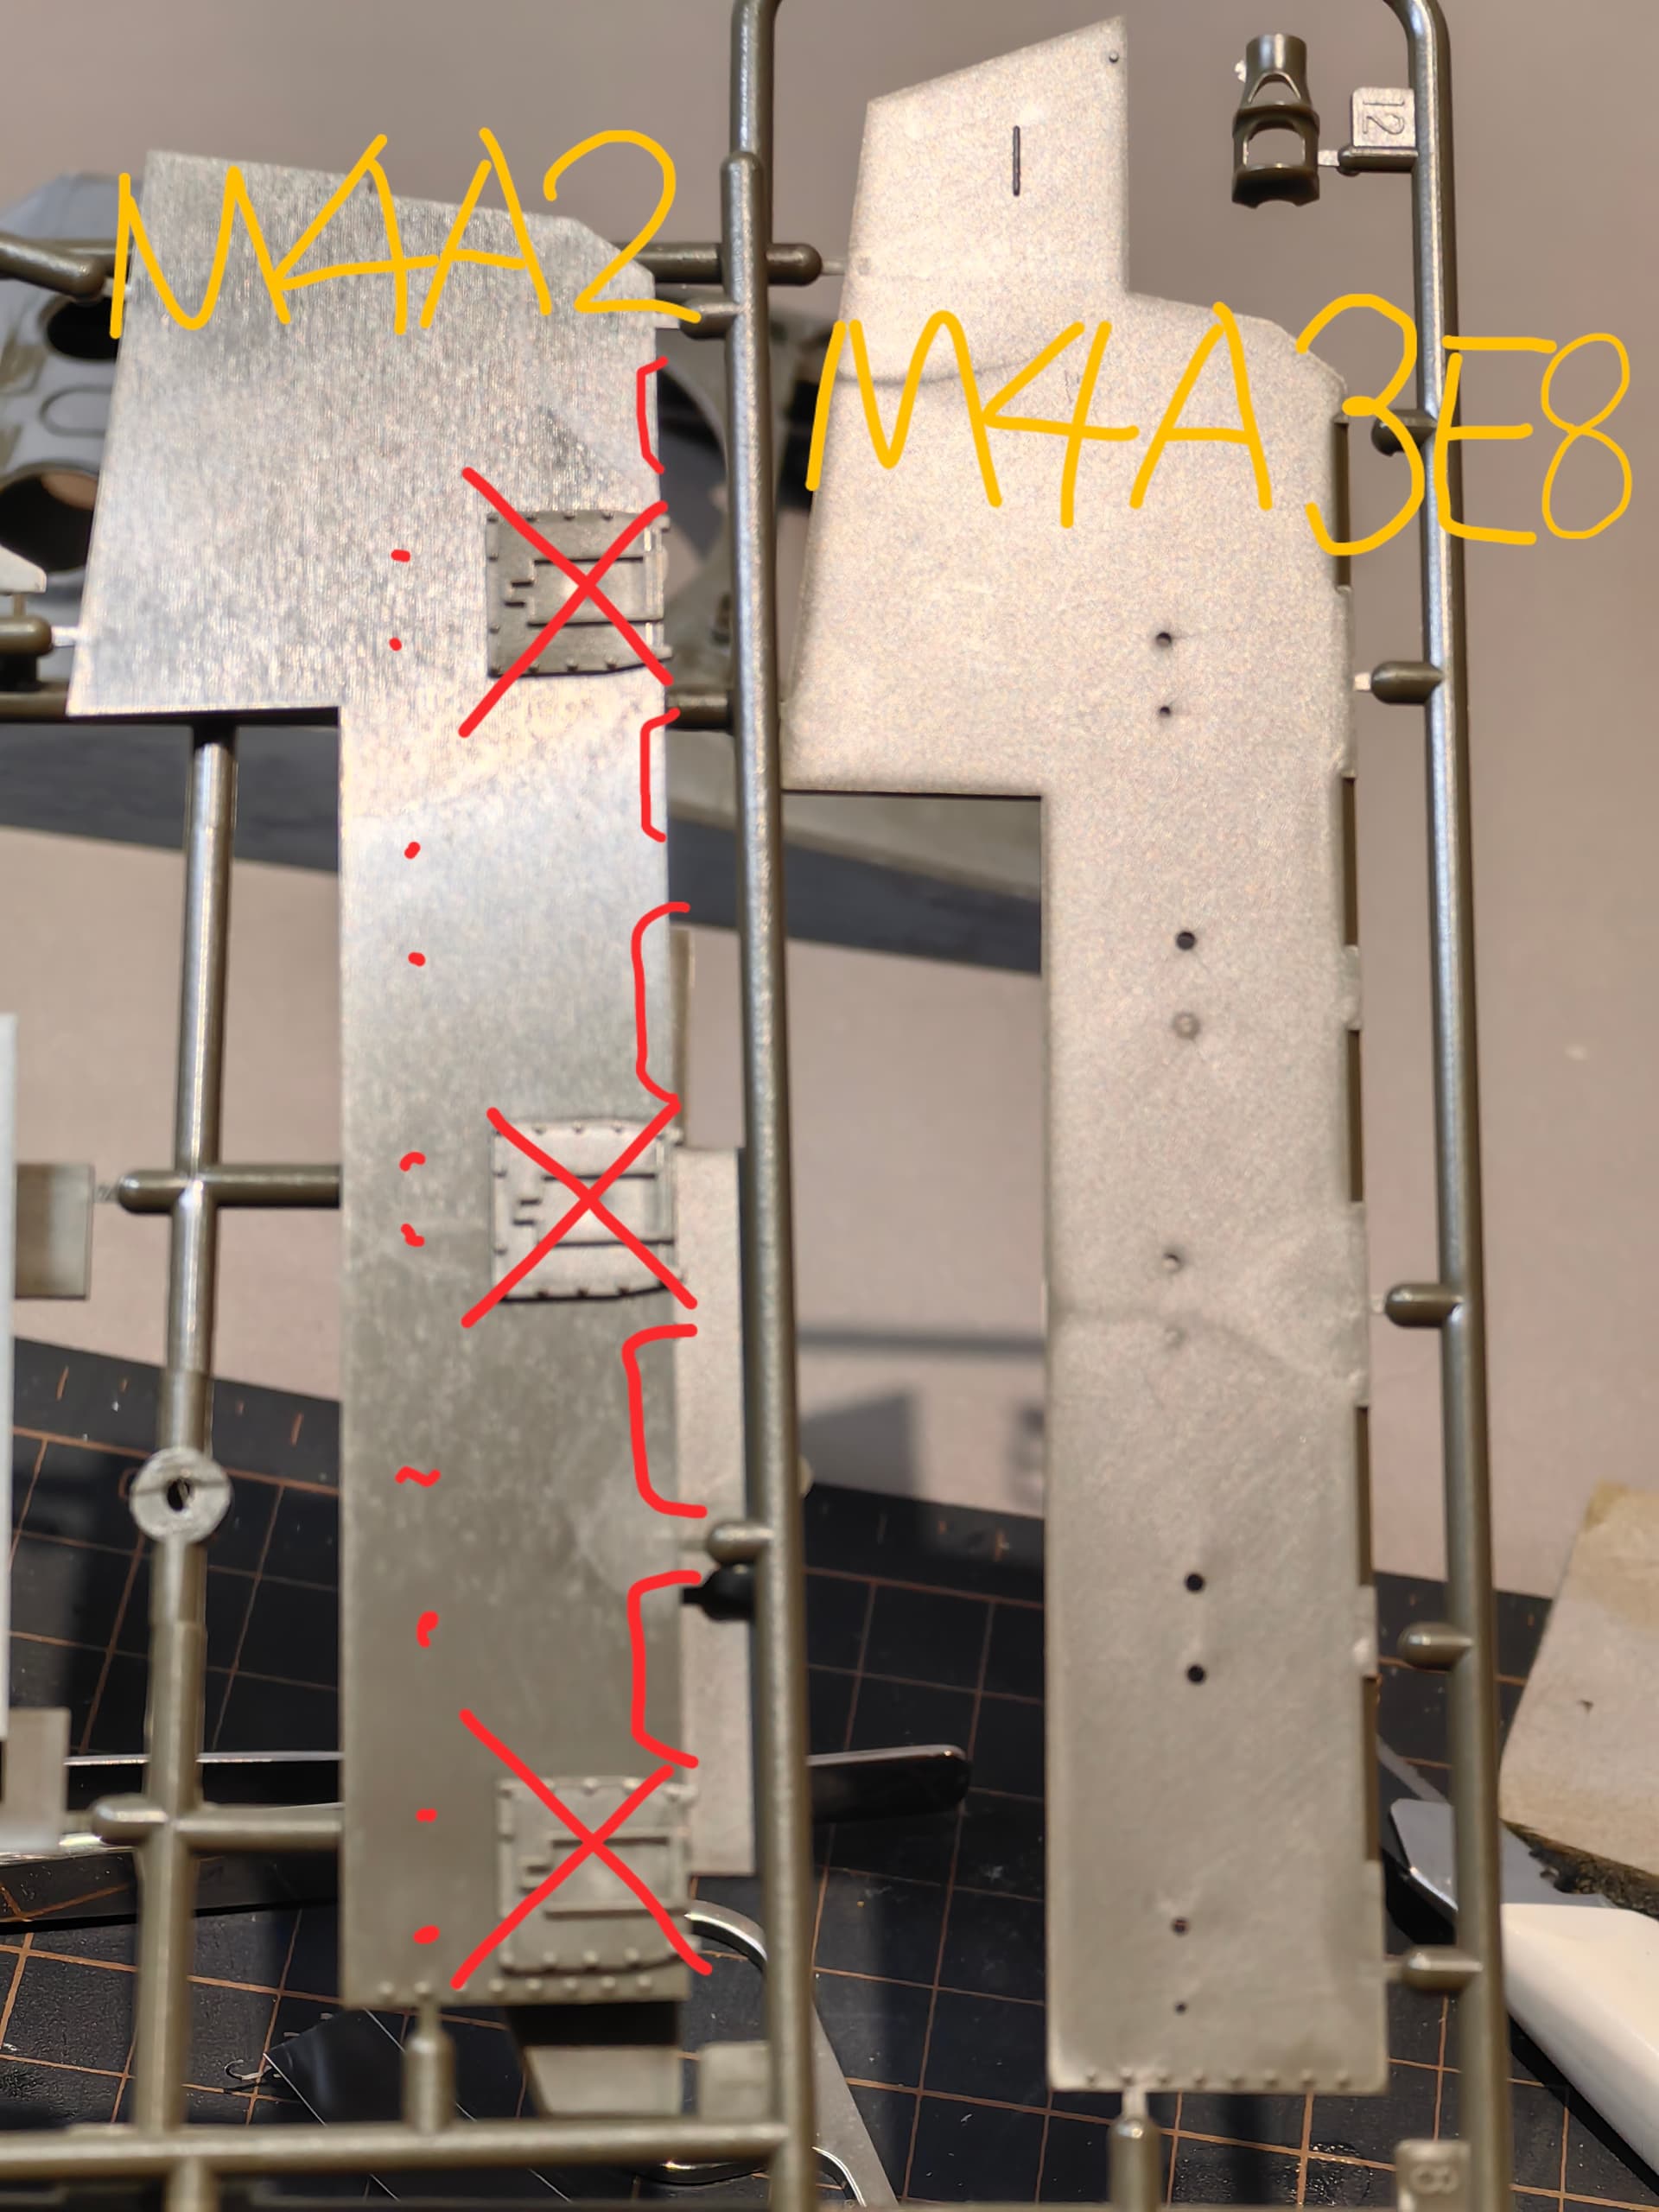
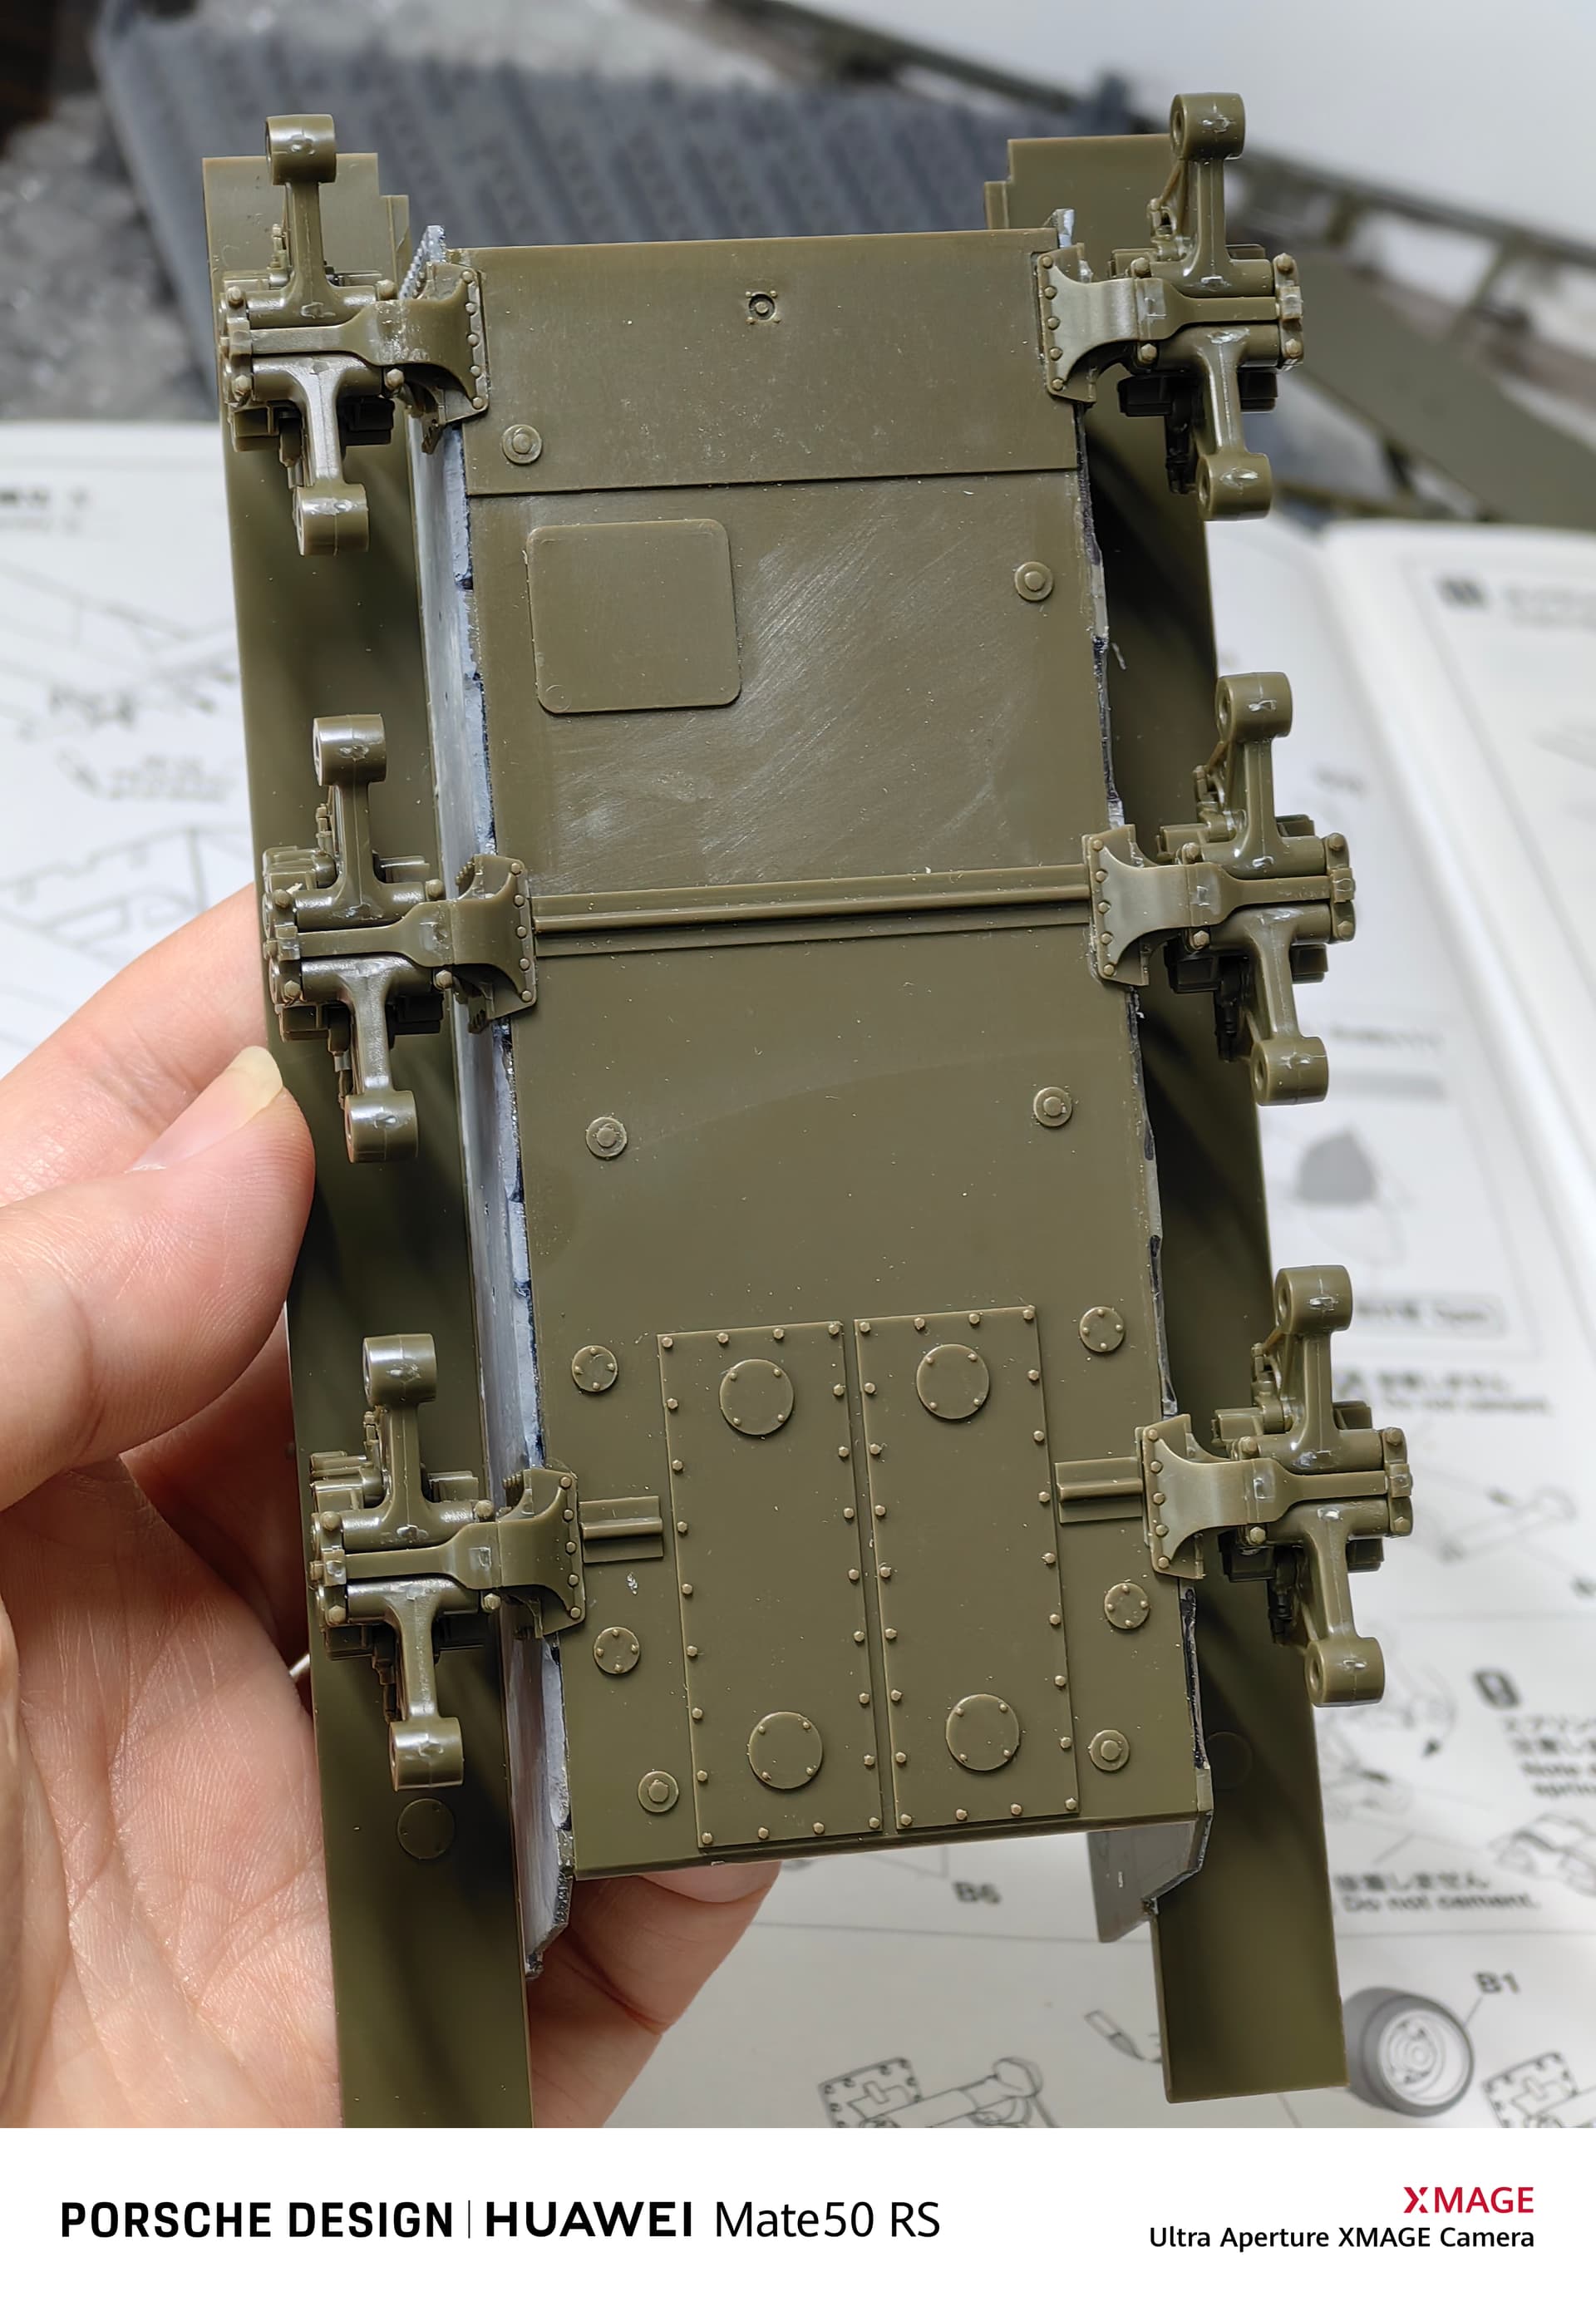
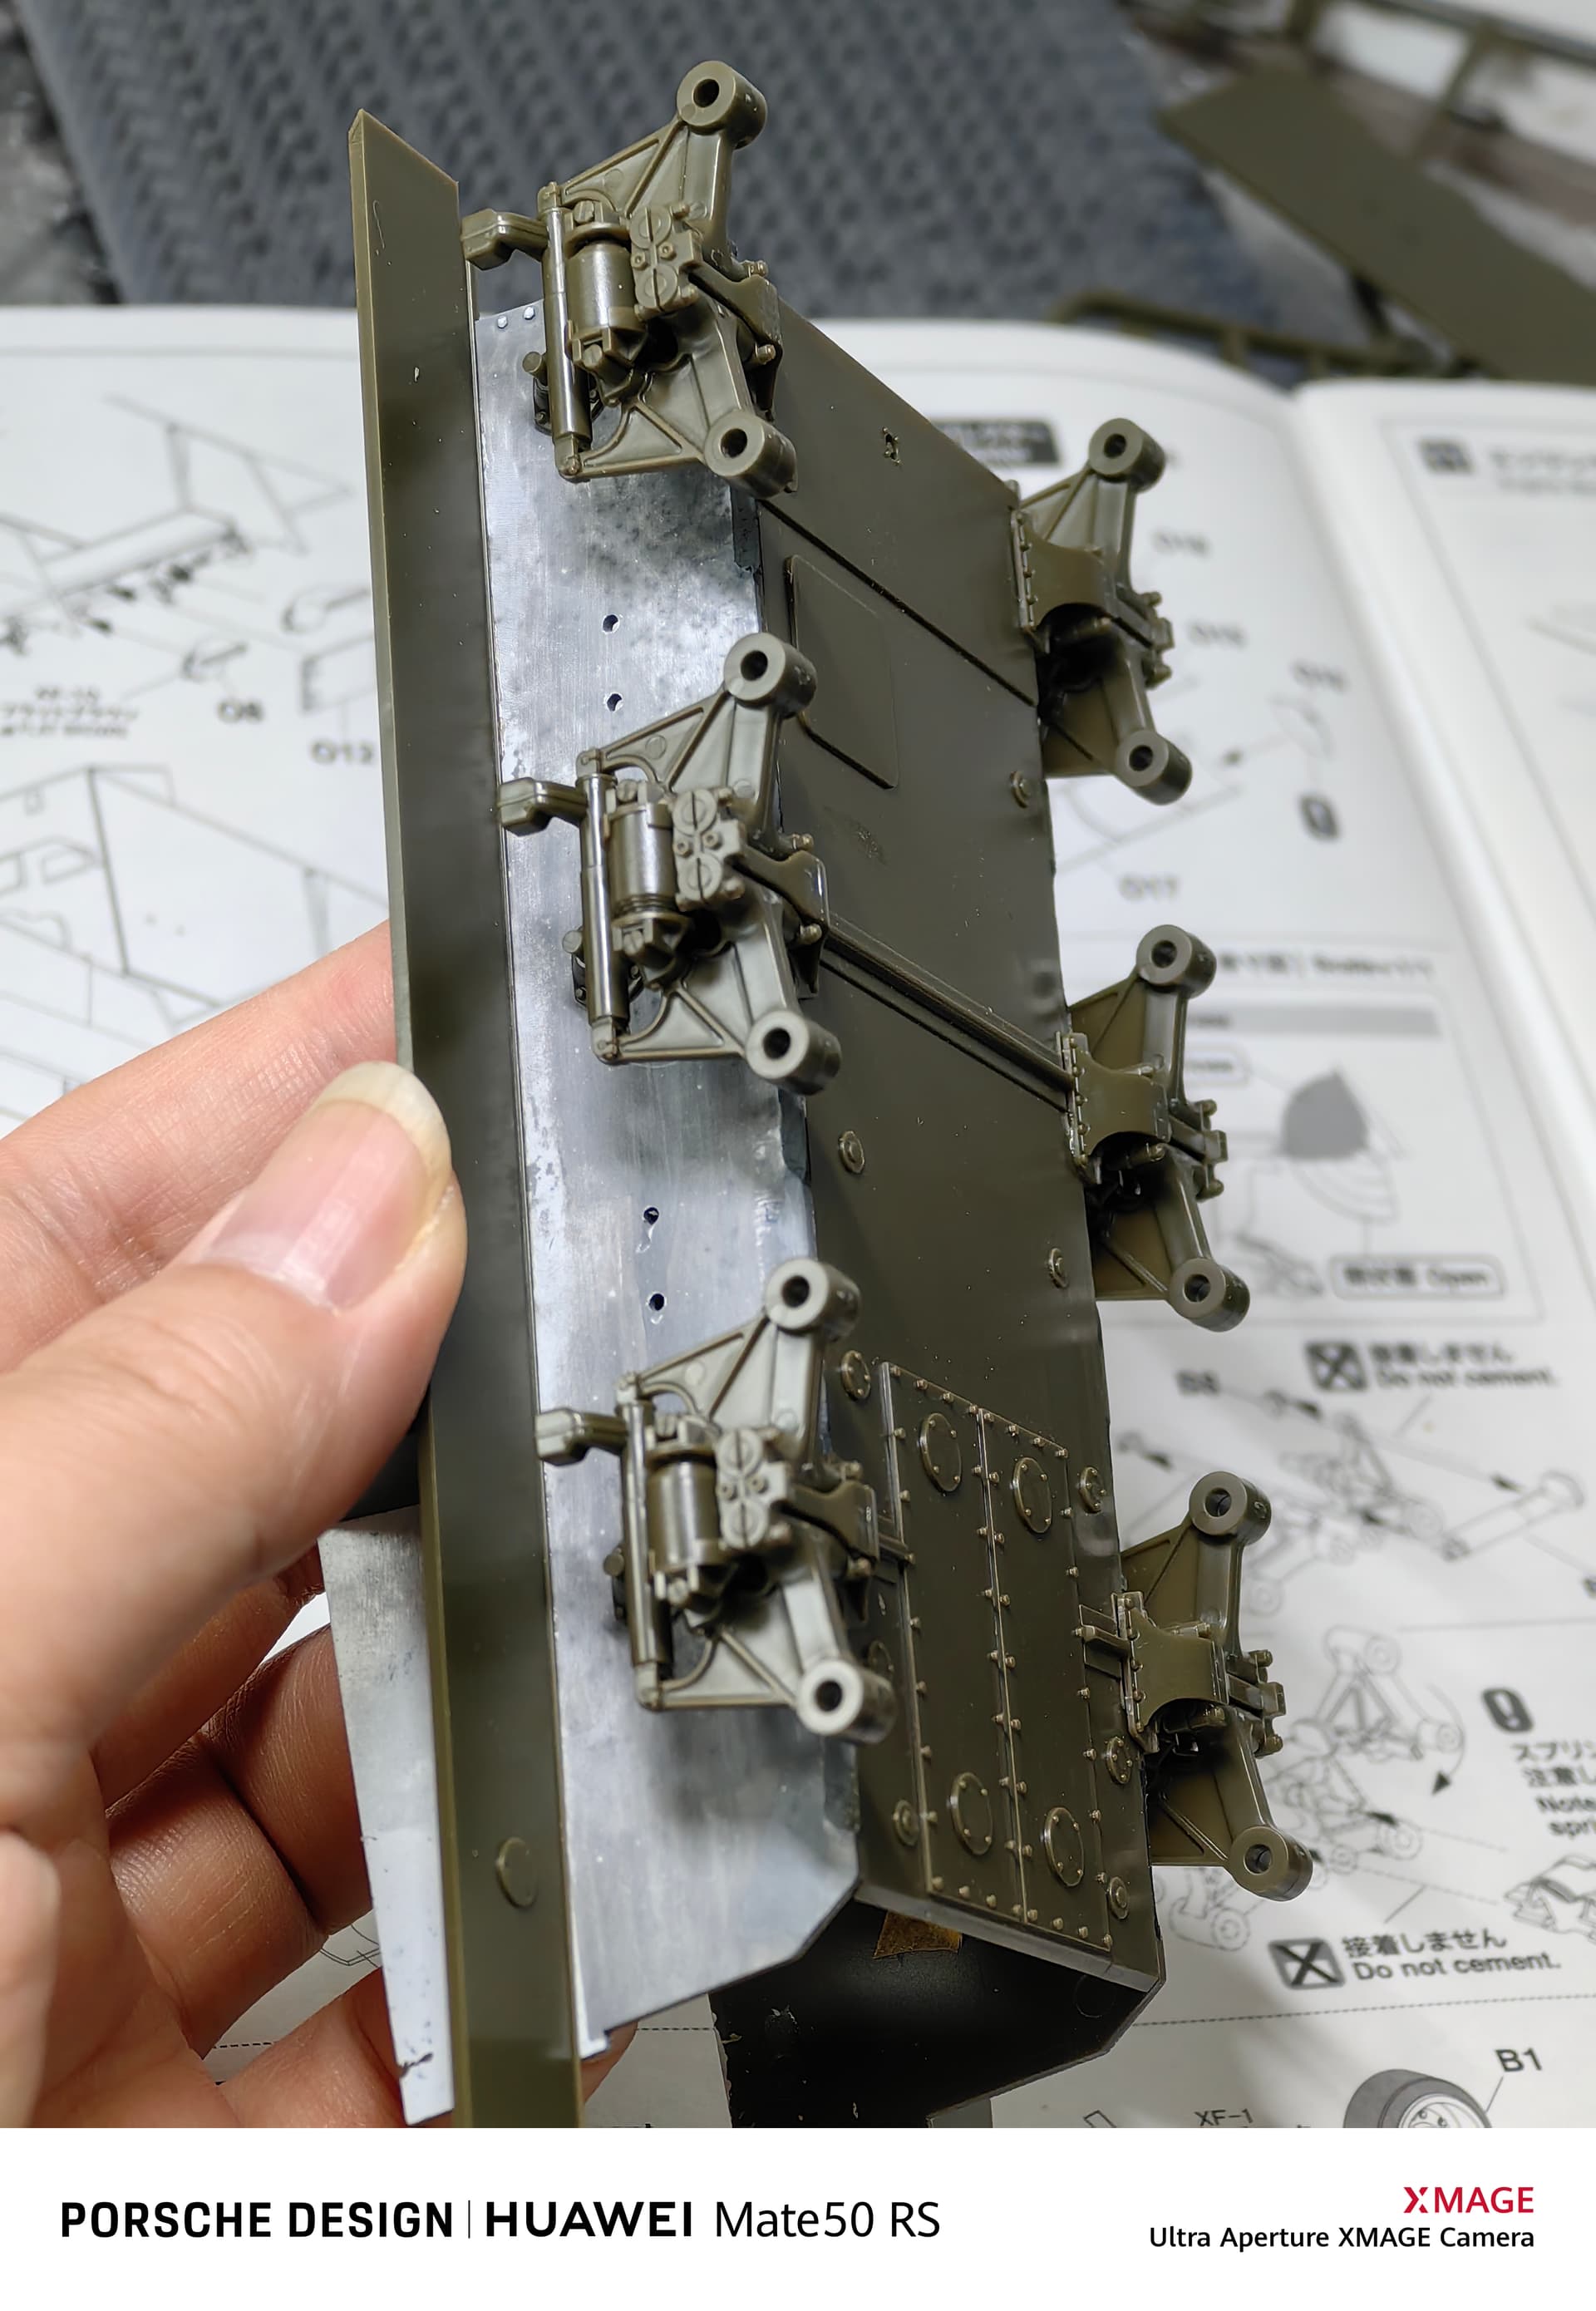
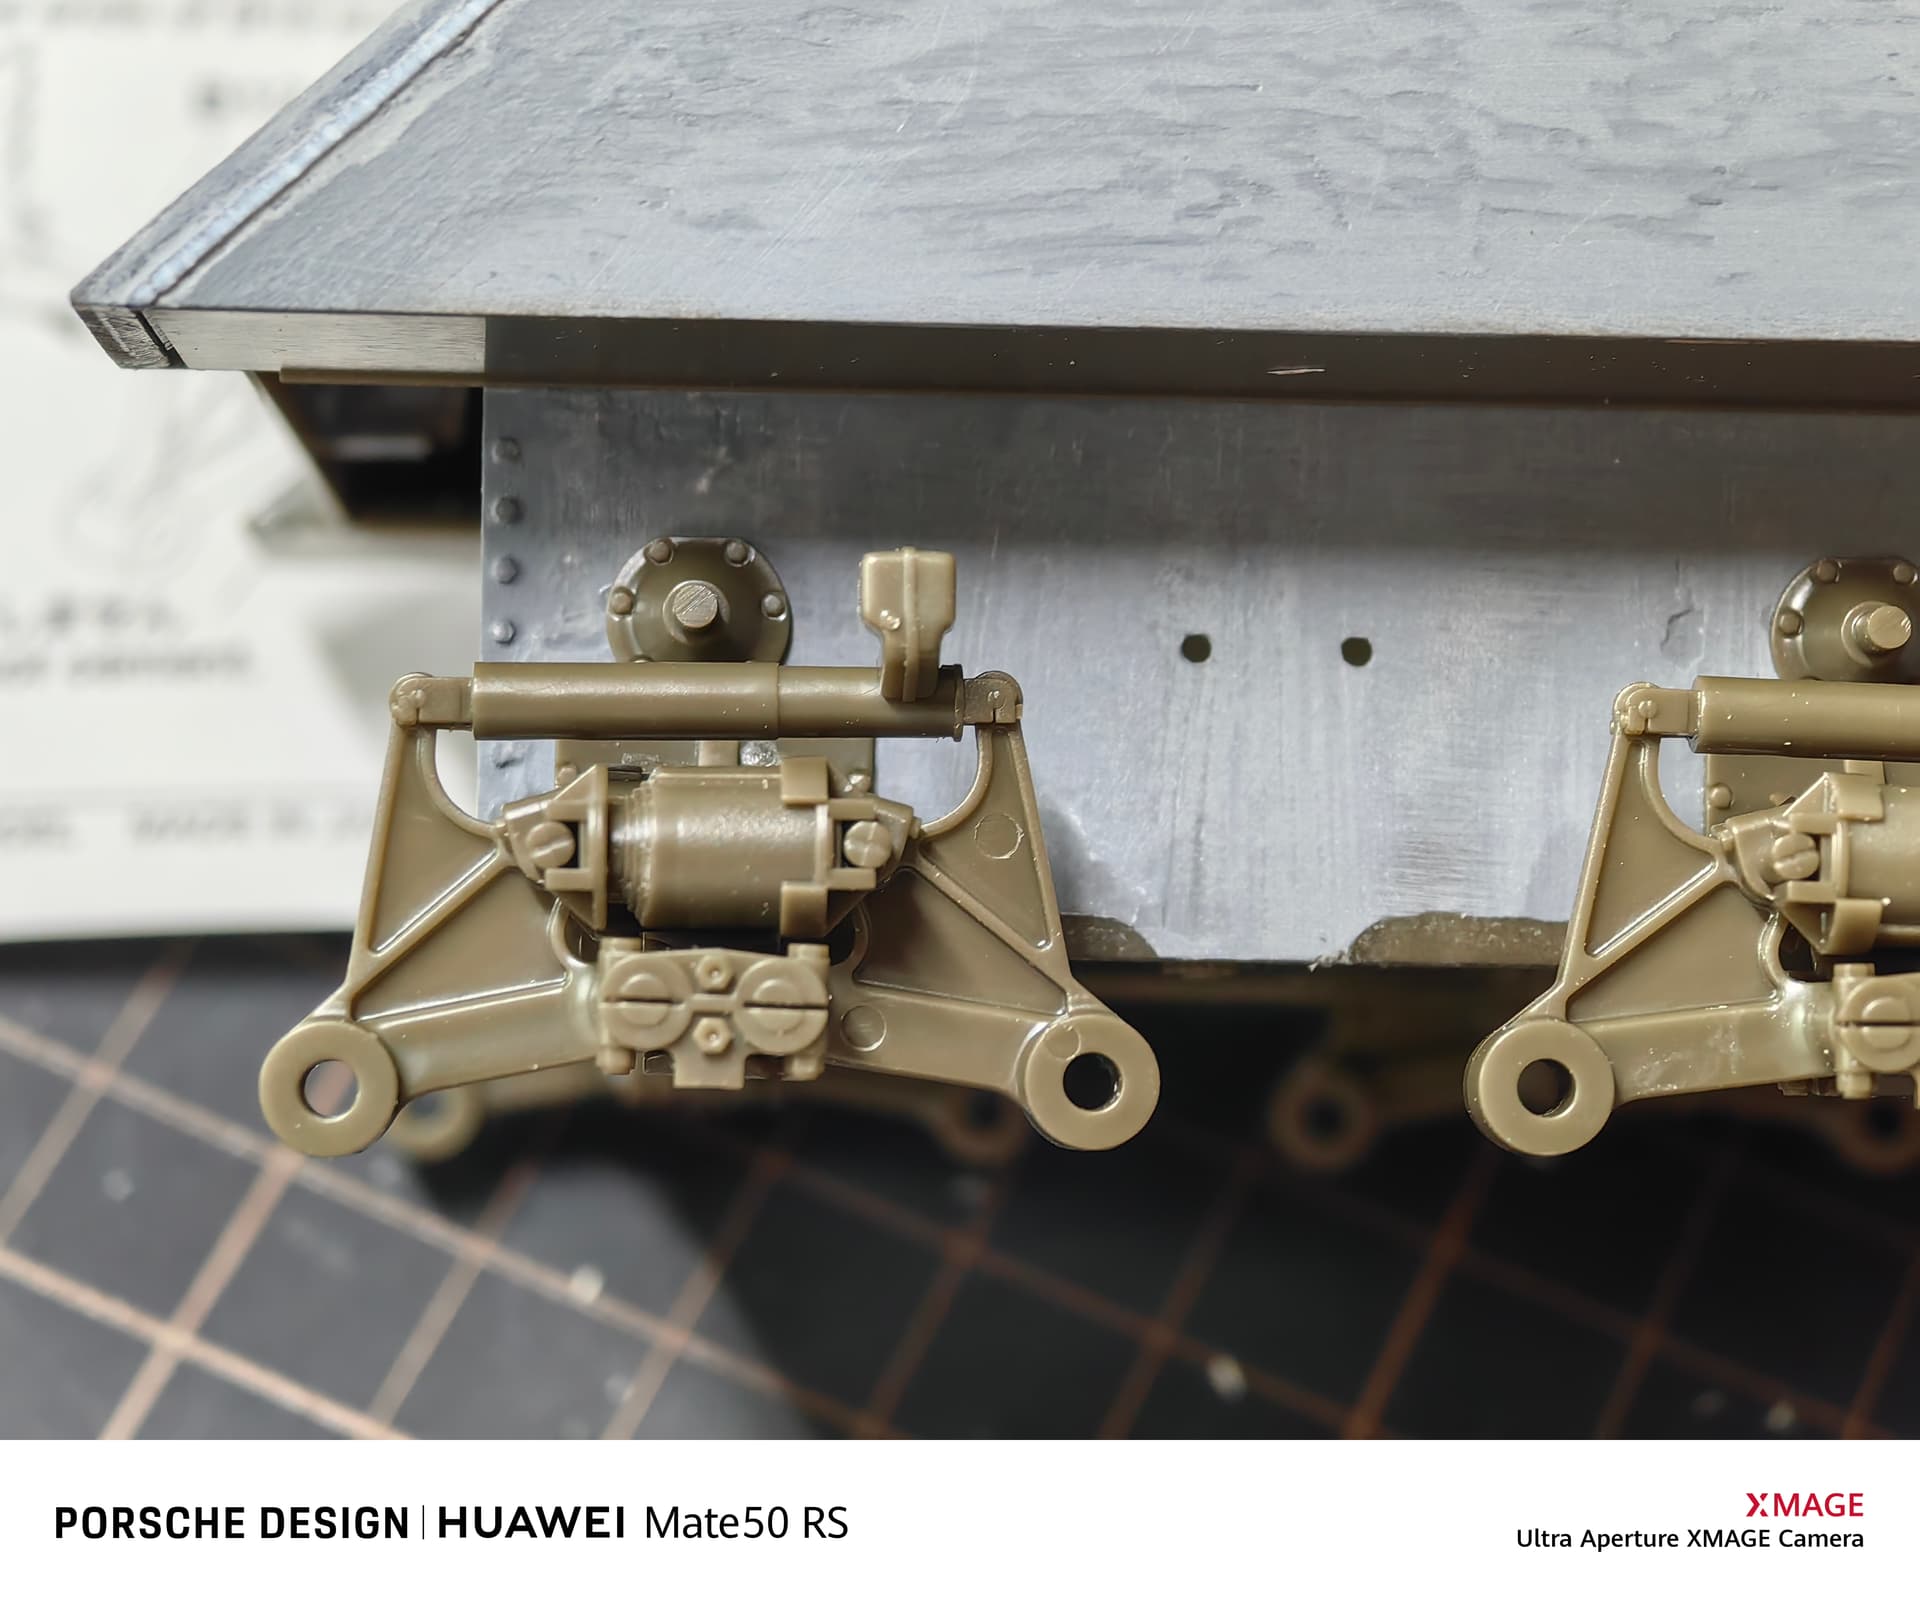
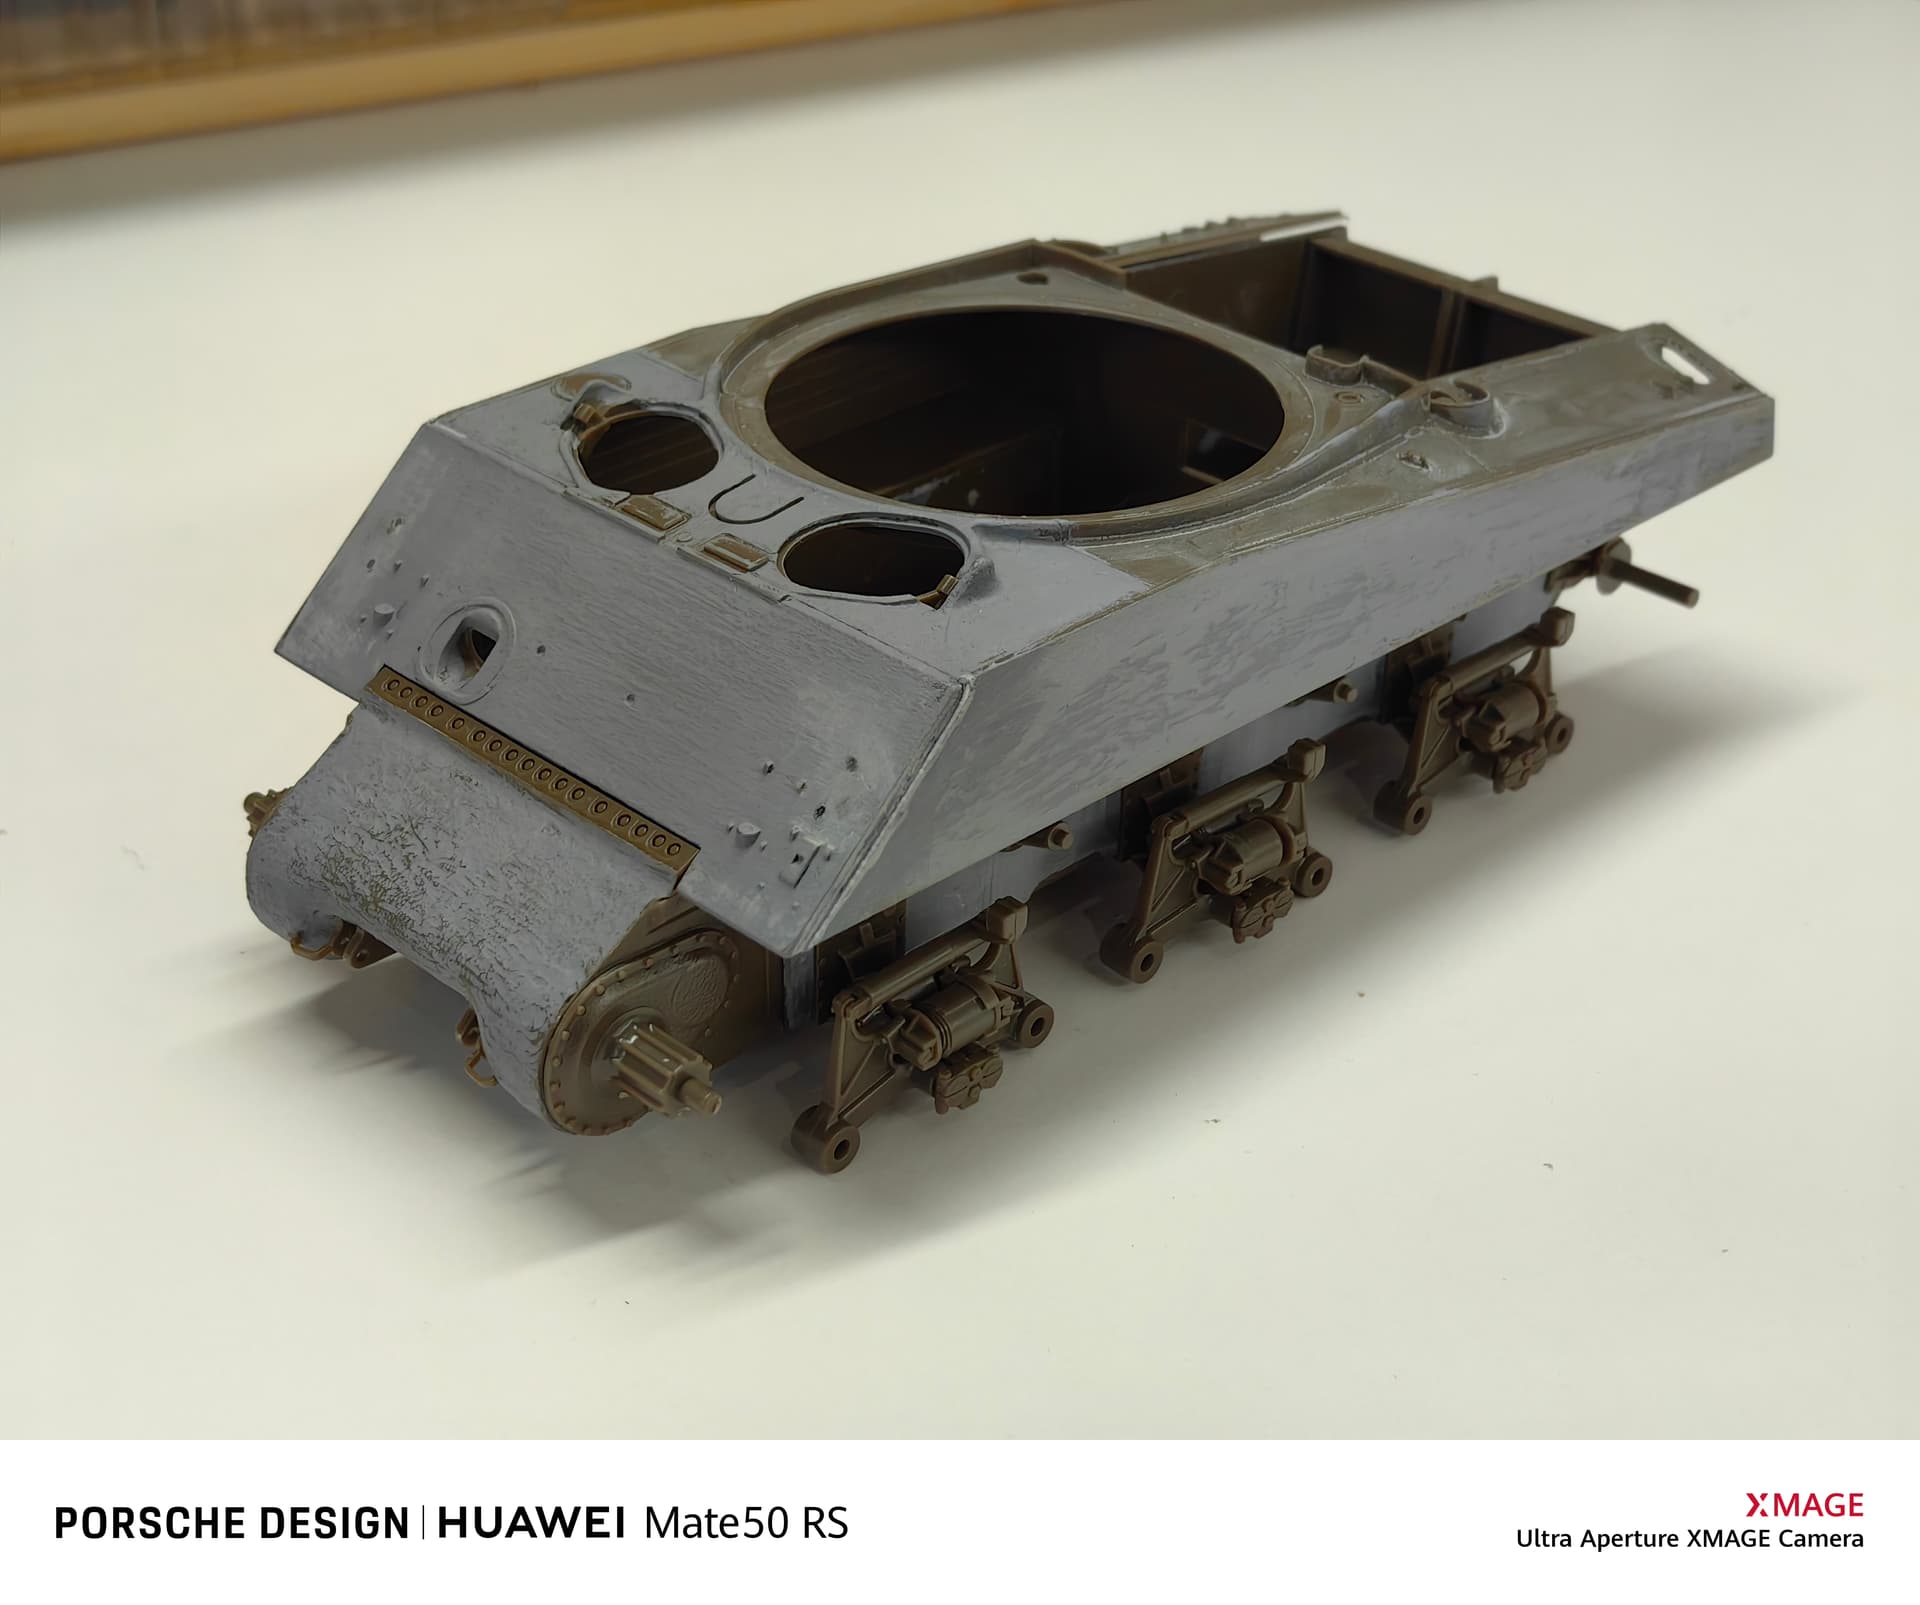
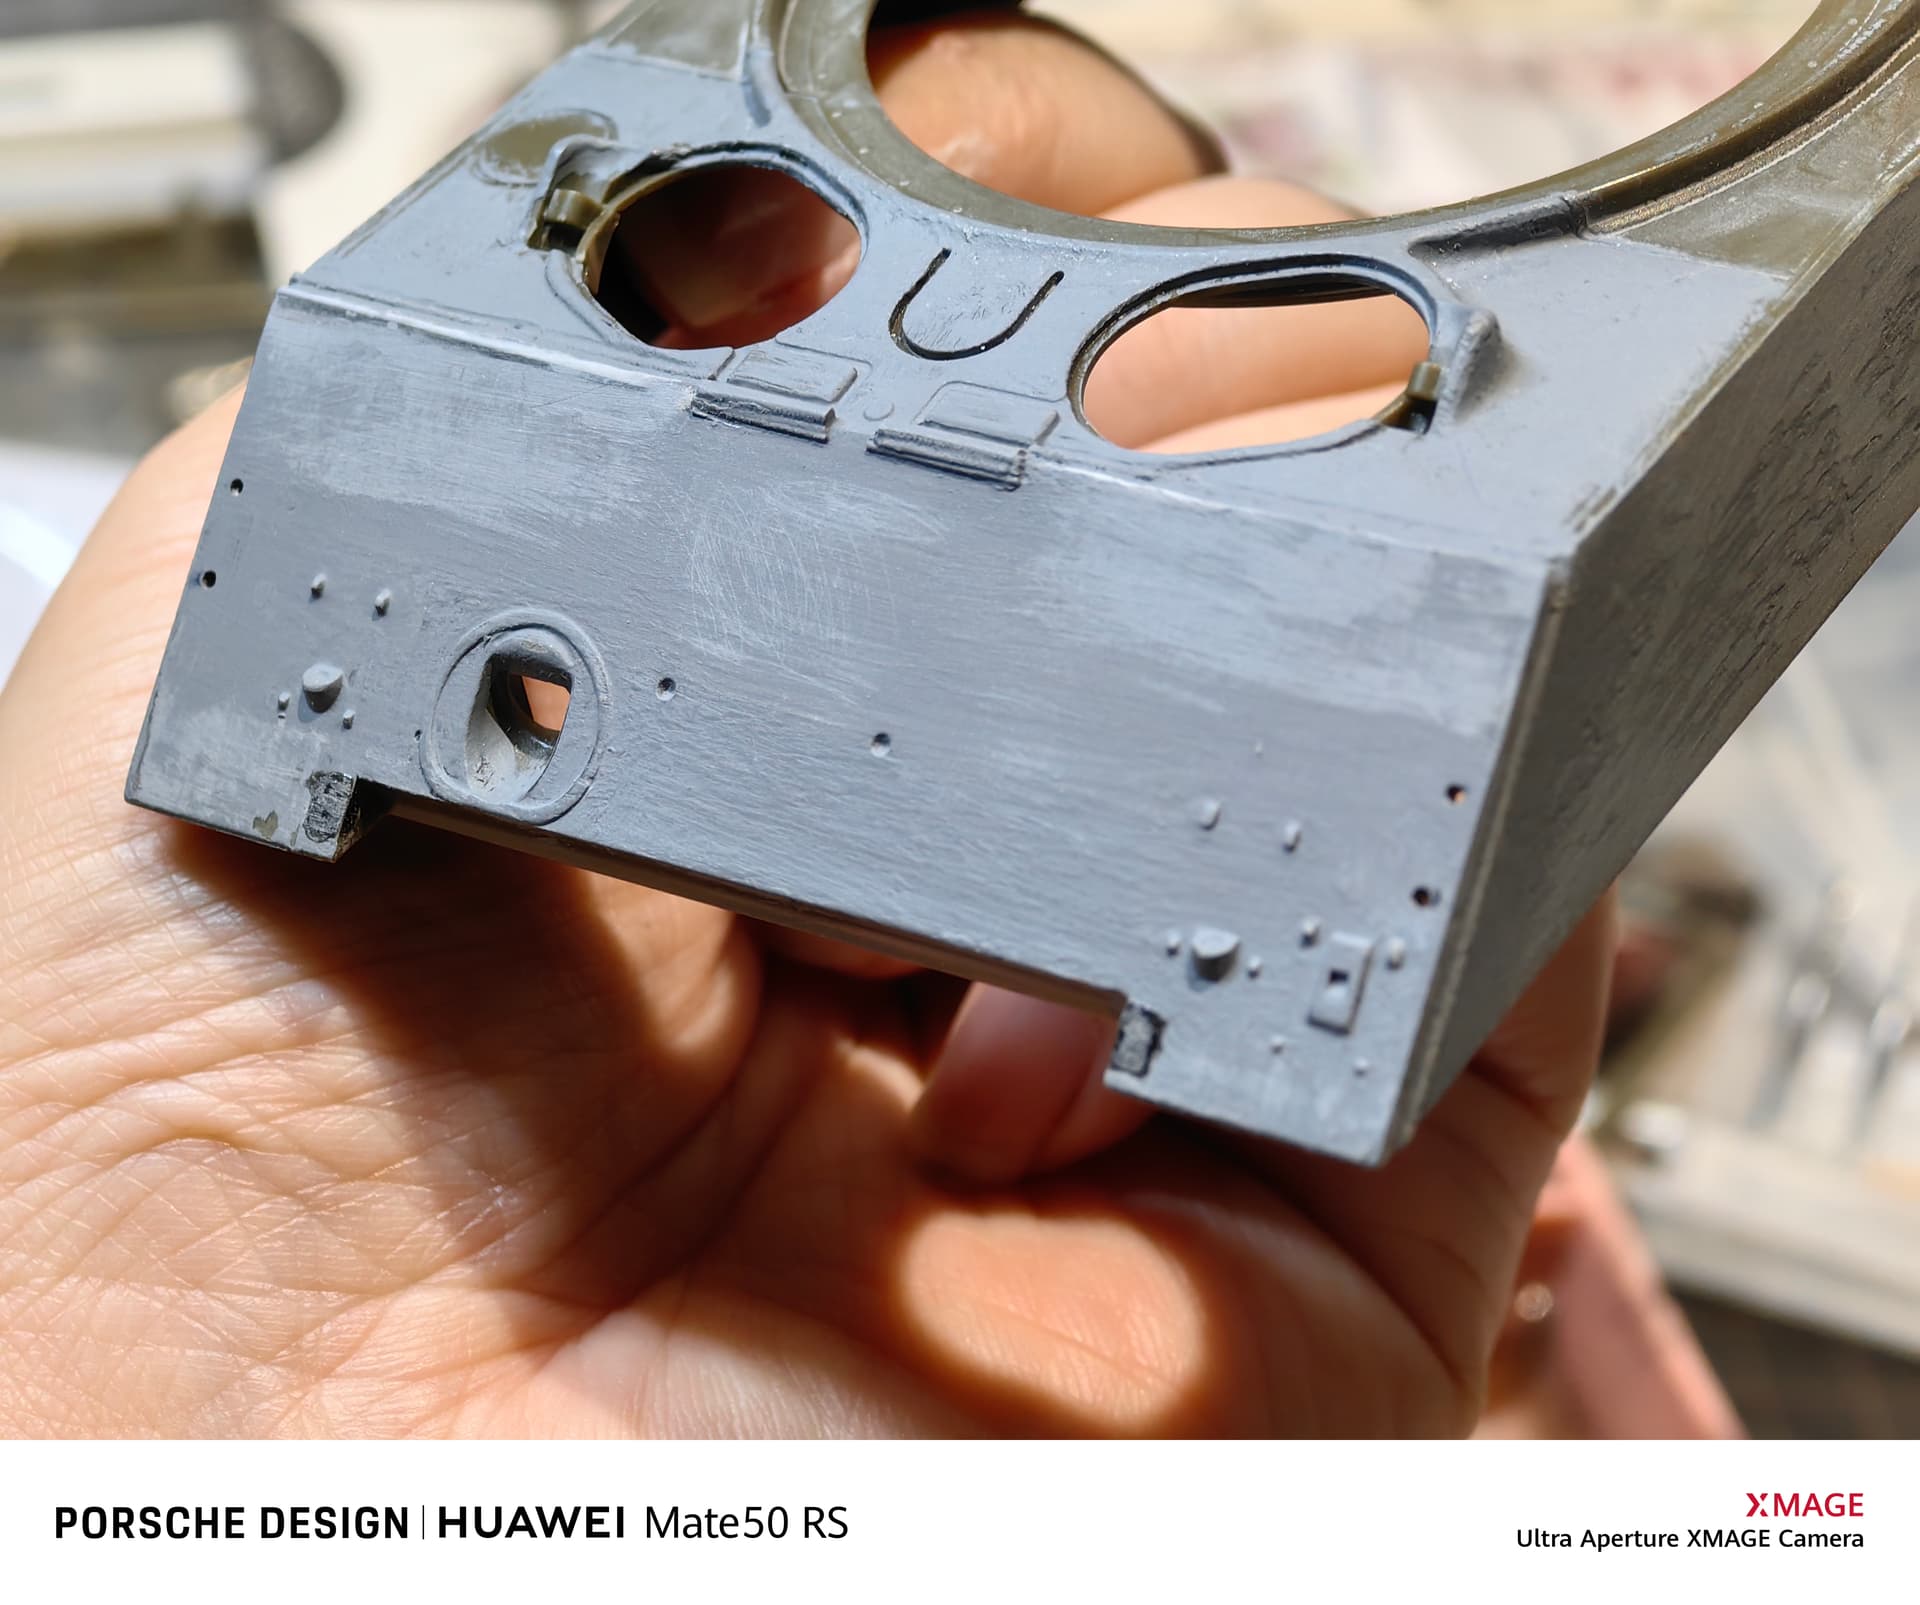
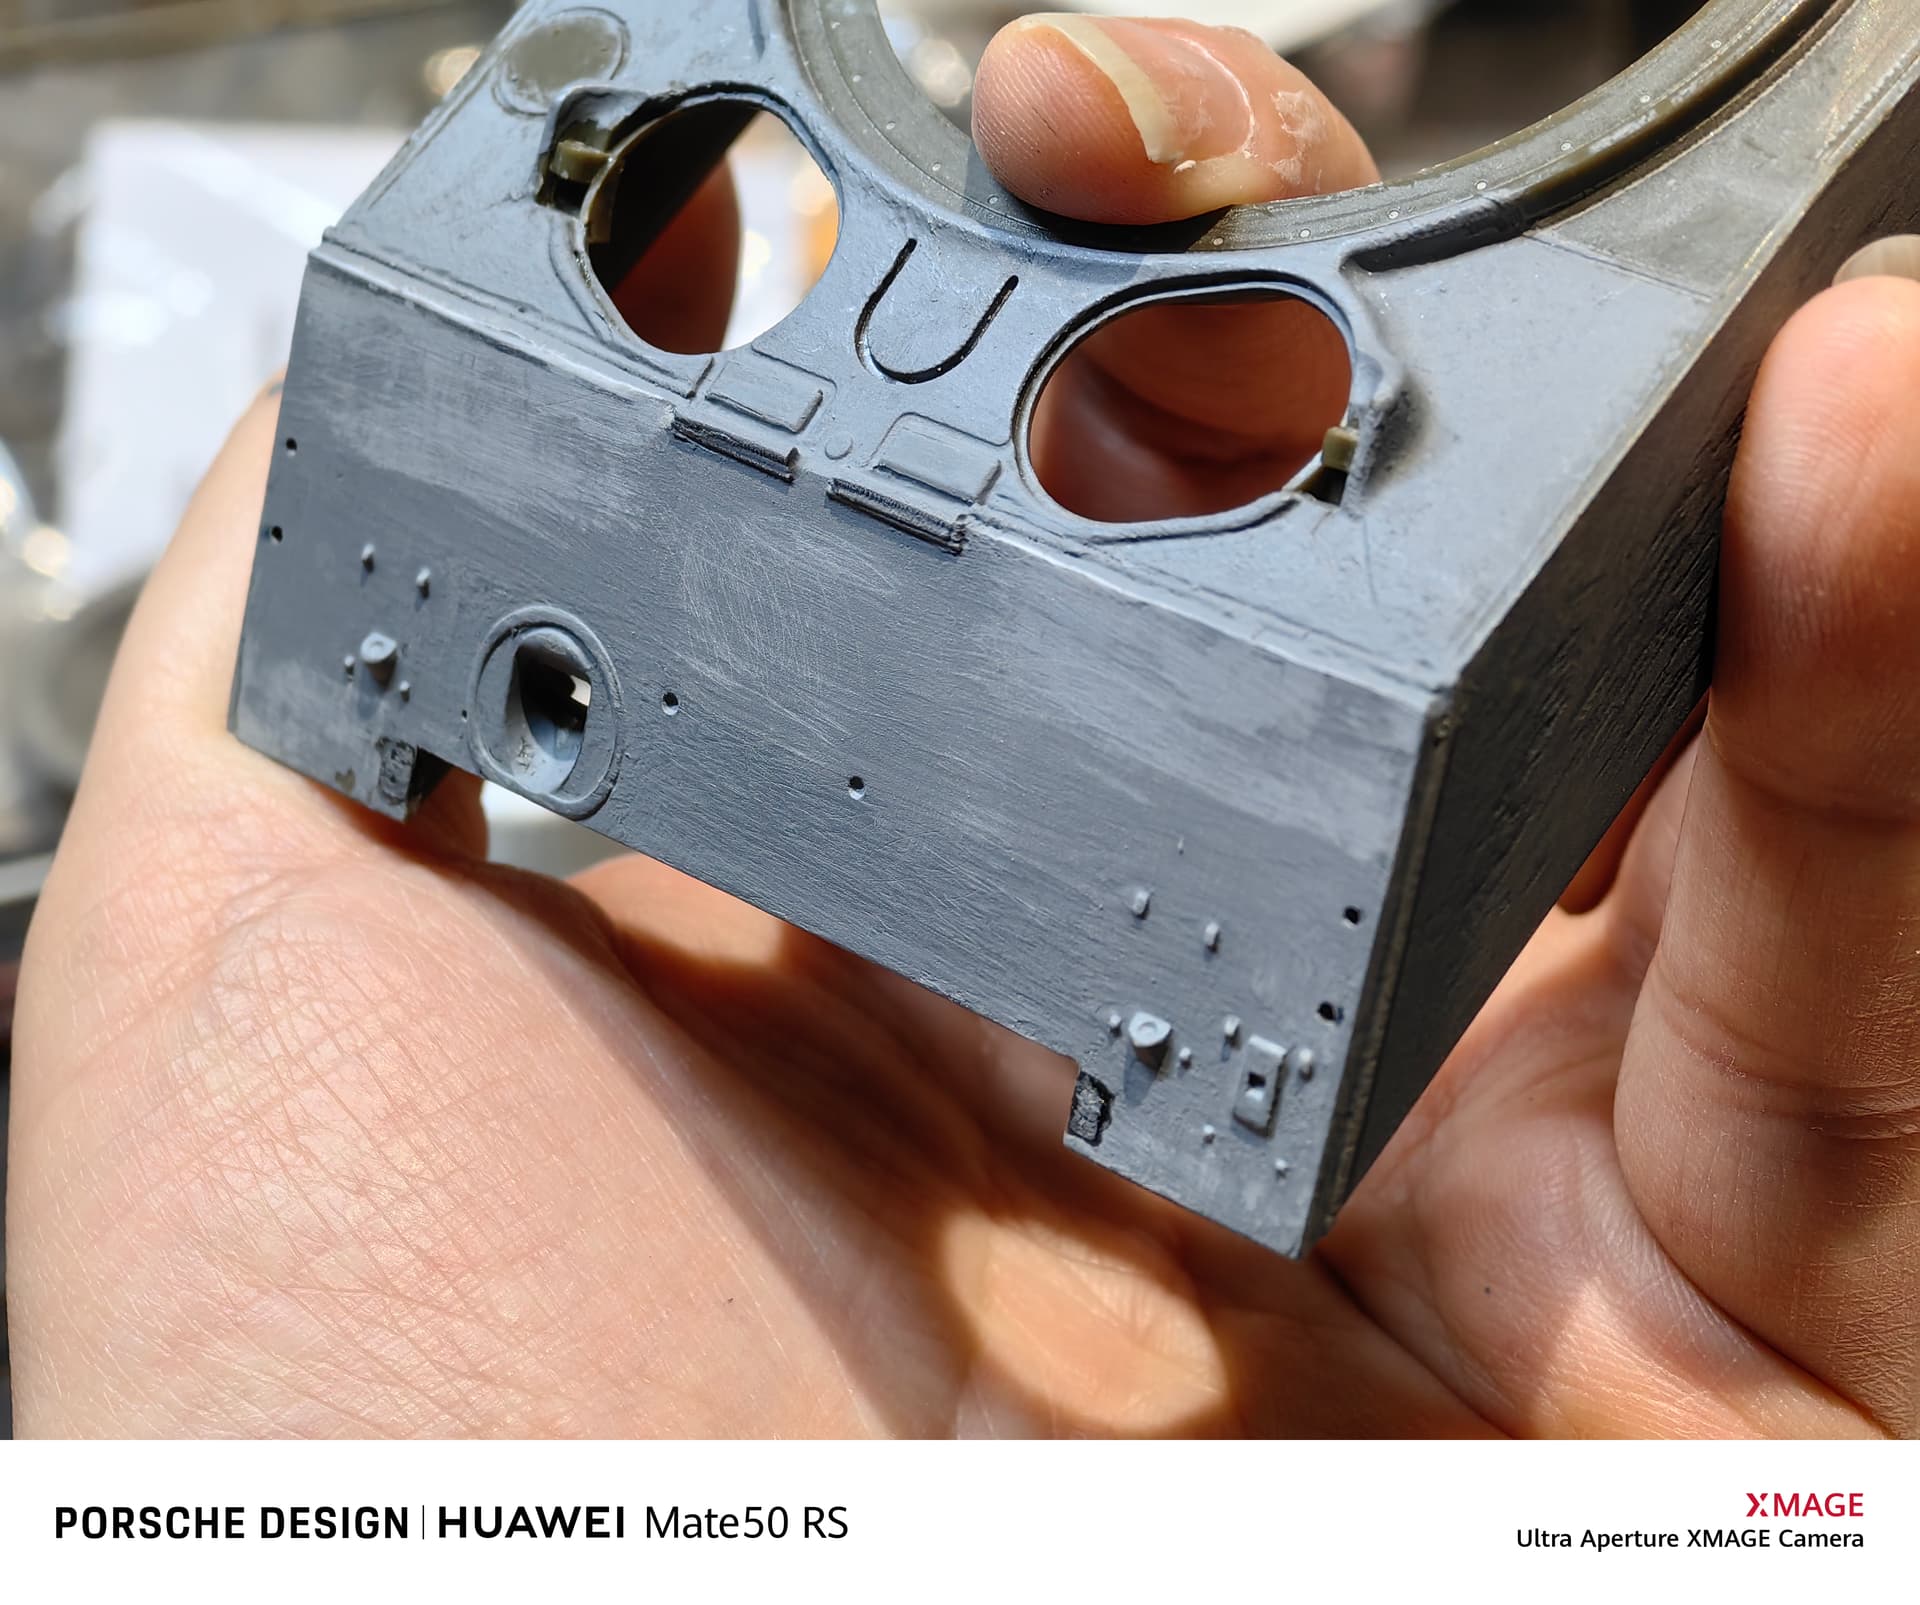
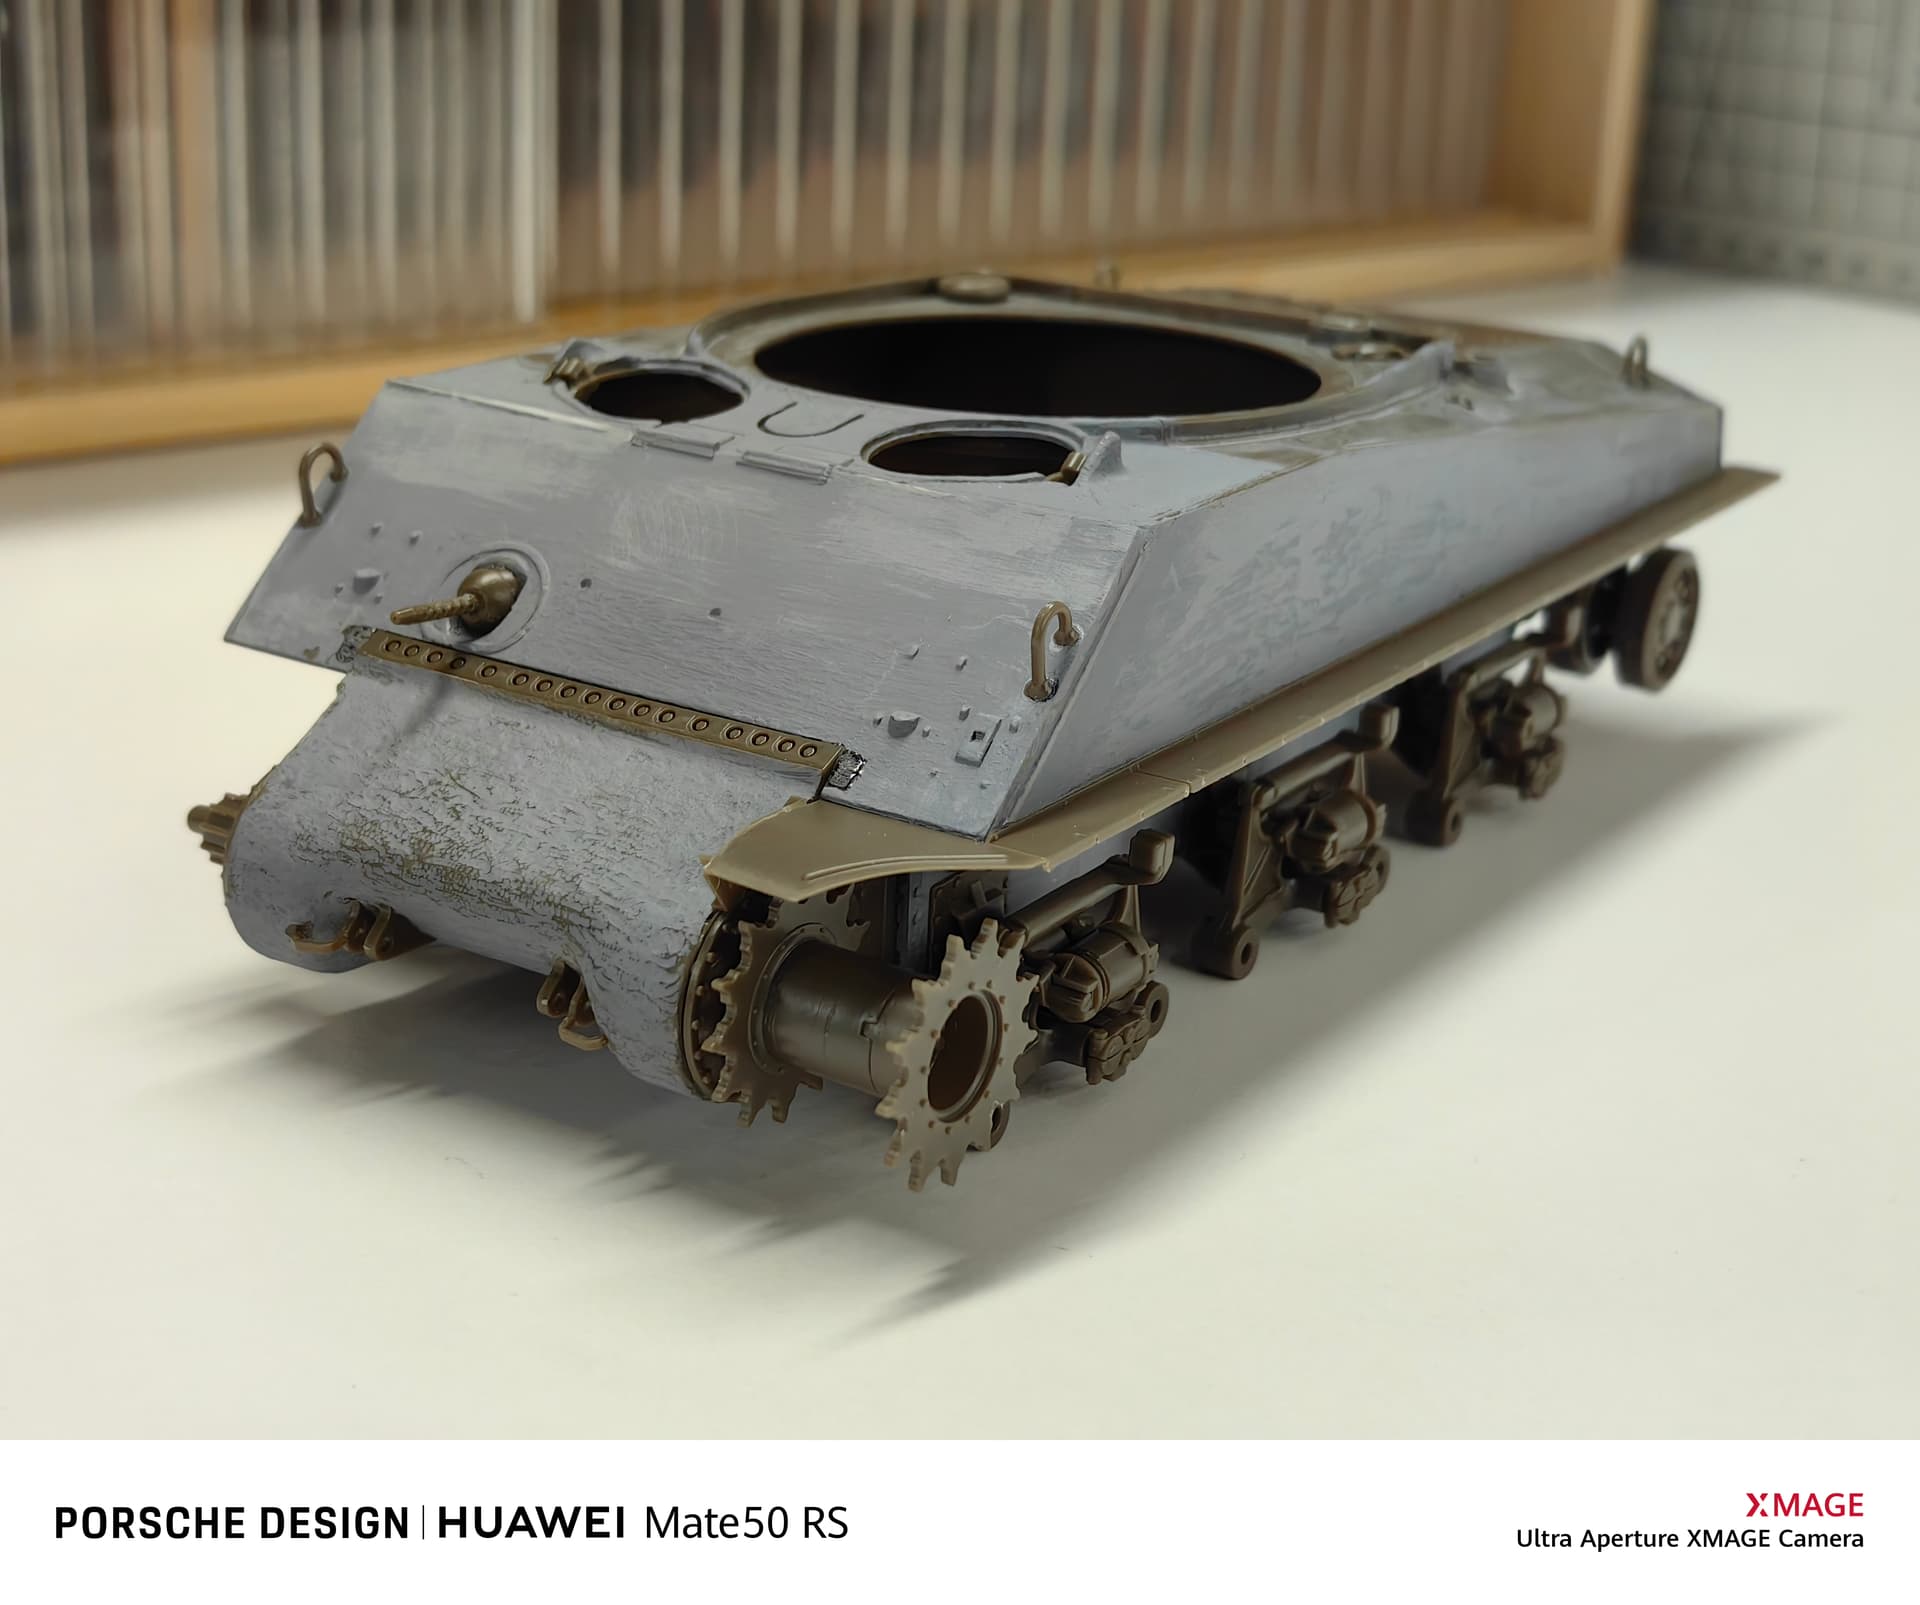
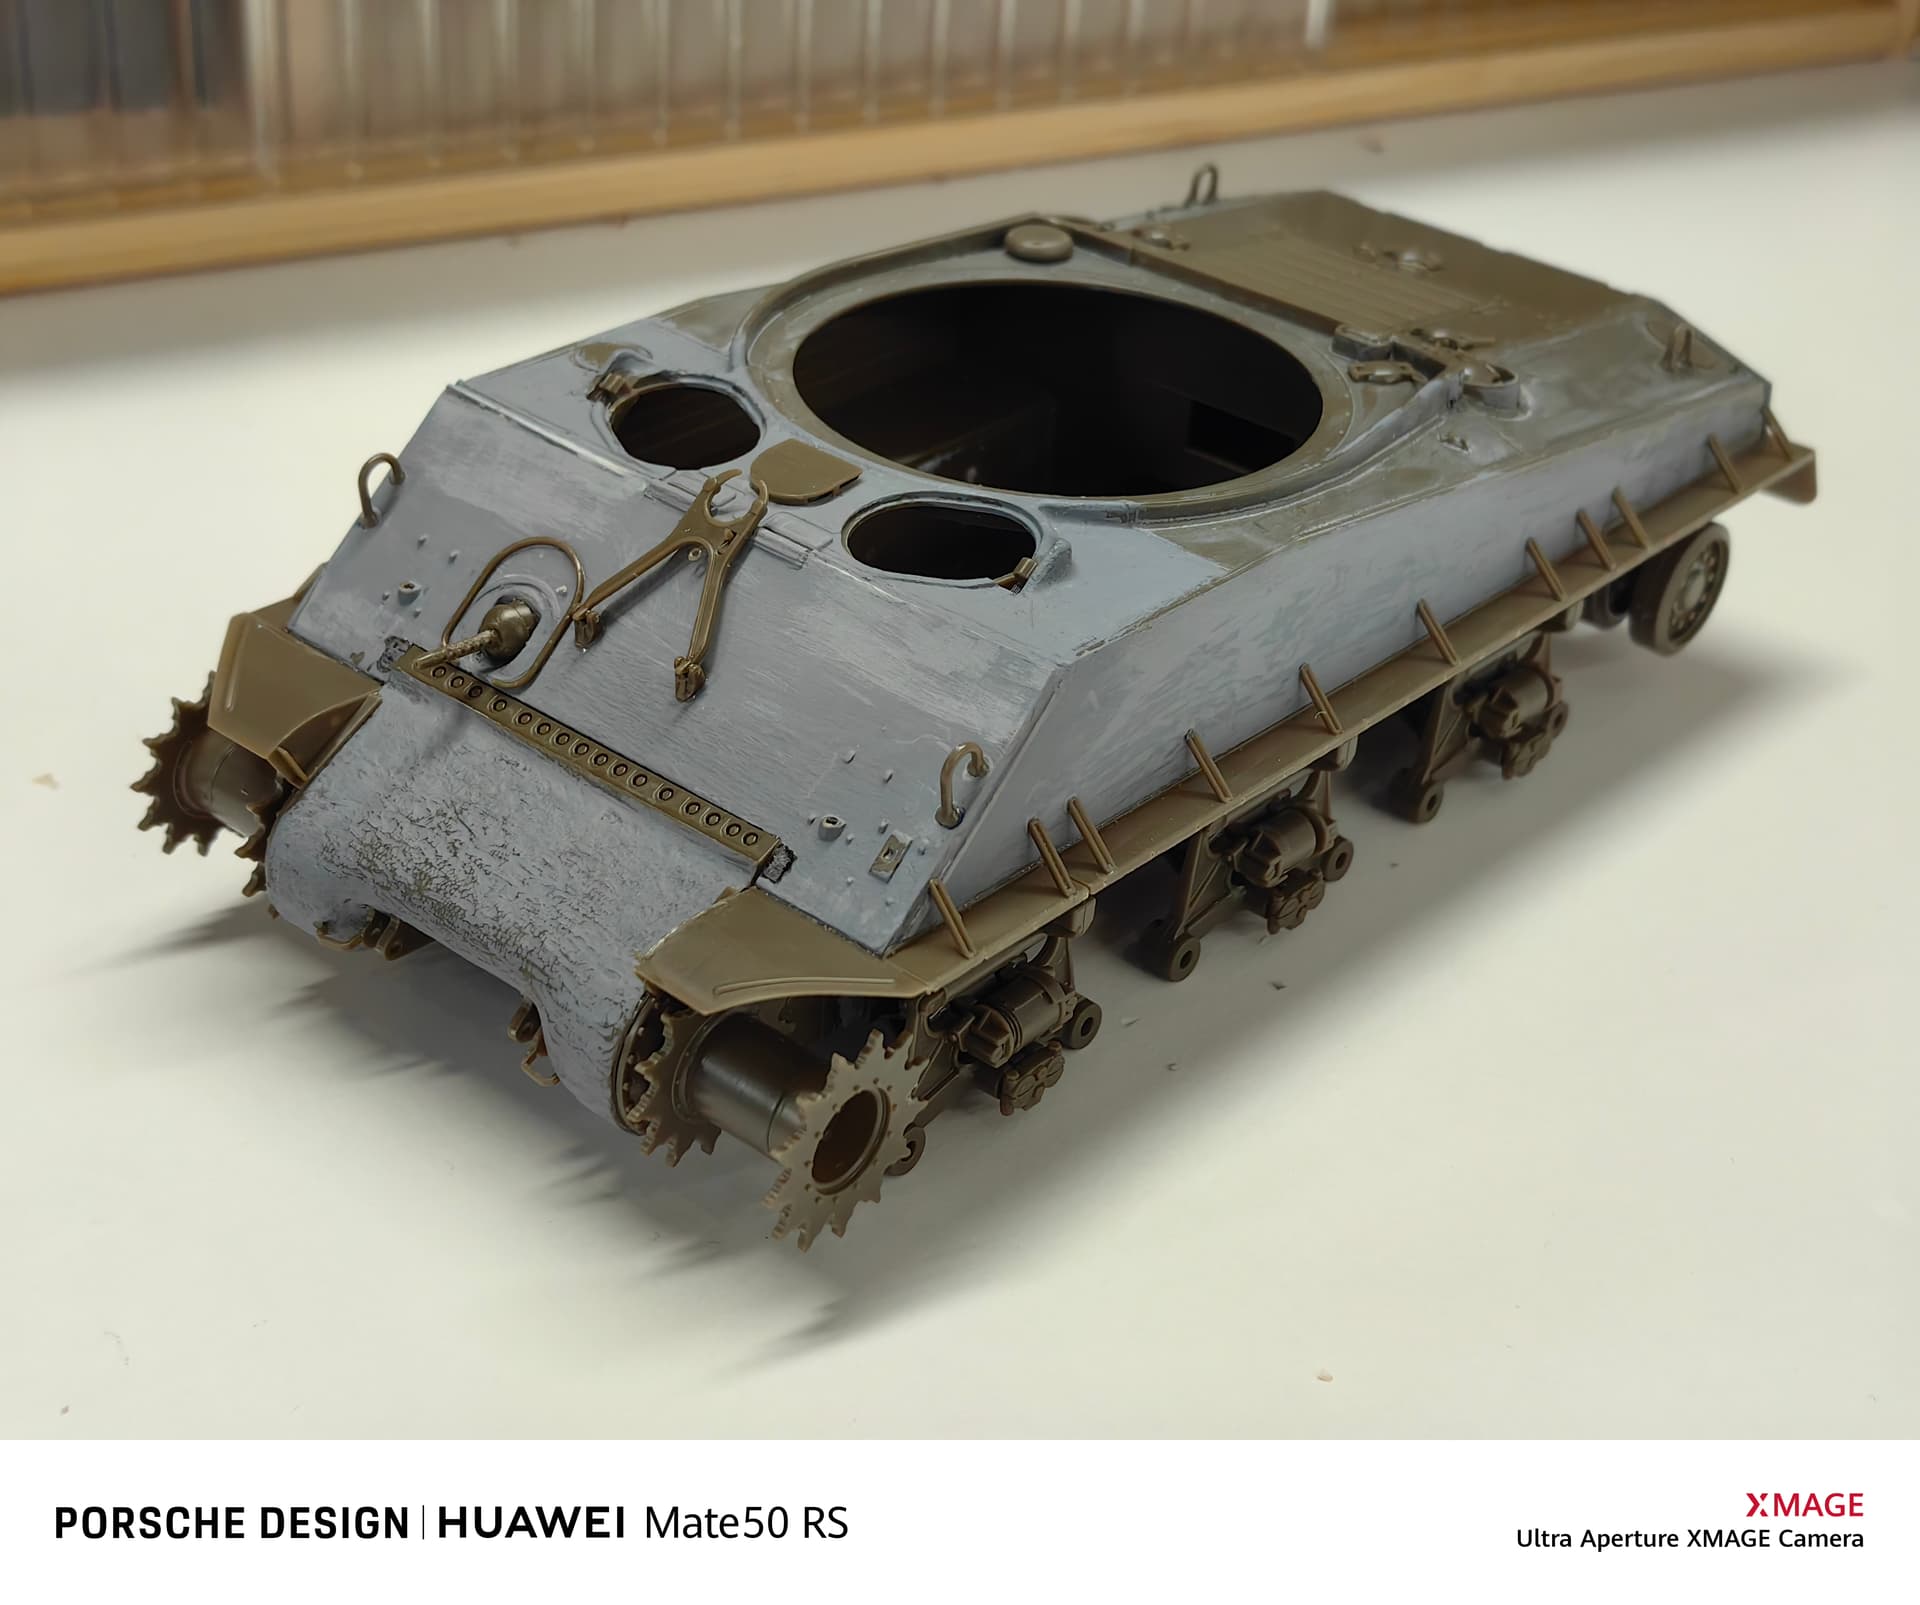
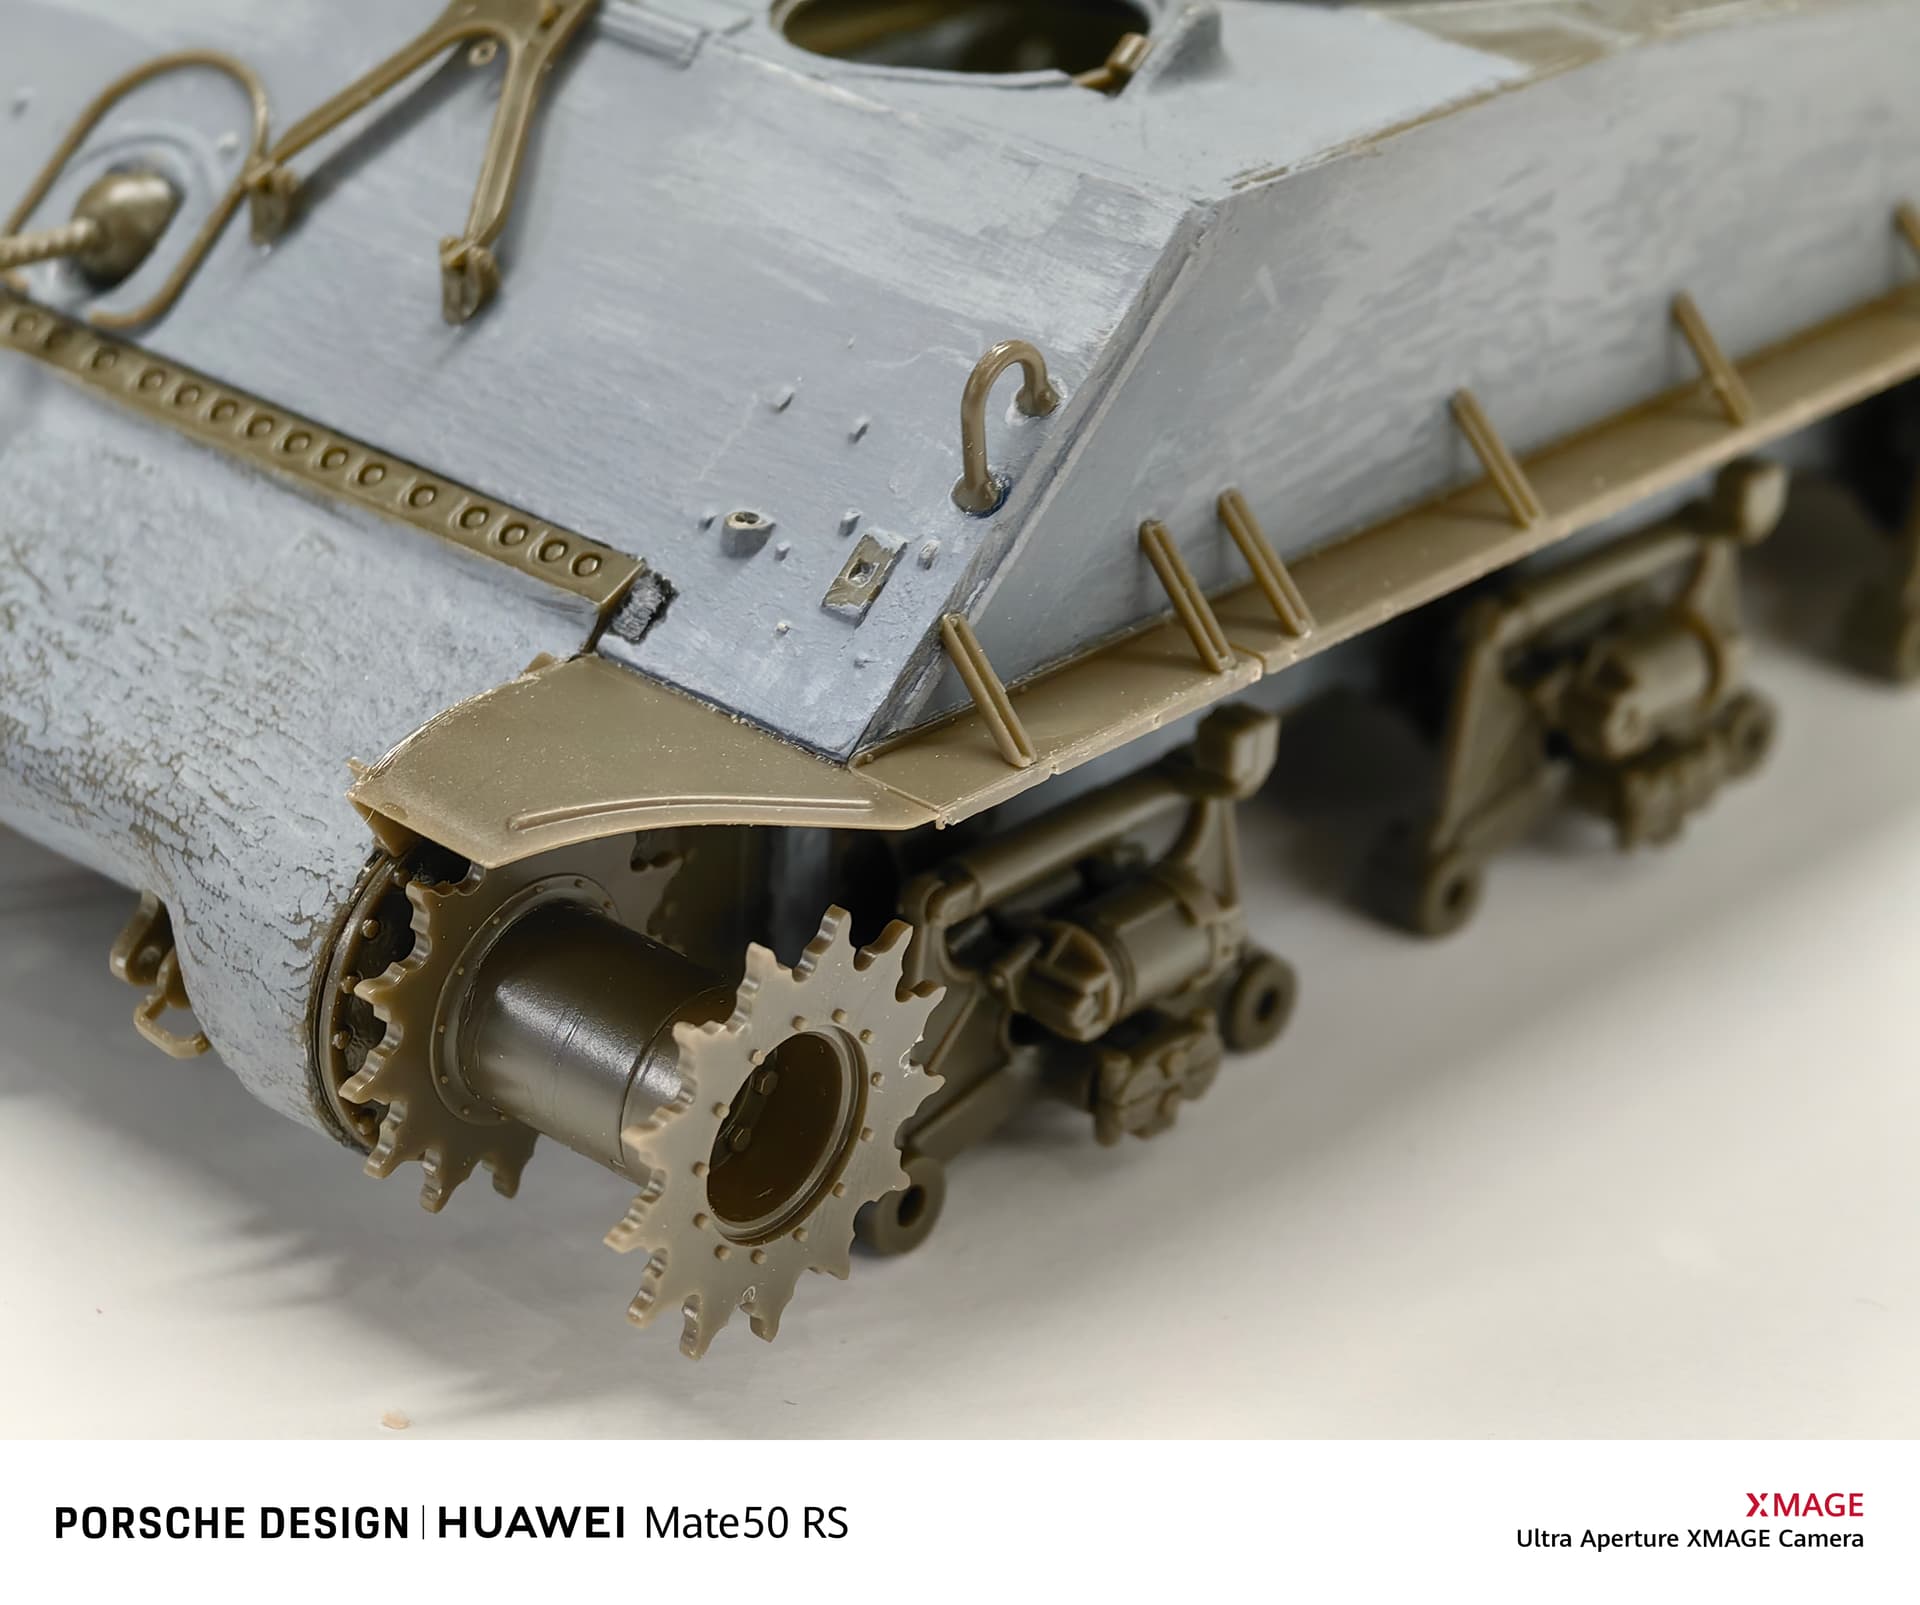
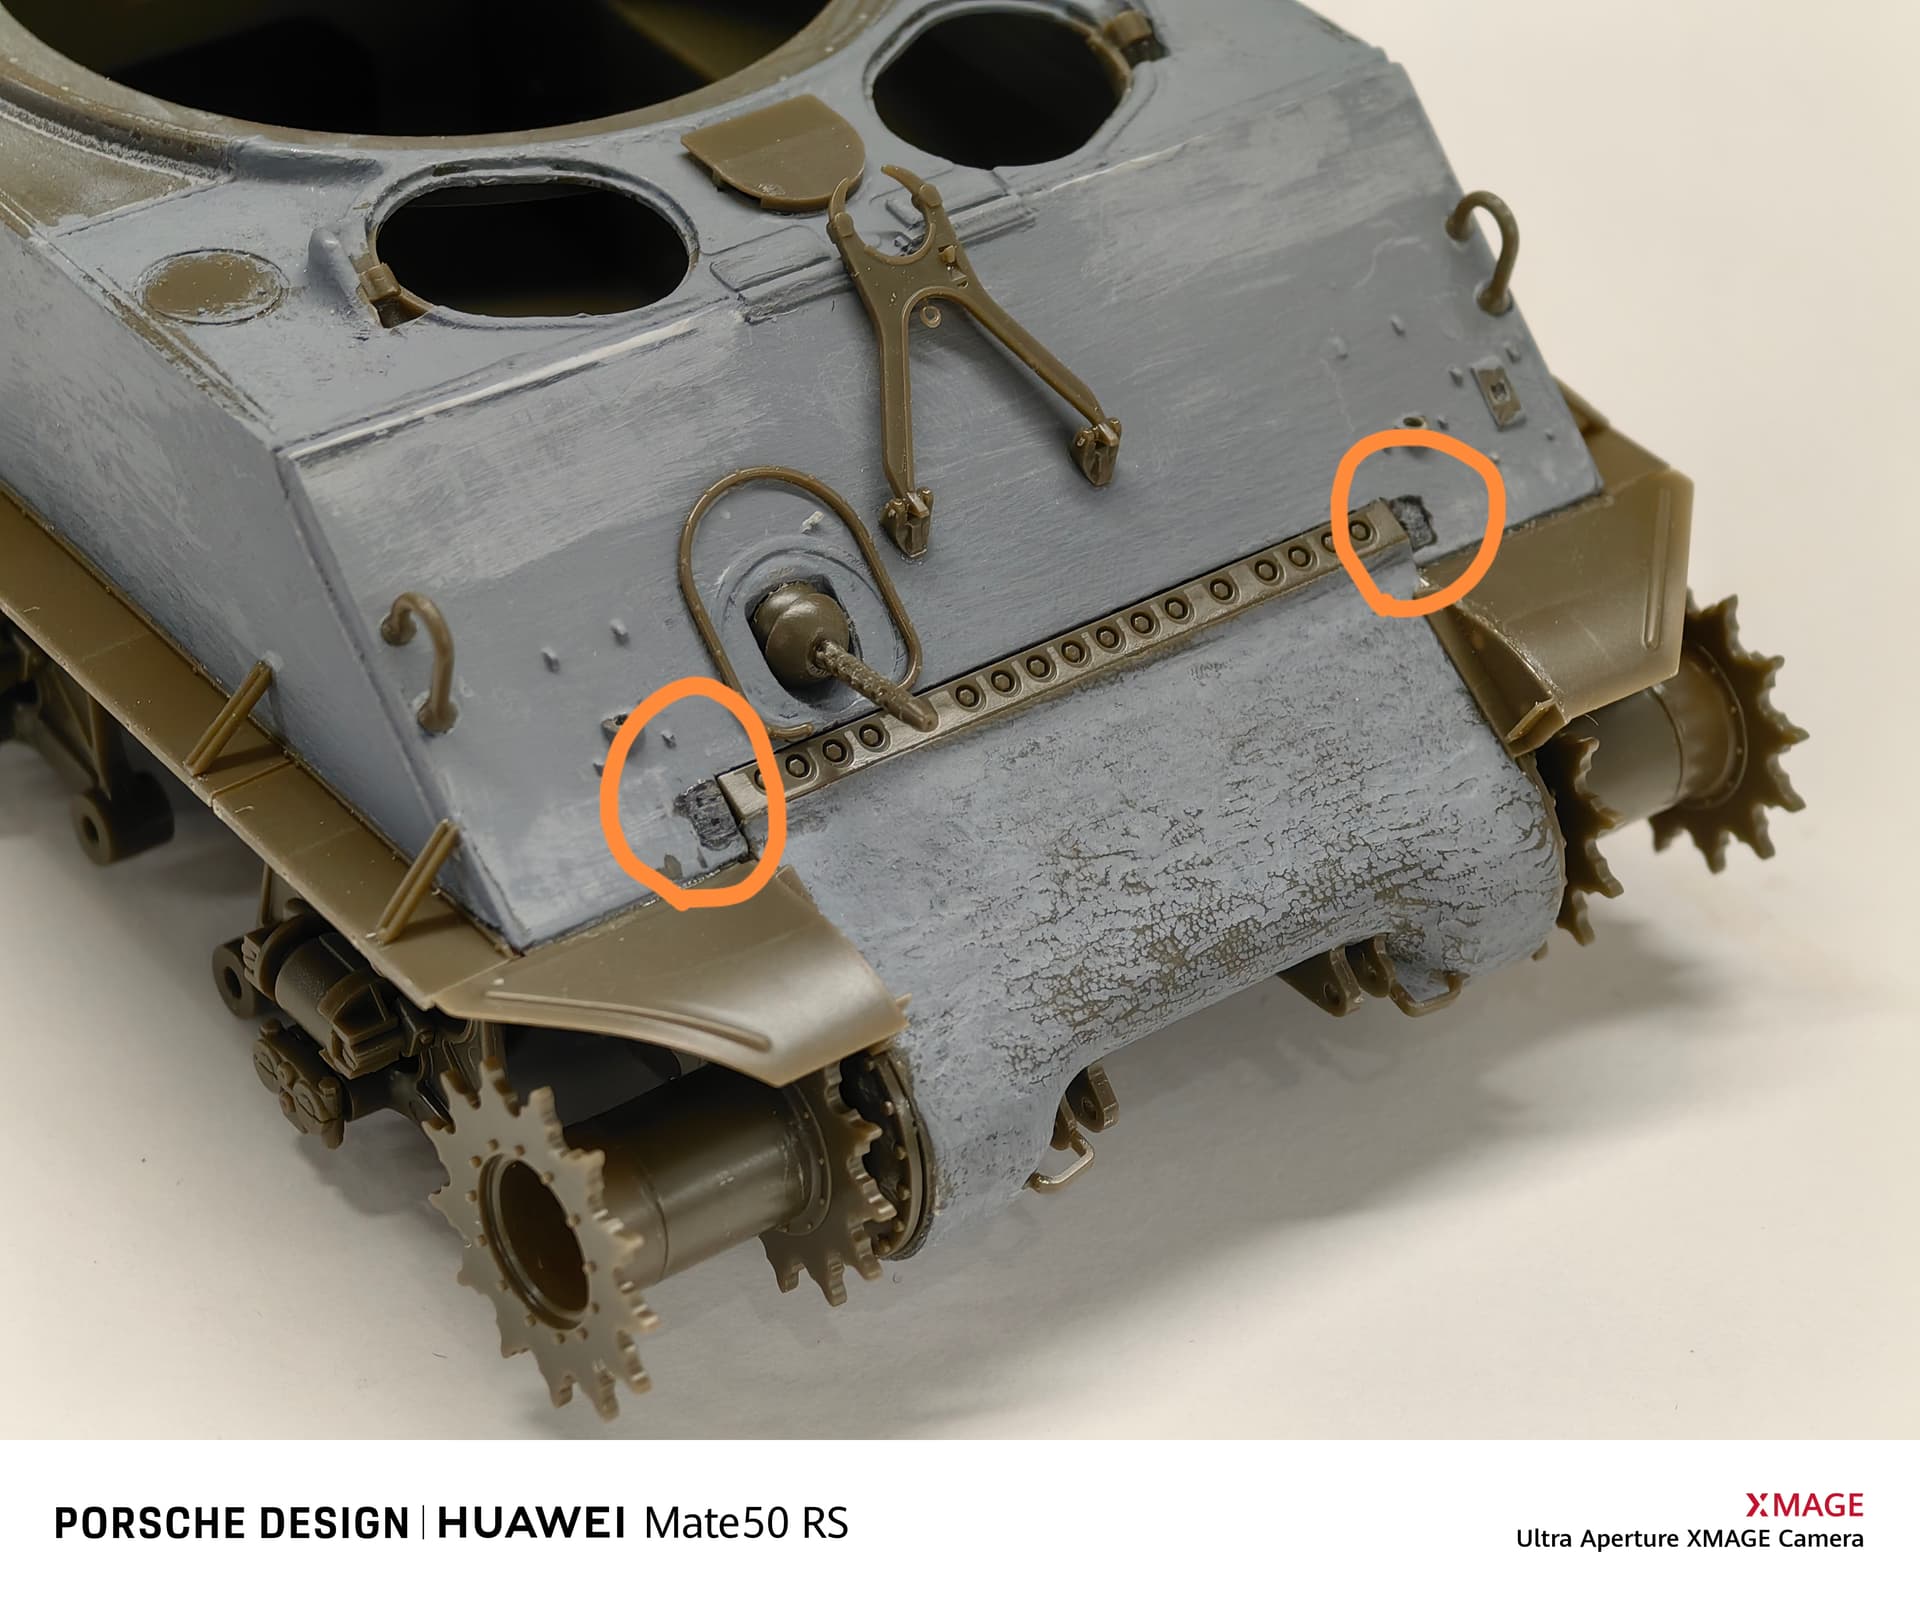
Next I compared the M4A2 and M4A3E8 on the sides of the chassis part. The difference is very big, corresponding to ASUKA VVSS and HVSS suspension mounting positioning design.
As you can see from this image, the M4A2 has a protruding mounting base, while the M4A3E8 is a flat plate with a number of positioning holes for mounting the pulley support bracket. The bottom is partially slotted. My idea is to use the M4A2 parts to process to the M4A3E8 state, first, bevelling the raised mounting base, then drill holes to facilitate the installation of the pulley support bracket, and finally open the bottom slot. This set of modification work is very troublesome, it took me a lot of time to repeatedly cut and polish, and finally it is basically finished. Please note that the position of drilling and mounting suspension should not completely copy the size of M4A3E8, and should be fine-tuned according to the actual correspondence of the chassis, otherwise there may be dislocation of various parts.
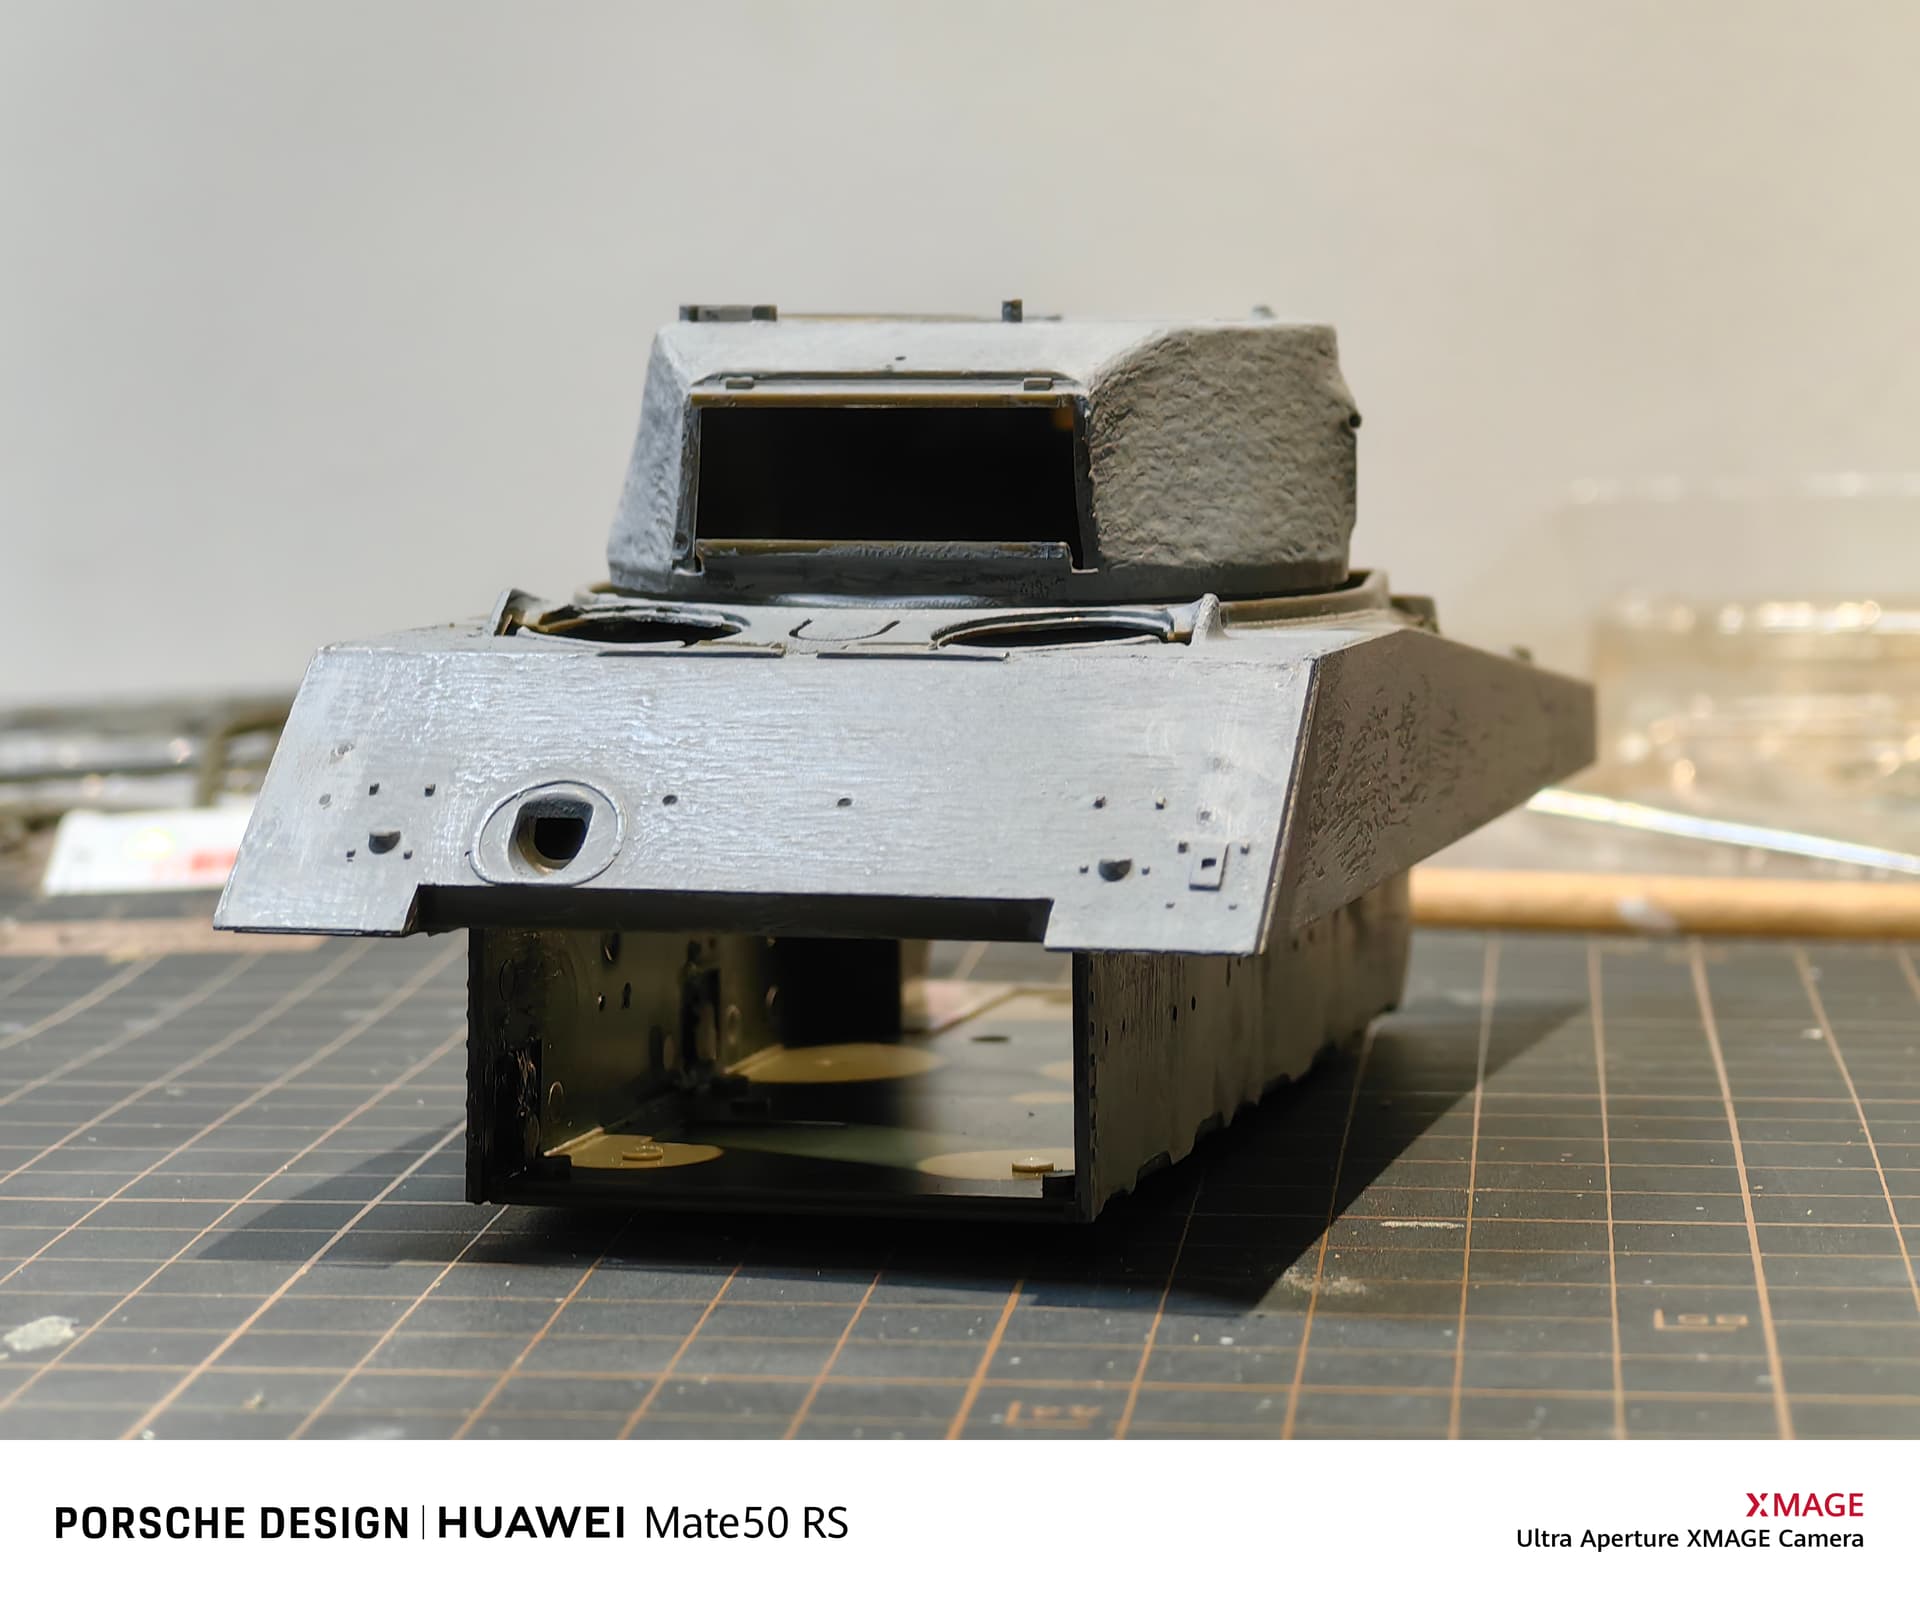
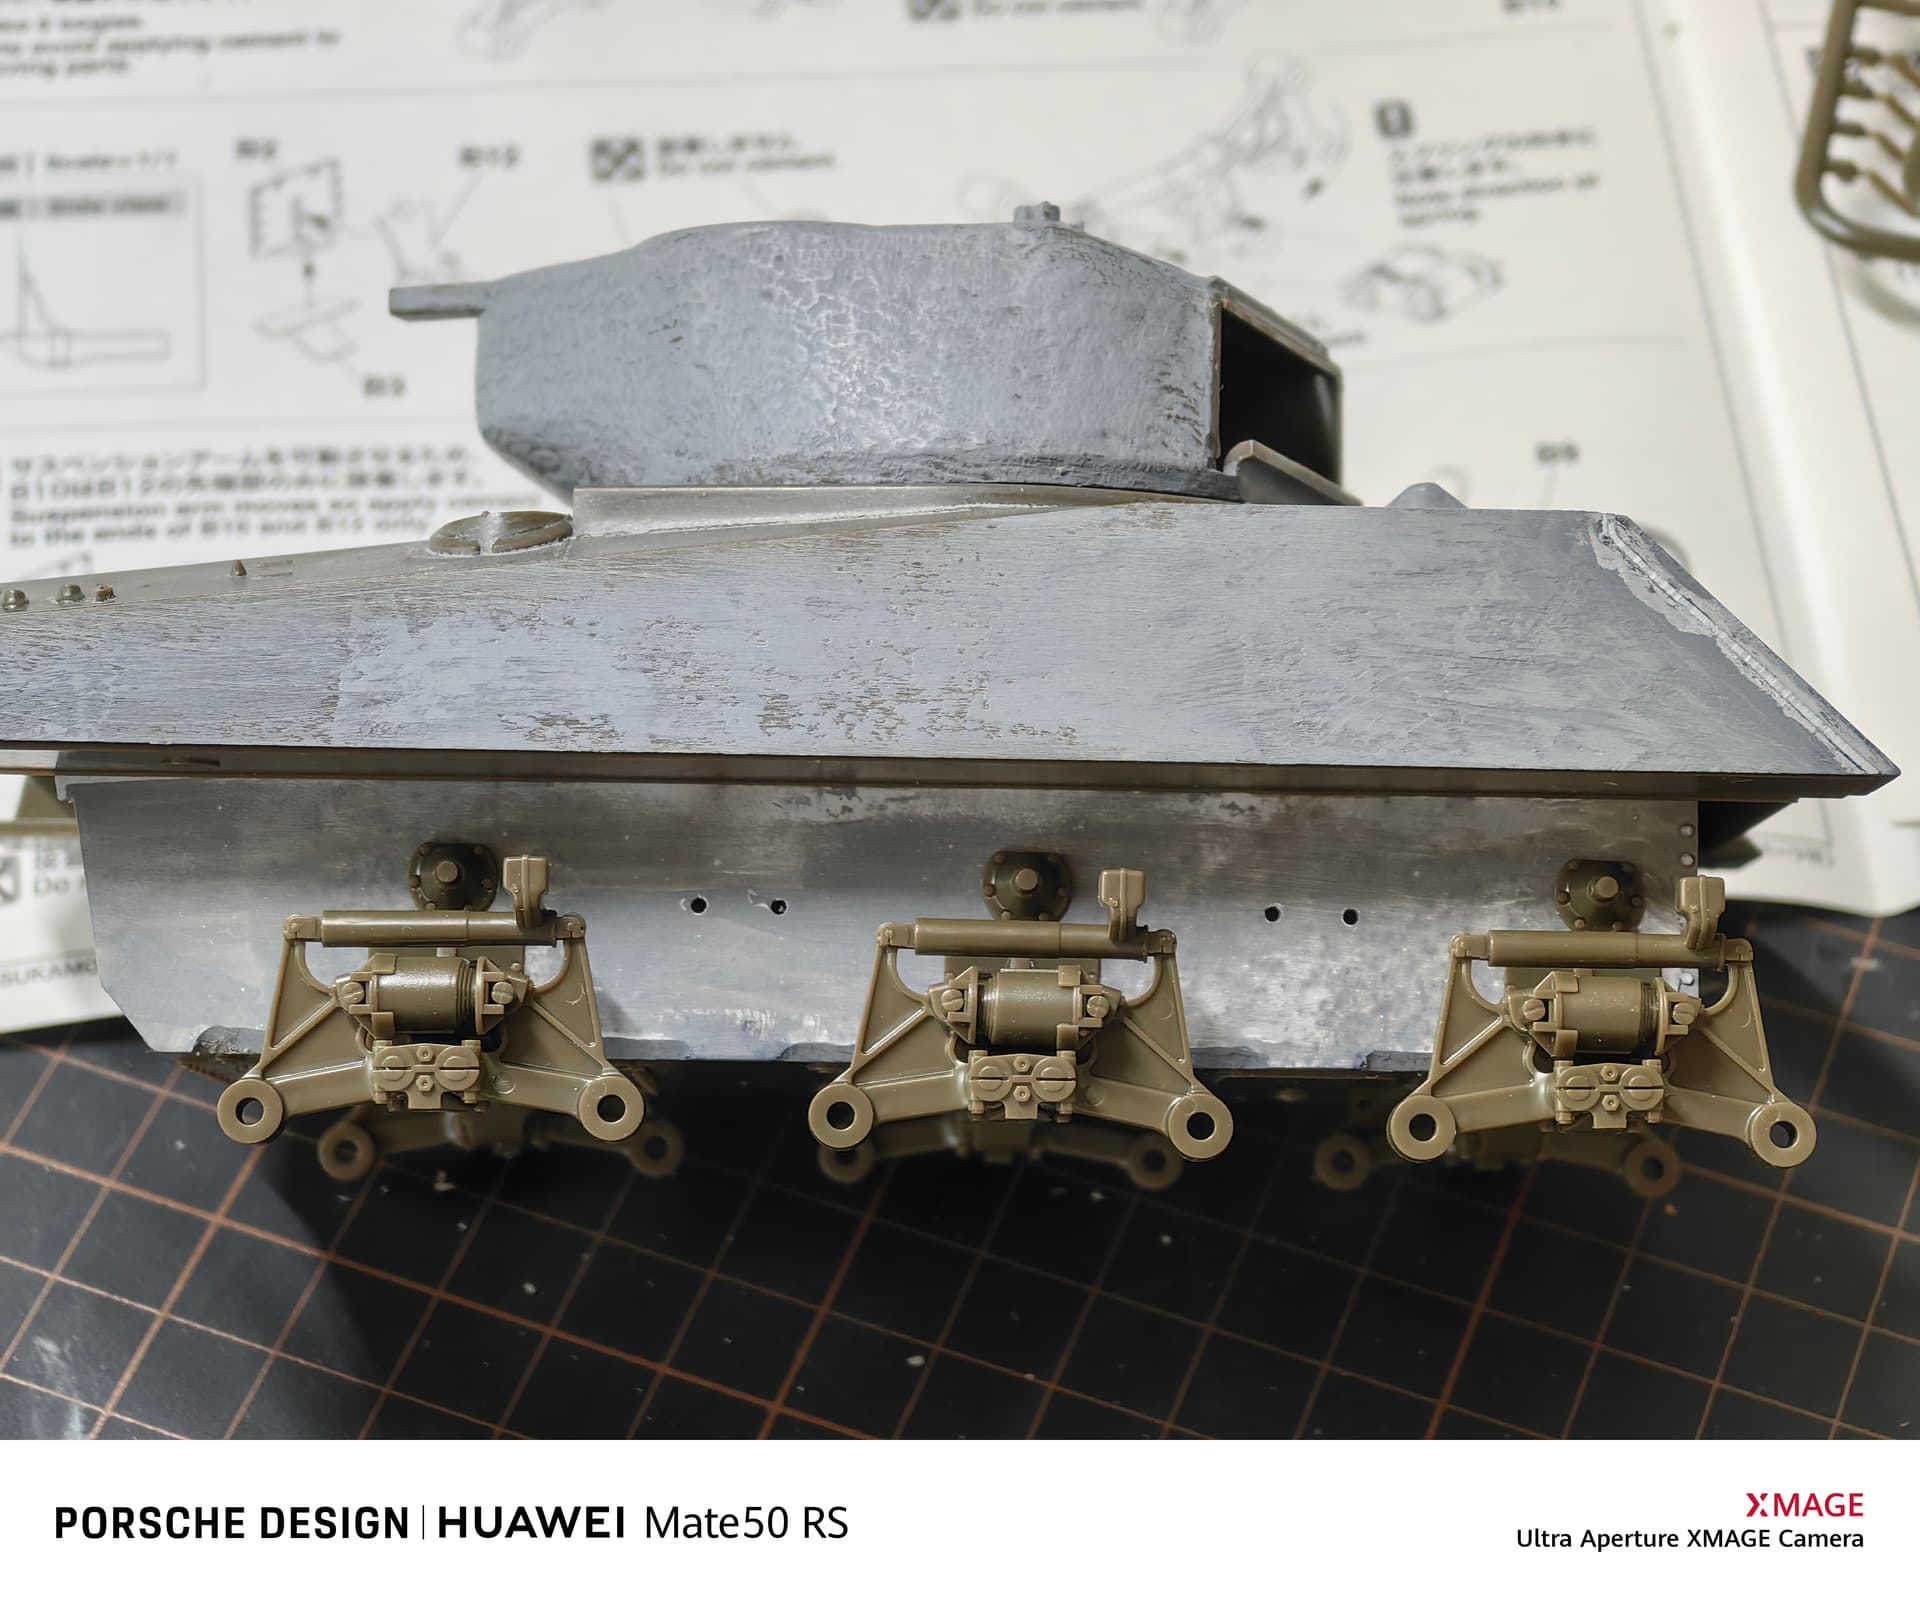
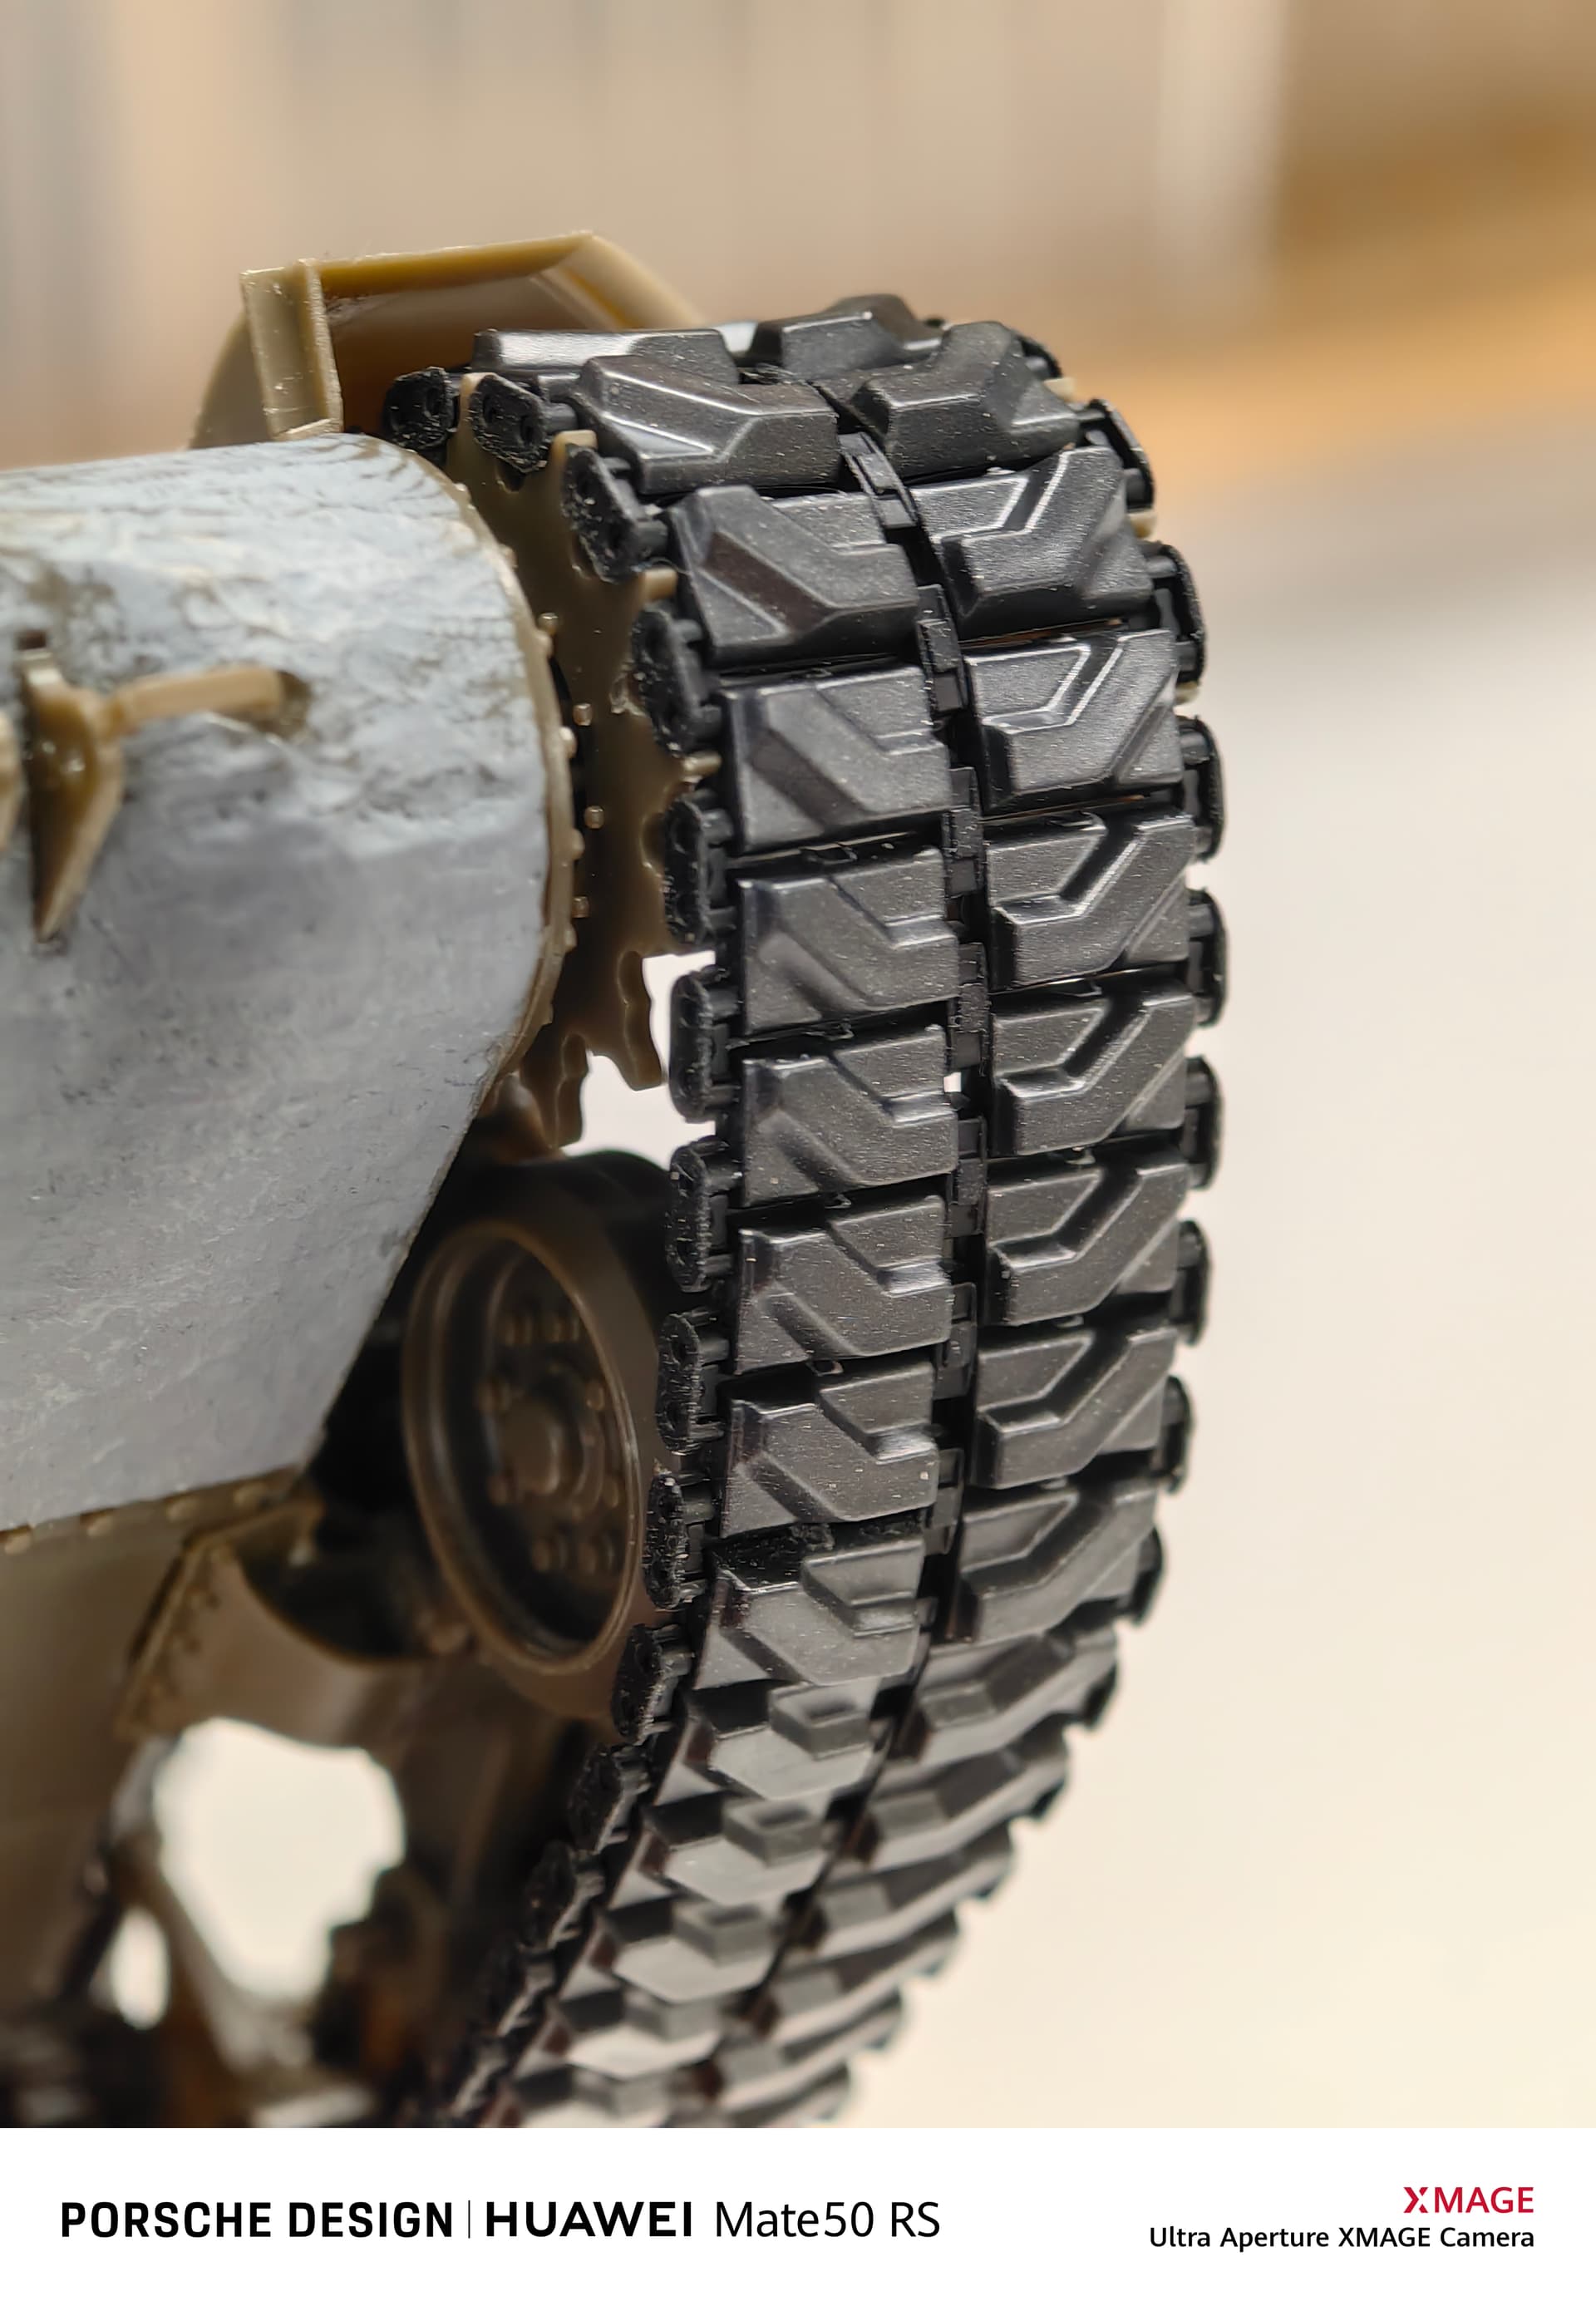
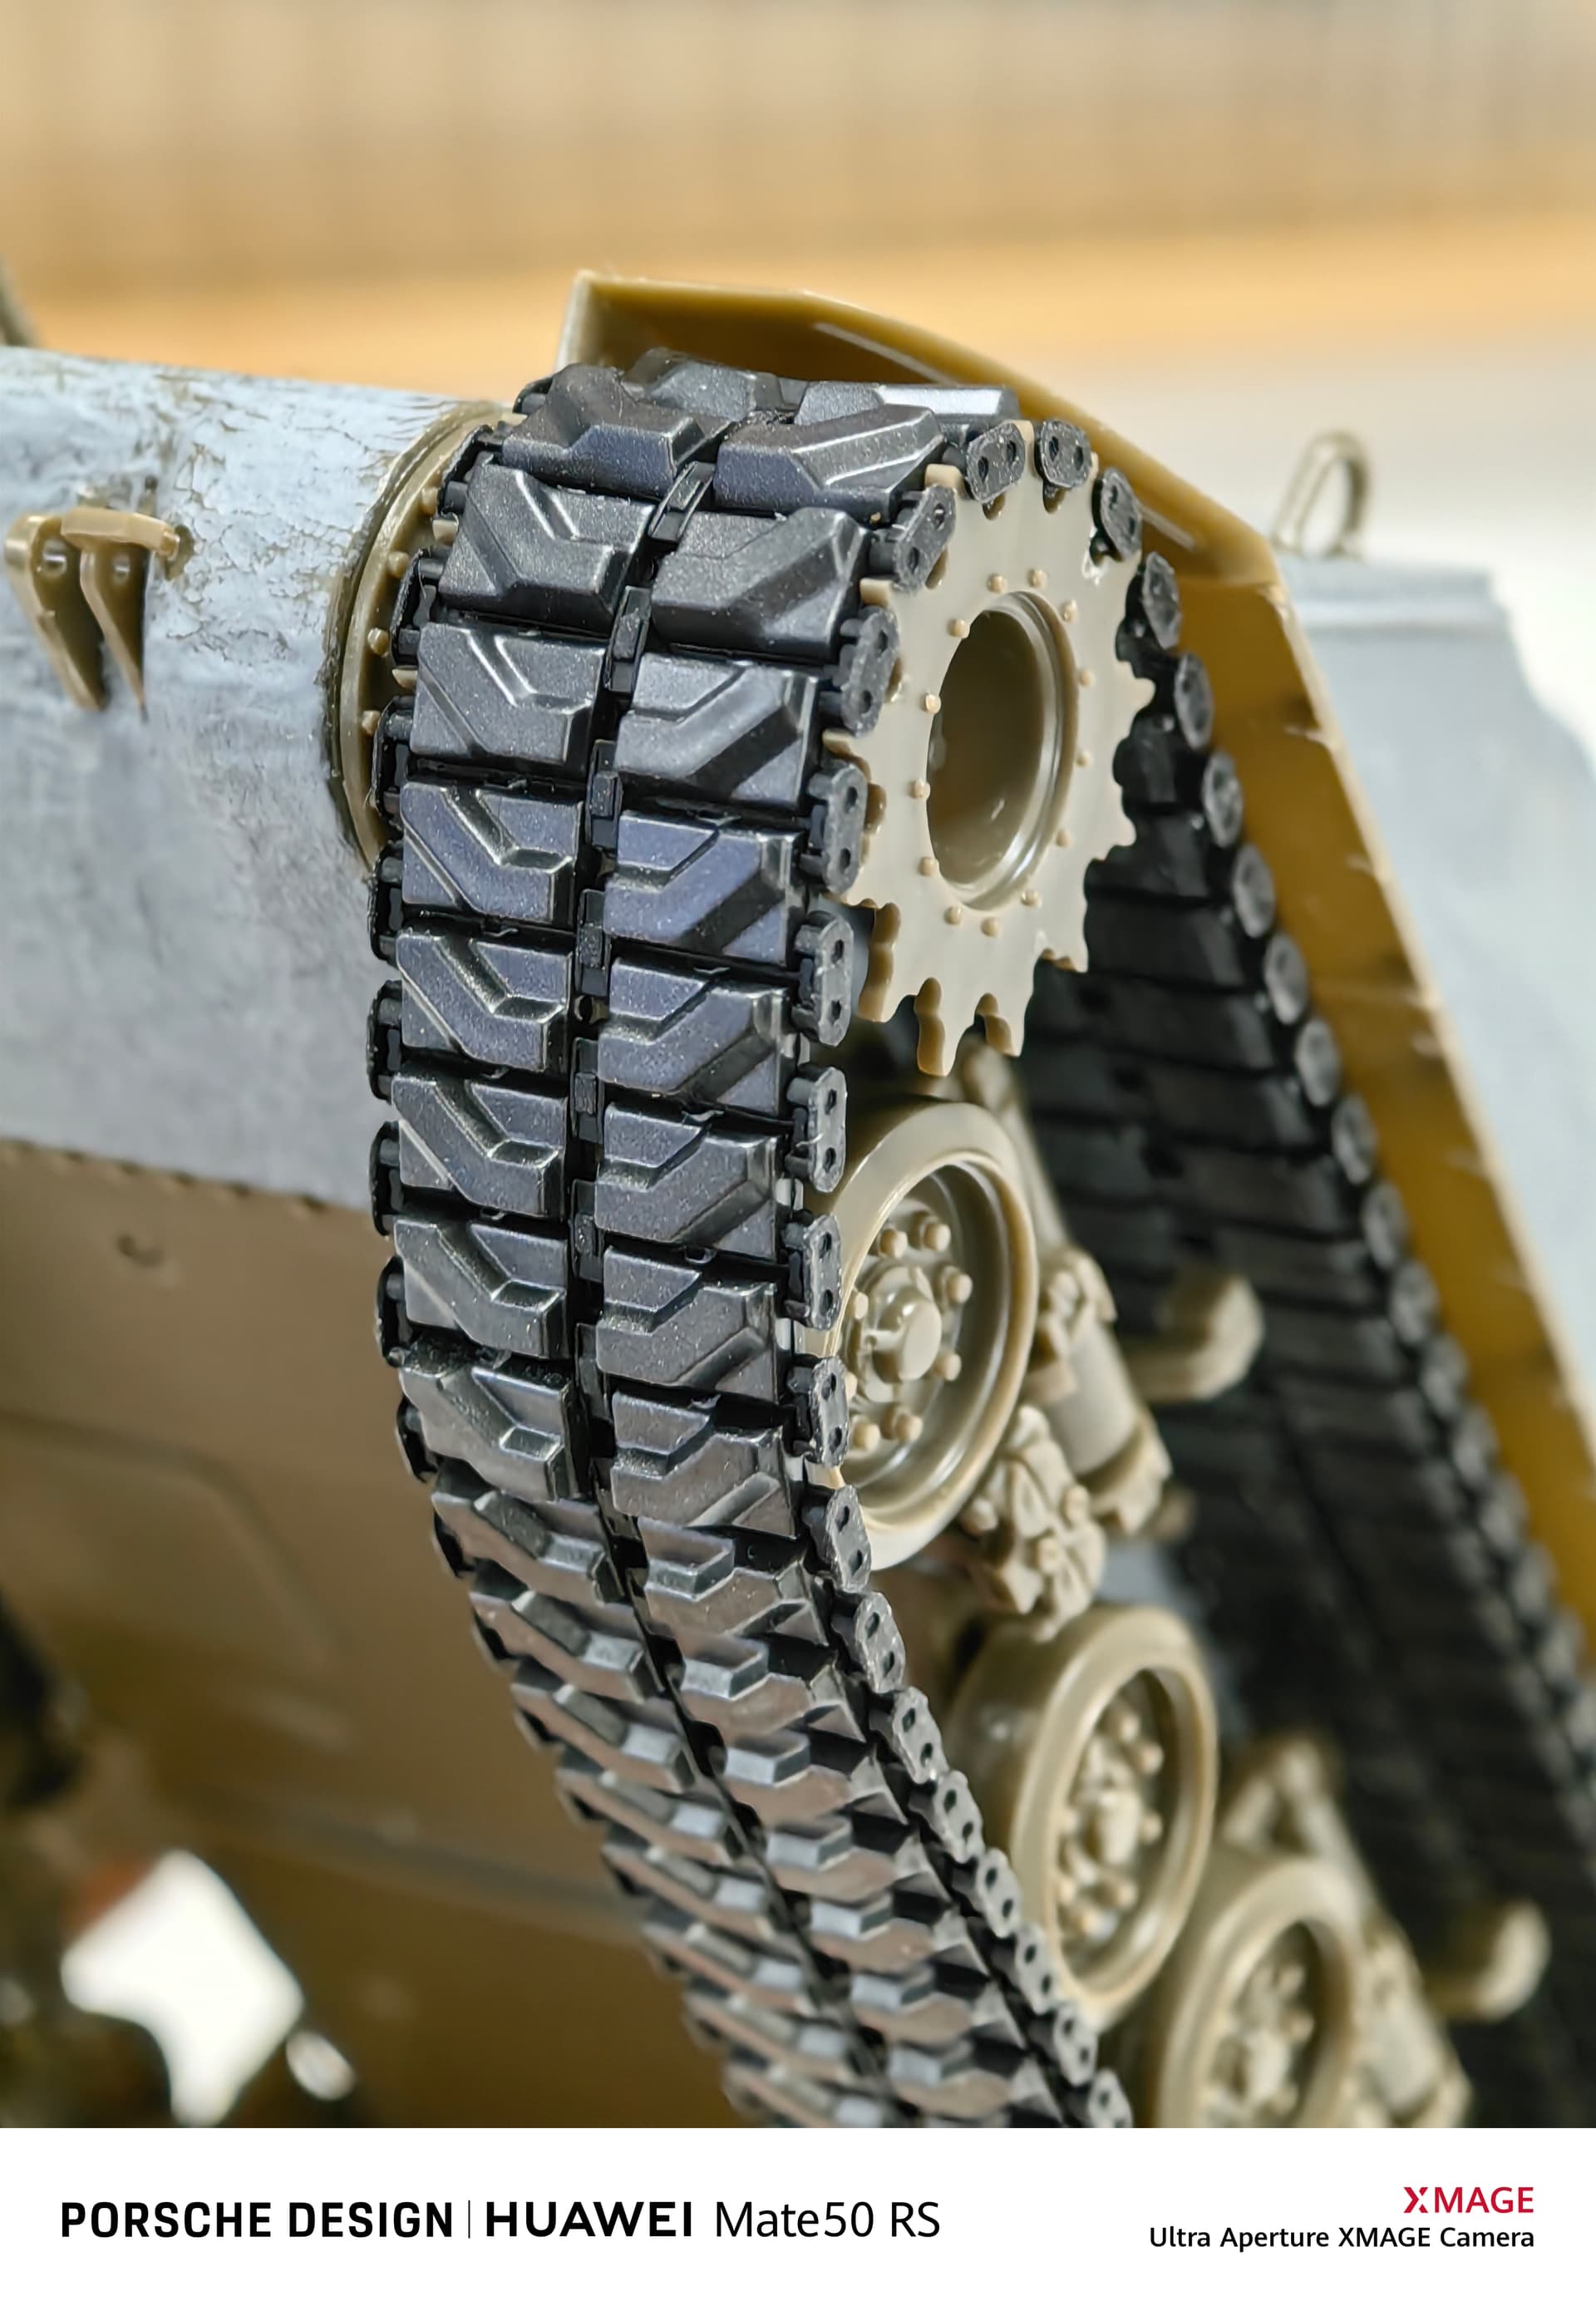
These days I have been assembling HVSS suspension from M4A3E8, the ASUKA HVSS suspension is really good, simple and easy to assemble, the shaft damping is just right, the movement is just right and not too loose. It looks good on the chassis.
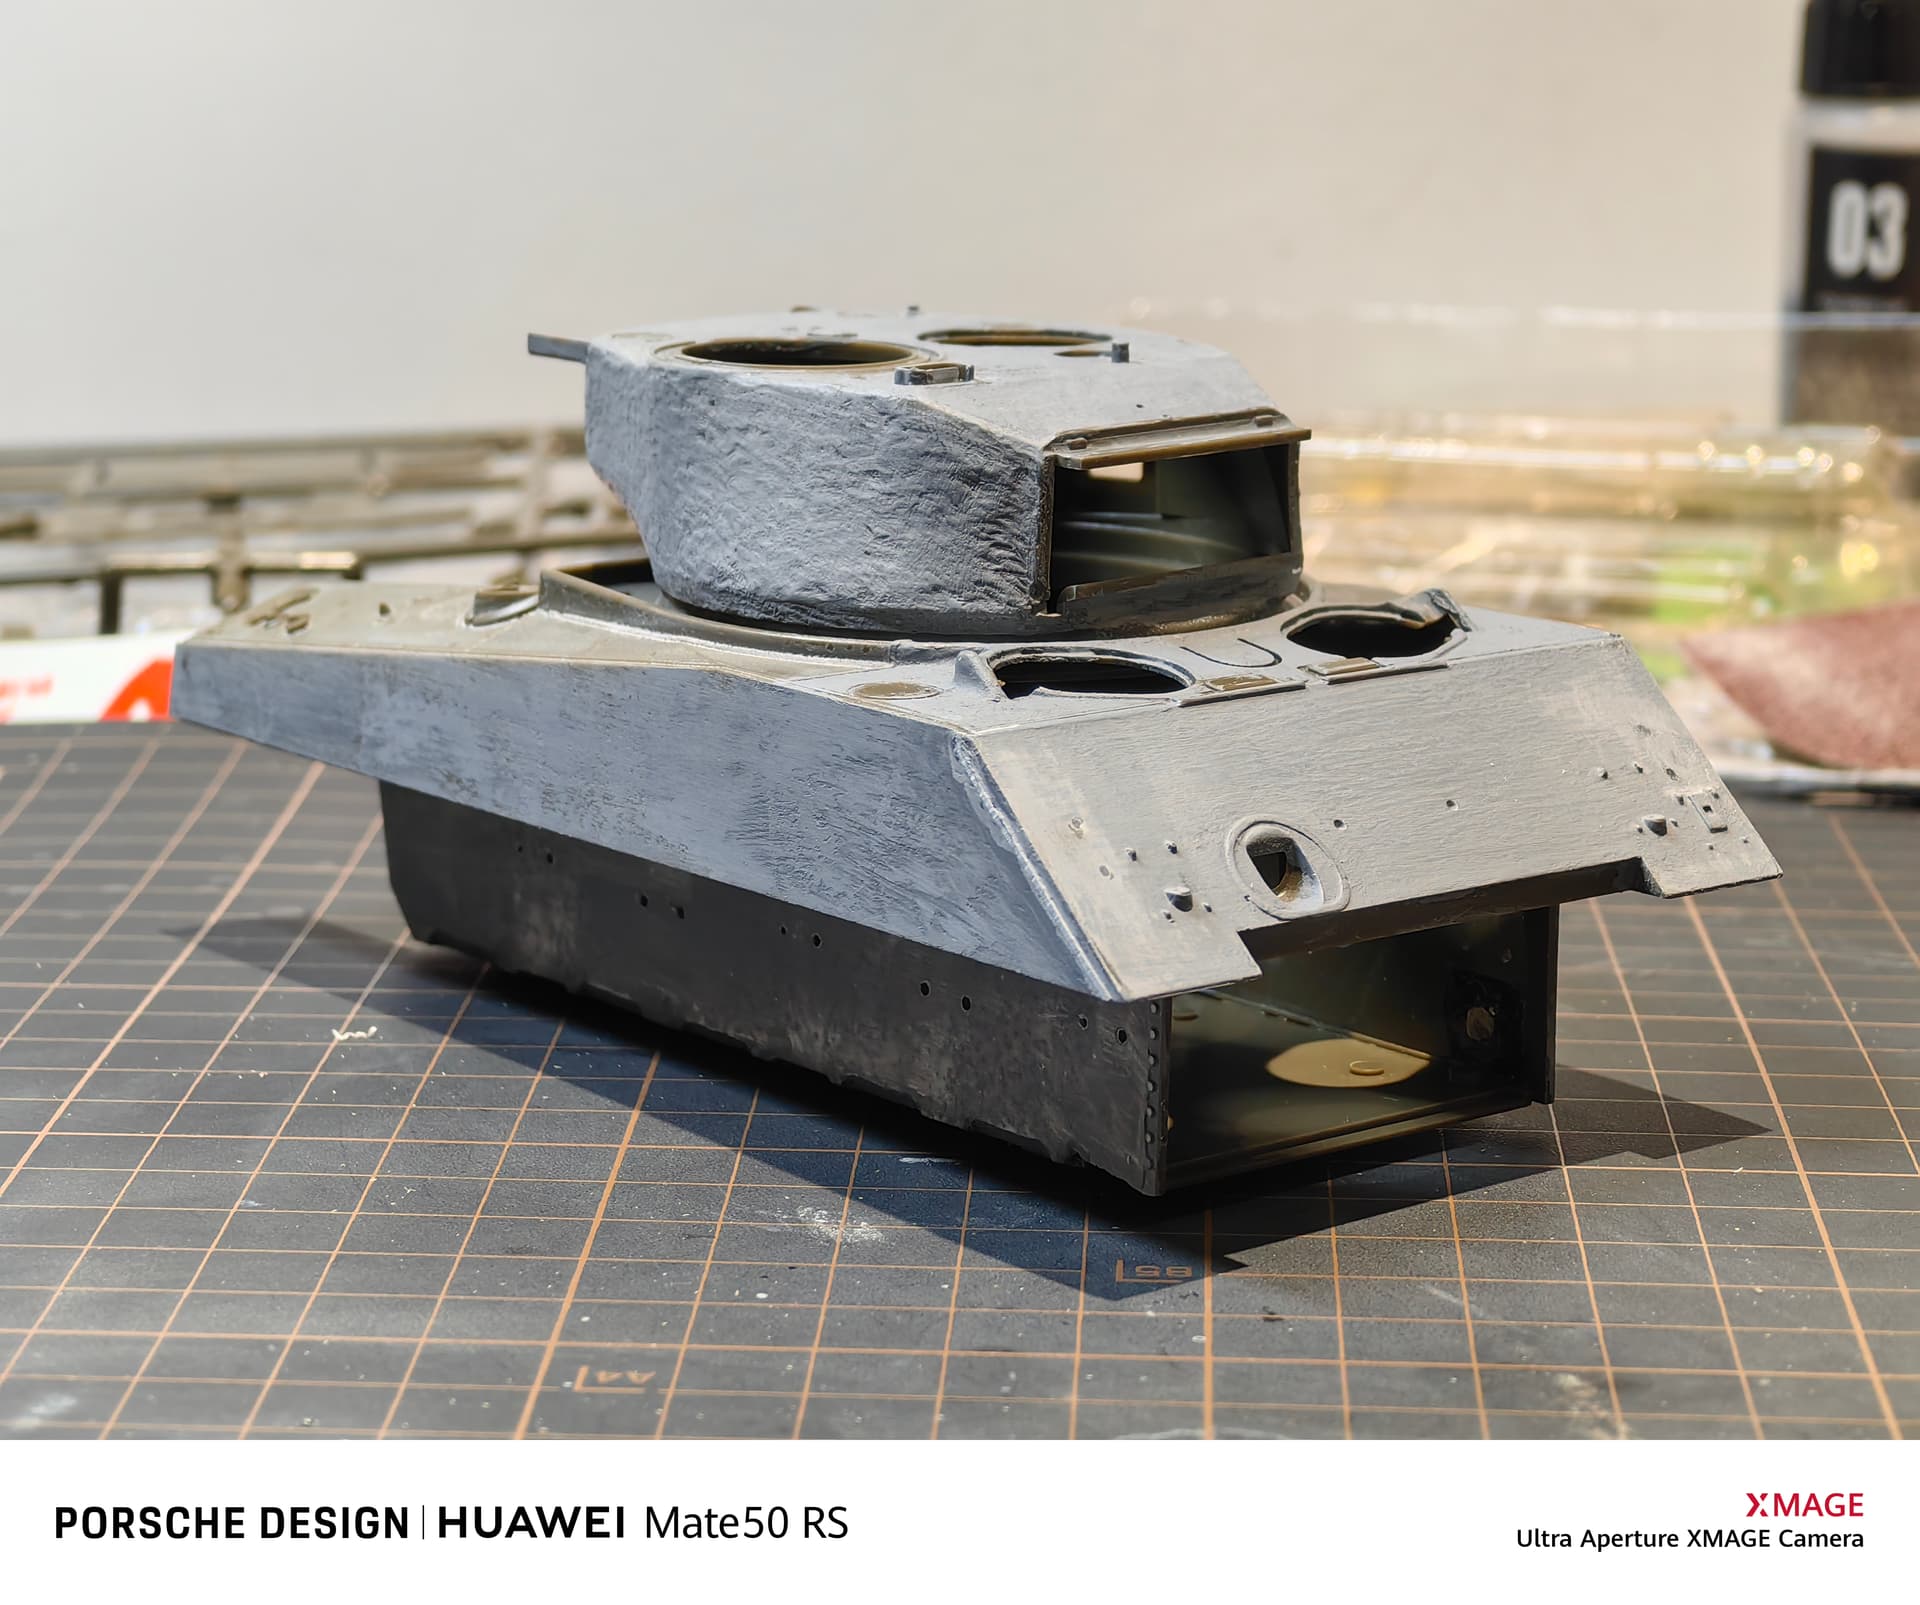
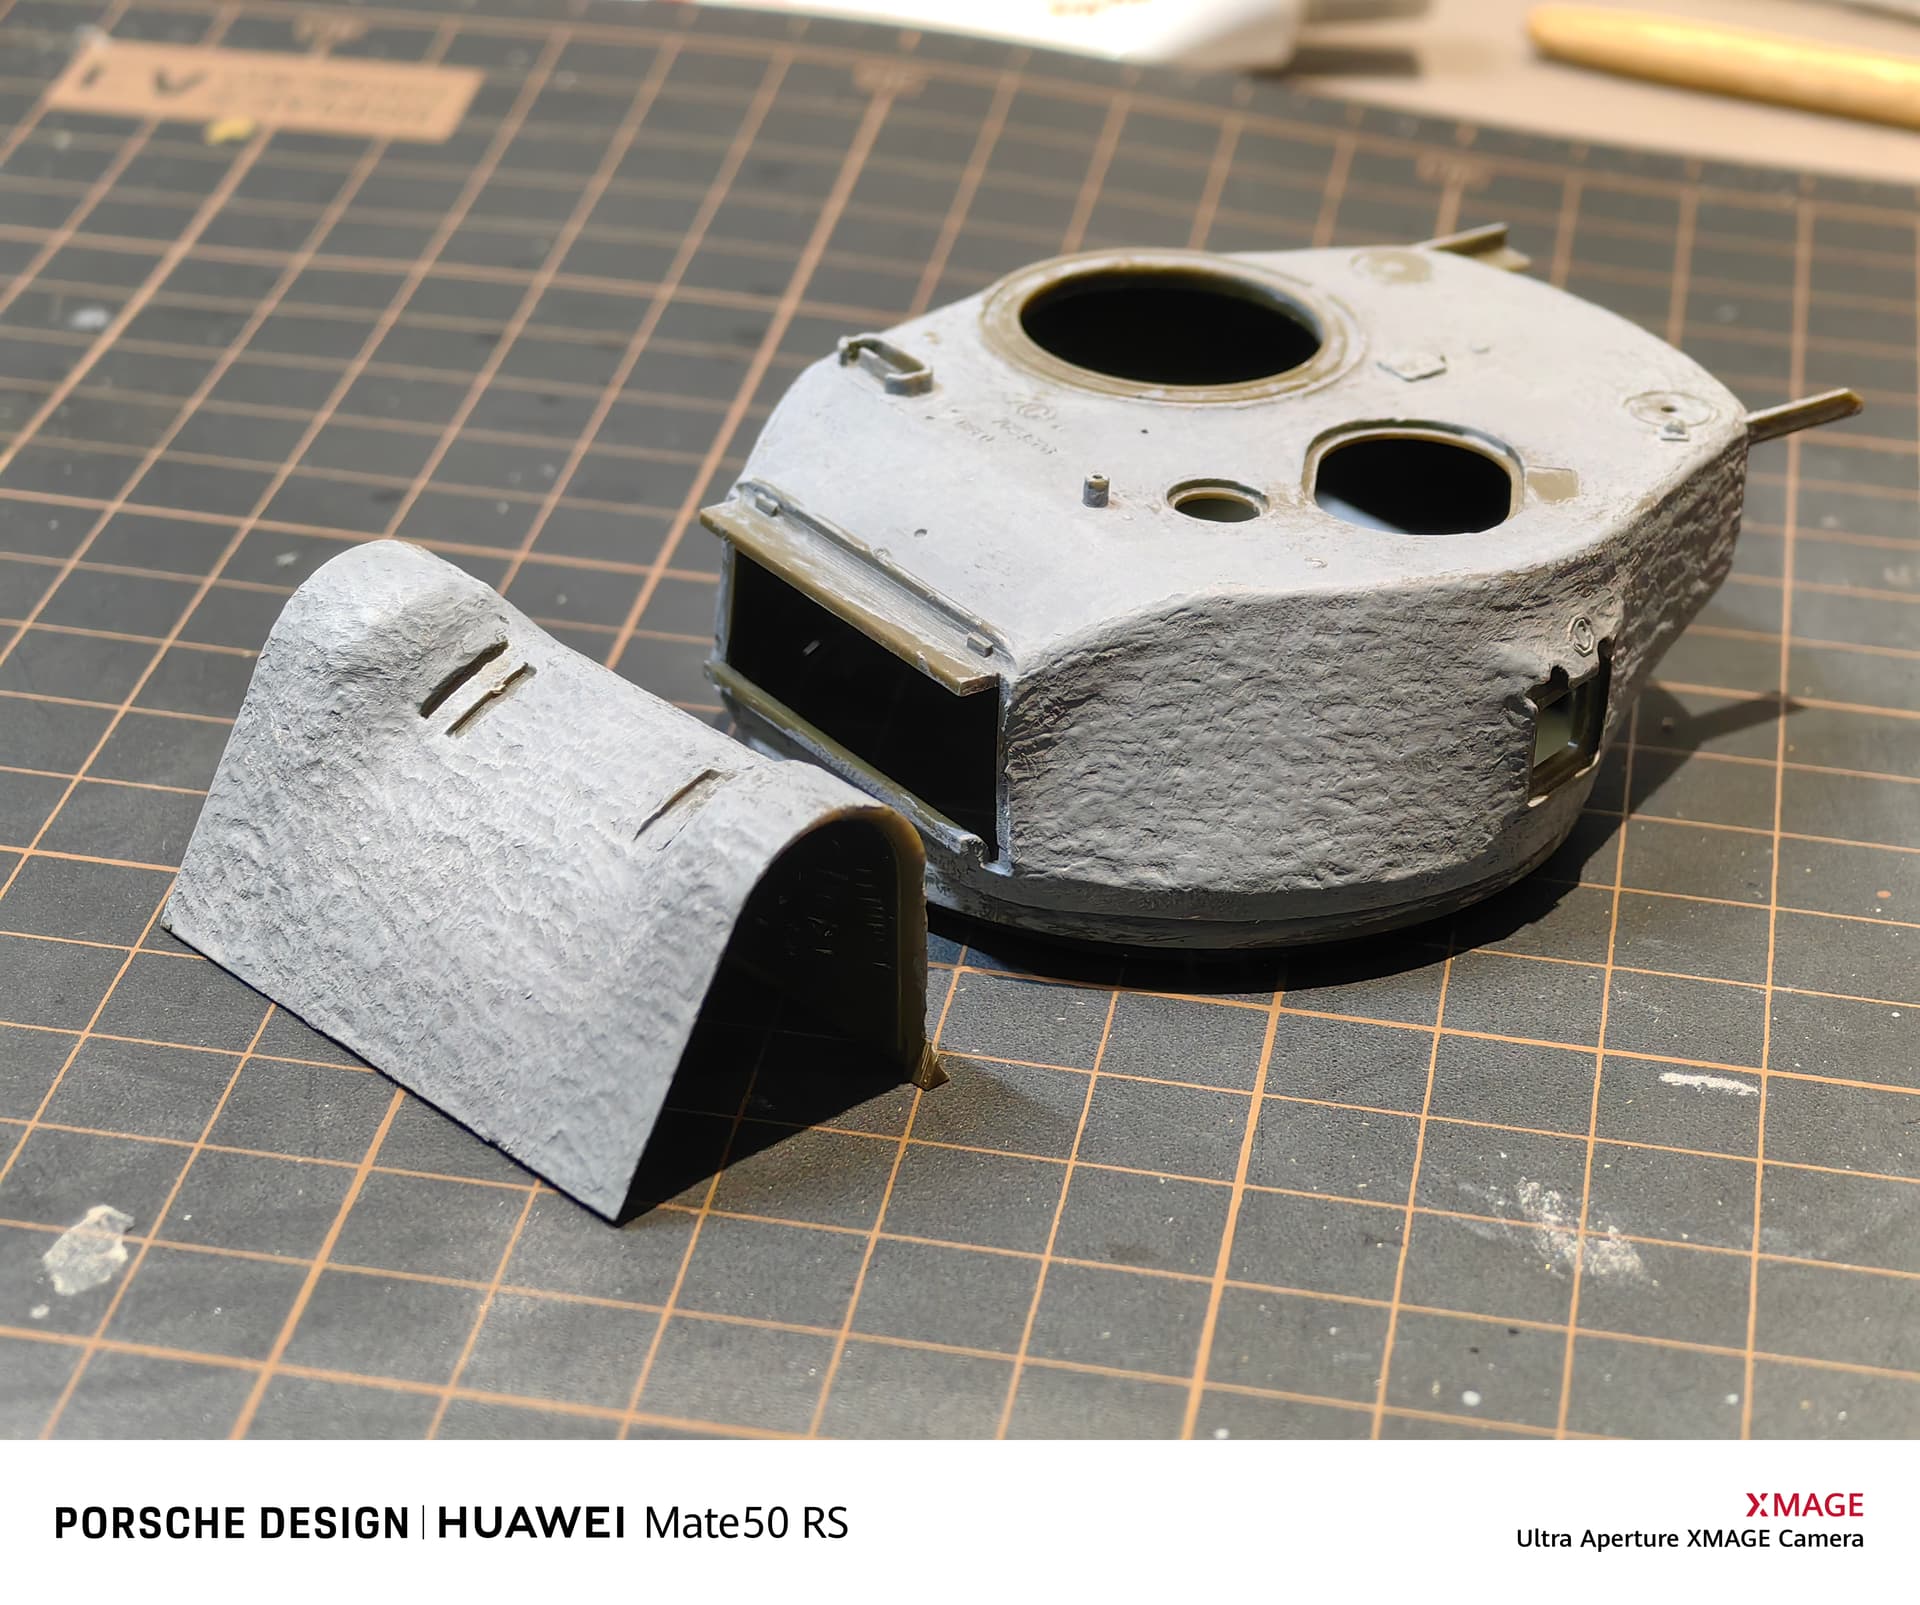
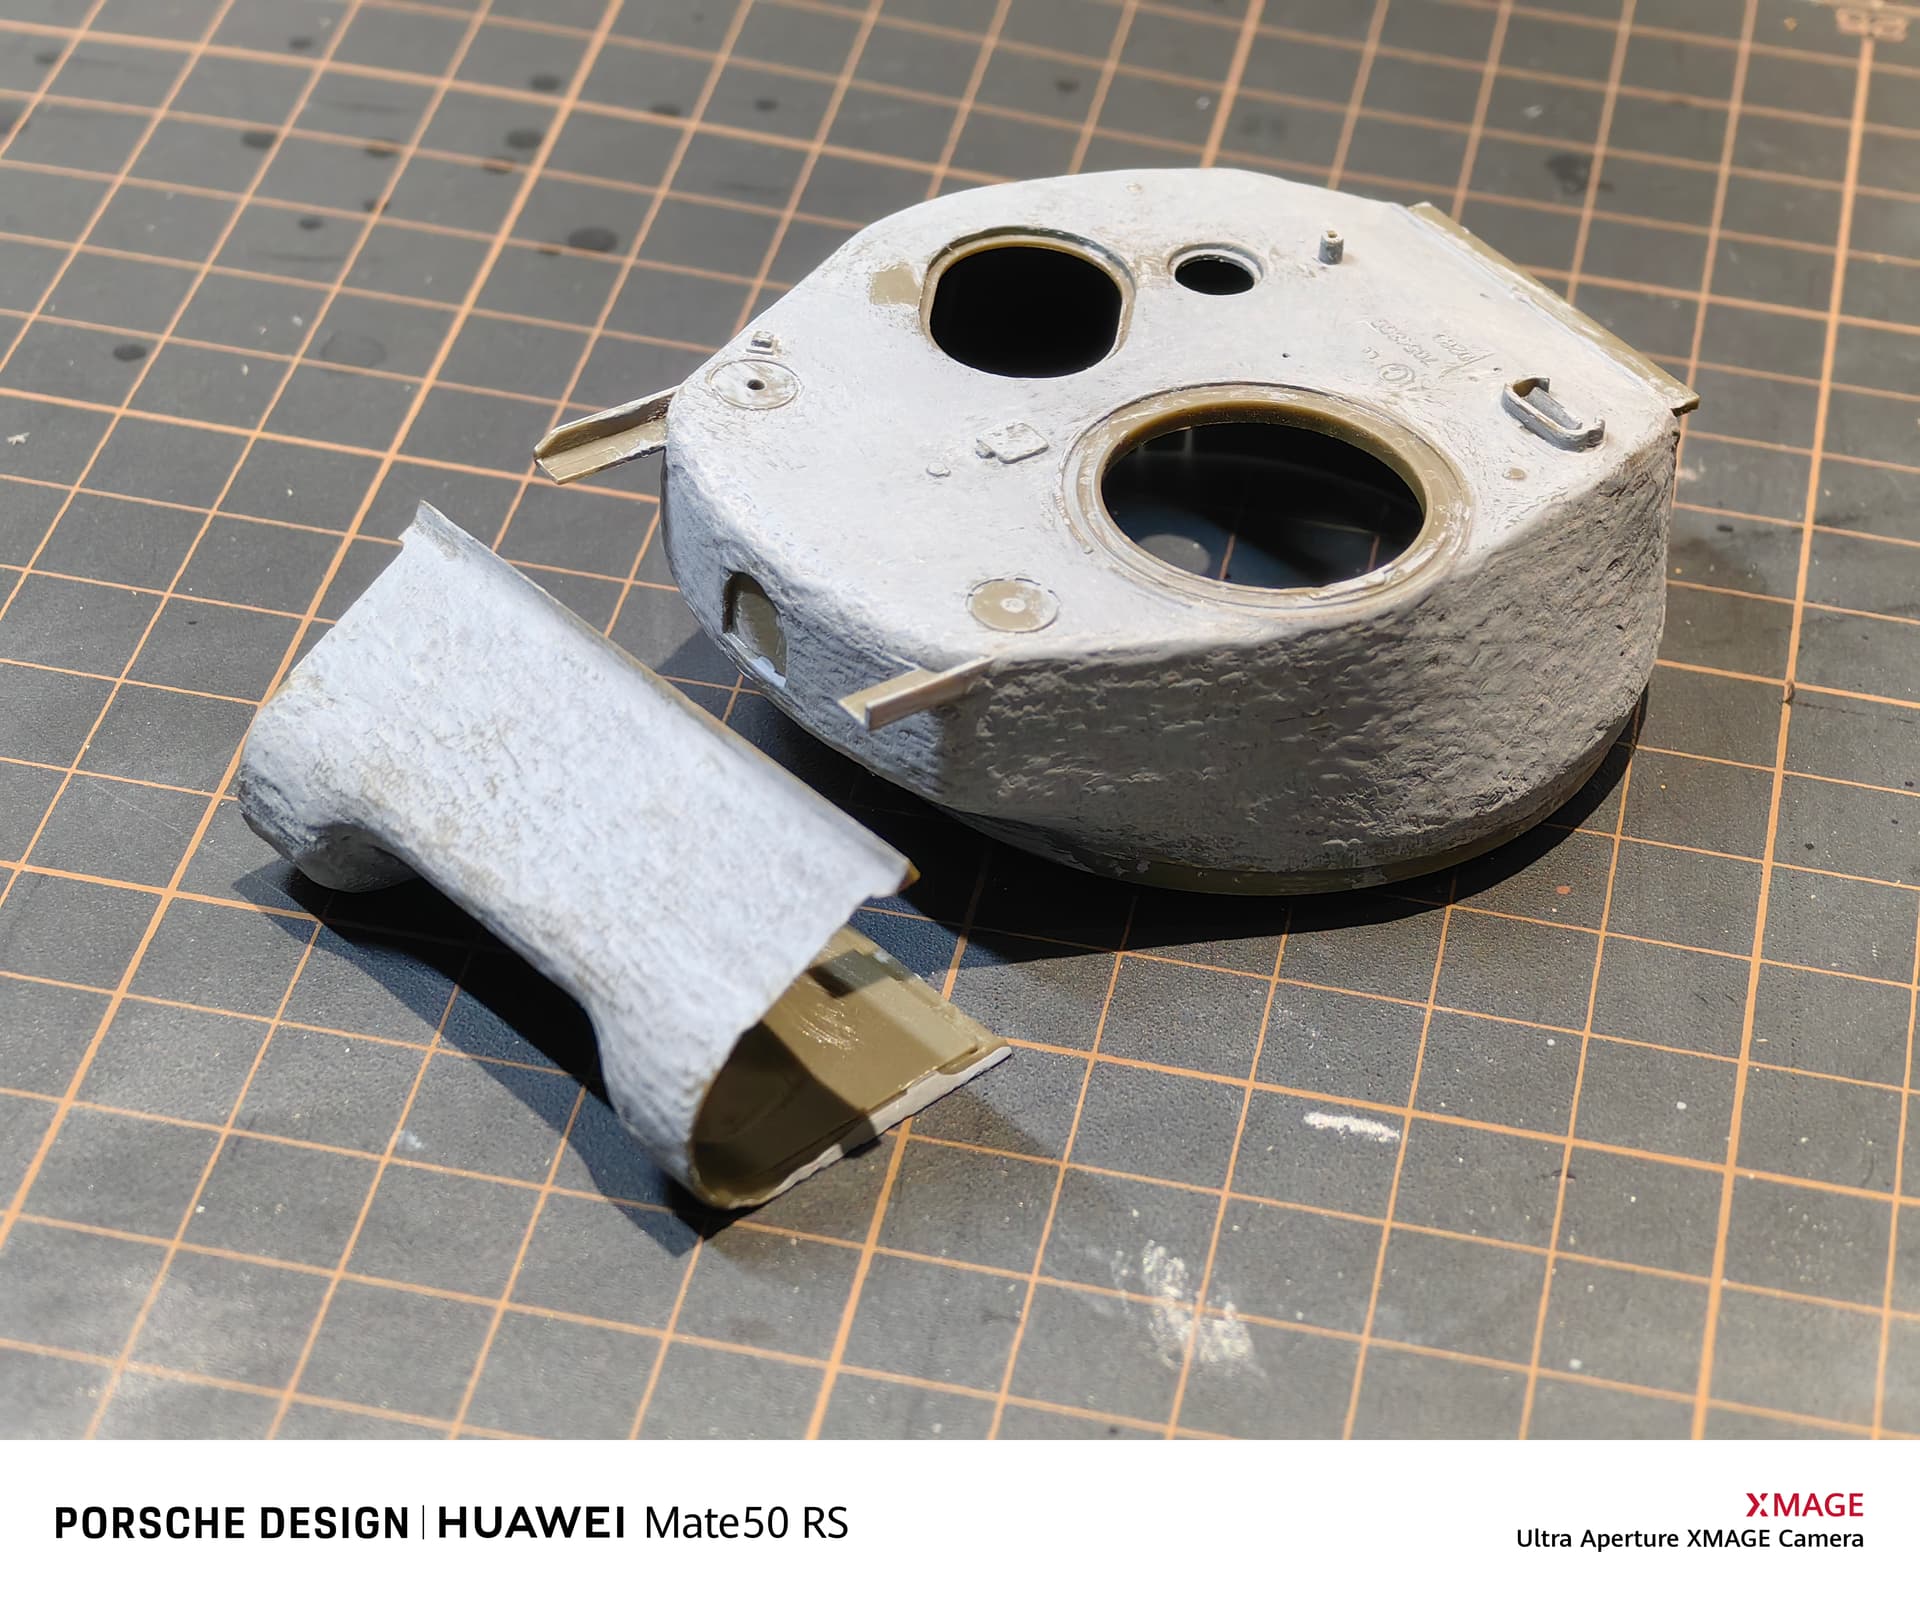
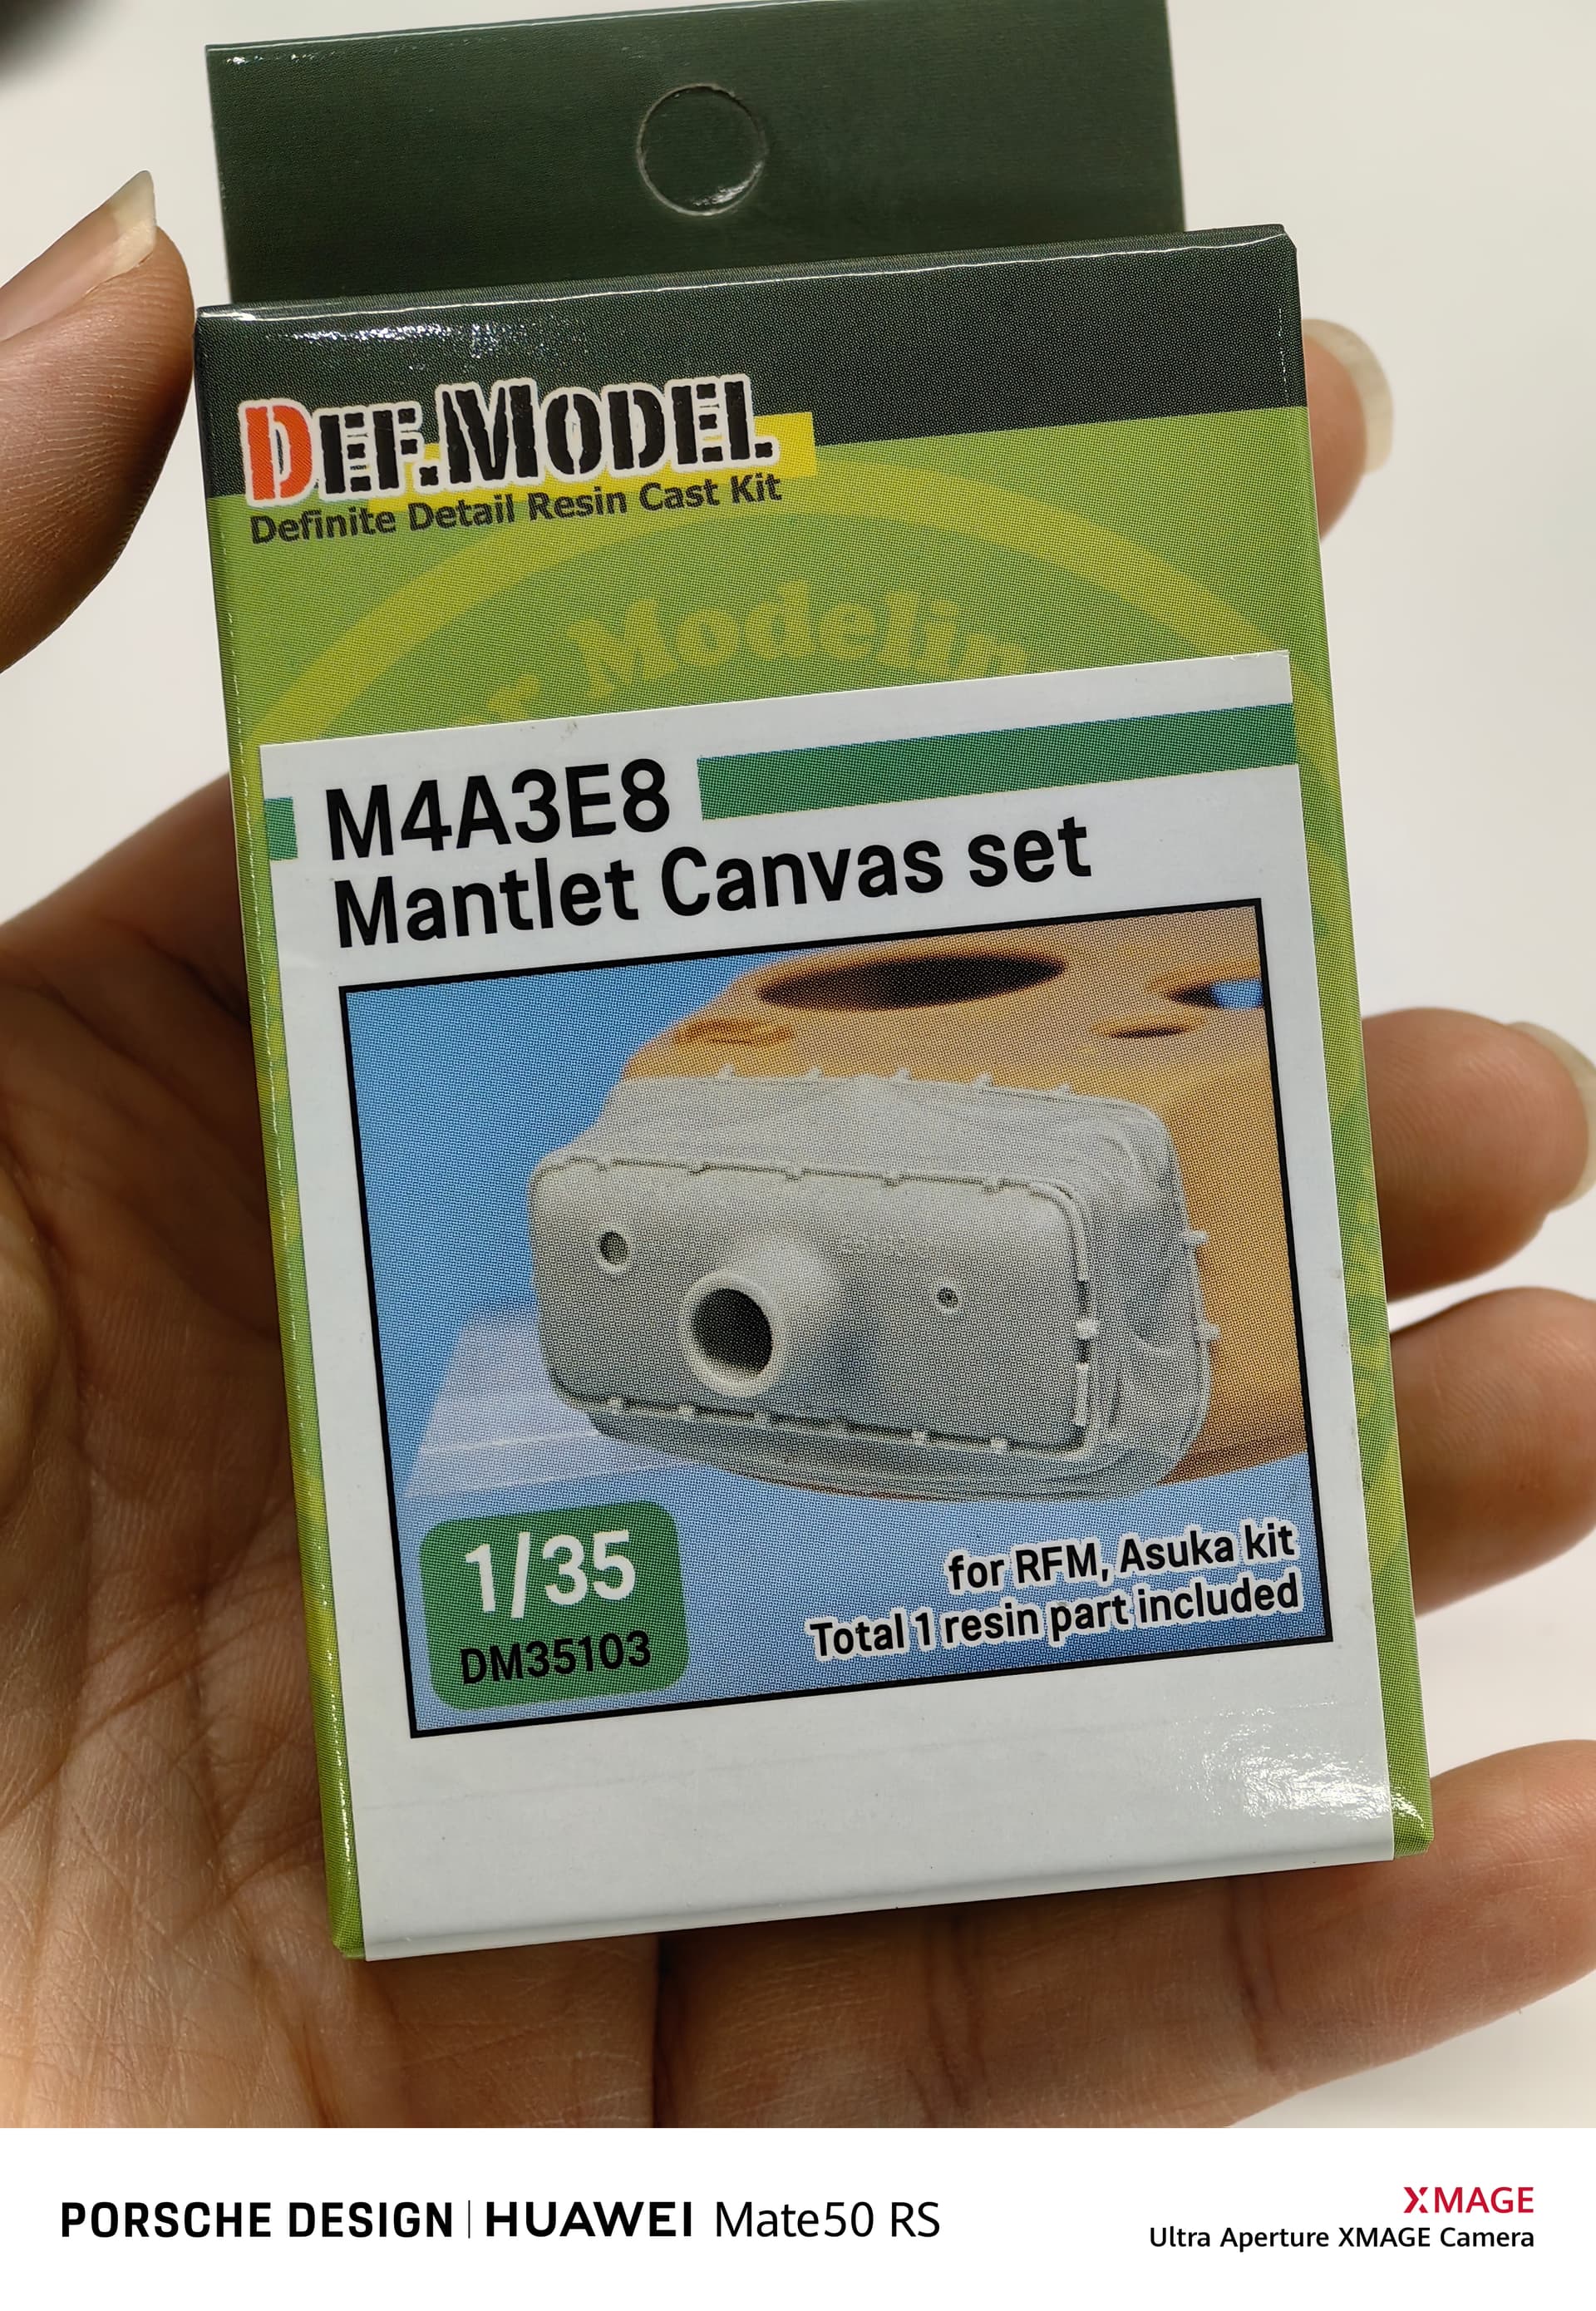
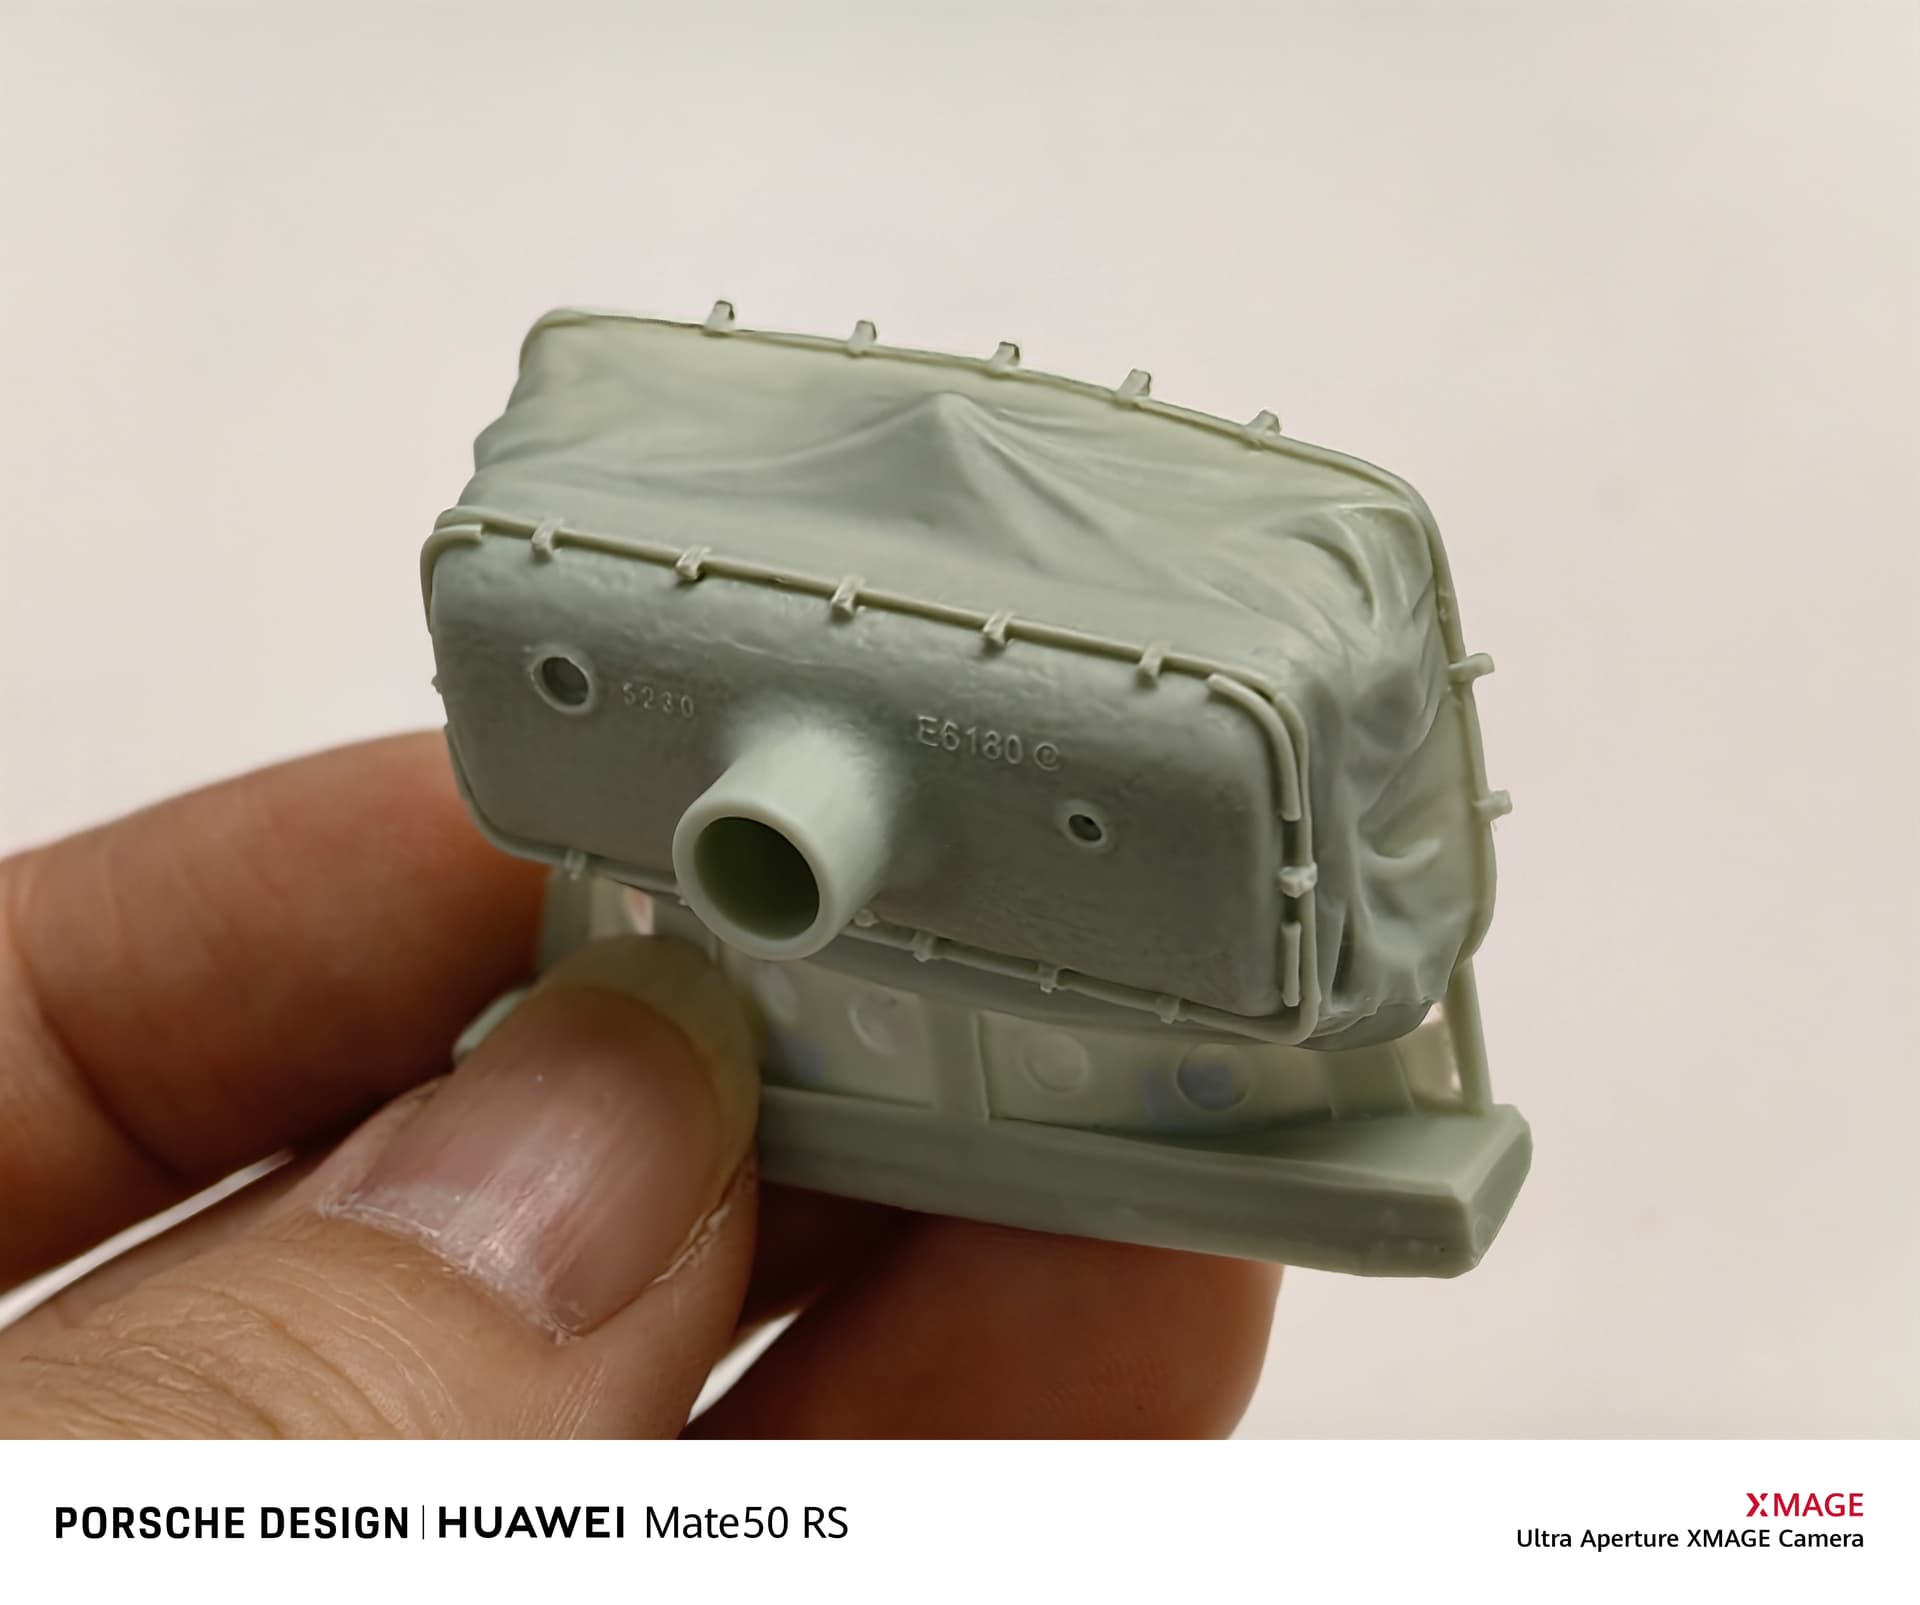
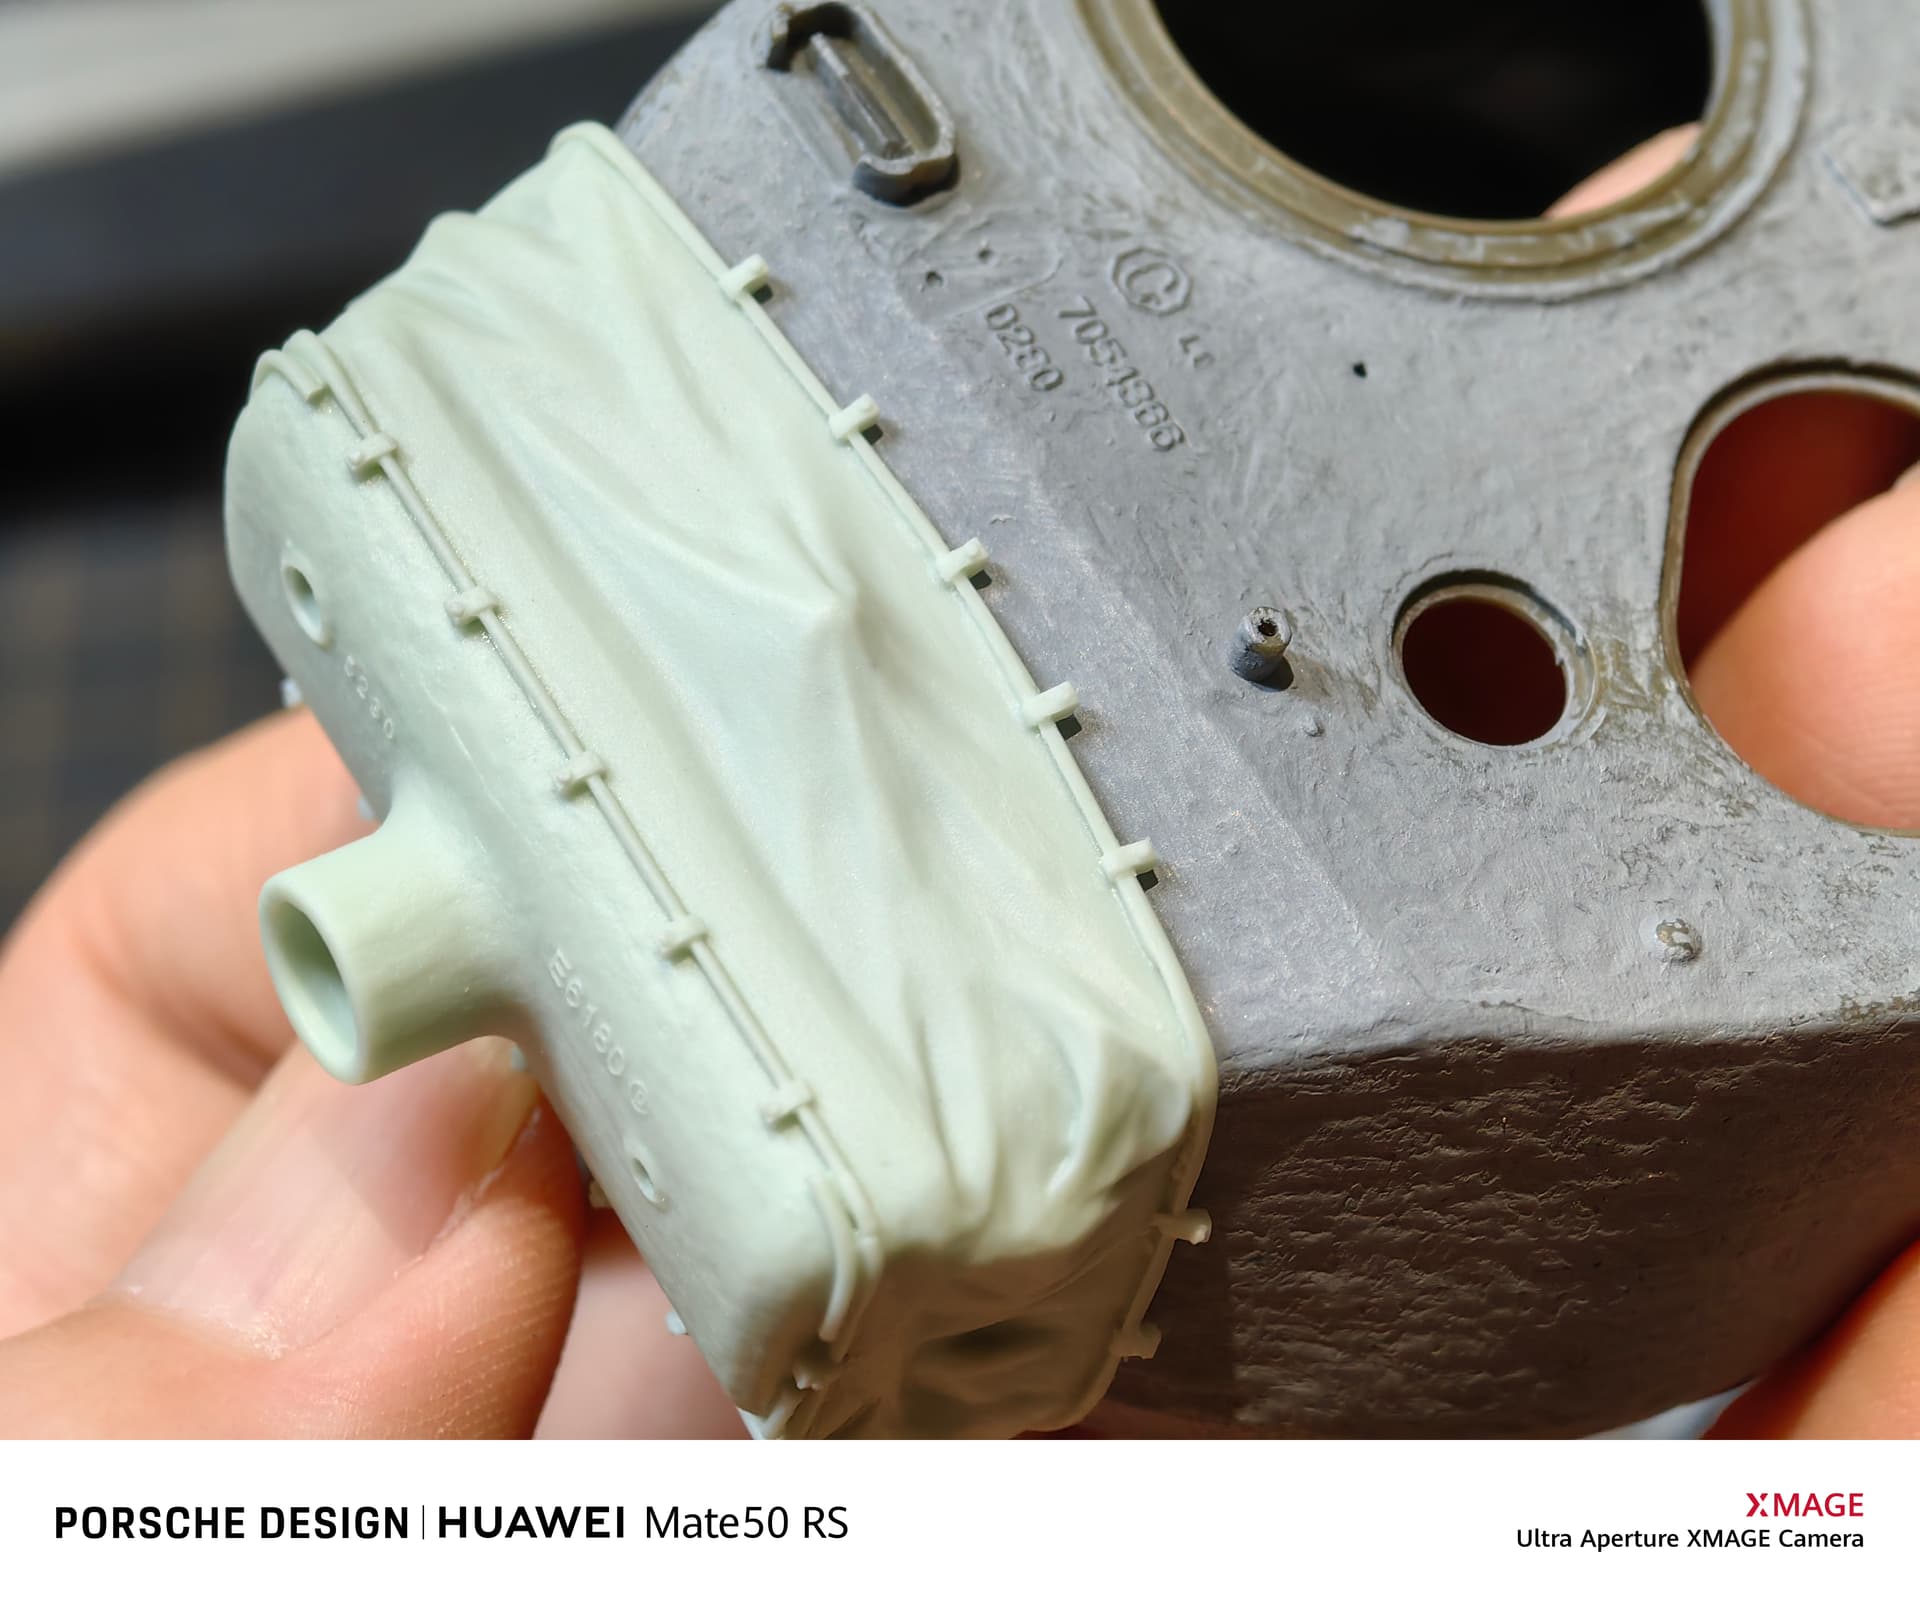
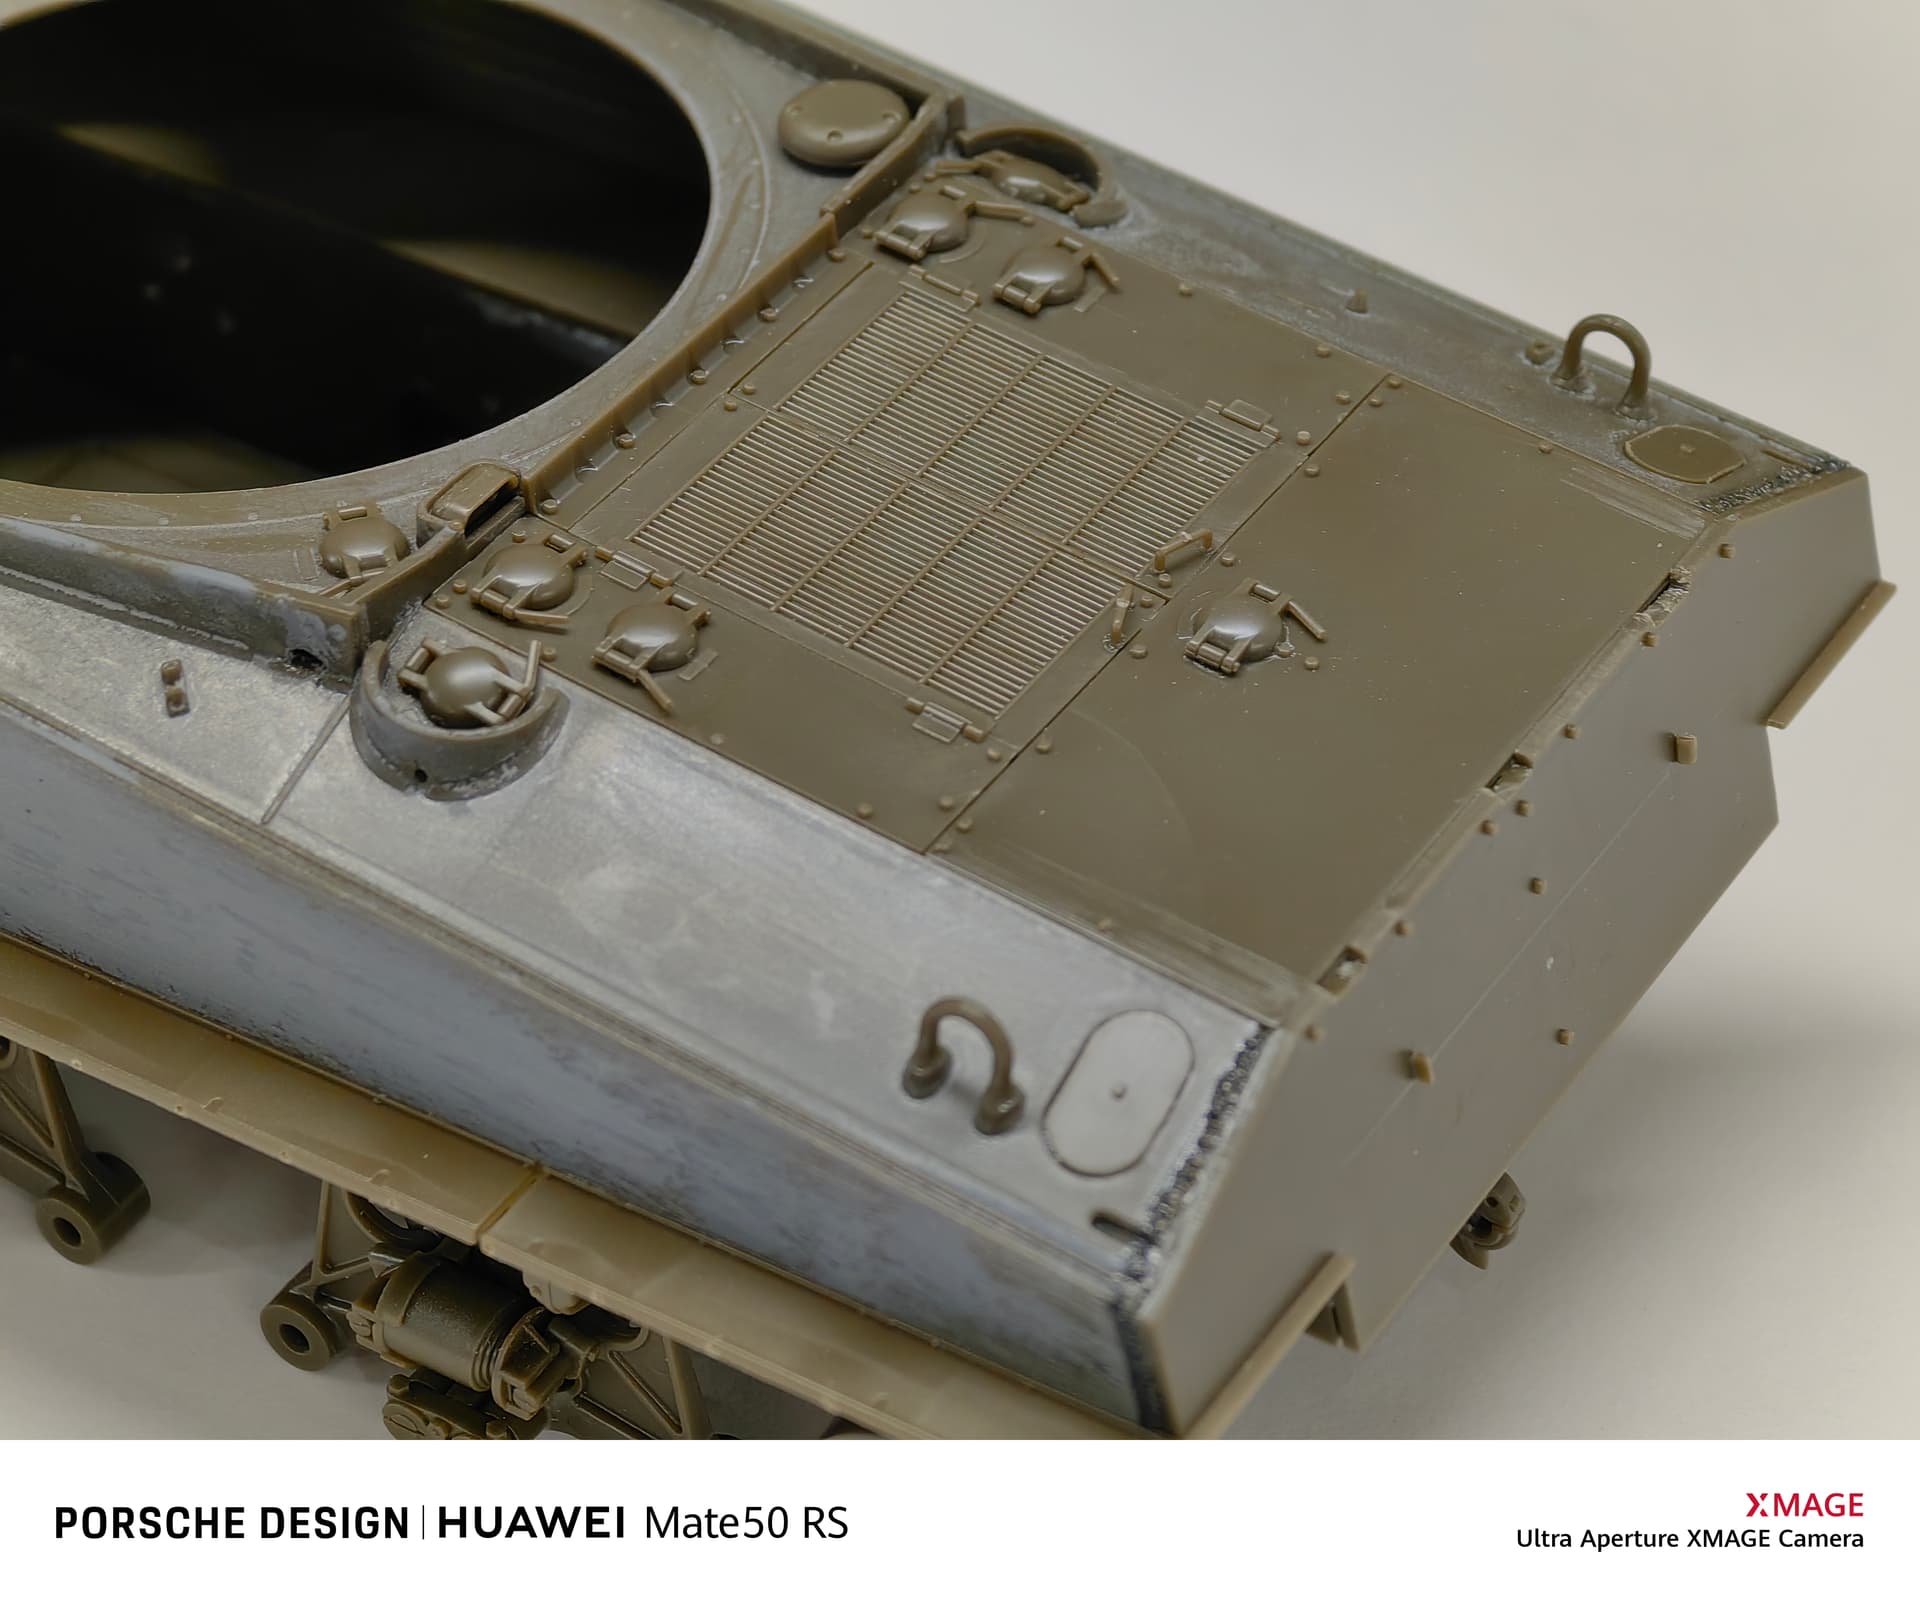
The turret and transmission cover have been polished a little bit more finely. Also I bought a mantlet canvas set from DEF, its details are great and I love it. It looks like a perfect fit.
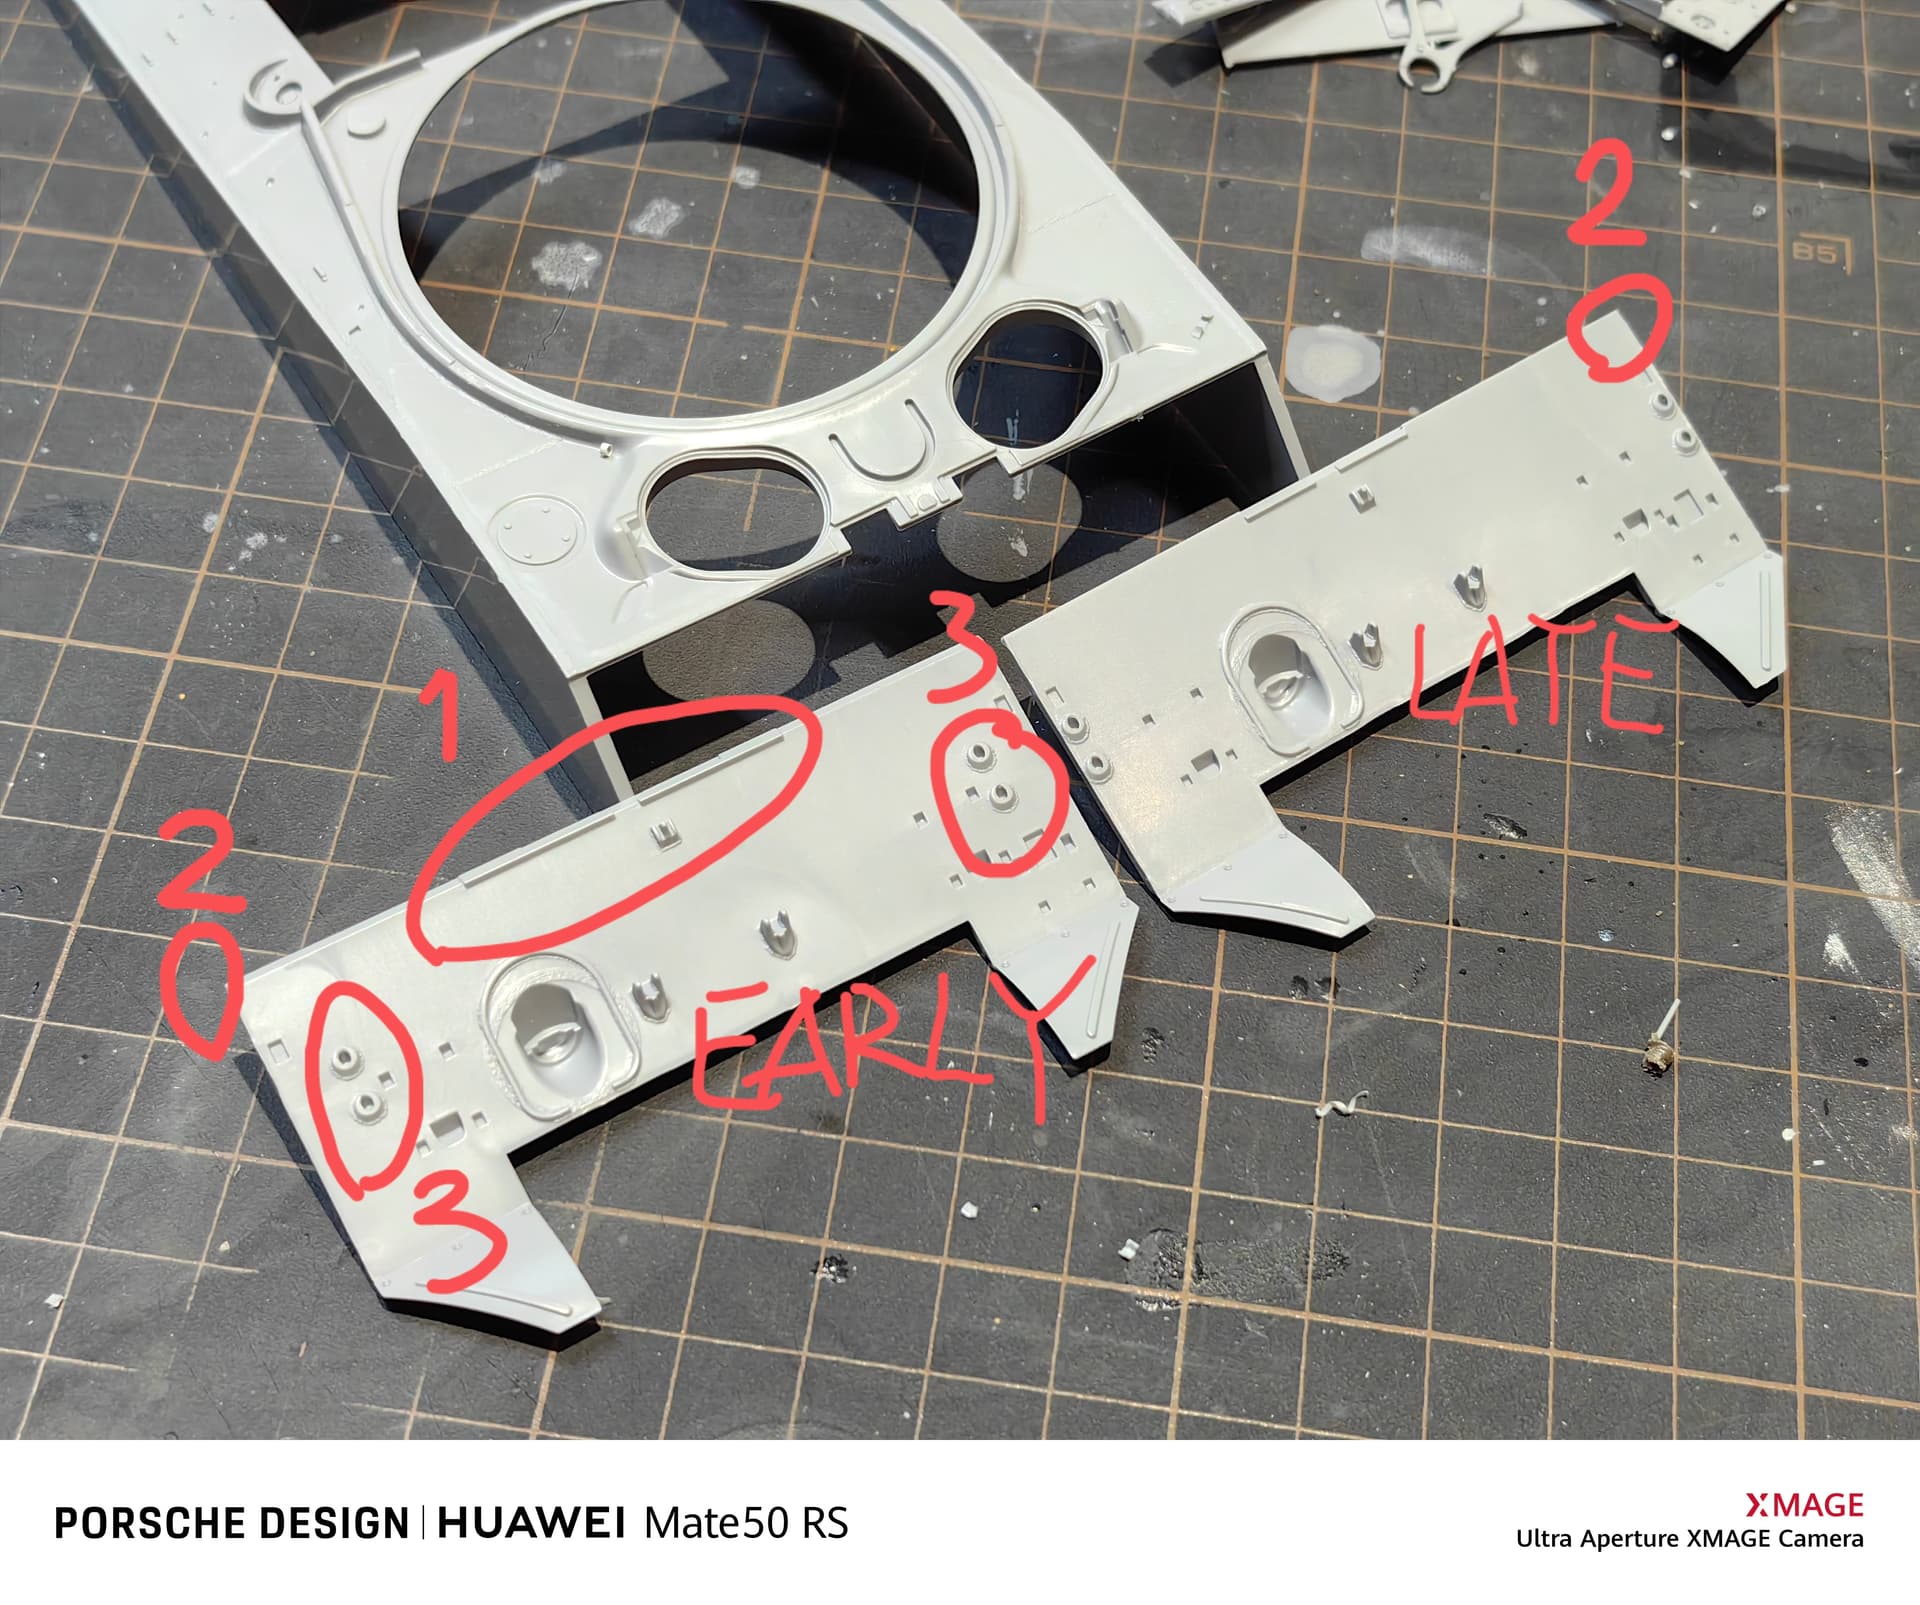
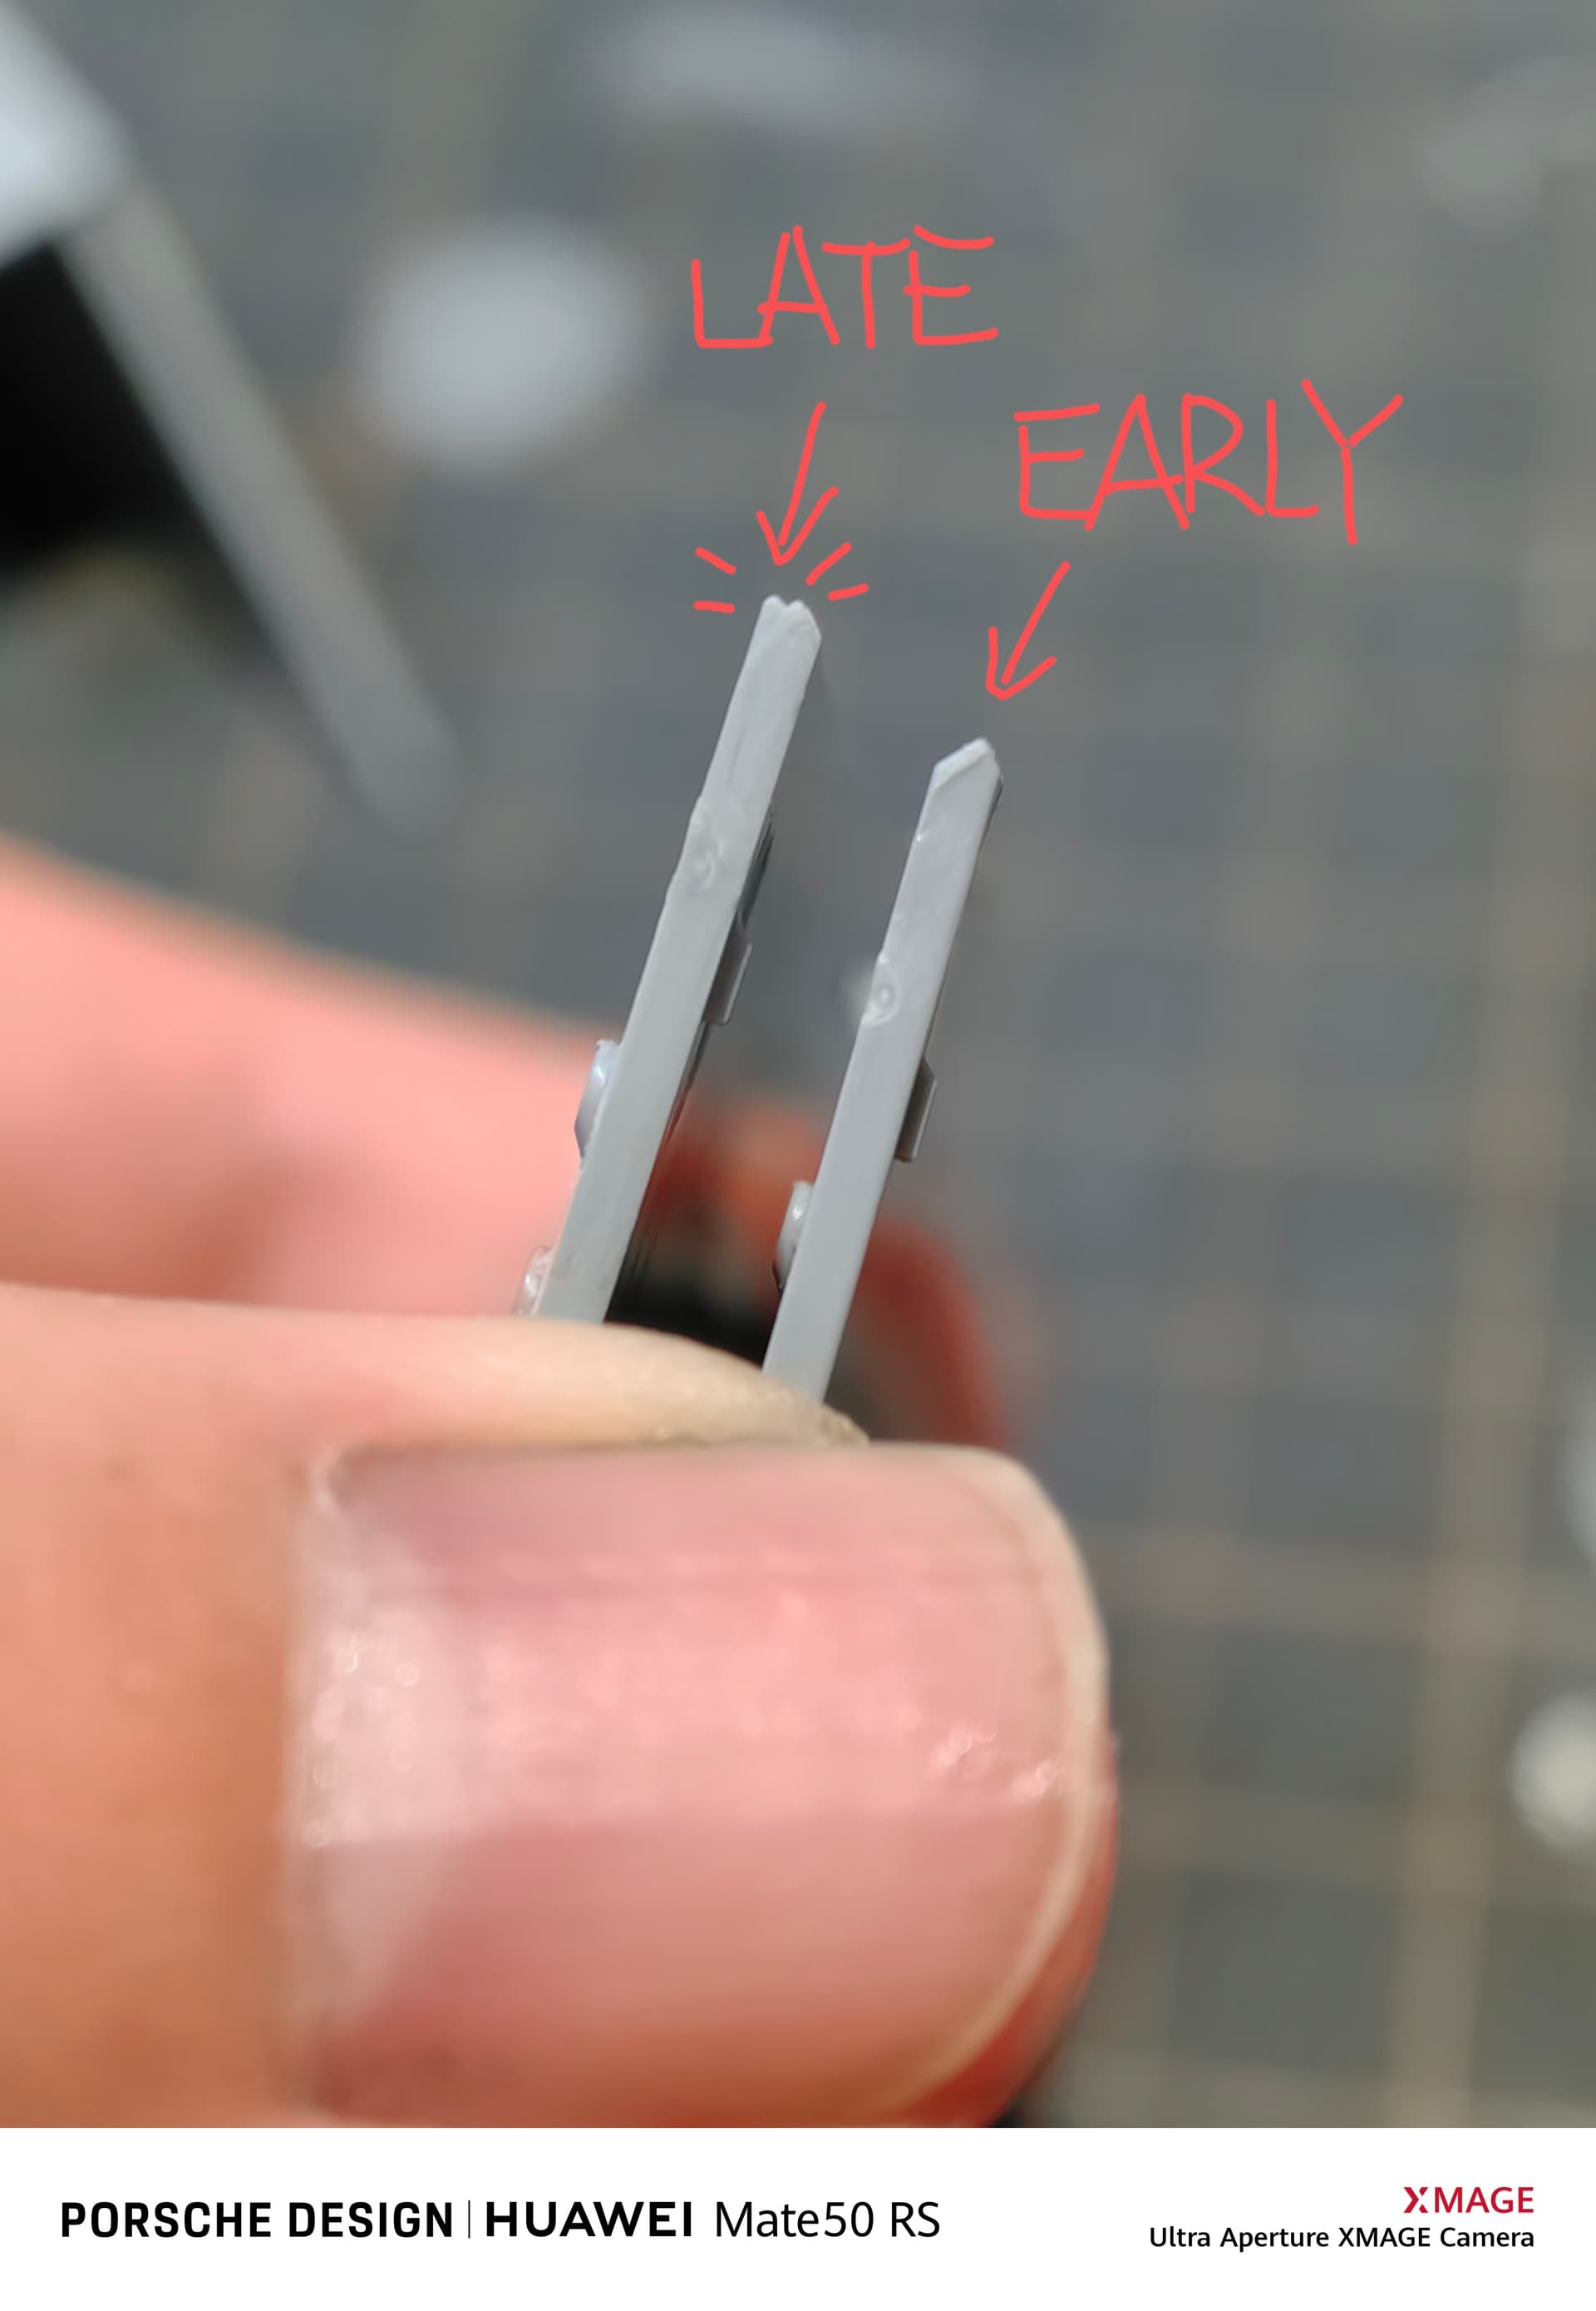
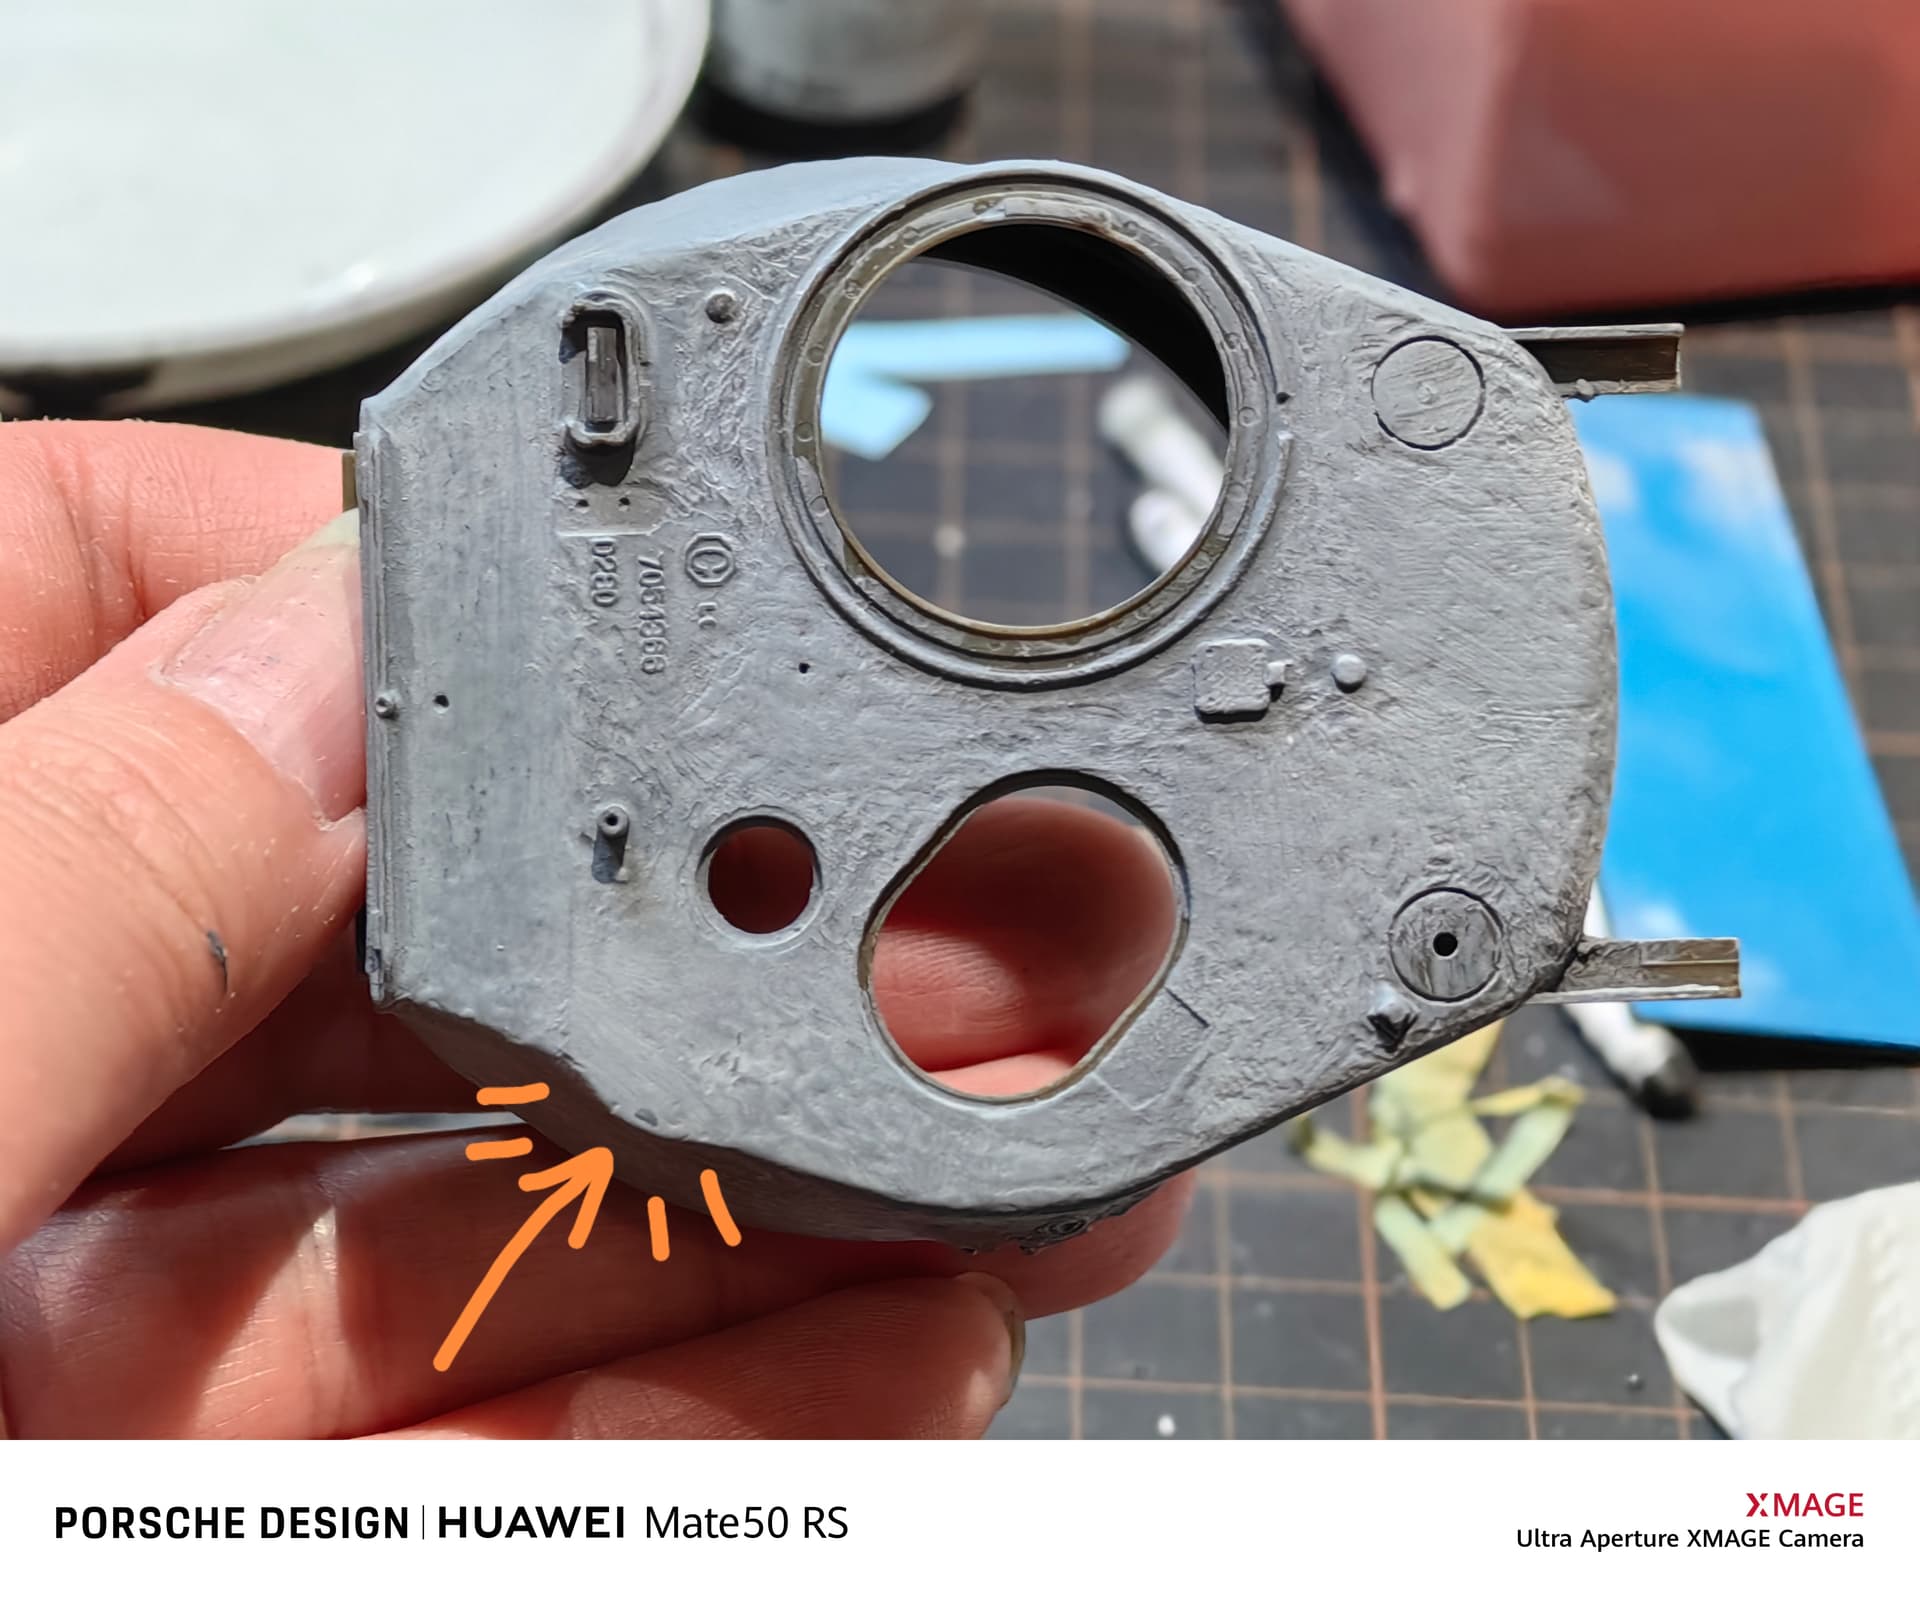
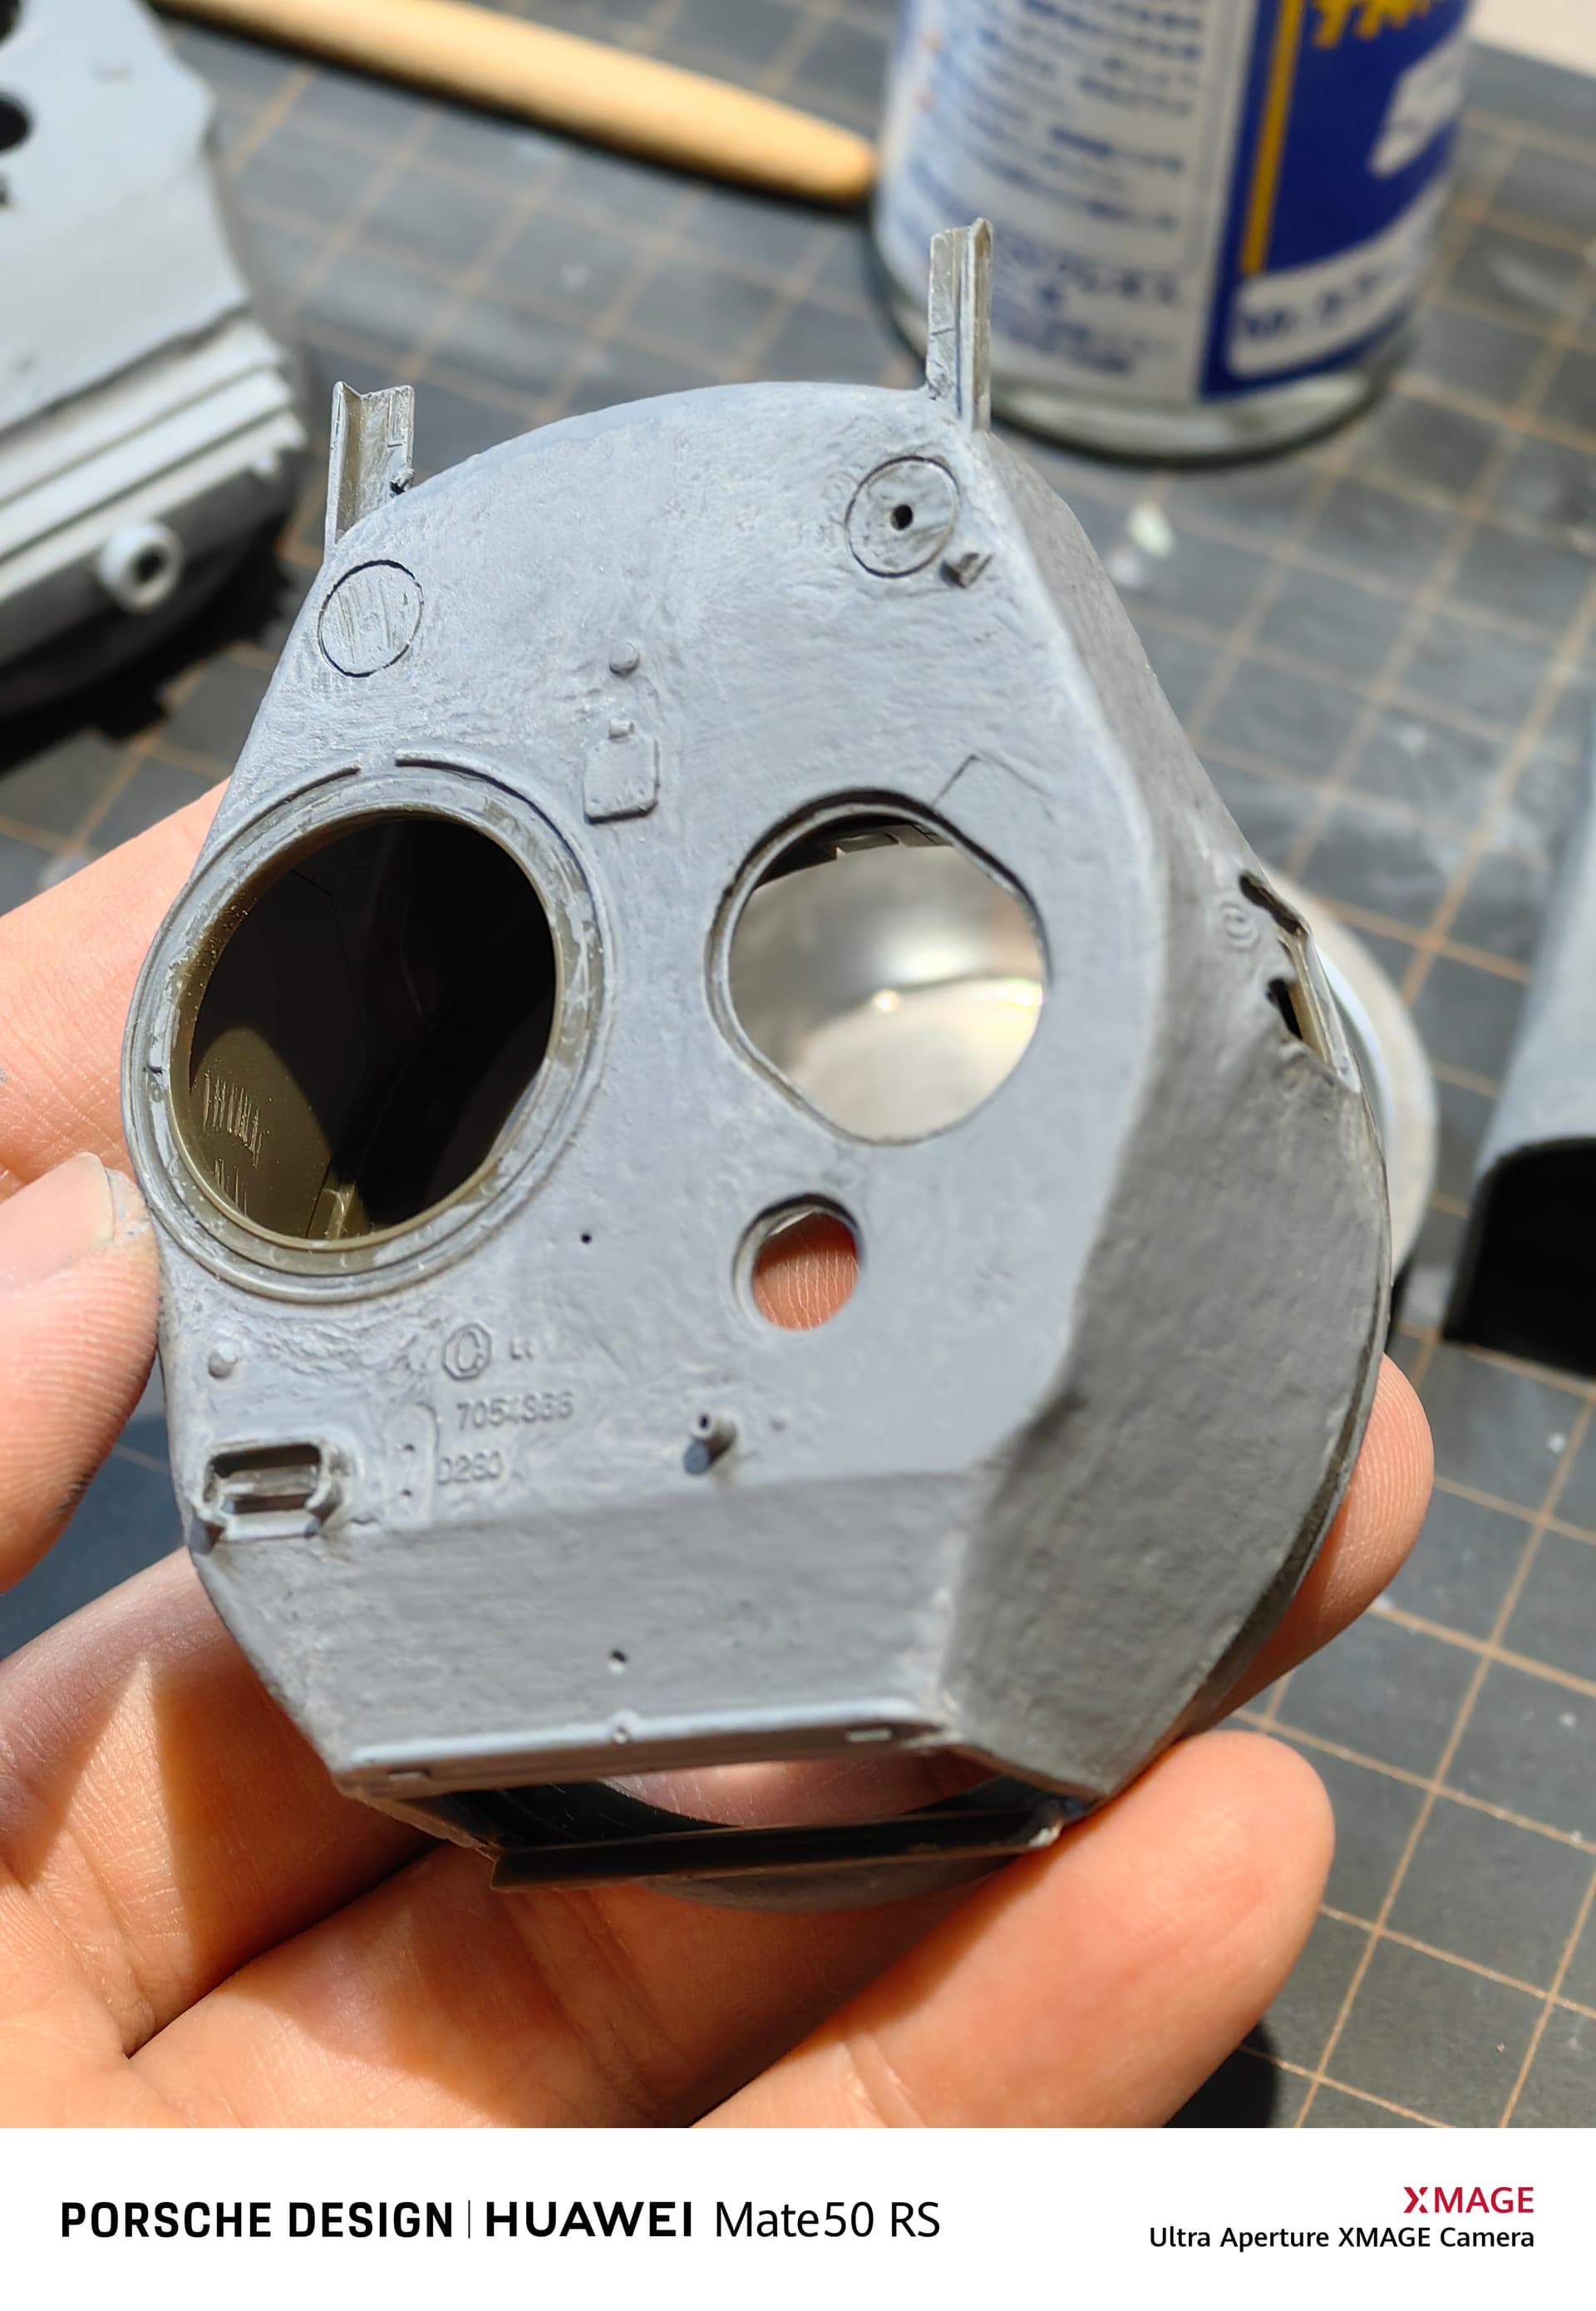
I found that the hull of Canadian M4A2E8 has the features belongs to the later type hull, while ASUKA’s M4A2 Marine Kit provides the early type hull. Specifically differents in (1) the welding method and side shape of the front armor plate are different, then (2) the length of the grooved detail at the periscope is different, and (3) the position of the lifting ring is different. This can be seen clearly in the latest ZVEZDA M4A2/76(W) kit. It presents two sets of front armor plates, Showing the different of the early and late types.
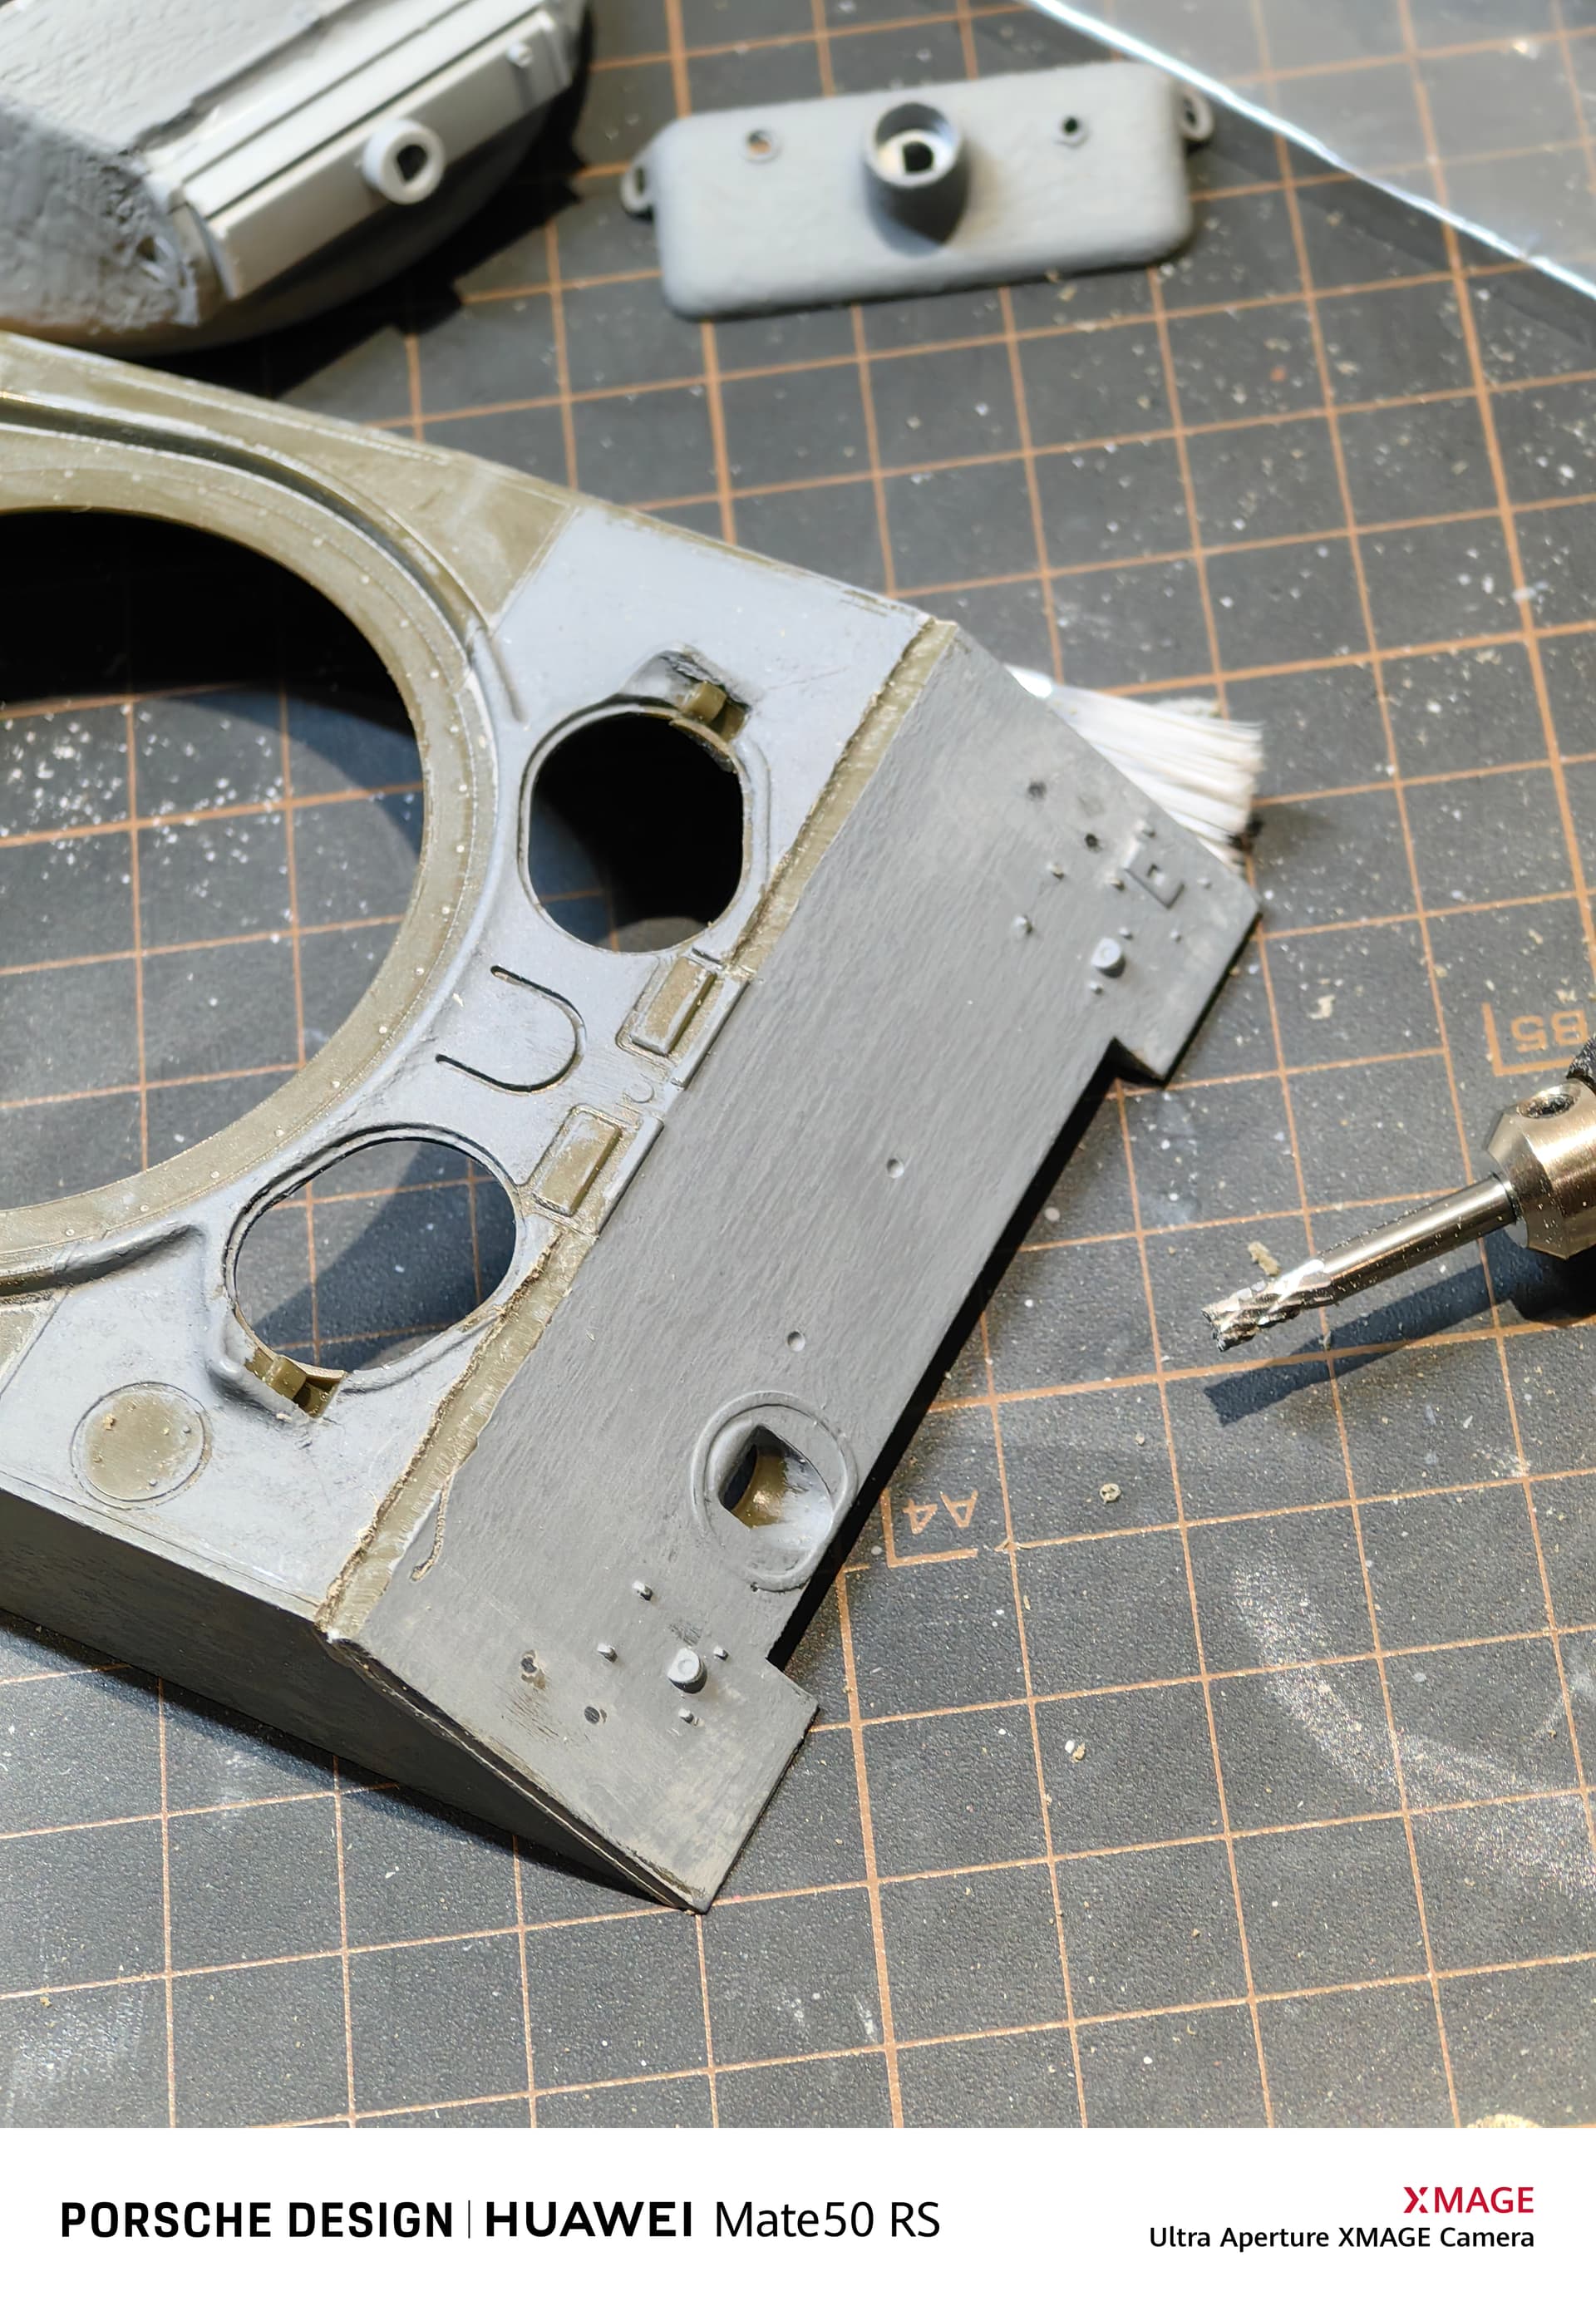
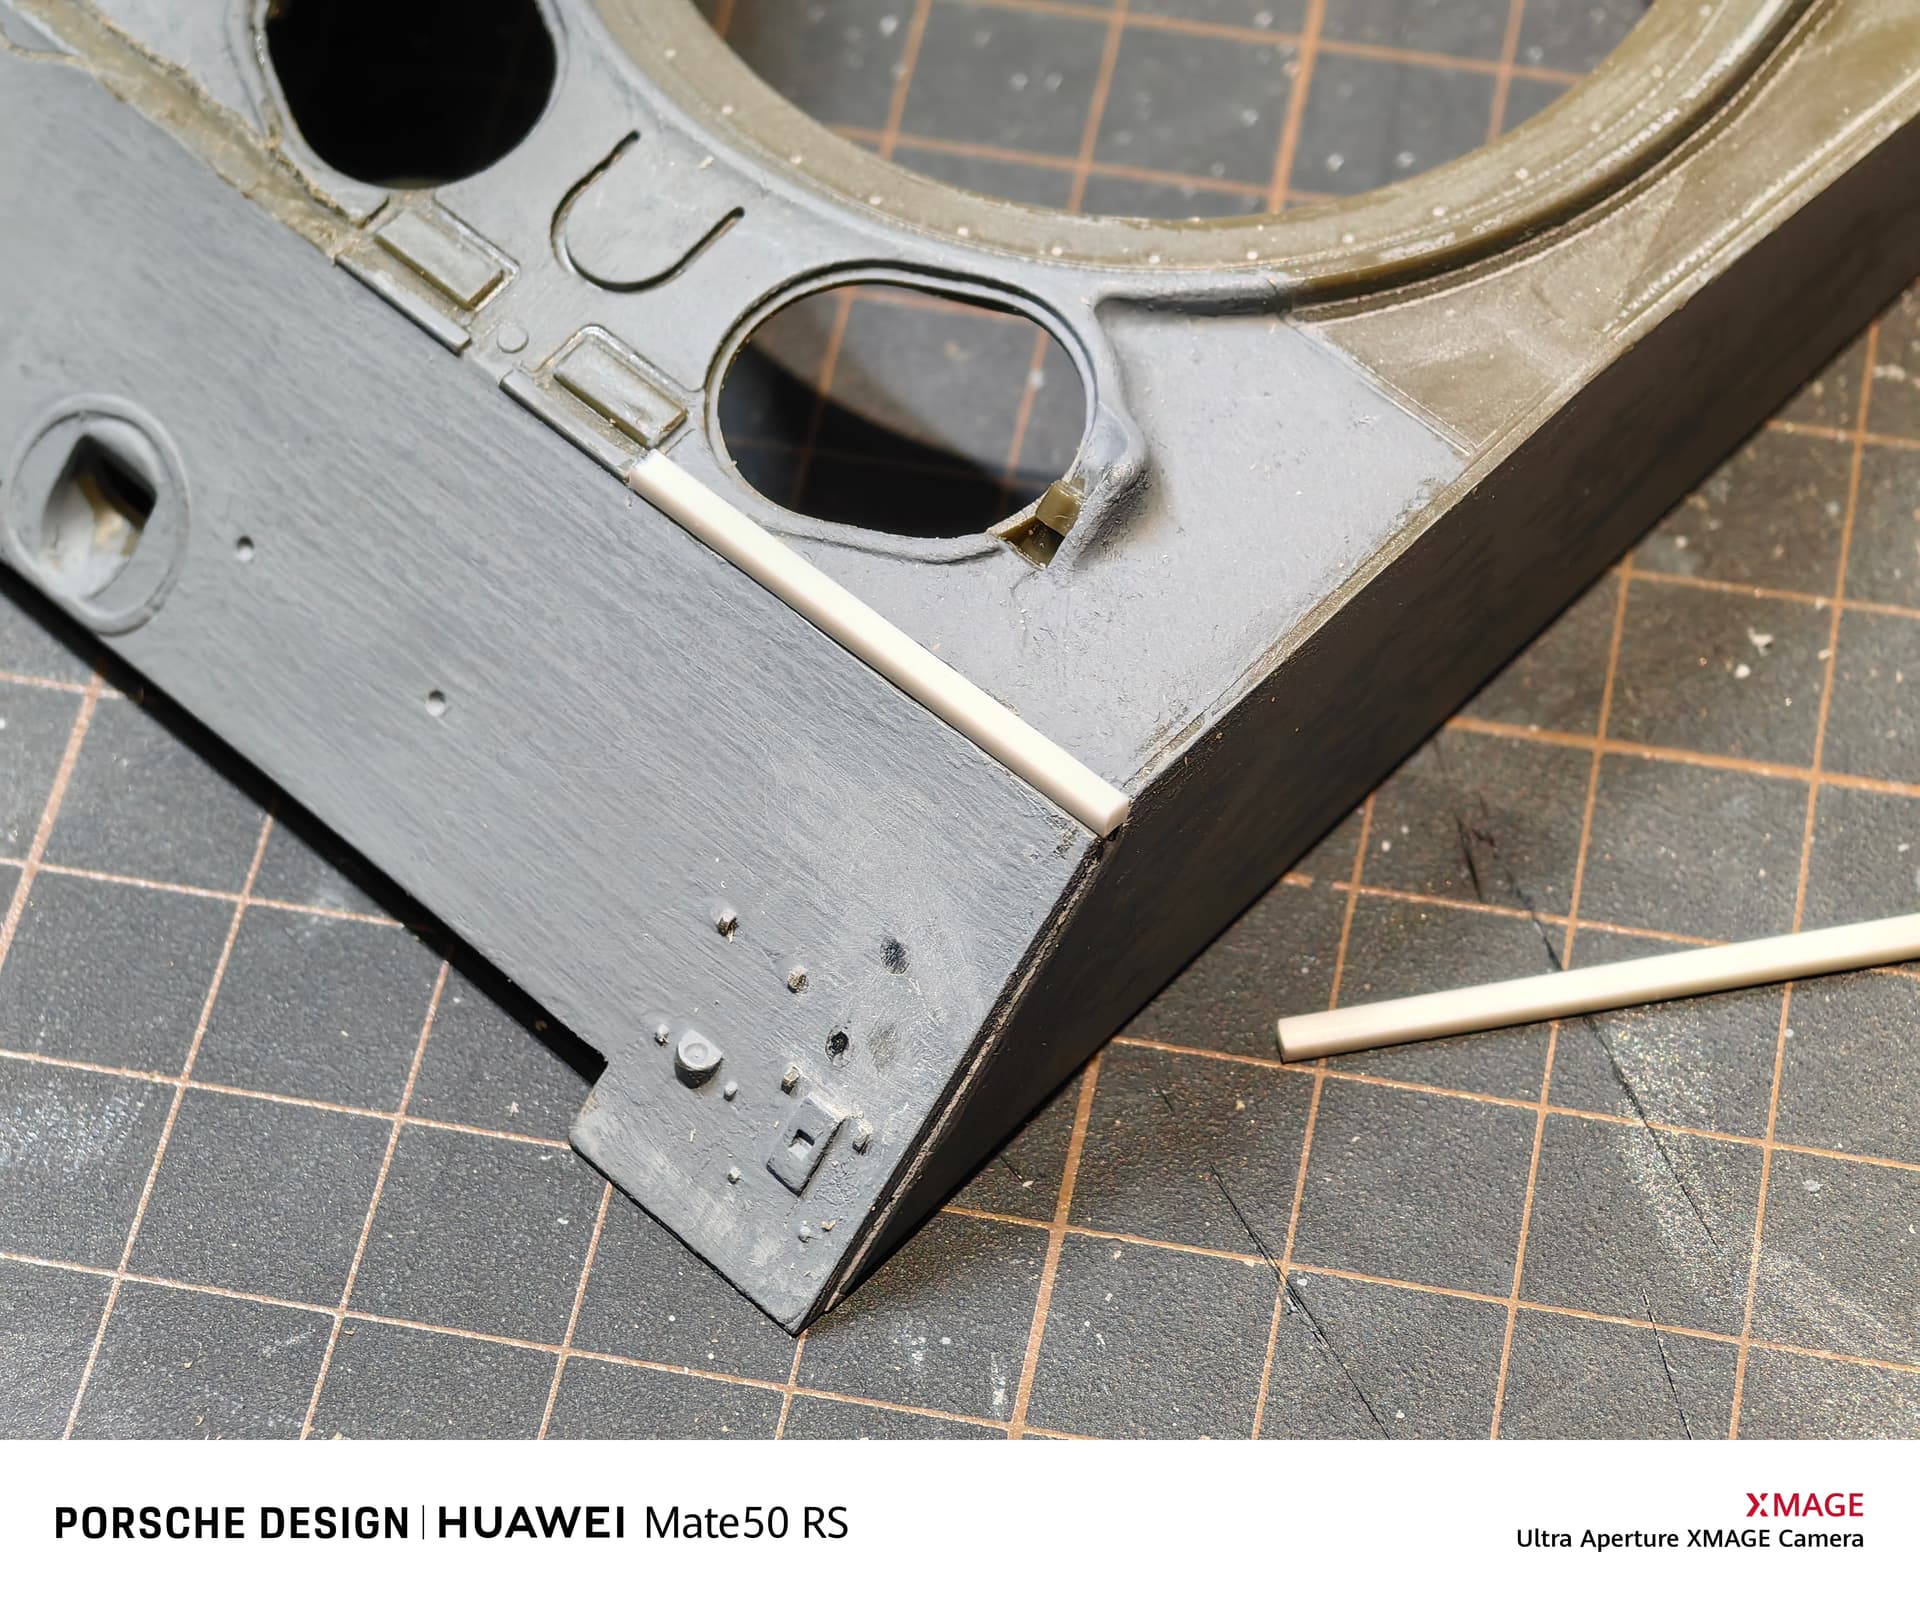
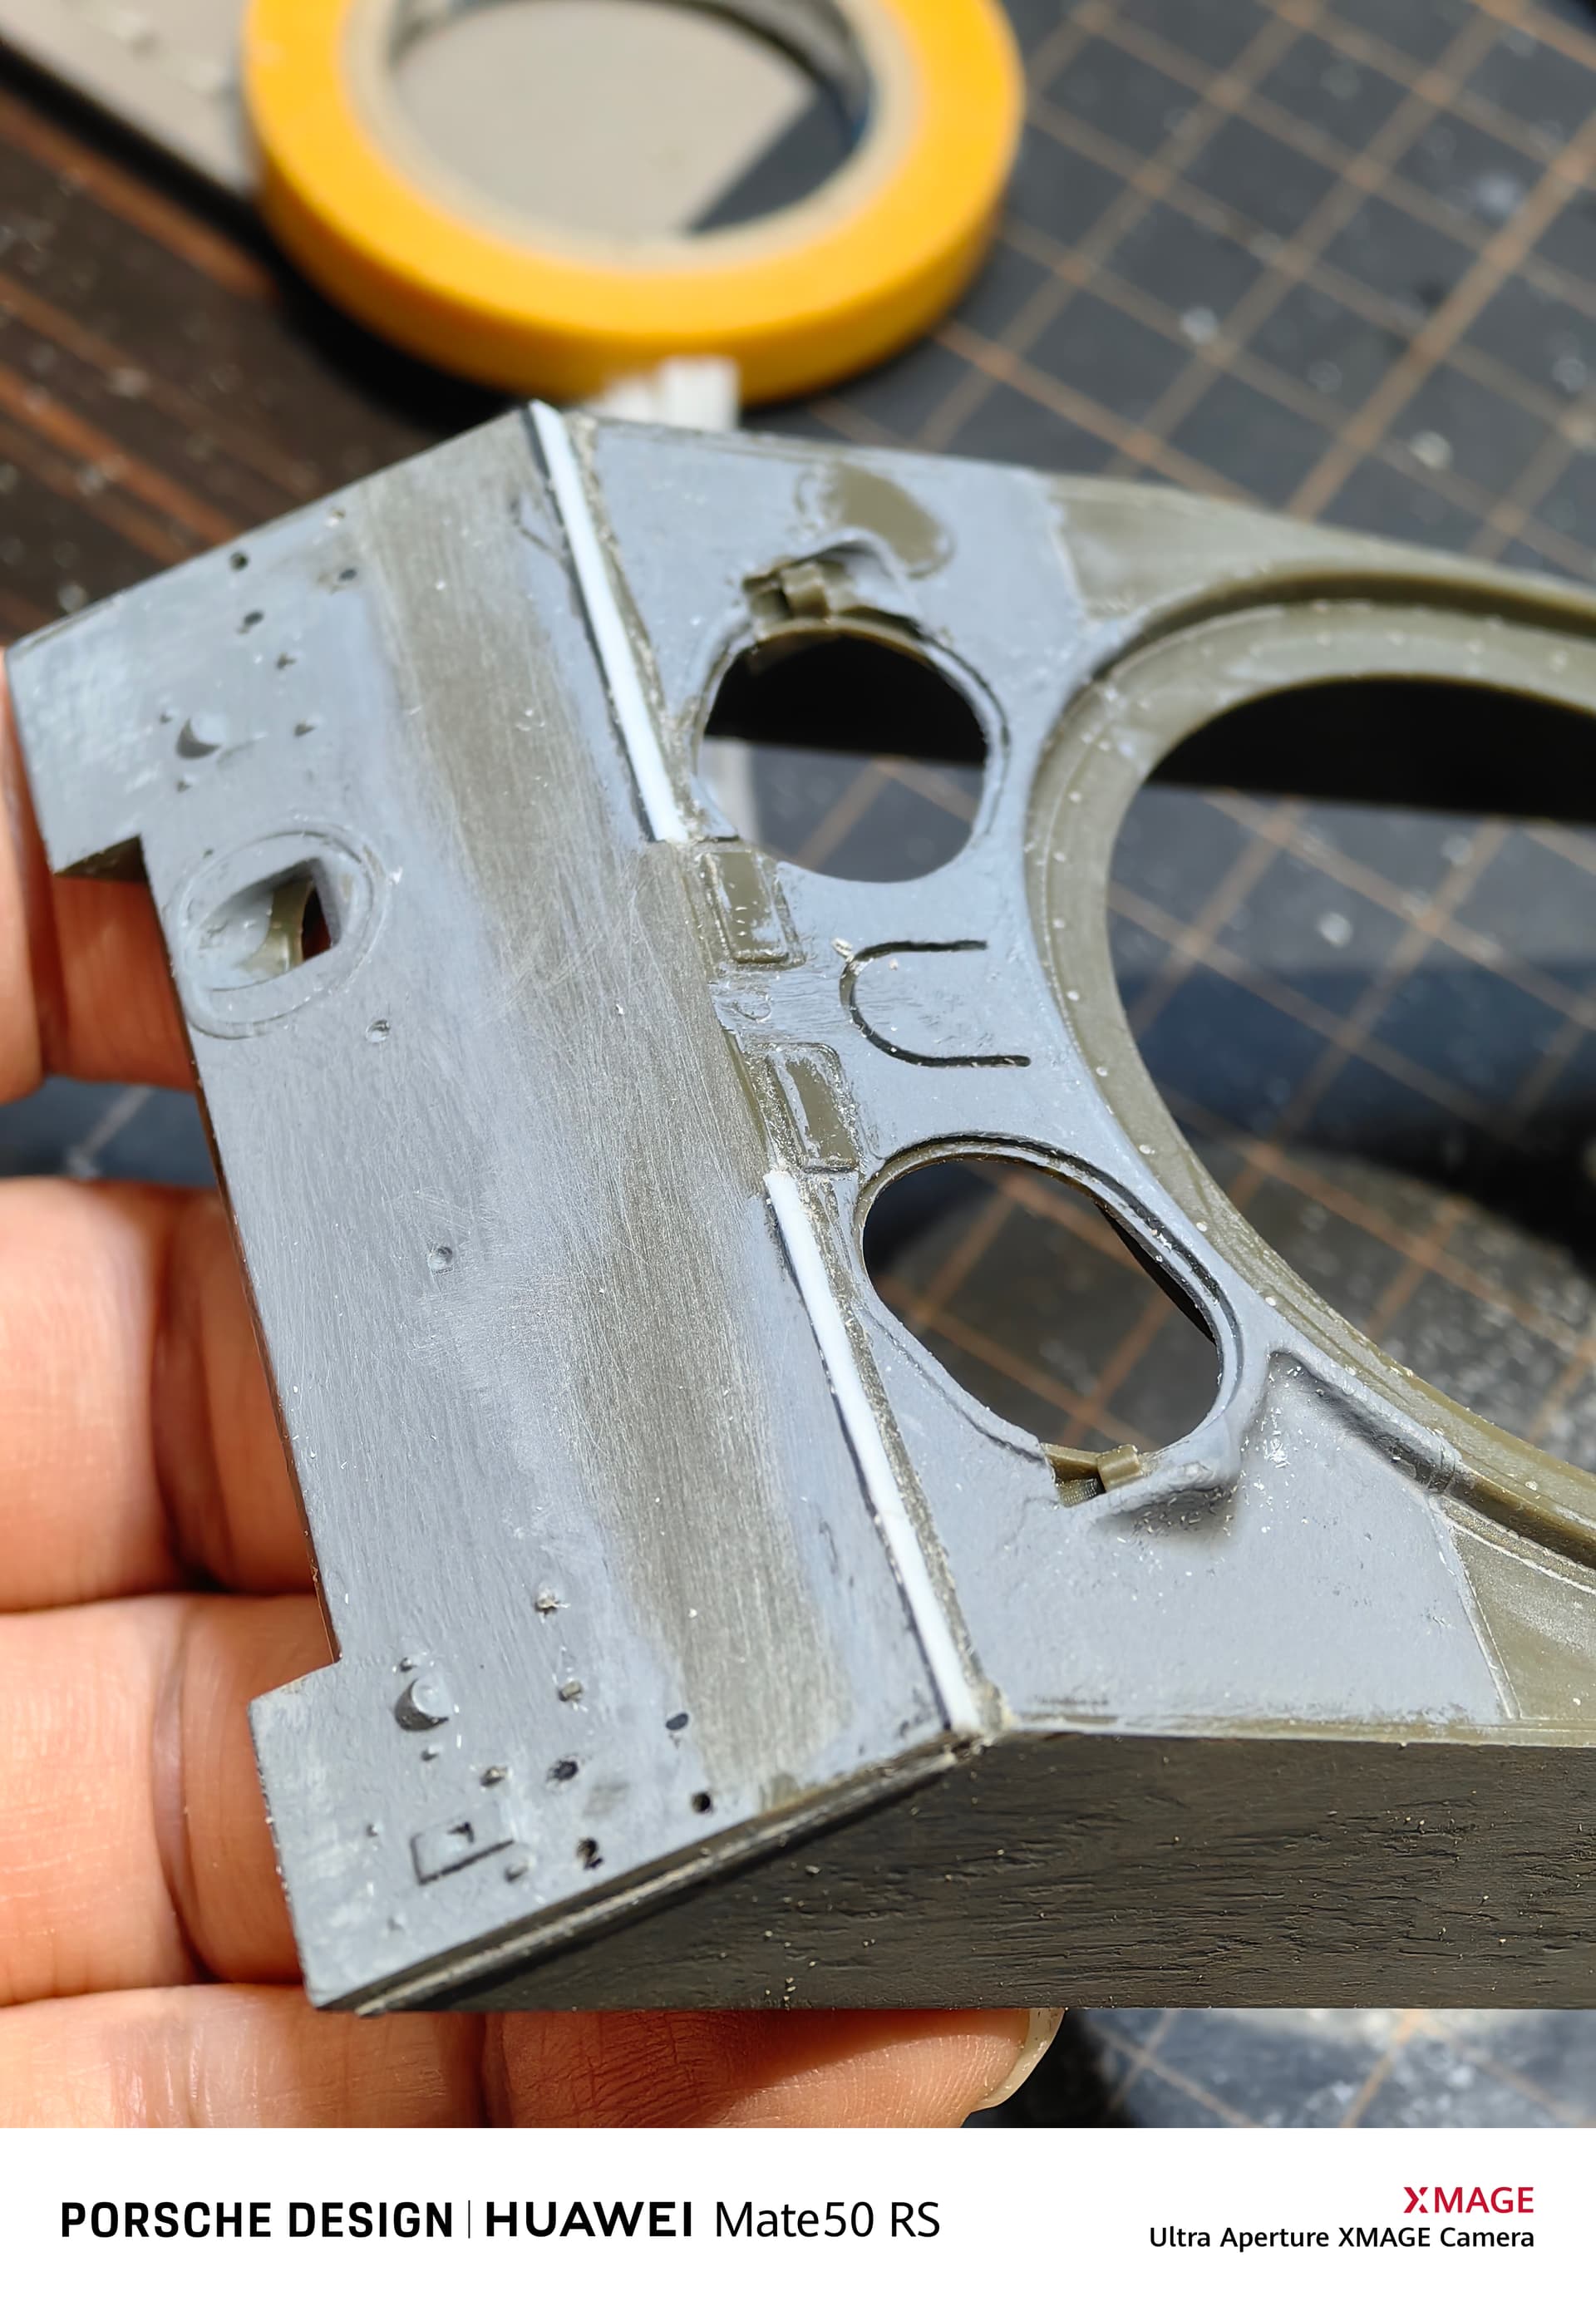
Of course, I only have ASUKA parts available now, so I can only modify them again. Modify welding wires and lifting rings are easier, but changing the side shape of armor plates is not. So I decided to grind off the top part first, add a thin plastic strip to raise the armor plate, and finally grind the desired shape with electric grinding. These jobs are polished at a scale of less than 1mm, if i’m not careful, it will grind too much. However, in the end, I basically achieved my goal and changed the hull to be a later type.
In 1946 the Royal Canadian Armoured Corps were equipped with 294 M4A2 76mm (W) Sherman’s with the HVSS suspension , which were purchased from the United States at a cost of $1,460.00 each. The M4A2 76mm (W) , the (W) referred to “wet” stowage for the 76mm ammunition, the HVSS refers to Horizontal Volute Spring Suspension… In Canadian service they were called the M4A2E8 in our lesson plans and tech manuals. The Use of M4A2 76(W) is also correct, and also the US designation as detailed on the data plate is correct. The tanks were used by the regular force units until the early 1950’s as they were issued with Centurion Mk 5’s, the Shermans were reissued to the Militia (reserve) armoured units, who used them as mentioned when the last one was phased out in 1972. The Oshawa Ontario Regimental Museum has restored a Sherman gate guard in the camo pattern as seen in the photos.
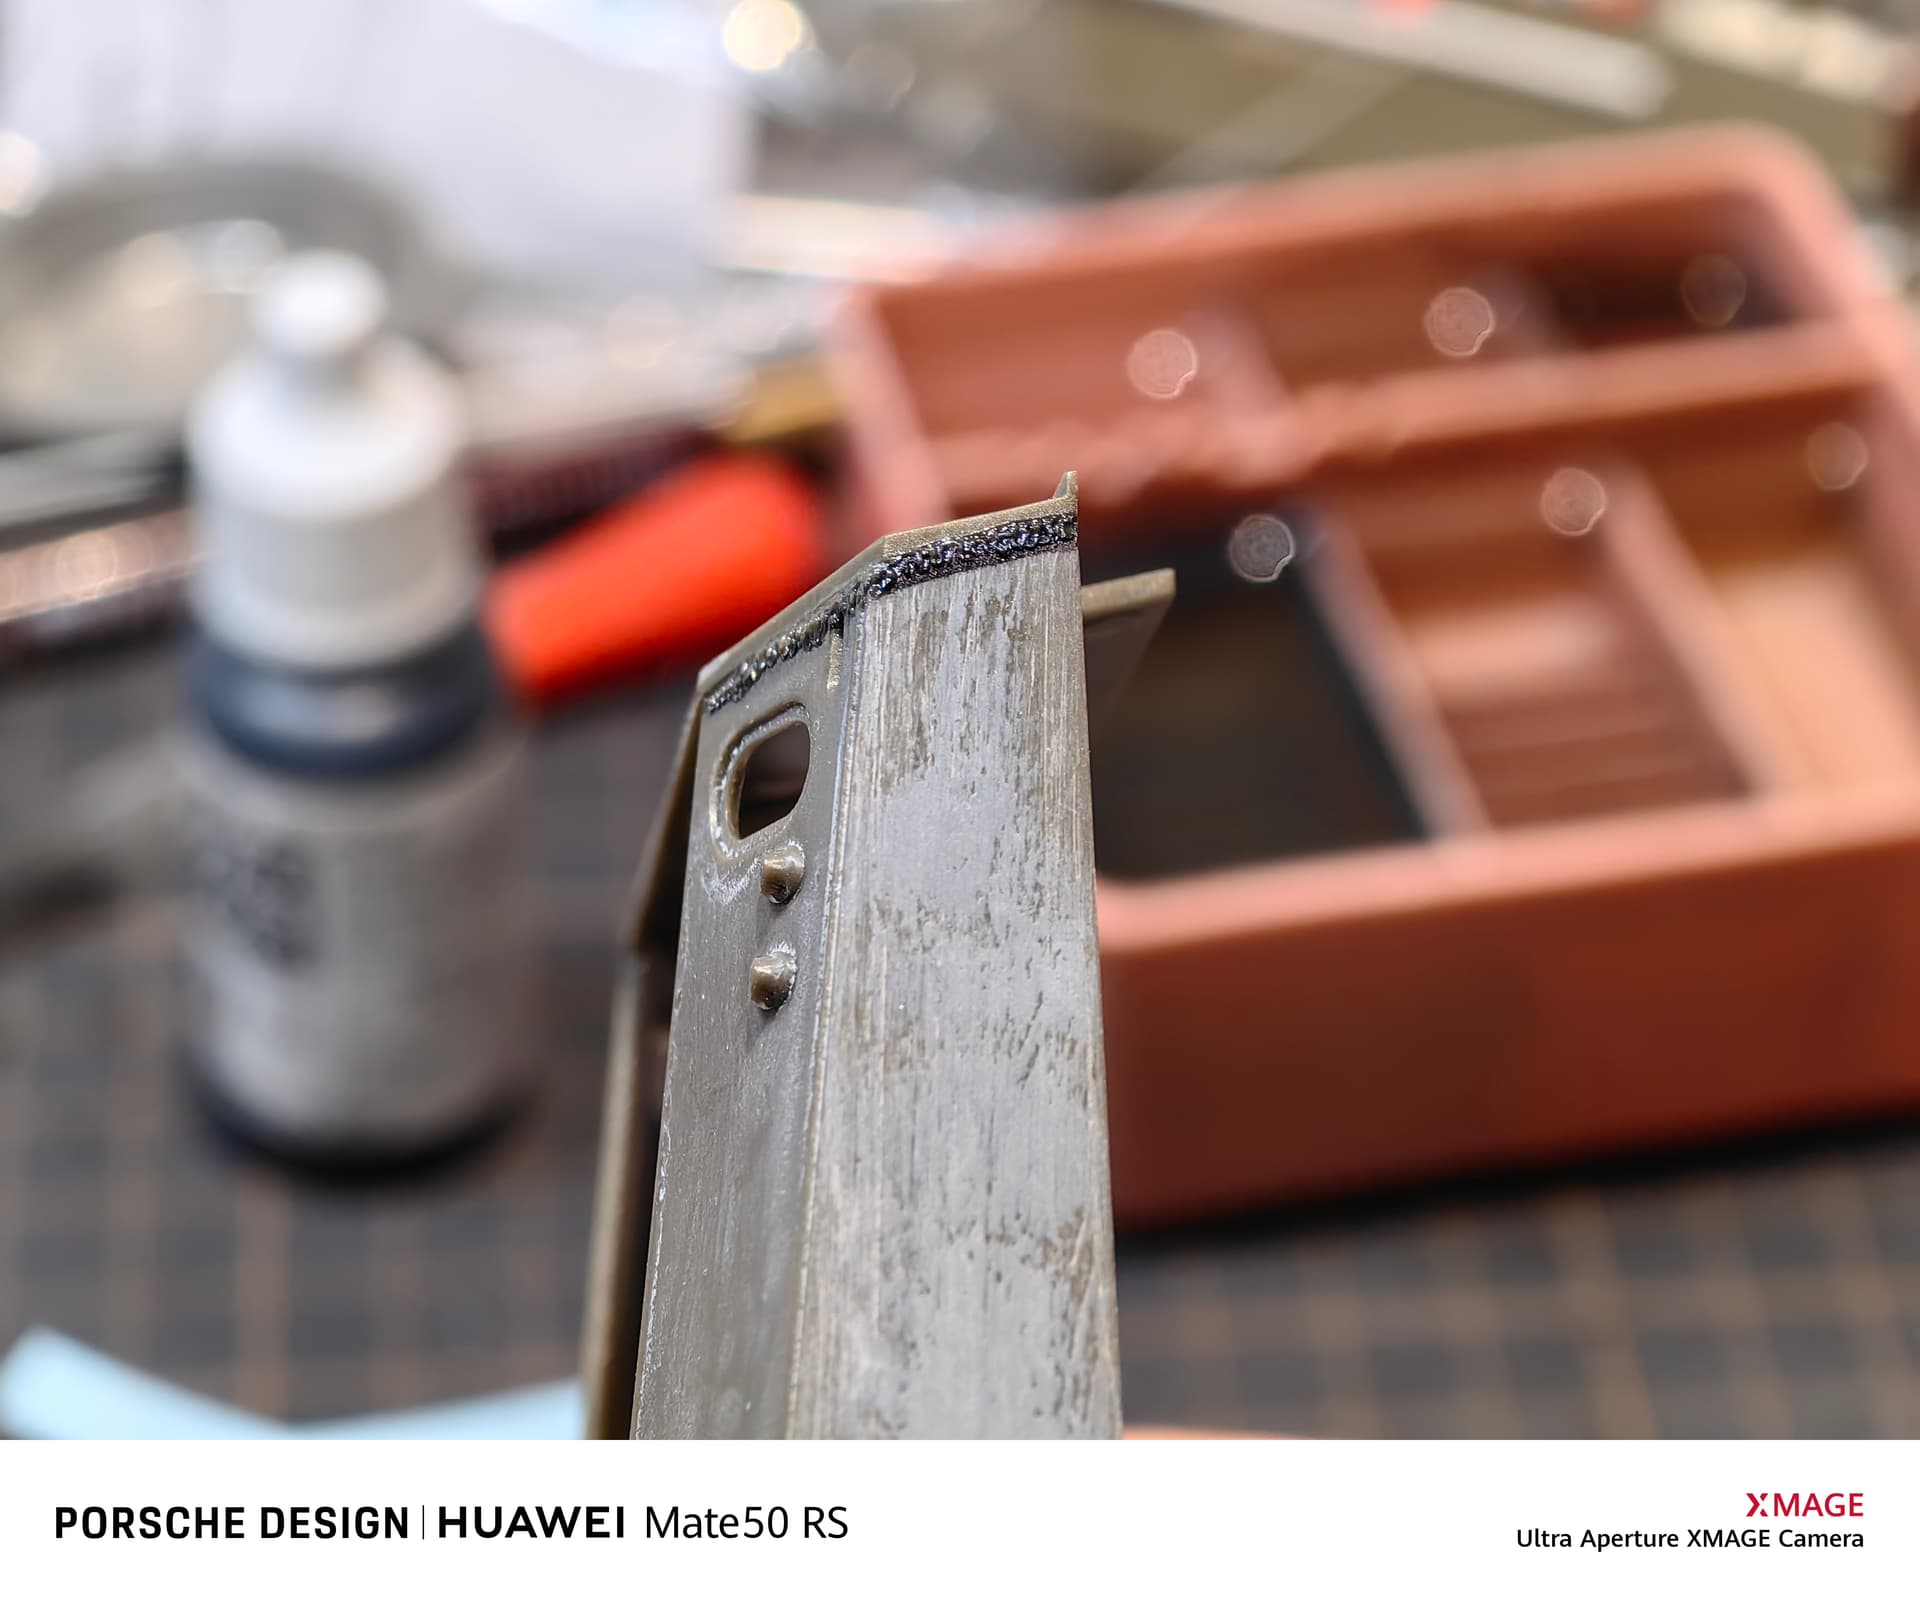
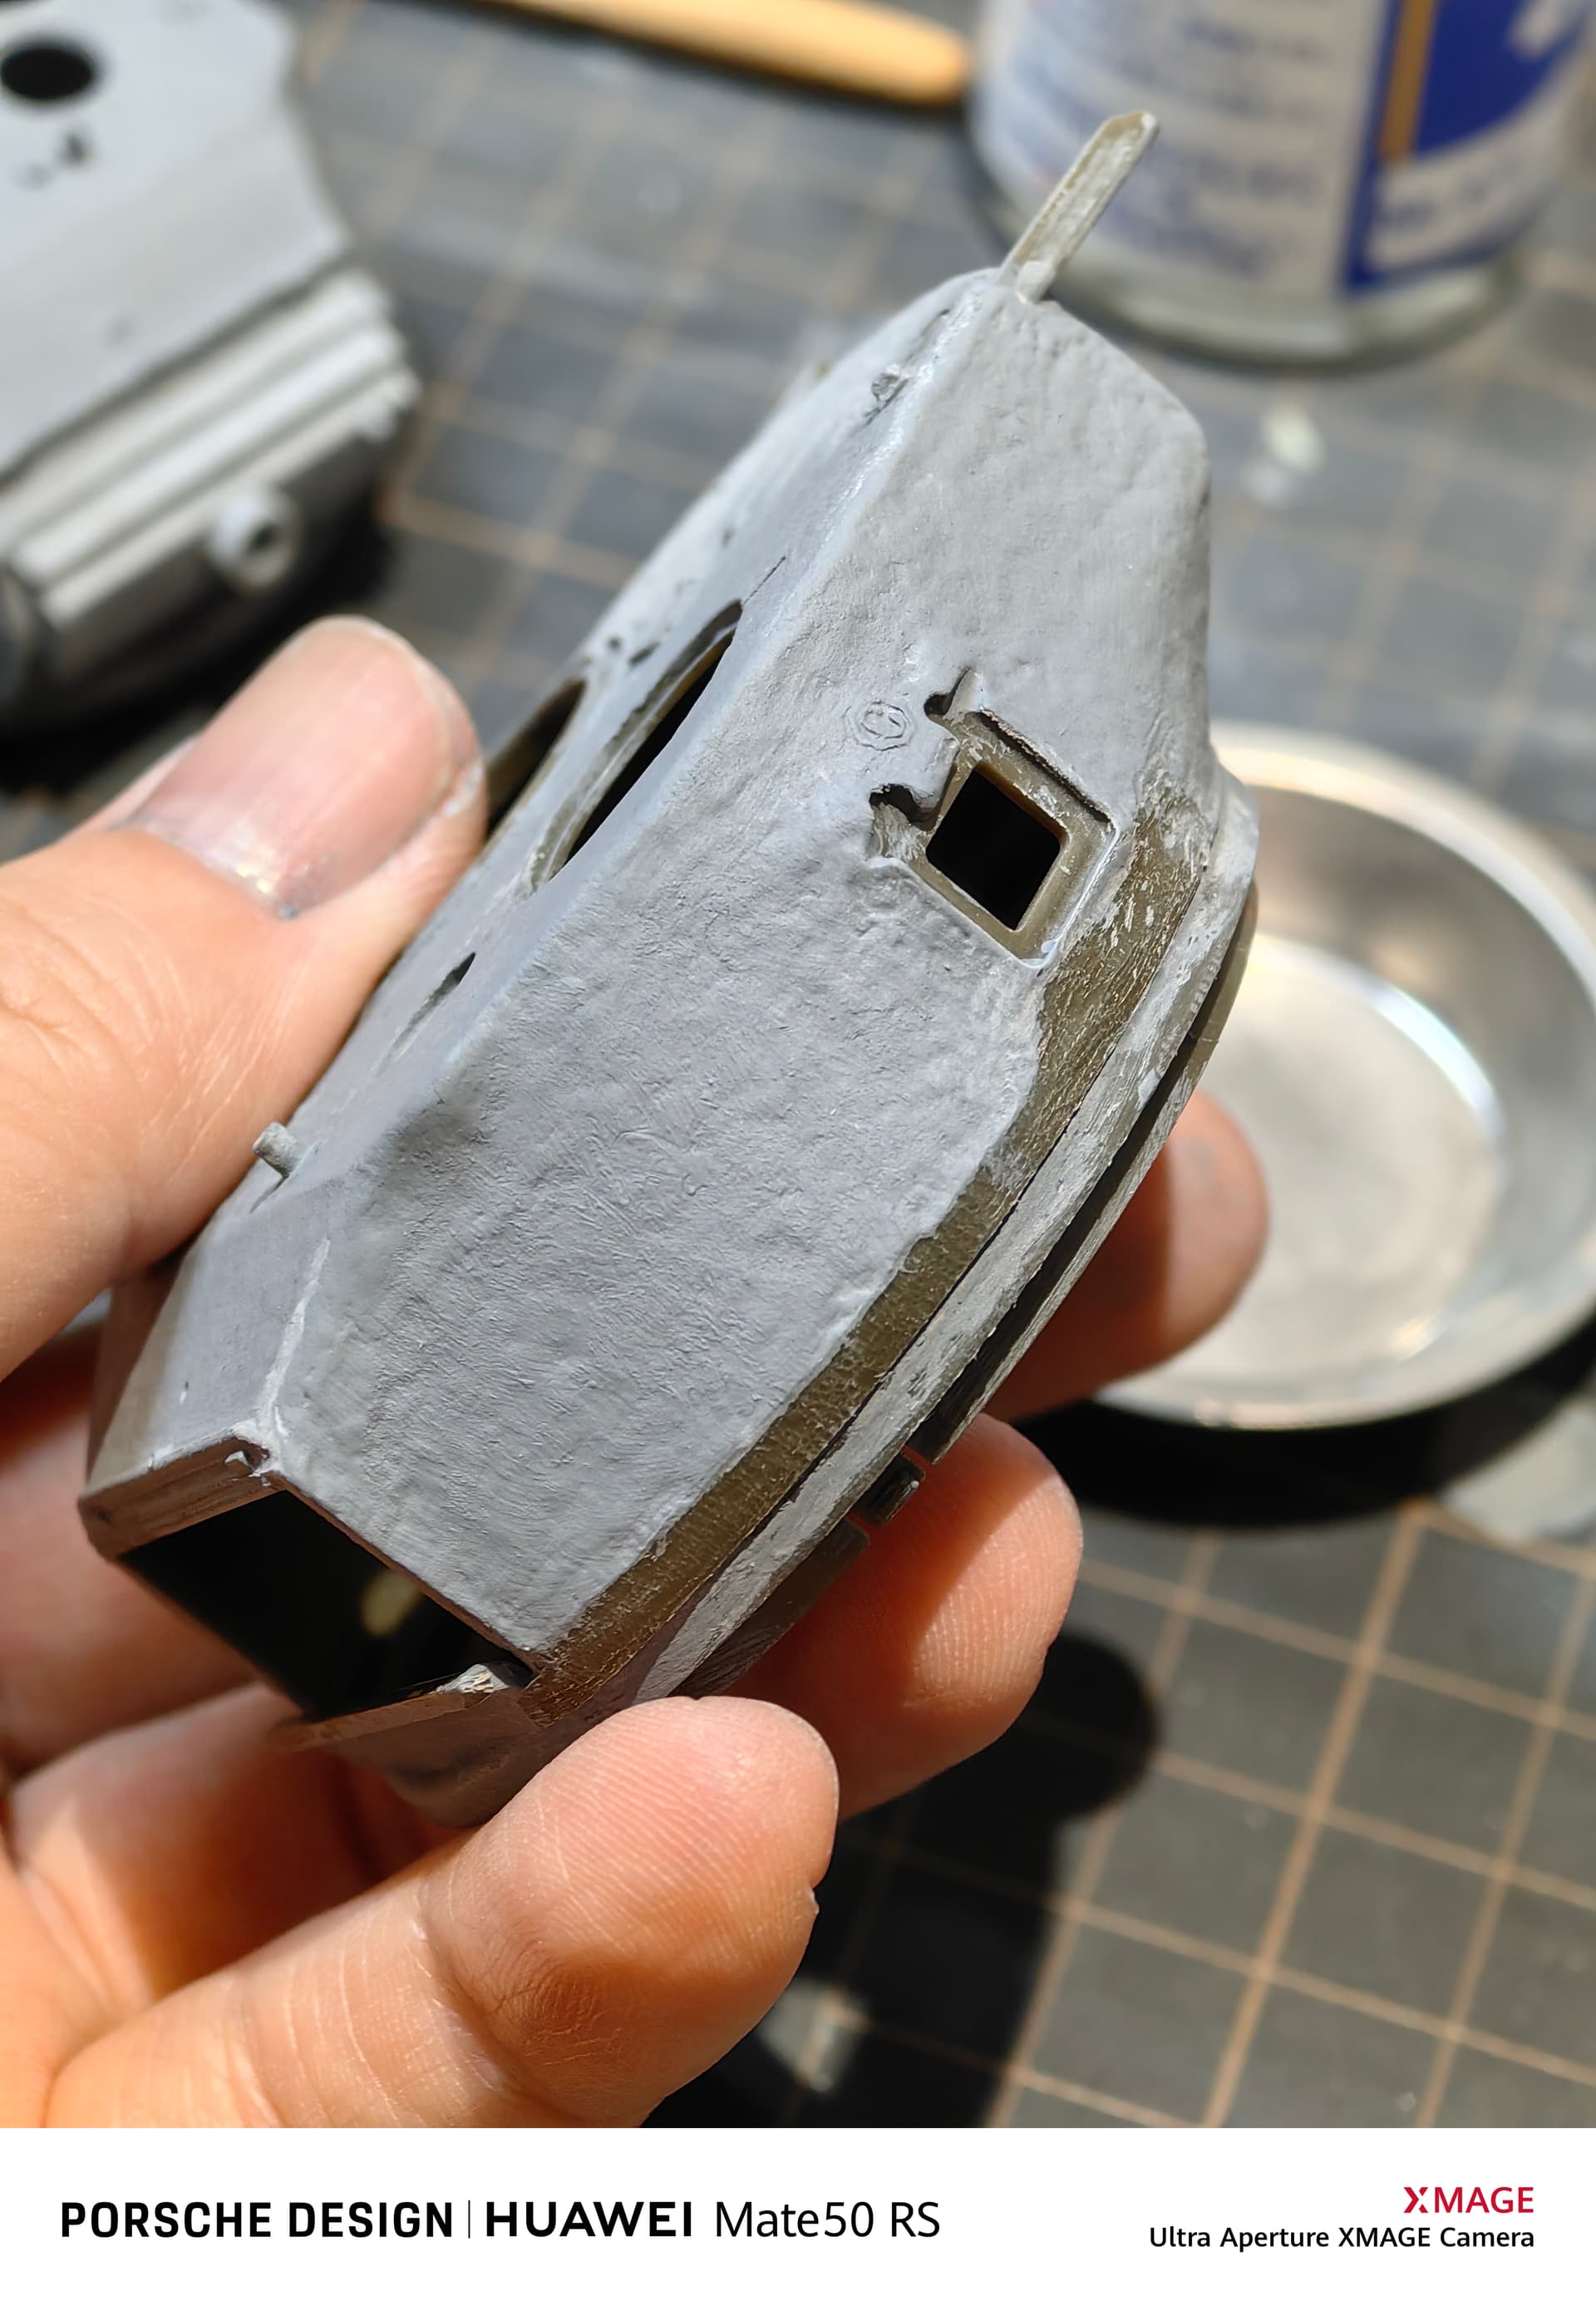
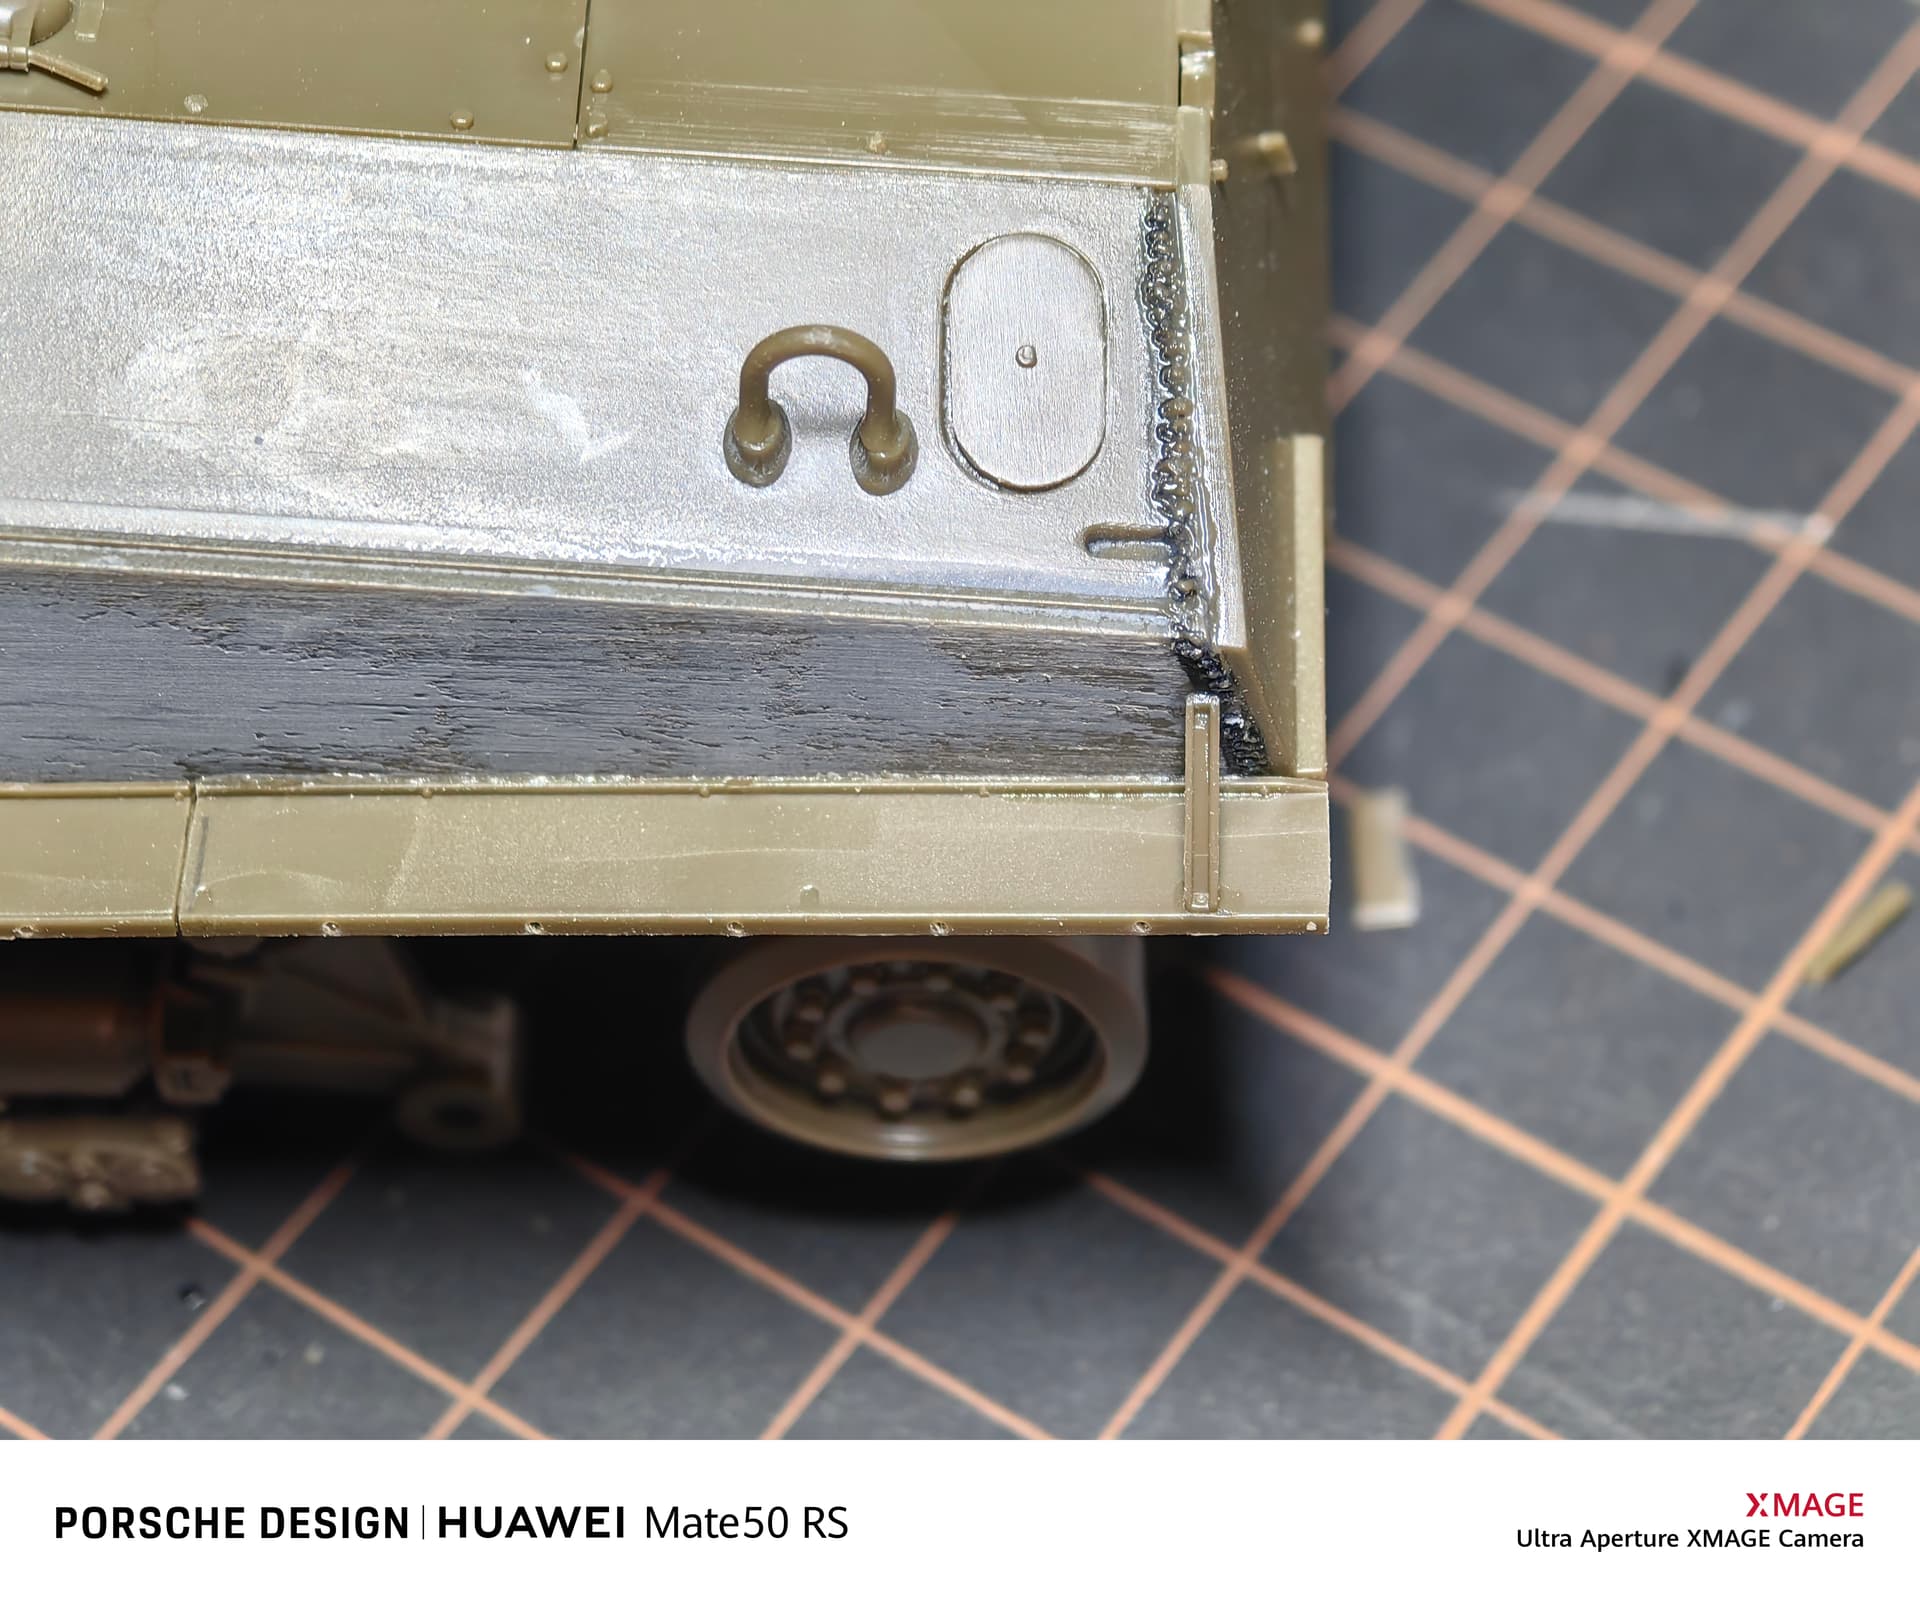
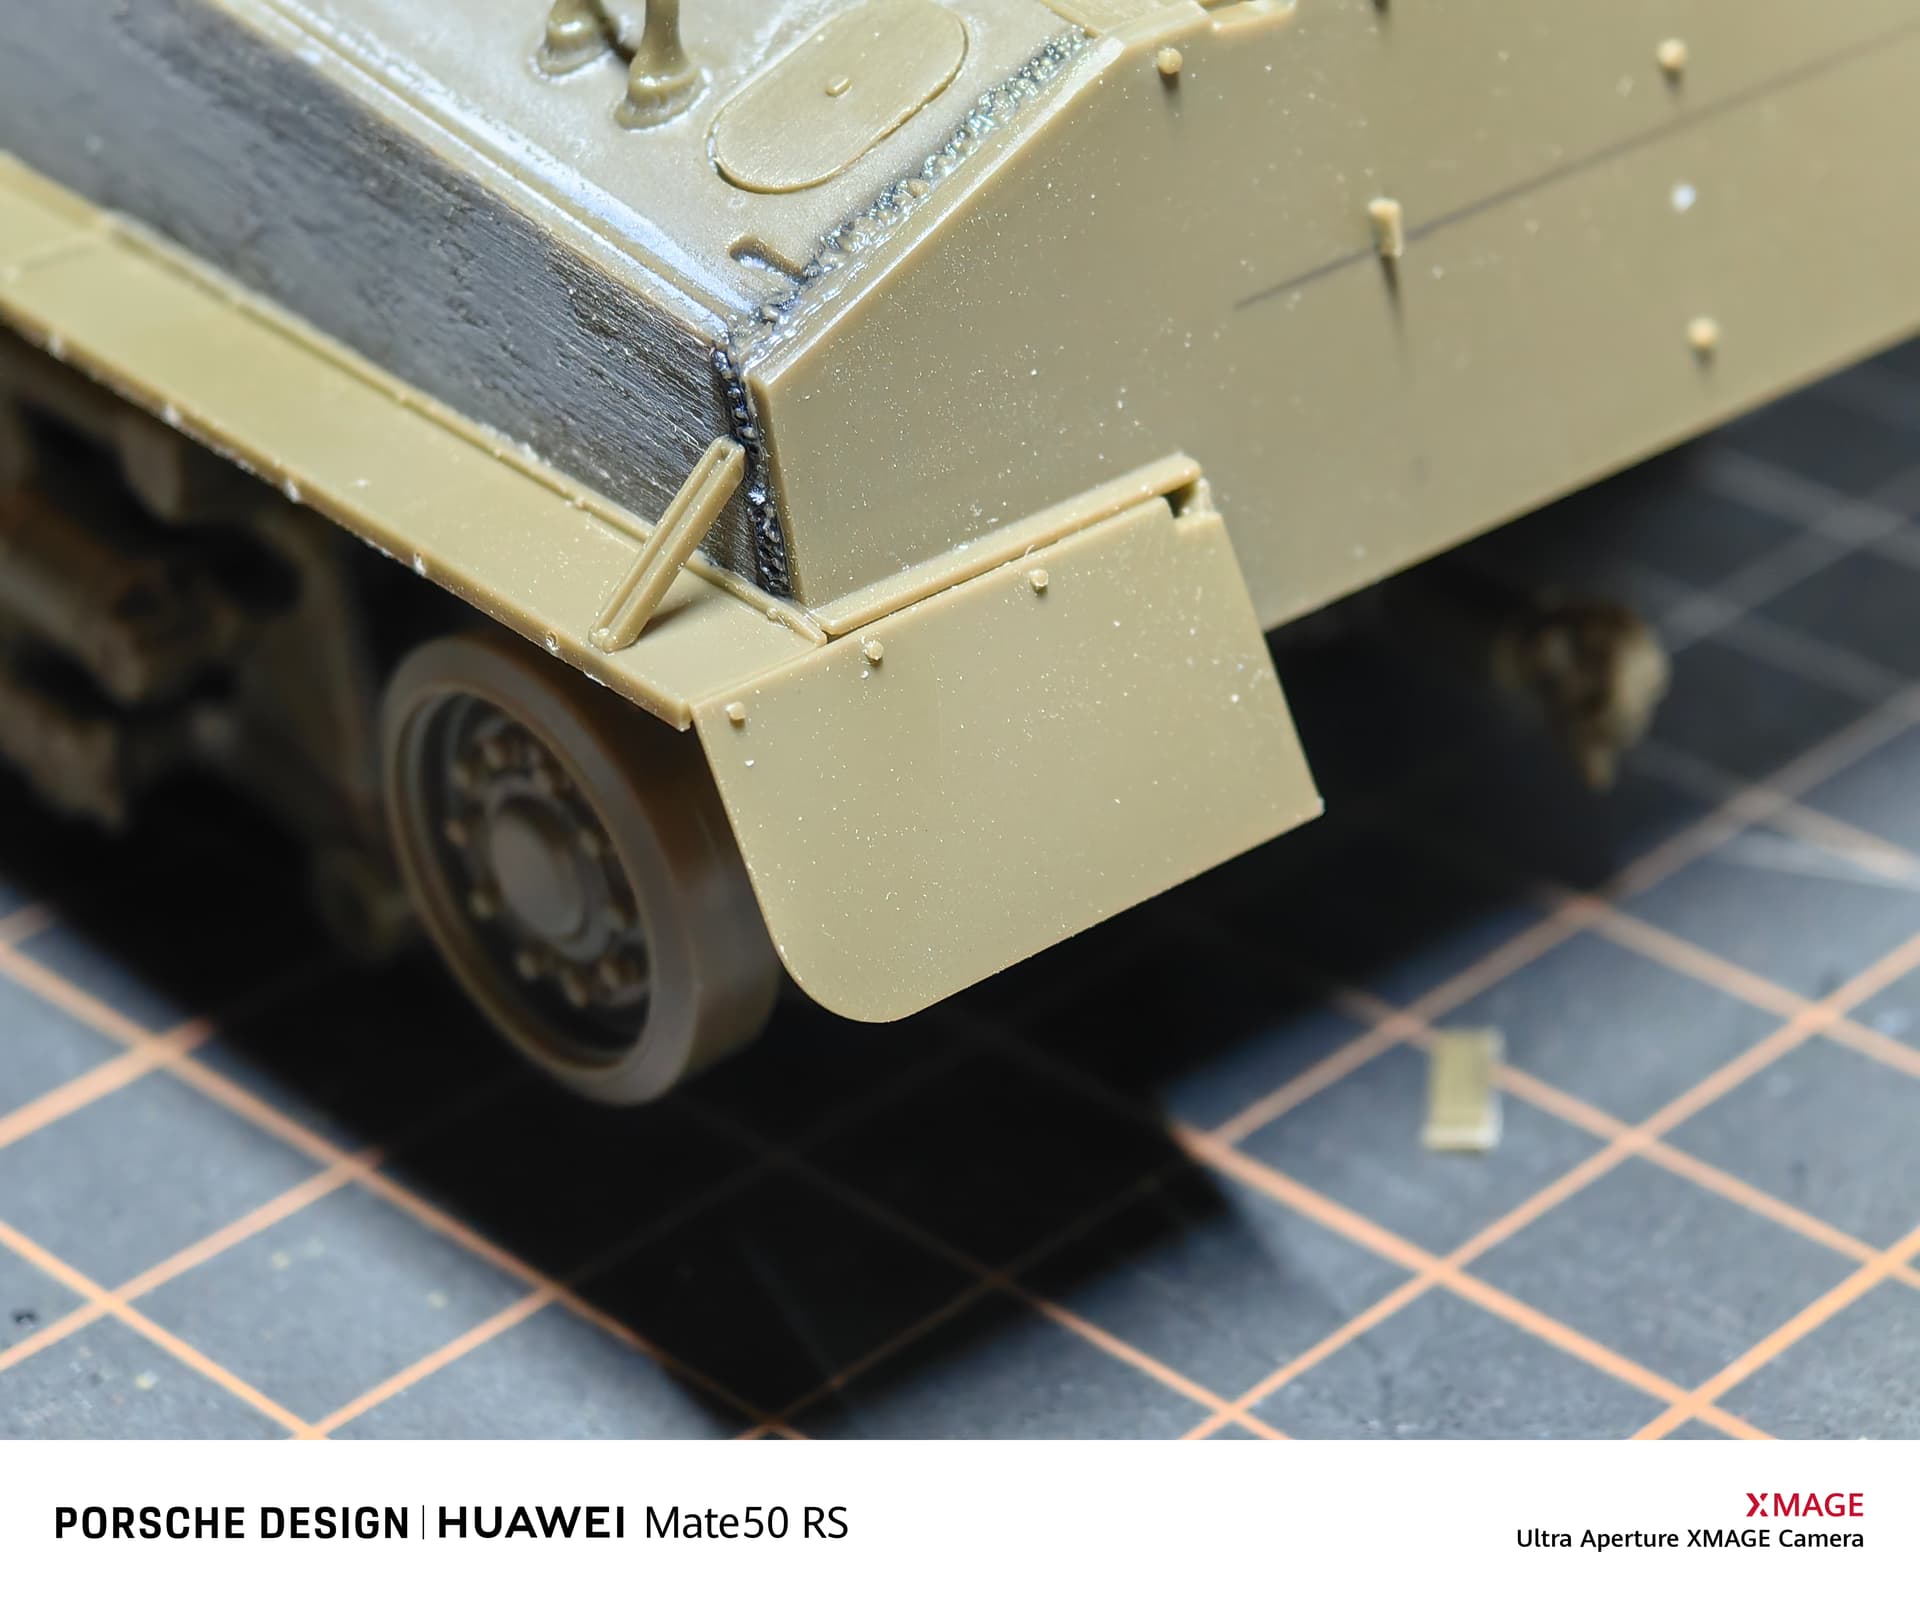
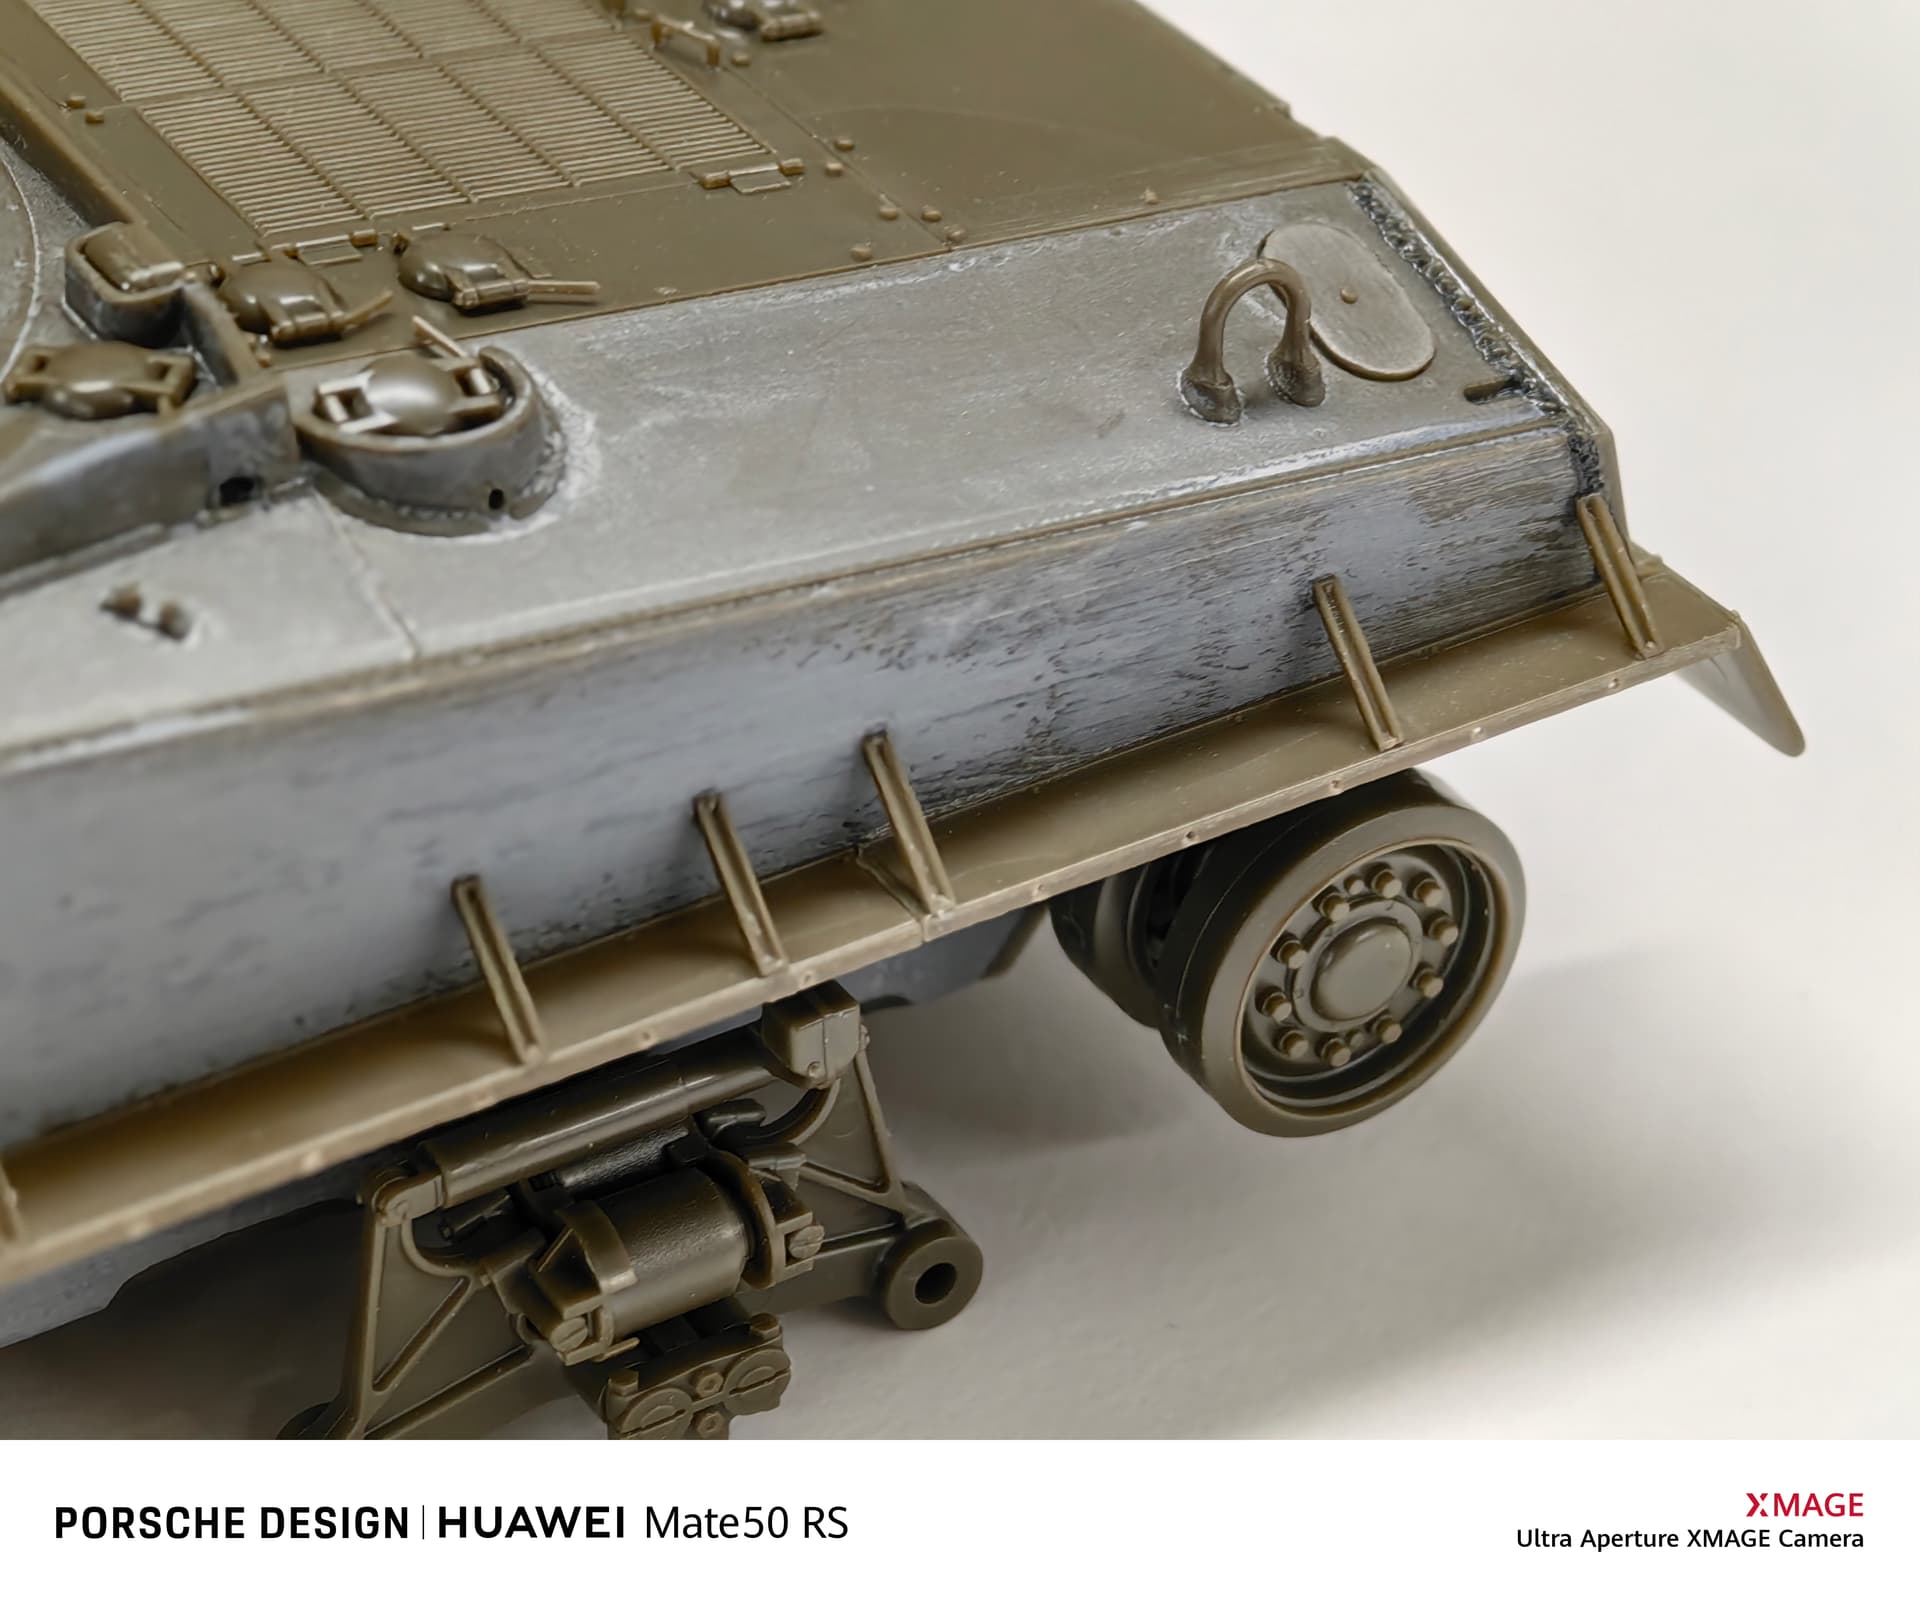
After modifying the features of the front armor of the hull, a missing weld seam between the rear armor plate and the hull was added. At the same time, according to the actual vehicle research, a screw in the rear armor plate was removed.
In addition, I found that the turret of this model had the feature of an abandoned antenna base on the left front side, which was not shown by the turret of ASUKA. So I myself added a small convex hull feature with a patching on the left front side of the turret. According to the actual turret photos, it seems that the bottom side of the turret has a sharp cutting line, which should be the traces left by the actual cutting of the turret. So I simulated this bottom side trace (olive green) with electrogrinding, Looks pretty good.
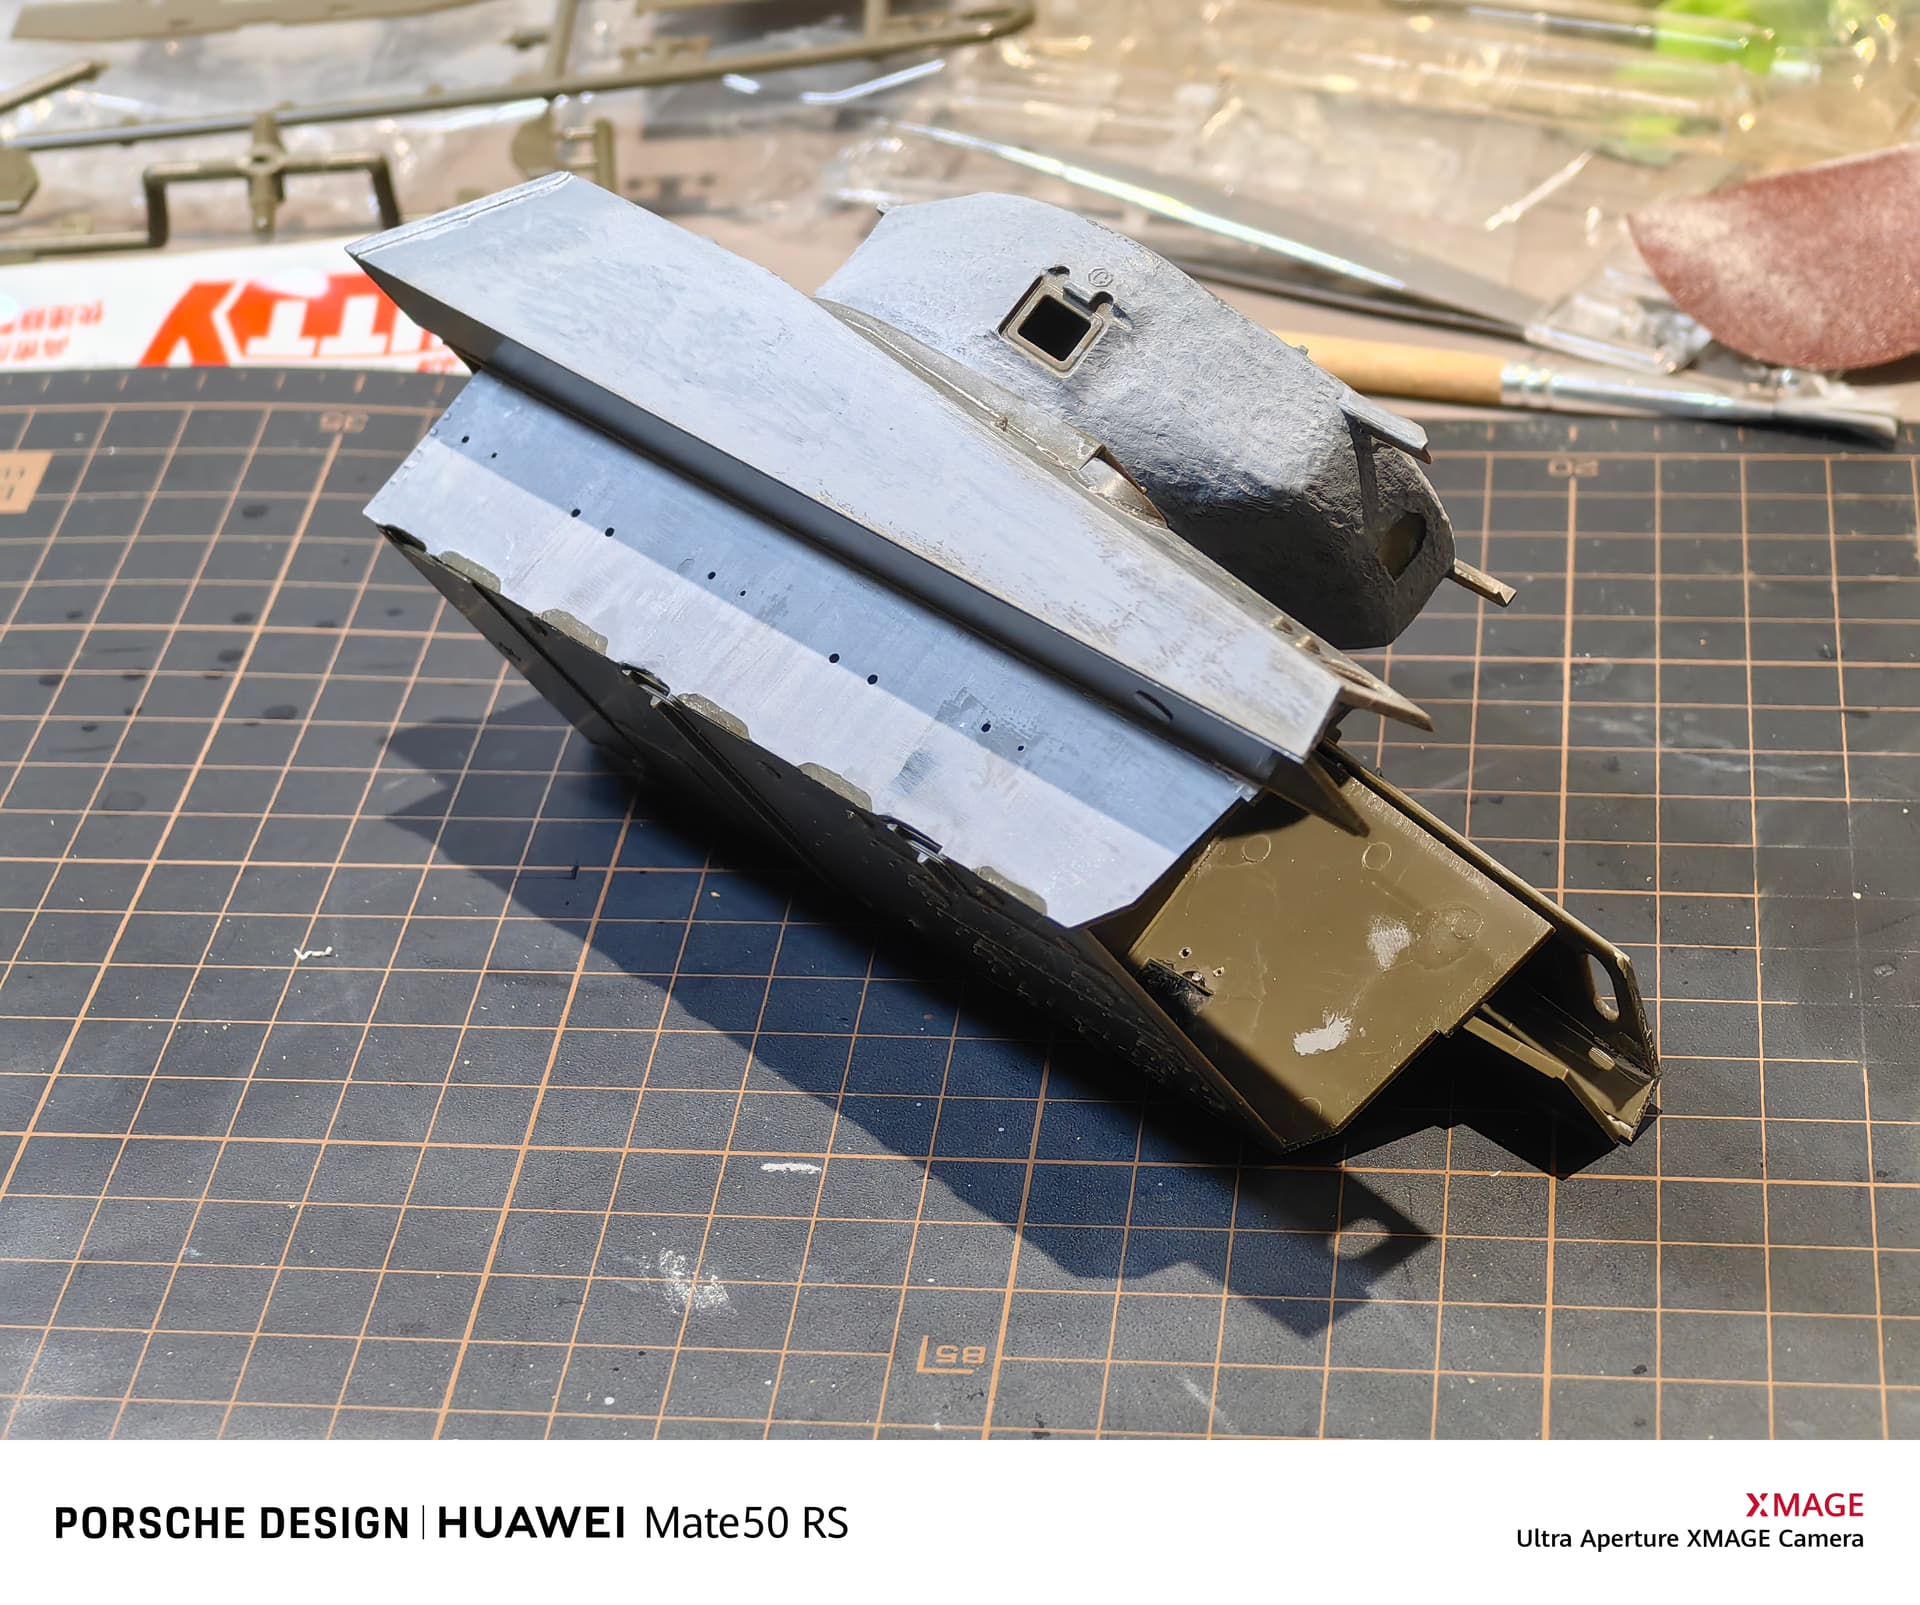
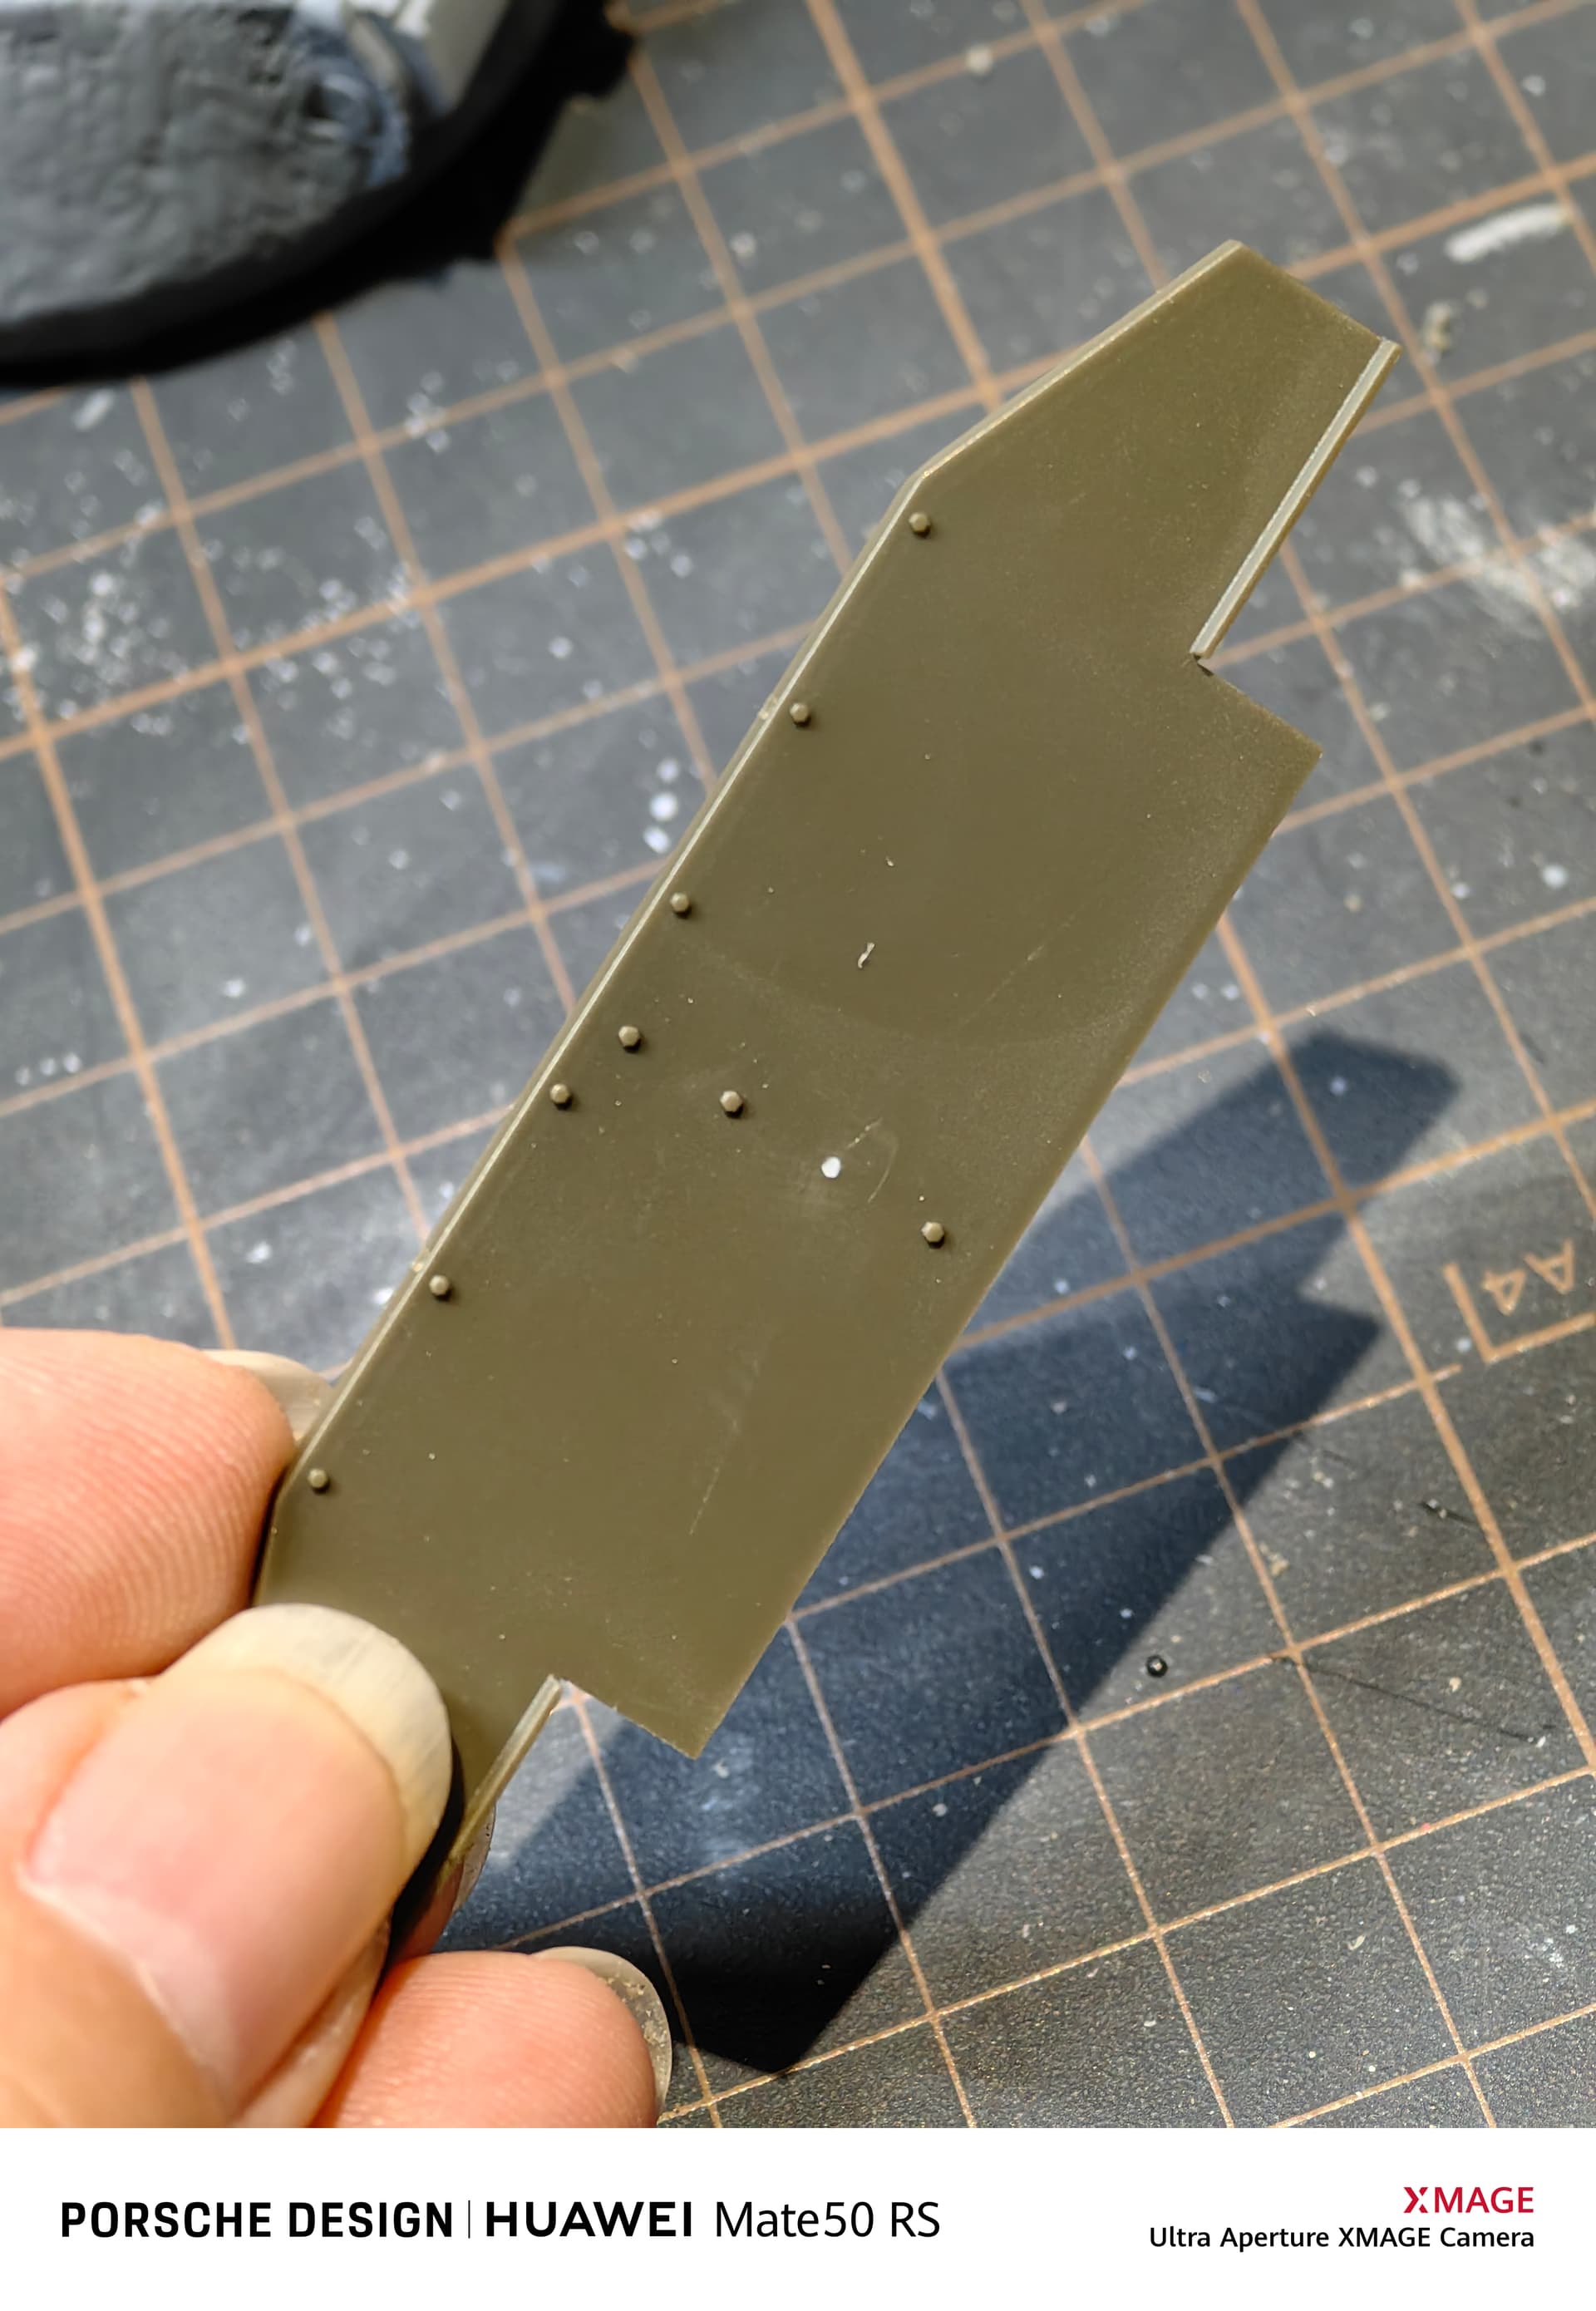
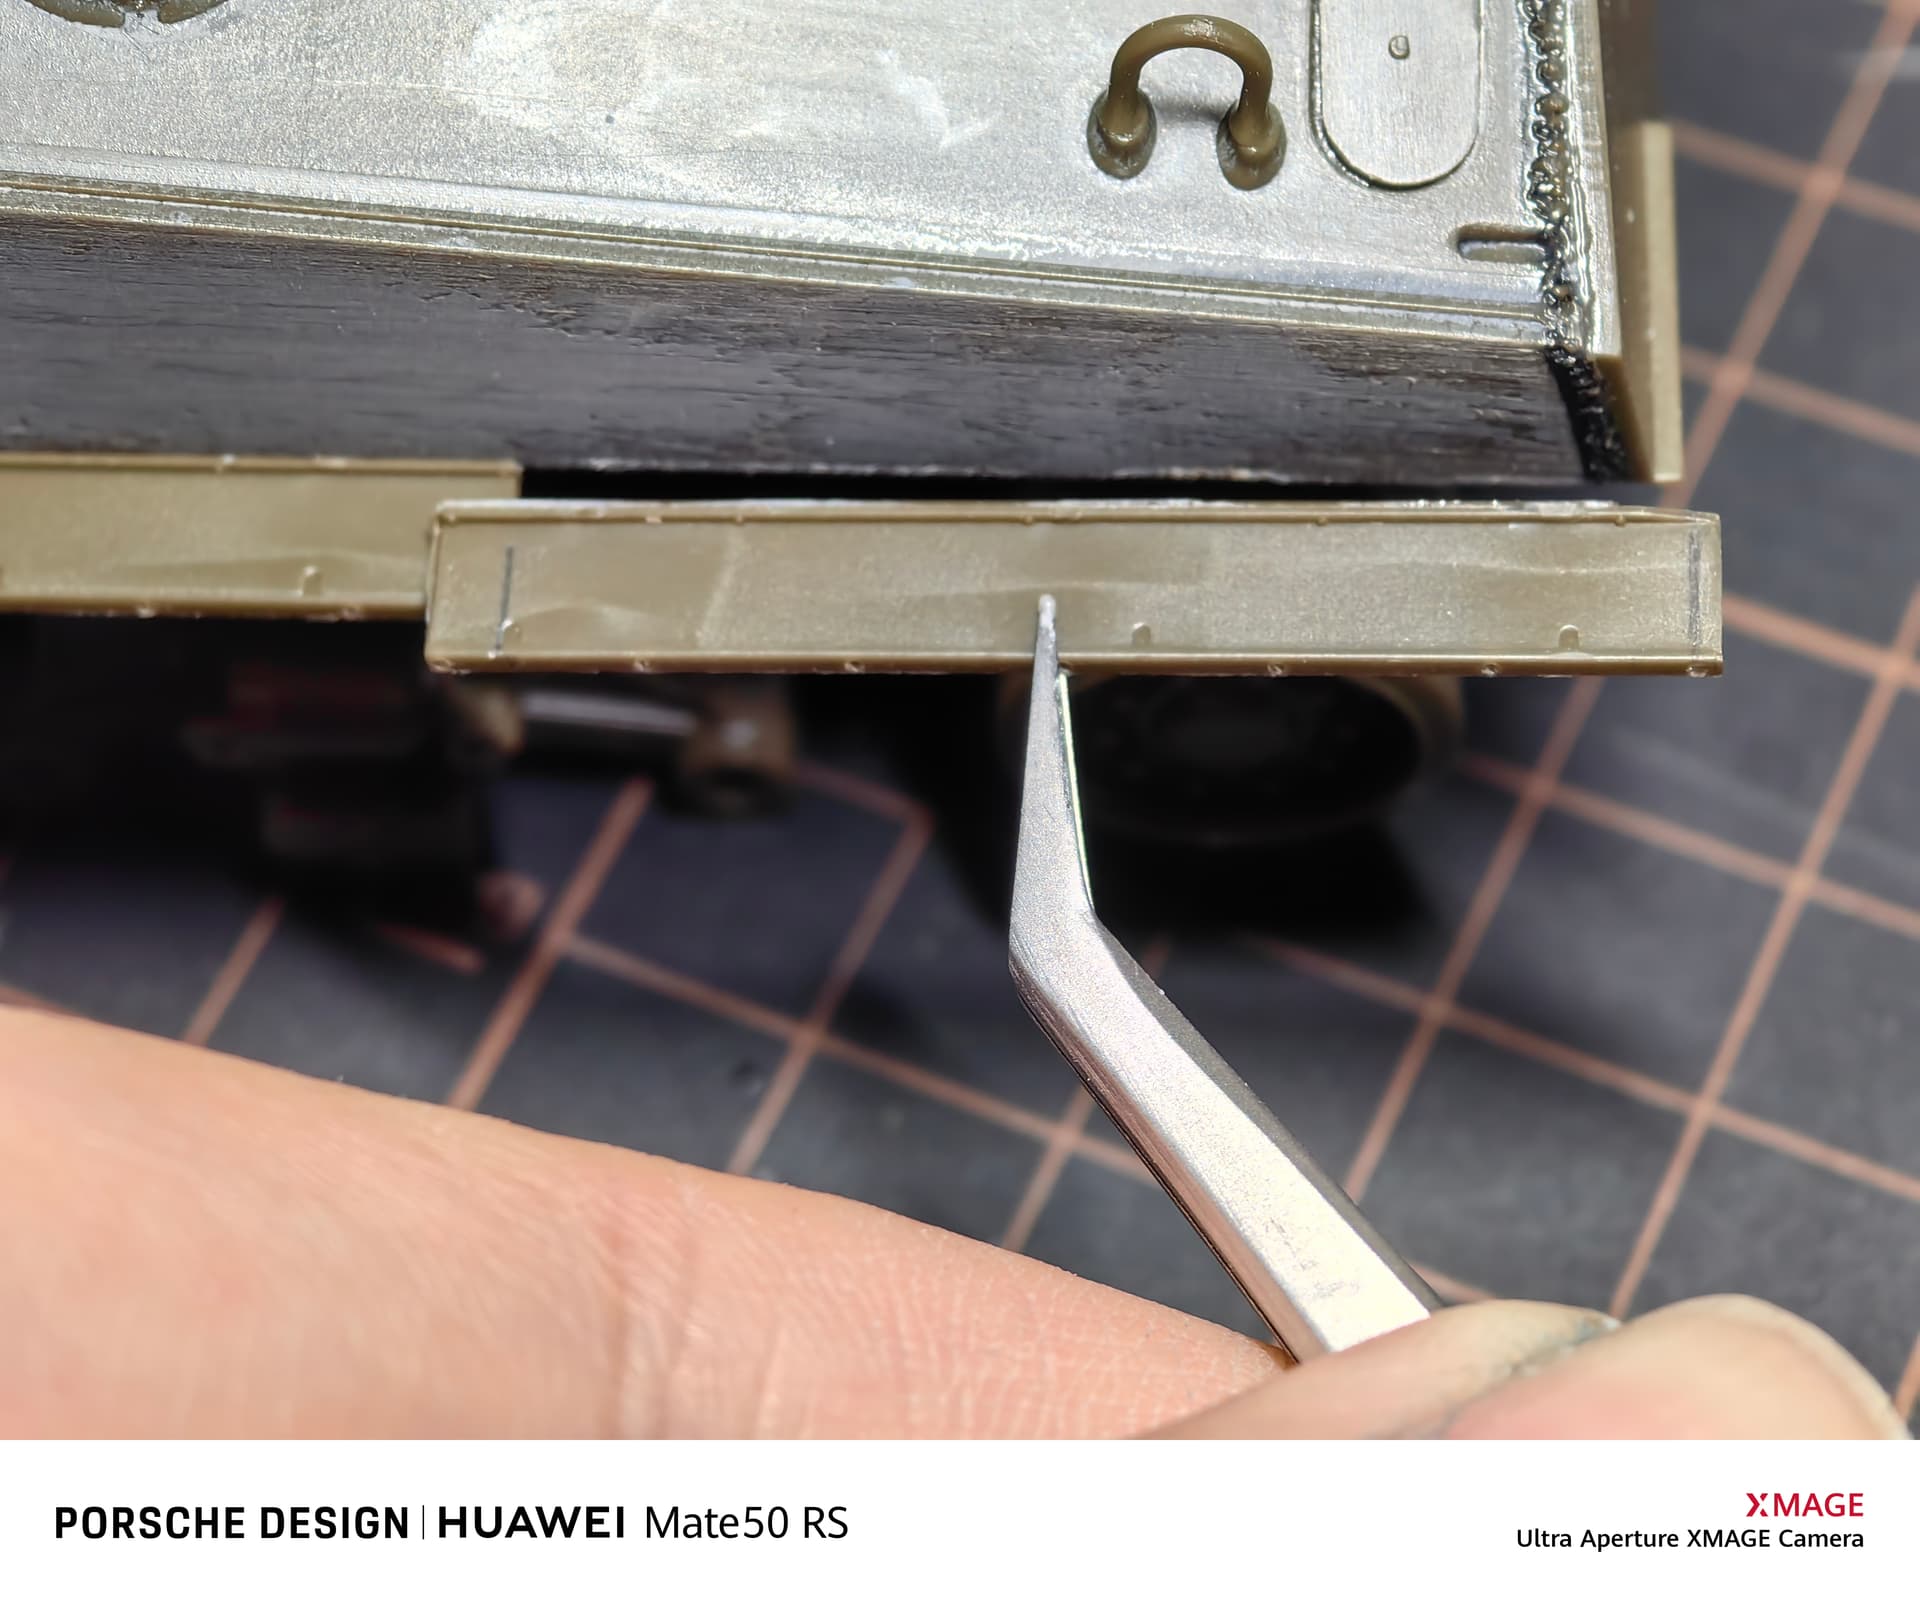
Next, I started installing the fenders on the sides of the hull, which are also one of the important features of the HVSS suspension hull, which is equivalent to covering the widened suspension and tracks. I used the fenders of the M4A3E8 directly, and most of the front still fits perfectly with the hull, but the problem is in the rear of the hull. Because the angle of the rear armor plate of A2 and A3 hulls is different, so the length of the entire hull is slightly different. Specifically, the fenders of the A3 is a little longer than the fenders of A2. When attached, the tail protrudes about 2 mm. In this way, I have to modify the length of the fender, cutting it to match the length of the hull. In this way, the rear fender can also be installed normally. The bracket for installing the fenders should pay special attention to the bracket at the tail to avoid the position of the weld seam.
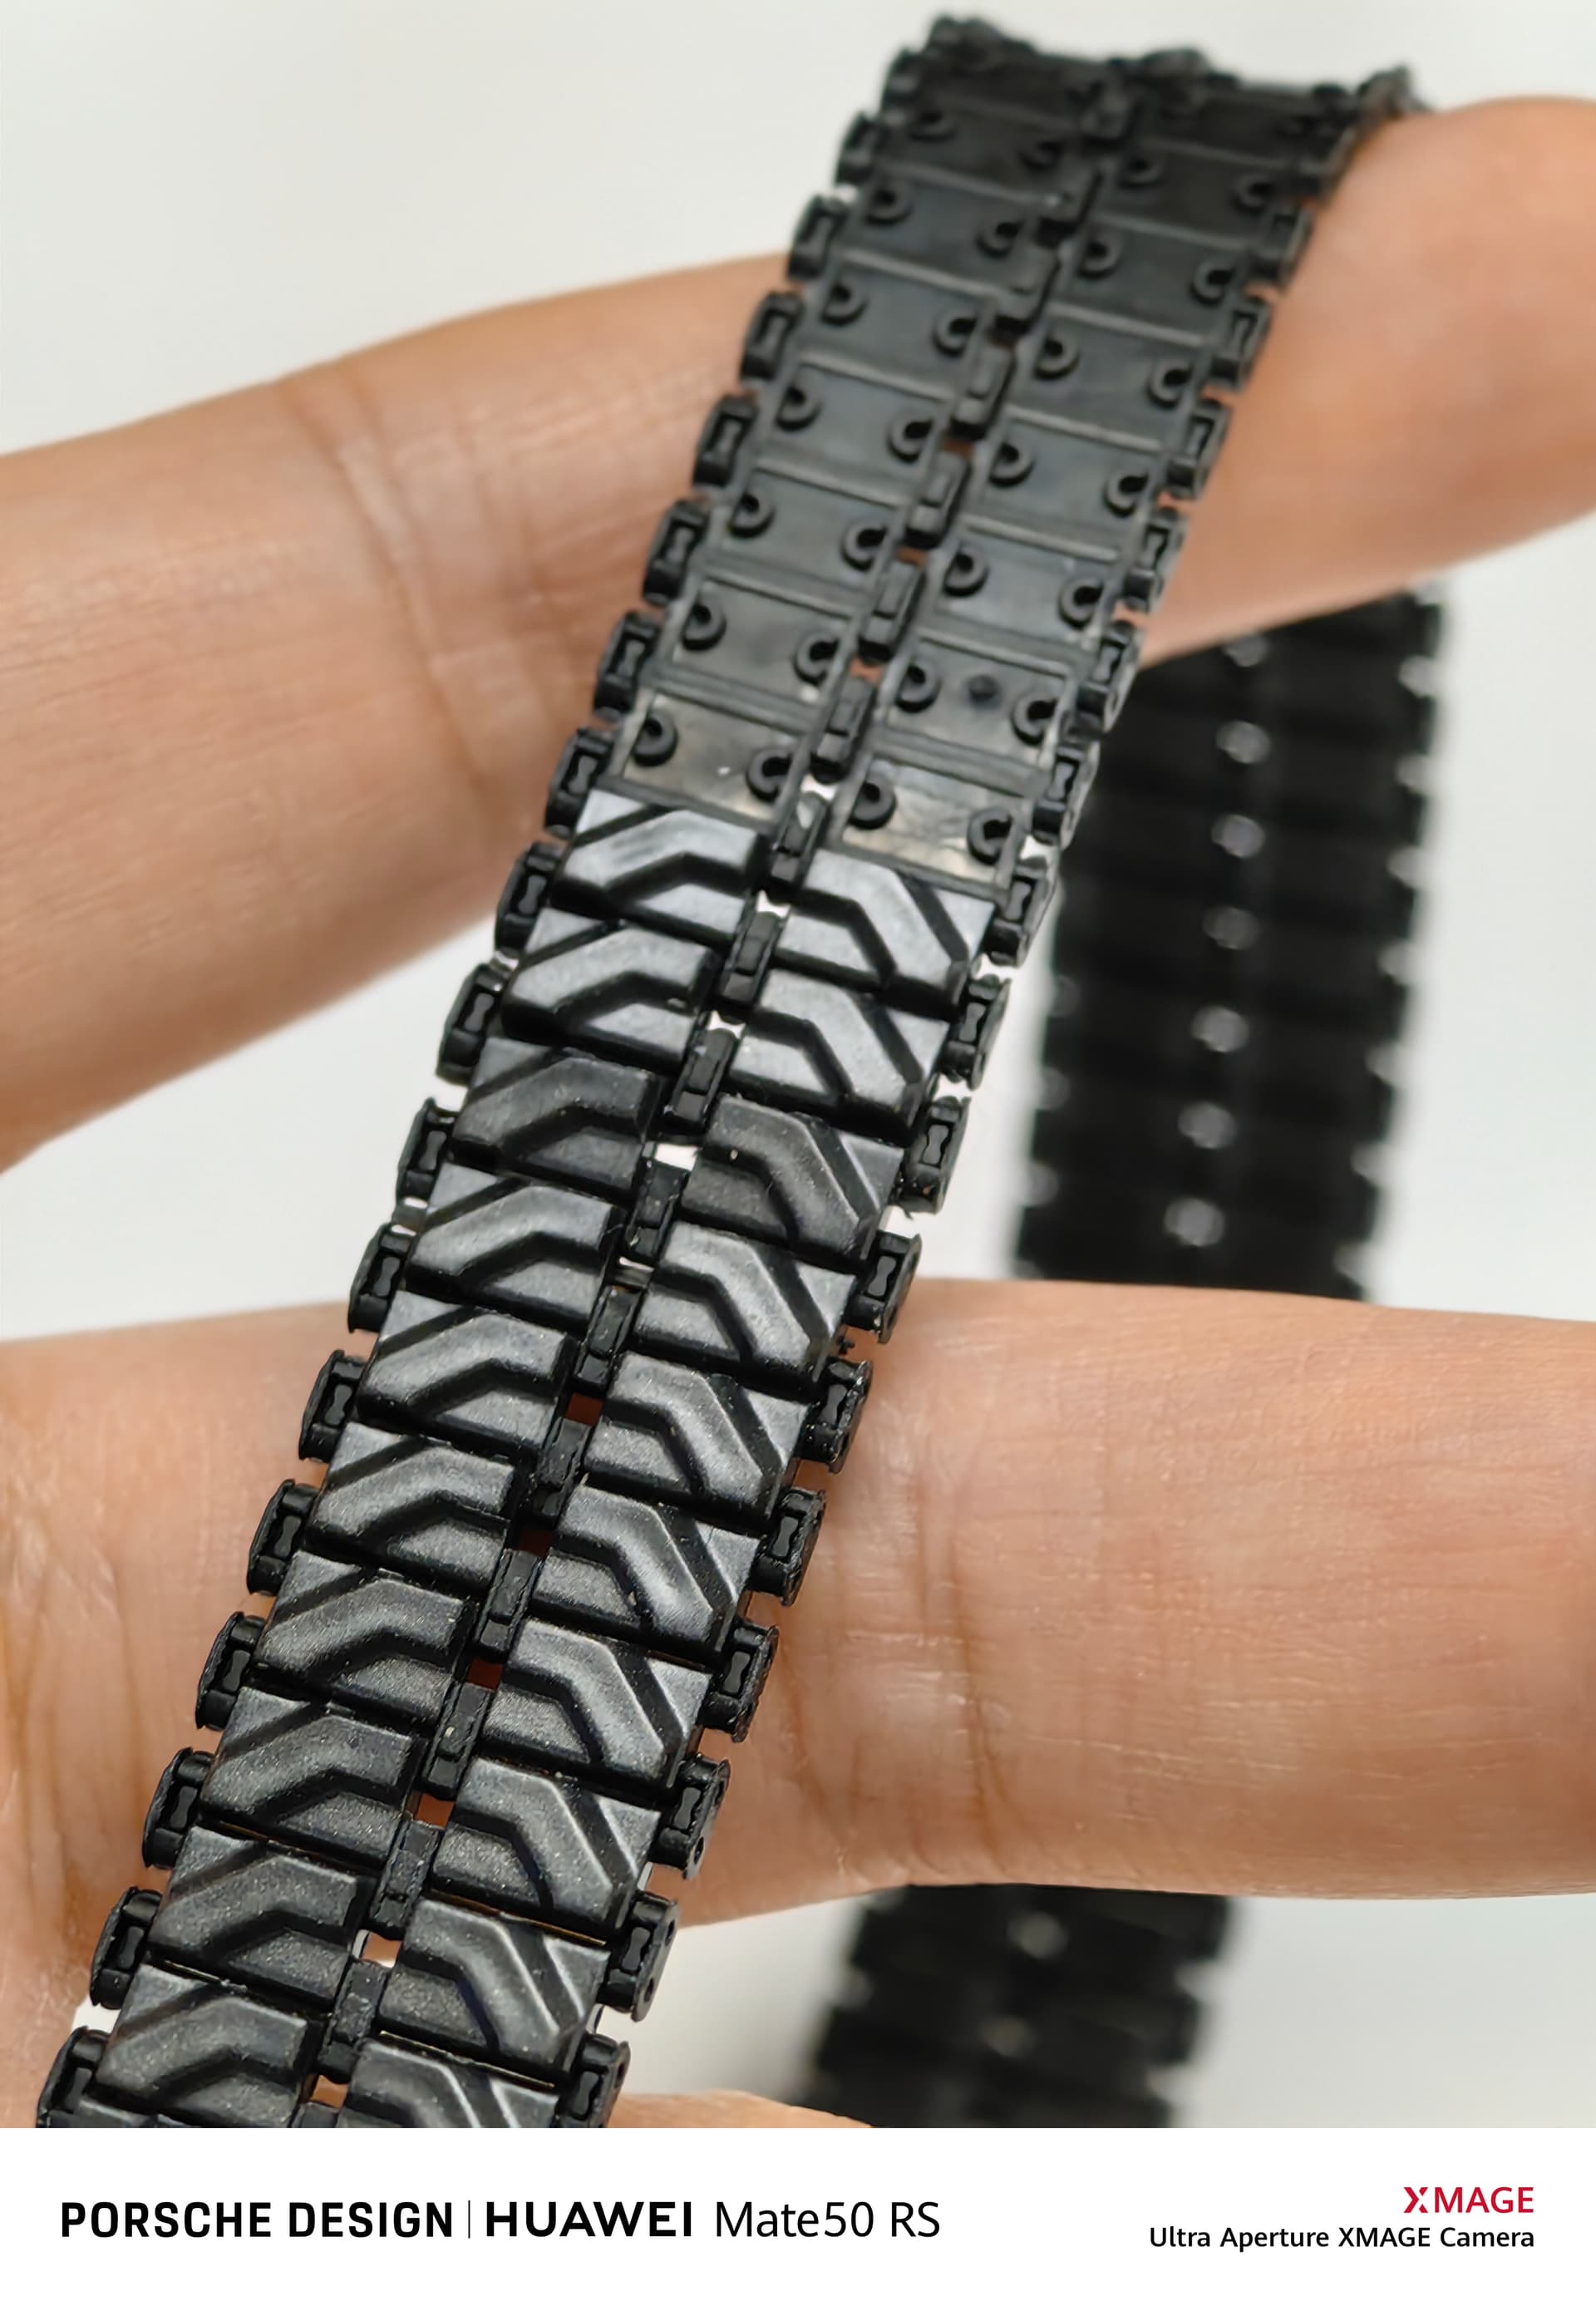
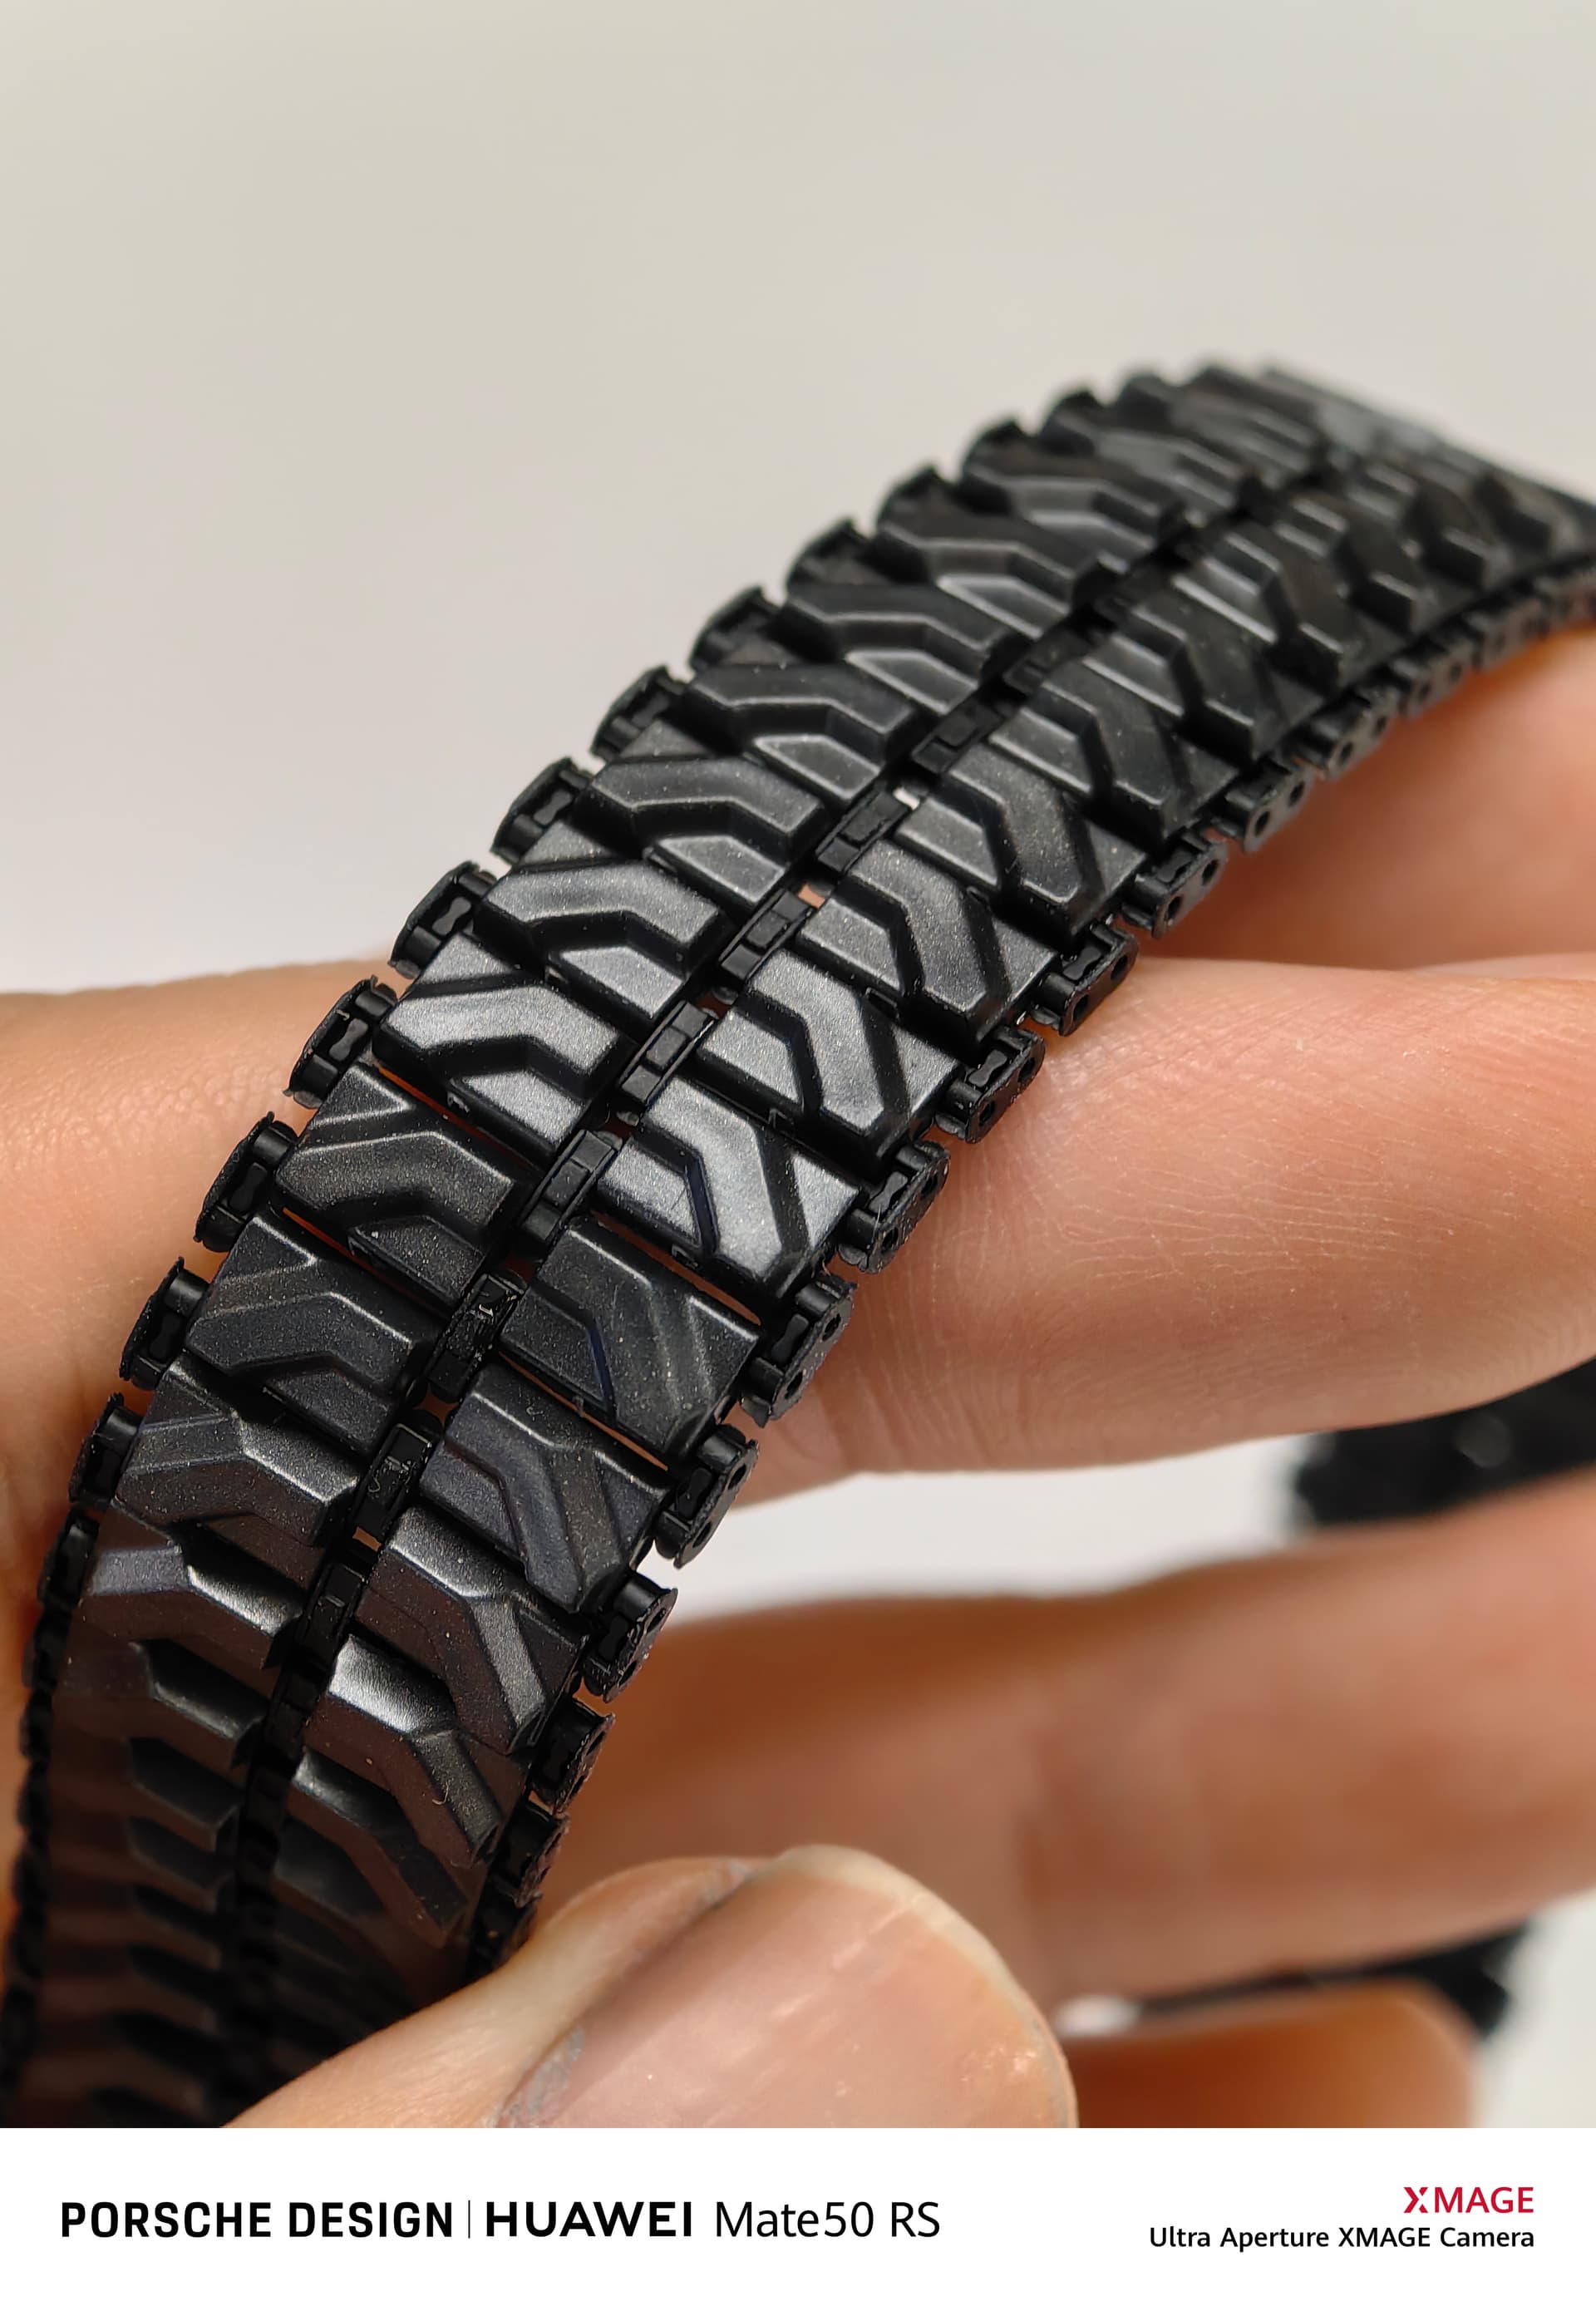
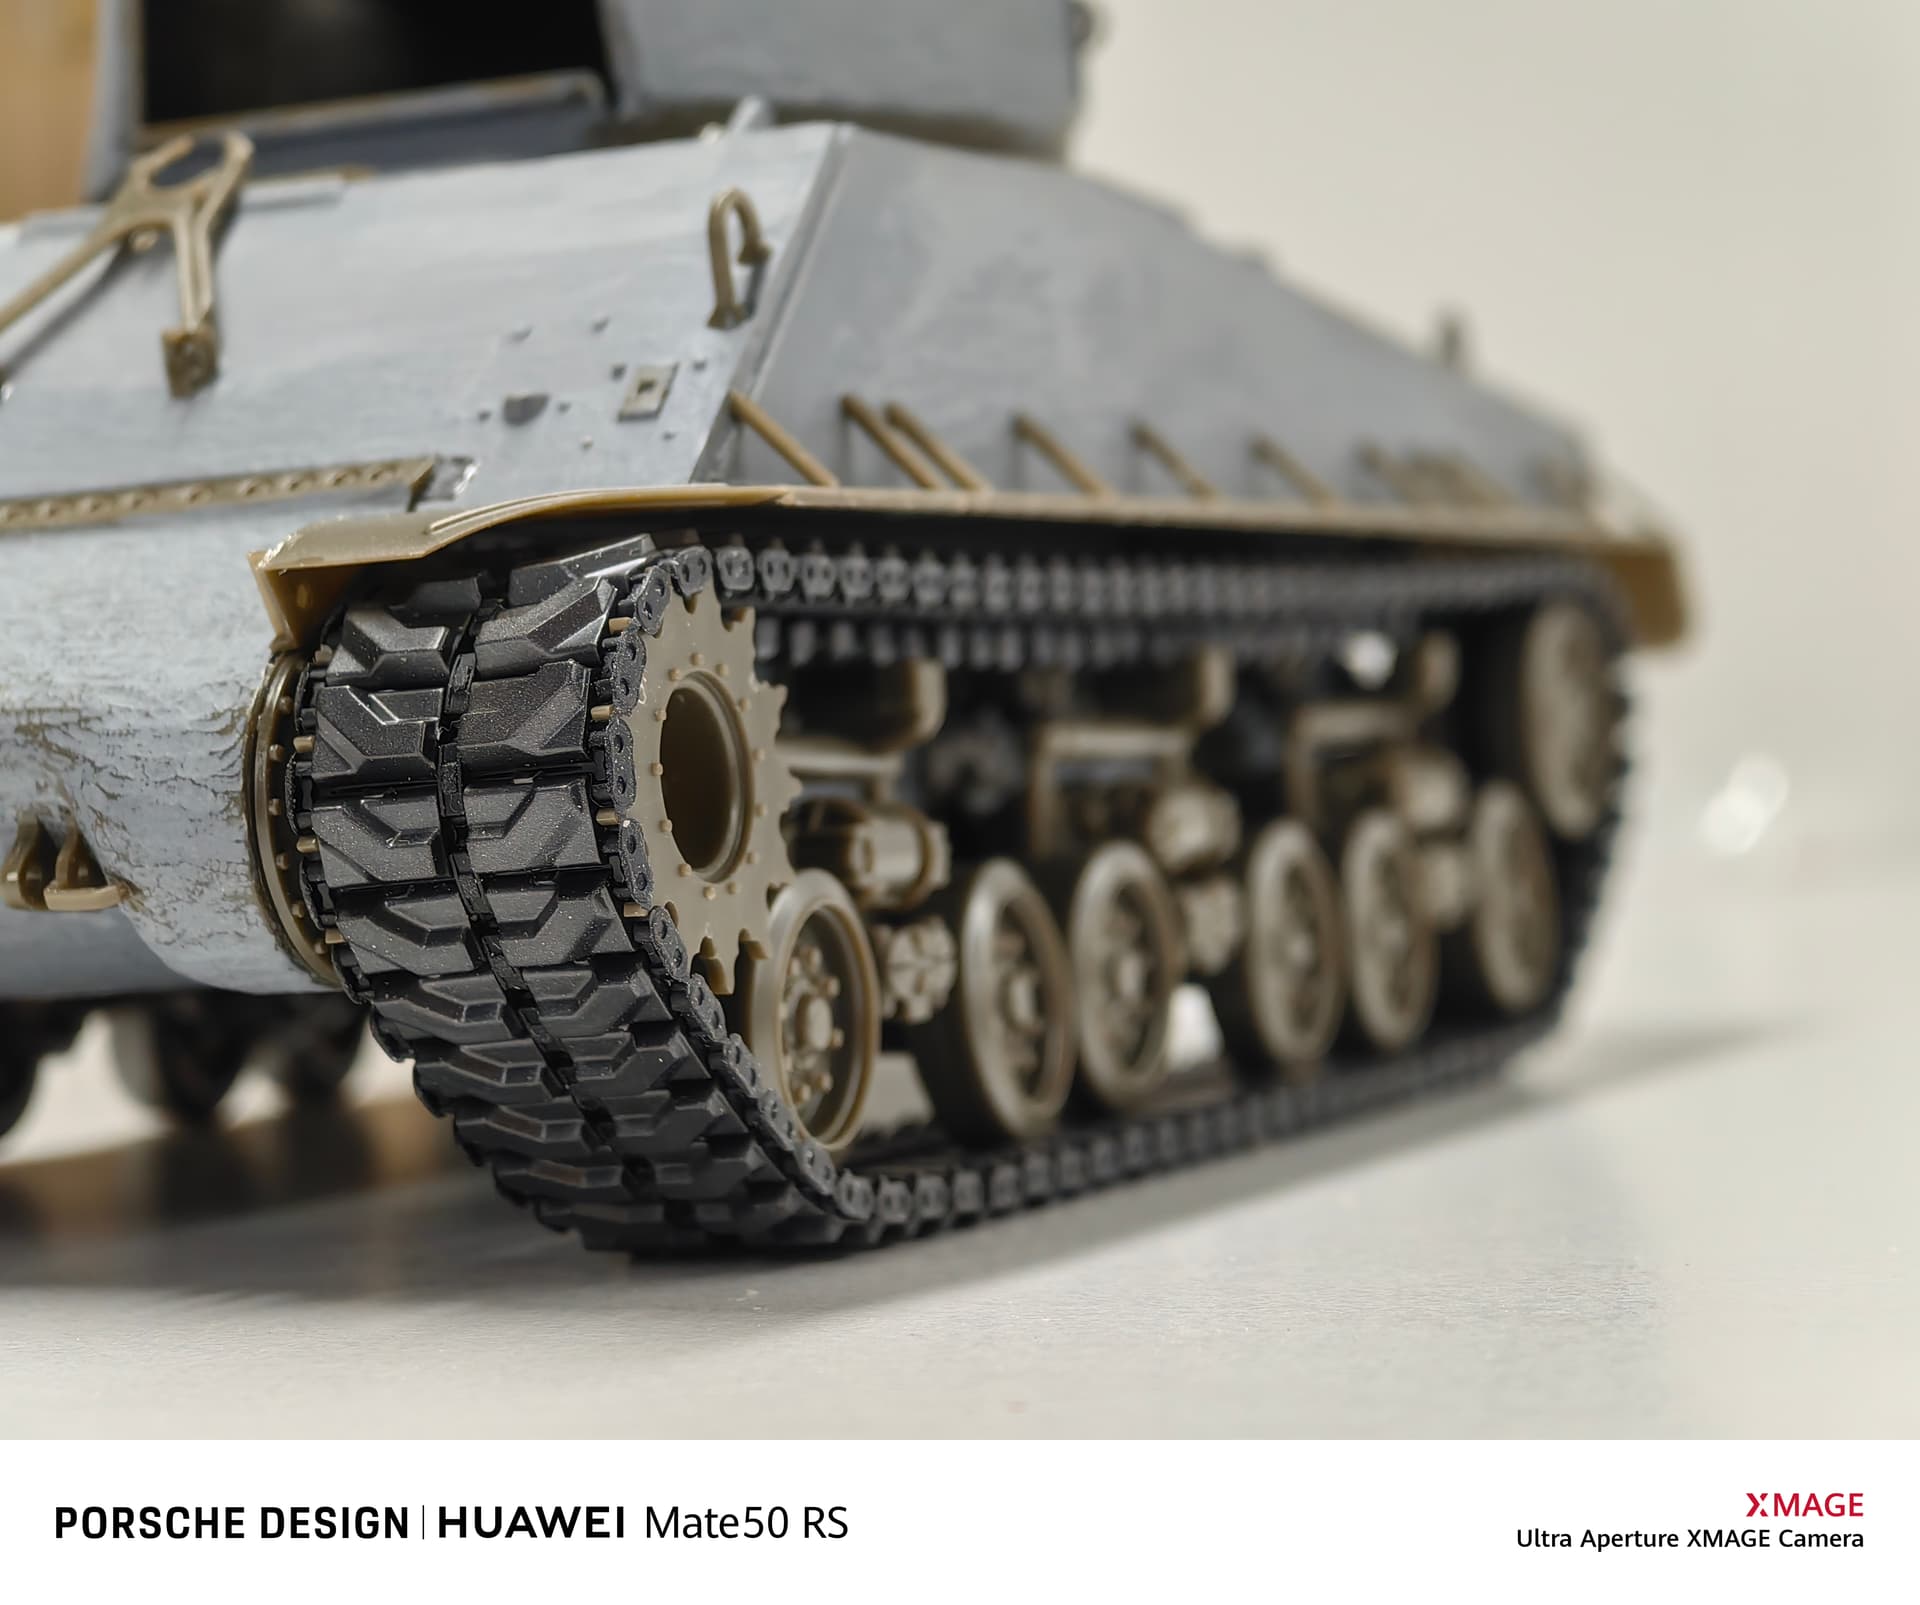
After finishing the hull modification, I was ready to assemble the tracks. In the choice of T84 tracks, I considered the semi-rubber and semi-plastic track in this kit and the standalone plastic workable track, I finally chose the rubber + plastic track. The reason is that the splicing workable tracks are too cumbersome to make, and they always look loose and thin, without the thick feeling of T84 which being wrapped in rubber. In addition, the actual situation of HVSS suspension is that the sagging of the tracks is not too obvious, so I chose rubber + plastic tracks that are easy to make.
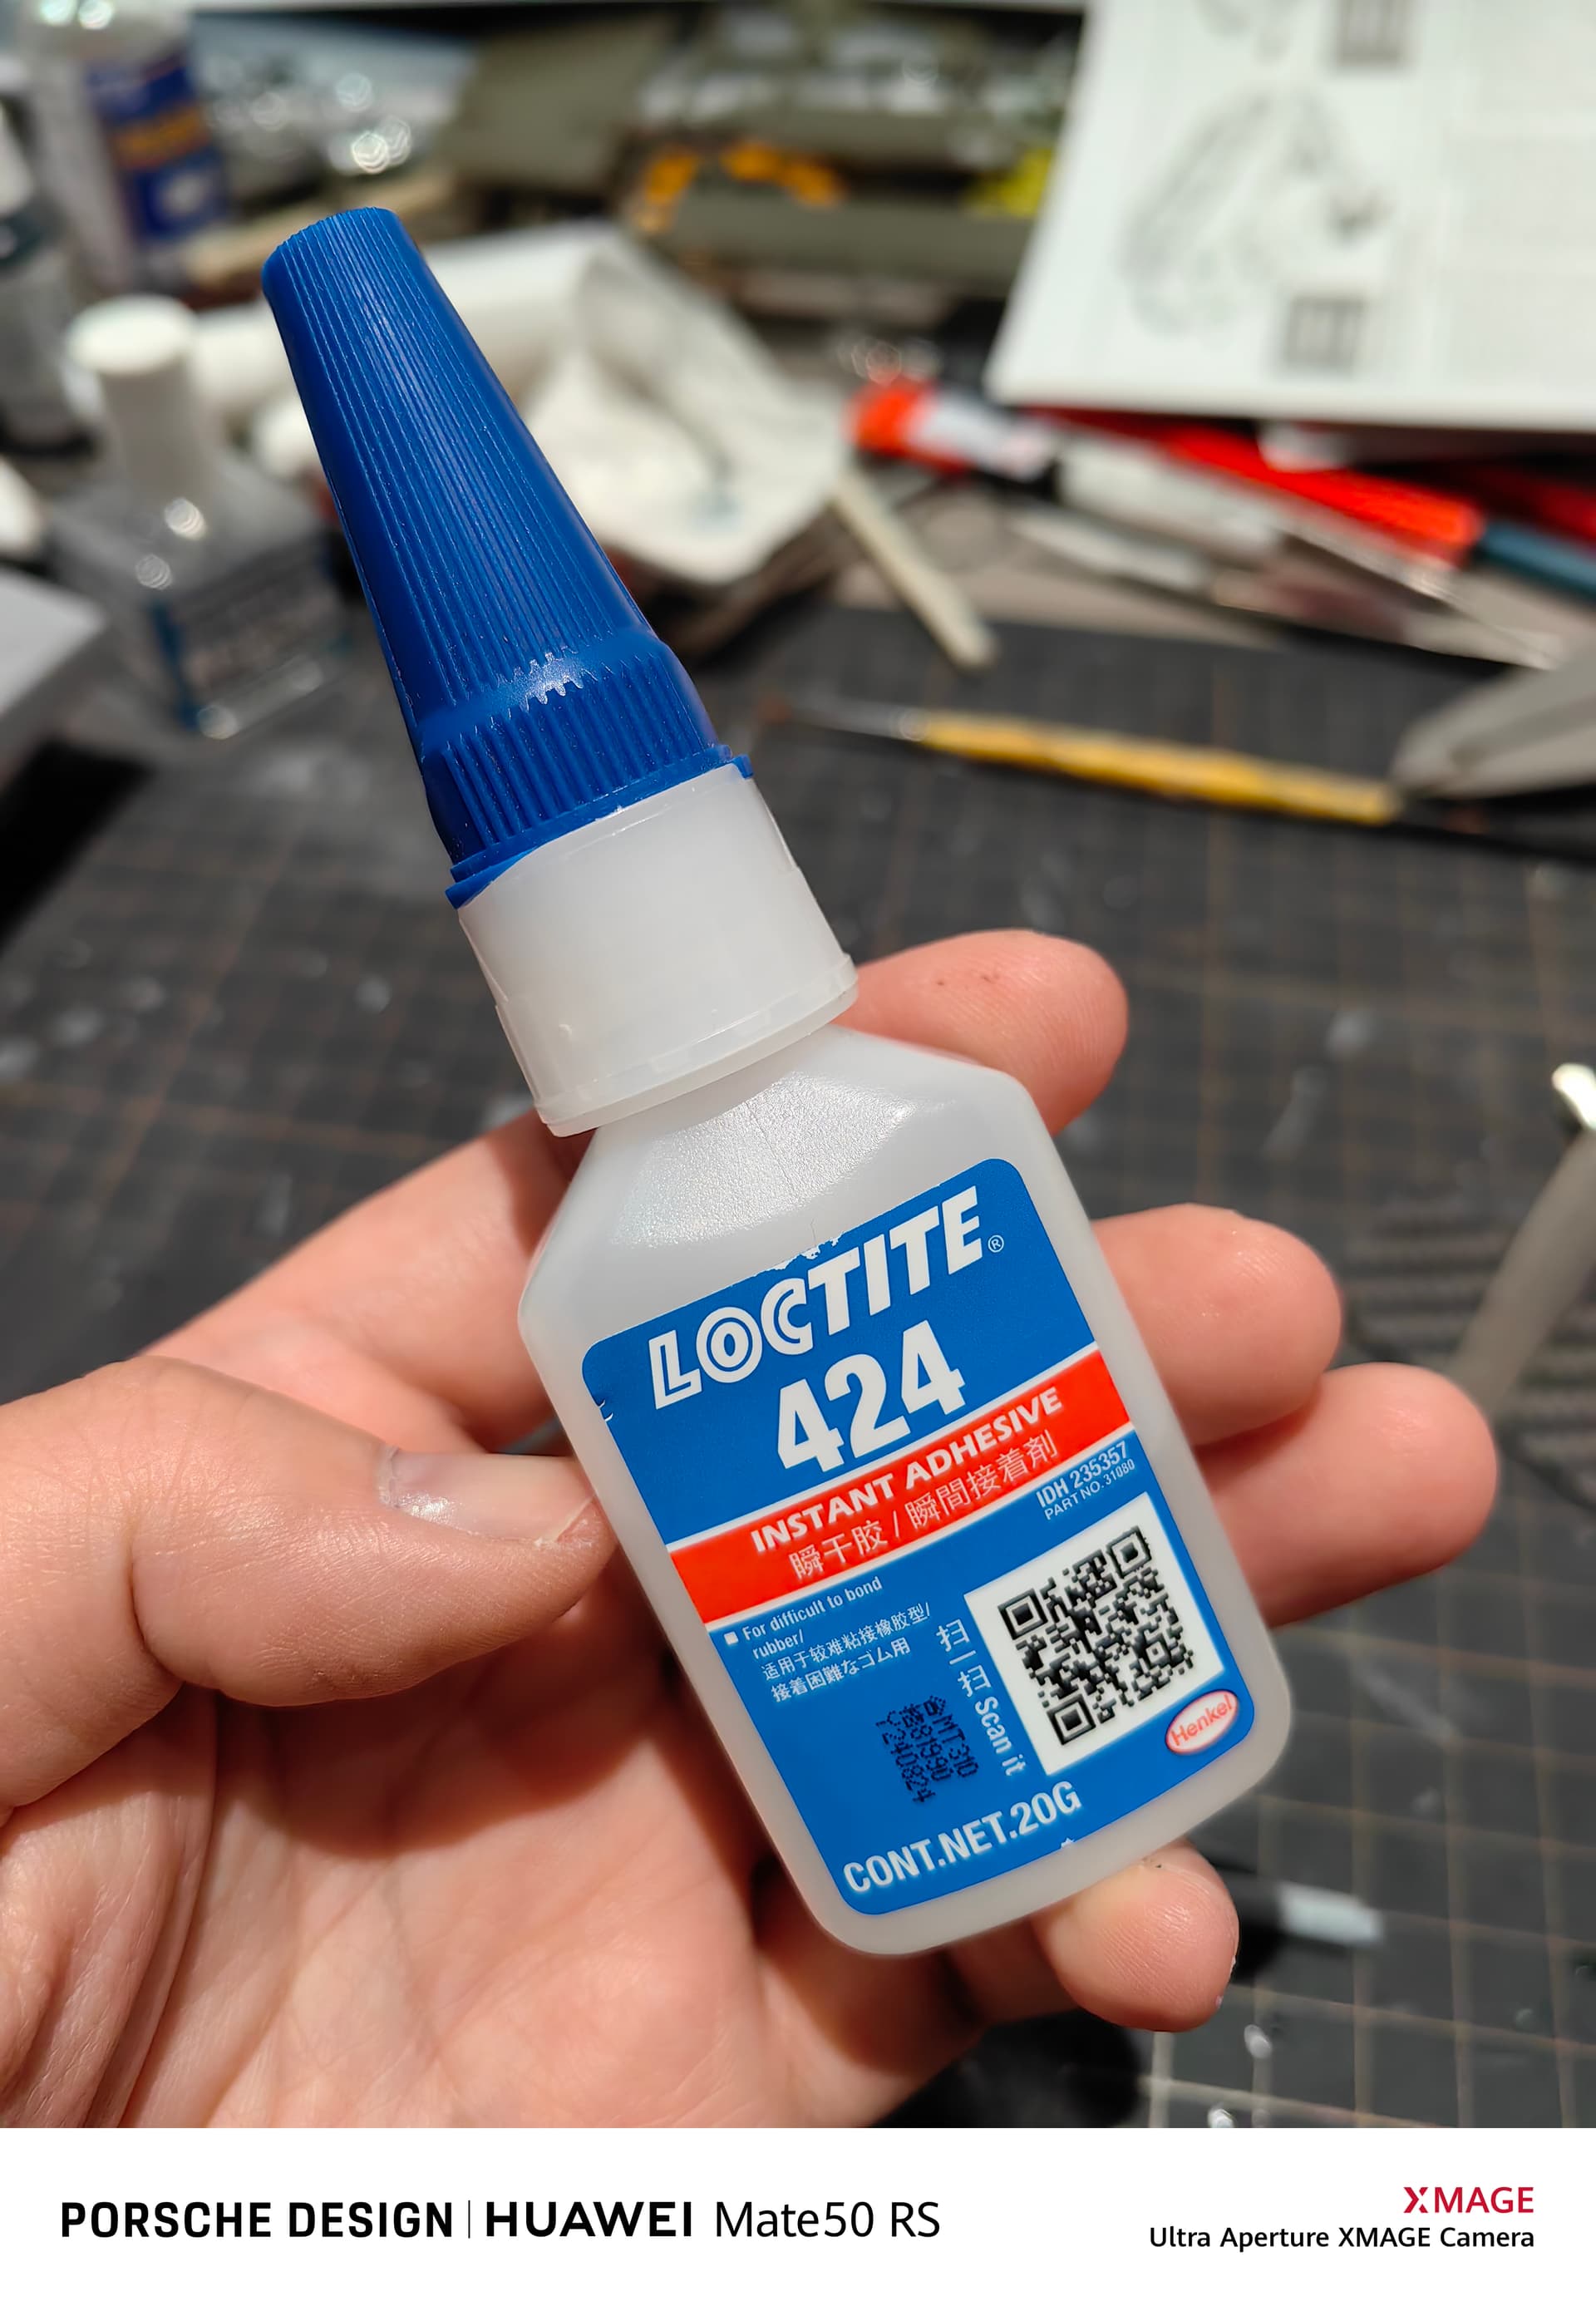
The actual assemble experience is also very good, the bonding of the entire track block is completed very quickly, but the bonding induction teeth are slightly cumbersome, but the other tracks will be more cumbersome. After the finished track is installed, the effect is very good, almost perfectly showing the thick feeling of the T84 track. By the way, I use a glue optimized for bonding rubber materials - Loctite 424, the bonding experience and bonding effect are very good, friends who have the need for bonding rubber can try this special glue.