Most important thing is your health. Believe me I only know all to well when it’s going south, nothing else much matters. Computers can be fixed or replaced. The good news there is that the mining craze that drove the prices to insane levels is over and prices are back down to competitive prices once again.
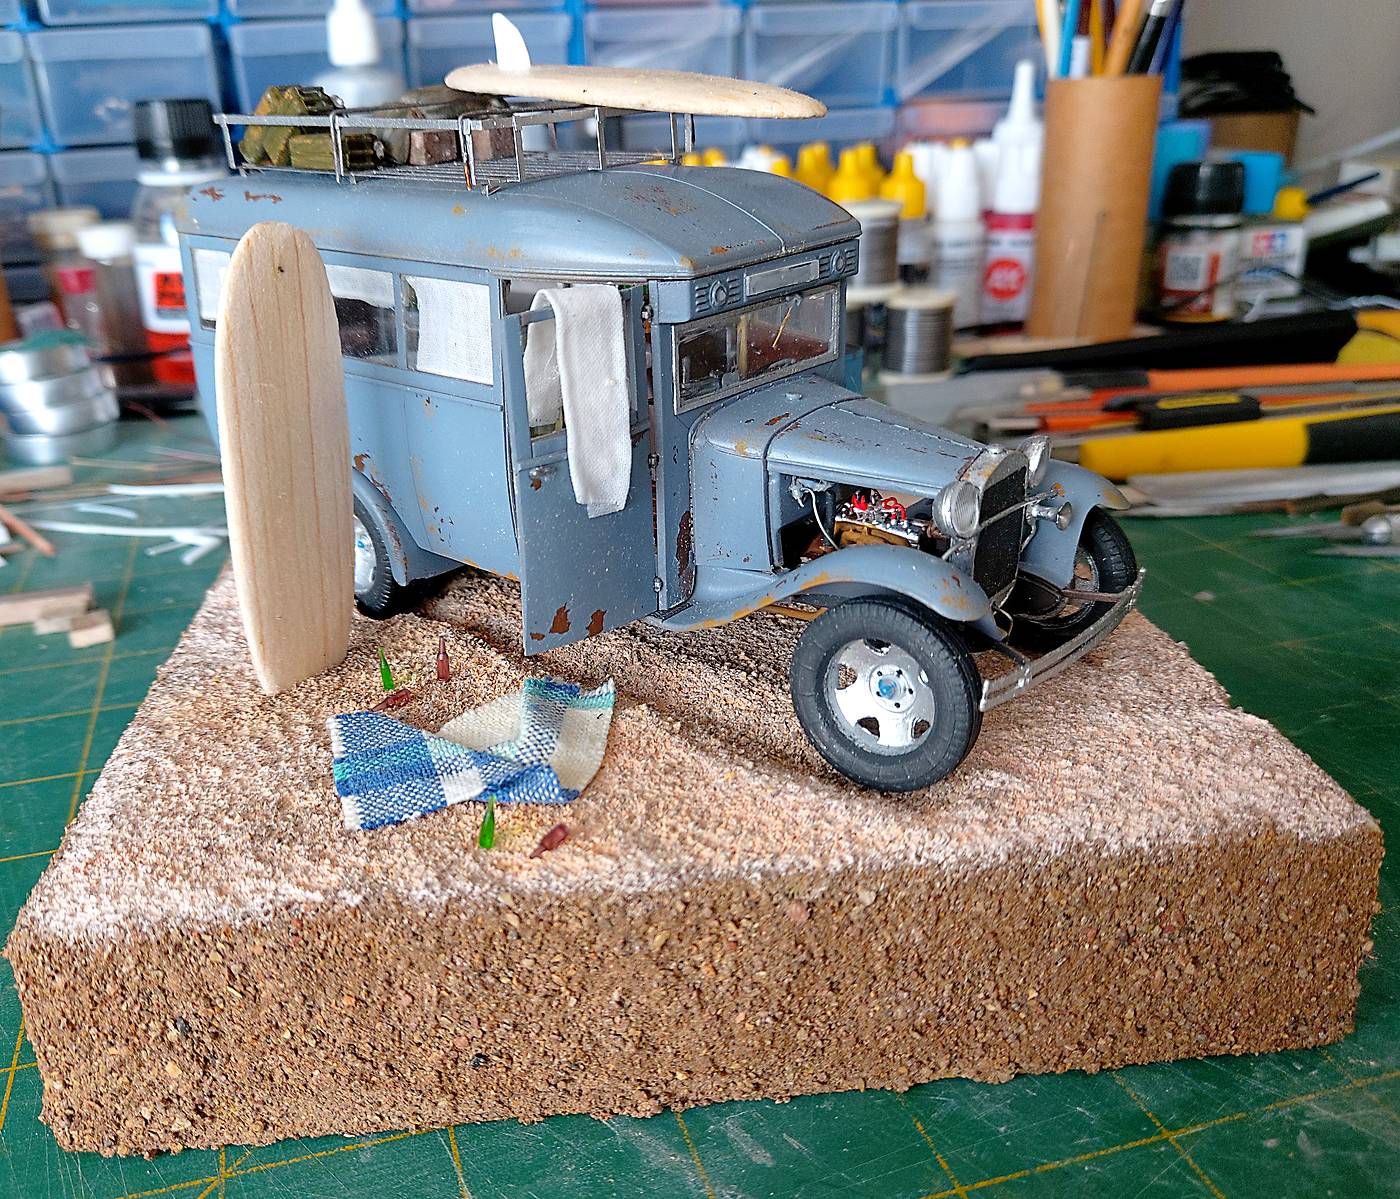
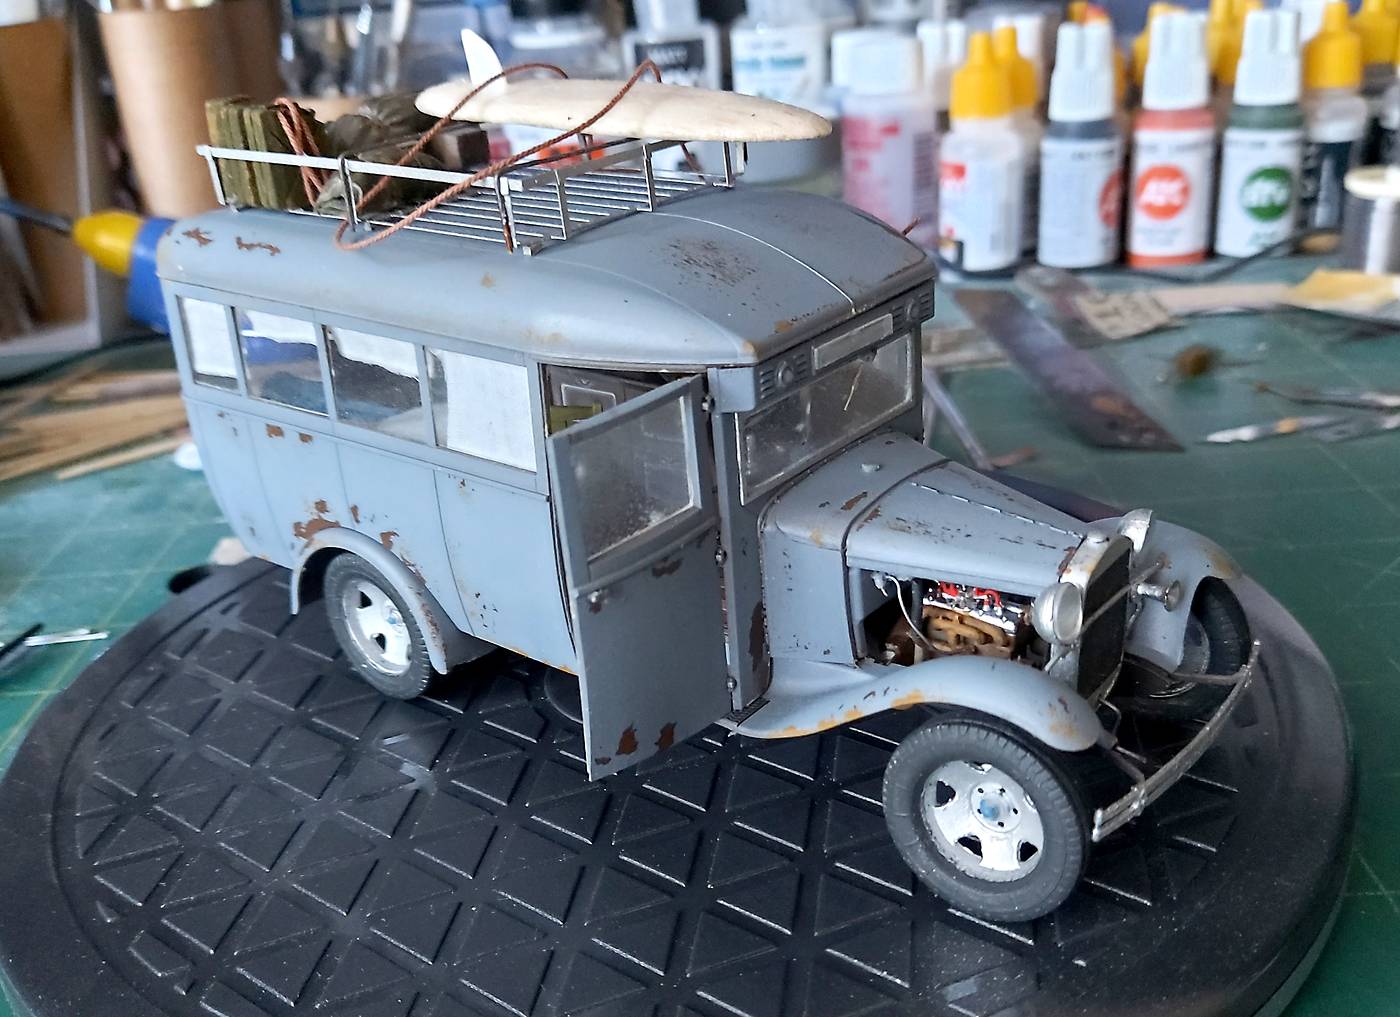
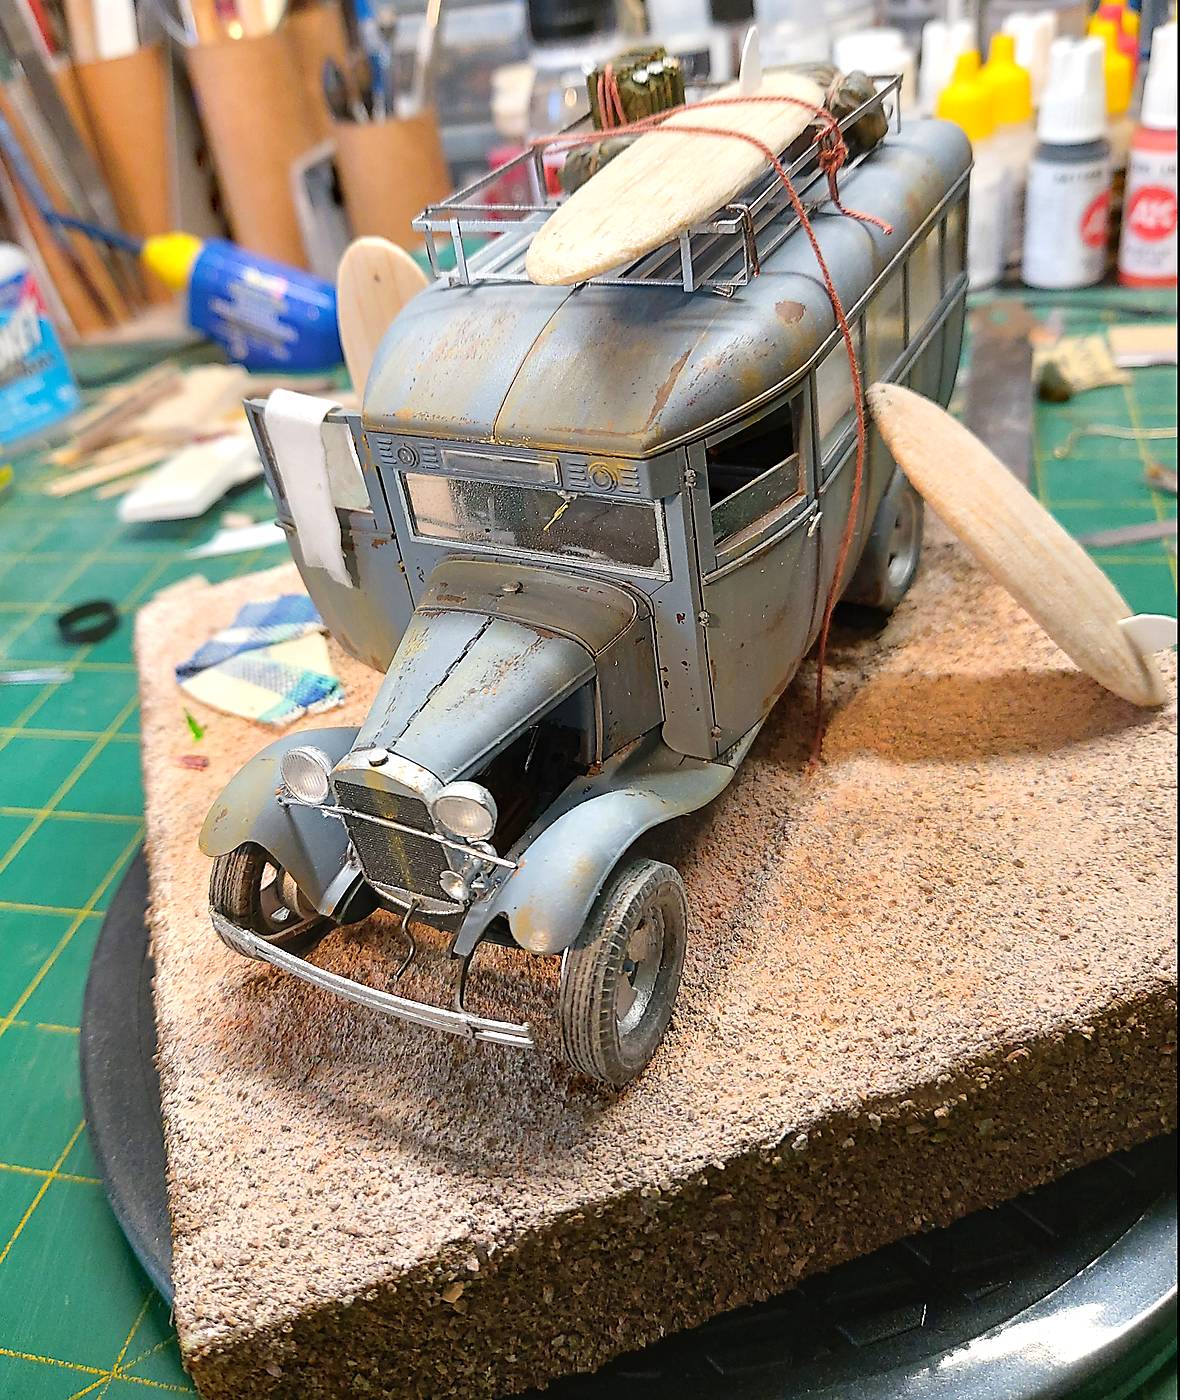
The Surf wagon dio is really starting to take shape. There’s not much finer then granules then sand. You could always bake some beach sand to kill any germs and insects, then put it in a blender.
I’m still thinking about a solution for the fine/scale sand.
Something to consider for those contemplating one of the various versions of this kit.
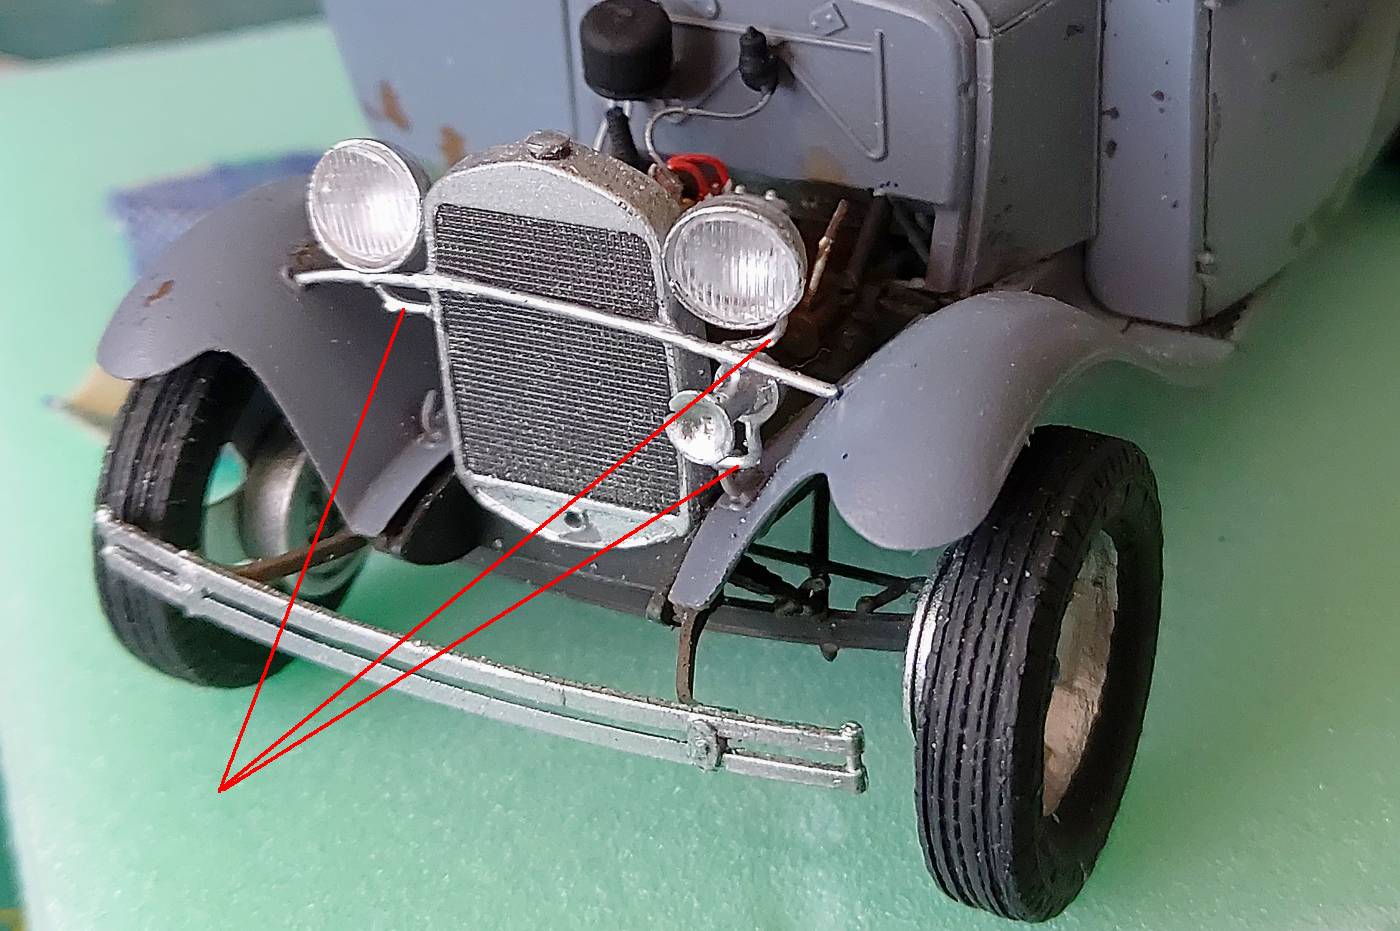
The headlights and horn.
See red lines. (Excuse the crappy photo).
The two headlights and the horn attach to the cross bar. Each has a connection to the side to the grill/radiator assembly. Red lines. At first, I thought of assembly on the bench then gluing all of it on in one part. But to do that you really need to know where the power connections go on and how to line them up.
So I glued on the bar followed by each headlight and the horn. Fiddly at the best. I glued them on and went to bed. Over glued them actually thus the messy joints. Overnight they sagged. Bum. Am I allowed to say ‘bum’?
My suggested solution for ‘next’ time. Throw the kit plastic wire connections in the trash. Drill small holes under each light and the horn and superglue in some fine lead wire. Then glue on the headlights and horns one by one. When dried bend and glue the lead wire to the appropriate locations.
Mine looks messy and it’s right in your face. Sure, I have dust and all to tidy up but it’s not a good look.
One more note - If you haven’t installed your fenders just right your cross bar won’t fit!! Be warned.
Not a lot going on. Too much time in the sick bay!!
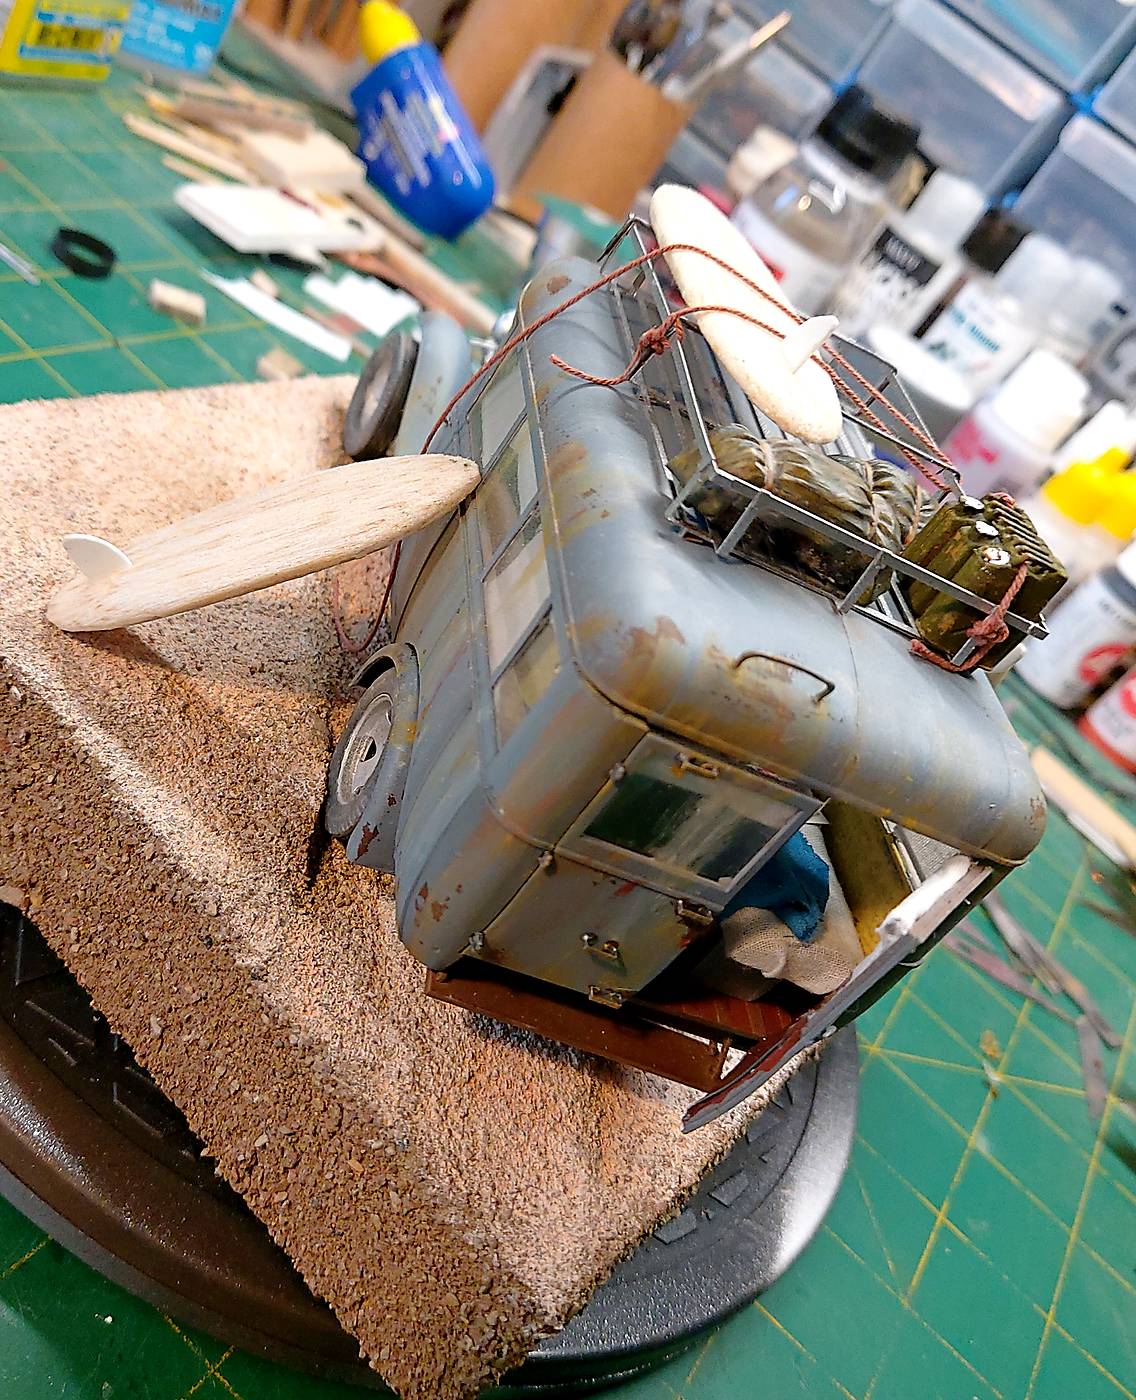
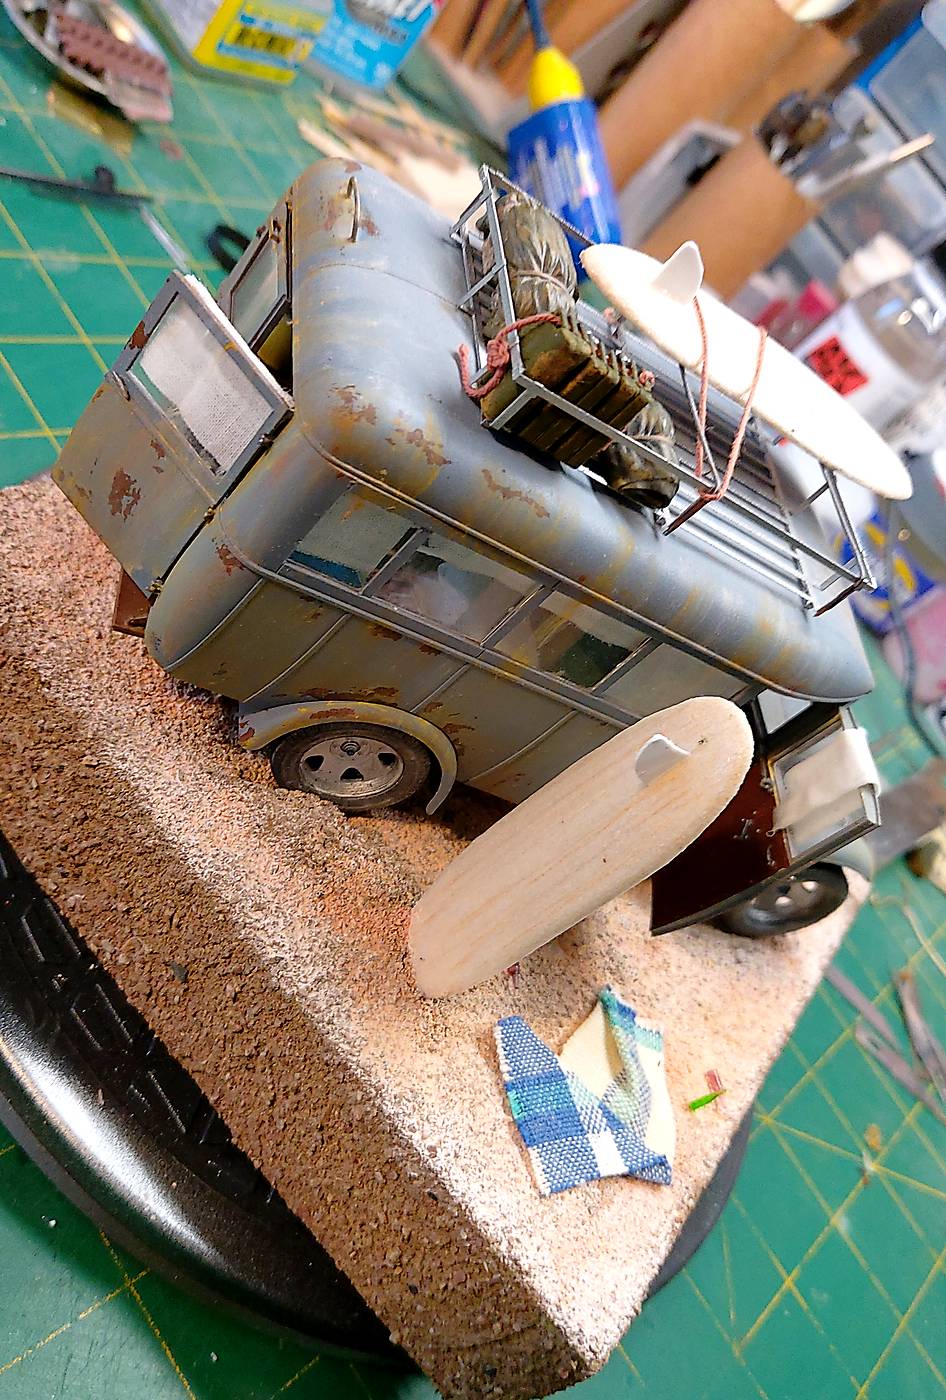
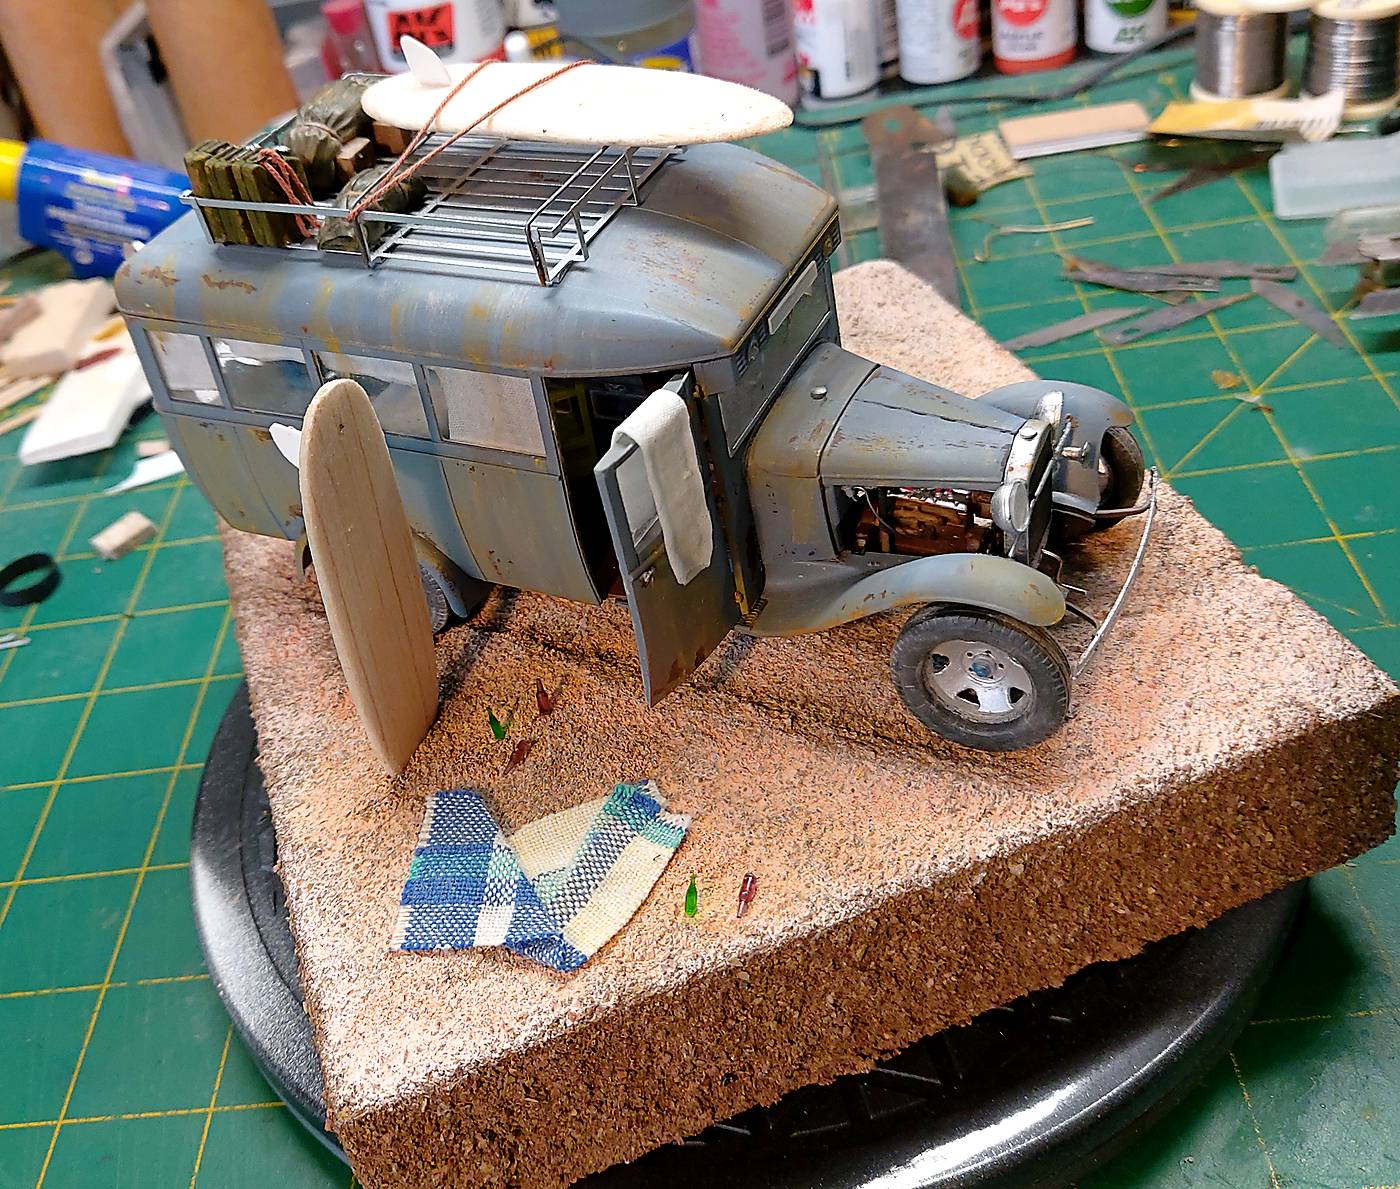
I made a base. Sand ain’t the best. All mocked up and I think ‘less is more’ will work. I may put a small campfire ring by the beach towel. After all someone was sitting there to empty those bottles! Interiors all done. I made it so the roof will come off.
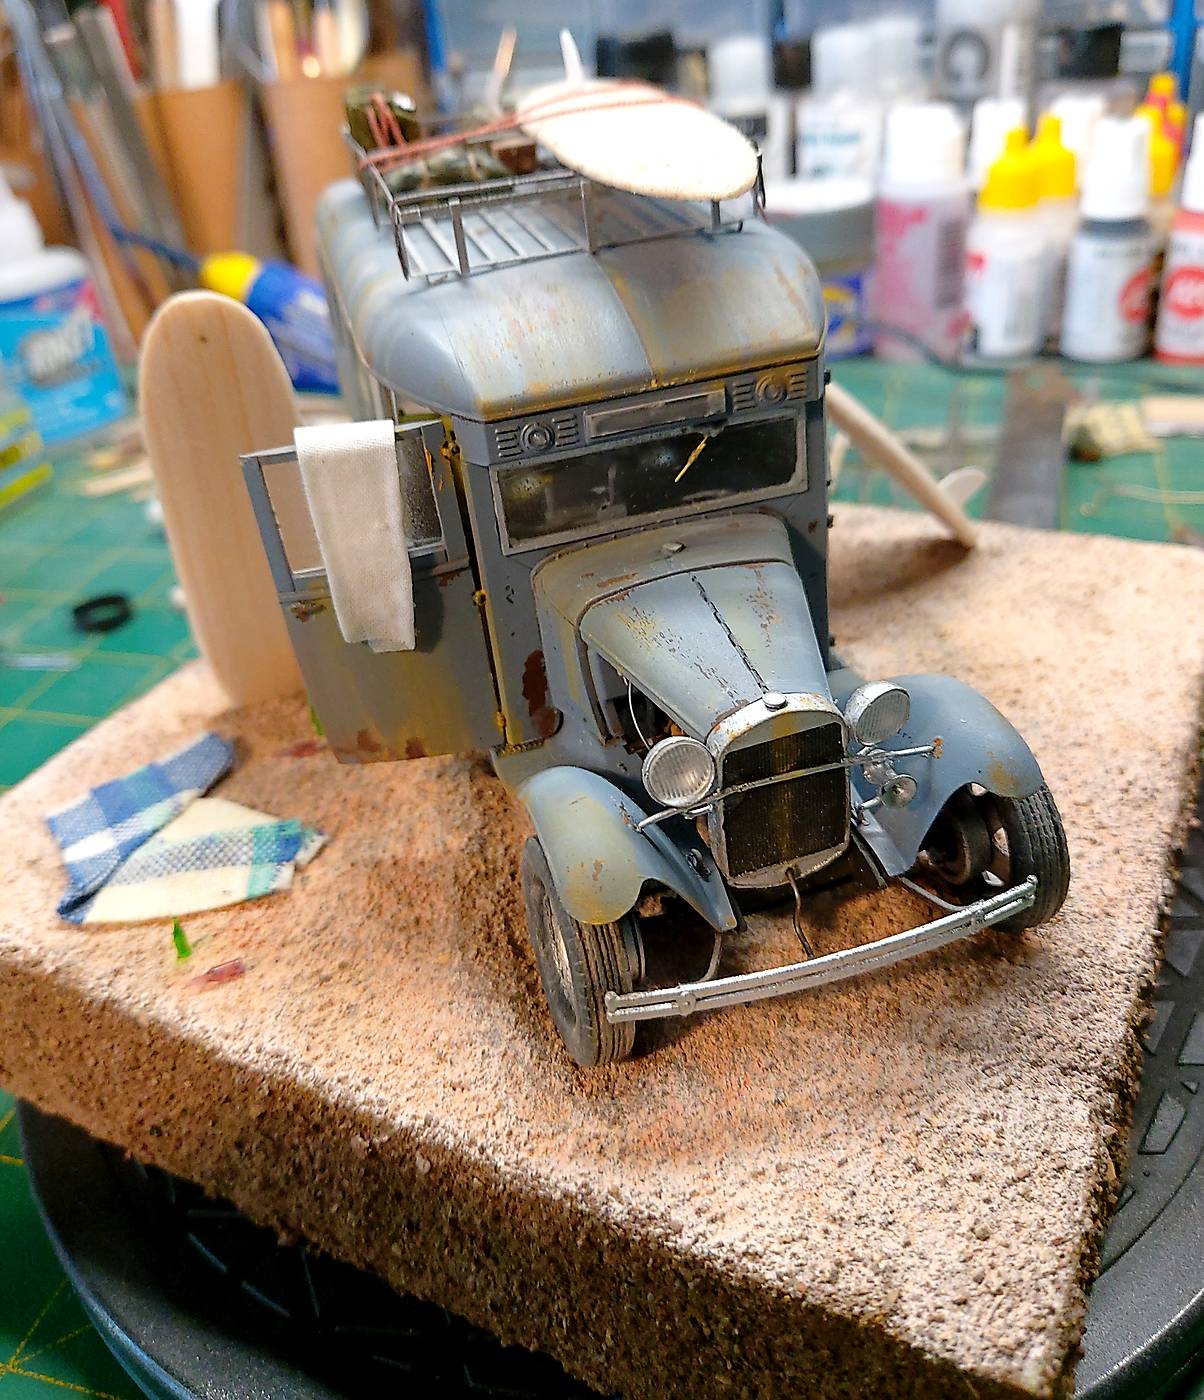
Next step is to give the wagon a clear coat and some more weathering. Then I think I’ll call it done. I could add more engine detail. and more ‘junk’ inside but time to move on.
Next project will be a 1/48 Sopwith Camel. Haven’t built a plane for ??? Gee must be 40+ years.
A matt clear coat on. Then some weathering with oils.
A few more details on the engine. Glue the roof rack on and detail the rope for the board tie down. (It’s hard to get ‘scale’ rope to look like it has any weight. My rope it just sitting there waiting to be glued down somehow. Any tips?). Then onto the diorama.
Note to those getting old and prone to brain farts! Make notes for jobs for later on. I drilled out the wheel studs so I could put my own bolts in. I have just noticed I never put them in. I have holes but no studs or nuts. Does it wheely matter? I was also going to put in some valve stems. Oh well next time!
Nice Bruce ! I particularly like the rust treatment.
One way of dealing with stiff thread representing scale line is to soak it in thinned artist’s acrylic matte medium - it can then be draped more naturally or tied off taut.
Cheers- RT
That’s me!!
You could probably find some micro-scale nuts and thread and just glue them in place without even needing to paint them, the silver would sit nicely against the rims.
I love the paint and weathering on this, really nice work and great choice of colour.
Bruce,
She’s really look’in like a surf wagon. Back in the days, the Californian surf crowd would have surely loved it.
As for Brain farts, believe me I led everyone here and most likely else where as old age (will be 75 on the 14th), and just jumping to one thing from another my whole life surely doesn’t help with long range focusing. I do write things down so I don’t forget, but then I forget where I put the list, even when I remember that I made a new list.
And Richard, nice to see ya back on the list. I’ve for one missed you as well as Michael these days.
OK guys. I’m about done. Time to move onto a new project. I could keep fiddling but enough is enough.
A peek in to the back. Unmade bed and a ‘dirty’ magazine!! Note the roof isn’t glued down and is a bit high at this time. I added the extra grab handle on the roof. Yellow caste is from a bad LED light.
Crank handle is a simple piece of bent wire. Wiper is still unpainted!! The hood will lift off if I ever get the inclination to add more detail to the engine.
This was a fun project. MiniArt make an excellent kit. I love this type of project where I only have to follow my imagination. I hope I haven’t offended any surfies in the making of this kit. No one was injured or harmed during production. And to all those fathers with teenage daughters I hope this wagon doesn’t bring back any bad memories.