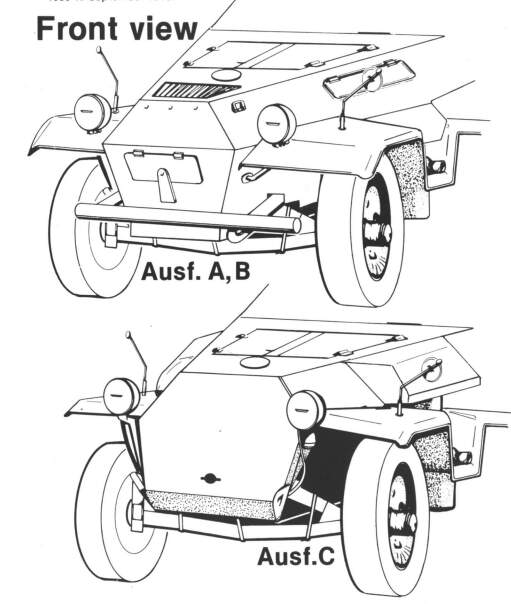
Yes, you are correct. The Ausf D had the sloped rear access with flat doors. The earlier marks had the V shaped doors for the angled rear.
Quick rule of thumb to determine version:
The Ausf A had a split front section with flap and also vision slits and tool clamps on the side.
The Ausf B was the same except it had the tools relocated and rear vision slits removed
The Ausf C had the sloped front without the flap. The Ausf C had the same 'V" shaped as the A aqnd B but the stowage boxes were located further to the rear.
2 Likes
Update
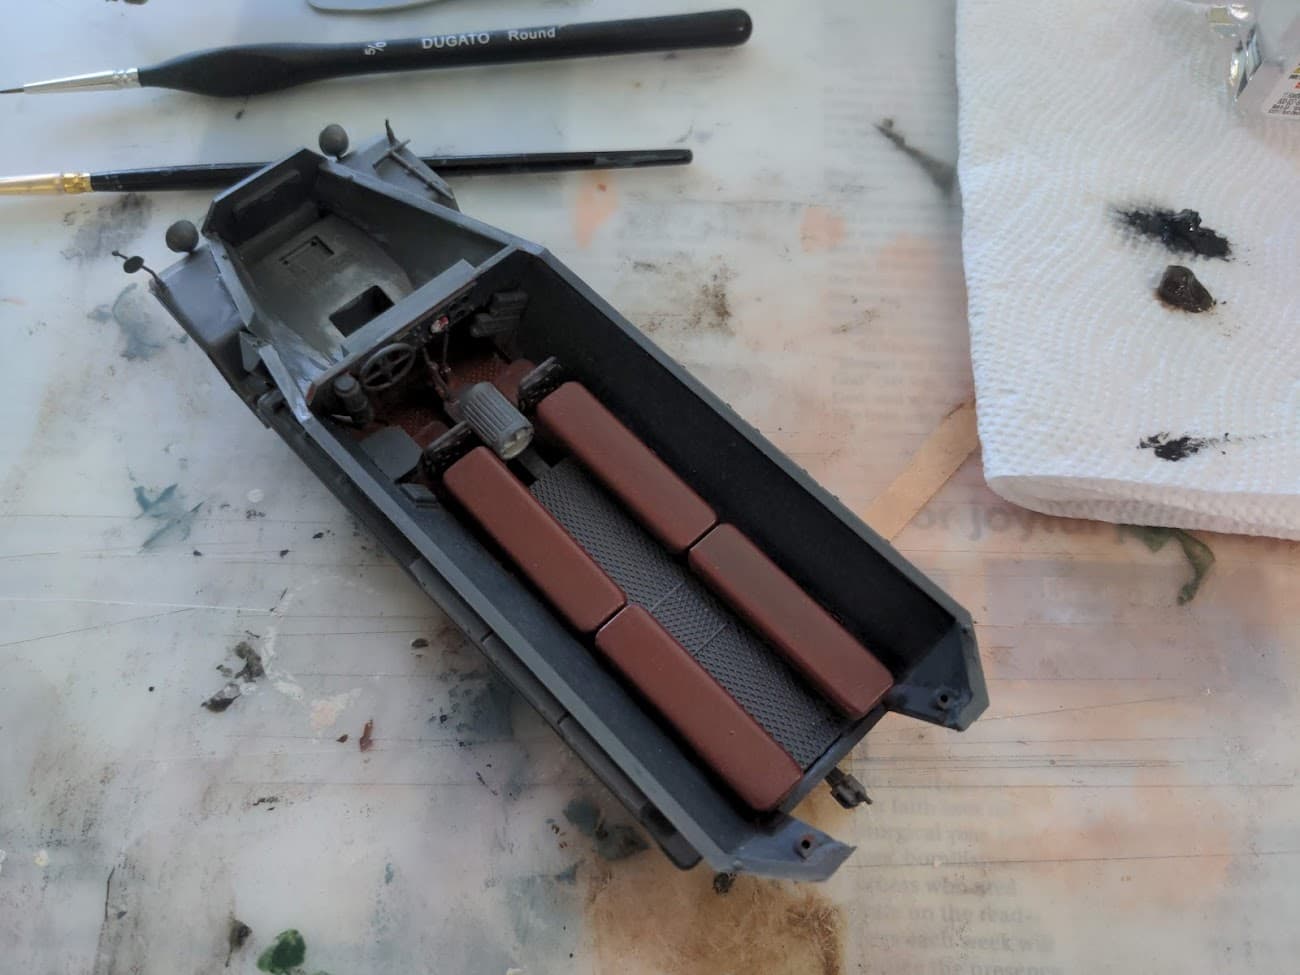
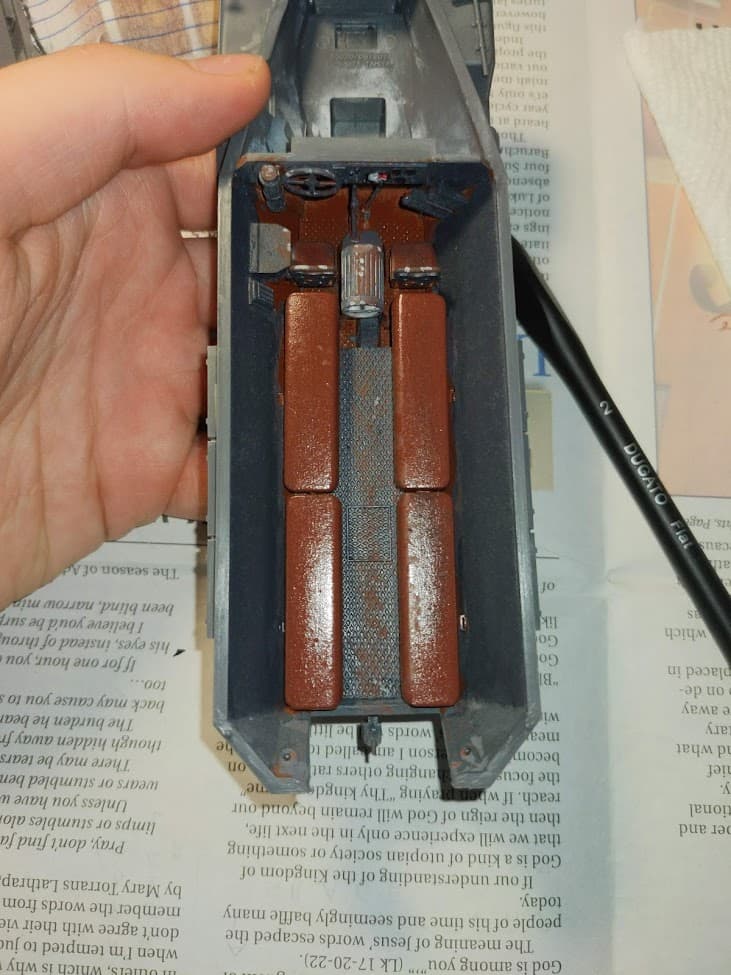
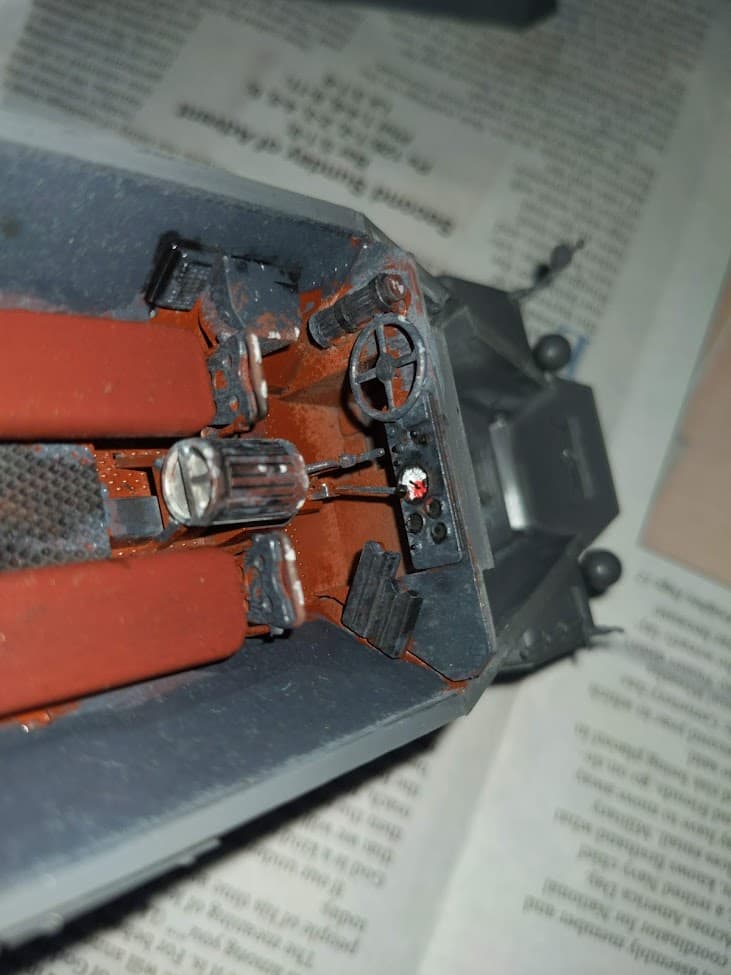
I have painted the inside on the vehicle and have clear-coated it. Next will be a pin wash/oil streaking on the inside before closing it off and working on the outside.
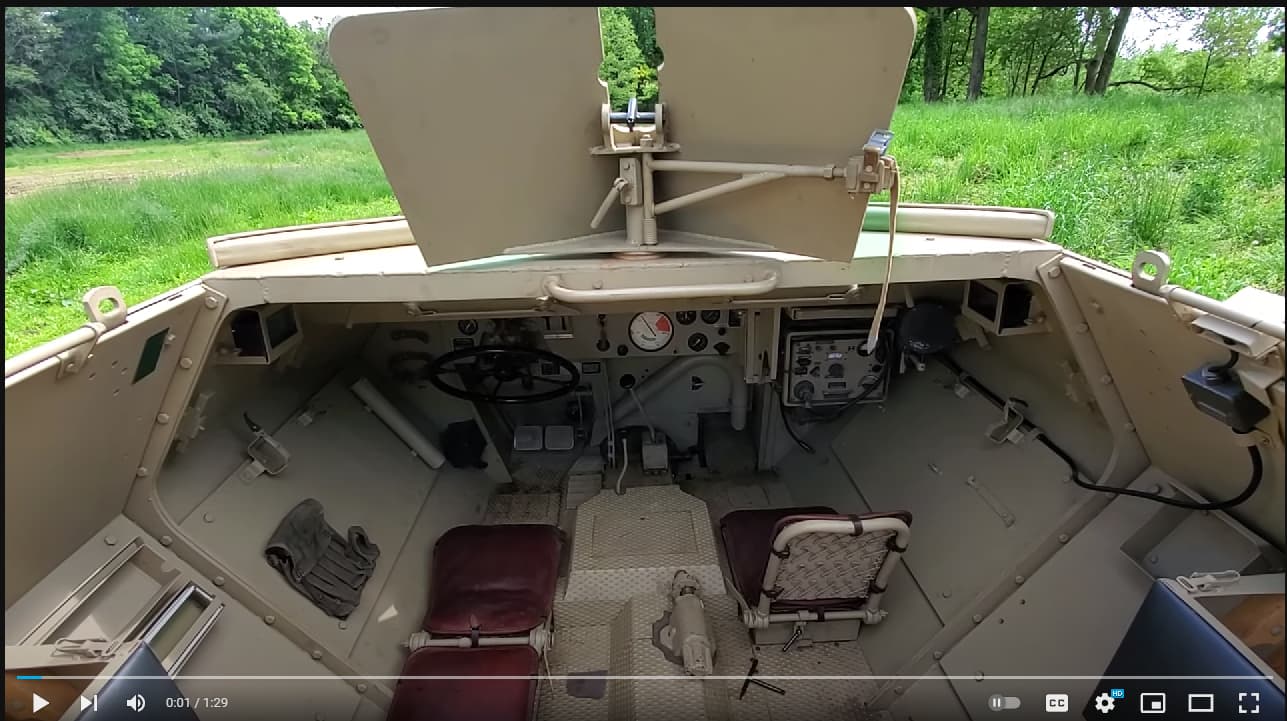
I found a video of the inside of an Sdkfz. 251 and used this scene to paint the control panel of my model.
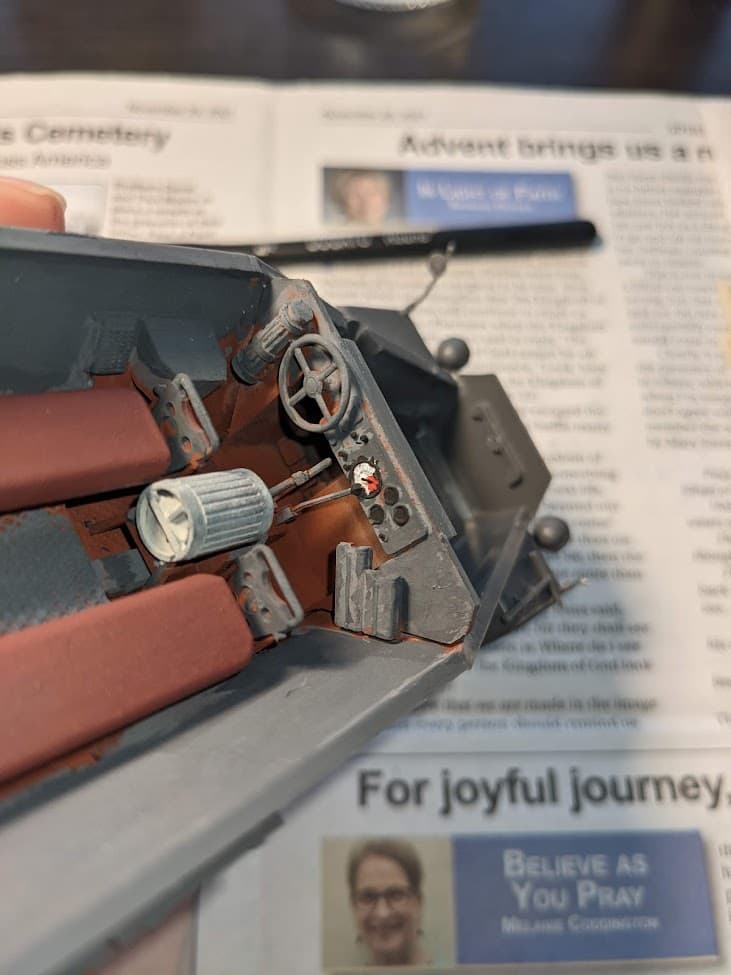
Some shots of the control panel, I’m satisfied with this first attempt at a painted control panel.
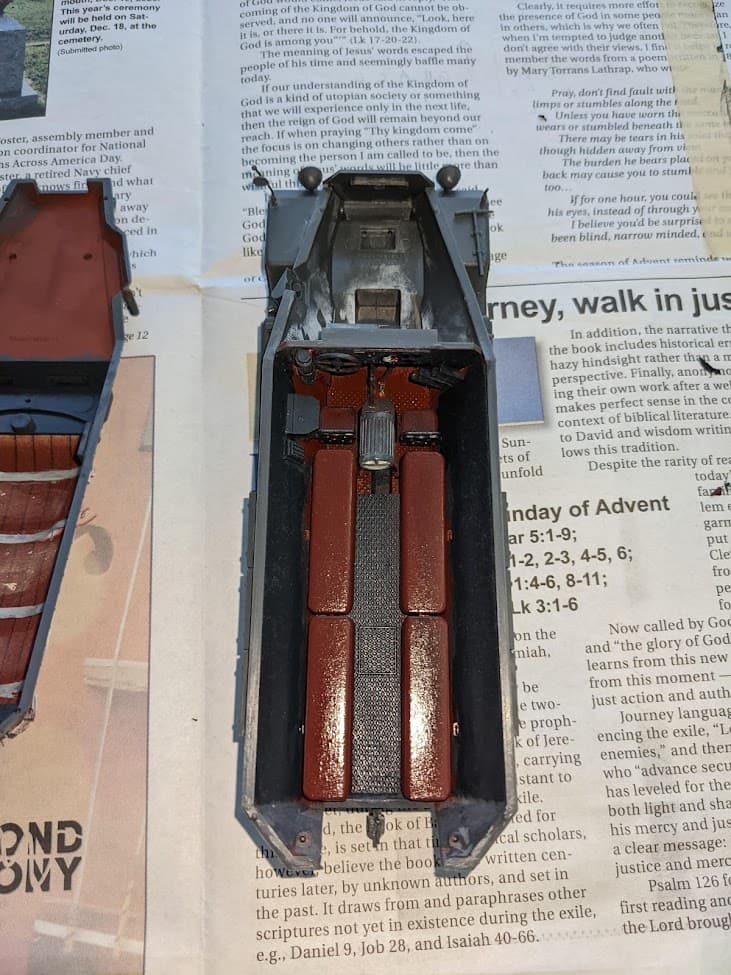
The inside of the model
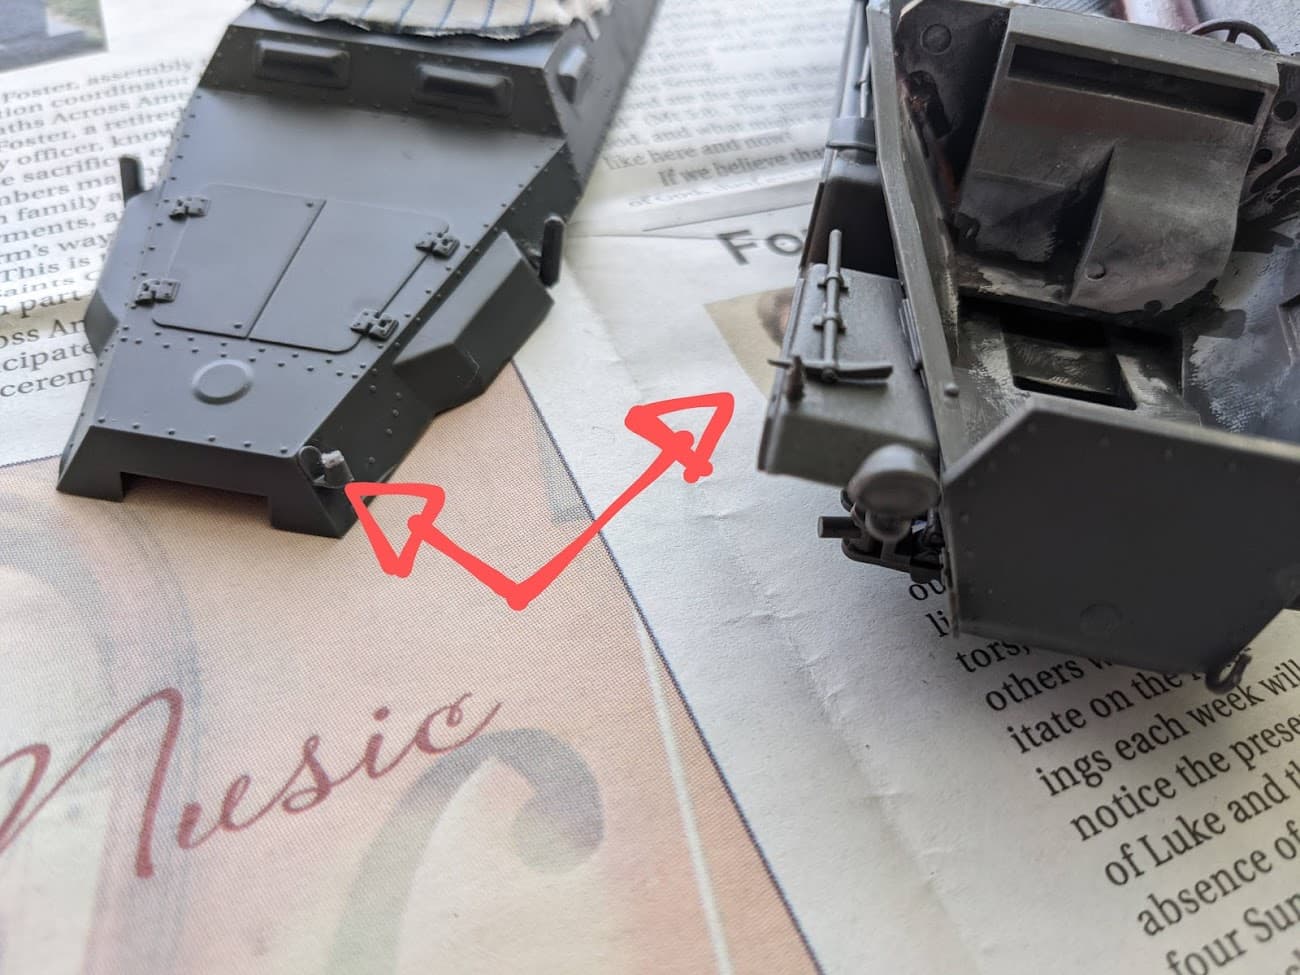
However, in my clumsiness, I accidentally have snapped off two pieces (which has made me shelf my sopwith camel for a while out of frustration). Would it be historically plausible for these two parts (indicated by the arrows) to not be replaced?
I am satisfied so far with the model, and although it is taking a long while to complete, it is relaxing and enjoyable.
I pulled up the instructions for the kit. As best I can tell, the left arrow points at the mount for the NOTEK light and the right arrow points to the mount for a width indicator pole.
If I recall correctly, it was a simple matter to dismount and stow the NOTEK light on pretty much every vehicle that carried one. Hopefully, someone else with better knowledge can offer more information on that.
Width indicator poles were regularly bent up and sometimes ripped off entirely, along with the fenders that carried them.
If you want to take a stab at scratch building, you have some options.
For the NOTEK light, find a leftover piece of sprue at a ‘T’ intersection. Hold the sprue by the stem and carve the top of the ‘T’ into something approximating the lost light. If you manage to make something that looks decent, cut it off the stem and attach it to your model.
For the width indicator pole, you could use a spare pin. If you have a pin with a small round head, you are there. If you have a pin with a flat head, you can build up some putty around the head into a ball shape. You could also stretch some sprue and put a little ball of putty at one end.
If those things strike you as too difficult or the results look poor, finish the model without the parts.
It may be that, some day, you will build a model with an extra NOTEK light or width indicator pole. When that happens, you can always go back and make minor repairs.
I guess I’ll leave it as-is for now, then. I hated mounting the things on the hood of this model; the parts were thin and awkward to glue in place. I hate gluing in parts that have thin stems that have a loose fit – if I try superglue, the part will fall over before the glue cures, and if I try Tamiya extra-thin, the stem almost melts apart. Thanks for the insights, though. It is interesting to build models that don’t look like they’re fresh from the factory, but I can’t do a lot of damage to things like fenders and the like, because I don’t have the tools.
When I build a model with really delicate parts that stick up, like antennas and lights, I often attach them last. When you come to such a part, mark the instruction sheet with a highlighter and skip it. Later, when the model is almost ready for the first coat of exterior paint, go back and attach the highlighted parts. Parts will still get knocked off but less often.
If your plastic model cement melts small parts, consider purchasing a less aggressive adhesive for such delicate items. For example, Testor’s Liquid Cement, while not very popular amongst model builders (as best I can tell), works less aggressively than something like Plastruct Plastic Weld. I am not sure where Tamiya Thin Cement sits in that spectrum as I never use the stuff.
Realistically bending fenders is an art onto itself. It pretty much requires using some form of thin metal and superior painting skills. I’ve never pulled it off to my satisfaction.
1 Like
You’re right, I should attach those things last. I know that you can thin the plastic on a fender fto make it more malleable too. Another thing I hate is instructions that make it difficult to determine perspective, because that can lead to a lot of errors, which happened with the doors (I was able to fix it though) and the previously mentioned Sopwith Camel. That thing was supposed to take a few weekends, but I shelved it out of frustration (multiple part snaps).
I use Testors cement as my primary glue, I think it works great.
Ken
1 Like
The width indicators are more robust than people think. Google SdKfz 251 and see how few wartime photos show them missing compared to ones that have them. The Notek light was not readily removeable like the Bosch ones were.
If you still have the parts, just replace the broken stalk with brass wire. Cut the stalk off under the ball on the indicator and drill a hole into it to hold the wire - it is fiddly but do-able. Same with the light.
Options:
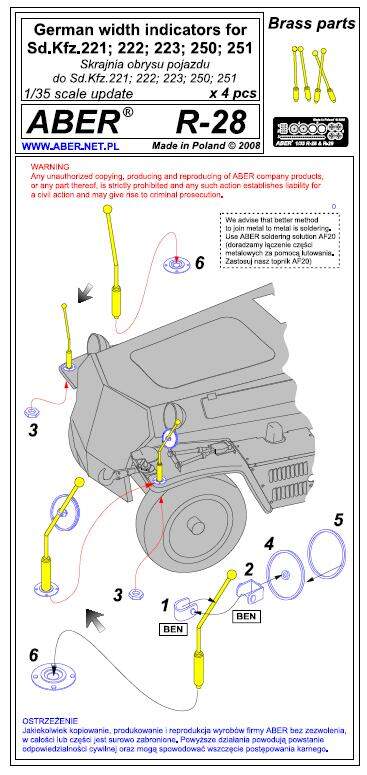
If you have any Dragon 251 kits, look inside the box and see if it is one where they provided both brass and plastic options - you can use a set from there.
Most of the major players do a set in brass if you want to replace them:
The Notek light is also done by aftermarket guys, or look in your stash for one. Often the Dragon Panzer IV kits of the early Ausf’s have this as a spare.
I still have the snapped width indicator, but I lost the NOTEK light. I don’t see myself making a large online modeling purchase anytime soon, so I probably won’t purchase aftermarket parts. What options would I have to reattach the width indicator?
Reattaching thin parts like that is not easy and the join is never strong. I’d suggest just drilling a hole in the base and also the knob and use wire as the shaft, suitably bent to shape.
2 Likes
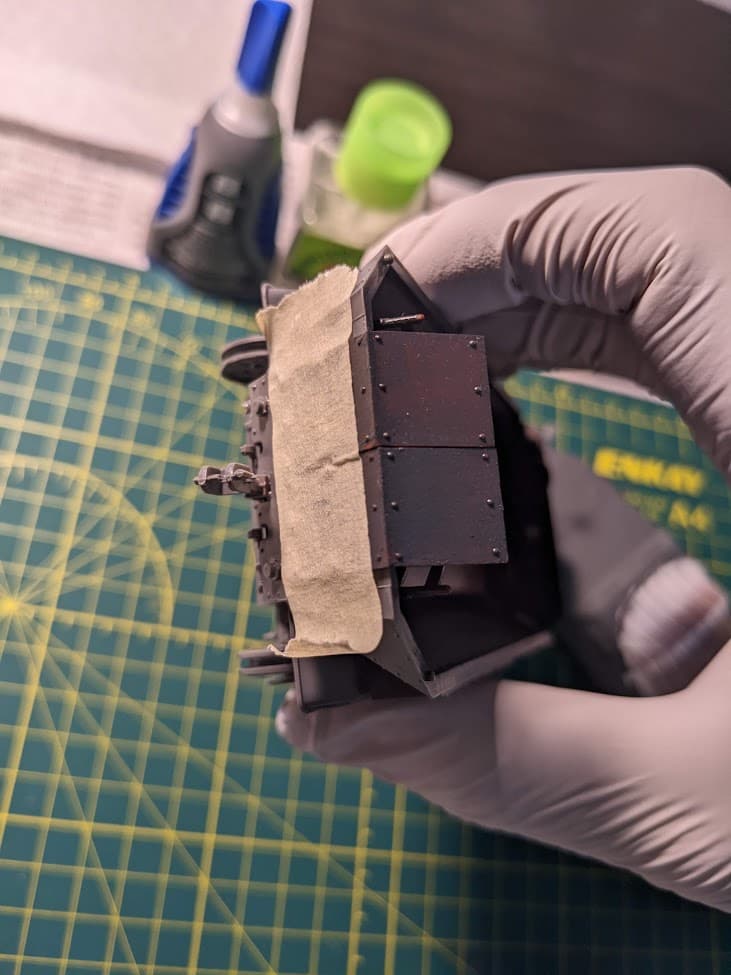
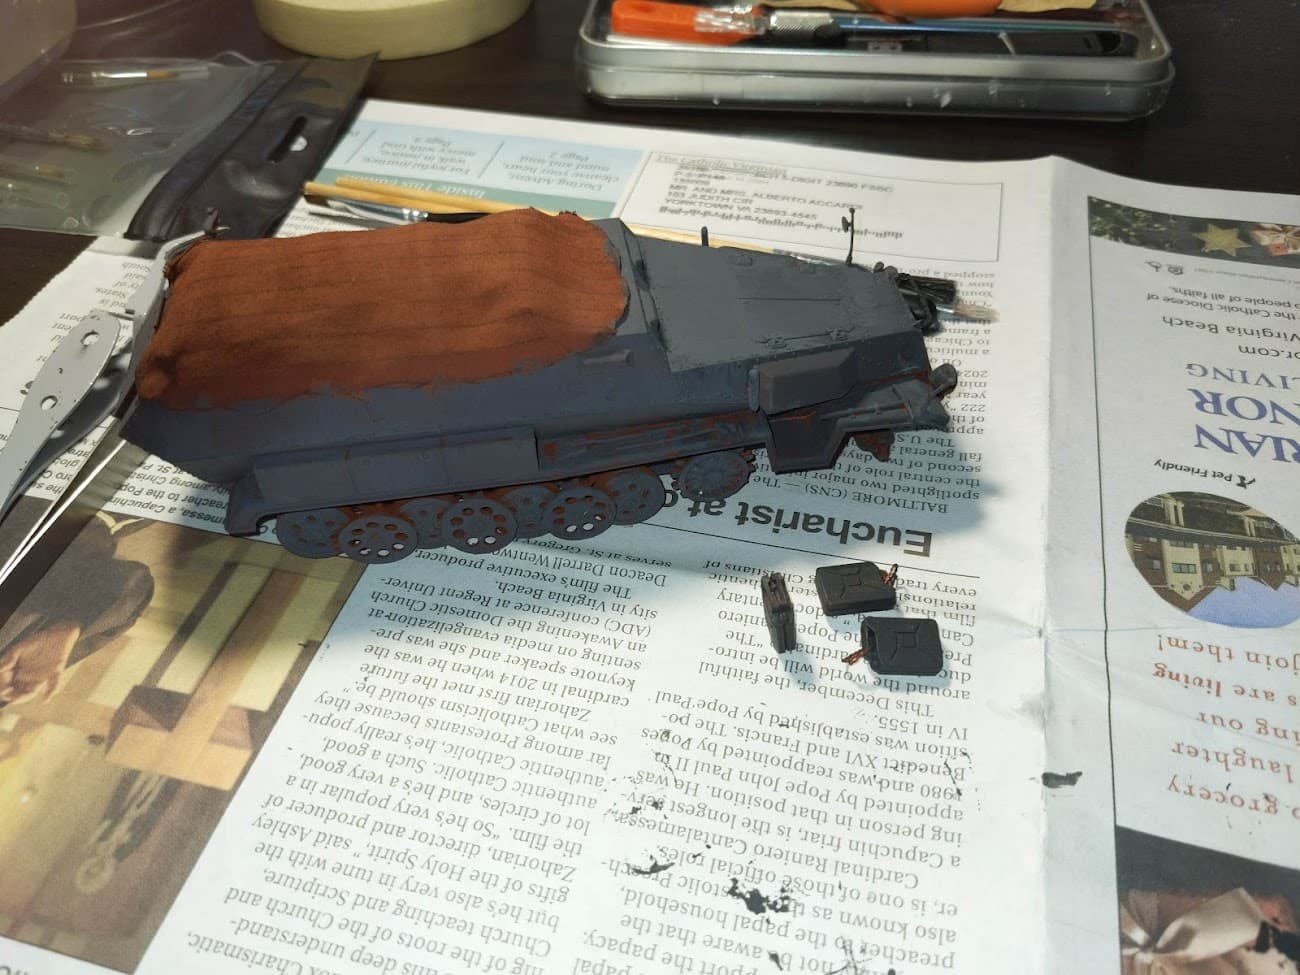
Finally got back to the project, mostly because I didn’t have much time and I was avoiding trying to do the wash on the inside. Unfortunately, it doesn’t seem to have been successful. Do you guys have any suggestions to get a better pin/panel line wash and oil streaks?
Before chips/wash
After chips
After the wash
The next step is to close up the model and begin the final external modifications/repairs.
I discovered a neat trick for attaching Sdkfz. 251 doors. Just align the doors on a piece of masking tape with rnough overhang to tape onto the sides on the back plate. Then you can tape them to the back and align the door hinges, then you can put on the upper half.
Disclaimer: This did NOT work, unfortunately. I ended up clamping the two halves together with tape and getting the doors in place individually.
Finally got the two halves together, but the seam may need some more work.
Overall build rating: 6/10 Not horrible, but many fiddly parts and the fit wasn’t great. Definitely not a beginner-friendly kit, but it is definitely doable. Would not recommend, though, unless you are ready for anger and frustration.
1 Like
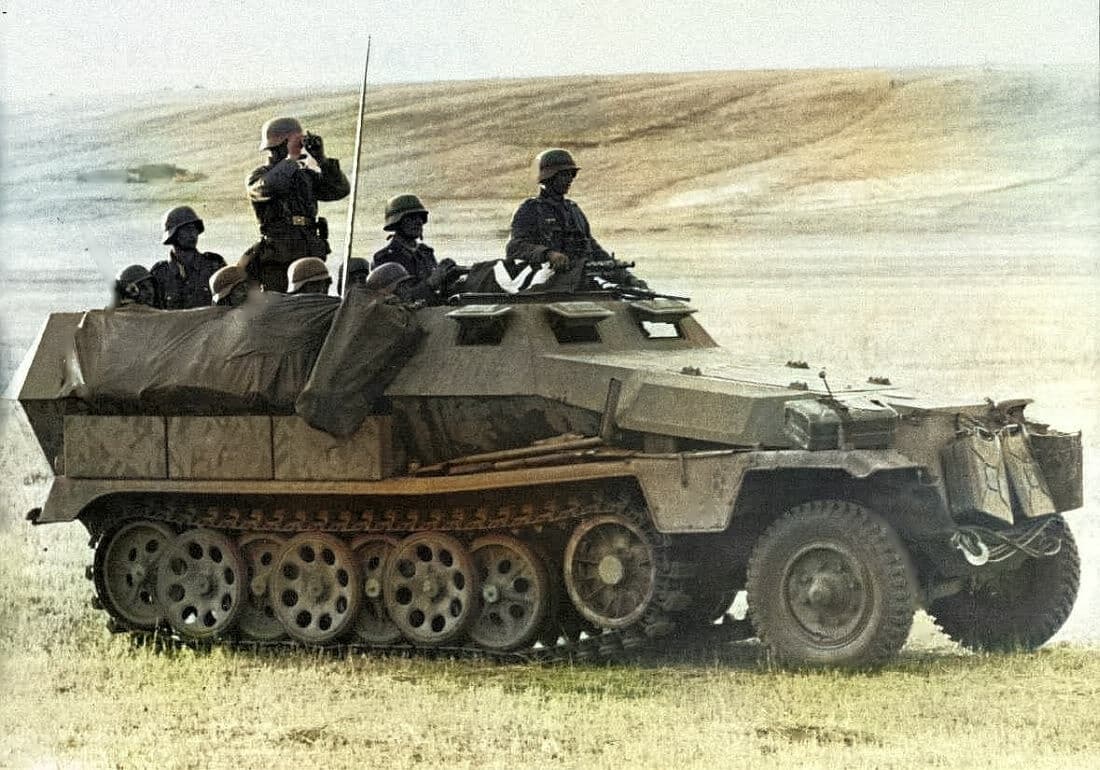
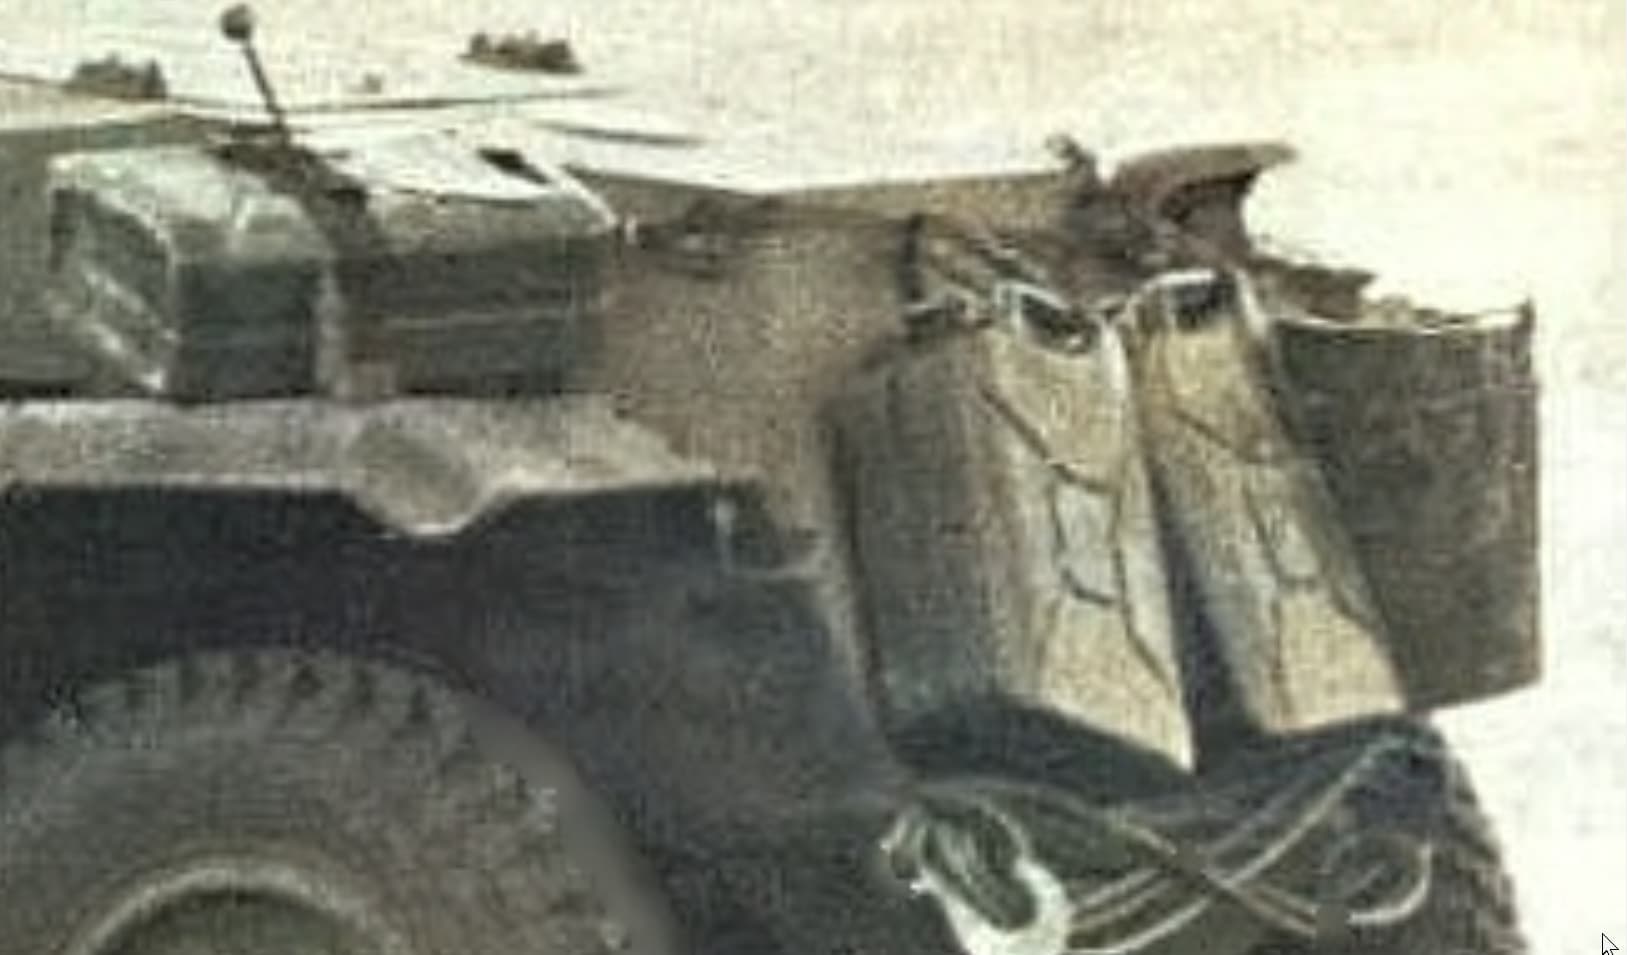
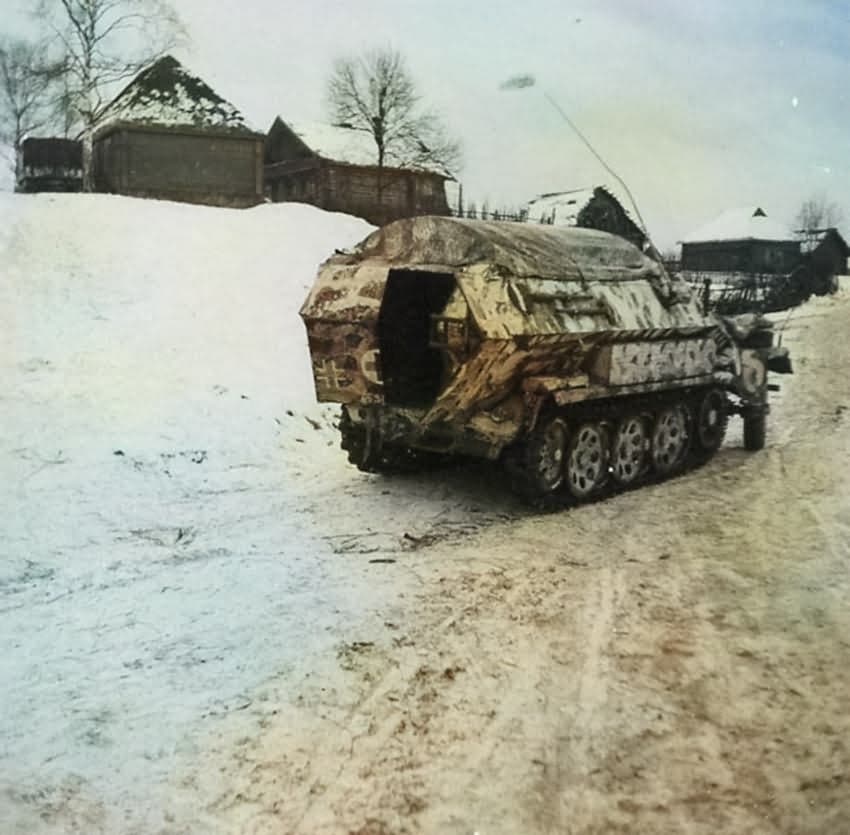
Inspired by the below image, I want to add the jerrycans to my model. What do you guys think the two in the front are hanging off of? Is it a cable across the front with cable straps on the cans, or were the straps more likely some kind of leather?
Close-up of the area of interest
1 Like
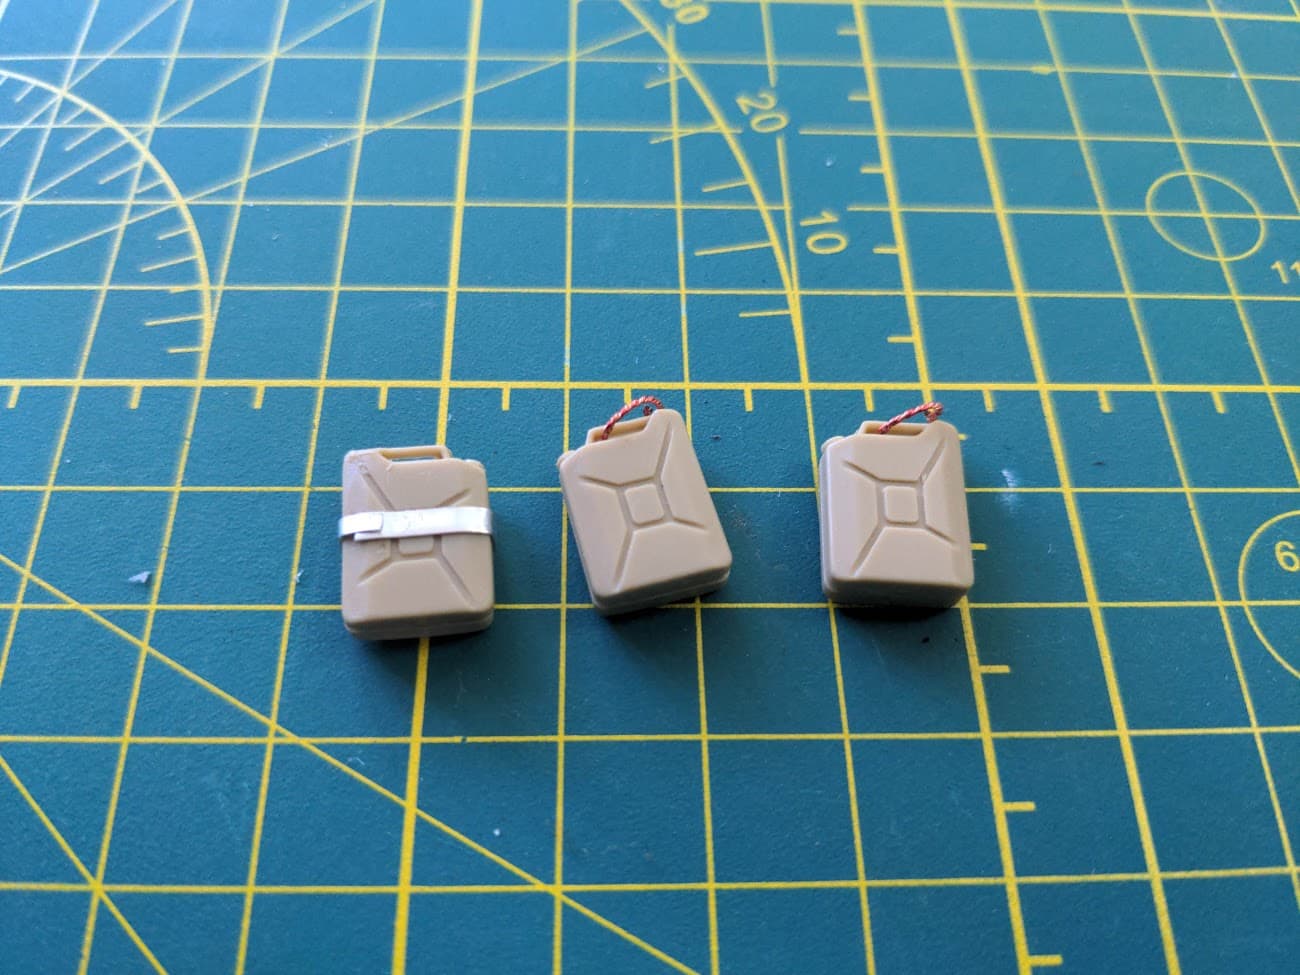
My take on the jerrycans and their attachment points.
1 Like
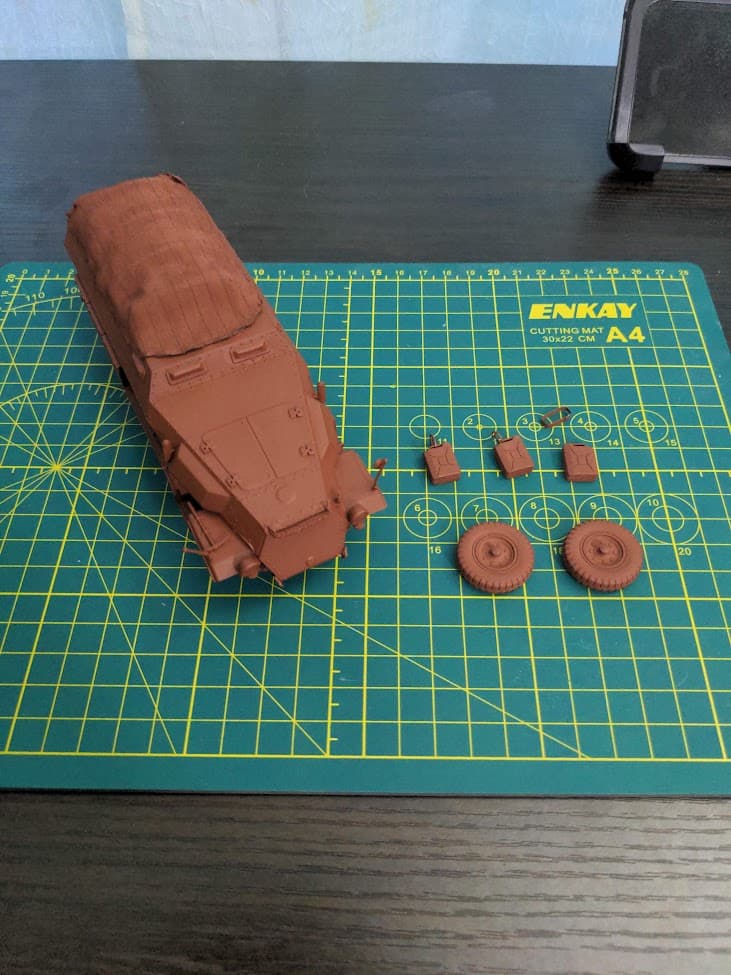
The rest of the modifications are done! I will paint either later today or tomorrow.
The jerrycans are removable because I made the attachment in a key ring-like style, and wil either leave it like that or glue the ends together after painting.
@petbat I was able to reattach the broken-off stalk with CA glue.
Speaking of jerrycans, on a vehicle painted with Dunkelgrau, what color would the jerrycans have been?
2 Likes
All primed and ready to paint!
2 Likes
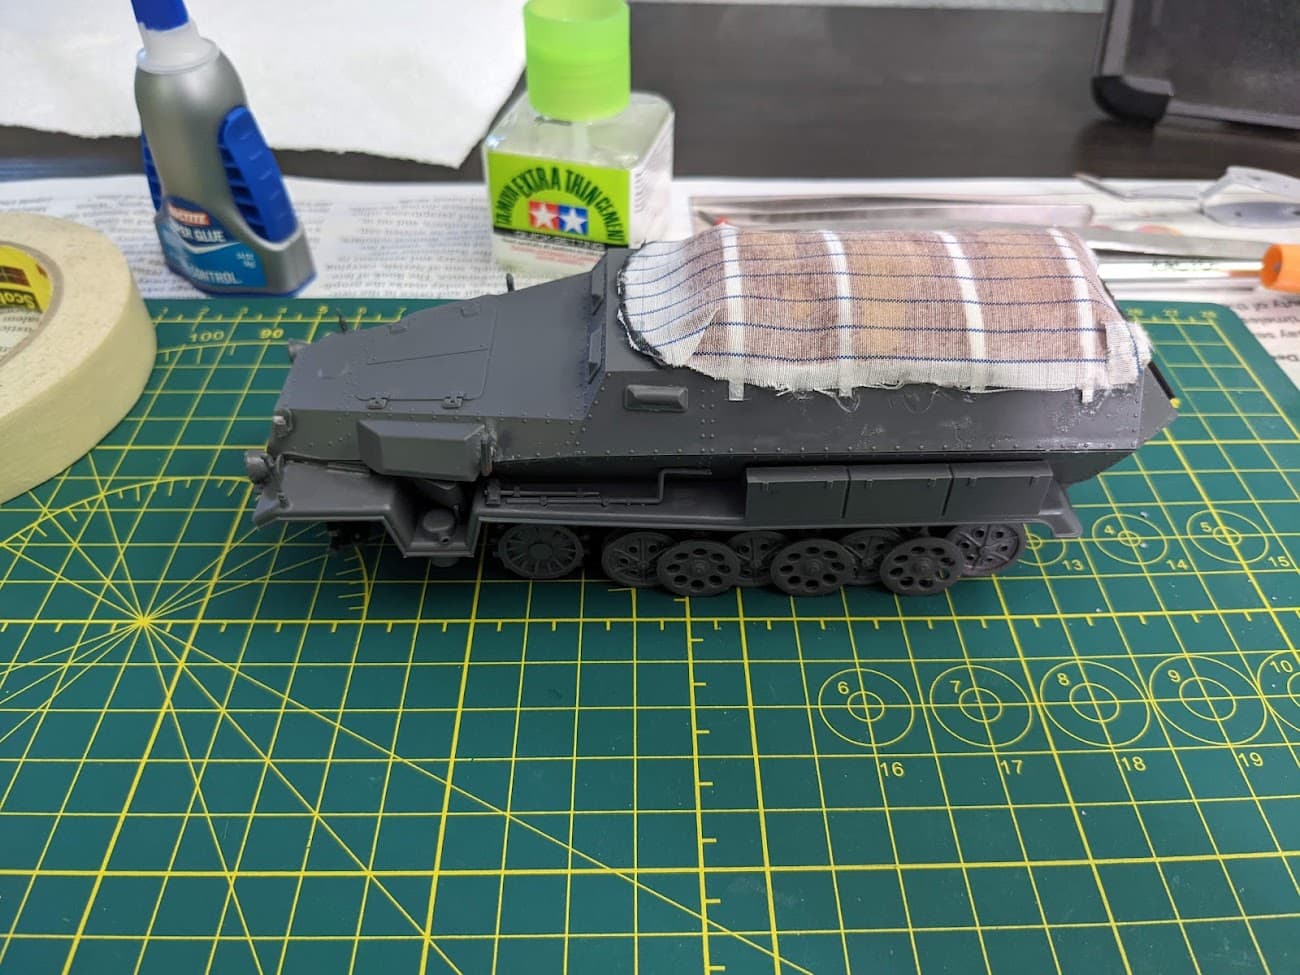
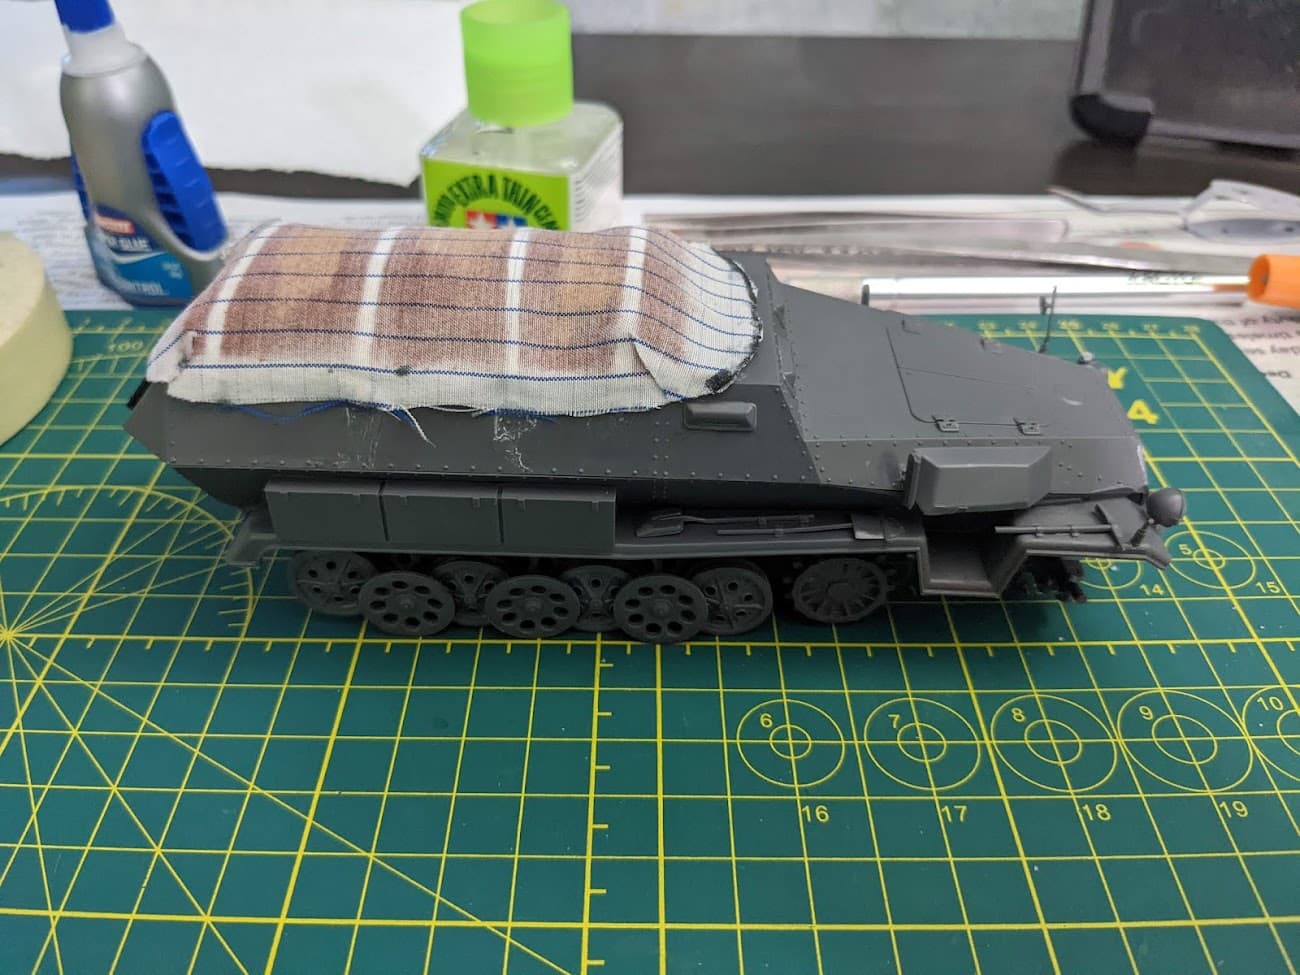
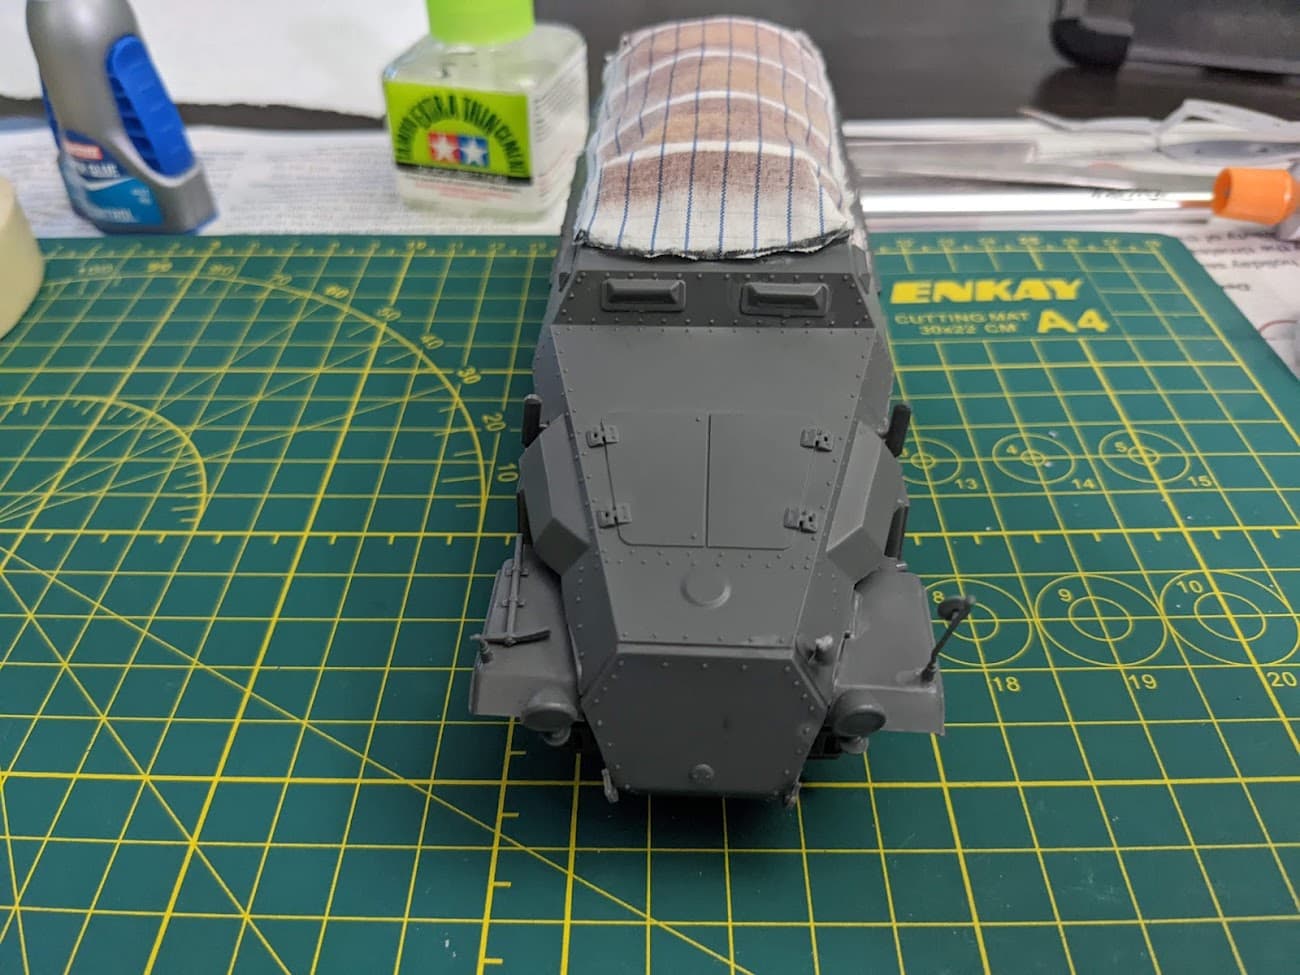
What color do you think the canvas roof is?
First shot at painting, got most of the vehicle covered in gray, some inconsistencies throughout due to the fact that I mix my own colors. I also got the jerrycans in a greenish-gray color. I’ve encountered trouble with some tough to reach spots. I need some help determining what color to paint the canvas roof. I’m taking inspiration mainly from the image in the previous post.
2 Likes
I’d guess brown or field grey on that canvas