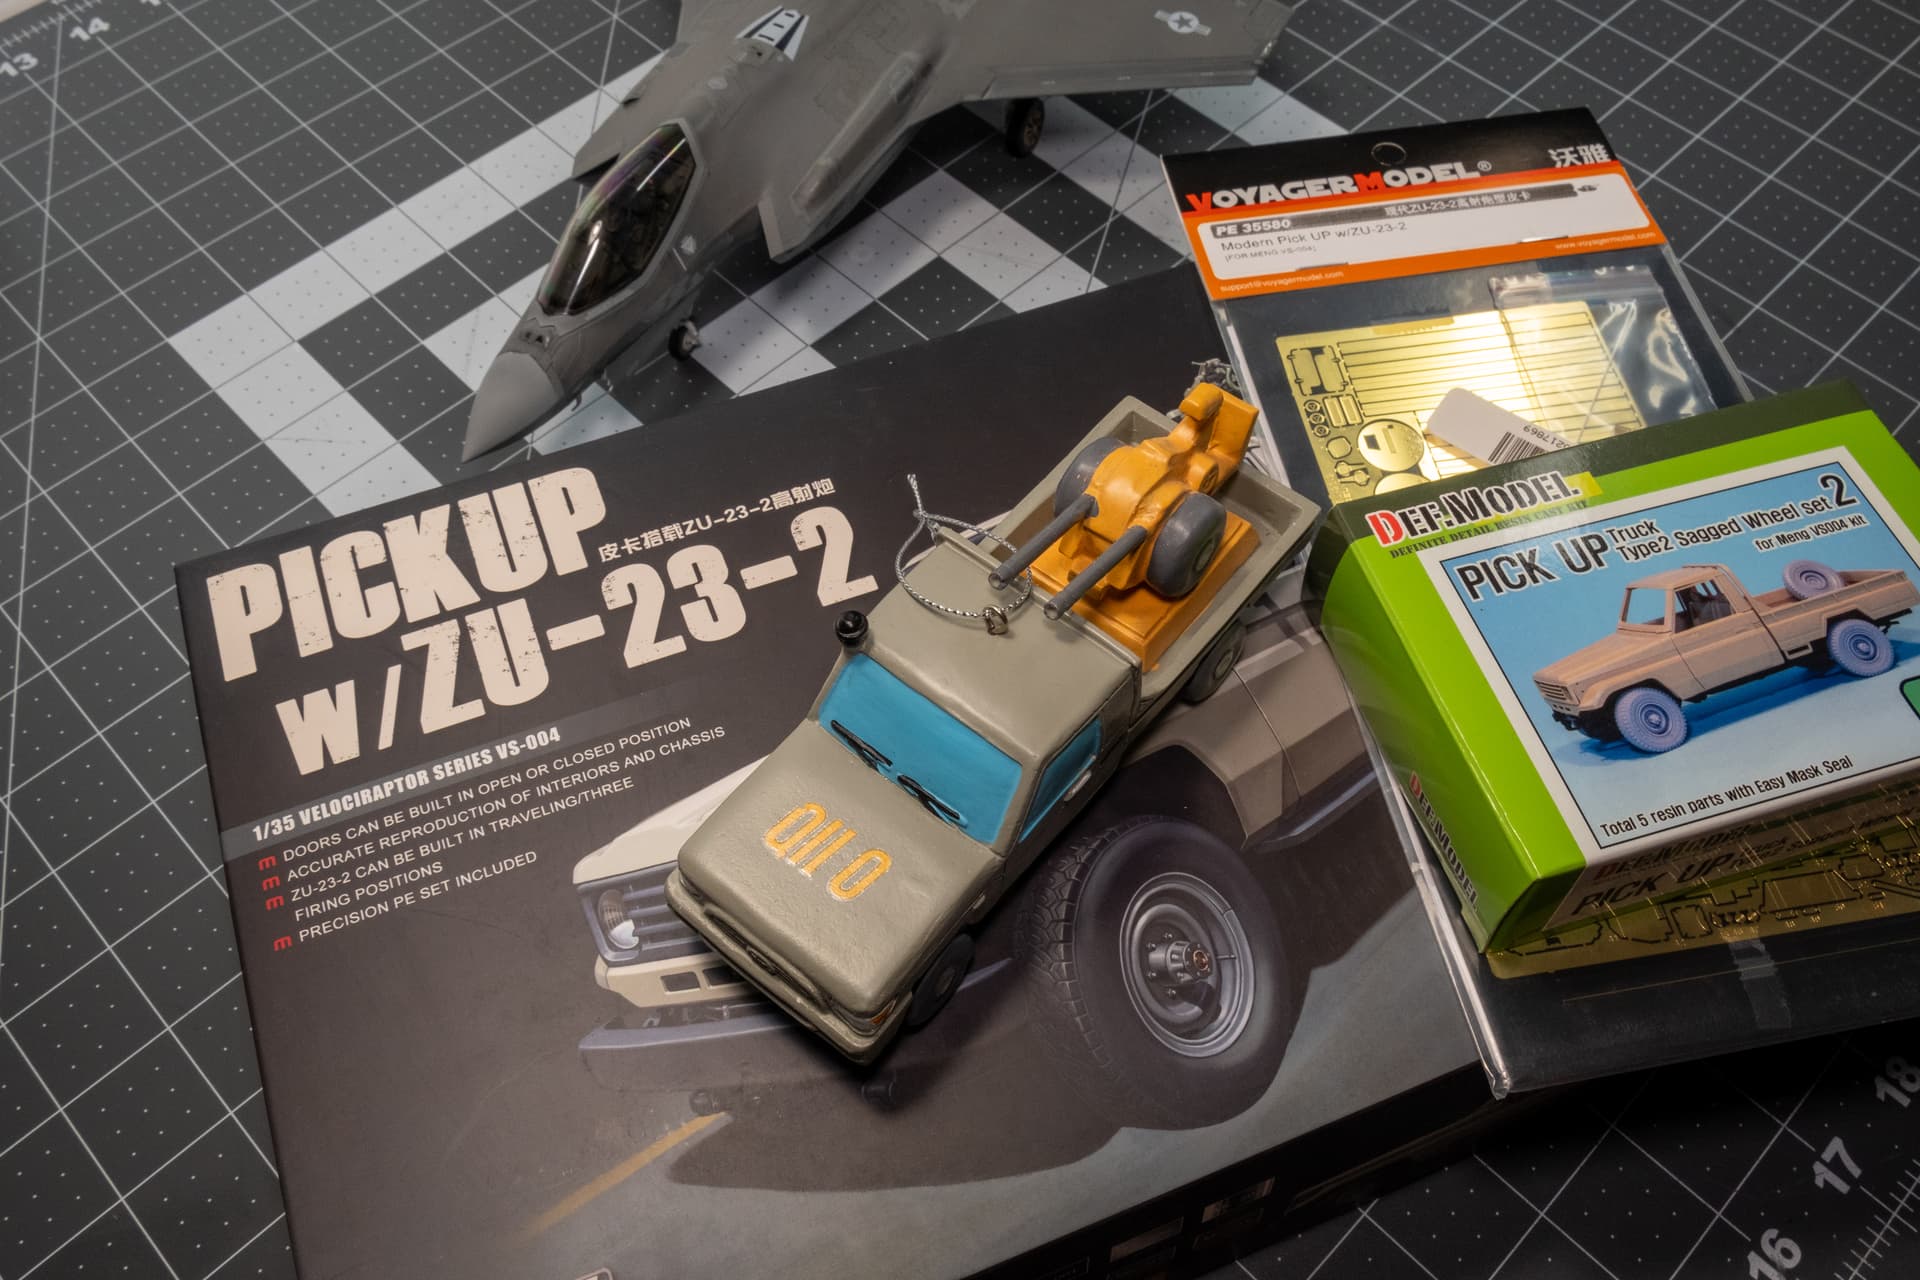
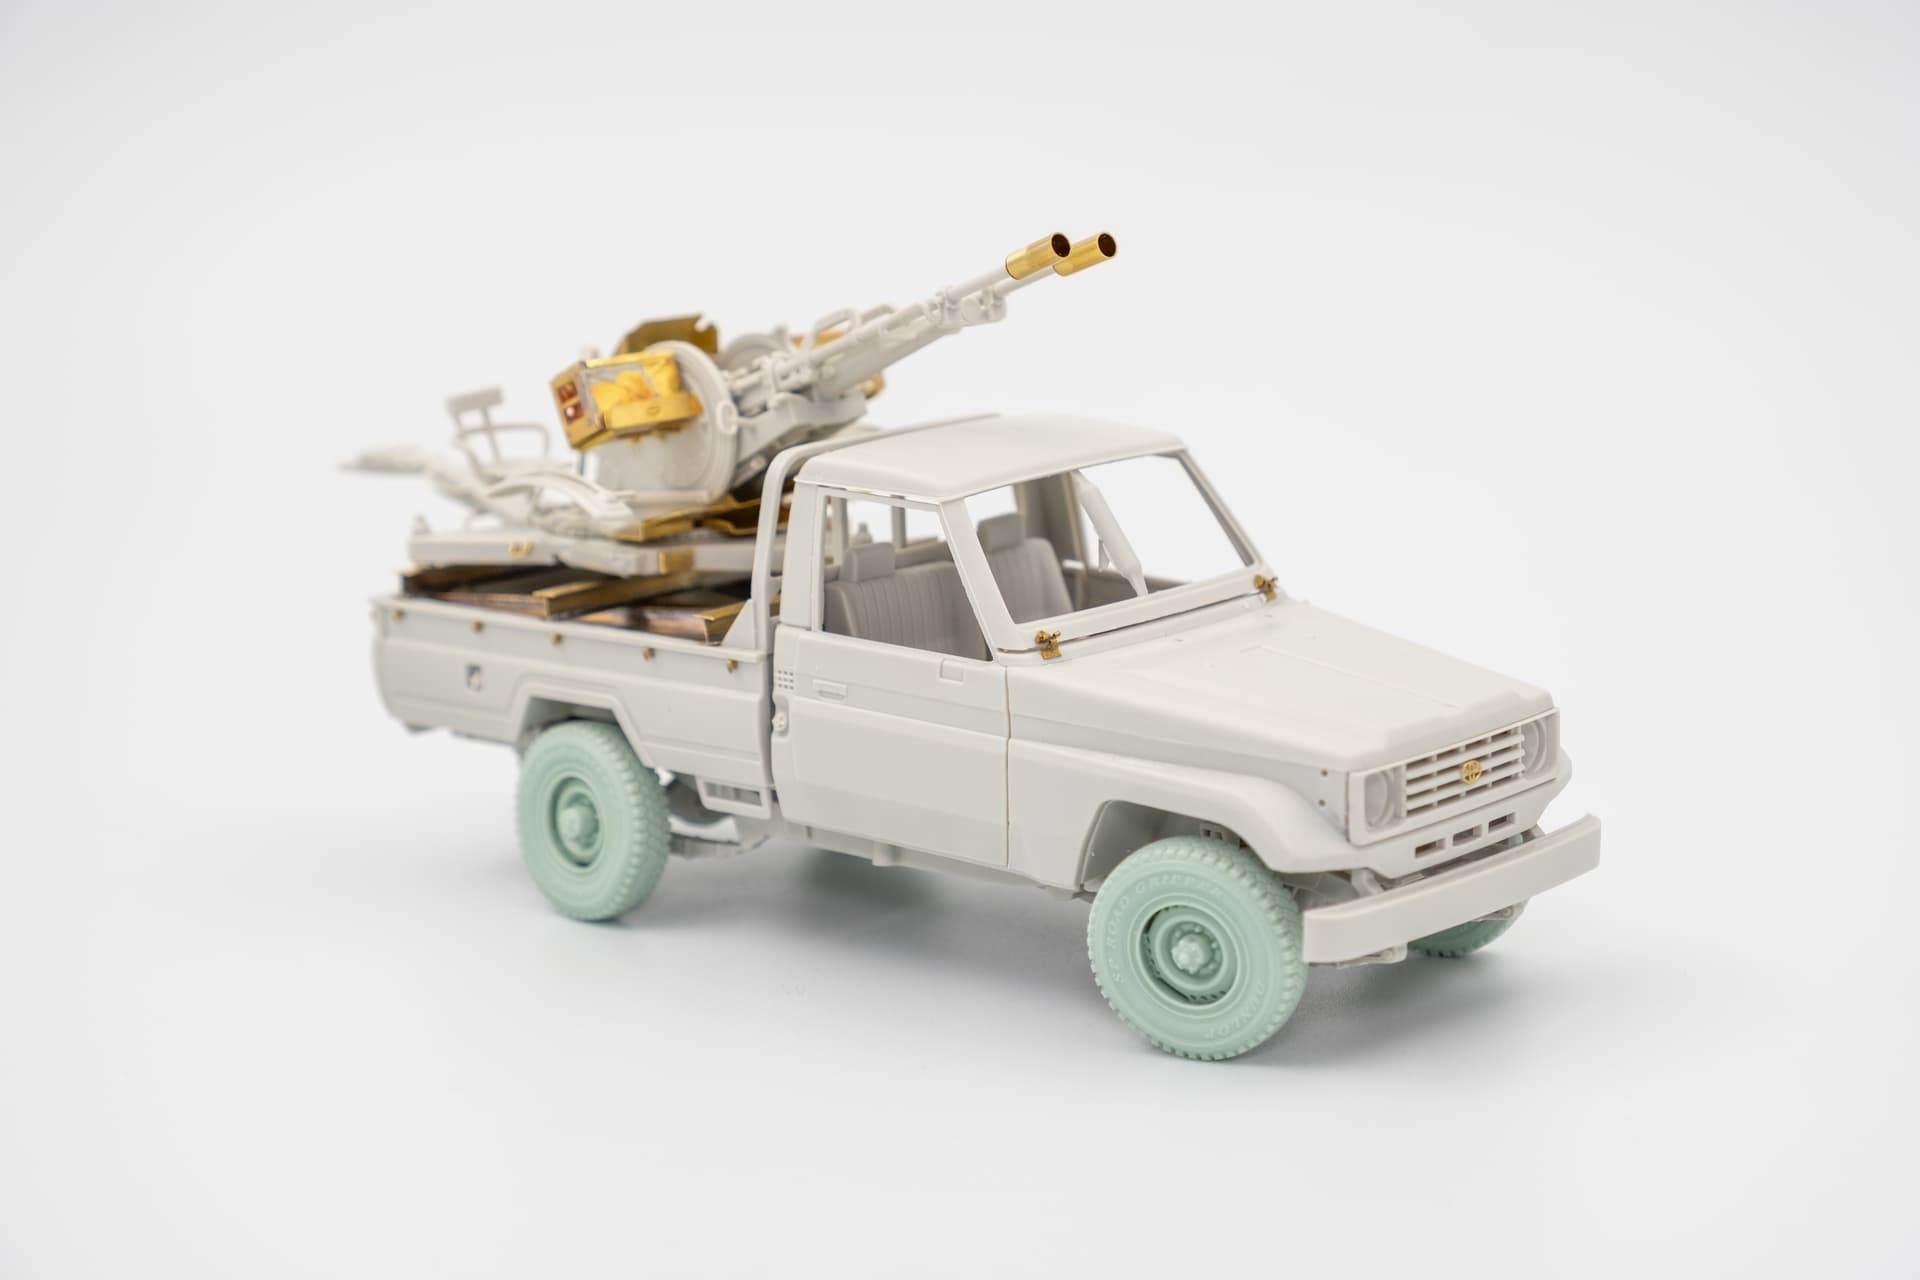
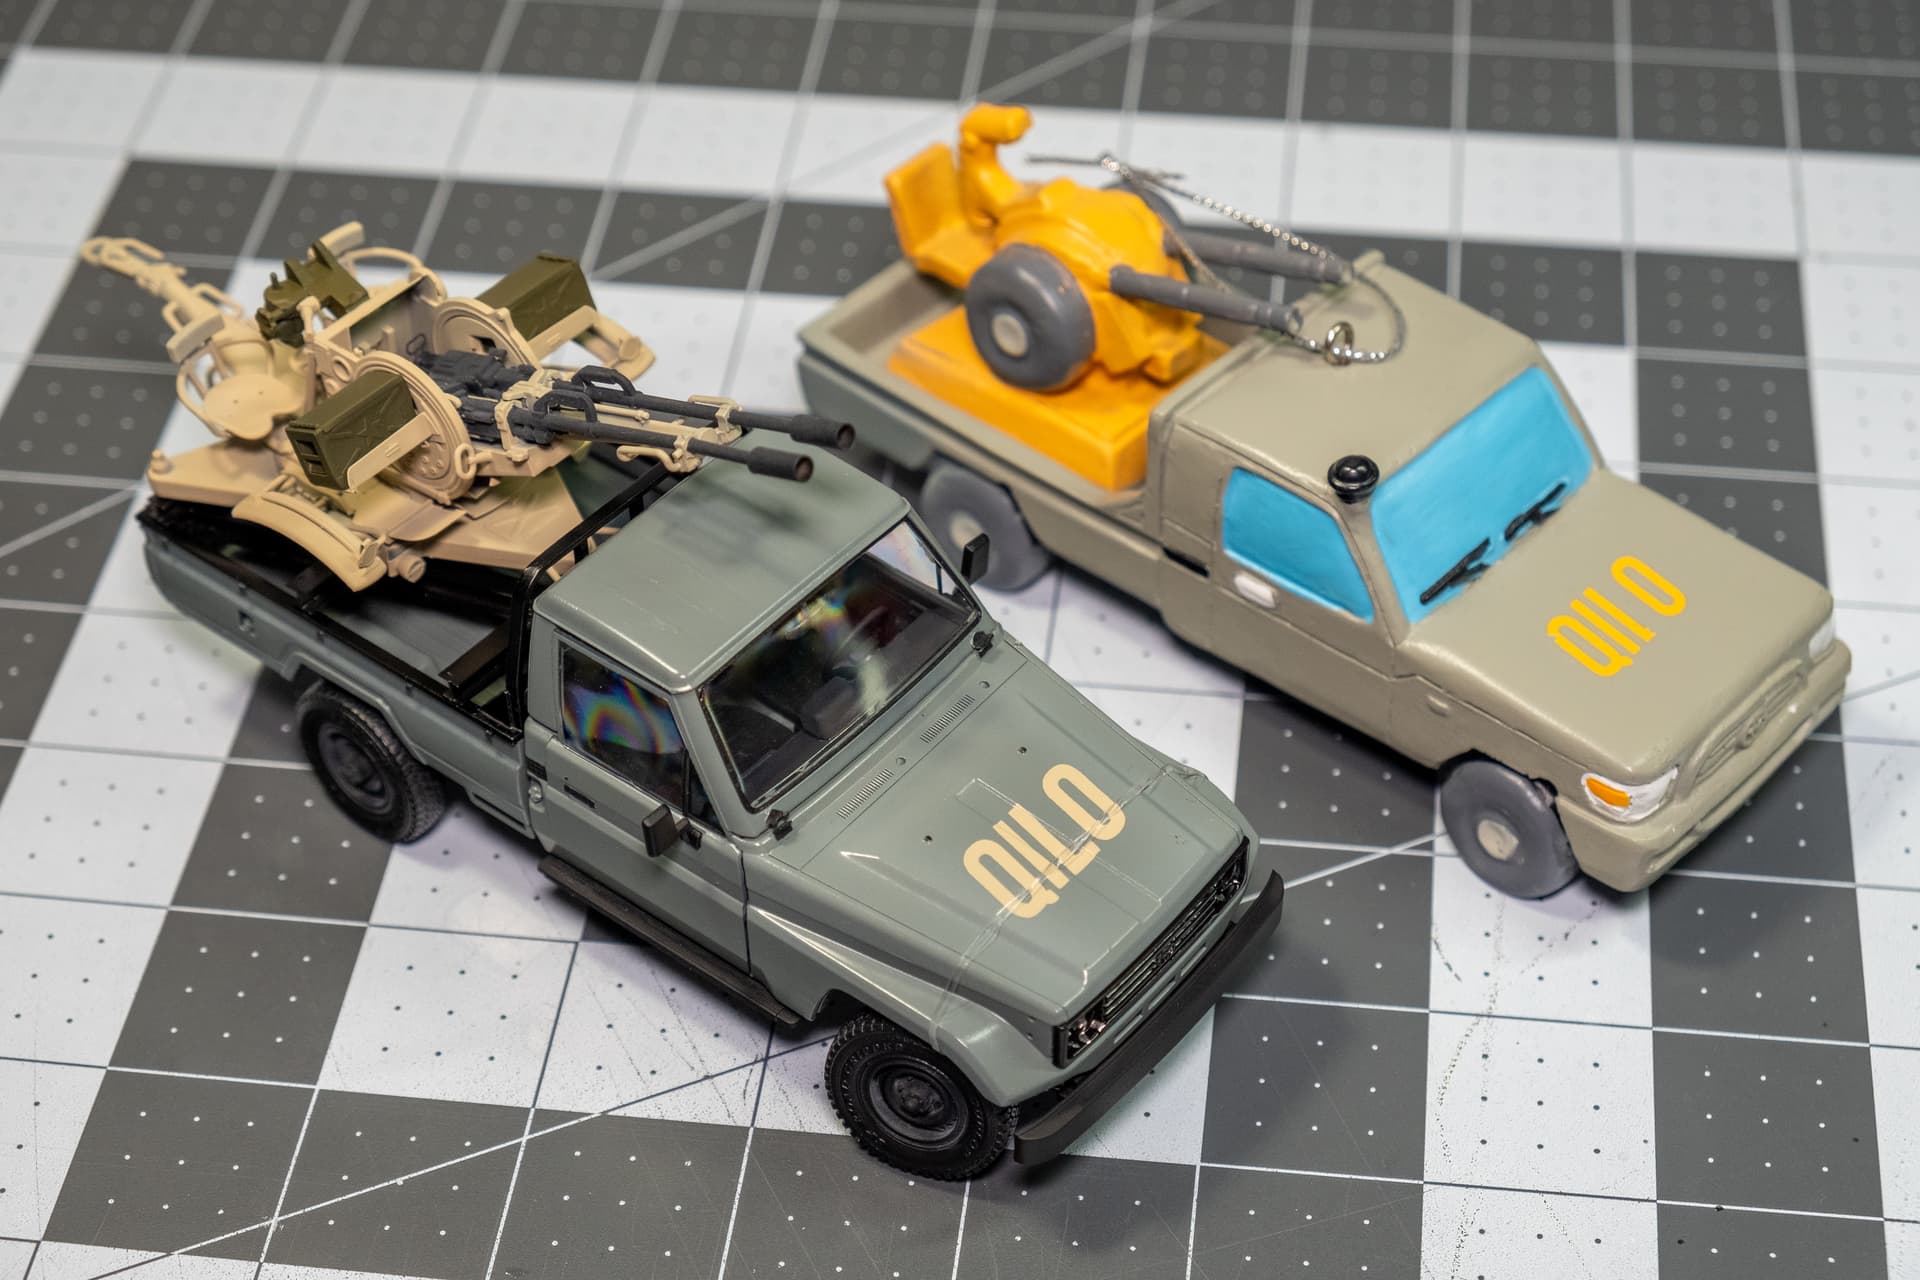
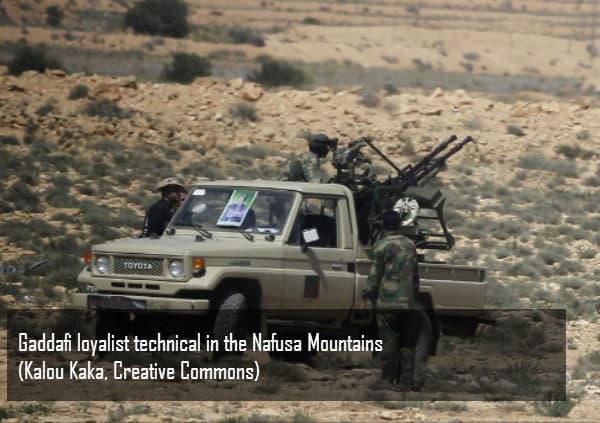
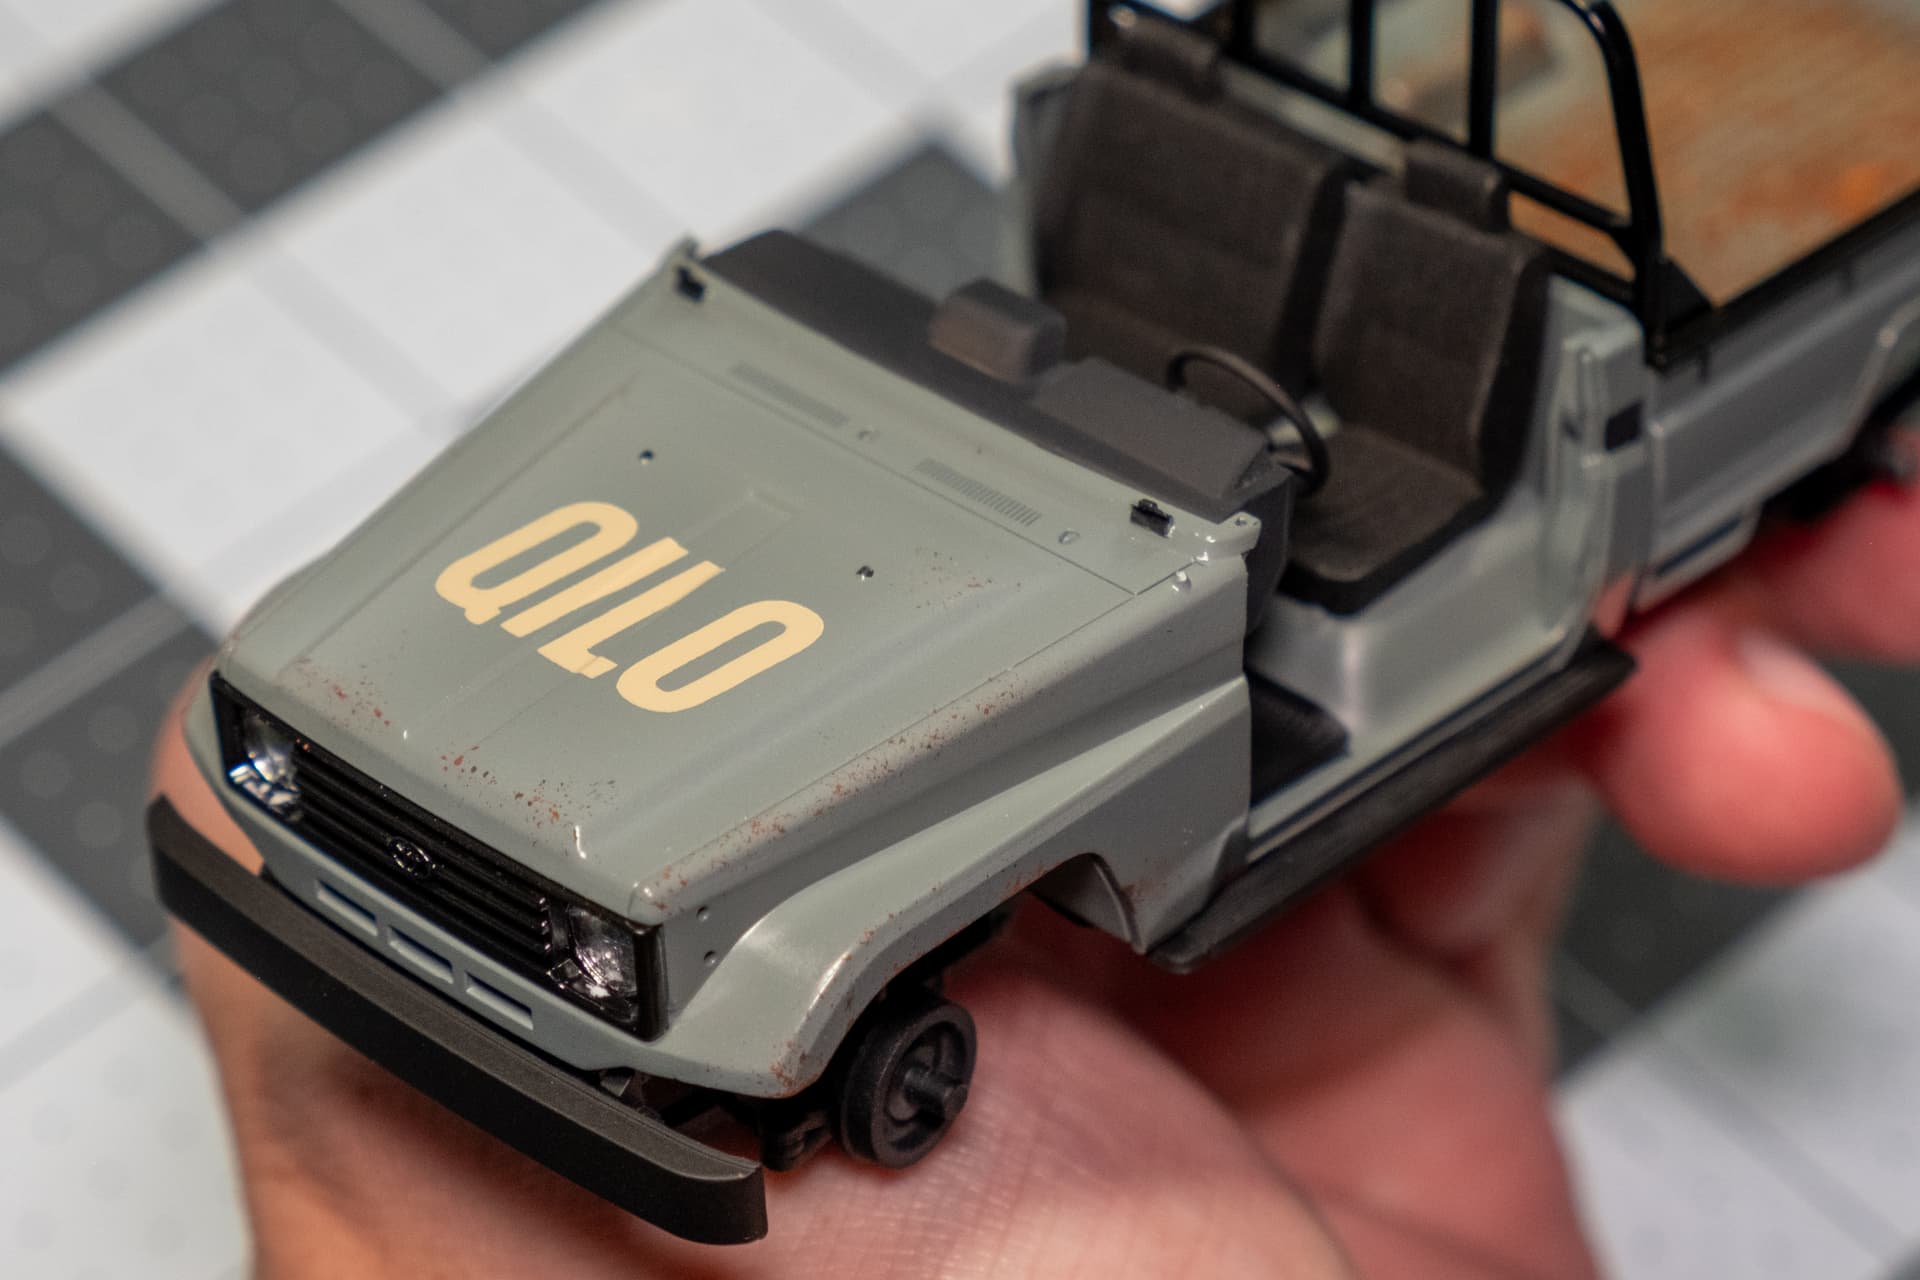
Onto the next project on the bench! Inspired by a Christmas tree ornament I got from Qilo Tactical in November of 2023, this build has been something I’ve wanted to do for a while, especially now that Meng’s pickups have been re-shot and can be had for a reasonable price again. I picked up some D.E.F. Model wheels and a set of Voyager Model PE for the build. Fingers crossed I don’t get PE paralysis.
I stumbled across Qilo when I was looking for a decent rain jacket that could handle the 15 minute walk from the parking lot to the office in a good New England rain storm without soaking through, not break the bank, and looked cool. This is a scale modelling forum though! Back to the build.
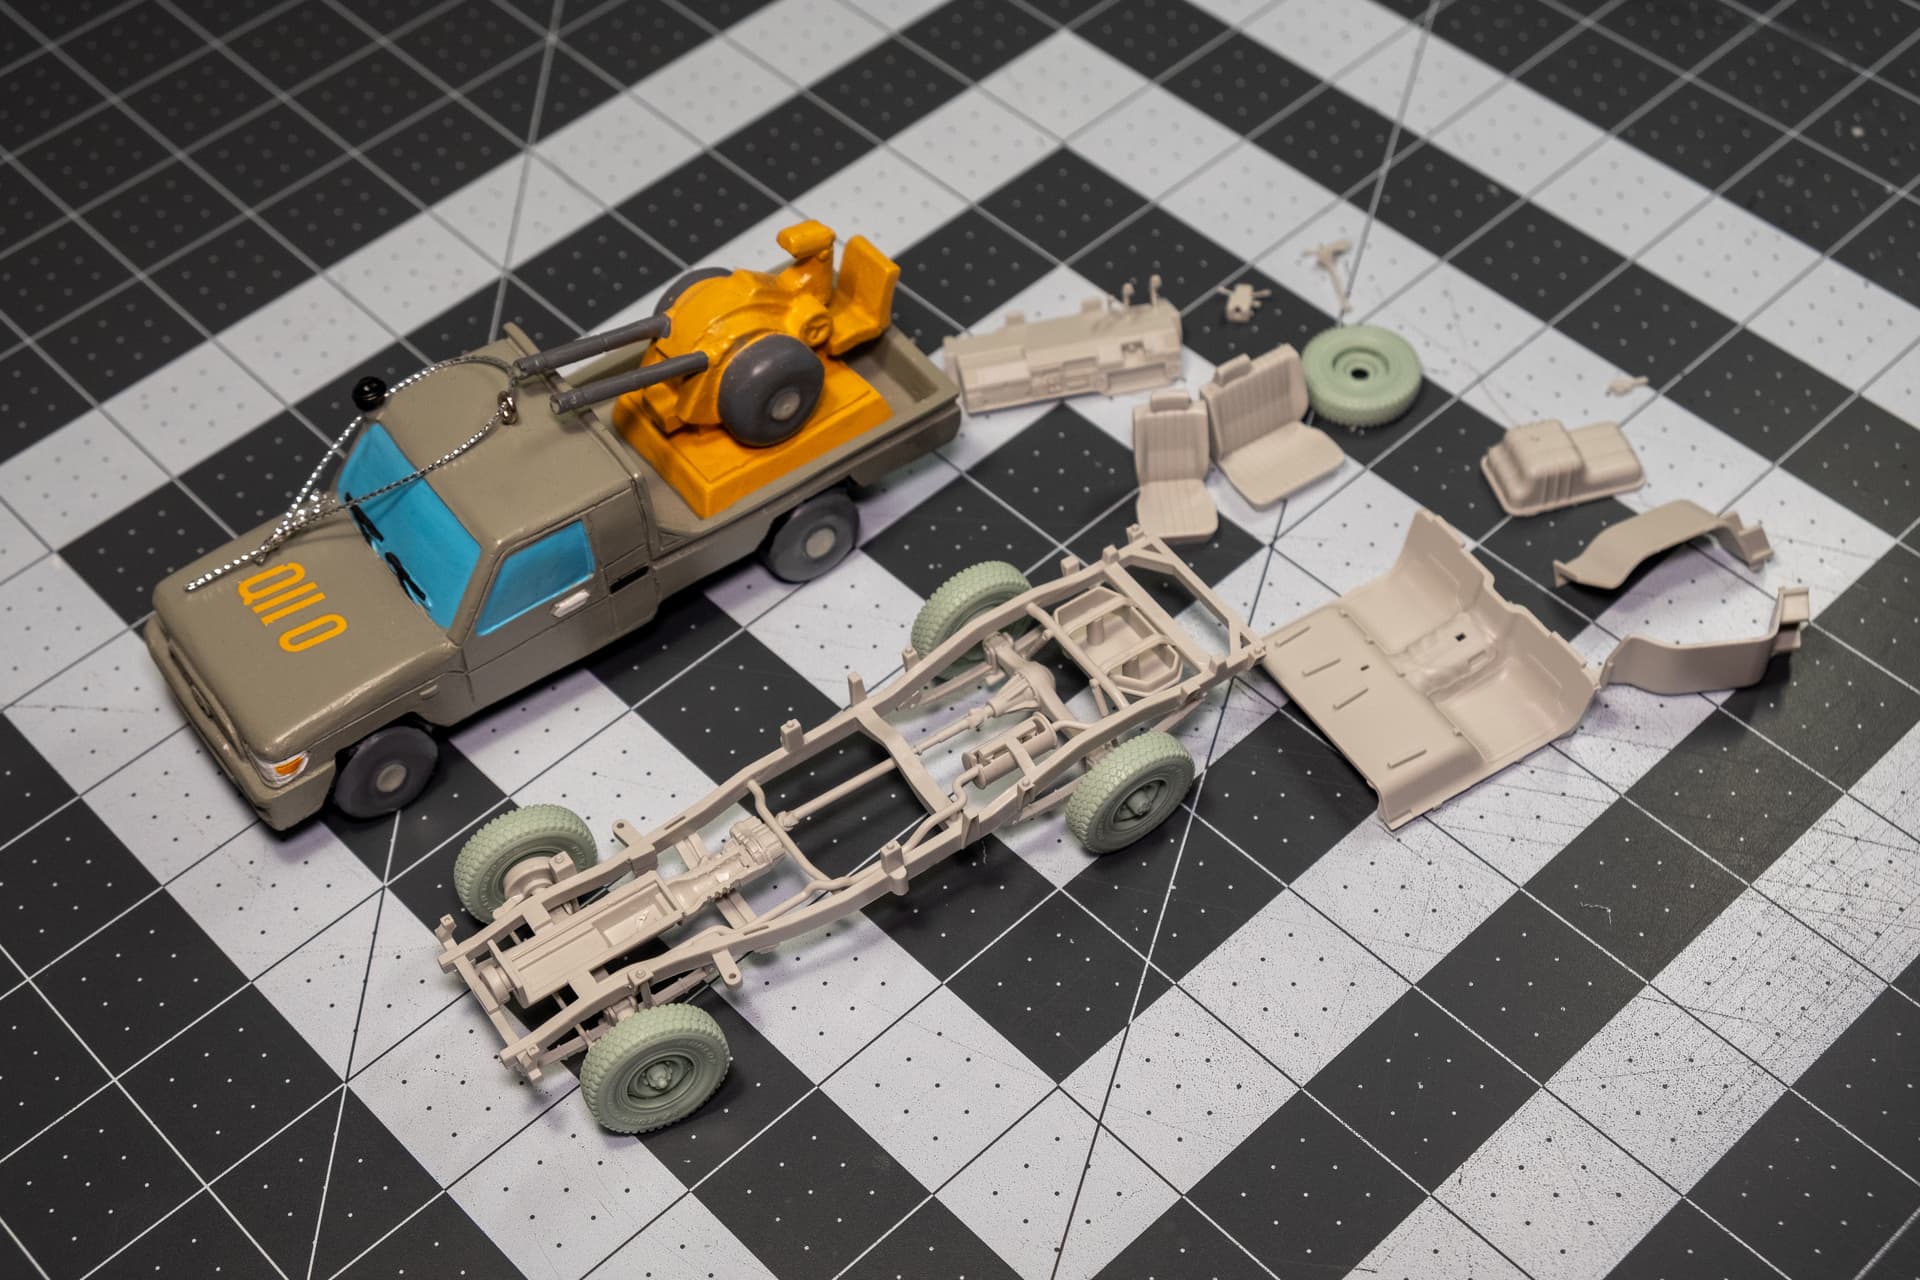
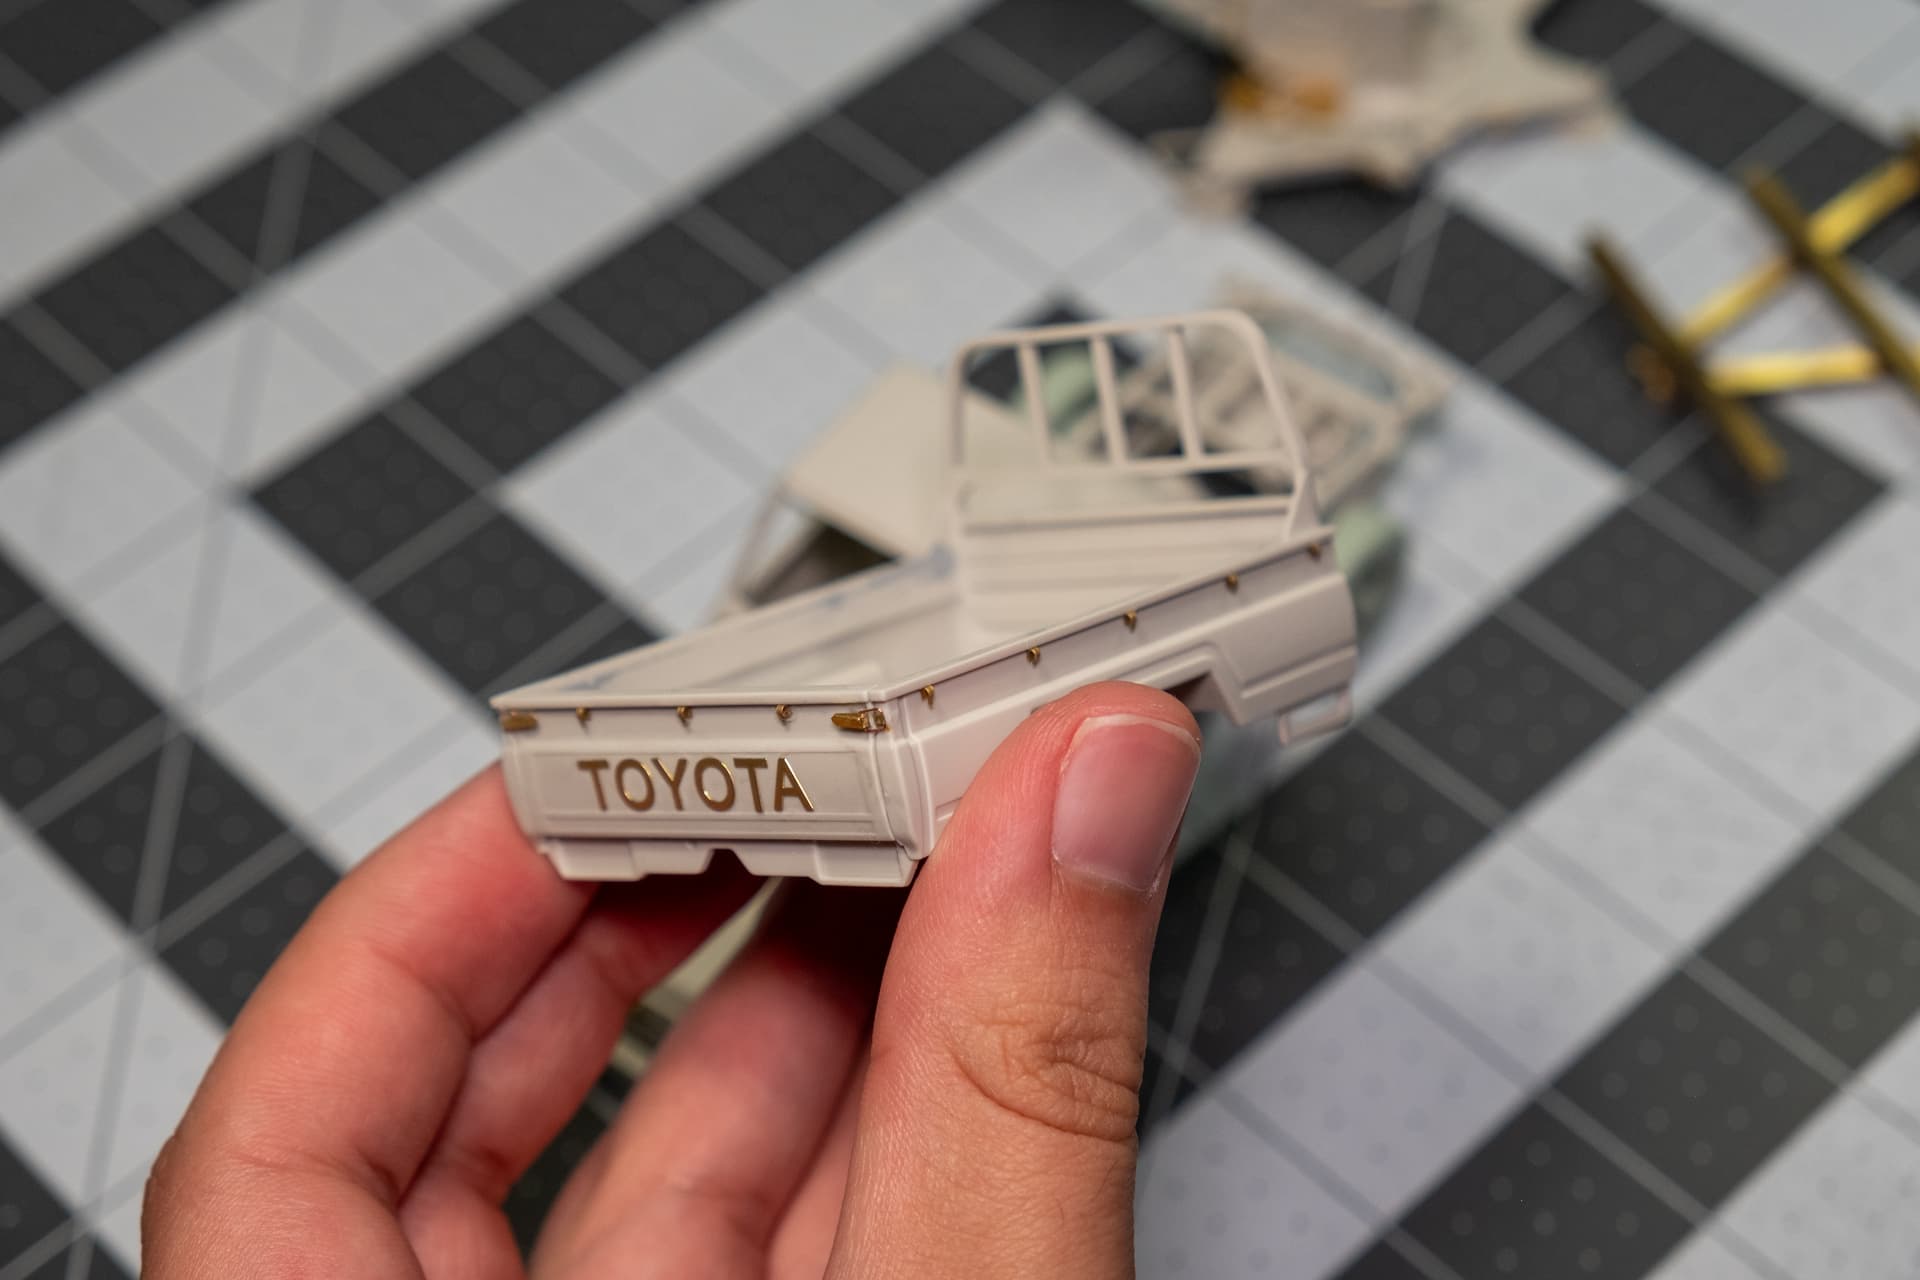
After the first night of building, I’ve got the suspension on the frame and a few of the cab parts cut off from the sprue that need some bits cleaned up before assembly.
The frame is one part, which is a nice change from the last few trucks I’ve built that have been fiddly multi-part frames. The frame and suspension went together pretty easily, minus some parting lines that needed to be cleaned up on the driveshafts and leaf springs. I know they’re probably not going to be seen, but they also wouldn’t be too hard to spot if you really went looking. I also test-fit the wheels for good measure as I was building the suspension. I’ve been burned in the past with resin wheels not outright replacing the kit parts and having to hack suspension bits off after the fact.
Tomorrow will be the cab and bed of the truck and then it’ll be onto the ZU-23-2.
They aren’t the cheapest (but I suppose there’s a cost-function-form triangle for these situations; pick two), around $180 or so for their jackets, but that’s a fraction compared to Arc’teryx or The North Face for something that actually works without a Durable Water Repellent coating. I went on a ~4 hour hike in the rain and didn’t get wet so I’d call that a win.
That’s what it’s billed as, not that I’ll ever use it for that! It’s really just something that I use as a bookend.
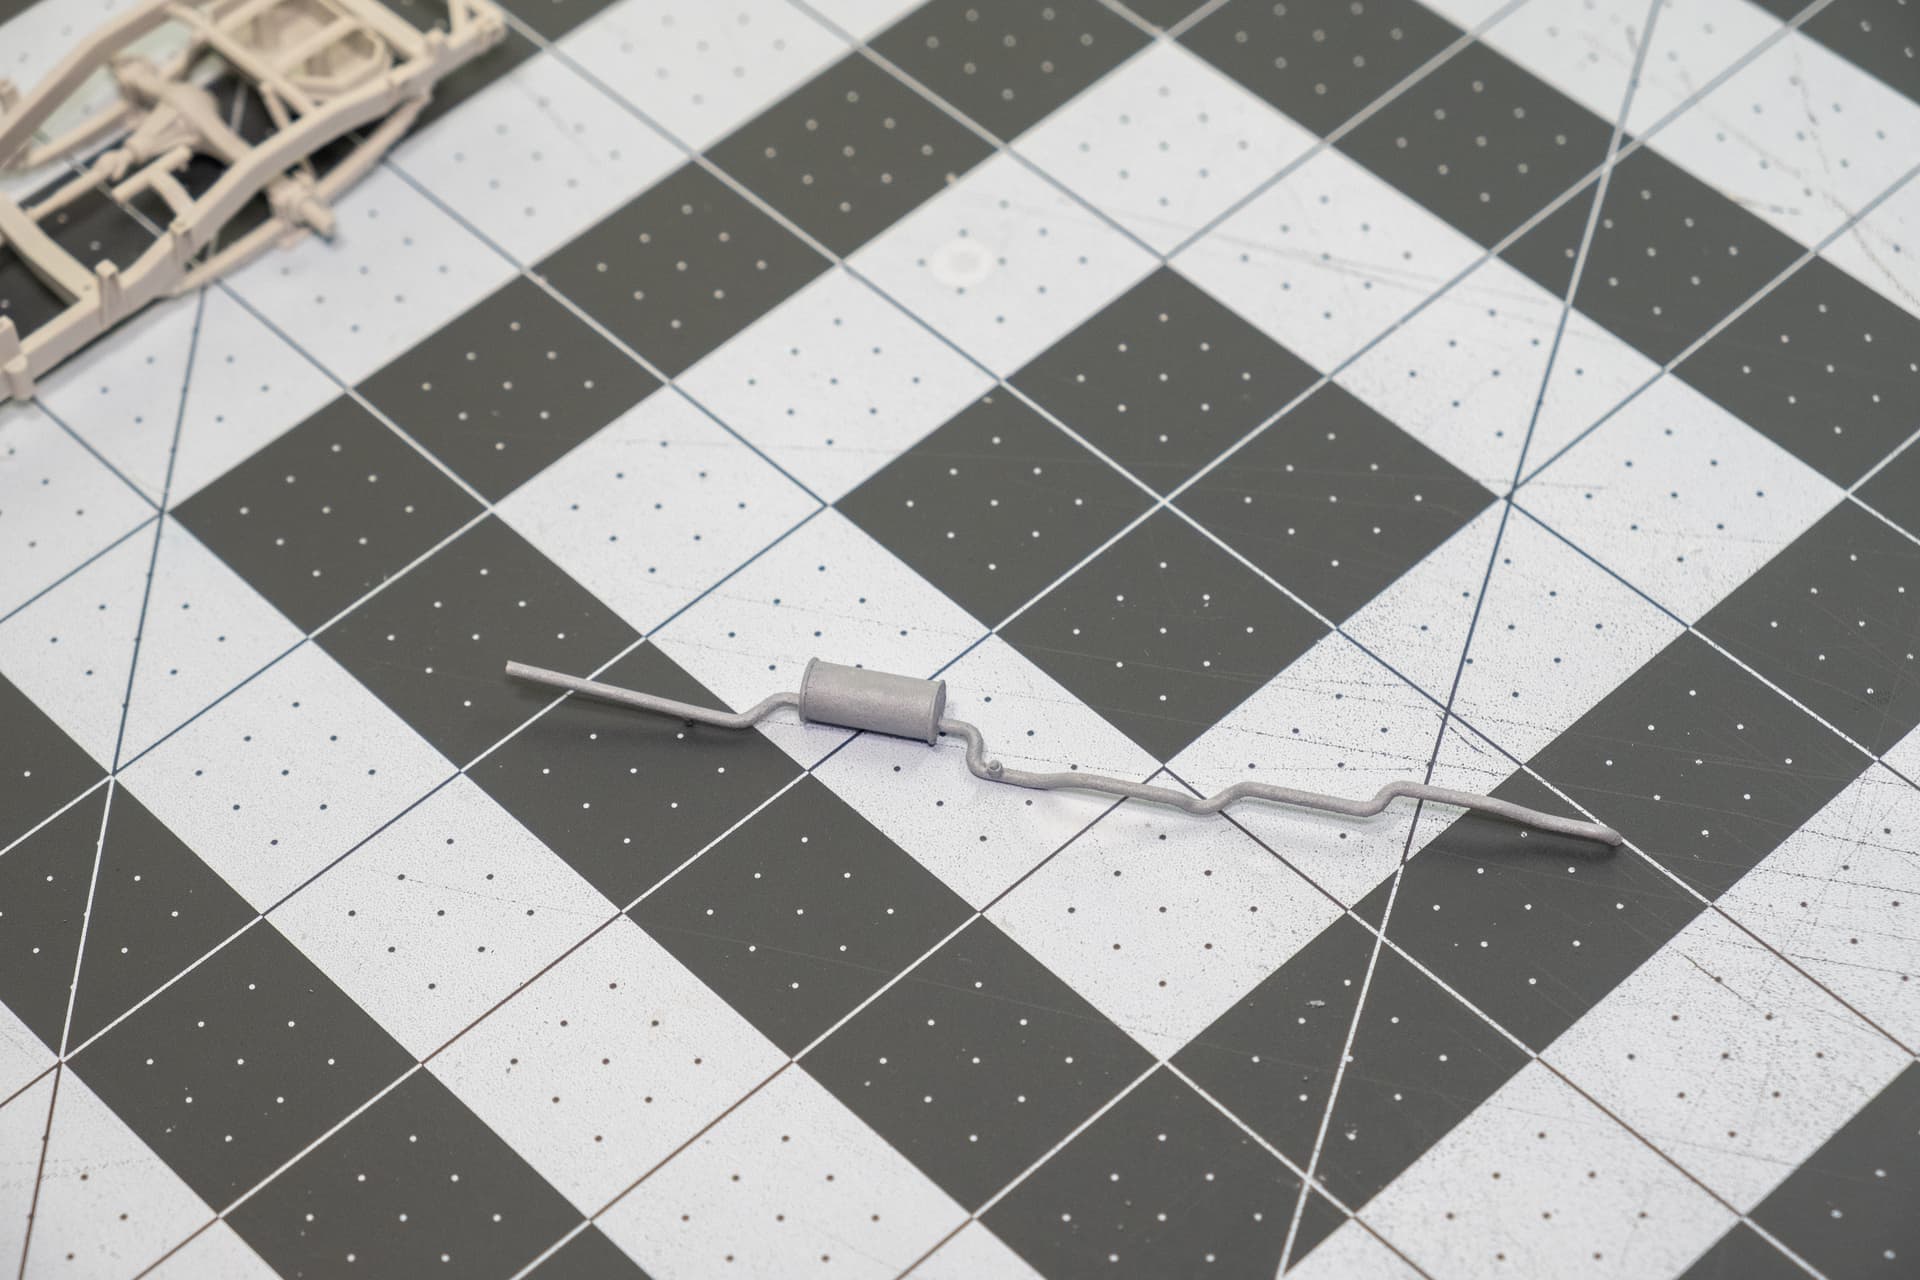
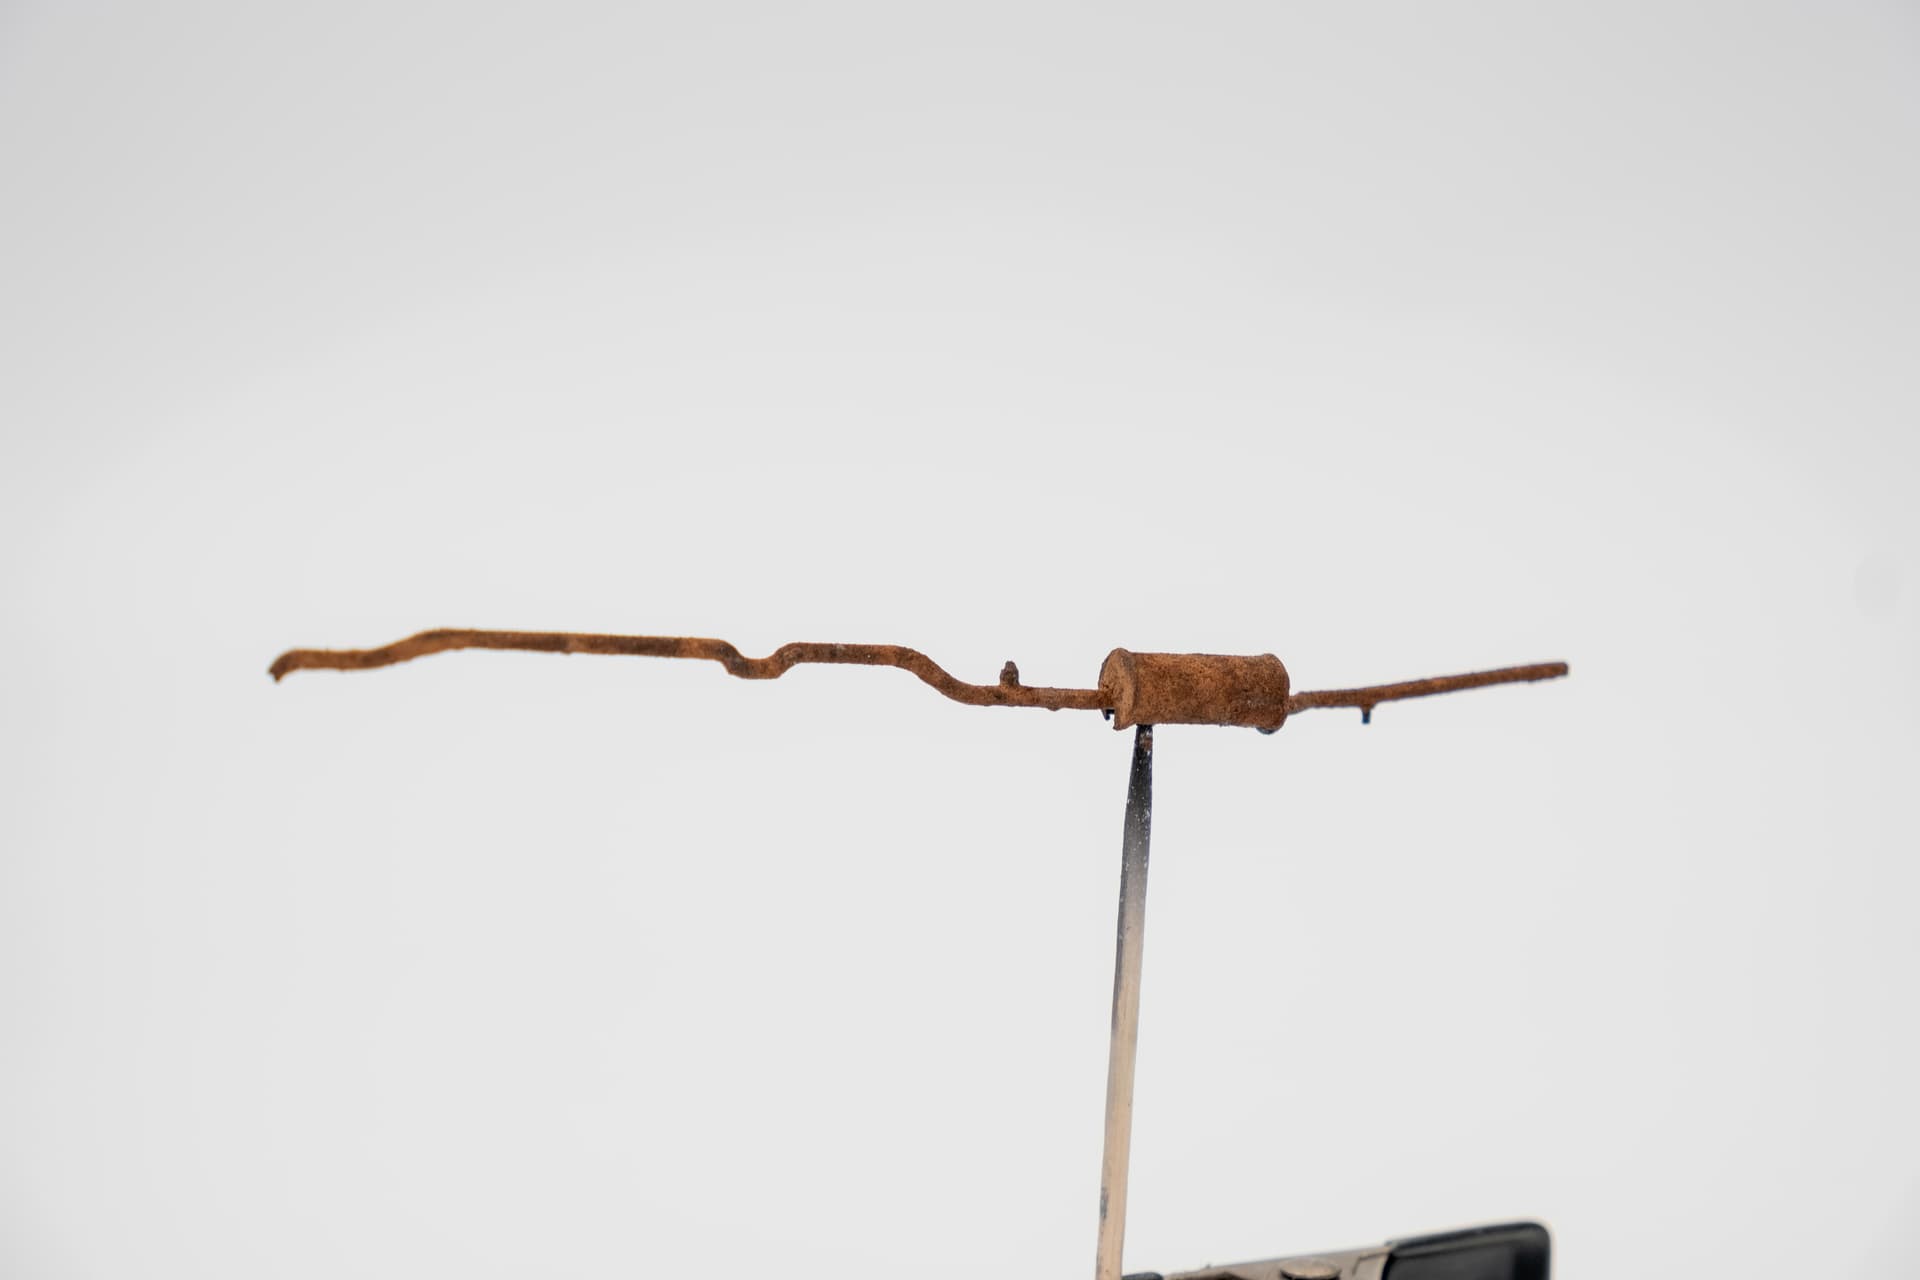
Made some good progress last night/today. I used some Tamiya basic putty mixed with some acetone and a short, stiff-bristled brush to get some texture on the exhaust in preparation for the eventual rust painting.
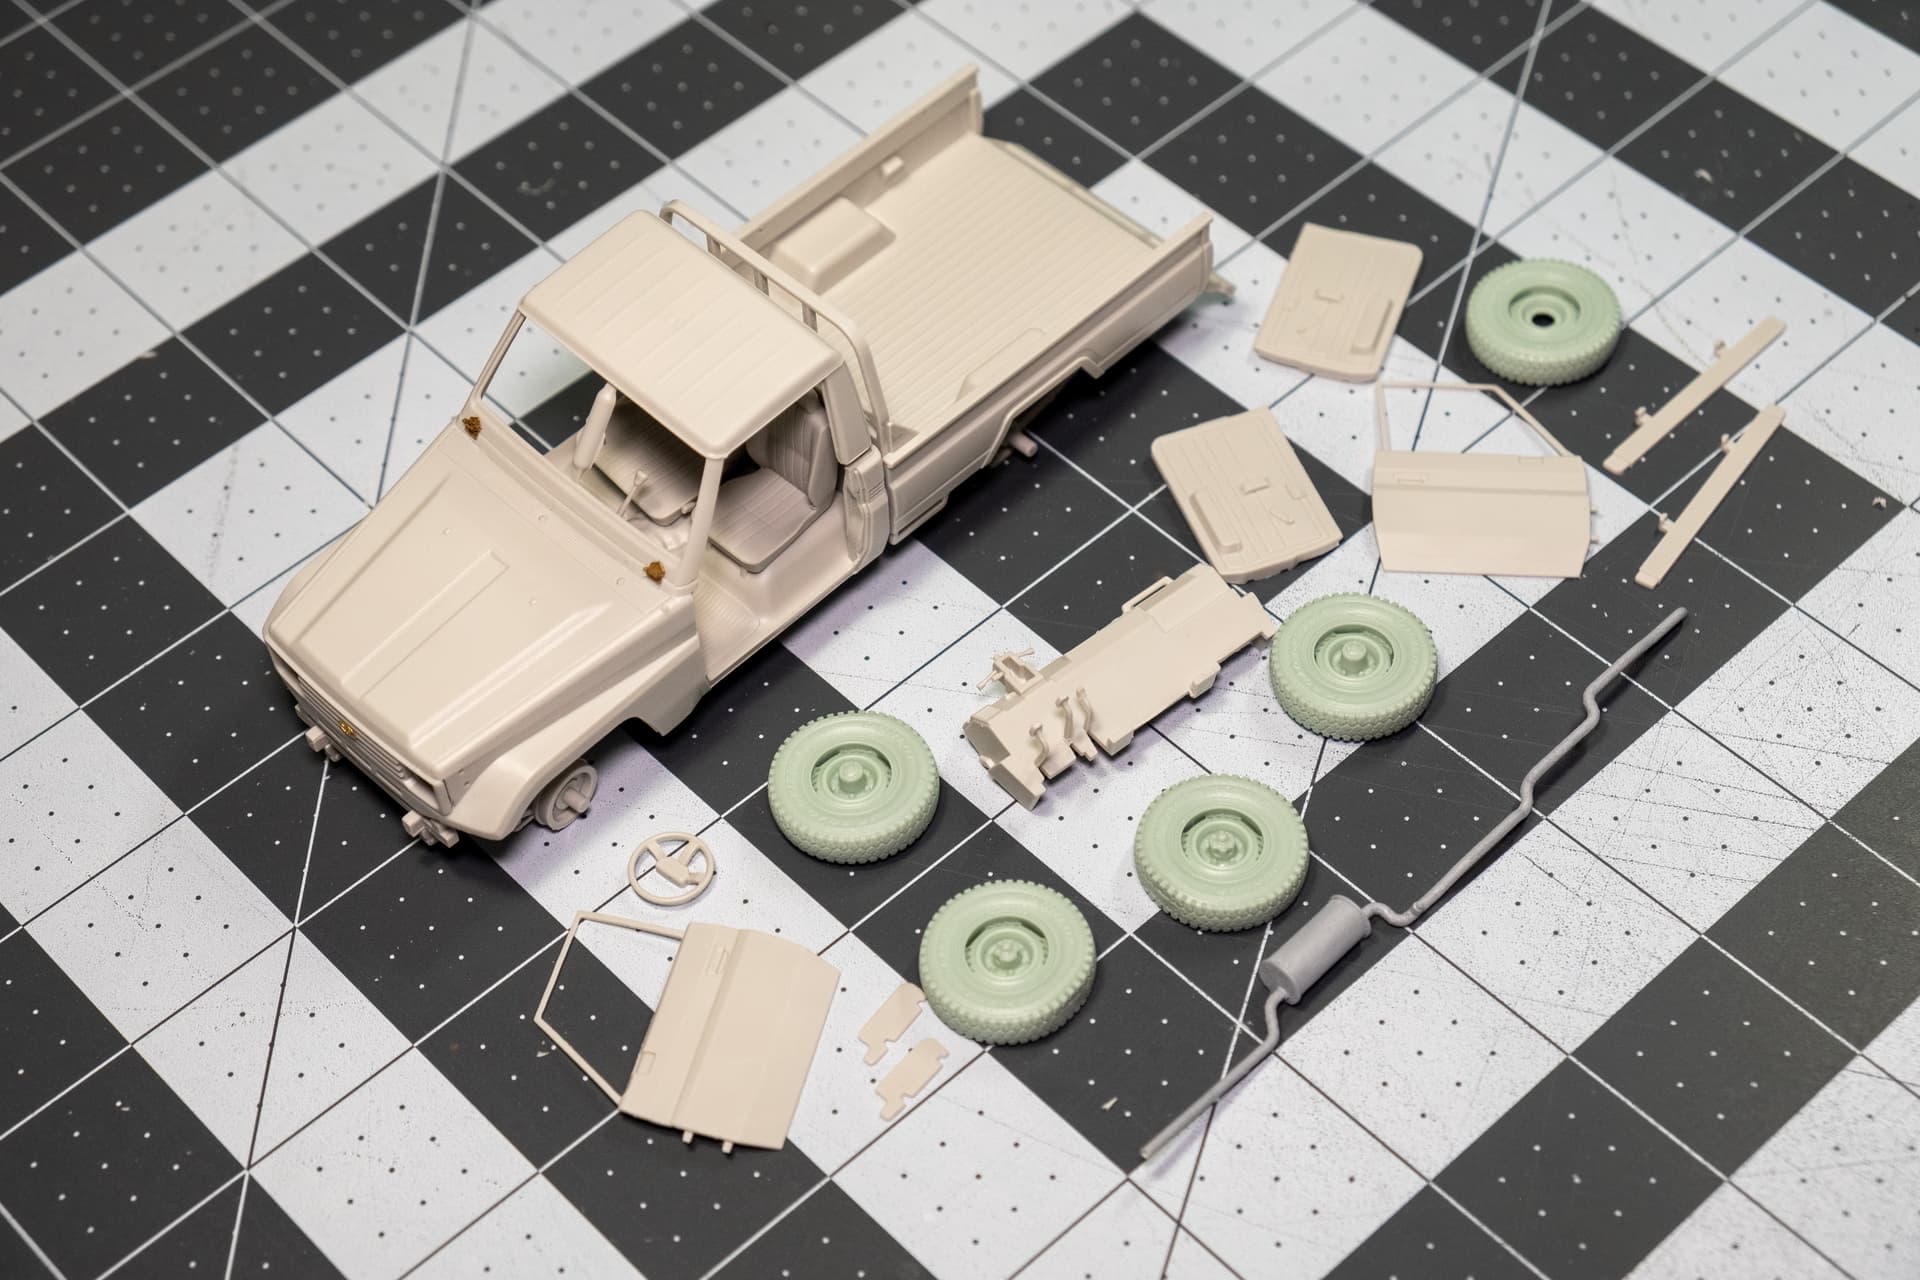
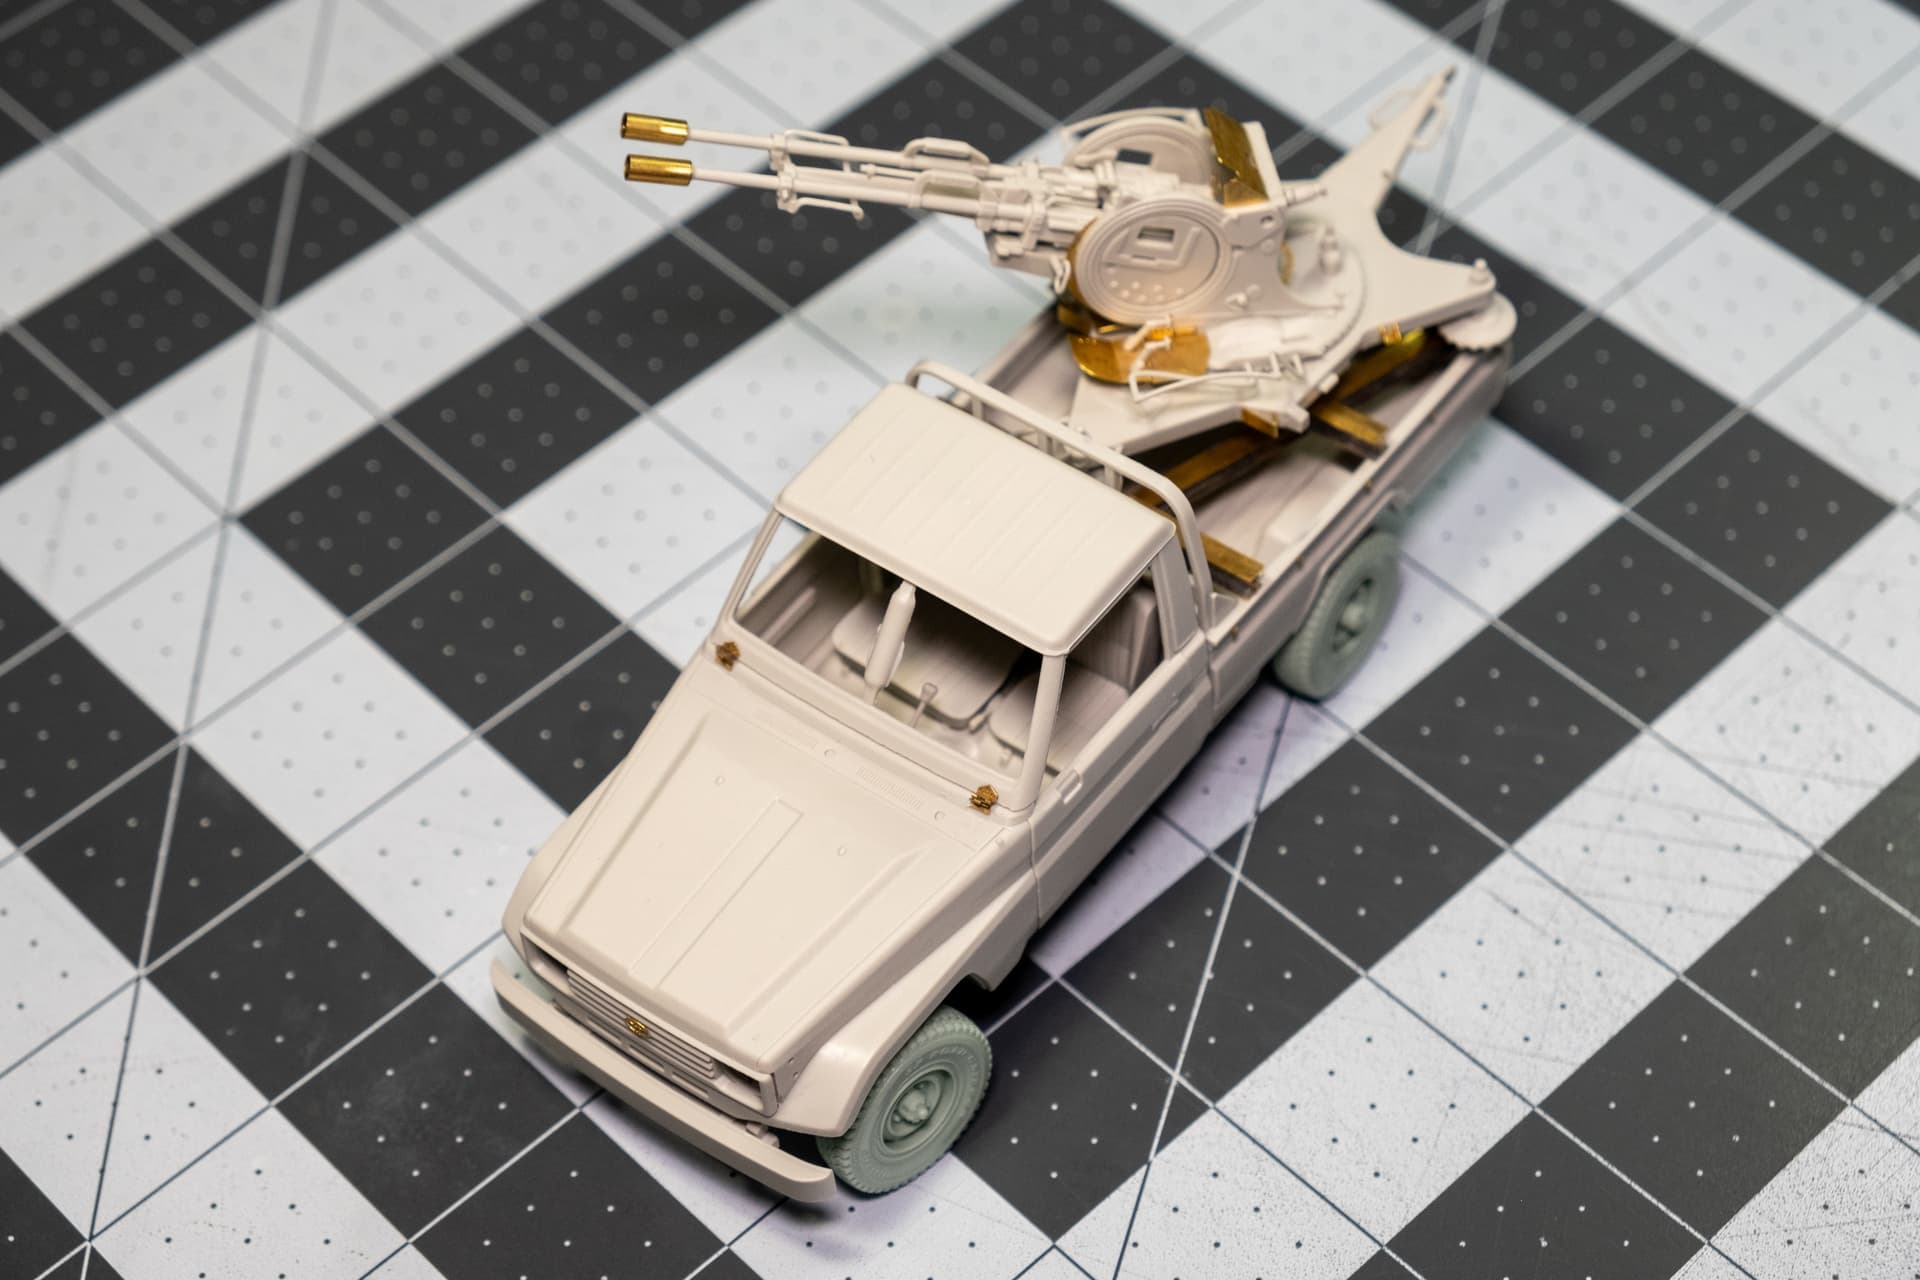
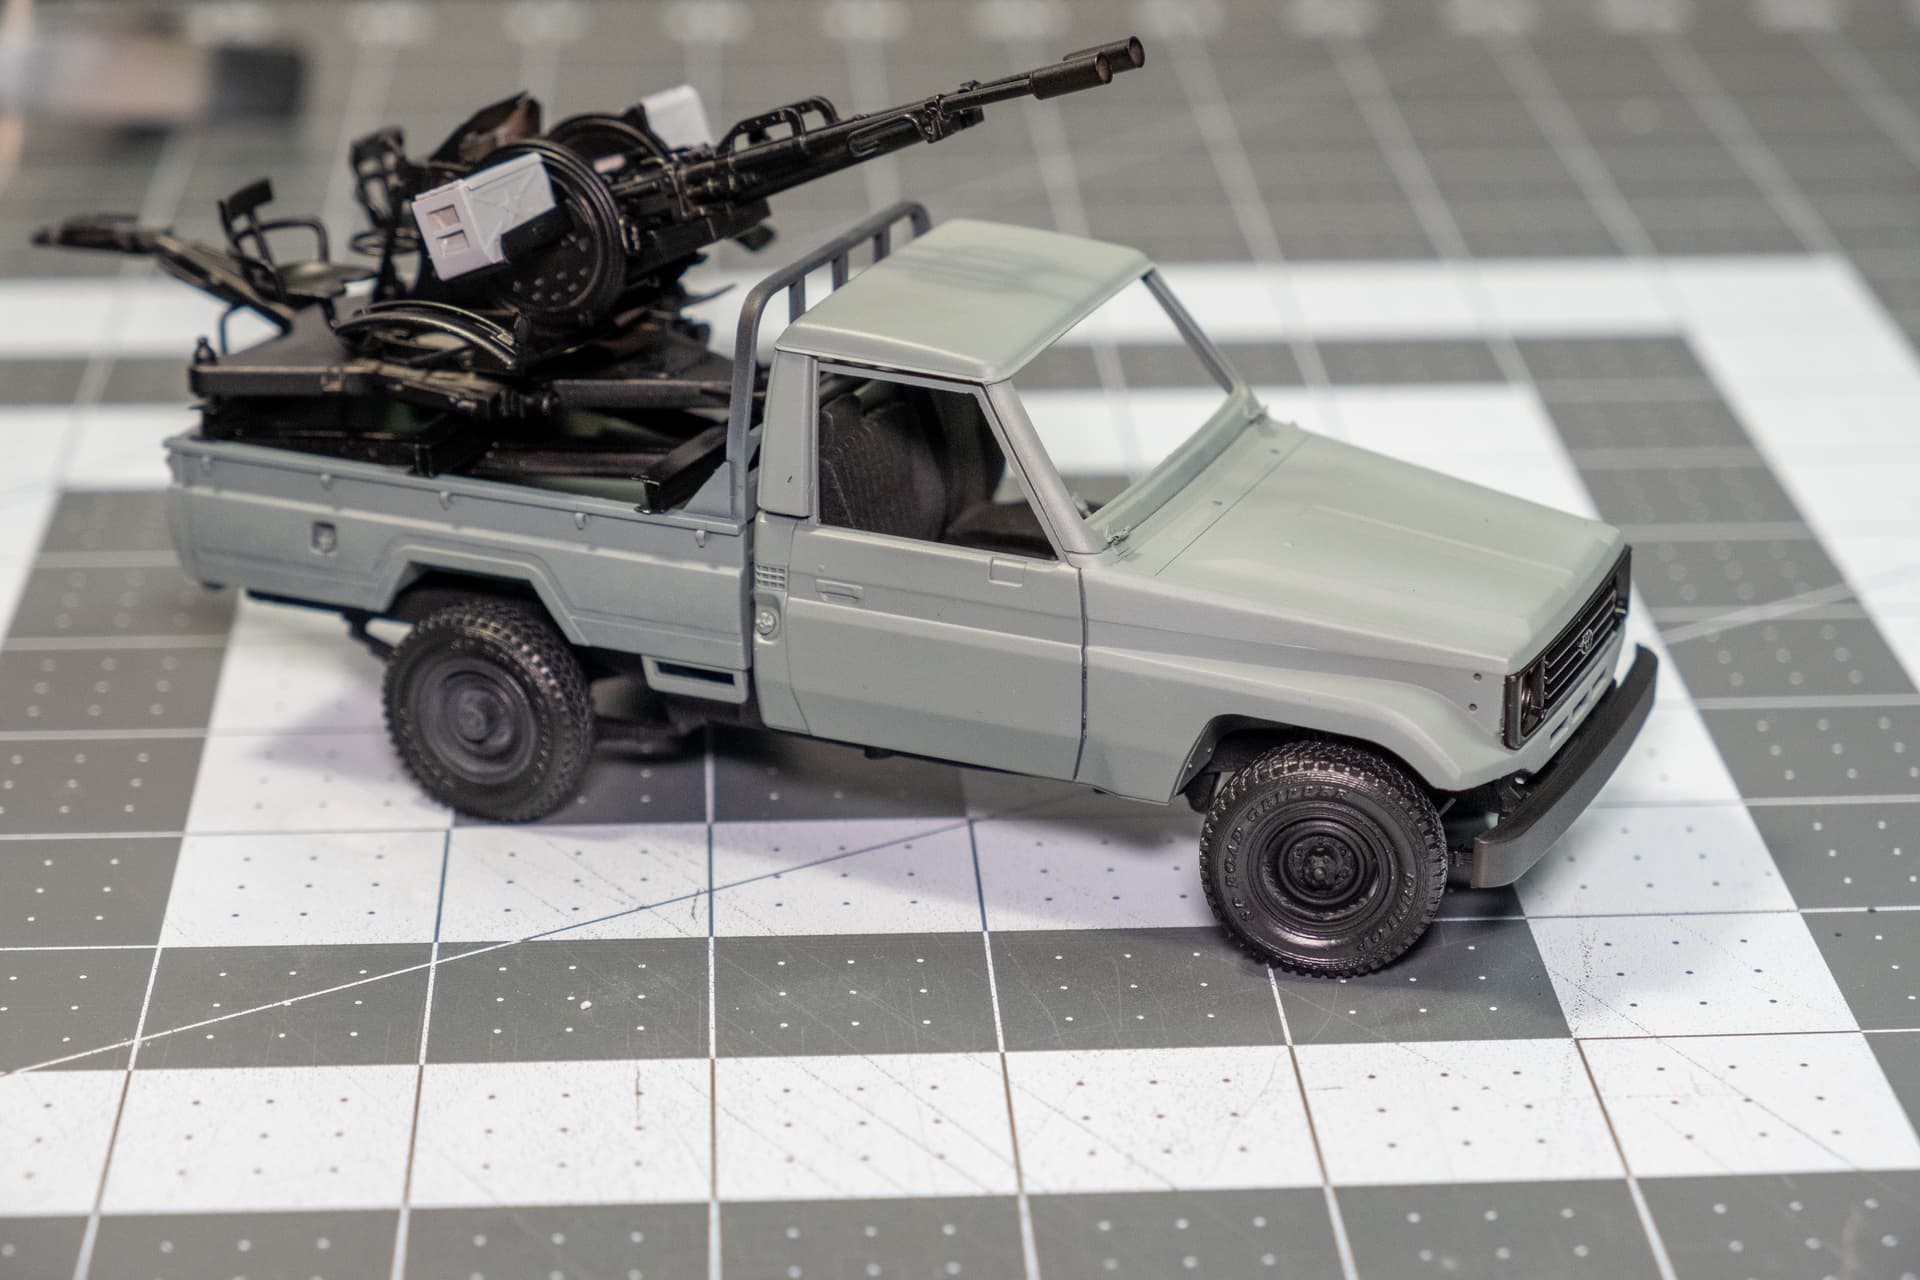
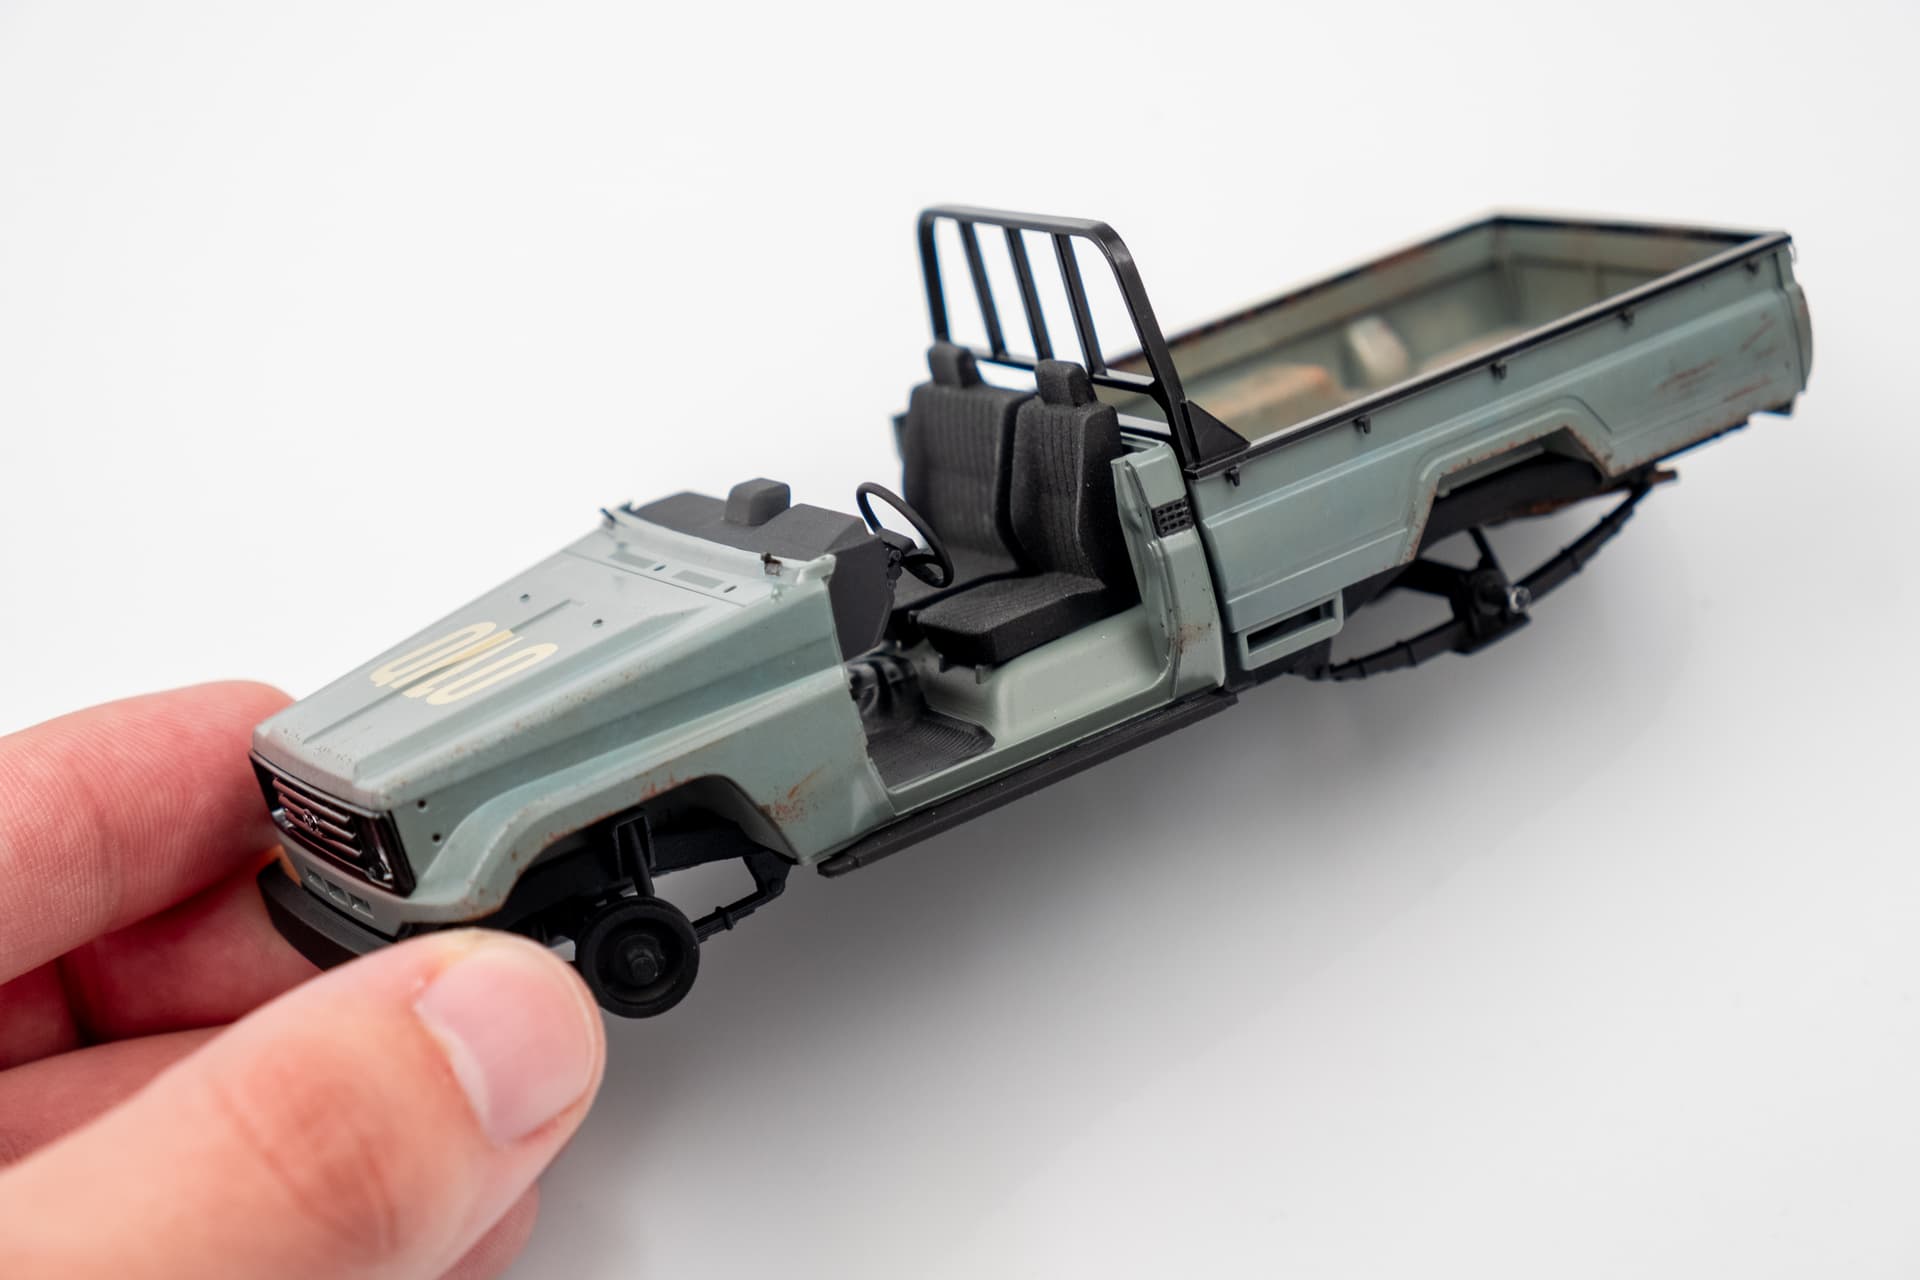
I’m at about 75? 80? percent done on construction of the pickup itself. At this point all that’s left are the PE tonneau cover “fingers”, a kit-supplied piece in the bed, and the PE latches for the tailgate. We’ll see how much I fuss with the latches and if I can manage to keep them workable. The hinges for the windshield are done, and they would be functional, but this will have a cab like the one I’m working off of.
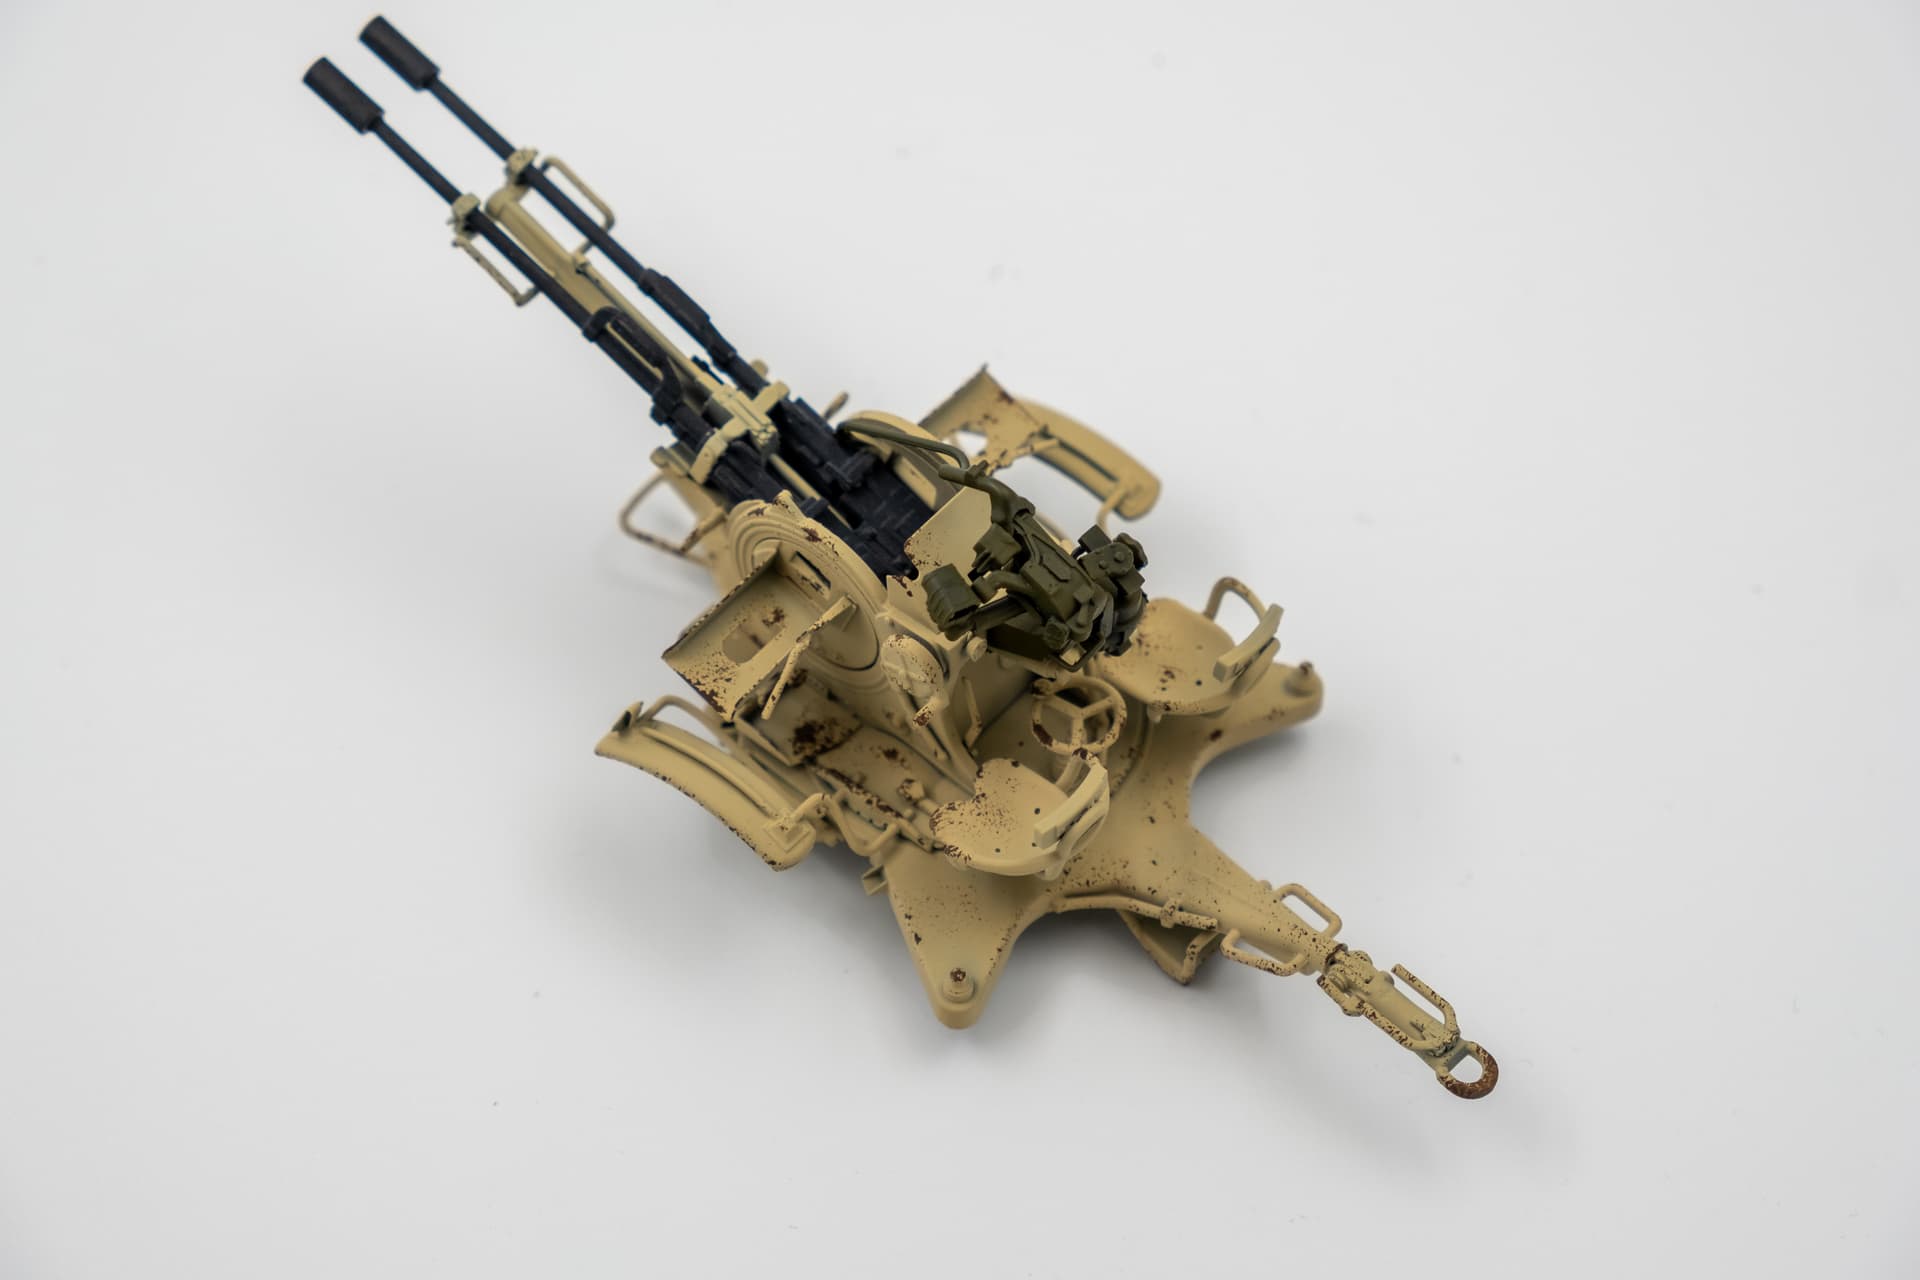
I’ve already decided to skip the PE on some areas like the sun visors and the window cranks. There’s no additional detail provided by the PE and the PE is too thin for these parts. We’ll see if this tracks once I get to the ZU-23-2 as that’s where the majority of the PE will go.
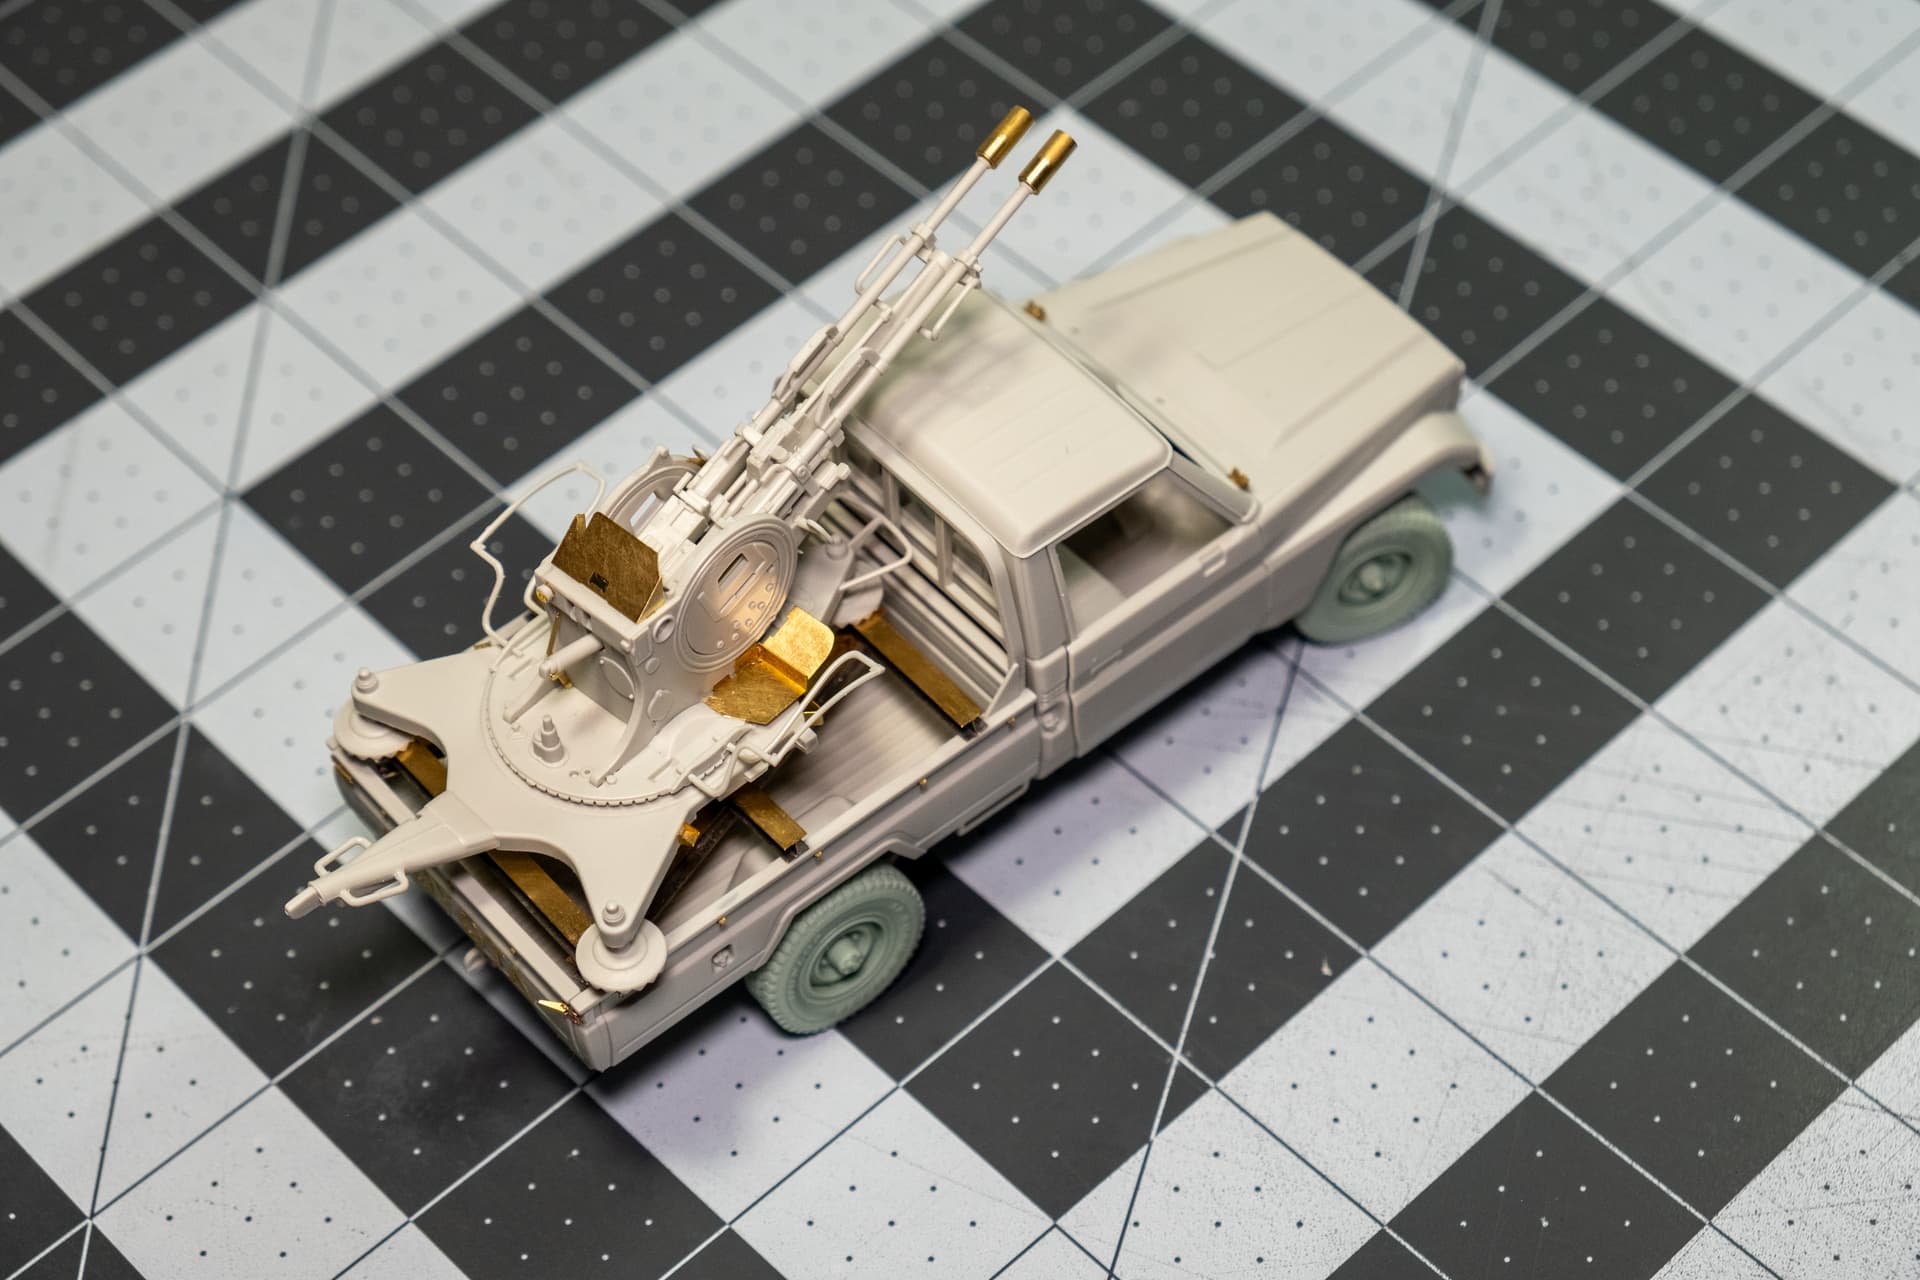
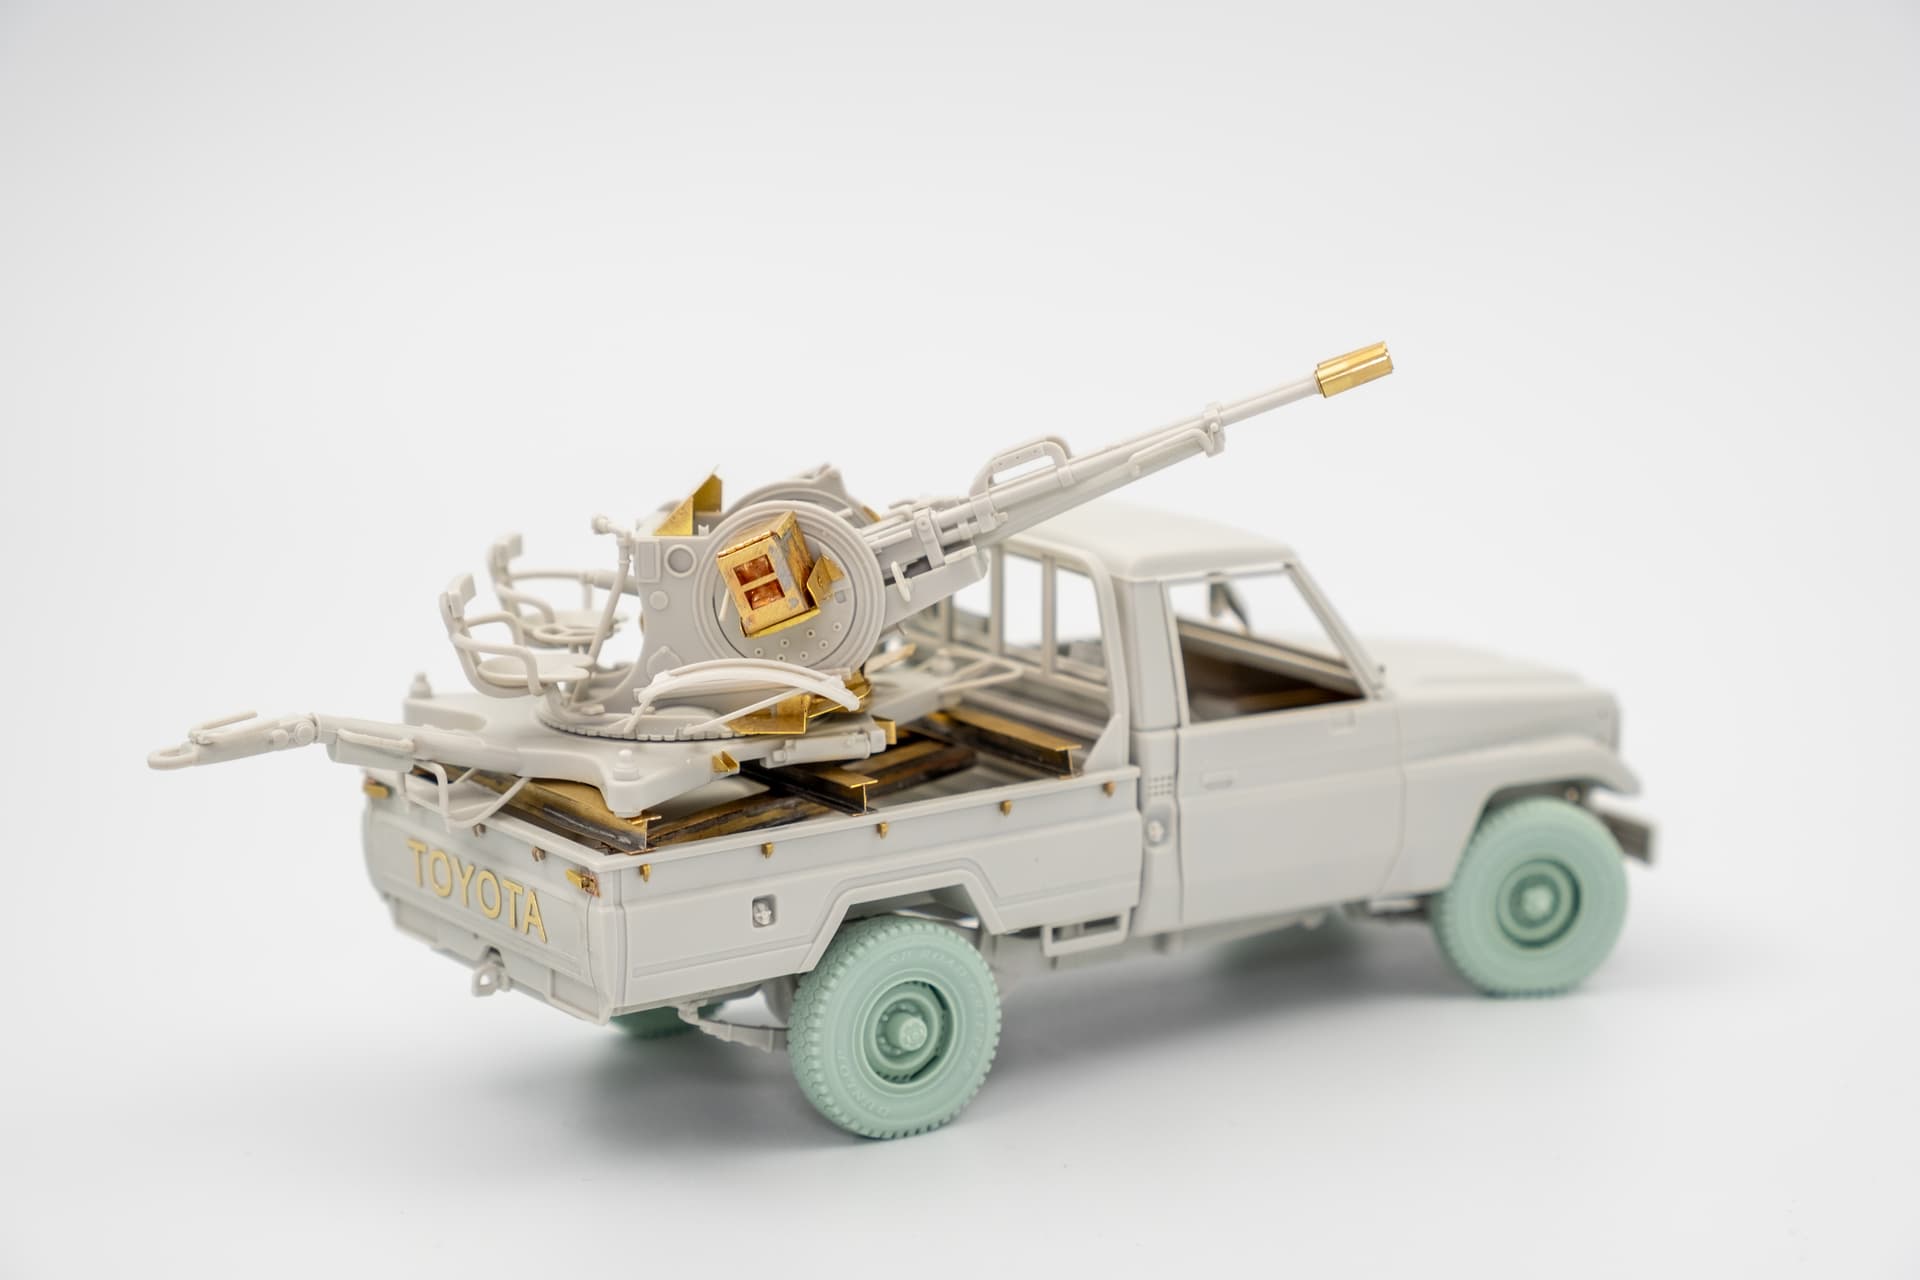
I’m through most of the pre-paint prep, but there’s still some odds and ends on the ZU-23-2 before I can move on to paint. Nothing too crazy except the PE ammo cans, we’ll see how those fair.
Finished assembly of the sub-assemblies today and painting will begin here shortly. I ended up soldering the ammo boxes after fussing around trying to super glue one.
I also filmed everything up until this point and edited it all together. Starting this YouTube thing after longer than I’d hoped, but it’s never too late in the end.
I’ll be filming the rest of the process as well, one video for painting and then another for weathering and the base. Still need to decide if I’m going to go with a desert scene or dirt road with some greenery.
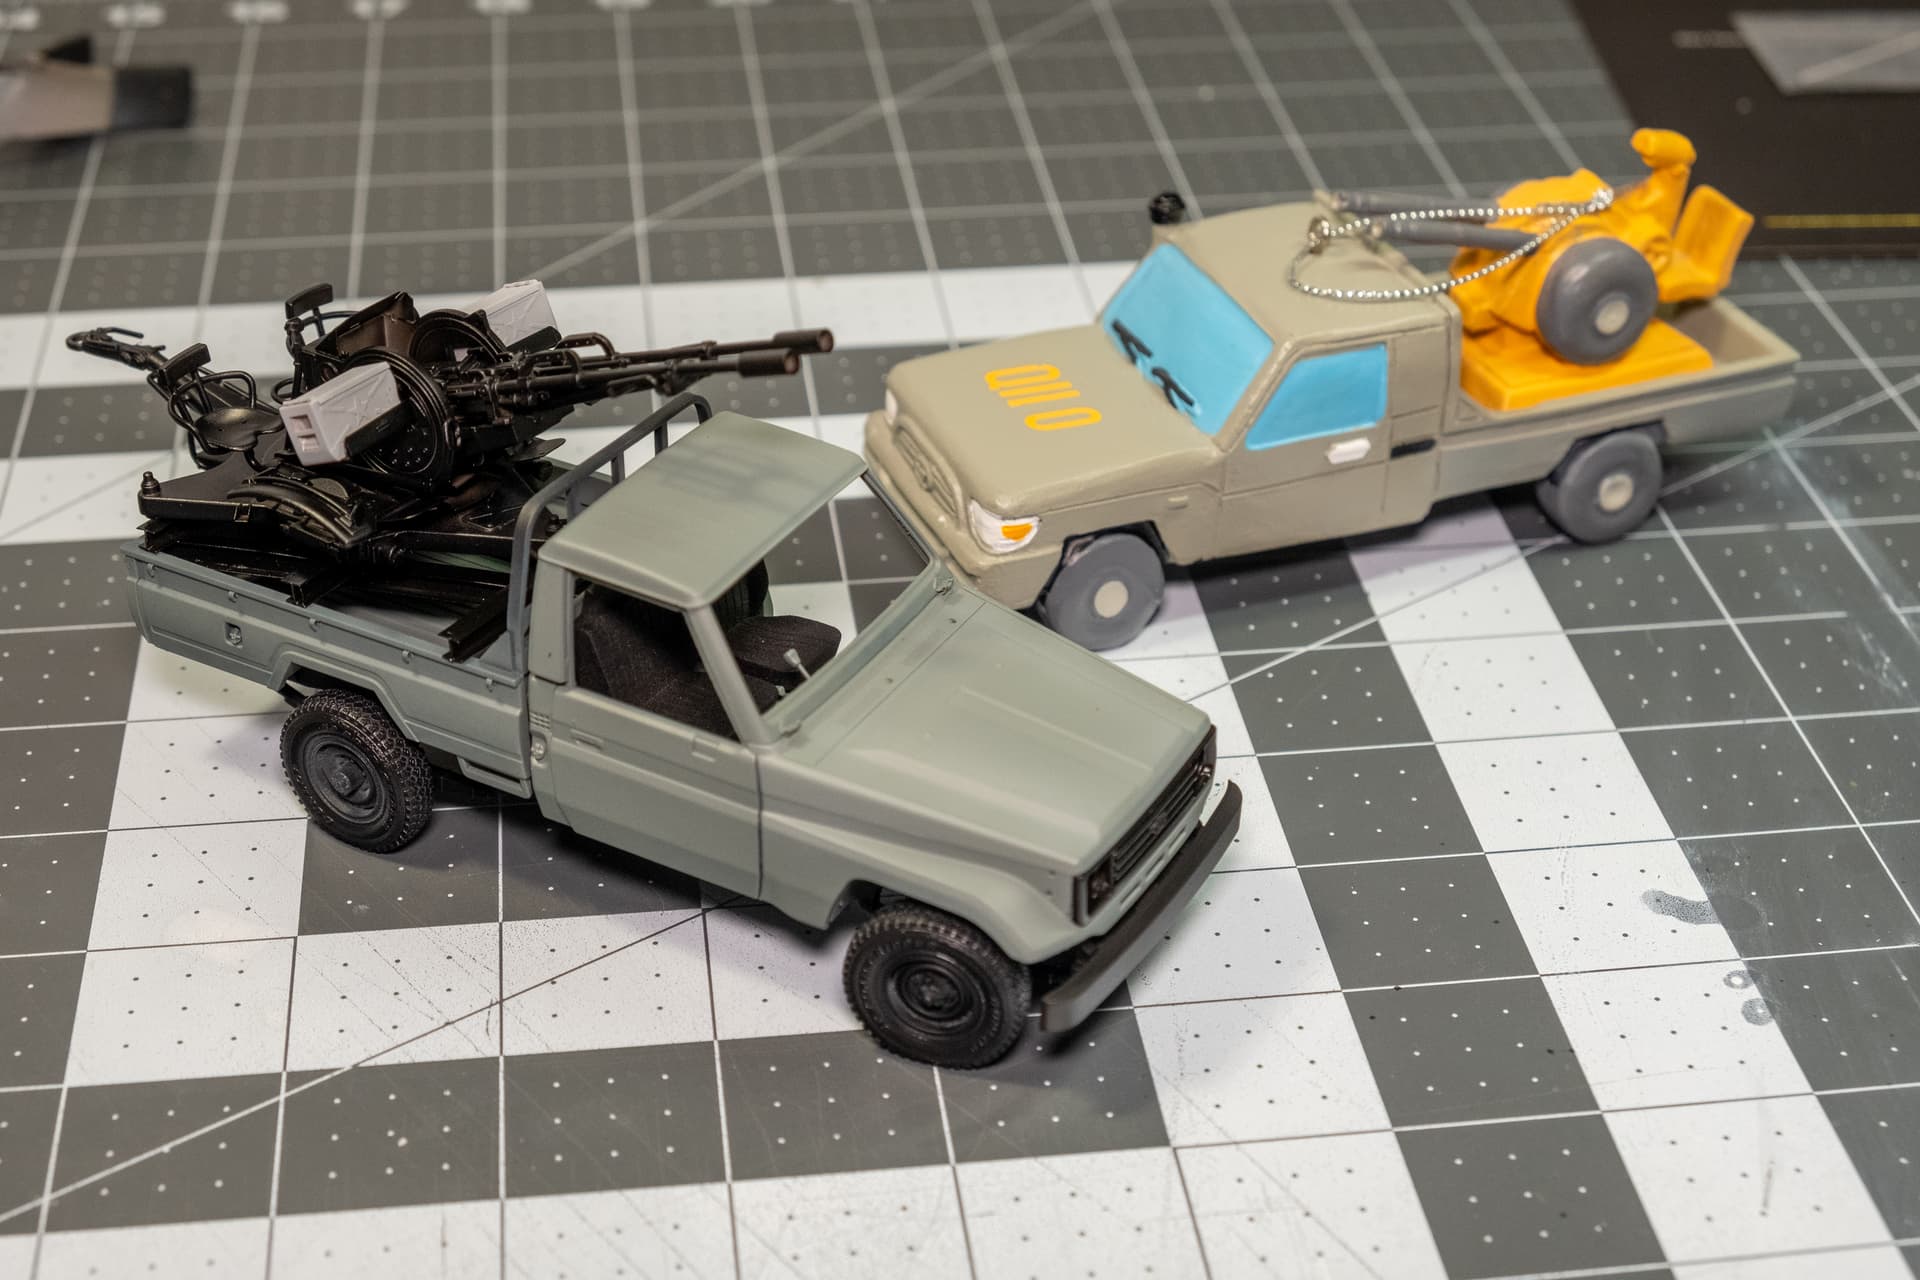
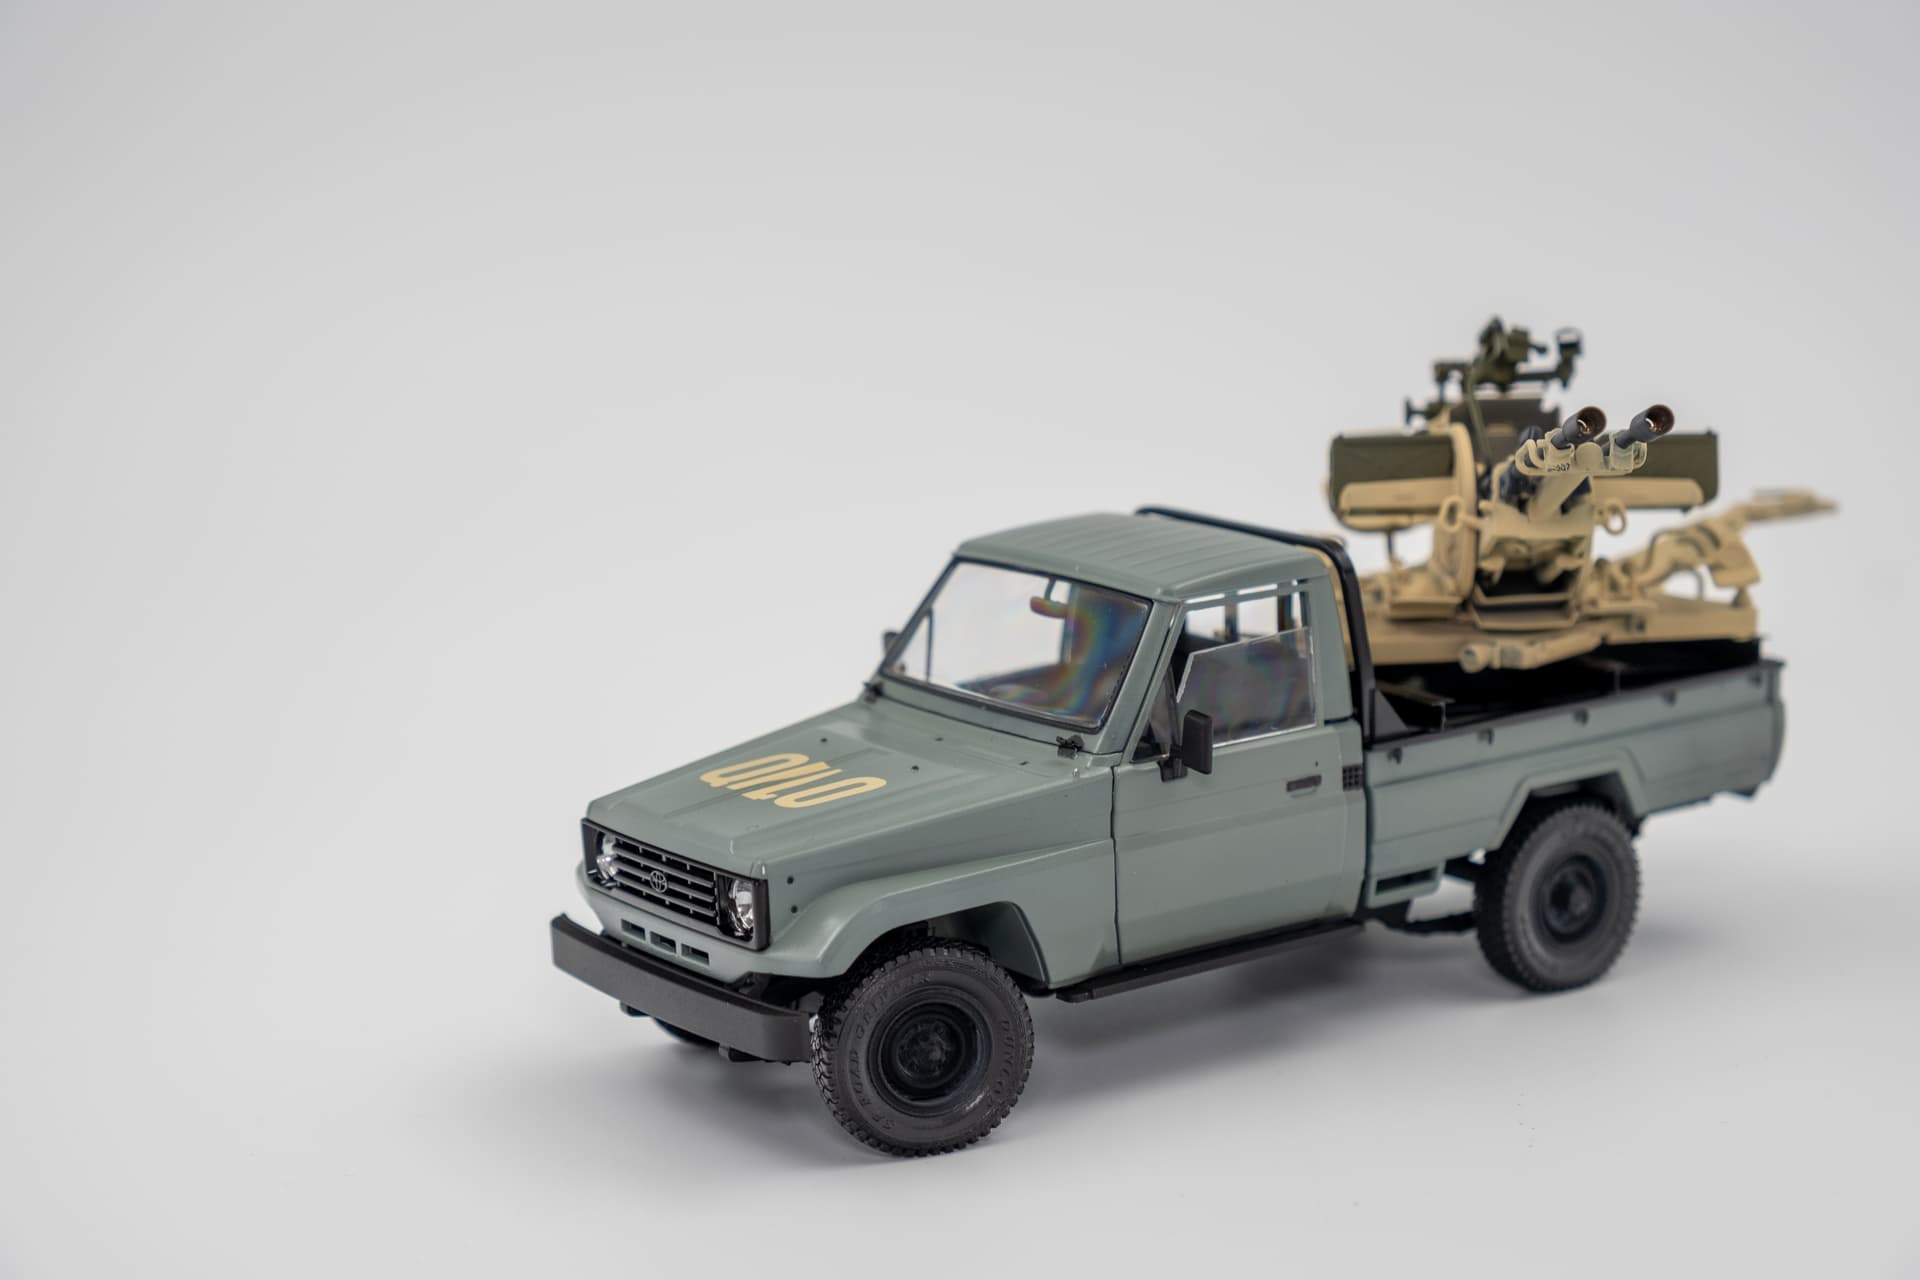
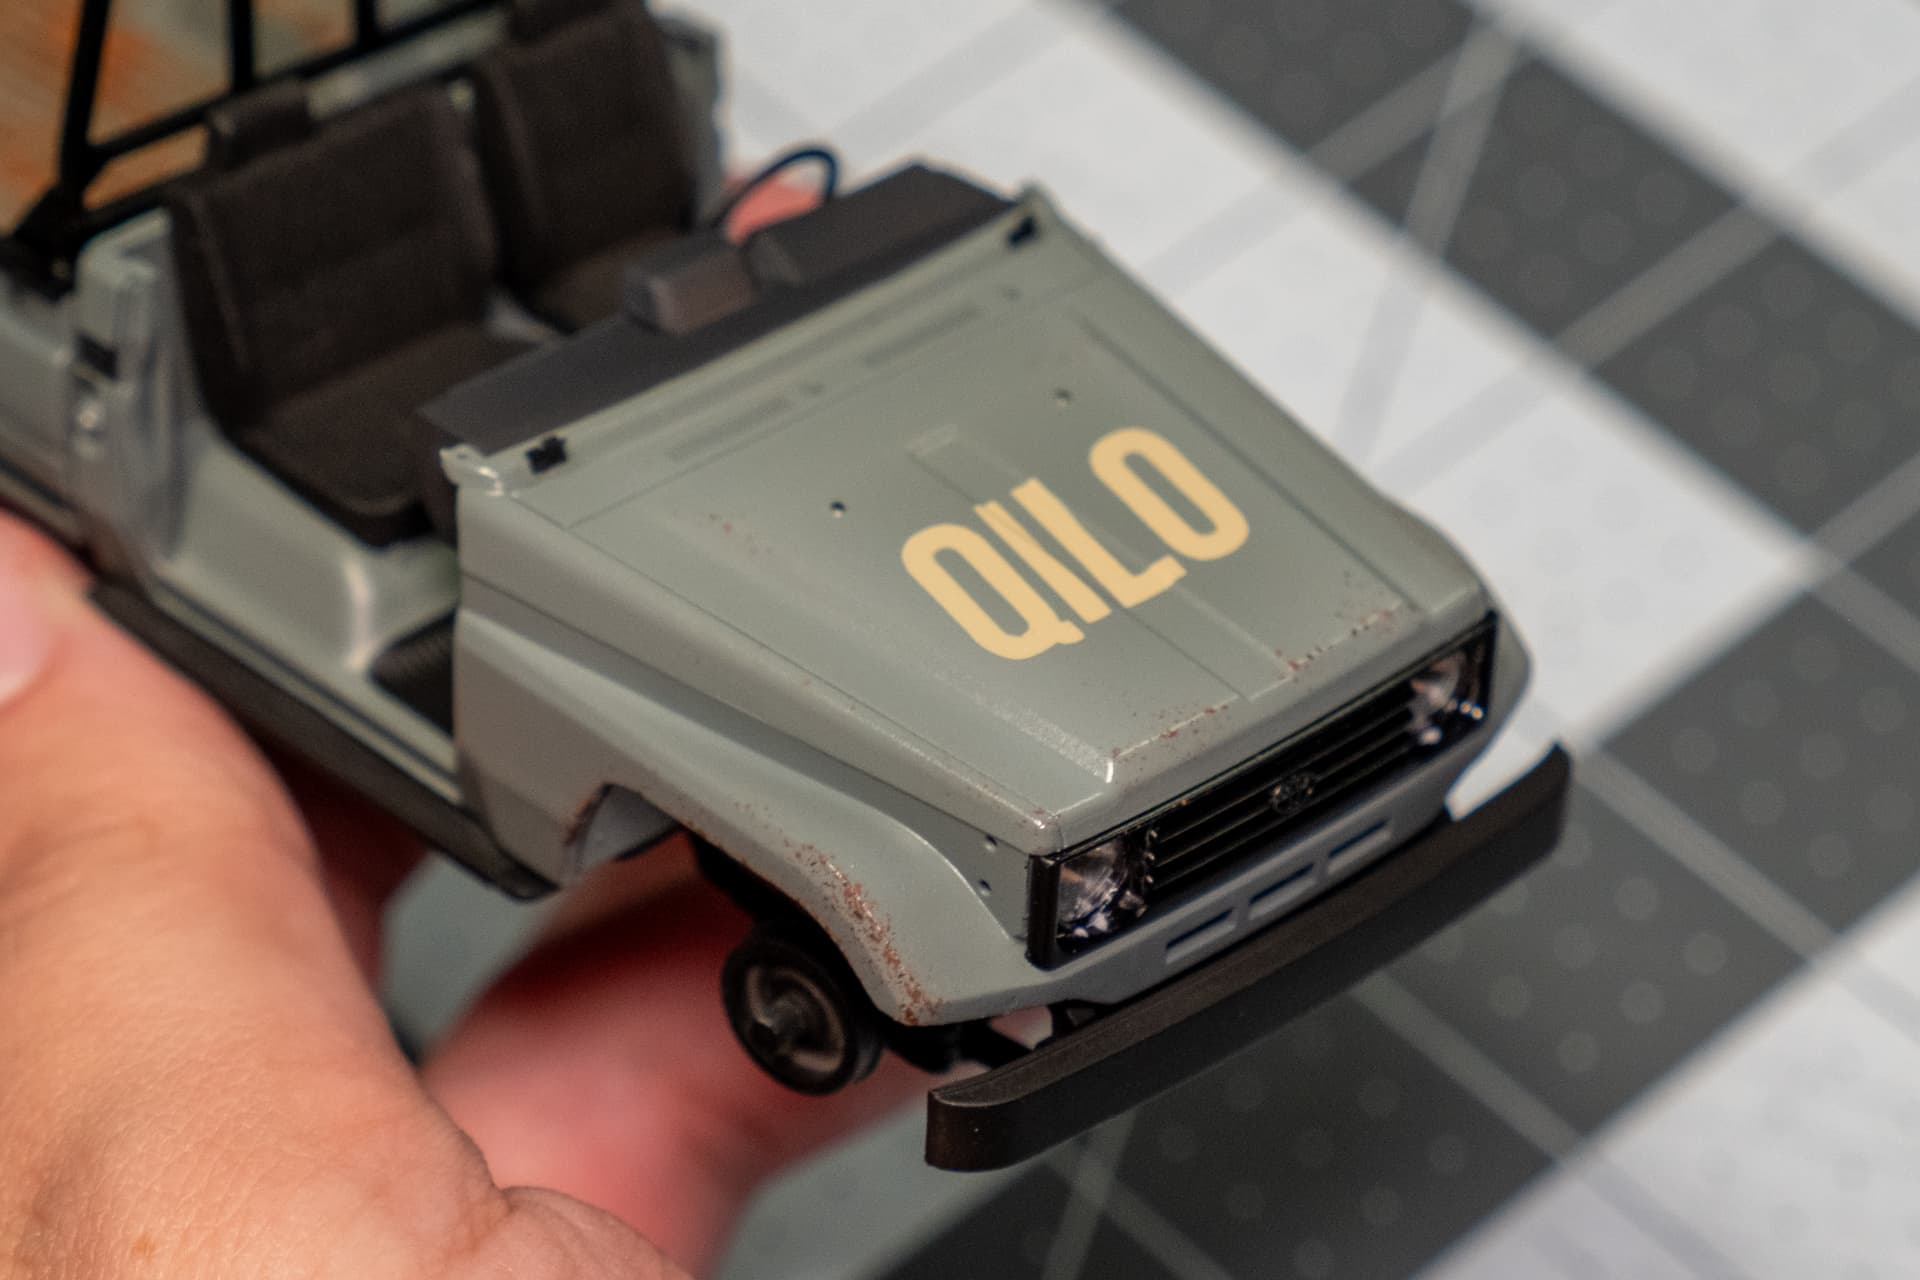
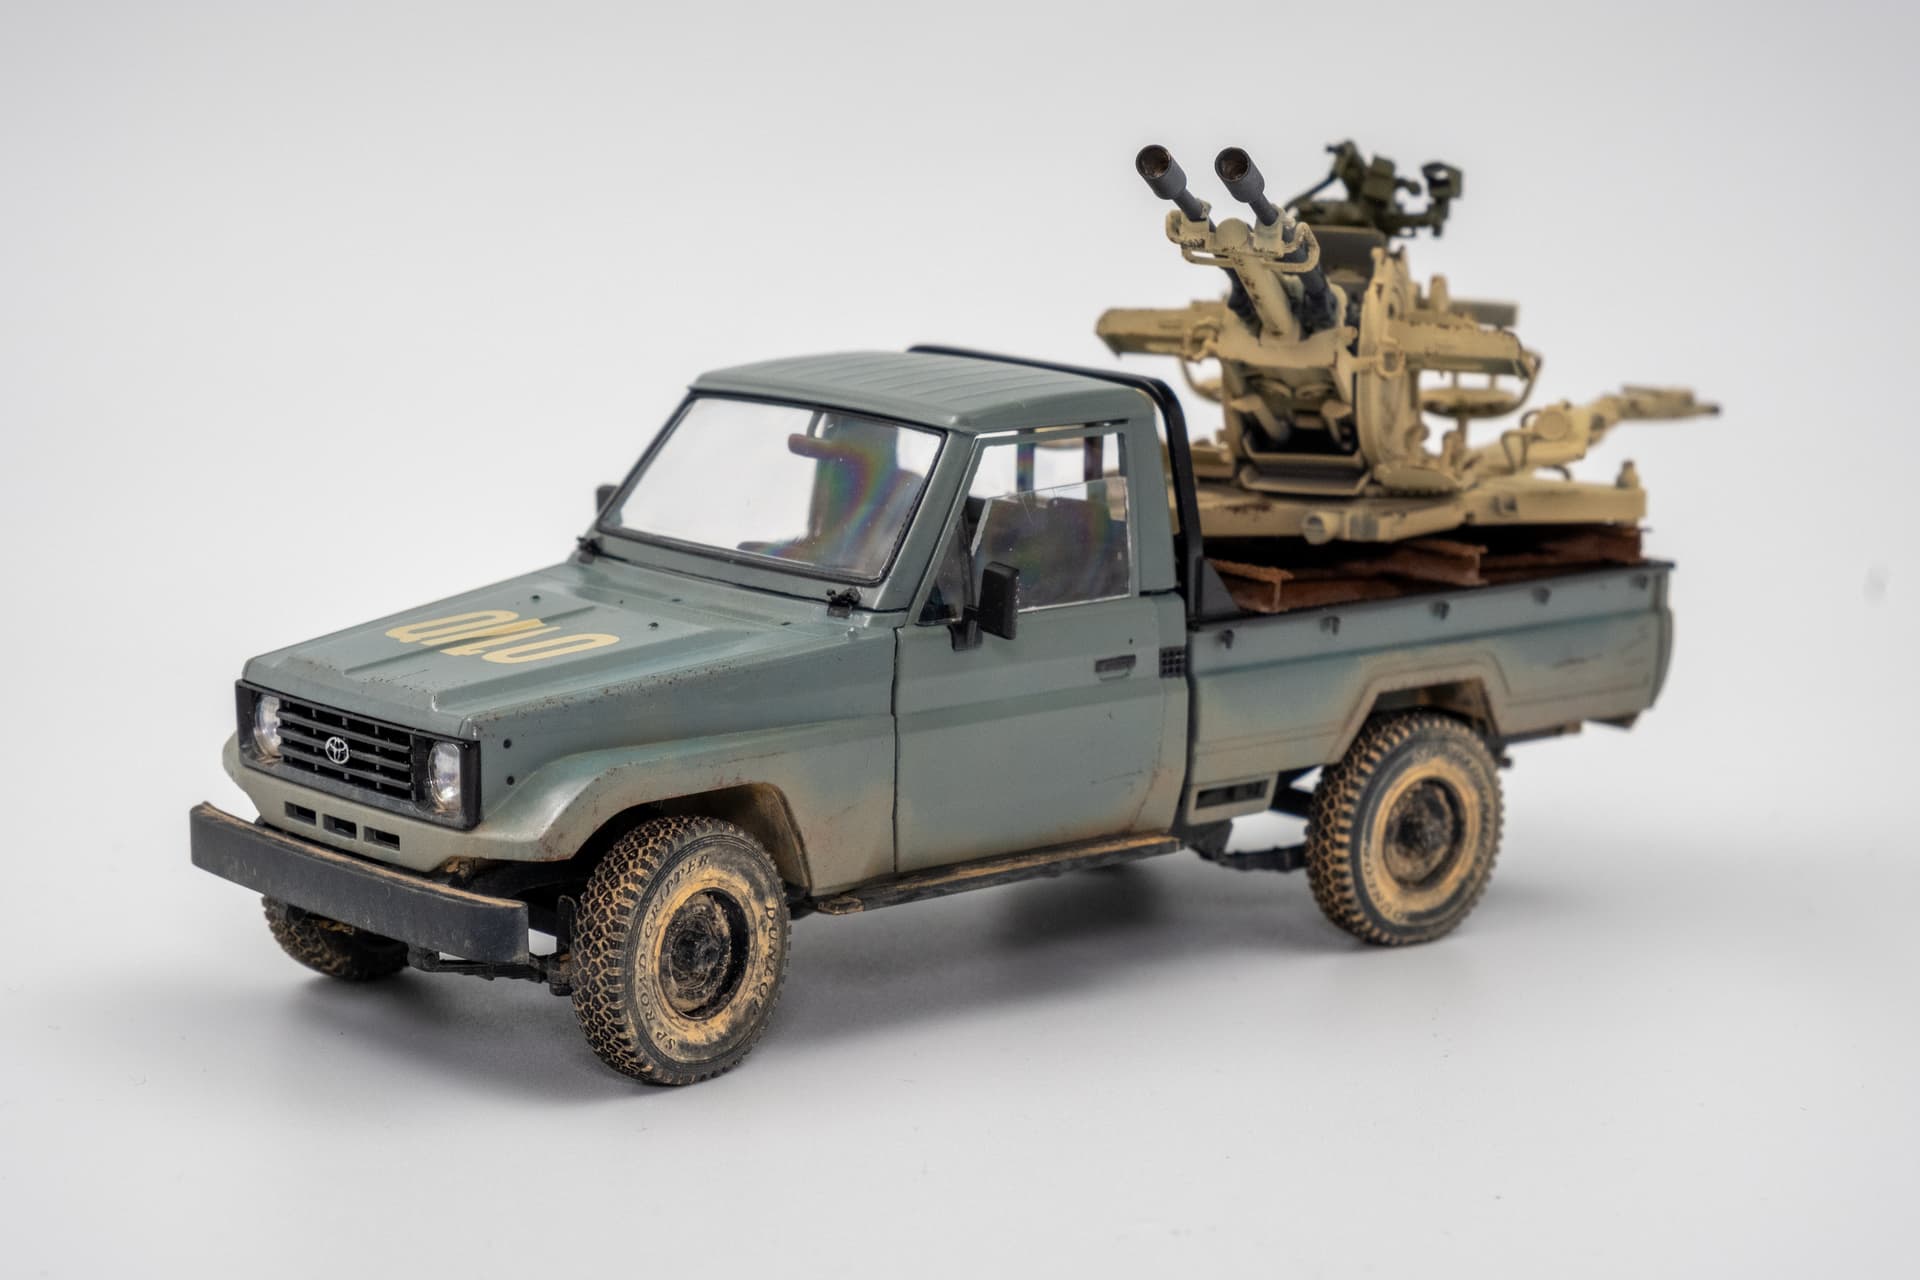
The color isn’t a 100% match, as I had to take a guess at what looked the closest as Qilo weren’t sure what the color code was. I knew I wasn’t going to paint the ZU-23-2 in the very orange beige so the slight difference in body color works out for the better I think.
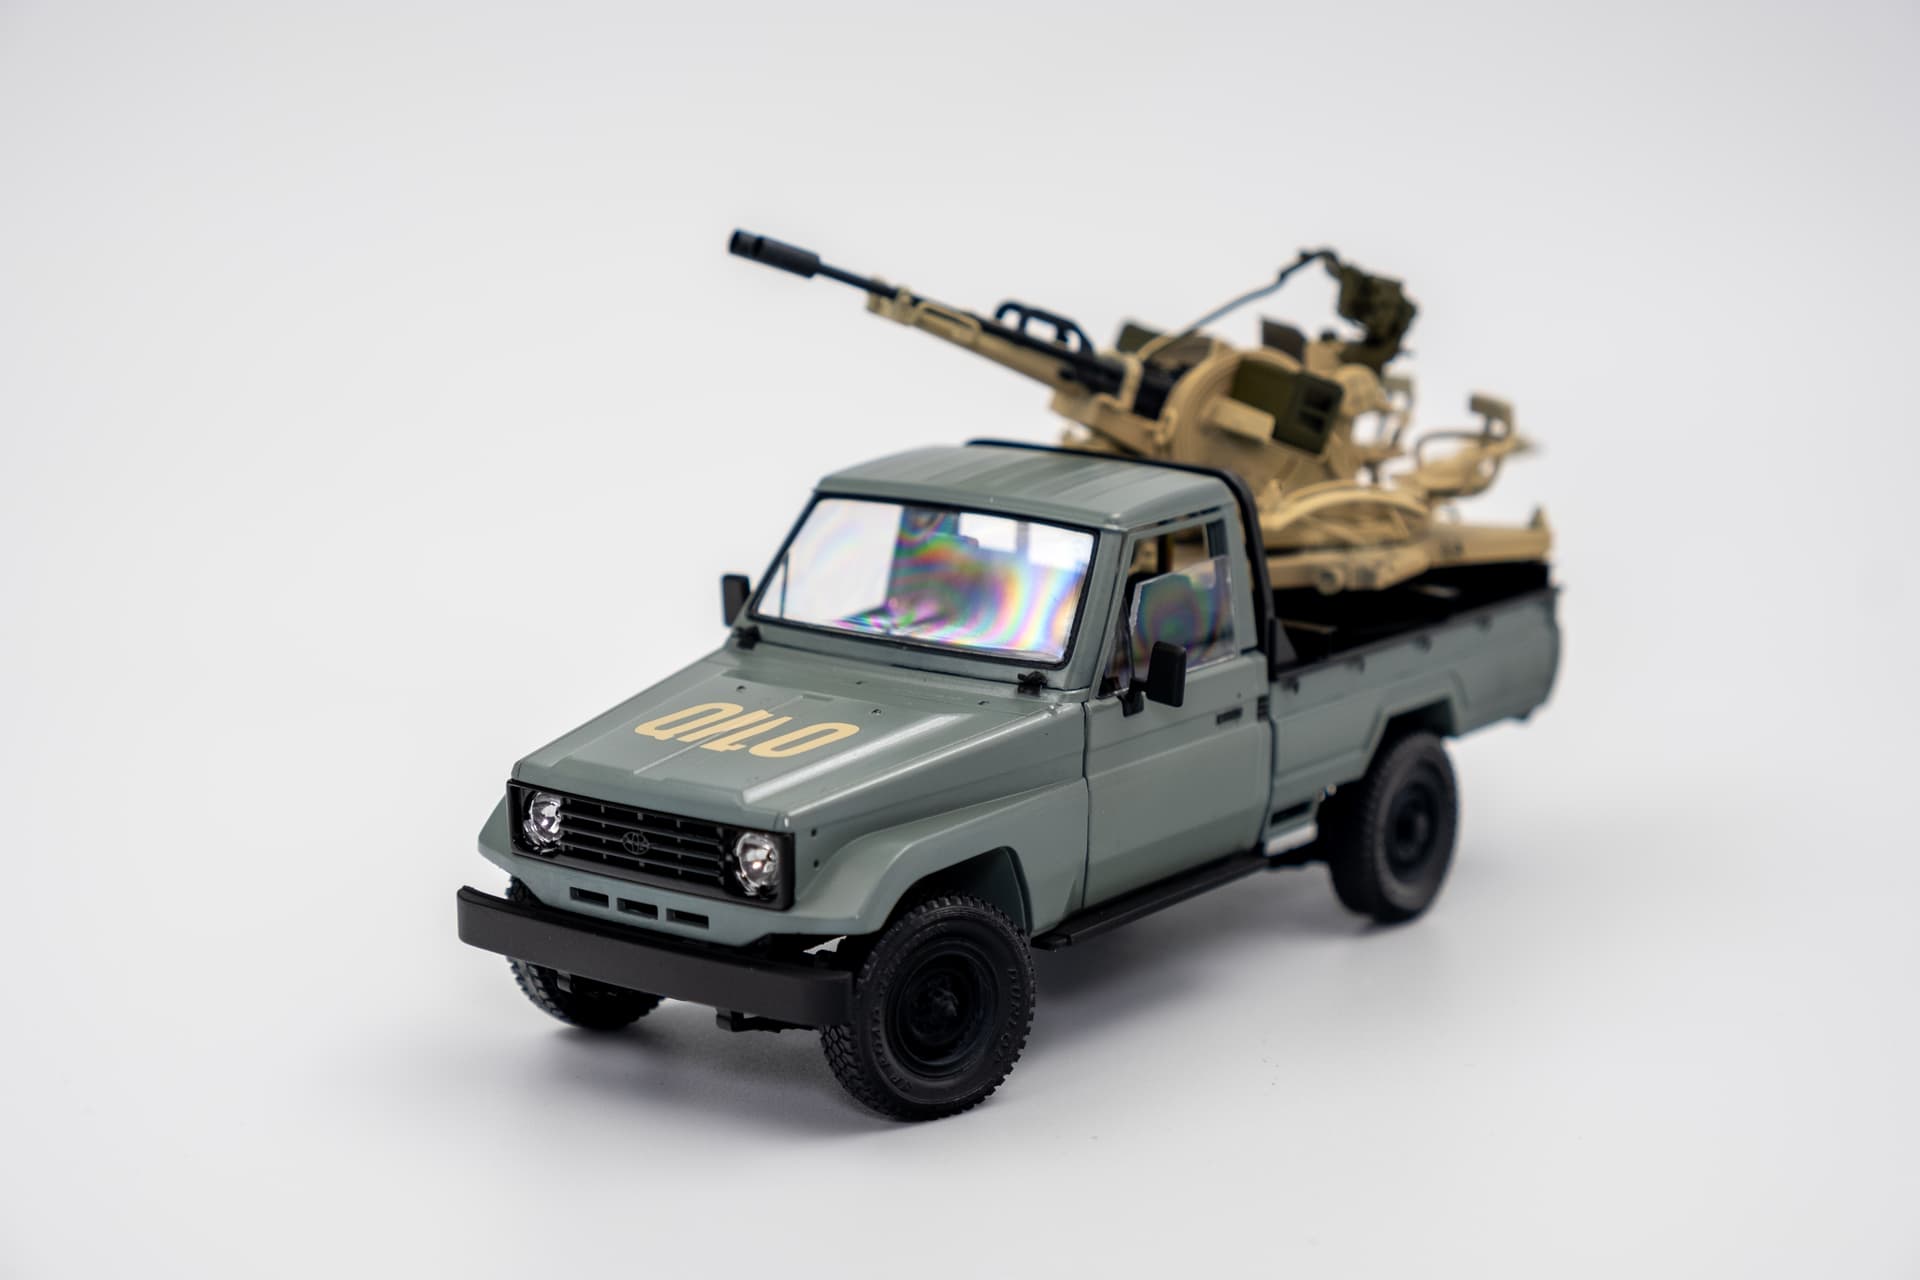
That of course means one more test-fit, and I think I like the colors I ended up with a lot better than the ornament. The sand and green is a nice combination. Now I just need to decide on a sandy environment or a dirt road with some greenery for the base. A sandy scene is the norm for a technical but I think browns would look better with the coloring than more sand.
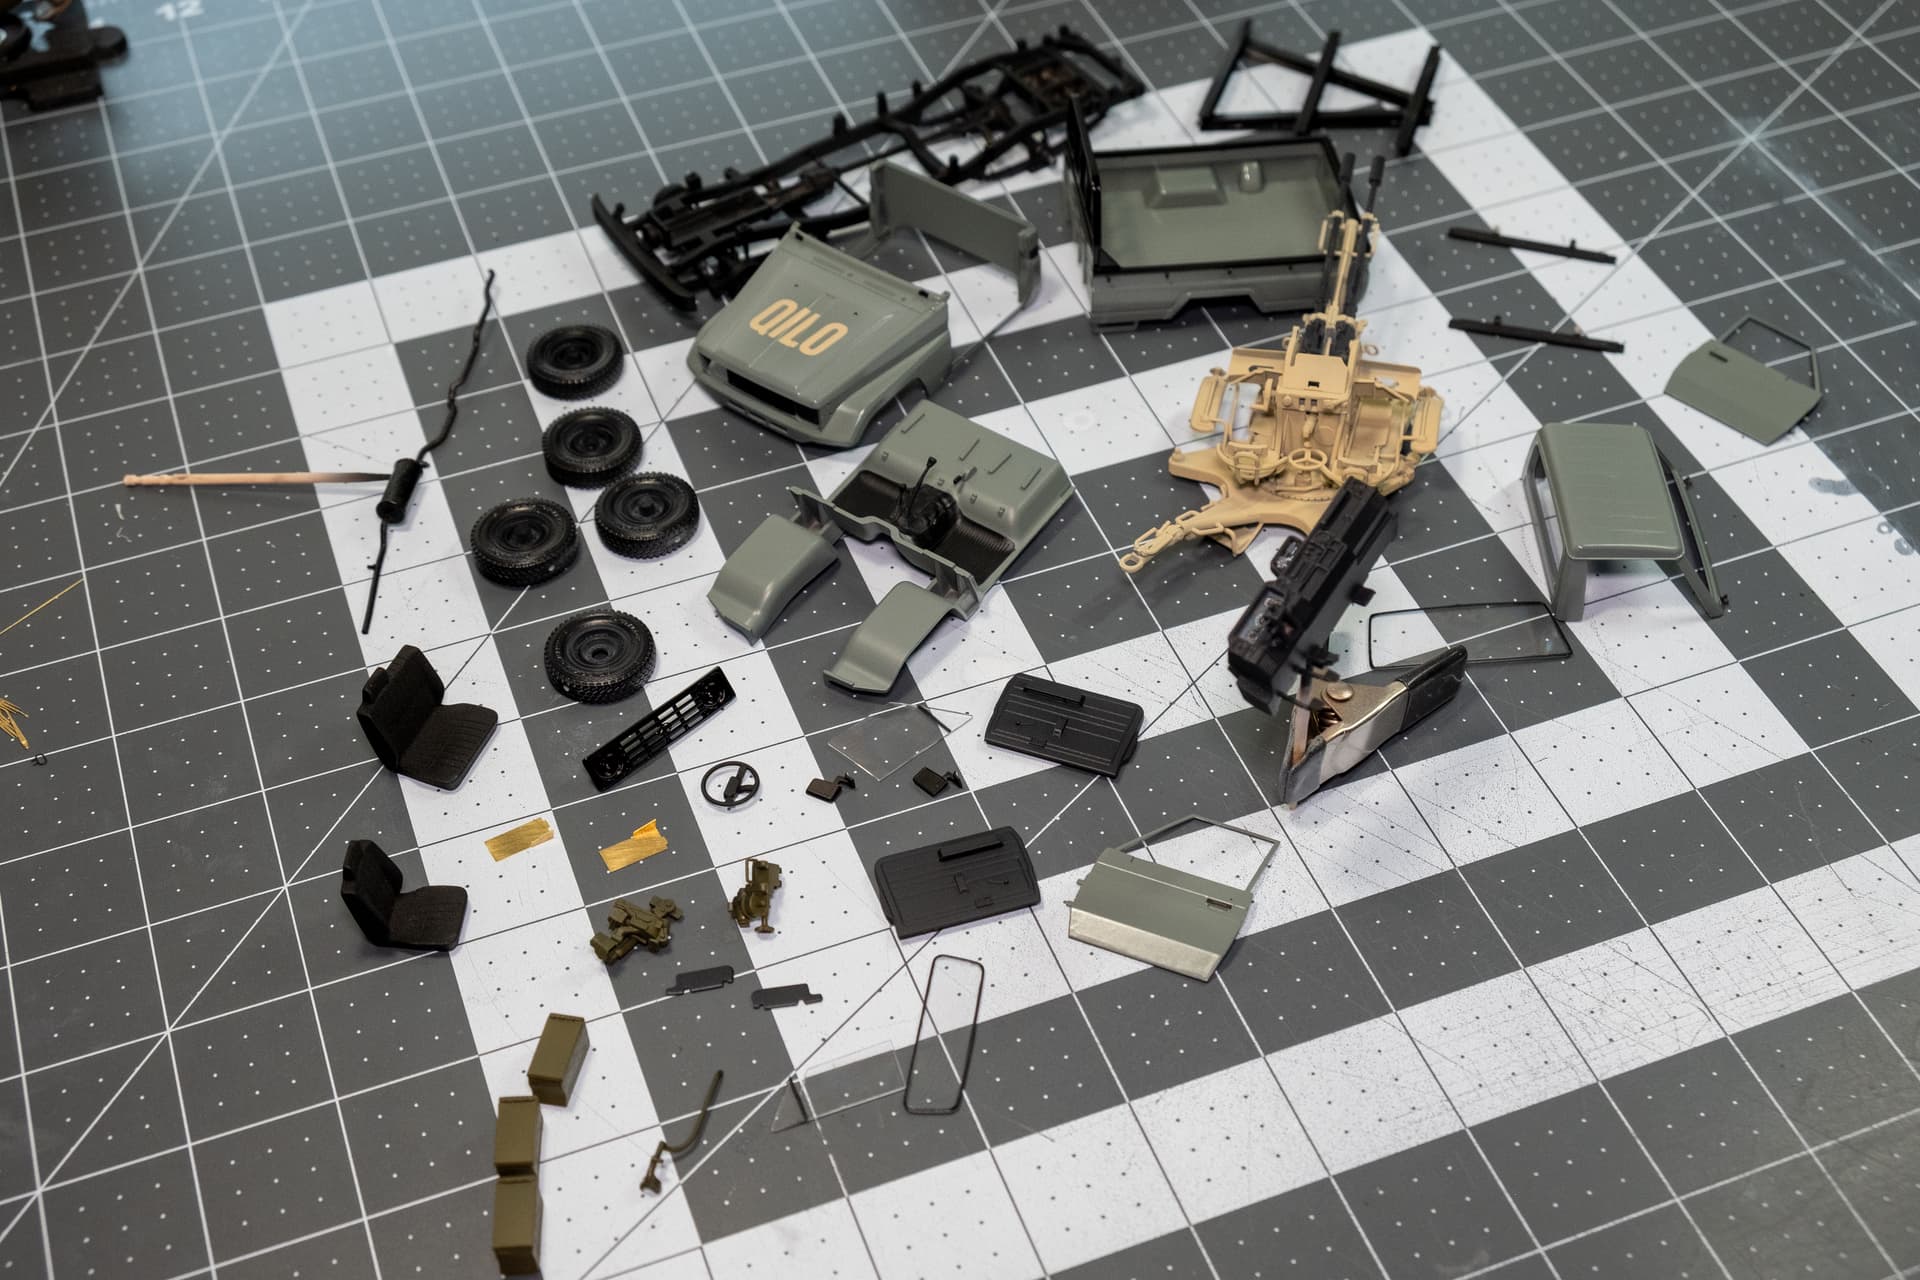
I still need to attach the indicators, headlights, and the taillights, but I’m waiting for the Molotow Liquid Chrome and Tamiya clear red and orange to fully cure before gluing those on, but I didn’t want to delay the video. The wheels, doors, roof, and ZU-23-2 aren’t attached yet to facilitate weathering. I’ll be giving Ammo by MiG’s U-Rust kit a try on the I-beams that the ZU-23-2 sits on along with the exhaust. I’m also going to sift through the spares bin to find some goodies to decorate the cab and bed with.
For the base, I think I’m going to go with the truck parked off the side of a dirt road, but we’ll see what Qilo says.
The exhaust has been rusted using Ammo by MiG’s U-Rust set. It’s the first time I’ve properly used it for rust and not copper/bronze patina for some busts I made a few years ago. I’m quite happy with the result and I’ll definitely use it again when I need to make an entire thing rusty.
Now it’s a matter of figuring out how exactly I want to weather the truck itself in terms of scuffs and chips. Once the base is laid down, then I can move to dust and such.
The plan is for a scene with foliage somewhat like this:
I’d decided on desert environment, but I wasn’t really pleased with the general layout of the reference photos I was finding. Sand and pavement isn’t the most visually interesting thing, and considering this is a gift for Qilo, I wanted it to be something that would catch their eyes.
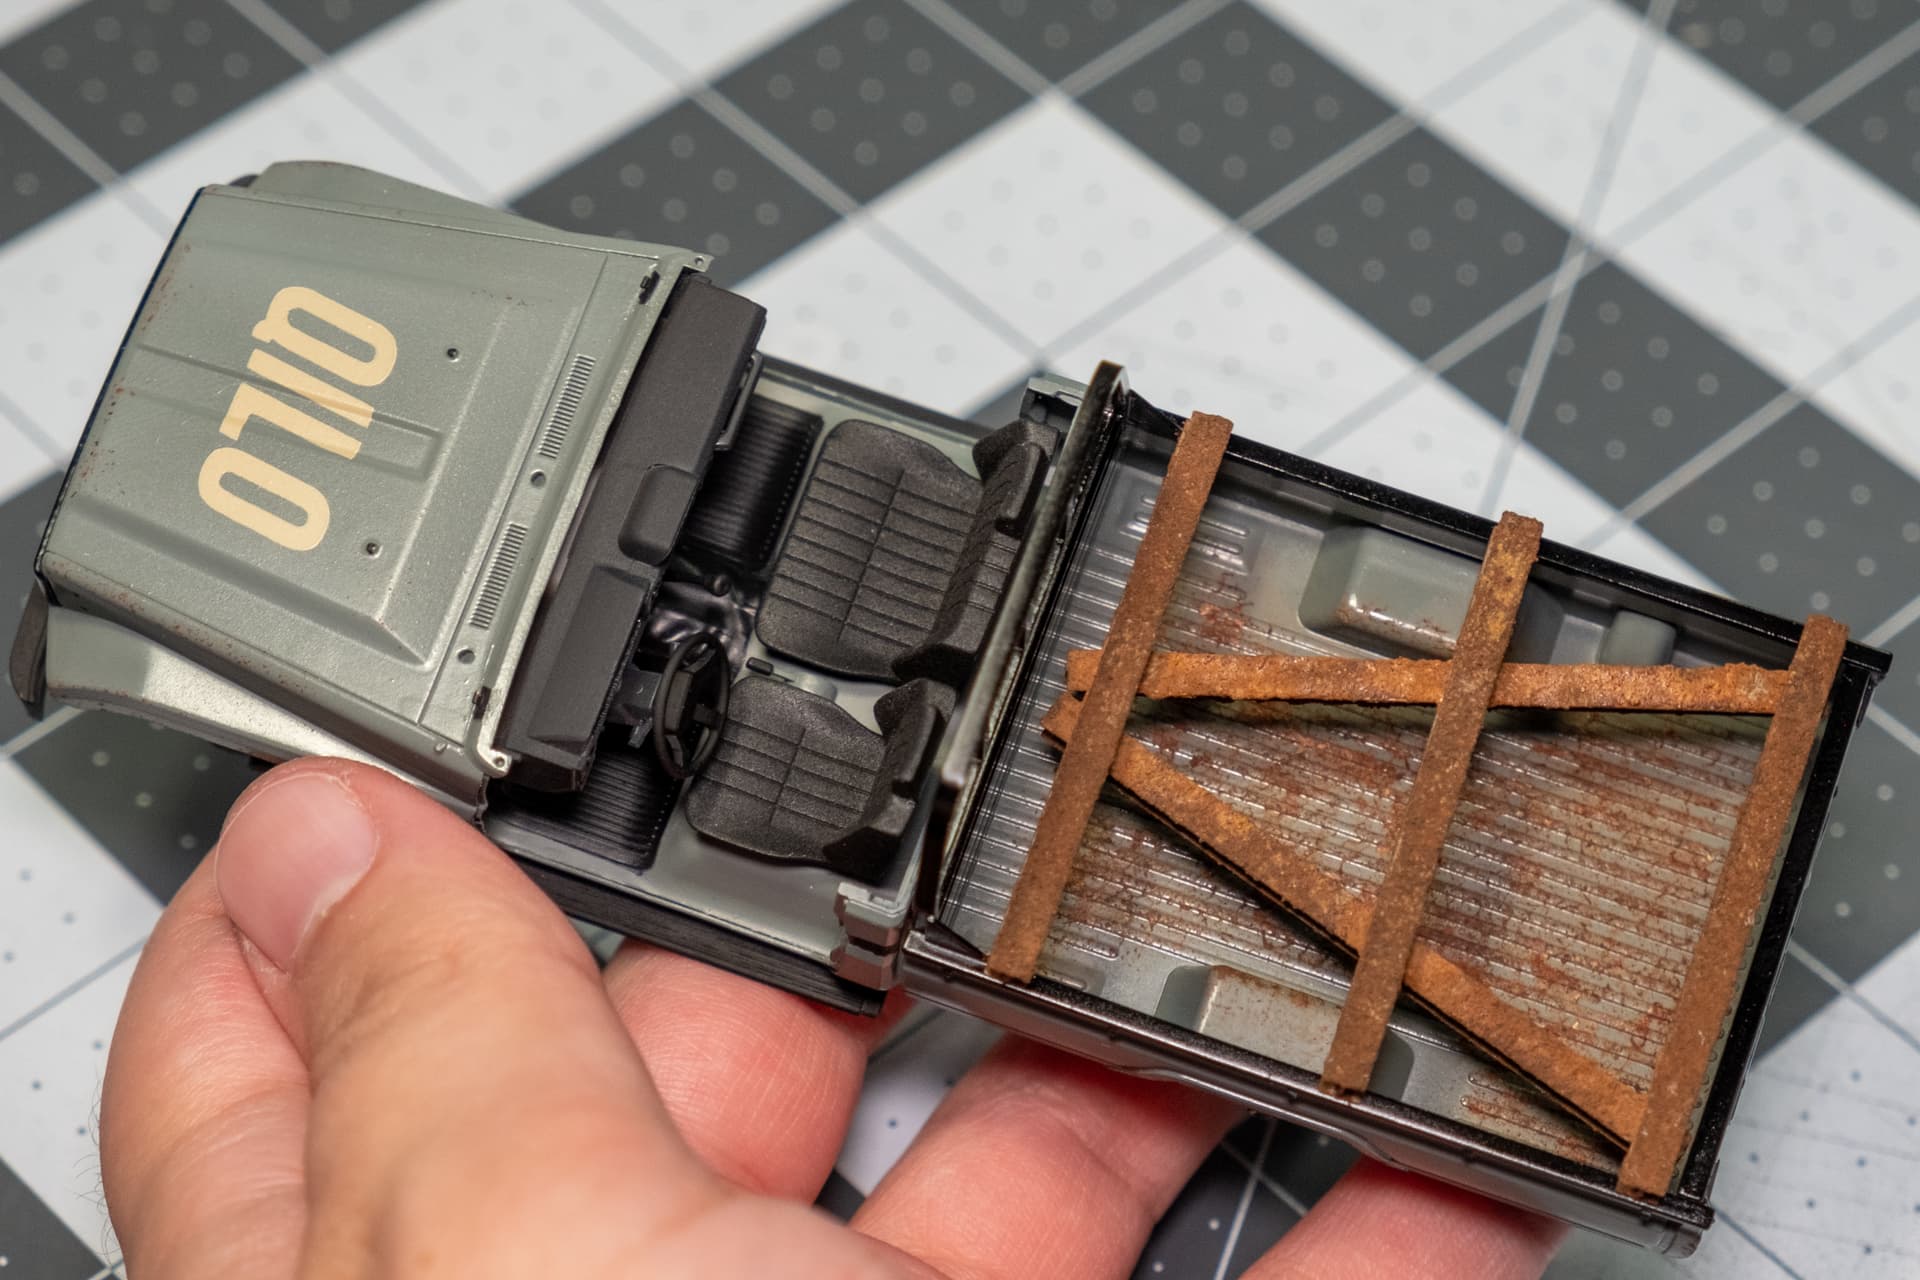
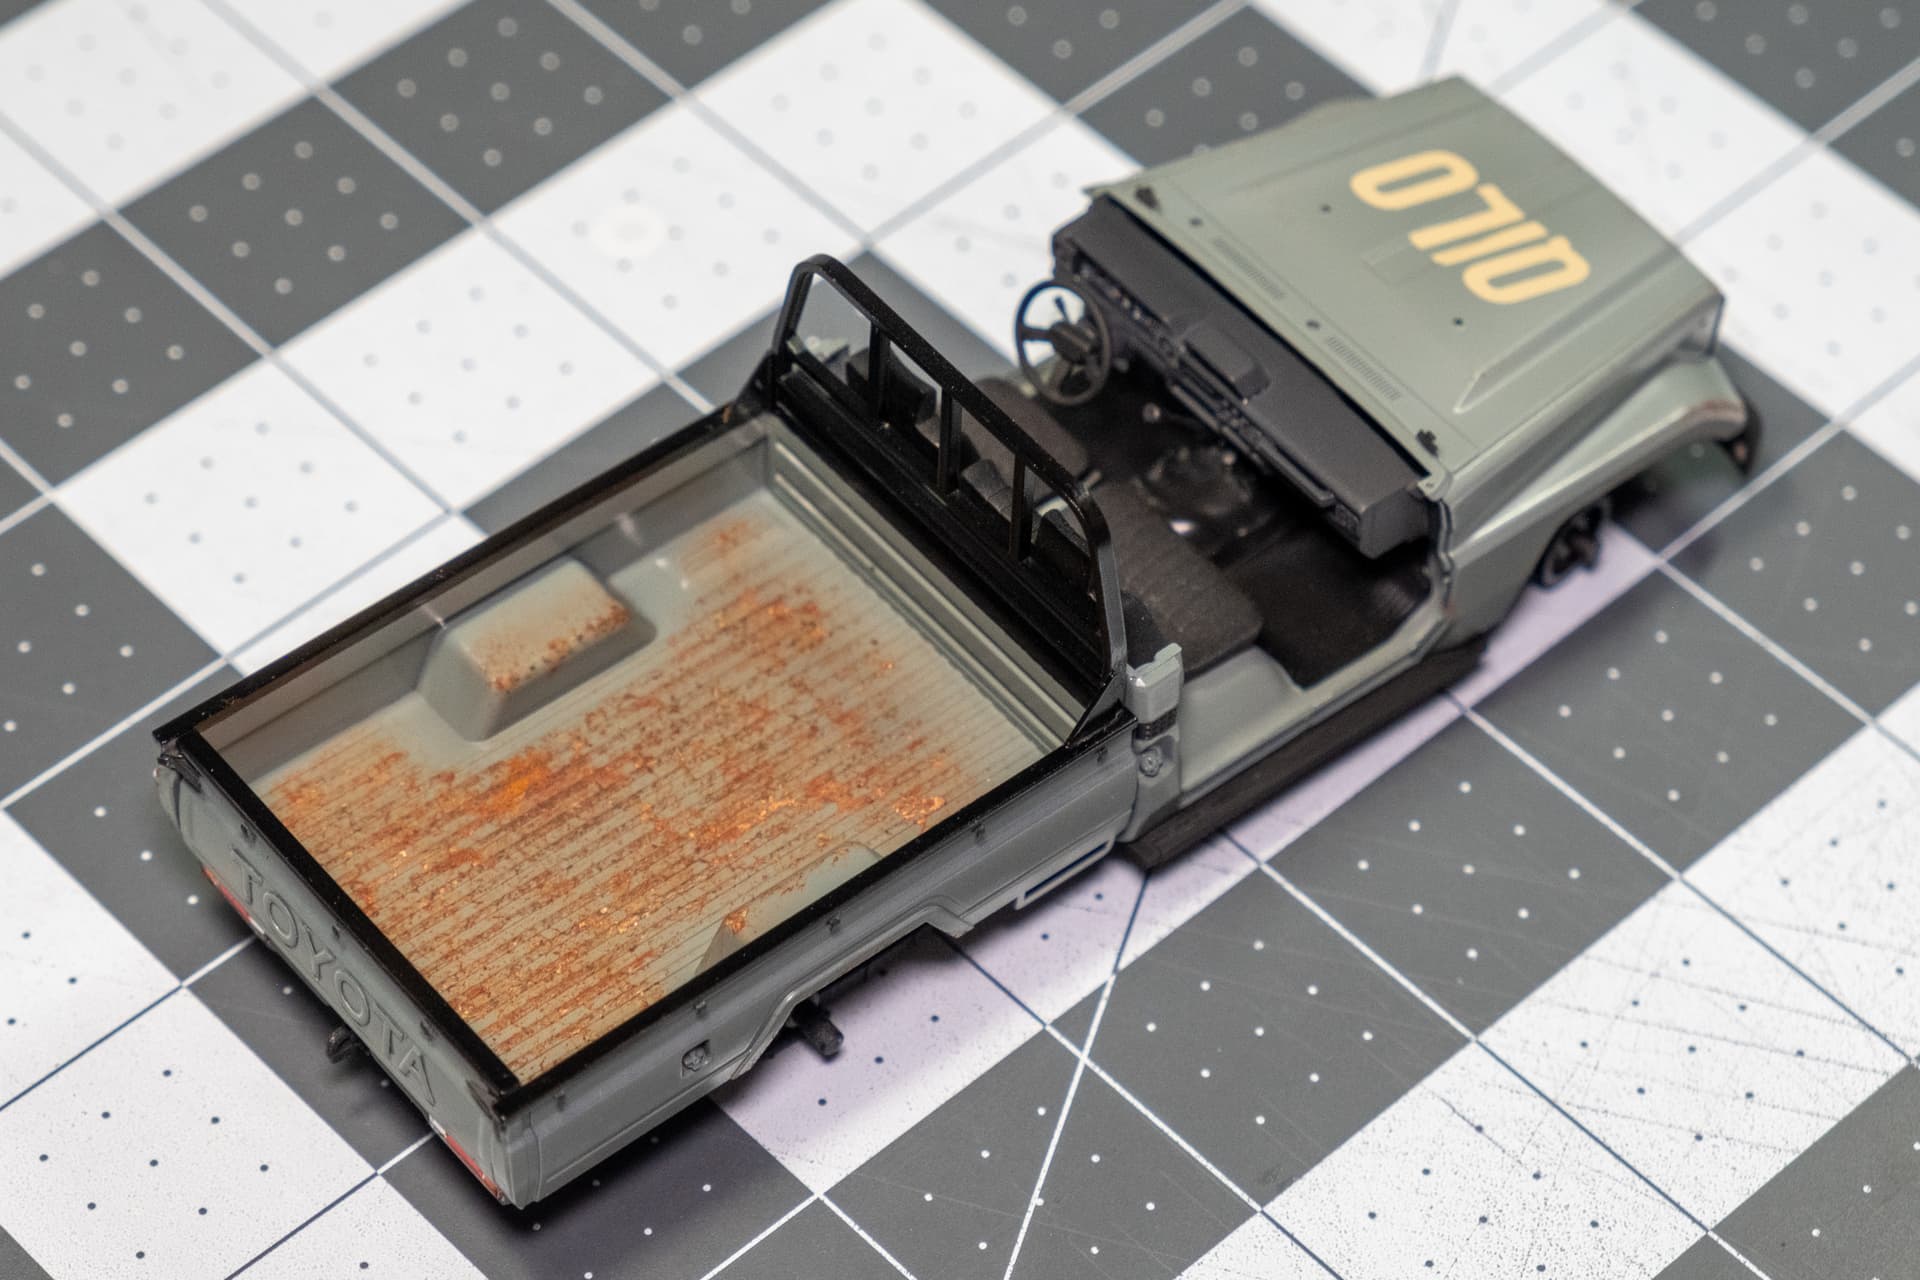
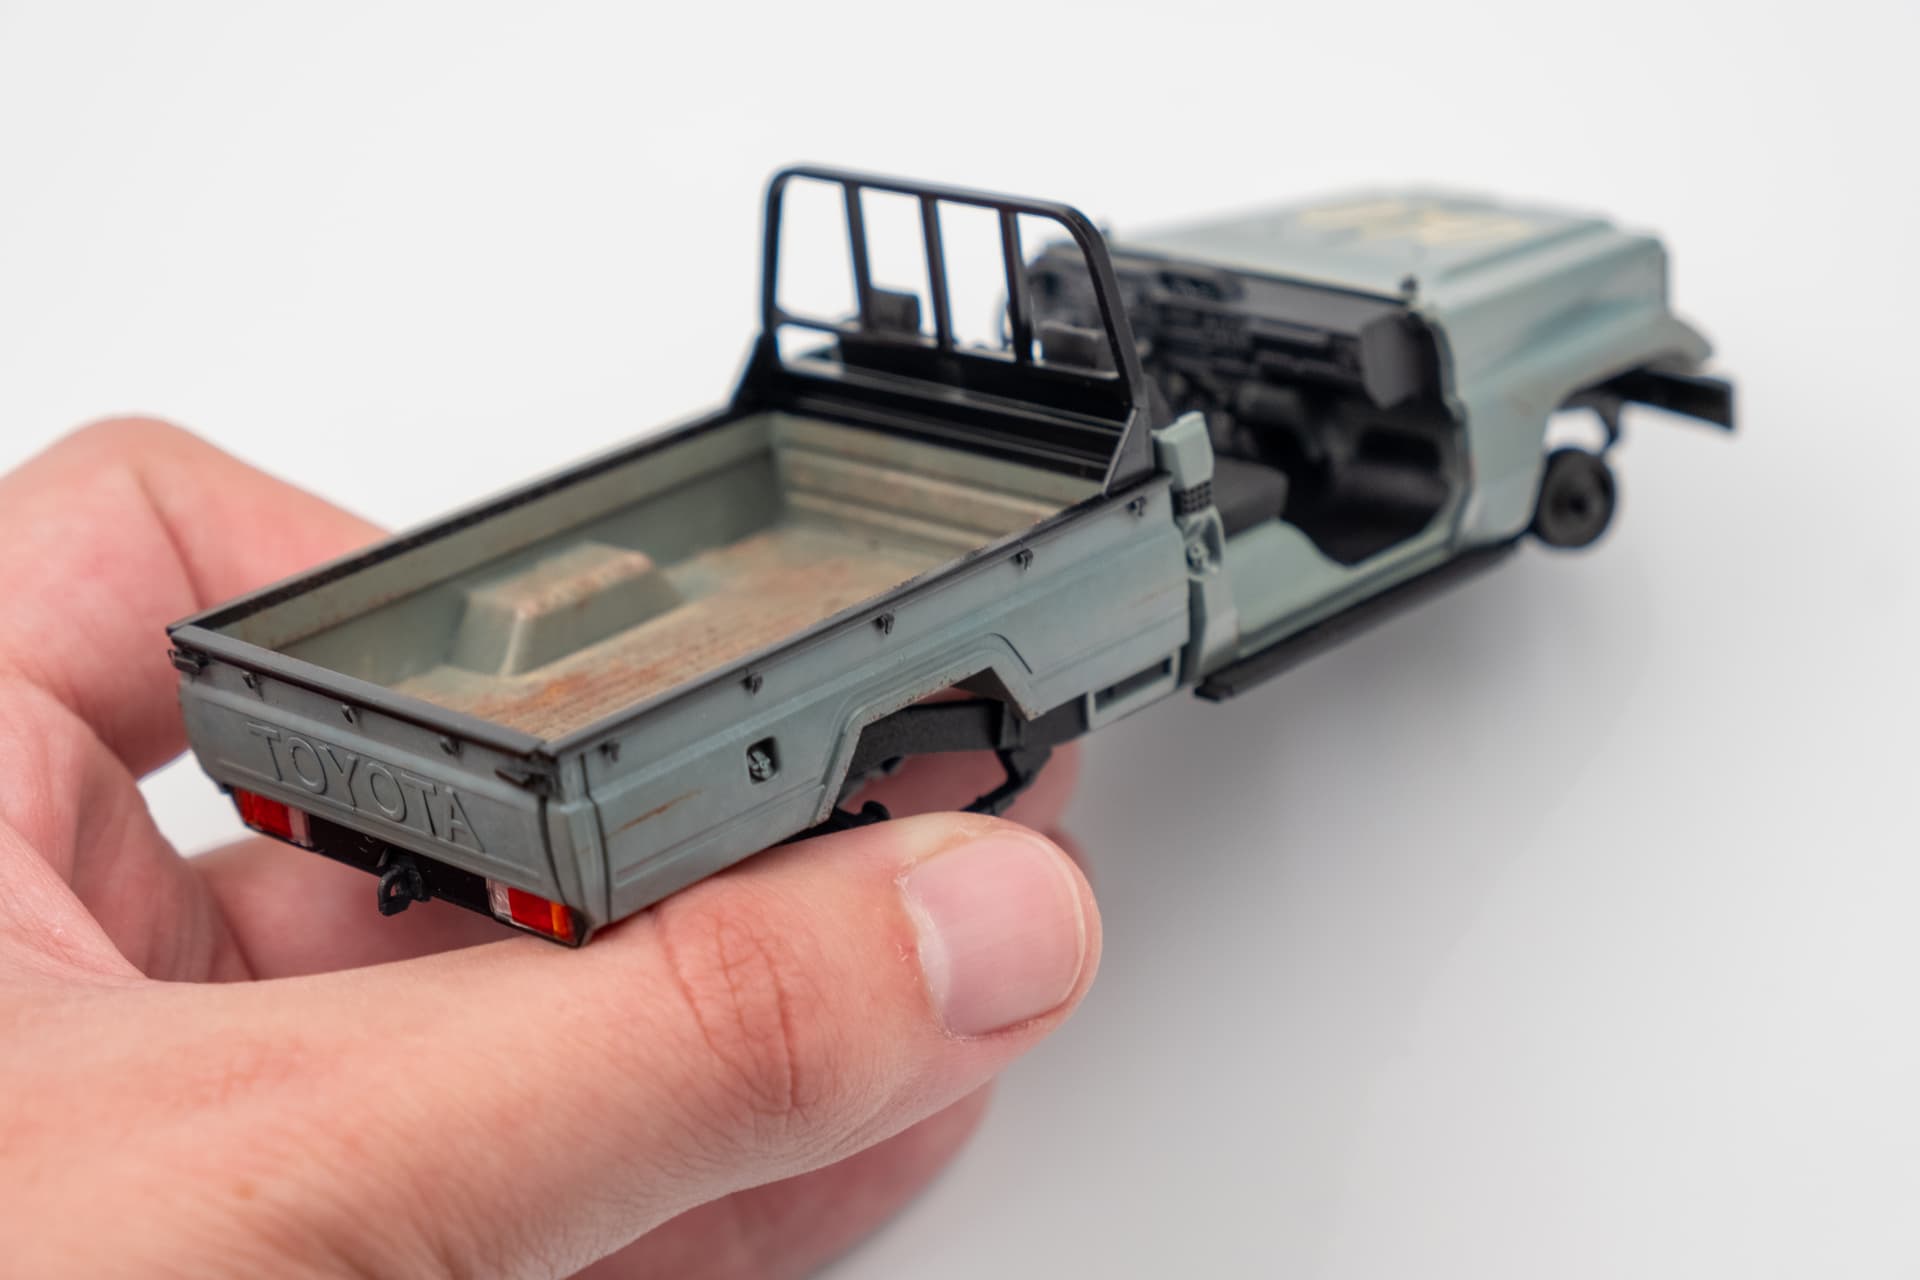
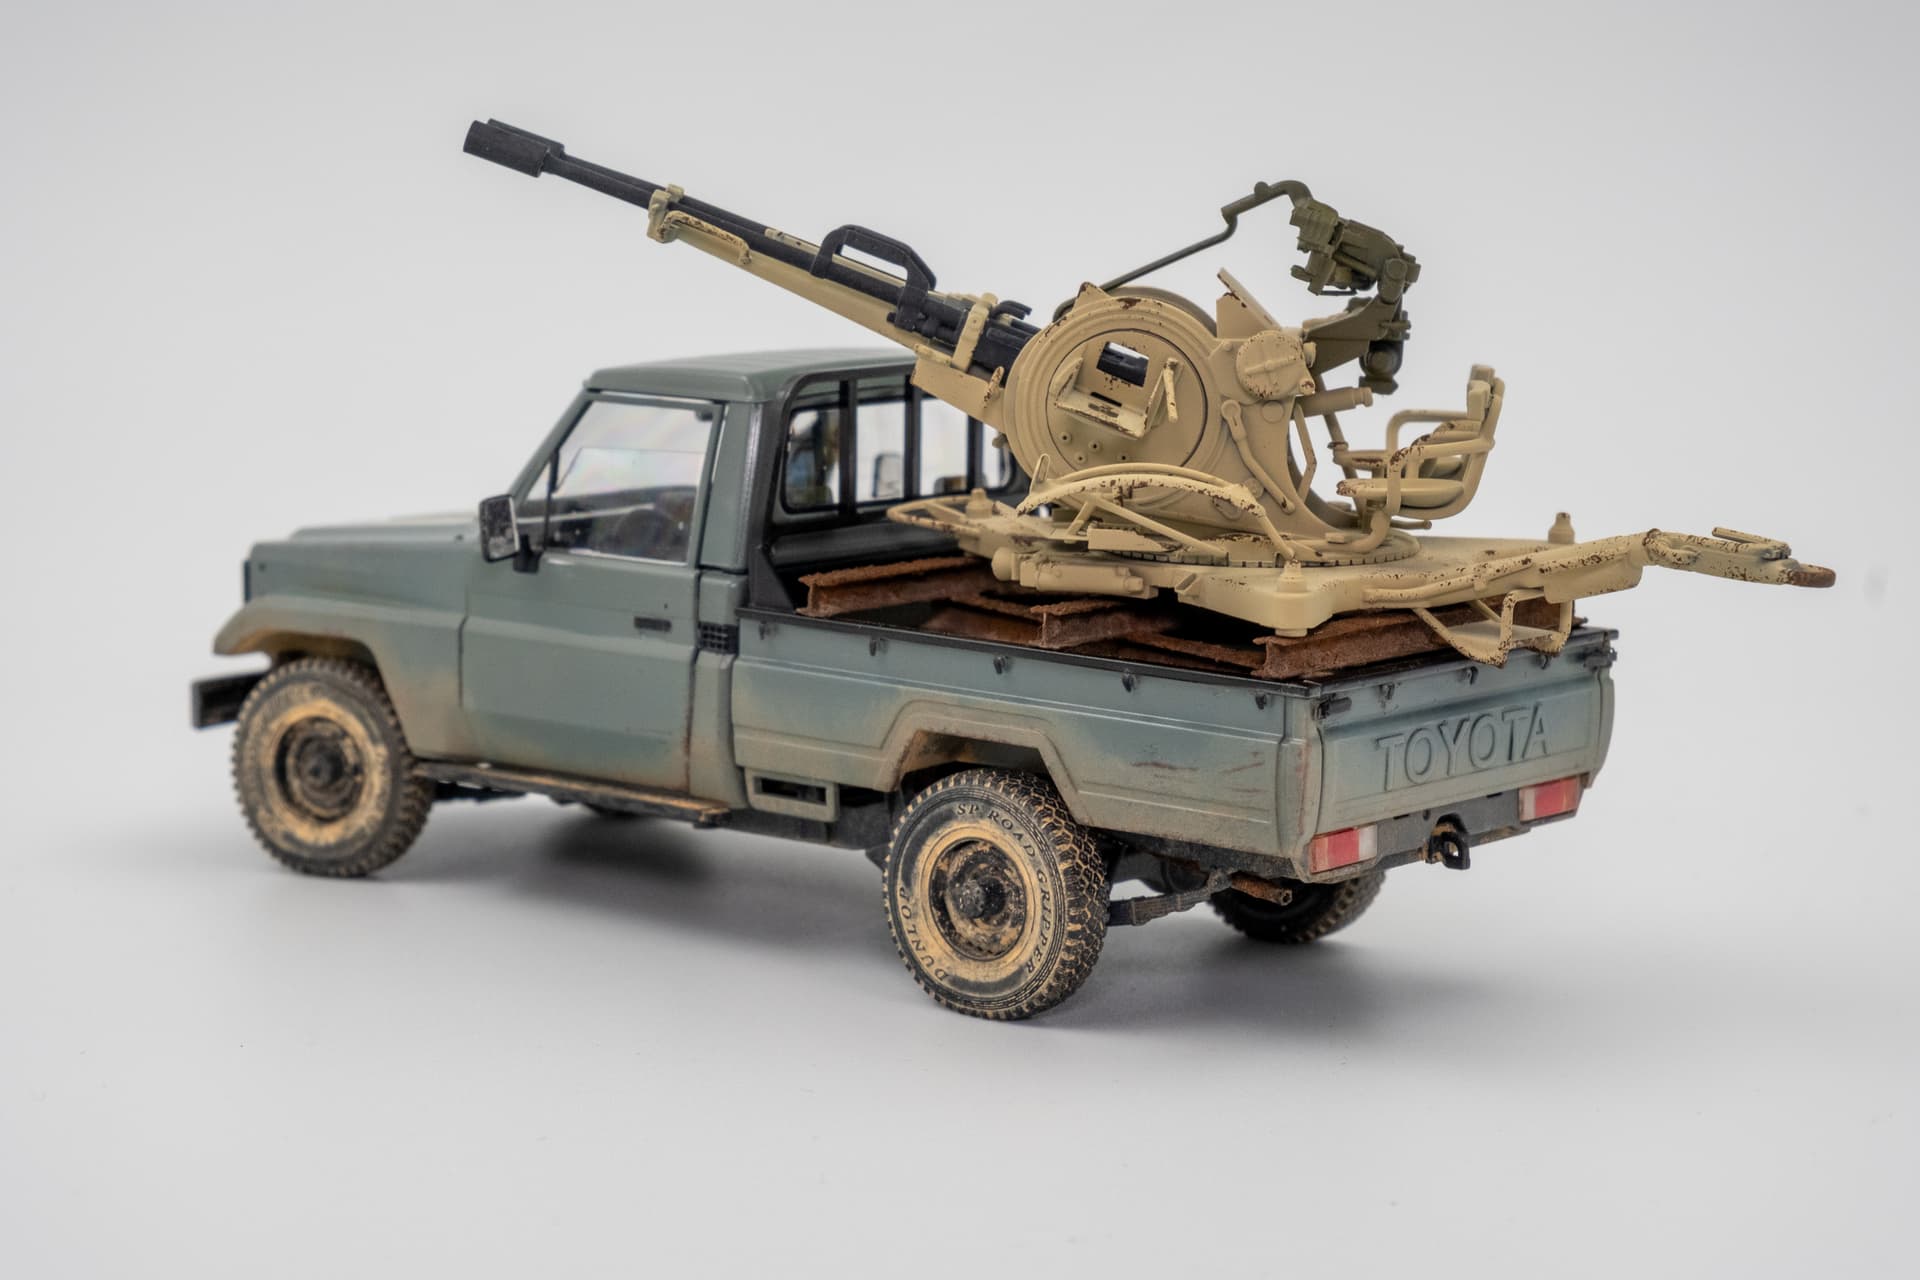
I’ve been chipping away (ba-dum-tss) at the rust and have it mostly completed. I just need to do the upper areas of the bed and the tailgate and then it’s onto rust staining and maybe some rust streaking, although because of the arid environment, there probably won’t be many streaks.
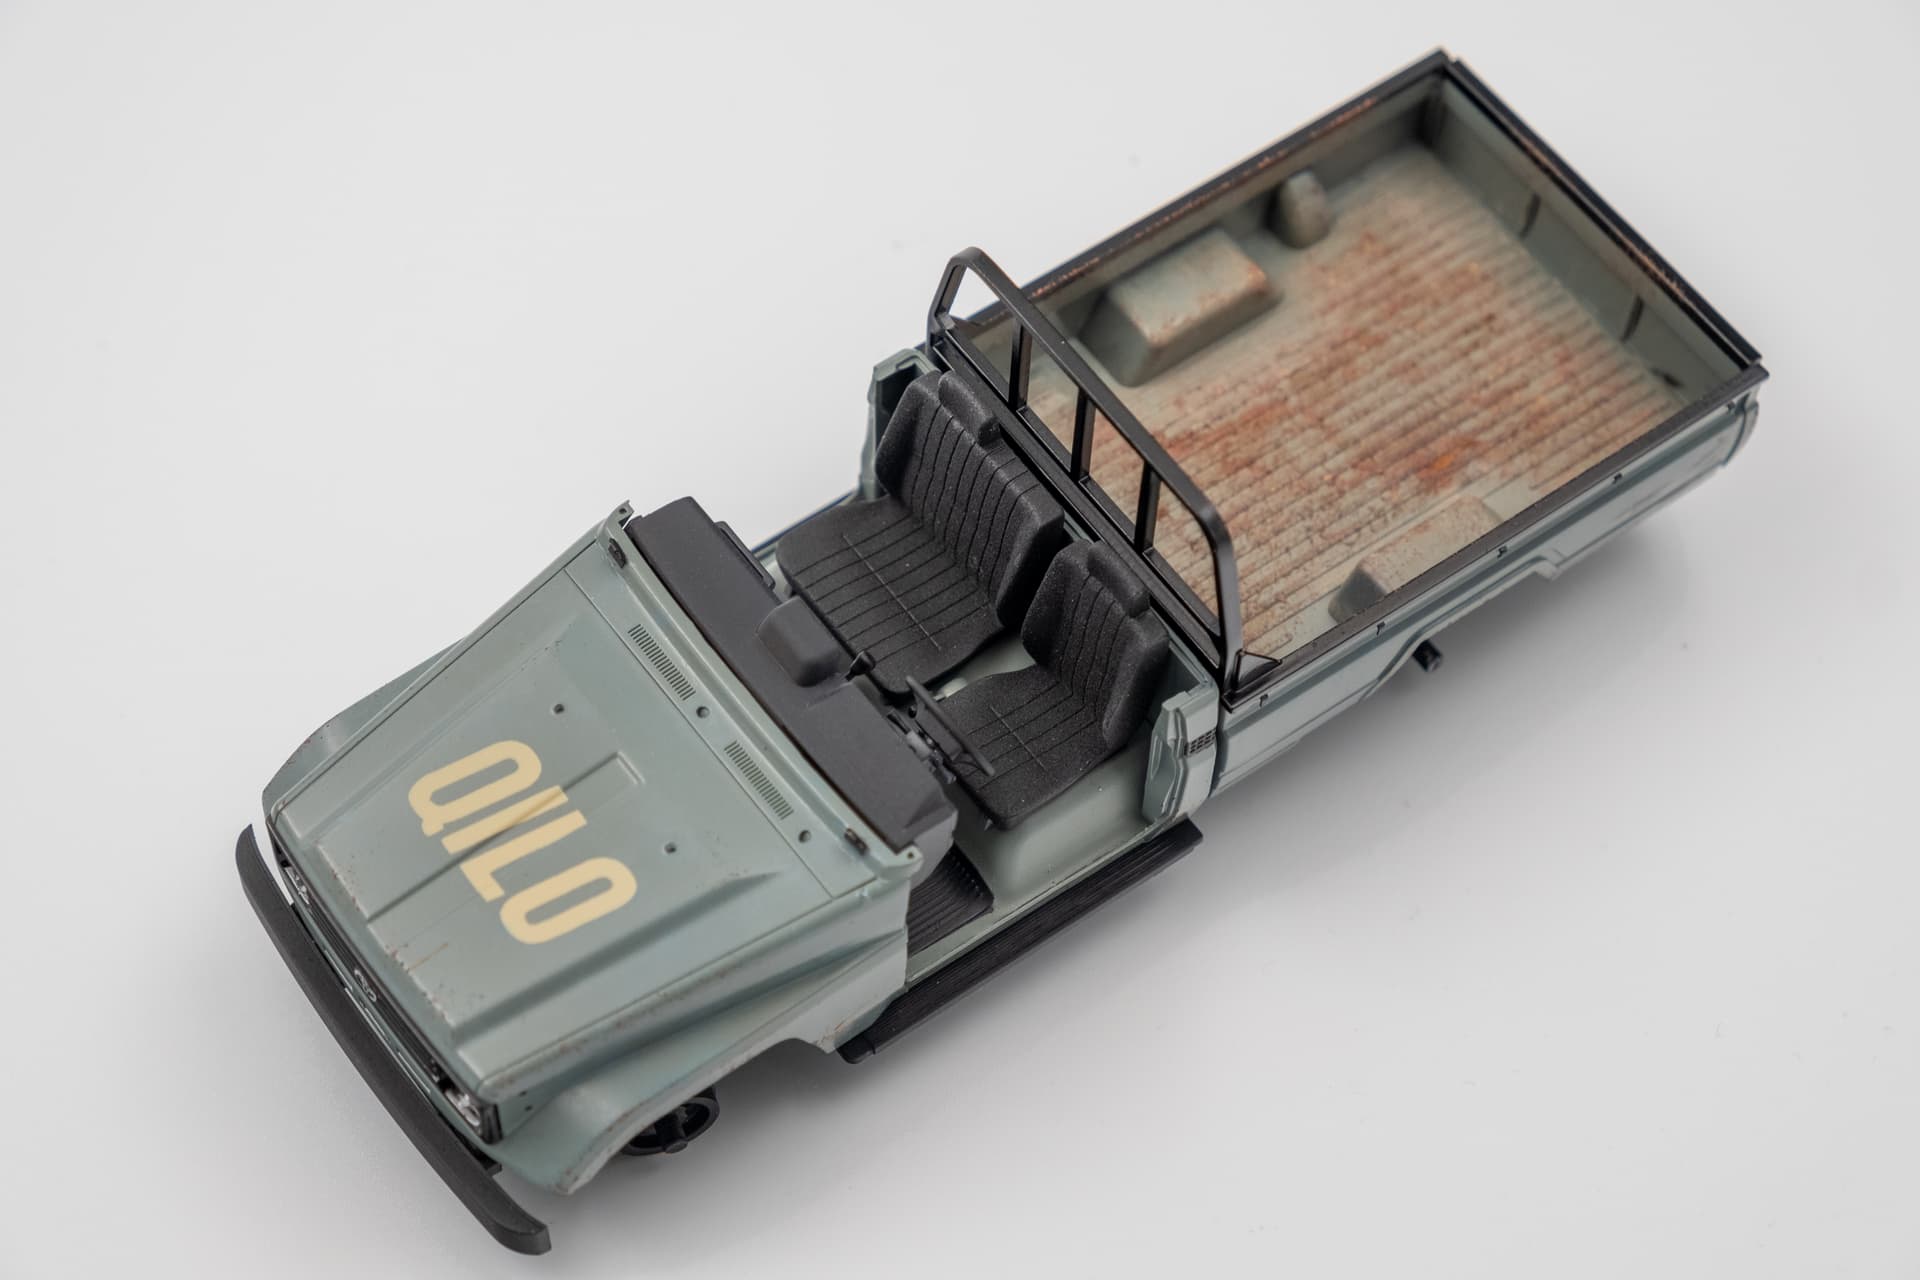
My goal with this was to give the pickup a life before it became a technical by roughing up the bed - the thought there is if it rolled off the line and the ZU-23-2 was slapped in the bed, it wouldn’t be nearly as scuffed and rusty, because there would hardly be anything in the bed with the ZU-23-2 in the way.
The rust on the vehicle itself has been done with a combination of Ammo by MiG’s “Rust” Oilbrusher and AK Interactive’s 3rd Gen acrylic rust set. The support I-beams for the ZU-23-2 got the same Ammo by MiG U-Rust treatment as the exhaust.
Once I finish the rusting, it’ll be time for some OPR, then washes, some fuel stains, dust, some more fuel stains, and we’ll see what it needs from there. Oh! and I need to do the same to the ZU-23-2.
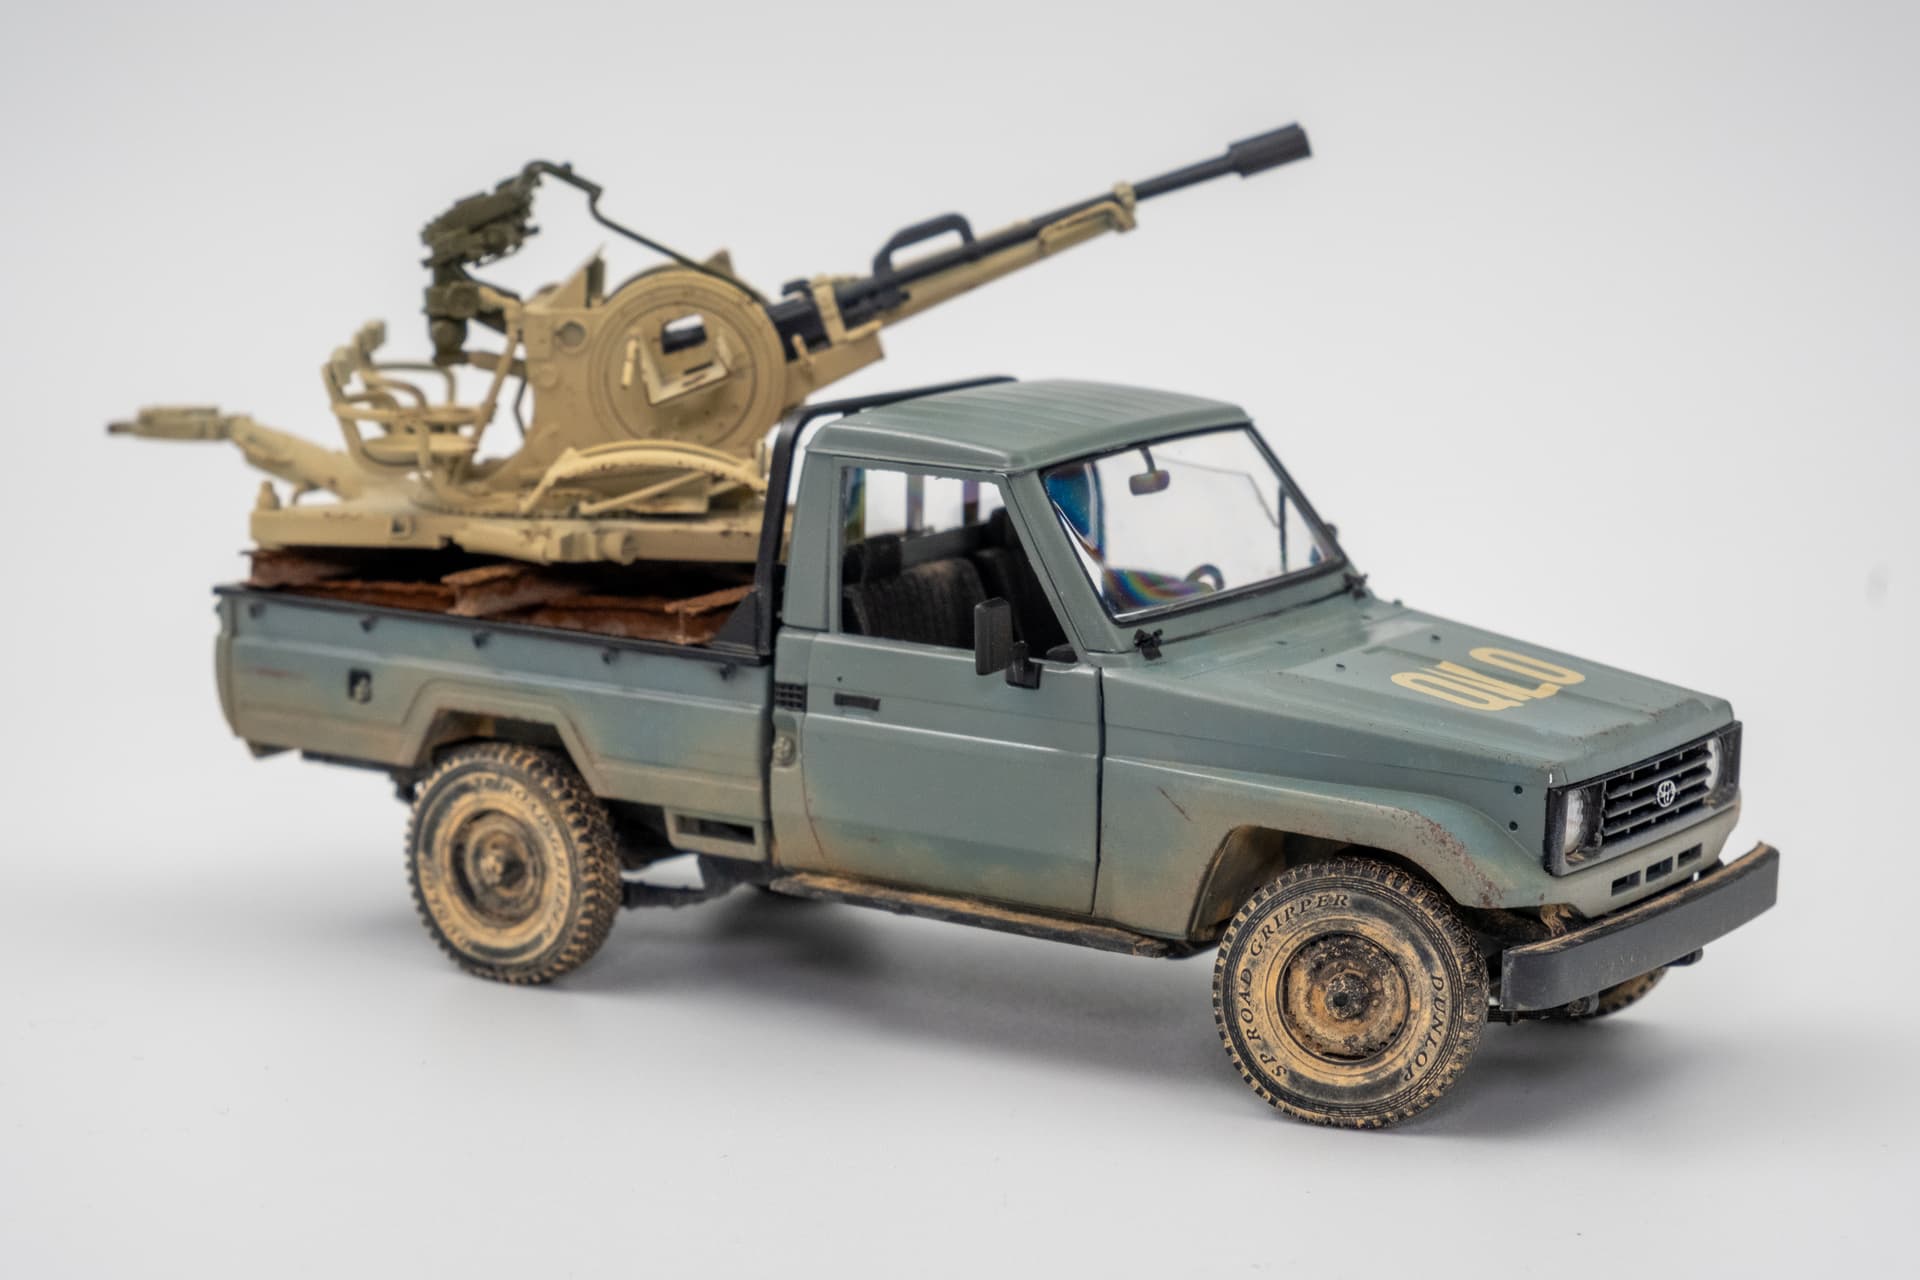
I’ve finished up the chipping on the pickup and added some scratches along the way. Once that was all dry I went through and did a pinwash to add some further tonal variation to the very uniform color.
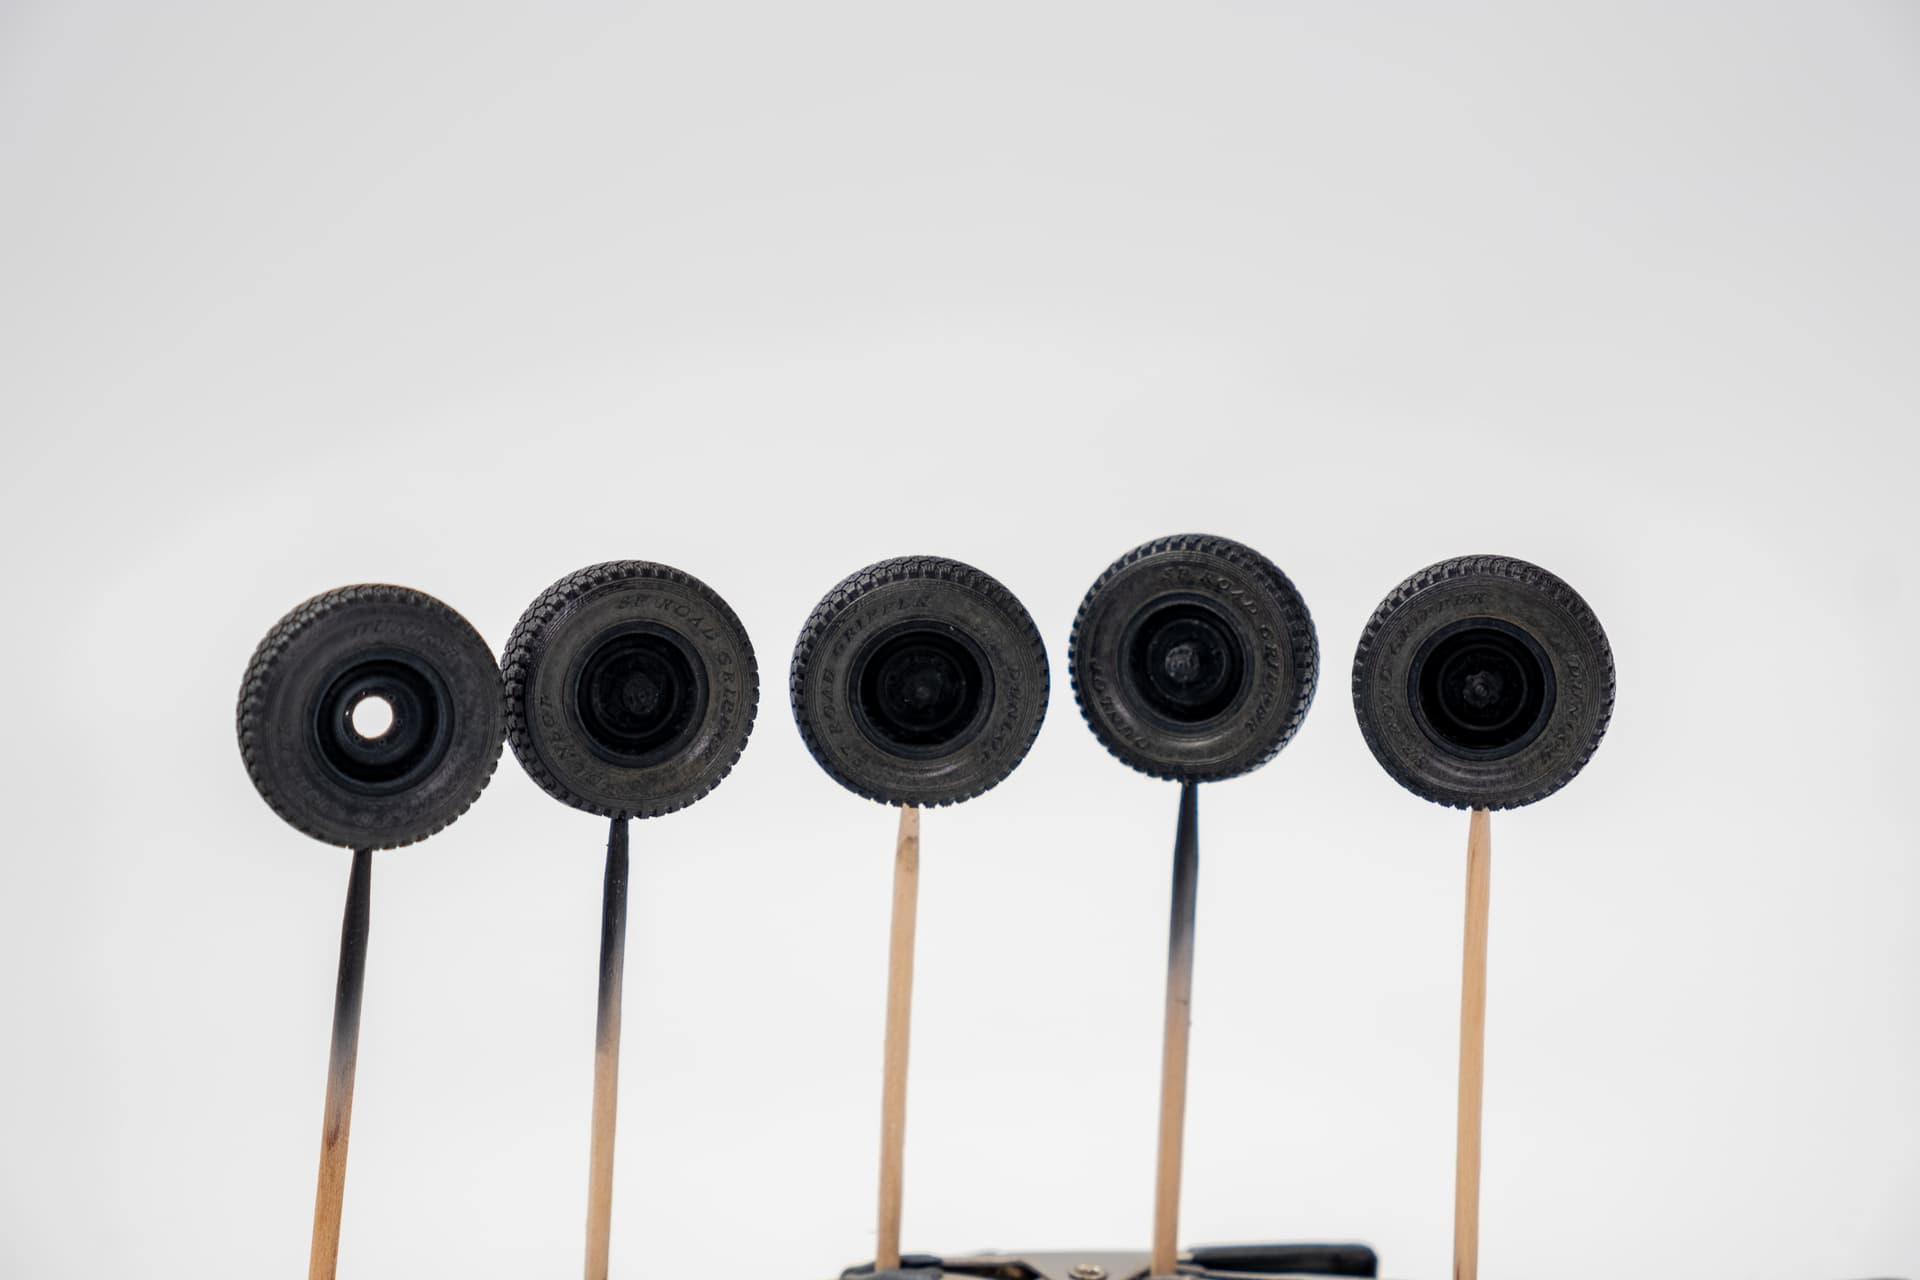
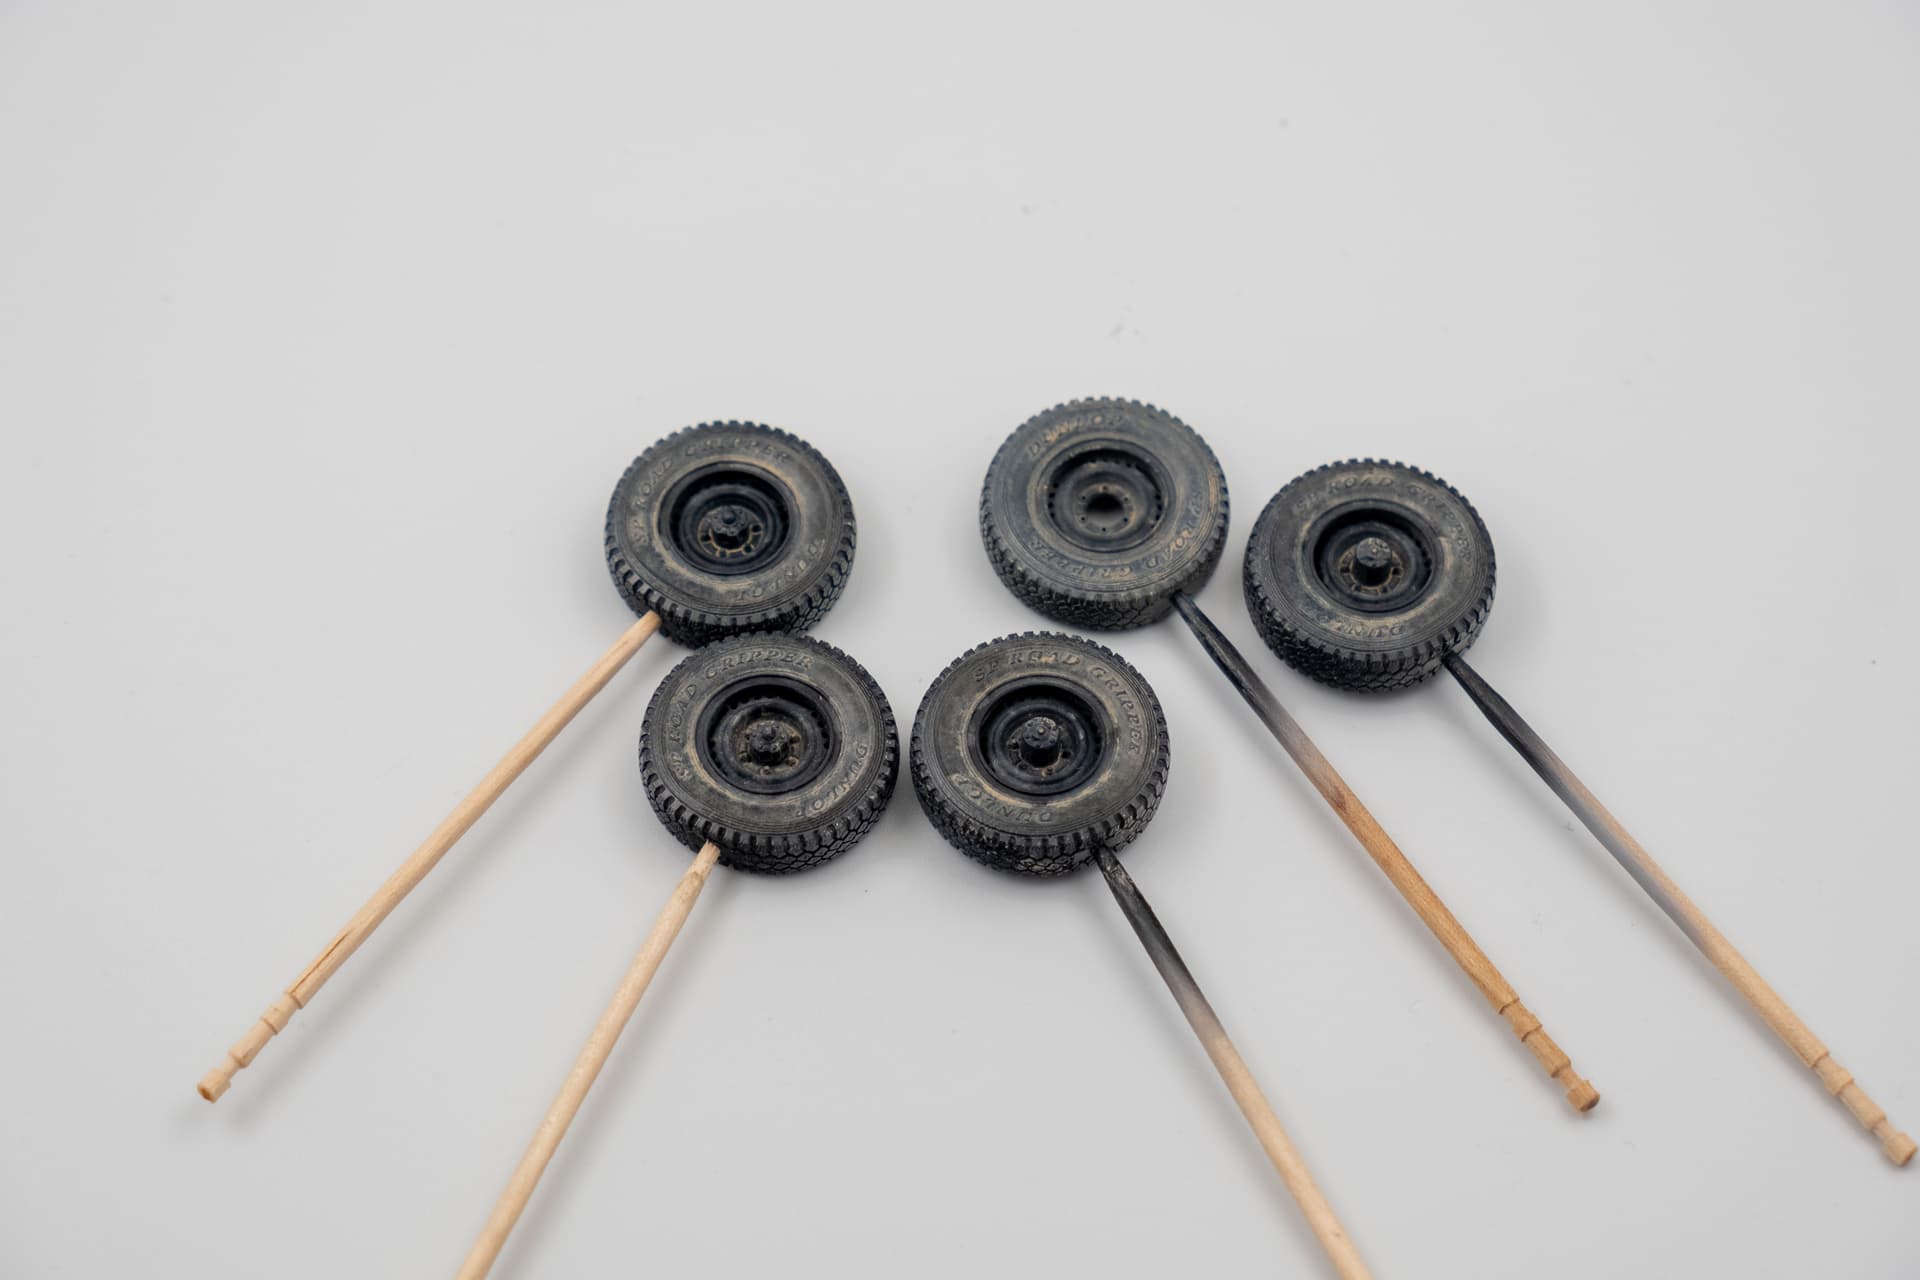
I also went through and laid down a base of dust using oils on the wheels (as well as the pickup bed, because it was dry and ready) before adding pigments. I went for a more uniform application of dust on the spare as opposed to buildup like on the main wheels considering the spare just sits in the pickup bed and collects dust.
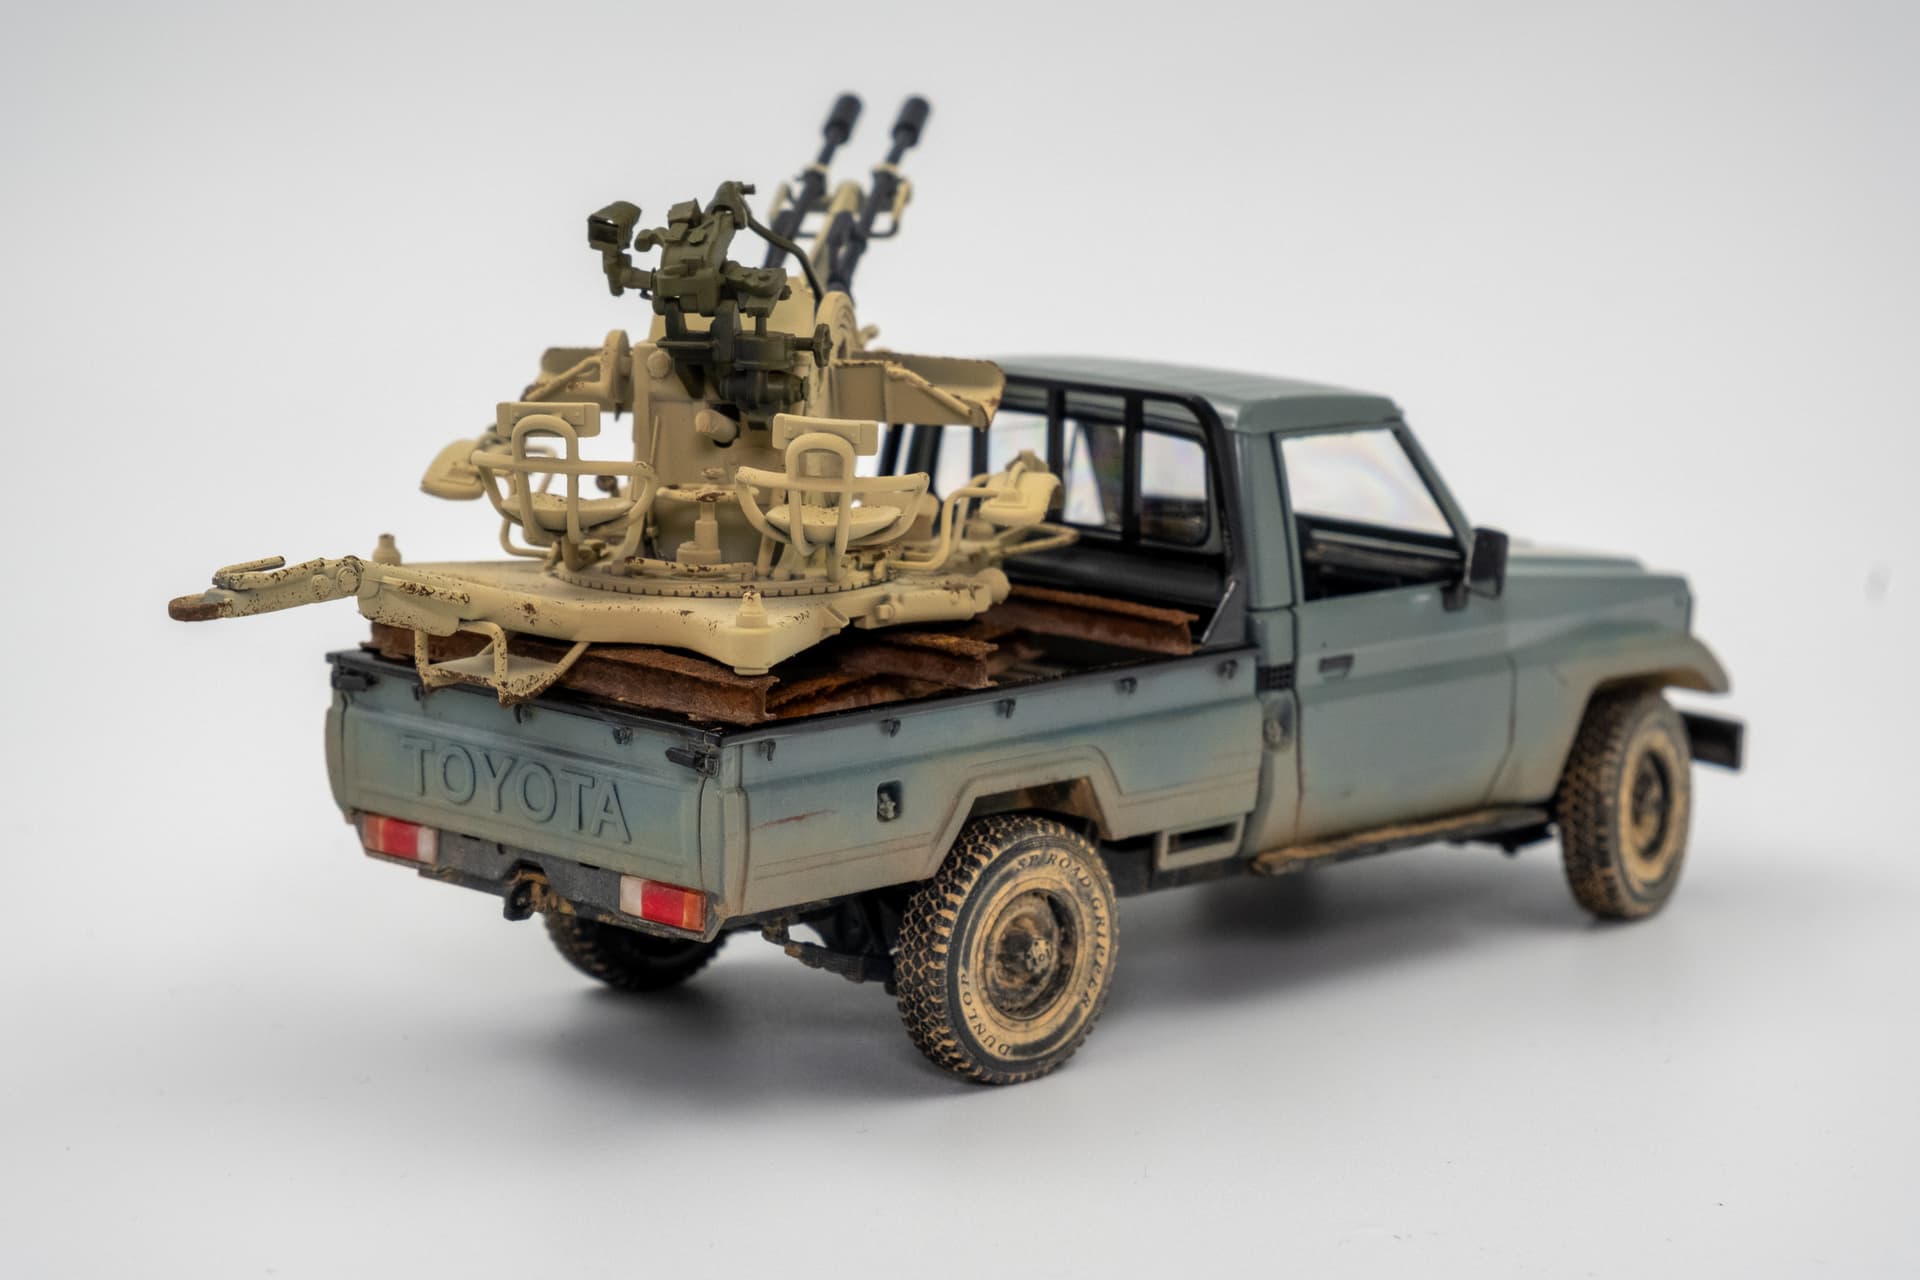
Nearing the end of weathering the truck, finally. Wheels have been attached for good along with the I beams for the ZU-23-2. There’s a few areas I need to apply a dust wash to, like around the bed’s tie down points. Once I sort out some goodies for the interior of the cab the roof can be glued on for good.