An exceptional build, you’re doing a brilliant job – how would you rate the kit generally for accuracy, parts quality etc? 
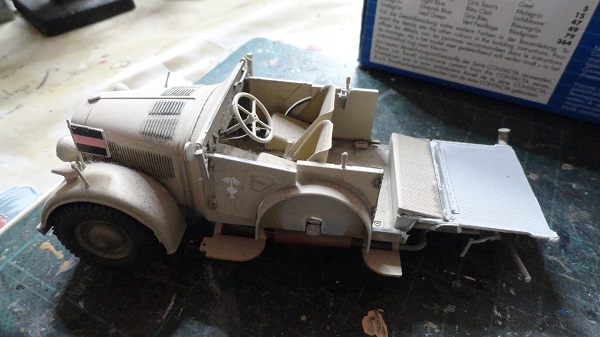
to be honest, I wouldn’t recommend this kit, the suspension was a nightmare. The kit interior was a great fit, very accurate, better than the academy interior, but the academy kit has better suspension.
This was absolutely epic reading through this and seeing all the progress images.
Im in awe. Your skills make this look easy .
Please tell me your doing another epic build soon.
1 Like
Hi Chris, thanks Mate, kind words. I’m making the diorama base for this Grant soon, I’ll put it right here.
1 Like
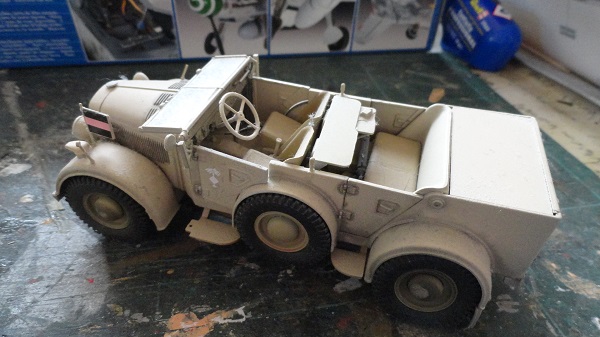
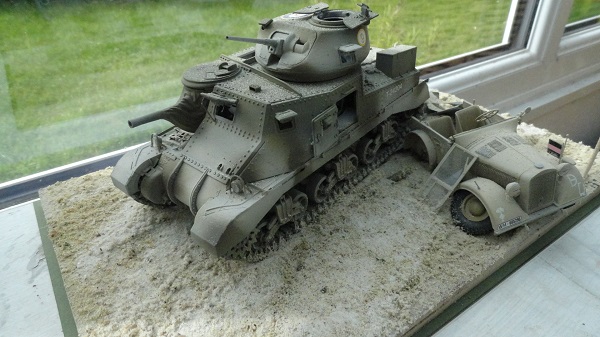
I’m experimenting with some ideas on a diorama base for the M3 Grant, this one involves the tank having run over a stalled and deserted/abandoned German car on a narrow breach through a minefield. I have this Funkwagen in the shelf of doom, so it’s time to make use of it.
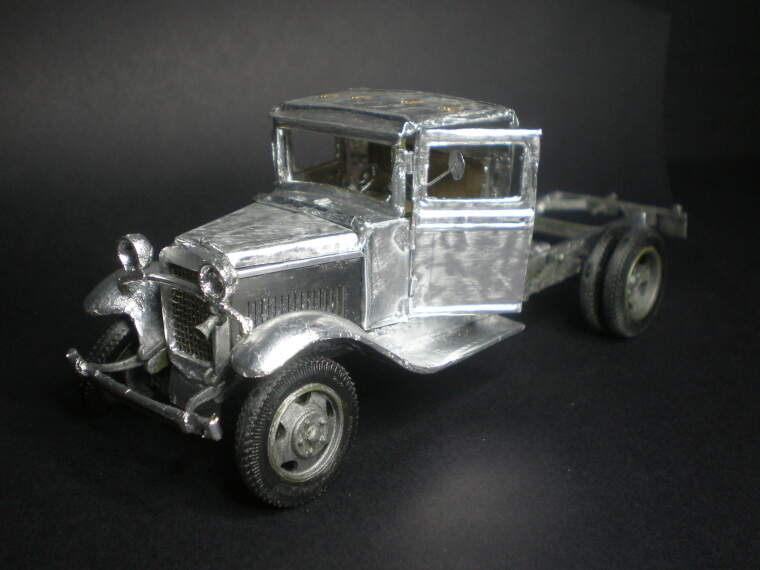
making a crushed car will involve some experimental work making the crushed body panels out of tin foil and painting them to match the uncrushed bonnet area, as the model doesn’t have an engine, it will be crushed and twisted and part buried in the sand.

if I can make this technique work it will form a debris trail leading to the rear of the grant, with crew taking pieces out of the tracks.
2 Likes
Looking forward to this part! I’ve used this technique, if you’re experimenting I might be able to save you some grief. The grade of foil: the heavier stuff used for baking trays is usually better, just as malleable but sturdier. The thin foil on rolls is too fragile even if backed with (say) white glue after you’ve got the desired shape, it tends to crack & split along creases - sometimes not apparent until painted. Whatever foil you use, sand it (600 or 800 grade) before you work on it. If there’s a shiny side & dull side, use the dull side to face outwards. Good luck
1 Like
excellent advice Martin, I’ll take that all on board, many thanks.
1 Like
No worries hope it helps. Pls forgive the photo-bomb but just to illustrate how much stronger the baking-tray-grade stuff is, it can stand up on its own…
…until this happened…

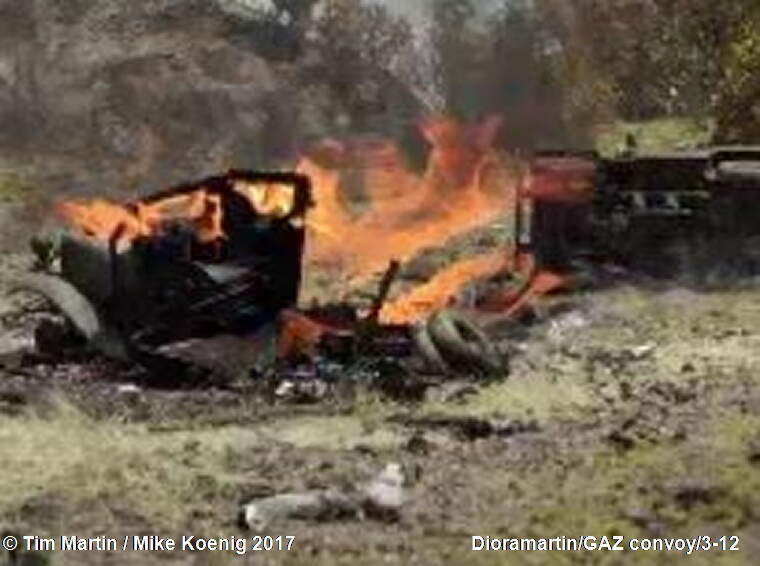
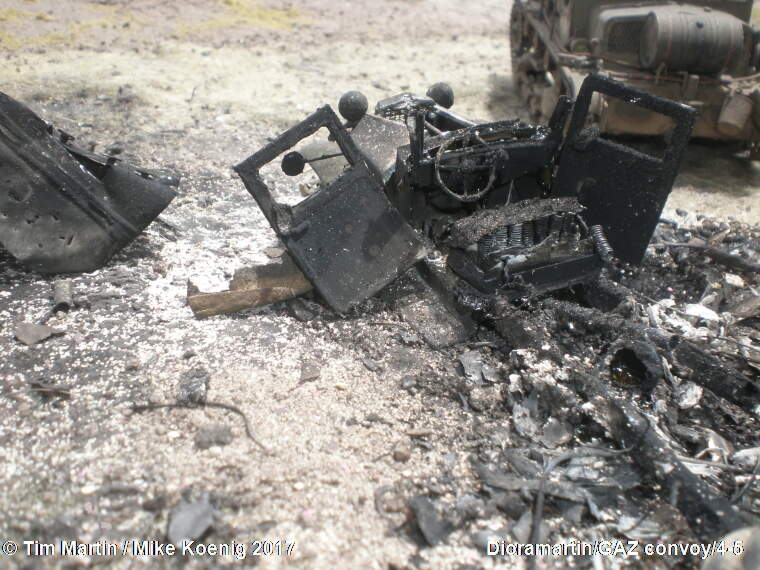
If I tried the pyro again I’d do it differently. Anyhow it sounds like you’re going for crushing rather than burning which will be far more controllable & should look amazing, have fun with it
2 Likes
You should do a post just on this! Great photos!
Ken
excellent attention to detail their Tim, looks like a war movie special effect sequence.
constructing body panels with an inner and outer panel just like a real car body is made, in real life they are spot welded together to make a stiff, strong panel.

the boot (trunk) area is going to be crushed, so the rear door and top panels are going to be crushed too.
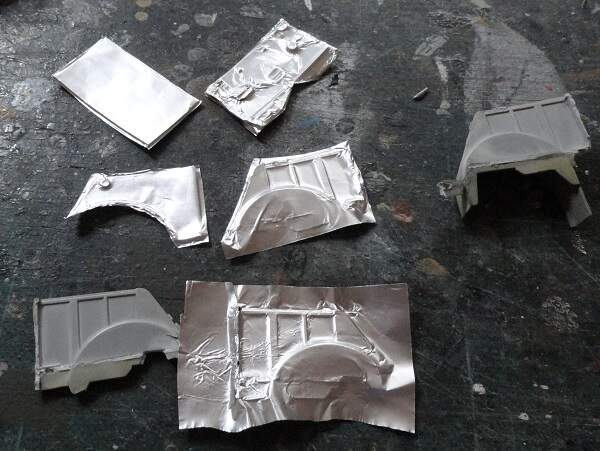
painted in grey primer from a spray can.

I may cyro them to the base once I’ve twisted and deformed it a little.
4 Likes
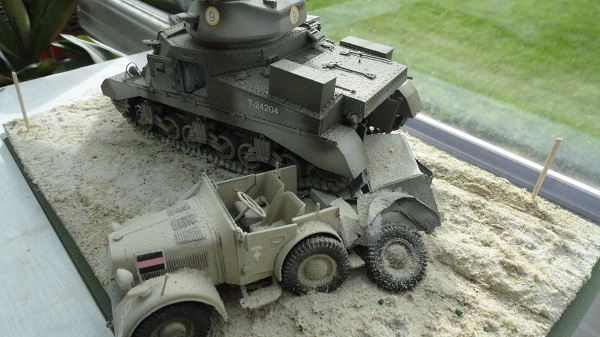
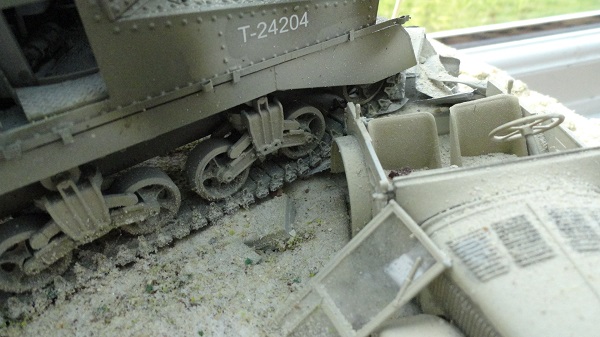
having partly reconstructed the rear of the car with the crushable foil body panels, it’s time to actually crush the car using the tank.
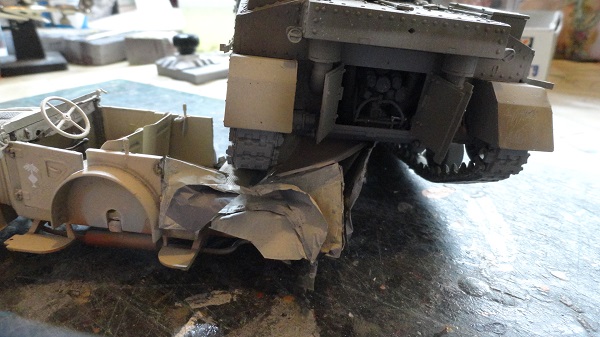
the car is going to be pressed low into the sandy base of the diorama so the track bottom run is almost in contact with the surface.

I’ll place the model on t5he sand and then rebuild it in situ with all the stowage, bent axles/wheels ect
5 Likes
Please send this one in for a feature for the site as I think it will prove popular.
3 Likes
thanks cmot, if this is successful as a diorama I will do as you suggest, just got a lot to sort out with it first, and it’s dragged a bit due to lack of modelling time, outside pressure, but it’s coming along steadily.
1 Like
Wow those crushed parts look really good! Very convincing!
1 Like
Crushed metal looks like crushed metal.
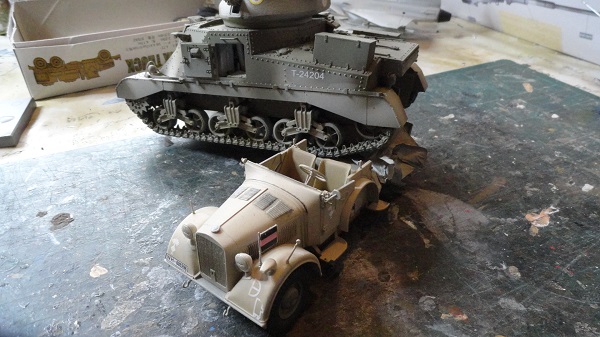
placing the tank and truck on the diorama base, the pair need to move 20mm inboard to clear the edge for the glass to come down.
plenty more to go on here, figures, maybe sappers clearing the mine field either side of the narrow breech.
some items spewed out of the car might look good too.
4 Likes
a great film clip to watch for inspiration is this one from what if they gave a war and nobody came, similar running gear to the grant, looks like an M7B2 post war version. excuse the zany 70’s movie, go to 34 seconds.

1 Like
@Grouser . The crushed metal looks very convincing . If I might say so , the square edge wher the body begins again could use some bending as well . Or maybe just some tears along that edge.
I really like what your doing this is super challenging and your making it look good
1 Like
Grouser,
Just binge read this epic thread. The Grant was reason enough to follow along but that dio is going to be something else when it’s done. I’m very much looking forward to the final act!
1 Like