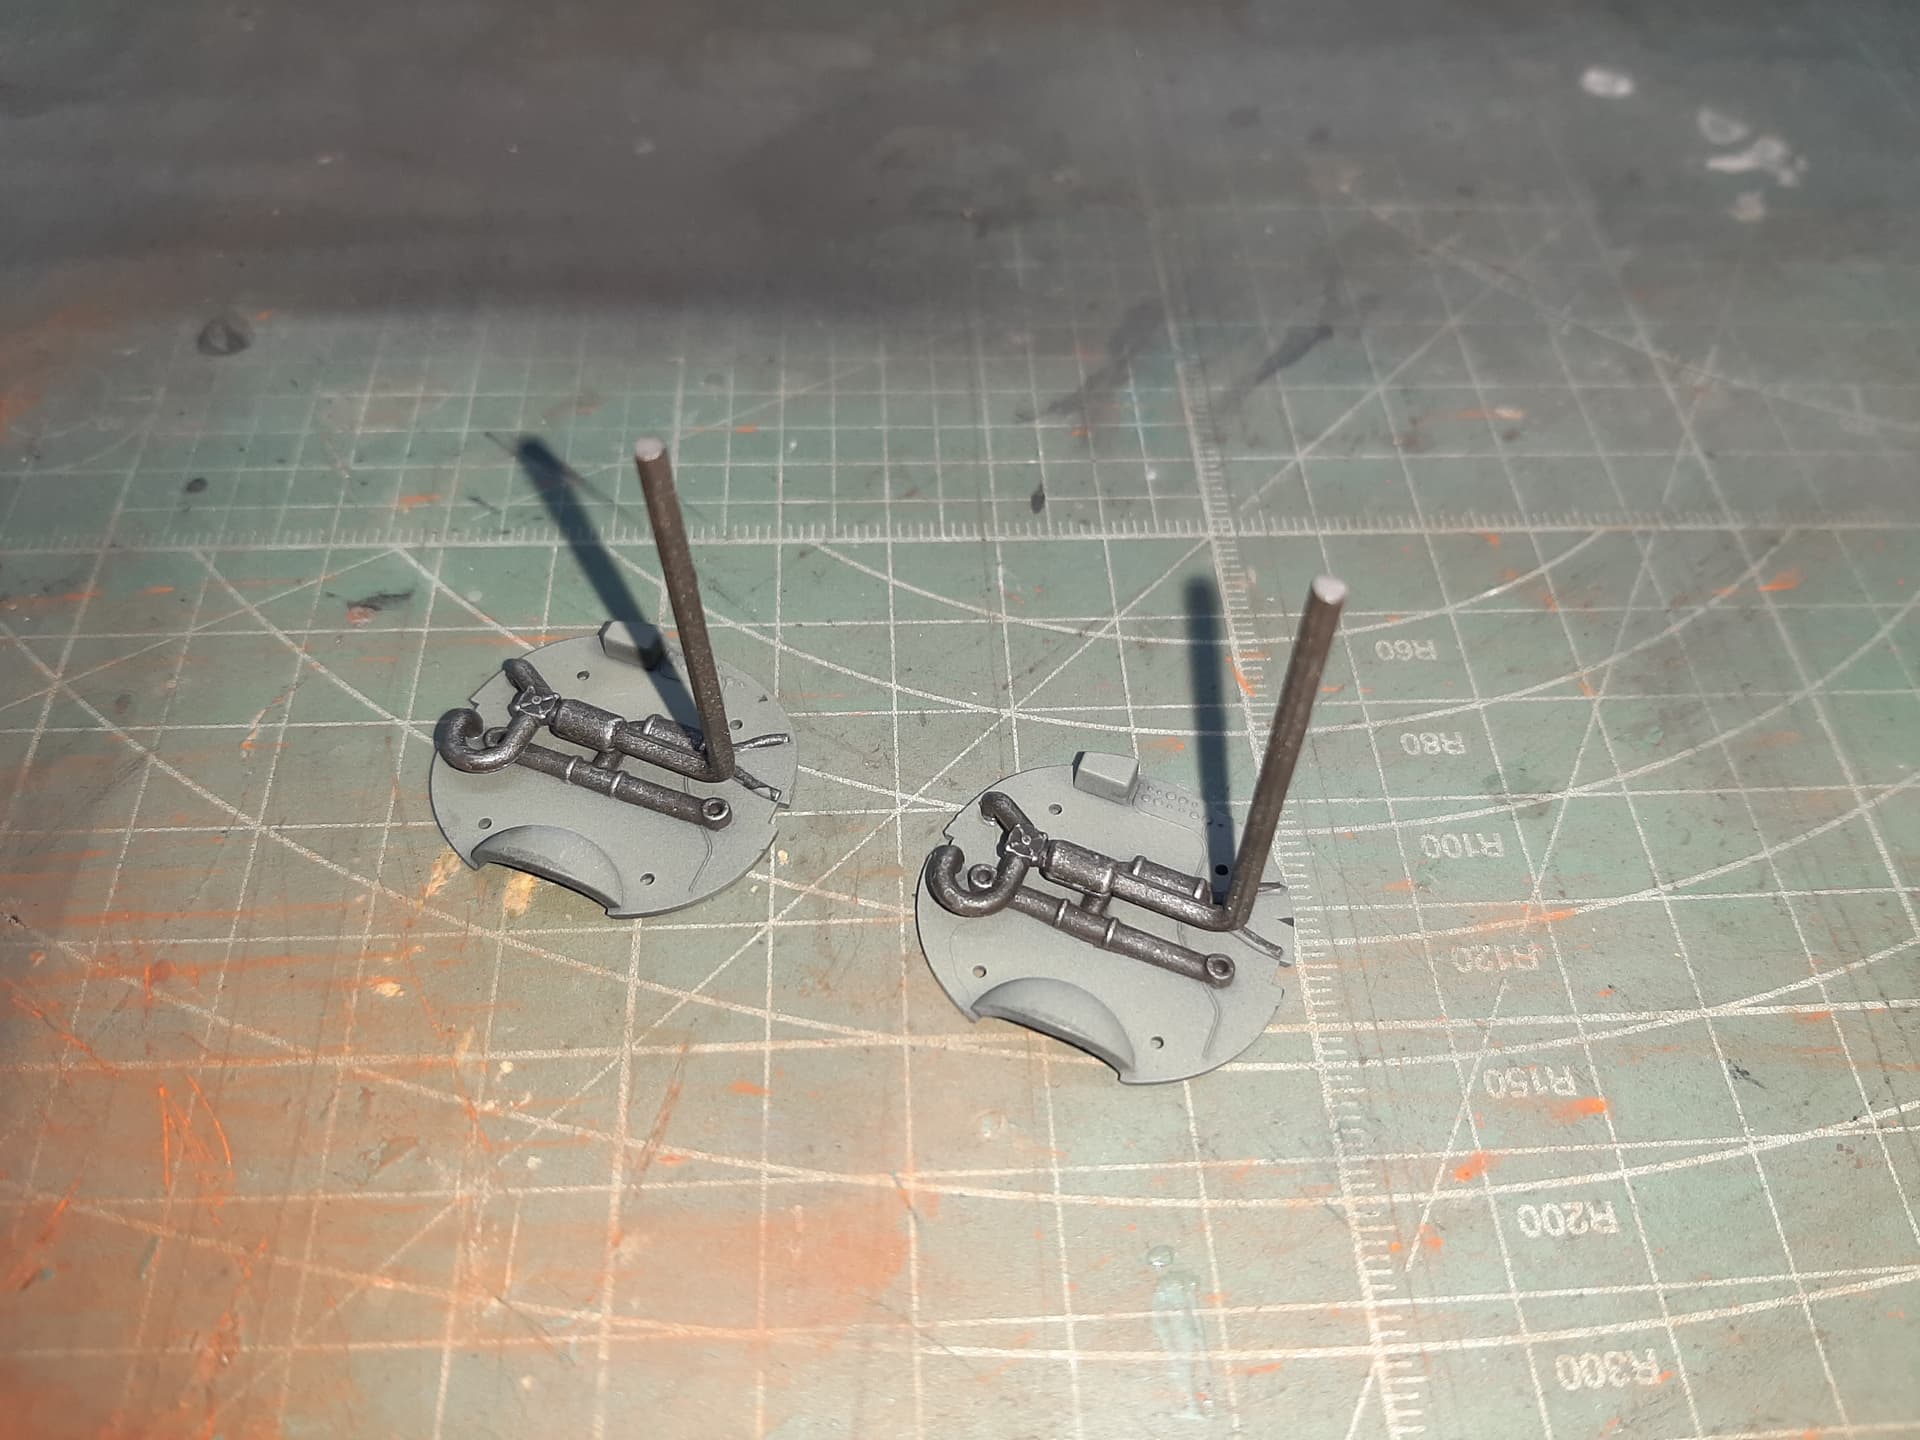
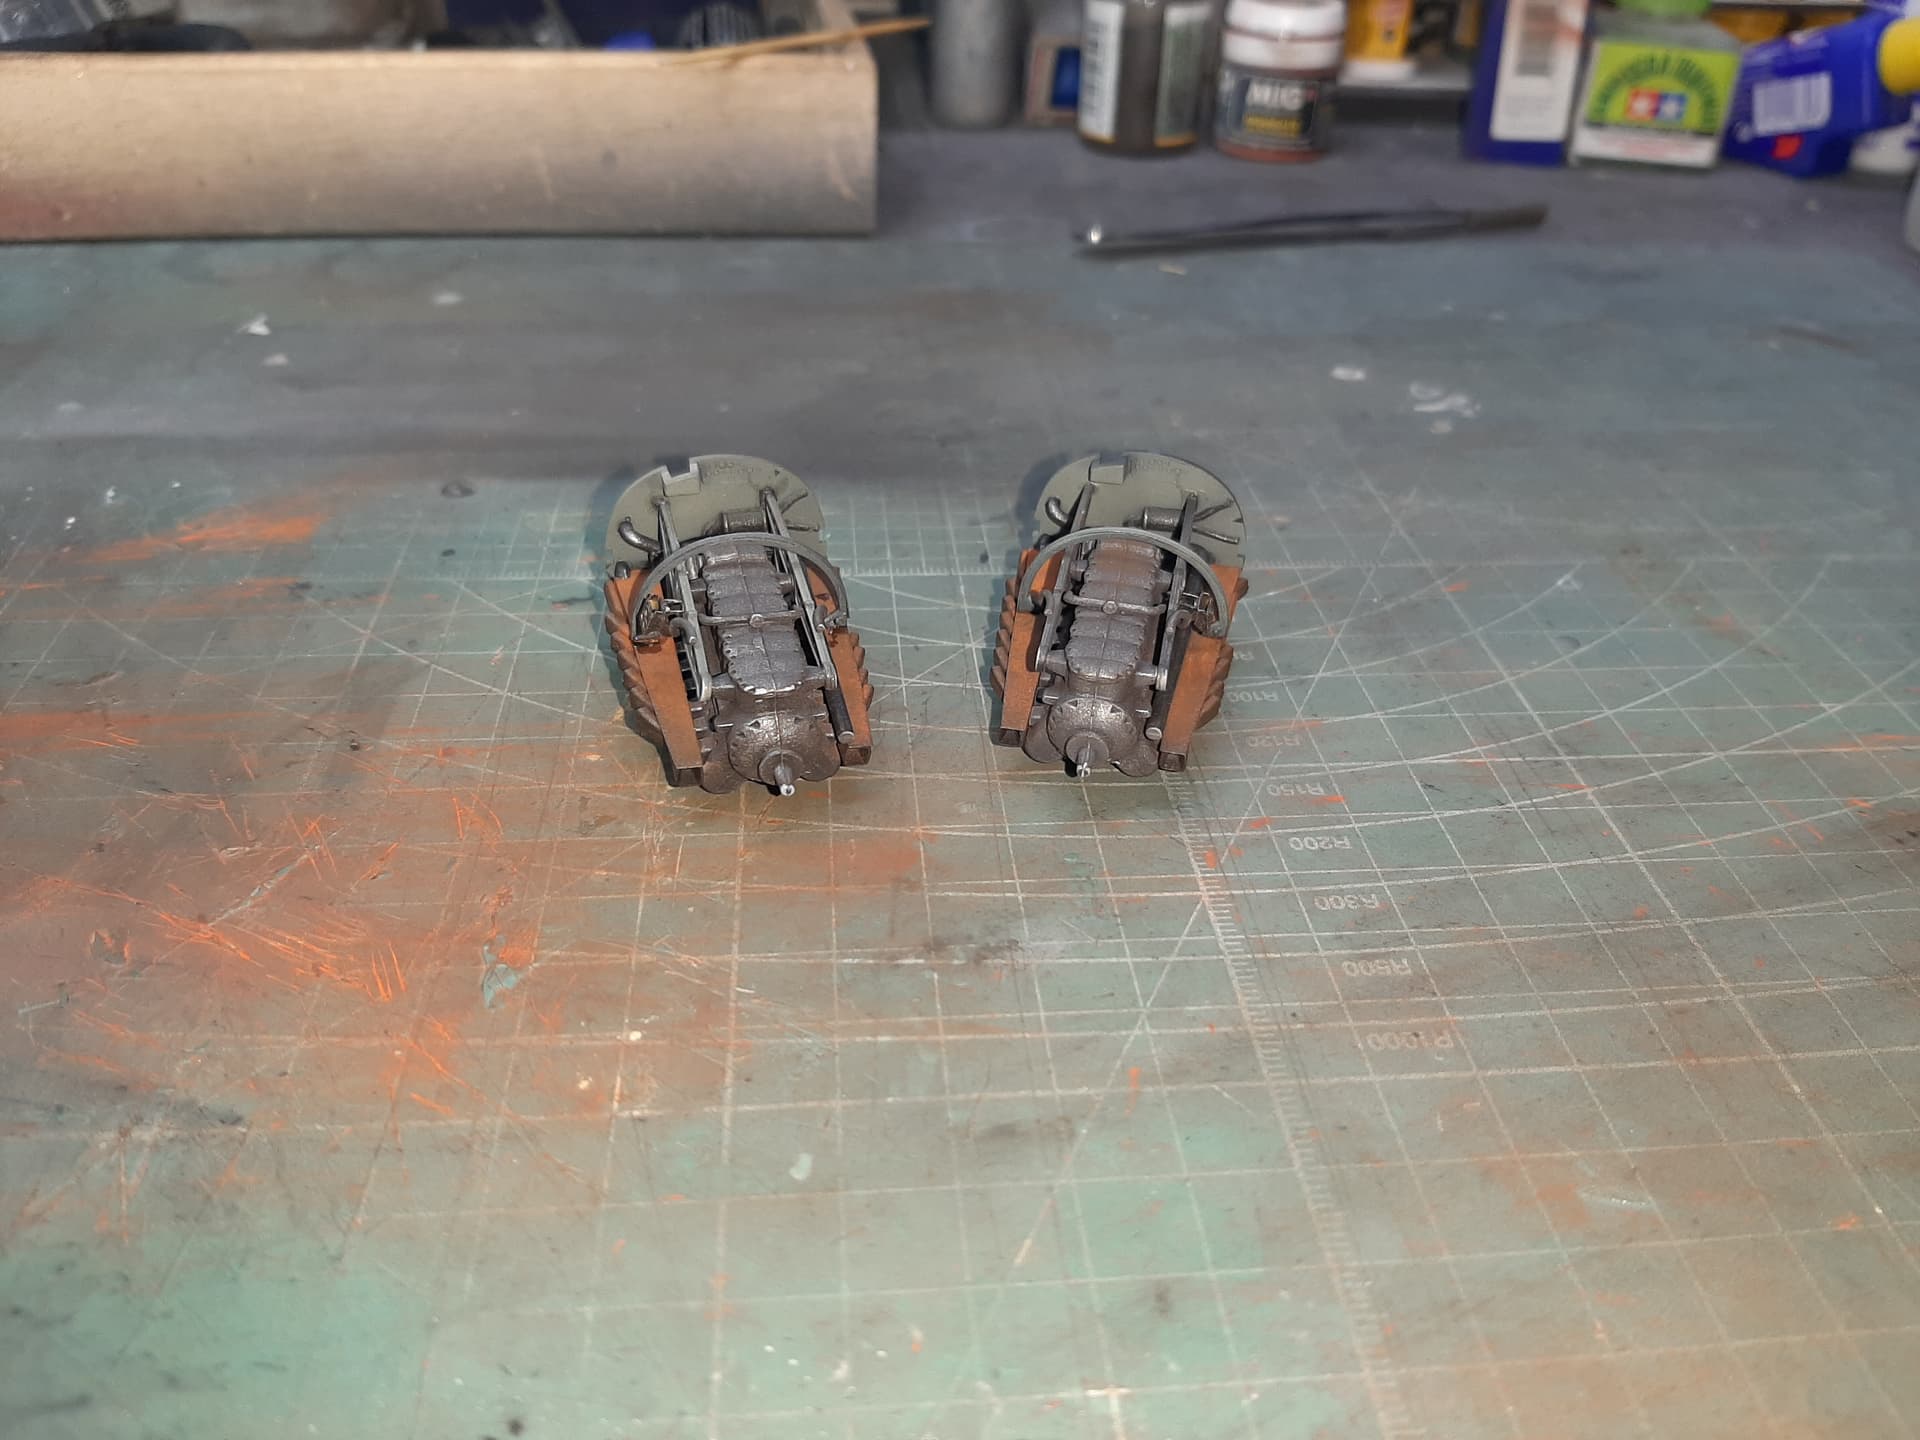
Okay, the main landing gear, which must be constructed and installed on the wing undersides before the engine cowlings are fitted.
These went together well, despite being quite fiddly.
Okay, the main landing gear, which must be constructed and installed on the wing undersides before the engine cowlings are fitted.
These went together well, despite being quite fiddly.
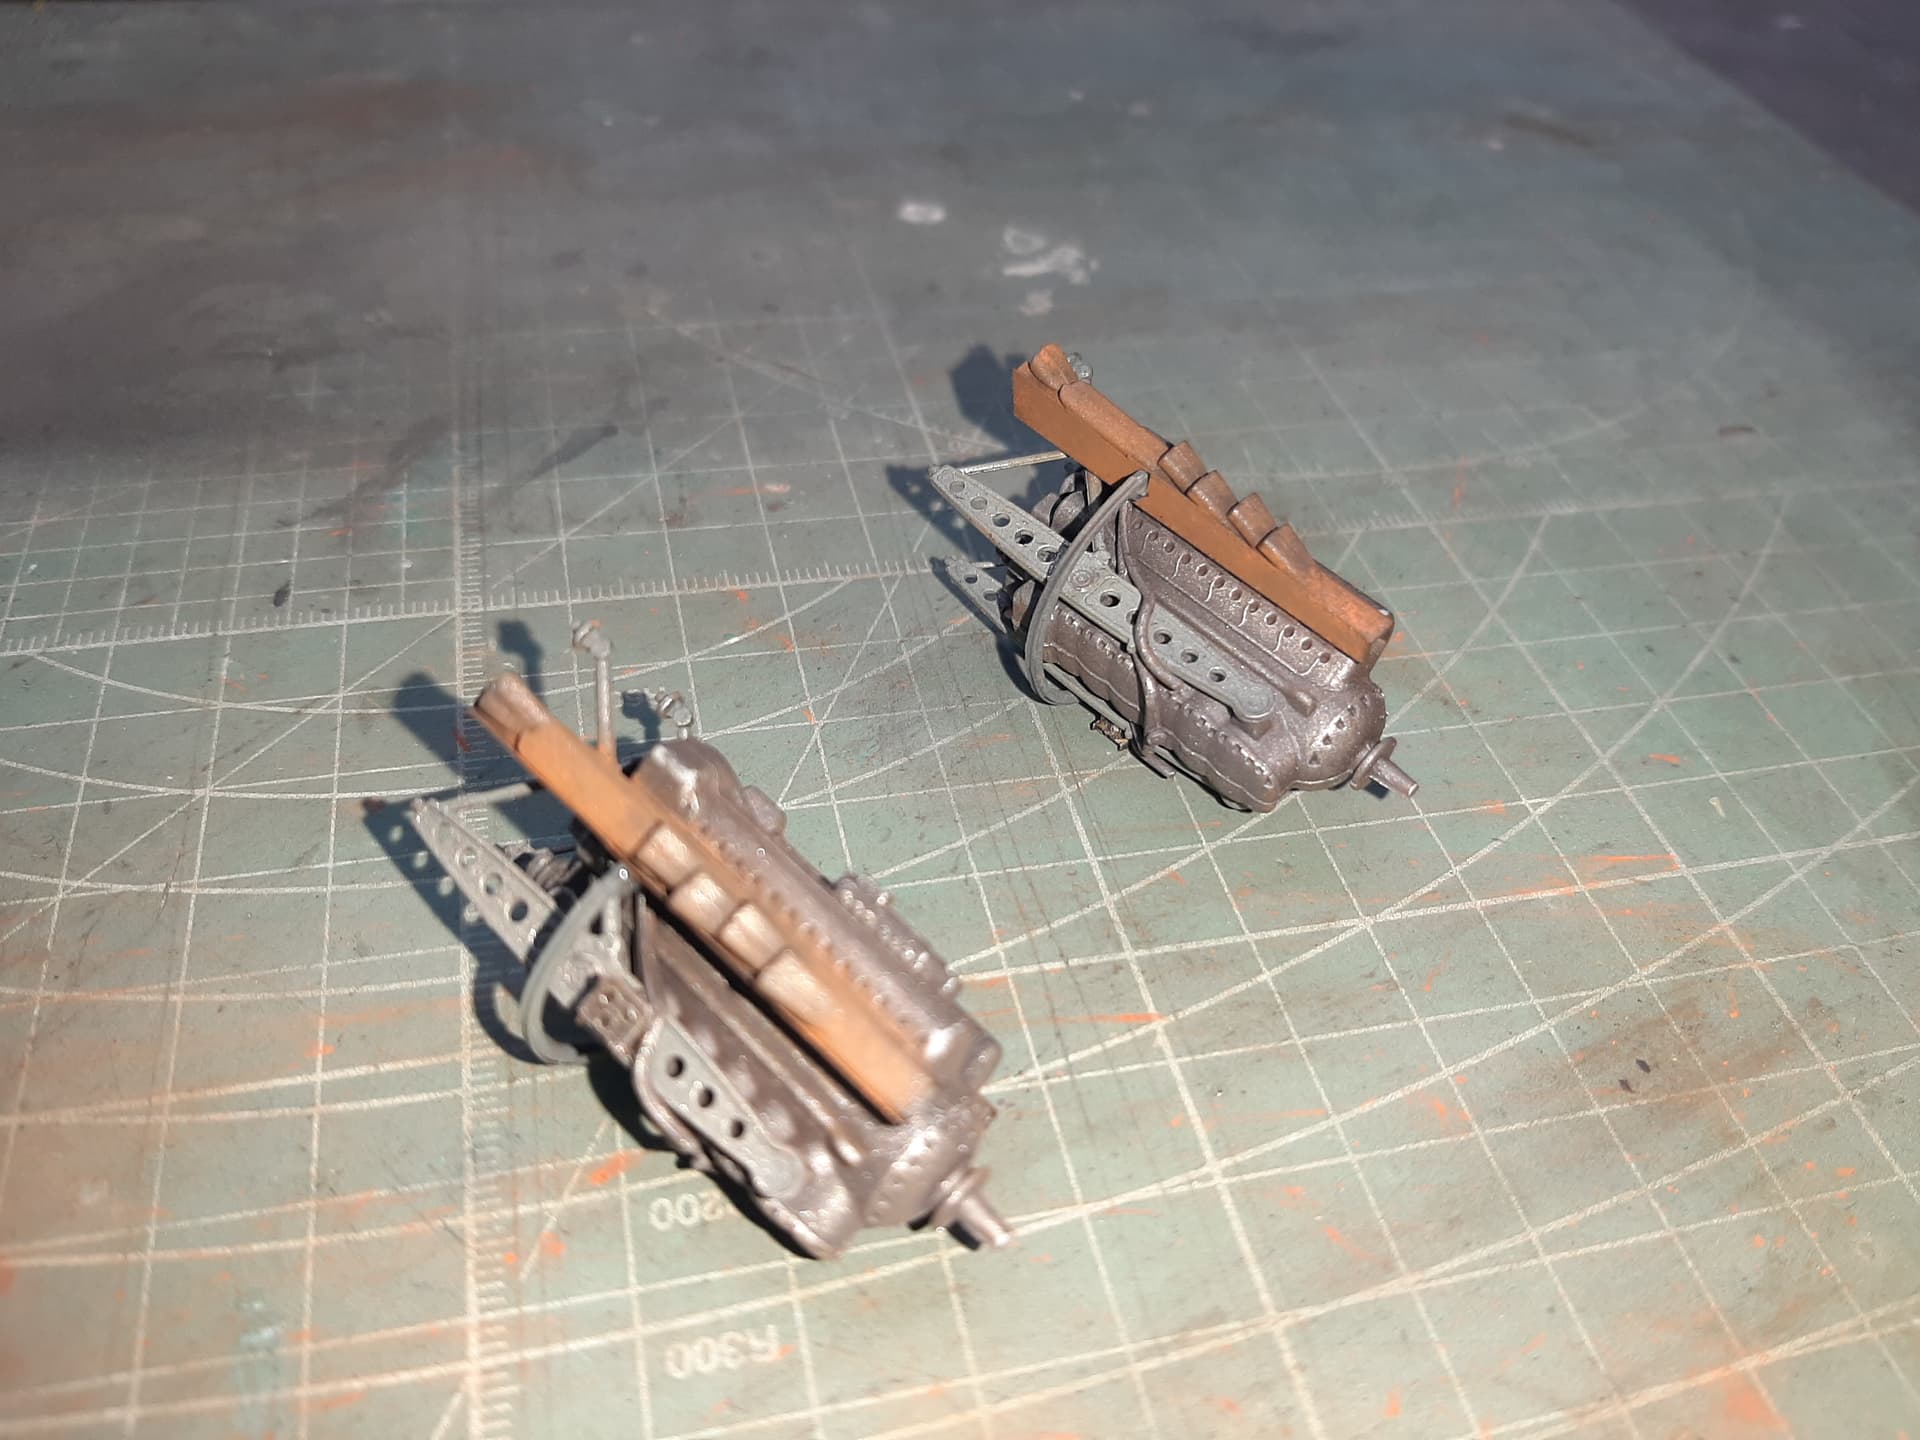
Now construction on the engine rear bulkheads.
Went together easily and at this stage, all seemed well.
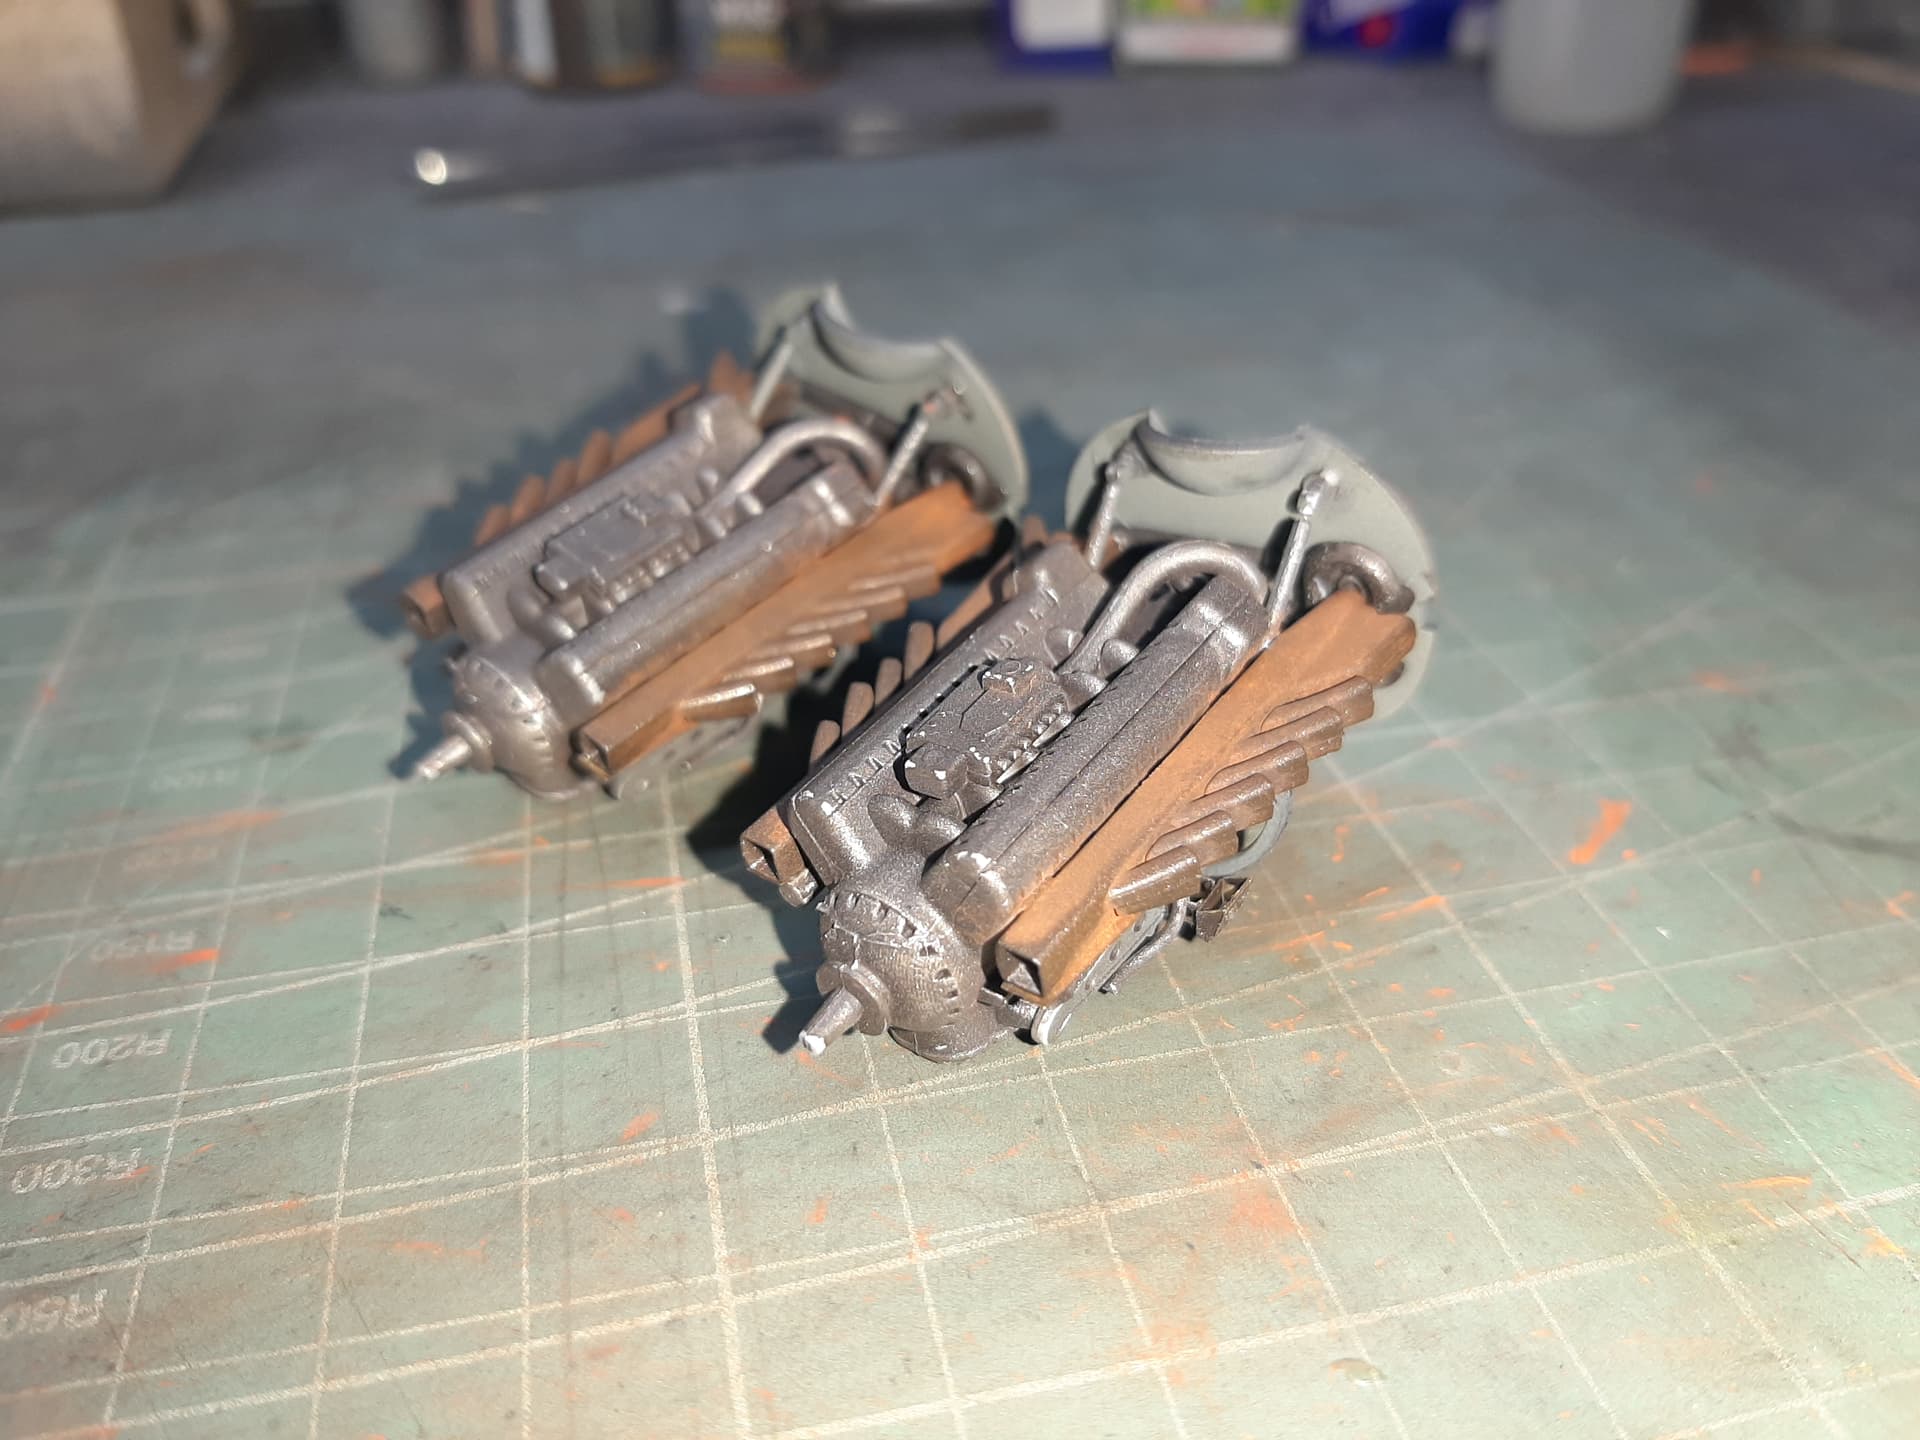
Now the engines mated to the bulkheads.
What I didn’t realise, and something that confused me a lot initially, is the engines are actually mounted upside down in the aircraft.
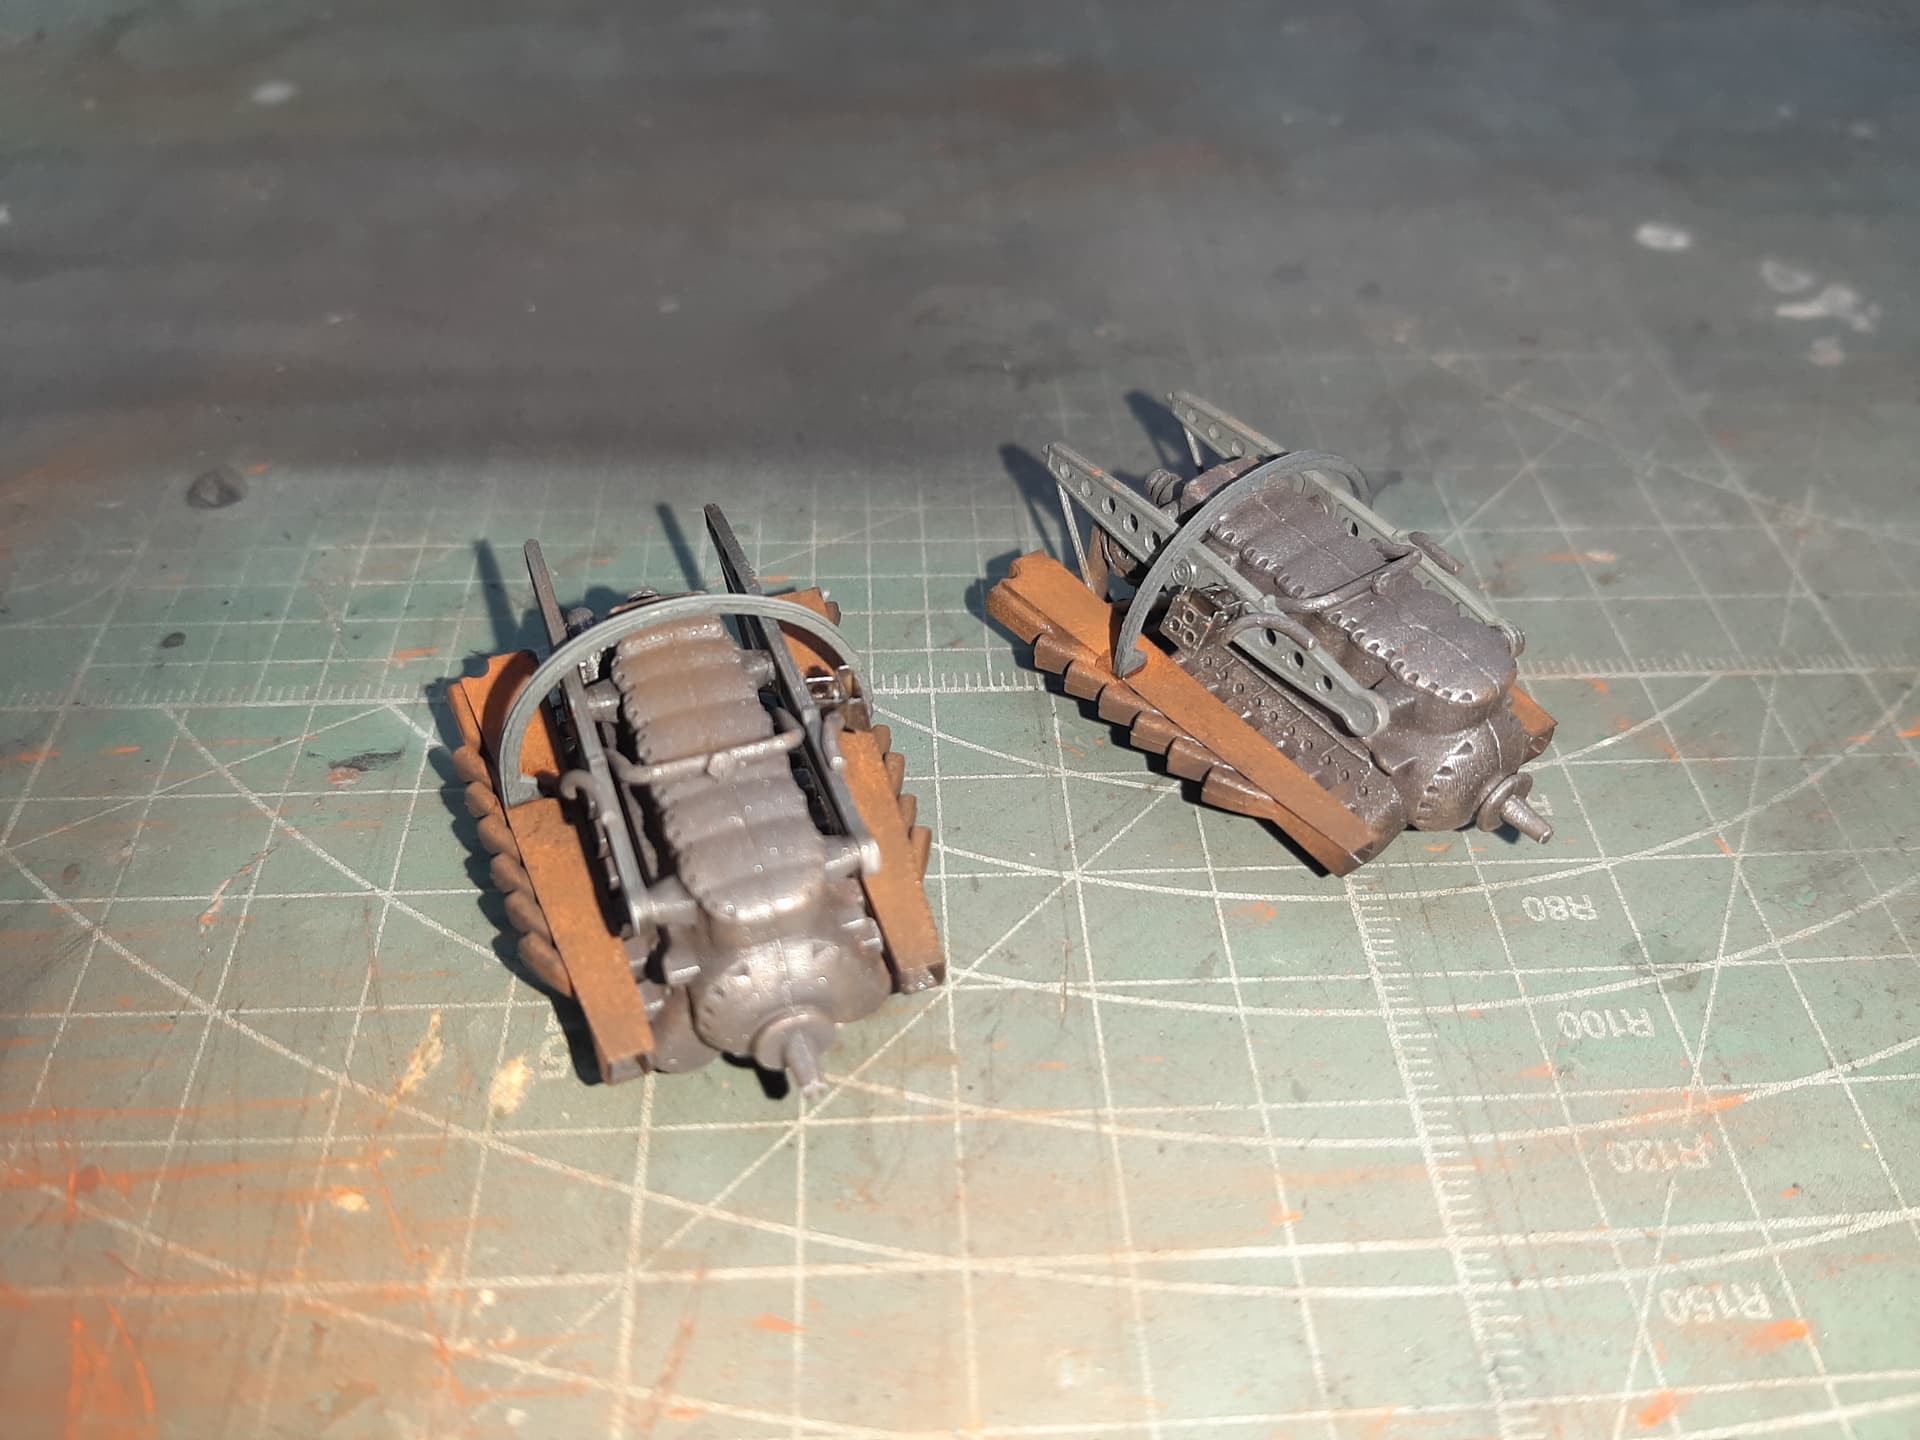
Now this is where it began to a go horribly wrong, although I wasn’t to know it at the time. The engine support struts didn’t want to line up with the mounting holes on the bulkhead and the engine wouldn’t sit fully back against the bulkhead because the exhaust manifolds were quite literally a tiny fraction too far rearwards. I basically ‘made’ them fit (don’t do it, just don’t - read on).
I’m convinced I followed the instructions, and when all was said and done, it was pretty close to where they should have been.
I am enjoying watching your progress, keep it up bud.
Now we come to the sorry bit…
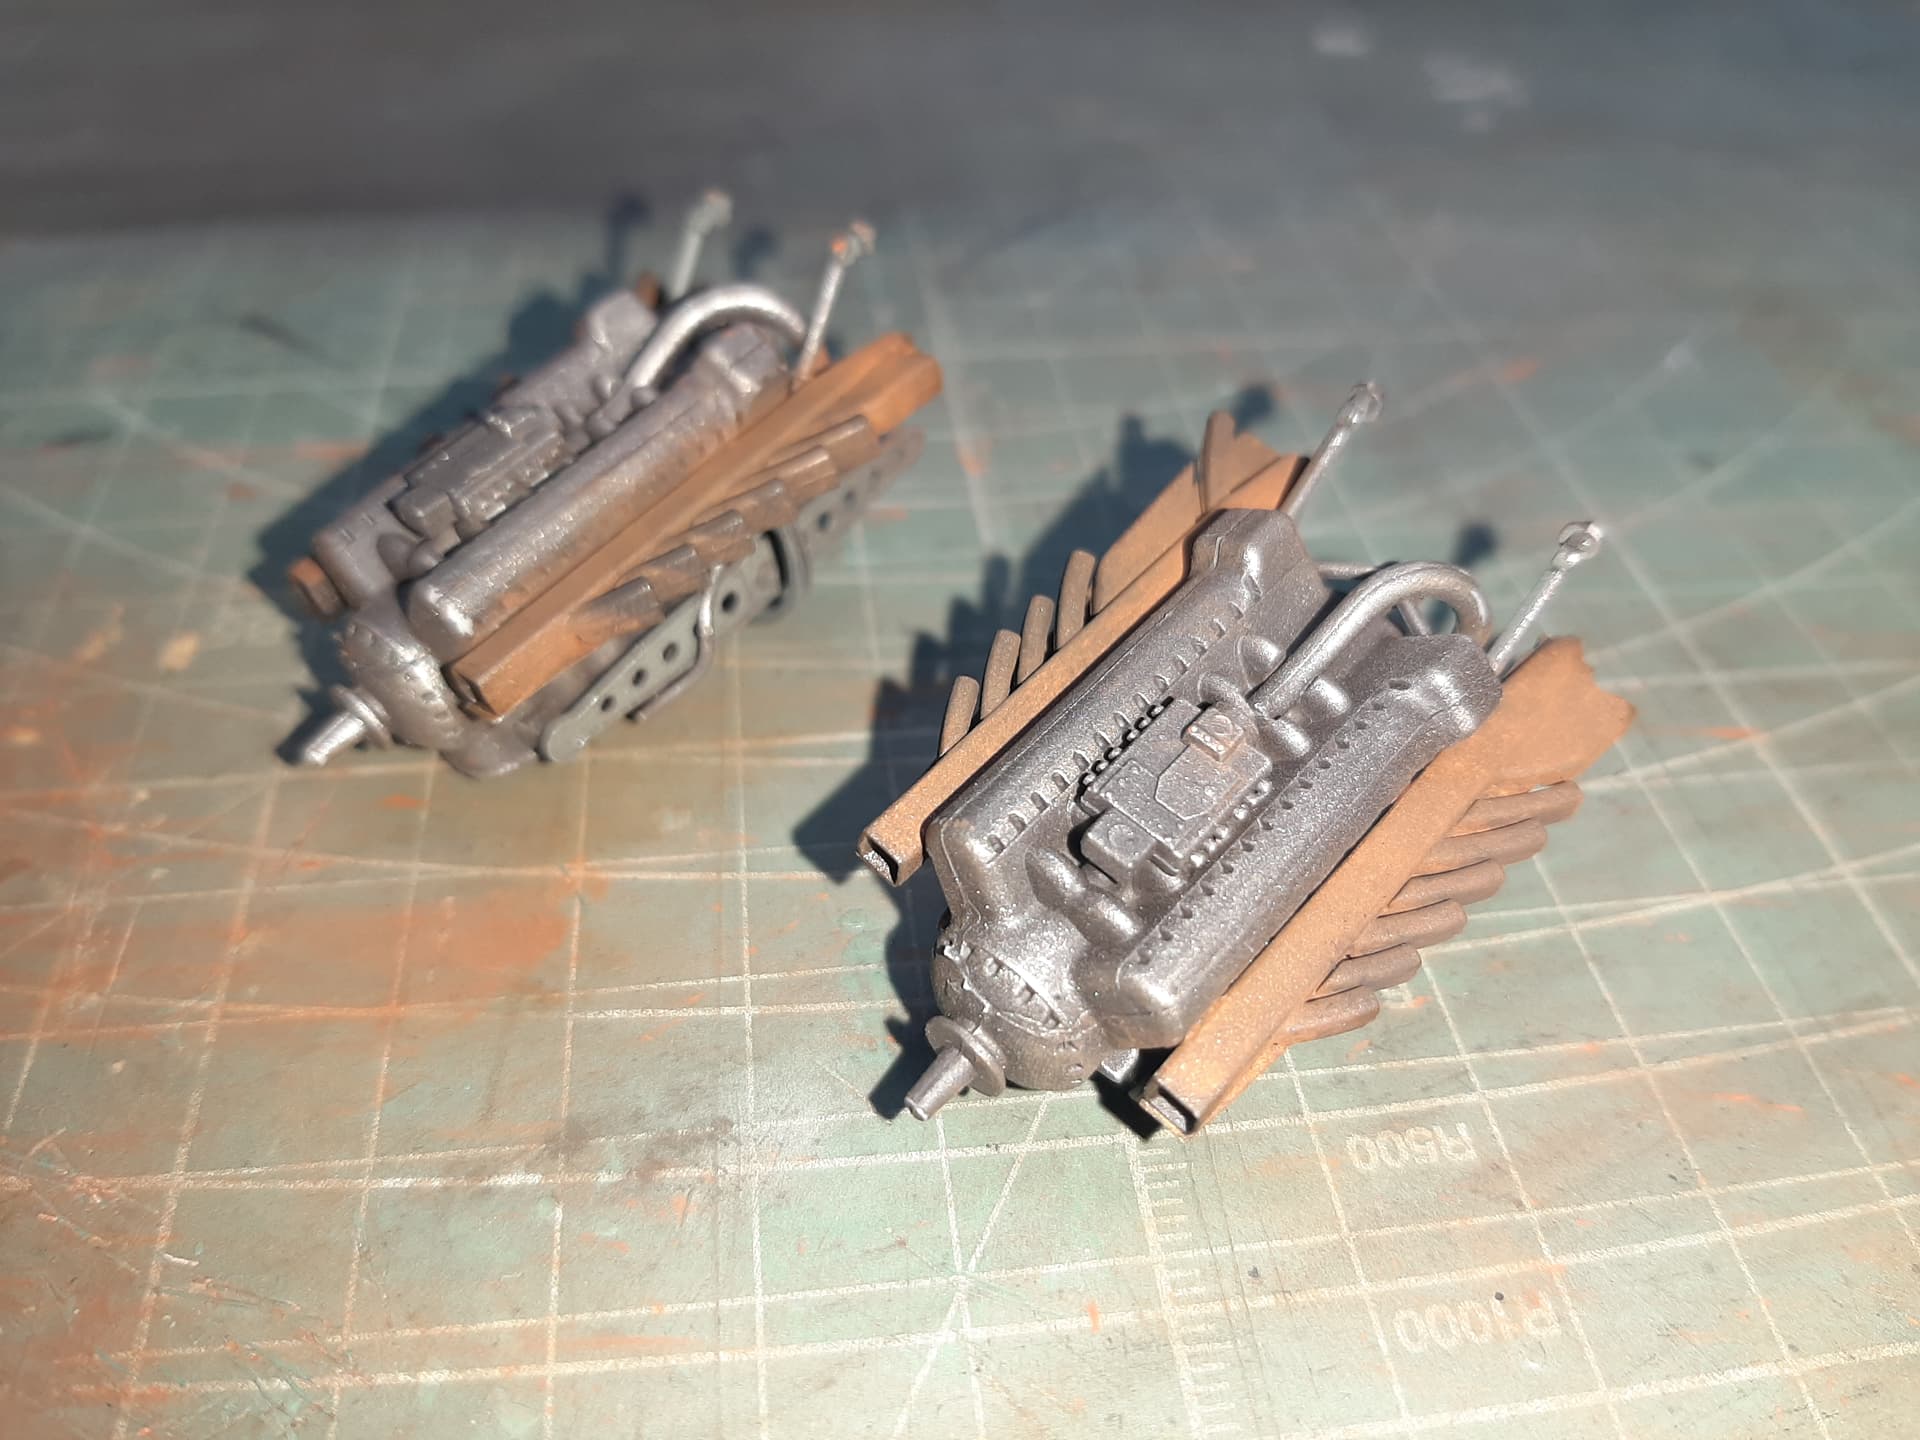
The completed engines and bulkheads now glue into one side of each engine cowling. It looked fine albeit a tight fit - but, when I tried to attach the other cowling half, it just simply would not go together. There were huge gaps in the two half because the engine is simply just too big to fit! And, it really shouldn’t be. To make matters worse, my ham-fisted attempts to shoehorn the engines into the bulkhead resulted in an almost imperceptable mis-alignment of the engine which when the two engine cowling halfs were ‘joined’ resulted in a twist to the upper cowling surfaces.
In short, the completed assemblies would have needed a ridiculous amount of work to put right and ensured that the engine cowlings would nowhere near fit the wings. Incidentally, both sides were the same.
I tried, oh how I tried to make this work, but I just couldn’t and in the end, abandoned the project.
It nearly went in the bin. But, by now, the damn thing is nearly complete and i’d sunk a lot of time, effort and money into this.
So, I have decided to walk away for now. My plan is to buy another ICM kit and take the engine parts from it to try again. Bit of an expensive solution, but I want to see where I went wrong and hopefully end up with a completed project.
I’ll be back!
Must be soul destroying Roly. A real pity as the engines look great. Like the rust look on the exhaust and exhaust manifold. Hope you get your mojo back on this project. Enjoyed following it ![]()
don’t know how i missed this but I’m onboard now
Considering all the work you have put on the cabin, it would be a sad waste. Although expensive, I think you are right getting a new one for the engines. Keep the good work!
Shame this one started fighting back … It was going great guns … I am sure a short break away from it and then facing it again is the right approach…looking forward to seeing this get finished so it can sit alongside the Mossie…
ICM have a no quibble replacement offer just contact them
Occasionally i have had issues like the ones you describe here and have blamed myself for the inaccuracies. I have naively been under the impression that manufacturers of kits are always spot on. Following your build has opened my eyes to that fact and i thank you for that. I,m sorry that, for the moment, this build has come to a halt but, after seeing the high standard of your work, i,m sure you get the better of it or it,s replacement. Thank you for posting.
Nik Watto
Even though I was following this I apparently missed the part where it all fell apart. Sorry to hear that you ran into the problem with the engine fit. Did anything ever become of this? Did you somehow salvage it?
Being a diorama person, rather than scrap the project I probably would have changed the focus and went for a crash scene where the engines & cowlings were torn loose and damaged (fit problem solved) If more of the engine area need be hidden you could stage the crash scene in a bog or even snow. Anyway, pretty late response (sorry) but I do hope you were able to salvage something from this nice build.
Late Cheers,
C.
He wont answer Charles as he was banned
Thanks for letting me know.
C.
Yep it was a shame, some really good work there & like you suggested I would’ve changed tack to make it a crash-land – even posted a Dad’s Army sentry guarding it. Alas the builder lost focus & went way too many rounds with way too many people – strange, you’d never guess that from his posts here.
Great minds think alike! lol… a crash scene would have been awesome.
I learned long ago not to cross political/religious beliefs with modeling in forums. There were enough problems in these forums years ago when heated arguments erupted over the credibility of some members who had published a book or CD about Panthers. Someone did a scathing review and sides were chosen. I think people ended up banned then also.
Cheers,
C.