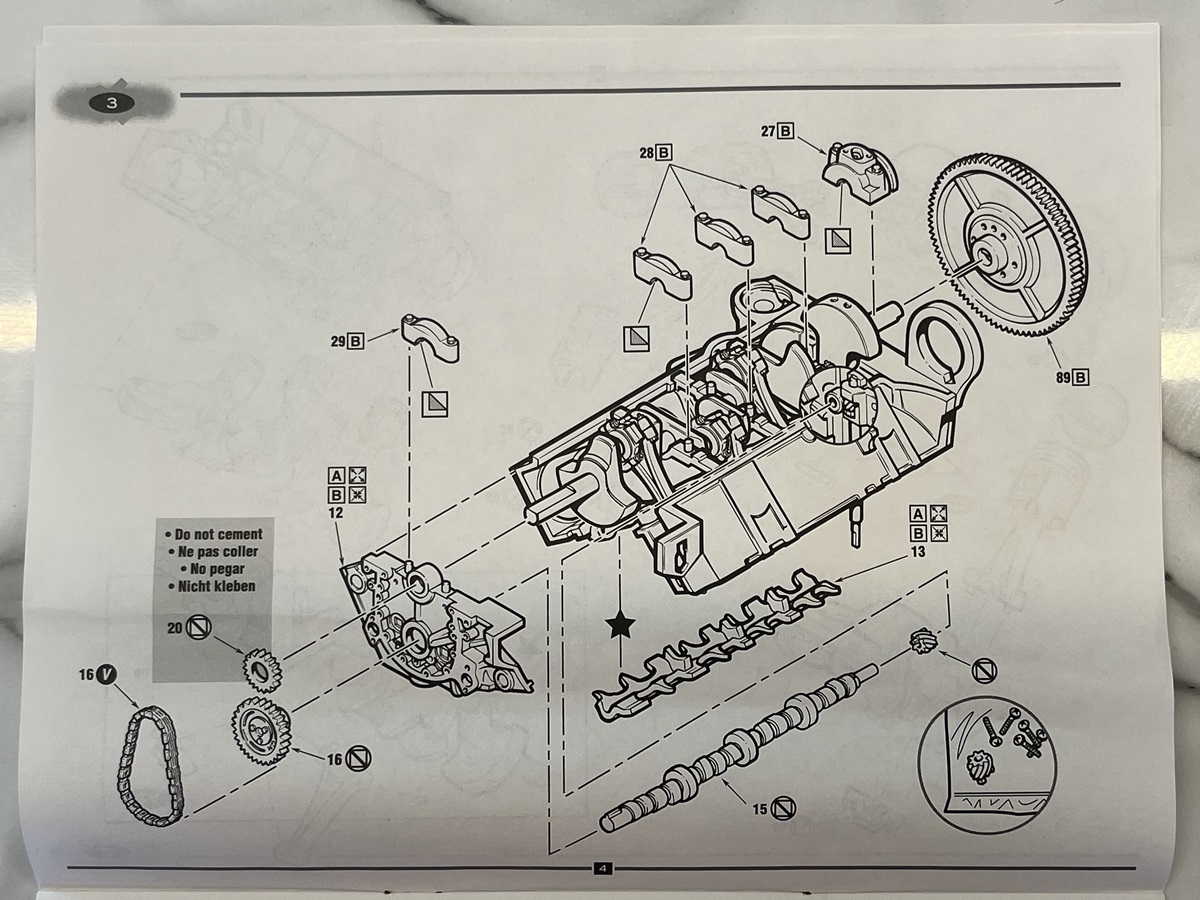
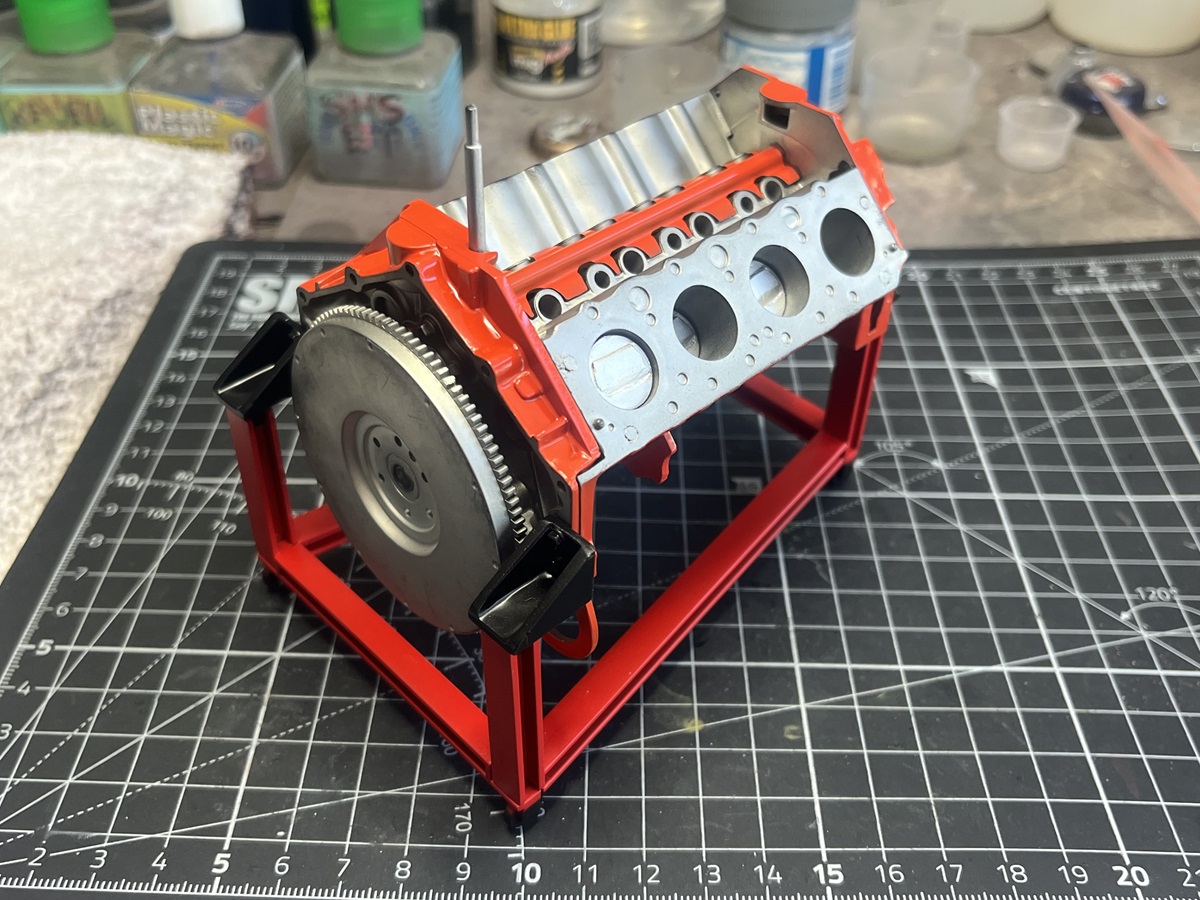
The main flywheel was set in place with CA, and the hold-down brackets for the crankshaft cemented in place. There is still a bend in the crankshaft so the flywheel is a bit tight to turn in some spots.
The 2 smaller cogged wheels for the front end are not fixed in place, I’m leaving them dry fitted for the moment. The small wheel turns with the crankshaft and via the vinyl “chain” this turns the larger wheel and this drives the camshaft and via another gear at the back end, turns the distributor shaft.
The chain is shown in the instructions as Part #16 V, but on the vinyl sprue it is labelled as Part #21. There are 2 of these supplied on the sprue, which is fortunate because one of them was broken while I tried to install it. Very tight fit.
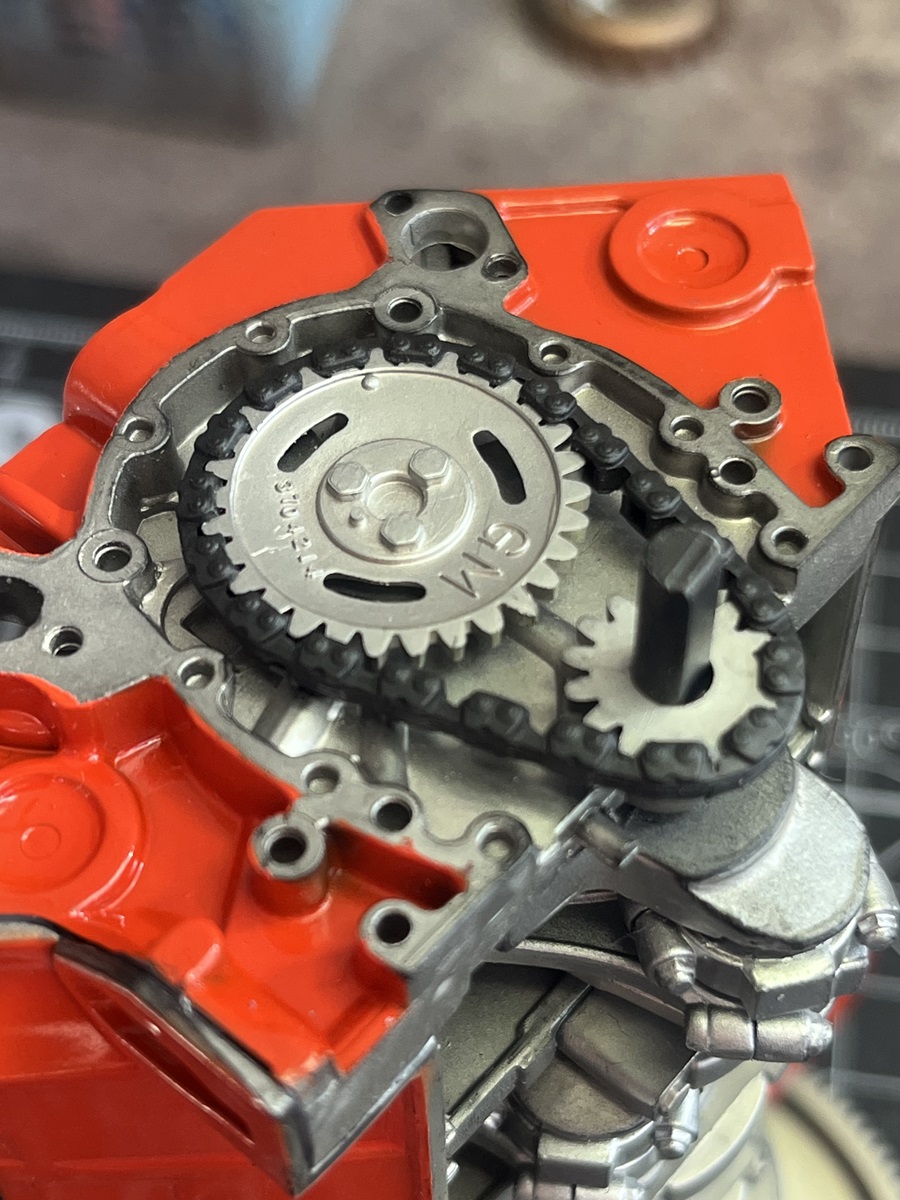
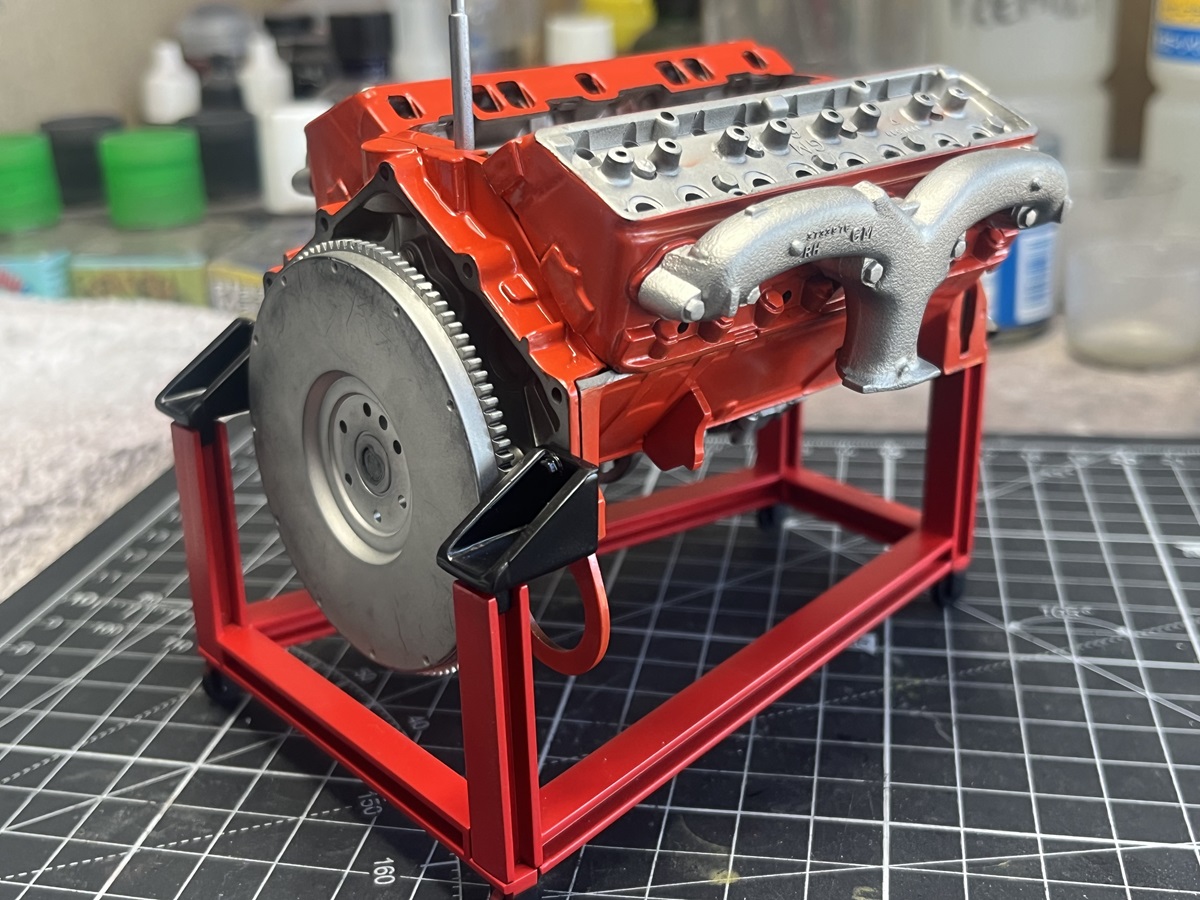
Nice work D . Agreed that the metallic color is spot on . Are there timing marks on the crankshaft/ camshaft sprockets ? I think I see one on the cam sprocket but can’t see anything on the crank sprocket.
Thanks Richard. Good spot as well, I had the crank sprocket on backwards. There is a timing mark on the other side. All fixed now, easy fix with the sprockets dry fitted.
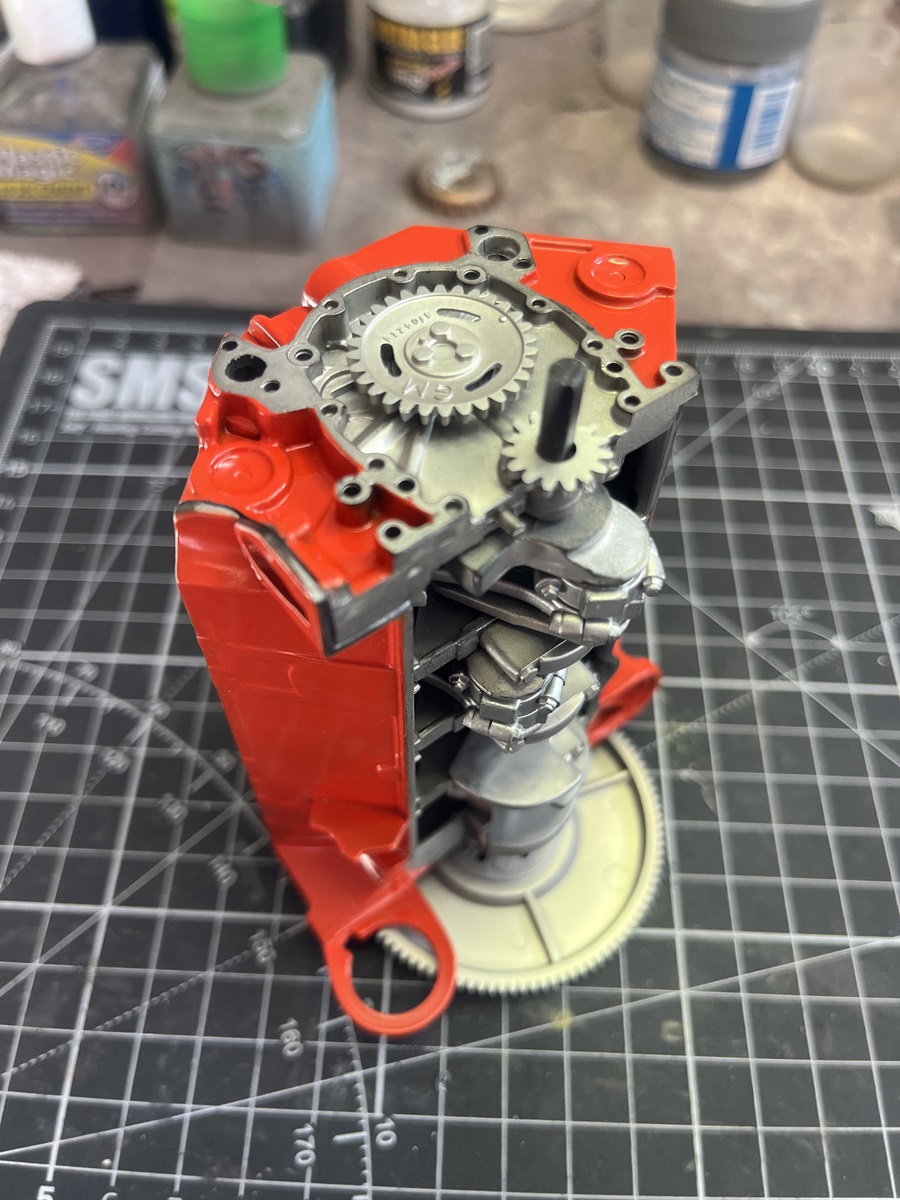
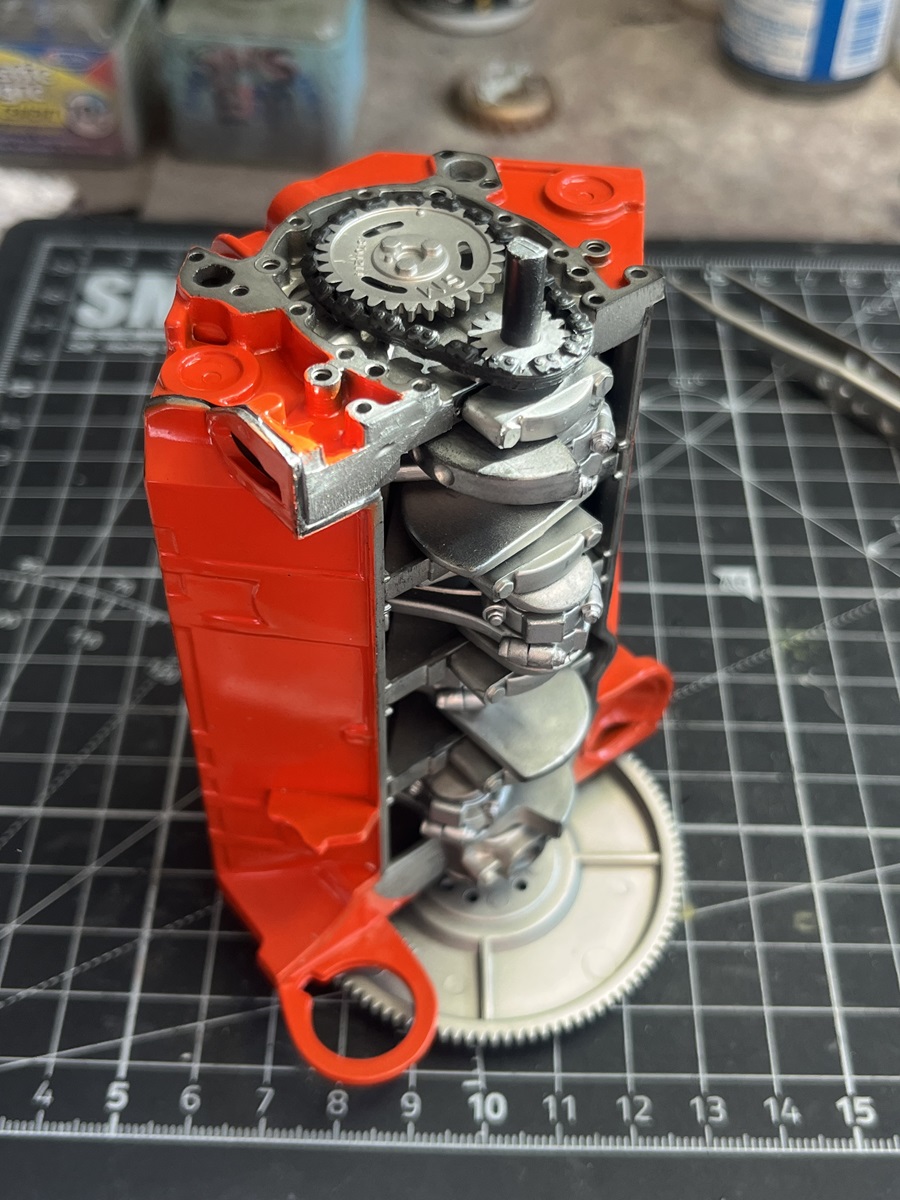
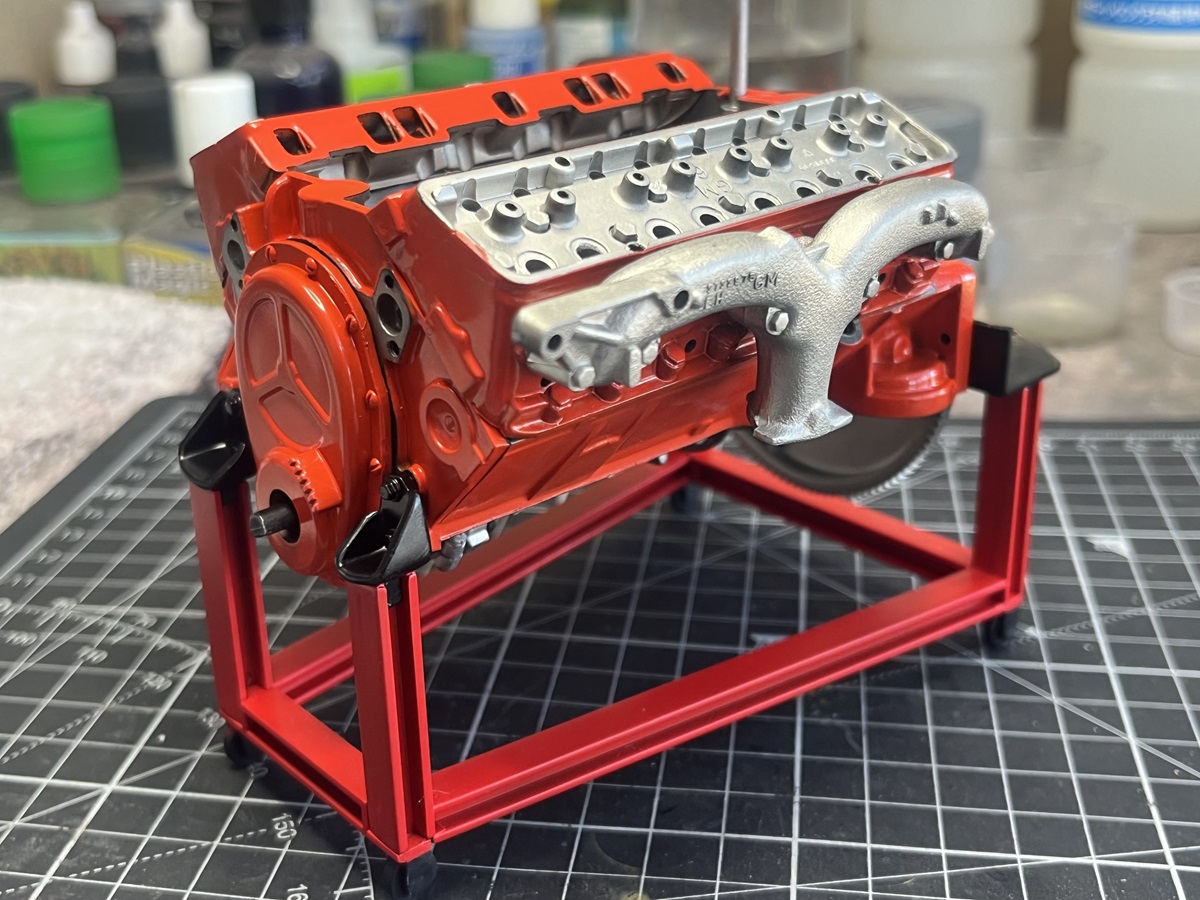
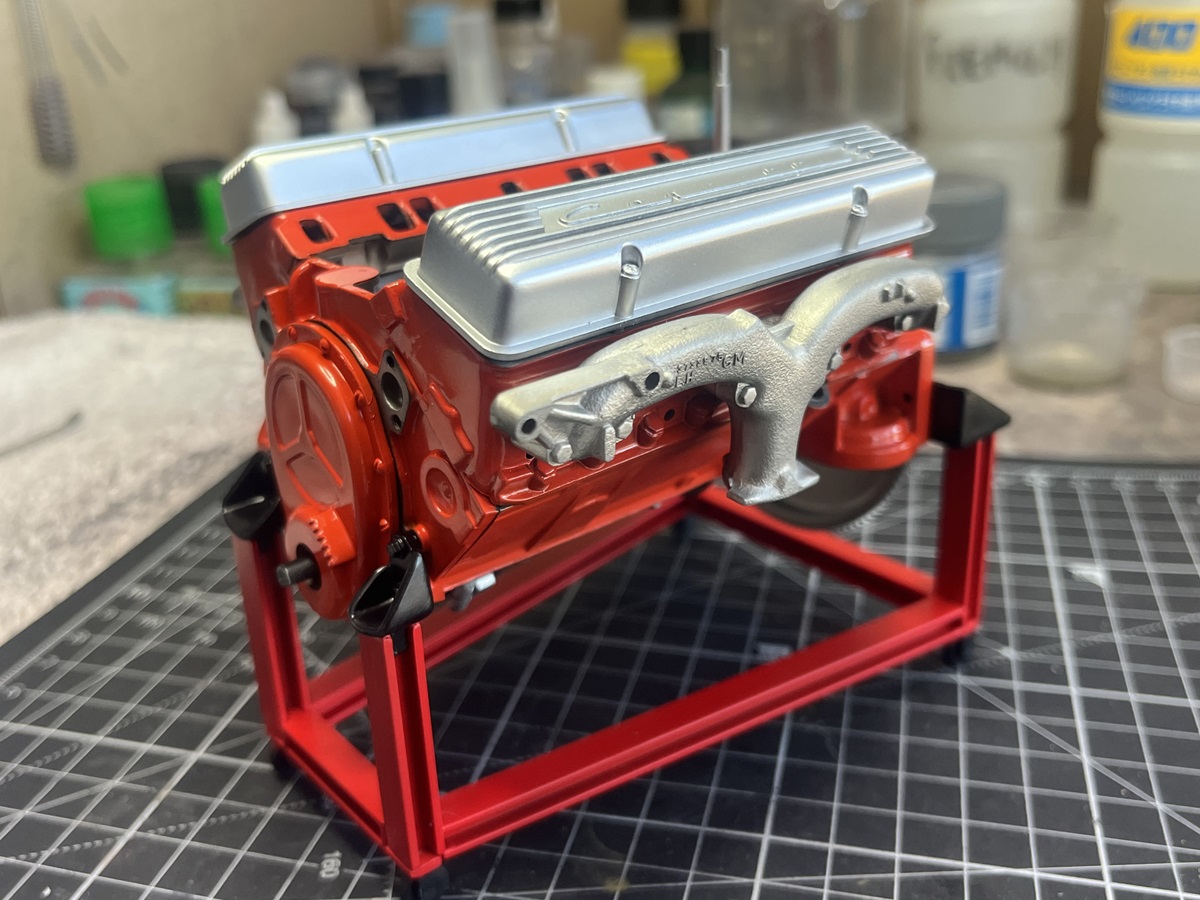
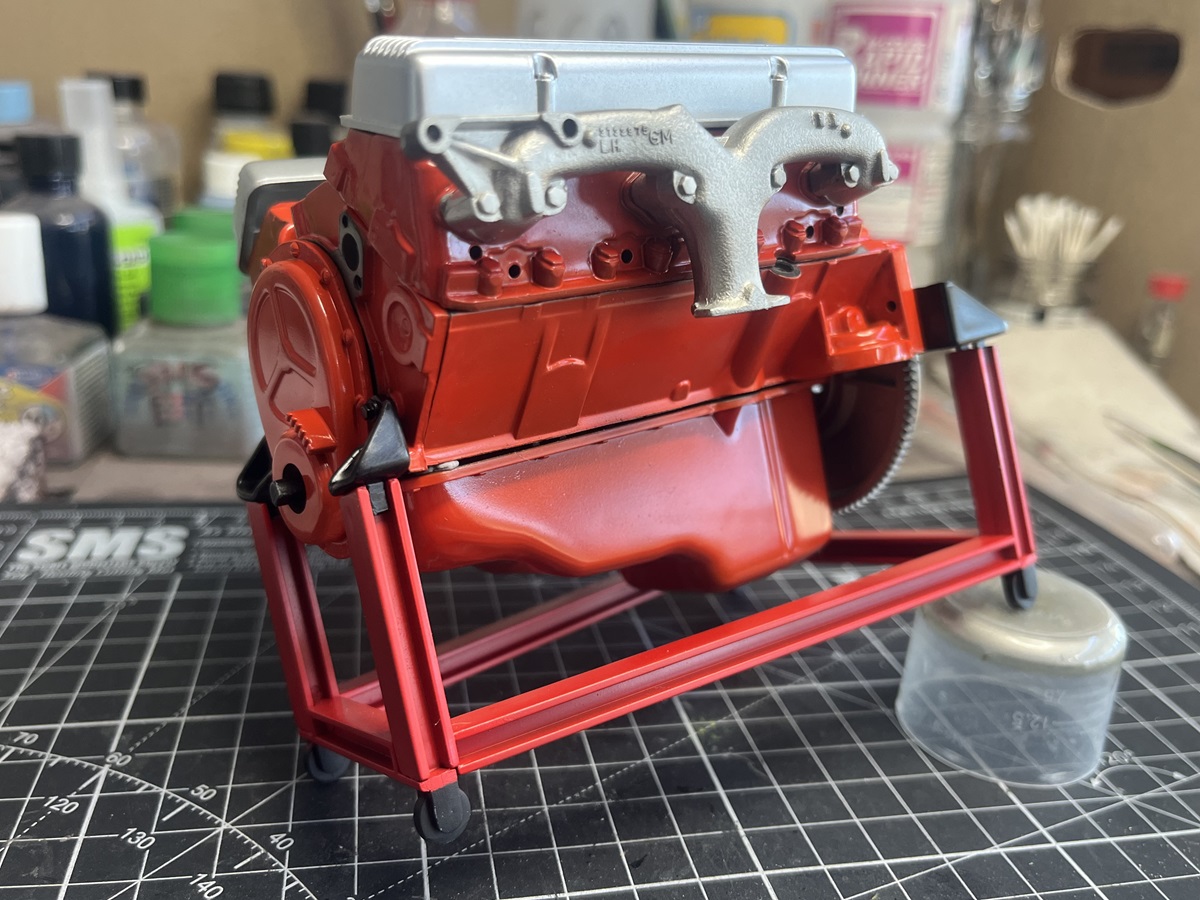
I’m facing a bit of burnout on this build right now, I will put it aside for a while and come back to it with renewed vigor soon. Here are a few images of the current state of play with a dry-fit on the engine stand. The heads hold on nicely with magnets. The exhaust manifolds are held in place with Blu-Tac. The rocker covers fit neatly with locating pins and hold firm, as does the timing chain cover on the front end.
Sucks about being burnt out on this. Its a great build you have here.
As someone who only builds armor , i can really appreciate the effort you put into this.
I look forward for the continuation of this when you are ready.
wow that is looking GREAT. I’m sure a few days off will get you back into the mood to finish it all up. Looking forward to more! The BattleScale Collectica Show