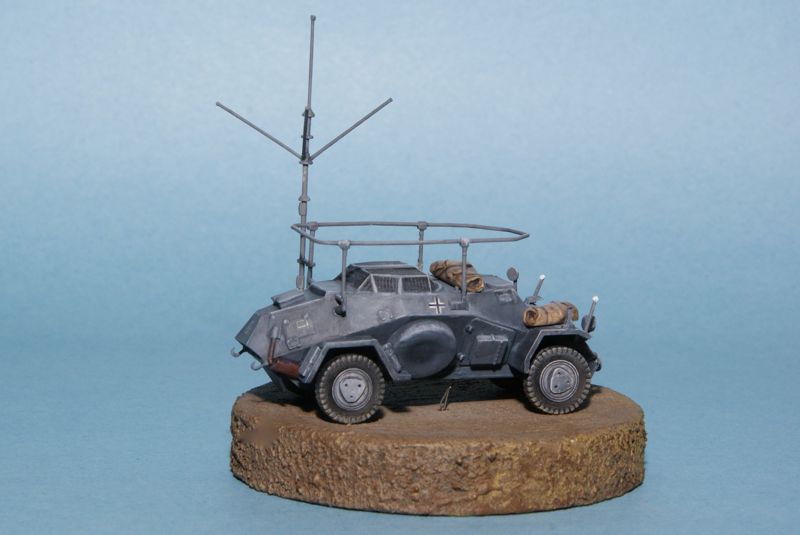
There’s going to be a frightening number of delicate or fragile pieces on this kit that will require extreme care in painting and handling. Should take no more care than what was required on that series of four wheel armoured cars with their multiple antennae I did a while back.
However it did surprise me that while the brush-guards for the headlights have minuscule but definite locating features, Zvezda has nothing comparable when it came to the headlights. 
Cheers,
–Jan 
1 Like
 Not even dimples and pimples (© Tread Geek, 2021)
Nope, nada, nothing other than a slightly noticeable semicircular mark on the right side with a raised moulding line leading to it but only visible with corrective lenses + 5x Opti-visor + eyestrain. 
Cheers,
–Jan
1 Like
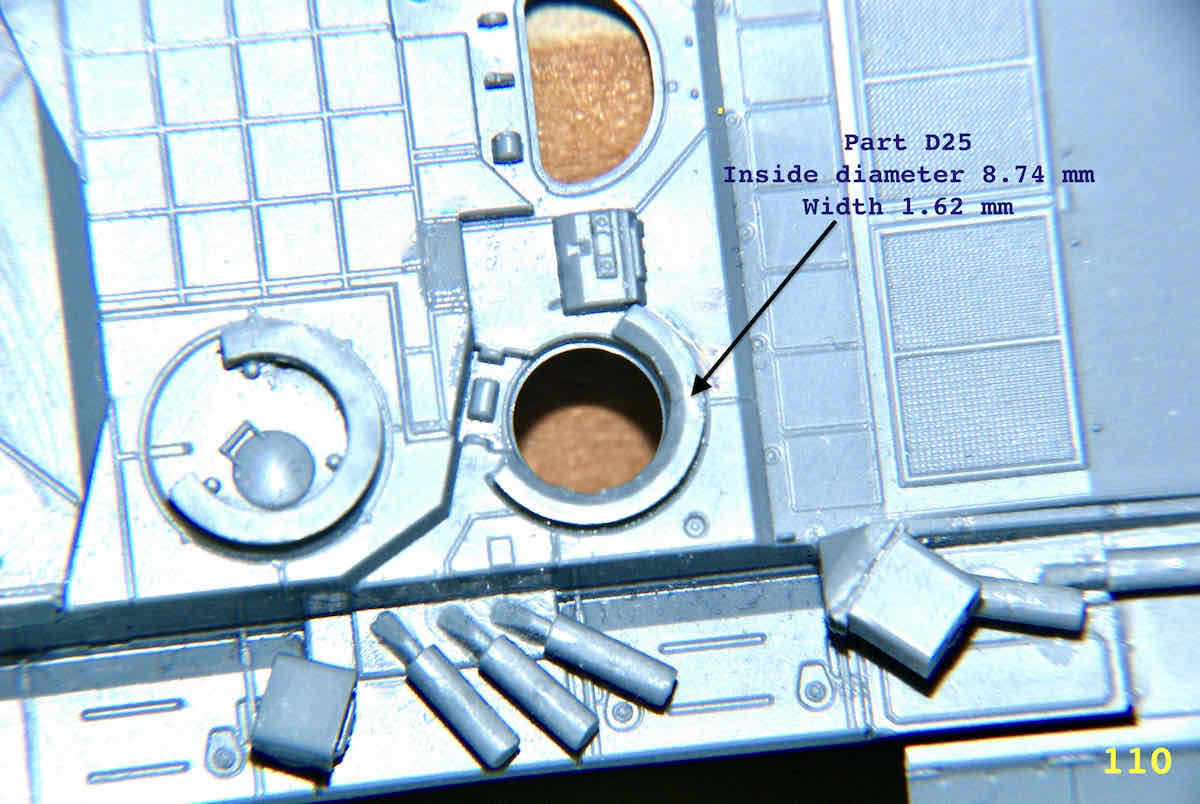
I CAN"T believe it’s been 7 MONTHS since I’ve added to or even touched this model!  Life and a lack of motivation or Mojo are all equally responsible but excuses don’t get a model built. Anyway, I chose what I felt might be a rather simple addition to this beast, namely the commander’s hatch ring located above the periscopes, Part D25:
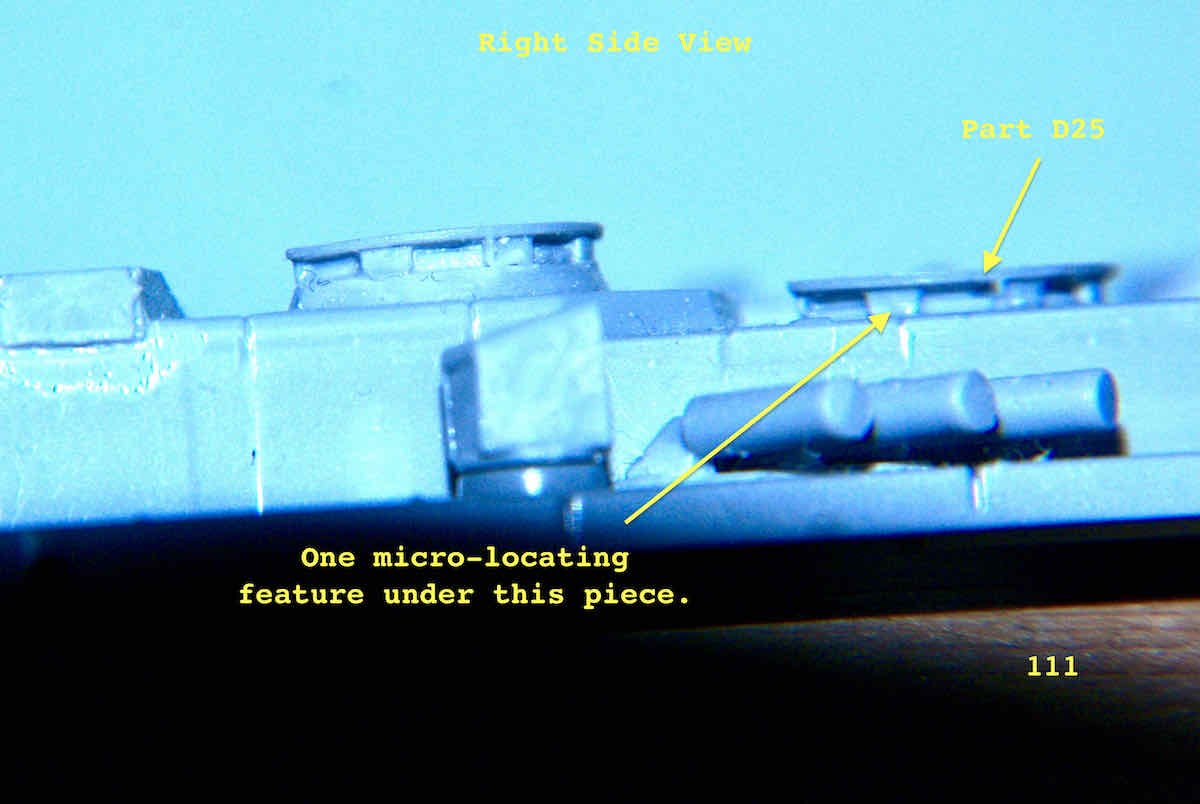
“Simple” you say and so I thought! Nope, nada, dream on? Now firstly, remember the scale and secondly, remember Zvezda uses those microscopic pimples and depressions as supposedly locating features. Trying to position the ring correctly turned out to be as much an exercise in patience and dexterity in manipulating micro tip tweezers.  It took the better part of 40 minutes to finally get the ring lined up so that some Tamiya Extra Thin could be safely applied. Here are a couple of images of the part fixed in place.
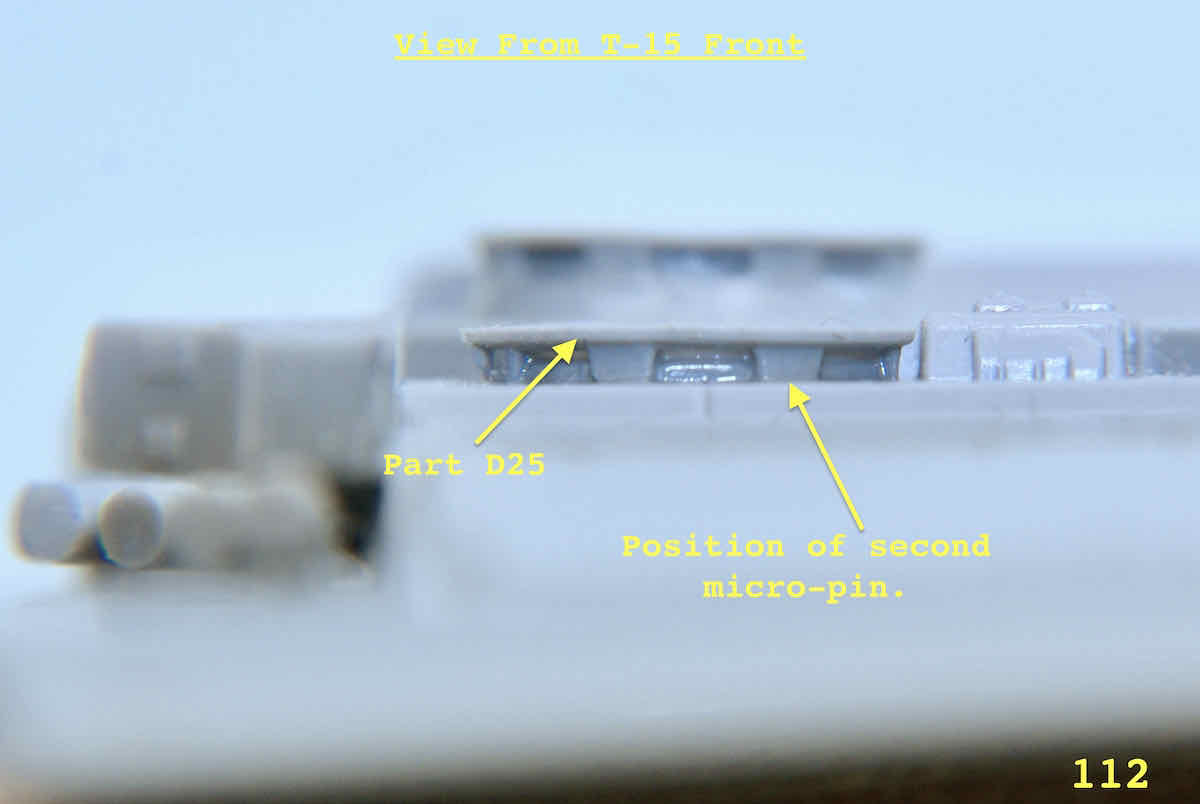
Not the most enjoyable reintroduction to building but it’s done now. Further progress will again be delayed as some painting will need to be done before more parts can be added but at least I got back to it. Hopefully the next update won’t be so long in coming.
Cheers,
–Jan 
Looks good. I have to keep reminding myself that this is braille scale.
I can’t remember how long it’s been since I last posted on my blog but it’s been a while. It’s good to see you’ve got your mojo back and good to see you back on the bench again. Looks like fun too. One part at a time and then you have a completed kit ready for paint. I haven’t worked on a Braille scale kit in a vary long while but I do appreciate the effort it takes to position parts together and reworking them to scale thickness. Well you’ve done it Jan, now you’re goin to have to finish it!
~ Eddy 
Seem to be making hard work of it! Can’t remember having any problems
@taylorrl - Rick,
Thank you for dropping by and leaving a comment.  From my limited experience these Zvezda kits are nicely detailed and mostly have a good fit. As you might guess, I’m a small scale (Braille) aficionado and have been forever, or so it seems. I’ve unfortunately been away from the hobby for a significant time and am still trying to reacquire past skills. I hope that a Blog like this may help those that are new to building or this scale to not be too put off by the size.
@Braille - Eddy,
Slow but sure and progress is still progress?  Things that I hardly paid attention to in the past have on and off stumped me as I try to recall how I might have handled things in the past. And yes, it is important to not get too fixated on things and have FUN!
I think I have finally gotten enough supplies to start some necessary preliminary painting. That has been a hinderance as there are a few areas that will require paint before other parts can be fitted.
Thanks for dropping by and checking things out. I certainly hope that this build continuing after my slump may give you and others a spark of incentive to get back to something you too might have going. BTW, IIRC, the last update I saw of your 1/16th build was back in June. 
Cheers,
Jan
Yes, its been a long while since I posted an update. One of the biggest things standing in the way were a new set of glasses. I finally got around to that and hopefully I will be picking them up this coming week. Now by the time I get home from work I feel so sleepy and really can’t see out of my old glasses.
What I have been doing is adding to the stash, it’s now time to start building and spending time on the bench. Anyhow that’s the plan and we all know how plans go!
~ Eddy
@Braille - Eddy,
As a lifetime corrective lens wearing individual, I fully appreciate the need for properly prescribed lenses, especially for close up detail work no mater what the scale. I’ve also heard stories of people getting new lenses either having to wait for their new glasses or the optometrist getting their prescription off due to pandemic related issues. Knock on wood, I’ve been fortunate in that my prescription has remained fairly stable for some time.  I also benefit where appropriate with the use of a 5x Optivisor and take macro images of my work to review as needed.
I had hoped to do some necessary painting before assembly would continue but my supply order has been delayed as it’s on “back order”, also thanks to this world wide supply mess. However, I’ve checked the instructions and determined what I can safely add/construct that which shouldn’t interfere in the overall build process. 
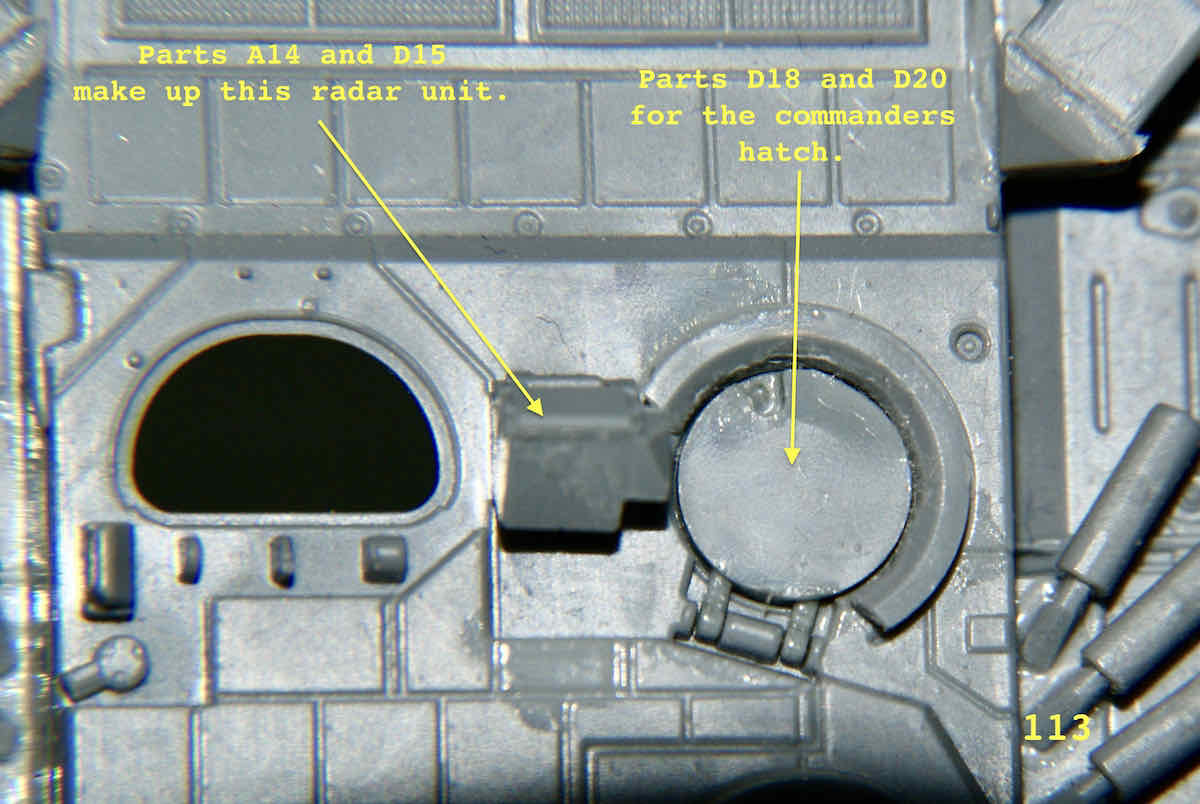
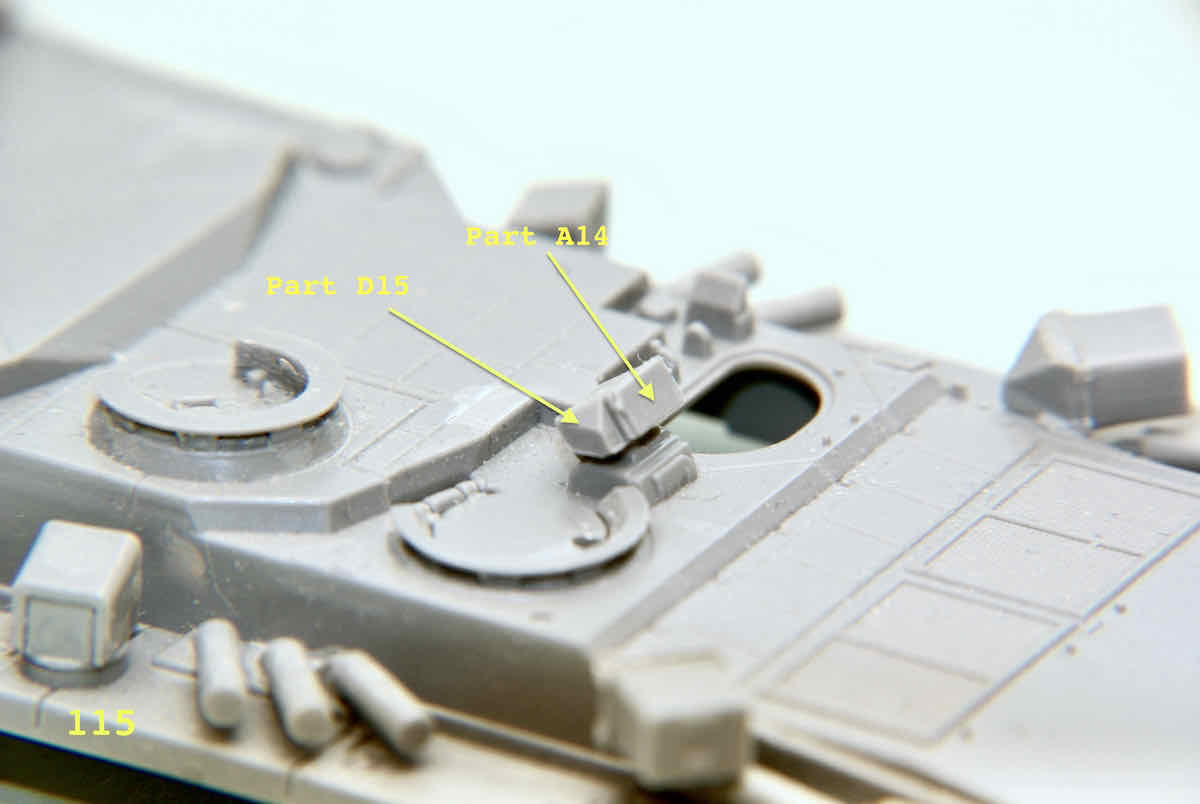
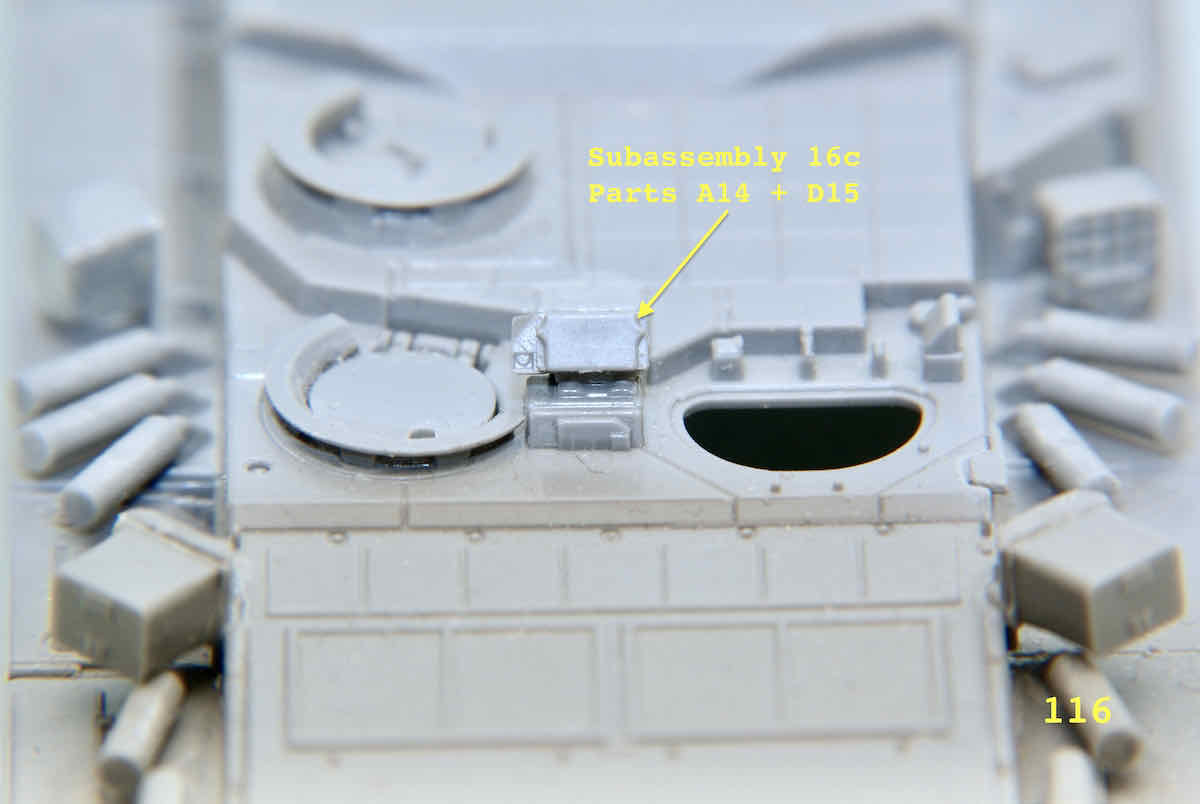
On a positive note I must say that in the majority of cases Zvezda parts fit is very nice, even with the most diminutive assemblies. I decided to deal with the assembly and placement of the forward facing APS radar located between the commanders and driver’s hatches. It’s subassembly 16c comprising of parts A14 and D15. At the same time I constructed subassembly 16b which is the commanders hatch and consisted of two parts also. Here are images of the two subassemblies with the radar glued and the commanders hatch just dry fit.
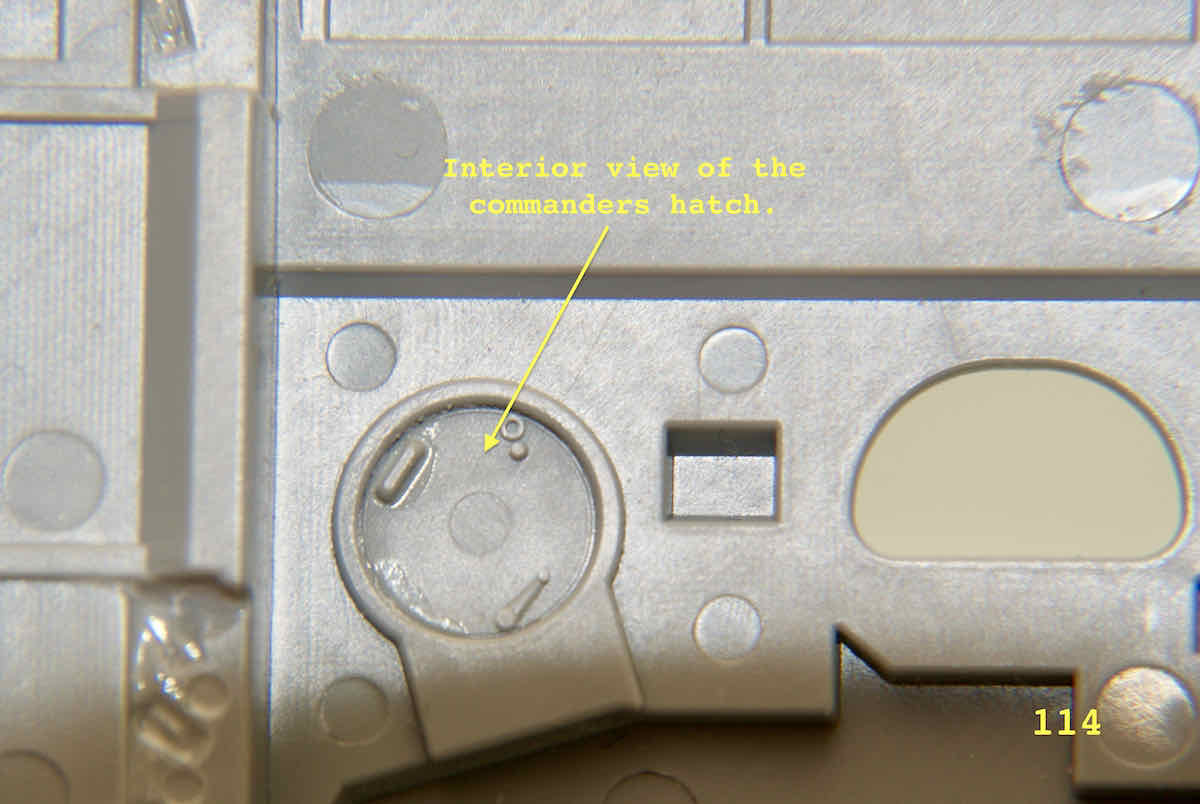
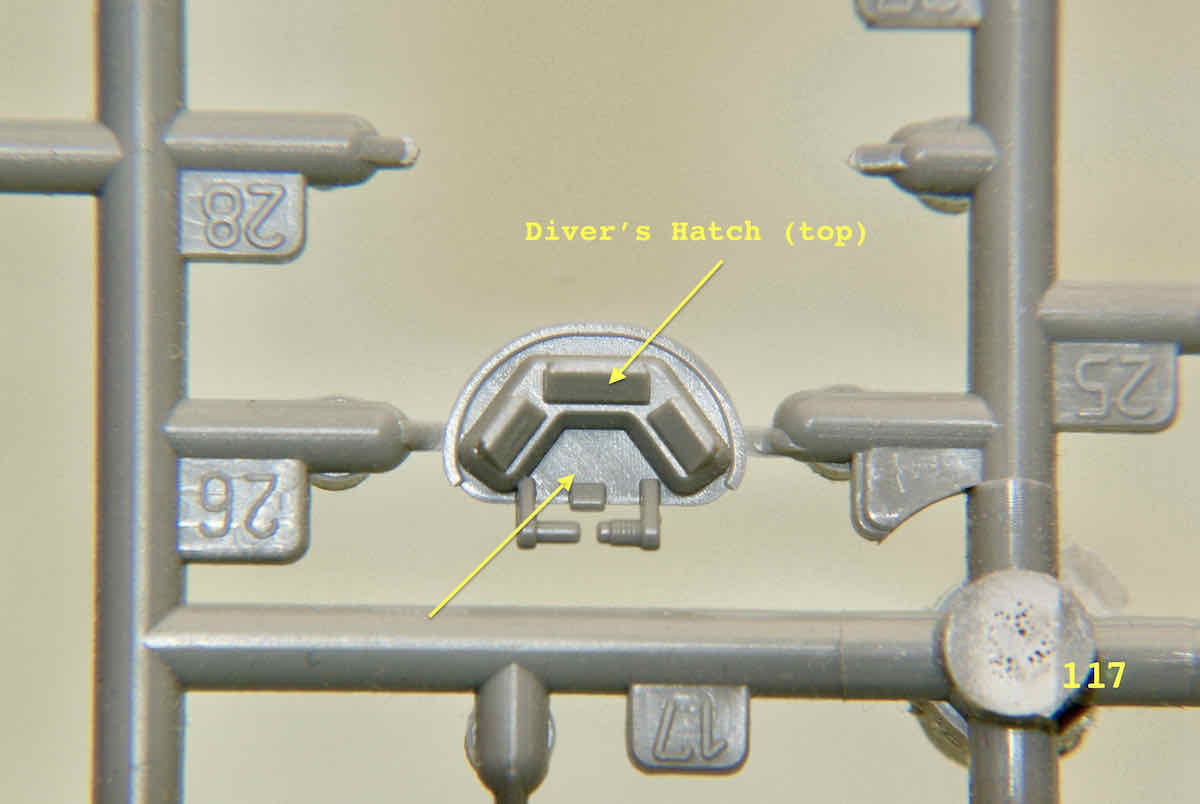
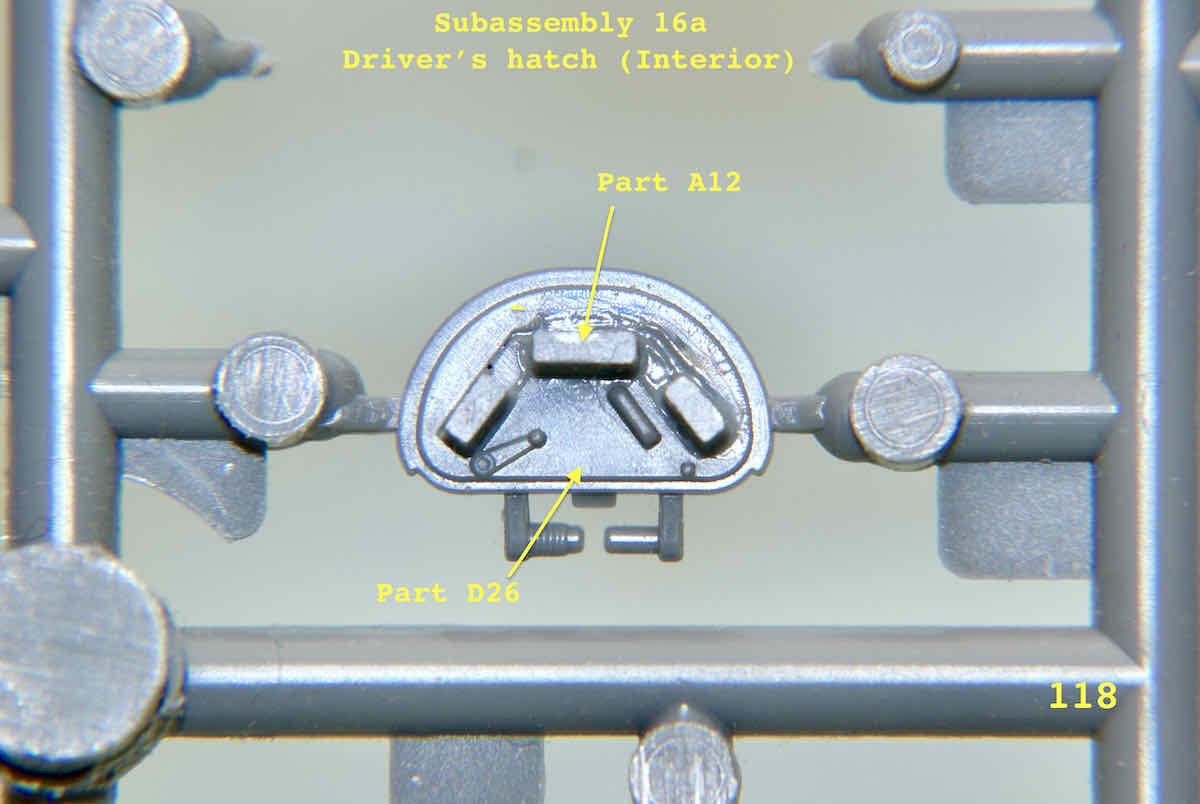
Many will be happy to note that both of the commander’s and driver’s hatches may be posed open or closed. The Driver’s hatch was also assembled and like the commander’s it has details on both top and bottom.
Well that little smidgen is it for now. There are a few more little parts I can add but not much until I can get a coat of paint on the suspension area and get it’s construction going. 
As a news anchor is often apt to say “Think positive, test negative!”
Cheers,
–Jan 
Finally got my glasses this weekend so I’m headed back to the bench again as soon as I get a chance. You keep hammering at your project and next thing you know it’s together and ready for paint. Which brings me to setting up the paint bench, it’s now filled with my girls school papers, drawings and a load of documents and things that need to go into the file cabinet.
Those Russian vehicles are not so simple anymore and it makes for an interesting model. Radar, huh! I think that the hatches being detailed as they are makes it nice to place figures in the openings.
~ Eddy