Nice work.
1 Like
Exceptional work.
2 Likes


Unyo completed and given a coat of Tamiya flat (rattle can)


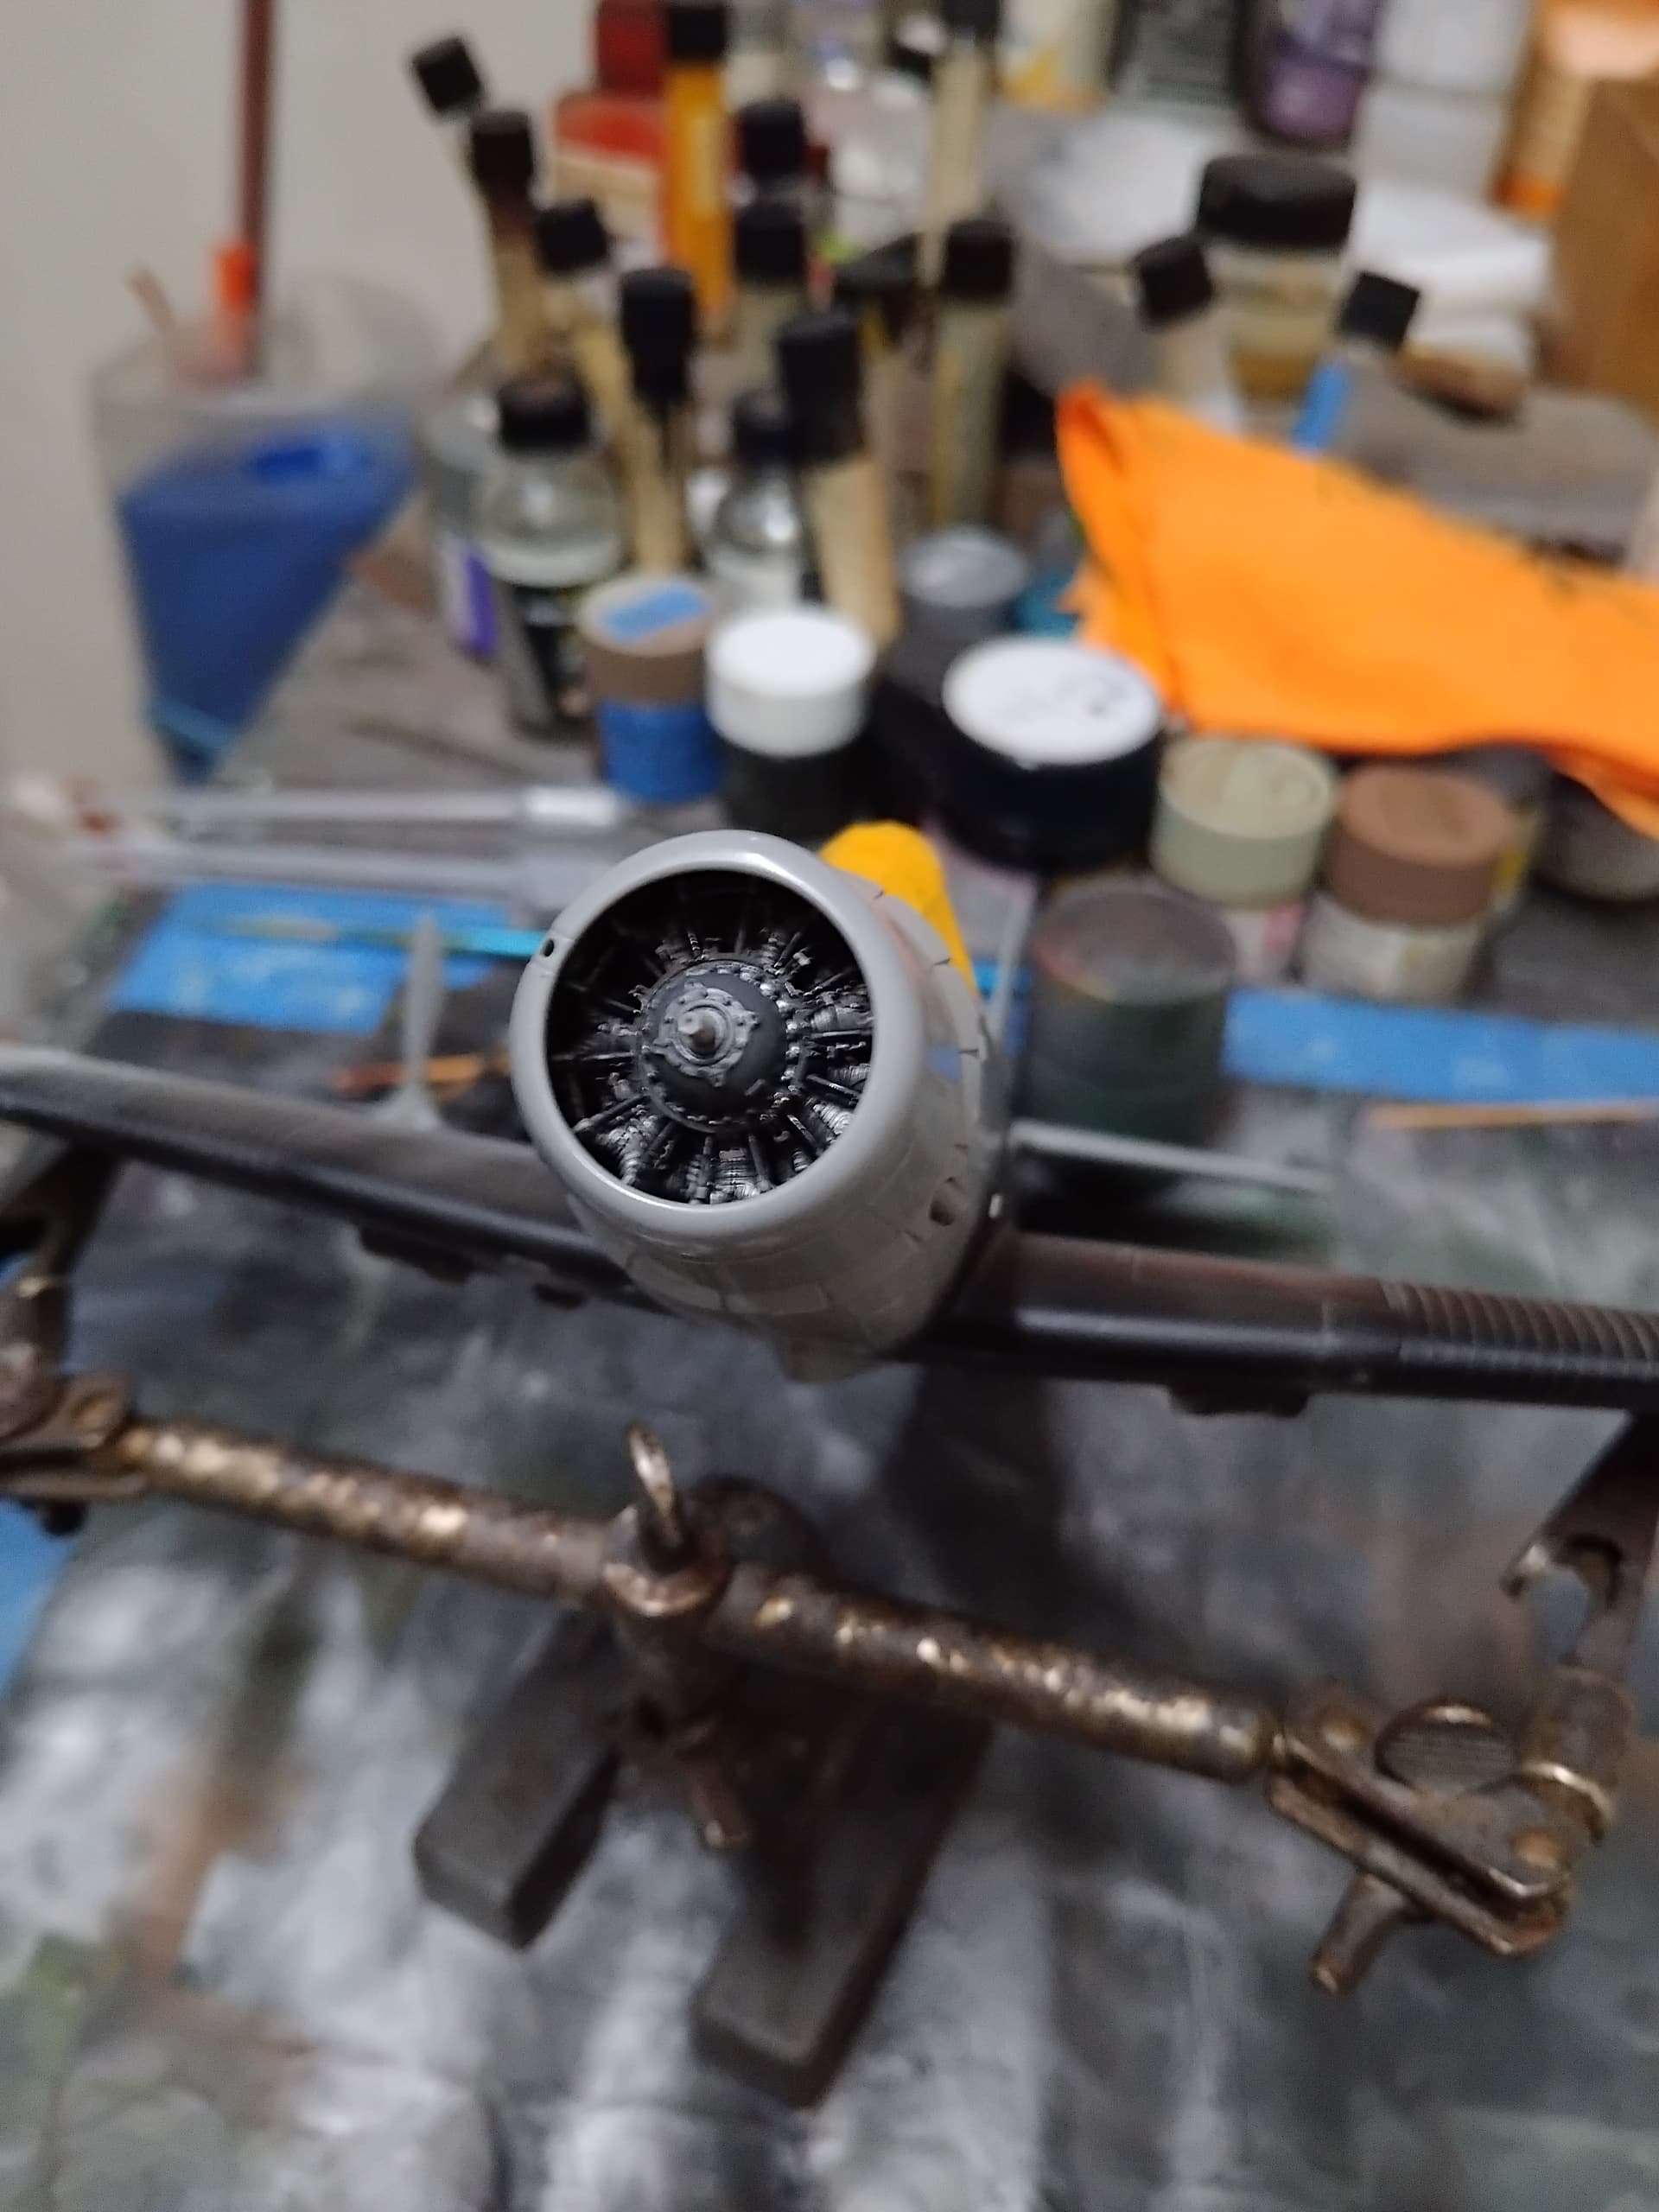
The Oscars fully painted and ready for Decals and landing gear

11 Likes
that first photo must be how it would have looked from a dauntless cockpit!!! nice work. how did you do the water?
Joe
weren’t oscars army aircraft? didn’t think they operated from carriers.
Joe
1 Like
Oscars were army planes but the Unyo transported Oscars to Truk in December of 1942 and from there they were flown to Raubal. The reason they were sent was that the IJN Air Force was fully occupied with the air war over Guadacanal so the 11th Sentai of the IJAA went to Raubal to fight over New Guinea. I have read only of the British flying off (and on) land based fighters from carriers specifically to Malta but USN CVE’s were used to transport Army Air Force planes to various destinations
The Unyo with Oscars on the flight deck so I’m calling it done


It needs more Oscars but I would have to get more
5 Likes
was not sure if that was the case. never heard of that transport but it makes sense for them. army and navy rarely cooperated, i guess this time they did.
nice build, i have to do a ship one of these days.
Joe
1 Like
Well done getting under the wire, guys!
I’ll be trying to get a list of who completed the campaign over the next few days and will post here to be sure I didn’t miss anyone. Well done to everyone and happy New Year!
Michael ![]()
![]()
2 Likes
I didn’t participate but this one was really fun to watch!
3 Likes
I forgot to mention, I used the Fubuki in our club’s Open Contest back in November. It won a 1st place in the Ships category. It was the only Ship entry.
2 Likes
My first crack at a list of those who completed their builds. Please have a look and if I left you off, please let me know and give me a heads up when you posted your finished kit so I can look it up:
Bert van Wiltenburg (bwilt)
Michael Satin (michaelsatin)
John (Johnnych01)
Peter Mollenhauer (B-17-peter)
WWII in Plastic (brekinapez)
Chris Wilson (c4willy)
Joe Bombace (Bomber14)
Stephen Willdig (phantom_phanatic)
Jesper (SGTJKJ)
Lucas C. (DeskJockey)
Colin Roberts (deerstalker36)
William Herd (panzerman1)
Chuck Willis (hetzer44)
Andrew Egan (Amegan)
Doug Dropeskey (Damraska)
Don (Lakota)
British Bulldog (steviecee)
Michael ![]()
![]()
10 Likes
The list of finishers has been sent on to the powers that be. Sometimes it can take him a little while to assign the awards (he has a lot to do!), but they’re on the way.
Michael ![]()
![]()
2 Likes
Hi Everybody,
I realize that the deadline has passed. While the build was complete before the end of 2024, the writeup got delayed due to a major illness. So, if no ribbon, that’s fine. I do apologize for the delay. So, I’m just going to carry on as it was prior to getting sick, and finish this up.
Hi Everybody,
There are so many great projects going on, and some great finishes as well! The threads here are a great pleasure to read. That said, I hope that I can contribute to some more pleasurable reads.
In my last update, I had closed up the Great Wall TBD-1 Devastator fuselage. I’ve been working on it, among other projects. Following along the instructions and doing some dry fitting, the middle portion of the wing was attached. This had to include clamping to aid in minimizing any wing root gaps.

I was a bit surprised to see gaps on a newly molded kit, then again based on the layout, GWH might have designed this to have the bombardier doors open considering the PE that was included. Needless to say, the fit here is not so good. Requiring lots of sanding and several coats of Mr. Surfacer 500 to make things look right followed by some rescribing.

While things were drying, I turned my attention to the outer wings. GWH followed the same format as Monogram with the wings. The TBD had corrugated wings, one would think that a new mold would have delt with the wing mating/corrugation area, perhaps by molding the join under the wing? Not sure, I’m not a model designer, I am however blessed with a cool tool! Hobby Mei makes sanding blocks where the sandpaper self-adheres to the block, and the 1 mm wide block was the perfect fit to get in between the corrugations! In any event, the wings were delt with, though I highly recommend that anyone doing this plane regardless of manufacturer, get a good sanding block, it’ll make all the difference in the world.

Did some black to see if there were any seams, they were exposed, and delt with

Next up was to get this bird ready for some paint! After painting the interior cowling area, I debated about a mask. Despite my best efforts, I chose to use the full canopy as a mask.

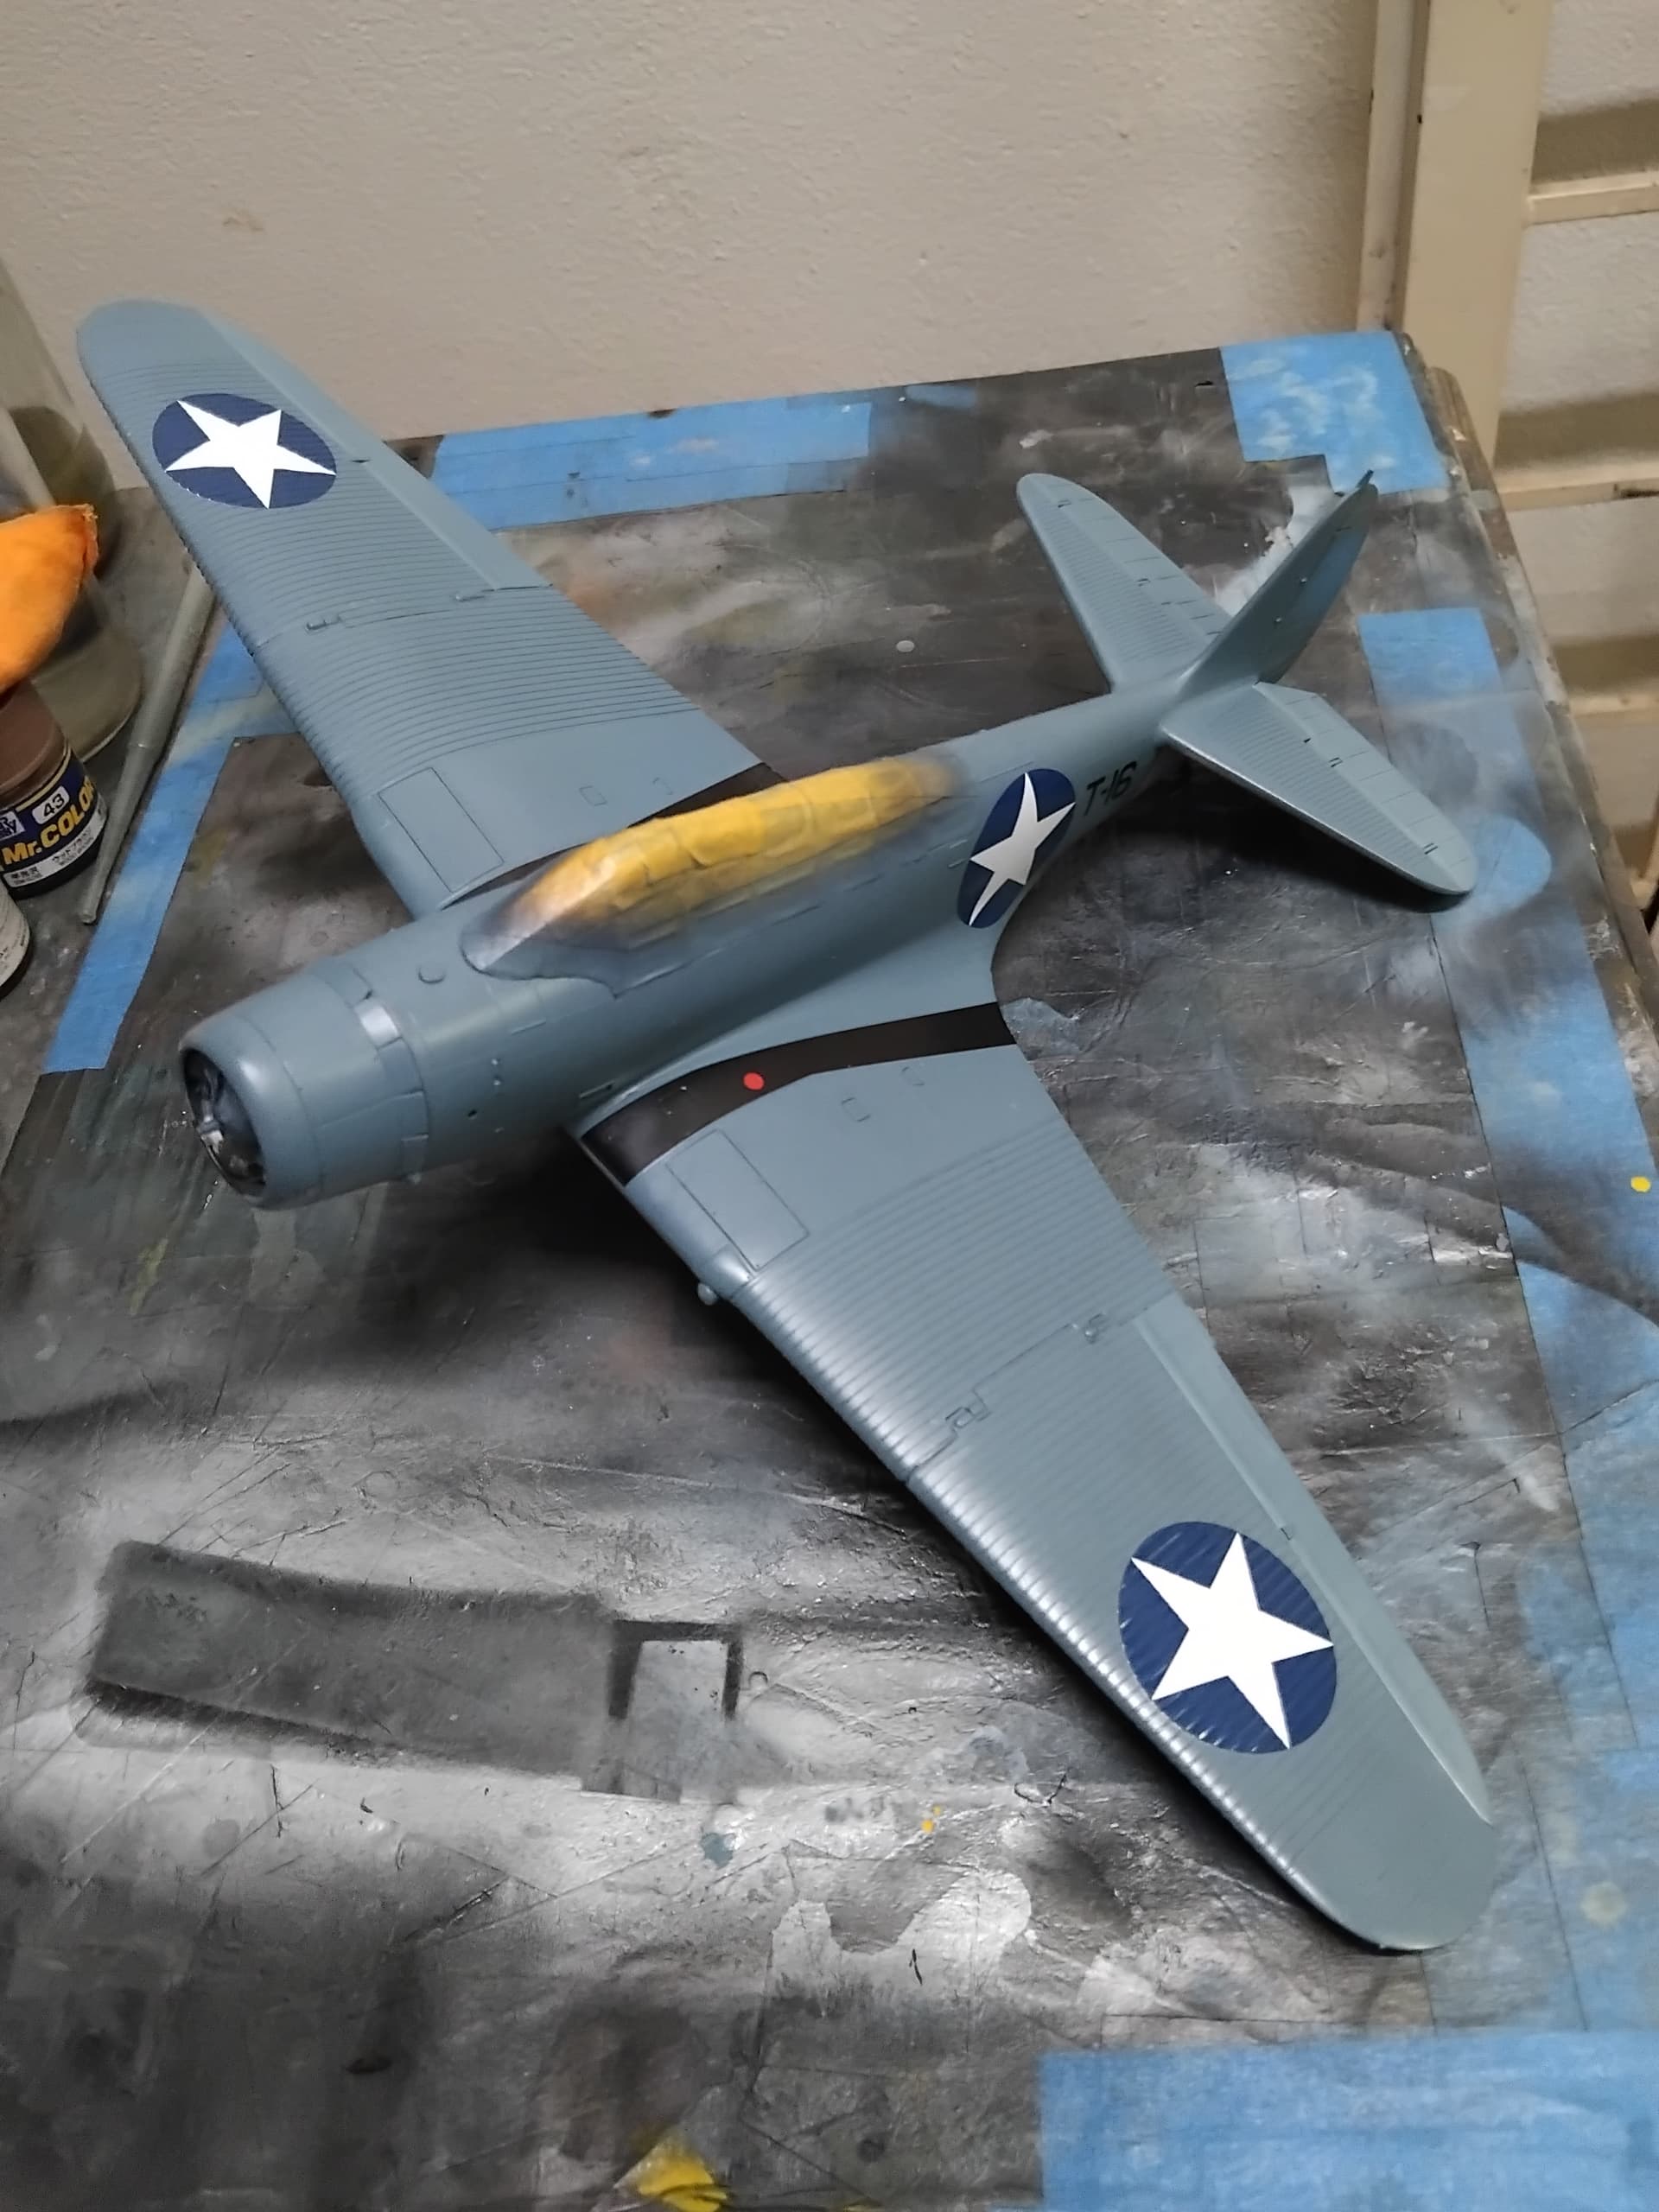
This turned out to be a good call. The underside was painted in a light grey, what I call PTO 1942 grey, which is, Tamyia XF-19 and white, mixed 2:1 and diluted 1:4.
this was followed up with what I call PTO grey blue, Tamiya median blue and white, 1:2 ratio then dilute 1:4, pretty easy right?

Prior to painting the basic upper color, I gave the fabric areas a shot of white so that they would look a bit lighter than the metal areas.
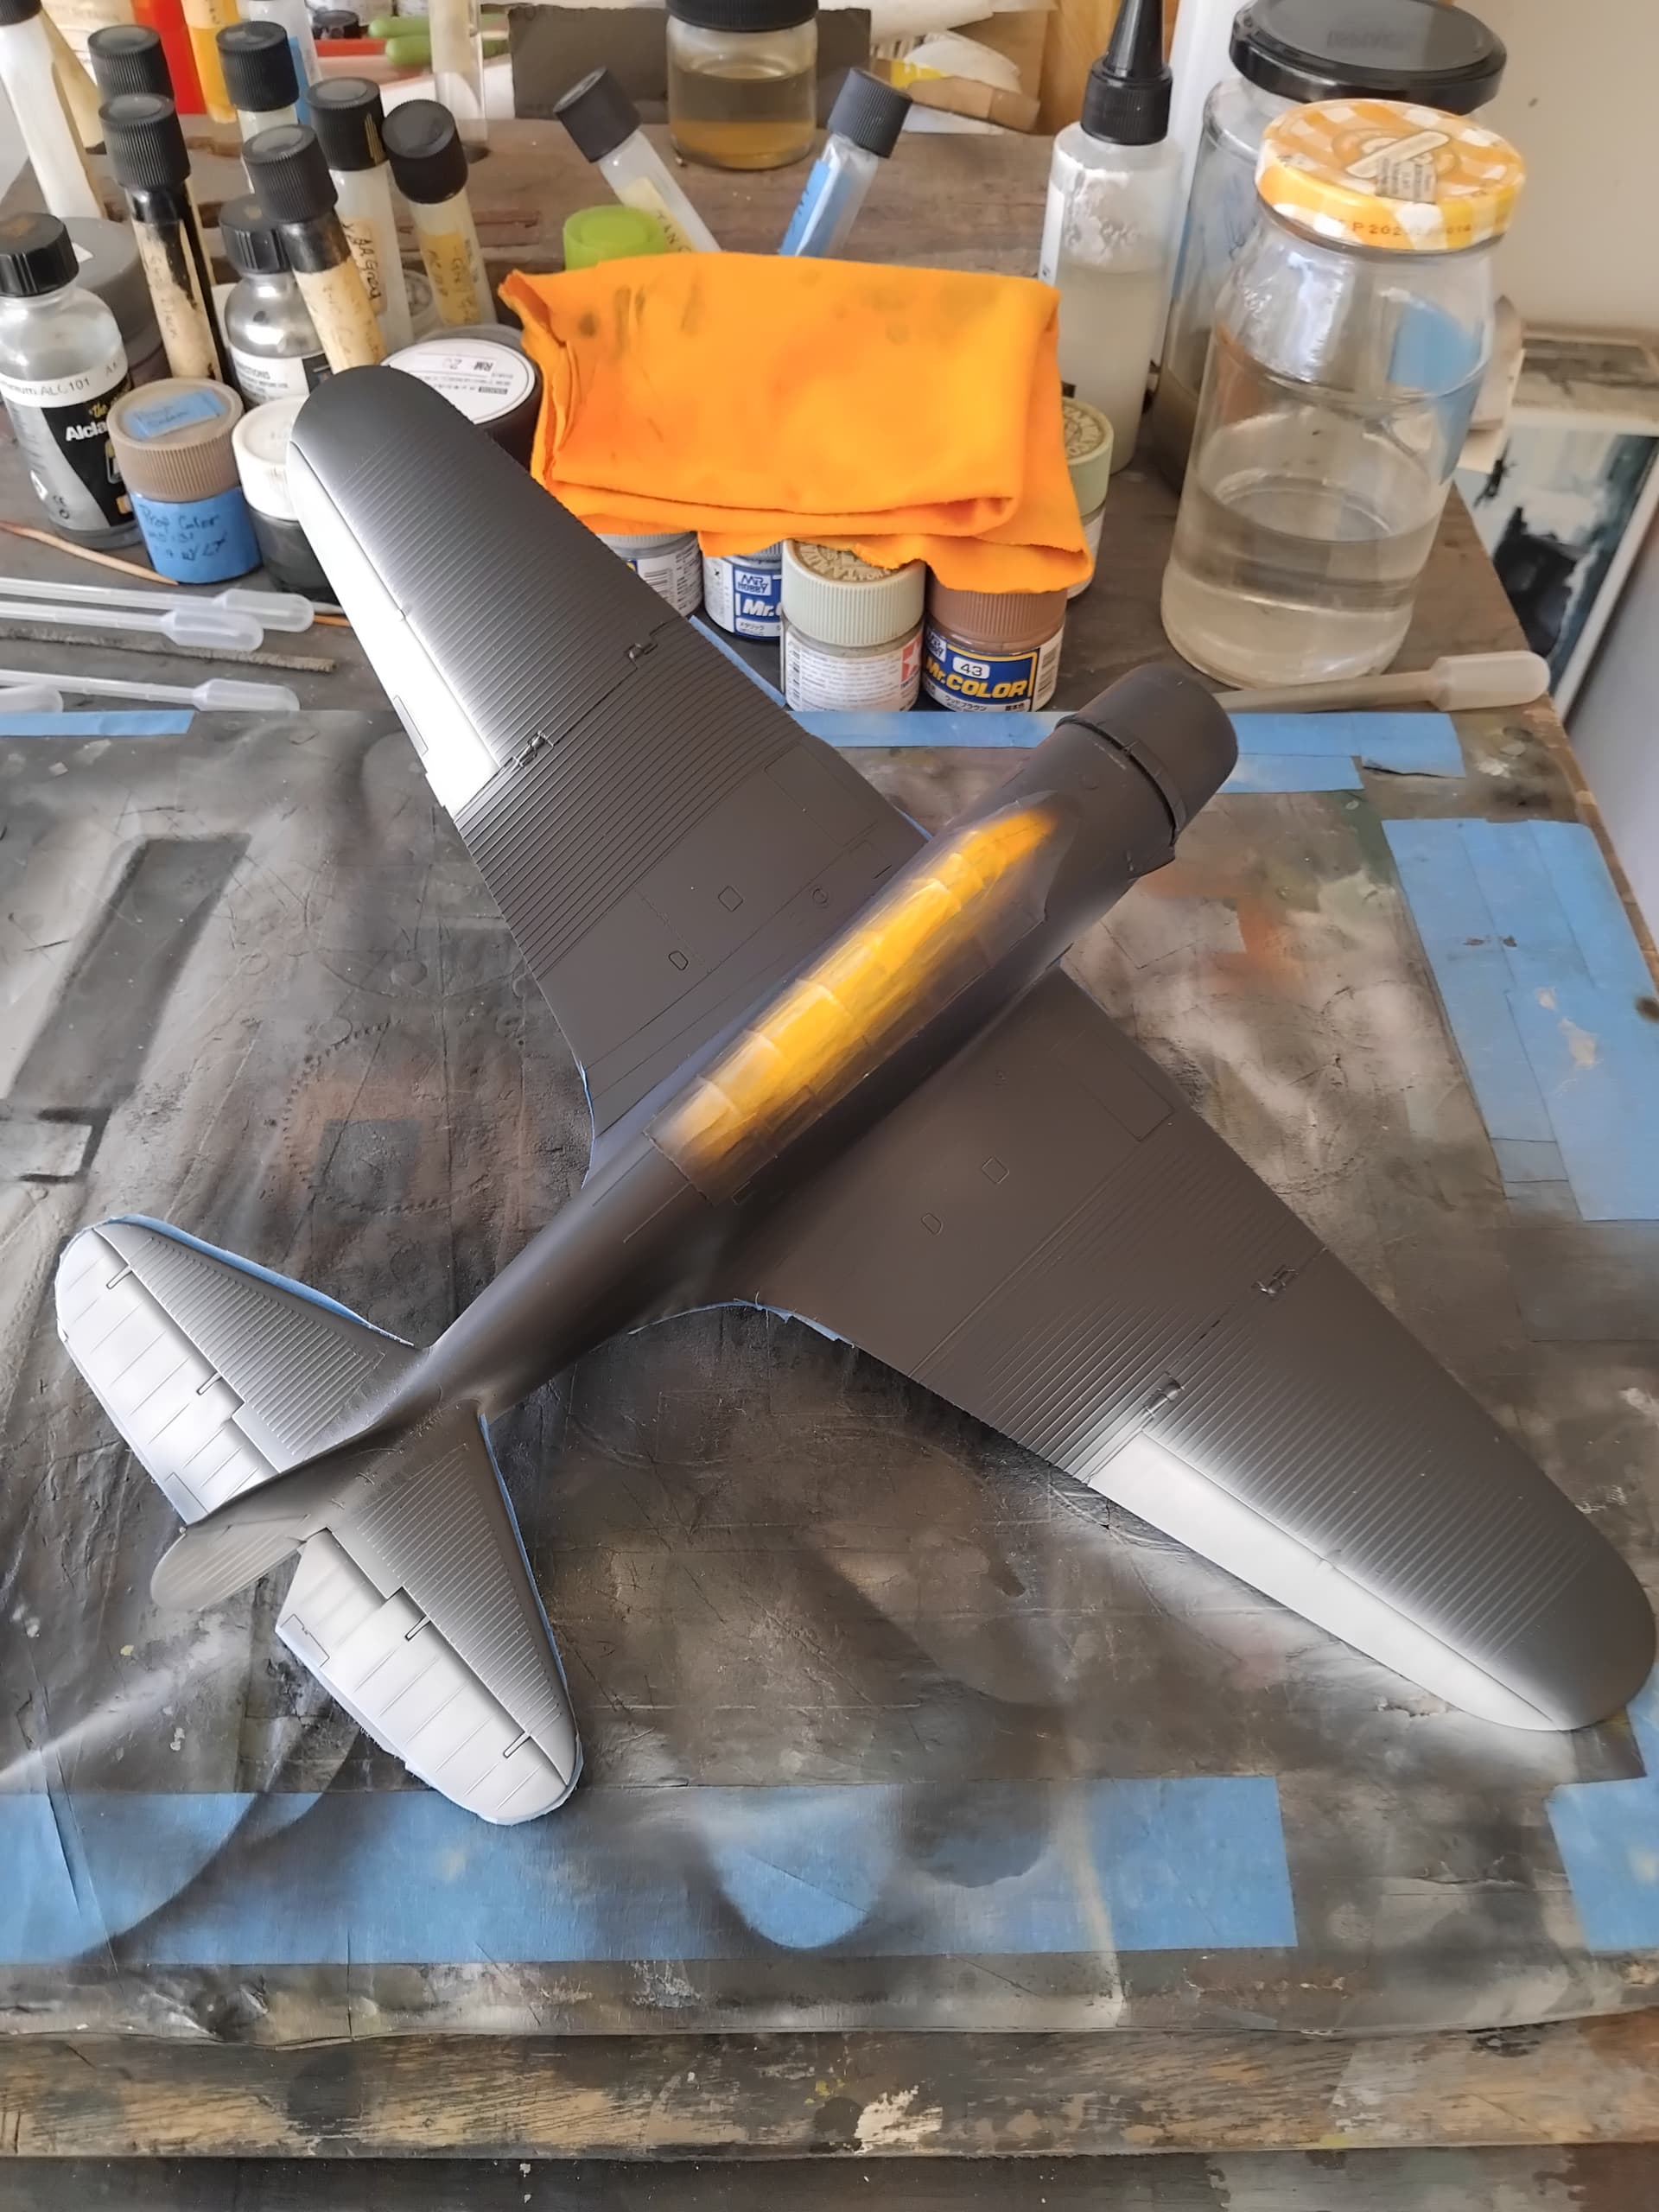
Then got the fabric color to look right.
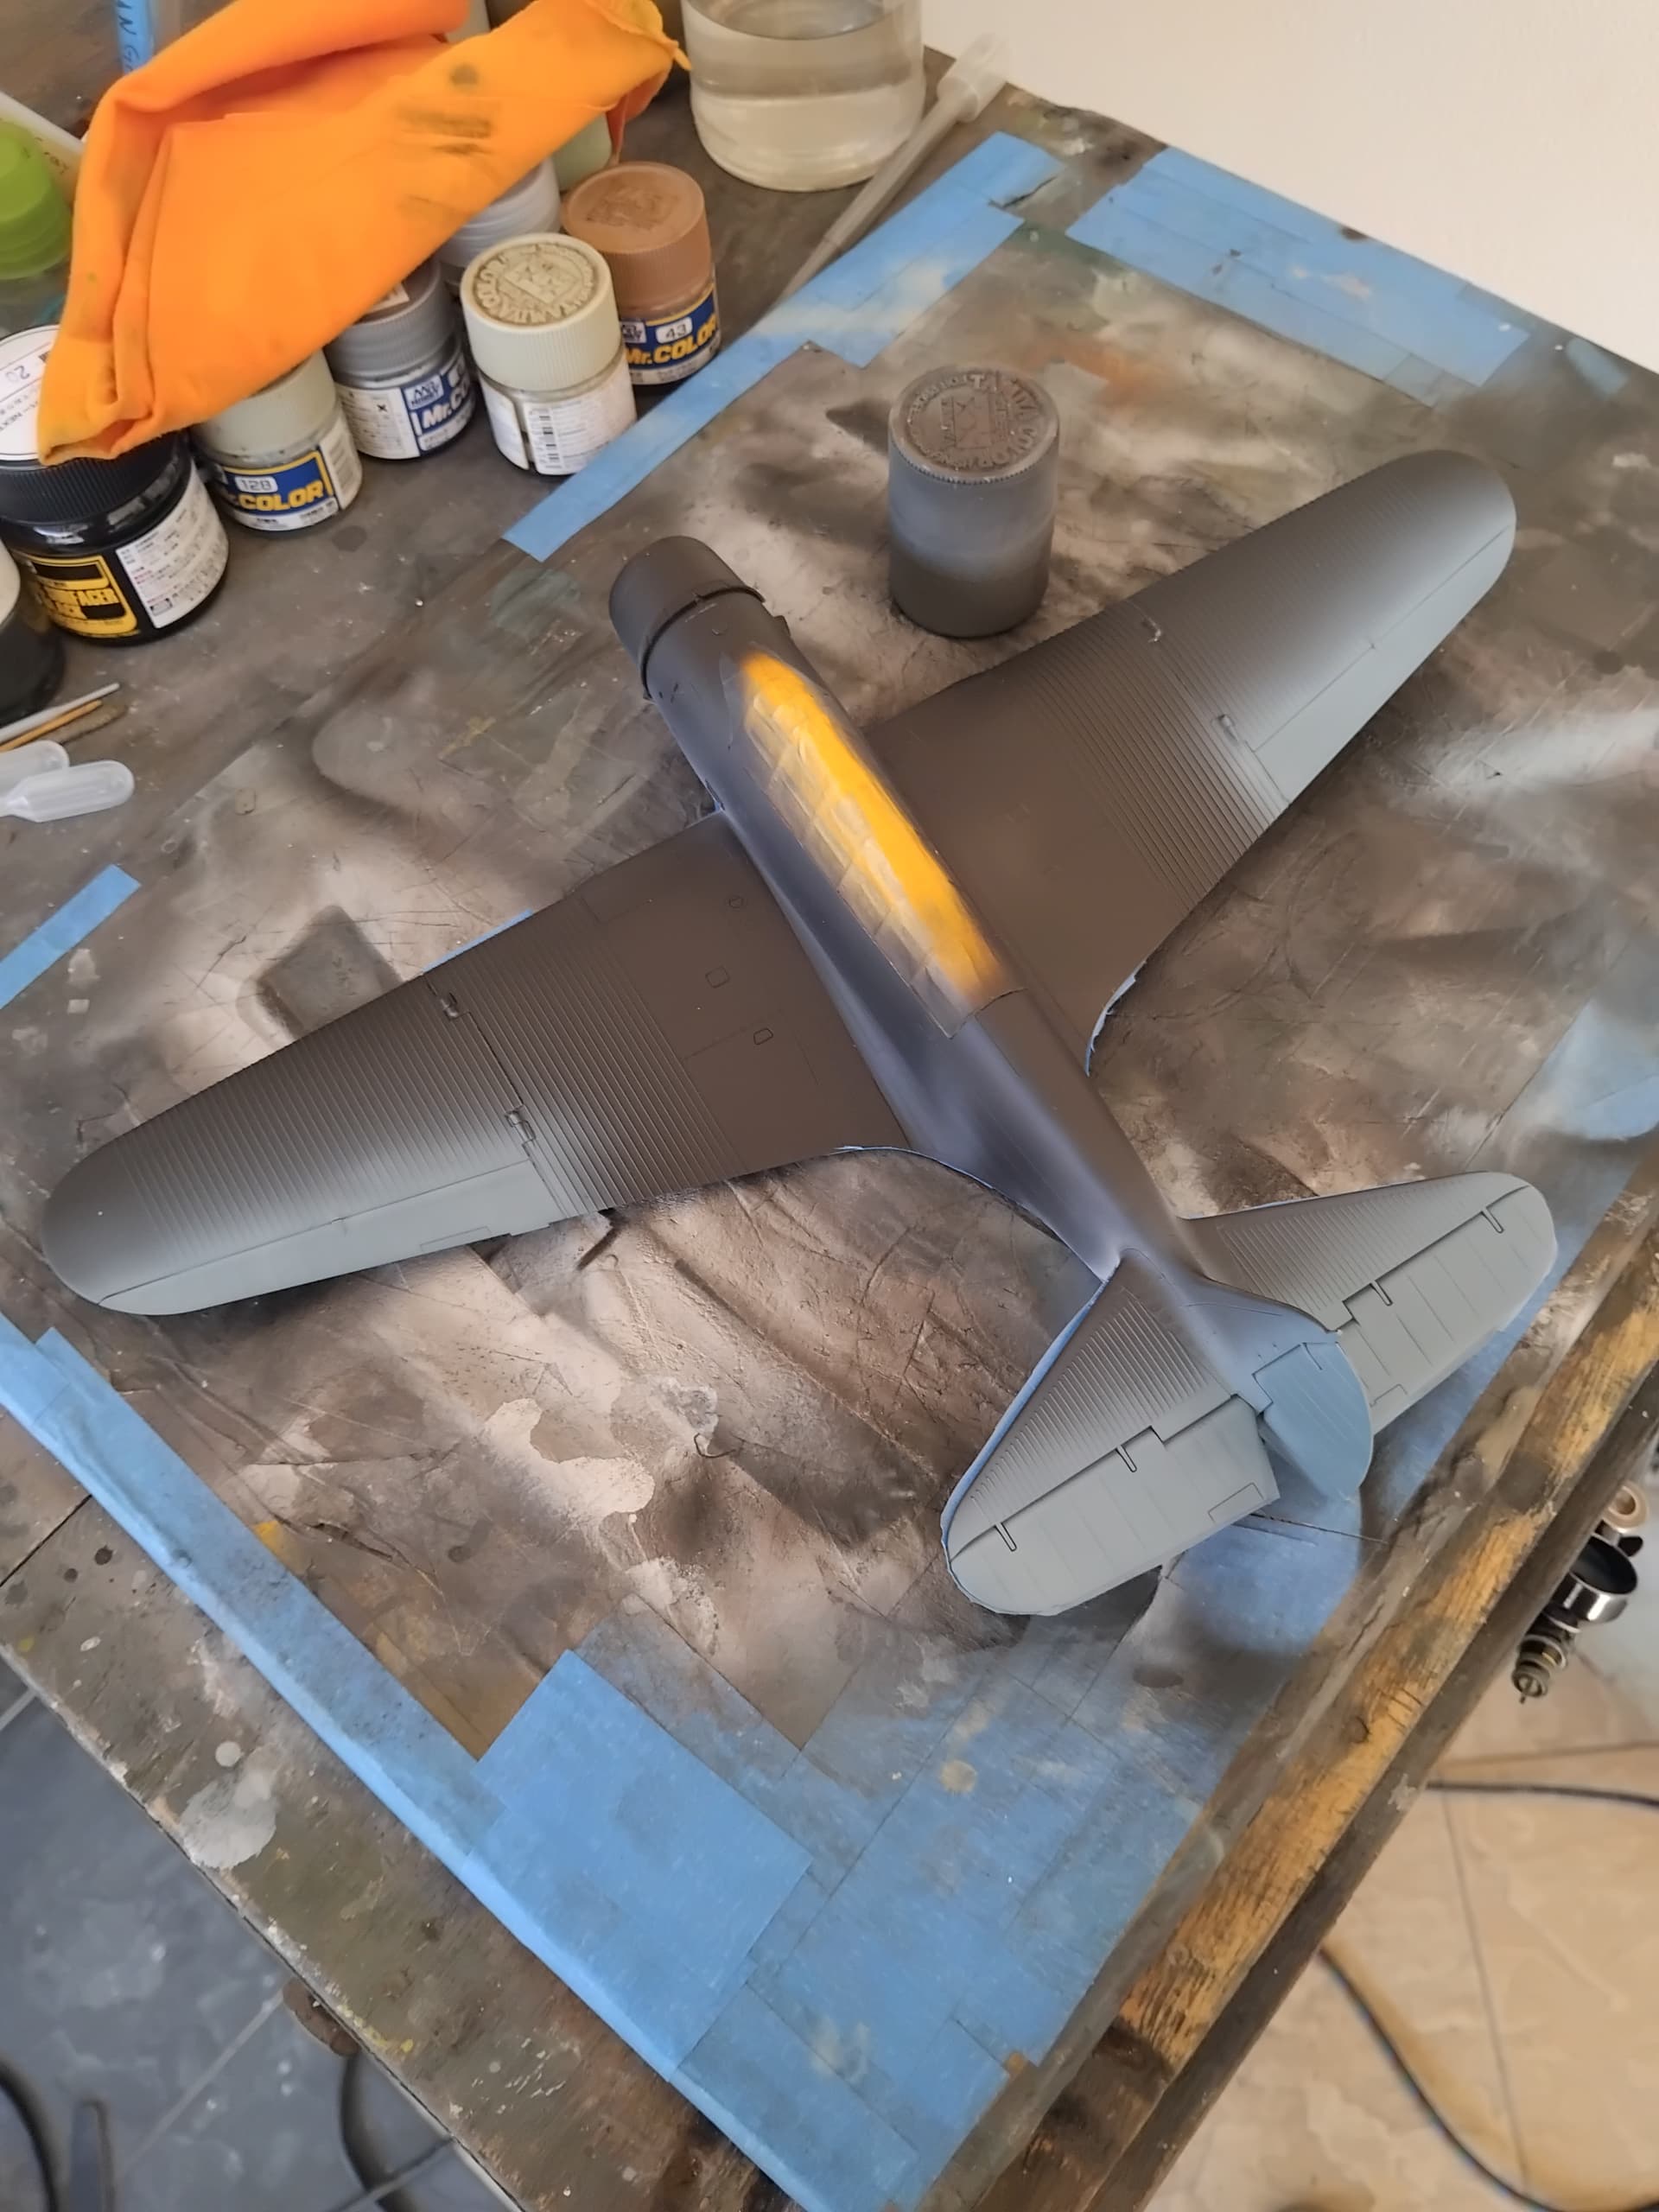
The fabric areas were then masked, and the primary grey/blue was painted.

Once done, the fabric areas were unmasked, and the bird got clear coated in preparation for decals.

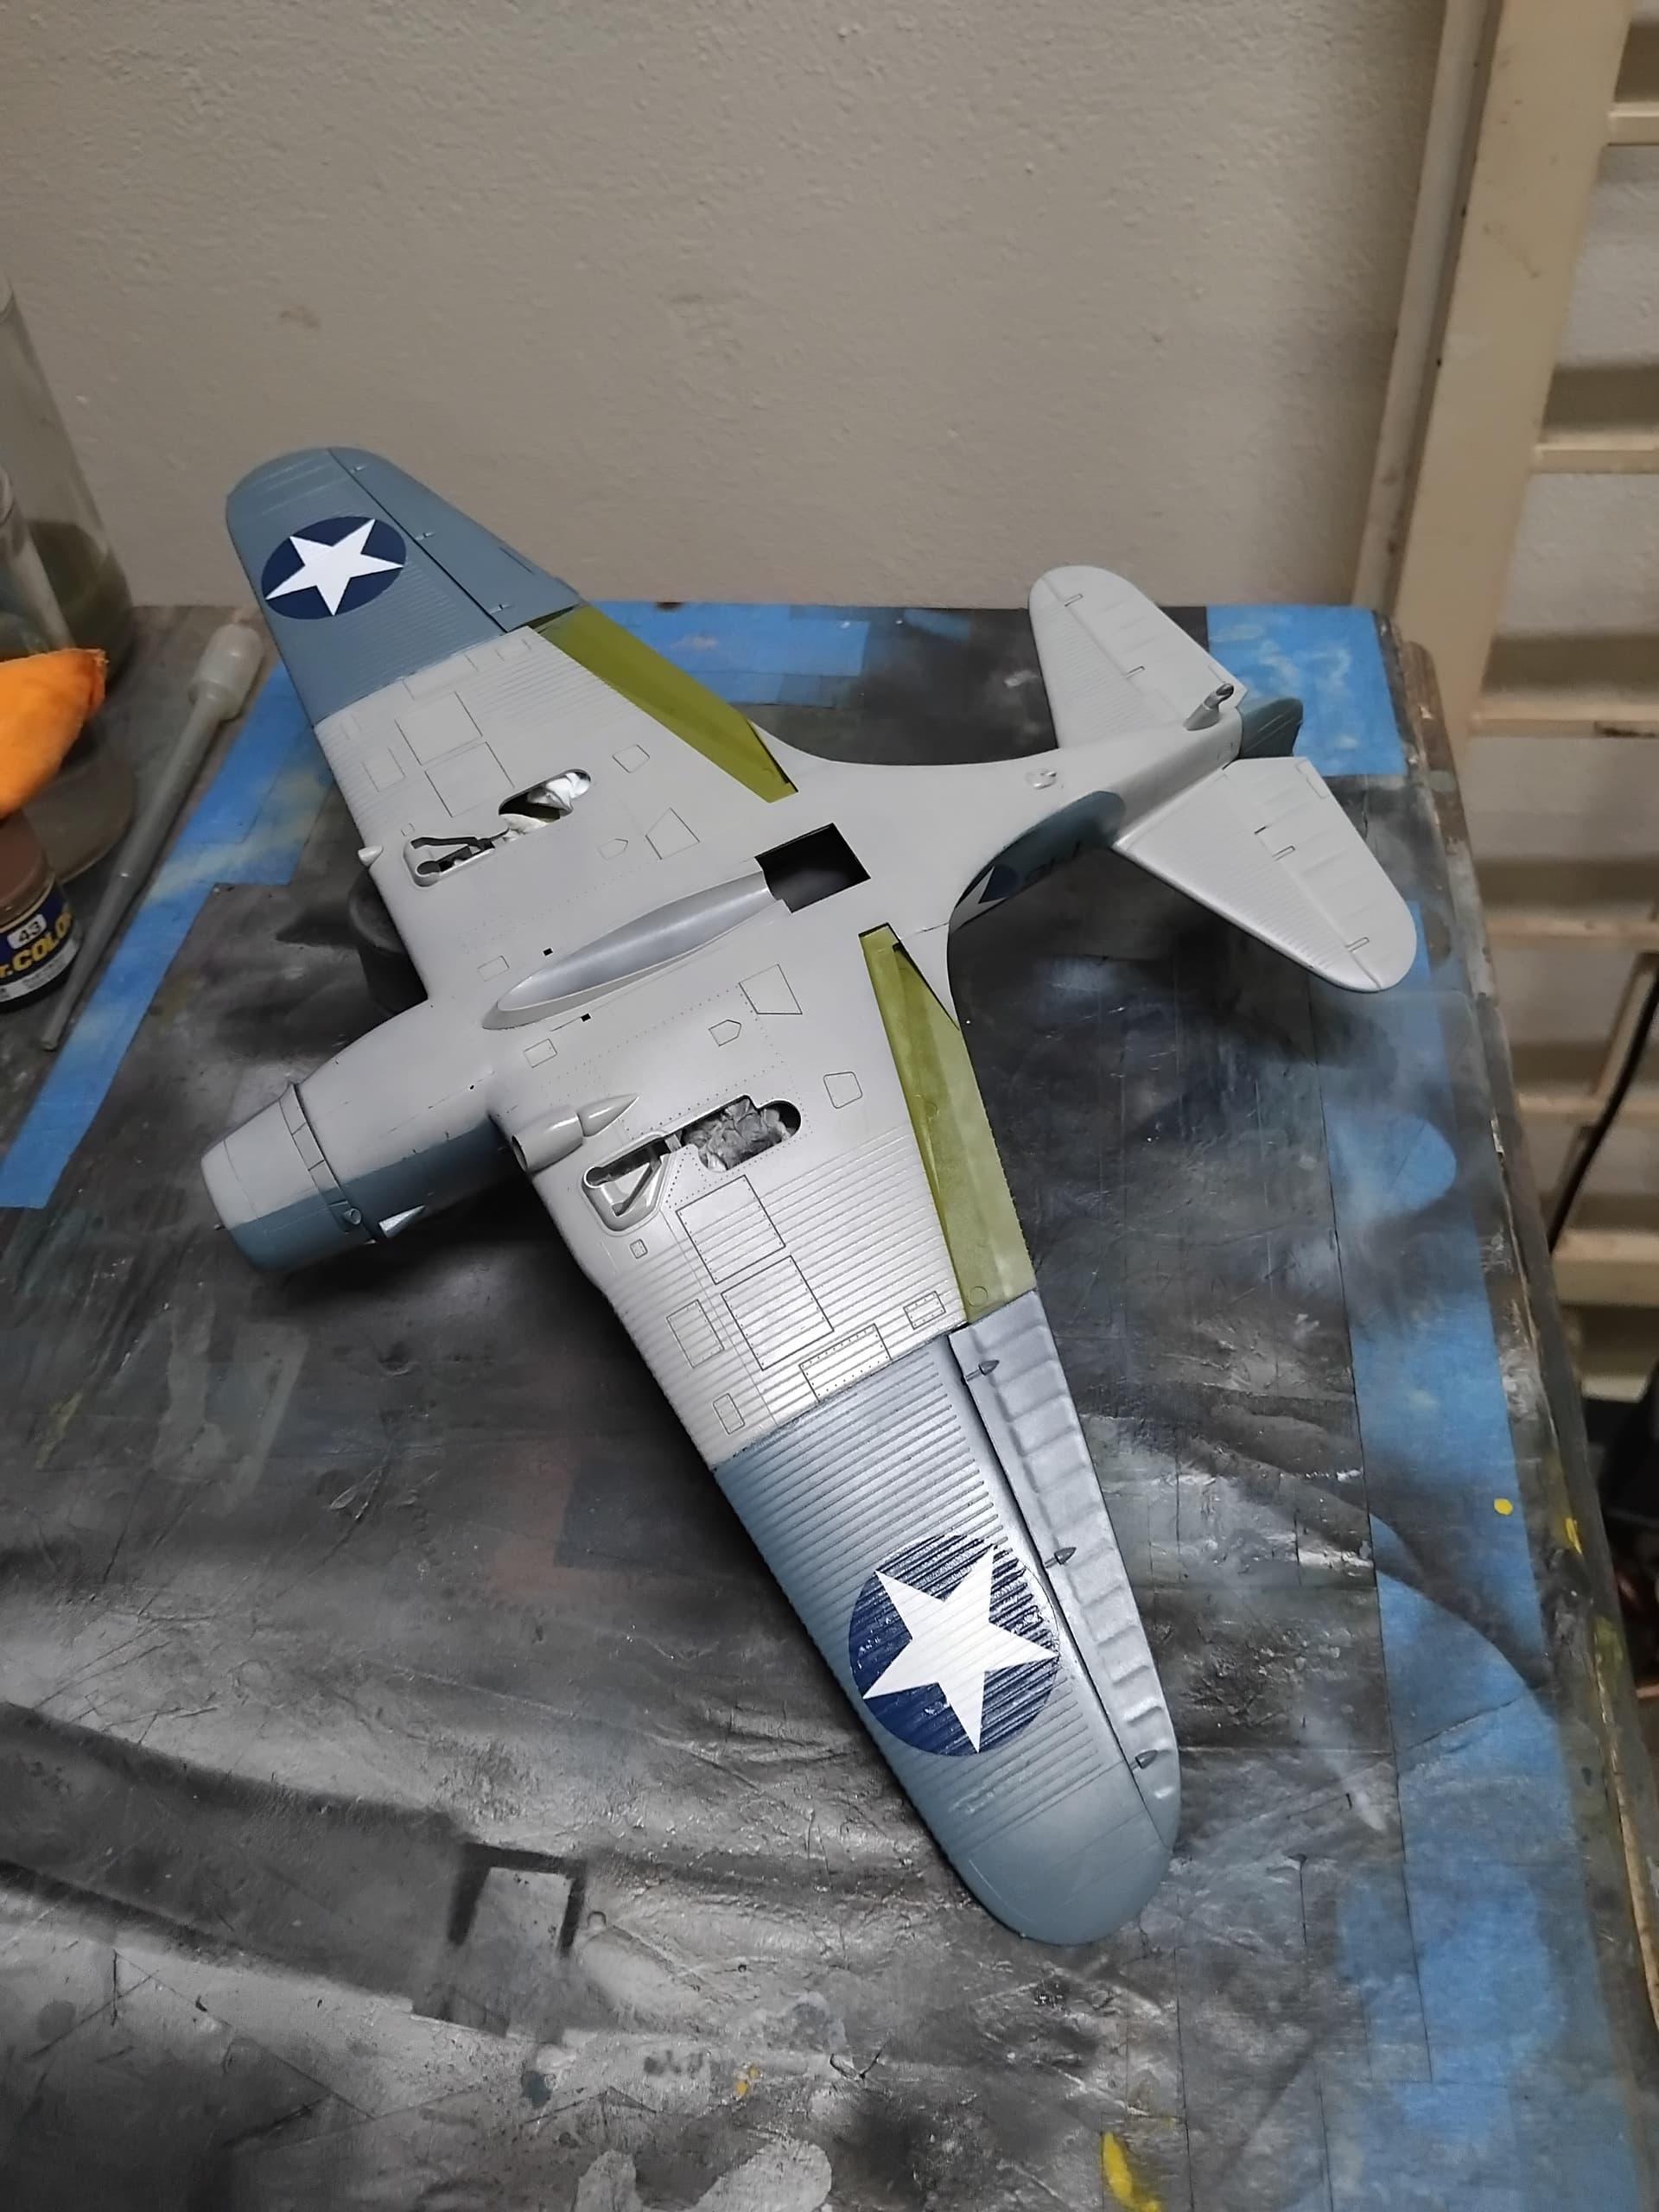
I decaled the plane using the markings for Waldron’s mount, and will admit that GWH decals performed wonderfully.

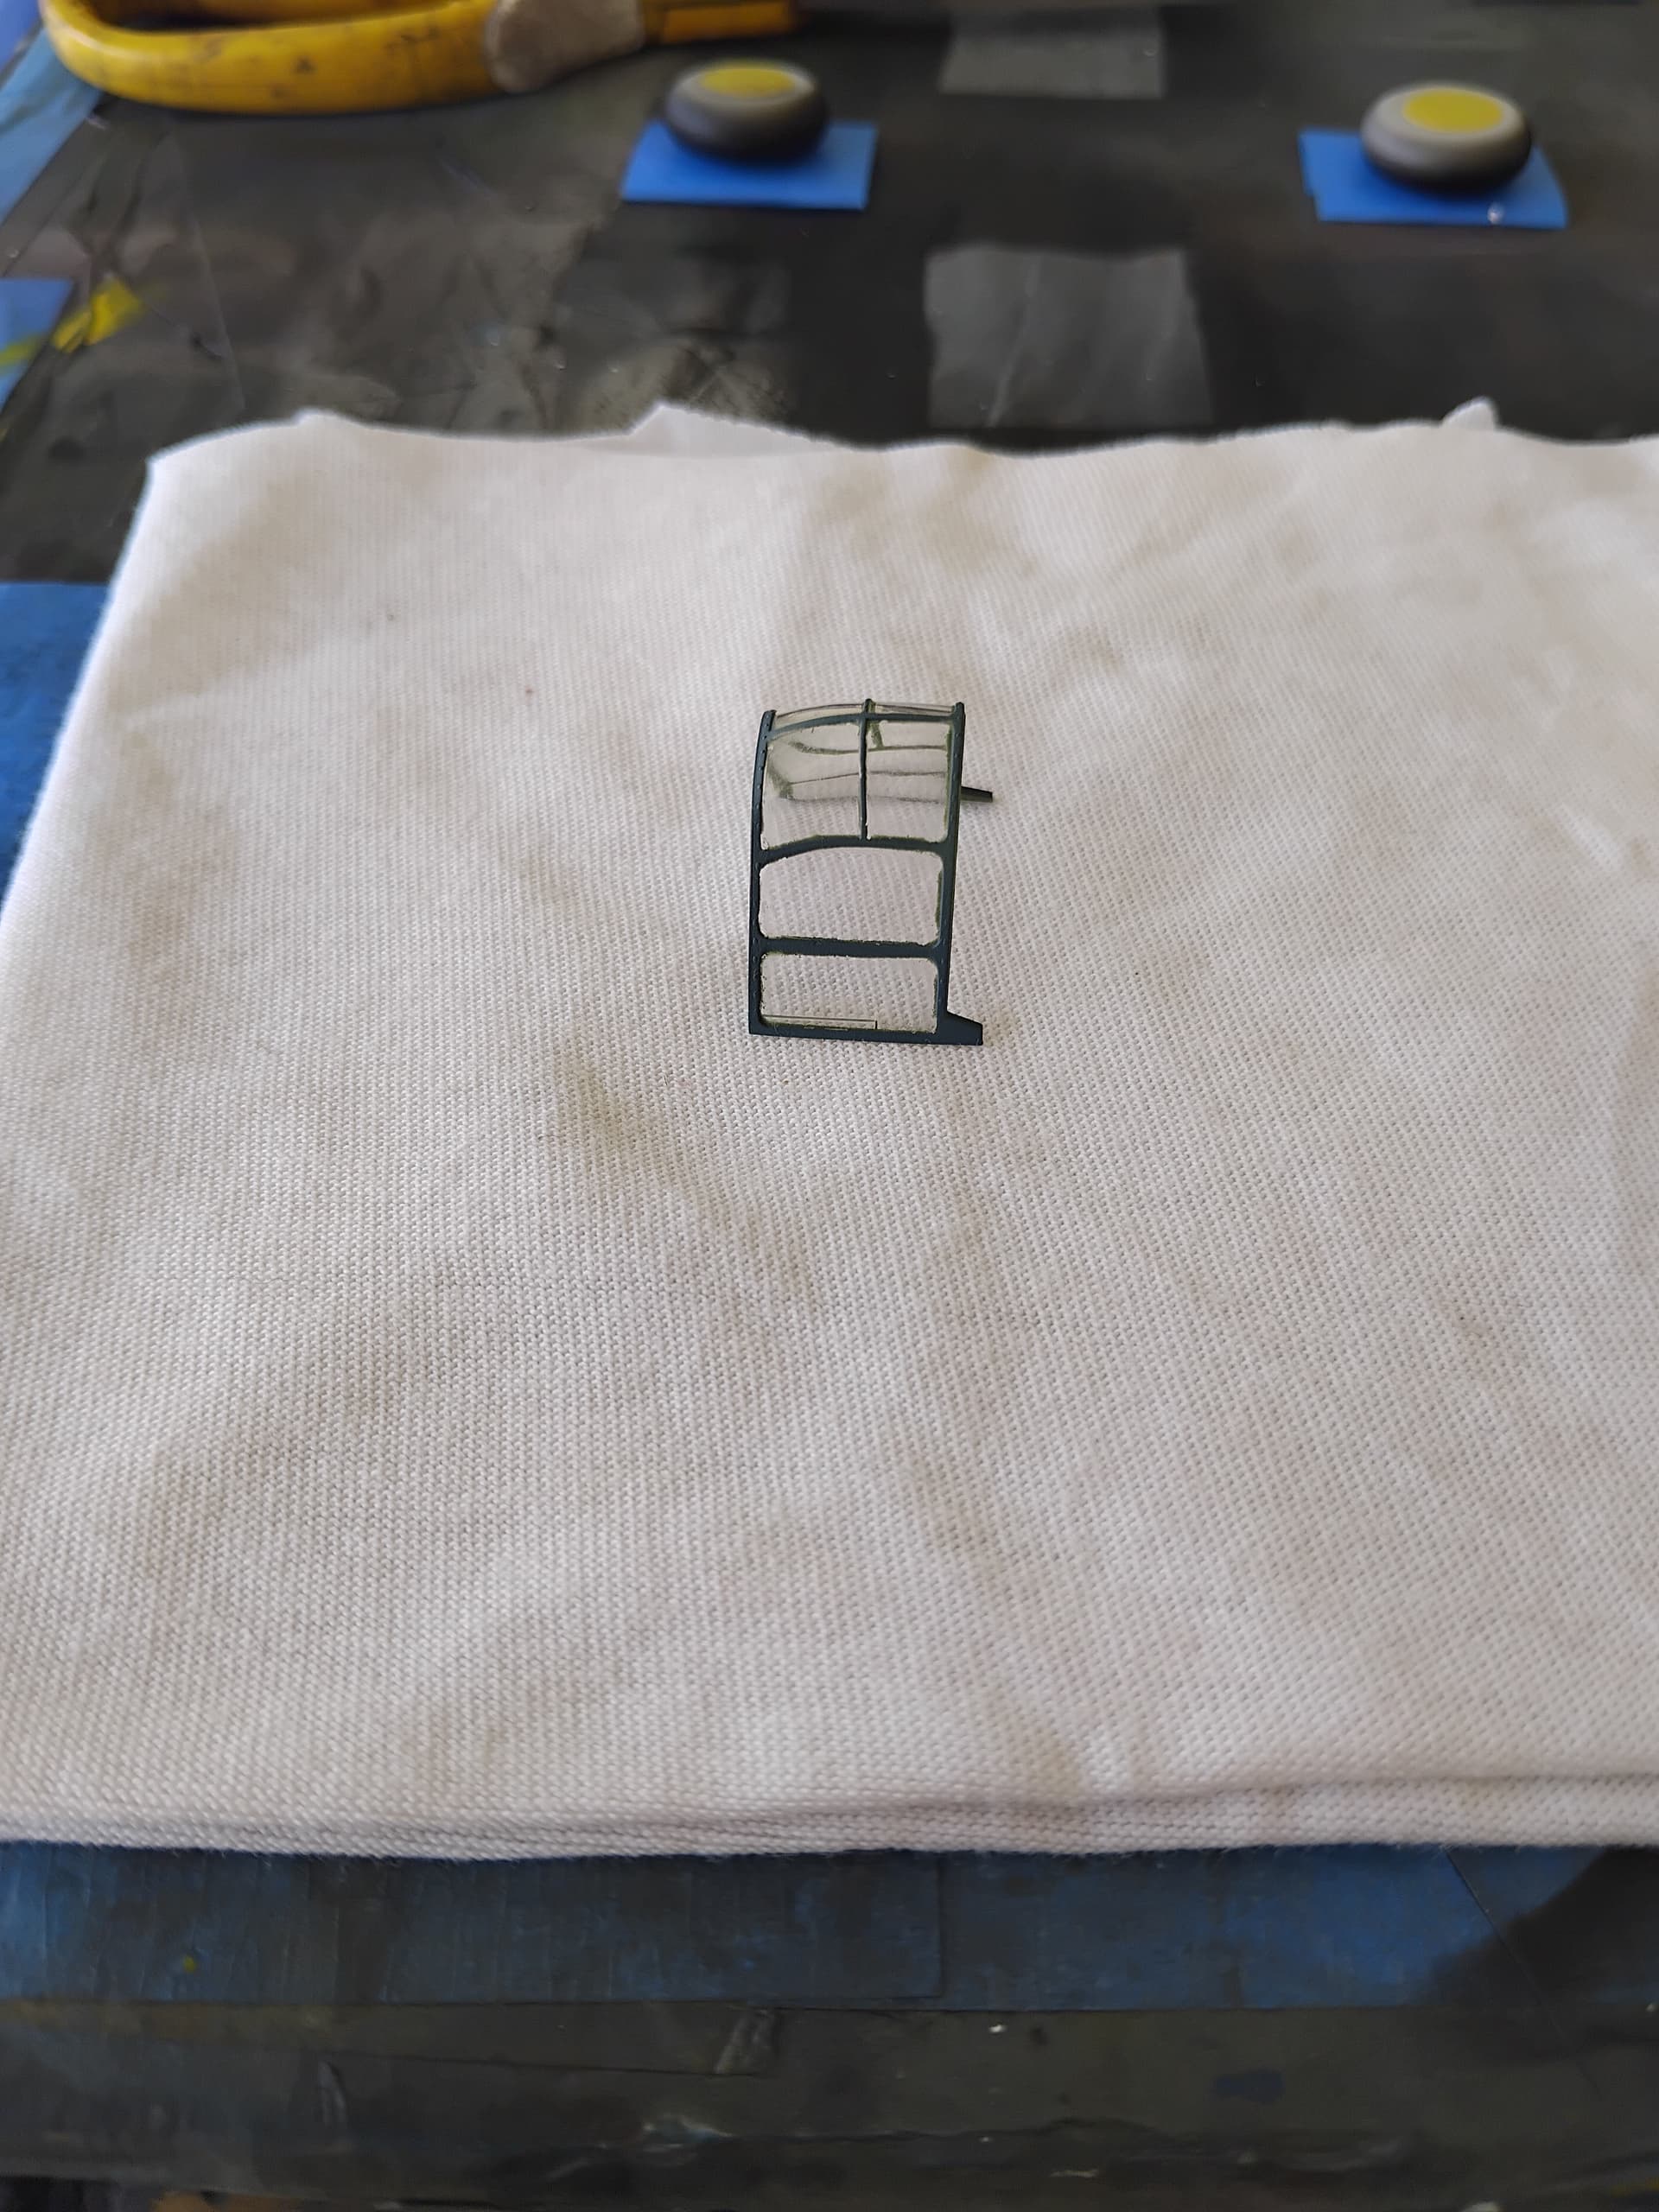
Aside from the outer wings, the only other glaring issue I had with the kit was the canopy. The kit comes with a fully closed canopy that I used as a cockpit mask, and then there are individual sections of canopy, which do not fit at all. To remedy this I cut the one piece canopy that fit fairly well such that the middle section would fit well.

Final work was done to complete the cockpit.

Fit of the middle canopy section looked good.

With canopy situation solved, they were masked off and painted to match the rest of the paint job.


These turned out pretty well, and were cleaned up using a toothpick cut to act as wooden chisel to remove the areas where the paint leaked through.

The canopy was then attached using white glue, and things were moving along towards completion, when for the third time…

A note to those building this kit with wings down would be better served by not putting the kit supplied part inside the wing, and instead take strips of stock plastic to give the wing butt join more area to make a solid base. That said, the wing was repaired, and the flaps and landing gear were installed, these went on smoothly.

The aerial wire was attached, and the prop was put on, and this project was called done.


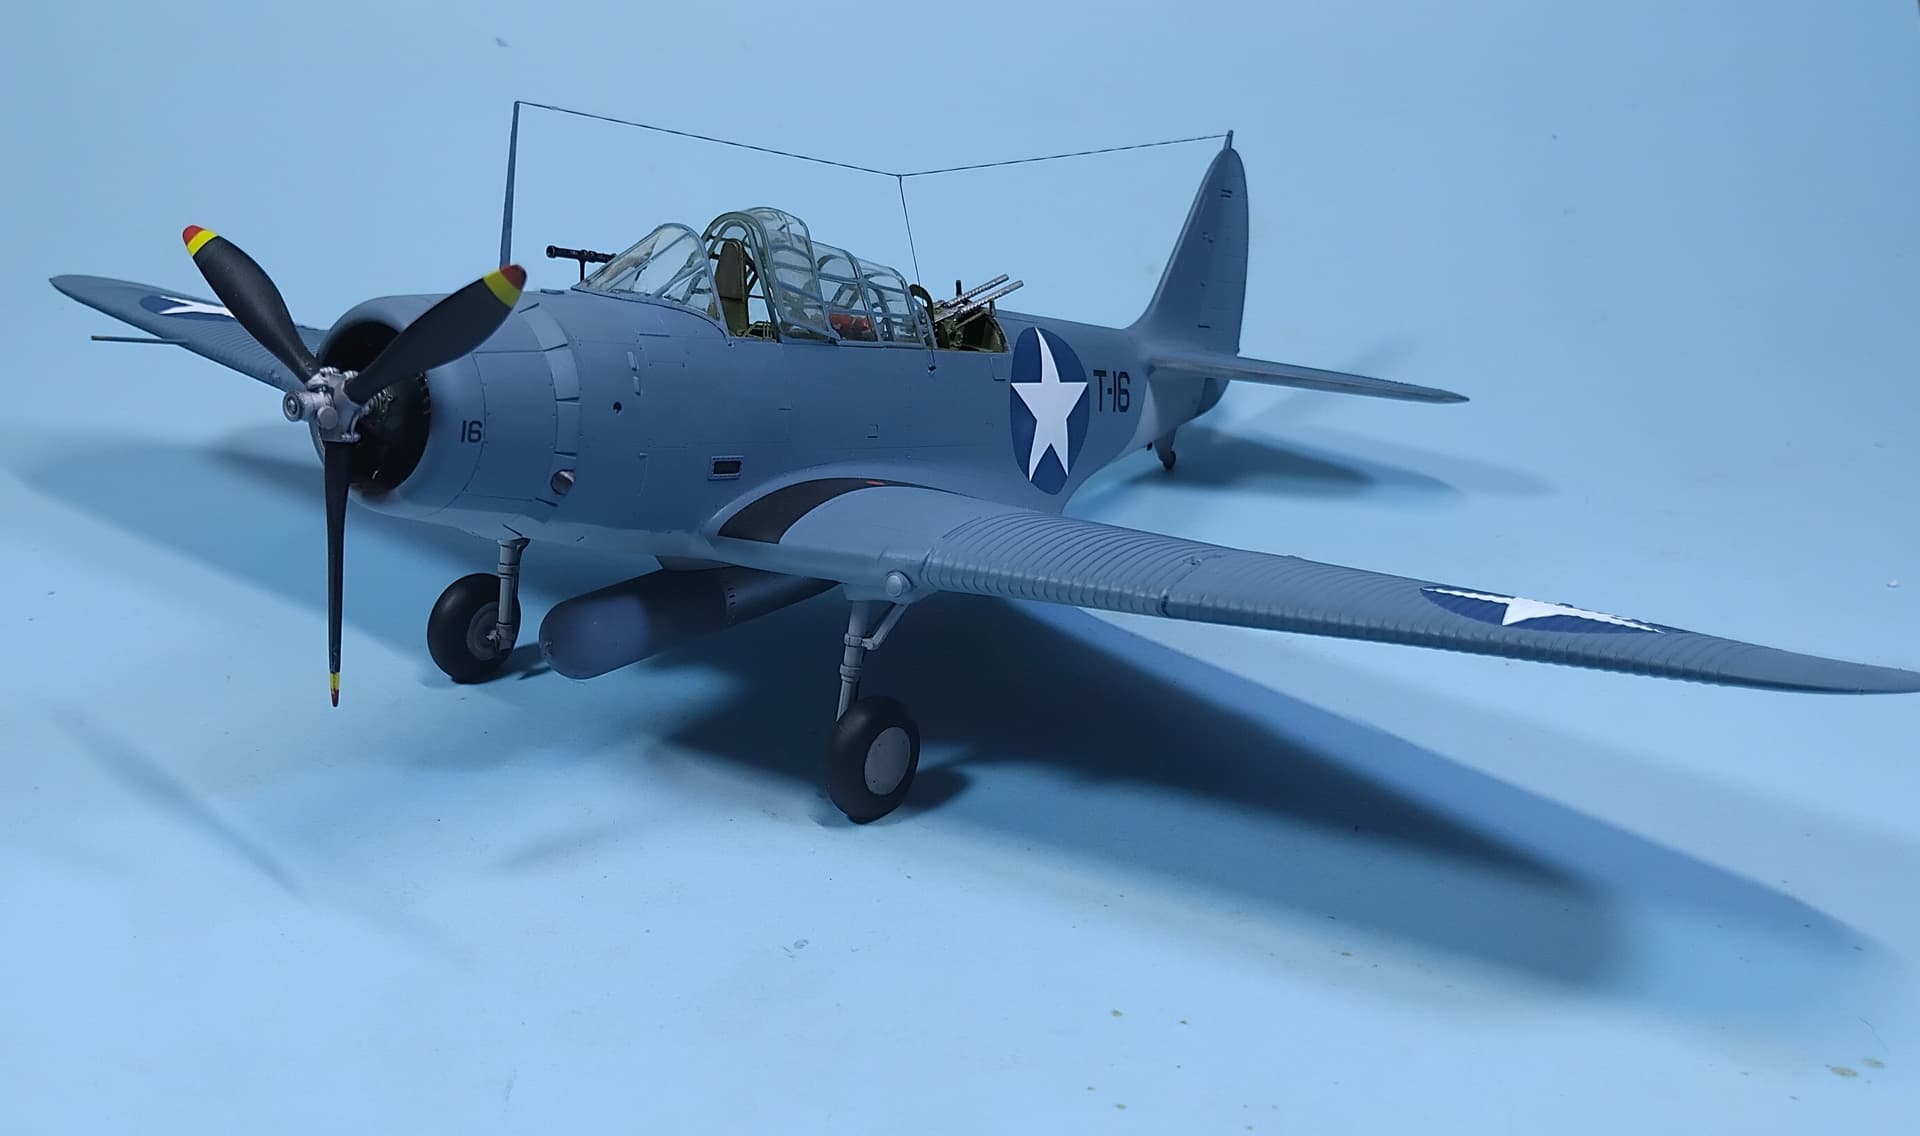

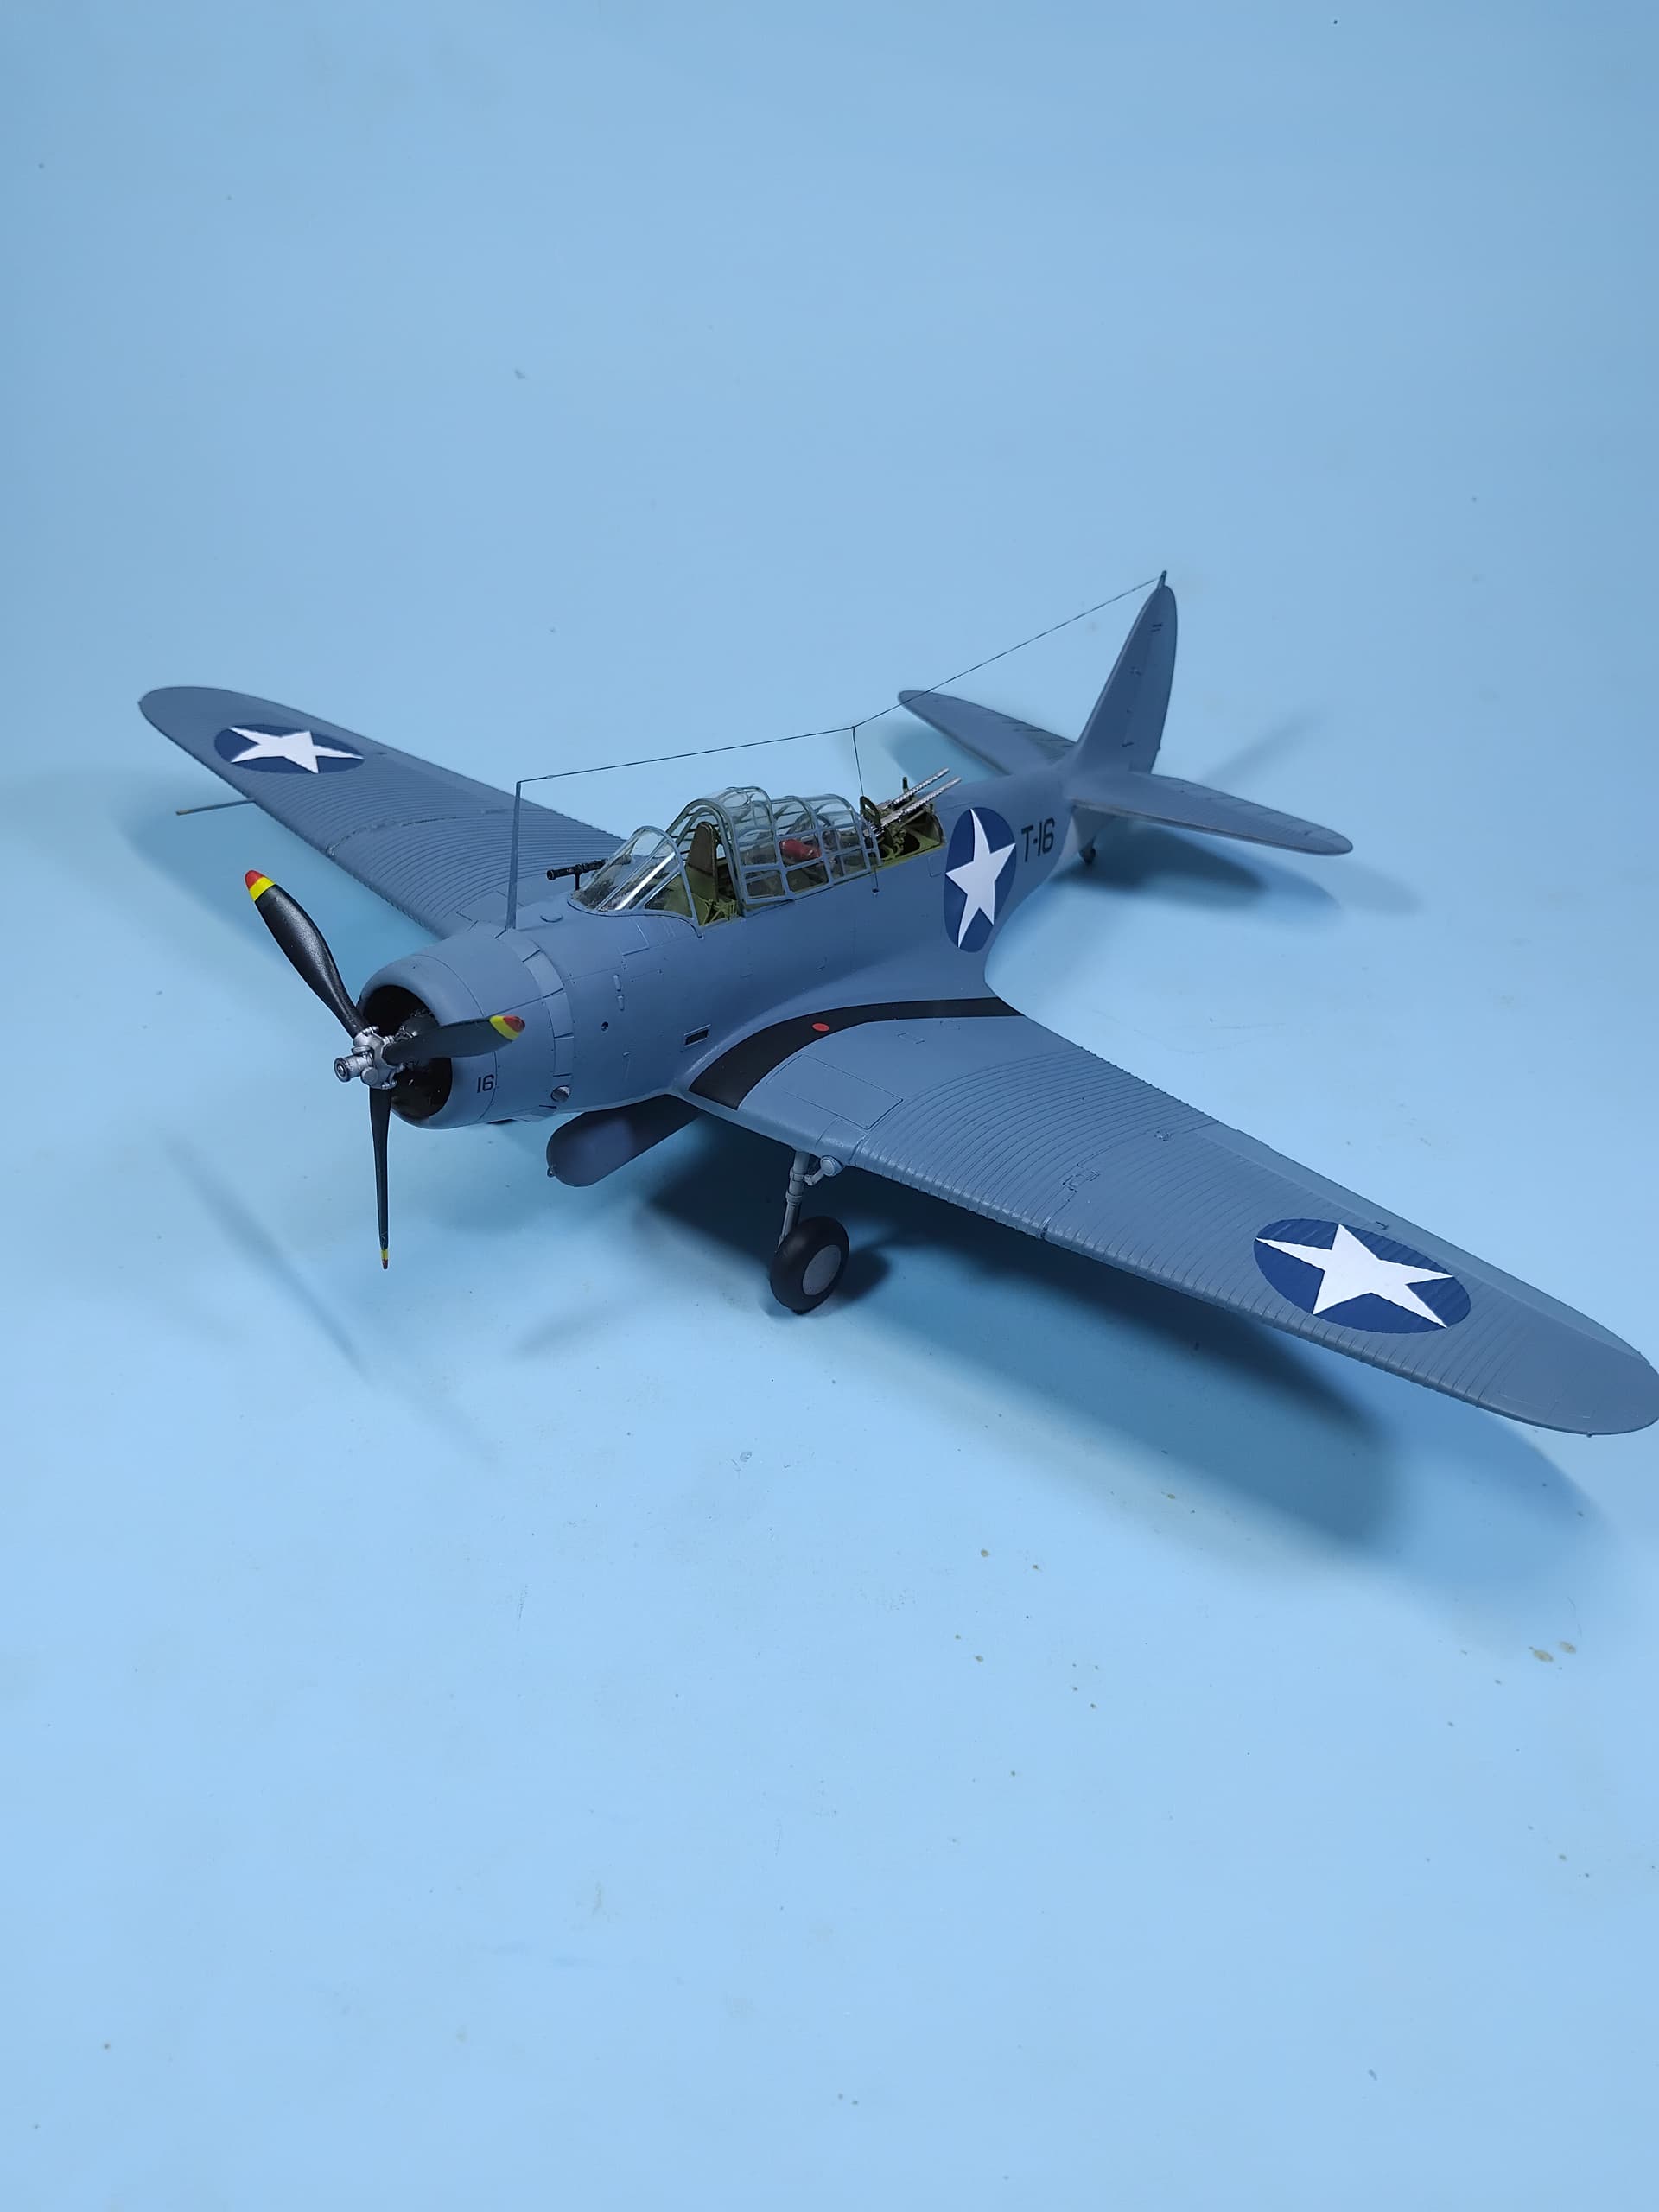
So, there it is. Overall it’s an ok kit, the areas that could be improved would be the wings and the canopy, the areas that are far better than the Monogram kit would be the cockpit, the engine and the torpedoes. The PE is a nice touch, and the kit can be had much less than MSRP with some digging on Ebay. I picked this up for ~ 20 USD. Hope you enjoyed the build of one of the US heroes from the Battle of Midway.
Till next time, be safe, wash your hands with soap and water, and have lots of fun!
11 Likes
Very nice build and finish on it … lovely work.
2 Likes
This past year is the first year I’ve participated in campaigns. My question is where do I find the medal for finishing? I compled the IJN Fubuki for this campaign. Thank you.
1 Like
Lakota if you open your profile and click on summery, scroll all the way down and you will see the badges. it dosen’t look like it has been given out yet, i don’t see it on my profile either. anyone know anything about when we will get it or were we missed? I am also waiting for my mustang ribbon too.
Joe
1 Like
Michael add john1492 to the list. he finished before the end of the year.
Joe
1 Like
It was applied for a while ago by Michael, however, Staff Jim does get busy and it can take a while … Michael can ask for an update as and when…
1 Like