I love seeing these builds of old kits  Nice job with all the detail you’ve updated
2 Likes
Great work, especially with the tow cable.
Ken
1 Like
Looking better and better! Keep up the fire!
2 Likes
Well, I think I have done what I could so far as far as construction is concerned.
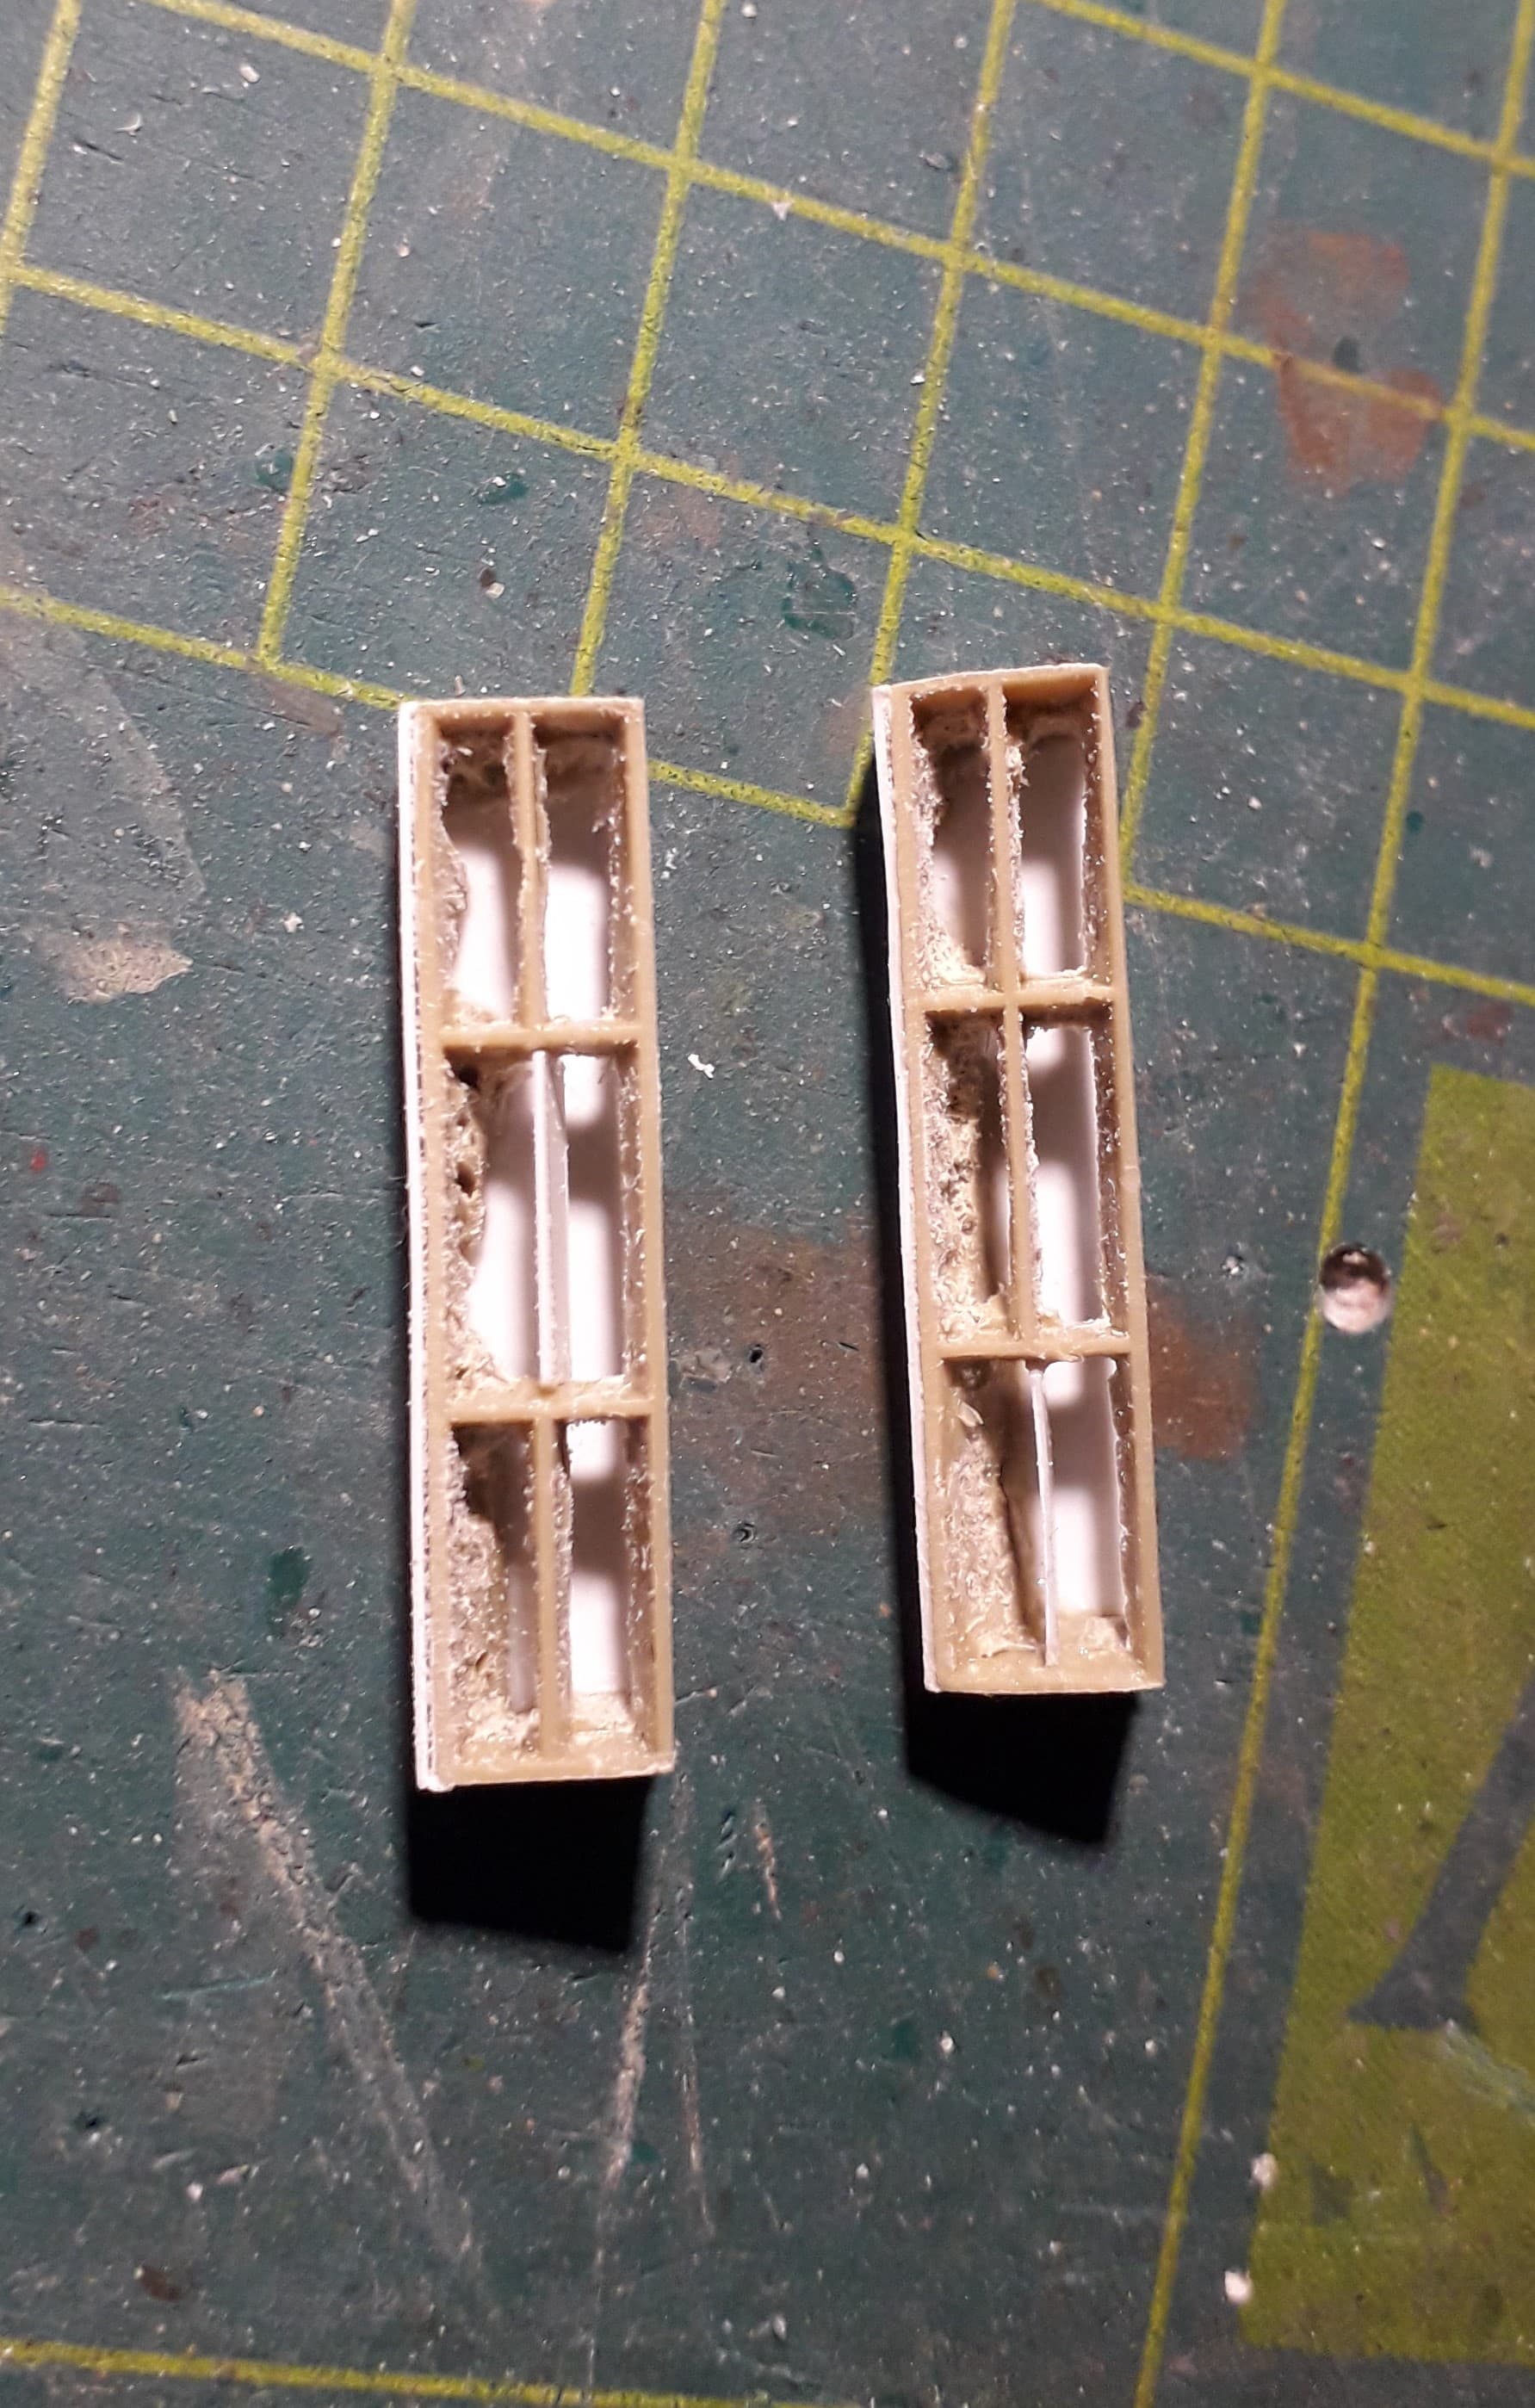
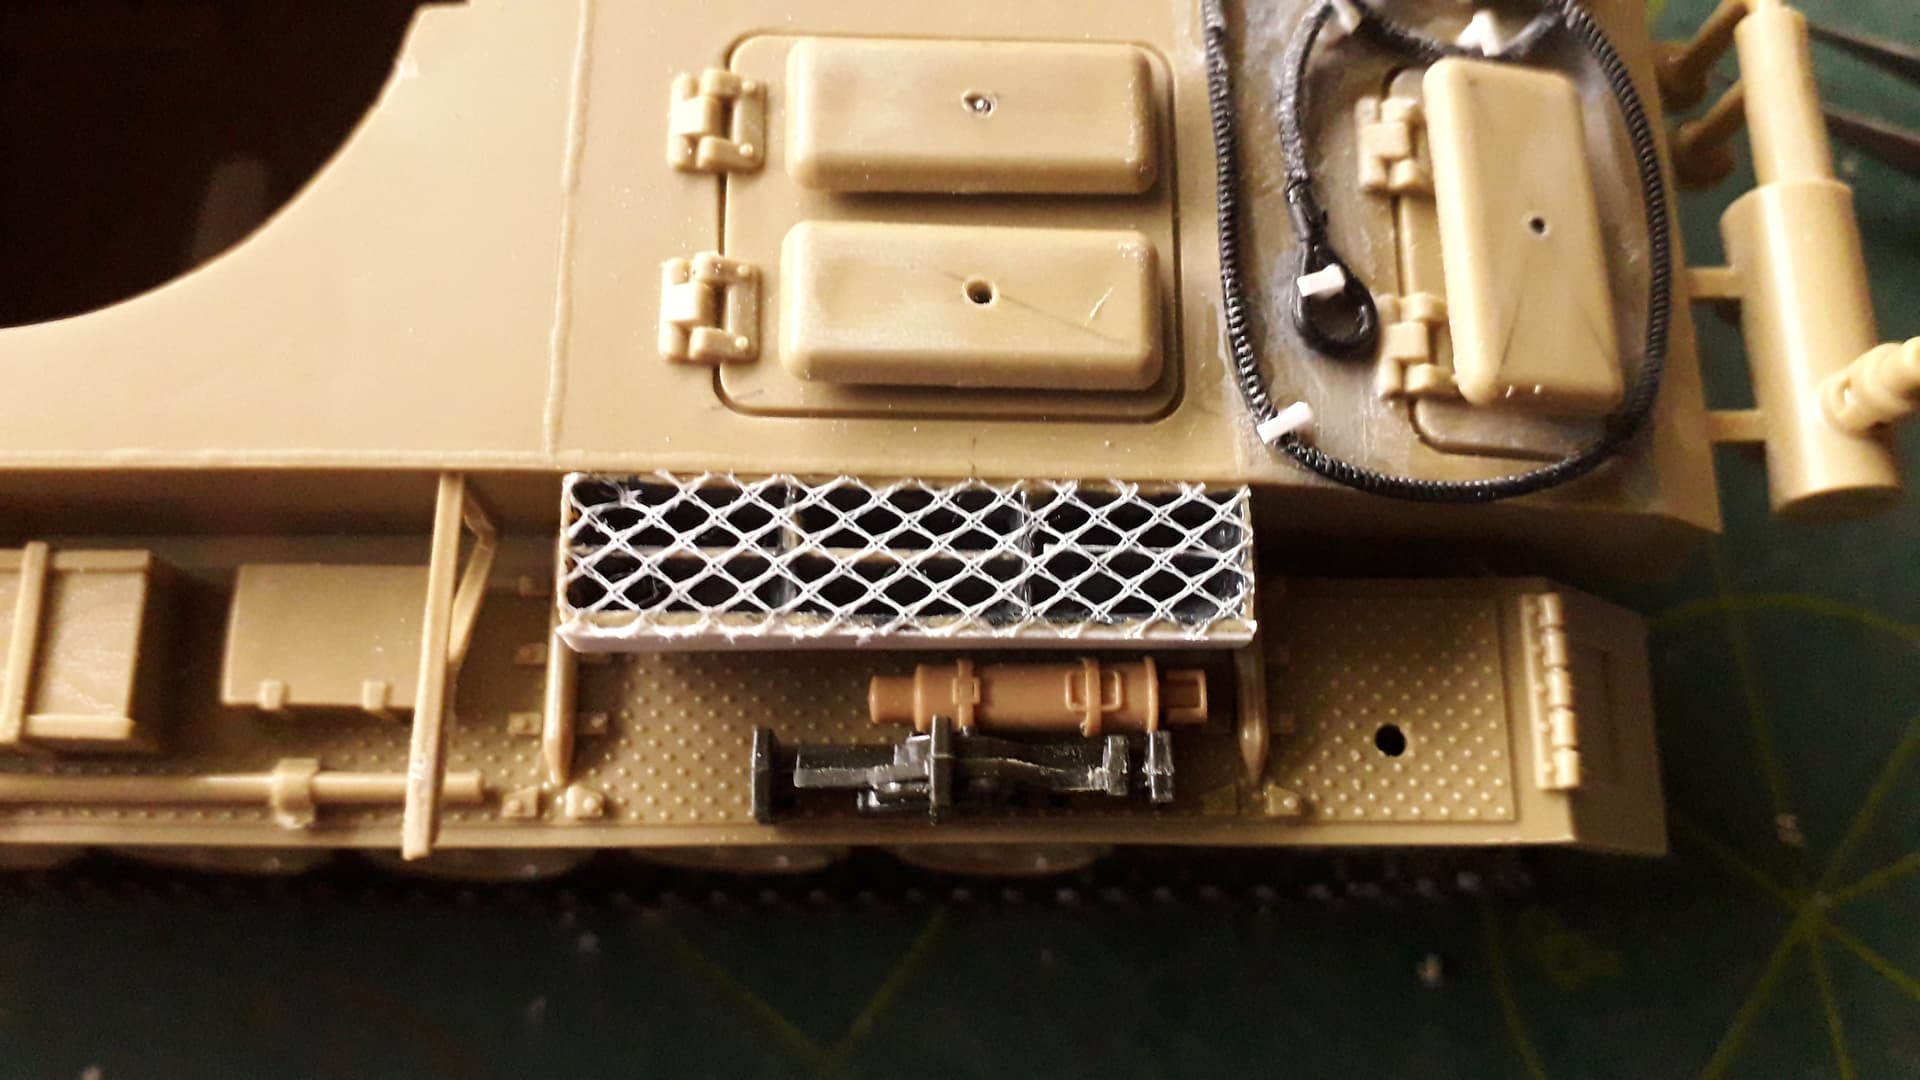
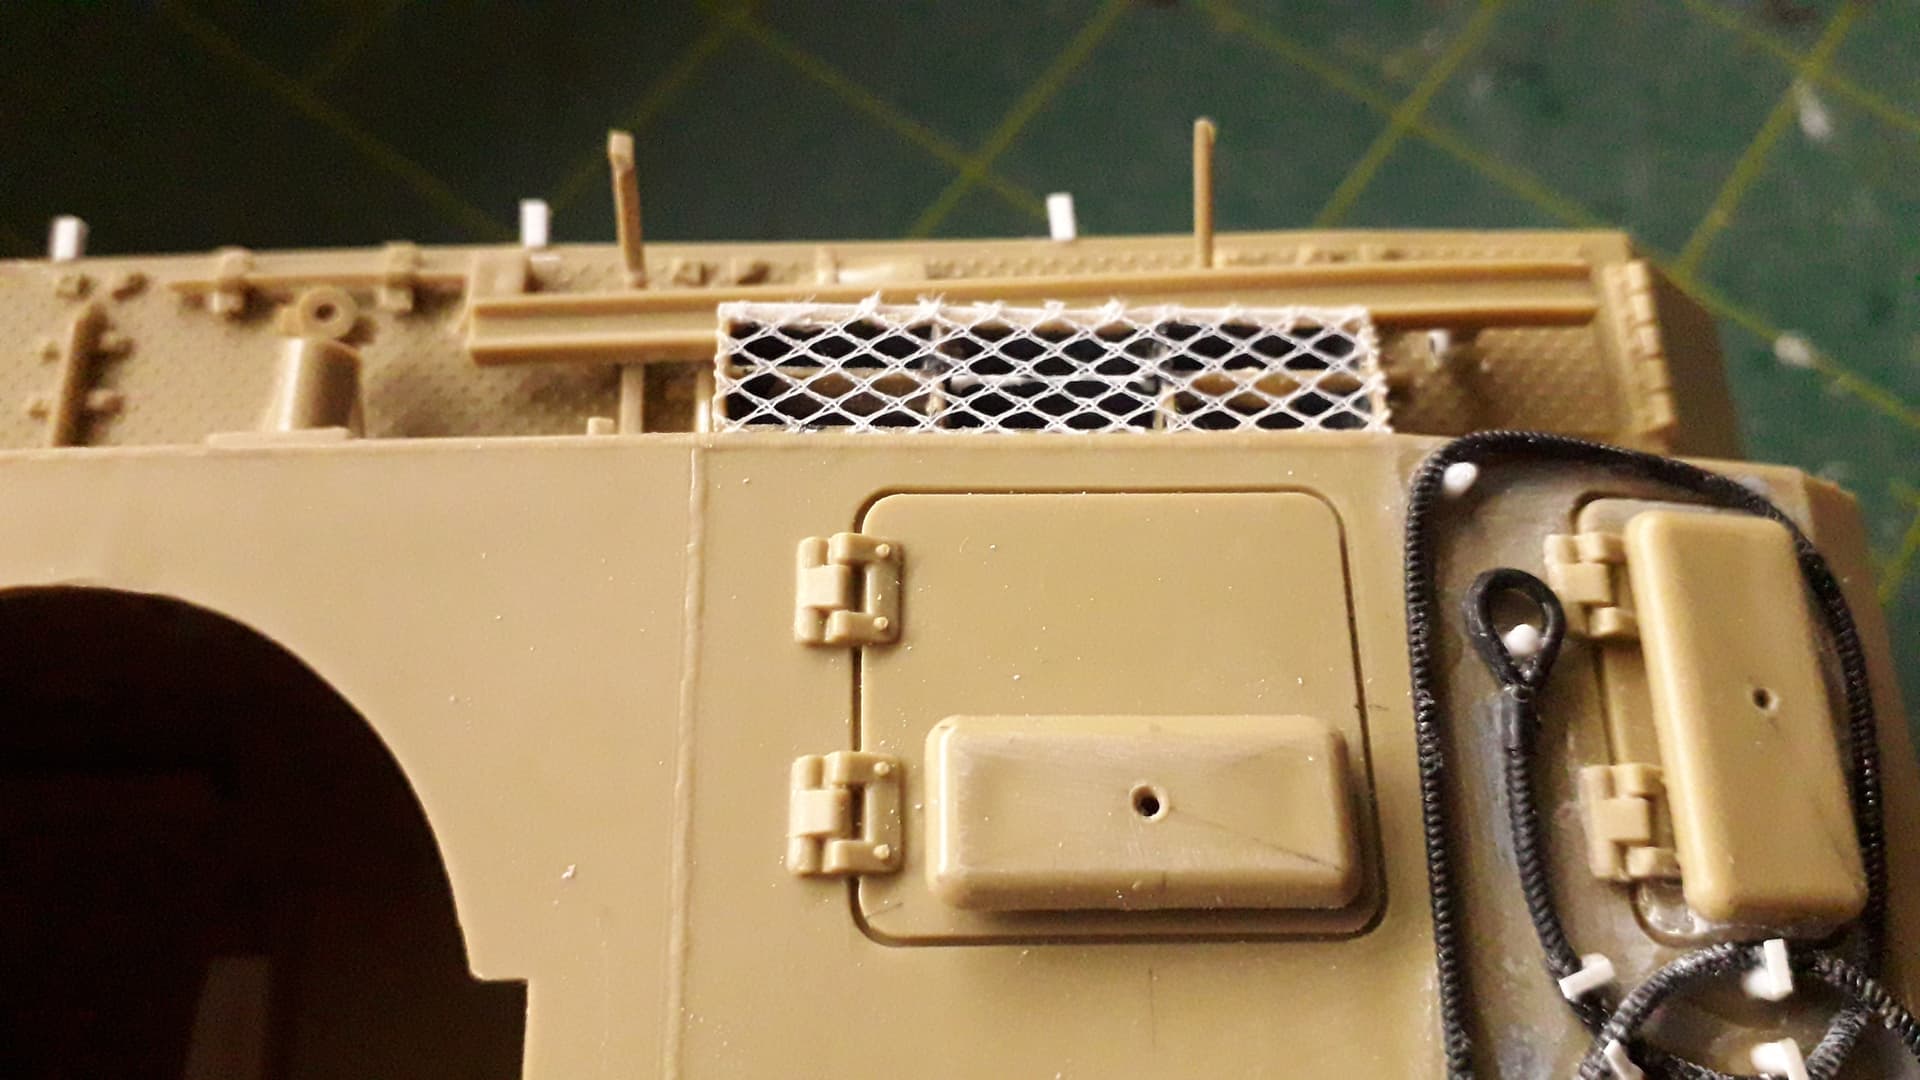
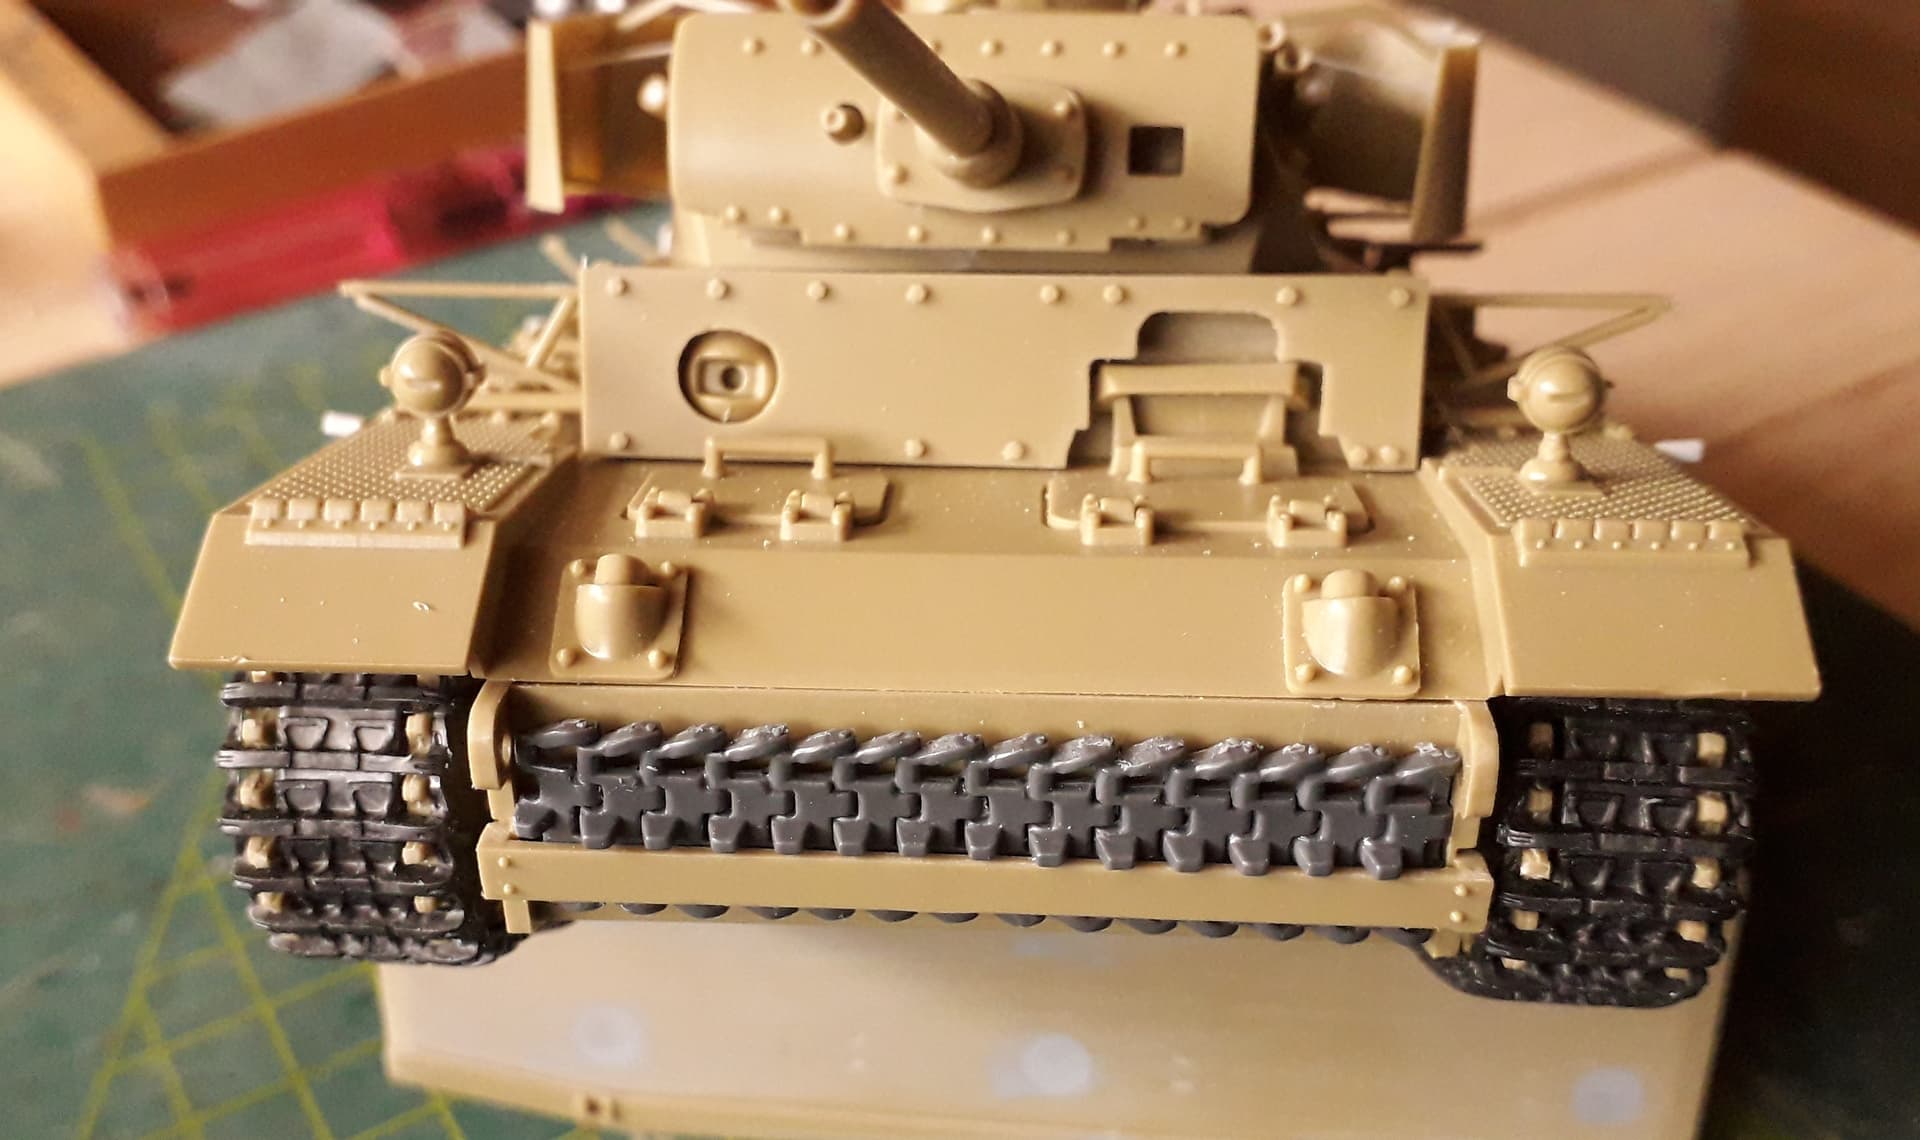
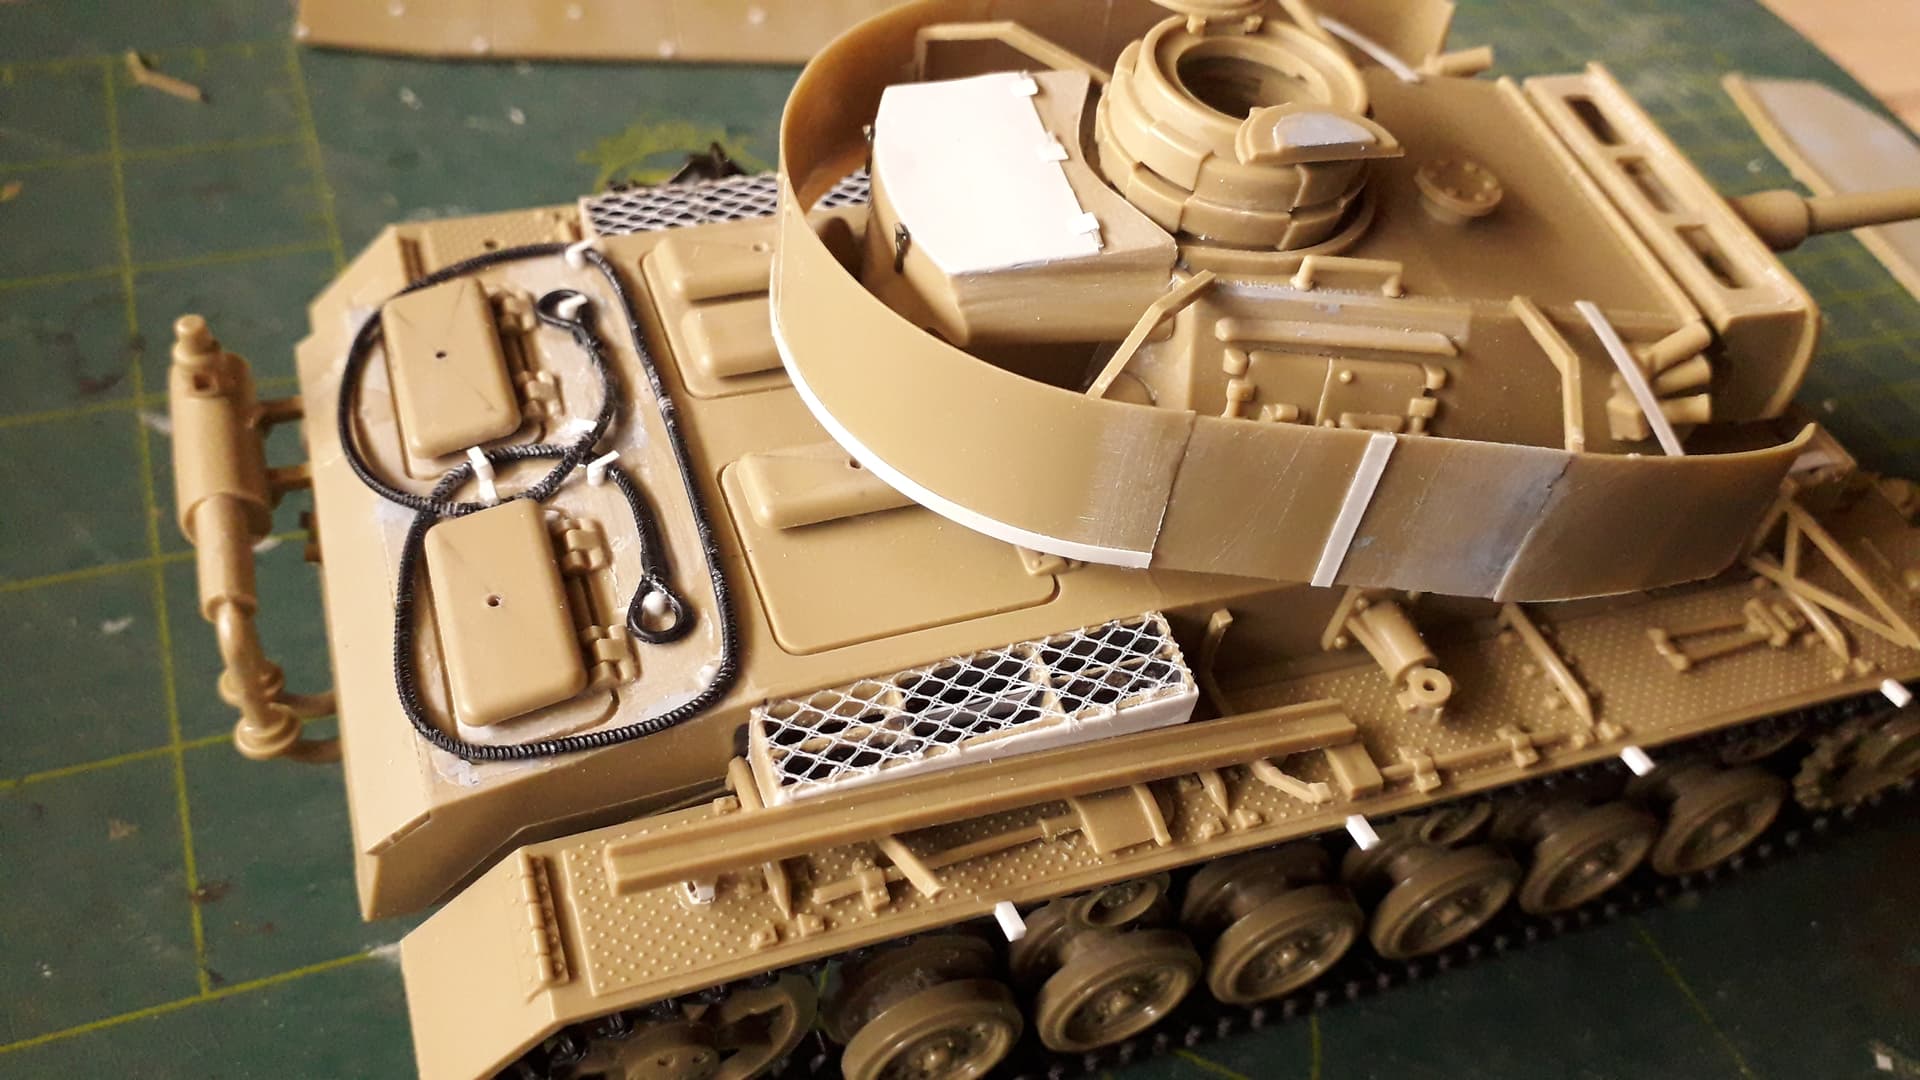
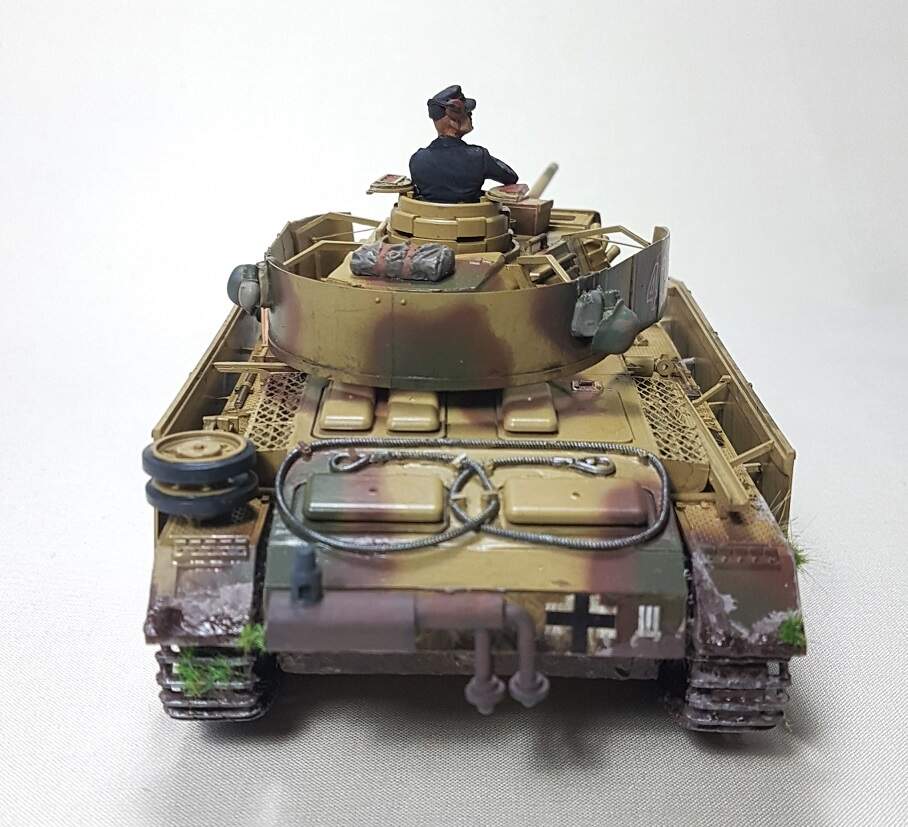
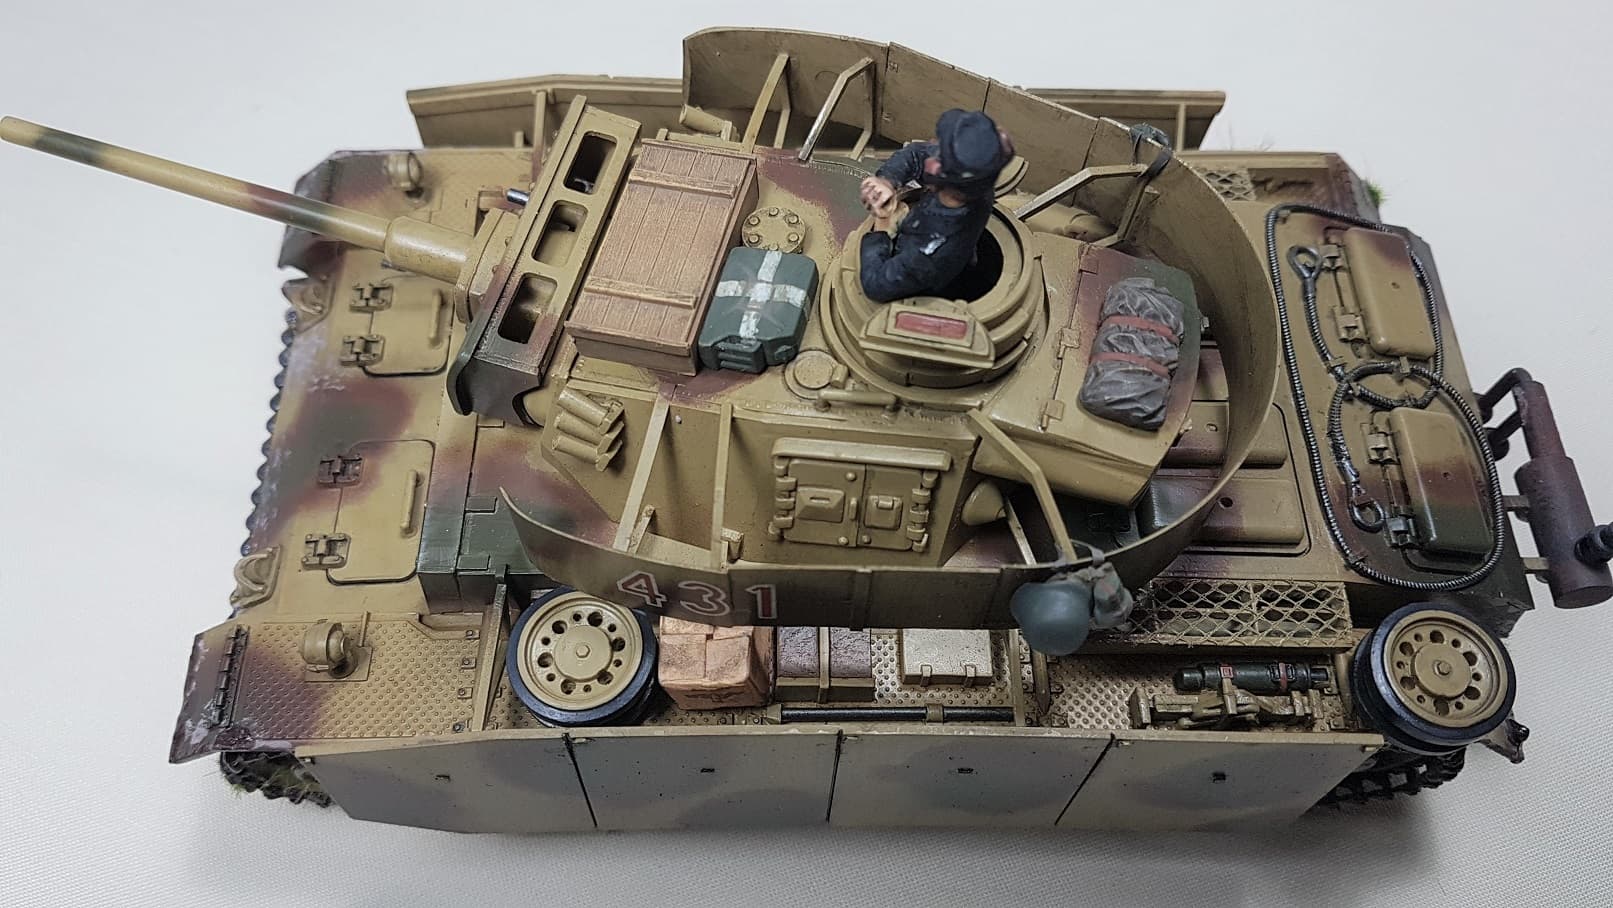
I encountered my first major mishap. The air intakes are lumps of plastic, showing a basic form and some basic grill detail. The Ausf.M has a lid and recreating that is beyond my possibilities right now. So I thought I’d make the intakes look more like intakes by hollowing them out, not taking into account that drills tend to melt plastic… which in the end lead me to partially reconstruct in- and outside. I painted the hollowed out insides dark grey, glued on some mesh and now I had some reasonably acceptable Ausf. L intakes.
Unfortunately I was forced to use the kit tools supplied, because they have the matching lugs to fit the enormous location holes, eliminating the job of filling them and fixing the (wrong) antiskid pattern. Plus I did not have any more spares left either
The exhaust is a piece of work too. Tamiya wants you to place it way to high up and the fit is not good either. Correcting the location and parts does not help.

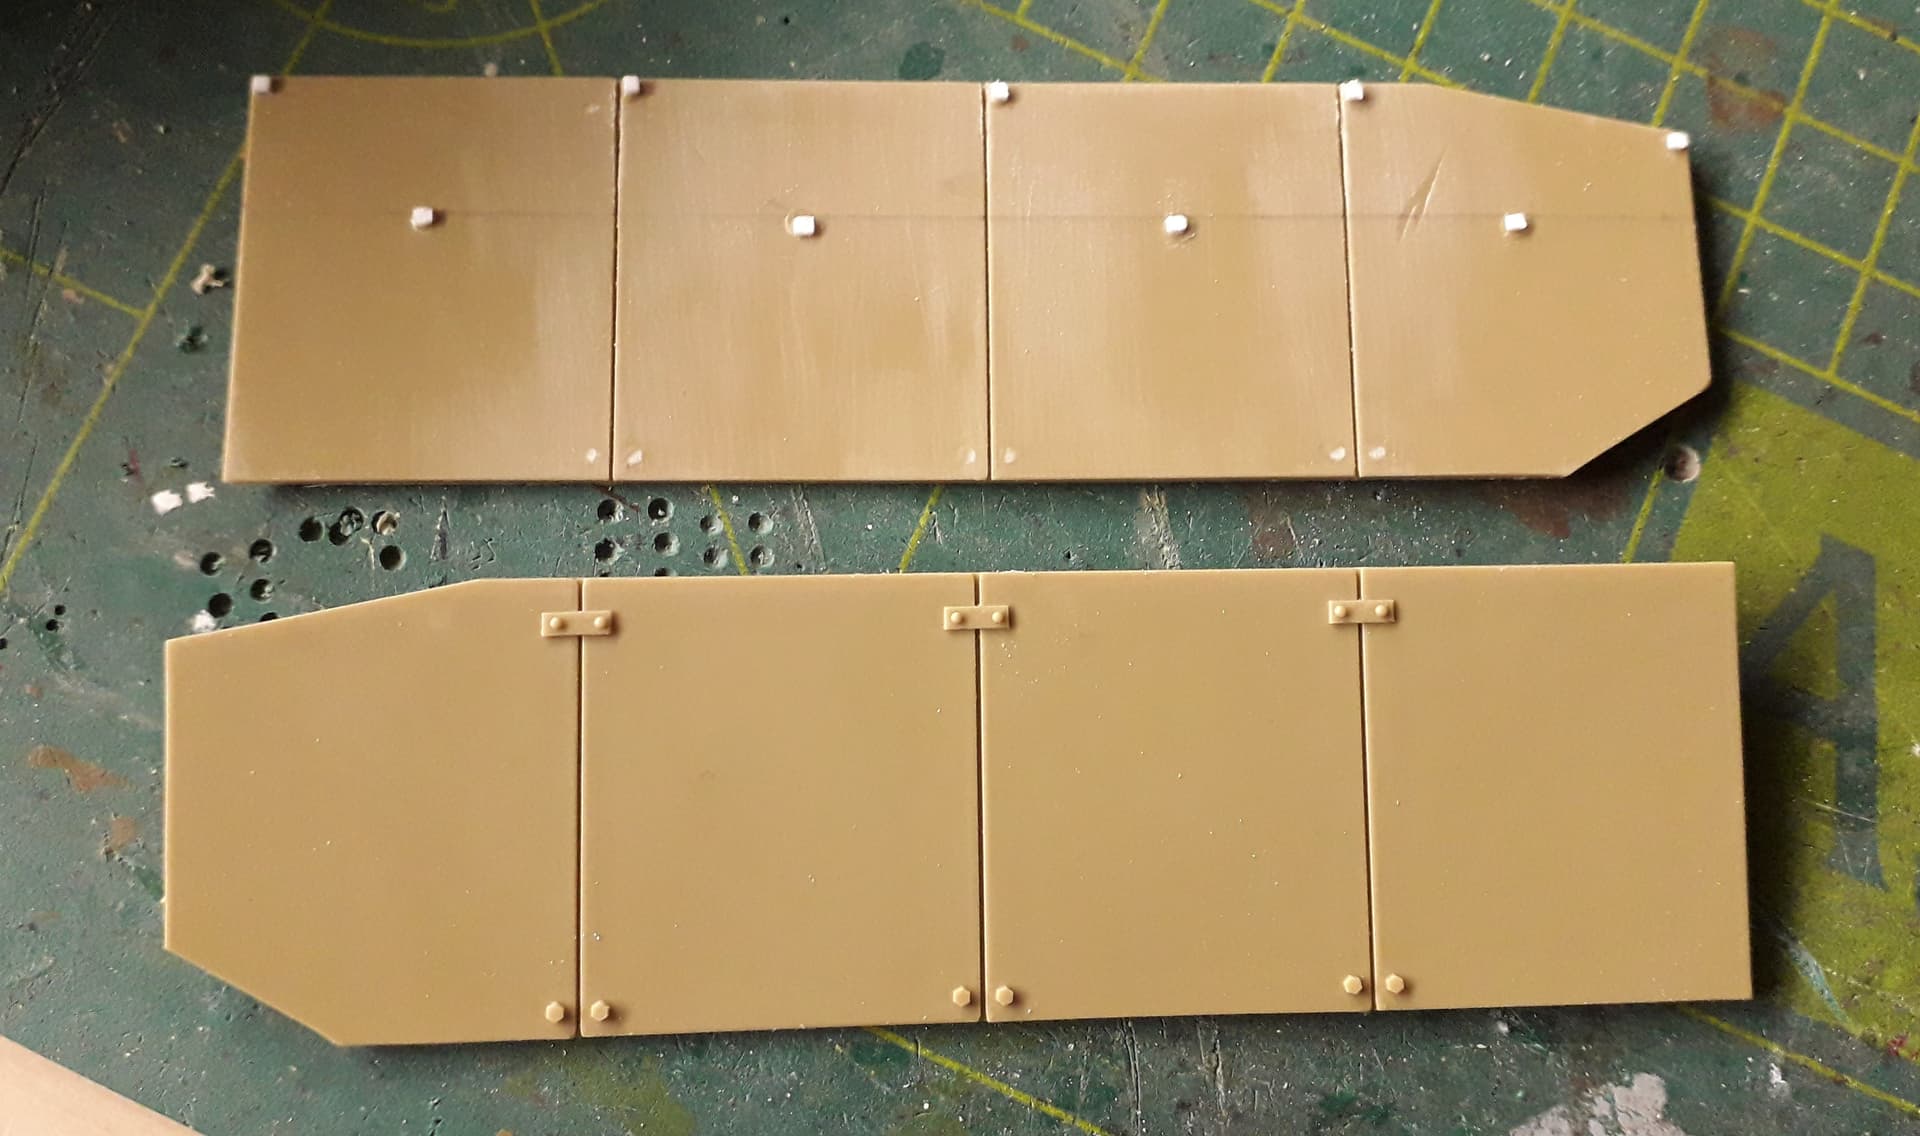
I then went on to the additional side armor… which is incorrect in every way. It is too thick, the outer details all wrong and the supports and brackets likewise.
I sanded the edges thinner, making it optically more acceptable, I redid all but the front 2 brackets, meaning the antenna tray has to be lifted at the rear too and remade all the details, so that they too are optically more like the original.
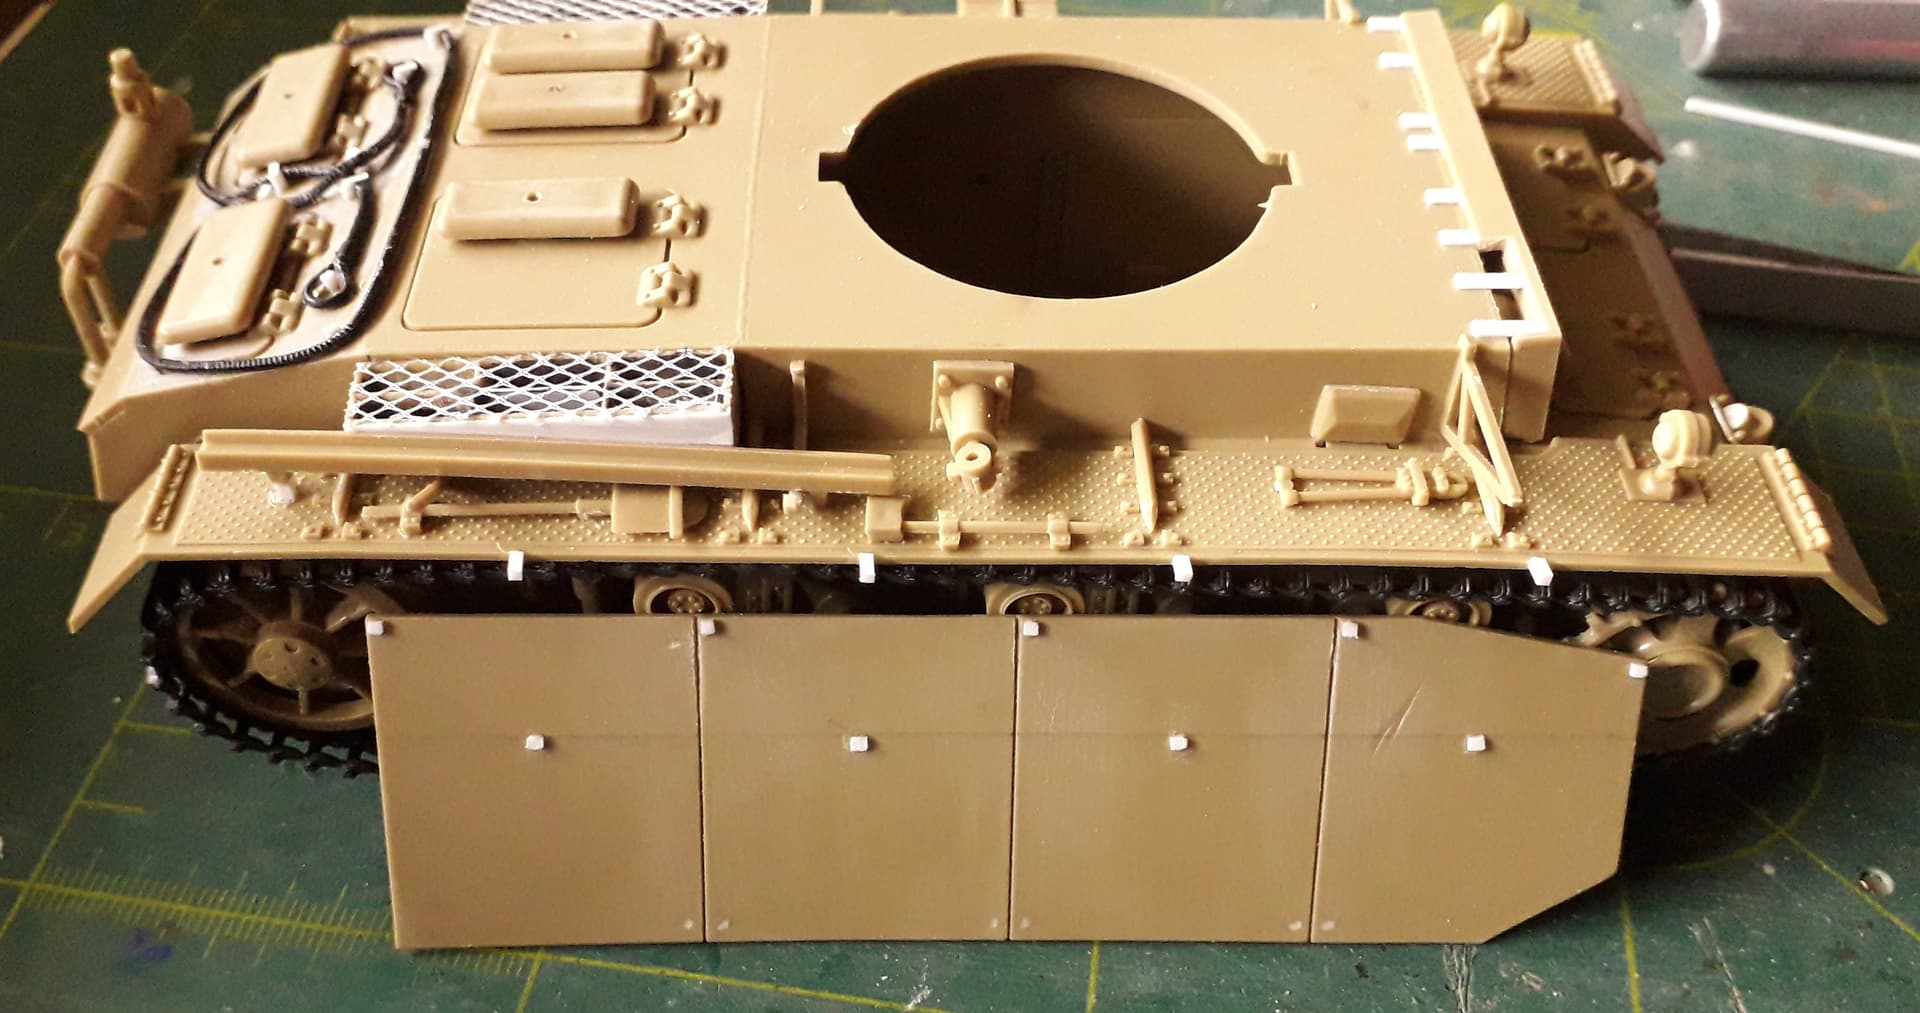
The front was beefed up by adding a row of singlelink tracks from the equally ancient Pz.Kpfw. IV Ausf.D and, even though they are of the eraly pattern, they still are waayy better then what comes with the kit.
5 Likes
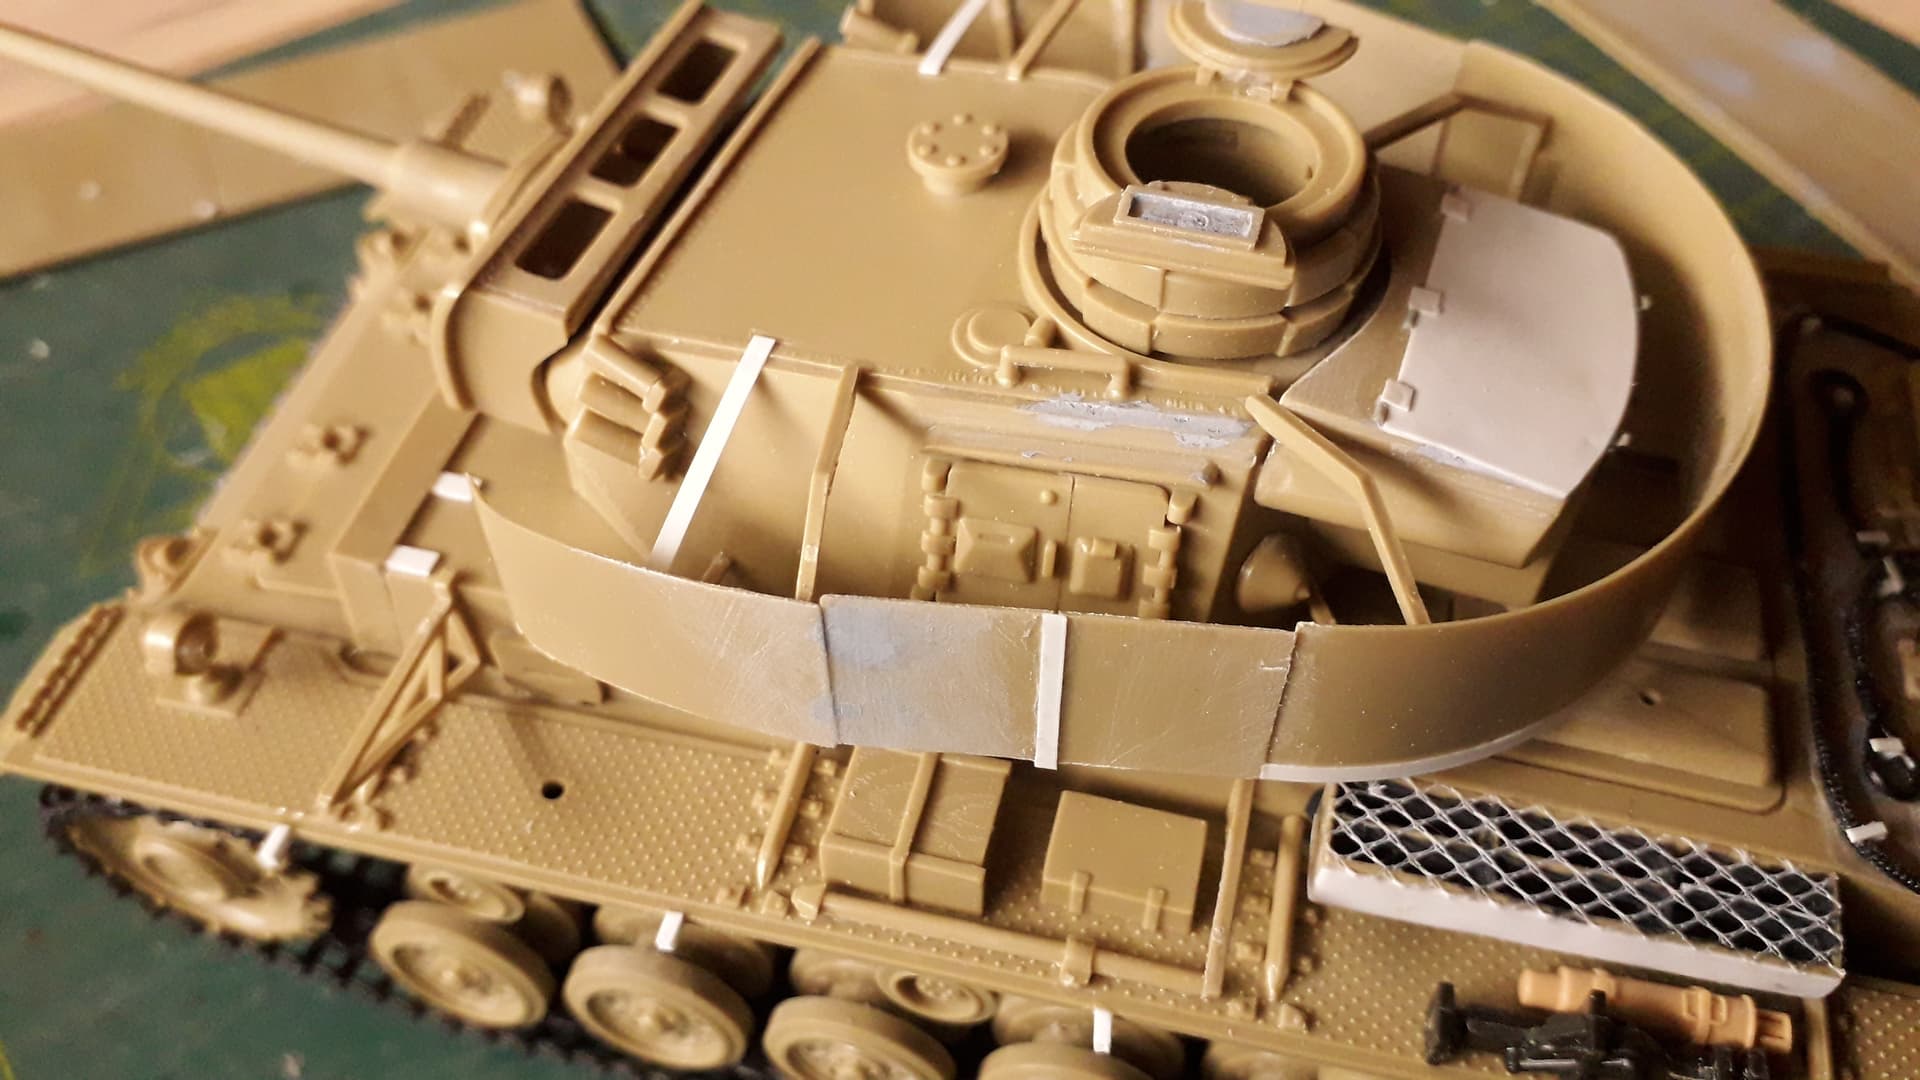
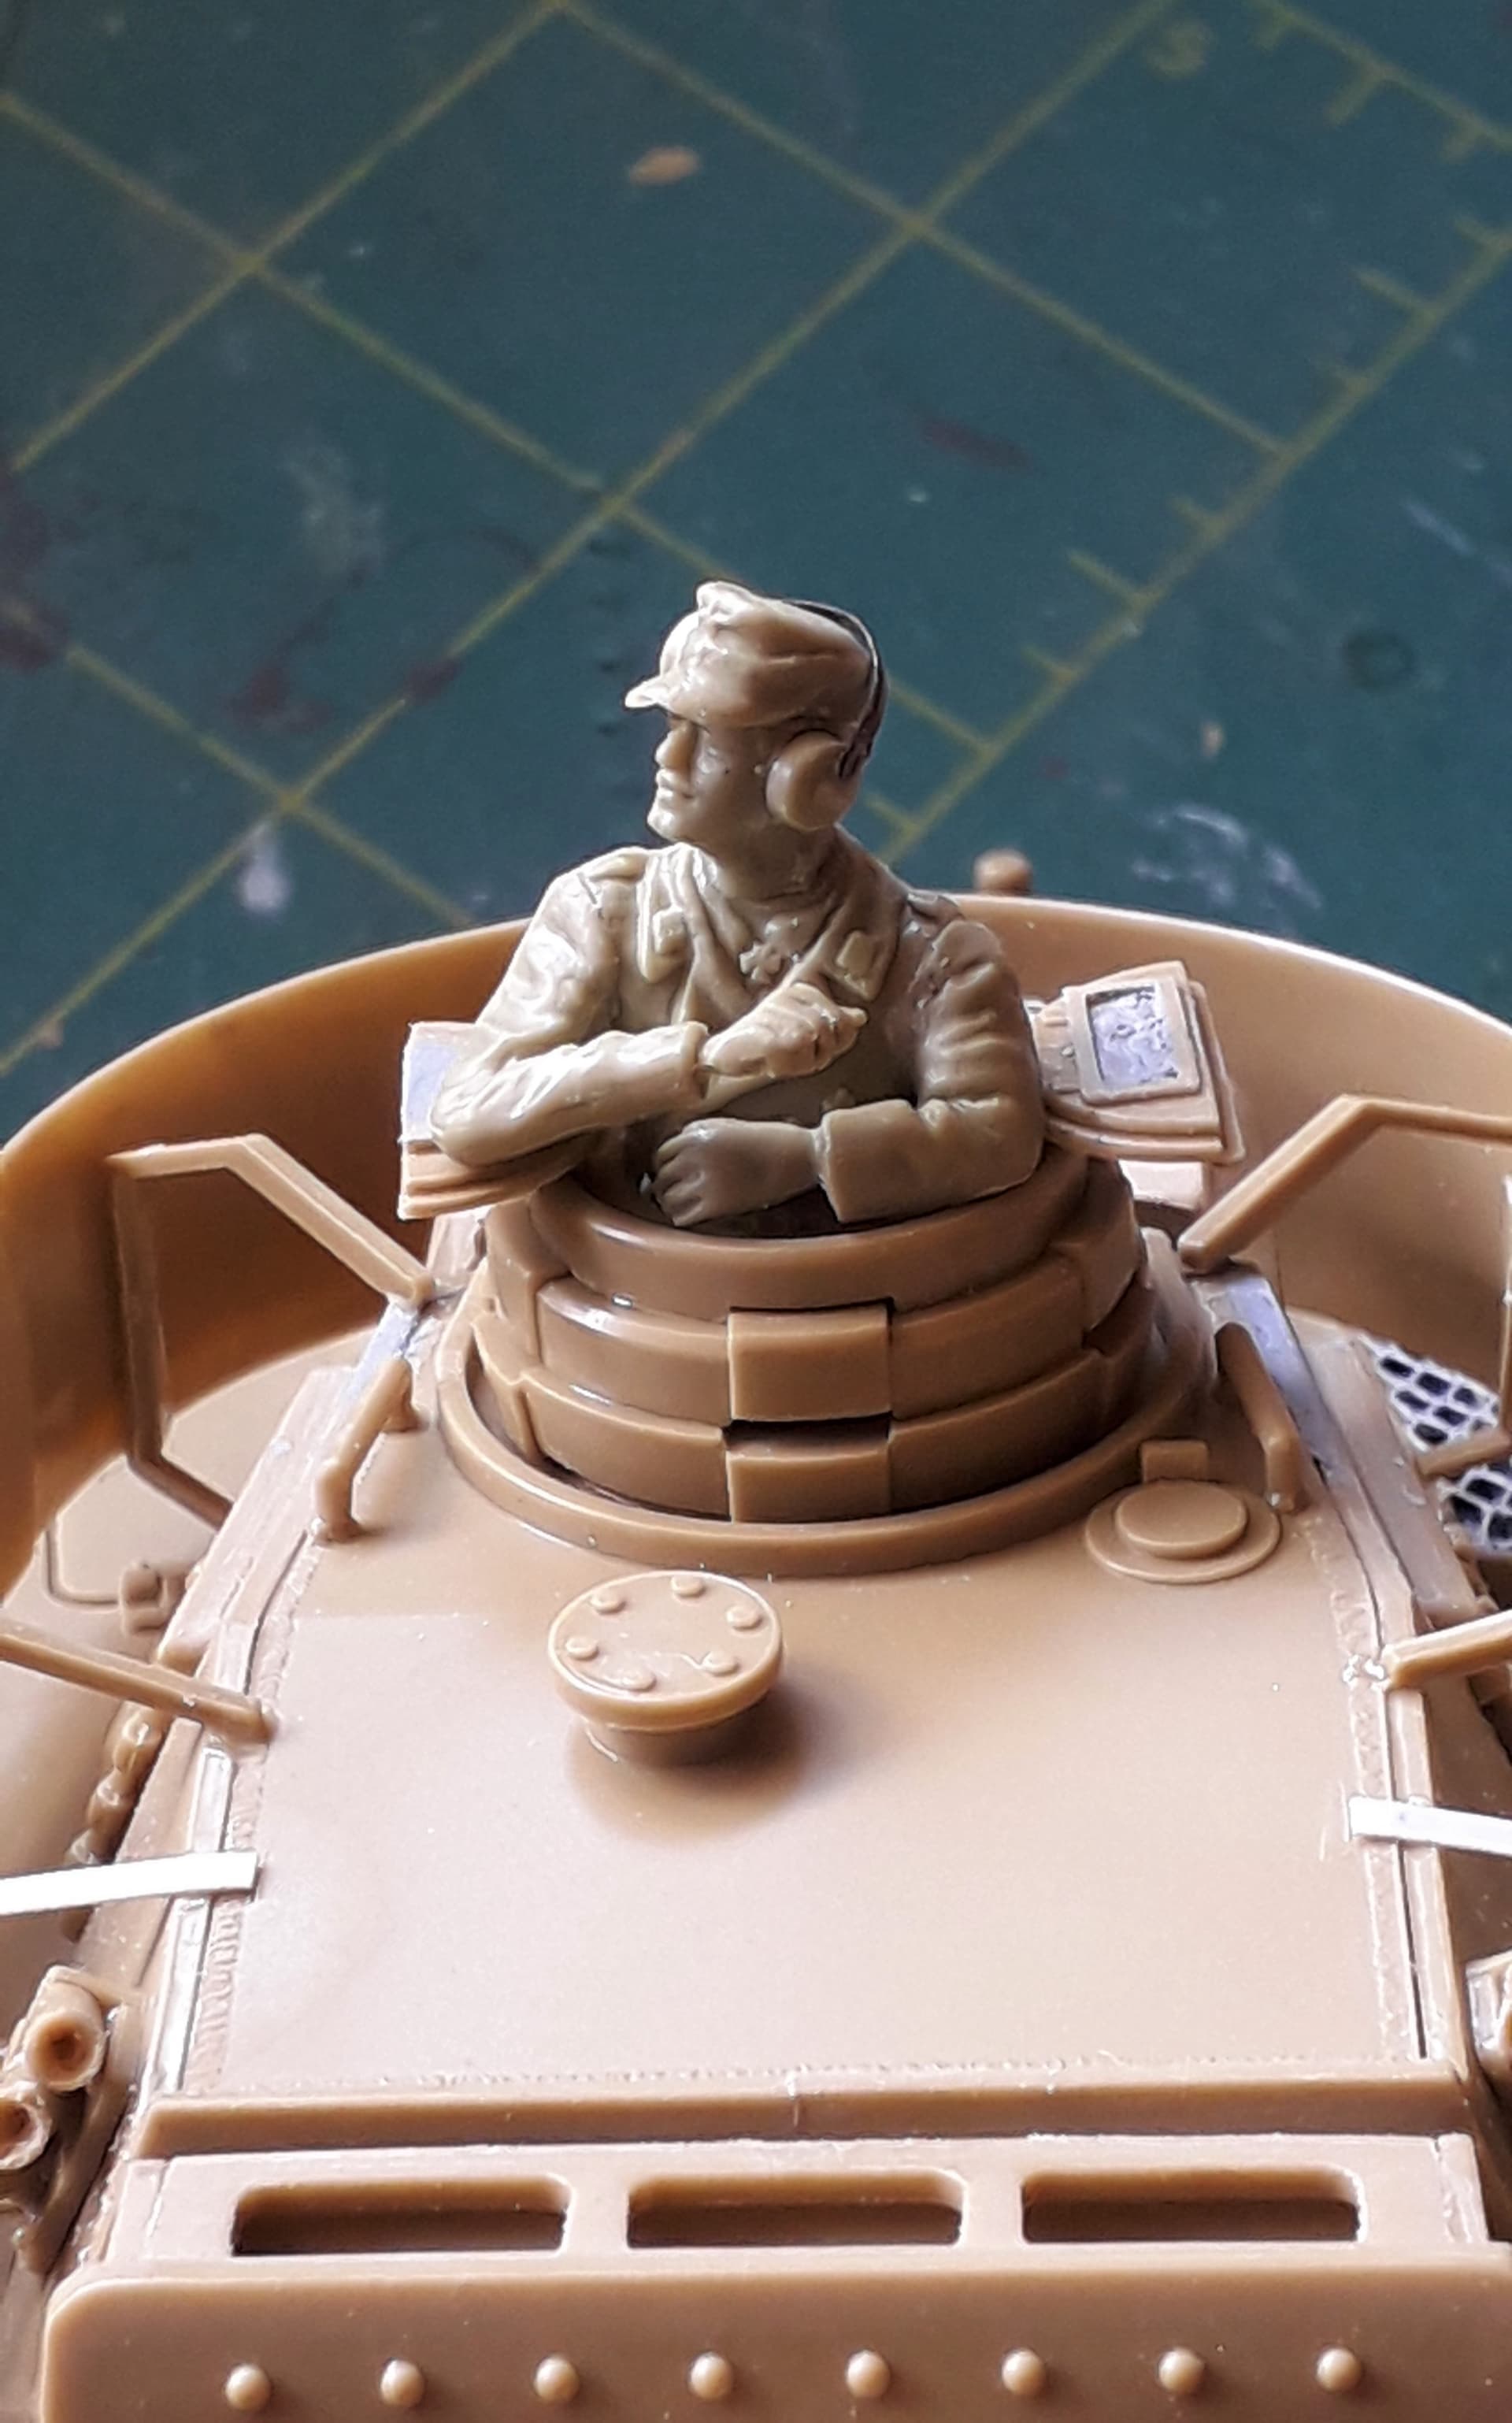
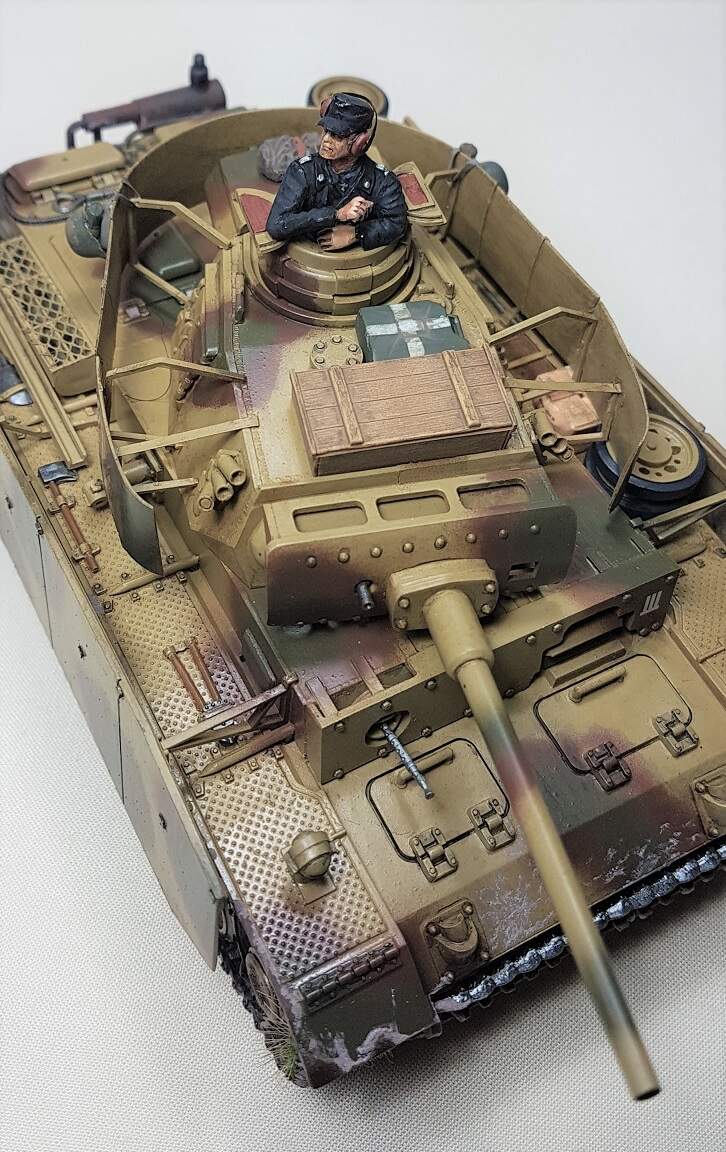
And then… the turret armor… Where to start?
It is crude, too thick, lacks detail and/or is incorrect.
I ended up glueing all the pieces together in a horseshoe form and then, whilst the glue had not completely set, I added the adapted brackets and tried to fit it around the turret as good as possible, constantly re-aligning it.
I then added some more details, again aiming at making it look more like the original. You be the judge if I succeeded…
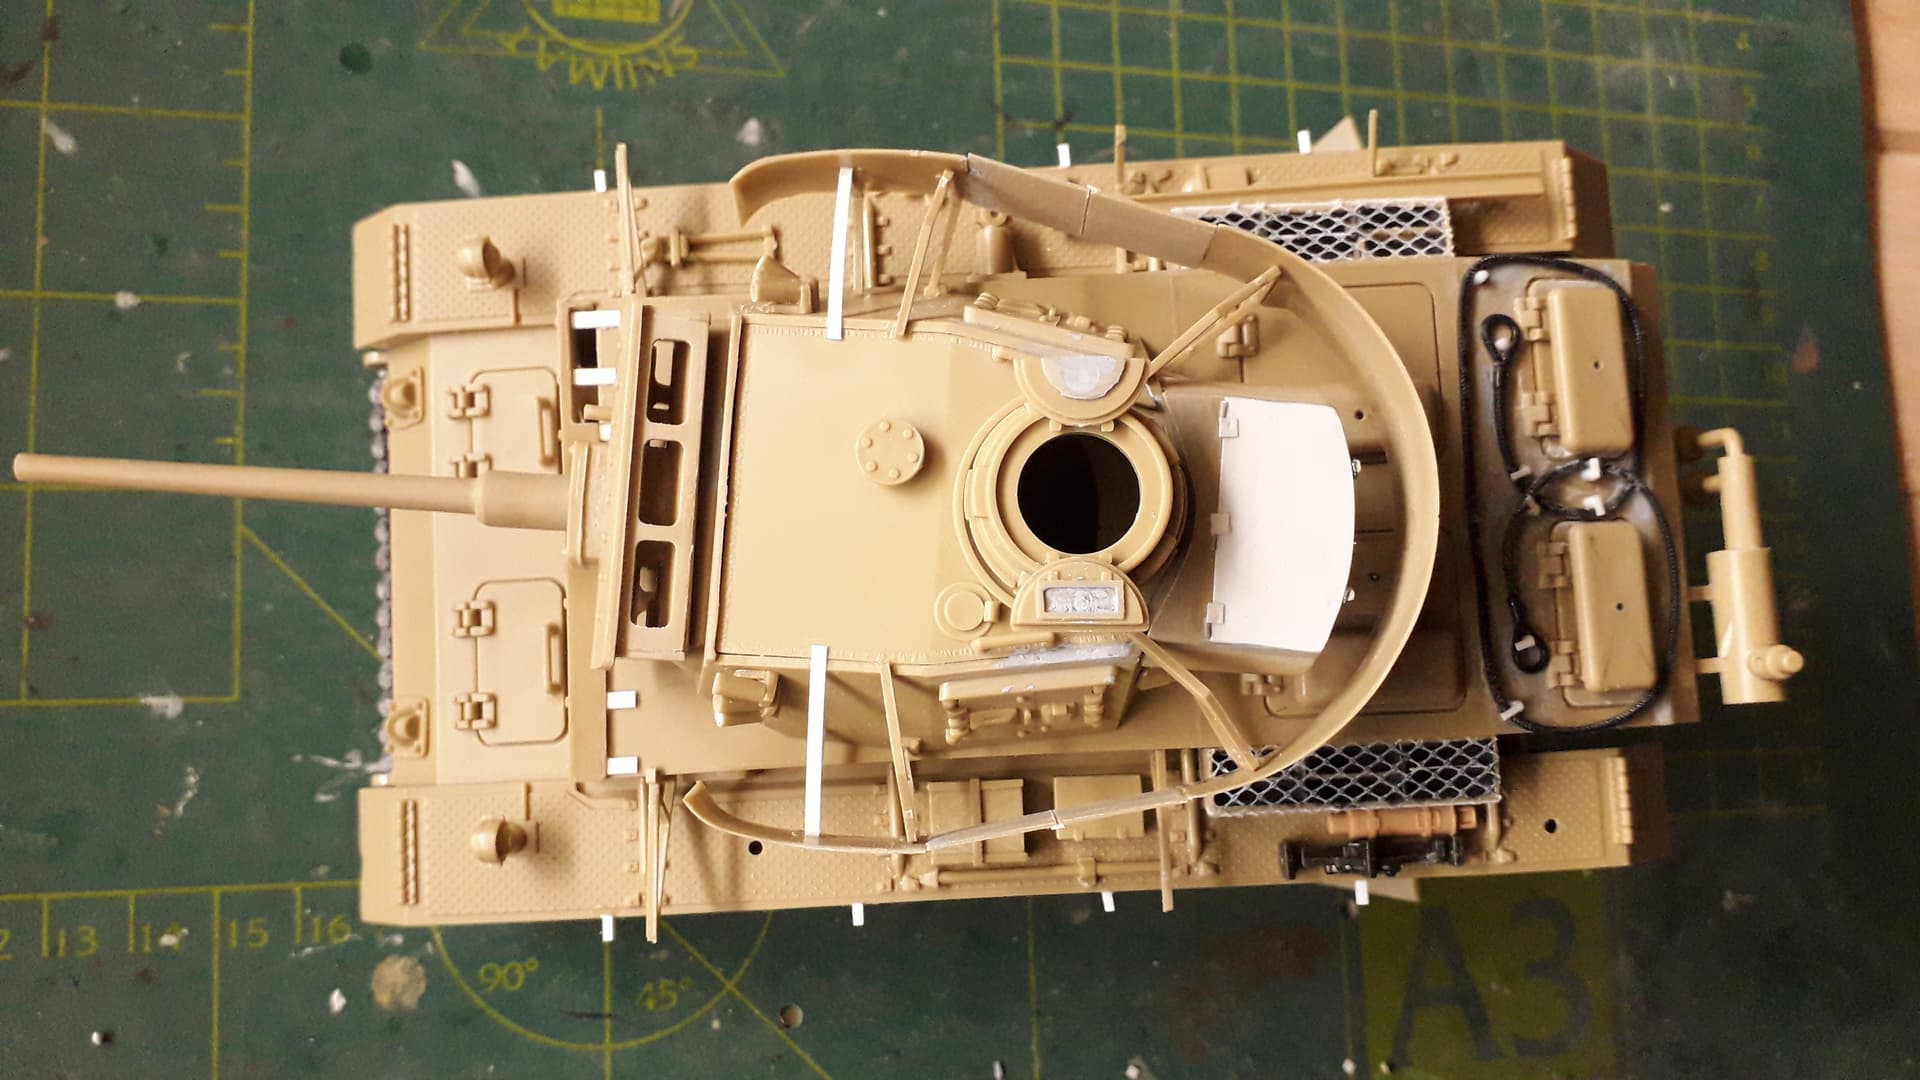
The commander has gotten his headset too, now.
8 Likes
@RonW Ron, it’s outstanding to see you breathing new life into this vintage 50 year old kit! Well done!!!
4 Likes
Really an exceptional effort here Ron! Lots of work and it is all outstanding! Superior detailing skills and dedication to scratchbuilding. A+!
2 Likes
I just found this build. WOW! I love seeing old kits like this brought to new life, showing that you don’t need the manufacturers to model the kit for you. GREAT JOB!!
Bill
3 Likes
Beautiful work indeed. You guys are killing me
1 Like
Nice. This is my first time seeing the thread. My first thought on the track was that it will sort itself out, and it appears to be trying to. I think if you put some rod through the hull to induce track sag it would put just enough tension on them to pull out the final kinks.
Edit:
I think you can fix that errant hole easily enough as well. Use sprue from the kit (I find like plastic seems to cement together better) and stretch it over a flame until you get a taper. Insert taper into the hole with some liquid cement. Let cure, snip, sand. I’ll bet you won’t even see it.
1 Like
Nice to see someone still making these “veterans”. Your additions and corrections improve it no end. People nowadays tend to forget Tamiya were “the gear” then. They were prolific too, bringing out three or four new 1/35th kits EVERY month (or at least there were new ones on the back of “Military Modelling”, awaited breathlessly every month). So much better than the other manufacturers. There was also the issue of moulding difficulties back then, although Tamiya hulls were always a one piece tub, so even then they must have had “slide mould technology”. I’ve made this very kit at least twice and the figure set, which I wouldn’t touch with a barge pole now, was bought multiple times (it was available without the tank) and chopped around and converted into other things.
1 Like
Thanks! I do not really get why people avoid these kits these days. They are such a pleasure to build.
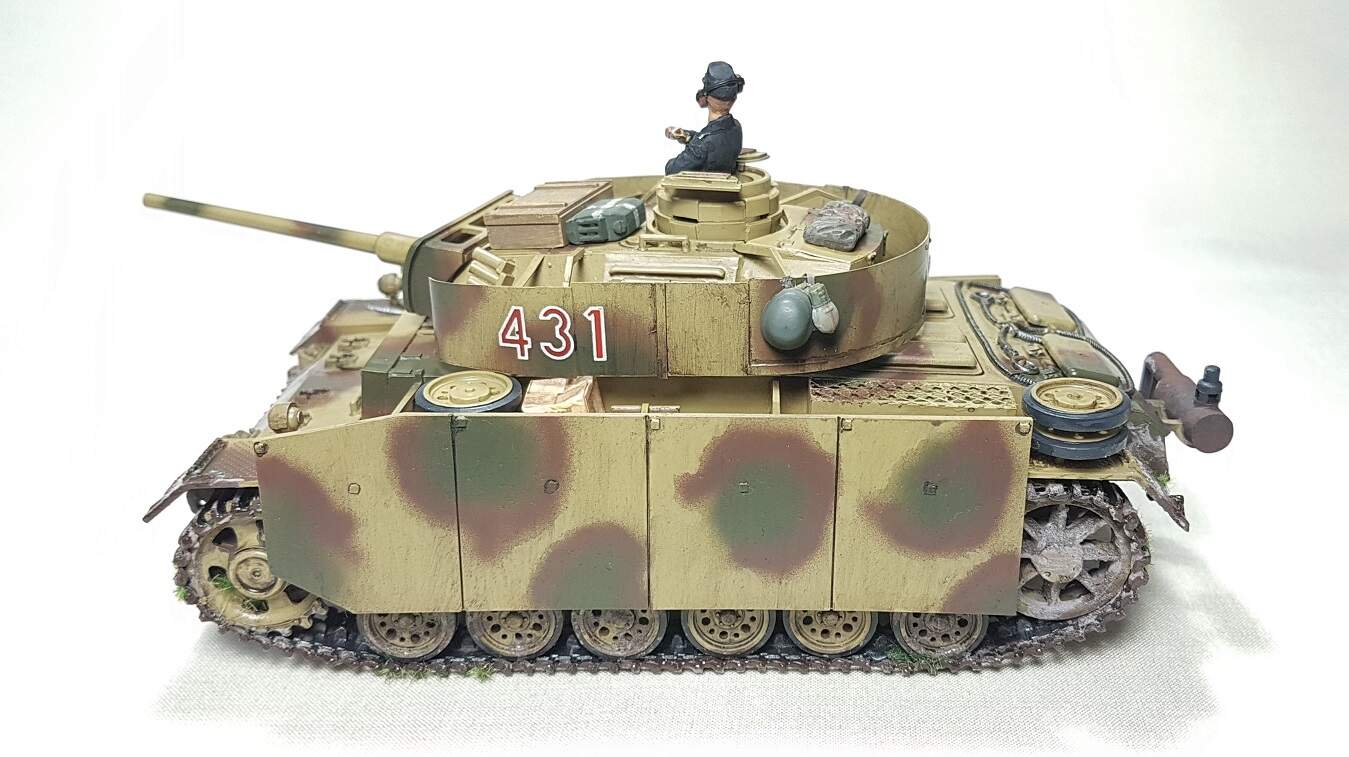
I messed up the paint though. Tried the Kurck-scheme with green blobs & brown edges and it looks absolutely horrible! So now it is just sitting in a box…
@18bravo And that is how I actually plugged the hole.
3 Likes
Nice work Ron, and the bits you have put right really improve the look. Tow cable looks very nice to me.
3 Likes
Ron, if you shot it in acrylics a bath in Windex (with ammonia) will strip it down to squeaky clean styrene without scrubbing in minutes. Actually, I let it sit overnight just to get all the corners. Rinse gently with your kitchen faucet sprayer, dry, and repaint.
5 Likes
Concur. After building a few of the recent, i.e. , released since late 90s, “super kits,” I am going back to the oldies more and more. Don’t get me wrong, I still have some superkits awaiting the metamorphosis from parts in a box to my abomination on the shelf, but the older kits are often such a pleasure to build.
4 Likes
I found exactly the same thing with the Tamiya 88 … such a great and easy kit to put together, with no issues, and not 600 pieces just in track link parts
3 Likes
Agreed. I can build five Tamiya Centurions in the time it takes to do one from AFV Club, and have more fun doing it.
5 Likes
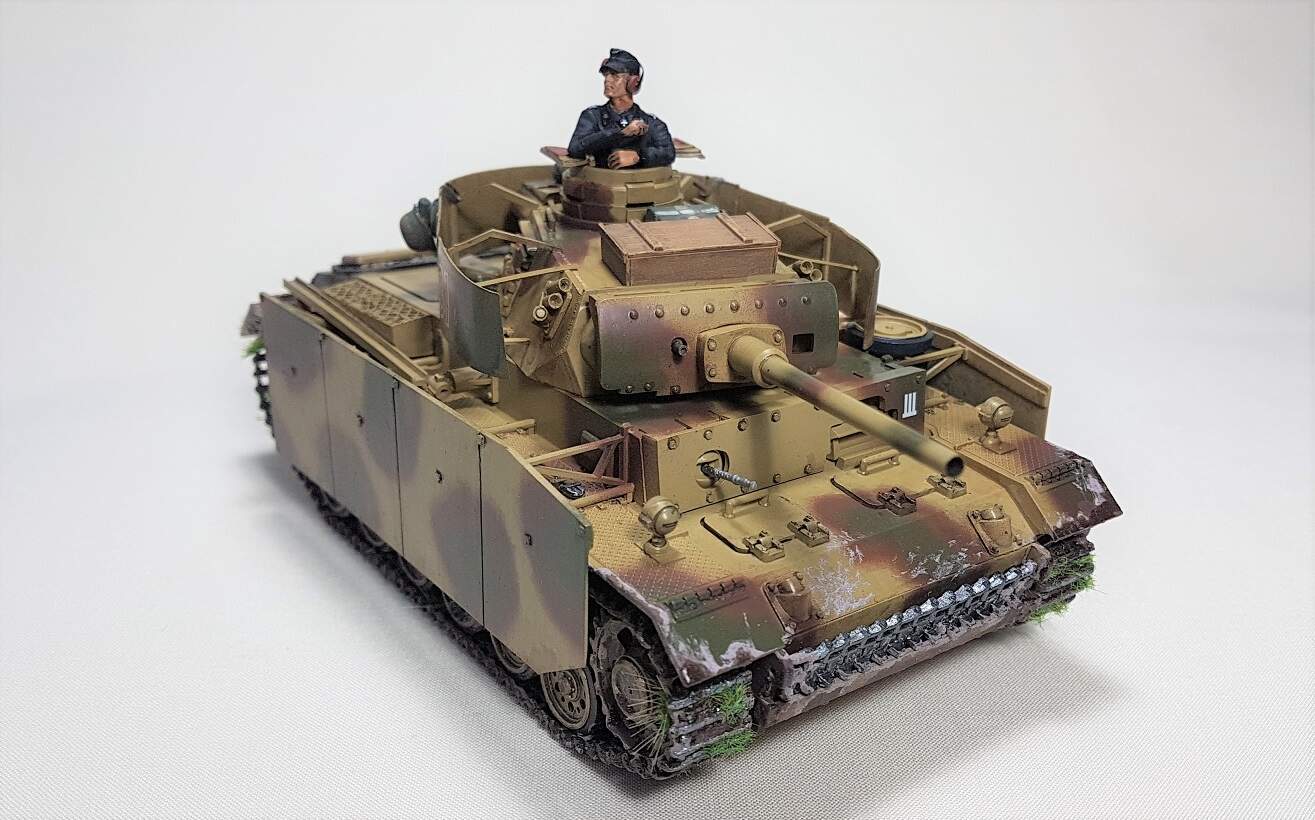
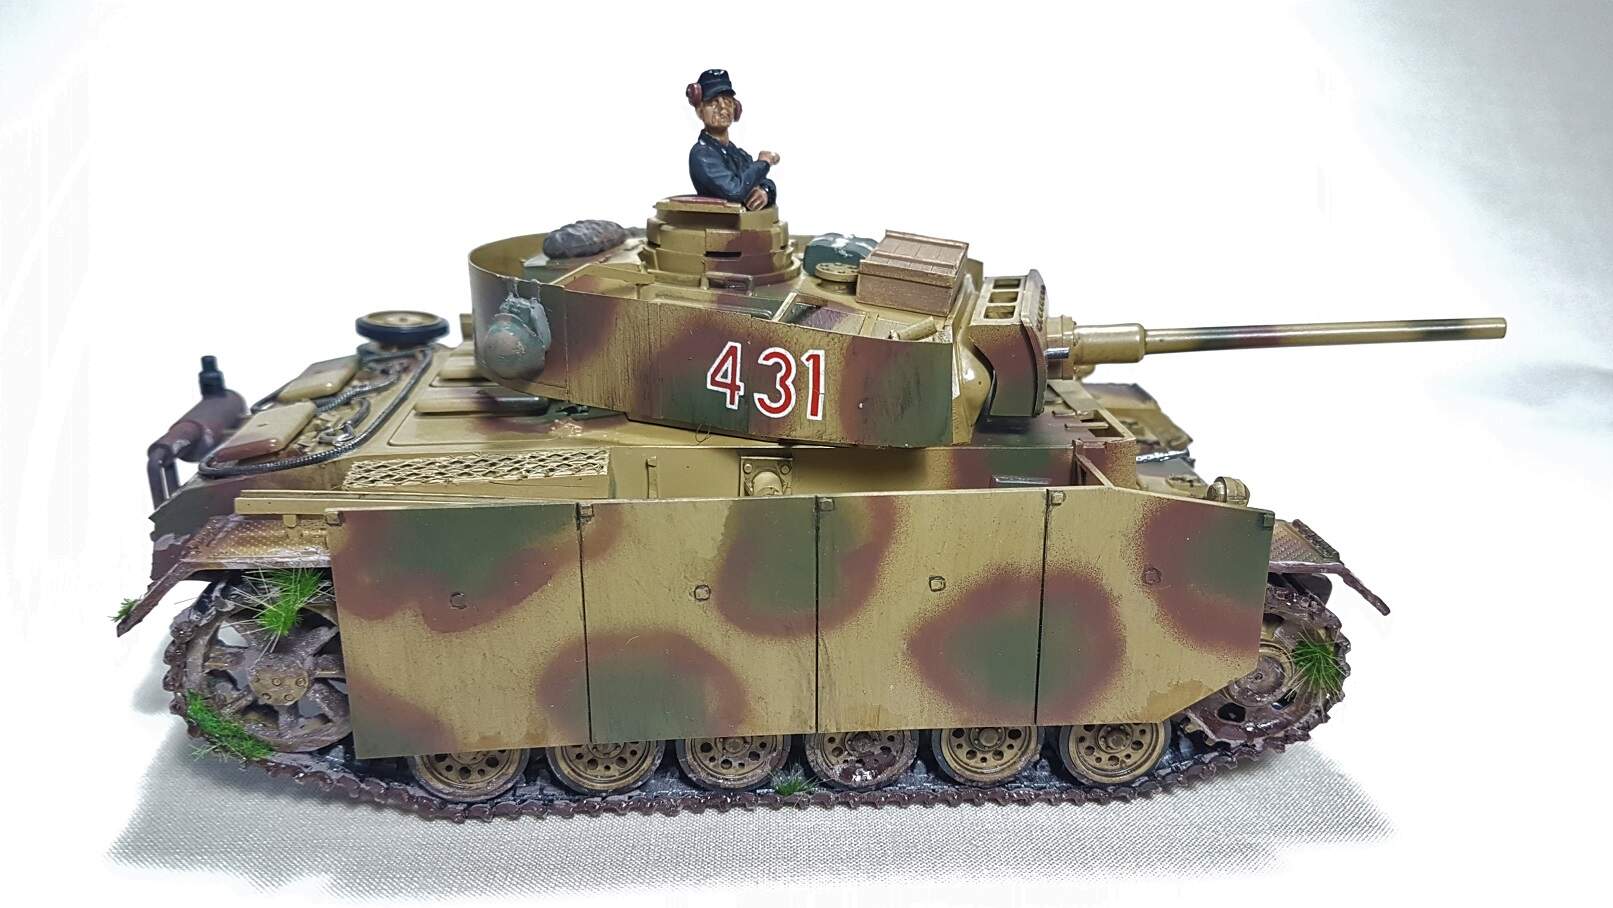
I finally finished this one!
It had been sitting in its box for way too long. A new dualaction airbrush and compressor meant a steep learning curce and the first painting was a total failure. This one is better, despite overspray and such.
The worst mishaps are camouflaged by a box, a jerrycan and a rolled up tarp.
And then… there was the figure… but even that turned out fairly acceptable.

6 Likes
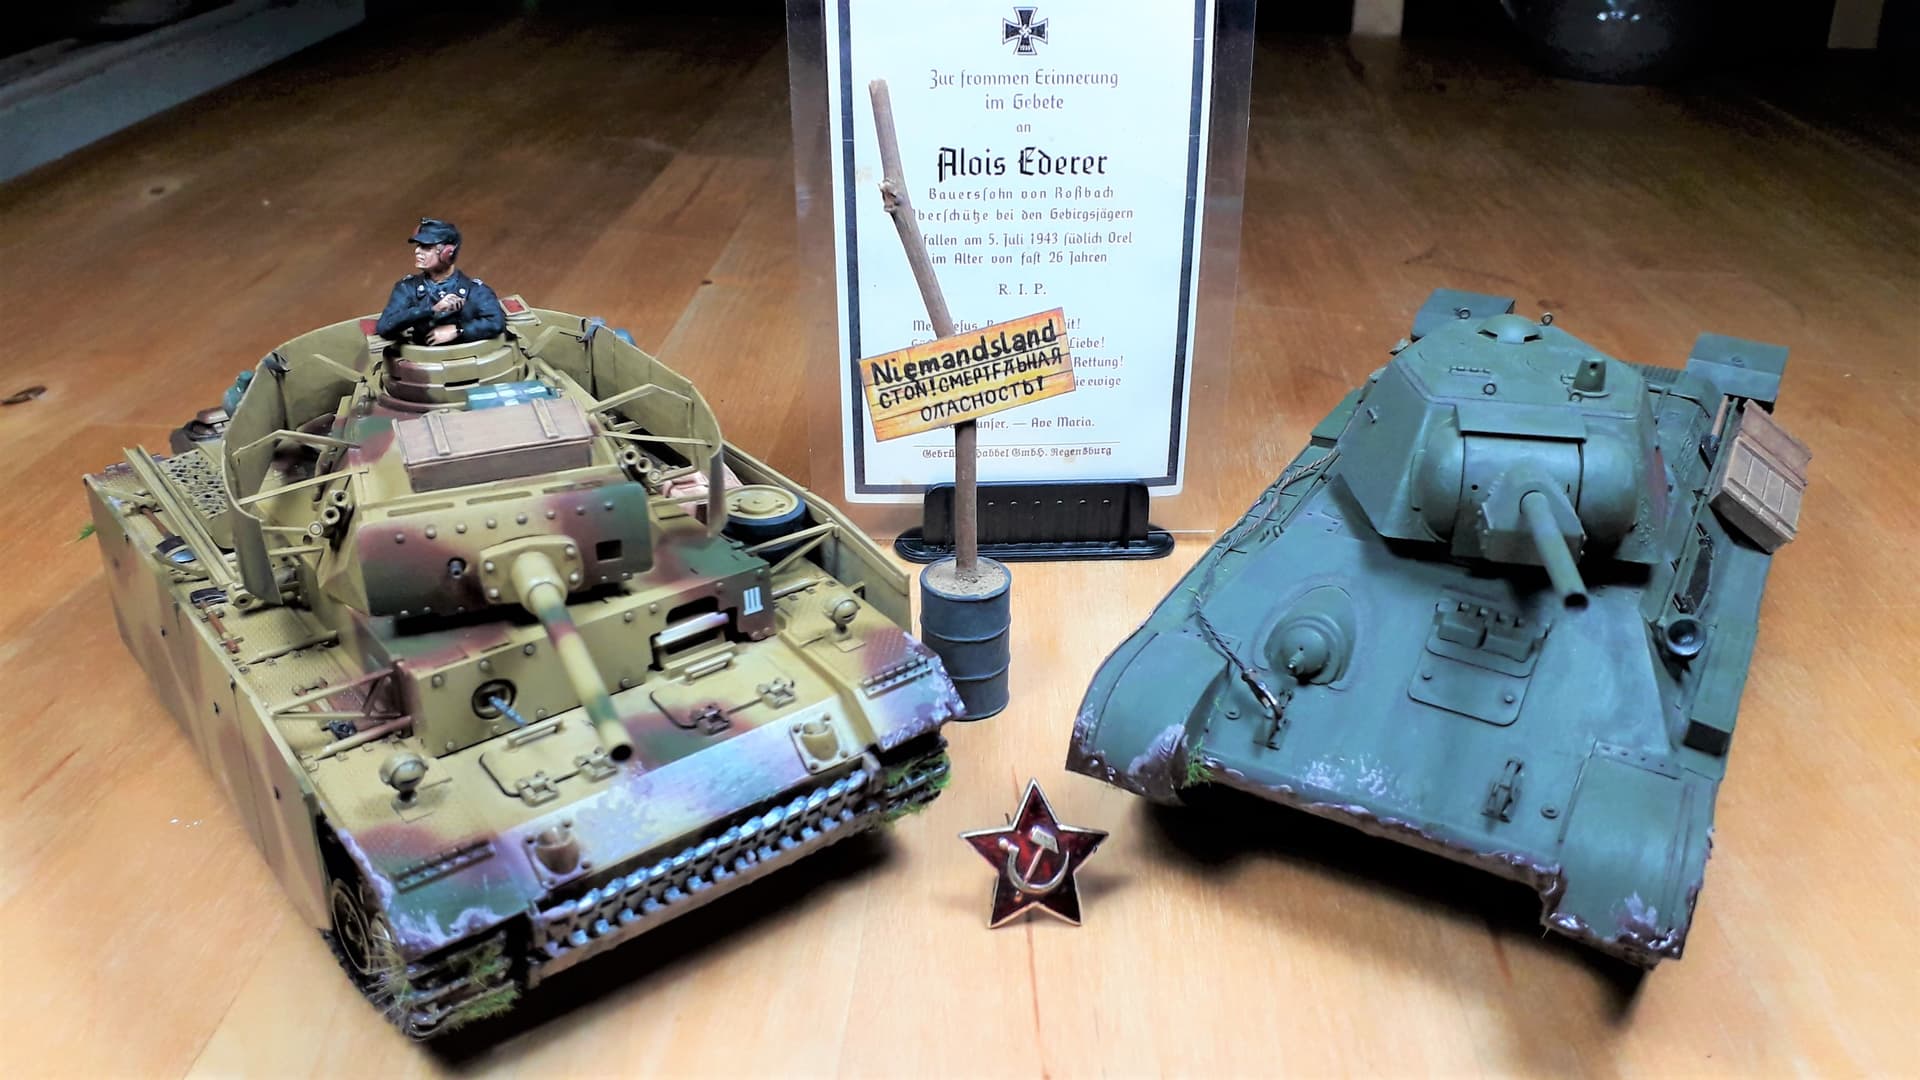
Together with another shelfqueen; Zvezda’s T34/76 in the final setup.
A homage to all those that fought, suffered and fell during the battle of Kursk.
The deathcard is from those days and of a soldier, who actuallt died there.
11 Likes
Nicely done Ron. Great finish on the Pzr. I like the streaking on the turret side armour. Final image is nice with the T34. Great work.
2 Likes