It’s LEGO blocks for me!
—mike ![]()
![]()
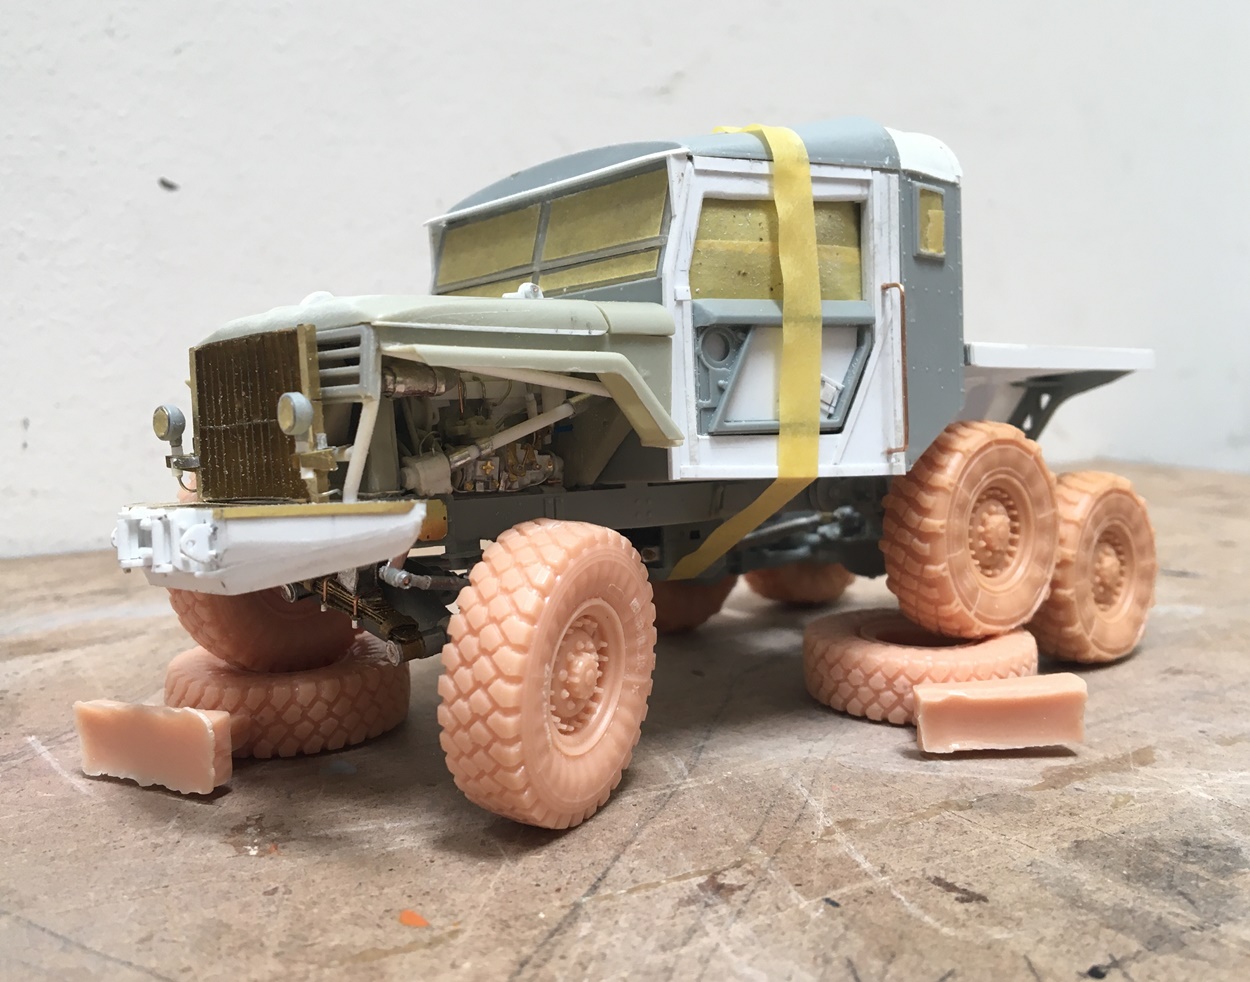
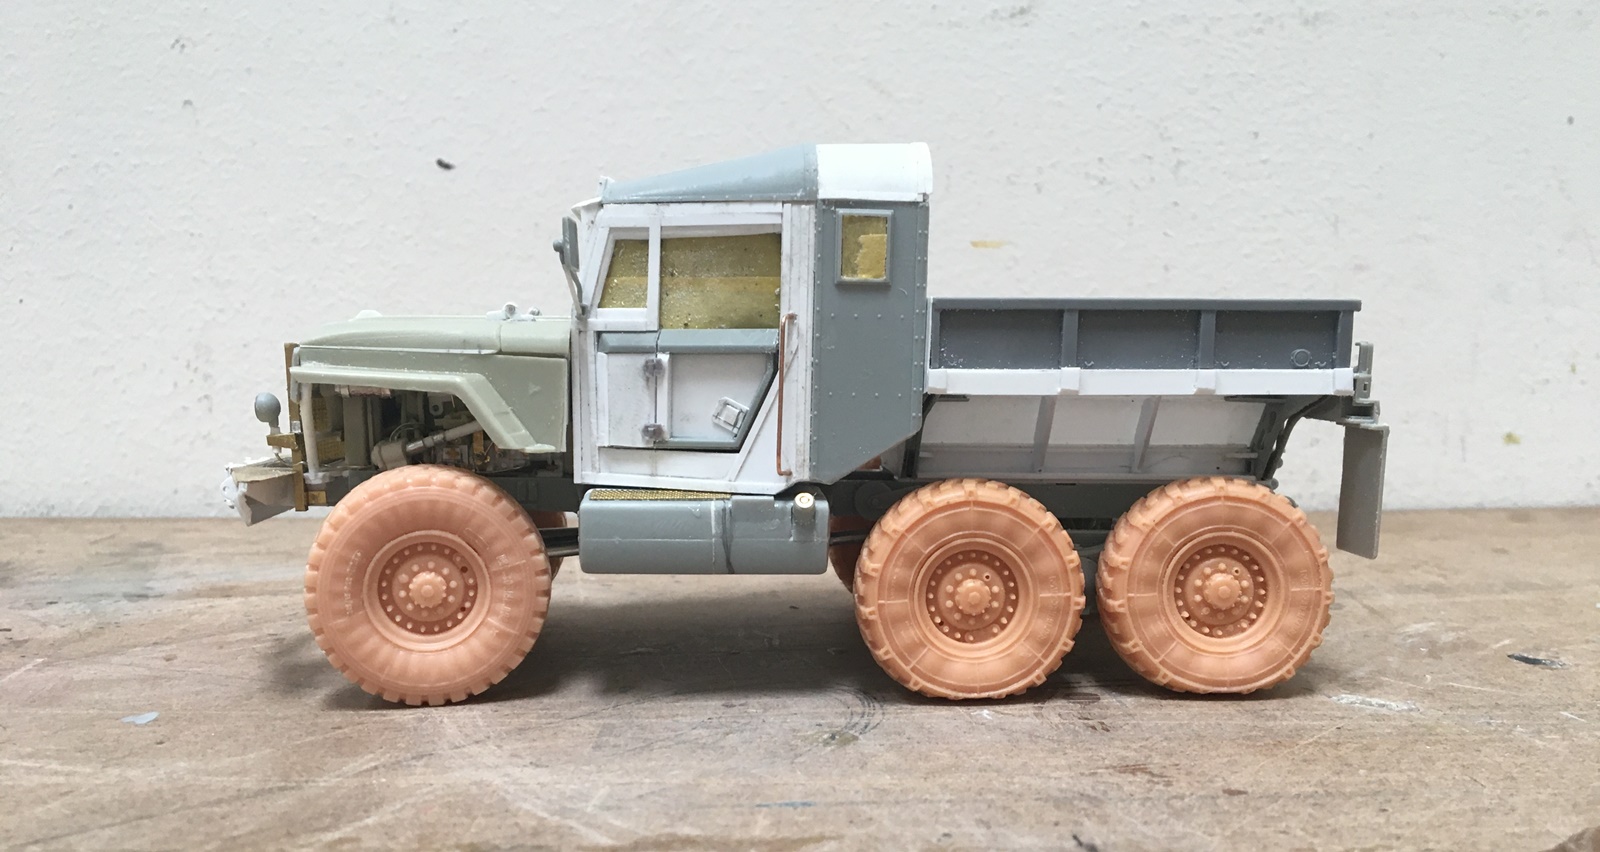
Speaking of beating one’s head on the wall…I did some work on the Scammell. Really just the bed and front bumper, but it’s coming along:
Ahhh…the bed - piece of cake really… ![]() no, it has not been that. As the wheels/suspension flex so much, well, the fender well needs to be high - but, I didn’t want it to look ridiculous, or too simple - like a “U” shaped box with little mud wings. So, thanks to the left over sprue box, this is what we’re doing. I must say, it took a while to figure out what to try, and then, how to actually do it.
no, it has not been that. As the wheels/suspension flex so much, well, the fender well needs to be high - but, I didn’t want it to look ridiculous, or too simple - like a “U” shaped box with little mud wings. So, thanks to the left over sprue box, this is what we’re doing. I must say, it took a while to figure out what to try, and then, how to actually do it.
Not bad - it will eventually get rails of some sort, just not now. Next up will be the other side, then the bed - maybe a roll bar, and of course, winches…
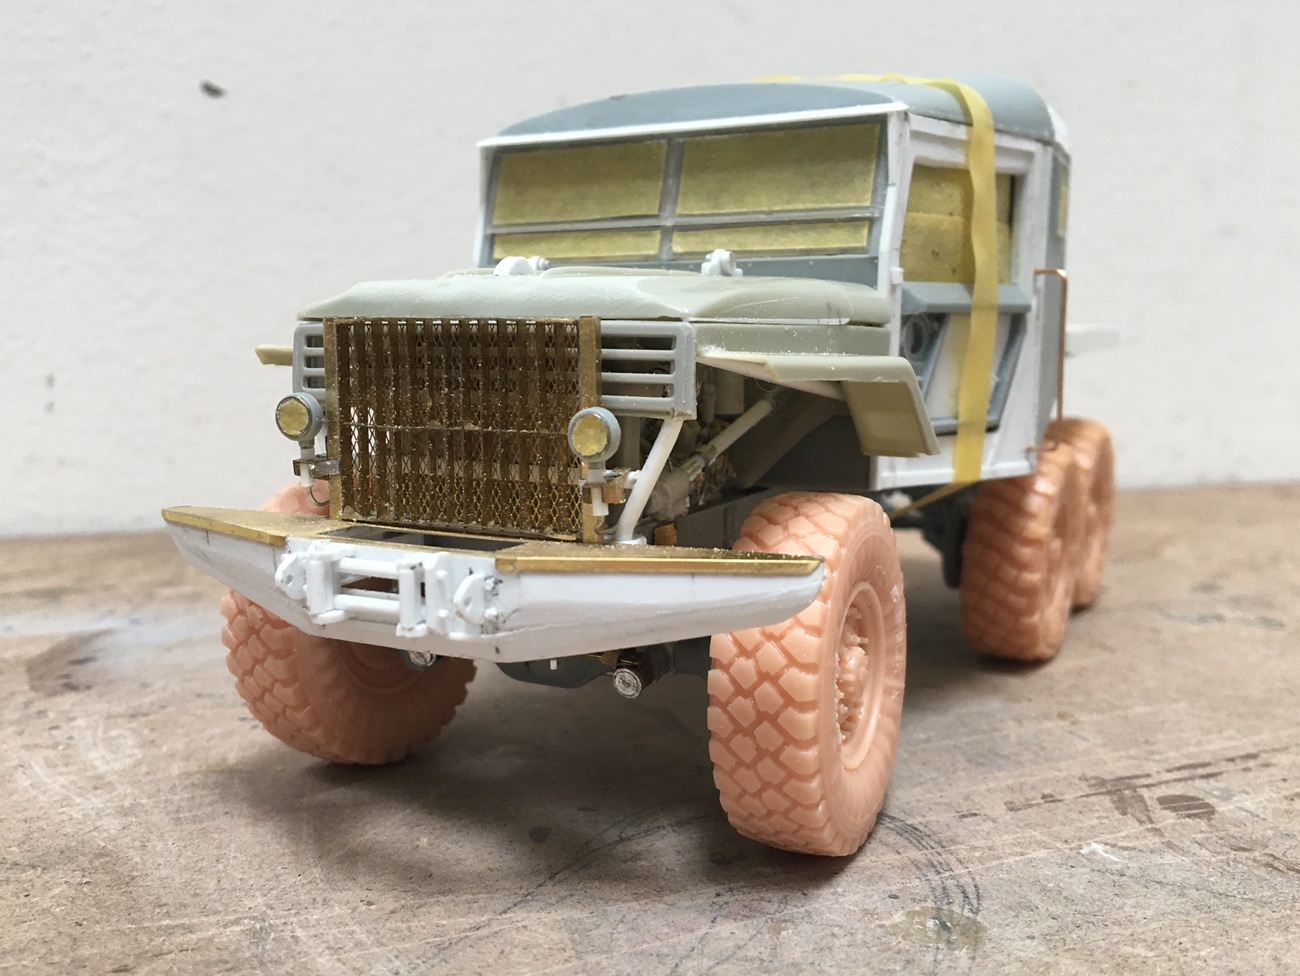
I also did some reworking of the front bumper, which looked OK, but with all of my cleverness, it also looked a bit meek - so, now, it’s more heavy duty.
Thanks for having a look -
Cheers
Nick
Absolutely awesome Nick, loving how this one is progressing!
Cheers, D
Hi D, thanks - it is a bit out there - lots of parts cobbled together.
With so many parts colors, I’m looking forward to getting this painted, just to see what it looks like being a bit more uniform. I’m not sure if this will have lots of decrepitude or not?
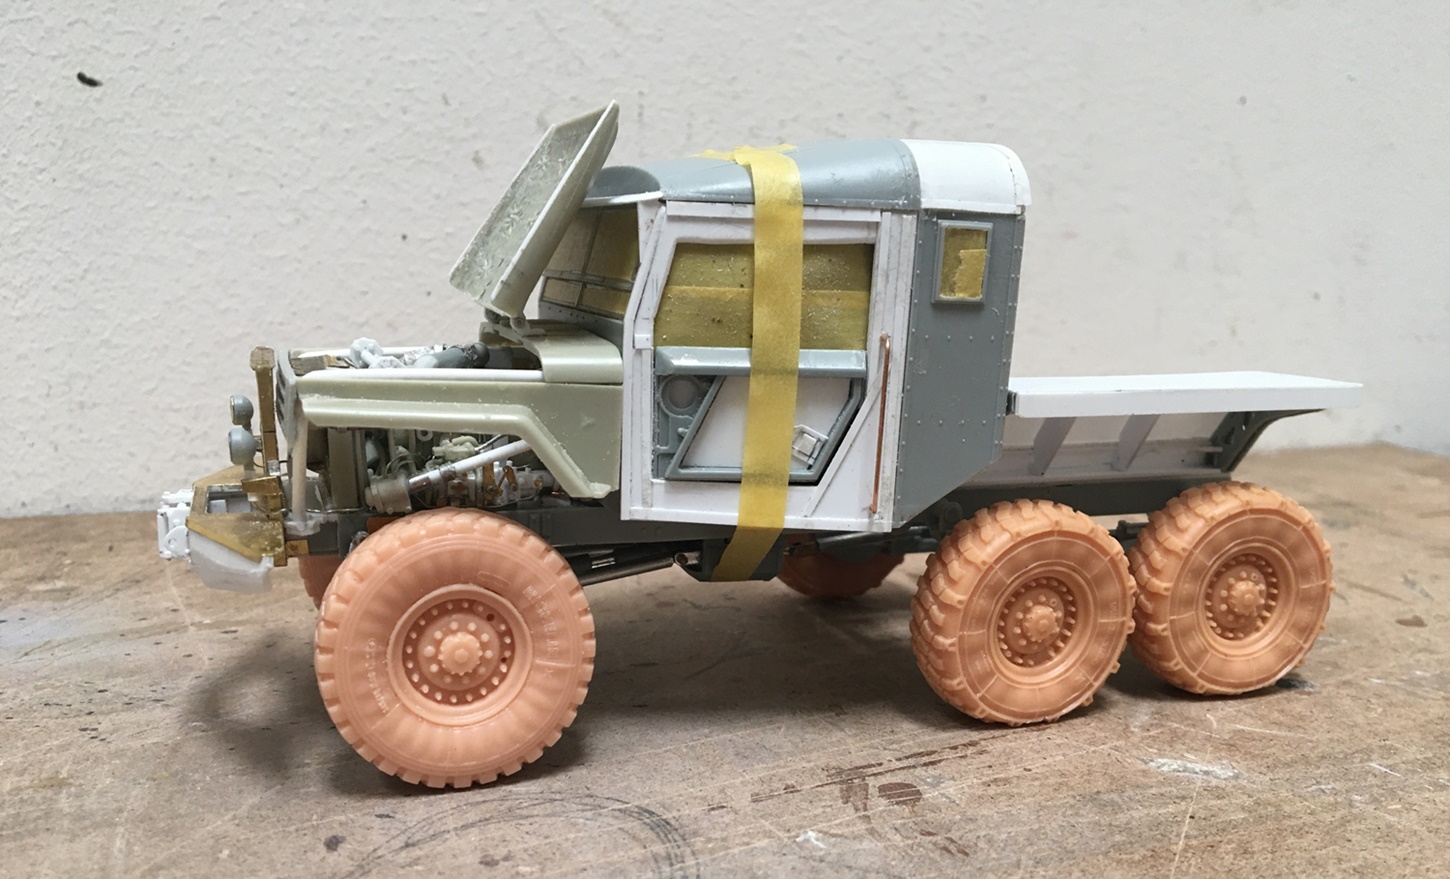
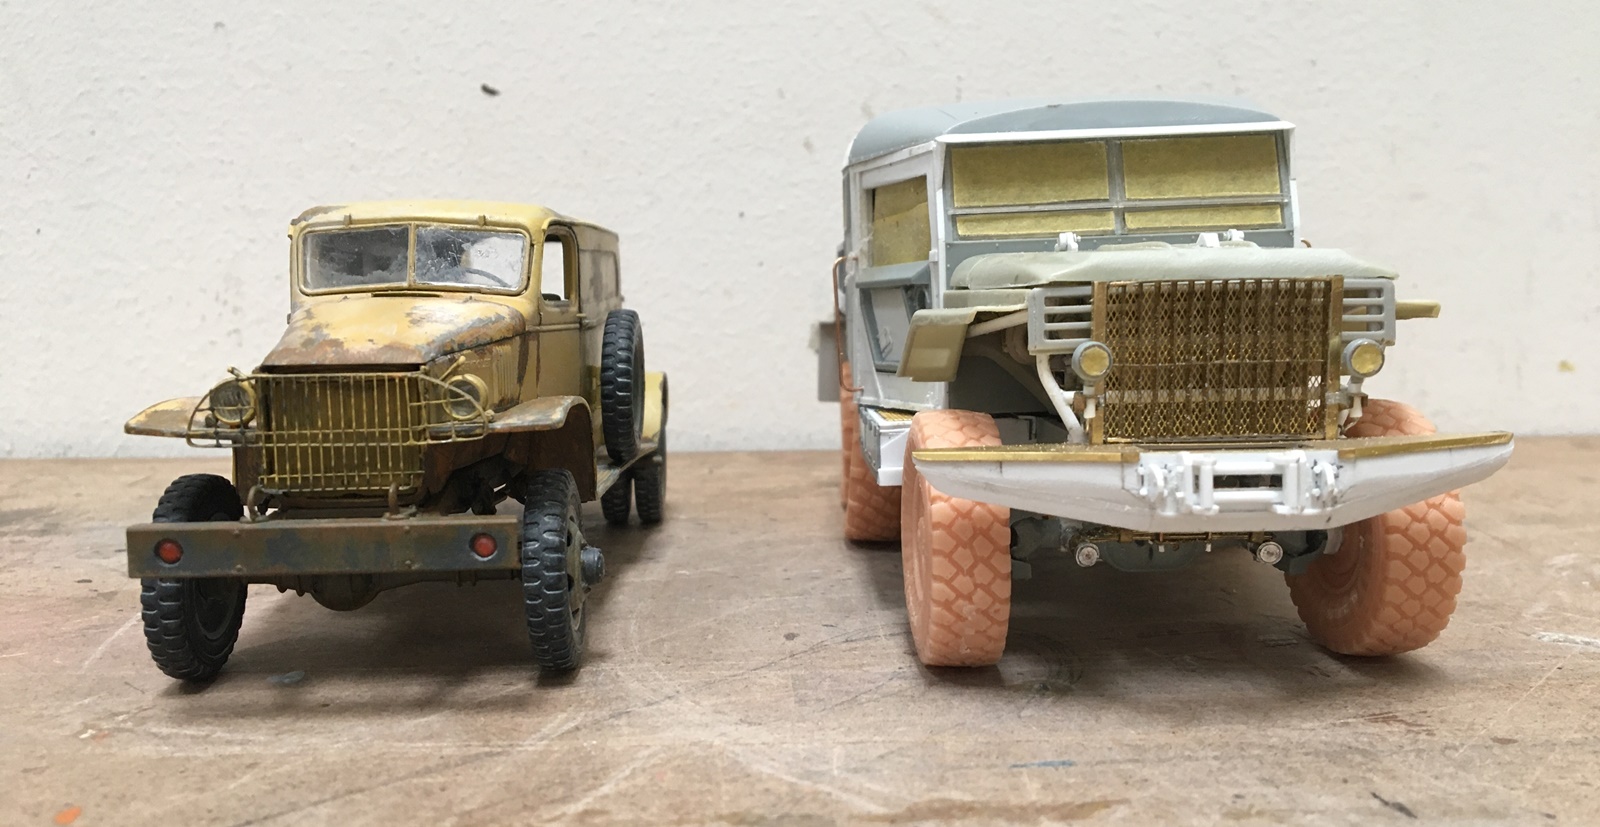
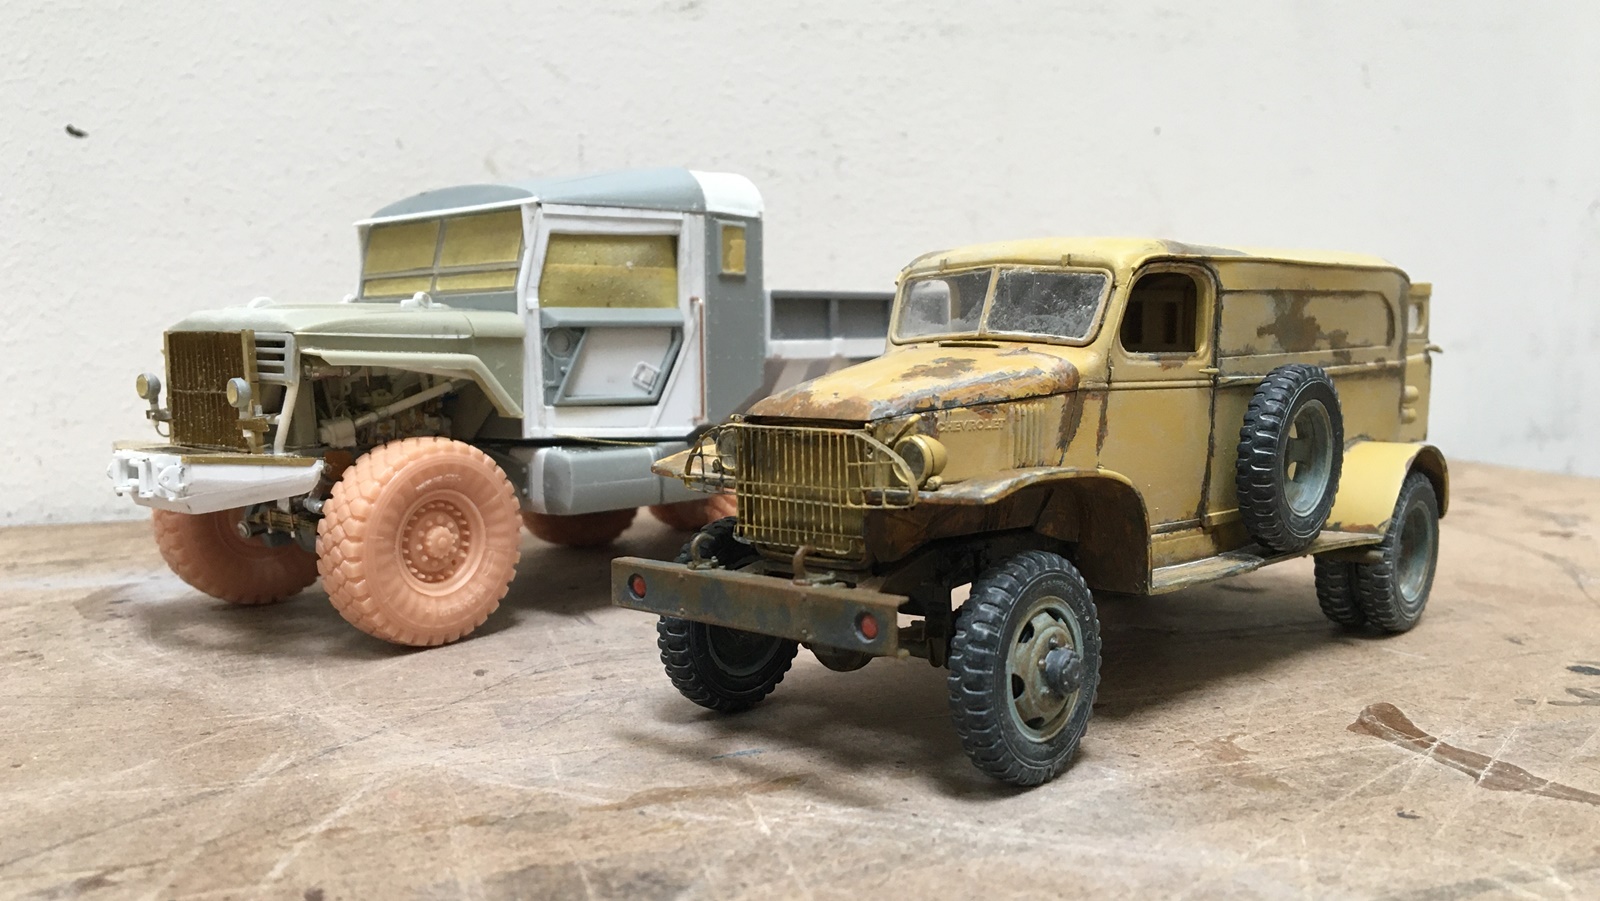
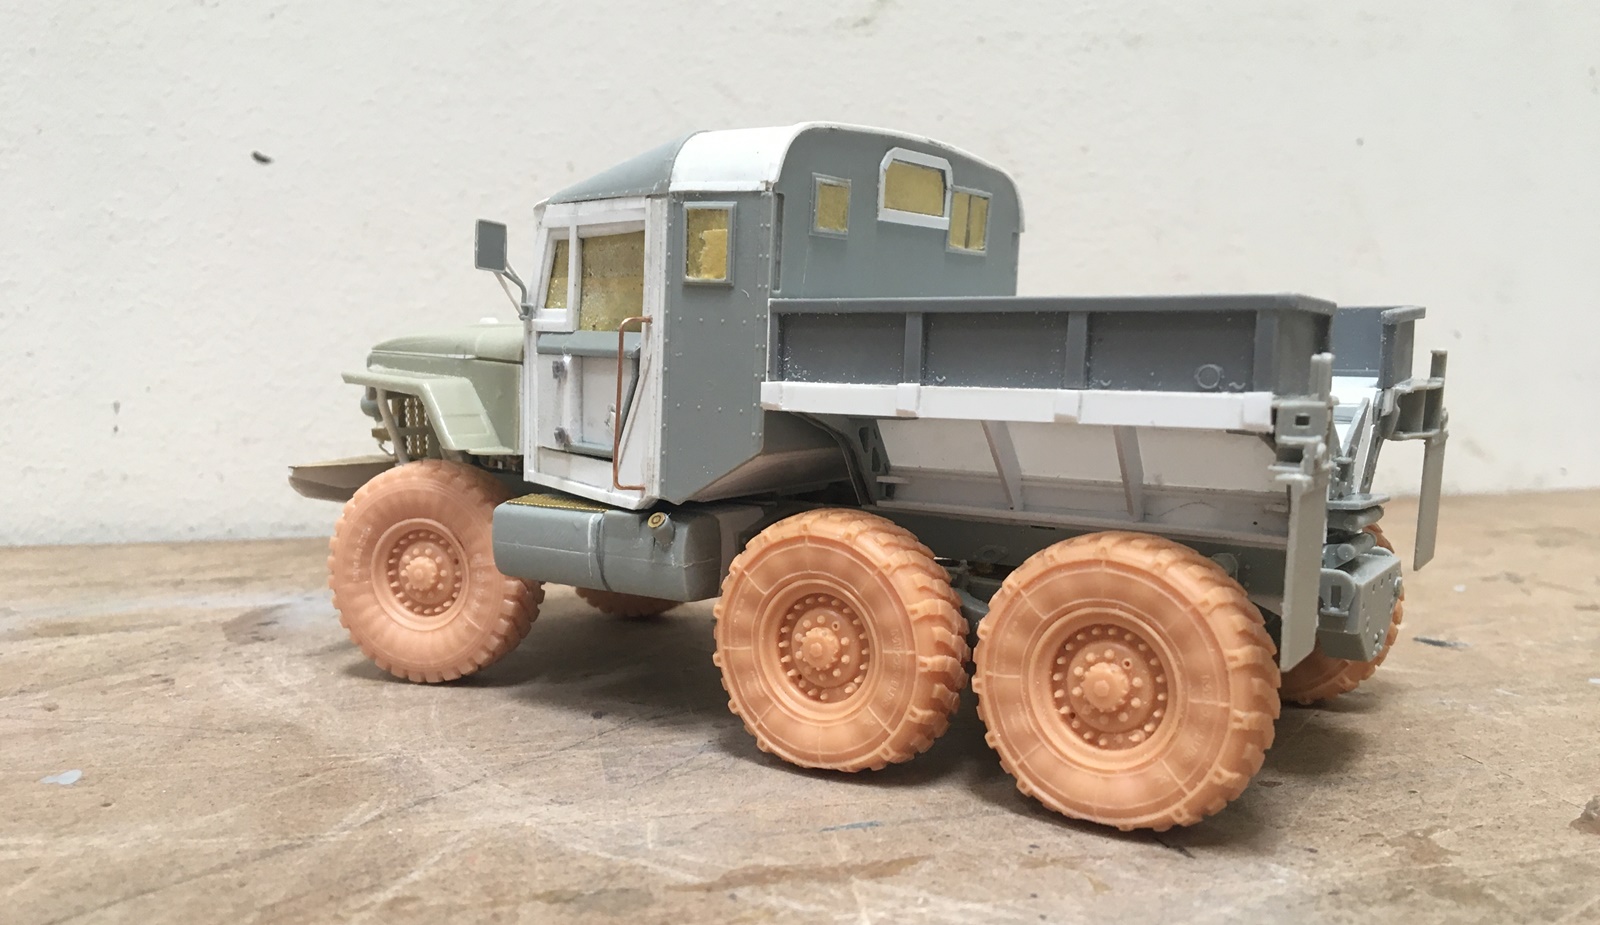
Scale continues to fool me a bit with this build, as it seems almost like a small 1/25 kit - but as it’s not, time to think about what’s going on here:
As you can see, in scale comparison, this is indeed very large. You can also see, the proportion of my window opening and door is wrong - too wide. So, I made them narrower:
Some of you might recognize the door hinges, which are some of the old R&J Products resin German AFV hinges - they do the trick. While a bit/lot rough here, I think with some paint it will be fine.
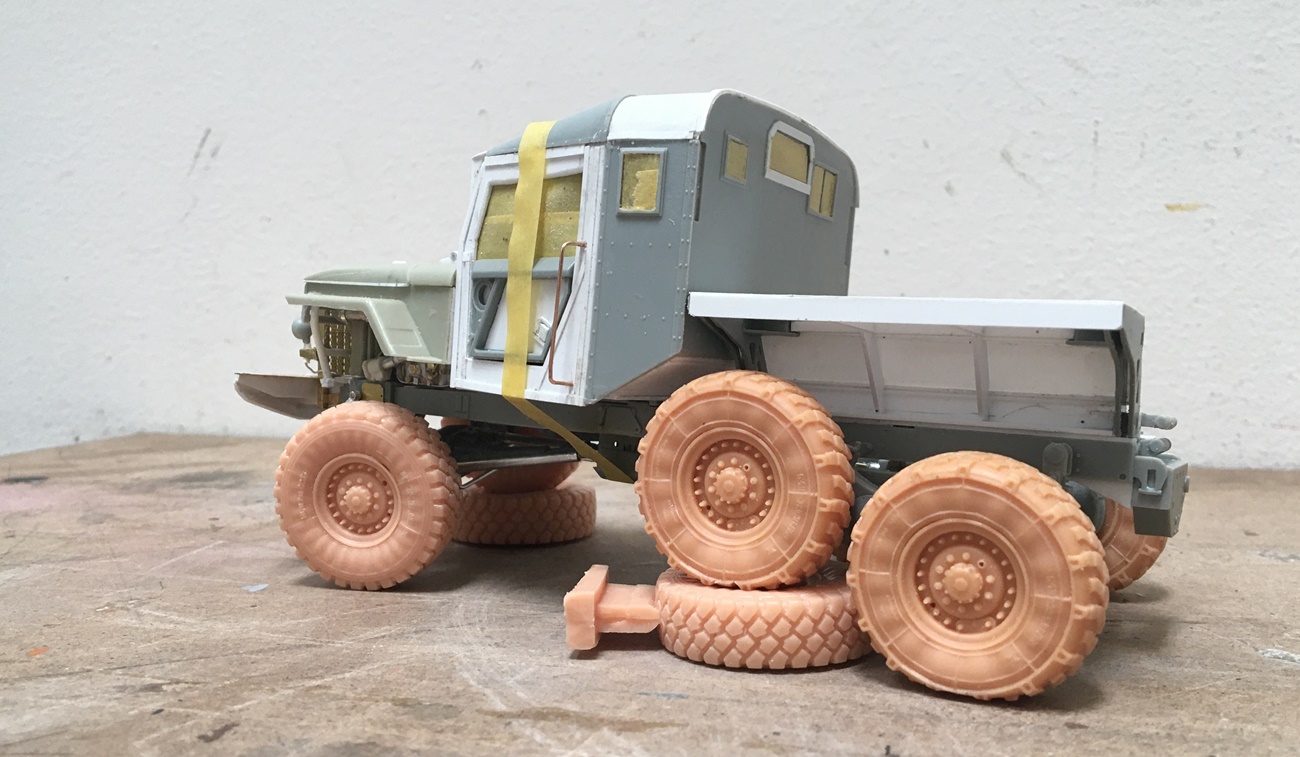
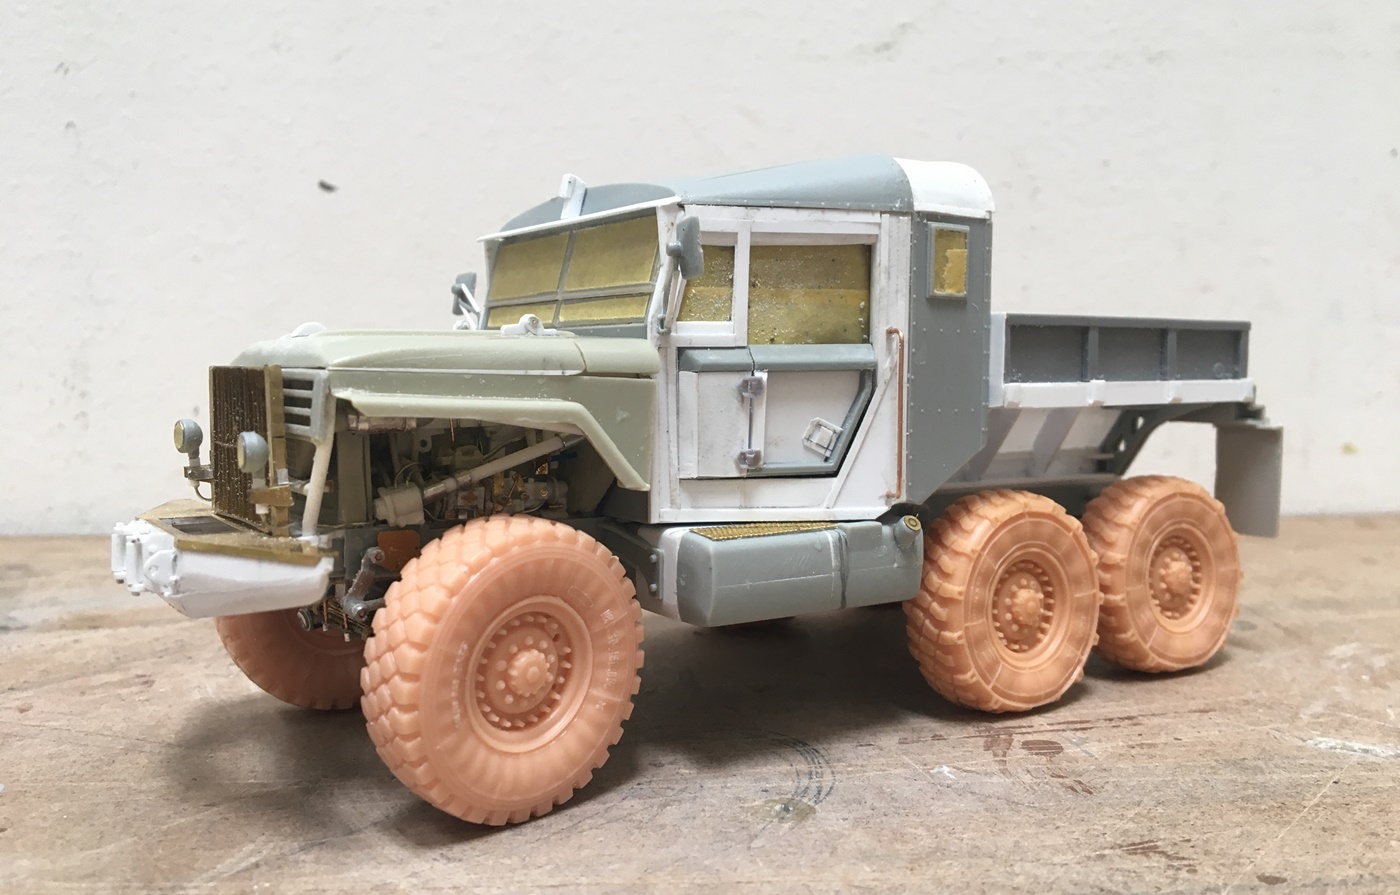
I also wondered about the fuel tank - as the kit part seemed to sit very low and looked too wide (as I’m using larger diameter tires), so I made it shorter, tilted its axis, and made it deeper. I think this is better. I almost shaved the forward side to match the cab, but decided I sort of like that it can work as a step at cab height.
This seems to work out fine - as there is plenty of clearance between the ground and tank, and front and rear tires. I thought about relocating it, but the alts weren’t that appealing to me, so here we are.
Yes, still largely dryfit, so there are several gaps that will hopefully go away.
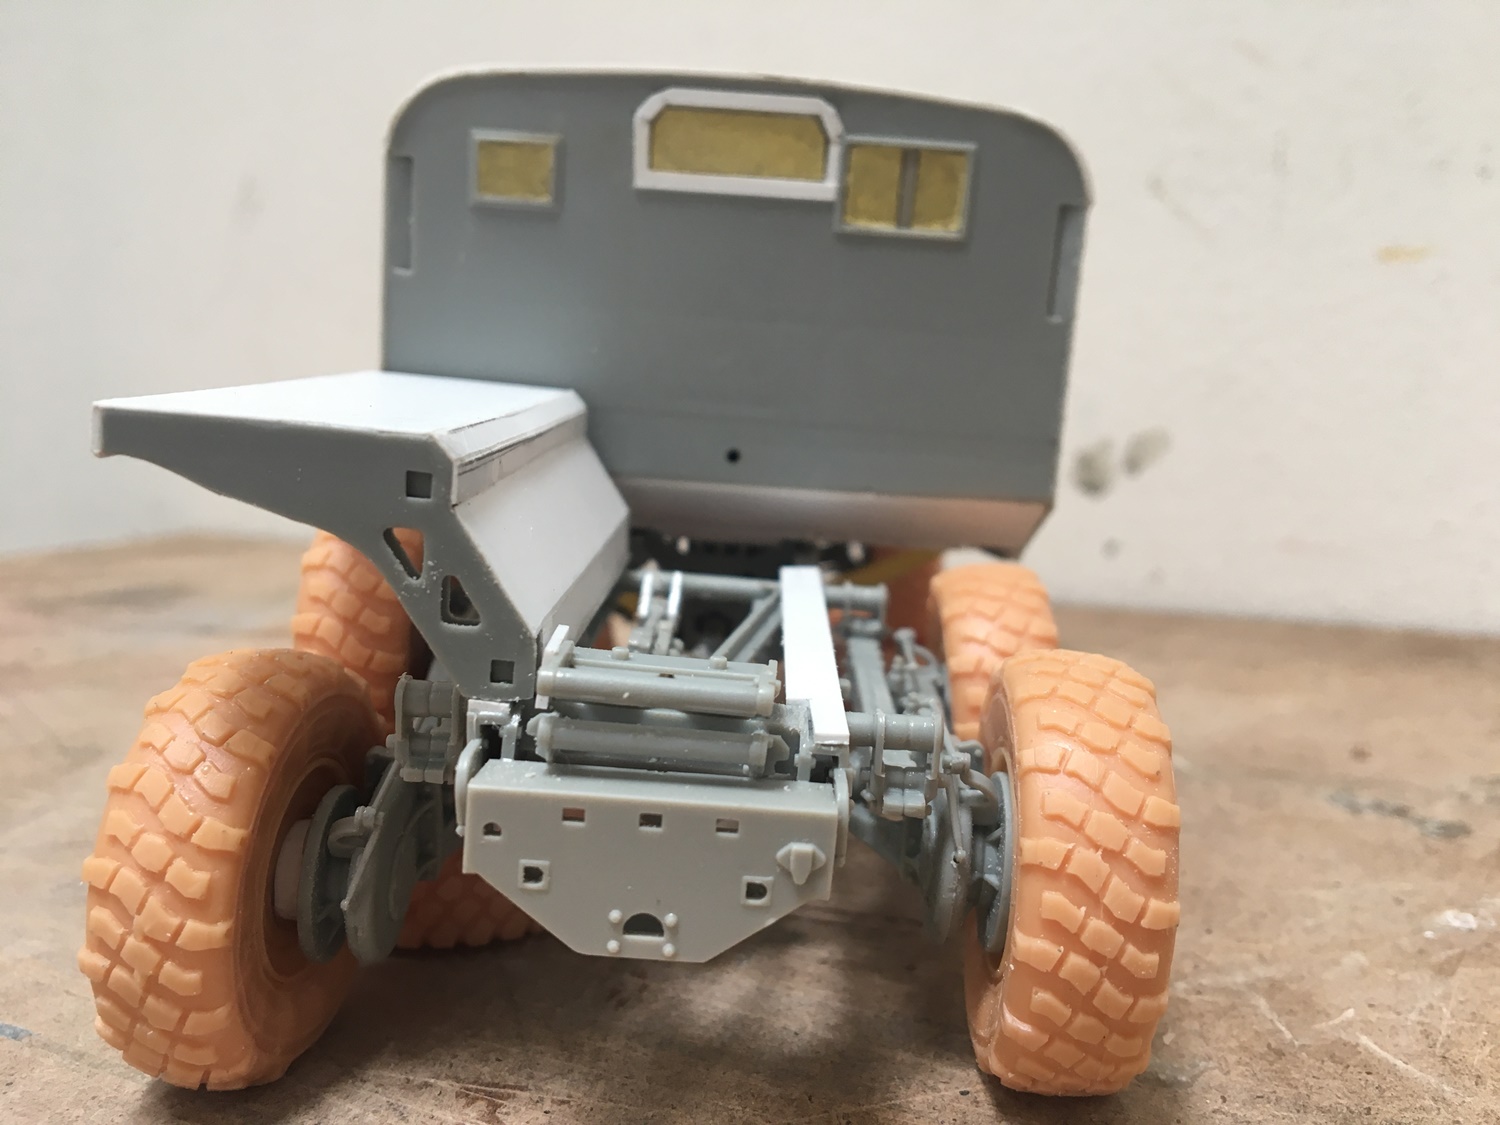
And, all things considered, the bed worked out reasonably well too. There are two big gaps on the back wall of the cab - which I think I’ll figure out how to convert to vents - why not? As for that added rear window - well, a guy thought that by using a space between the interior framing it would be ok - and well, not great - it’s way too high, but it’s done.
Thanks for having a look, and on we go -
Cheers
Nick
Brilliant. It takes an awful look of hard work and planing to get something looking this good with so much scratch building involved. The whole thing balances out perfectly and all the chops, cuts, and filling, extensions are looking spot on. Super cool build mate.
@Johnnych01, thanks very much! this one…while you’ll see below, I think it turned out pretty well, but…of course I still wonder!
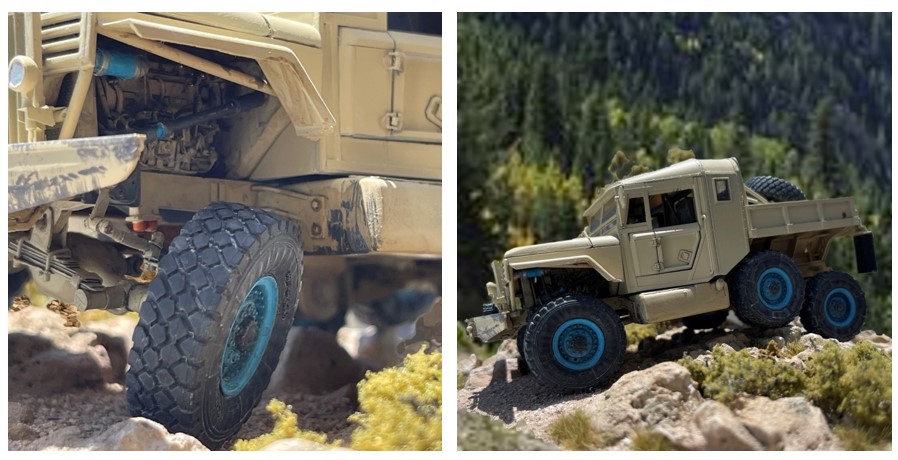
As it’s done, and was a sunny day, out for some pics we went ![]() , so please have a look:
, so please have a look:
It is indeed a bit of a stout beast!
So this is quite an unusual truck ,with our without all my changes. If i were to do this again, I’d try and use bigger tires - but, this would require extending the frame, and the walking beams. I’d also relocate the fuel tank, and battery box - as I think they sit too low - maybe bigger tires would resolve this? I don’t know… ![]() I’m still a bit surprised that it site level
I’m still a bit surprised that it site level ![]() It’s also nice to see the suspension works as hoped
It’s also nice to see the suspension works as hoped
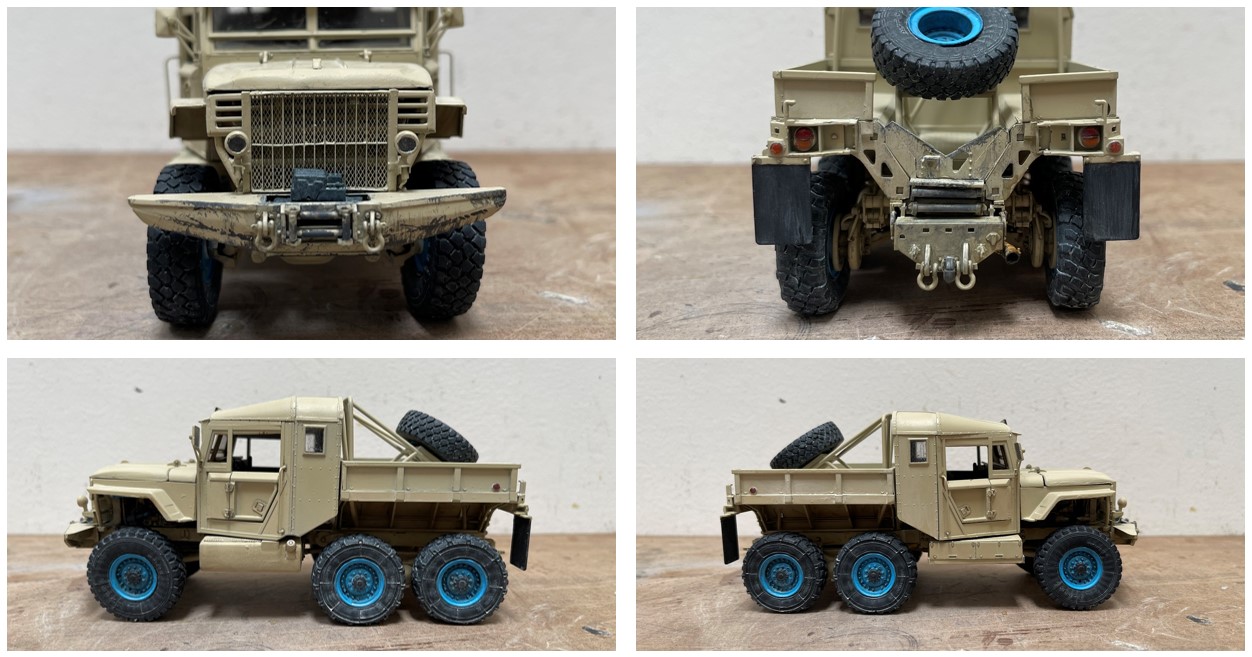
And a few indoor pics:
As a whole I think this worked out fine - I like the basic look. And now, calling it done, and time to try something else!
Cheers
Nick
Nice finish!
Noice! ![]()
![]()
![]()
I can just see this on the next cover of “Four Wheeler and Offroad” magazine. ![]()
Cajun ![]()
Michael, your signature “gray man” figures are starting to take on a life of their own, this whimsical gesture has me looking forward to your next antic.
Crazy man . . Crazy. ![]()
Cajun ![]()
I think Ryan already made the definitive comment about this project, something like “That’s it, I’m going to sell all my kits & do something else” I’m with him. I mean…seriously??! Any expletive you like, preceding “brilliant”.
Oh but wait – I gotta be picky Nick, the t*res are way too clean. There, I said it - a pet beef, for me it can make the difference between looking like a toy or…(sharp intake of breath) a miniature, and the real thing. That aside, ![]()
![]()
![]()
![]()
Absolutely brilliant work!!!
That looks sensational Nick. What an absolute cracking build from start to images on the mountain.
The wheel colour and contrast to the body colour is brilliant, really lets it have a unique look. Fantastic mate … ![]()
![]()
![]()
A brilliant example of the scratchbuilder’s art. A real masterpiece Nick.
Gorgeous work!
Hello gents,
Thanks for the positive words, they are appreciated! This was an interesting project - it certainly caused me to stretch my thinking a bit.
@agincajun, that would be perfect! thanks ![]()
@Johnnych01, I’m glad you noticed those colors - and that they worked! I was getting tired of doing highly rusted and weathered, and didn’t fell like British green - so, here we are!
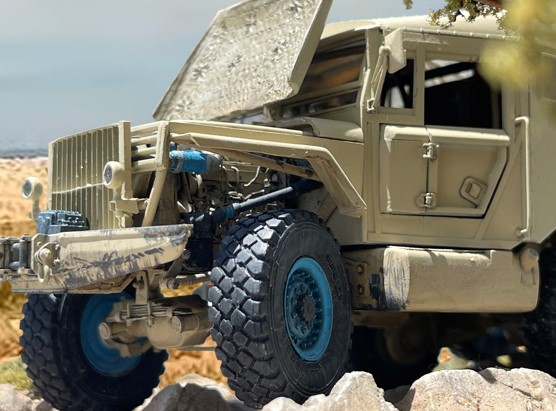
@Dioramartin, hi Tim, yeah…about those tires…believe it or not, they received several washes of my favorite Lifecolor Dust II - now, when I pull on the optivisor, I’ll mention what you didn’t - the inside of the front wheels specifically.
Not only did I evidently skip giving them a wash, well, I was also lazy and painted the wheel and hub the same color…very nice touch, and as this is highly visible, neglected to add any discernable detail…making them scream “I am a toy miniature!!! and not a detailed model…!” ahh…well, at least it’s done! ![]()
Happy model building,
Cheers
Nick
![]() I didn’t notice the t*re/hub thing at all – oh well, maybe Ryan & I won’t dump our stashes after all. Interesting how direct sun erased the ummm….subtle…understated…dusting though, it kinda shows up OK in shadow. Whatever, it all worked out beautifully & again as nobody’s mentioned it, great off-road photos.
I didn’t notice the t*re/hub thing at all – oh well, maybe Ryan & I won’t dump our stashes after all. Interesting how direct sun erased the ummm….subtle…understated…dusting though, it kinda shows up OK in shadow. Whatever, it all worked out beautifully & again as nobody’s mentioned it, great off-road photos. ![]()
![]()
I agree. So close to being a good model, now just trash. ![]()
![]() priceless - yeah right on
priceless - yeah right on ![]()
Incredible piece of engineering Nick , outstanding in every detail , very , very , very , cool !!!