All I can say is that this is one of the HARDEST car models to get the body over the chassis that I’ve EVER dealt with. When I finally did manage to get it installed all the way into the body, the leading edge of the dash contacted the bottom of the windshield mounting tabs causing the whole front of the chassis to not seat properly. My fix was to trim the leading edge of the dash back until the body slid into the correct position. Total PIA but I got it.
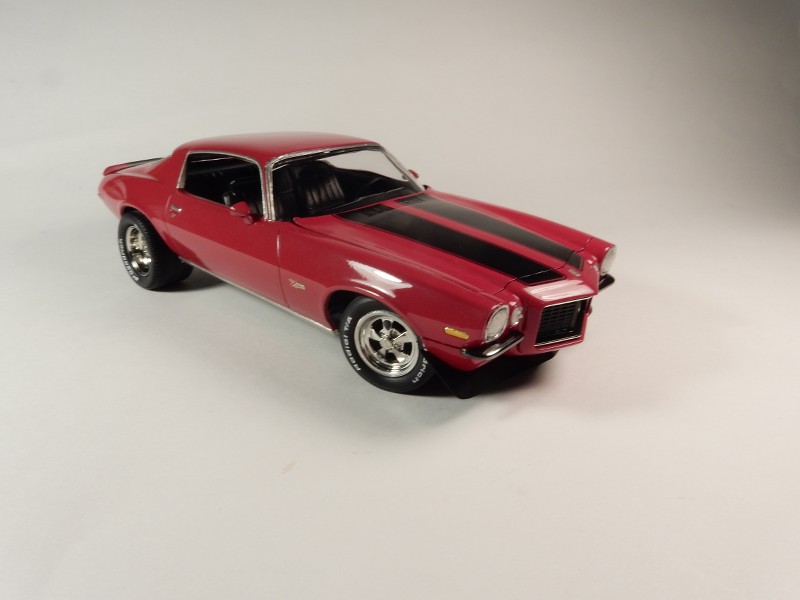
Here are the results of the labor over the last few weeks. Almost to the finish line with this one. Aside from the dash/ windshield fit issue this has been a great kit to work with.
Joseph,
Oh WOW !!!
The struggles to get the body correctly mounted was well worth it. The finish came out looking like a fully detailed car from a professional detailer. Can’t wait to see the full spread of this one sexy girl.
Thanks for the tip on the BMF. What I’ve found is that as the sheet ages, the foil closest to the edges just dries out. The middle area still has enough stickiness to do its job. Which leds me to wonder if I could order directly avoiding online retailers that could have the sheets laying around for a long time.
Joel: Thanks ol’ buddy. I’ve found the same thing to be true of BMF as it ages. I have talked to Randy from Bare Metal Foil and he said (provided that you bought the sheet from the BMF website directly from him) that he’s going back to the thicker foil that he had in stock before Covid. He also said that if anyone has a batch of foil that’s not sticking to send it back to him in an envelope. Just the foil, no instructions, no original envelope that the foil came in…just the foil folded up and put in an SASE and addressed to the addy that’s on the outside of the original foil envelope. He’ll send you a new sheet.
If you need to get ahold of him his phone # is 734-604-3695
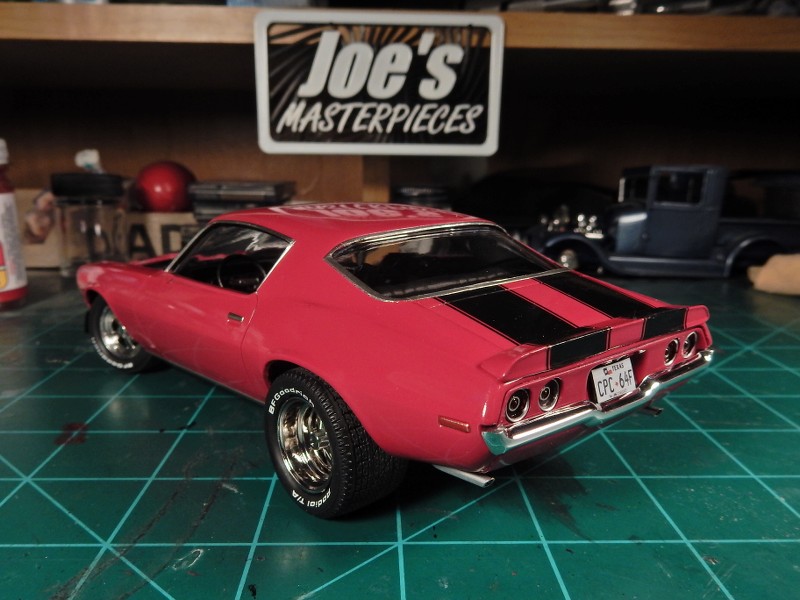
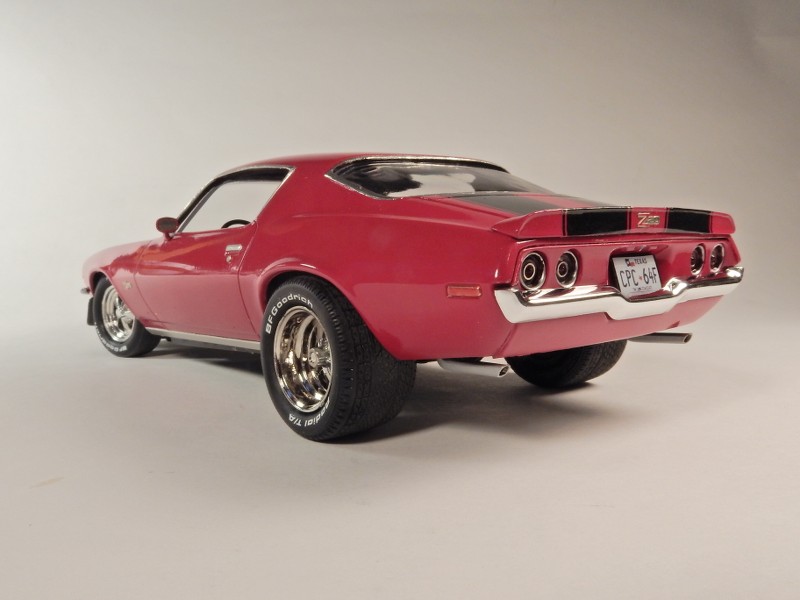
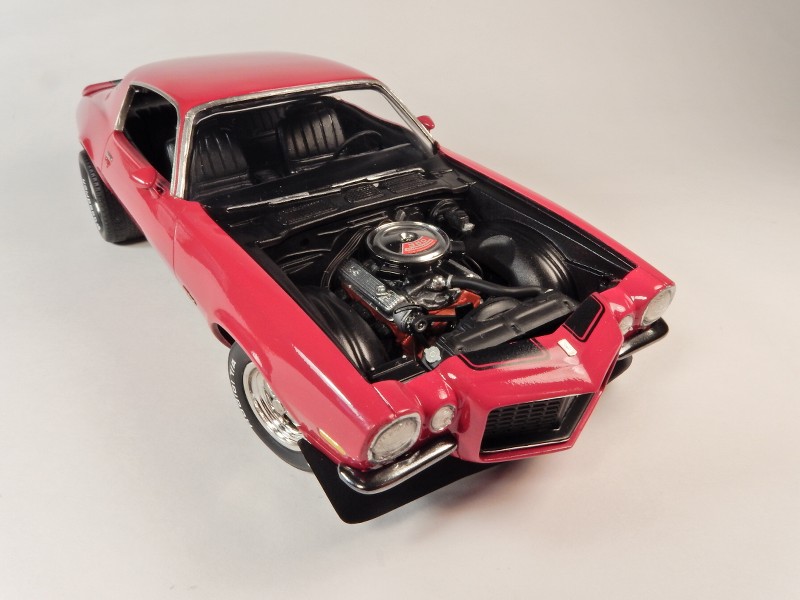
I managed to get the rear bumper touched up and attached this morning. Other items of this morning’s progress were:
Battery reinstalled. I had it installed prior to the core support install but it the core support wouldn’t install cleanly with the battery in place so…I had to take it out.
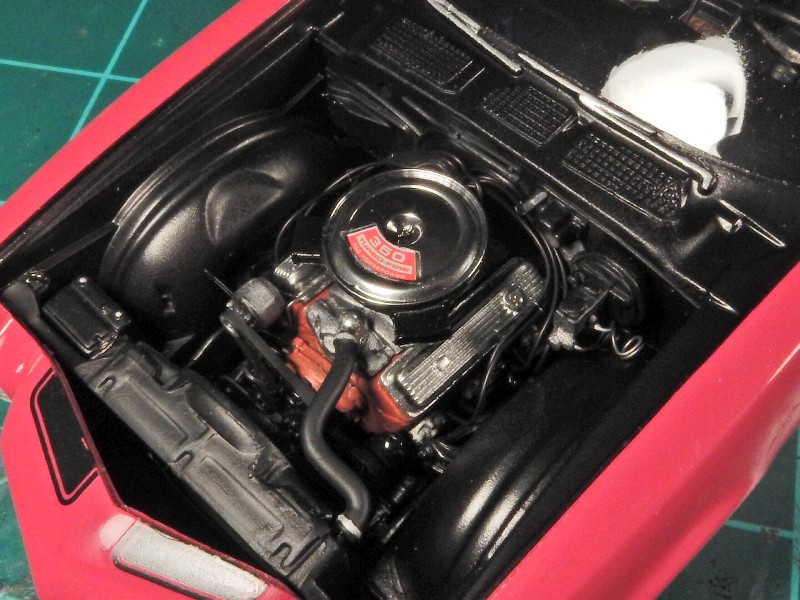
Radiator hose/ thermostat housing painted and installed
Alternator adjustment bracket re-attached. Just too much handling while fitting the chassis into the body. I figured there’d have to be a casualty along the way and I got lucky with just the bracket falling off. At one point during the chassis fitment into the body process I really thought I was going to ruin the whole build.
Cut front bumperettes from their sprues and currently soaking them in Easy Off. After cleaning them up I’ll treat ‘em to a good ol’ coating of Alclad.
Aligned the tail pipes (during the chassis install both pipes moved on me)
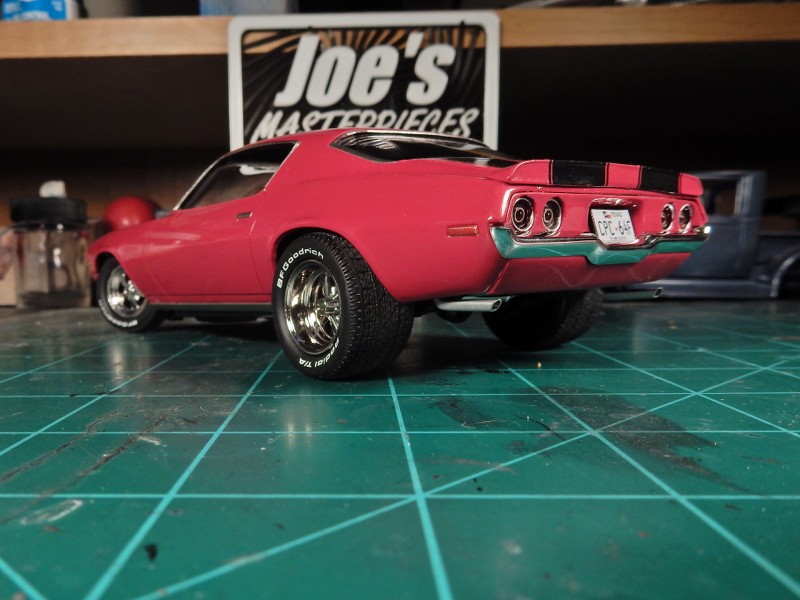
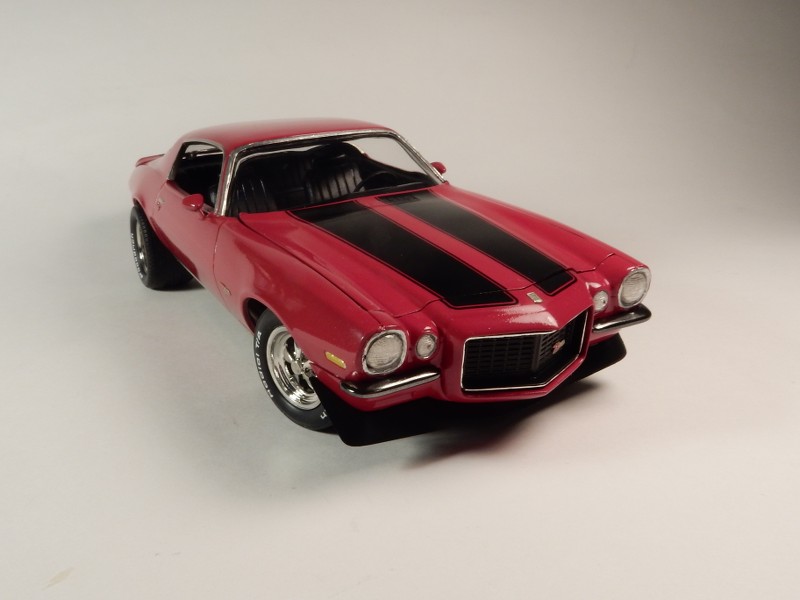
About all that’s left now is the light polishing on the whole body, painting and install of the outside rear view mirrors, front bumperettes install and then emblems/ badges application and we’ll be off to glamour shots.
Joseph,
I’m going to give him a call and see about sending back at least one of my two sheets: Chrome and Matt Chrome. I throw out twice as much plus what i eventually get to work. BTW, I recently ran across from one of Paul @ International Scale Modeler vids that Hasegawa makes a foil as well which works great. It’s Mylar based so it does stretch but sticks where burnished down. But there’s two down sides: 1st it’s super hard to find here, and 2nd in Japan it goes for $20 for a sheet about the size of BMF.
Sure sounds like you beat odds with only knocking off the Alternator bracket. From the engine picture I’s say that you did one heck of a job on the entire bay.
Looking forward to your polished/waxed pics as the posted pics look show stopper quality.
Joel: Interesting about the Hase foil. I’ll have to check that out and thanks for the kind comments & heads up on the foil.
Damian: I appreciate you droppin’ in and for your comments as well. I’ve always liked the big & little tire look on sports cars.
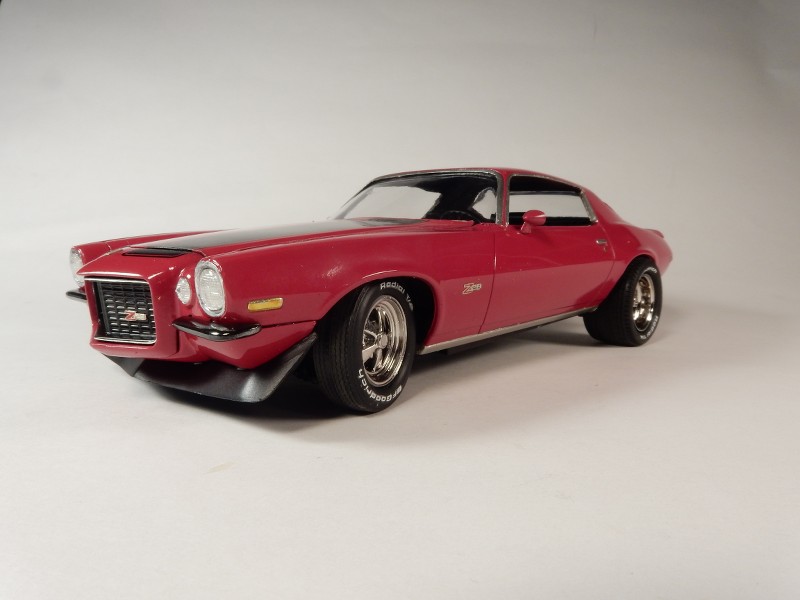
Well gang…after 3 months I’ve finished this puppy up. I’m going to put together a small re-cap of the trouble points with this kit in a separate thread for anyone that wnats to build one of these. I will say that in the kit reviews that I watched along with what I read before starting on this build, it says to build the subframe up front separately and install it after the base chassis has been installed into the body (which was no small feat onthis model. At several points I thought I was going to break something big trying to get the body and chassis together.
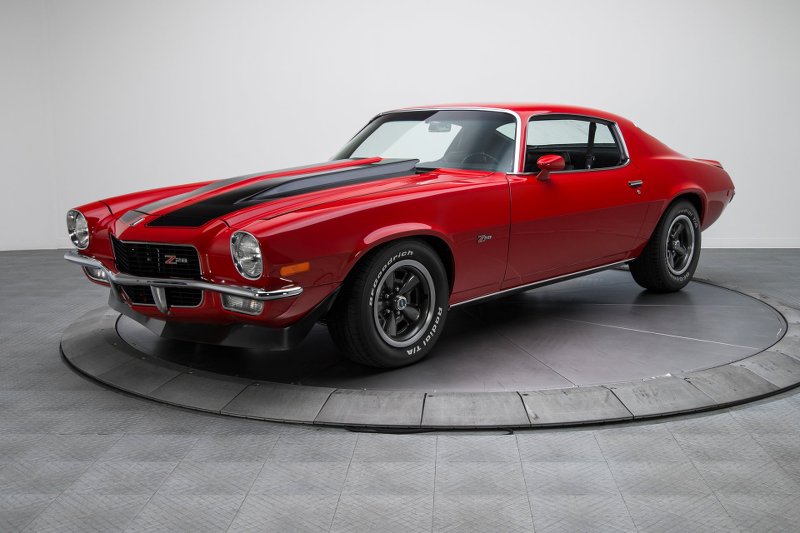
I’ve had this model in my stash for around 8 years and have always wanted to build one because I like this body style so much. I was gonna have one of these for my first car to drive before dad saw the well-built 350 in it with a 4-speed and put a stop to that. He used to tell me, “If you’re gonna kill yourself …you aint gonna do it under my roof”.
If you’ve been in Hobby Lobby, you’ve seen this kit a thousand times on the shelves.
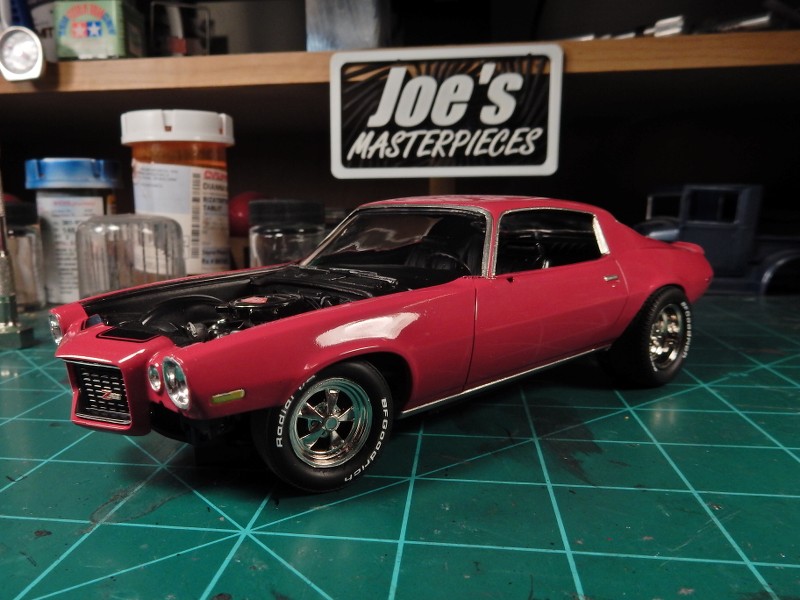
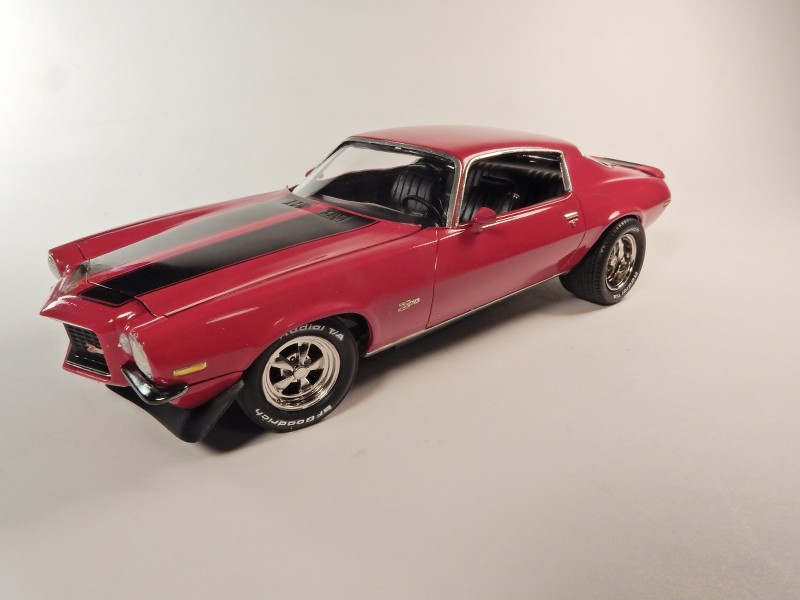
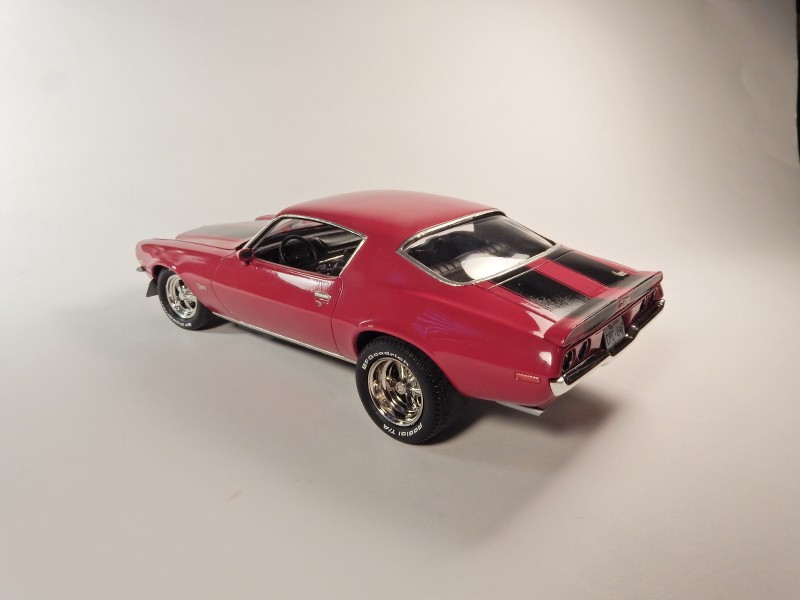
Most of the cars that I saw were yellow, green, brown, black…etc. I wanted something different. I wanted red…but not just any red…something that was out of the ordinary and magnetic to the eyes. My choice ended up being Raspberry Red. I fell in love with this car the second that I saw it…
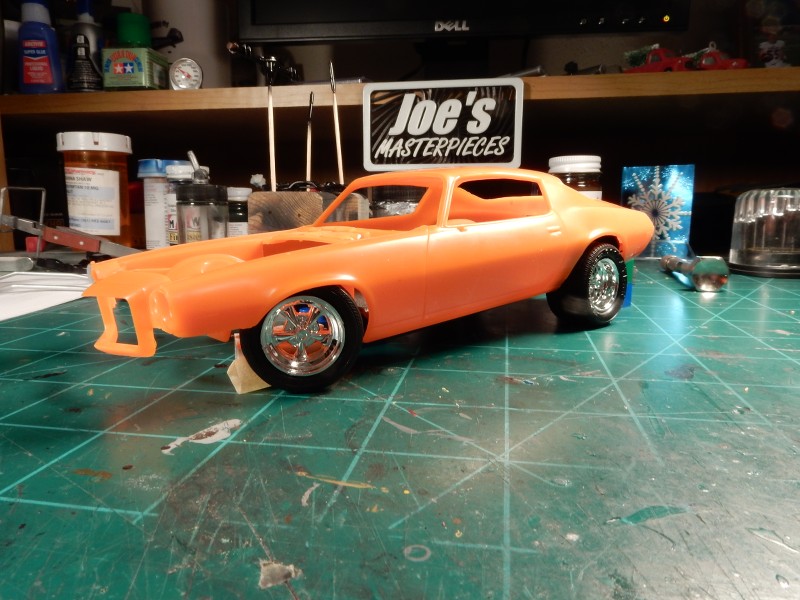
Now for the look that I was after. The stock wheels and tires look alright but I wanted something a bit more aggressive in regards to wheels/ tires and wanted to drop the front stance and raise the rear just enought to get the “meats” I had in mind to look how I wanted. I had parts from 3 different kits to make the wheel & tire choices.
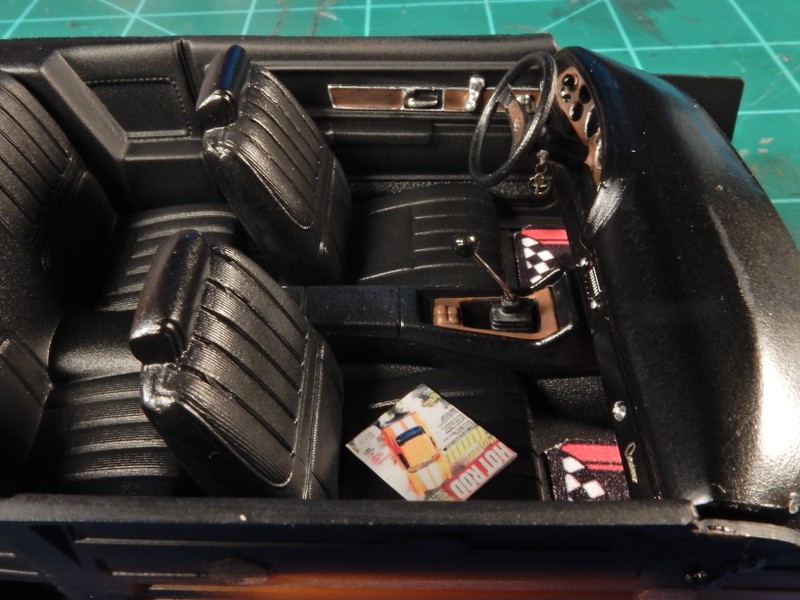
Other parts used throughout the build were the 1970-1/2 Z/28 PE fret from Model Car Garage for the engine, interior and exterior details. Magazine in the front seat was from a supplier on Ebay years ago and decals are from Speedway for the license plate. MCW supplied the Raspberry Red and Testors Wet Look was used for the clear coat. A light coat of Tamiya Smoke went on the wheels to give them a more realistic look and to bring out the details. The kit fought me some but wasn’t too bad to build thanks to reading reviews and looking over build threads from other folks who have built this same car. Thanks go out to all who looked in on and encouraged me along the way.
Joseph,
You out did yourself on the 1970 Camaro. The final set of pictures are truly hard to figure out if it’s the real deal or a fantastic
miniature. I really can’t call this a model, as it’s just so much more.
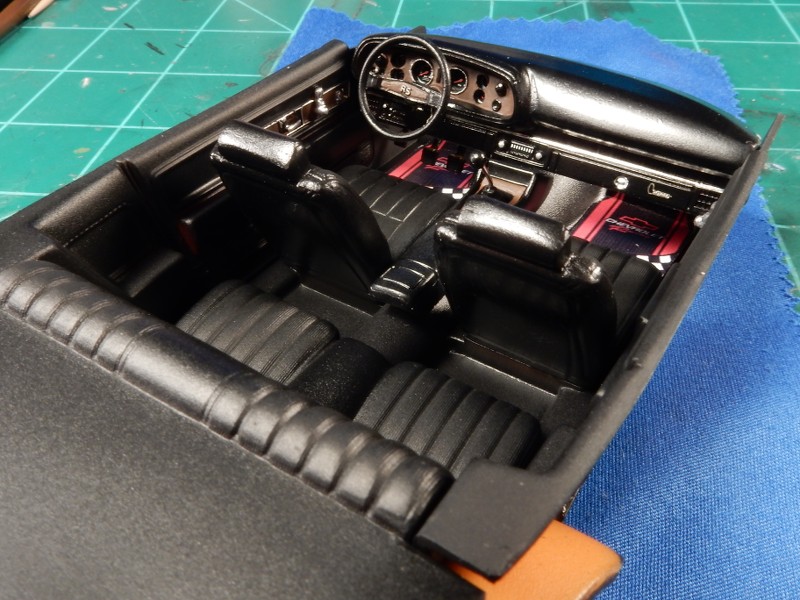
The paint and finish is just perfect. Wheels and tires up to your usual high standard, Engine bay duplicating the real thing to perfection. But what just grabbed my attention (that’s not an easy thing to do with a 74 year old with a limited attention span these days), and held it as I gazed at the overall interior pictures. The leather seats and dash just look as though it just rolled off the dealers lot with that sheen rather then a shine. I know you know what I’m referring to. Love the Hot Rod magazine with the Camaro on the cover.
What, no seat belts-lol absolutely awesome joe. o can never get my dashes to look so neat and the finish on the seats look like real luxurious vinyl great job so far paint look great too, love the color.
Thank you guys a million for the very kind comments. I was going to do seat belts for the fronts anyways but they are in the headliner. Engines and interiors are my favorite areas in autos and aircraft. With vehicles, I add the interior items to help define the character of the car/ owner.