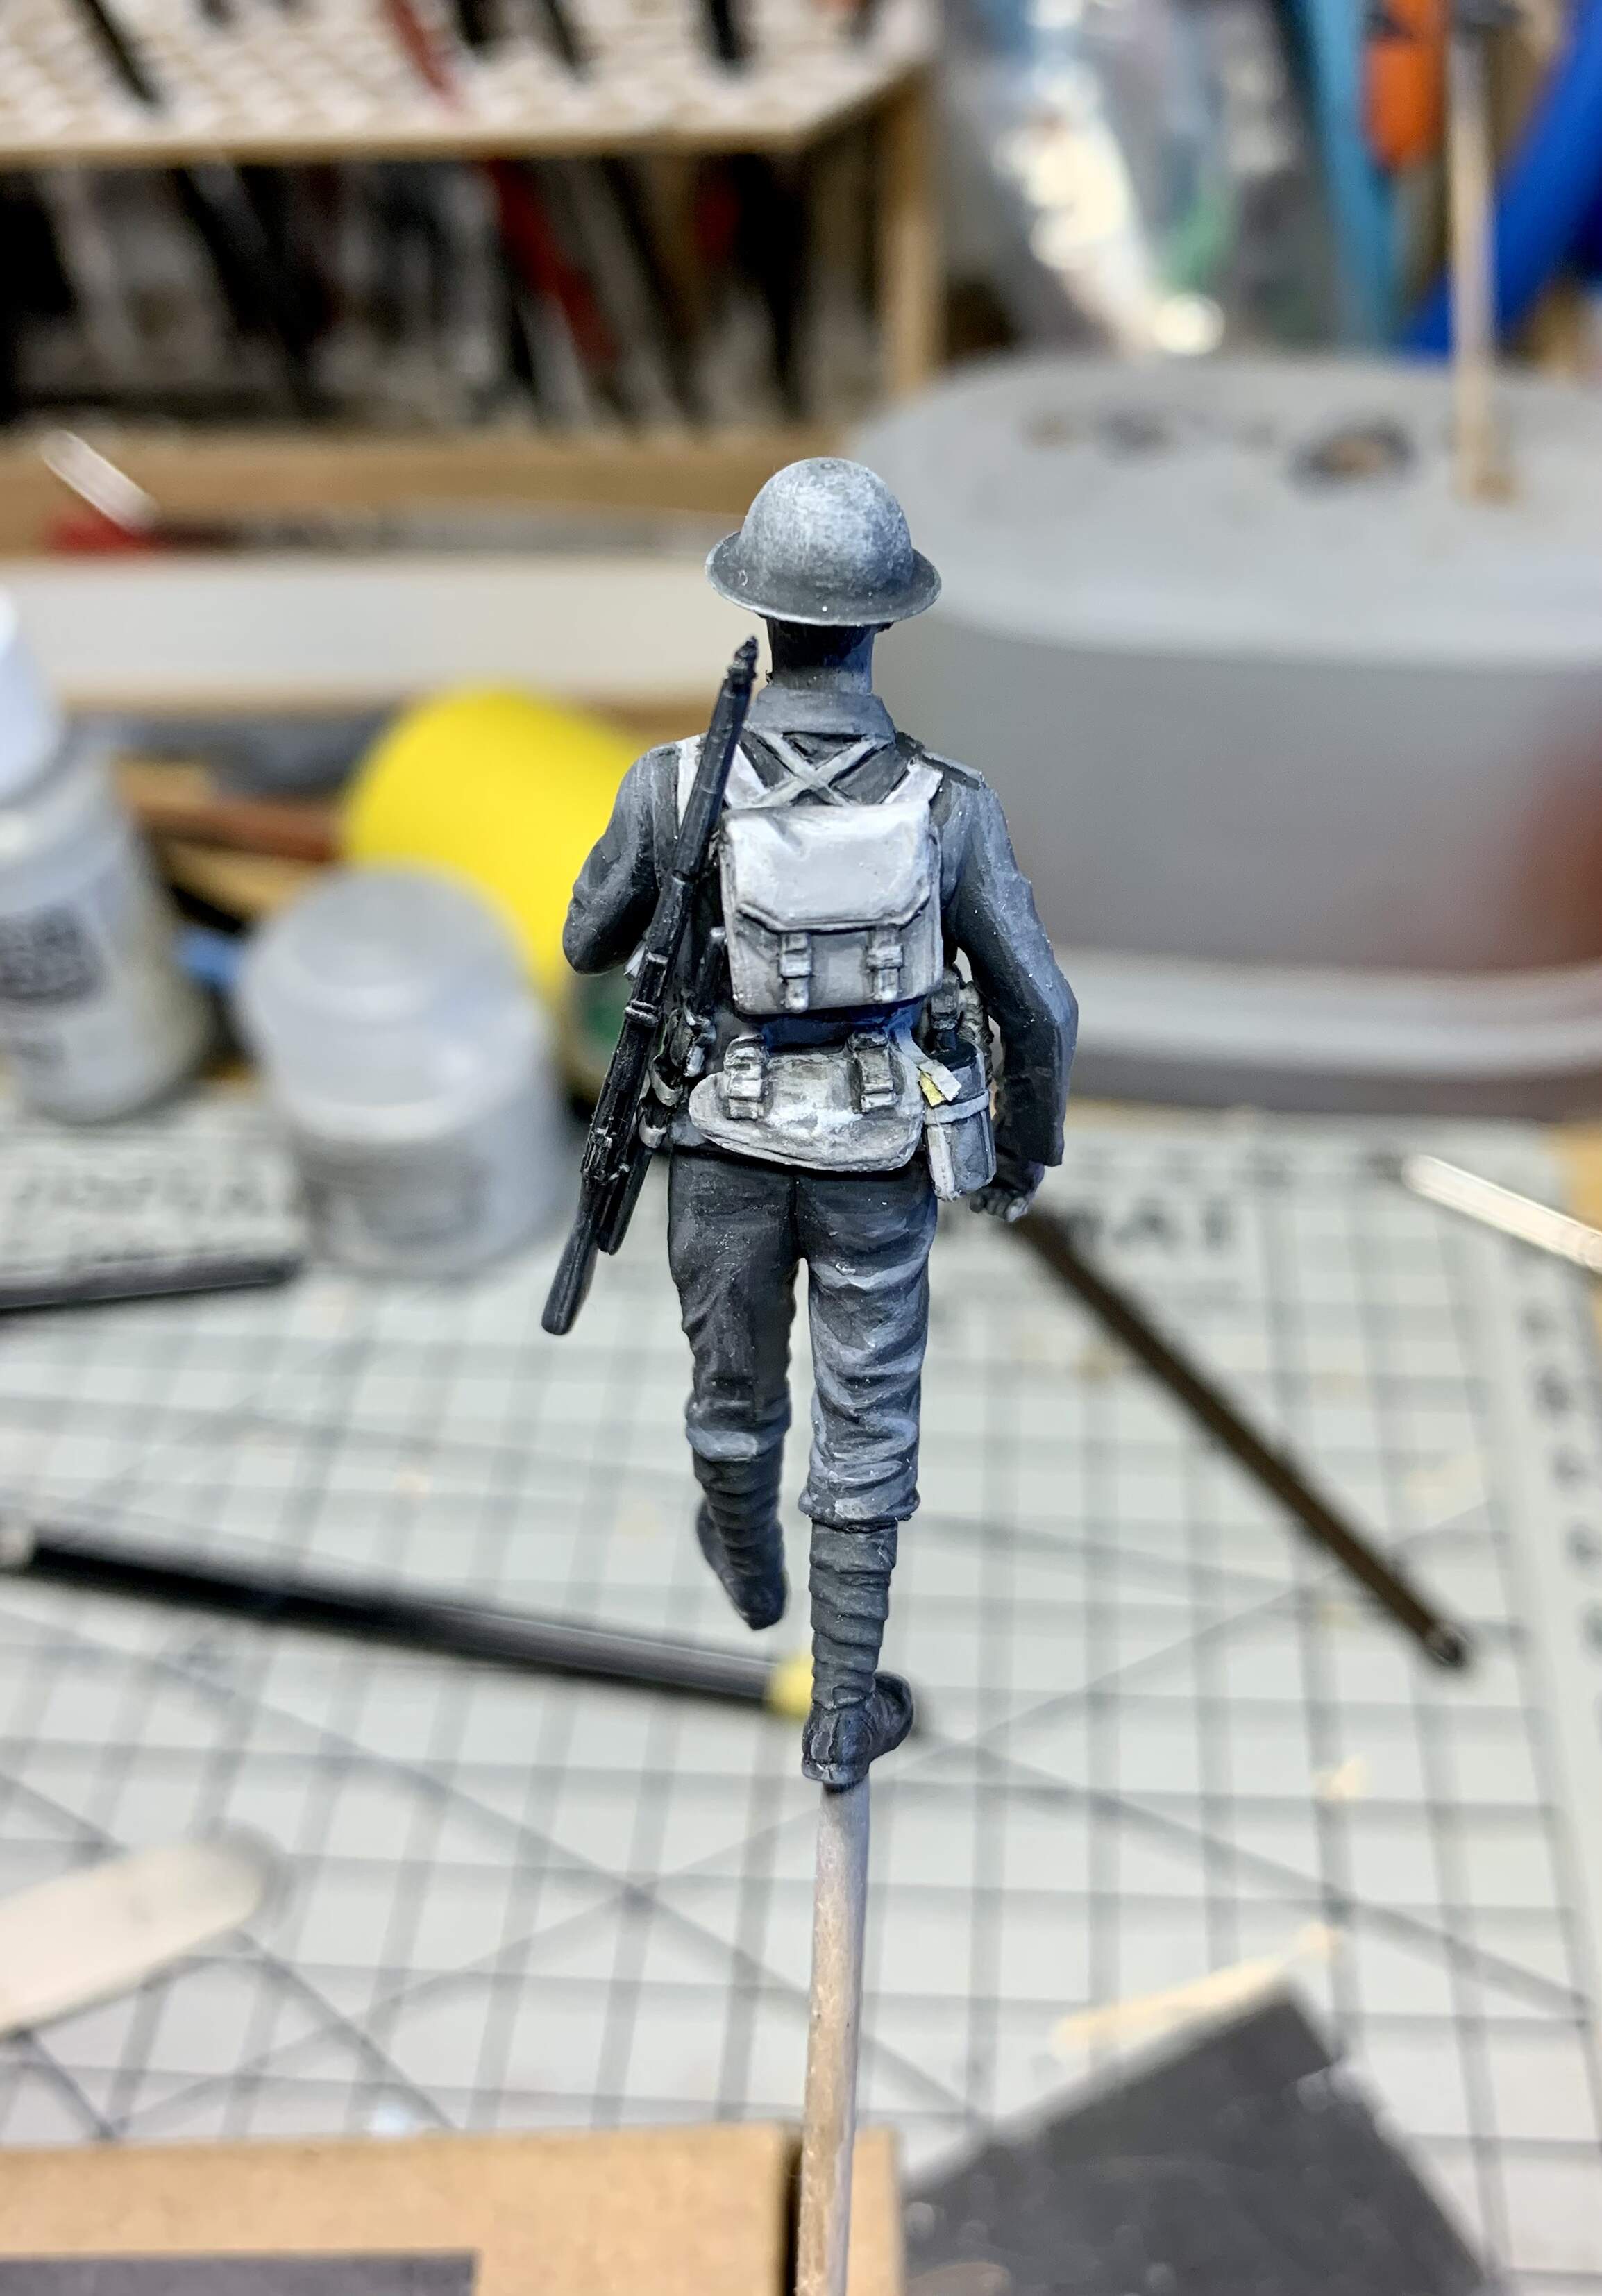
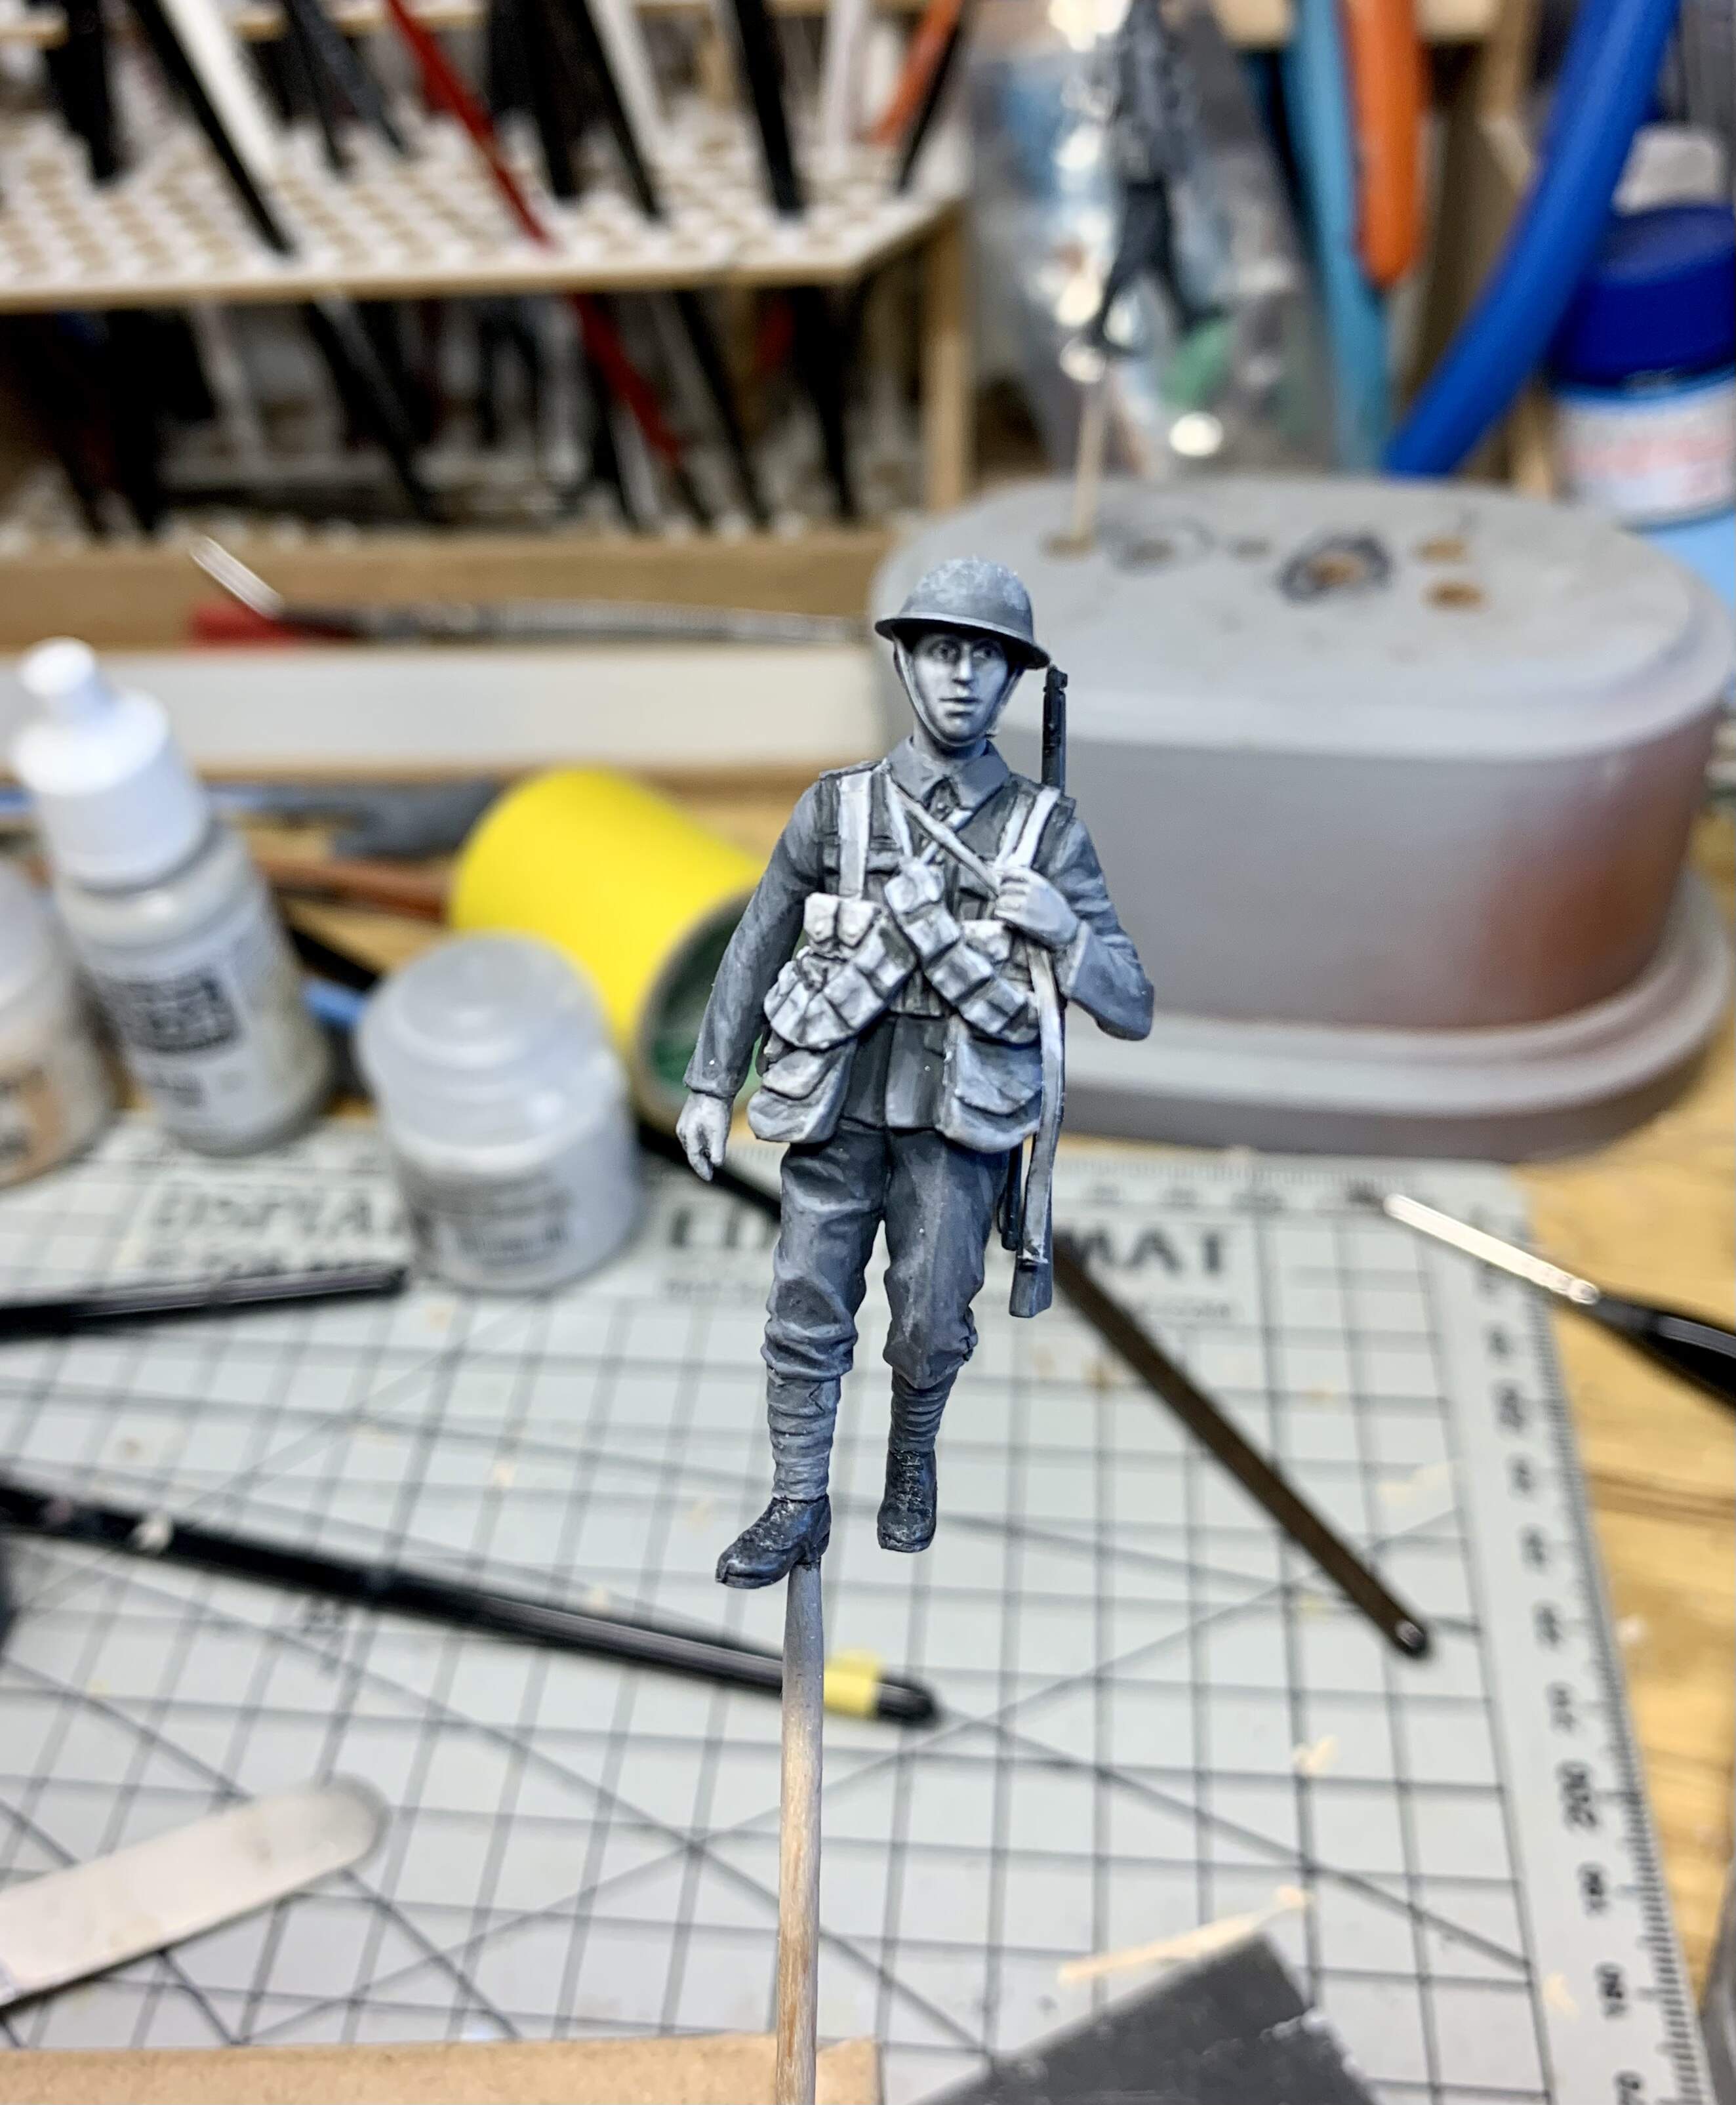
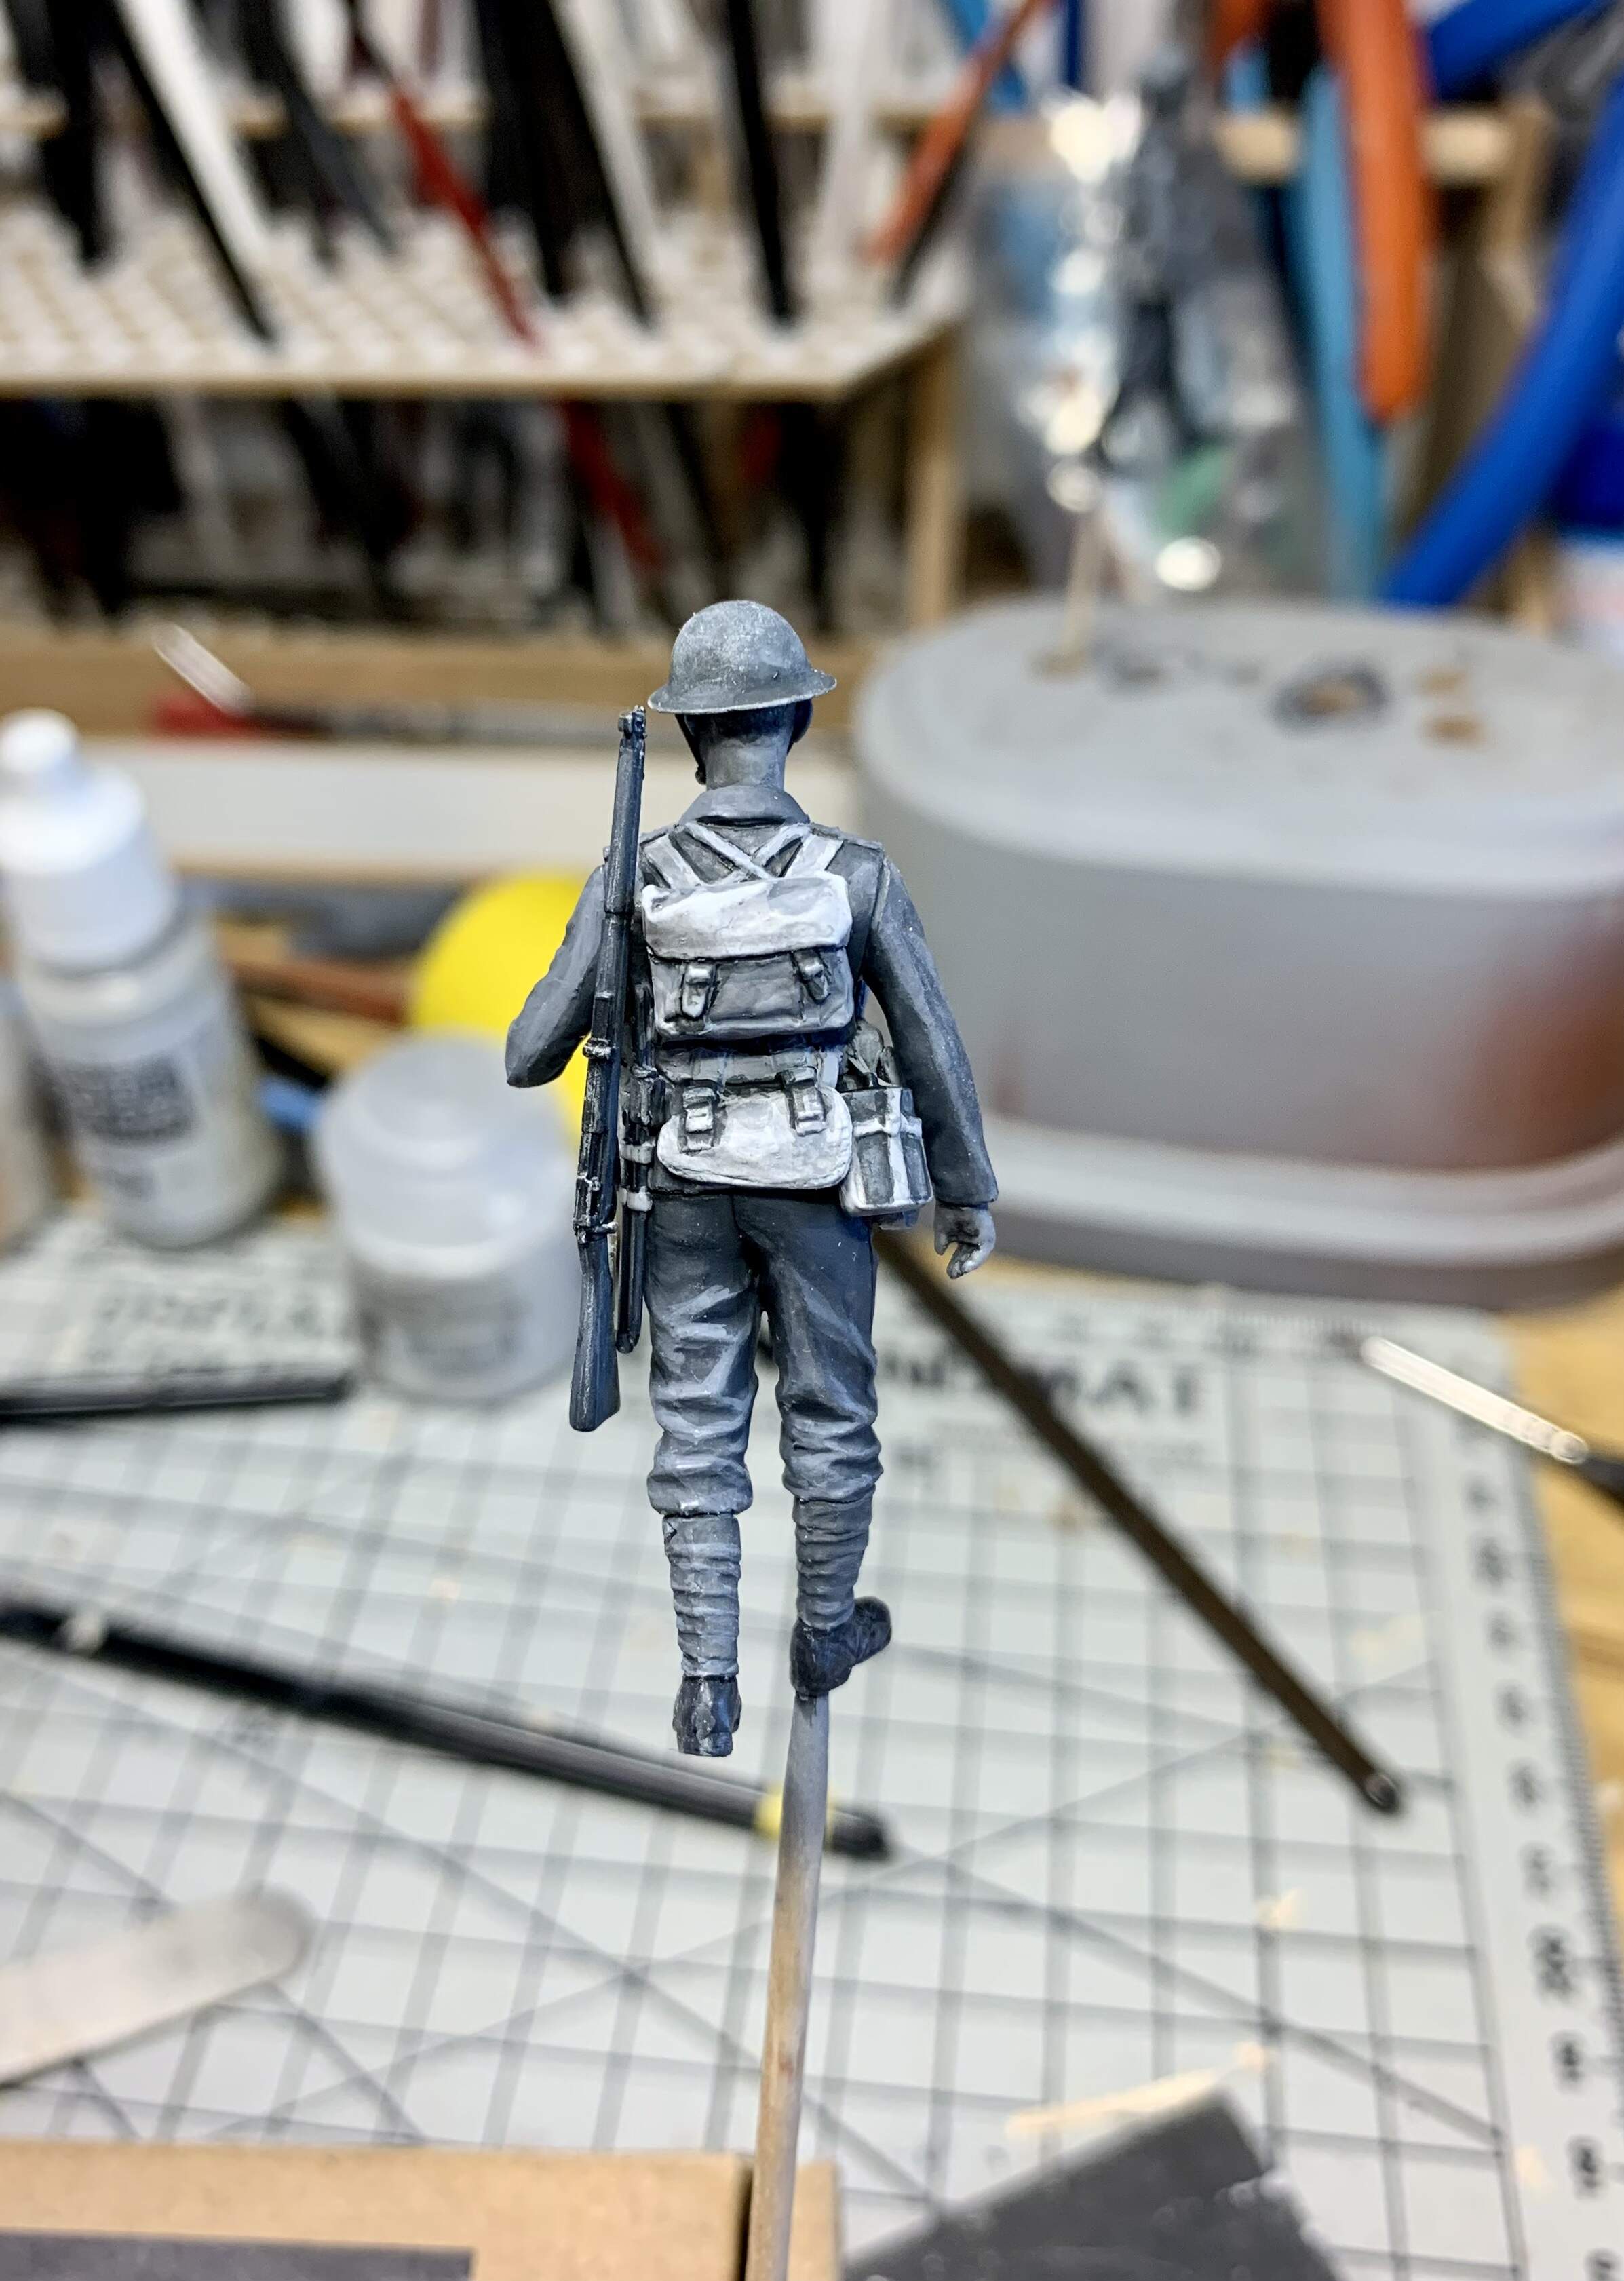
As painting the figures went on the novelty of using only grey tones wore off pretty quick. It became a bit of a slog!
I chose a few different black and white references to get the tones for each bit of kit- strangely the lightest thing in most was the webbing straps and kit pieces made from the same fabric.
Basil.
Cyril.
The painting essentially progressed as it normally would which, for me, is a several step process of base coat, 1st shadows, 2nd shadows, 1st light and 2nd light. Once this was done I picked out a few areas with small amounts of black acrylic wash, a black grey wash and other areas with white-grey highlights. Lastly a coat of Matt varnish is applied by brush.
Then it was assembly time which was just the heads and guns. The guns were tricky as each needed about a third of the sling coming up from the rearmost attachment point on the SMLE.
I made these from Tamiya tape and Aber Photo-Etch buckles. A little trick to get the buckles to attach neatly to the rifles is to leave some of the attachment nub on the buckle where it meets the PE fret. Then drill a very small hole on the gun at the attachment point and glue the nub into it.
Tamiya tape will also take paint very nicely. The rifles were glued on with superglue at the top end attachment point and the straps moved into place and given a final few paint coats to tie them in.
That is Basil and Cyril all sorted now and they are safely stored in a dust free cabinet while I get to work on the base.
13 Likes
Very cool Karl , the b/w’s are looking very good !!
1 Like
That’s really nice to read and just what I needed before I have to tackle half the scenery in the same tones!
Thanks for checking in to see the latest progress, cheers bud!
I’m sold, originality really well-executed – who could ask for more? Such a great concept, keep it coming 
Very kind of you to say Martin, thank you!
Really like the ghostly painting style

1 Like
Thank you mate- I have to agree with you about them having a ghostly appearance- I noticed they were becoming like that as the painting progressed.
Love your work man! /Erik
1 Like
Ghostly is a good thing Karl !!!
1 Like
Thank you Erik- your own work is a big inspiration I must say!
1 Like
Oh yeah, I agree- I don’t mind them taking on that kind of look  !
!
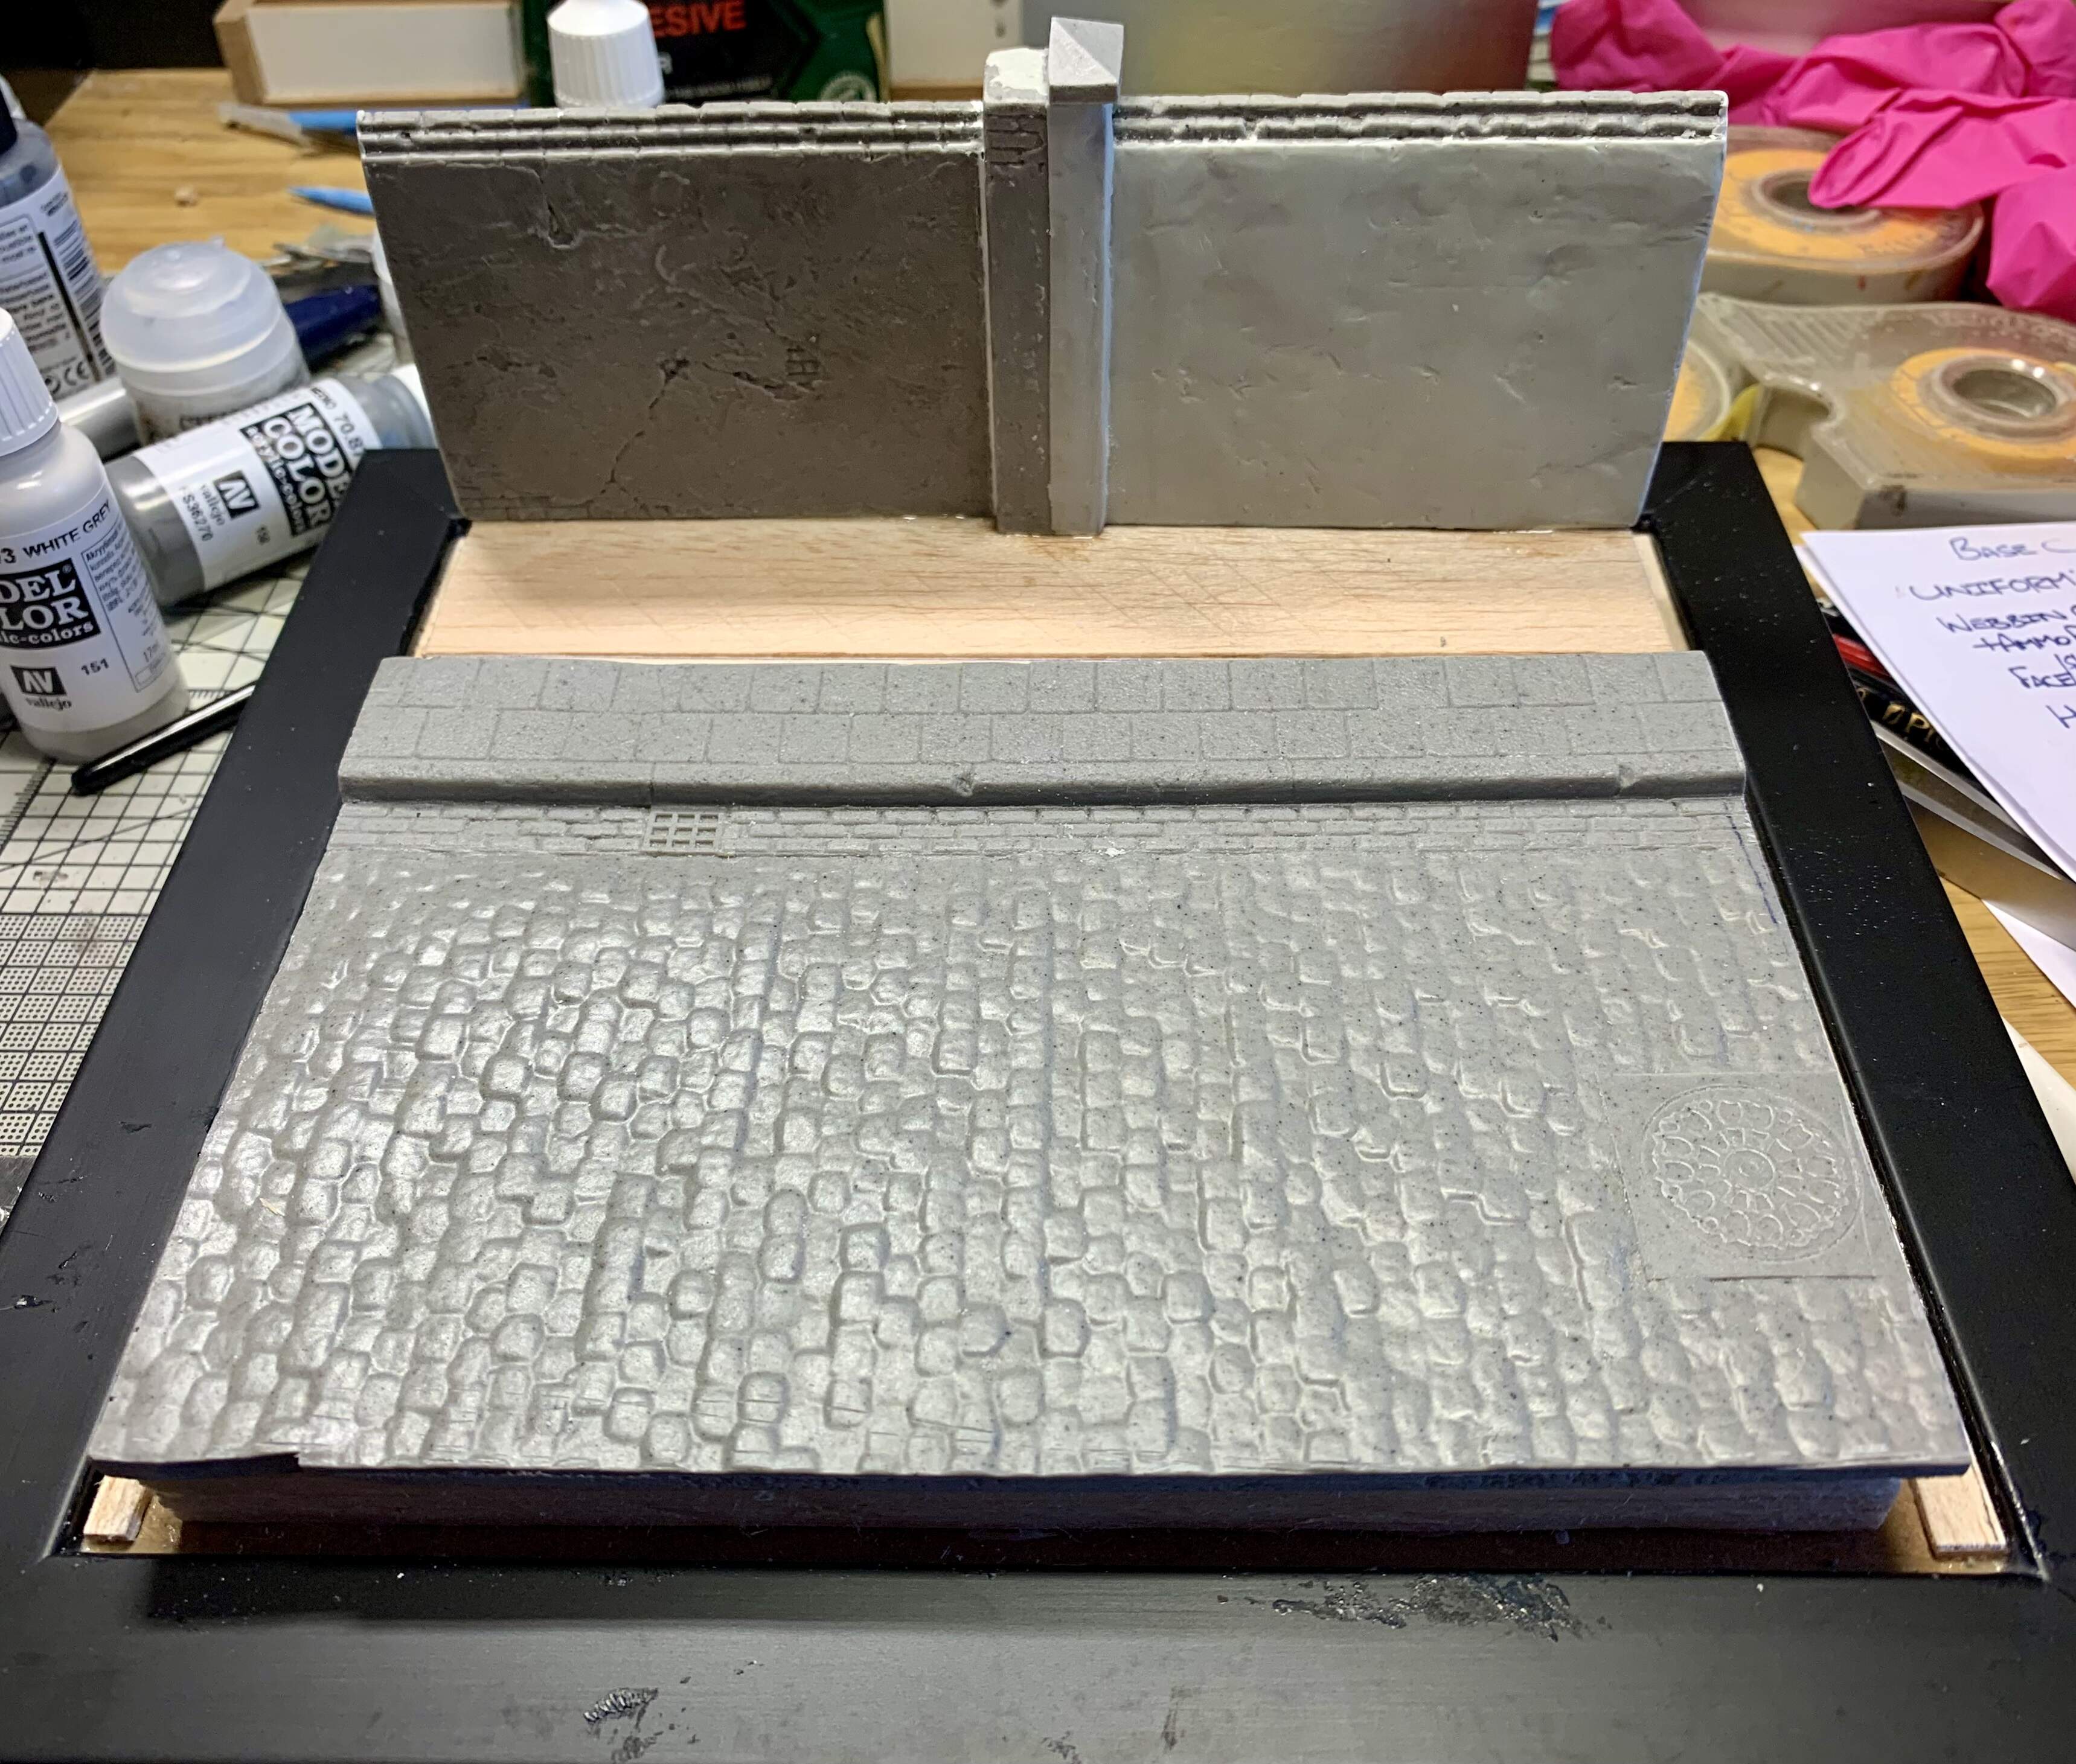
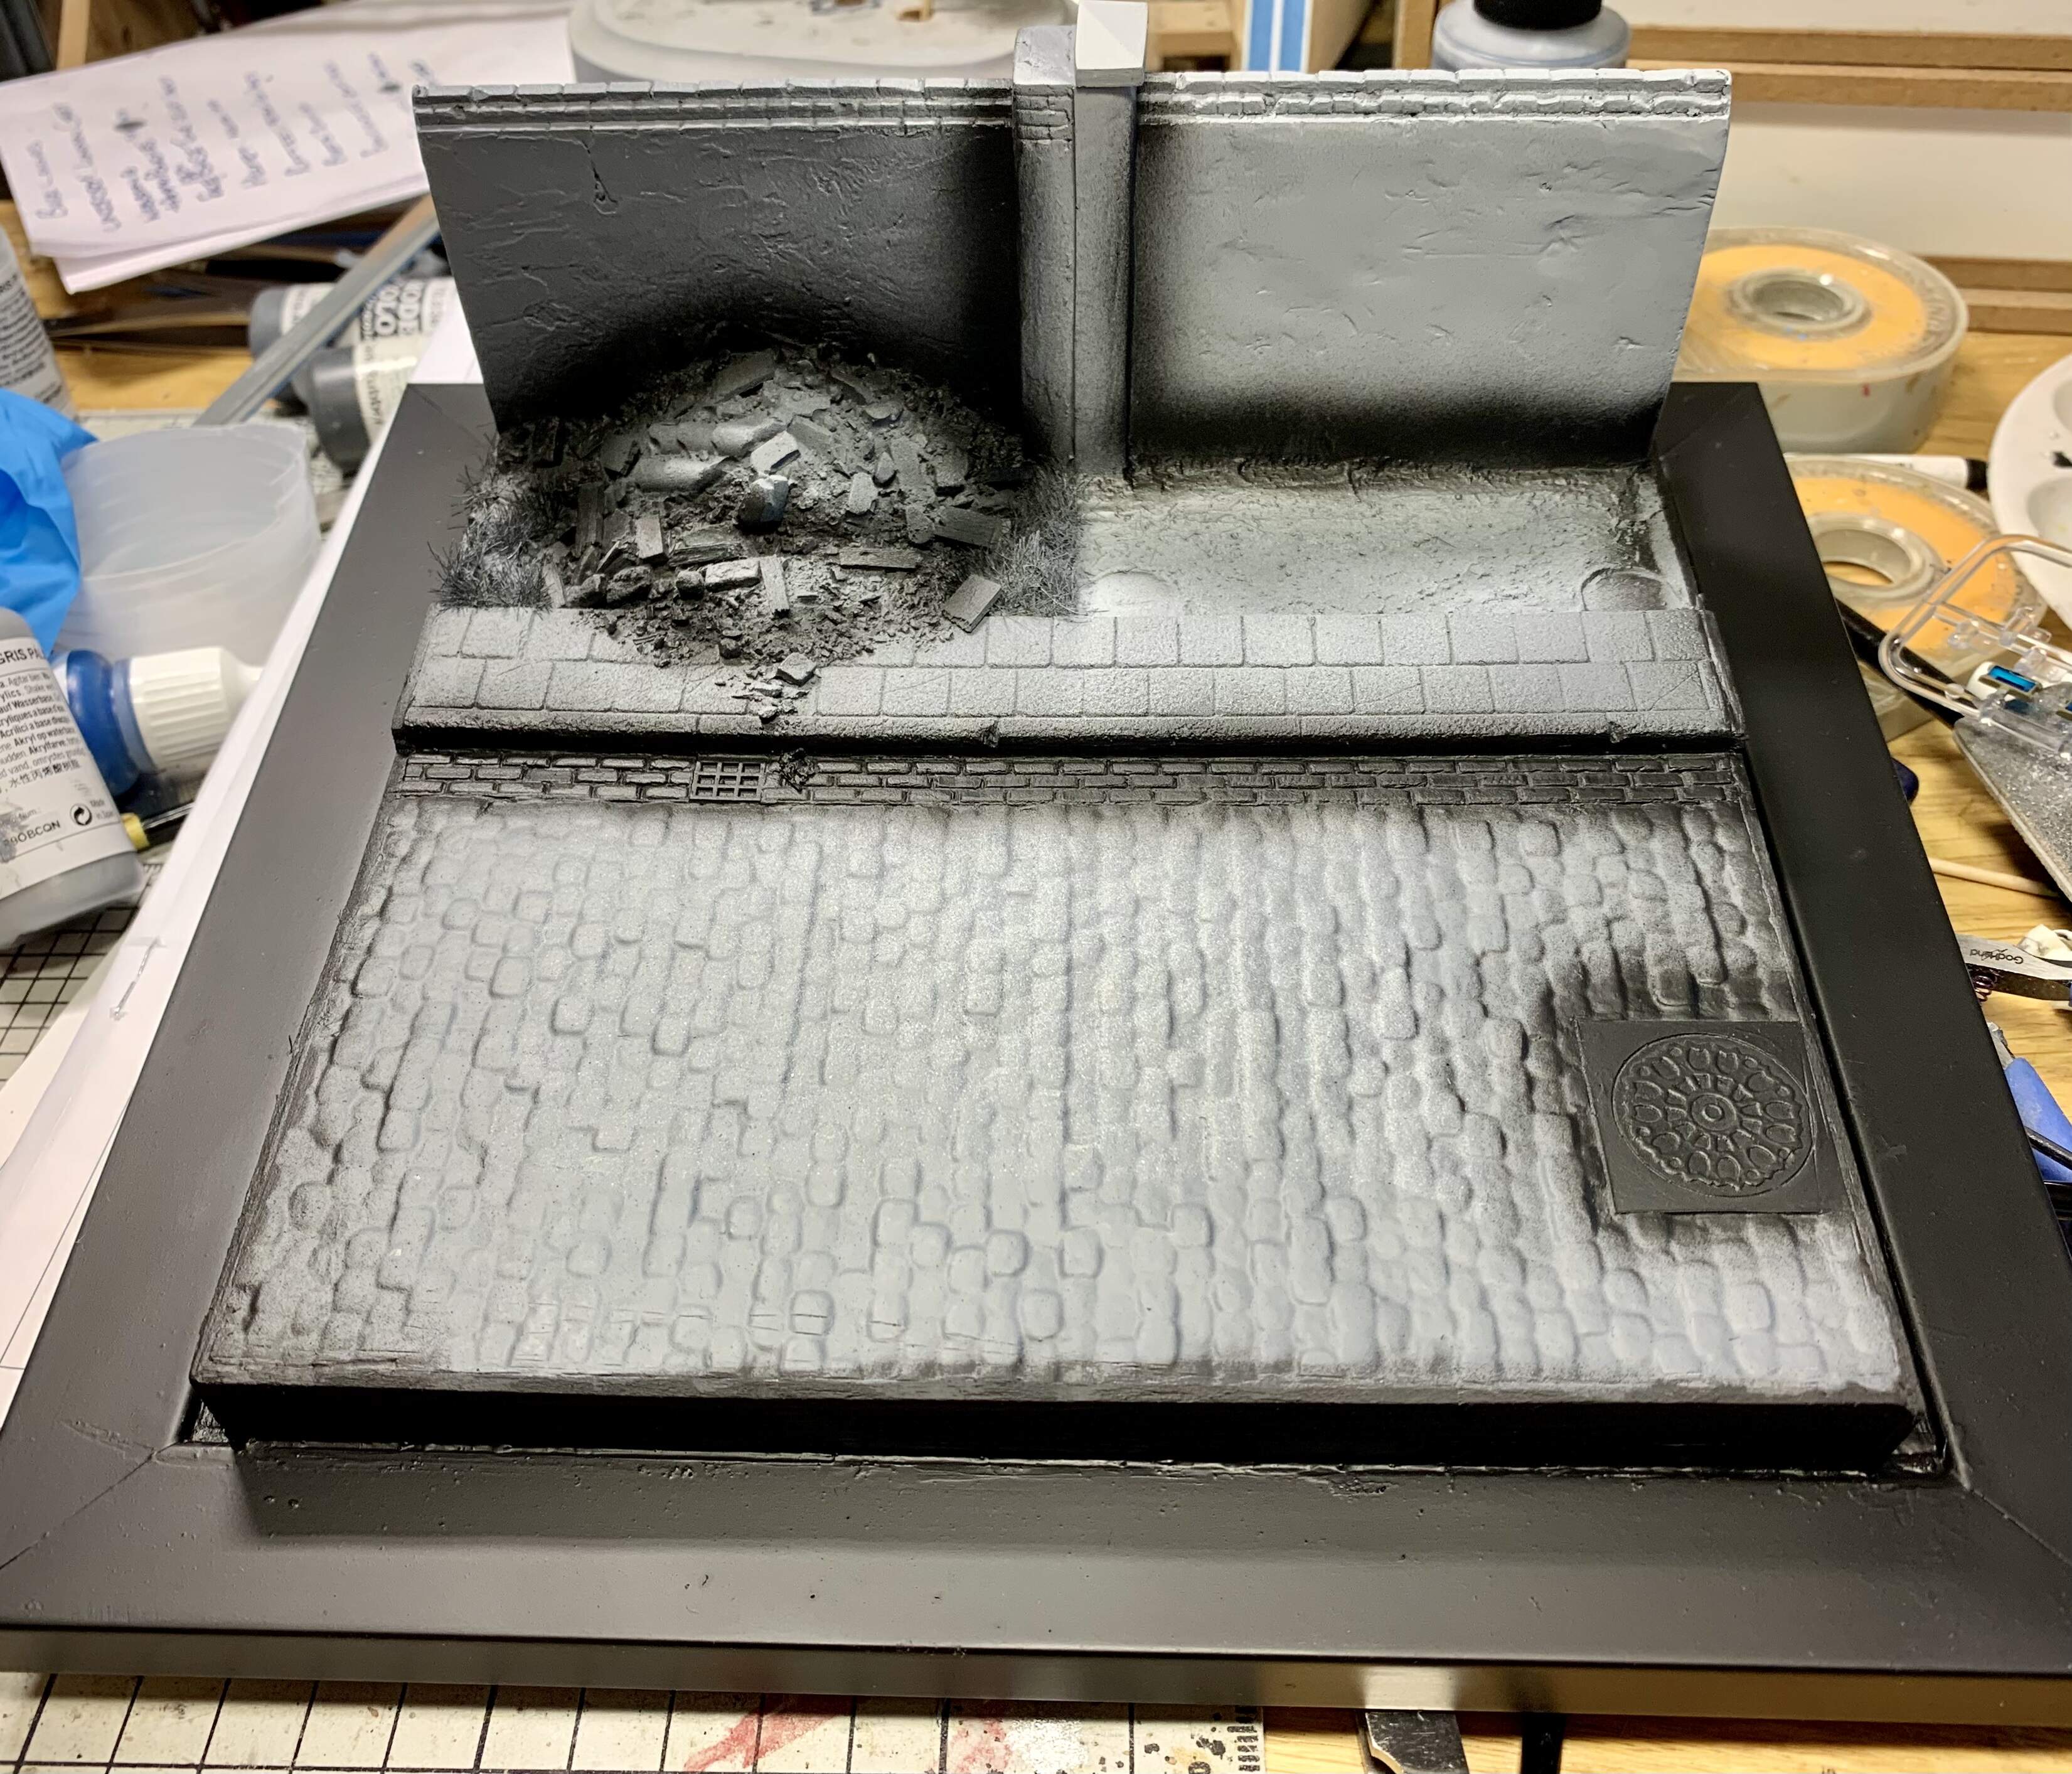
Getting away from figures and into some scenery was a welcome break. I hadn’t laid down any groundwork for some time and urban scenes are something I quite enjoy.
The base was just a picture frame with a little height built up with balsa wood. The resin road and wall were epoxy glued on top.
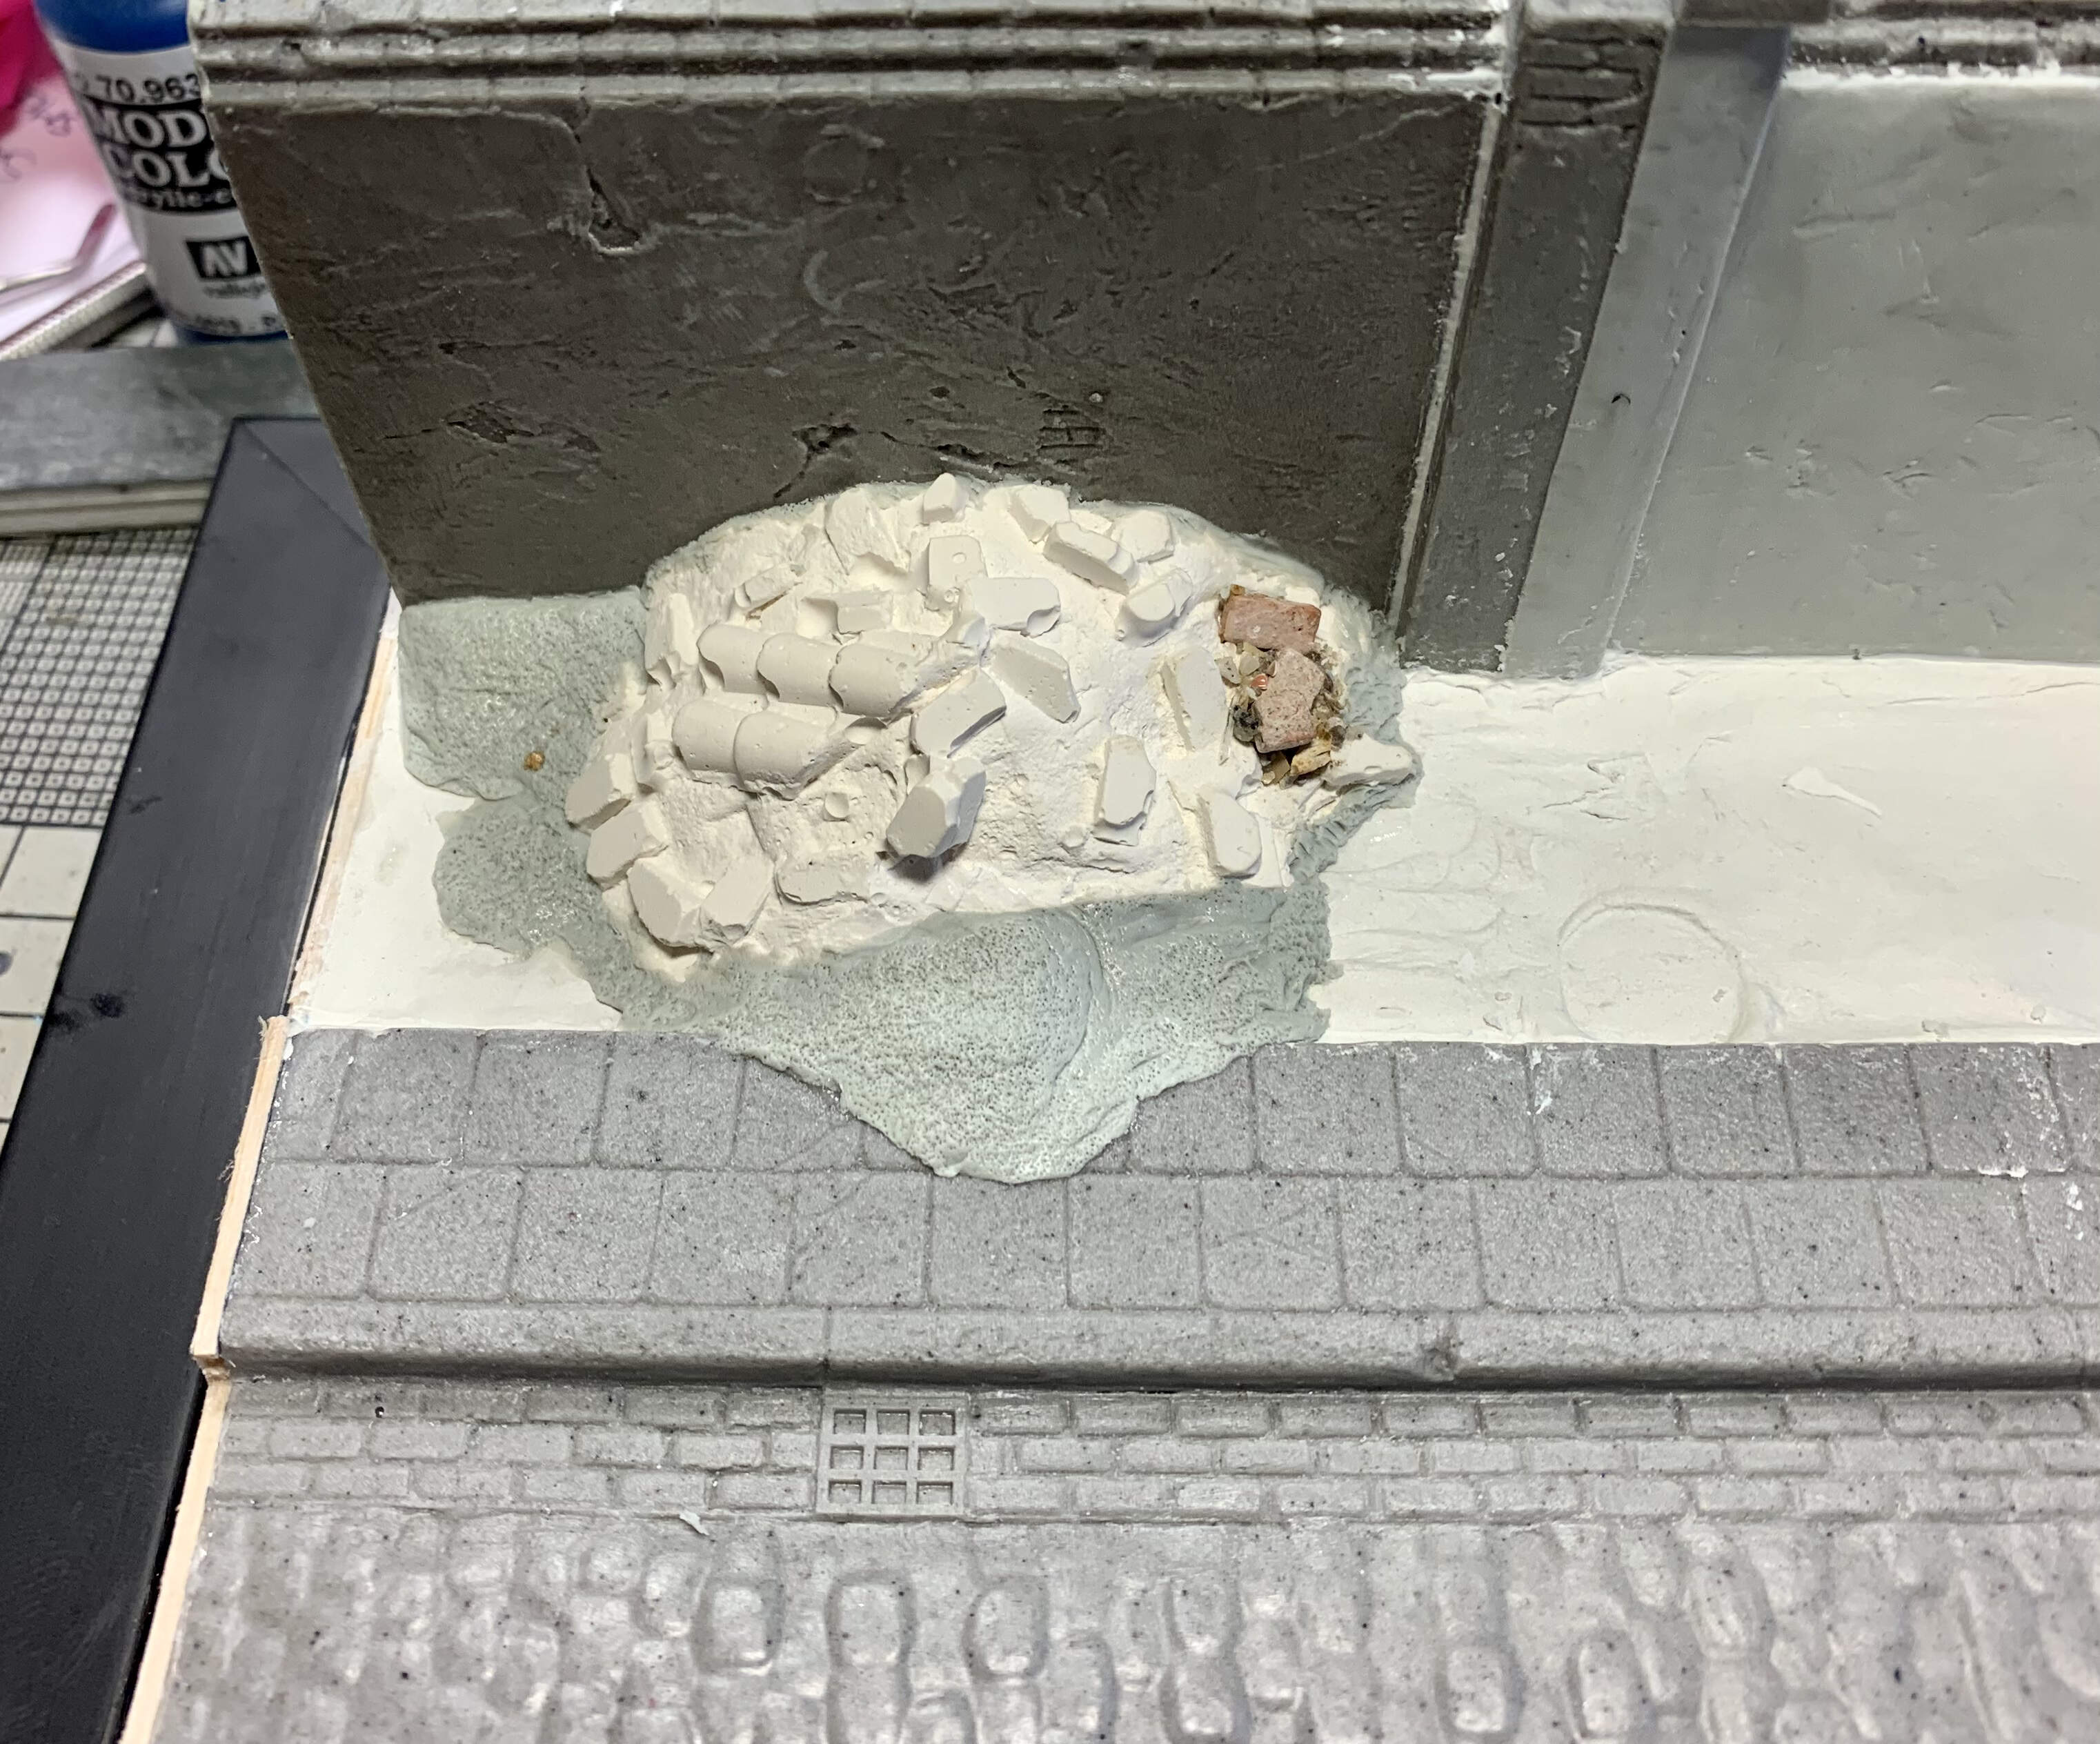
I used DAS clay to lay in the ground around the wall and a little plastic putty to seal any gaps after it dried.
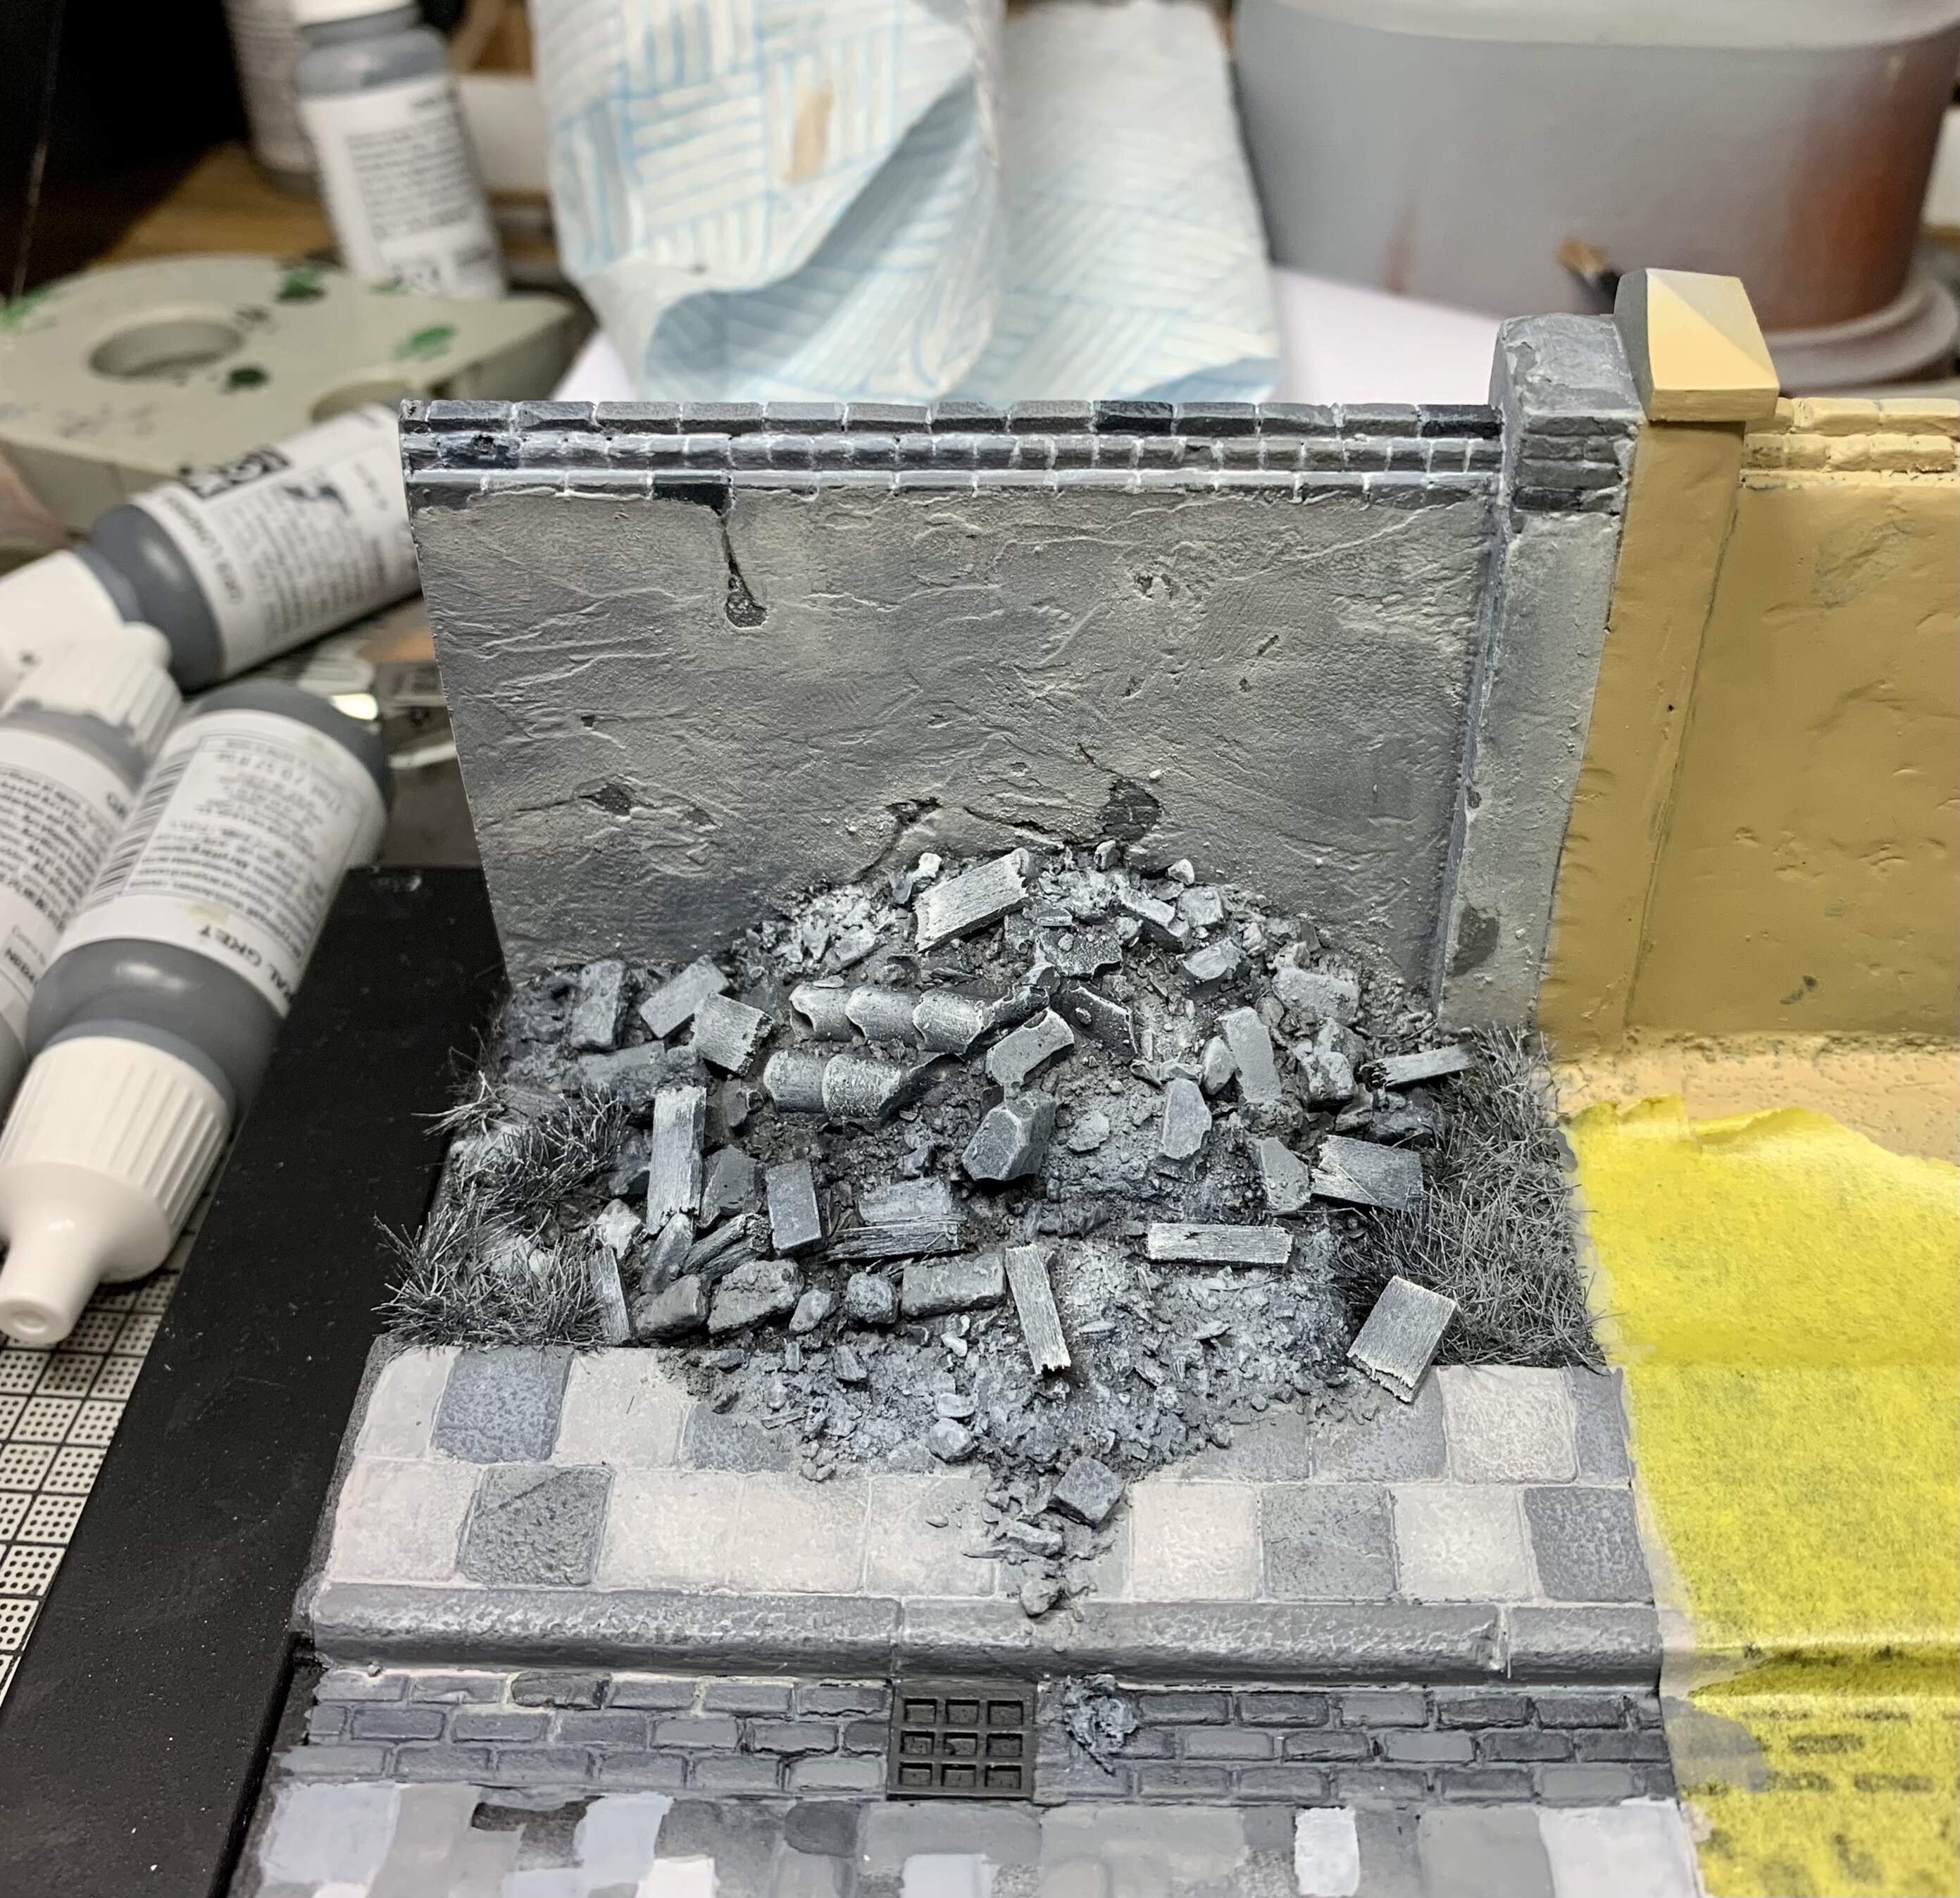
A FOG Models rubble heap made of plaster was cut to fit the base and glued into place. My objective then was to make it fit the base more naturally and I used magic sculpt to extend the basic shape, texturised with a toothbrush when it was in place.
Once this was done and dry I used Mr.Surfacer on the clay areas followed by Mig AMMO mud which gives a soil texture. Then it was on to the tricky part of populating the debris- the plaster shape was decently detailed but not enough to my liking and of course, my putty additions only had the barest hint of rubble texture.
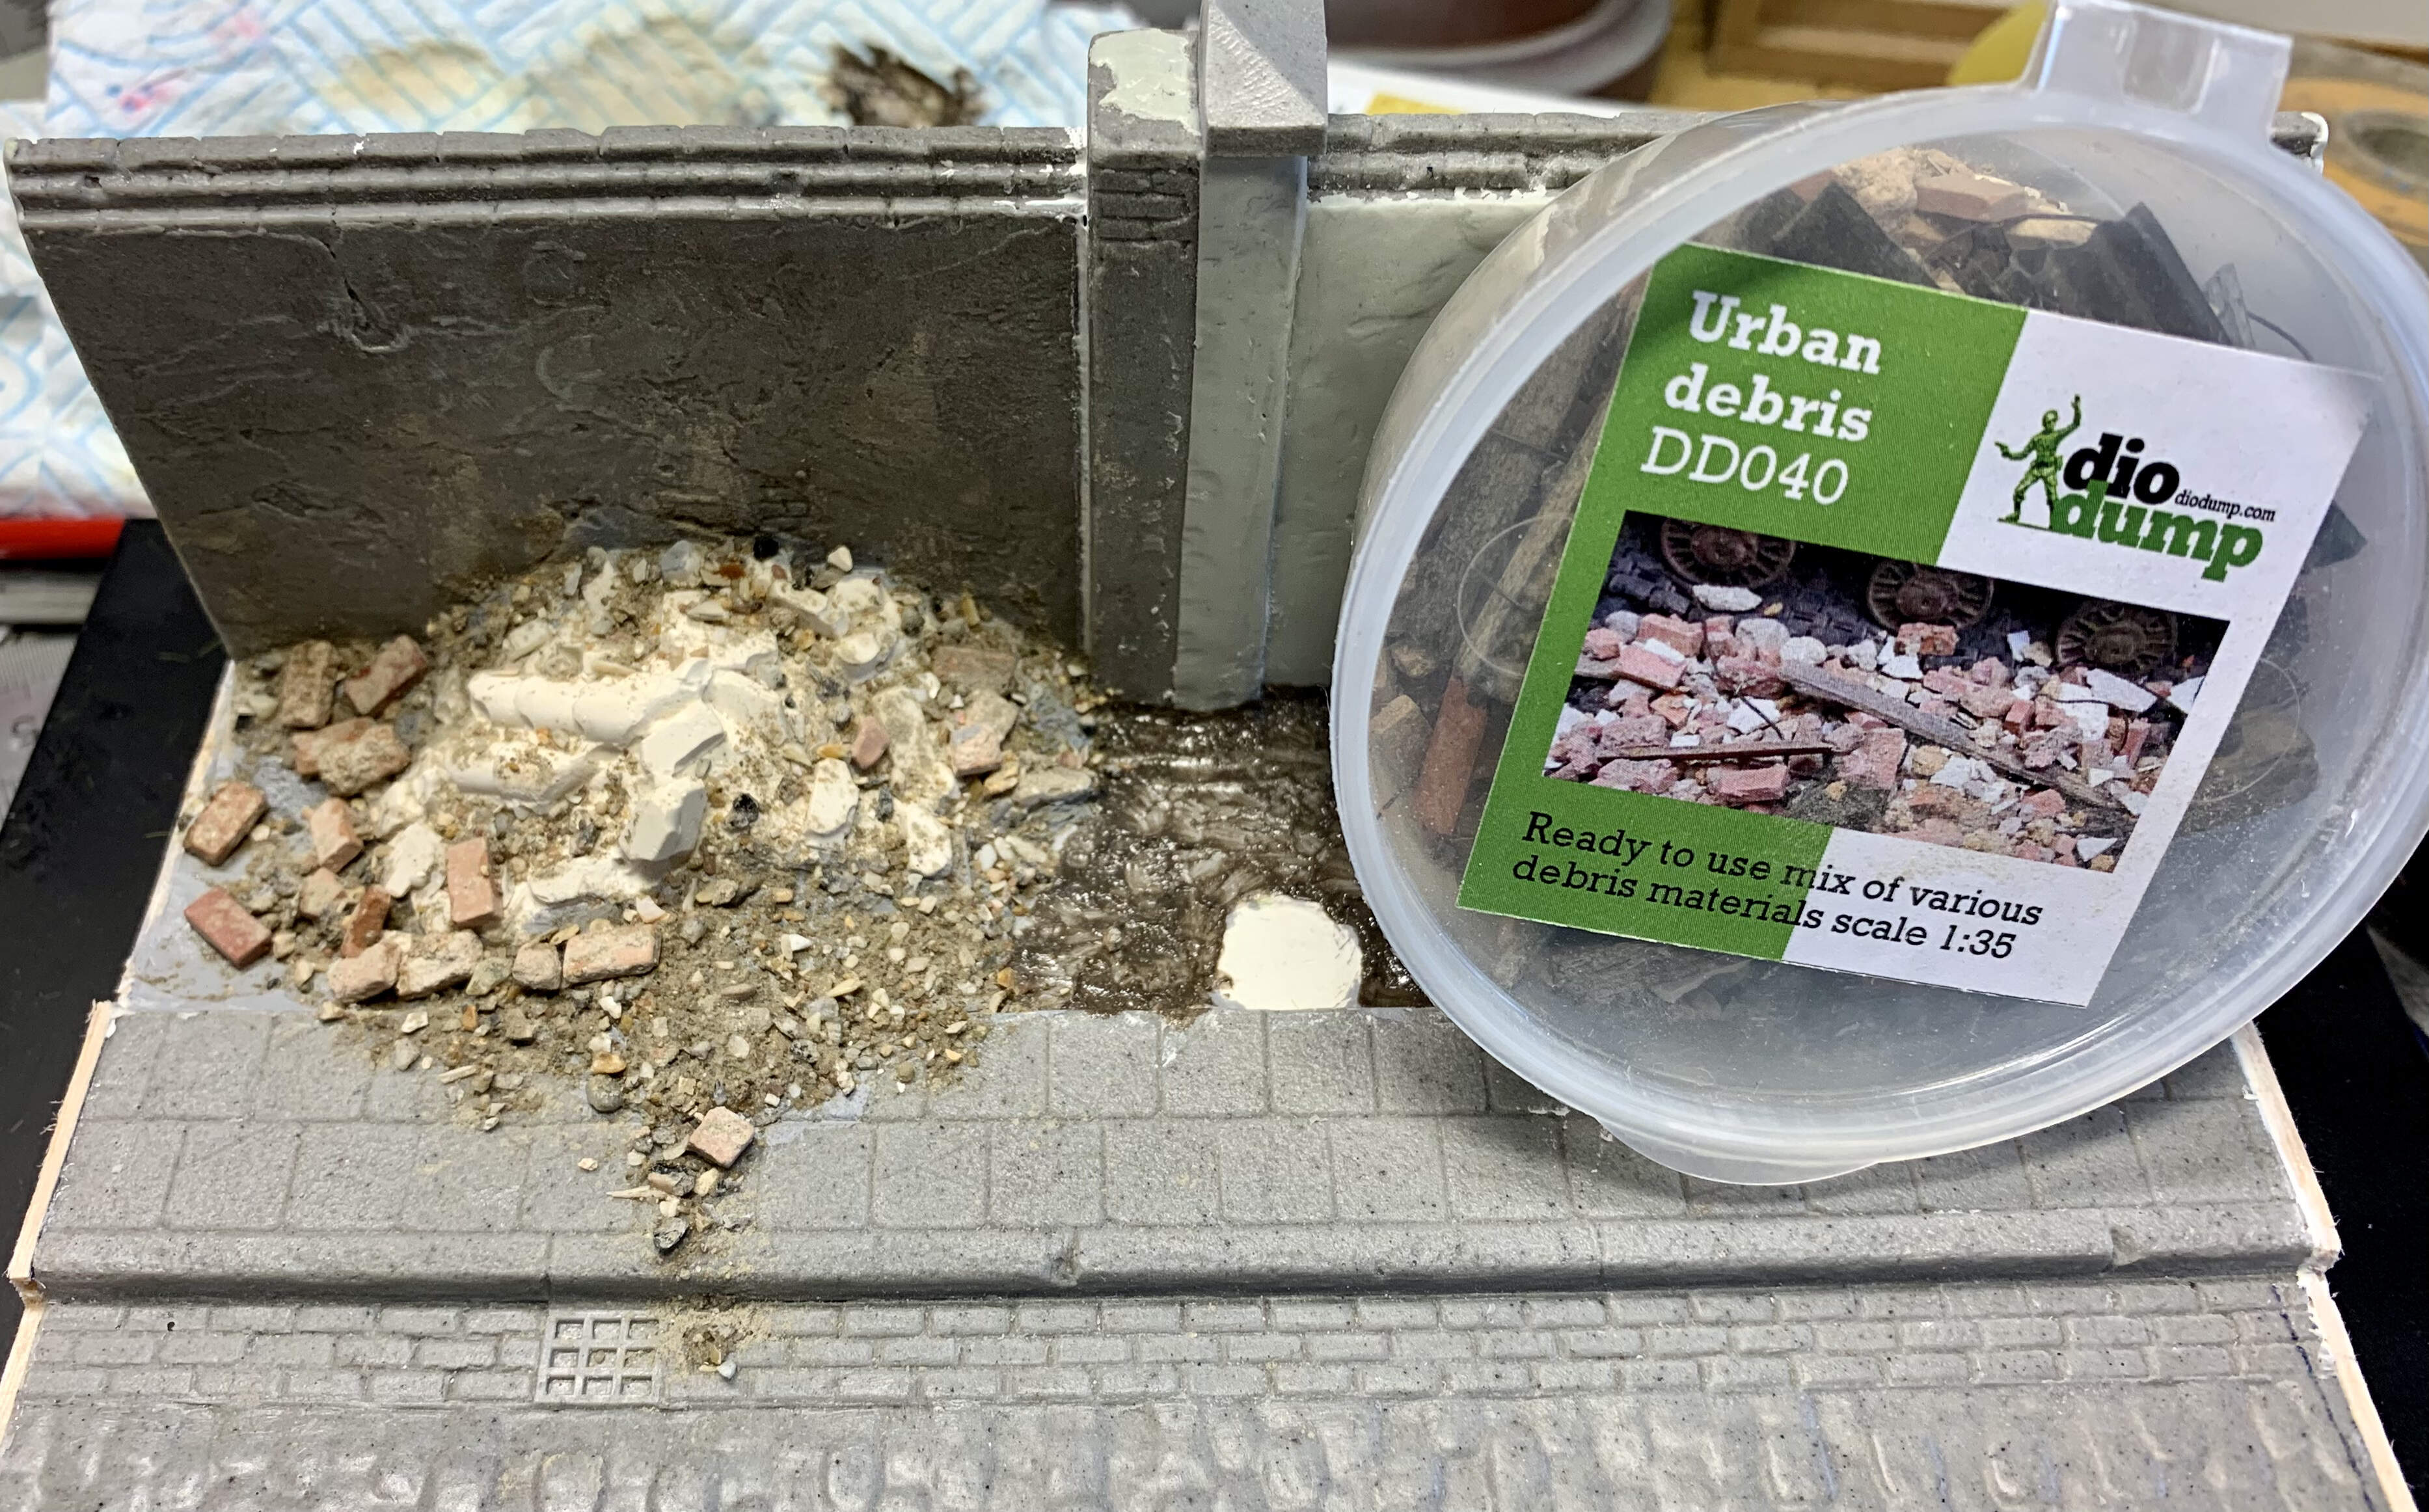
For the rubble I had a fantastic pot of pre-finished stuff from Dio-Dump- this is handy as it really only needs glued in place. However, the fact that it is pre-finished is a bit useless here since it needed to be painted black and white! Even so the pot is filled with useful clutter and it didn’t take long for it to start looking more to my liking.
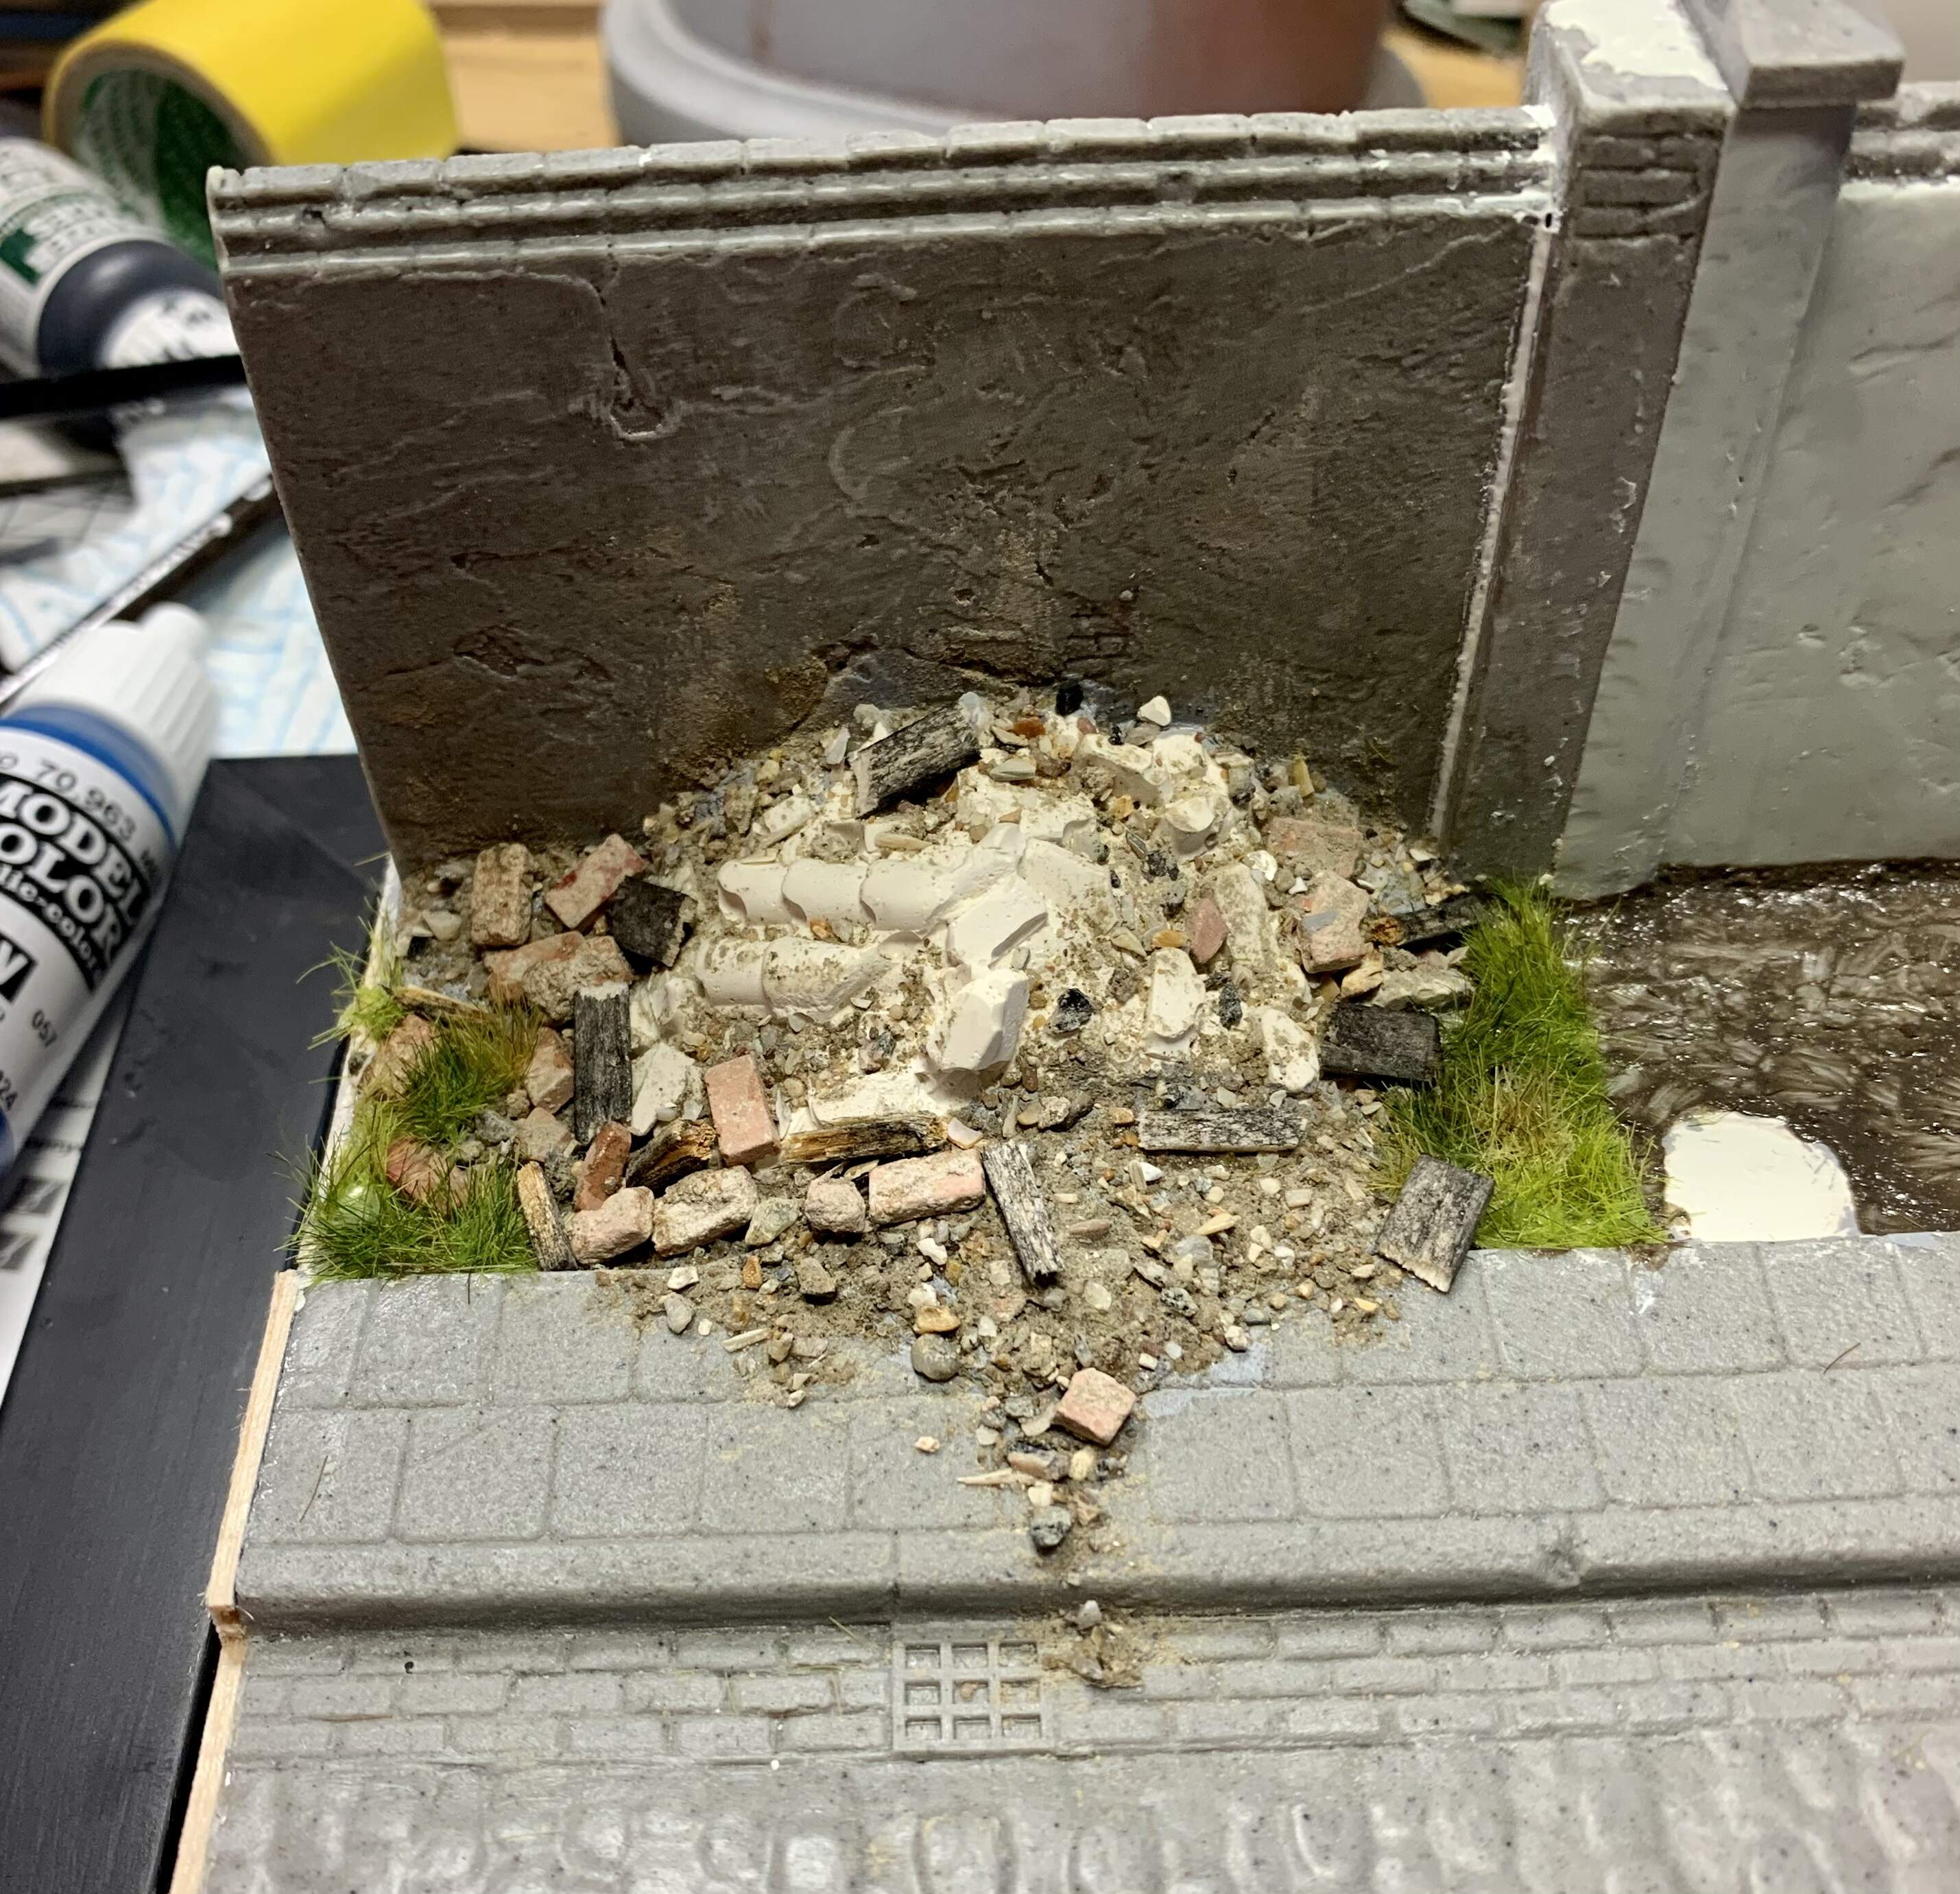
Then I needed to add the grass as it also needs to be painted black and white. Cuts of grass mat and tufts from Fredericus Rex Greenline were used for the most part.
I was looking for some weeds too, for the rear of the wall to add a bit of visual interest there but nothing I found was in stock in the UK/Ireland for a quick delivery. But luckily I did find someone selling pre-made weeds and plants on small patches of static grass in the UK which, cut to fit, were perfect.
As you can see a few salvaged bricks and some fallen plaster were glued on behind the wall and I will add an old spade in the corner too.
So it’s off to the paint booth with the base and then it will be time to break out all those grey paints again!
Thanks for reading.
8 Likes
Those B&W dudes look very nice. I’m sure it’s difficult to get that great look with that pallet of colors. Great work!
1 Like
Thank you for the compliments. I would say it was more monotonous than it was difficult!
That base is really starting to come alive Karl, great work,  .
.
G
Hey thanks G, very kind of you. I’ll be getting in another update soon on the painting of the black and white side of the base which is nearly done.
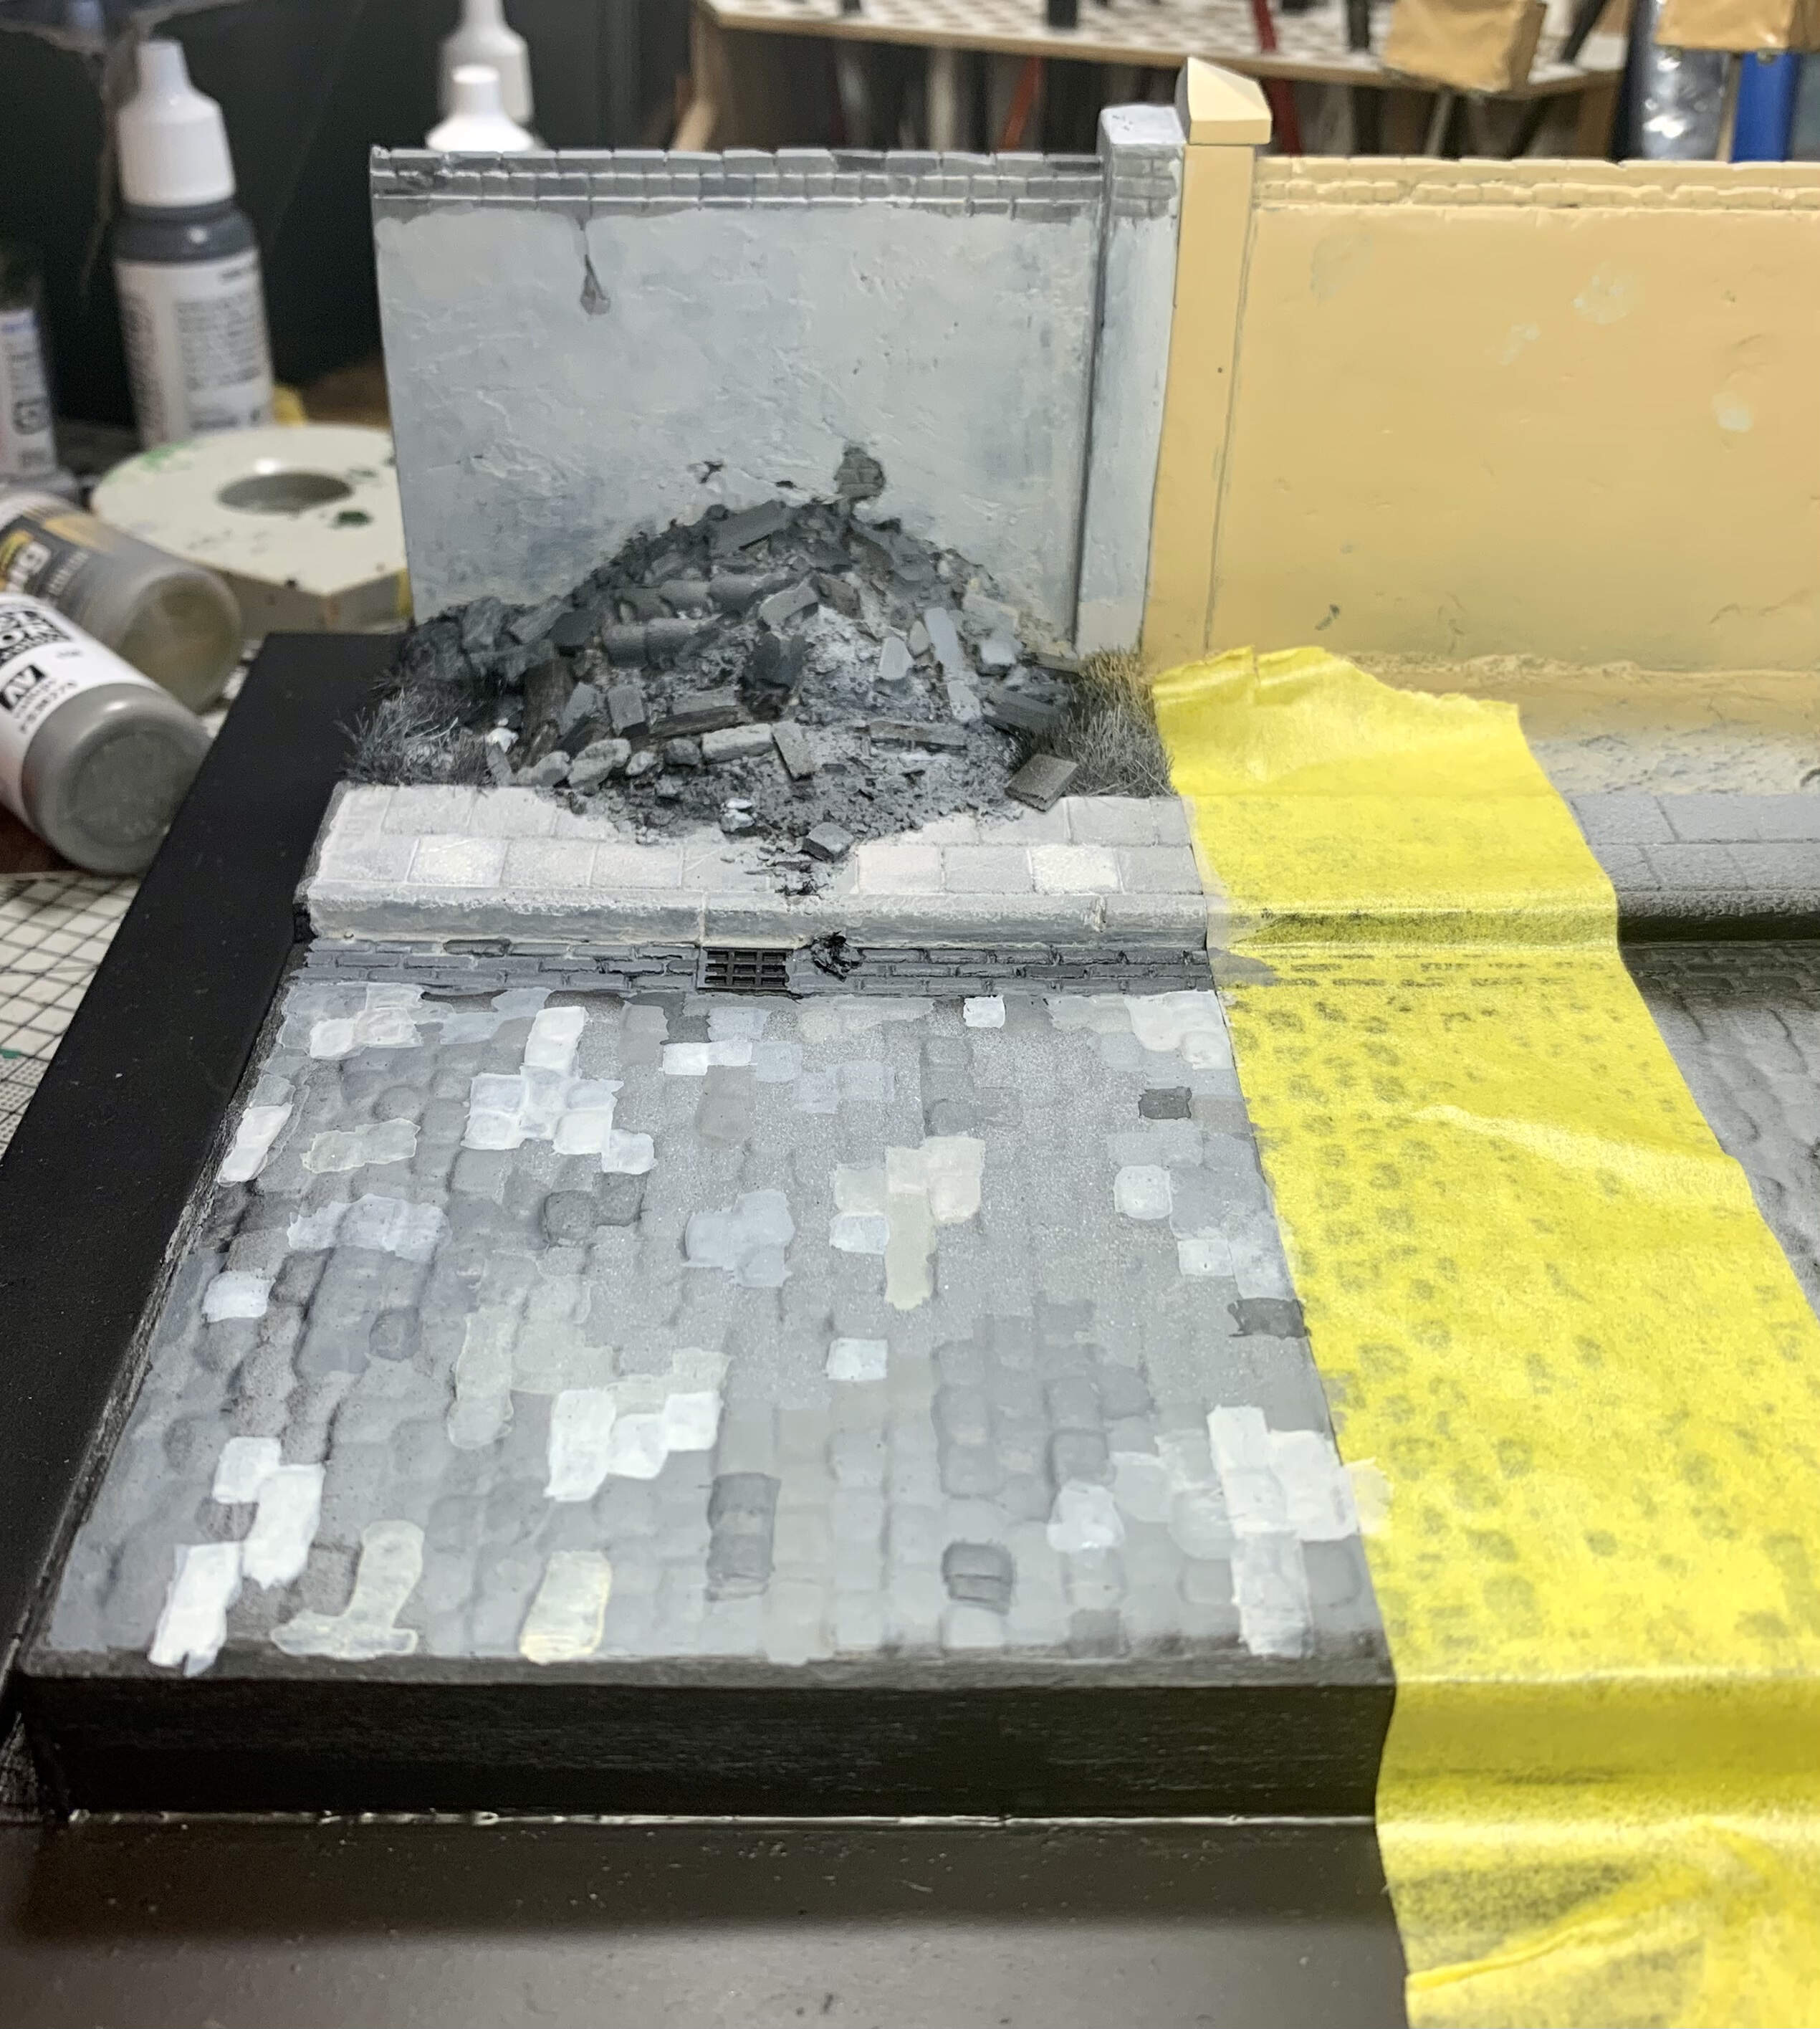
Nothing gets a build stage off to a great start like dropping your airbrush on its arse and busting a few bits  !I wasn’t rushing to break out the grey colors again but my other ongoing build, a Merkava Mk.4M was keeping me sane! Now it would be on hiatus until new parts arrive.
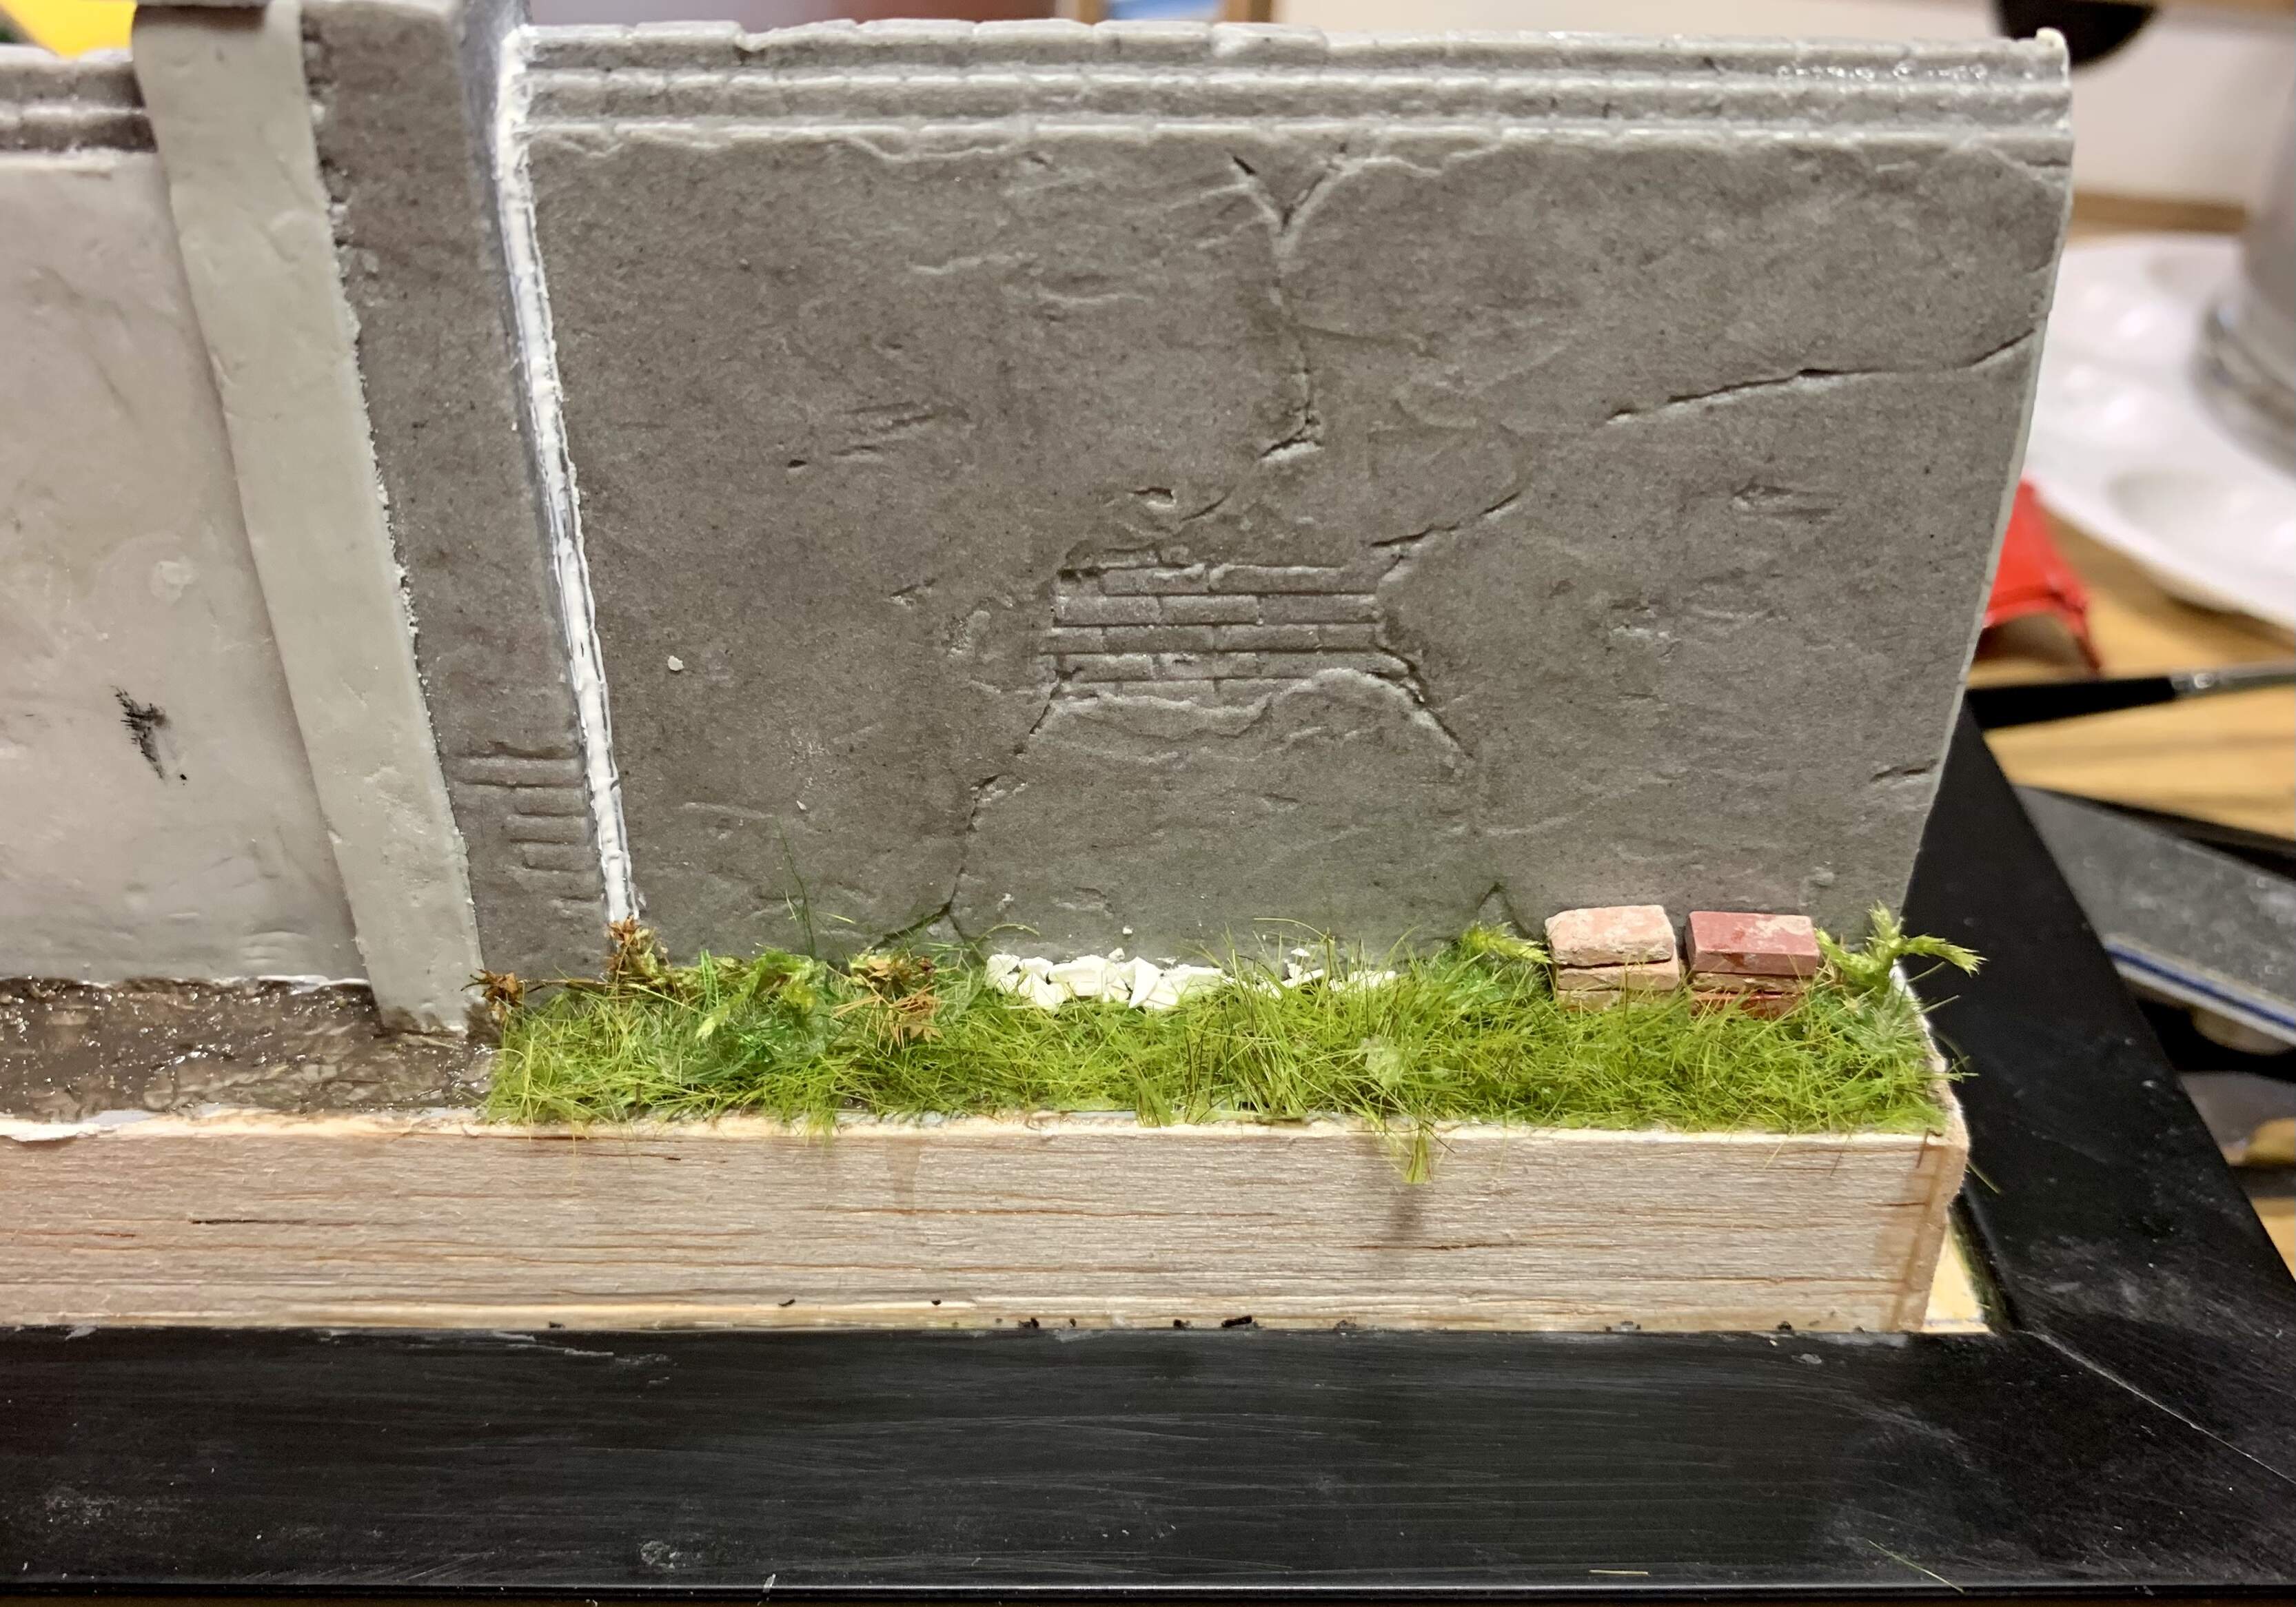
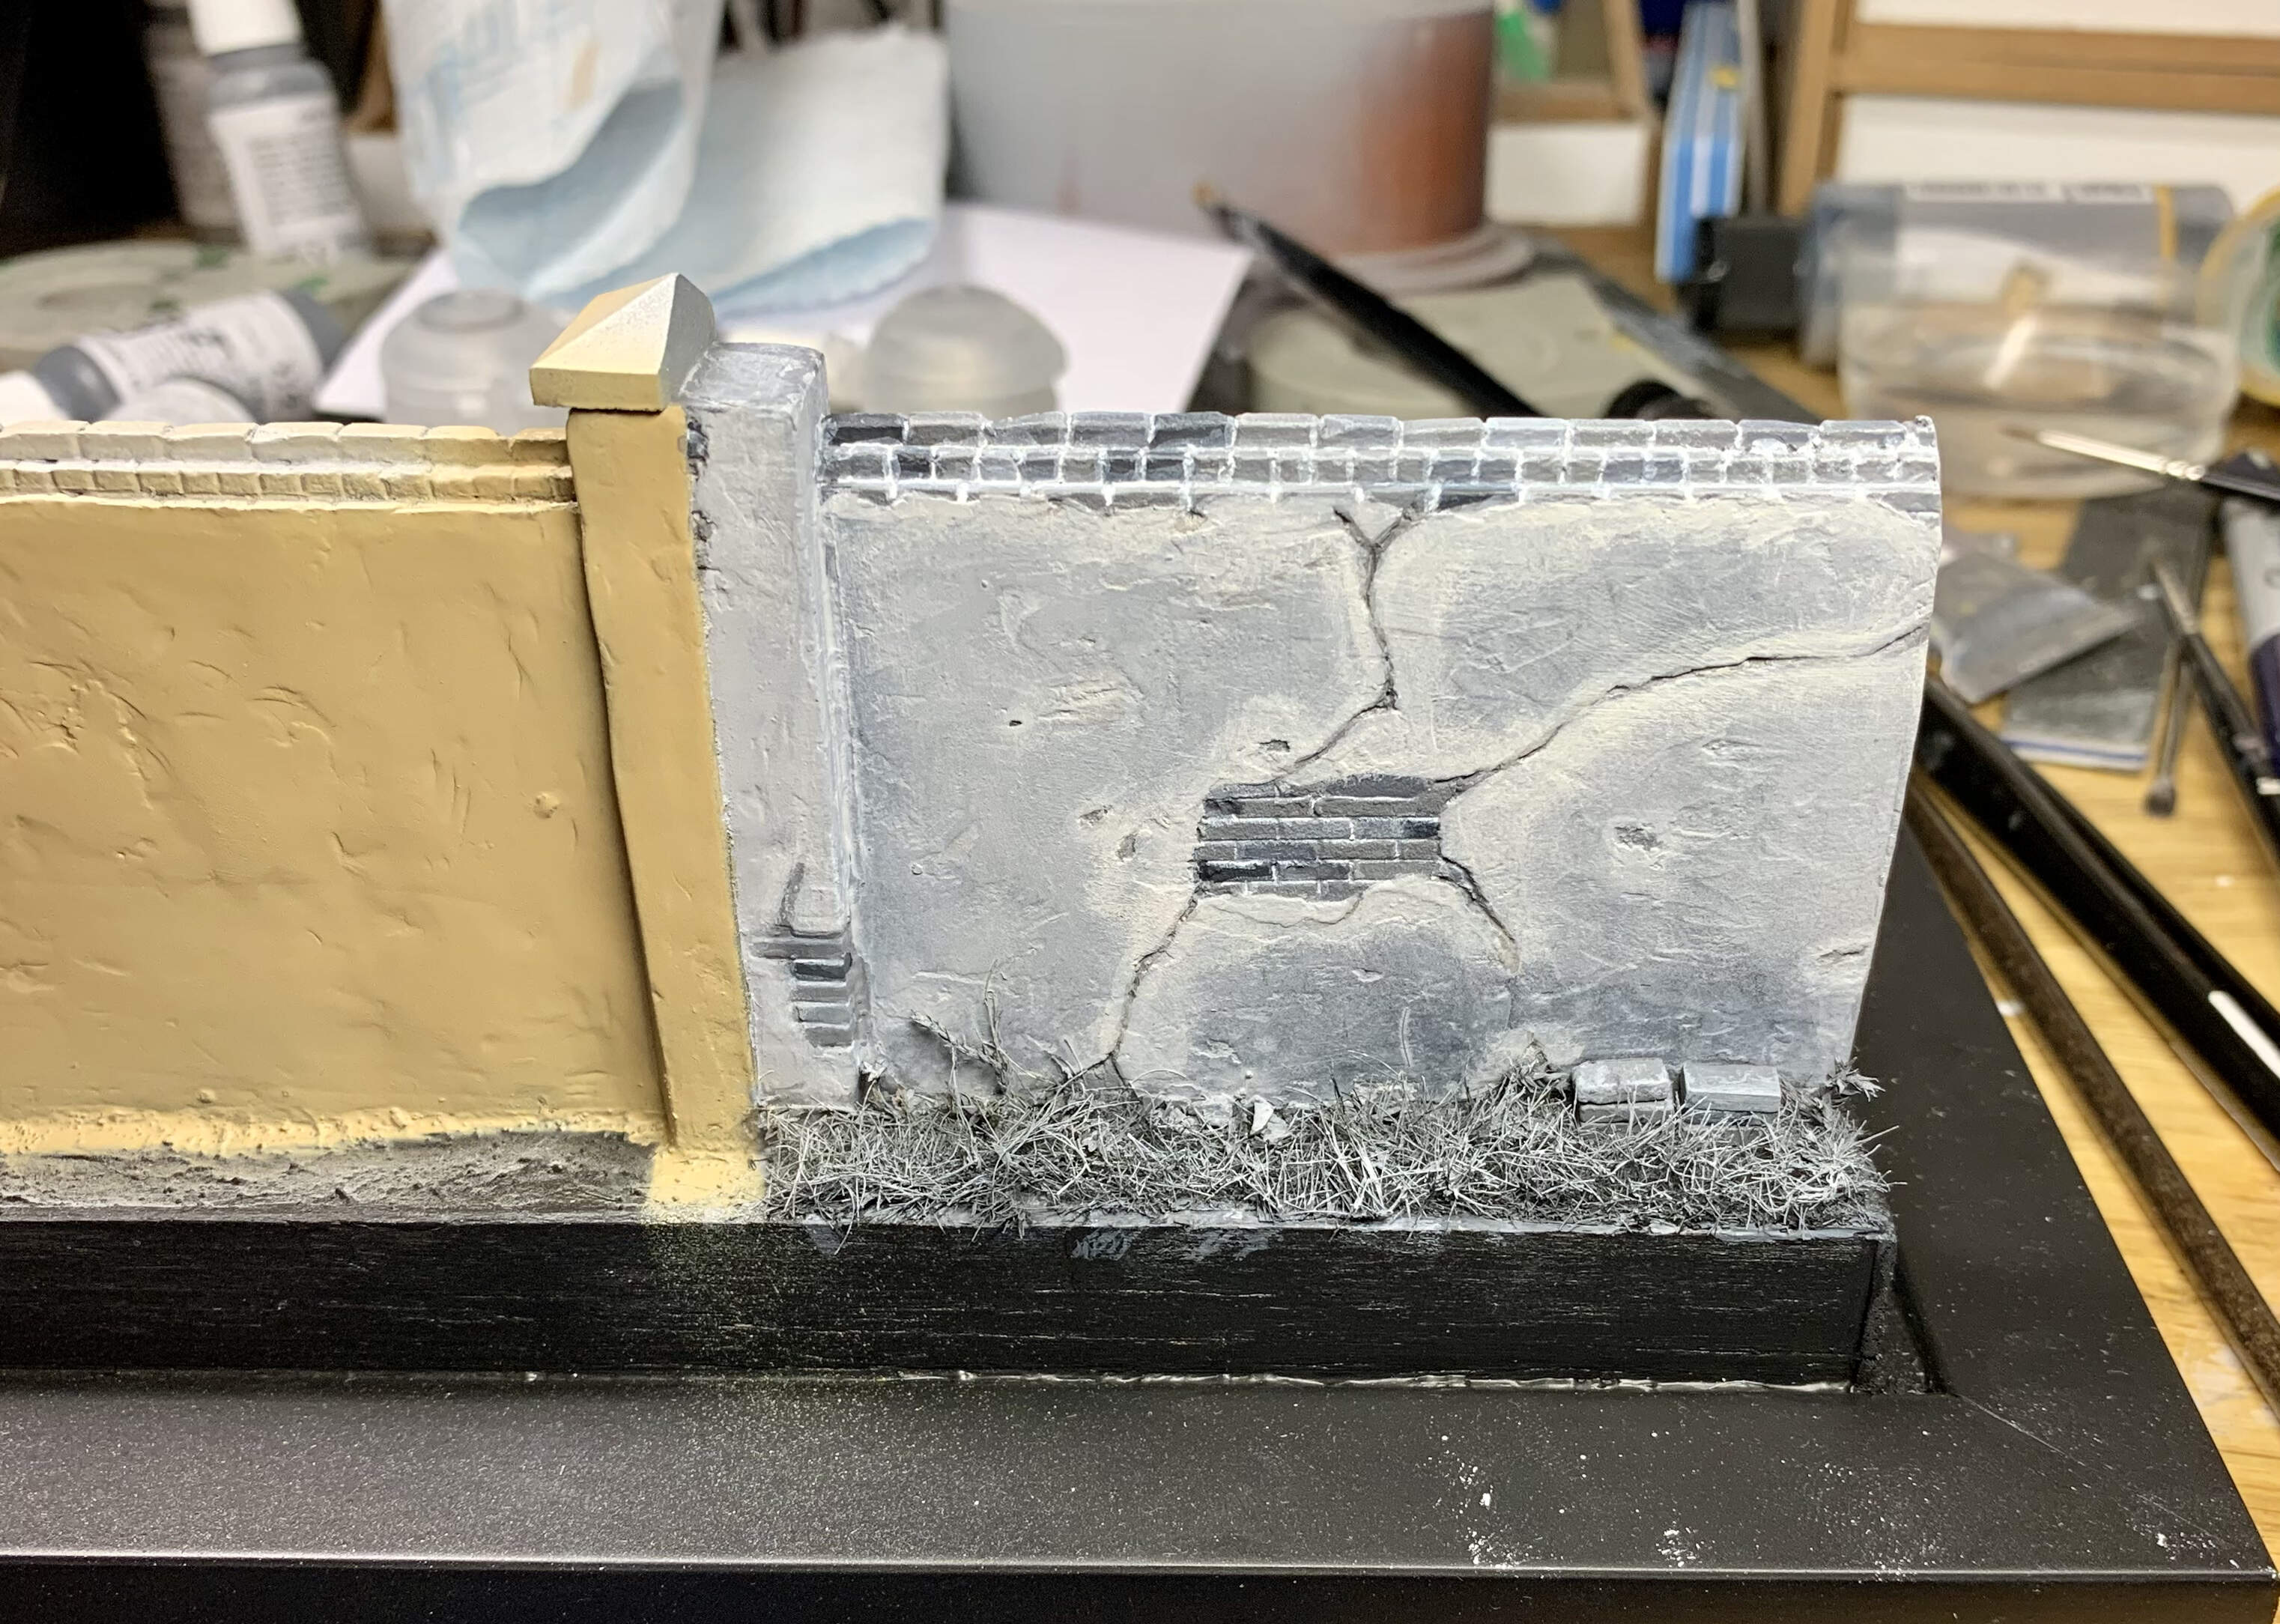
Luckily I had just laid down some black with the airbrush for shadow areas on the street so at least I could get on with things. (You can also see I managed to get a base tone light brown on the color side of the wall before the airbrush mishap.)
I started painting the wall plaster first which is a beautifully distressed piece of moulding (I also sanded it earlier with rough grit in various directions) that really started to come alive with a sky grey color.
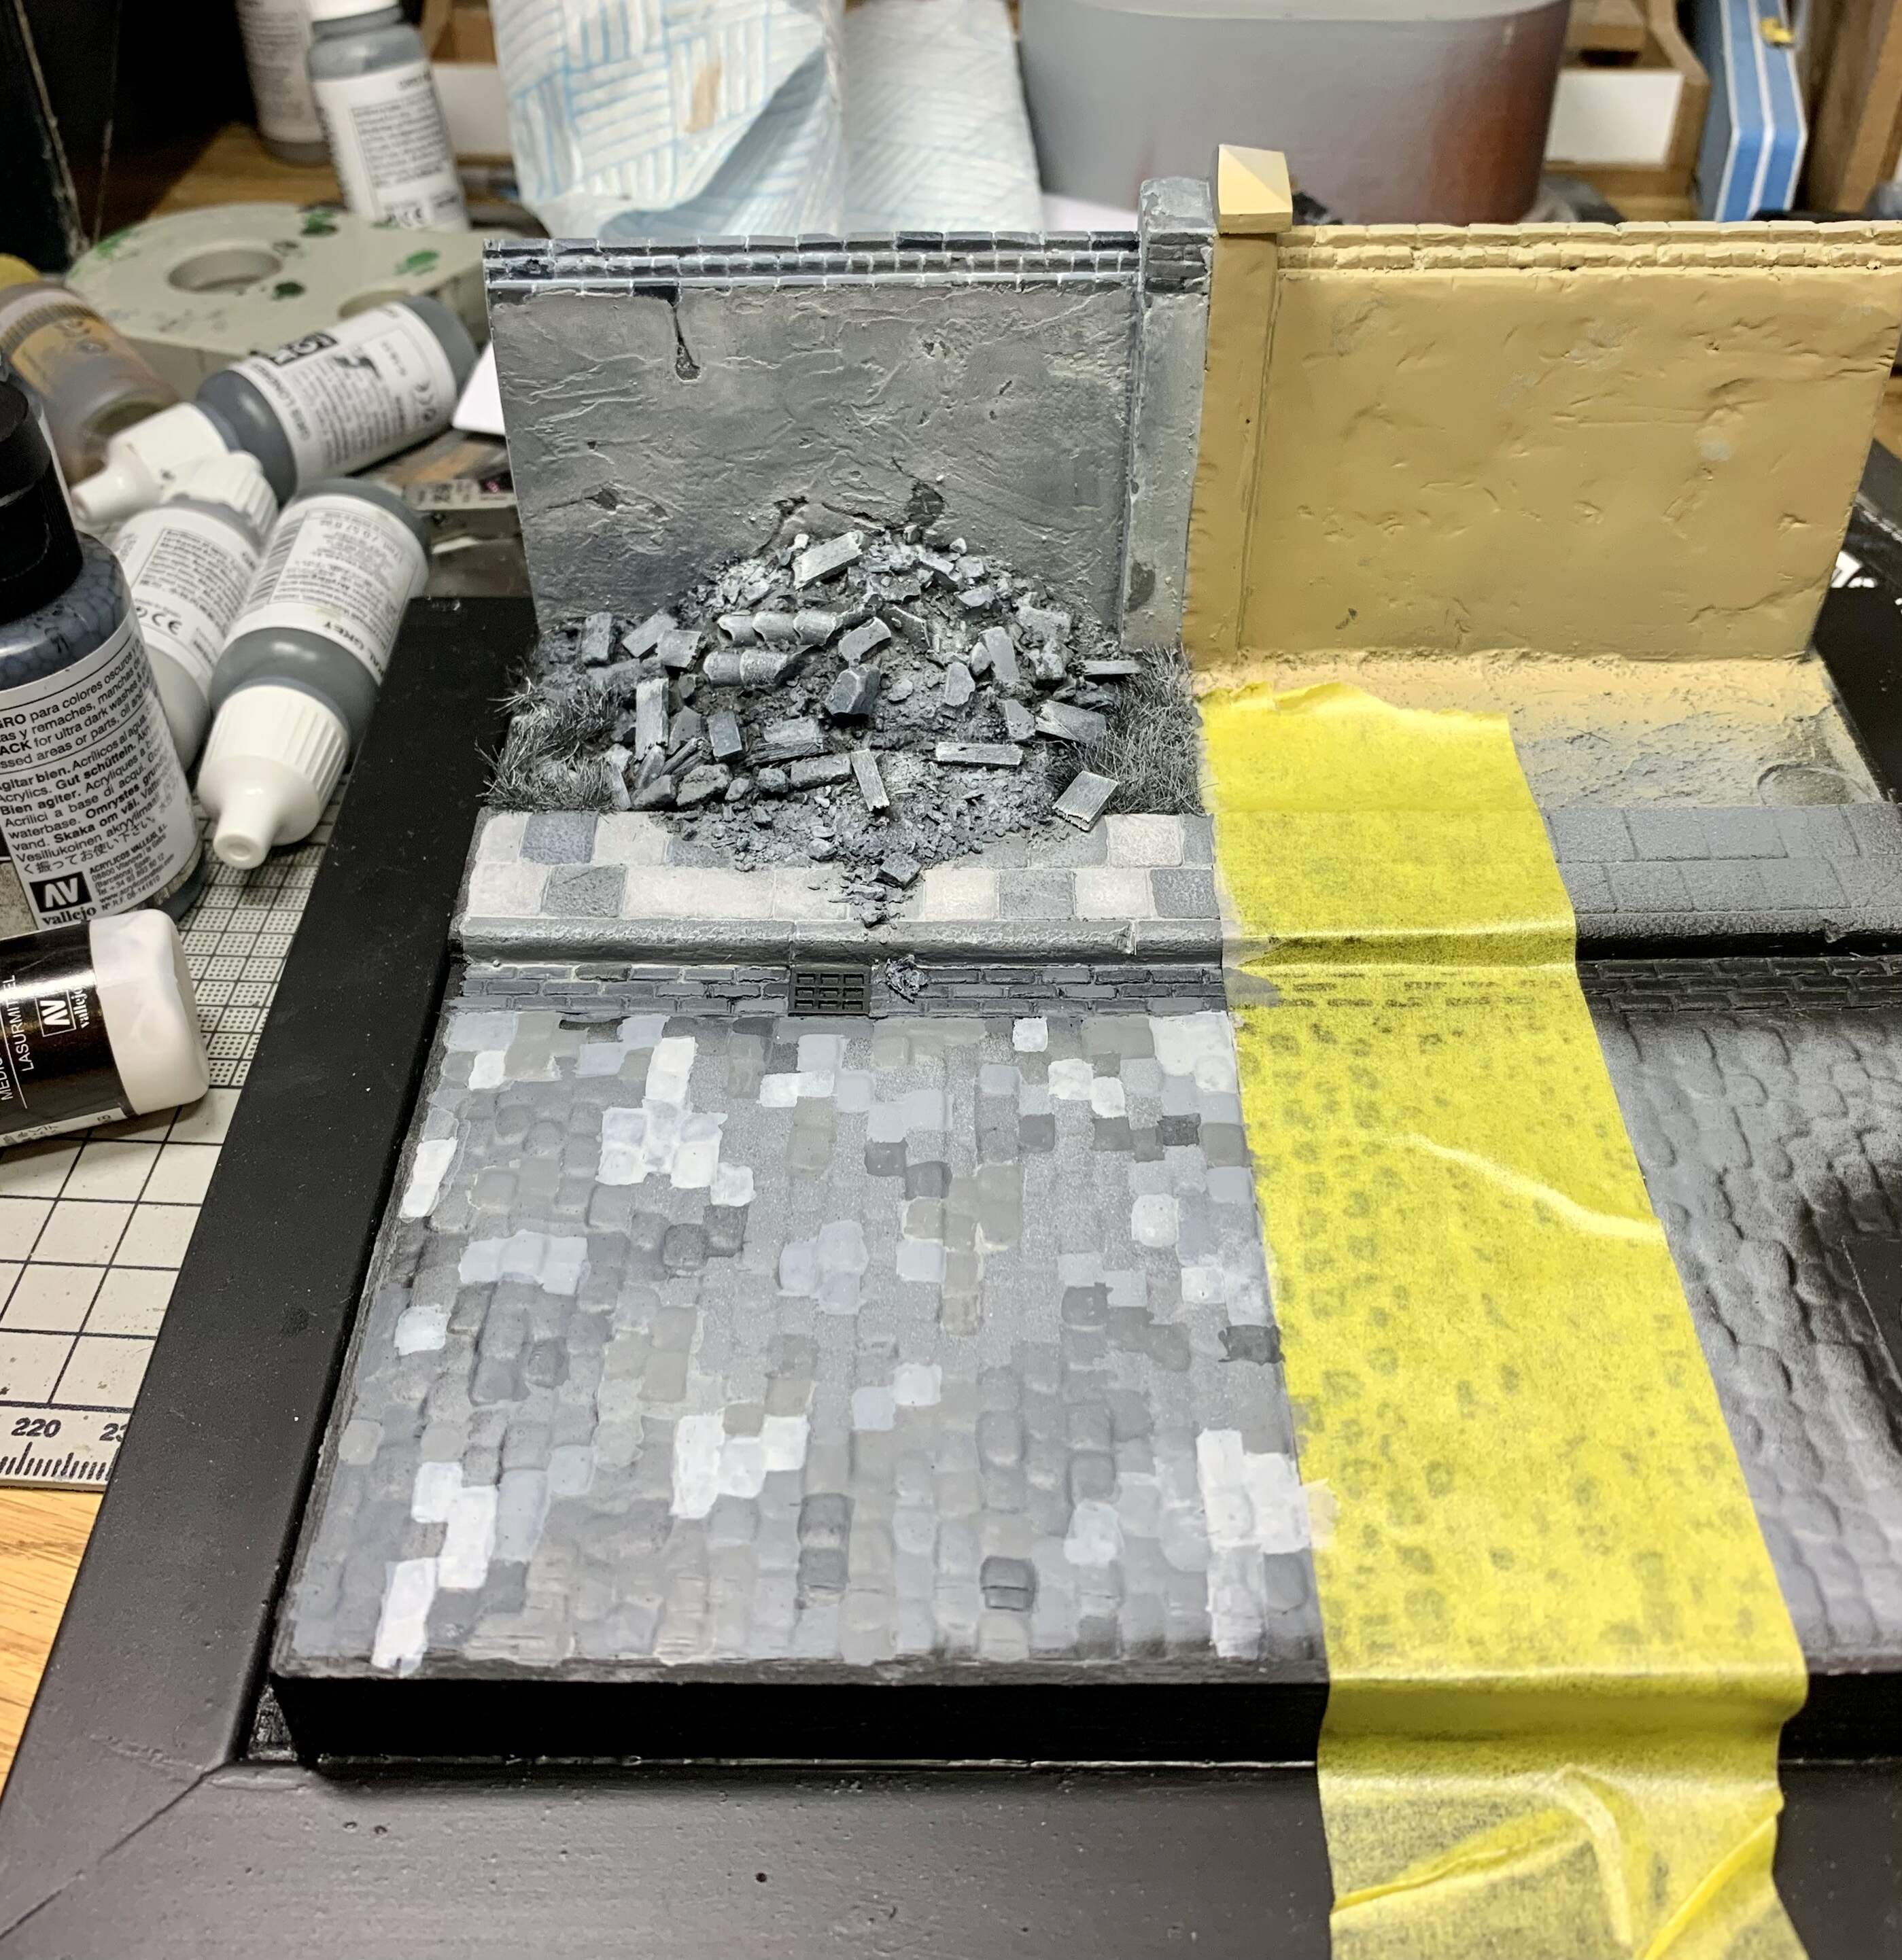
Progress was swift enough with various tones used on the rubble, bricks and wood. With each new color used I gave some of the cobbles a paint too. Medium Sea Grey was benched though- while this looked fine on the figures it seemed to dry to an almost sand coloured finish on the cobbles and had to be painted over.
Cobbles are a bit of a pain in the ass even with color as small areas of cobbles tend to have a multitude of tones. In this mould they are also, I think, depicted as rather worn without clear demarcation between individual cobbles.
Once I’d given the concrete between the bricks a white color the wall started to come together.
Finishing up the wall required some lighter tones around the crumbling plaster which was then finished off with some drybrushing.
The rubble was given a black wash in the darkest areas and bits and pieces picked out by drybrushing. The grass was given a similar treatment.
So that’s it for the acrylic stage. While it was, again, monotonous I don’t think it was as tricky as the figures, the simpler shapes and larger areas certainly helped in that sense. Once I get some varnish on it I can then do some work with enamel washes and oils which will require, yes you’ve guessed it, more grey tones!
9 Likes
This is coming along great Karl , lovin the b/w thing !!