Thank you Glen, I can tell you I was glad to put the grey colors away  !
!
My first task after sealing the acrylic work I’d done (with satin varnish) was to start defining the cobbles. I originally tested an acrylic black wash for this in a small area but acylic washes have an awful habit of forming tide marks very quickly that, once dry, are pretty much impossible to shift without stripping the paint.
They are useful in some situations, don’t get me wrong, but I decided to err on the side of caution here. Enamel washes too, can produce tide marks but they tend to emerge while the wash is still workable and can be quickly sorted with some thinner. That being said, if like me you mostly use enamel washes from one of the modelling brands, do take care to check their drying times as they can be different.

As you can see I’ve used AK’s Mig Productions Black Wash. I applied this fairly liberally before teasing it into the cobblestone’s recessed areas with a brush. I then used both brush and q-tips moistened with thinner to take some excess from the top of the cobbles so the wash would be concentrated more in the recessed areas.
You can probably see now why I wasn’t overly neat or tidy with the cobble painting because a dark color wash like this will cover the imperfections, leaving merely a hint of the color beneath. I continued to gently work on the cobbles with thinner and q-tips for a day or two until I was satisfied with the result.

(Just remember, if you are doing something like this, not to work the surface too much, even a q tip can take paint off if worked too much- I managed to do this on one of the cobbles but it was a tiny piece and easily sorted.)
Edit: Forgot to mention I also gave the areas between the gutter cobbles and the paving stones dark grey acrylic washes.
Now I plan to add some varying tones with oils both on the cobbles and other areas.
8 Likes
Well firstly bonus marks for what you’ve done Karl, I don’t think anyone could dispute those cobbles look good. But it made me think about my own exhausting experience doing cobbles which I’ll share, take it or leave it. I was originally daunted but determined to paint a wide variety of stone shades to break the monotony, but kept getting put off by photo refs which seemed to show little if any variation – for example…

So as the pay-off was far less work, I left mine monotonous…

Whether it’s that accurate I dunno, but by the time more eye-catching objects are plonked on top of it I doubt anyone would notice or care 
5 Likes
Yes Tim I see what you mean there. Personally speaking I used Google Earth Streetview to look around the area I am setting the scene in, Abbeville. Luckily on some streets there you can still see the cobbles at the sides of the road and they are in a variety of colors. Also, when I was younger (I’m 34) there were still some cobble streets and paths in various places in Ulster and they were rather drab and dirty and in various shades of grey from light to dark and everything in between with some stone hues as well.
I also remember cobbled areas being extremely uneven compared to a roadway today- which is where your picture, I think, differs drastically. Obviously for tram tracked areas an uneven area of cobbles could cause a derailment as could dirt and debris. Keeping a busy tramway clean and generally level was likely a priority to avoid accidents, hence a more considered approach to the cobbles.
Also, remember that in 1916 horses would have been a major form of transport and, of course, they leave the roads pretty dirty for obvious reasons! I figured a rural towns cobbles would be pretty dirty so that was why I have gone in the direction I have. To be honest looking at period photos of Abbeville in 1918 (See here) it is very hard to tell exactly what the road surface even is- in some pictures it looks like compacted dirt, in others it is cobbles but the detail is quite indistinct.
In any case I appreciate your input greatly and I’ve just explained my rationale for doing what I did. I would also add that I haven’t yet finished the cobbles! I was planning to add some more grey tones to them once the enamel wash is fully dry.
No problem at all I bow to your photo refs they’re all that matters, it’s always down to what local stone looked like. I know you haven’t finished but that’s why I posted now, in case you were veering towards heavily contrasted stone like this from an unknown hand in a Prague museum…
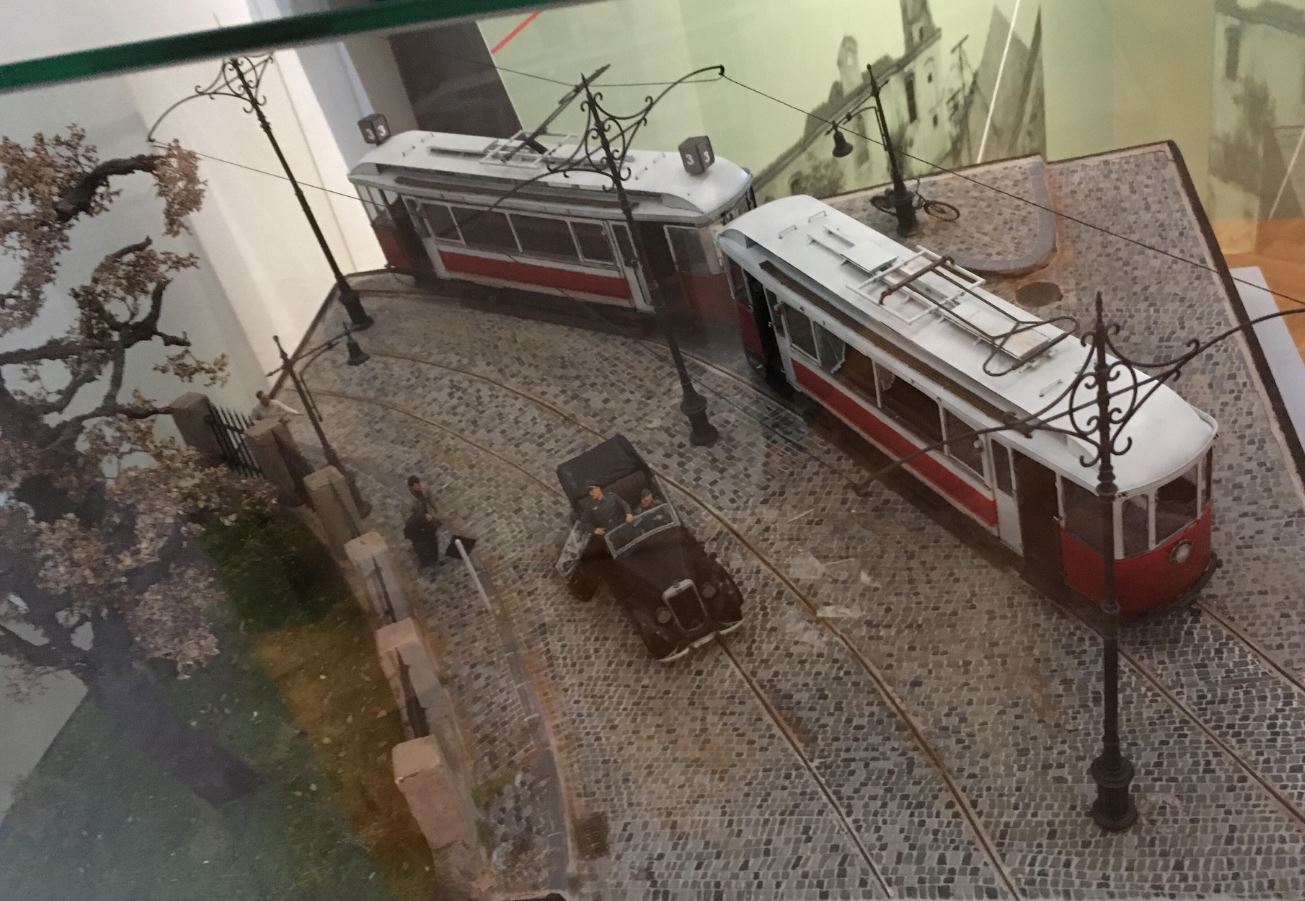
…which doesn’t look at all right compared to contemporaneous photos. Whatever you’ve got the best rationale, looking forward to progress 
4 Likes
I agree with Tim’s comment about the cobbles being scenery to the main focus objects that will be in your build .
Taking all things into consideration , your cobbles are a very good representation of cobbles and I wouldn’t have guessed them to be anything else .
I think the trick now will be the representation of the color part of the cobbles on the right side to differentiate the b/w , color , now and then theme .
I think you’re on the right track and you’re doing a wonderful job with the whole now and then theme .
2 Likes
@Cheyenne and @Dioramartin - thank you both for your kind words and your thinking on the cobbles, I value it very much.
Tim, I think what you said about getting the look right is quite important as too much difference of color and contrast might ruin the appearance of cobbles- pretty sure I have made that mistake before with cobbles. I also note what you said about local stone because I saw a cobbled area today near where I live- it was an entryway and the cobbles were various granite shades as that is the most common stone material in the area.
Glenn- I am actually quite looking forward to breaking out the color to do the cobbles having done them in black and white but I don’t reckon it will be any easier!
I also thought I would share a few random photos I screen-shotted from Streetview of present day Abbeville that show the local cobbles quite well.
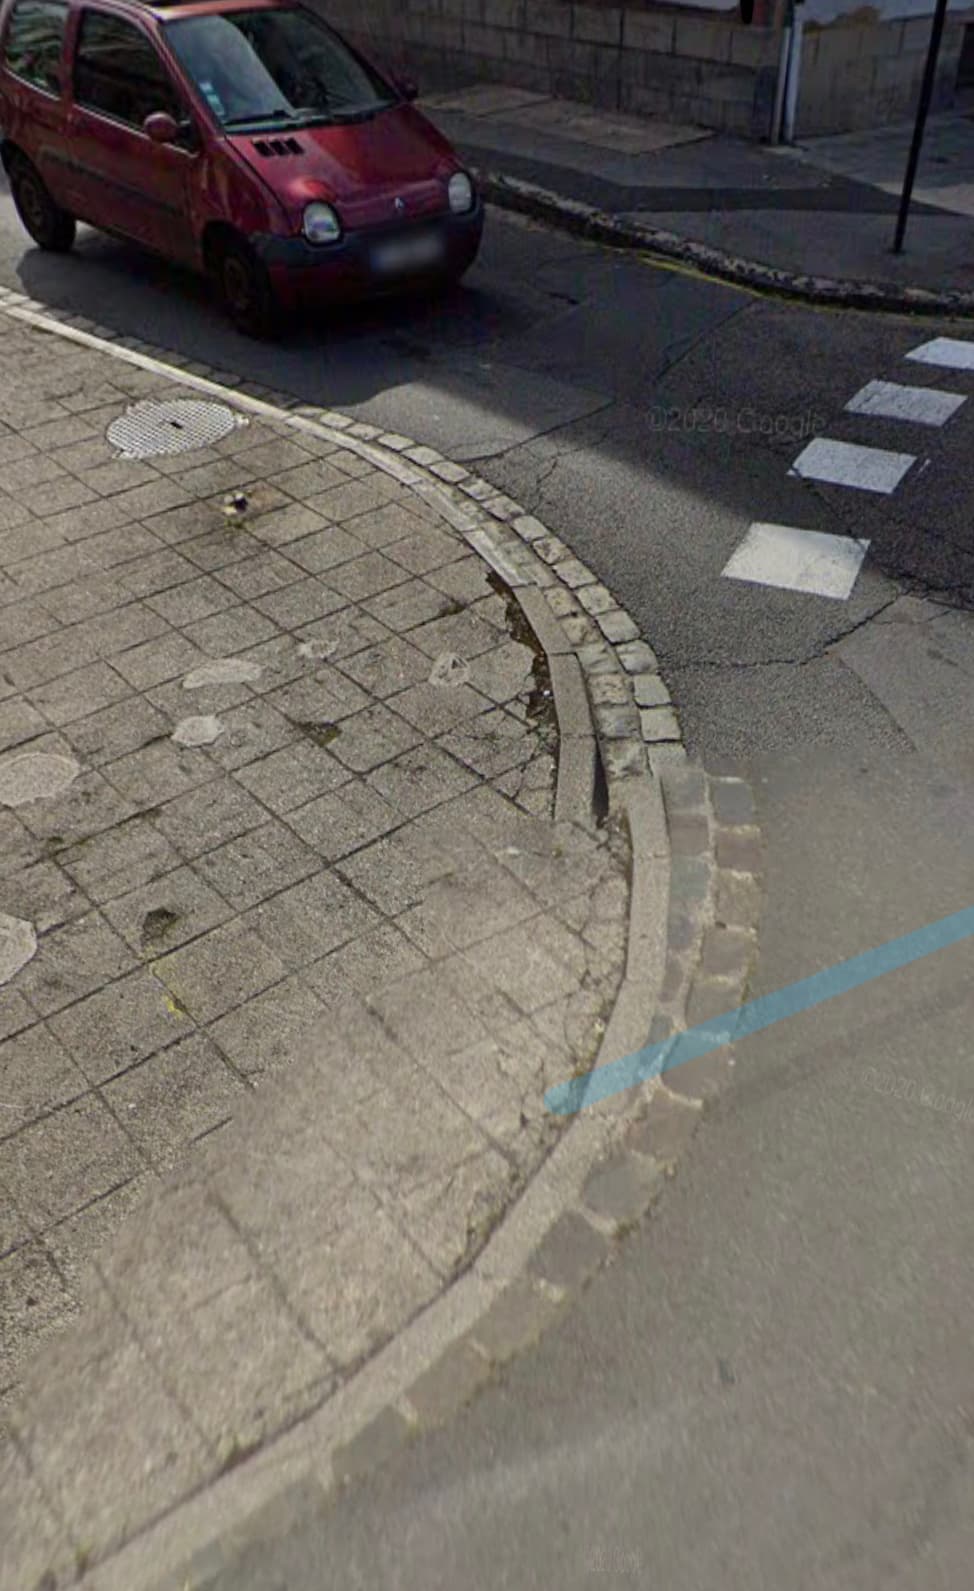
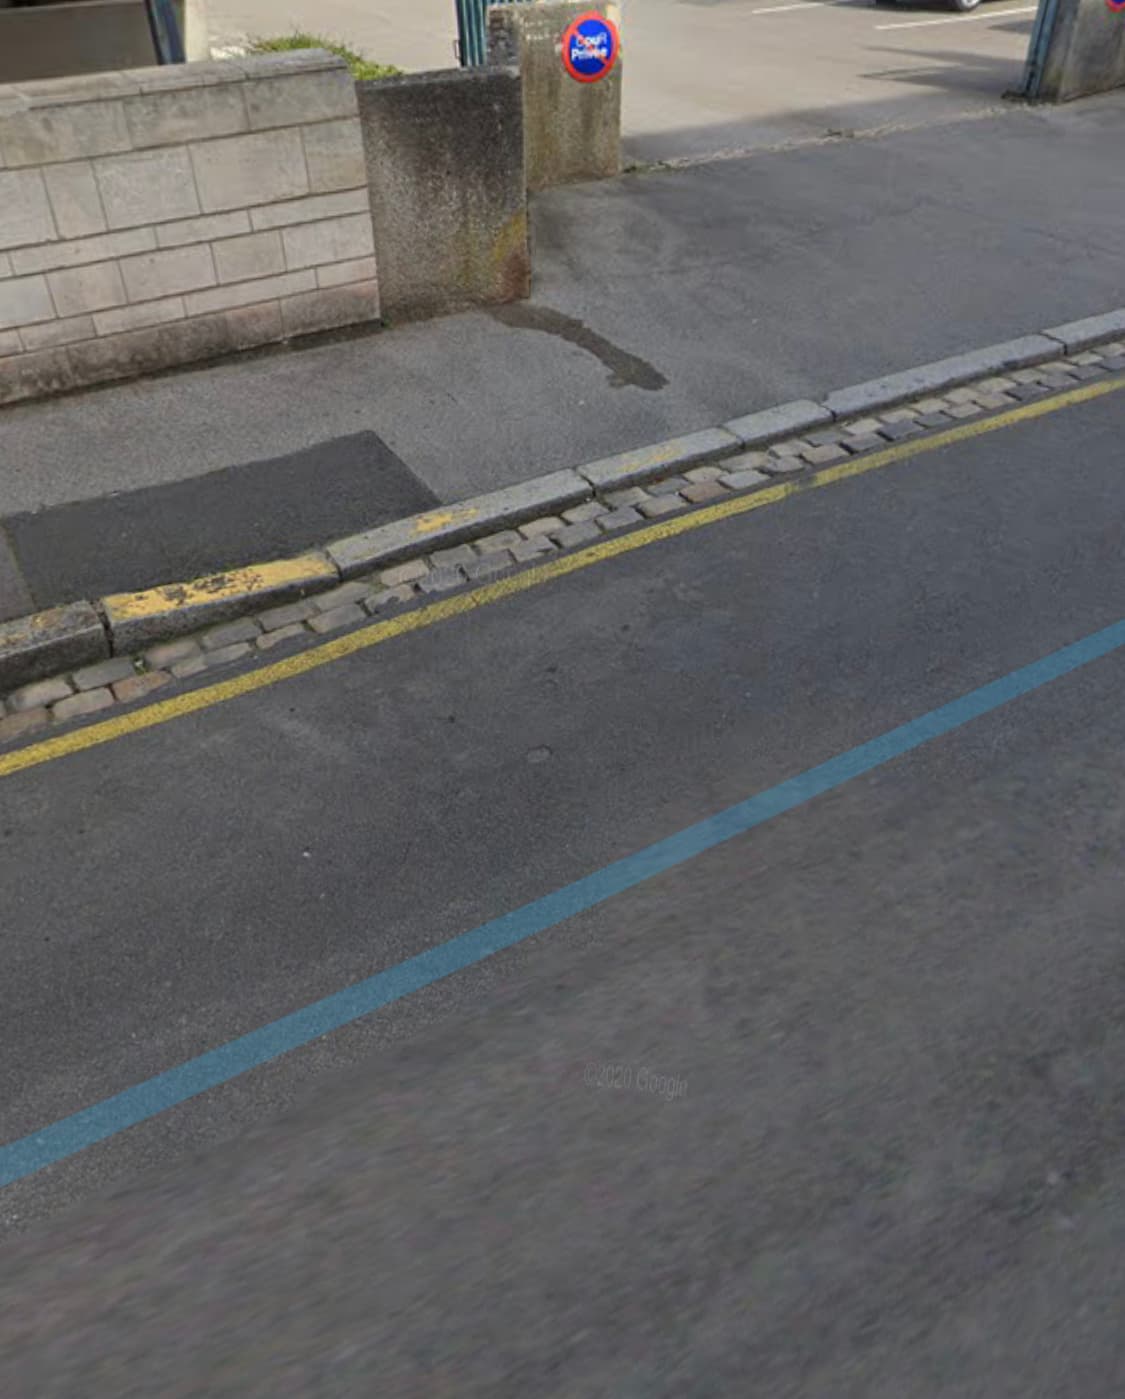

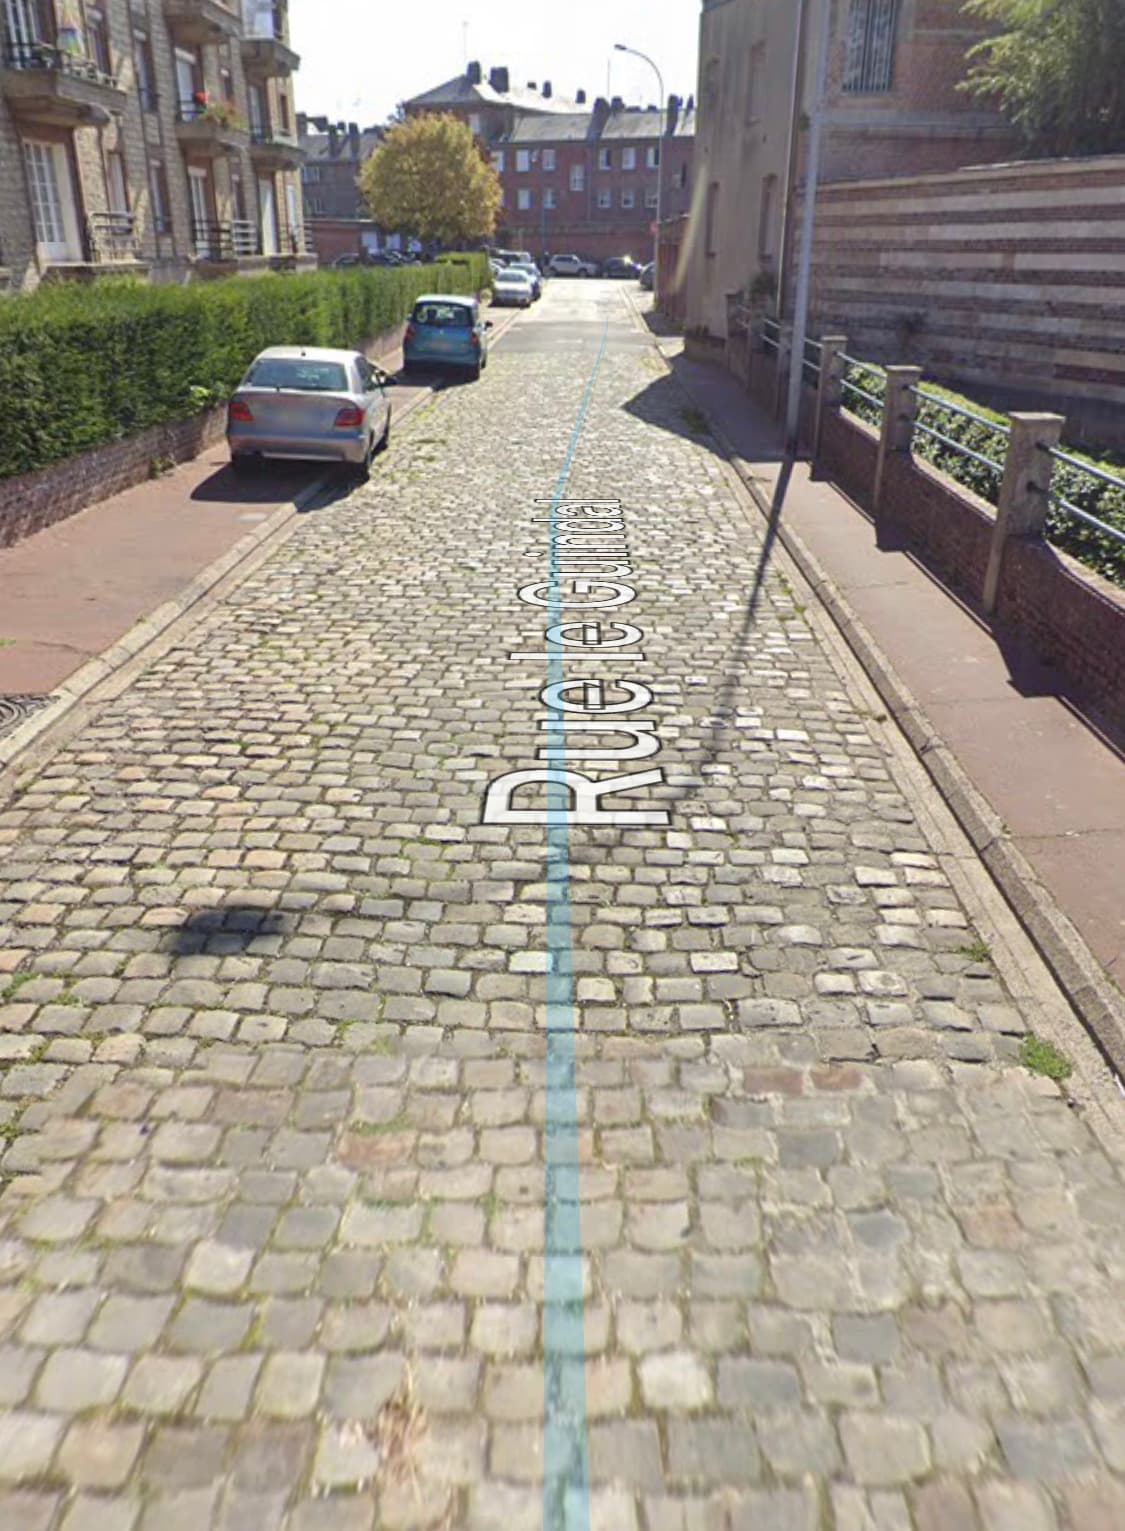
Managed to find the above whole cobbled street section too which I was very pleased with!
5 Likes
Compared to the acrylic paint stages I enjoyed using oils a lot more. Only two colors were needed, black and white. I use Abteilung oils from AK and put them on cardboard to leech any carrier oil away so they can dry quicker.
Some modellers like to use a hairdryer when using oils so they can get a coat to dry quicker and so move on to another color without worrying about disturbing the color already laid down. I’ve tried this but found it a faff going from paint to dryer and back again while wondering if I had dried it enough. I usually do several colors on one area or one color on multiple areas and let it dry overnight before moving on.
My objective was to give the colors of the wall more layers, more depth and to give the idea it was both old and uncared for. The work with acrylics started this and I aimed to finish it up with the oils.
I began by adding a couple of medium grey streaks to see how the color looked then I used this color in random places around the middle of the wall. Using lighter and darker shades of this I moved upward with the lighter and downward with the darker- enhancing the shadows and highlights with the oils.
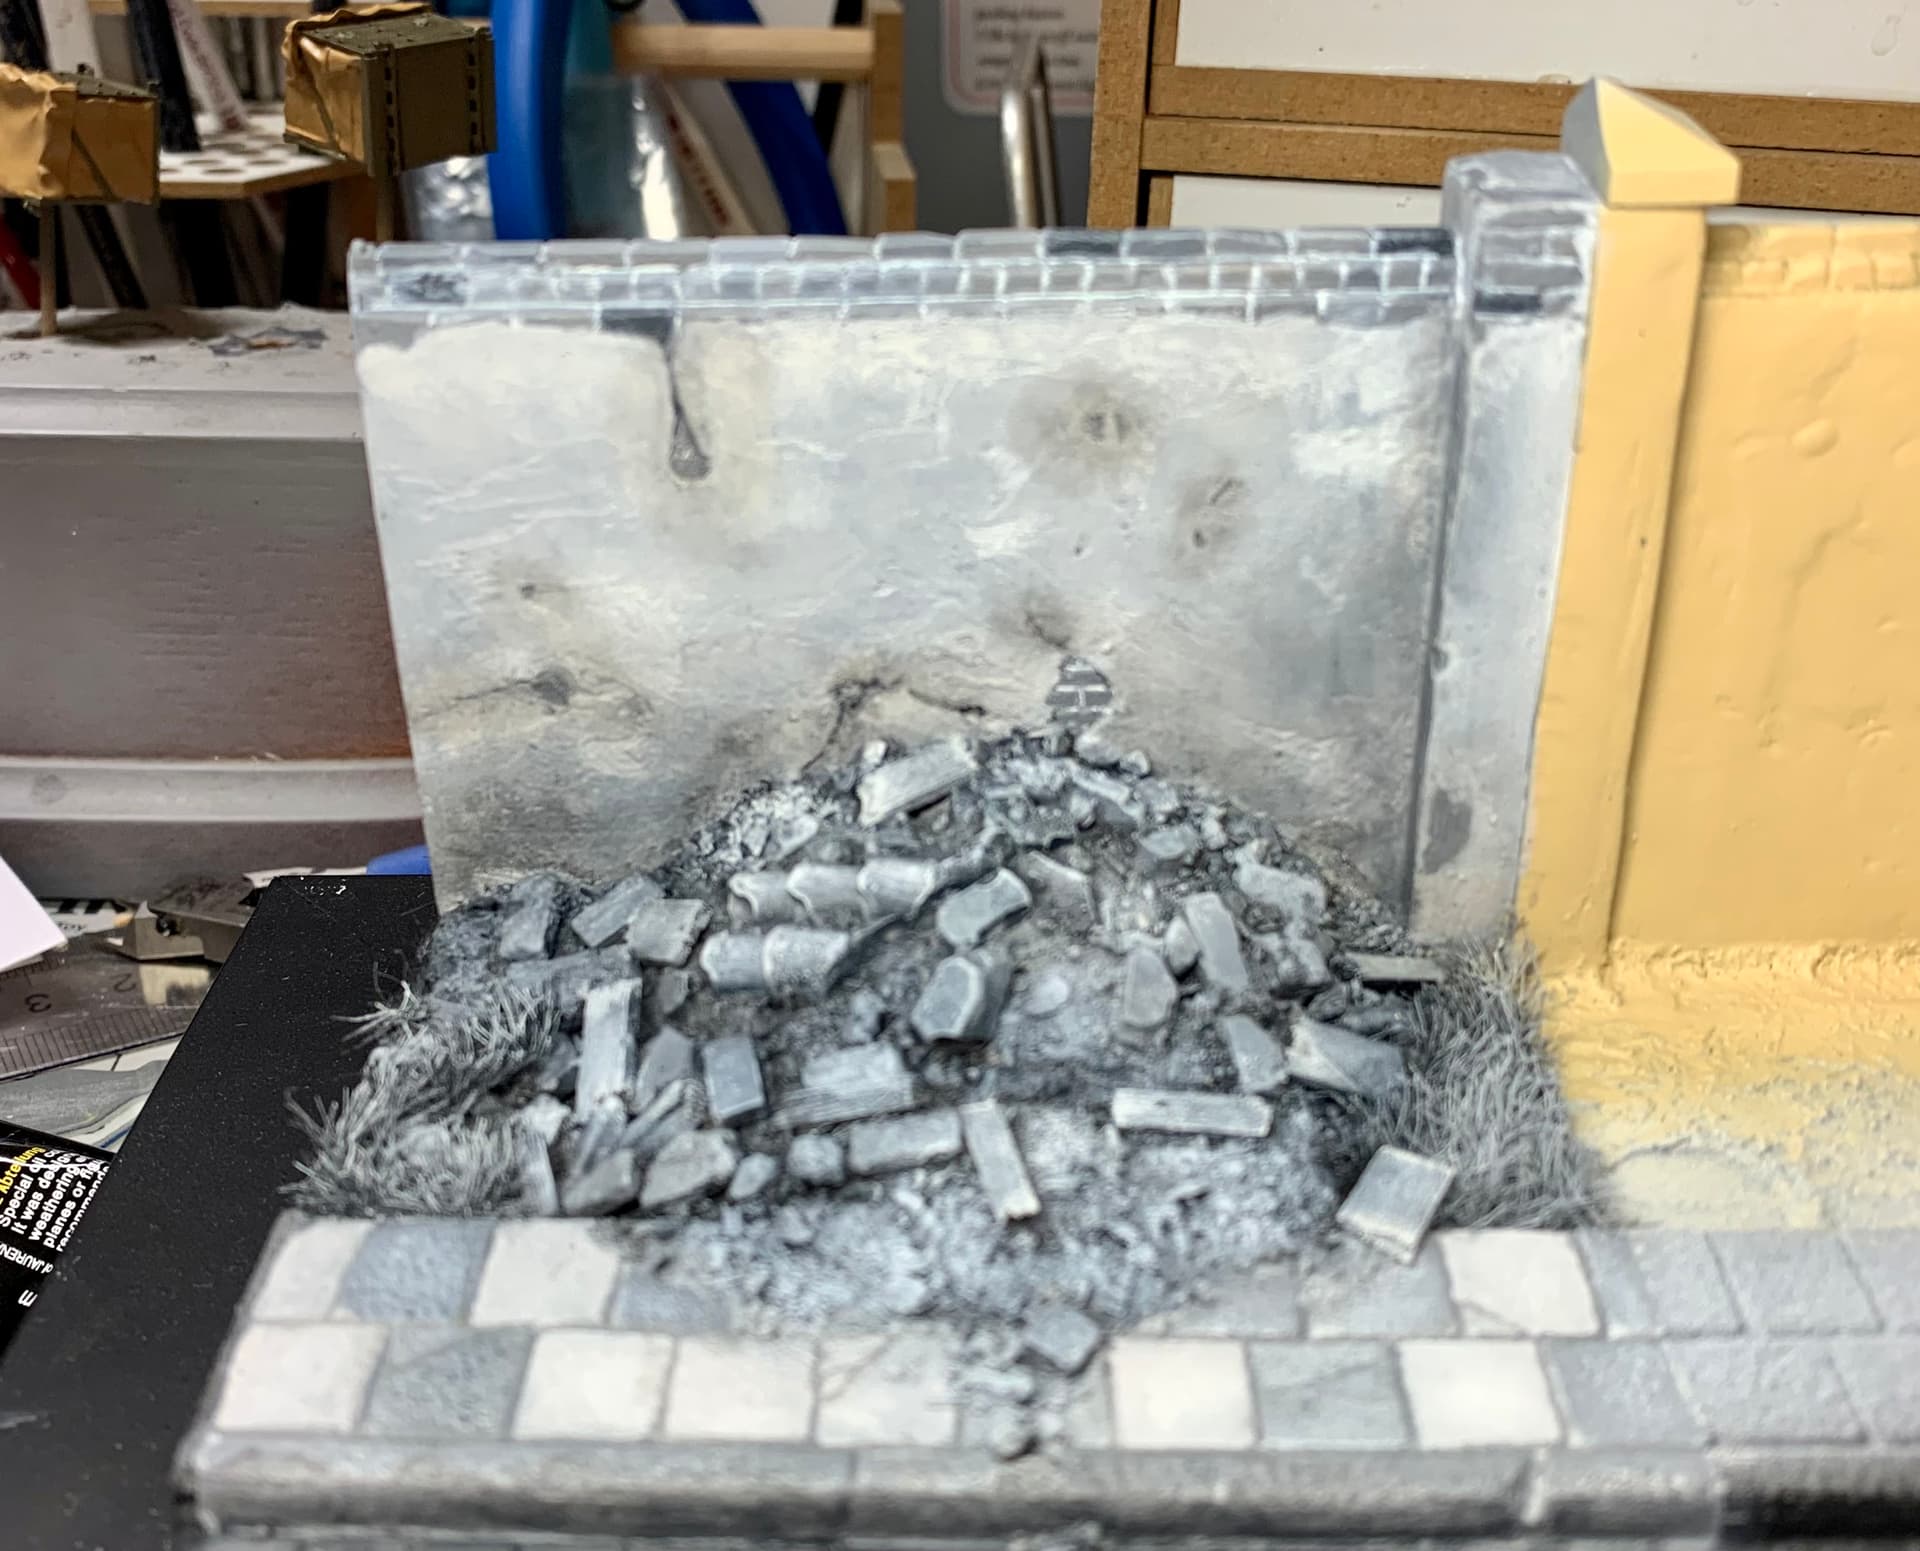
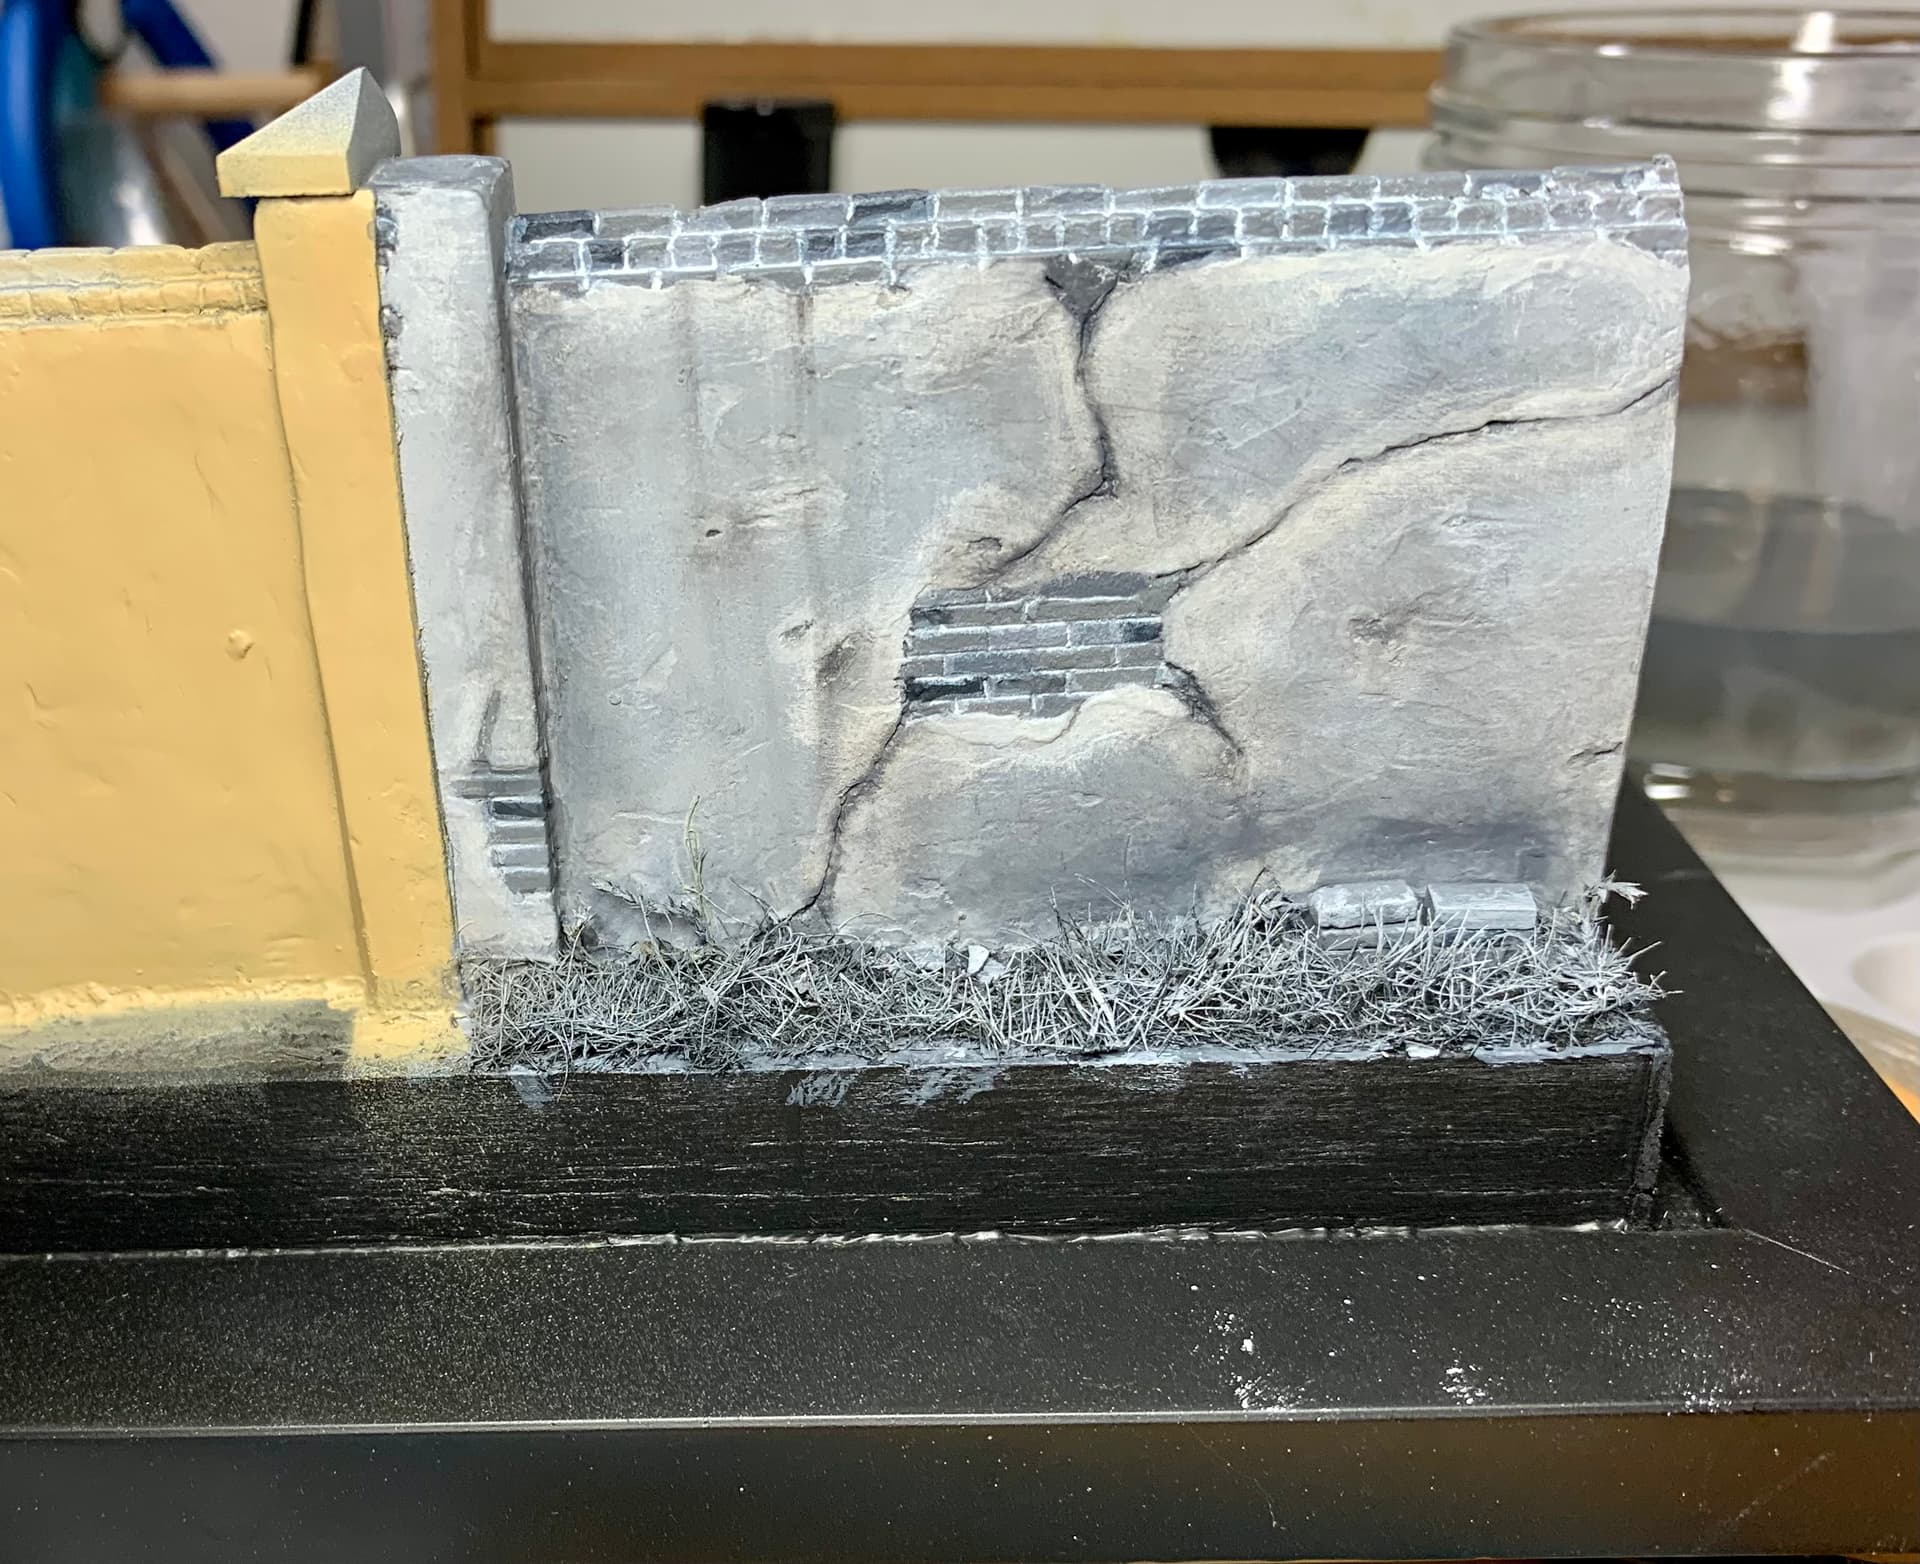
Small amounts of black was used on a few lower areas of the wall and rubble, the gutter side of the kerbstones and to darken the pavement around the rubble pile. White was then worked into a few areas, mostly the topmost edges of the cracked rendering and one or two other places.
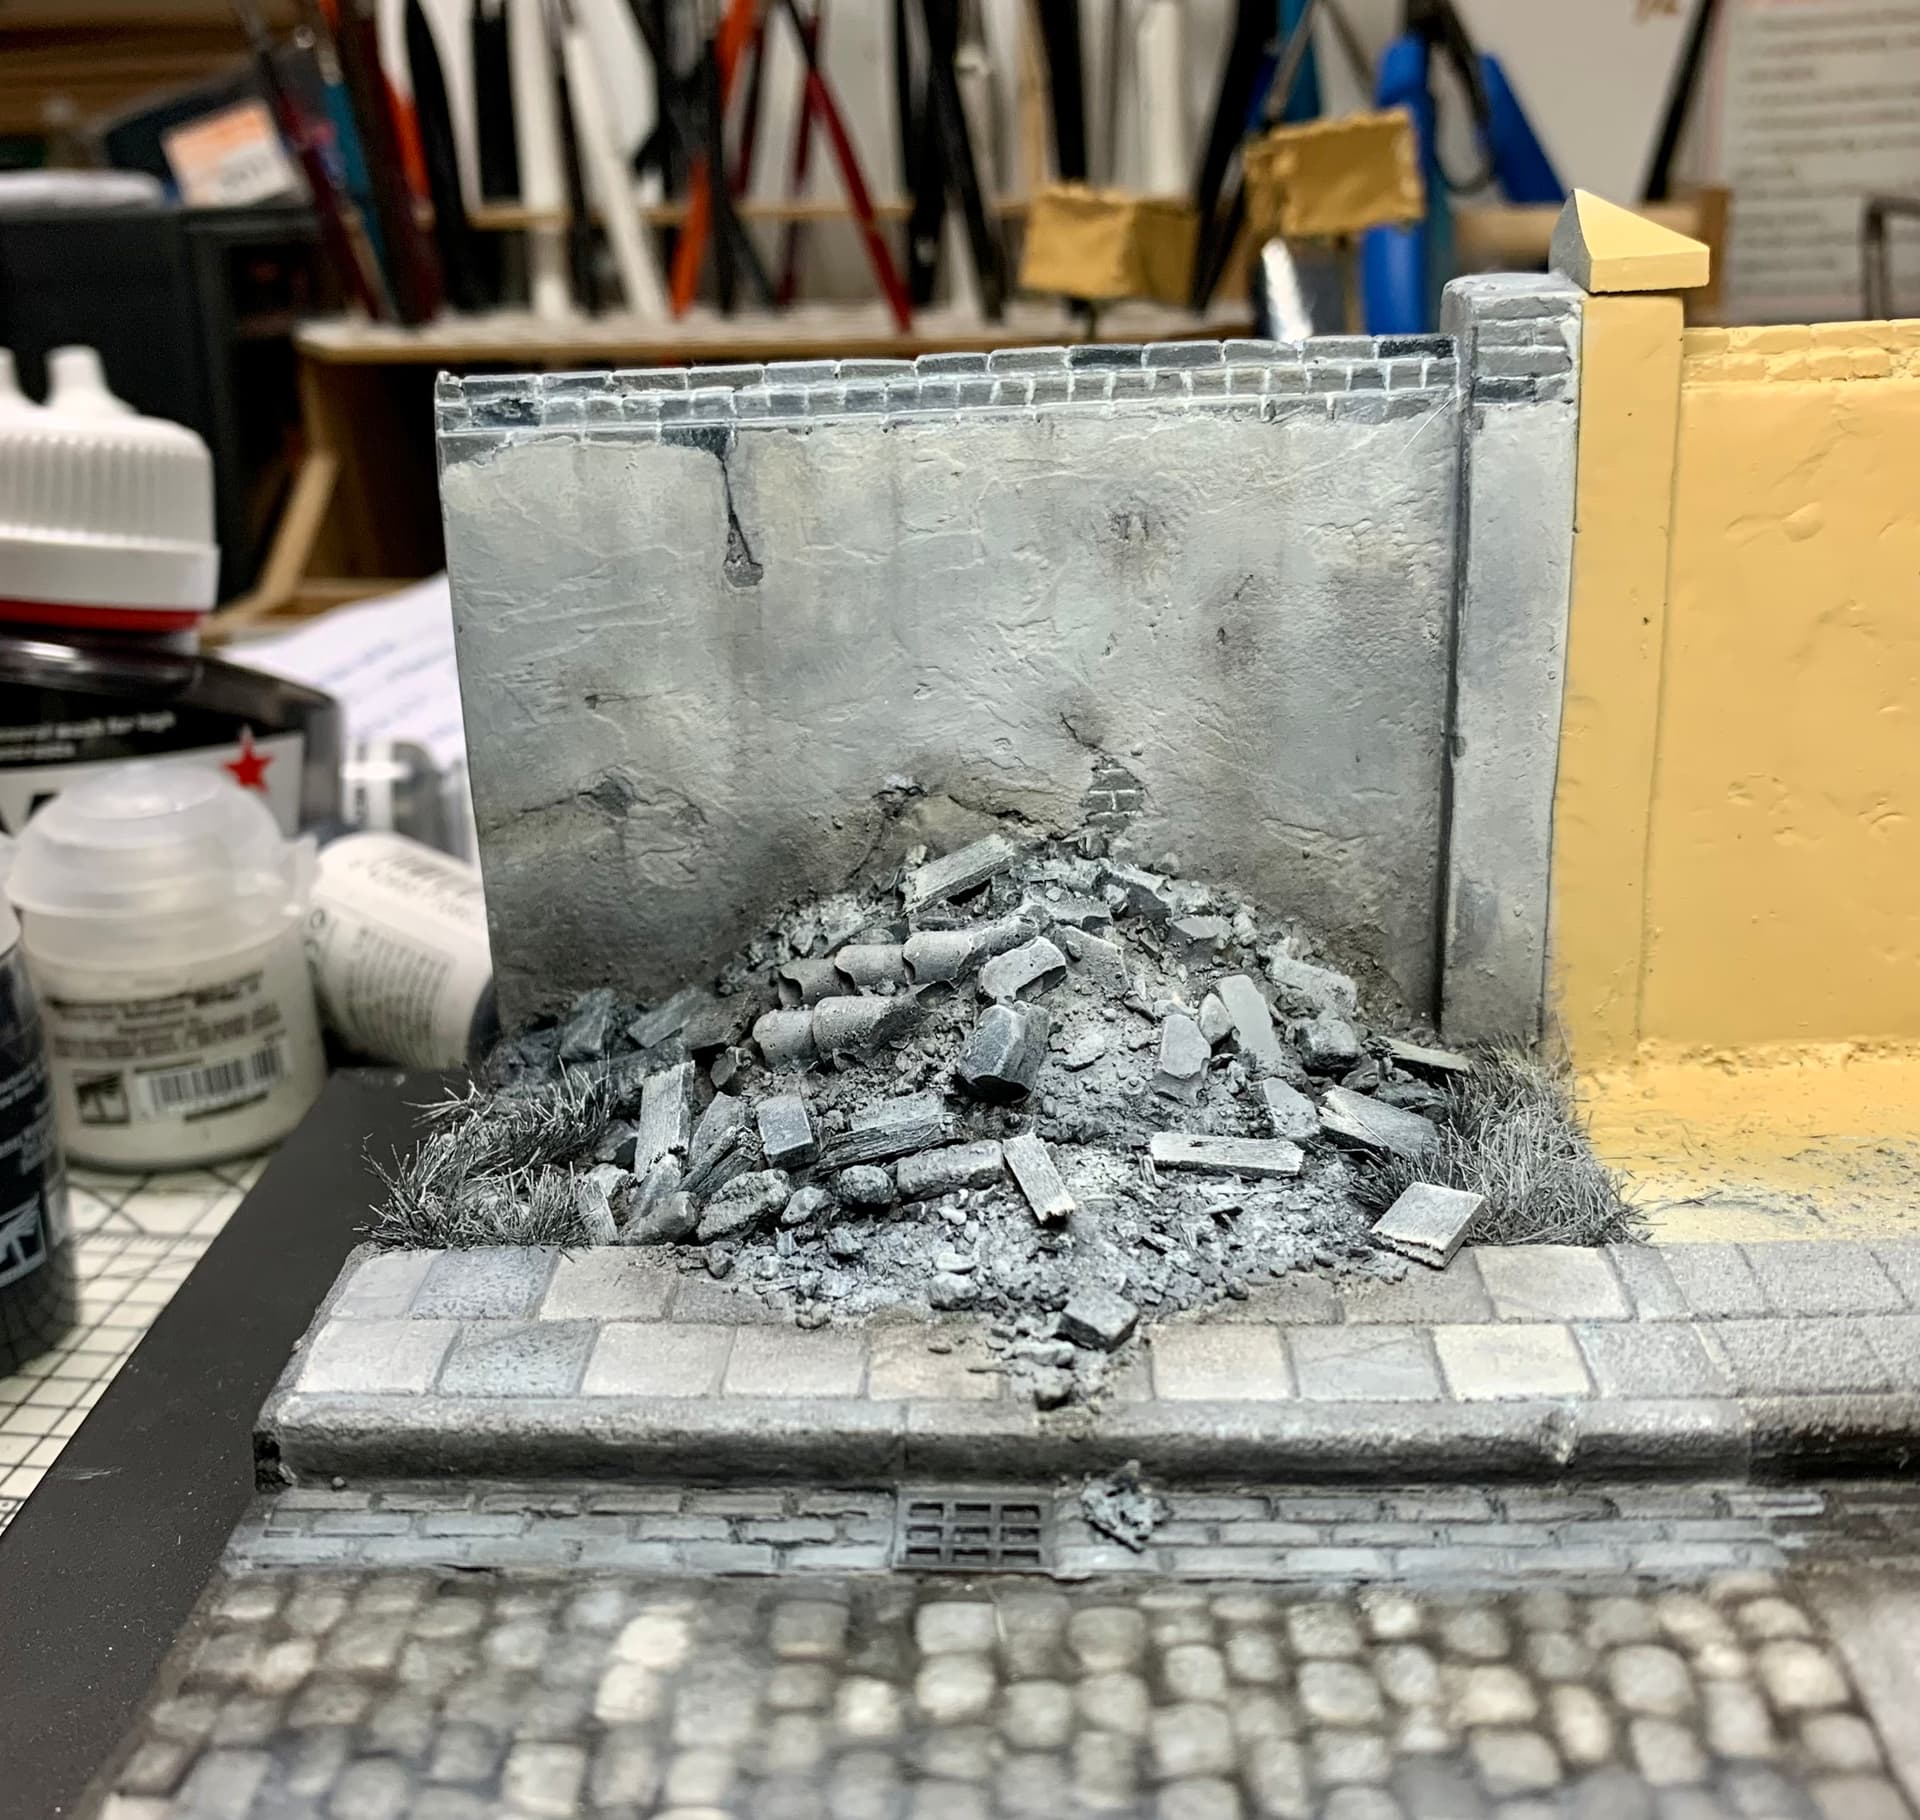

Lastly some grey was mixed to create streaks of grime down the wall.

As I mentioned earlier the cobbles were not finished and I turned the oils on them too- mostly trying to create a well used area in the very middle with light grey and a little white, while using dark grey on the gutter side and the outer side.

So that is the black and white side of the base almost done. I have a few small things to add but right now I’m getting stuck into the two 1940 BEF figures and that will be in the next update.
Thanks for reading!
6 Likes
Love it Karl , very black and white looking , in a black and white looking way .
The color/real life side will only enhance the b/w side when done and vice/versa .
One question , are you a little hesitant/shy on starting the color side , seeing as you’re going back to work on the figs. ?
I’ve found myself in this boat many times , finishing one facet , only to hesitate and breathe deeply before attacking the " next step " .
A rocks glass with a little whiskey and two ice cubes may or may not be the answer . Then again giving yourself boozeballs courage could even be more disaster …
Either way , love what you’re doing man !!
1 Like
Fascinating, such a great idea & it’s just beginning to have that eerie quality you must be after. Following closely & hey I didn’t talk a load of cobblers this time either
1 Like
@Cheyenne- I appreciate the kind words bud! And to answer your question, no I’m not feeling hesitant to start the color side but I have felt hesitancy like you describe in other projects. It’s a kind of modeller’s hesitancy I guess, kind of creeps up on you and you find yourself putting something off. A few drops of the good stuff and a wee bit of contemplation are usually a good idea to combat it!
The actual reason I haven’t begun it yet is because I plan to paint that part of the base with the two 1940 figs. But they have needed work and I knew they would so I’ve had the putty out to get them sorted for painting and they are nearly ready for some primer.
@Dioramartin- Thank you my friend for your encouragement- I must say I did not plan for the eerie-ness of the black and white colors, for some reason I never thought it would look eerie or ghostly but it does have that quality and I’m quite happy about it as well as surprised.
1 Like
Earlier in the build with the two WW1 figs I discussed their webbing (1908 Pattern) and uniforms (Service Dress). In the intervening years between 1918 and the BEF deploying to France in 1939 it sometimes looked as though not much had changed.
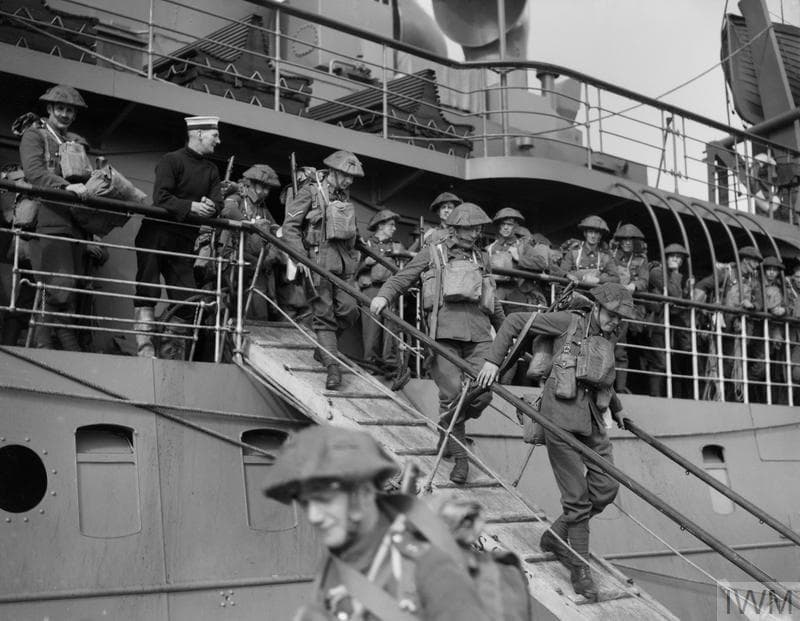
These are the Inniskilling Fusiliers disembarking in France in 1939 still wearing their inter-war uniform (Field Service Dress) and puttees, which looked very much like the WW1 versions. 1908 webbing sets (though not shown here) were still apparently in use when the Germans invaded Poland (according to the Crowood Press book The World War 2 British Tommy. This was despite a new uniform (Battle Dress or BD’s) and webbing kit (1937 Pattern) having been issued since 1938.
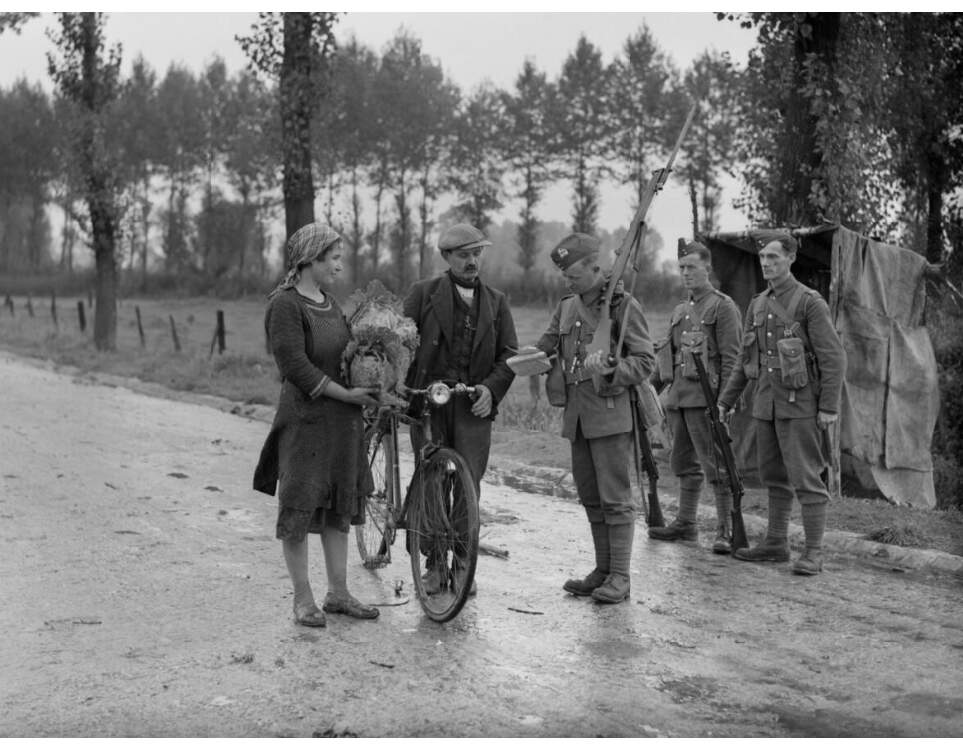
Men of the Berkshire Regiment in their old pattern uniforms.
The rollout of new kit had been slow, to put it mildly. Sticking with the Inniskillings you can see in the photo below they are still wearing their inter-war uniforms here in September of 1940.


In the picture above, taken in April 1940, they are wearing their new BD’s.
I also managed to find, in a transcription of an oral account, roughly when the 2nd Battalion Royal Ulster Rifles were issued their BD’s, which seems to suggest their kit was issued in October 1939.
Major-General Montgomery, Commanding the 3rd Division, paid a visit; the Battalion was not destined to remain there long. It entrained a few days later for Templemars, which it reached on October 12th. Once again the billets were good, but scattered.
Two days later came the final move before May 10th. This was to Lezennes-a suburb of Lille…
…General Georges, the Commander-in-Chief of the Allied Forces on the Western Front, paid a visit the same day. Happily enough, he was followed by the first issue of battle-dress to the Battalion.
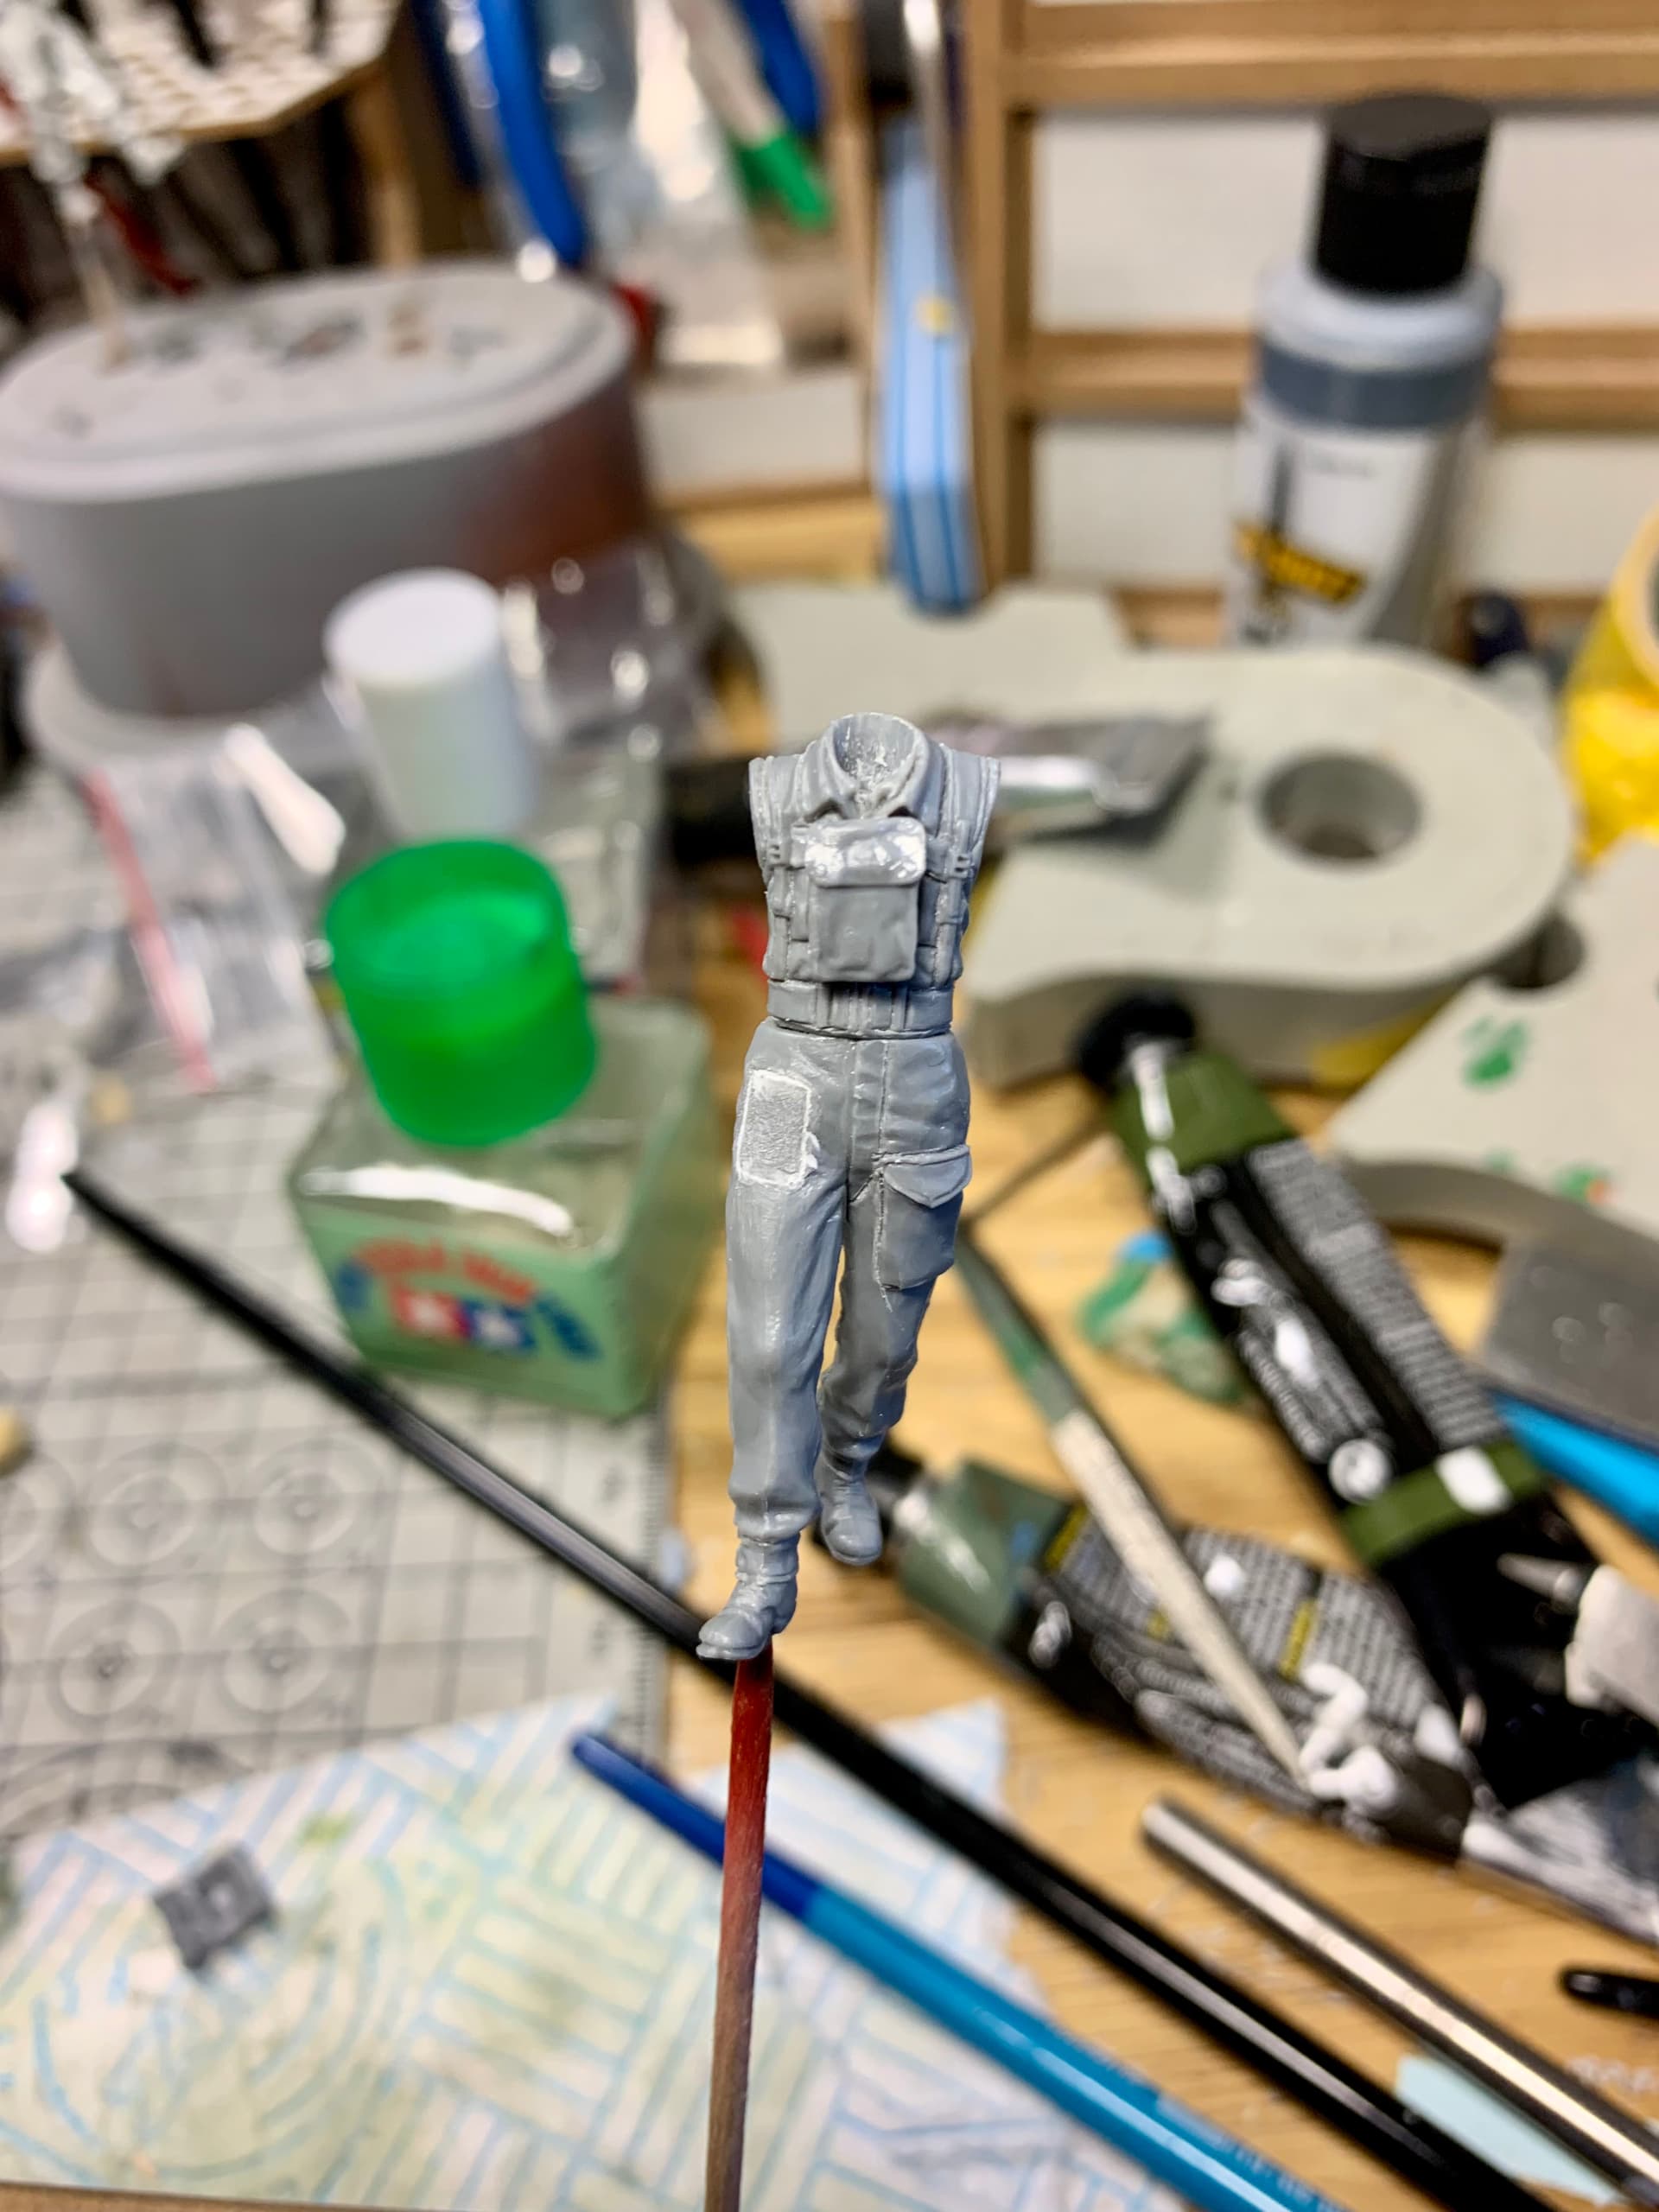
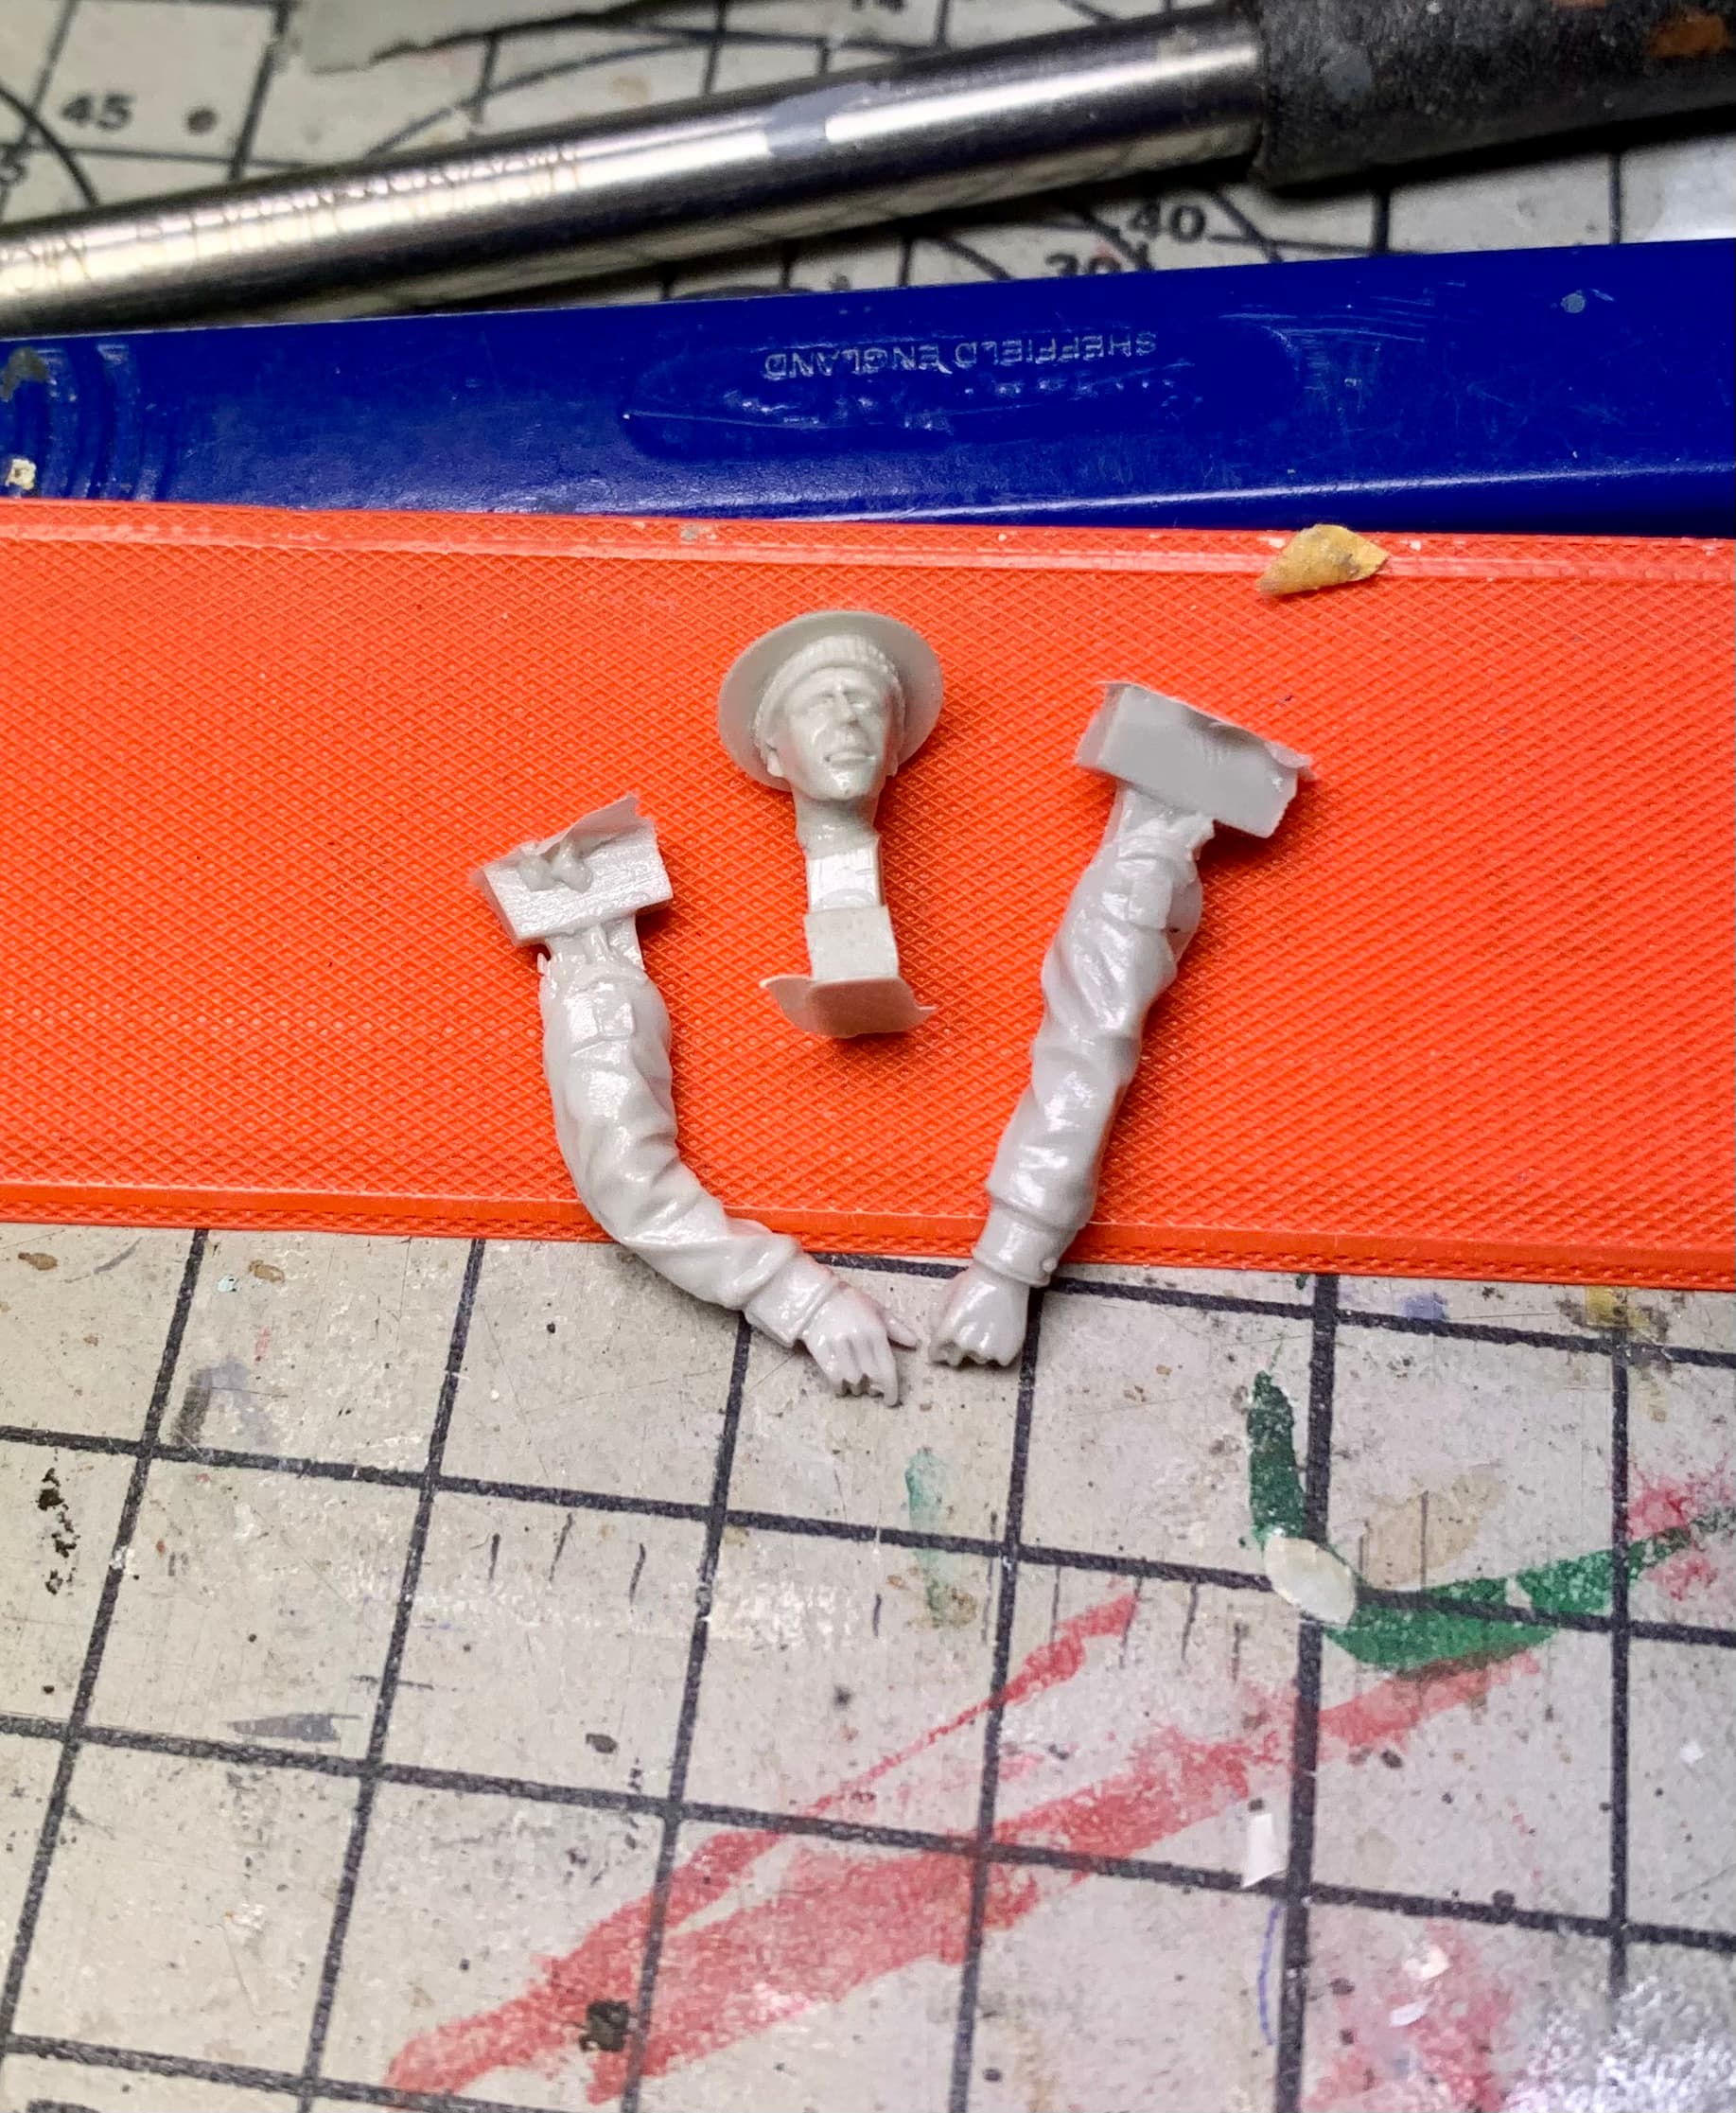
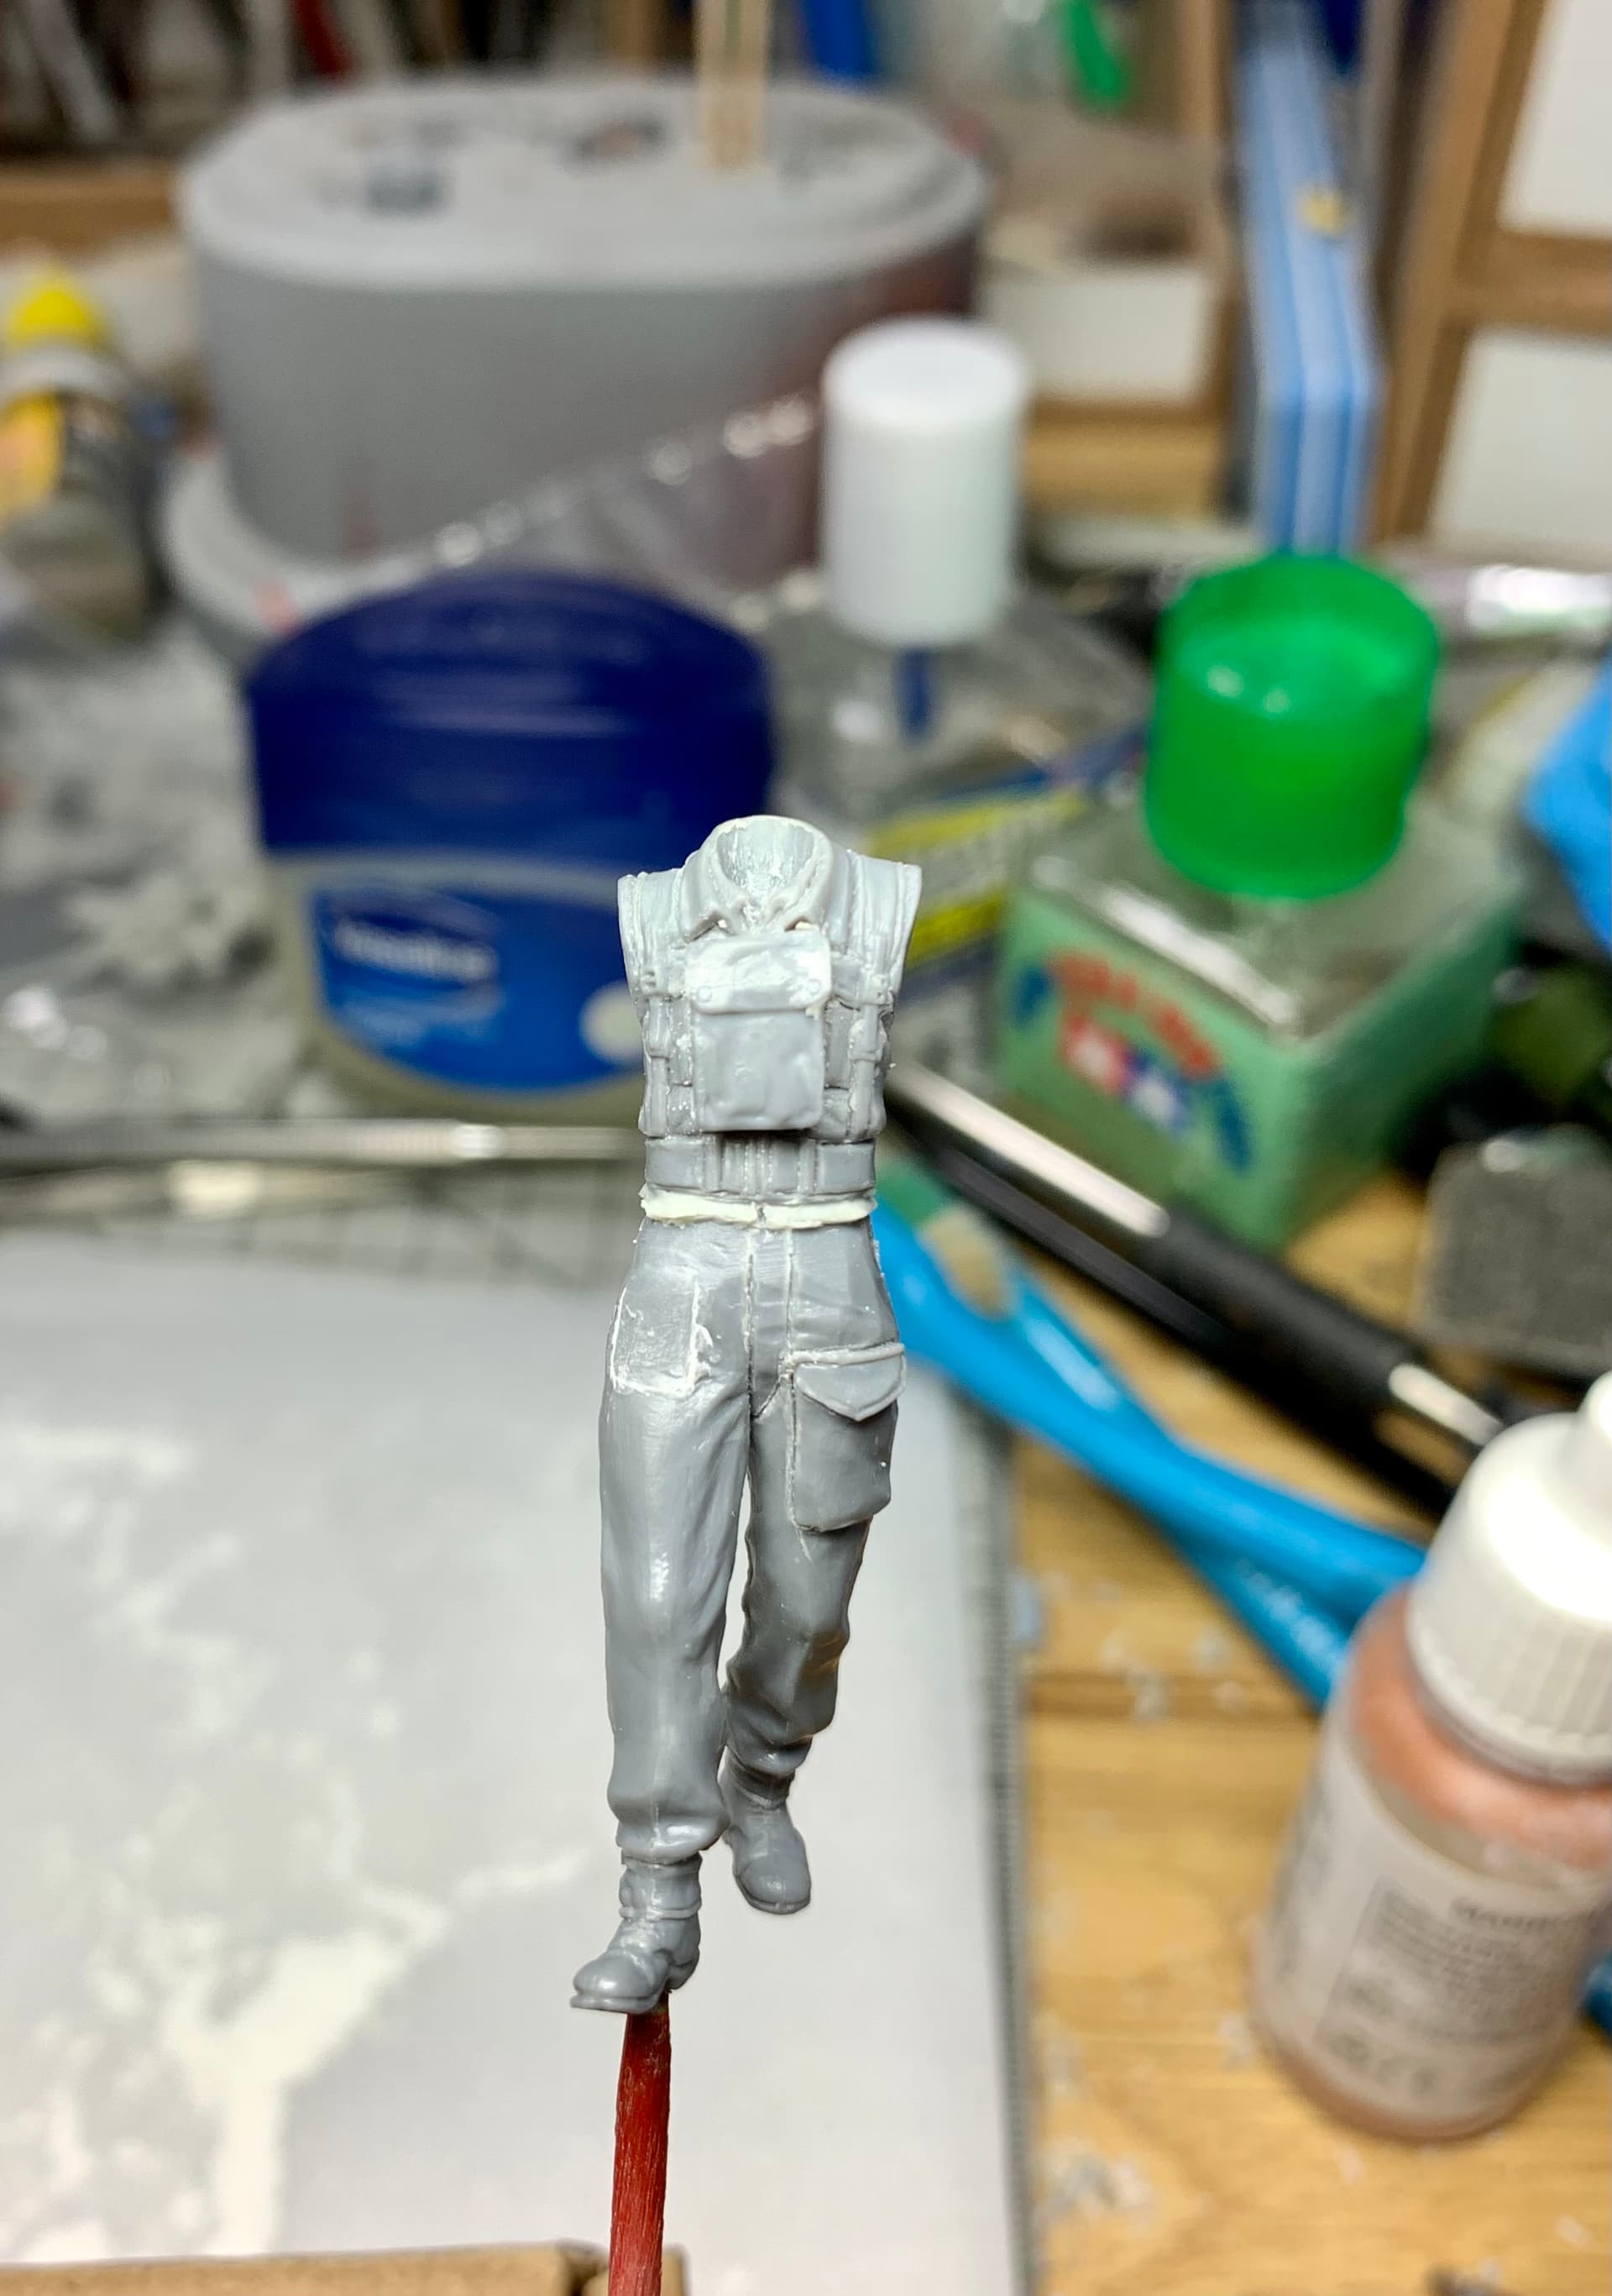
But let’s now turn to the figs themselves. We have a Rifleman from the old Tamiya British Infantry set whom we shall call Gordon. Despite its age this is one of Tamiya’s best sets both in terms of detail and usefulness. The figs are well cast with plenty of nice detail and there are plenty of extra bits of kit. I’ve chosen a Hornet head for this guy and once again goofed while drilling the neck out nearly wrecking the undershirt collar. Not as much swearing this time as it was not really noticeable damage wise- looking like the undershirt collar had kind of got pulled around by the heavier BD collar and the gas mask bag which will sit almost on top of it.


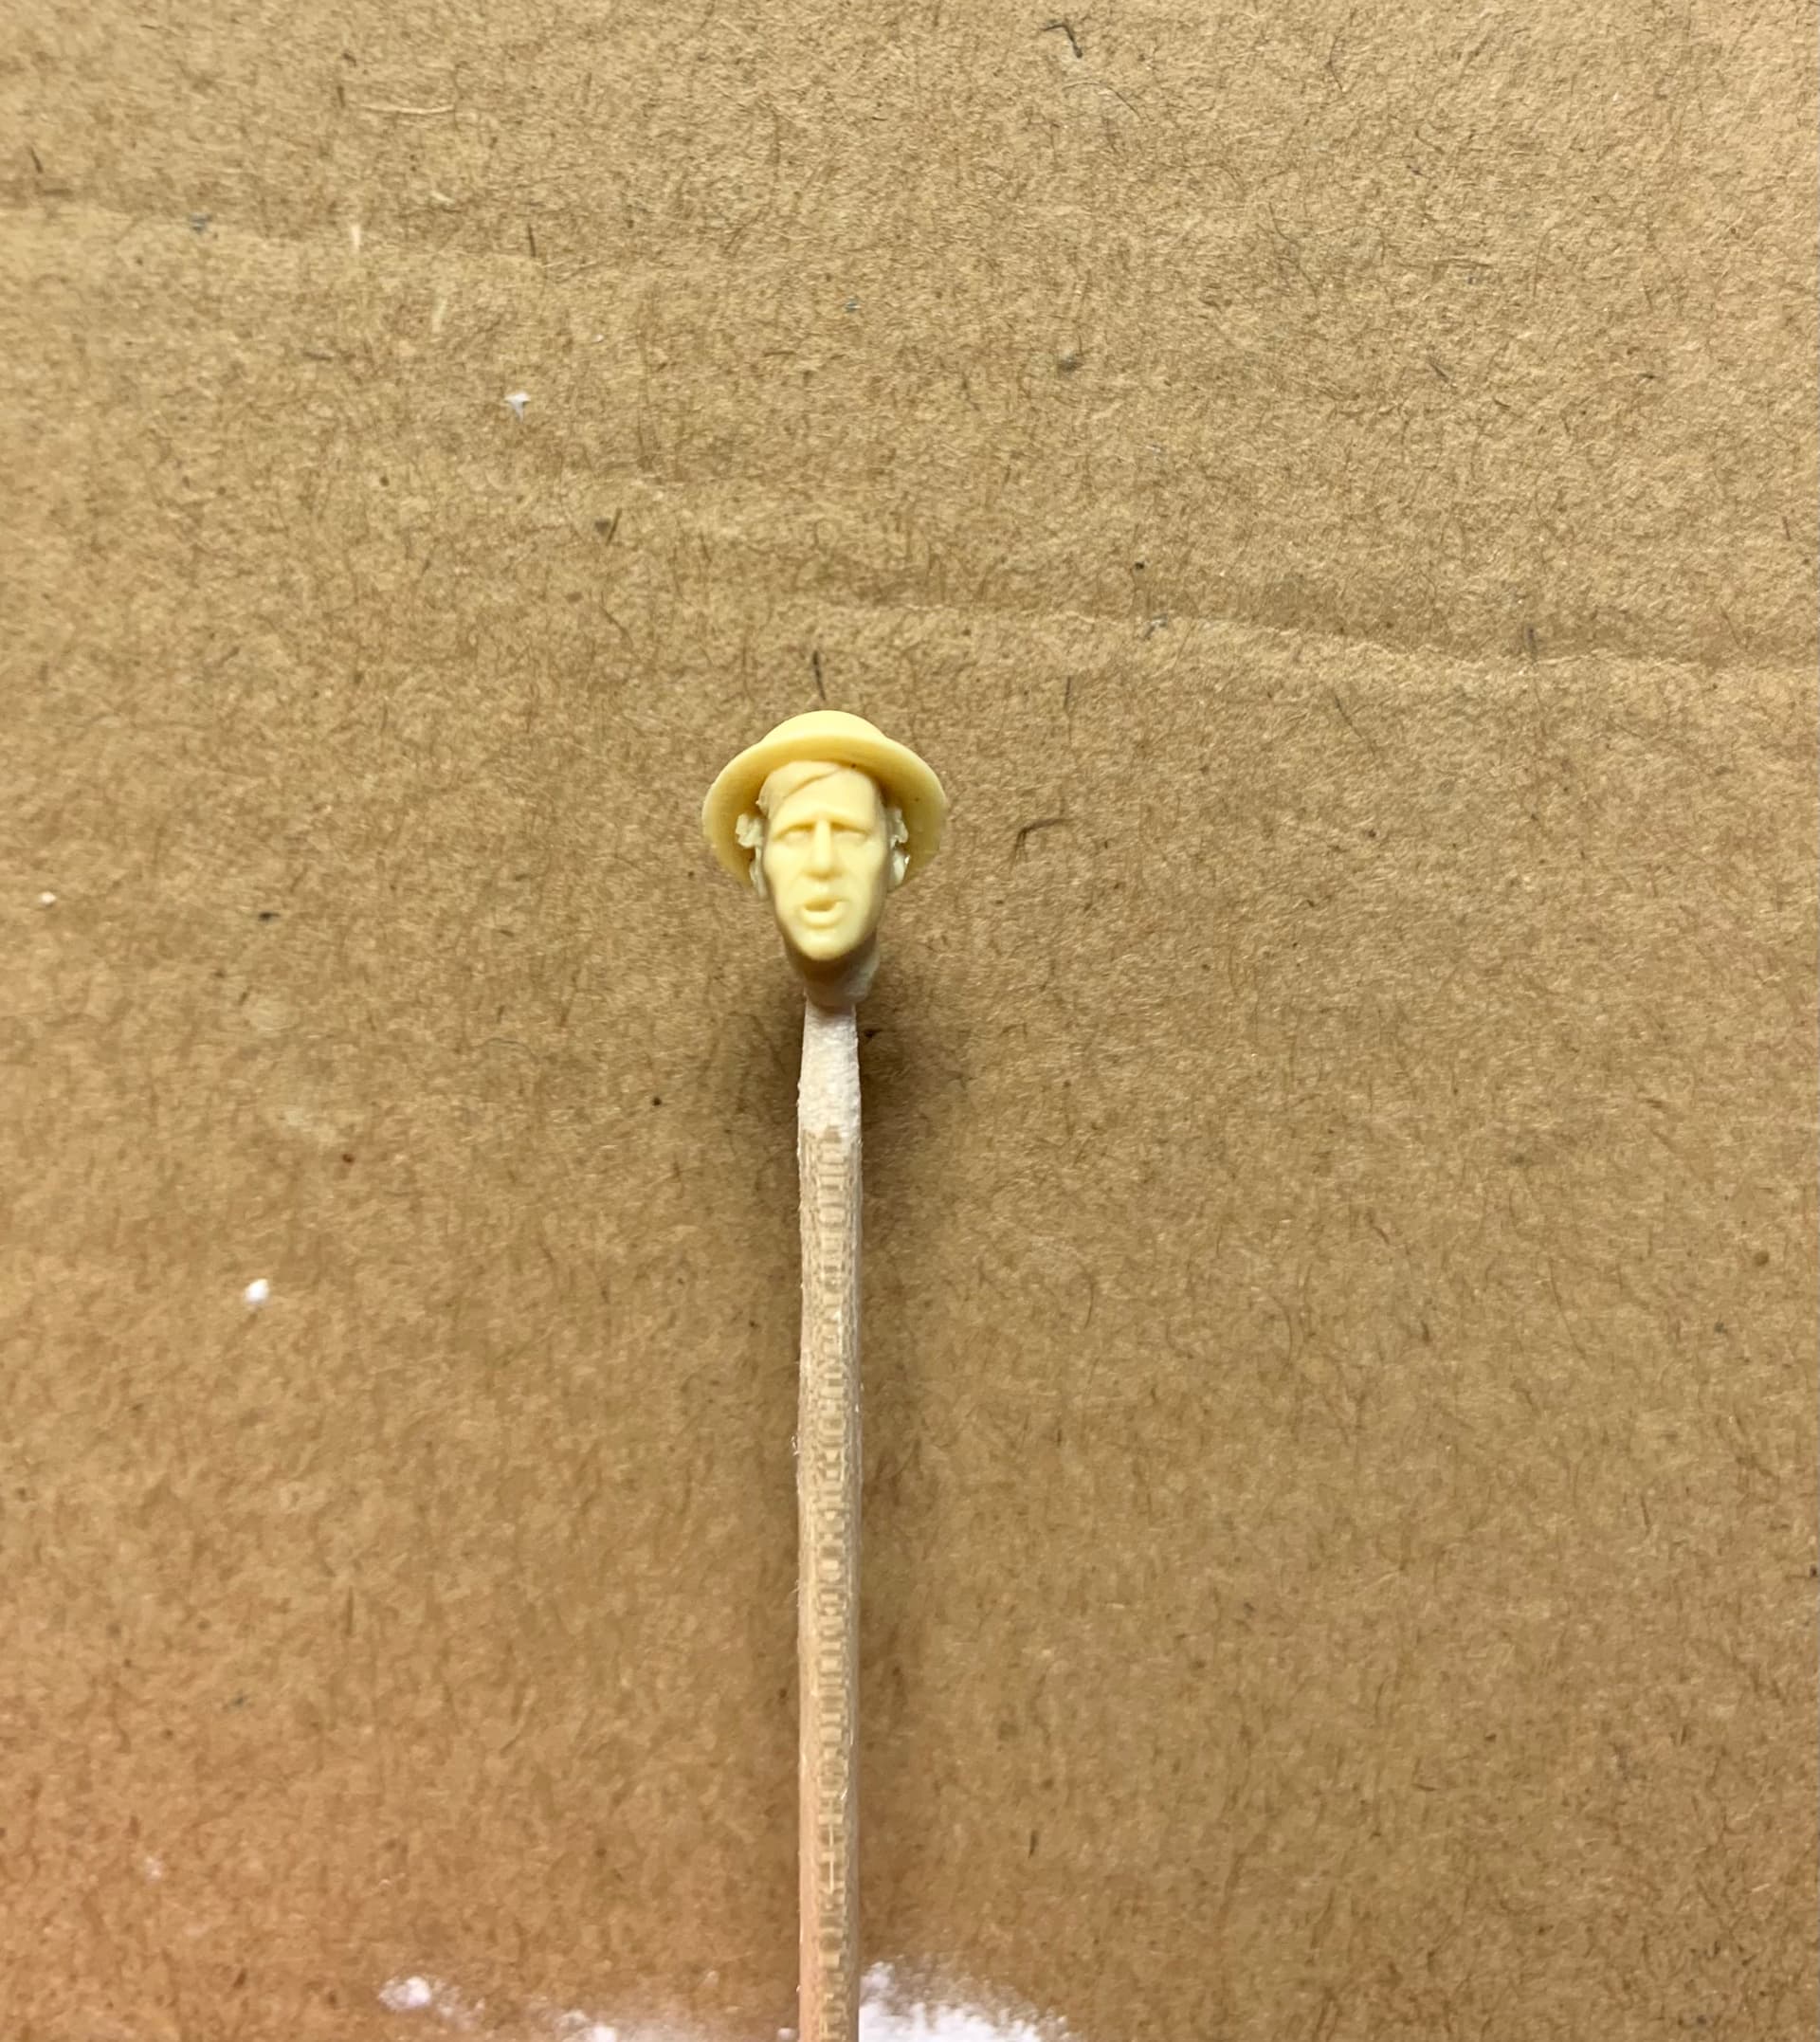
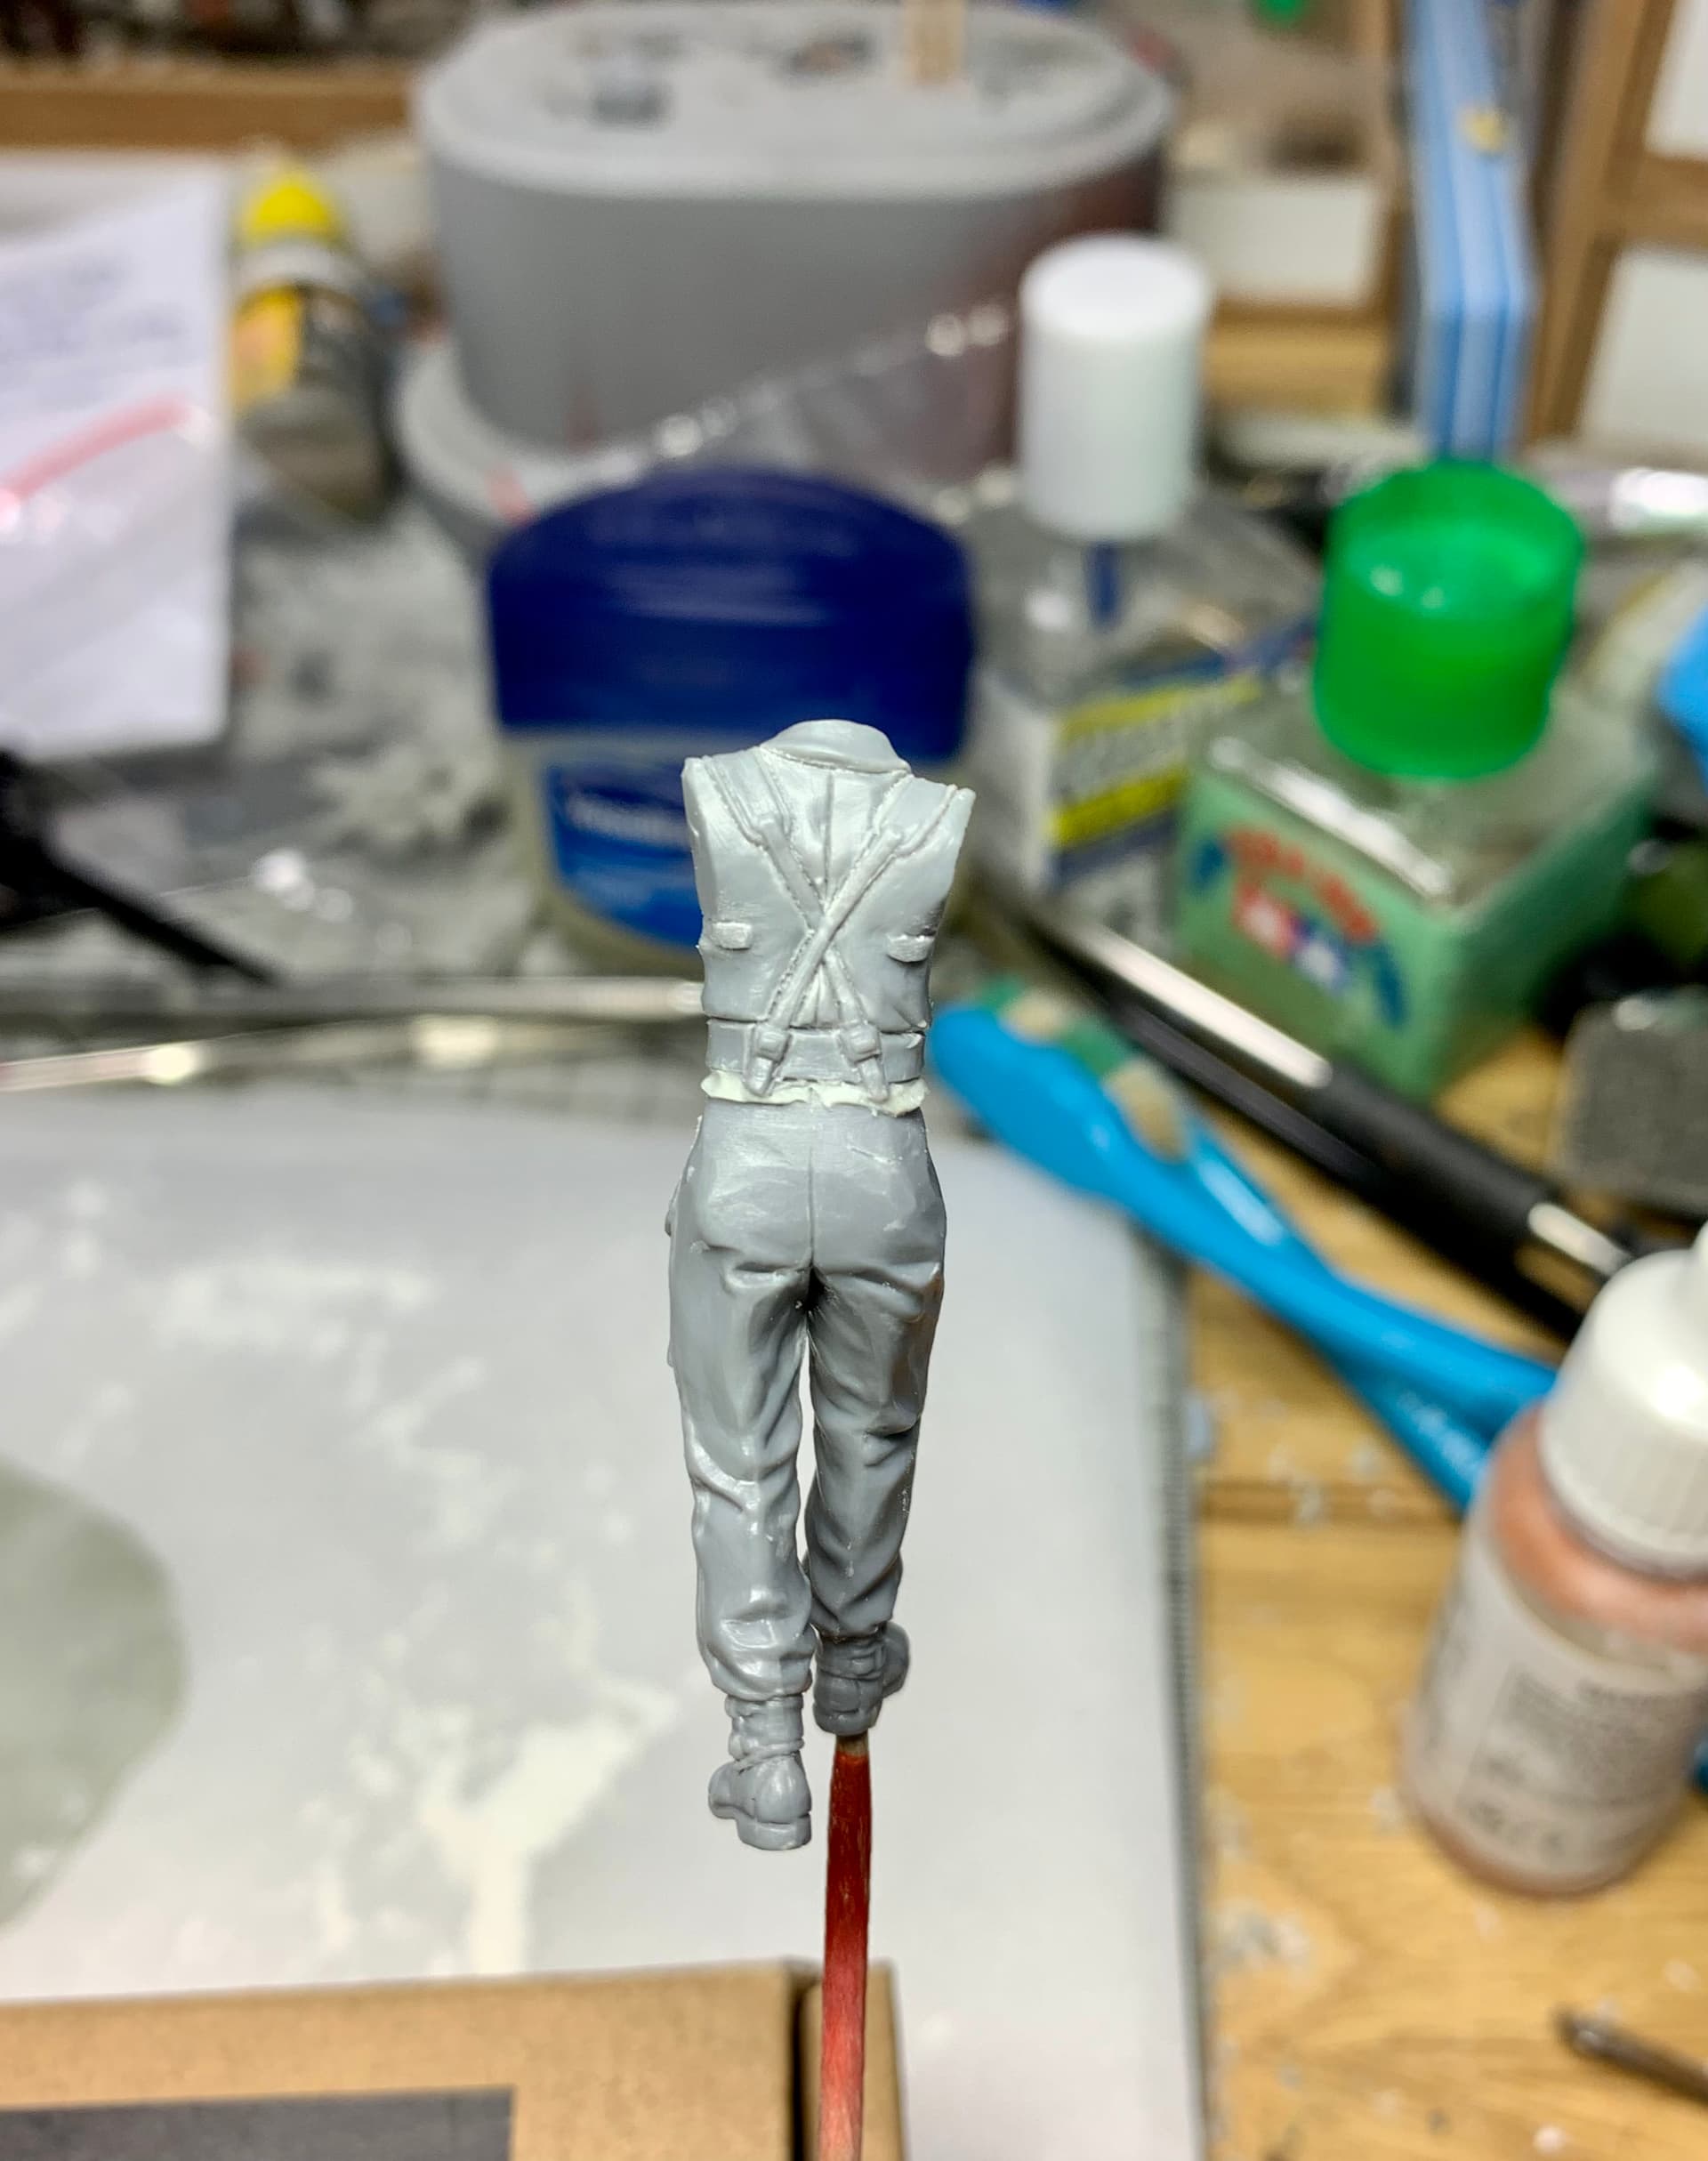
Next up is a very fine resin piece from D-Day Miniatures who we shall call Roger. I’ve been really impressed with the D-Day Minis stuff and as you can see the detail is crisp and the sculpting top rate- even the head is a great moulding almost up to Hornet standards. But not quite hence my choice of one of their heads.


(The arms here show the unit insignia which was not the practice in 1940 and will be removed.)
The Tamiya figure was given a spruce up by defining some of the detail as I did with the WW1 figs. The resin fig also, I felt, needed the seams in the pants deepened and the one down the middle of the back of the jacket added.
But then came a big issue for Gordon- the anatomy of the figure- a torso too small for the legs. The BD’s were meant to be worn with the trousers tucked in neatly under the bottom of the jacket creating a neat step just below the webbing belt. The Tamiya fig was pretty much the opposite and the other figs in the box are not much better. So I cut and shaved and sanded down everything from the belt to the bottom of the thighs to re-do with putty.


So as you can see their is a fair bit of work to do and I will explain that in the next update.
Thanks once again for reading and for all the support this thread has received.
8 Likes
Long time since I been here, I really like your groundwork Karl! Keep up the good work.
/Erik
1 Like
Thanks for the compliments Erik, I’m looking forward to starting the groundwork on the color side now, knowing I don’t have to turn it all black and white!
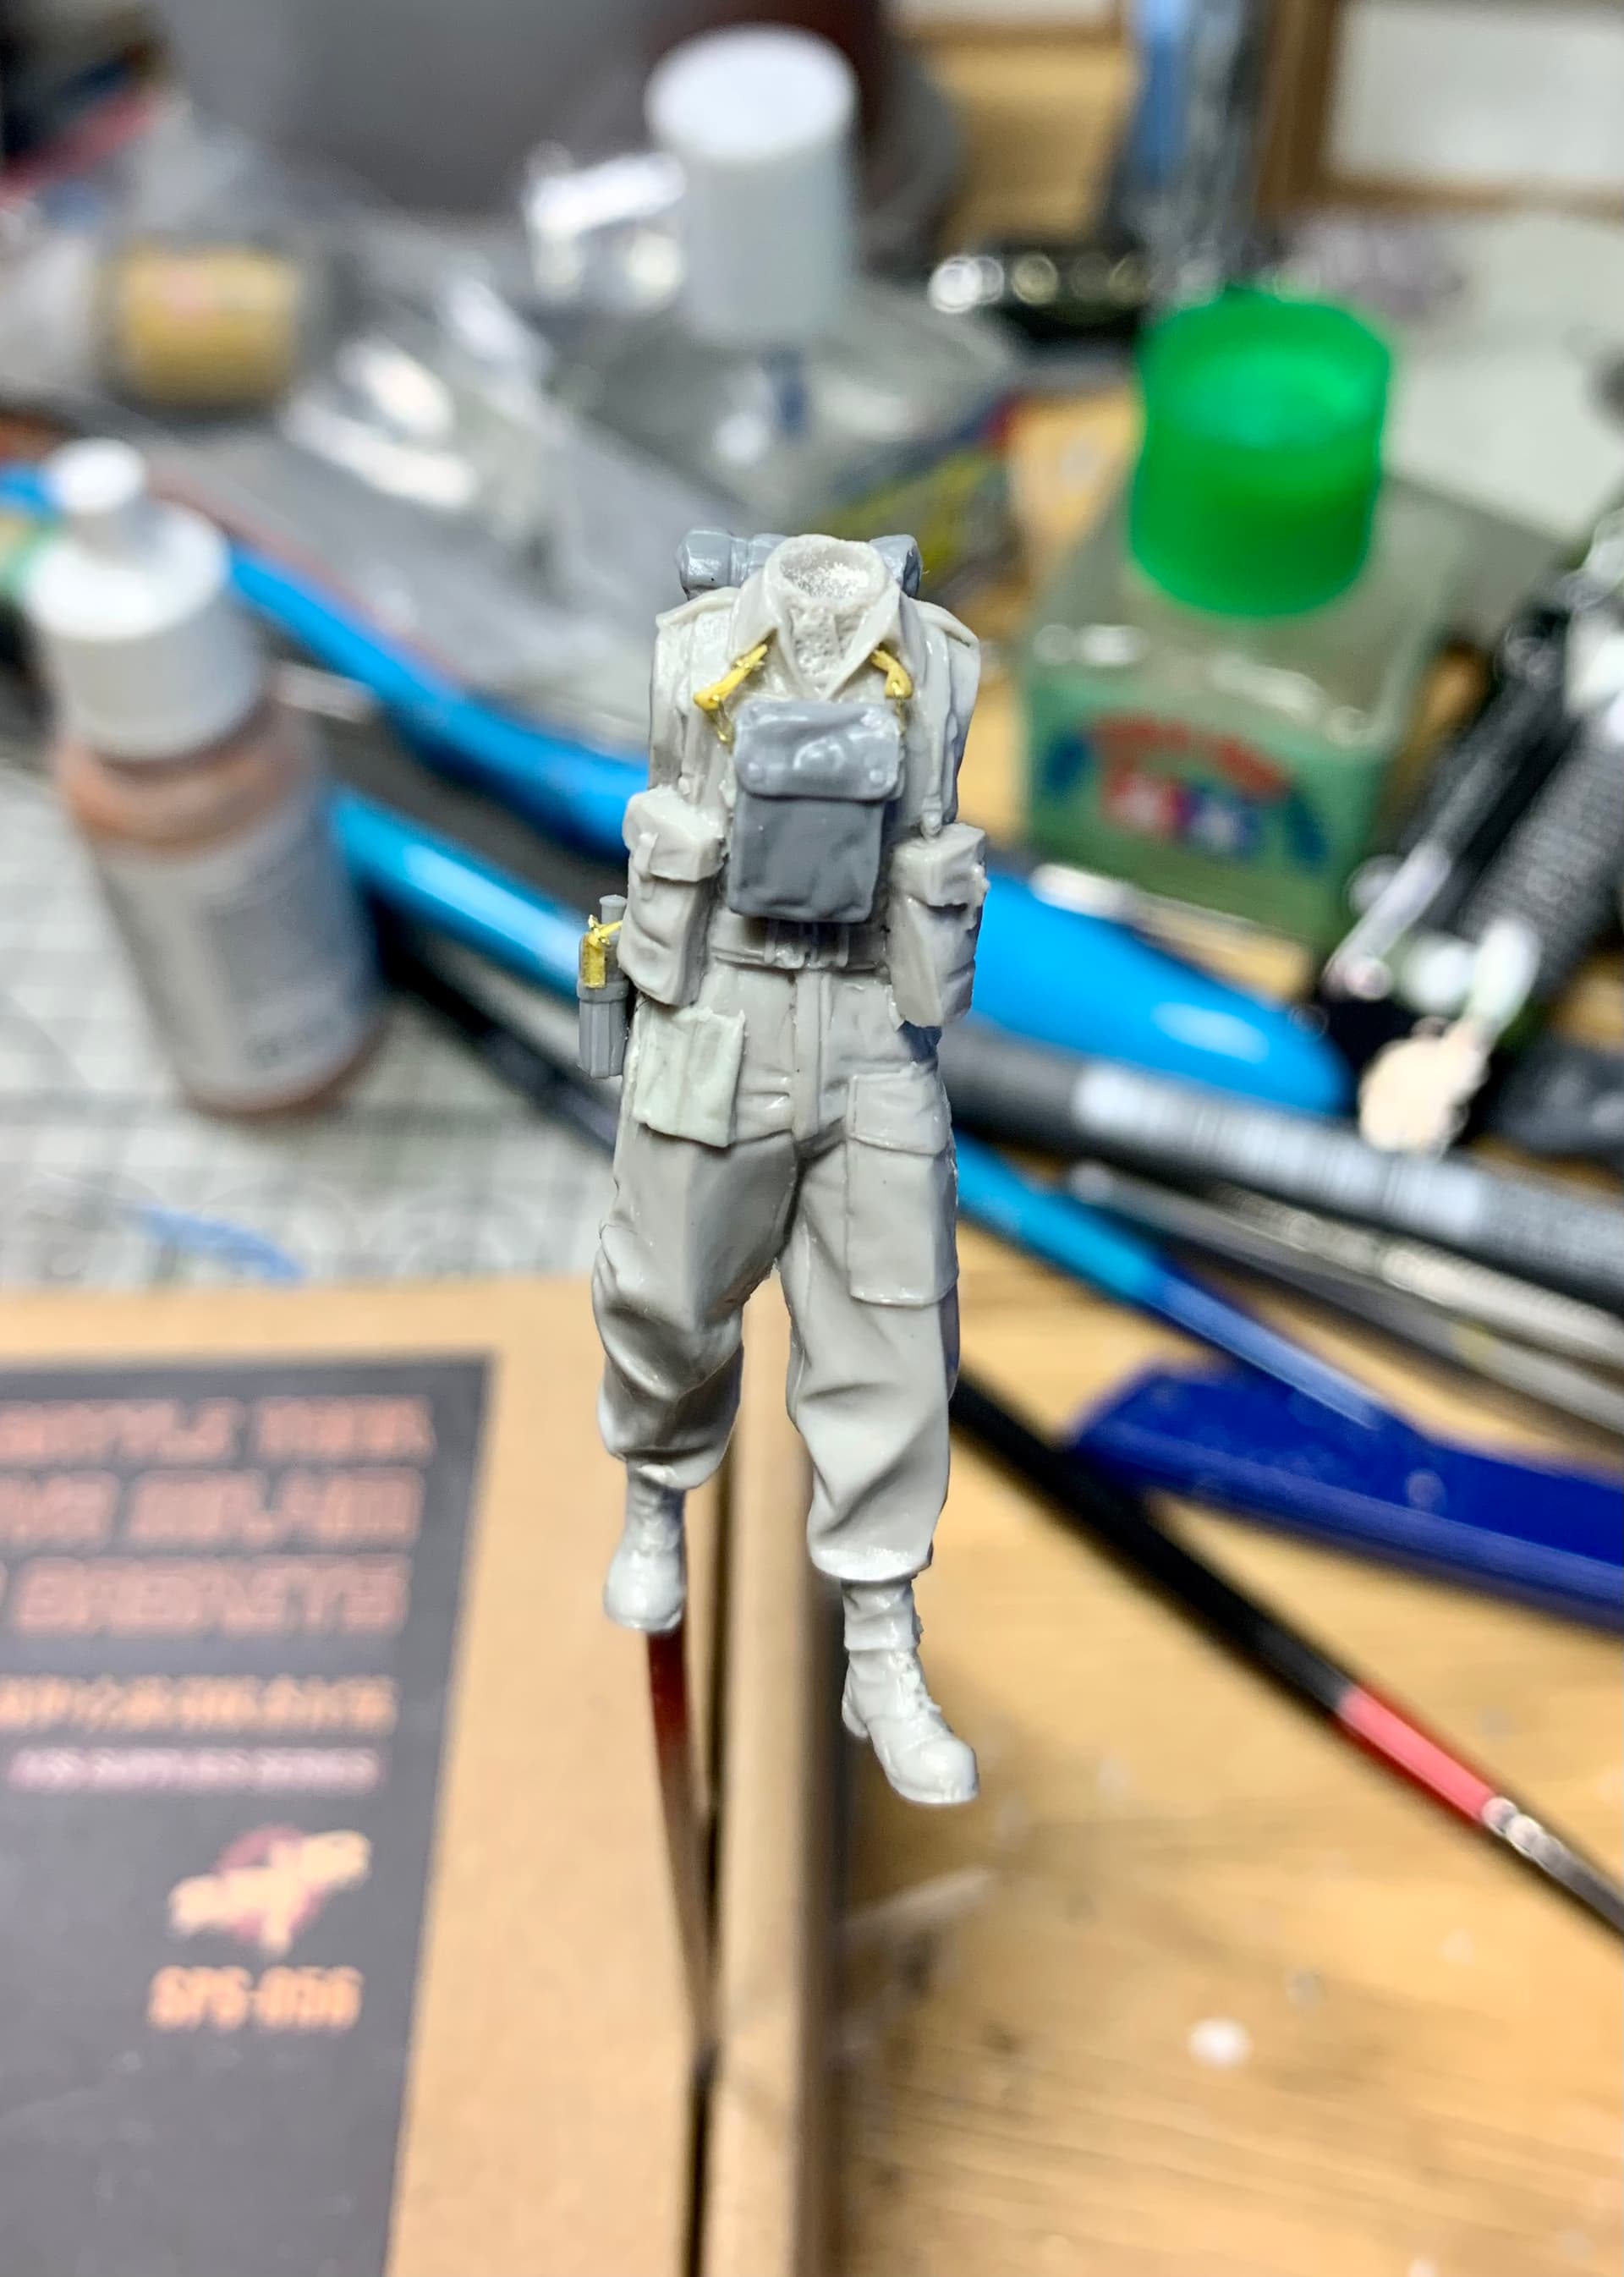
So to the Tamiya figure. First I added the bottom of the jacket, deliberately mis-shaping it to look more natural as the jacket could and did move around under the web equipment.
So now we turn to look at the ‘dating’ of the figs- and what I mean by that is that both figs are standard for mid-late war (at least after the Fall of France onwards) in terms of uniform and kit. In order to bring them into line with 1940 kit I have some changes to make.
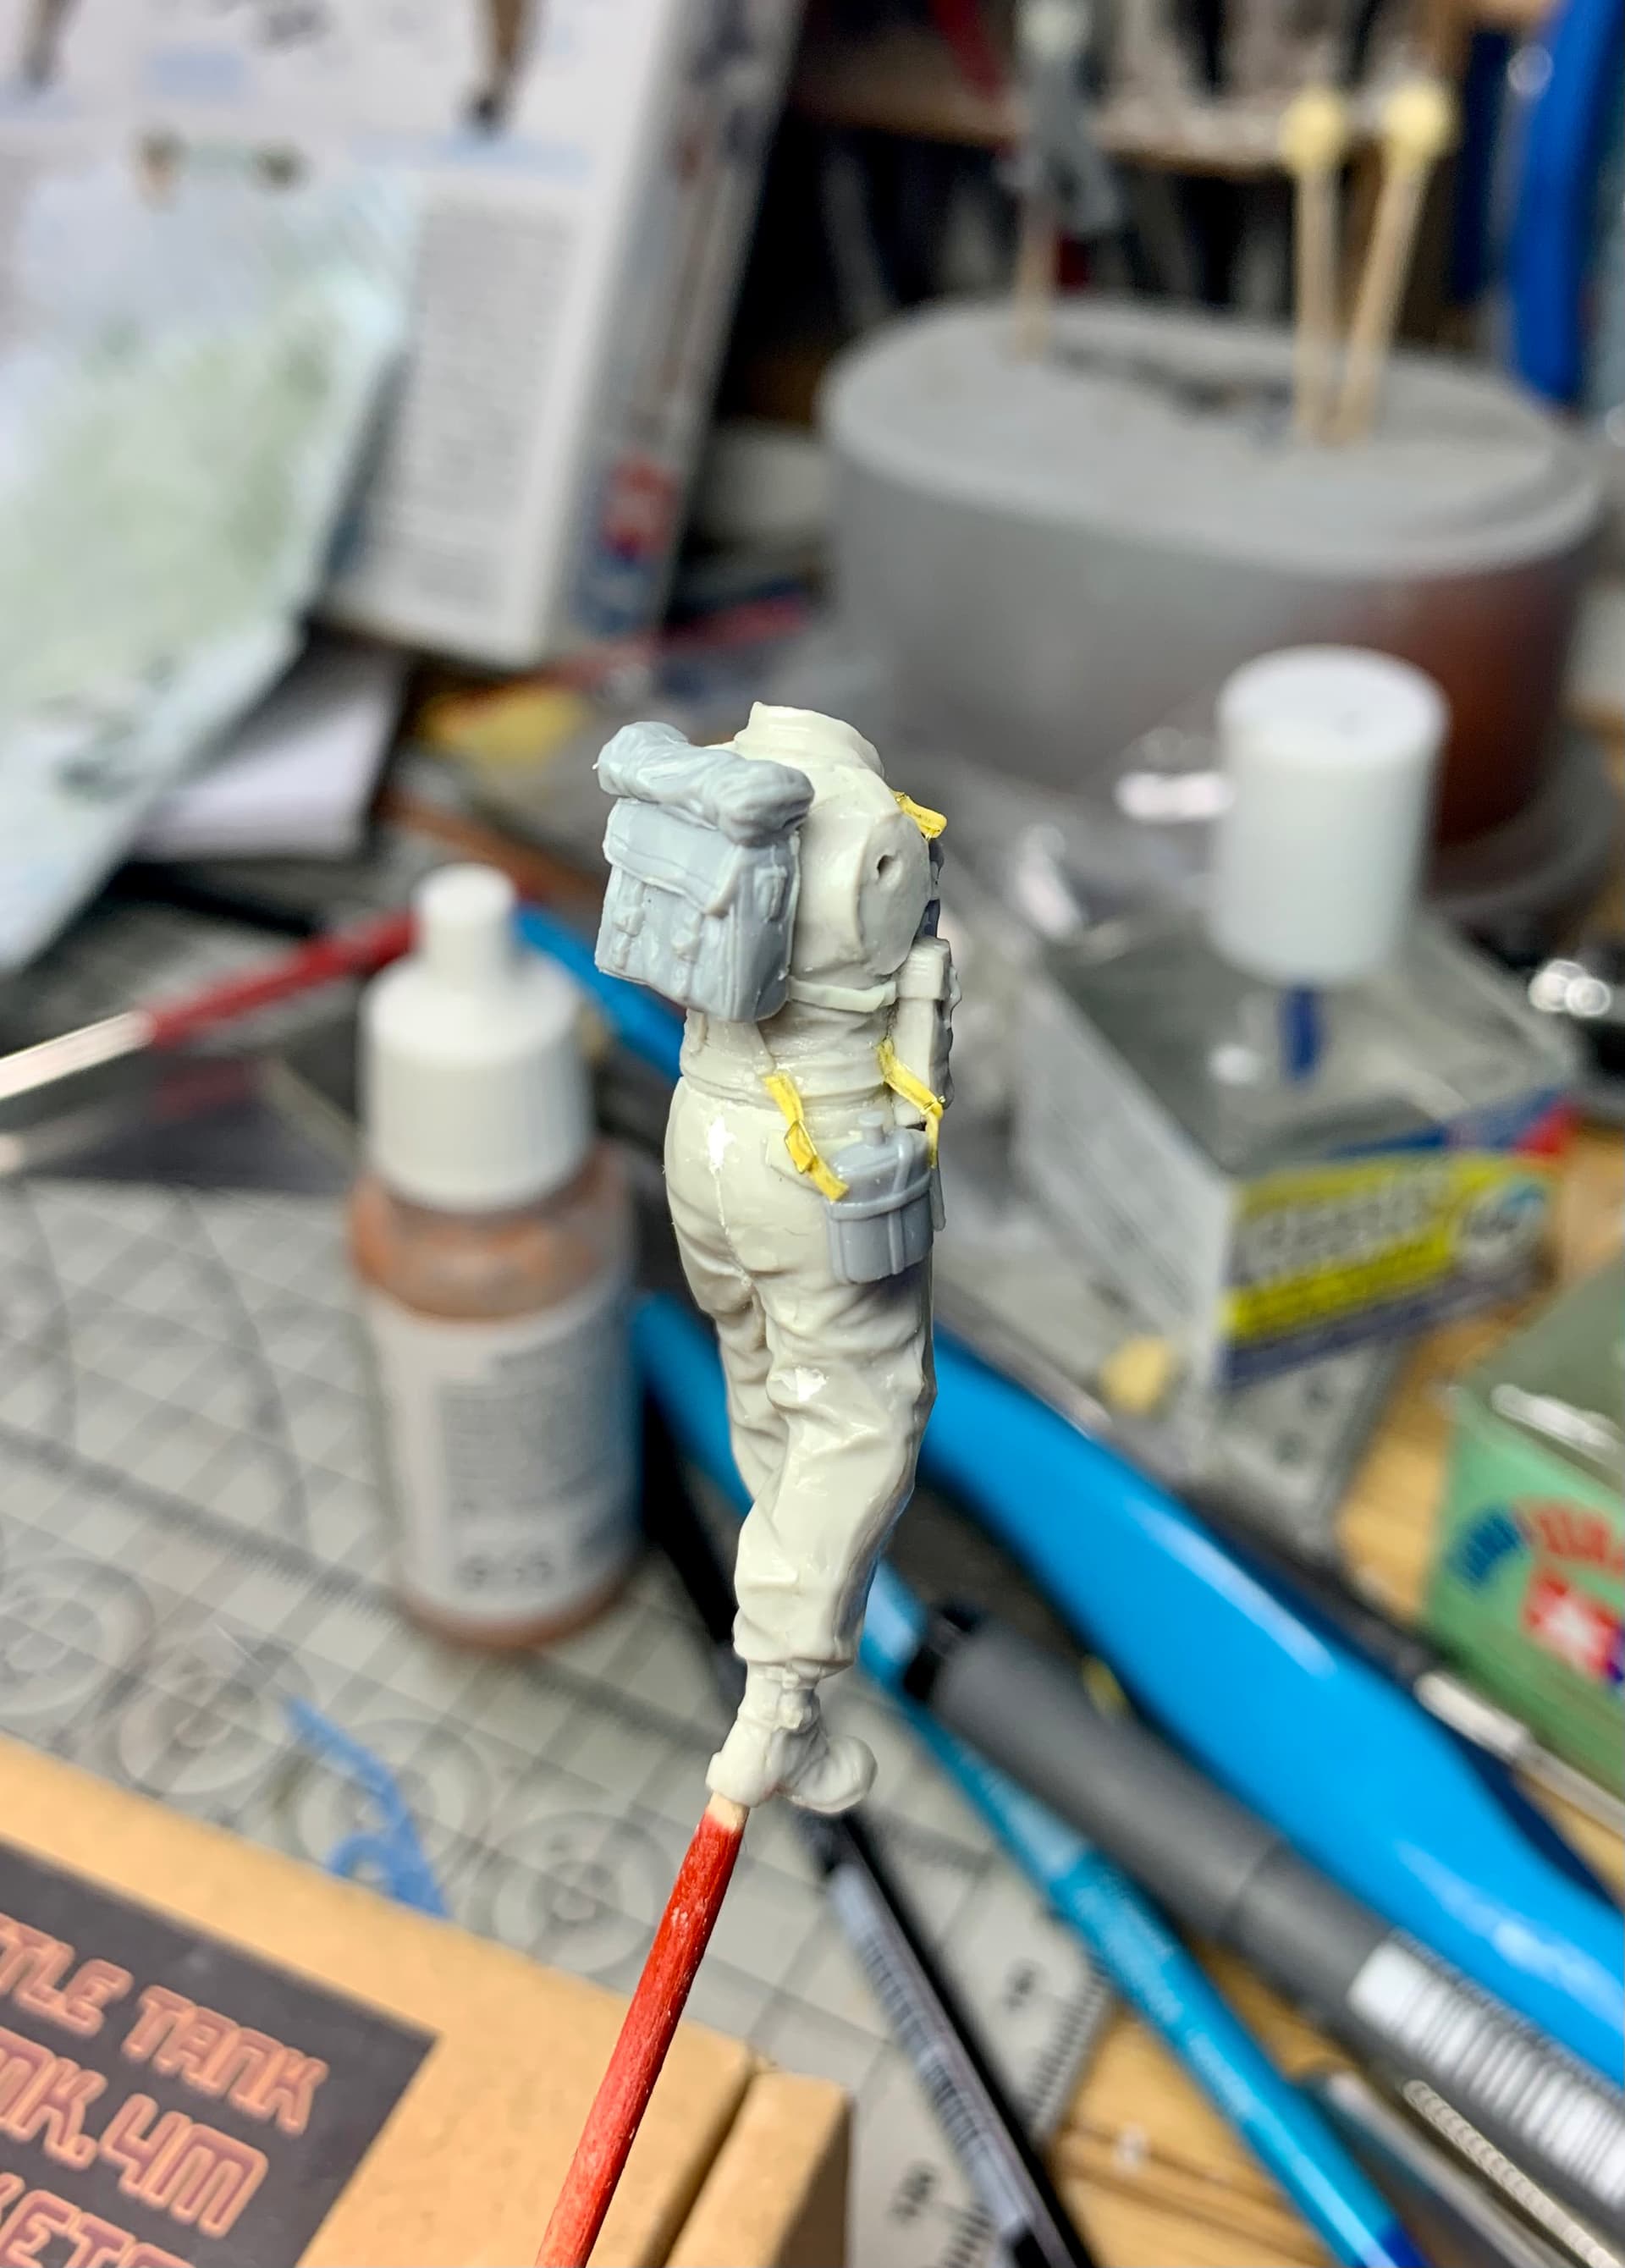
Both the resin and plastic figs have the three compartment right thigh pocket on the BD’s but this was only added after the Battle of France- prior to this it was a two compartment pocket which I have added to both figs. The resin one also had the rear and side pockets added.
Unlike later war figures, BEF soldiers wore Mk. VI respirators in a ready position on the chest. For these I used the Mk. II respirator bags from Tamiya’s WW1 British Infantry set. While not an exact match they are close. Tape was added for the straps.
In addition to the respirators the BEF usually had their Gas Capes to hand, normally sat on top of their haversack and Tamiya have this in their WW2 figure kit so they were added to both figures. Both these and the respirators were not a perfect fit but some cutting and putty sorted them out.


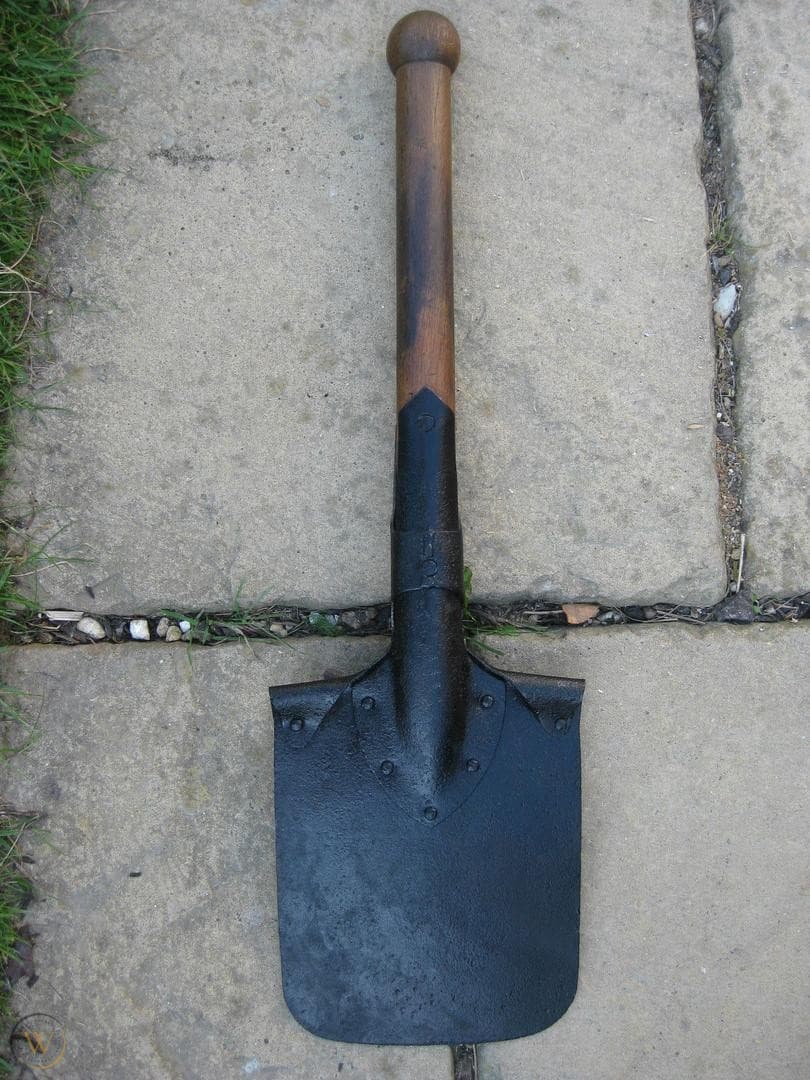
Besides the gas capes and respirators the BEF also had a unique entrenching tool that only really saw service with them.
A good source for uniform and gear info, which I have used here, is the Crowwood Press book ‘The World War Two British Tommy’ where I first came across the odd square shaped entrenching tool in the small BEF section of the book.
The authors describe this tool as ‘experimental’ , kind of on trial with the BEF or something to that effect. The actual reason for its presence is a bit odd in fact.
Some time in the 1920s or early 30s the 08 Pattern entrenching tool (as seen on Basil and Cyril above) was withdrawn from service with the British Army. When the 37 Pattern webbing was issued there was no e-tool.
However as war seemed more and more likely the British realised they did, in fact, require an e-tool but for some reason (and if anyone knows the reason feel free to enlighten me as I would like to know) they did not simply re-issue the 08 Pattern tool and carrier. They instead bought a supply of Linnemann entrenching tools (a square shovel with a fixed handle) from the Netherlands and had covers made and issued to the BEF. (On a Canadian website this tool is referred to as the No.3 Pattern but I’m not sure if this was the name used just by Canadian forces or by British forces too- again if anyone knows more about this please do let me know.)

The usual place to wear it was on the right hip under the water bottle or on the left hip under the bayonet. Here you can see it being worn in 1941.
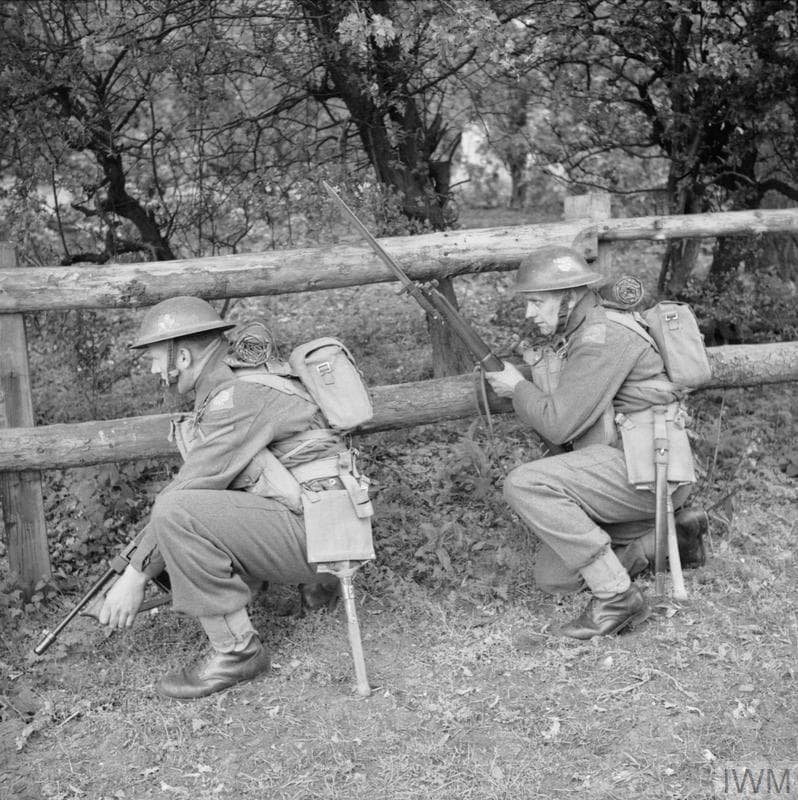
On the soldier on the left the strap around the handle of the e-tool is clearly visible- the bayonet scabbard was sometimes slid down into the strapping, presumably to stop it moving about.
However, this tool was not much liked and began to be withdrawn from service after the return of the BEF from France. The 08 Pattern tool was then re-issued although the Linnemann tool was still being used as late as 1943.
Luckily, the Linneman tool (or close copies) was very widely used in Europe including by Germany. A stash raid produced a pair from a German Infantry set- the basic shape is fine but the cover needed some work.

A comparison of the e-tools.
The British had to manufacture their own cover for the e-tool since most of the European military forces using them had leather covers (as many used leather webbing gear). The British cover was a simple square canvas piece with tabs coming off the top right and left at an angle to connect with the webbing straps. A loop of strapping at the bottom went round the handle.
Simple, I thought. Not so much it turns out. Vastly over-estimating my limited sculpting ability I (eventually) managed something approaching the right shape.
After gluing it in place the next stage was getting a bayonet to go on top. Except there were no bayonets.

Strangely, only the Masterbox set of WW1 figs had full bayonets but they were mounted on the two SMLE rifles. The Tamiya WW1 set has a bit of the scabbard poking out under a bag and the WW2 set has the scabbard coming out behind the e-tool cover. So far so useless- no idea why they can’t mould some separately!
Dr.Frankenstein (or should that be Fronkensteen) would have been proud of my solution!

The handle and scabbard top from the MB kit which are similar to the WW2 pattern bayonet and the lower scabbard from the Tamiya WW2 kit…plus plastic strip and tape to represent the webbing frog.
The bayonet was usually tucked into the handle retaining strap on the e tool so that’s what I went with.


Lastly it was time to get the arms of both figures sorted. Thankfully the Tamiya figure’s arms went on with no bother at all. The resin ones had to have the regimental insignia removed as this was not used in the BEF. Then a little trimming was needed around the armpits as I had added haversack straps to the torso and the arms needed a little work to fit over them, plus the bayonet handle on the left of the resin fig was butting into the arm so the arm itself needed a little trim. A little putty was also needed once they were glued in place.


Well it did take much longer than I expected but I am pleased I managed to get them both up to scratch in terms of detail although I’m not overly happy with my work on the e-tools or bayonets. In any case I have started painting and I will get into that next time.
Thanks for reading! Comments/Criticism etc are always welcome.
11 Likes
Following with great interest.
1 Like
Thanks Paul, I appreciate it!
1 Like
Keep going Karl looking great .
Thanks for sharing …
1 Like
Cheers Glenn  !
!
I should have another update sorted soon.
1 Like