AFV Club 60 cm. Flakscheinwerfer 36 build

My away-from-home-build for almost an year.
Have been working on it on and off, when away for some reason(4 small size sprues leaving a lot of space for tools and glue in the sturdy box of Plusmodel’s Pavesi P.100).

The kit is a small gem, typical for AFV Club, with lots of tiny- and I mean really tiny- and tiniest parts.Funny thing is- I did not loose a single from the tiny or tiniest parts, messed up only with medium sized ones…

First I built the Flak Sw 36 OOB:

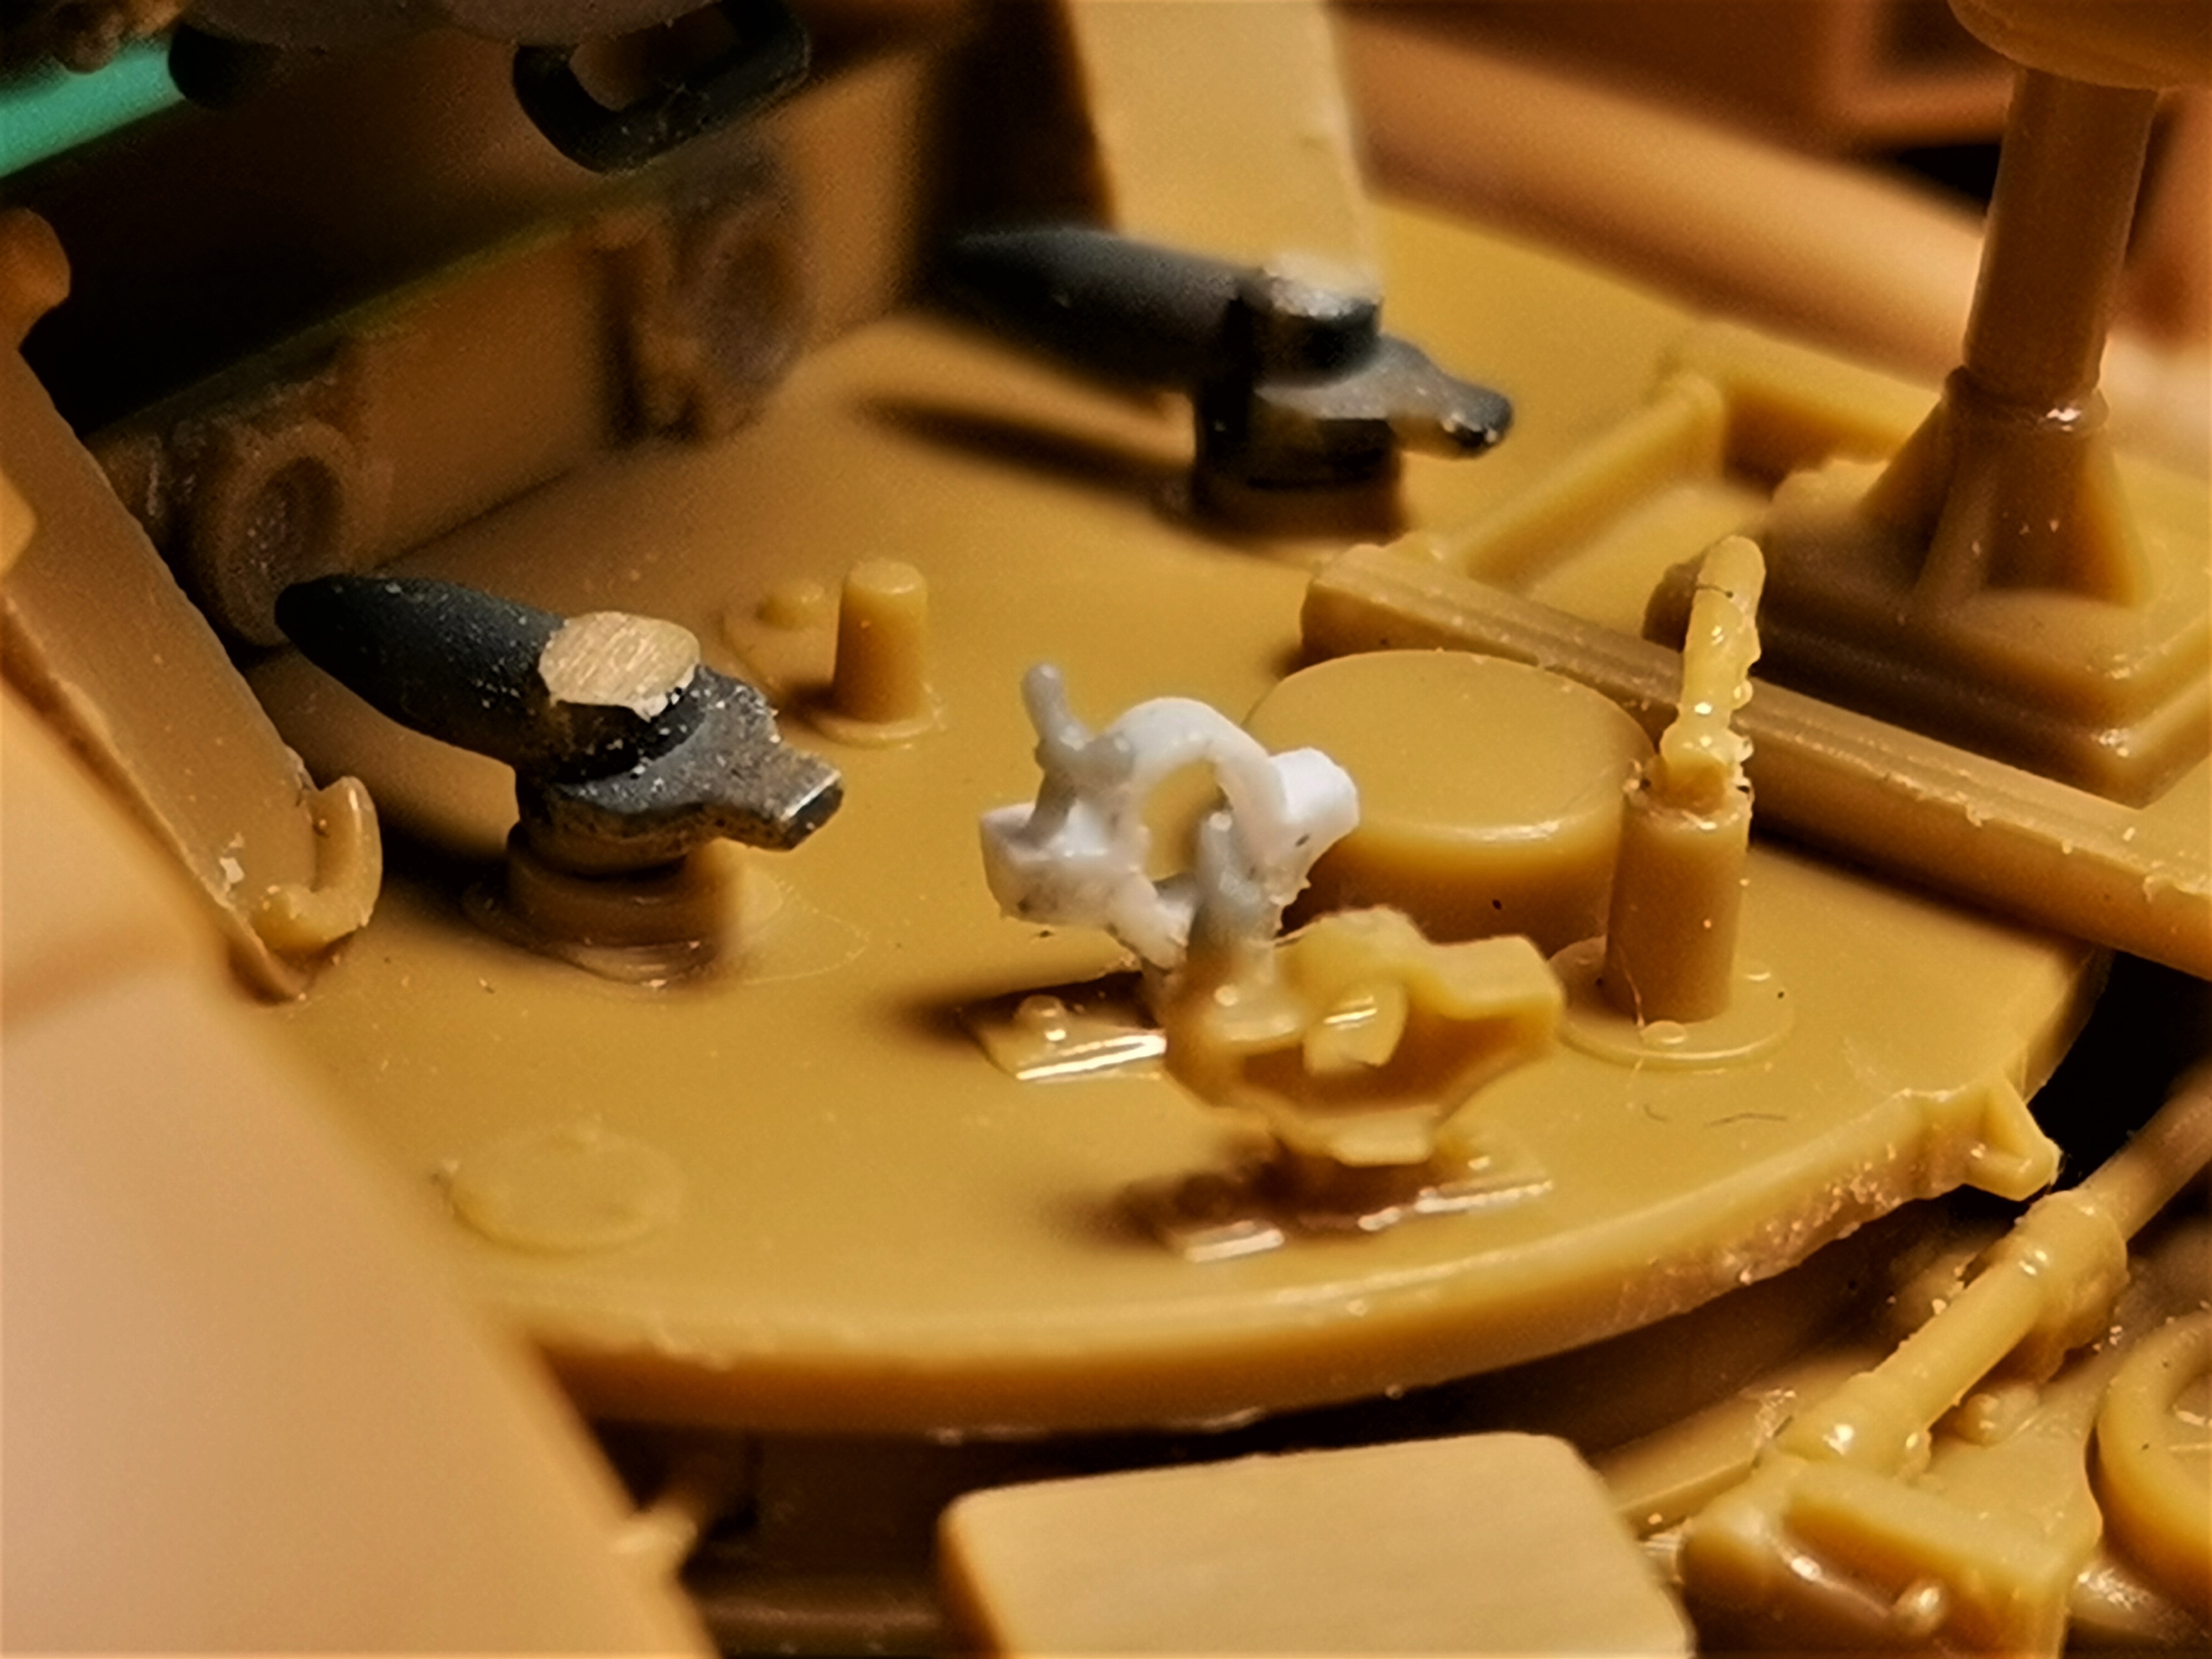
Had to make replacement for a clamp, I lost in a hotel room in Plovdiv:

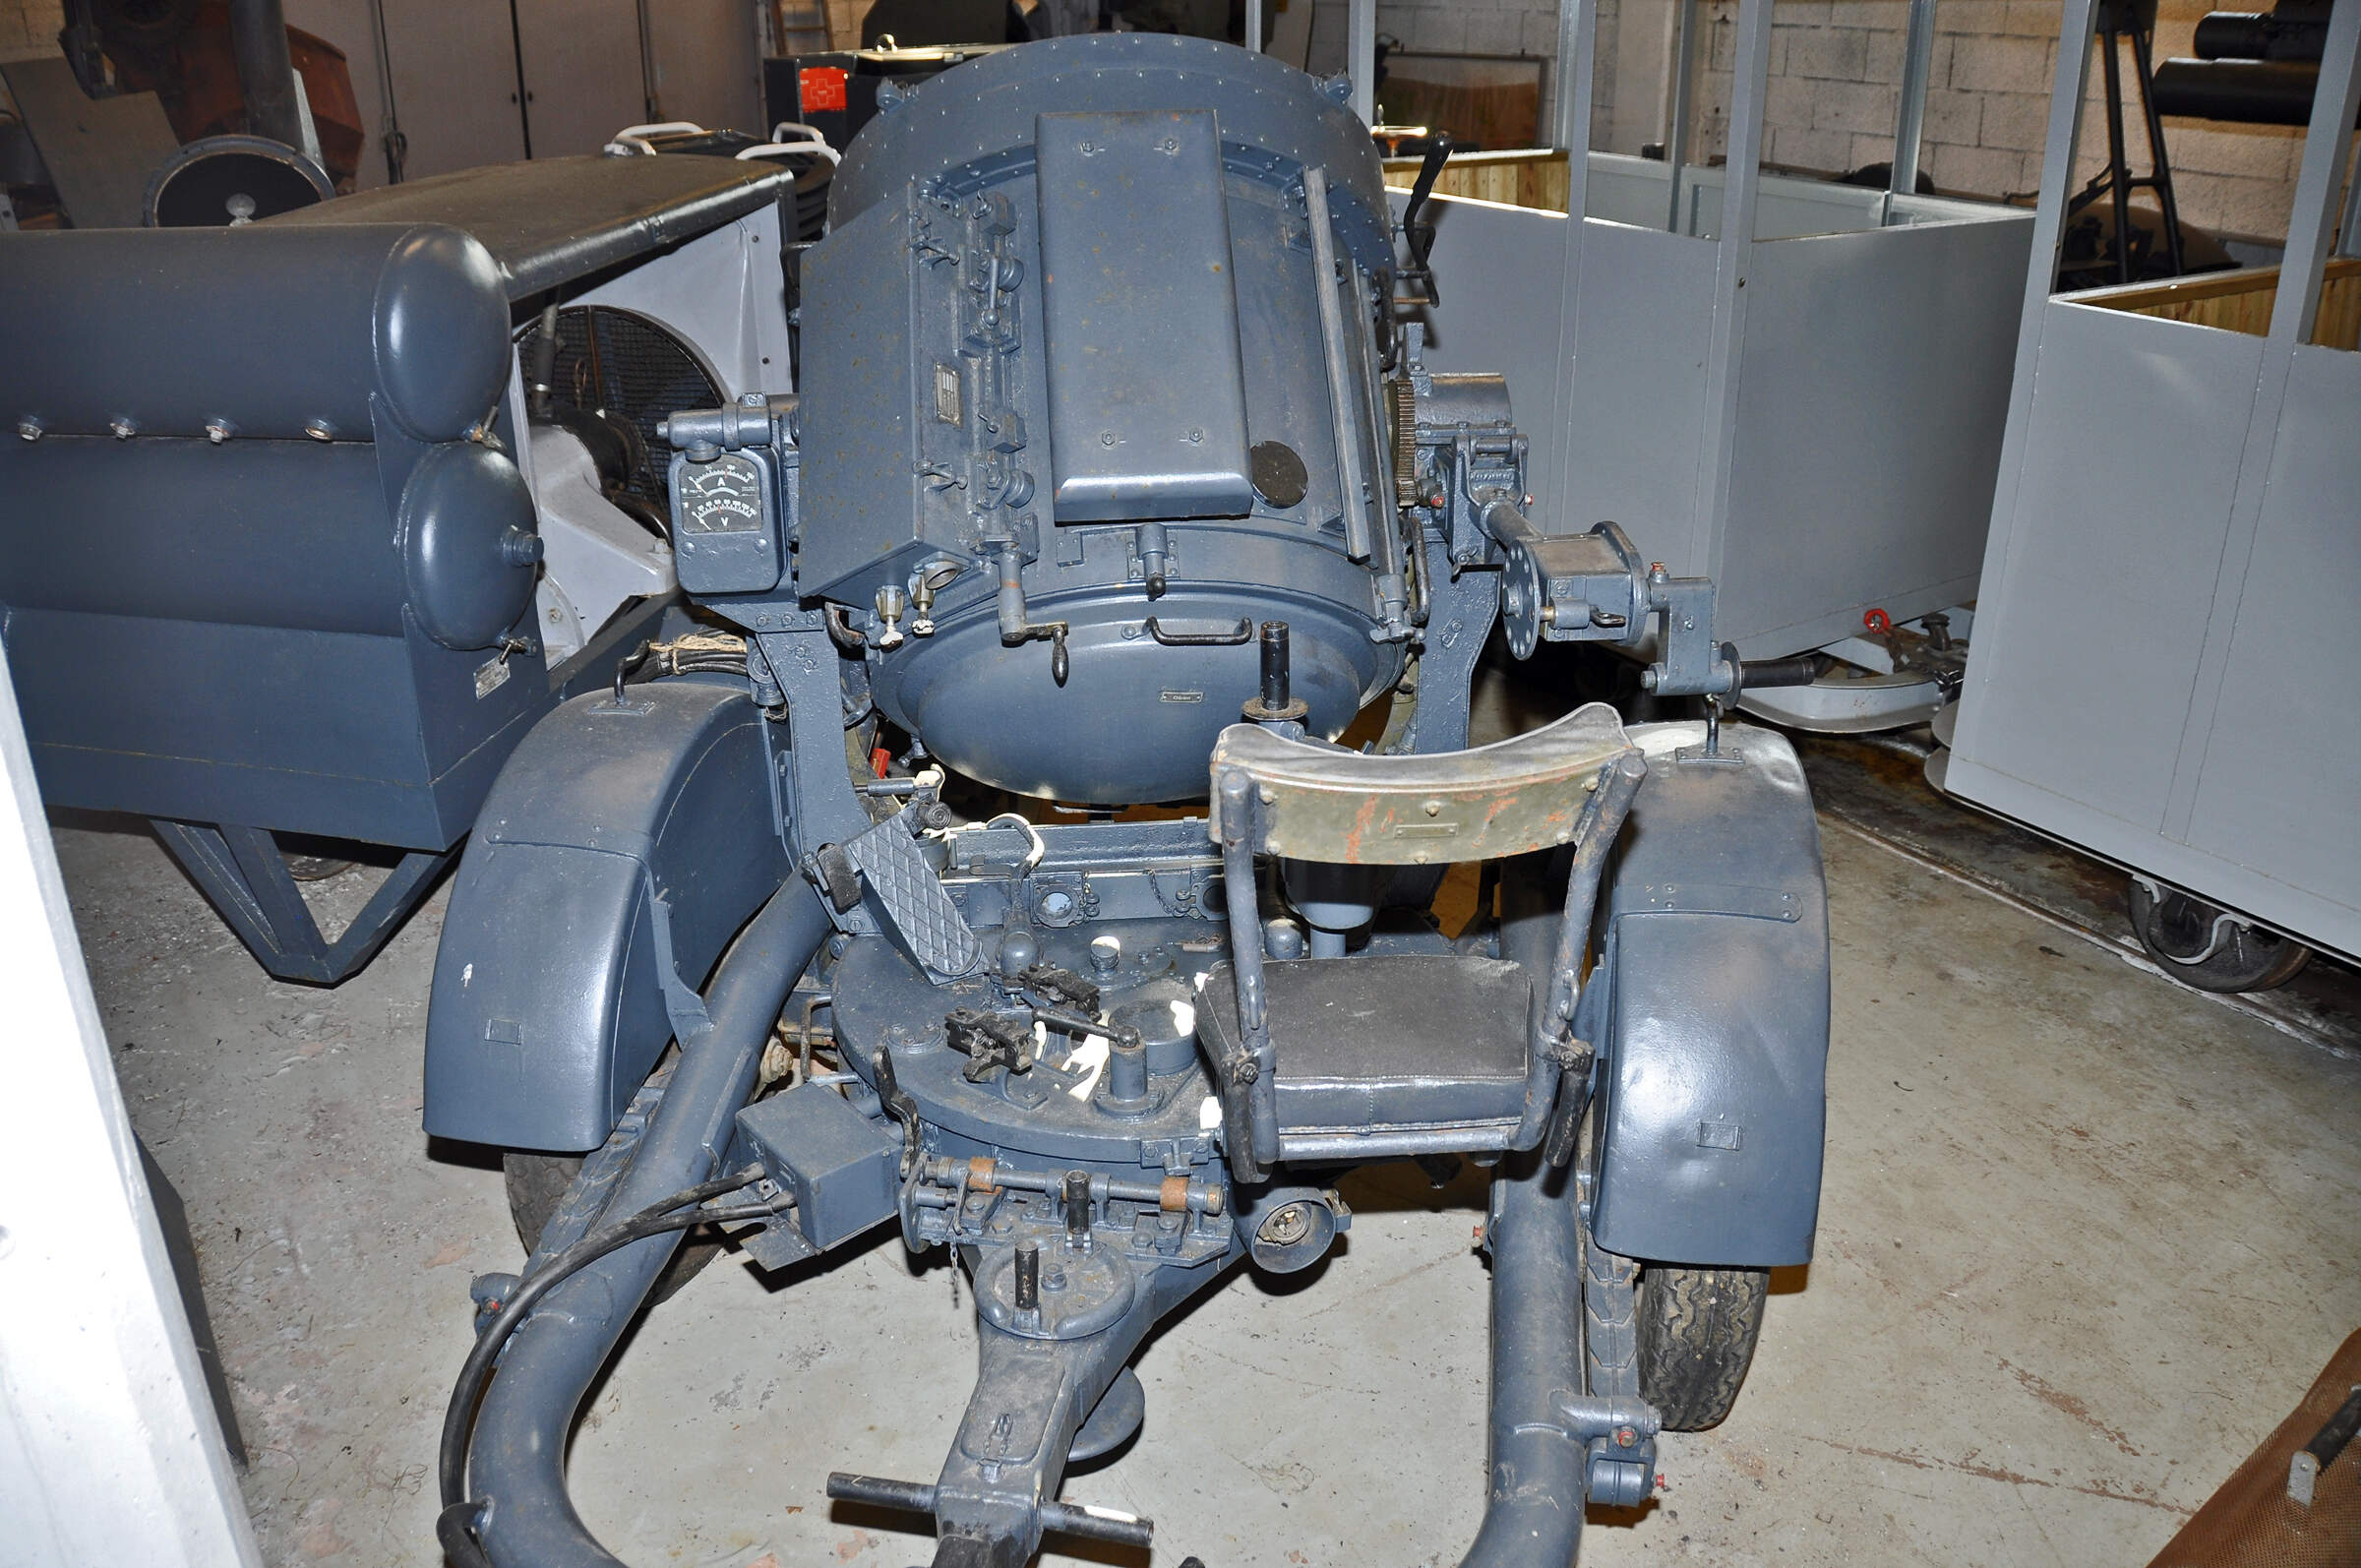
Coming home I decided I need to pay more attention to this build and started looking for refferencies. Found a great vid on YT:

Wonderful restoration job by these gentlemen and very informative.
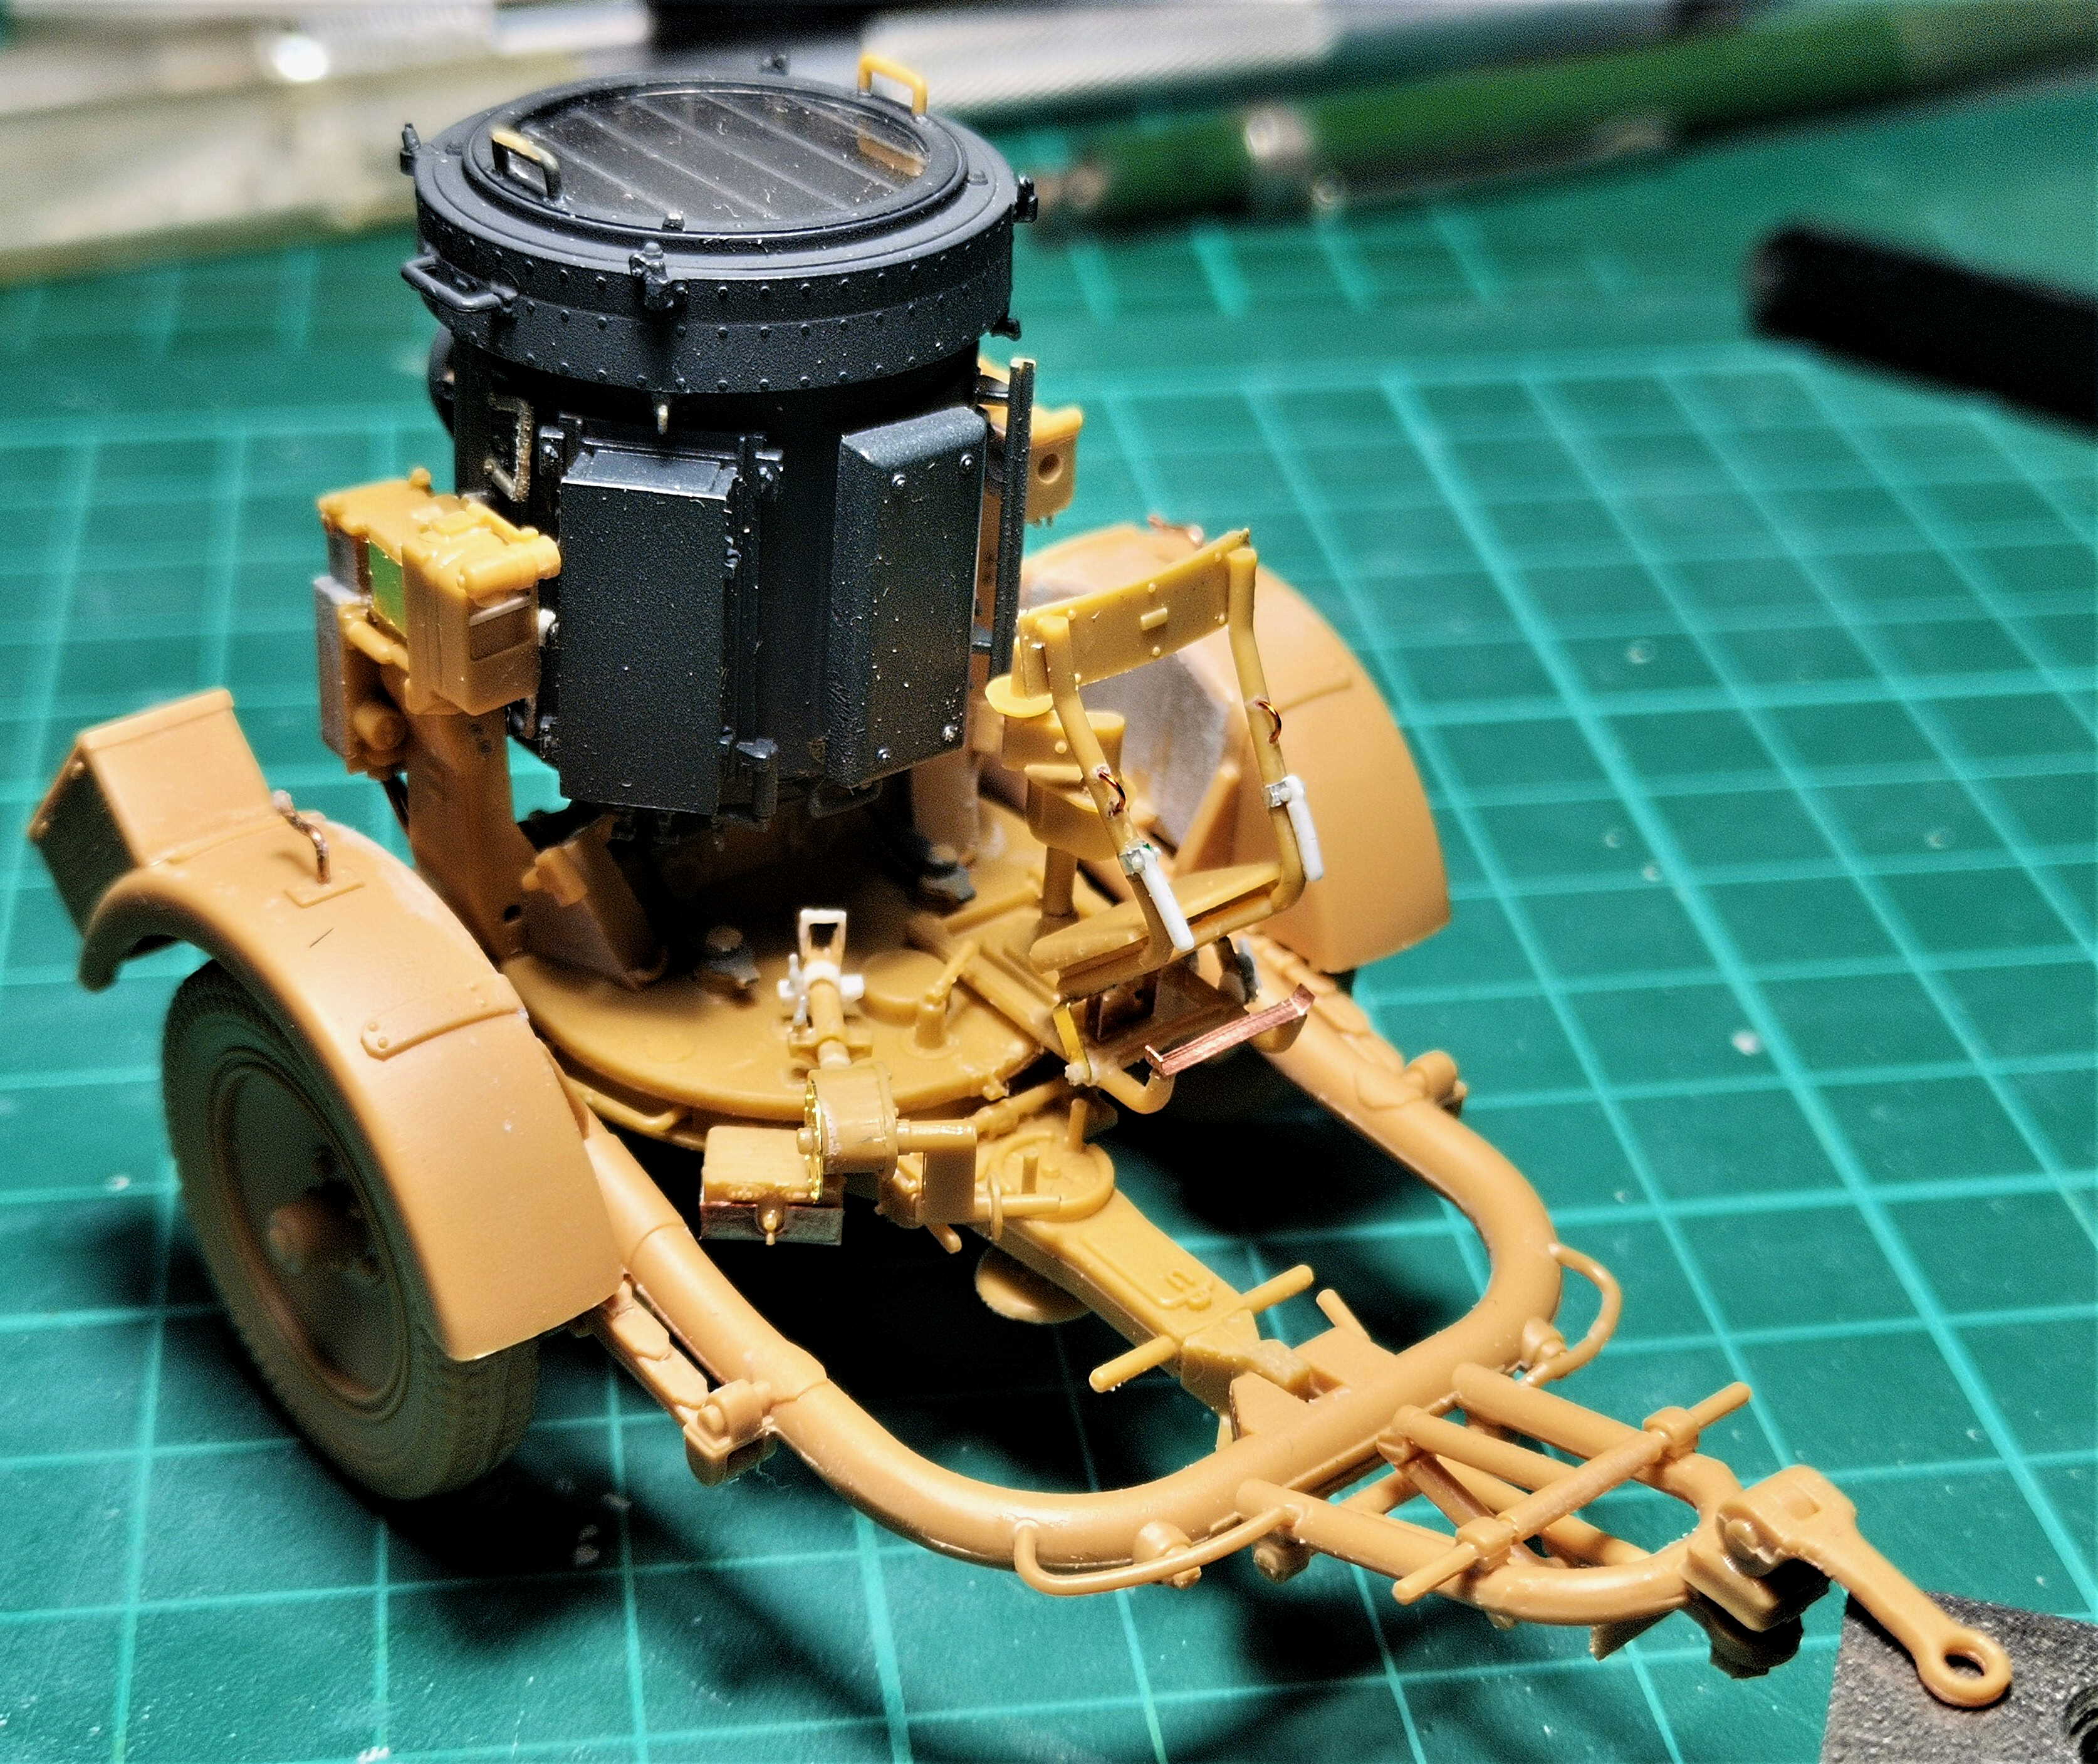
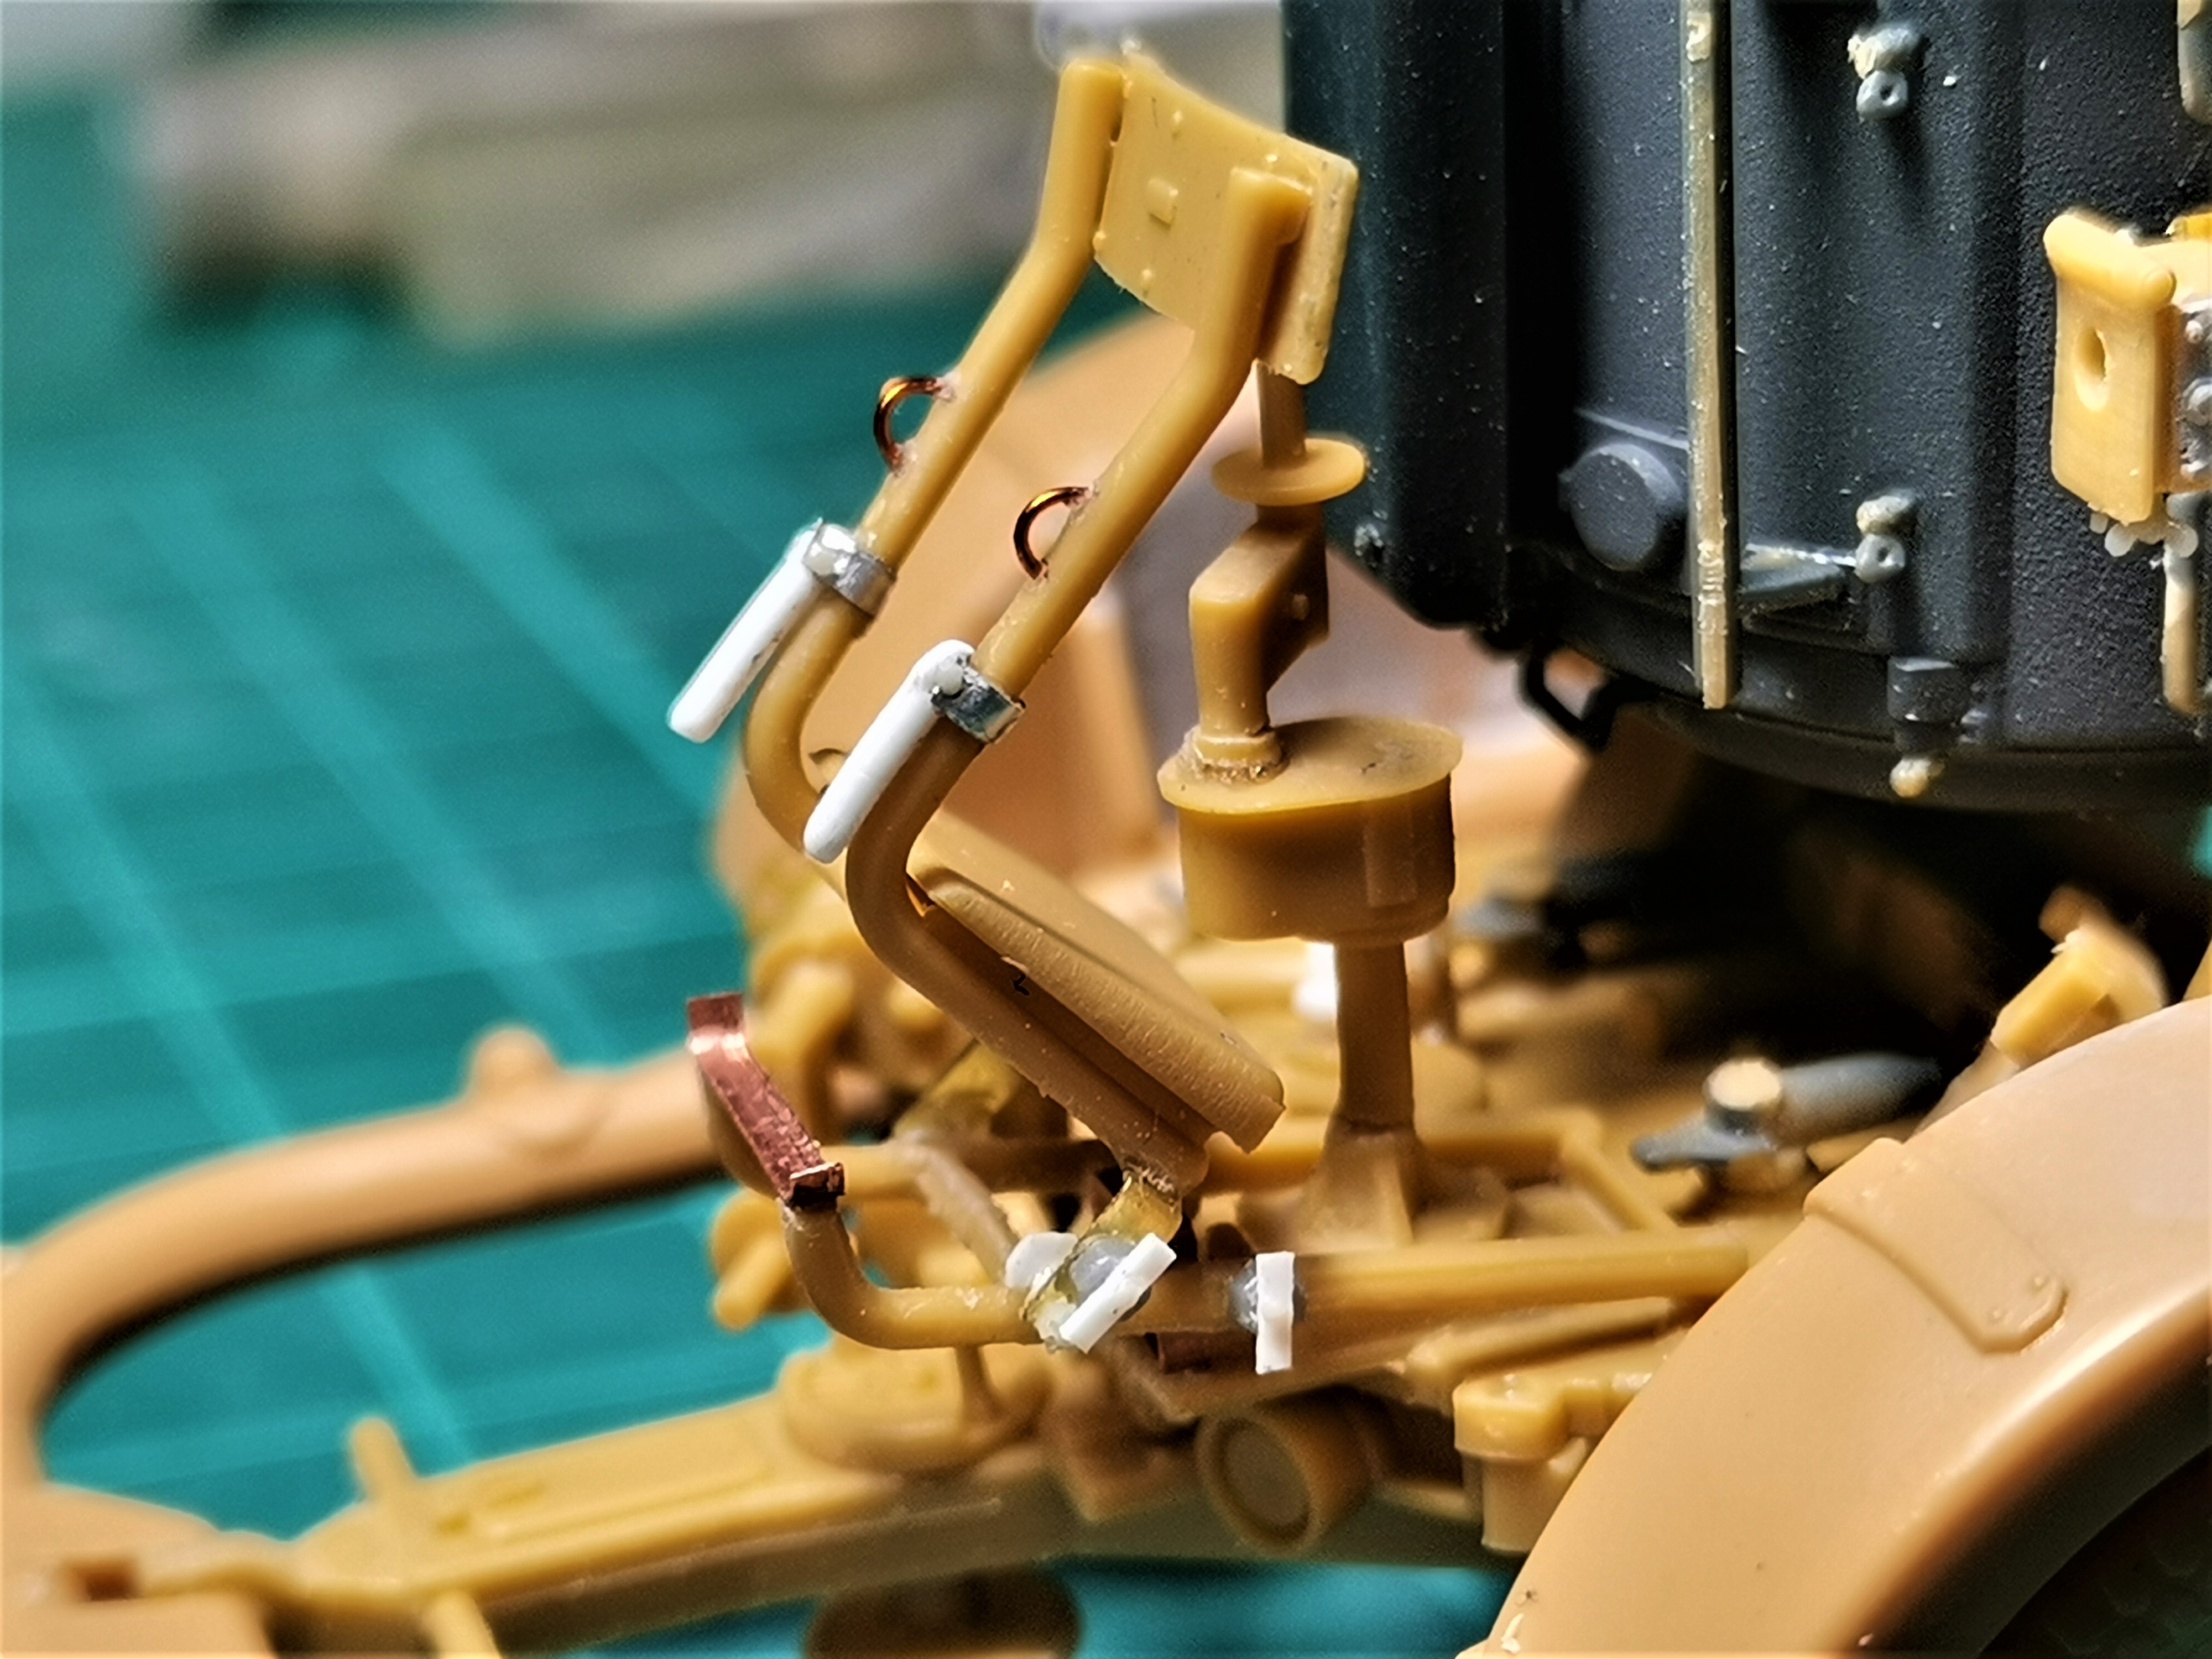
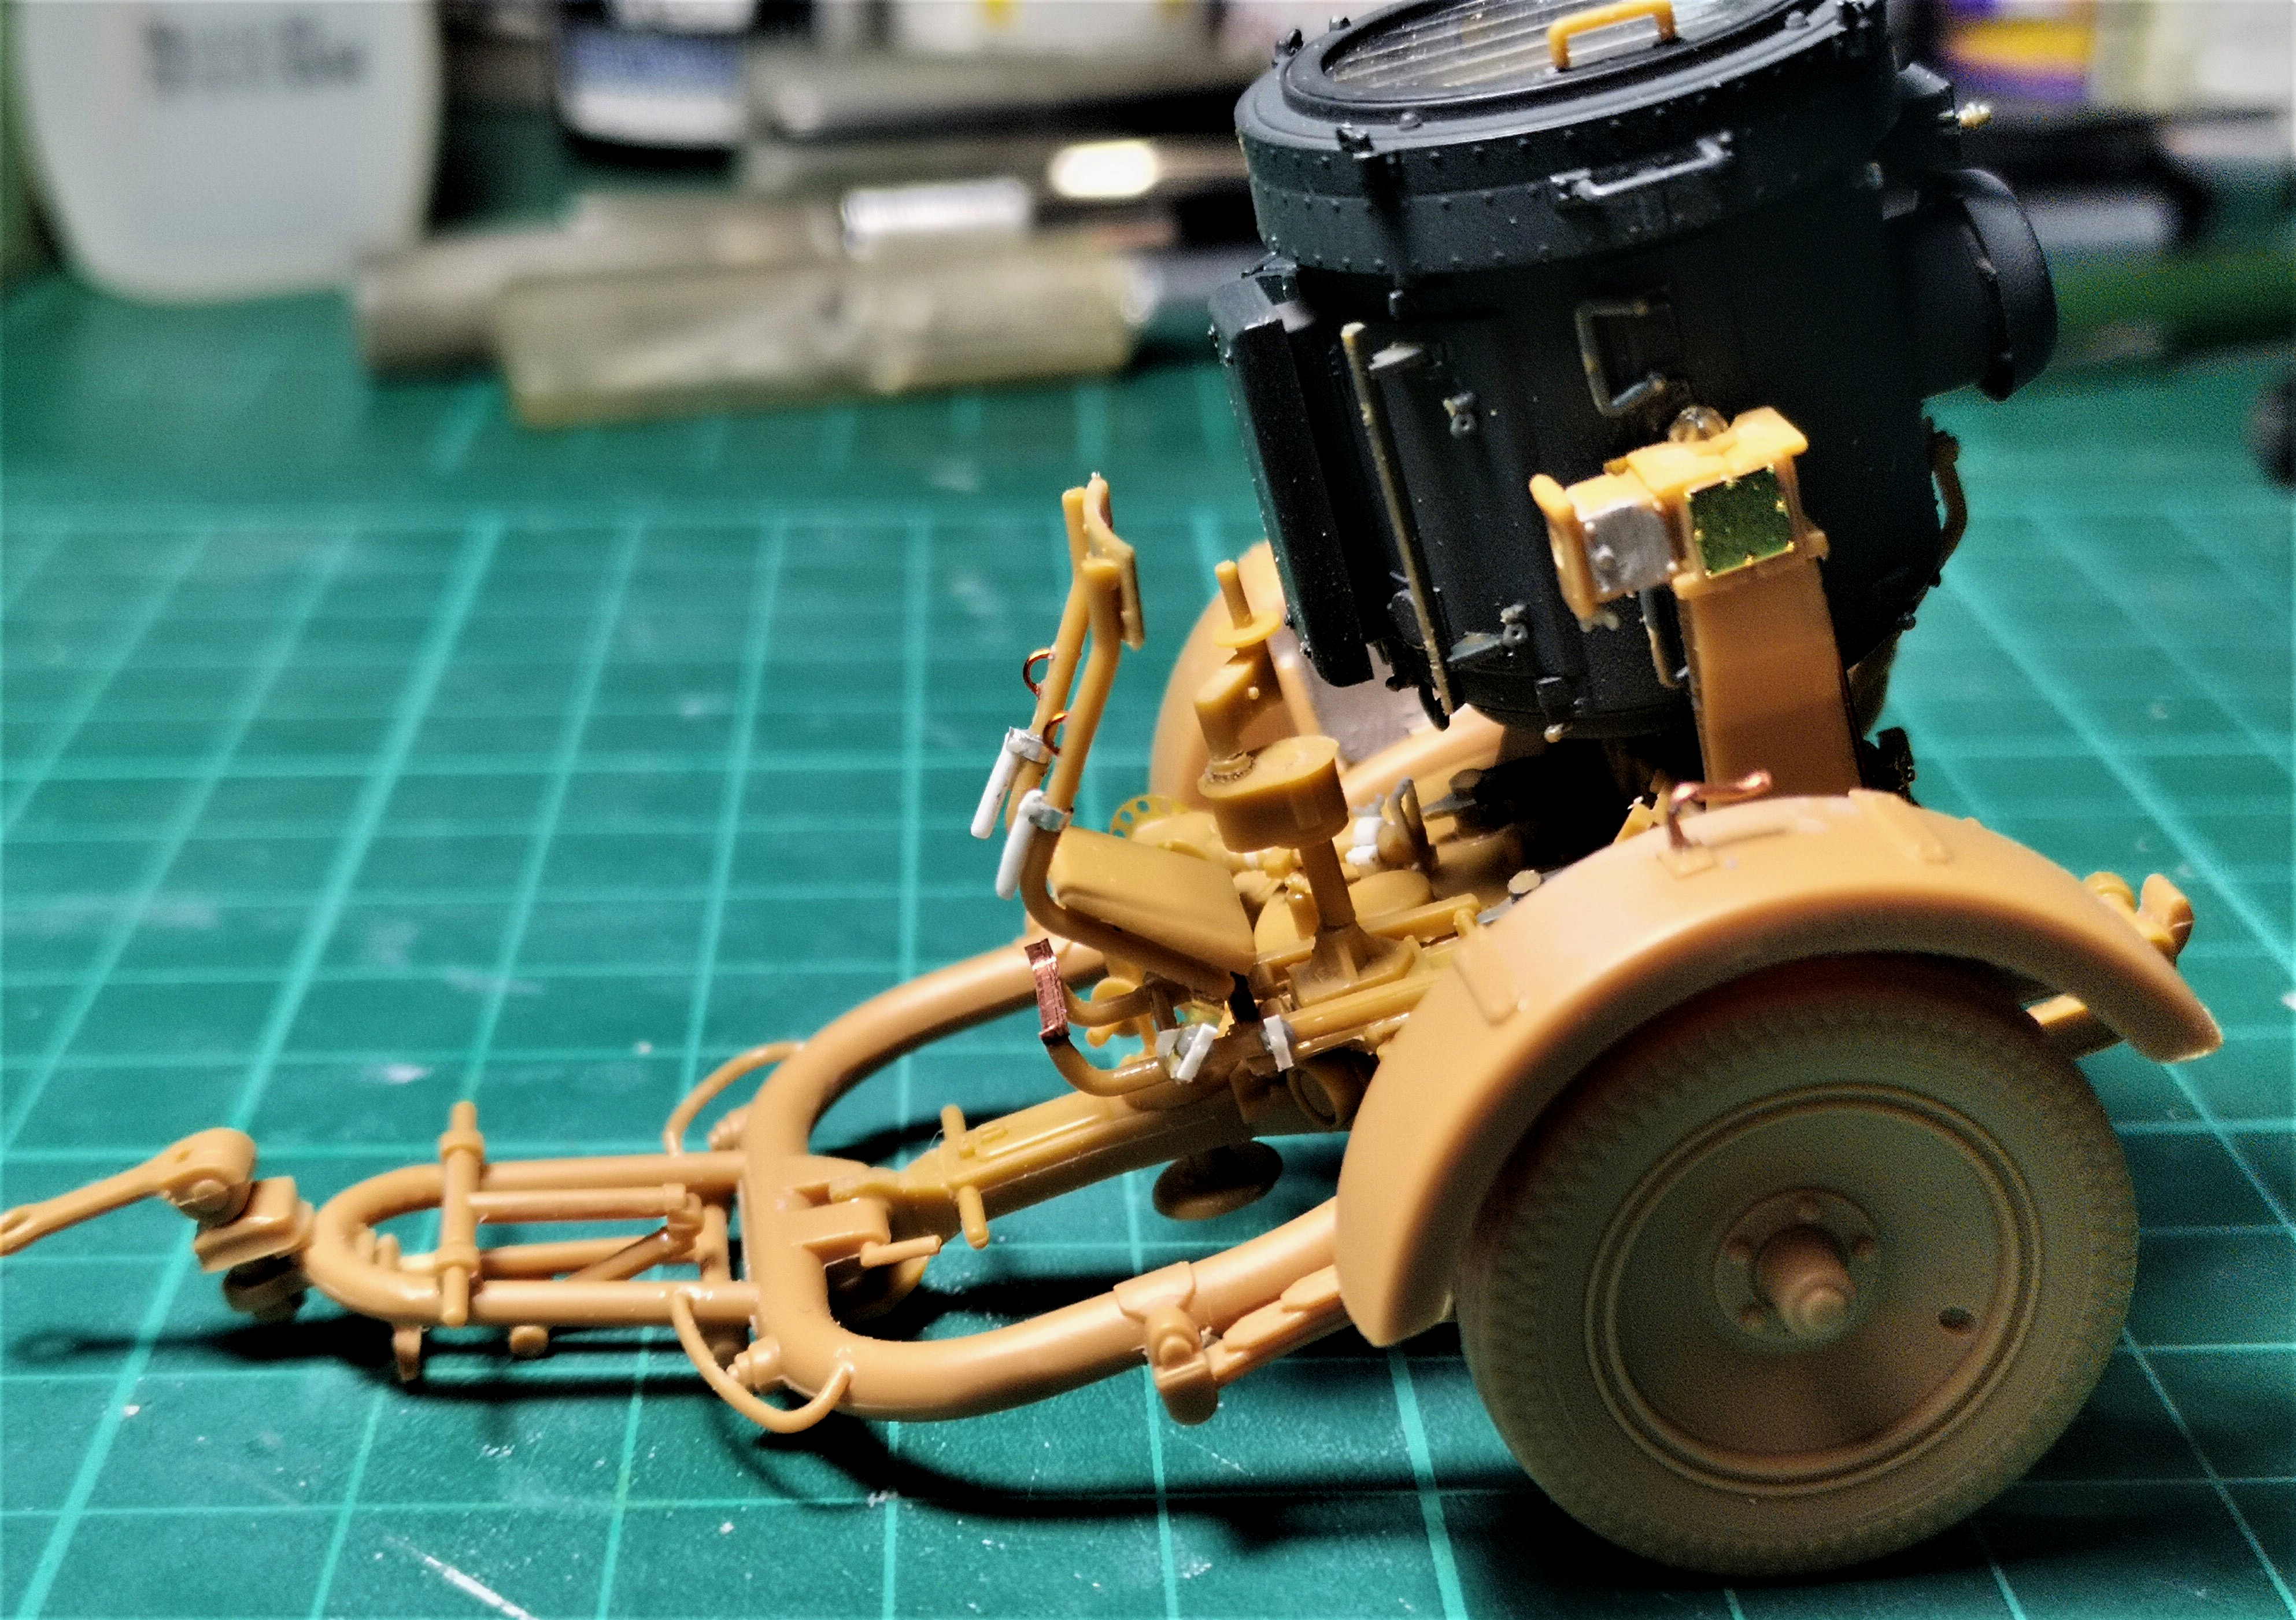
I was able to pick and add some details like wiring:

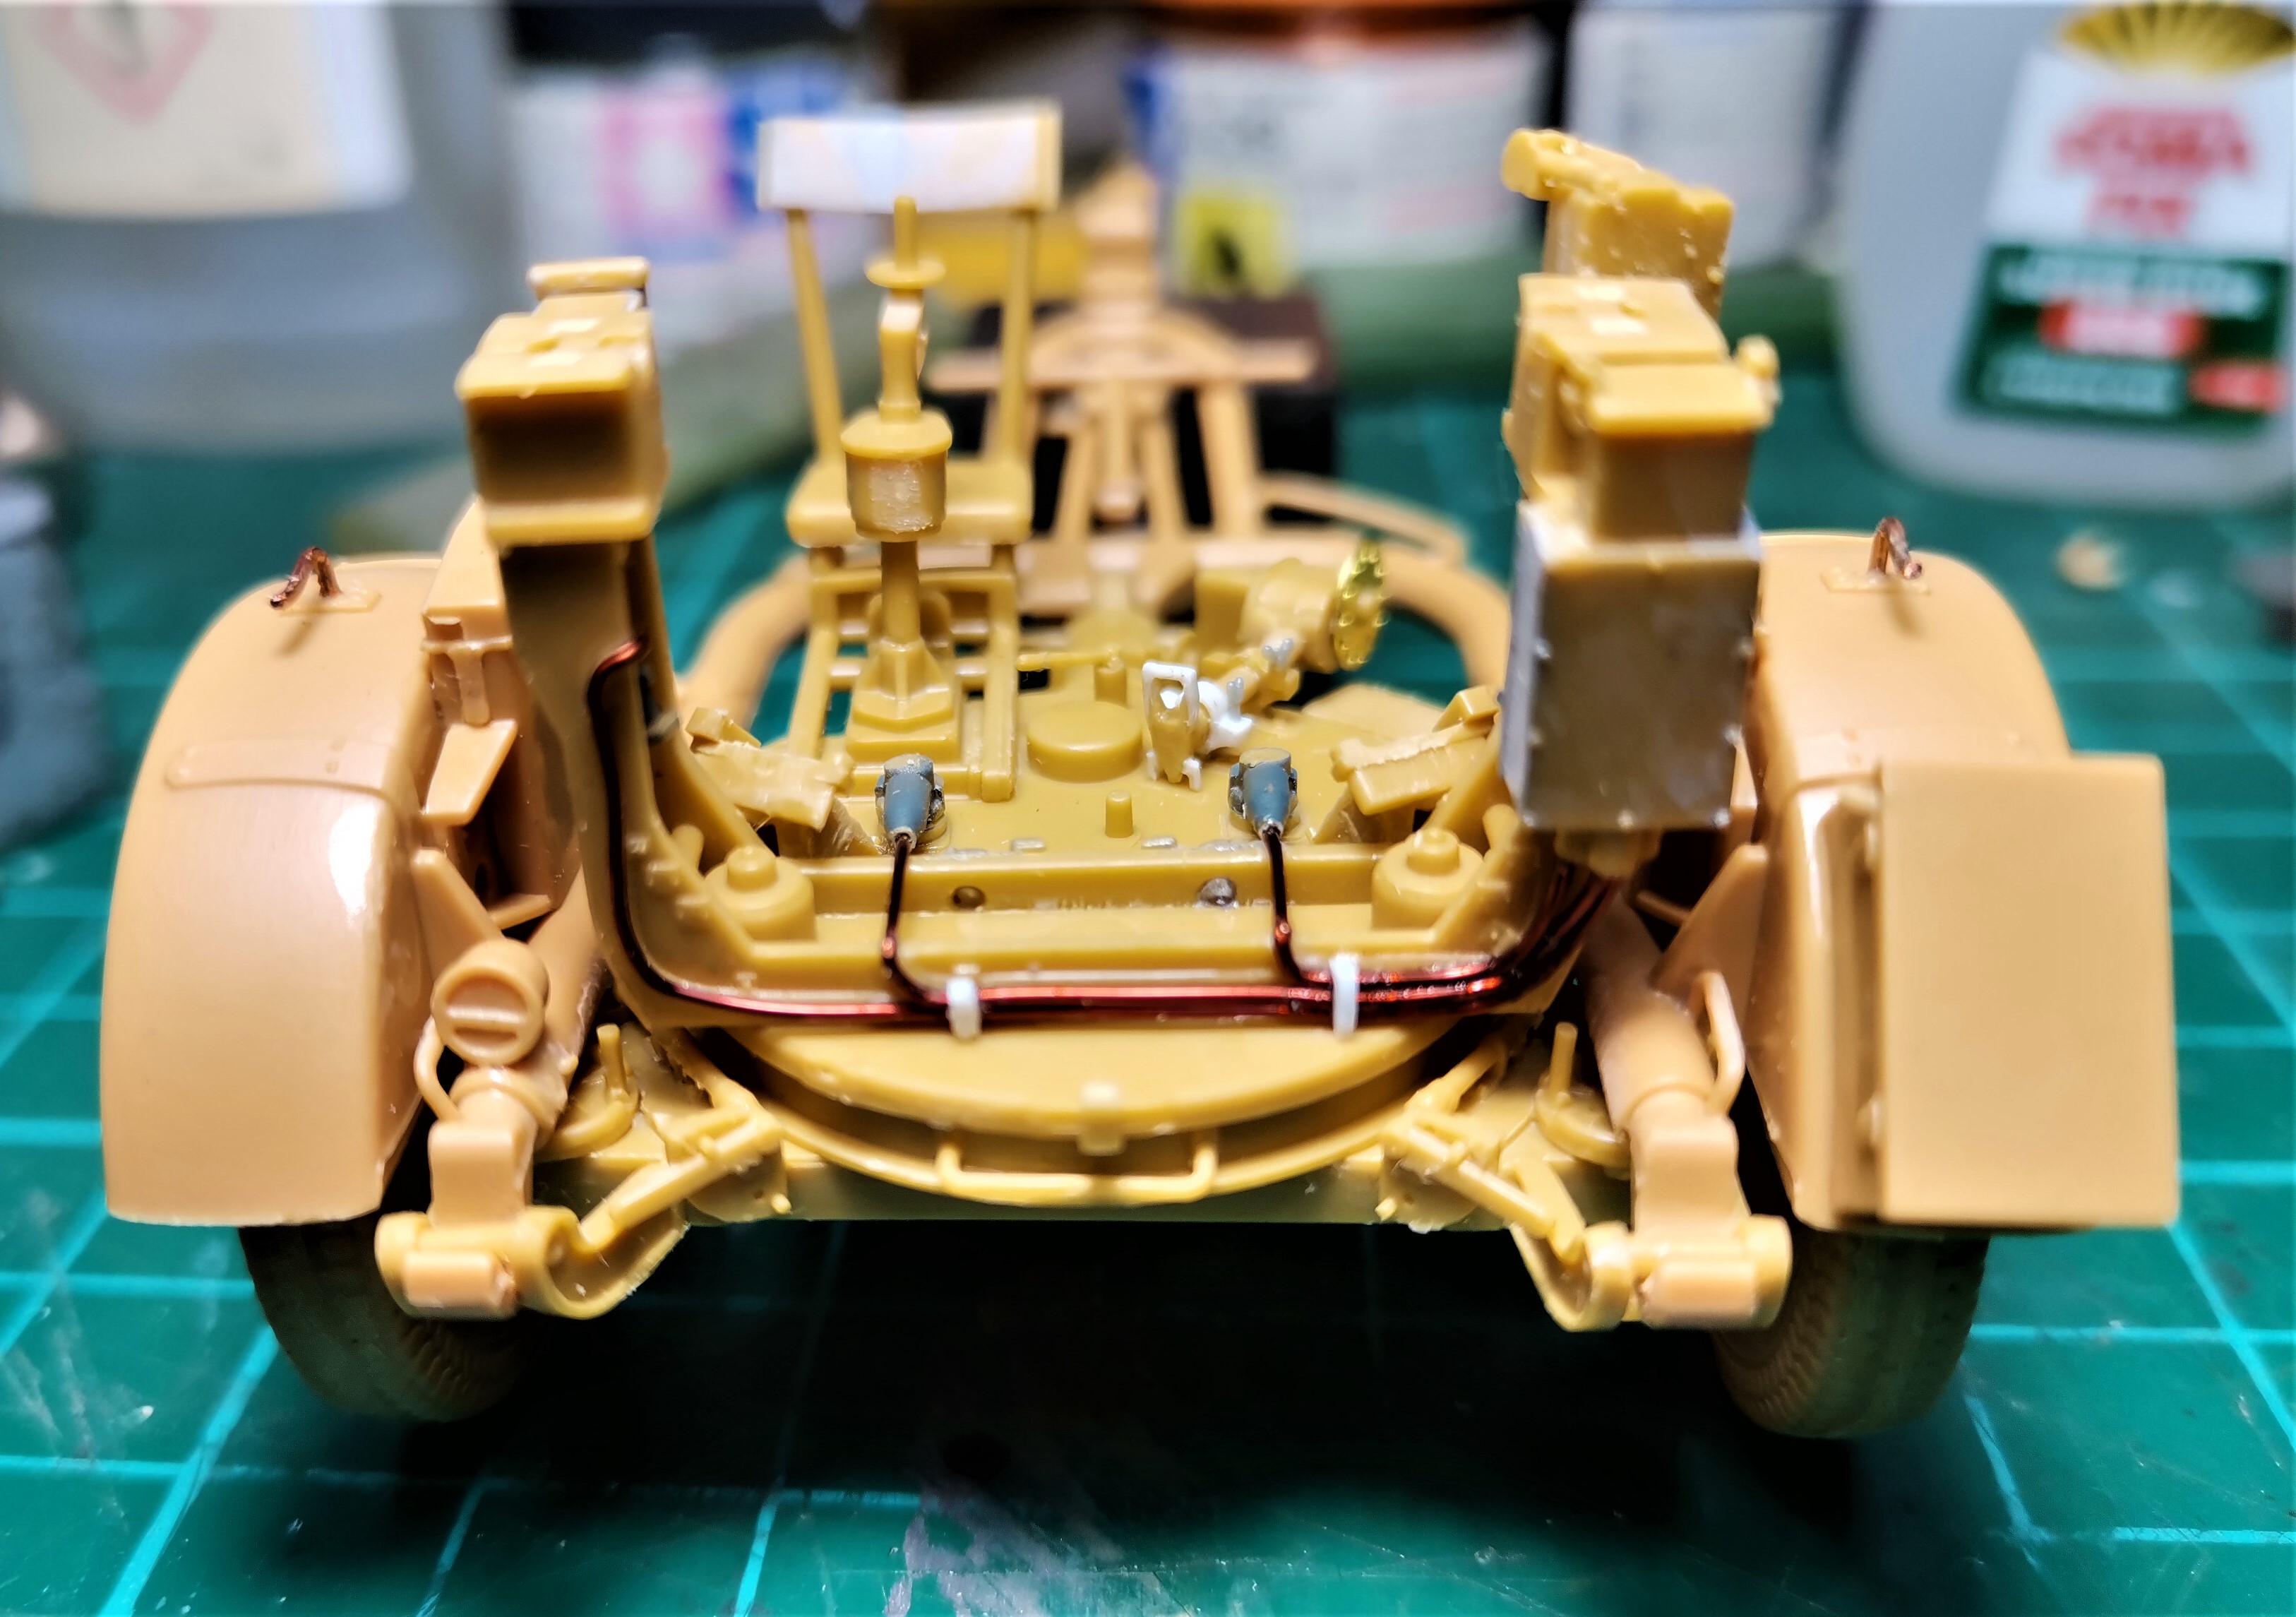
Missing rivets, divider between amper- and voltmeter on instrument panel and rope hooks on both fenders:

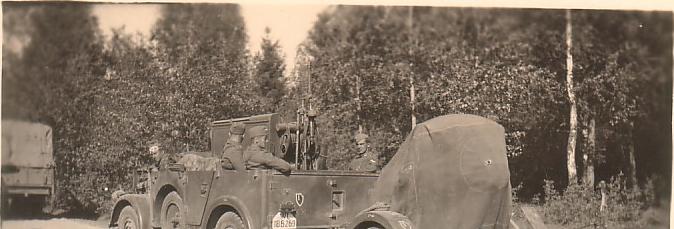
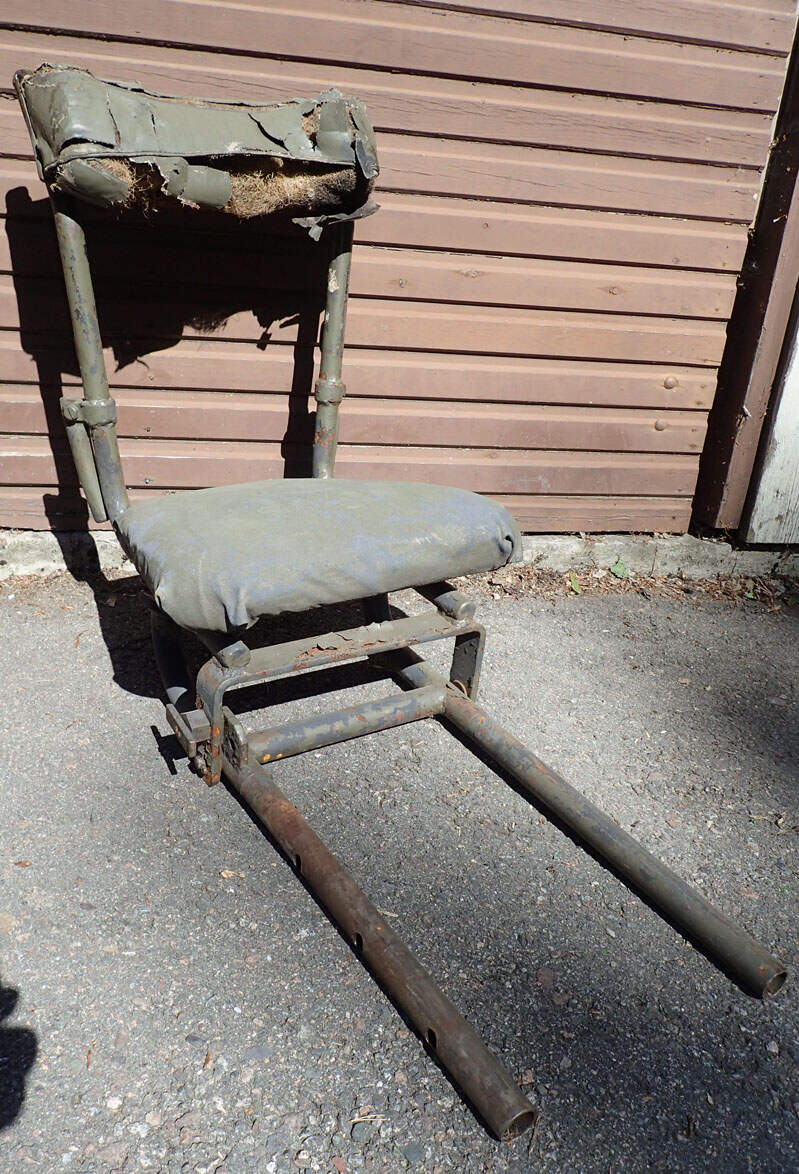
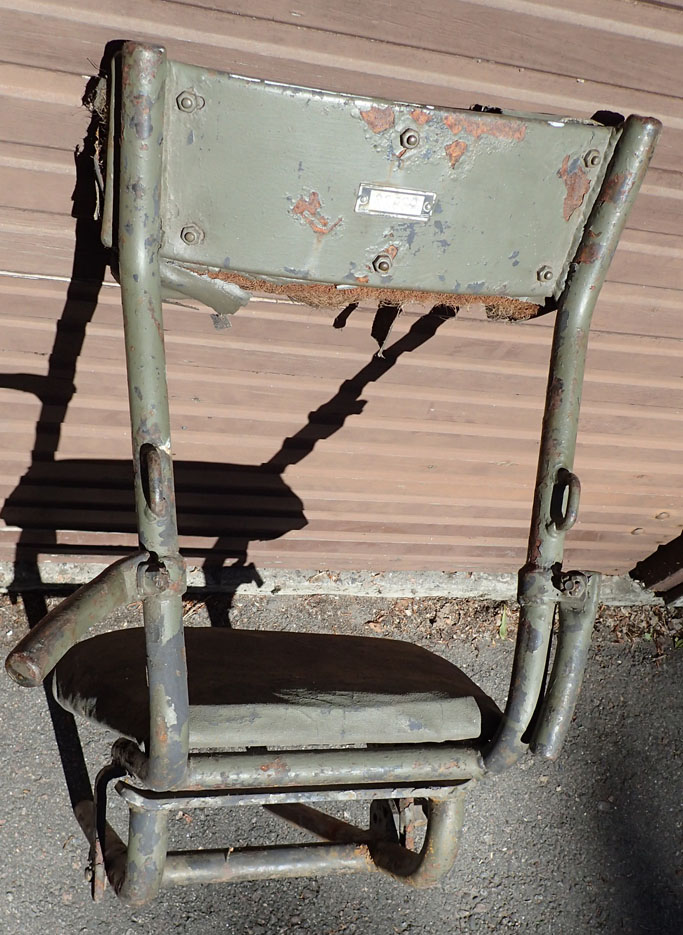
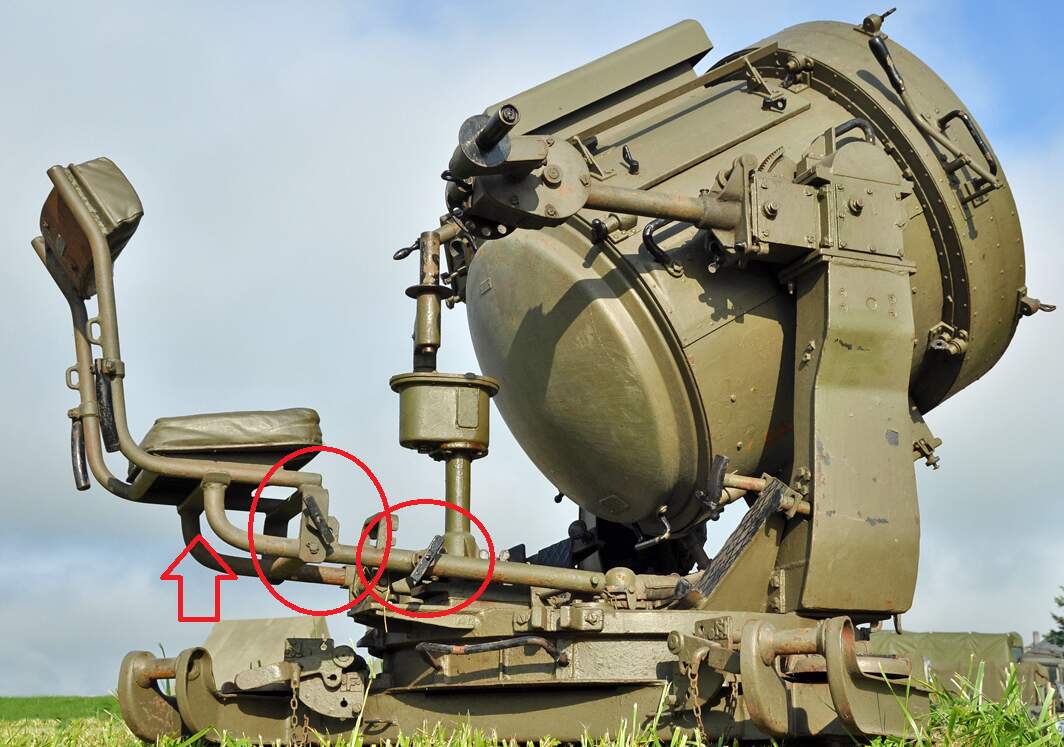
Further search led to the discovery of how the Flak Sw. 36 looked like in transport mode:

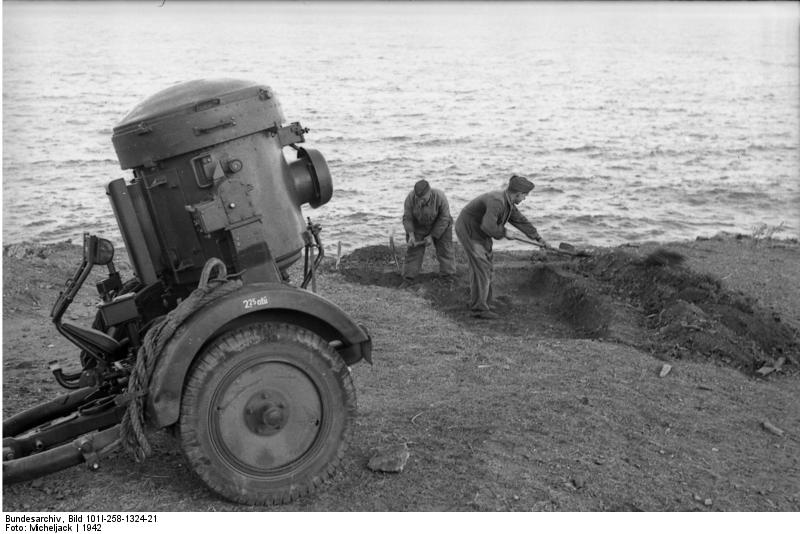
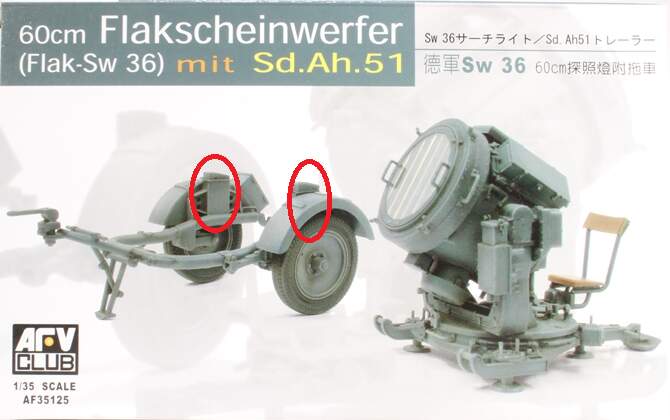
I was especially curious what the 2 clamps, mounted on the frame were designed to hold. Pictures from the splendid ASPMH museum in La Wantzenau/France gave me the answer:
http://www.asphm.com/vehicules/flak_sw_36_sd_ah_51_stromaggregat/flak_sw_36_sd_ah_51_stromaggregat.html

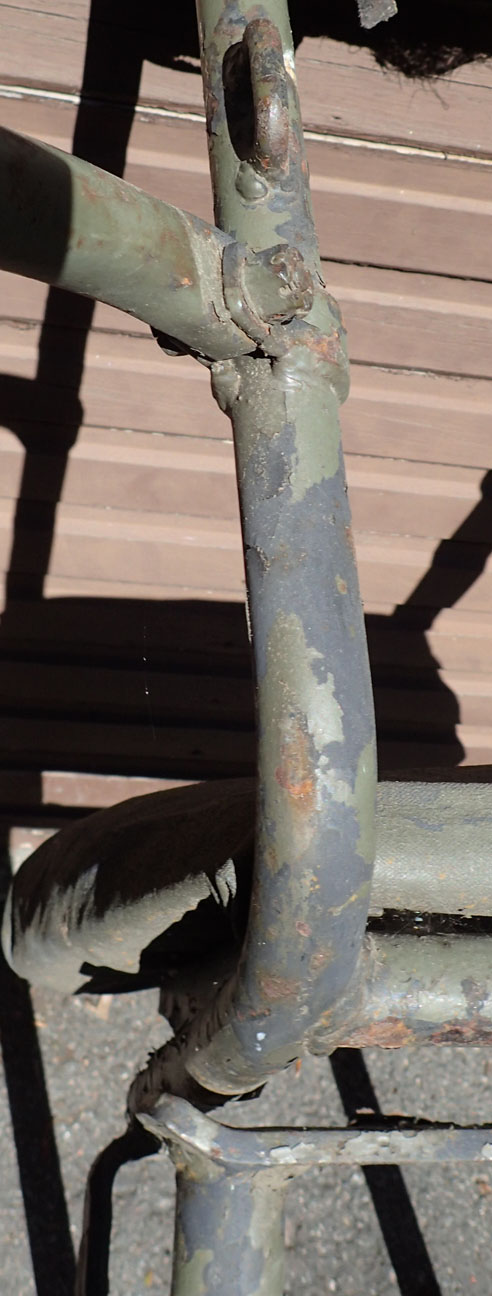
Vertical elevation gear was dismantled, cut, trimmed and after adding some minor detail the gear shaft was run through the clamps and the entire elevation gear was glued together again:

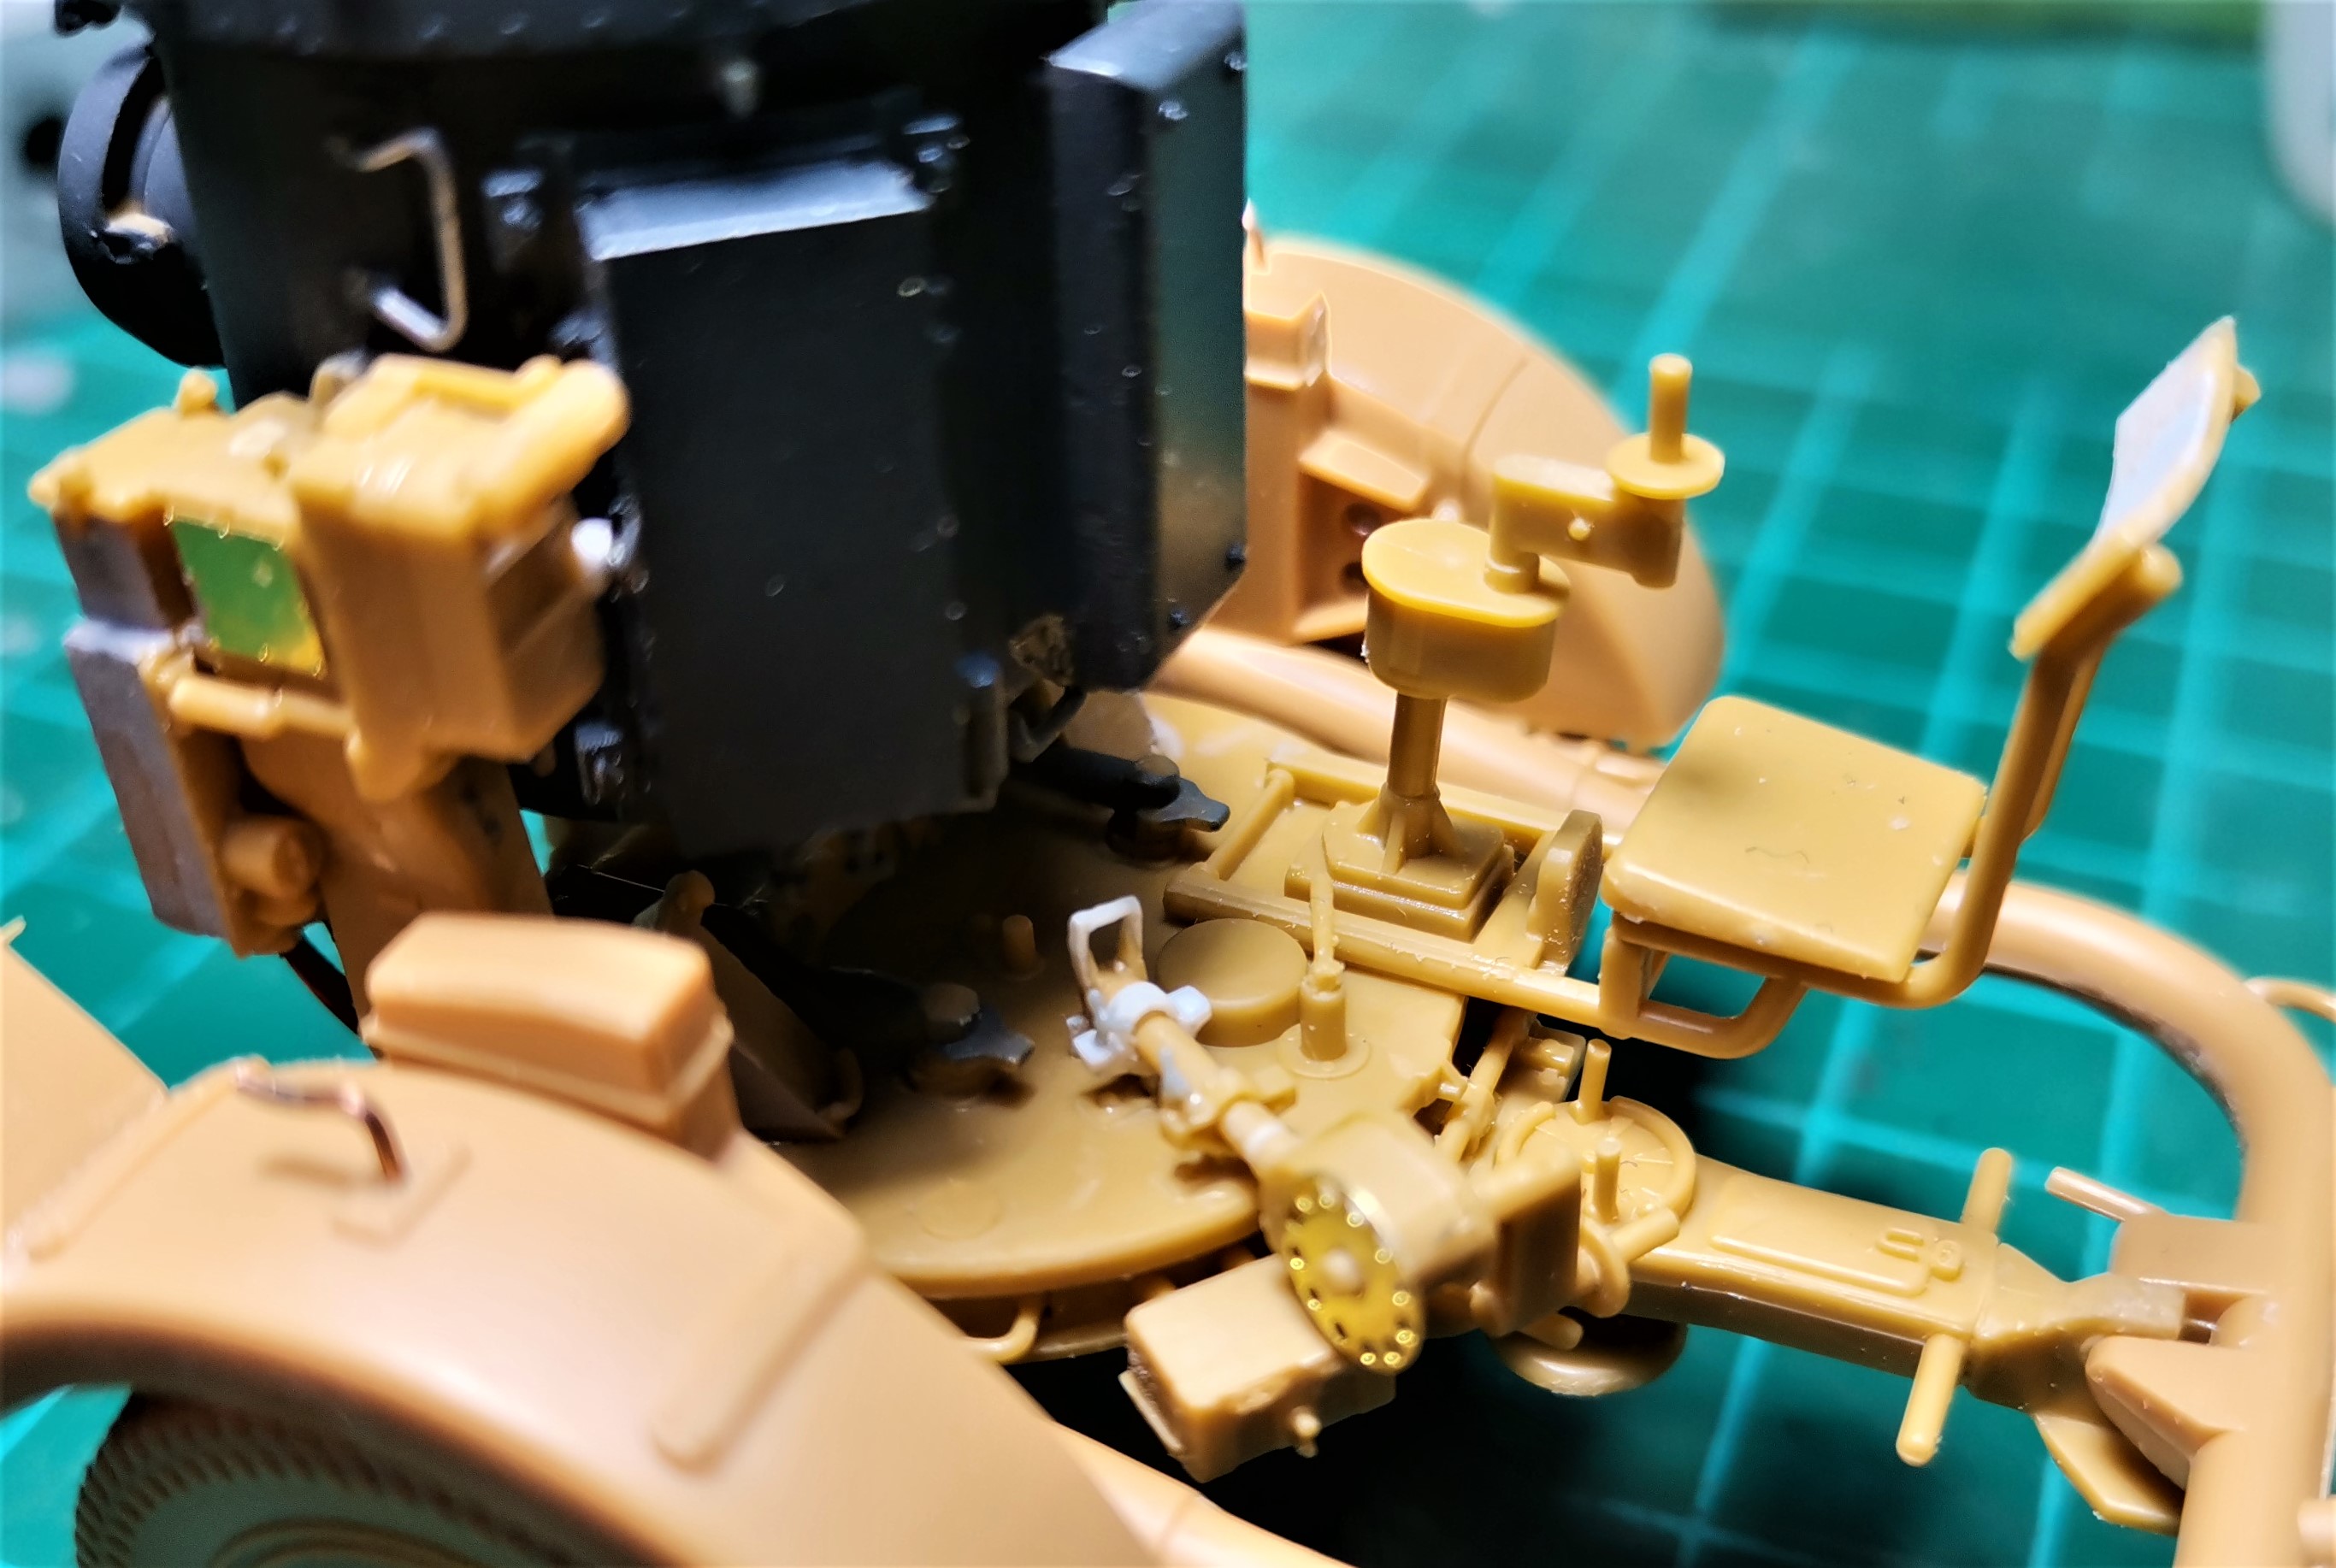
The rigid strut that fixed the projector to the frame in transport mode also underwent some modifications. A clamp was soldered and added to the frame, it holds the strut when stowed:

I need to finish the strut and reduce the height of the butterfly nuts on both clamps holding the vertical elevation gear.
And decide whether I build a German, or a Bulgarian Flakscheinwerfer.
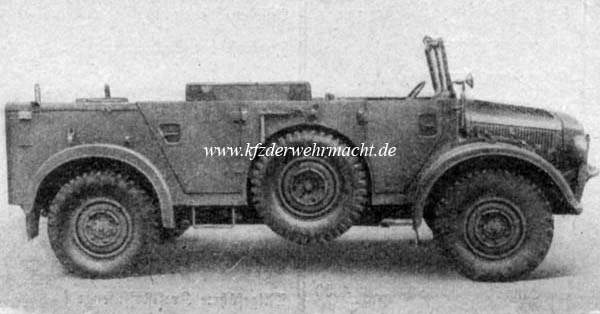
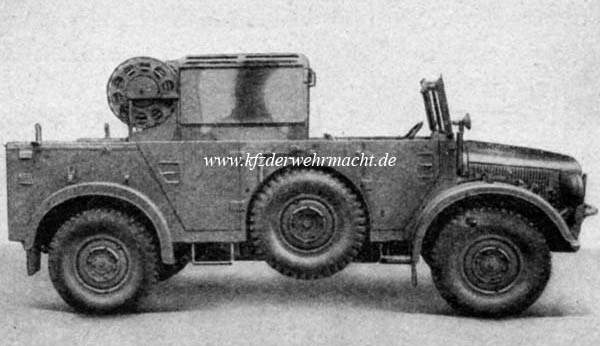
So far my search for the vehicle type used to tow the projector in Royal Bulgarian Army has been futile.
I intend to build the generator for Flak Sw.36 too.

More to come soon,

Cheers,
Angel

13 Likes

Amazing, you are doing a great job with this model!

1 Like

Nice Angel. I build one of these last year to fit on the back of my ‘Antique Antics’ Horch. Some of the sprue attachment points were as big as the parts themself!

One thing though, AFV Club used their 2cm Flak trailer parts for this kit, but I could not find any wartime photos where the 2cm ammo boxes were fitted to the searchlight trailer. Even the contemporary museum ones don’t have them (not that museum exhibits are a great source of accuracy!).

Here is another pic of the strut in stowed position

Interesting pics of a spare mirror and cover in its case.

3 Likes

Thanks Carlos and Peter!

The antique Horch by Tamiya is my German Flak Sw.36 towing option too- it was a rare combination, but it existed:
sEPkwWL-186269_1X

No doubt the tarp covered apparatus is a 60 cm. Flakscheinwerfer 36.
And if your remark, Peter, regarding 2 cm Flak ammo container refers to the box on the right fender’s rear, here it is visible.
I guess it is a storage container, but I have no idea what was kept in it.

Cheers,
Angel

2 Likes

Hi, the two on the inner guard are the ones I am talking about Angel:

image

Yes the Kfz 83 was a very rare beast. More often the Krupp Protze was used.

image

http://www.kfzderwehrmacht.de/Homepage_english/Motor_Vehicles/Germany/Einheits-Fahrgestelle/s__Einheits-Pkw/Kfz__83_l__Scheinw__Kw__II/kfz__83_l__scheinw__kw__ii.html

and the Generator loaded one.
image

I have my suspicion this is the same pic with the generator partially erased in the first - the box part seems identical in painting - why camo only the vehicle inside… and the wheel nuts on both front and rear are exactly the same places.

3 Likes

I have not been able to find definitive proof, but some of my research suggests that the searchlight with the rectangular moveable shutters inside was the Navy version. The shutters were for ship to ship signalling - morse code, etc.

Not a problem in towed mode with the protective cover on.

1 Like

Seems that the seat was folded for transport?

1 Like

Yes Carlos. The tubular seat rails has holes for a pin in them so you can move it back and forth. You pulled the pin and pushed the seat forward as far as it can, then pulled another pin out and tipped the seat forward. There is a tab with holes in it in on one rail and when you tip it forward, you put the 2nd pin in the lower hole to lock it.

2 Likes


In this image you can see the handled pins (circled) and also see the how the seat rests on a flat metal bar at the end of the curved seat rails. metal

3 Likes

Another showing the absence of the ammo bins

3 Likes

Excellent correction, Peter!
Thanks a lot- I’ll remove those Kasten and keep them for my 2.0 cm Flak 38 future build.
And a nice set of pictures of the foldable seat too- it is planned for rework.

I also see my butterfly nuts on the fixture of elevation gear are wrong, they’ll get some attention this evening too,

Cheers,
Angel

No Problem Angel. If you want to detail it up, there is a lot to do really. The seat needs the two handles added at the rear and the belt loops and the flat bar added. If you are doing the one with the vanes inside, you need the actuator arm on the side at the front - see the pic with the circle an arrow. Padding on the seat, the locking single butterfly clip on the electrical box (where the wires go in the pic of the grey one above, the circular lead socket for the connection to the towing vehicle (the round thing under the seat in the grey one), etc… a long list.

1 Like

This looks like another lovely little build Angel… which knowing you will turn into a super detailed one !! :grin: :+1:

1 Like

I always wanted to build one, however seen the amount of work needed I will think about it twice…

1 Like

Not so much work, Carlos, if you keep your build OOB.Worth trying!

Cheers,
Angel

1 Like

Wow! Interesting and informative post. I really enjoy reading and learning about things like this. Great build, great history lesson.

Cheers,
C.

3 Likes

Thanks John!

It surely looks that way and I hope I can do it justice.

Funny though- this is a 15 EUR/12 GBP/18 USD kit and it brings so much modelling joy. Much more than kits, with a price tag five times higher, I’ve built before.

:beer:

2 Likes

Thanks for your kind feedback, Charles!

Hope this topic- with all the precious input from other members- will be of help for any future builds,

Cheers,
Angel

1 Like

2 evening modelling sessions brought my Flakscheinwerfer to this state:

I removed the 2.0 cm. Flak ammo boxes from the fender sides and cut their mounting blocks from the frame. Mr.Surfacer 500 and some sanding took care of the burrs, that Tamiya Extra Thin left.
Further- I removed all vanes from the projector.
My kit has the butterfly clip molded on the electrical box, but the box has no bottom. So I cut the clip and stored it away from my elbows while measuring, cutting and bending the bottom and the lower front part from copper sheet. Once they were superglued in place, I fixed the butterfly clip again.

I also reworked the seat railings and added all features present on Peter’s excellent pictures. Replaced some rigid styrene moldings with frames bent out of PE runners. Measured the tilt angle between seat and seat railing and glued the seat accordingly:


Seat is not glued to the frame yet- I’m considering sculpting padding from Miliput or Tamiya Epoxy Putty.

Cheers,
Angel

14 Likes

He’s at it again. :grin: :grin:

2 Likes