Thanks! I’m fairly happy with how it’s coming along, given it’s my first scratch building attempt
1 Like
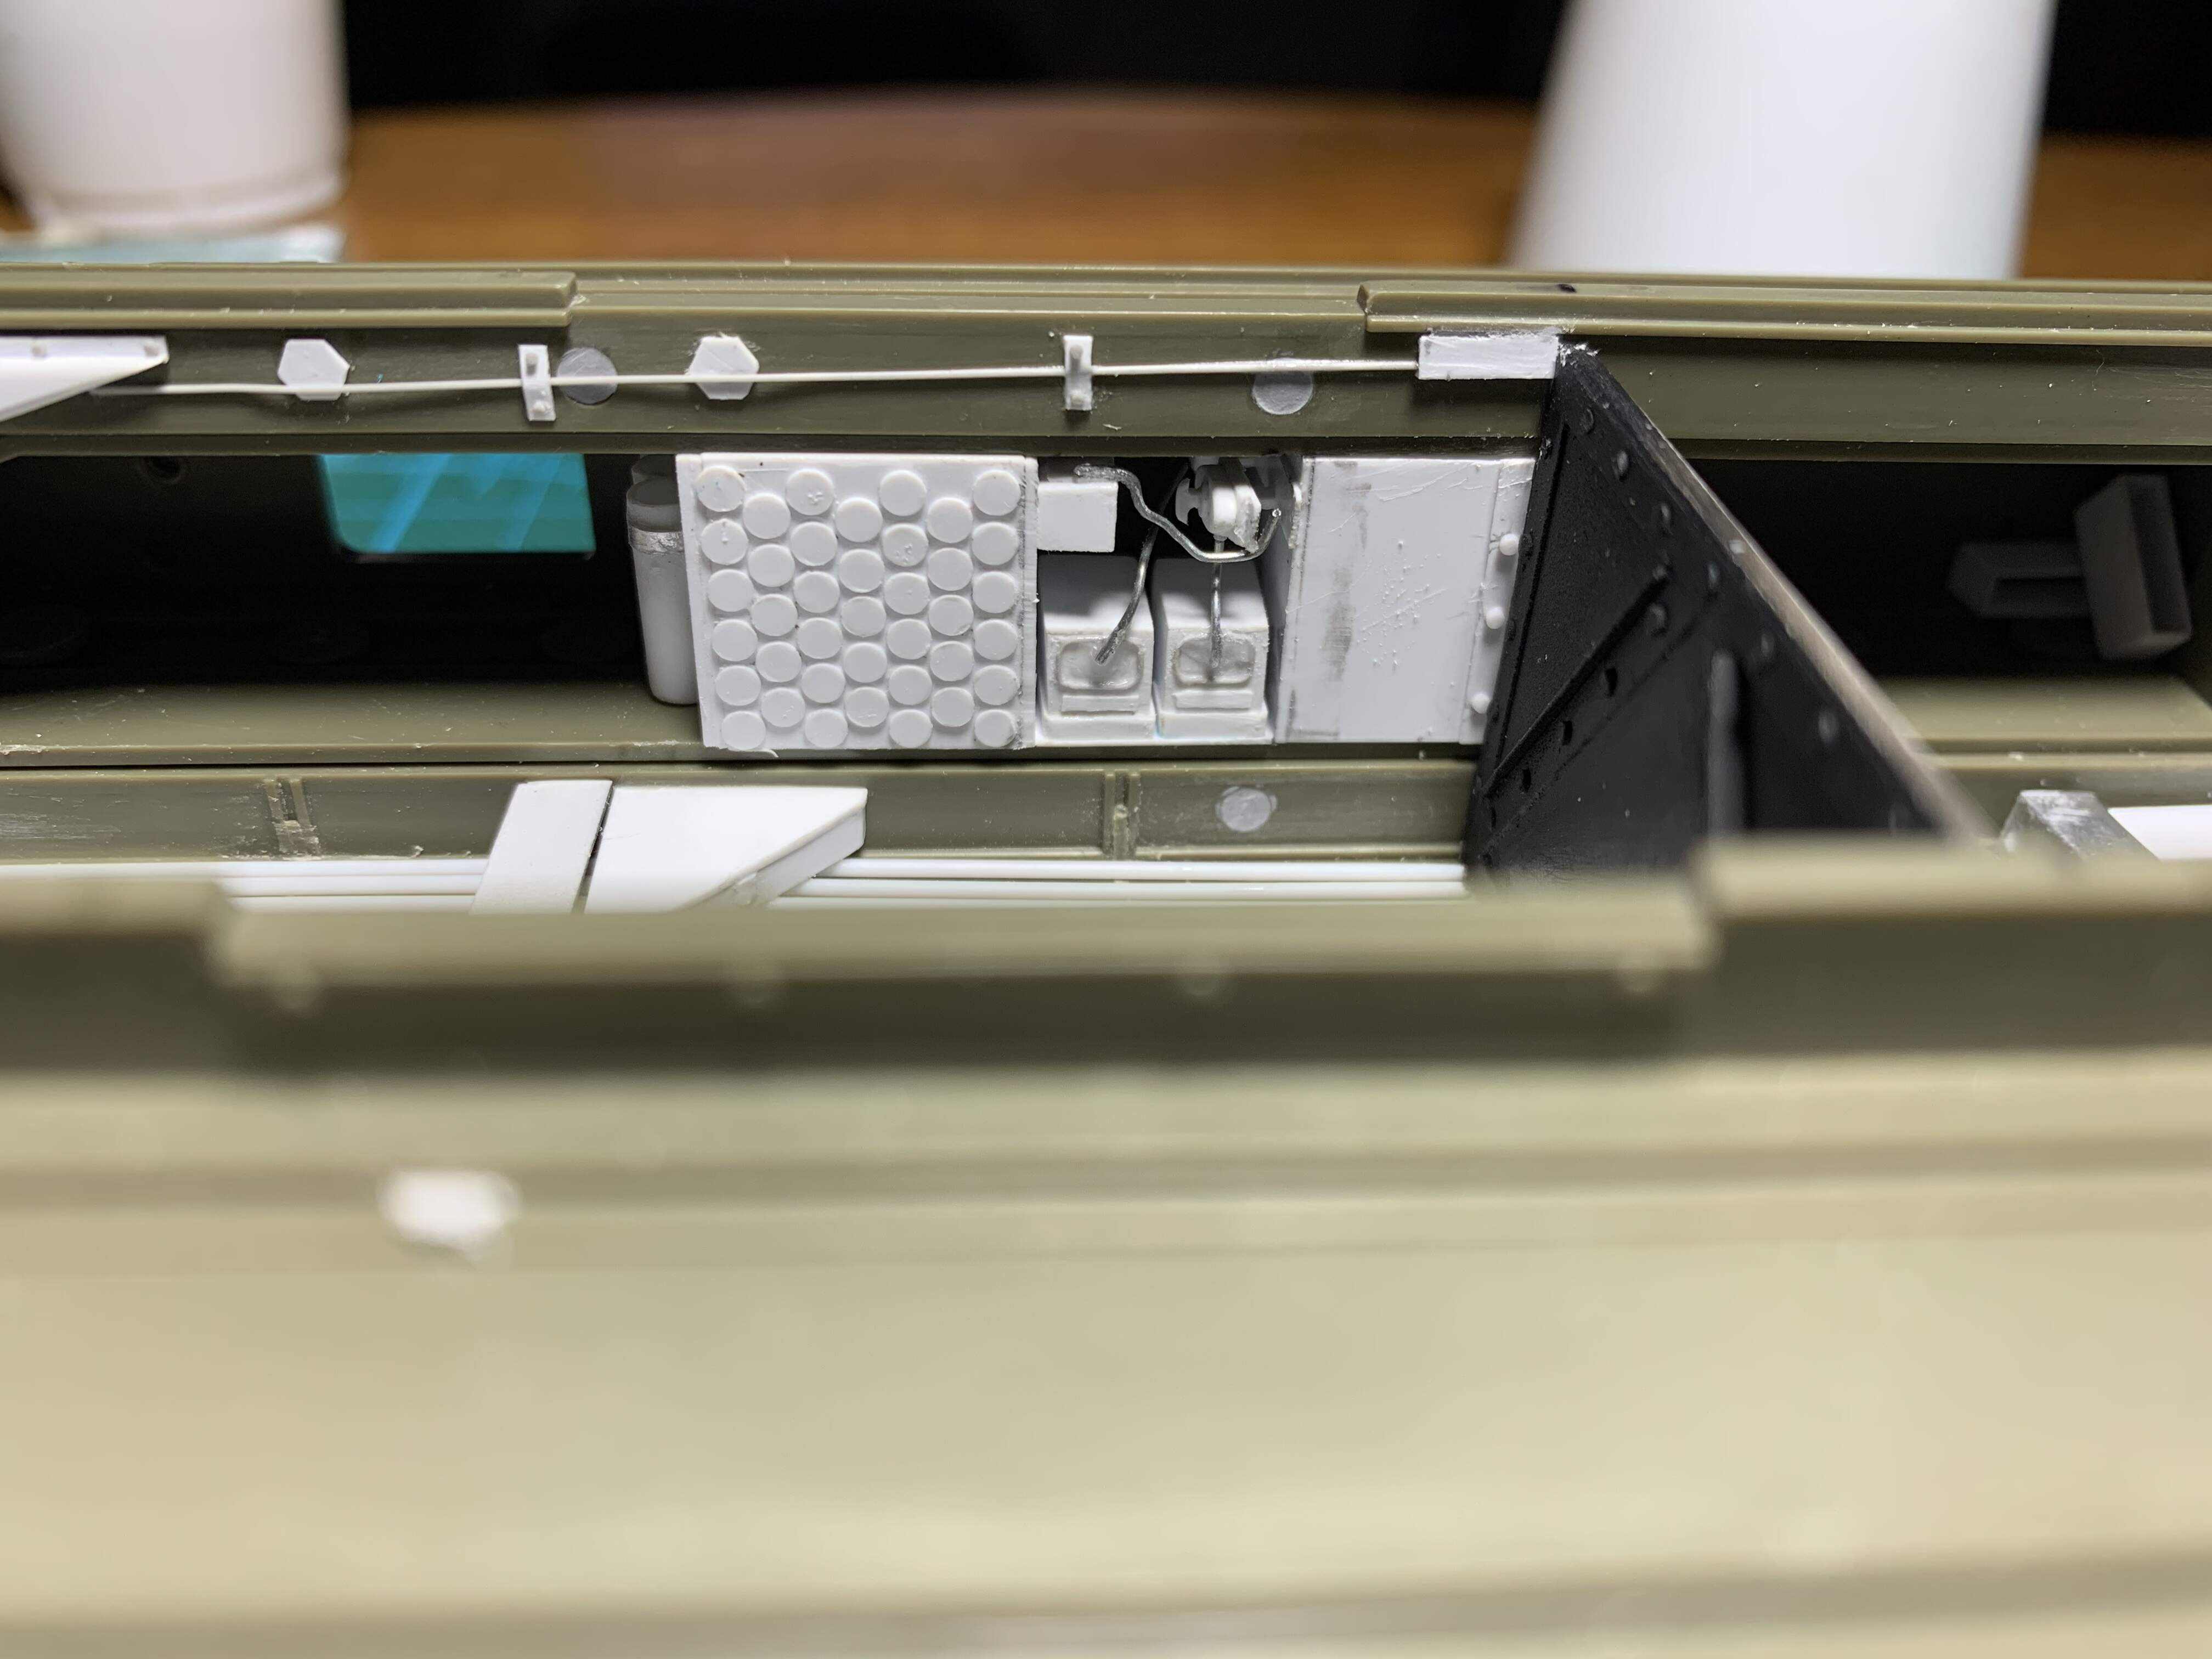
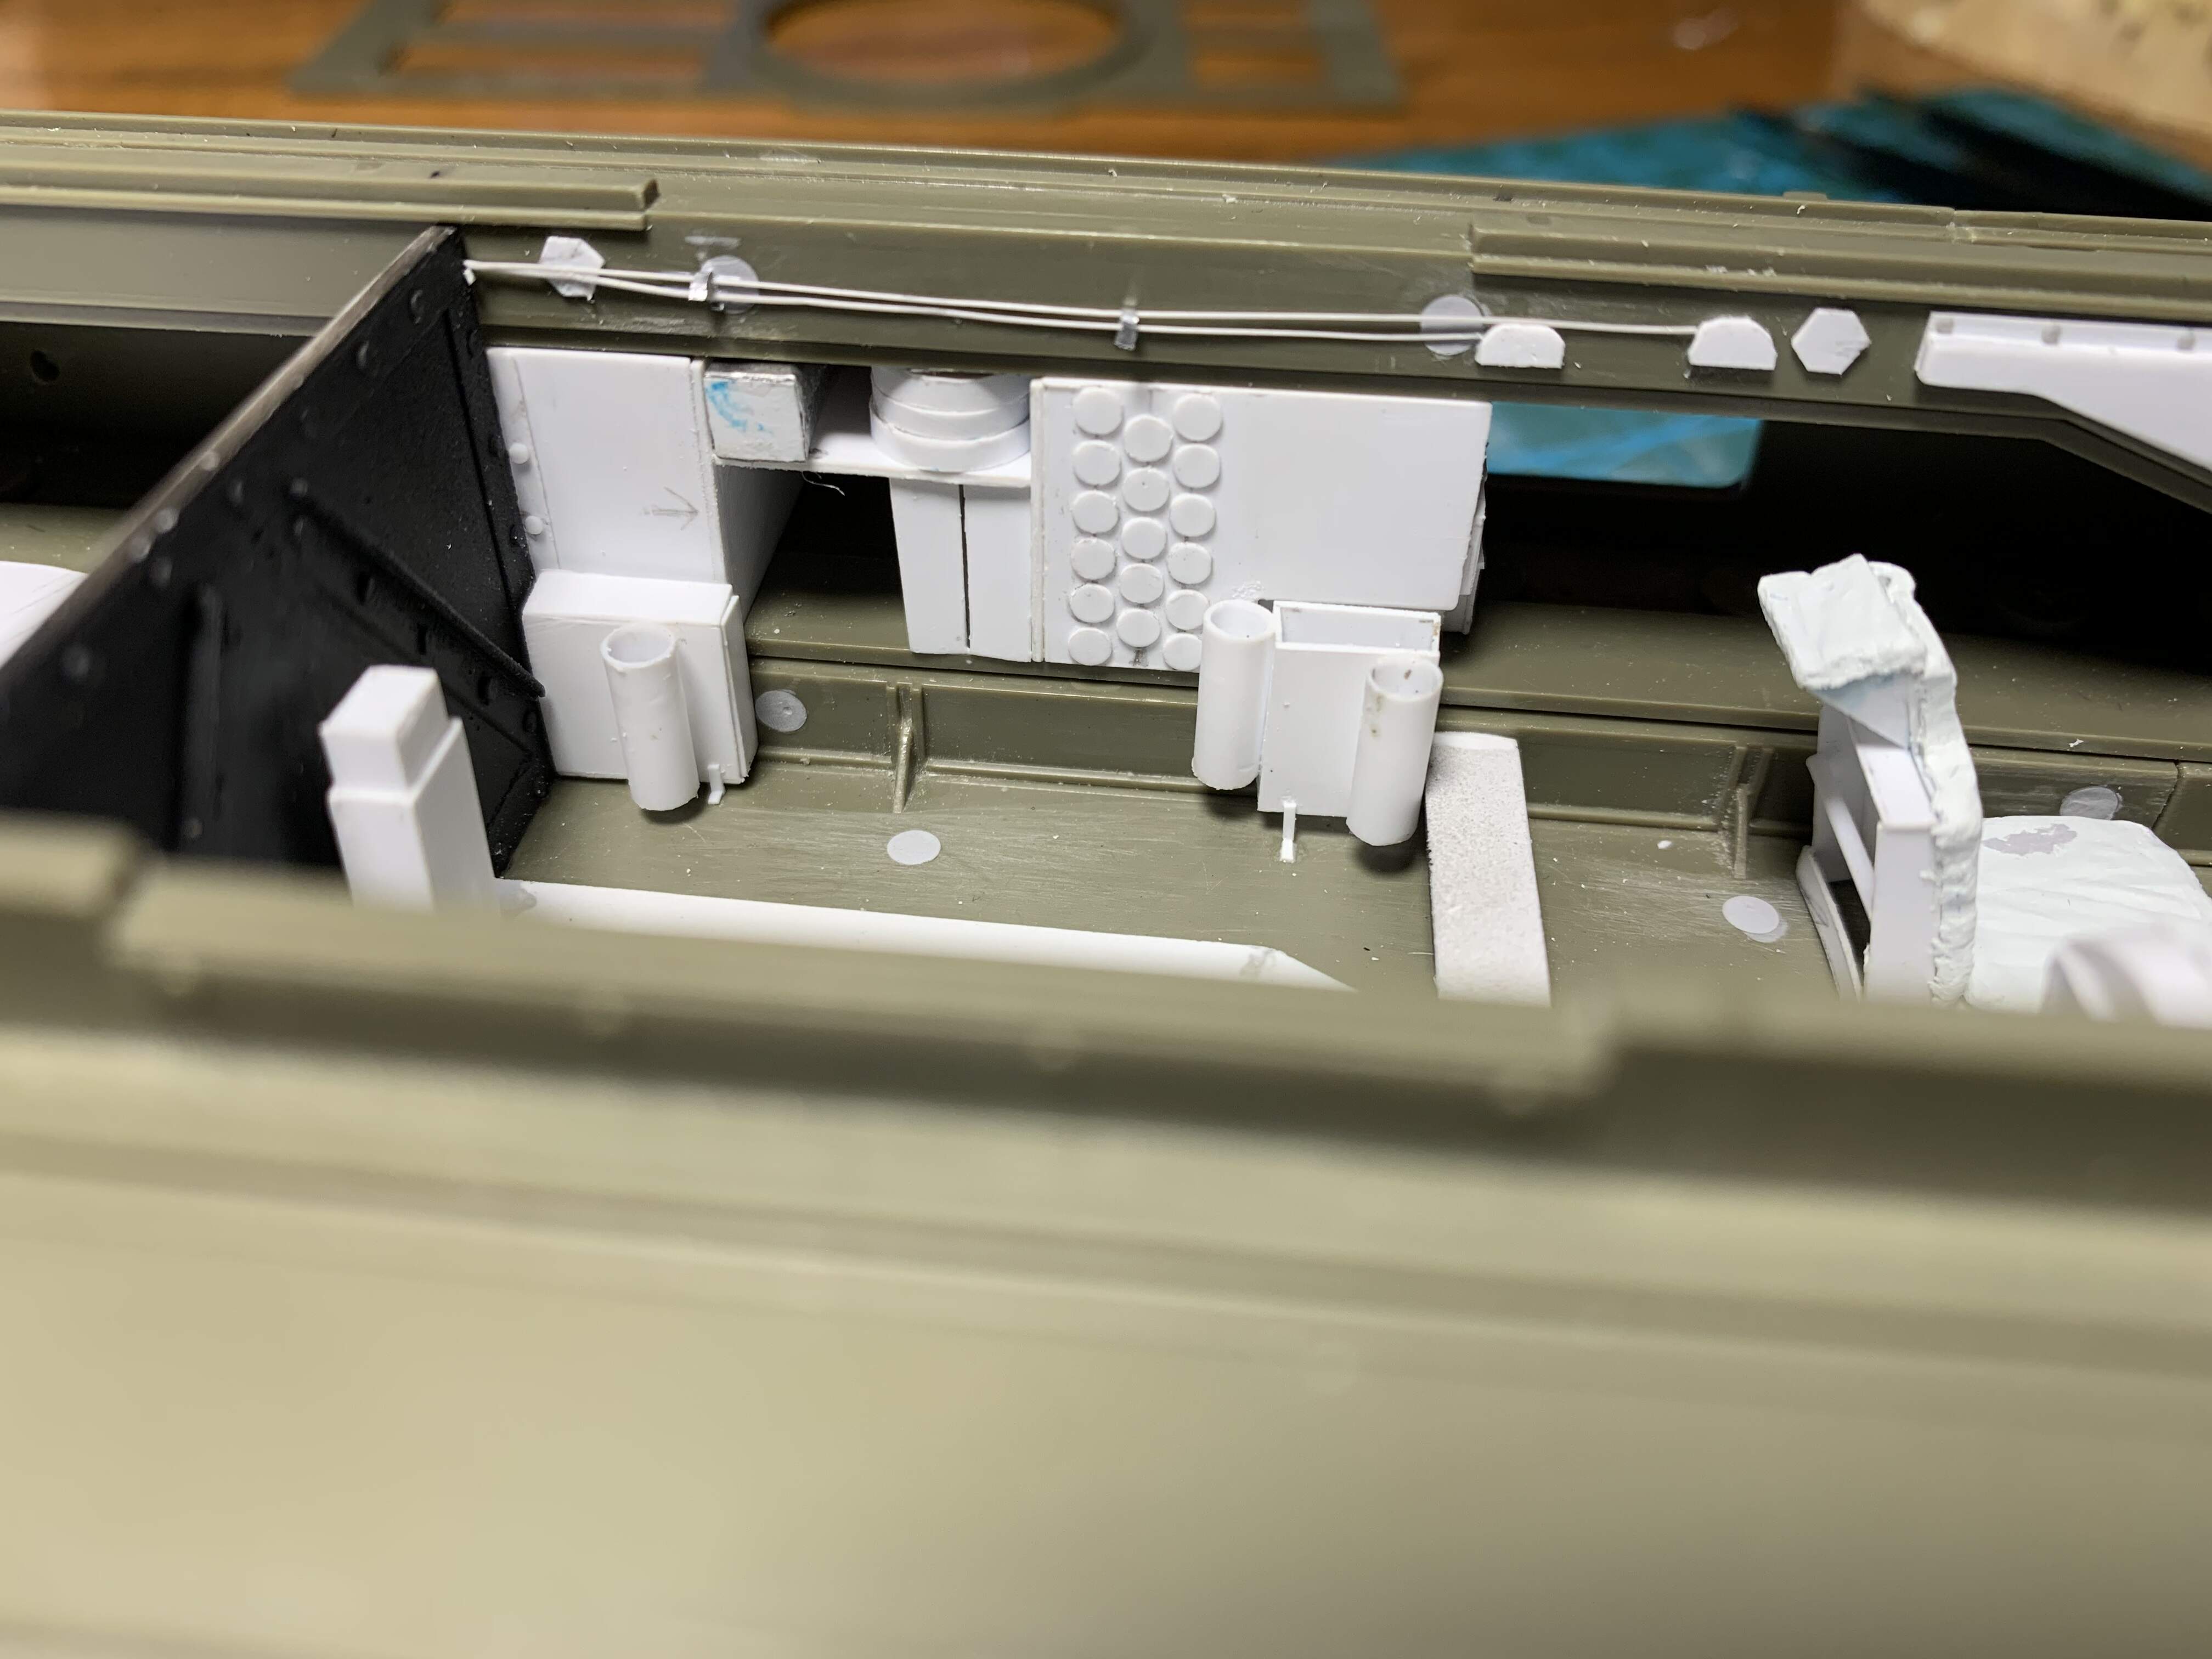
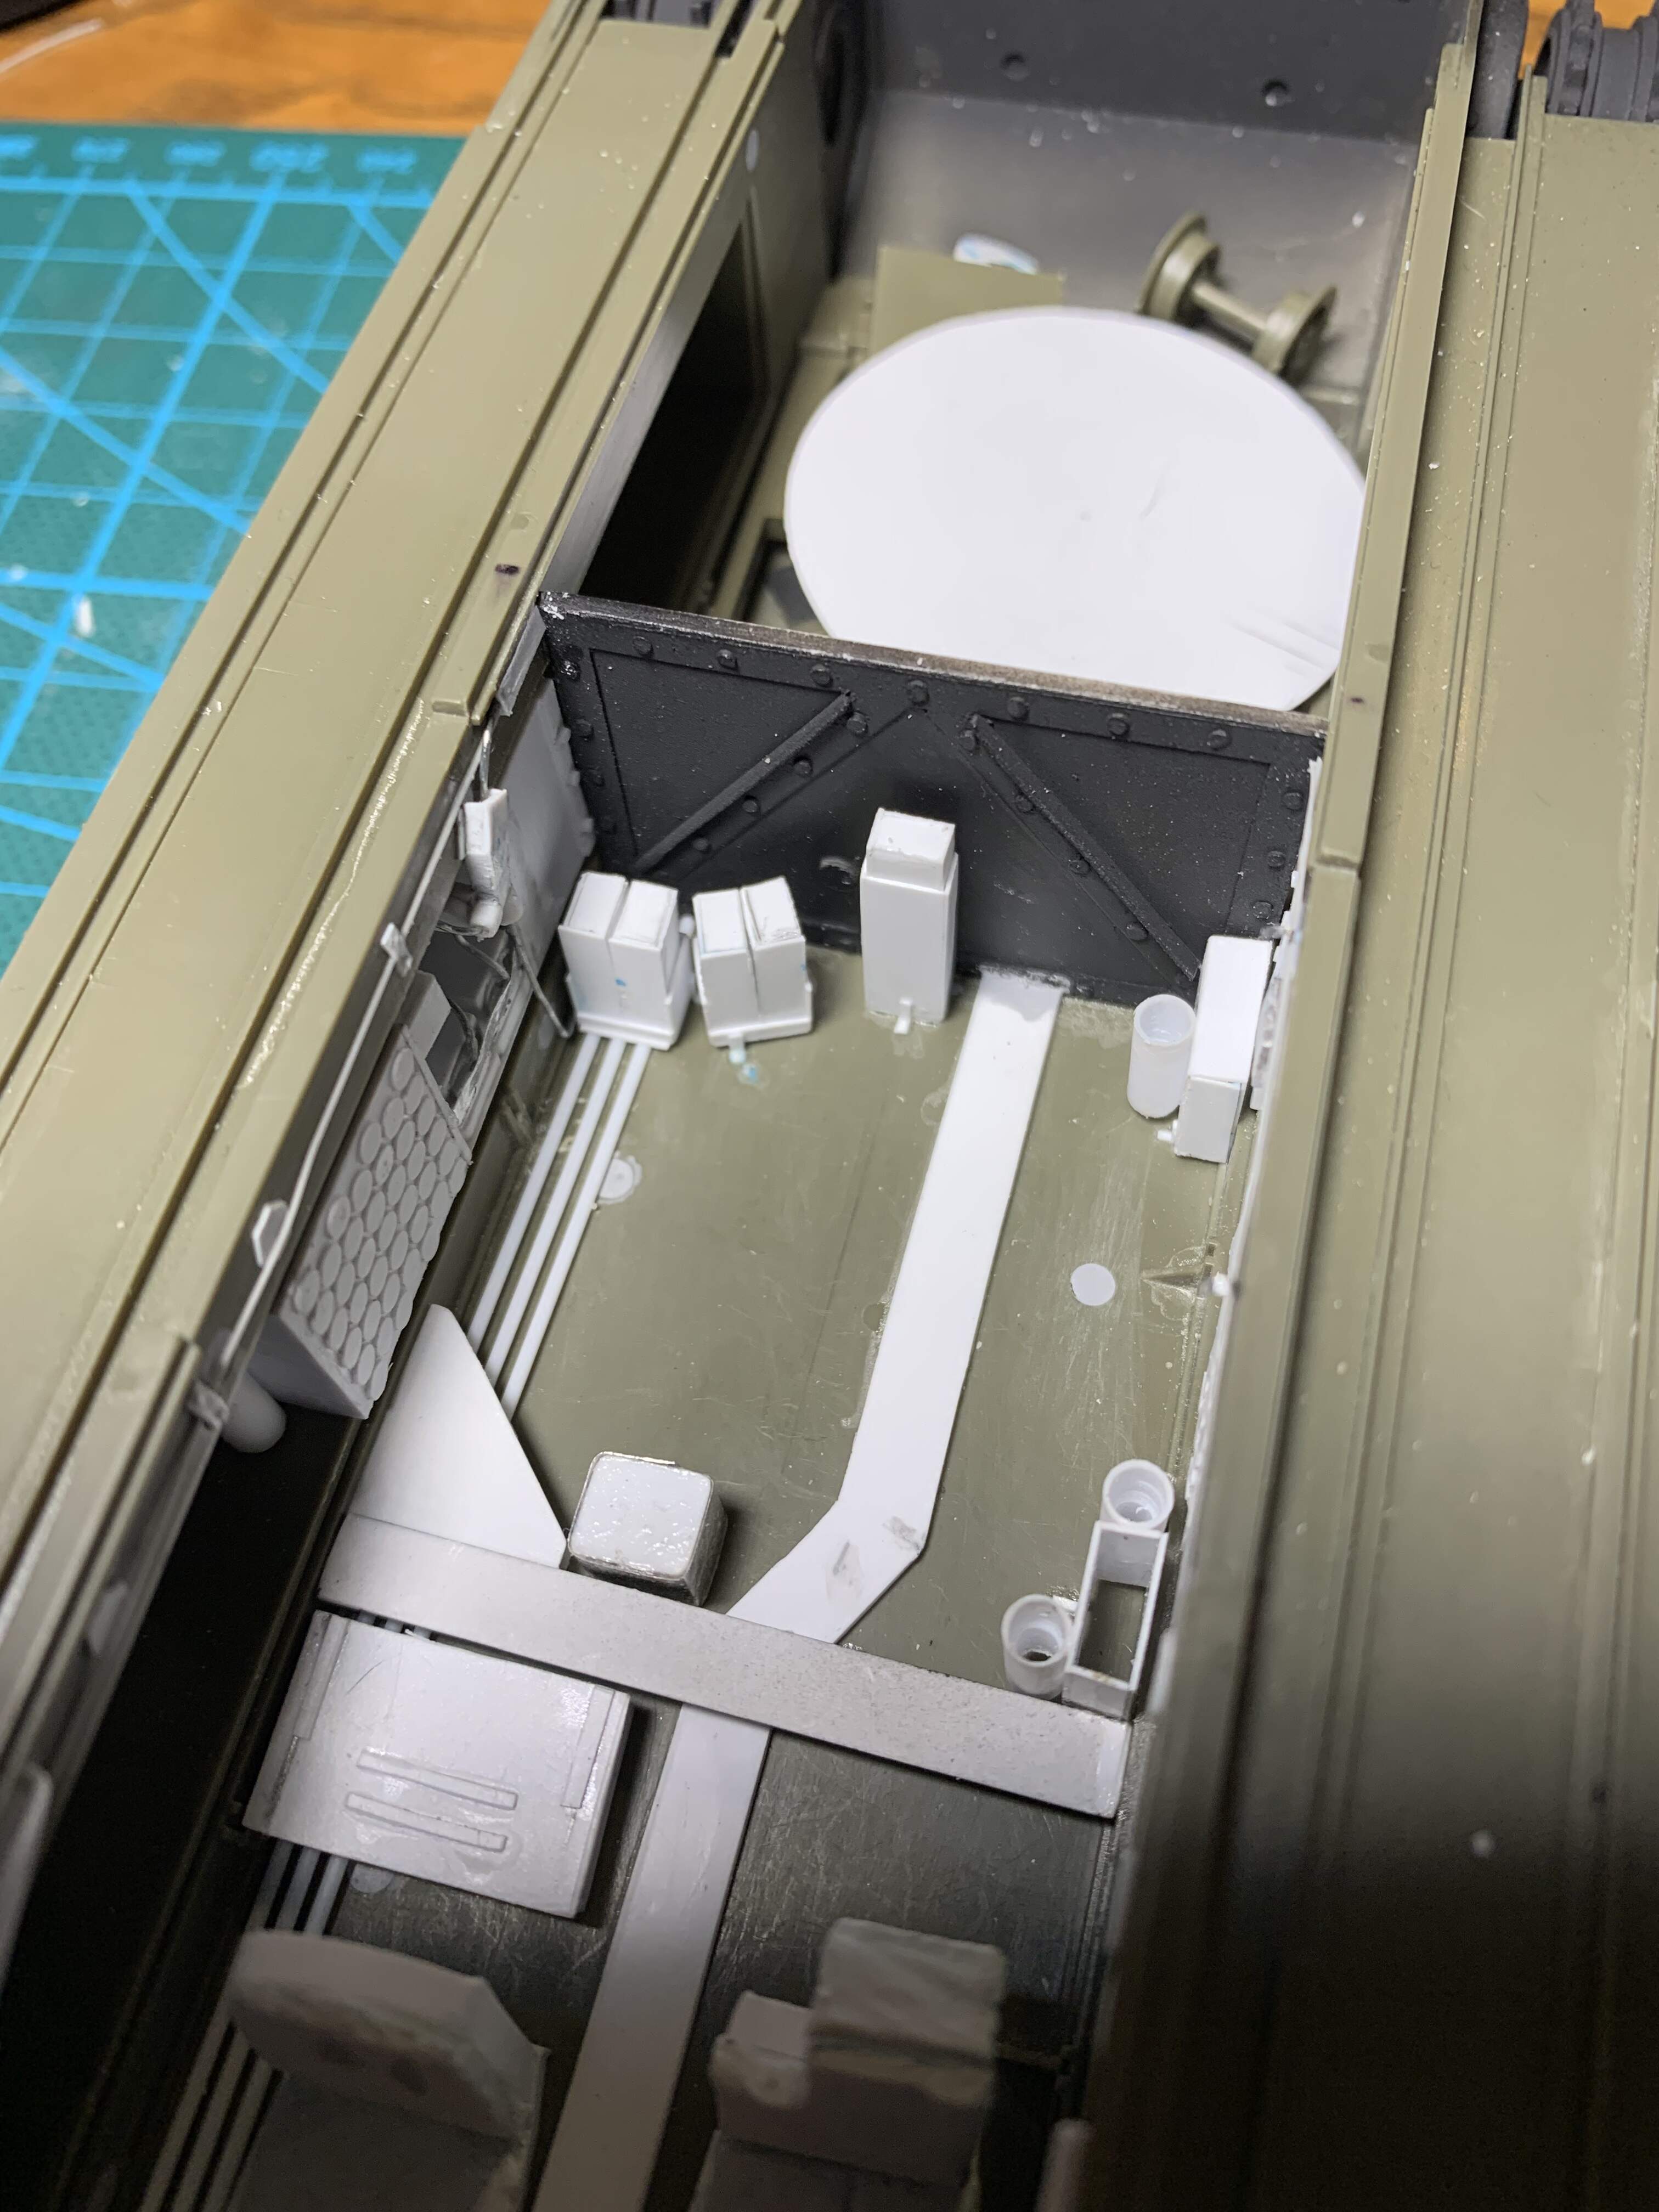
Work continues in the Churchill. The make recent updates include the triangular tool box that had equipment for cleaning the 6 pounder and the Bren guns. The hex bolts on the pannier, and the tubes for extra 6 pounder ammo.
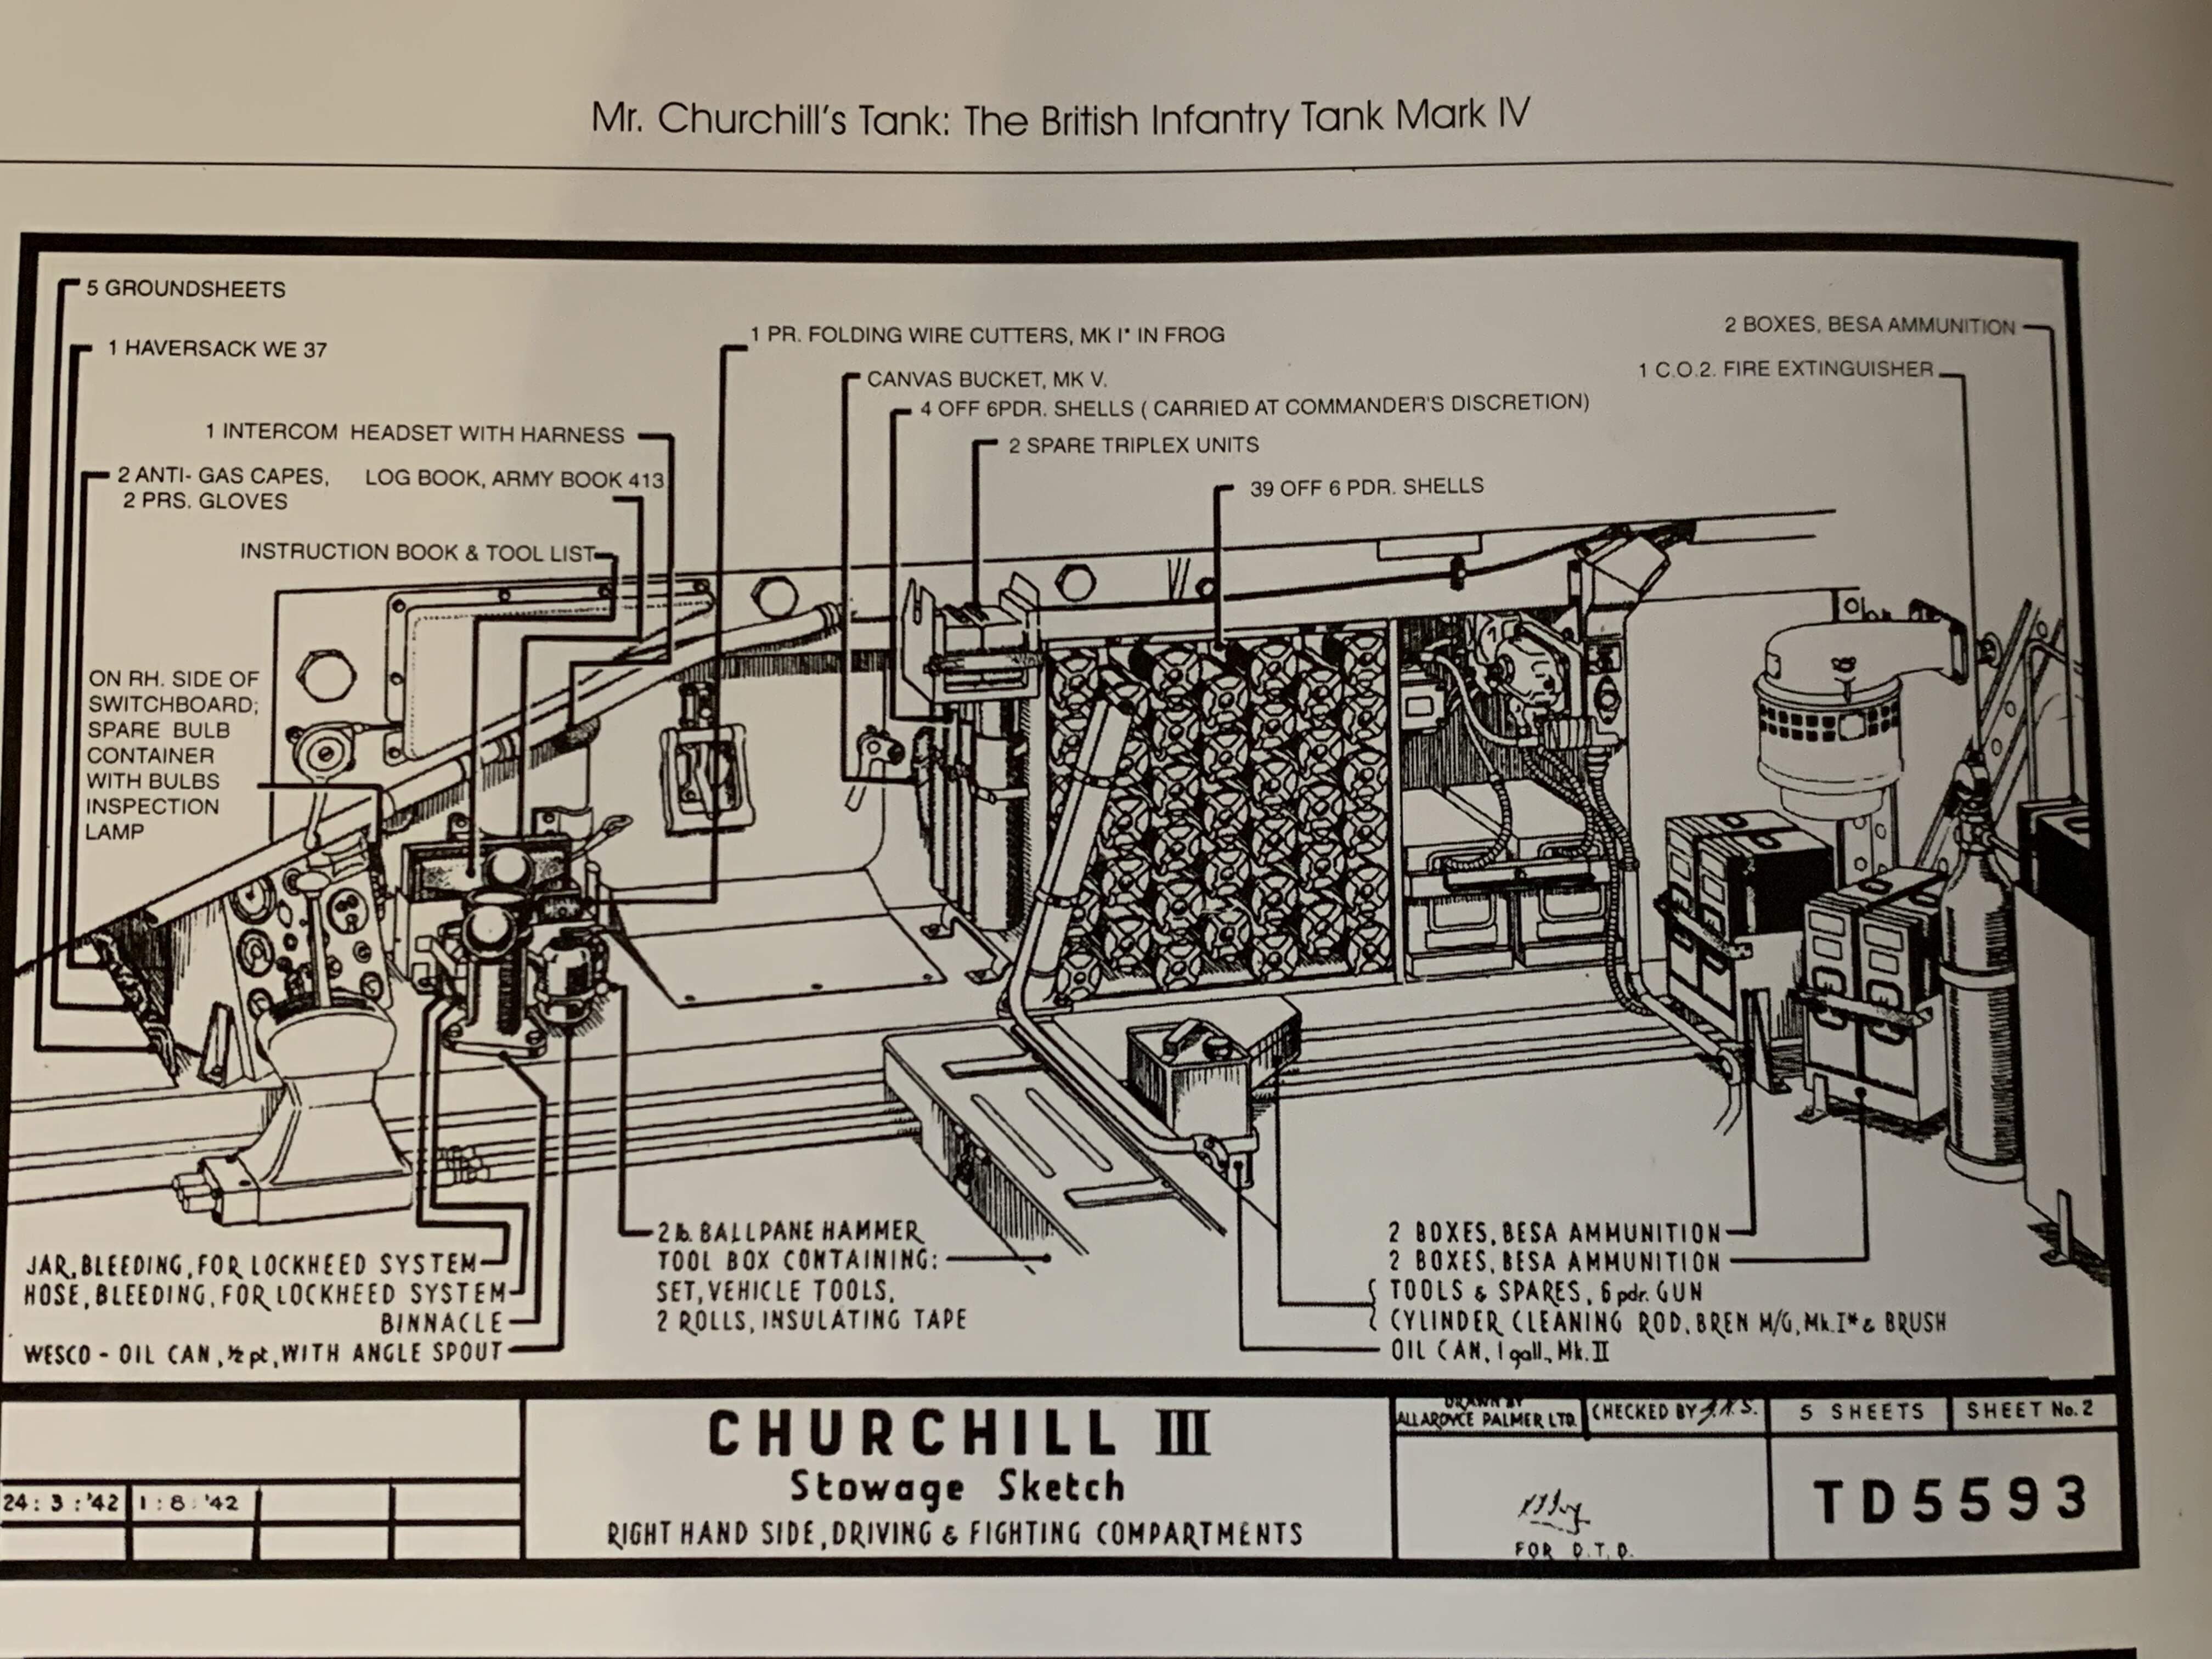
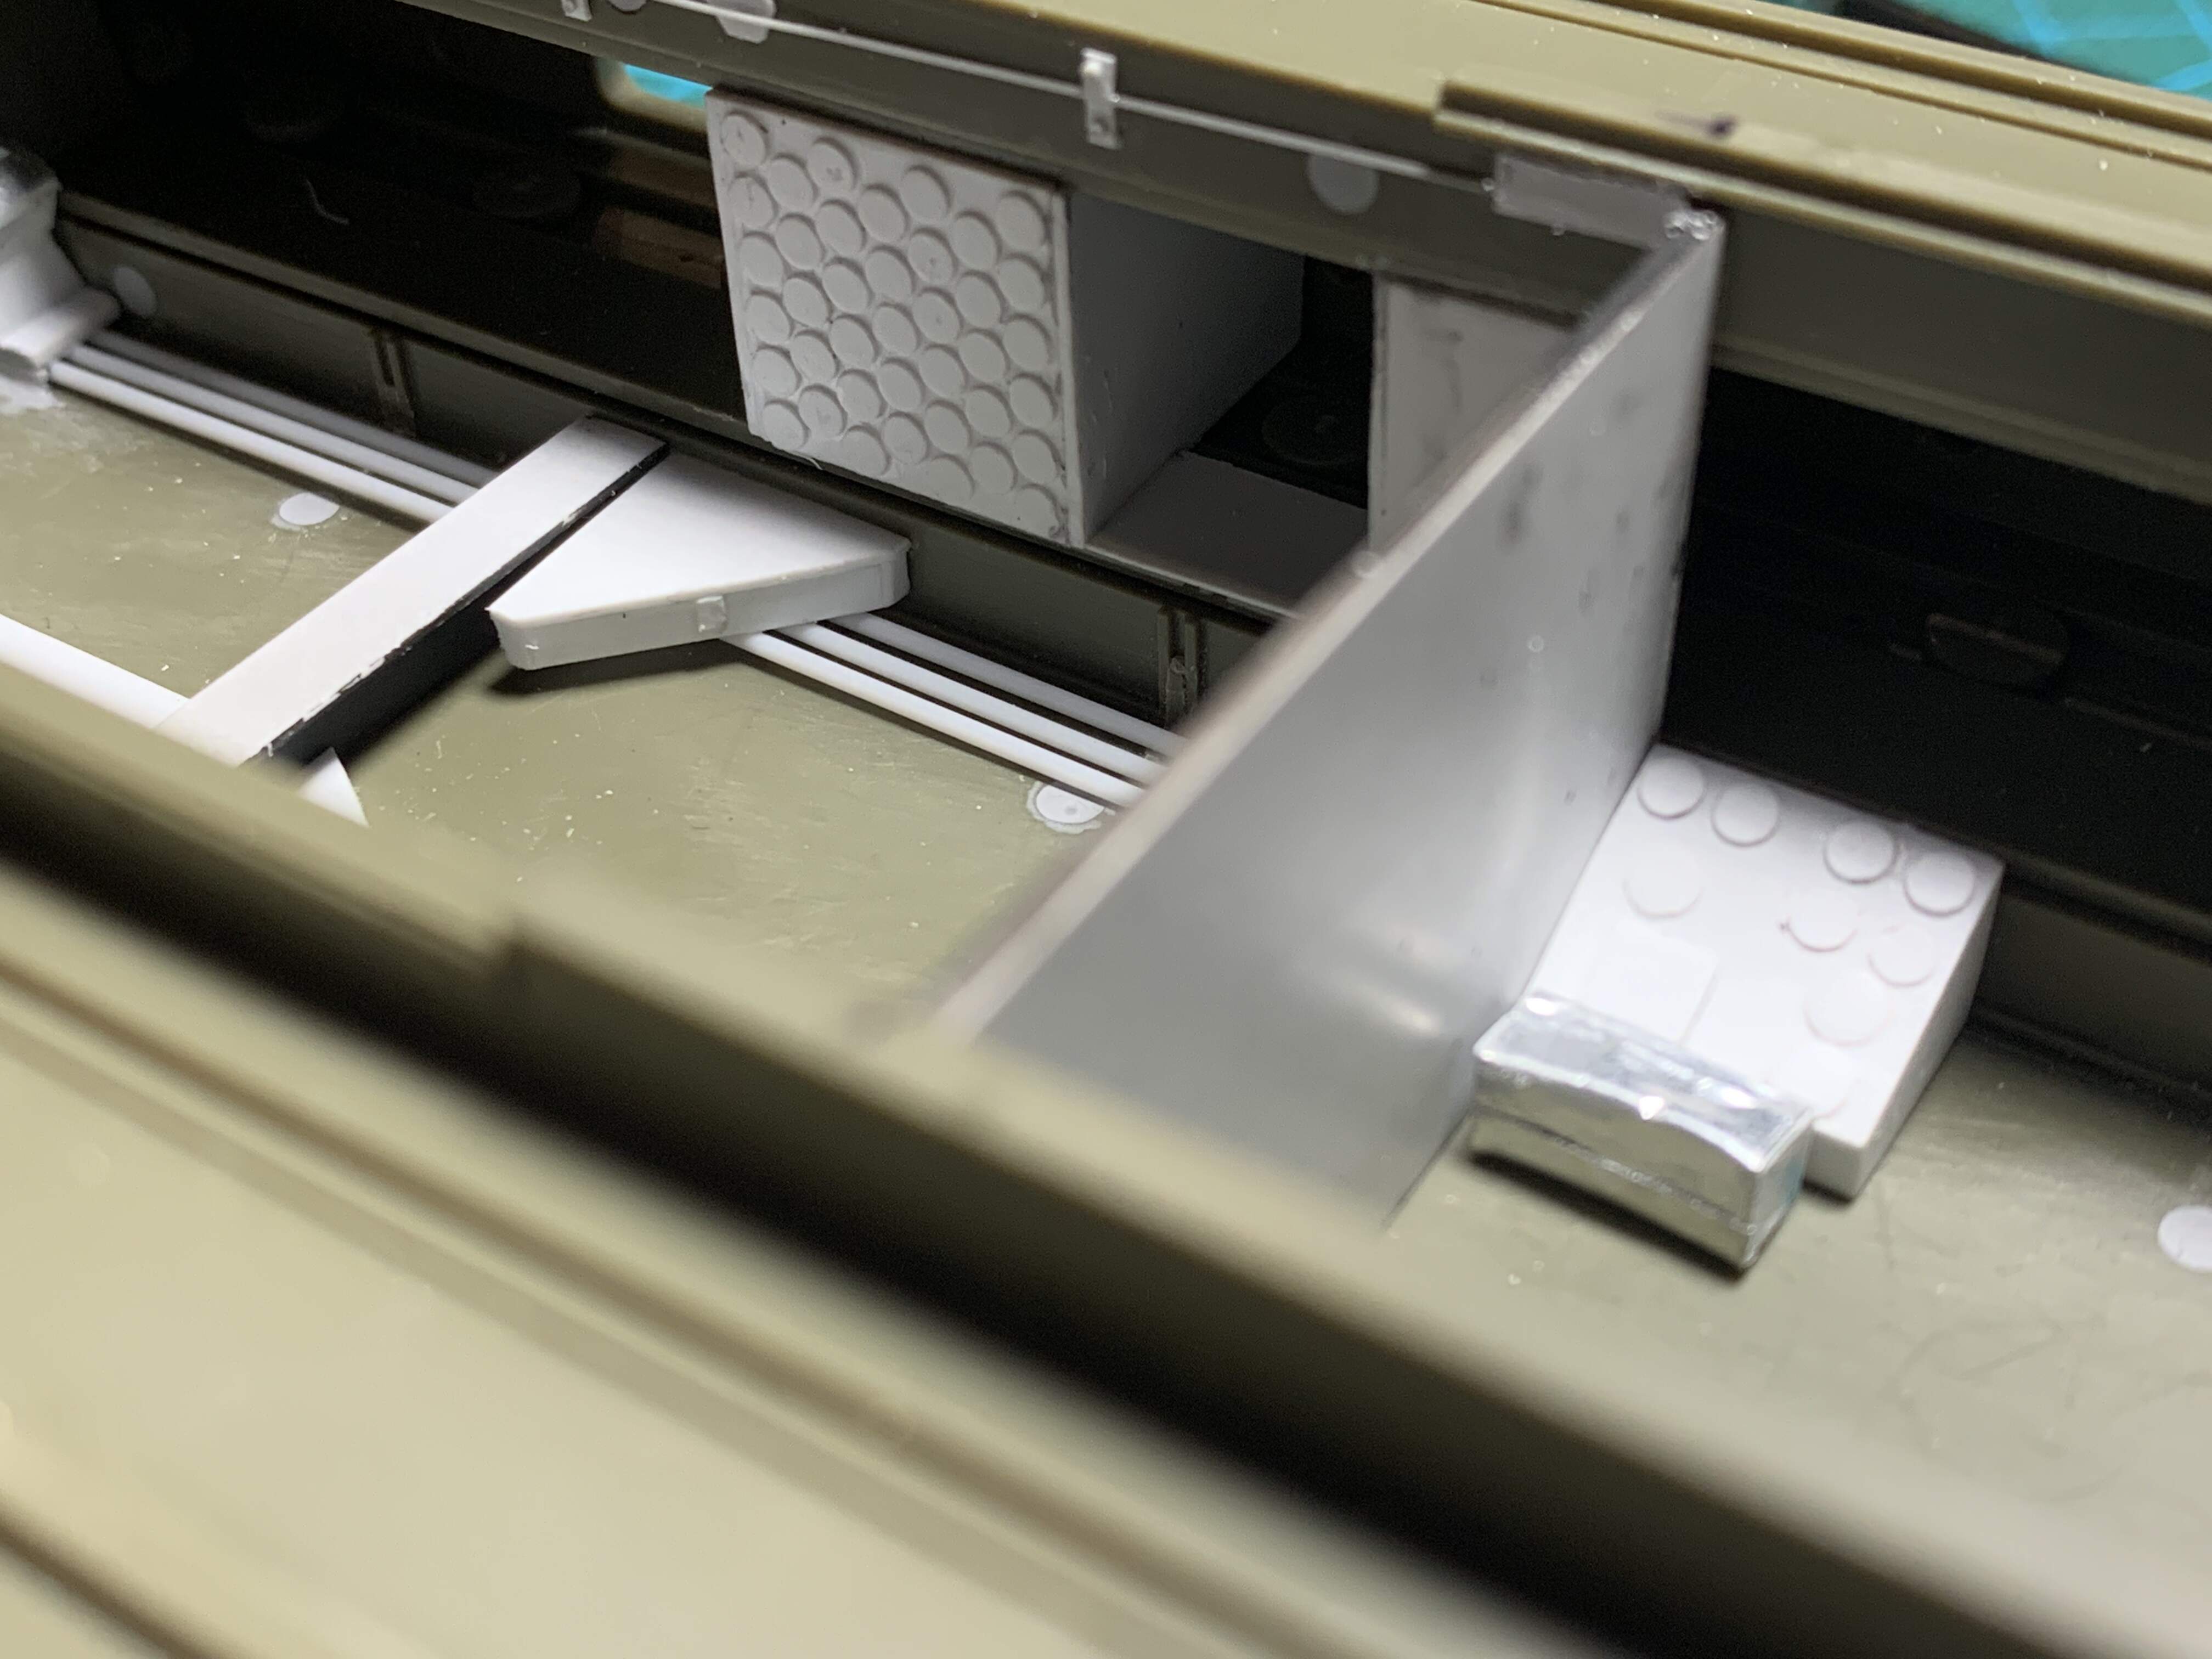
The hex bolts were a real PITA to cut out and make look similar in diemensuon to each other. I hope to have the drivers side of the hull done tonight. All that is really left is the two batteries, and wiring.
4 Likes
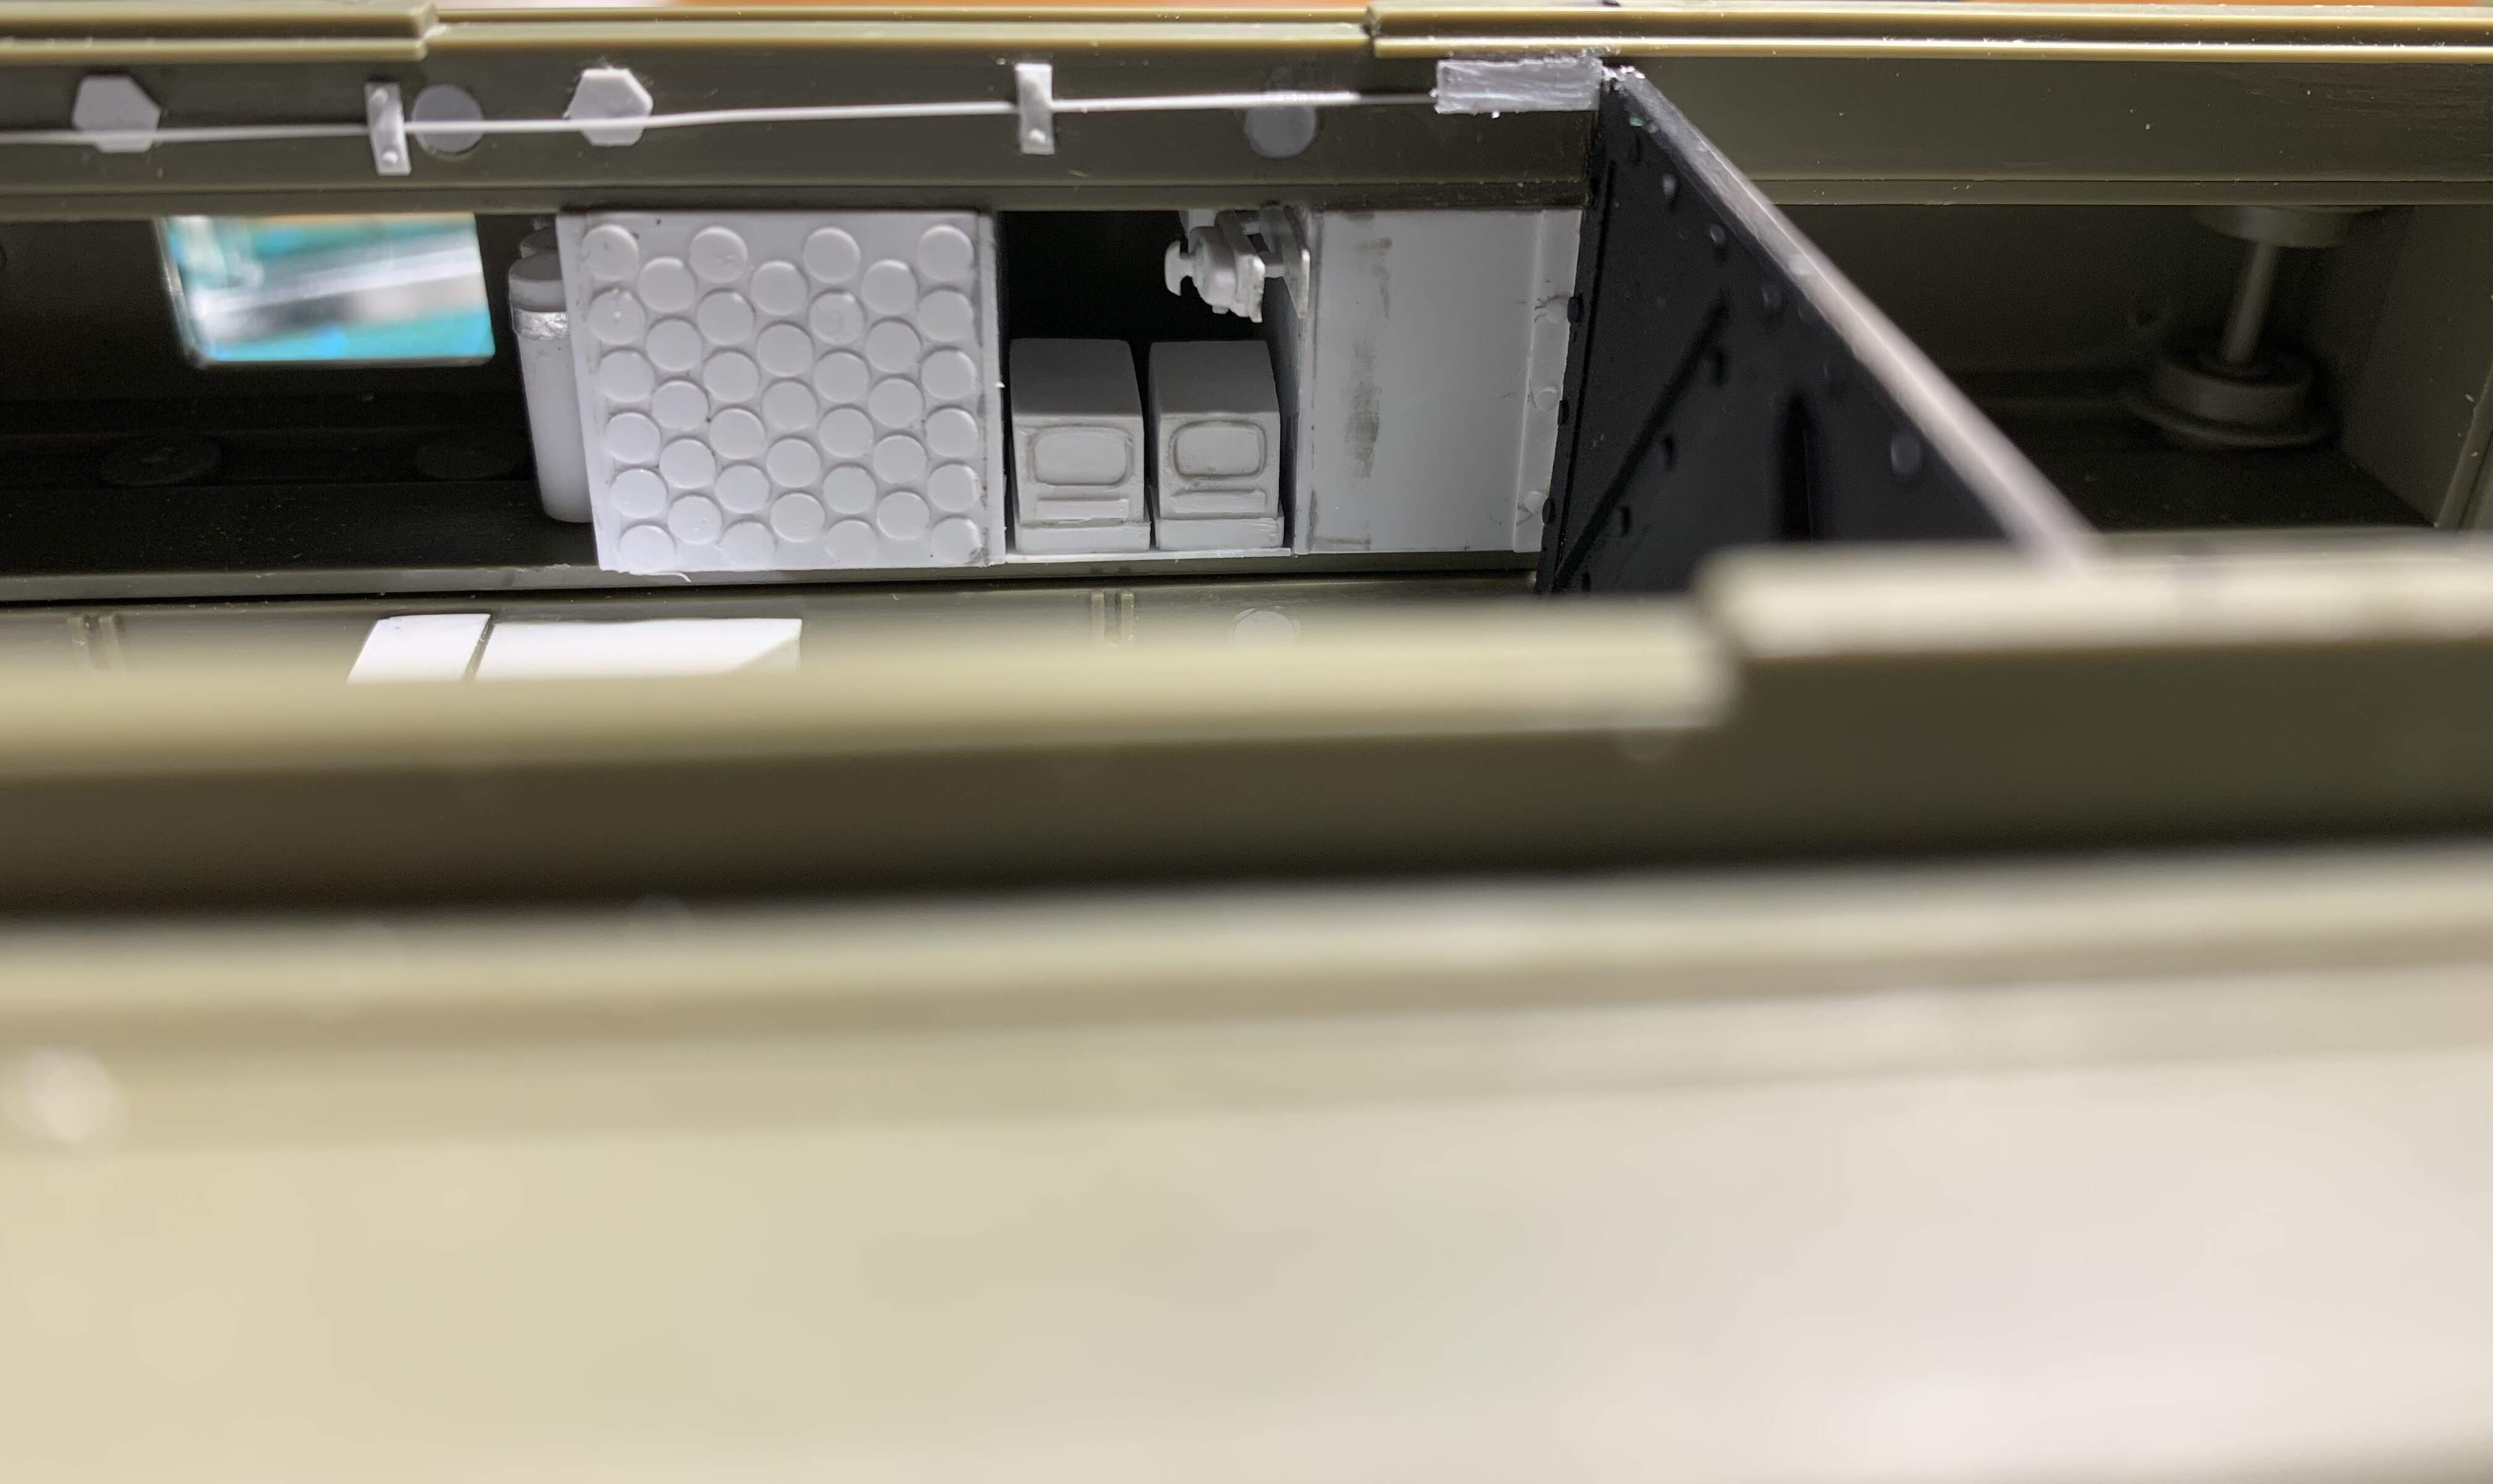
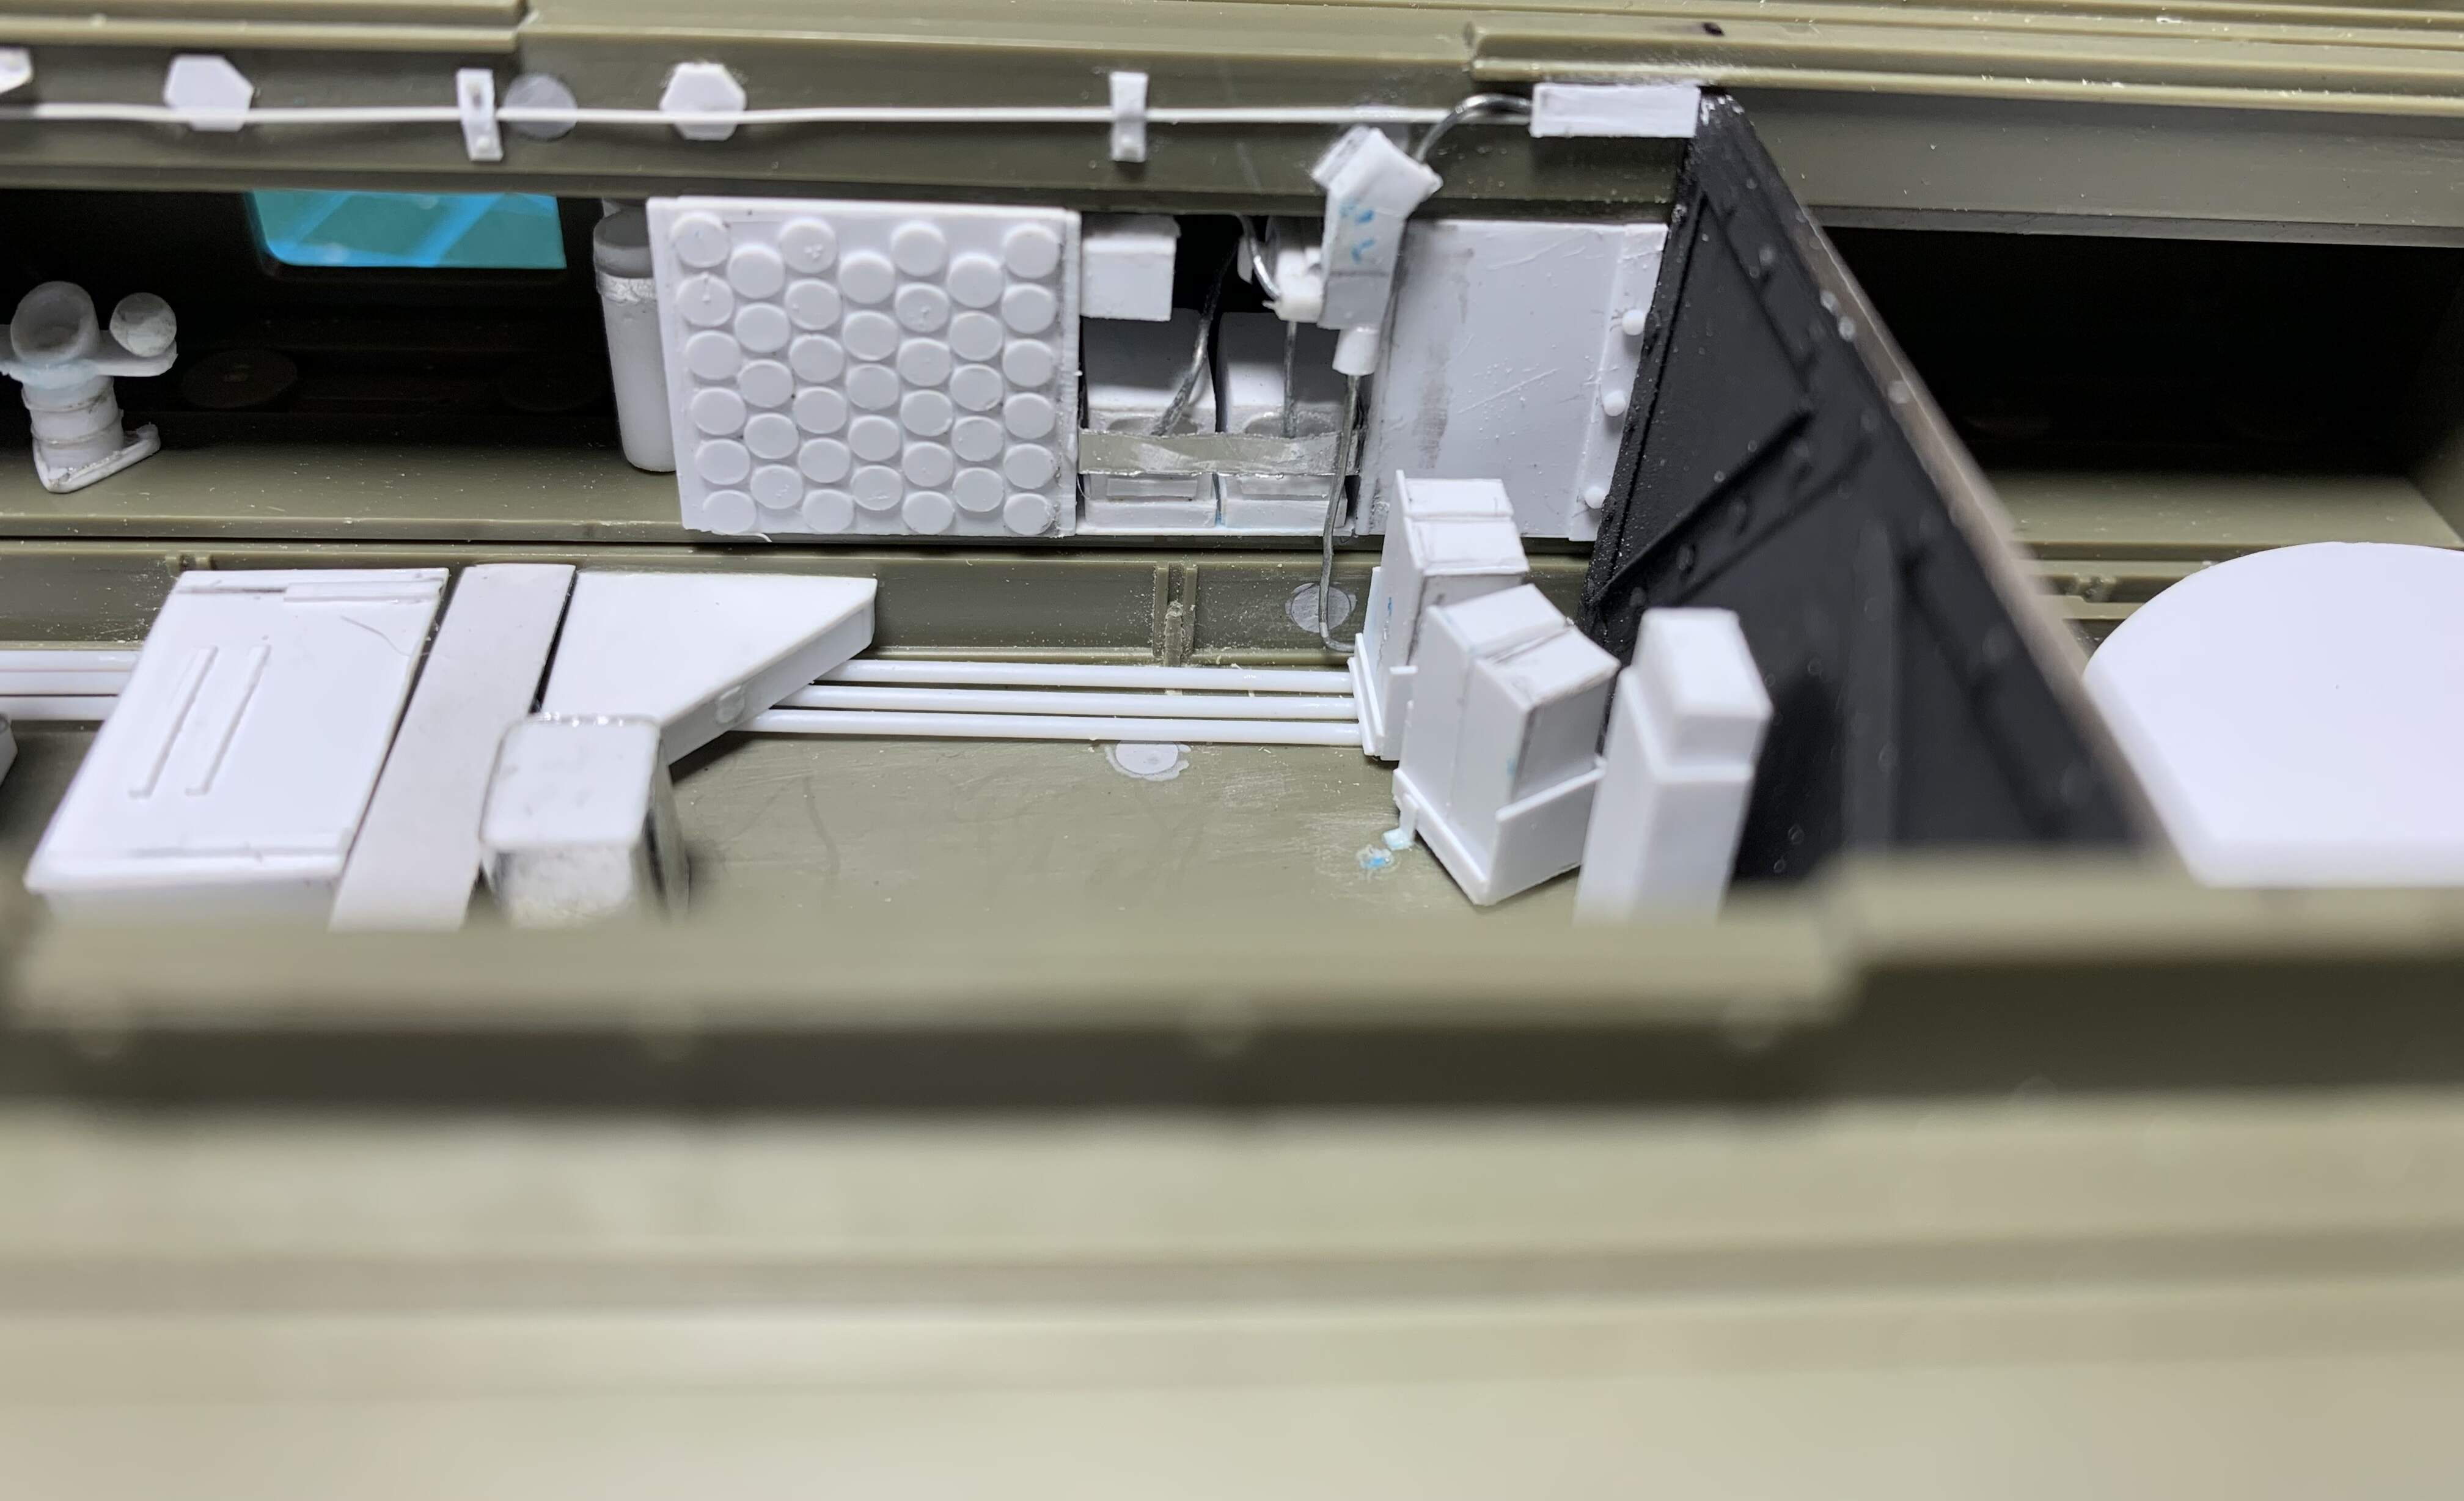
Spent some time on the battery compartment today. Wasn’t as clean as I would have liked, had a bit of superglue over application when doing the wiring, however some of the issue will be hidden but the bar that secures the batteries in place and the counduit that will hide the wiring.
Still have a bit of work to do on this compartment but mostly done.

6 Likes
Added the bar to the from of the battery compartment and the wire conduit. Just a couple wires to add now out of stretched sprue. I’m much happier now that I have the conduit and bar in place it covers up my superglue mishap a bit. And makes the area look cleaner and done. This was probably the hardest part I had left in the hull interior. Rest is details. Should be on track to be done the hull interior by Sunday. The bar was made from the same pie plate foil as the top of the gear shift. The conduit from .01” stock
6 Likes
This is just styrene porn of the highest caliber . I will be watching you.

2 Likes
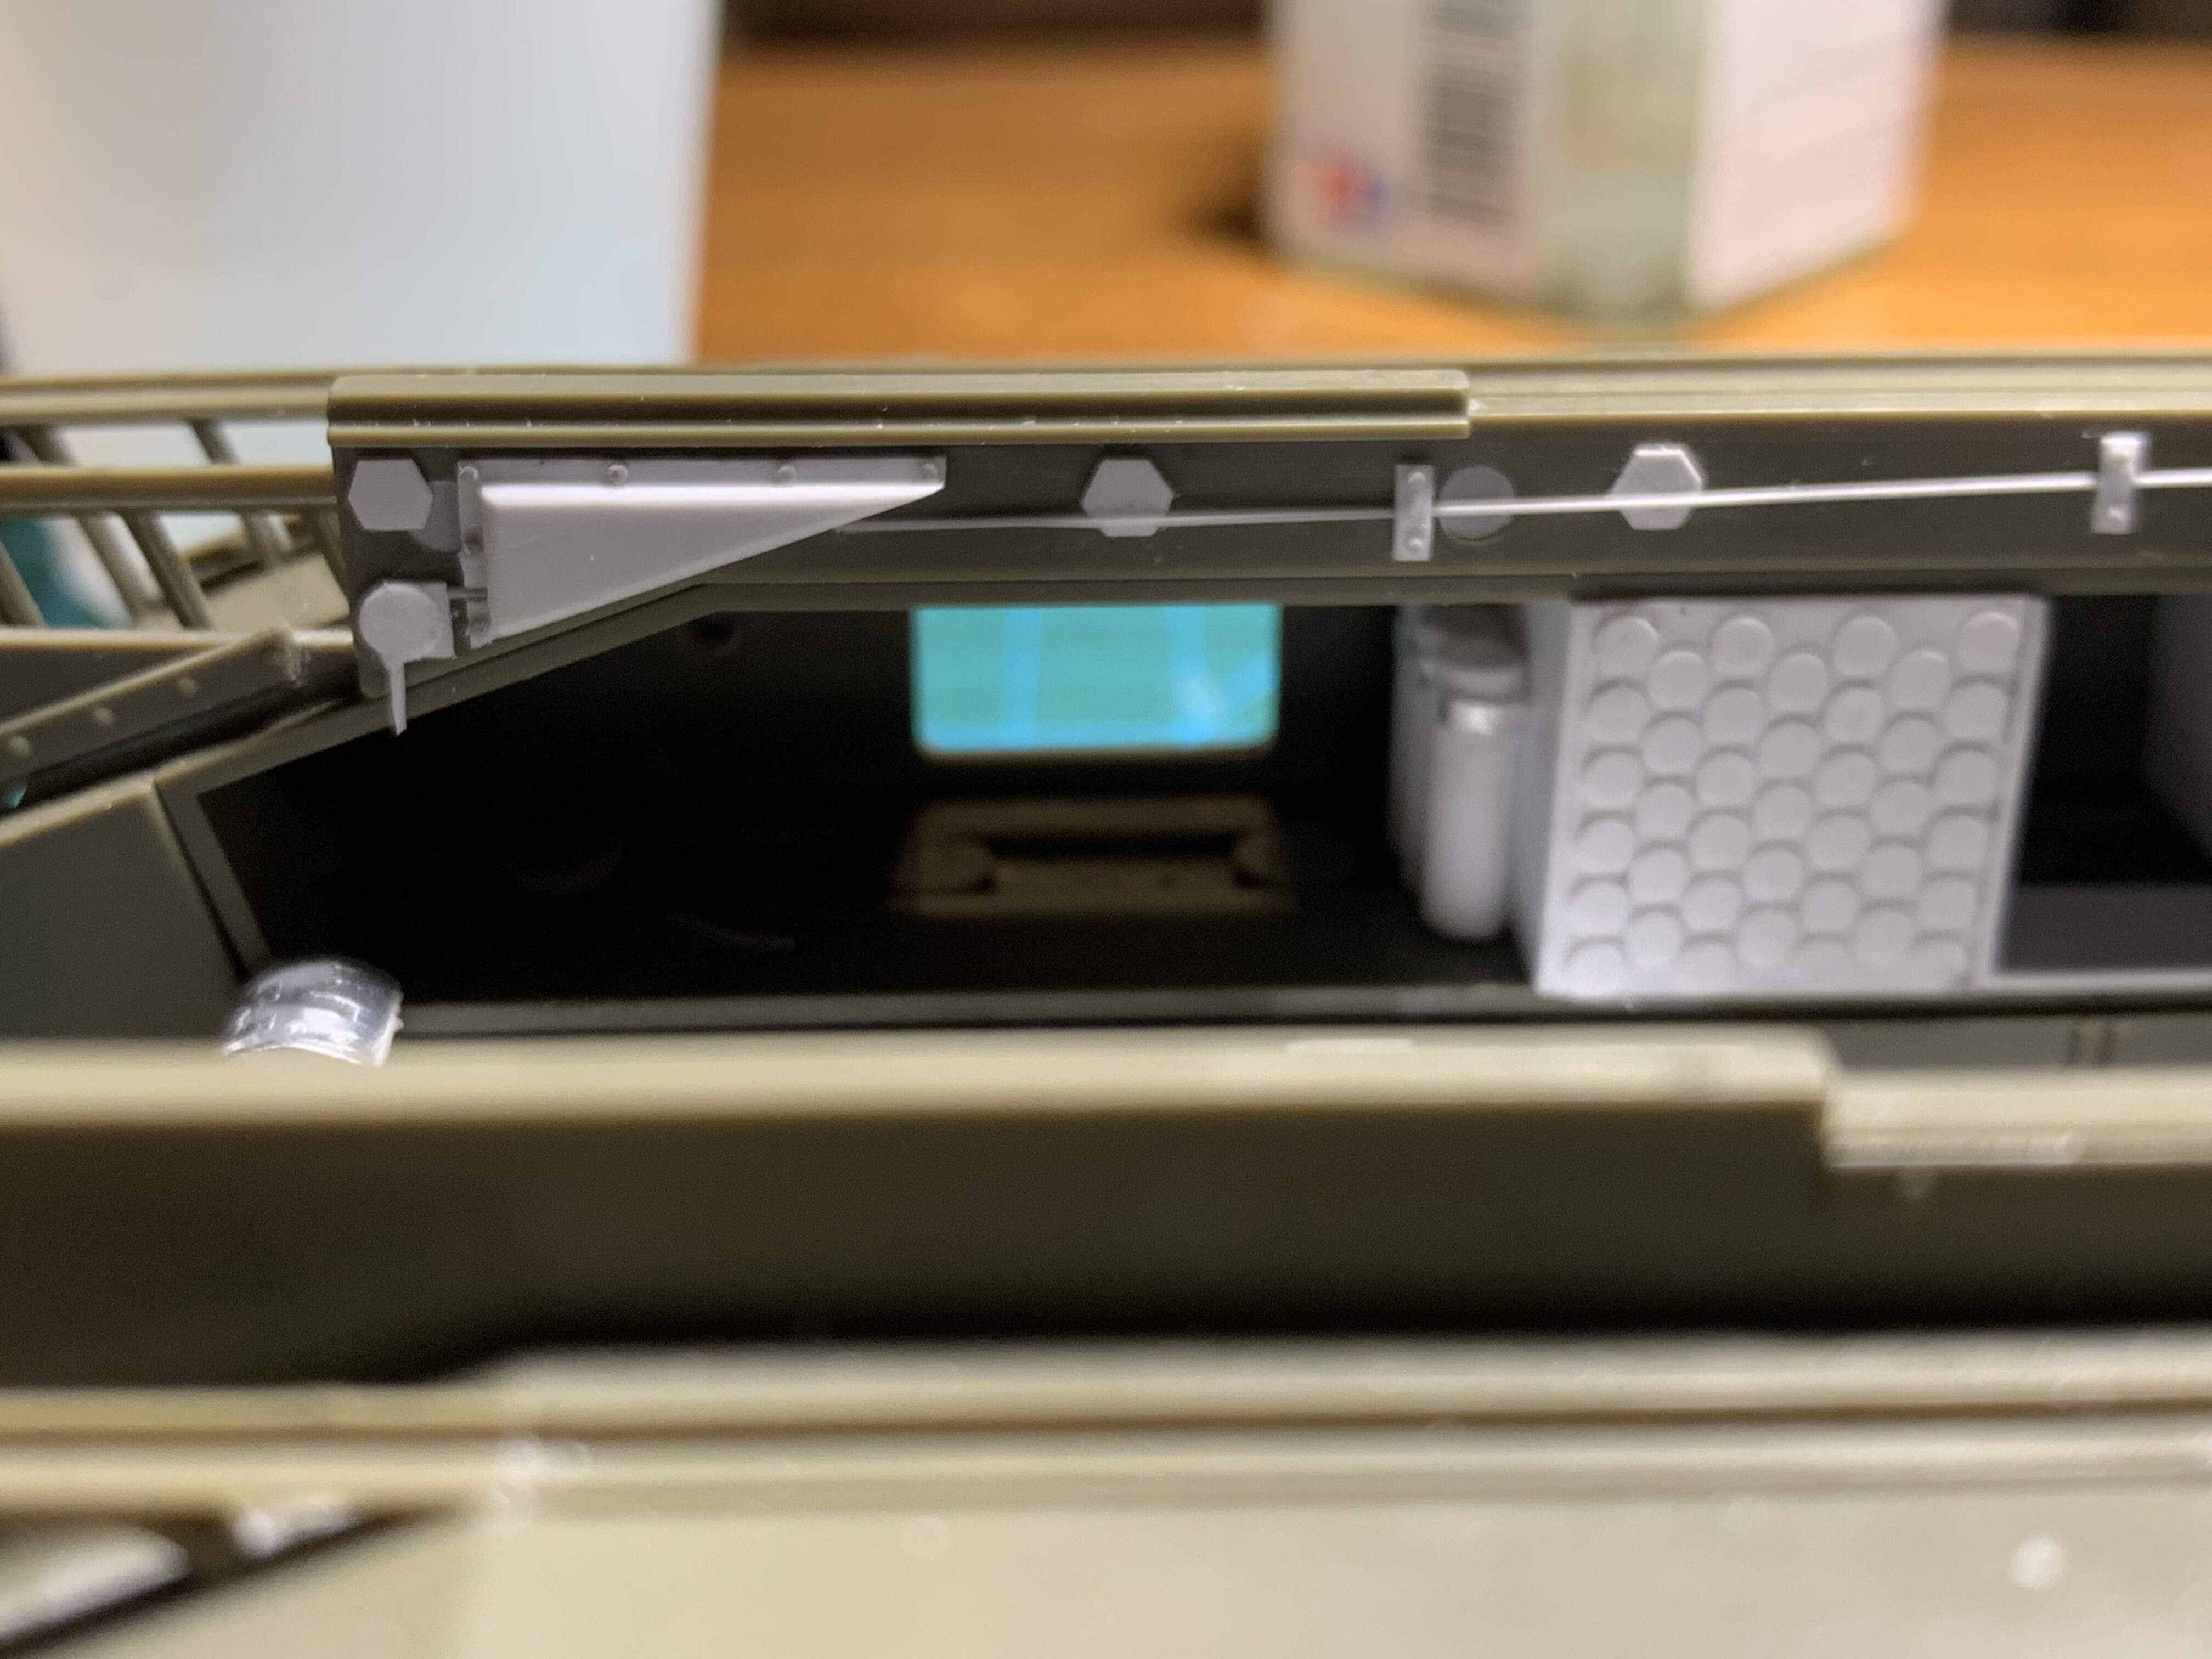
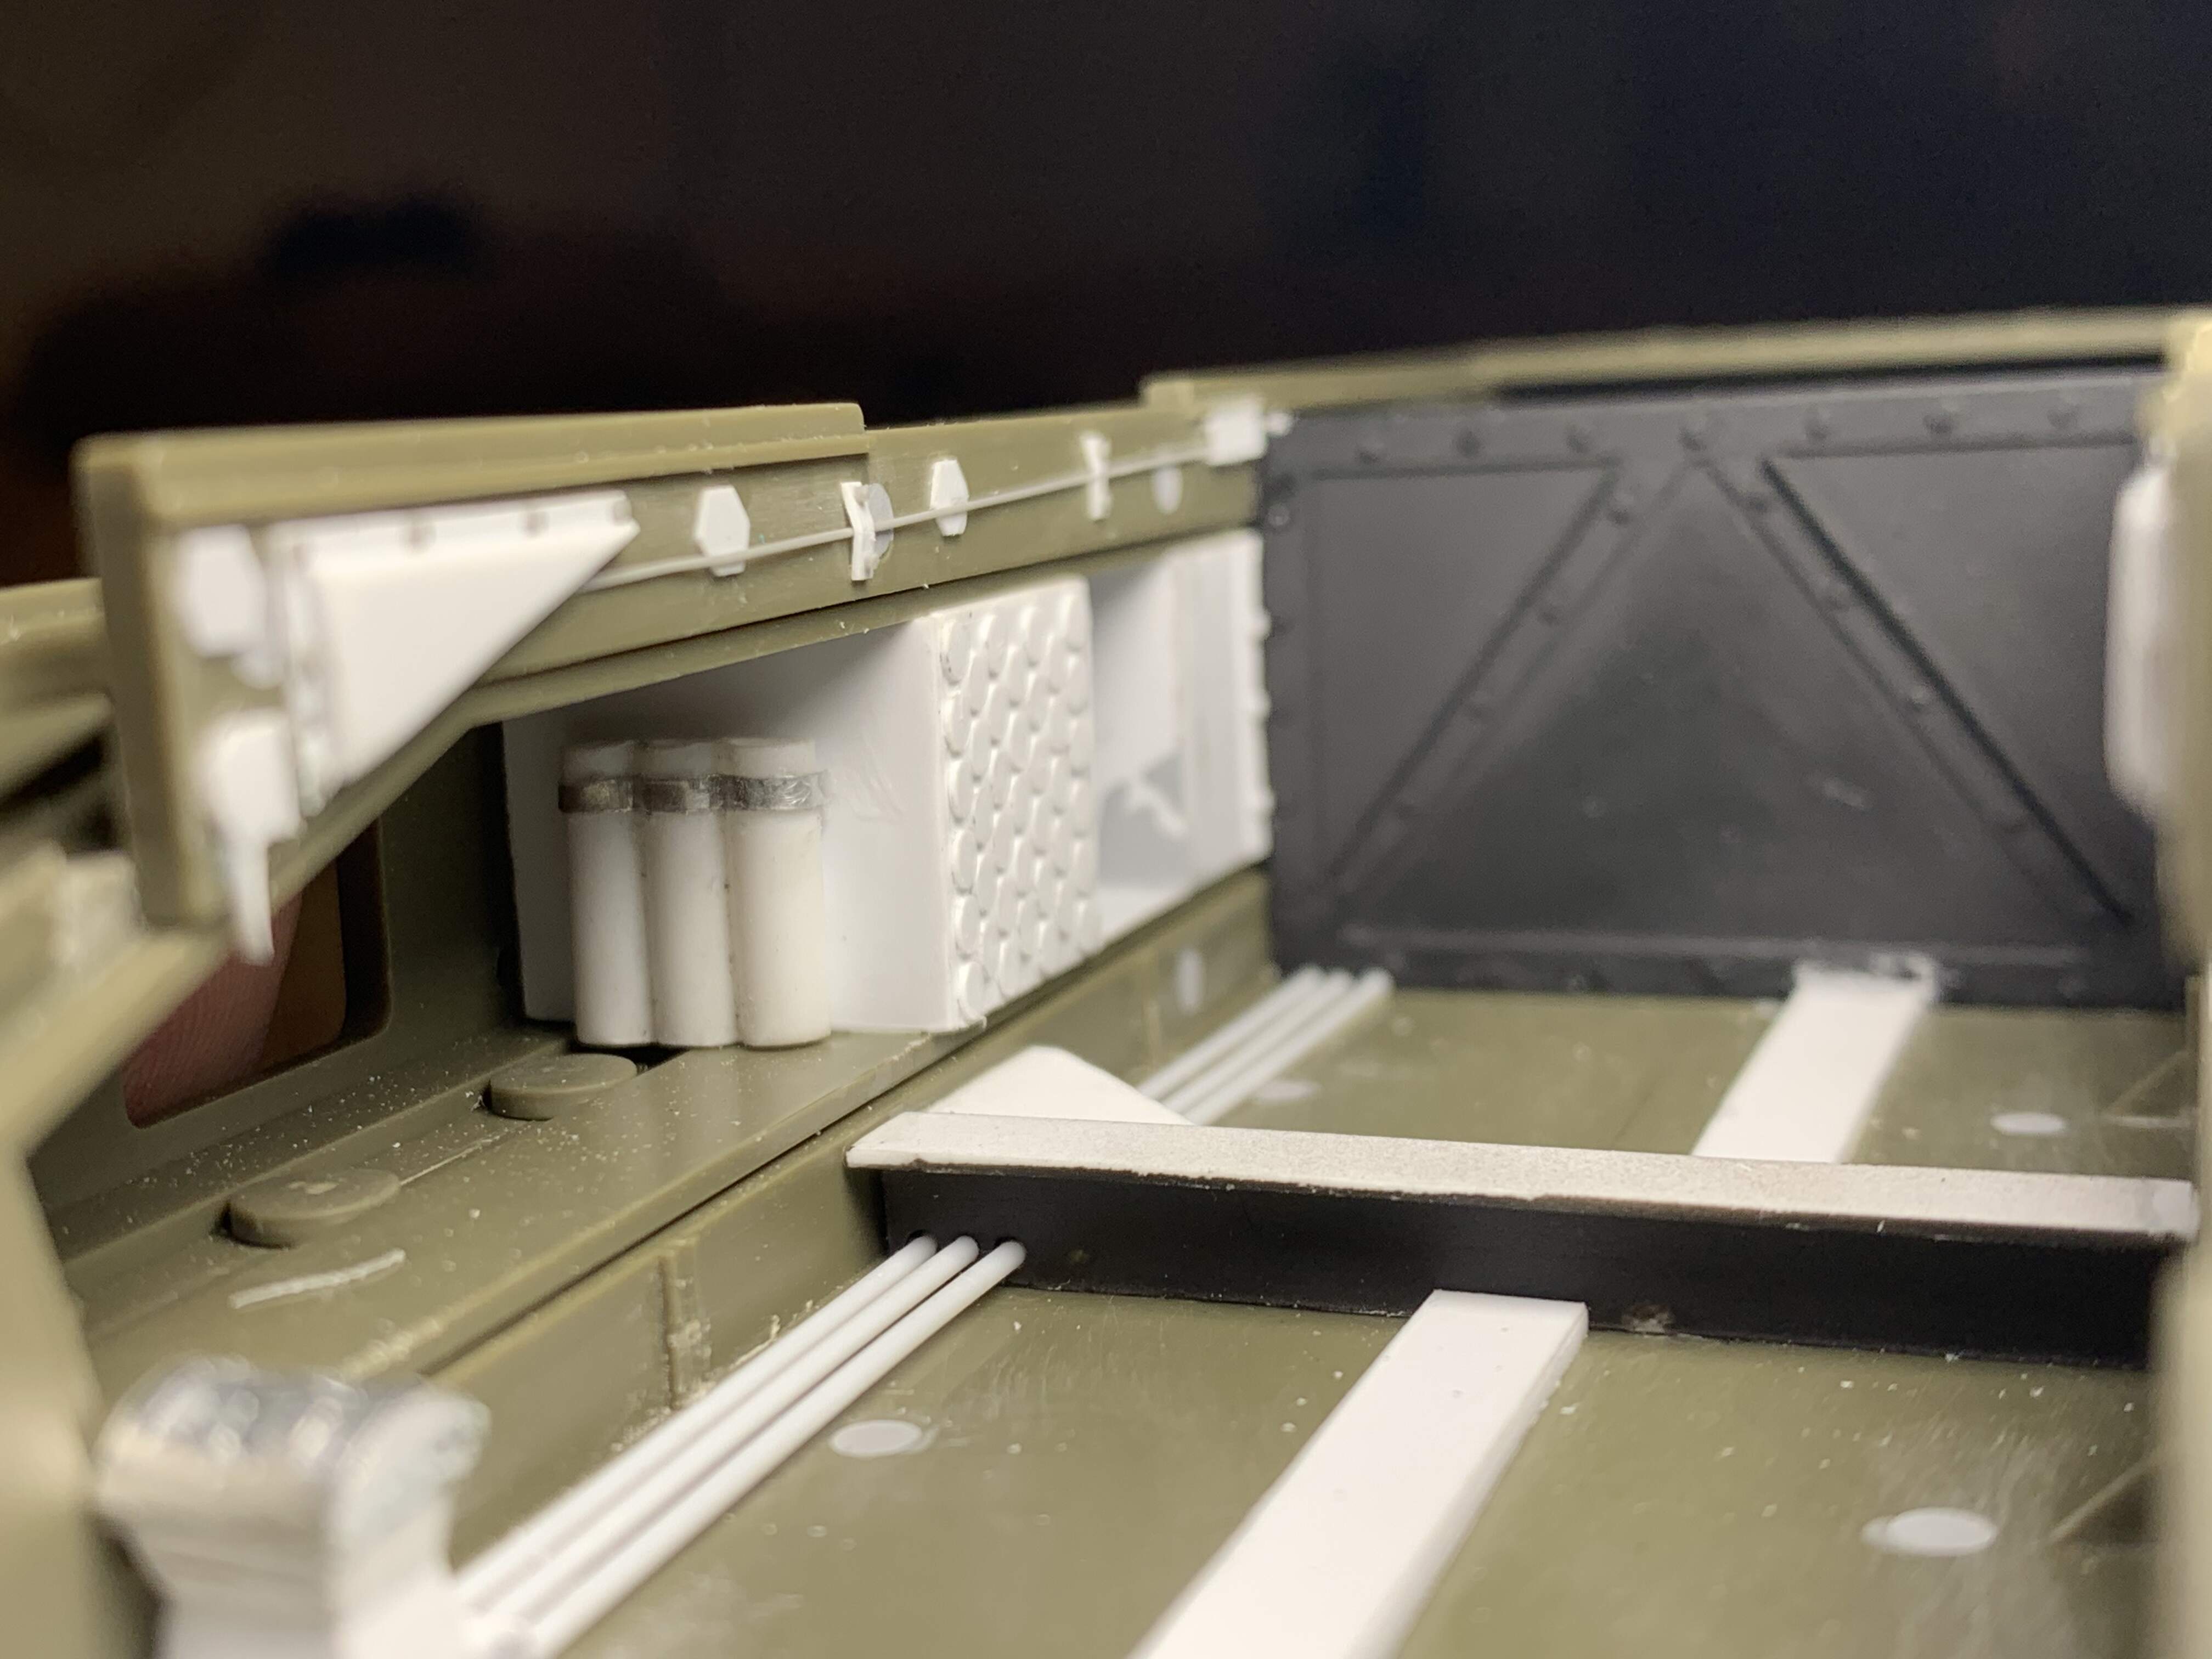
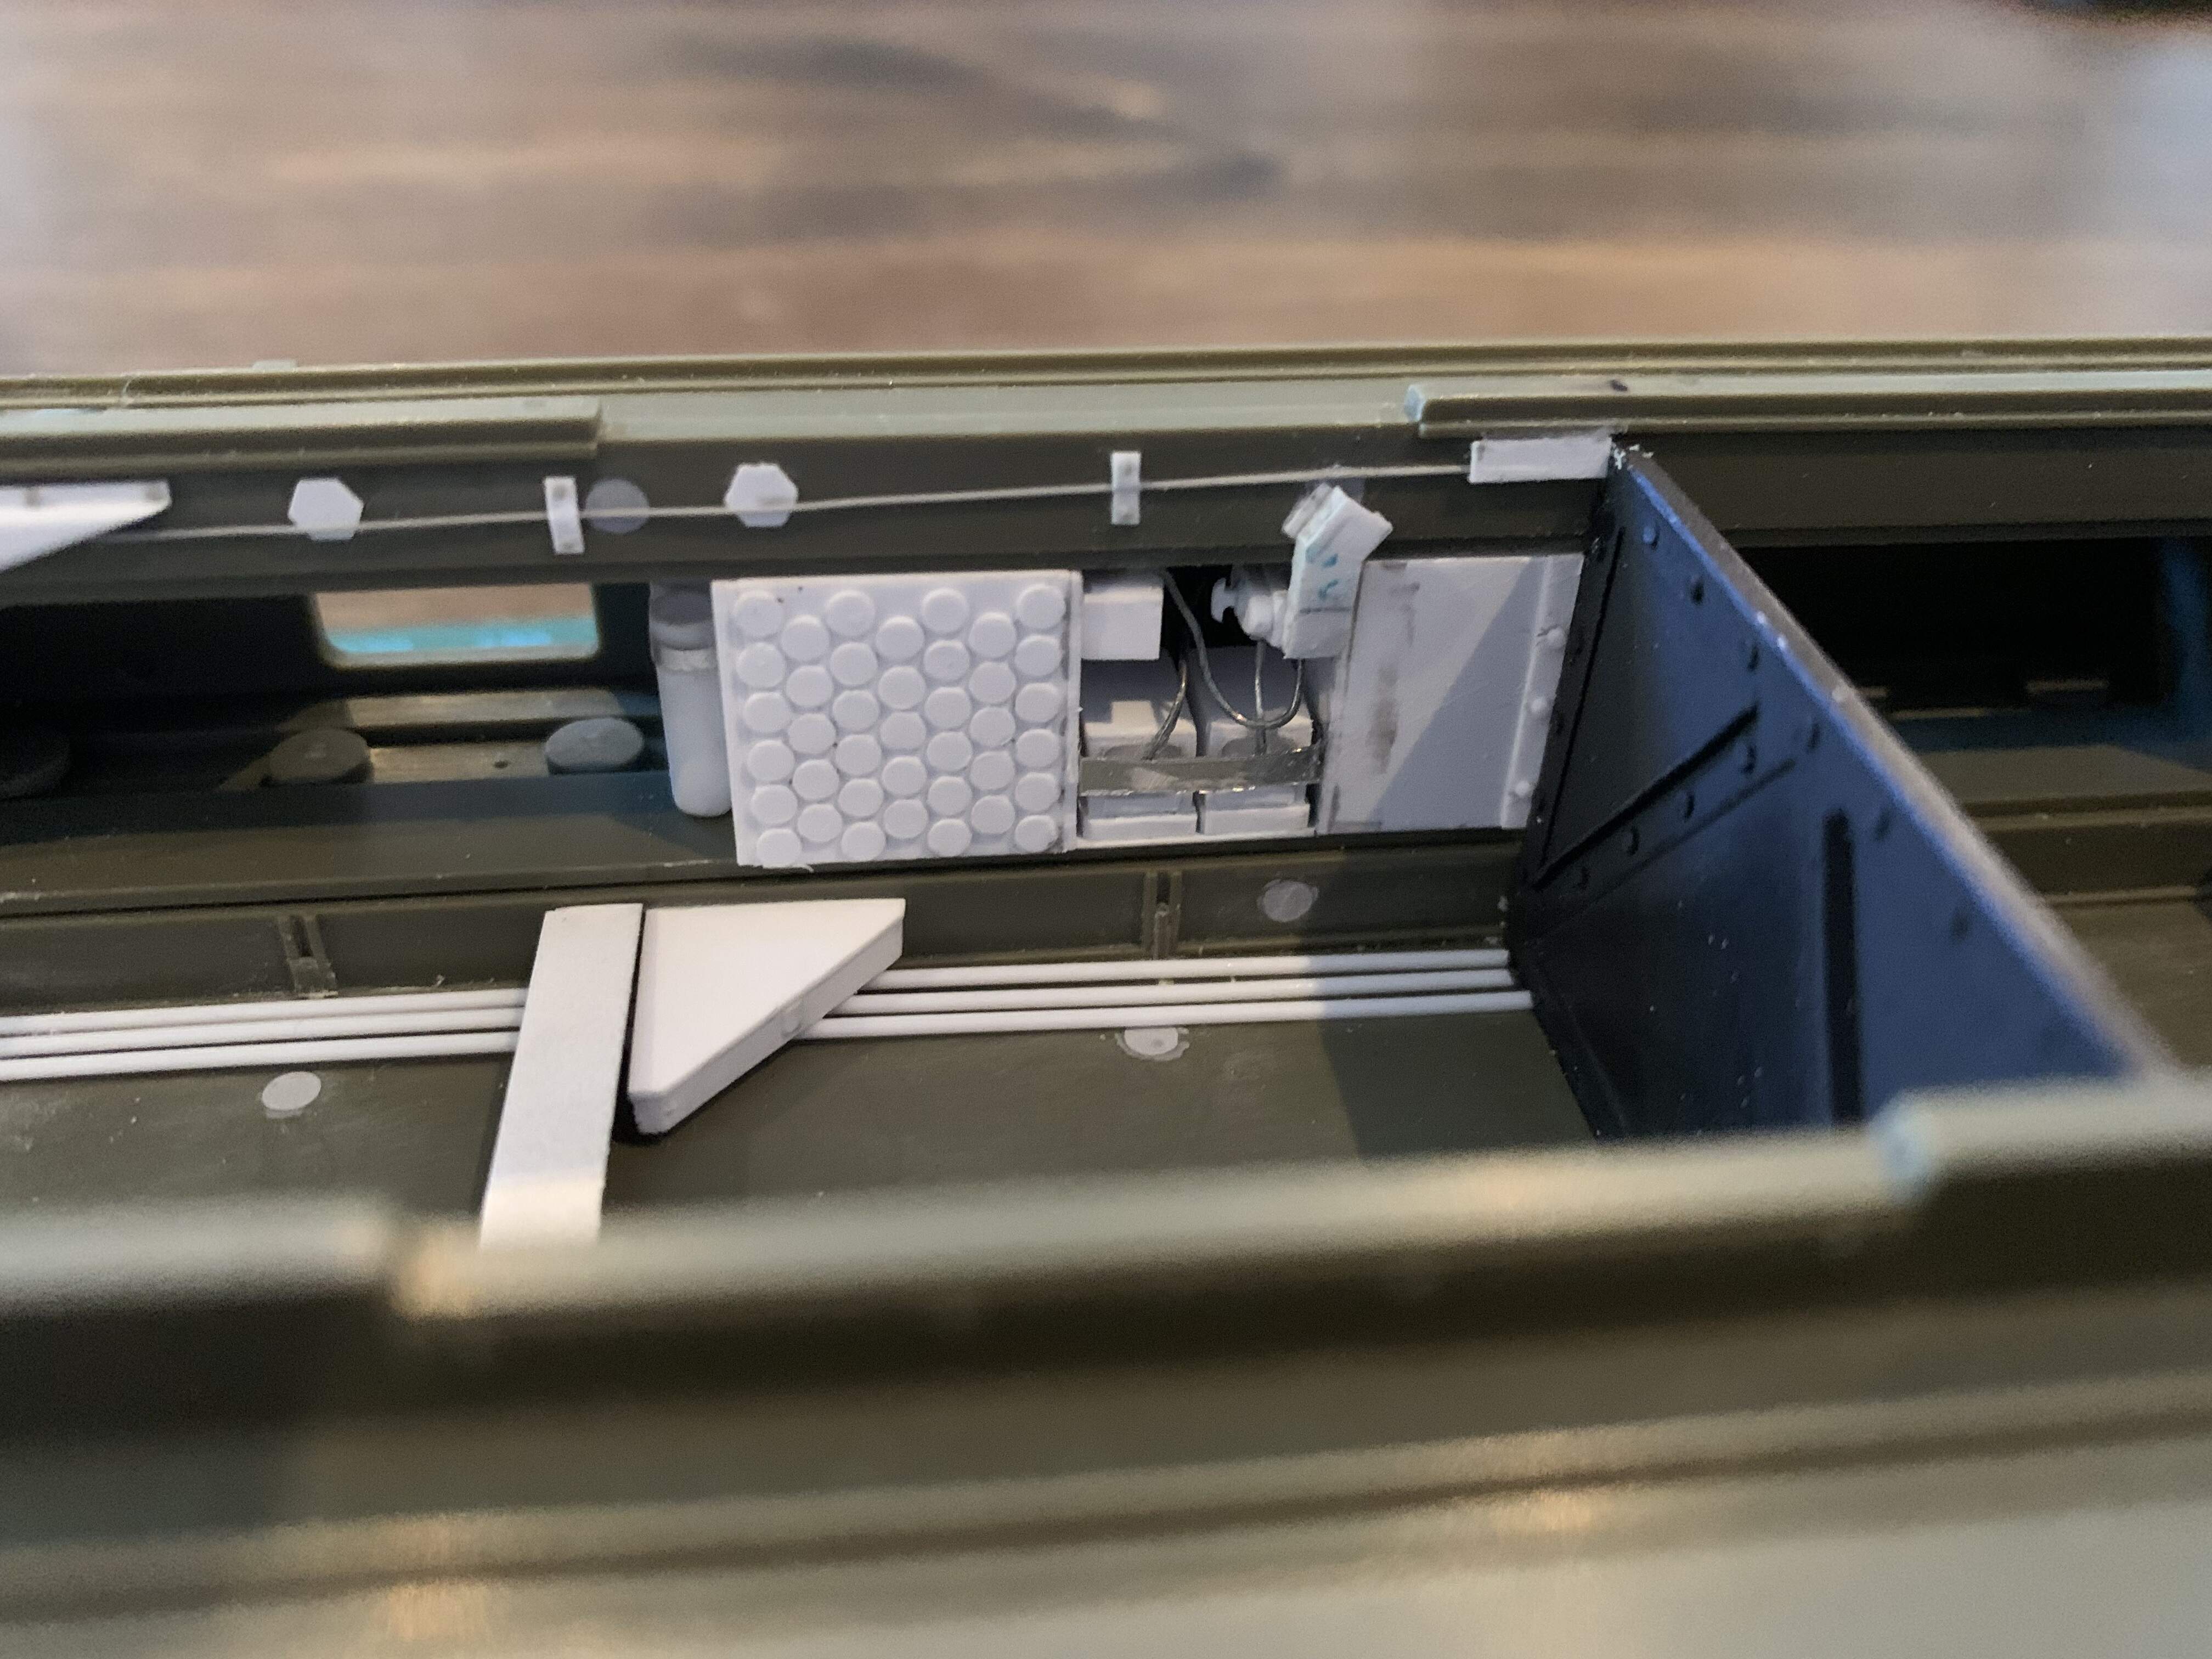
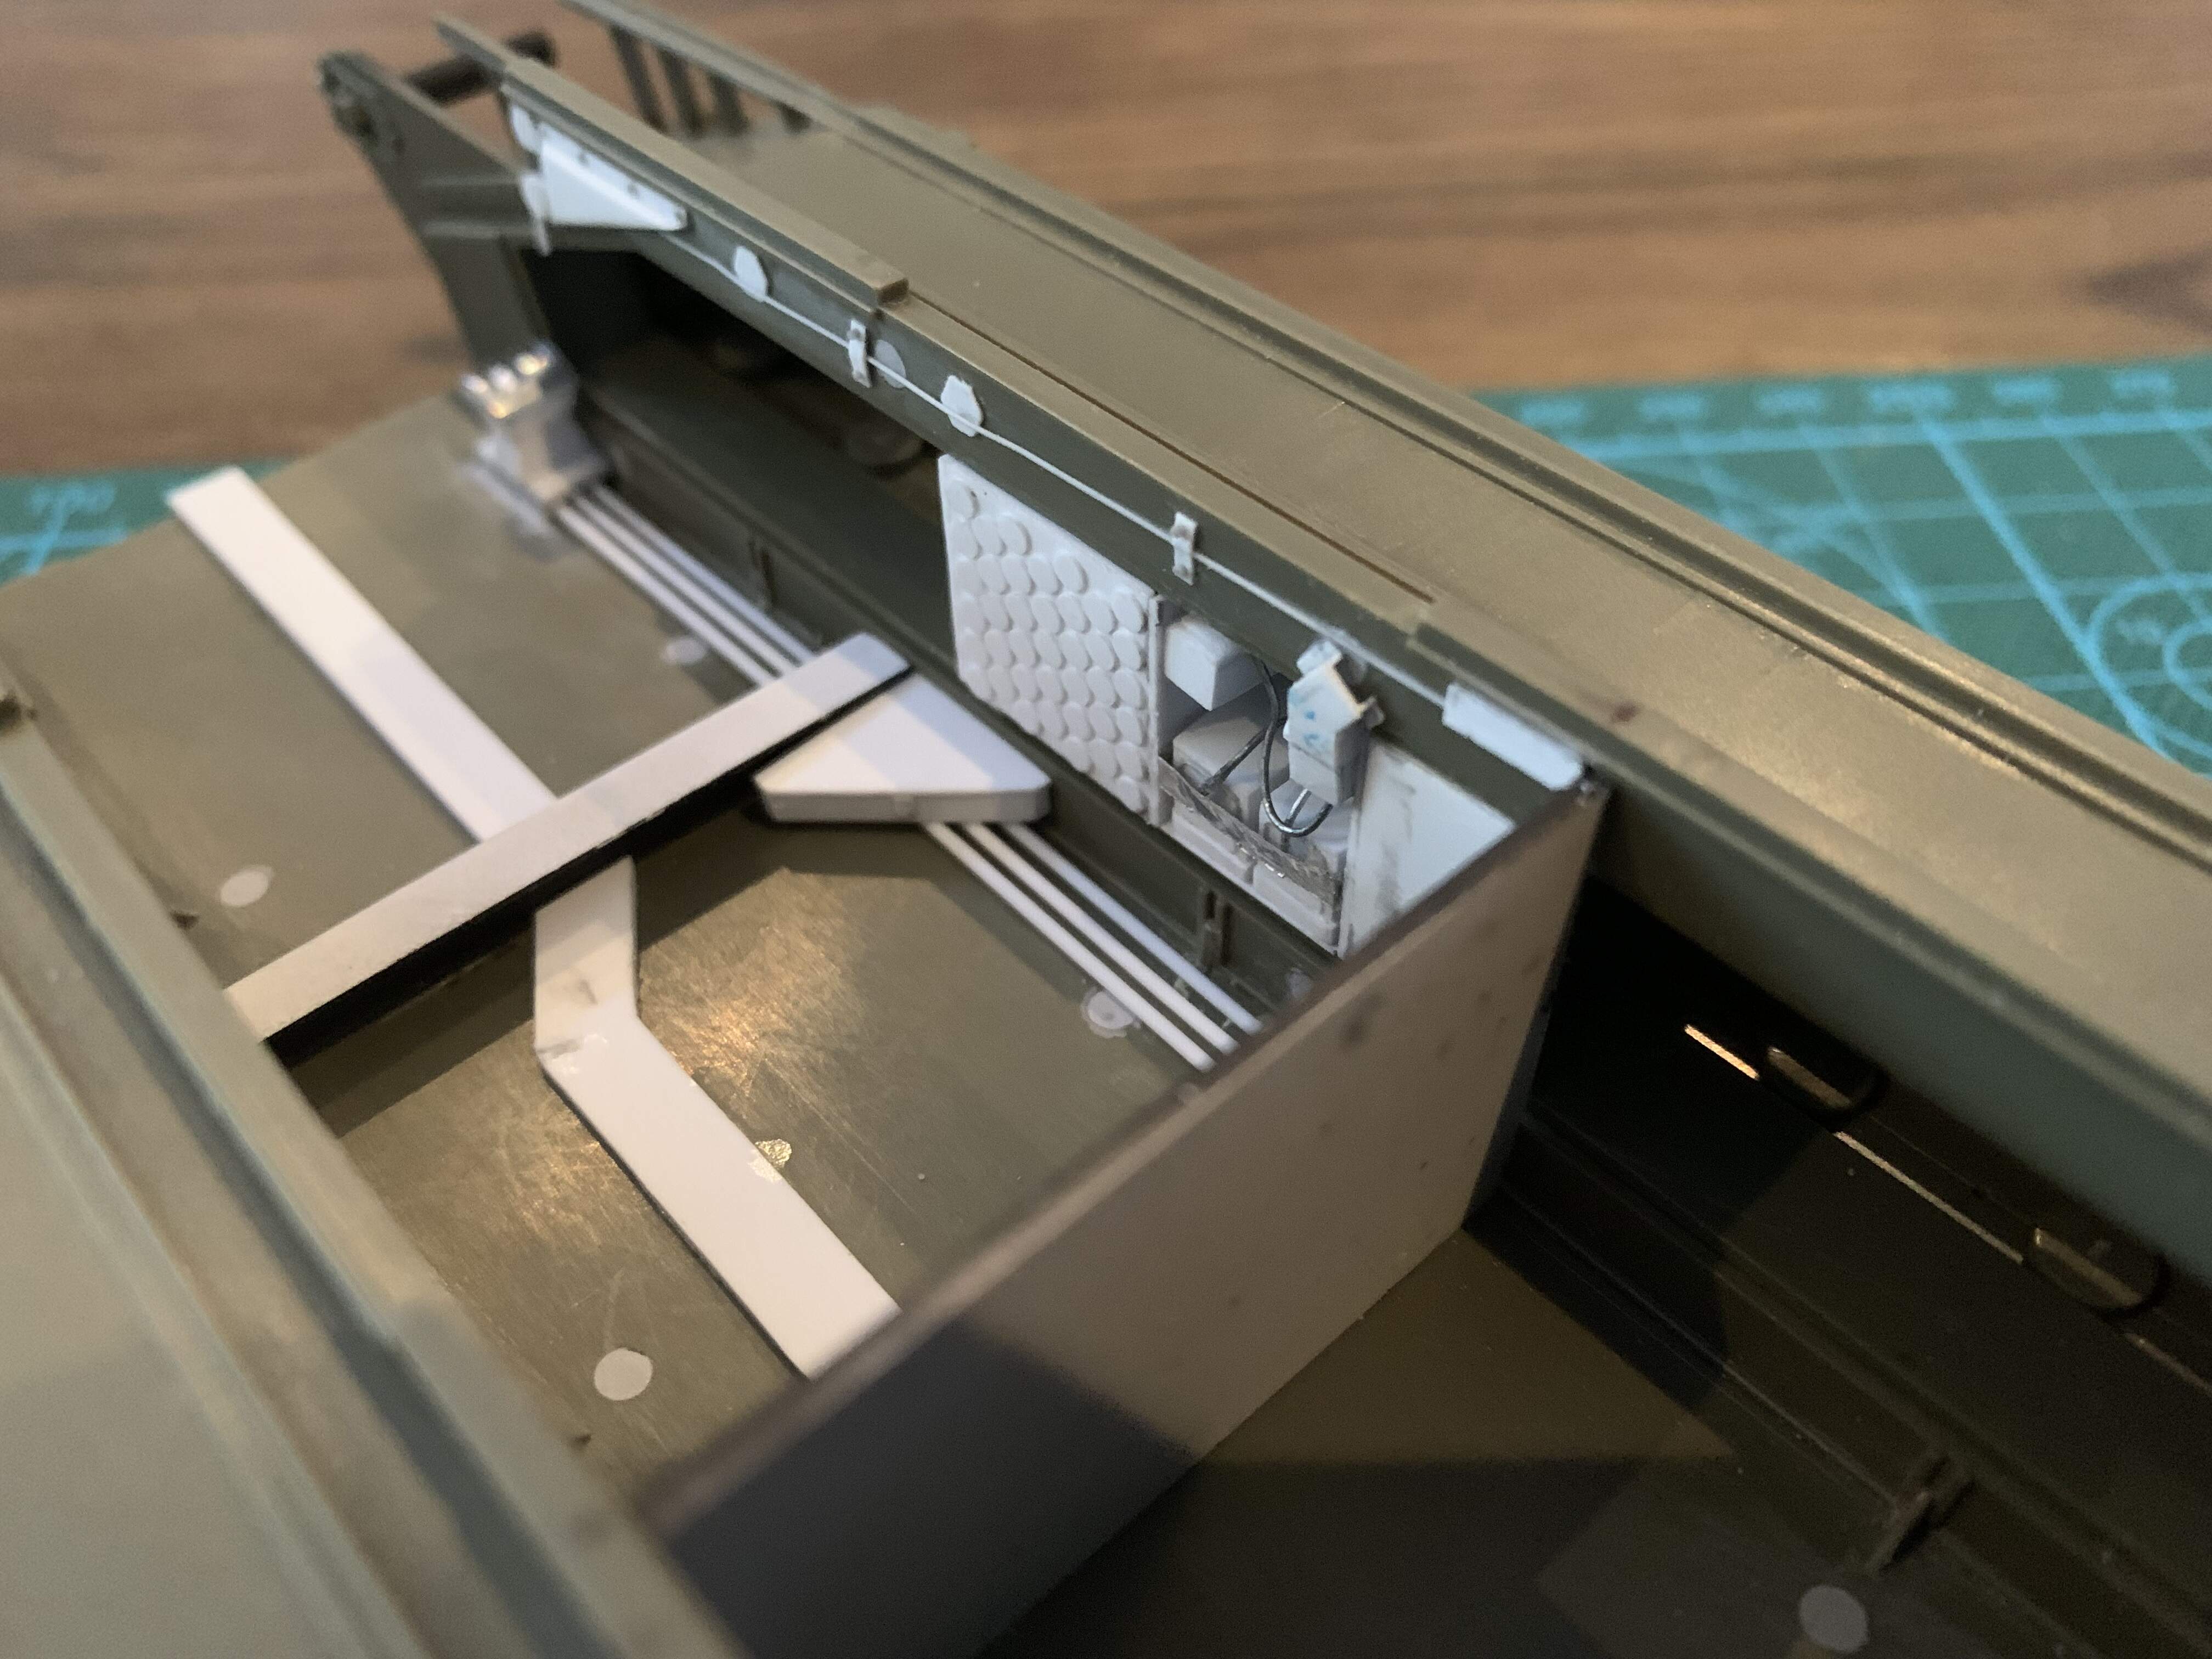
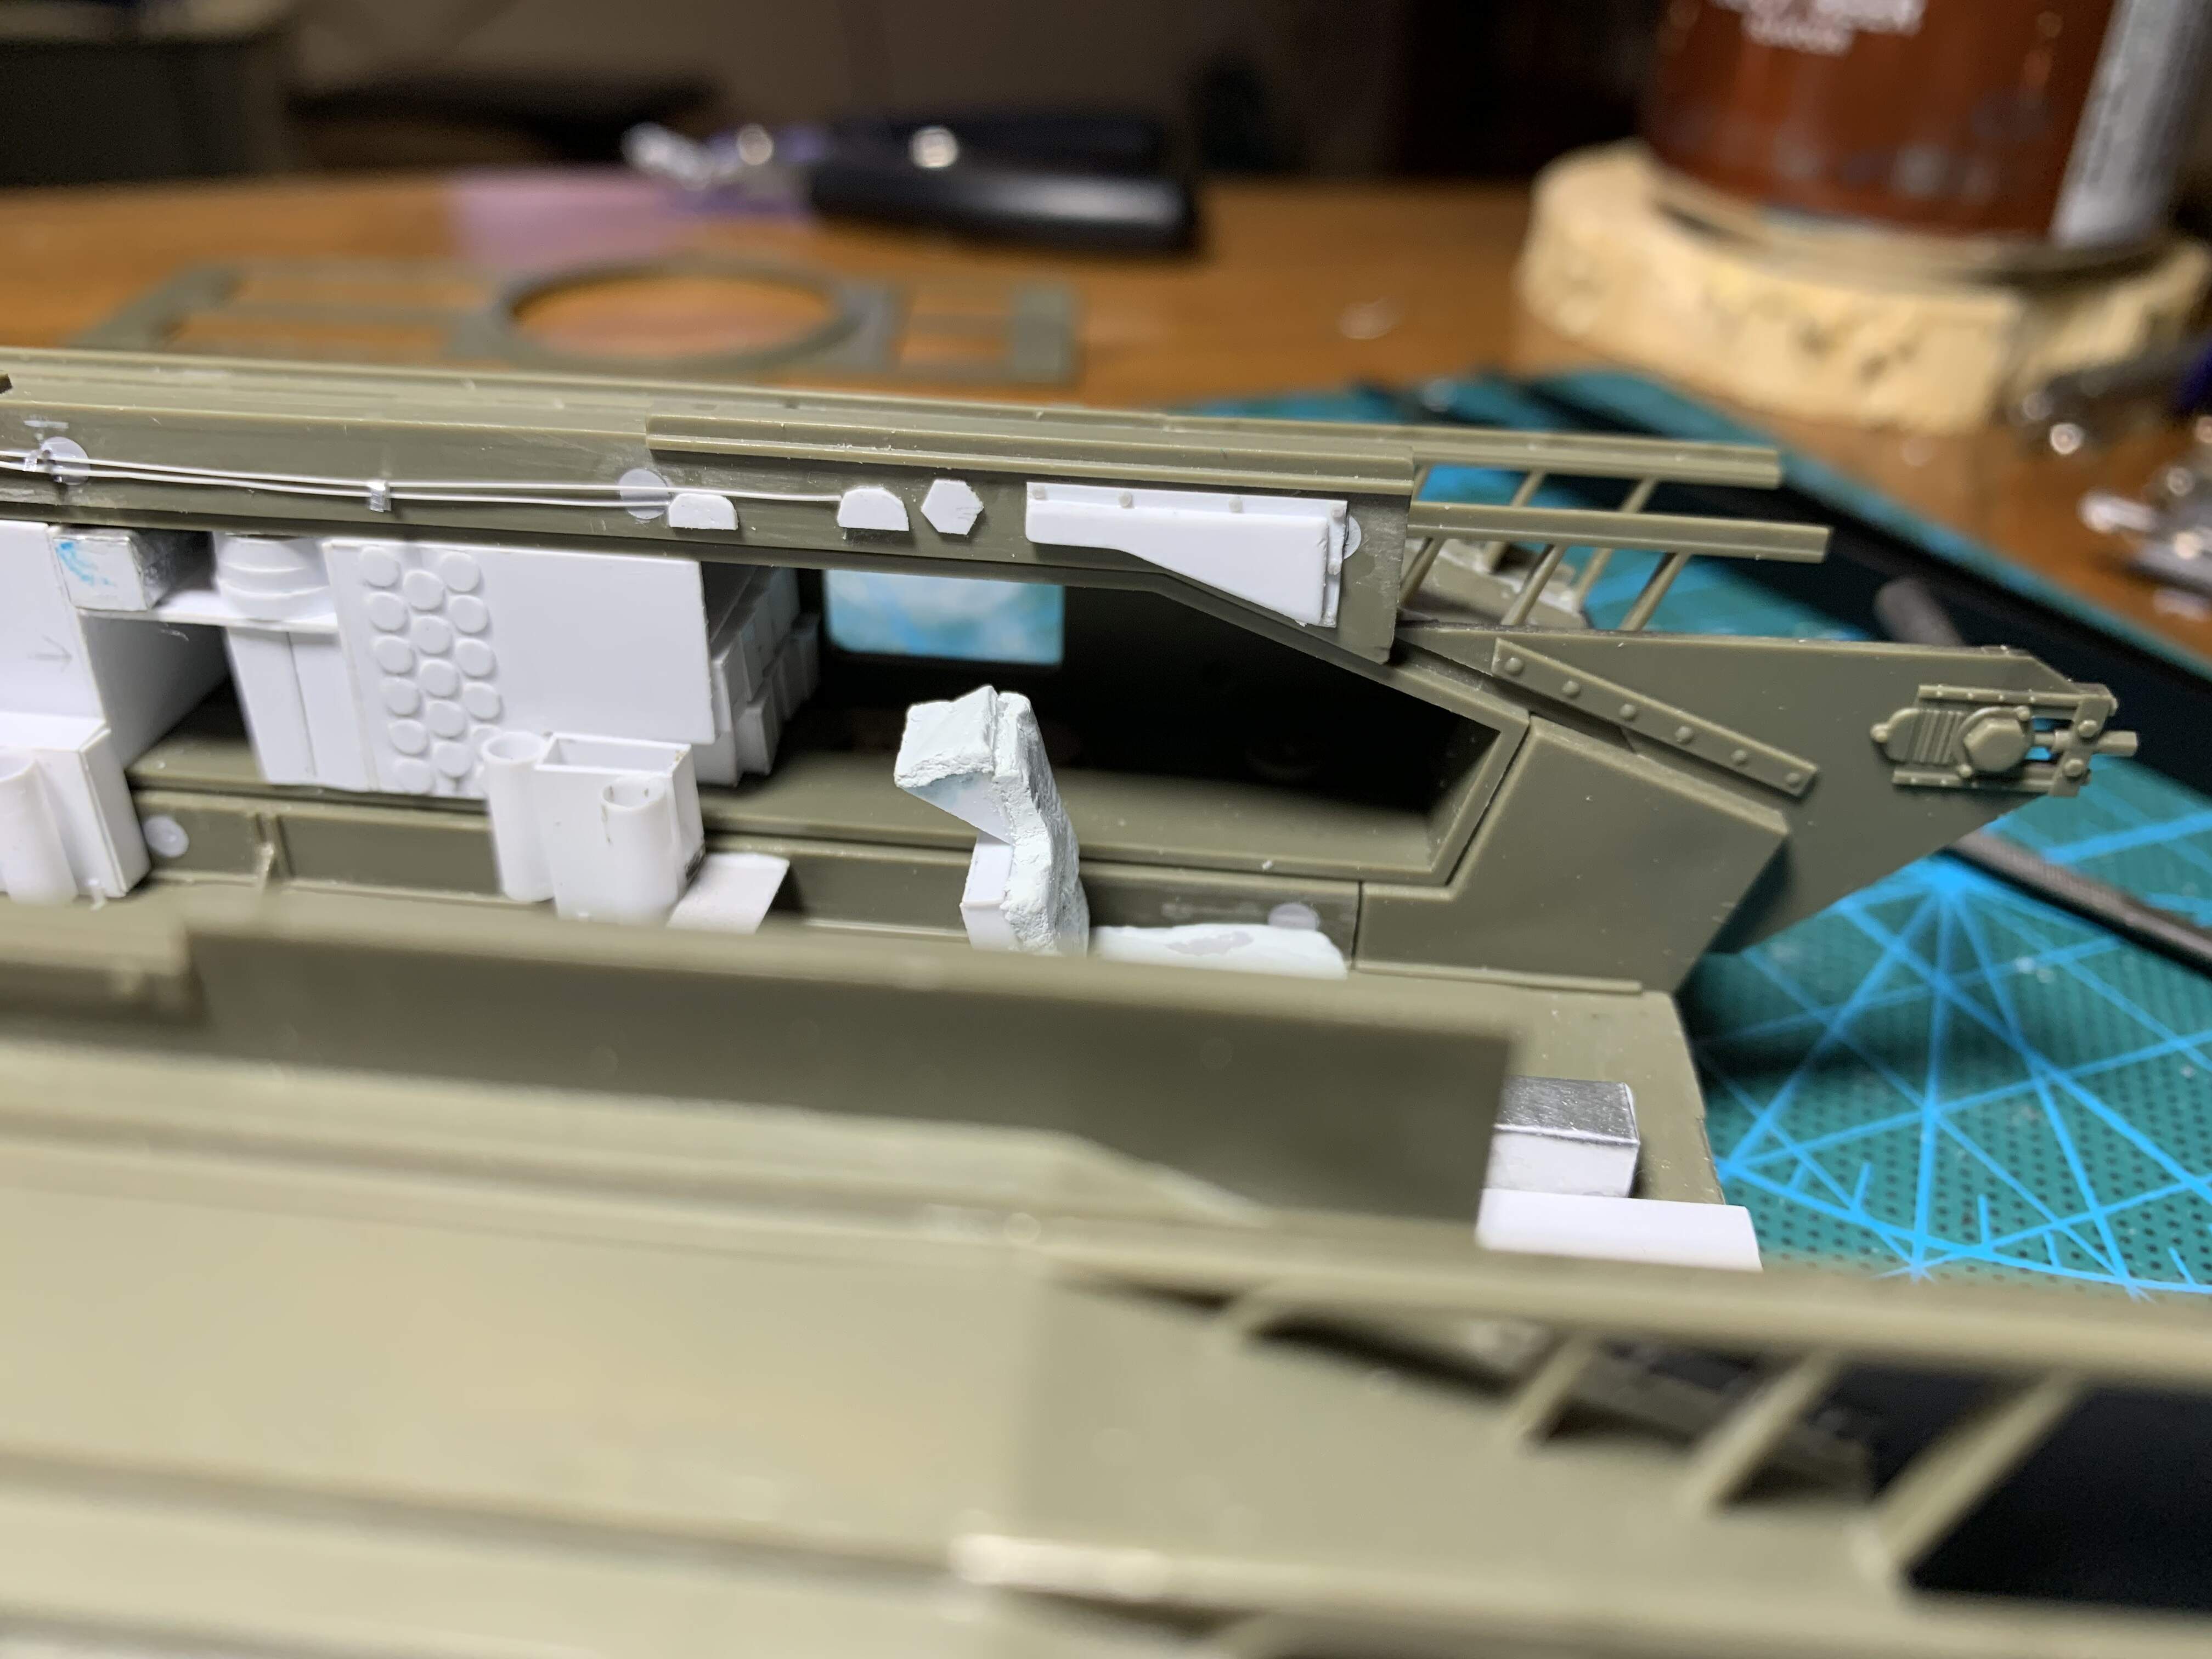
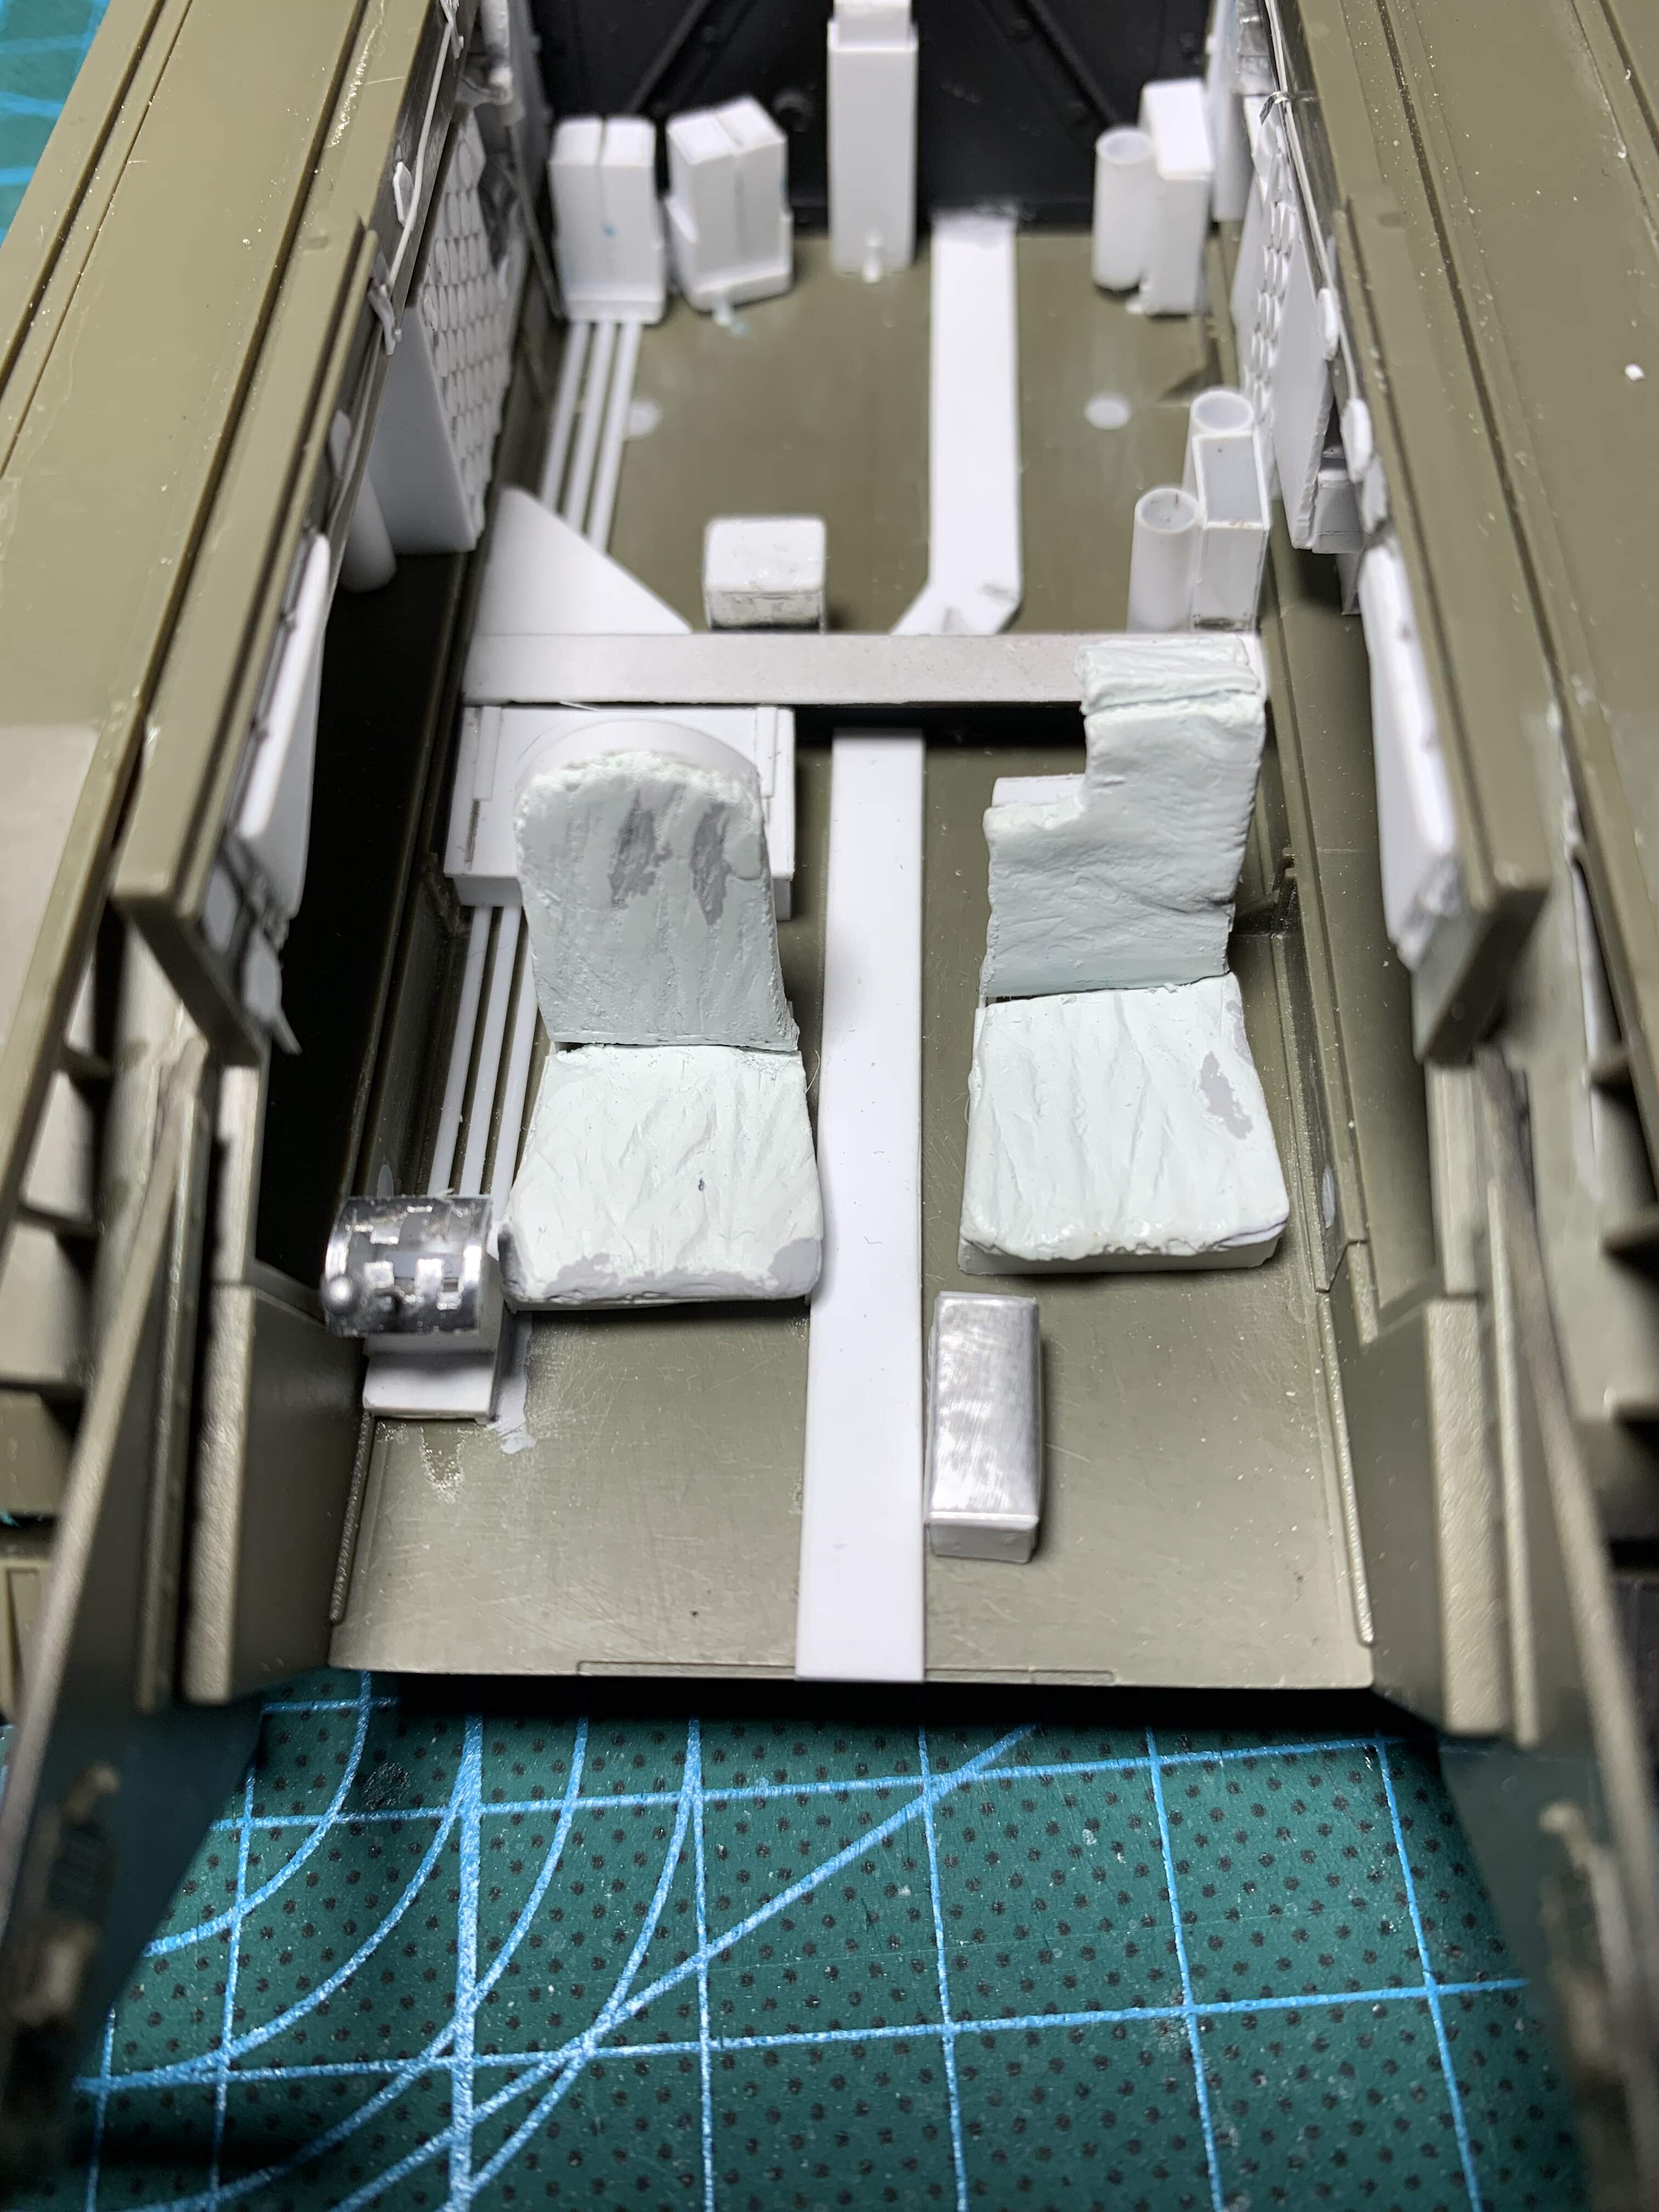
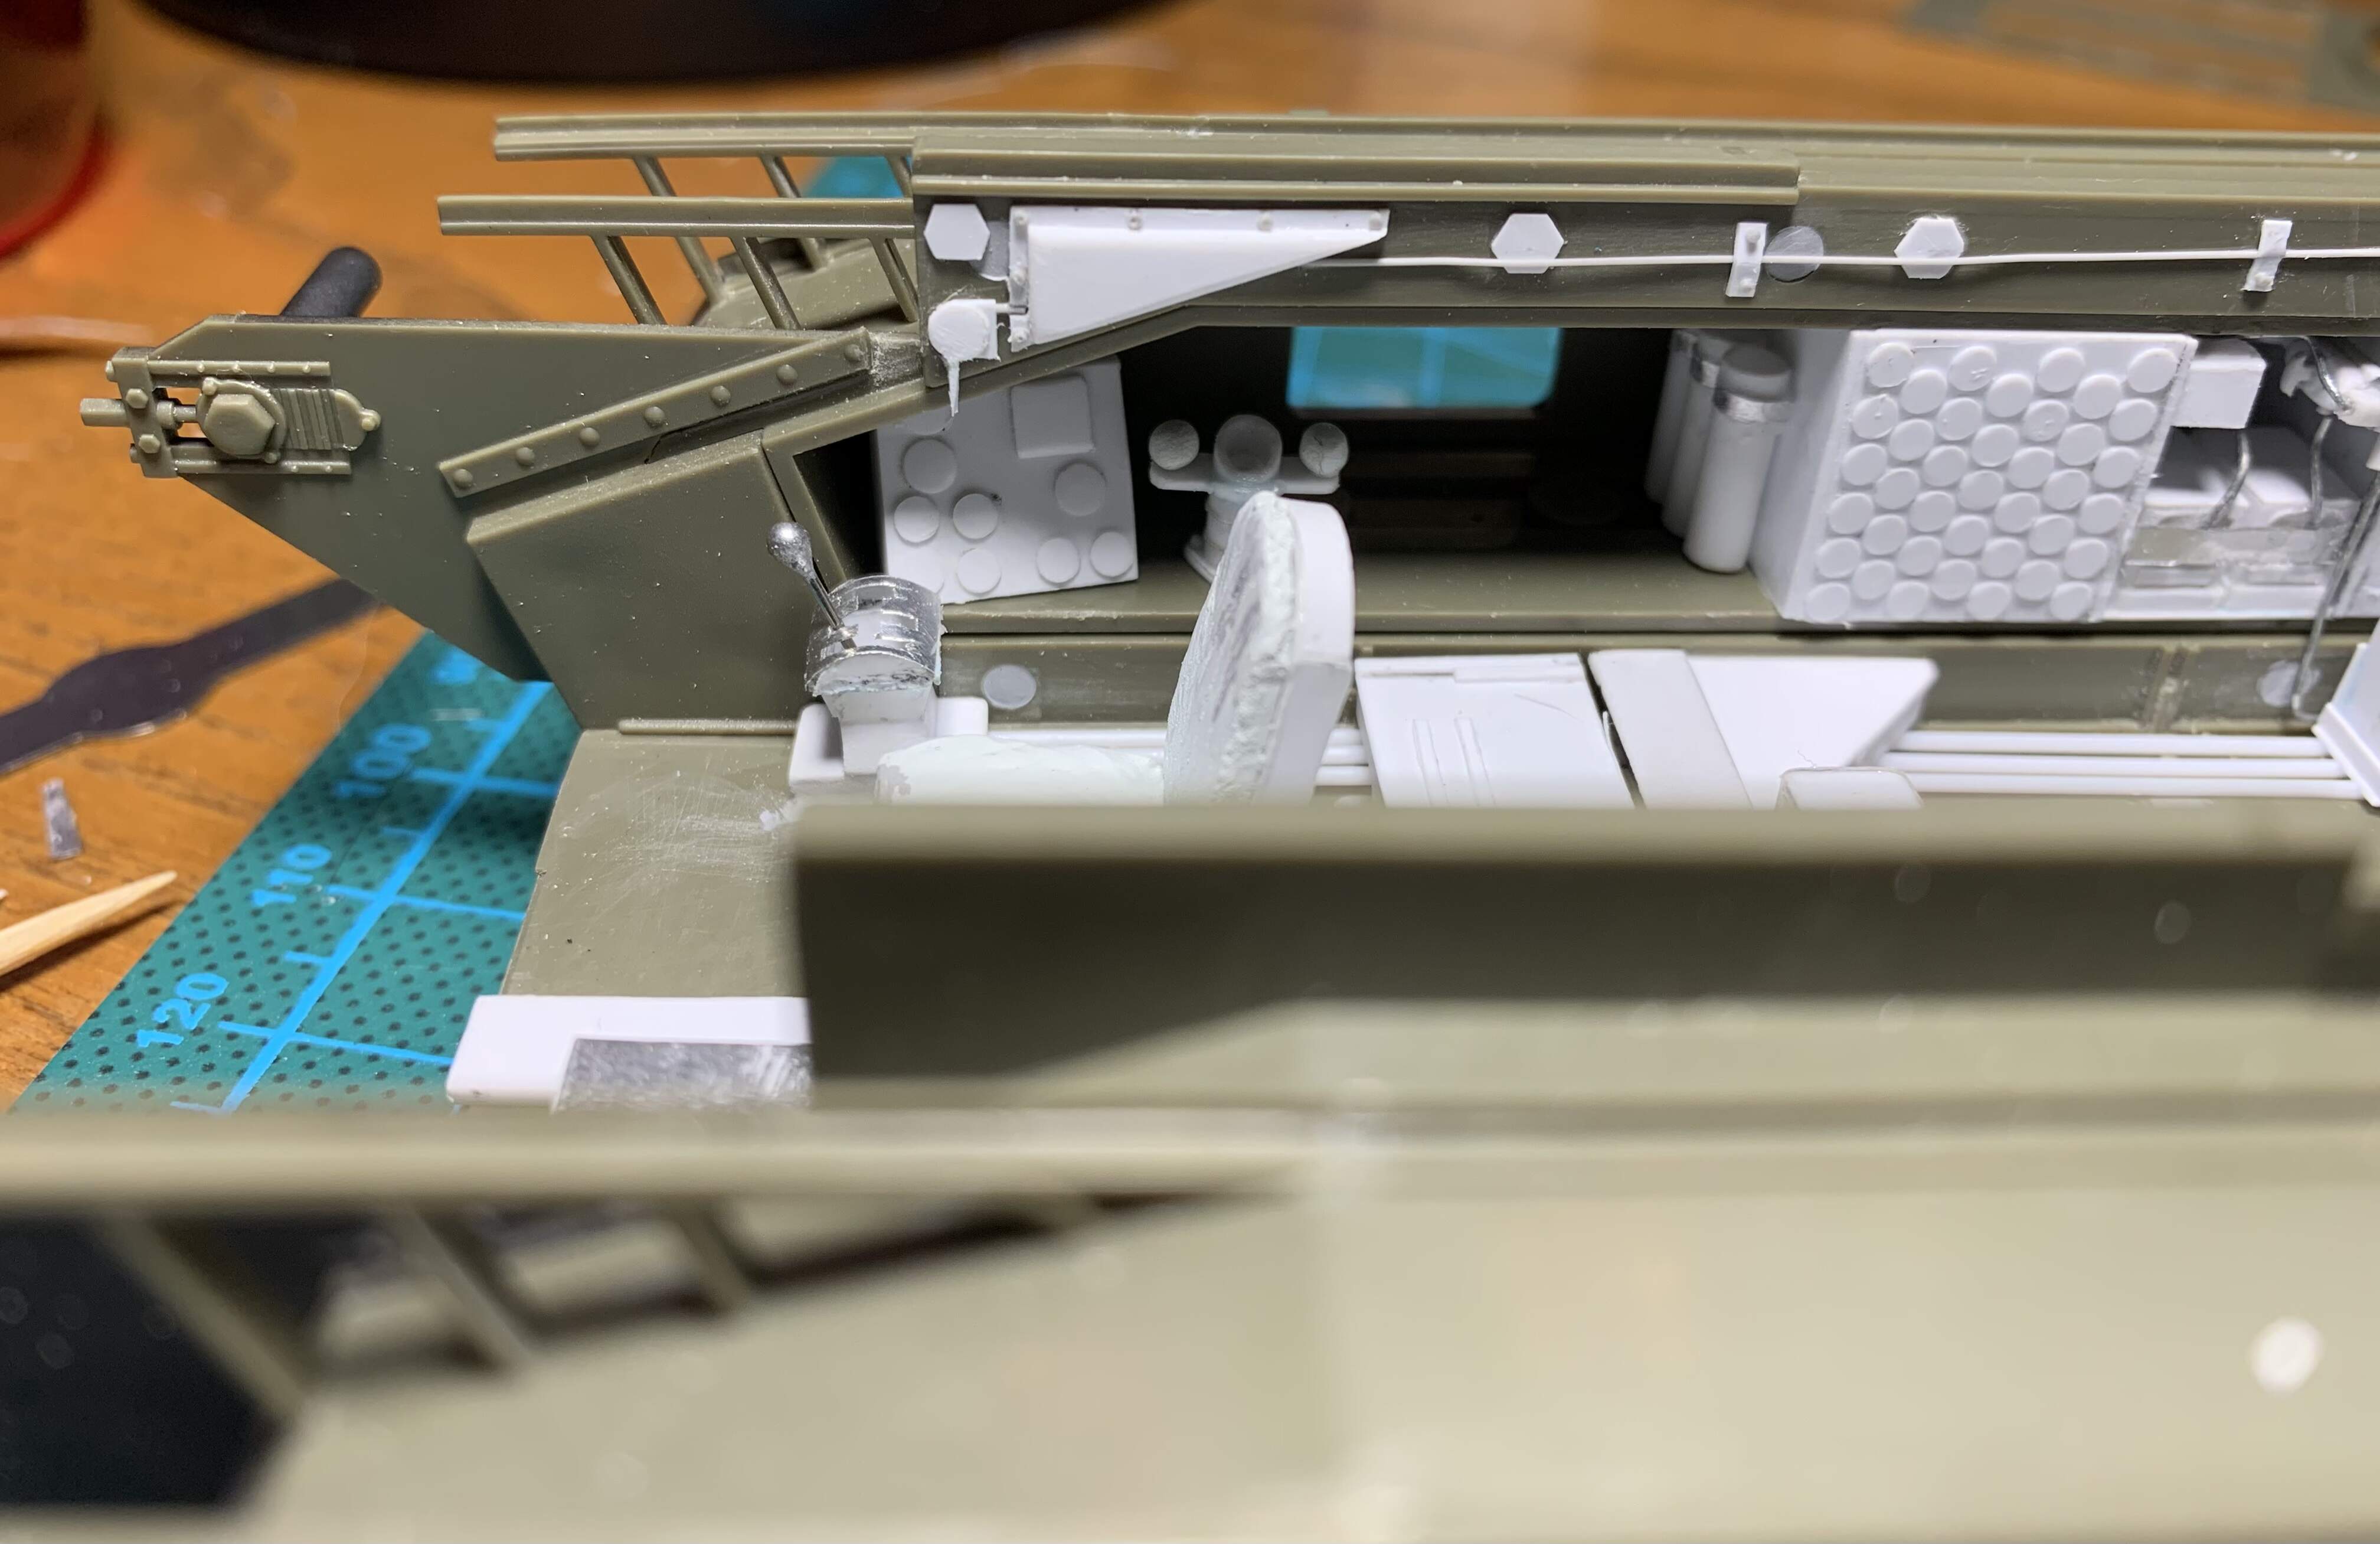
Alright the hull interior is about 95% done. All that’s left are small details like adding some handles to the mg gunner pannier wiring, adding securing straps to the pannier sides and ammo box holders, drivers controls, and then things like the raincoats that go in the three small tubes at the back, haversacks, etc
Two bigger assemblies and two smaller parts also remain. Those being the jack, the battery charging unit behind the mg gunners chair, the two rear fire extinguishers, and the hellesen lamp. I’m still trying to figure out how to scratch these.
I’m holding off on painting the hull interior just now and moving onto the turret ring. I am slightly concerned the floor of the turret basket will interfere with the second besa mg ammo box holder at the rear, and one of the tubes for the raincoats. I want to build up the turret ring and basket to check before I paint. Any interference will be easy to deal with before I move on.

4 Likes
That is quite impressive .
Thanks man. At times I doubted my ability to tackle any of this interior. I’m glad I stuck with it. I think it’s a fairly good representation of the real deal and at least as good in some aspects as the old resin ITA kit which I leaned on for reference.
Could have been better on a few spots perhaps but overall I’m happy. A little concerned the turret basket won’t fit. The turret basket floor I cut to size from fletcher a book fits in certain spots but has interference in others, but without the turret ring and basket built up it’s hard to tell if it’s where it should be or not.
1 Like
Well Mead you’ve certainly outdone yourself. Everything looks the part and your build quality has improved exponentially since your first faltering starts. The shape of your scratchbuilding is A-1 now. You couldn’t buy better in resin. This is really turning into a masterpiece interior and I only pray that it can be sufficiently seen when you are done.
2 Likes
I’m sorry, the what?
Technically gas capes but I guess they were mostly used as raincoats once the threat of WWI style gas attacks never materialized. From my reading they were a kind of rubberized material that was excellent rain protection
1 Like
Thanks man! Really appreciate it. I’ve had fun doing and I think gained valuable skills. I defintley look at kit parts now and wonder how I might scratch it.
I think some of the rear detail will be hidden by the turret basket but everything on the sides and front section should be visible!
2 Likes
Mead the beauty of your build besides the obvious quality of what you have done, is the valuable knowledge and the skill set you have now acquired .
Quite honestly after seeing what you have done I may just take my toys and go home …lol
You are really kicking butt with this . Keep rocking brother.

Thanks man! I’m pretty happy with how it turned out. Hoping to god the turret basket fits!
Don’t pack up your toys, I can only hope my paint and weathering turn out half as well as your mkiii
1 Like
Mead … Here is the secret , once you know where the stones are you can walk on water…lol.
I will show you where the stones are .
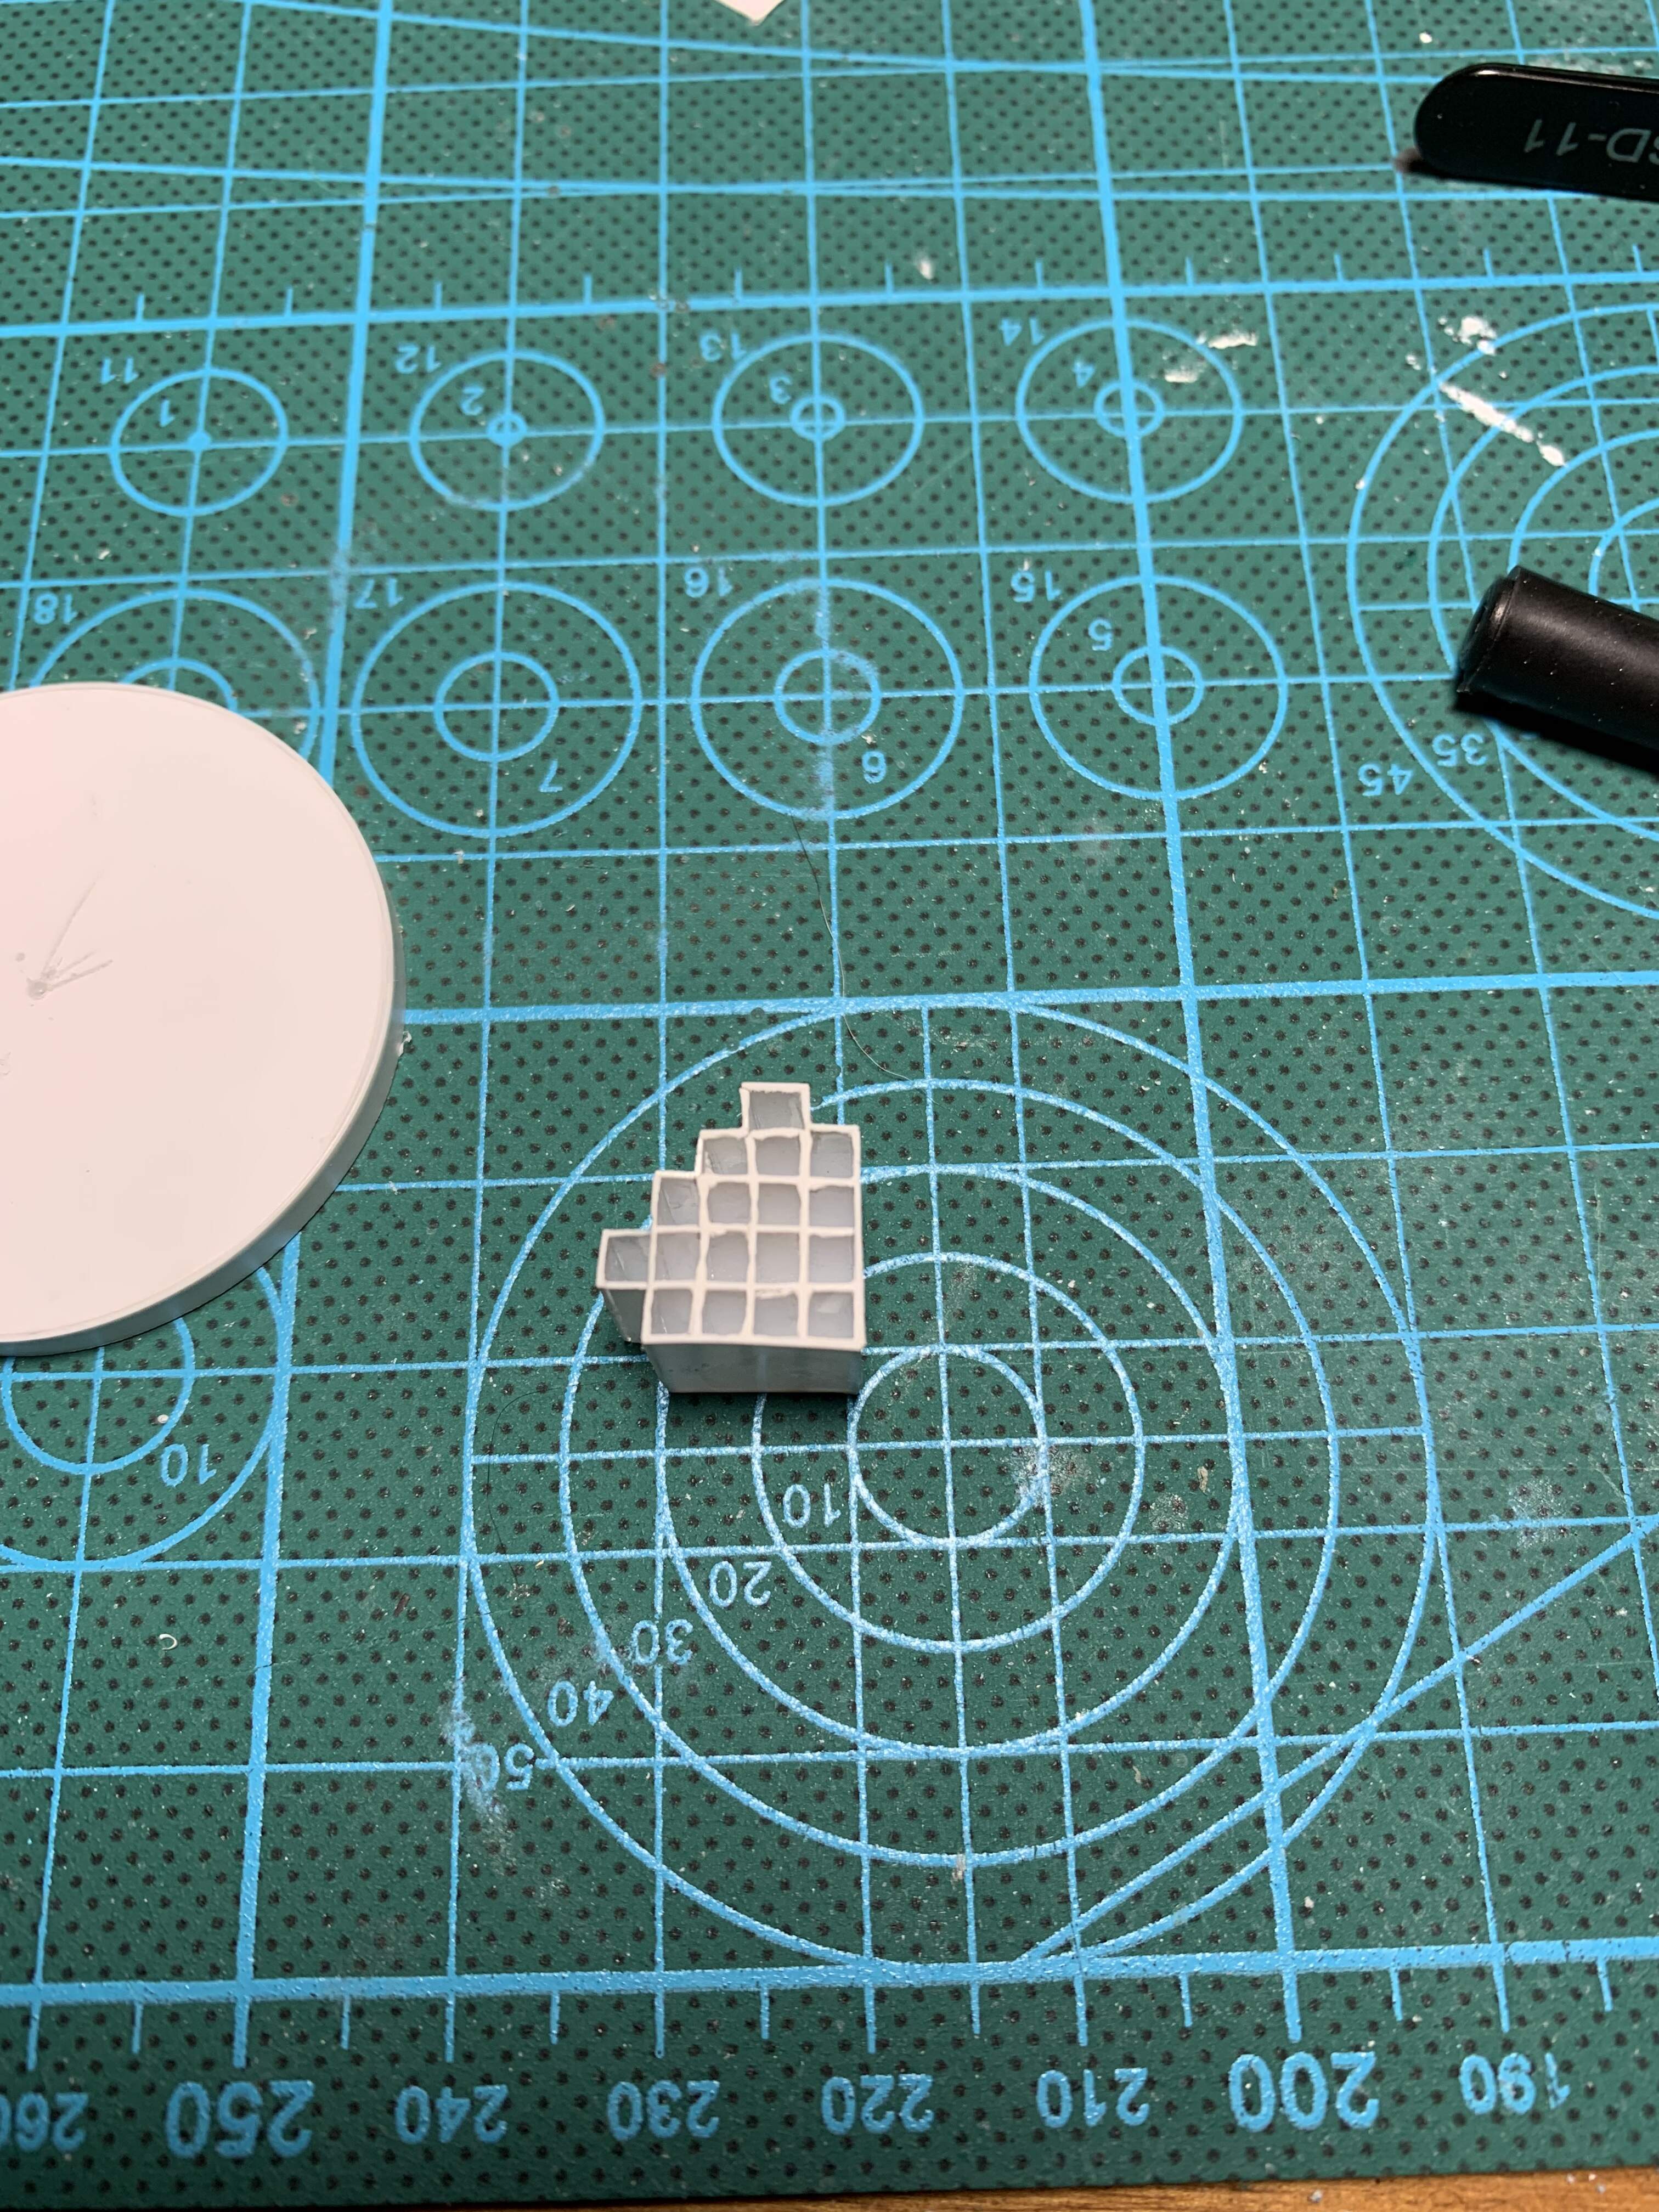
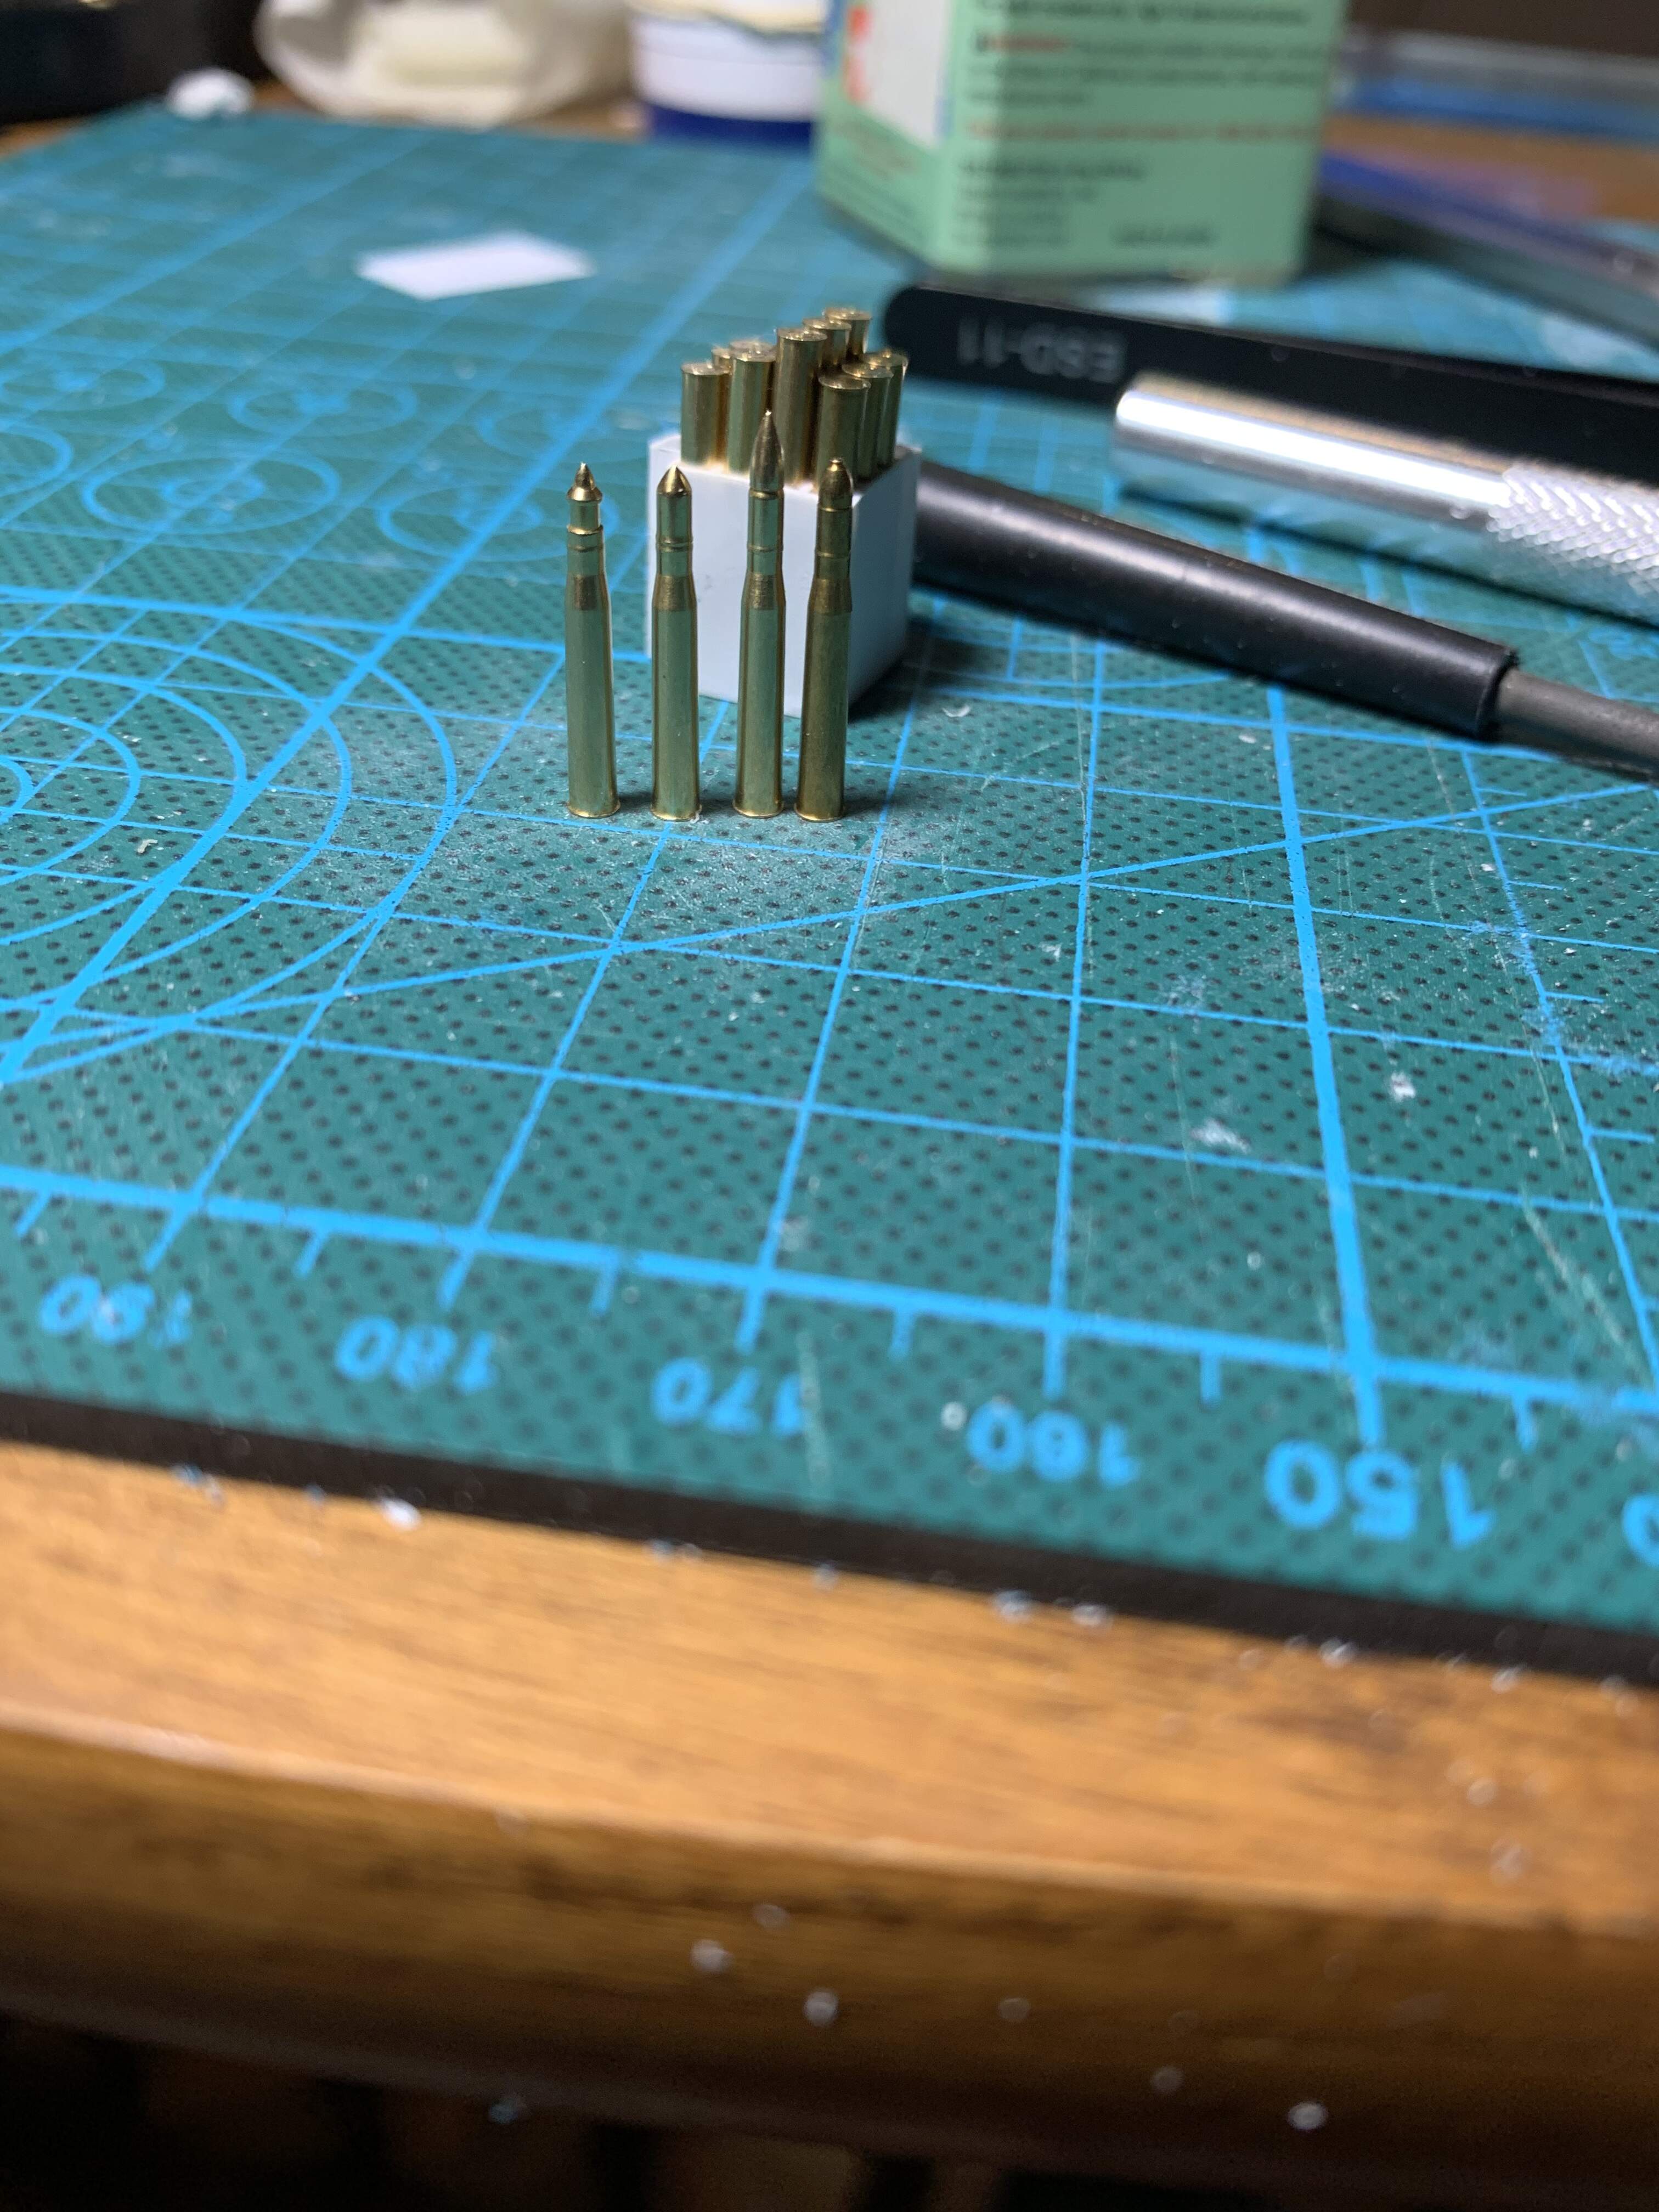
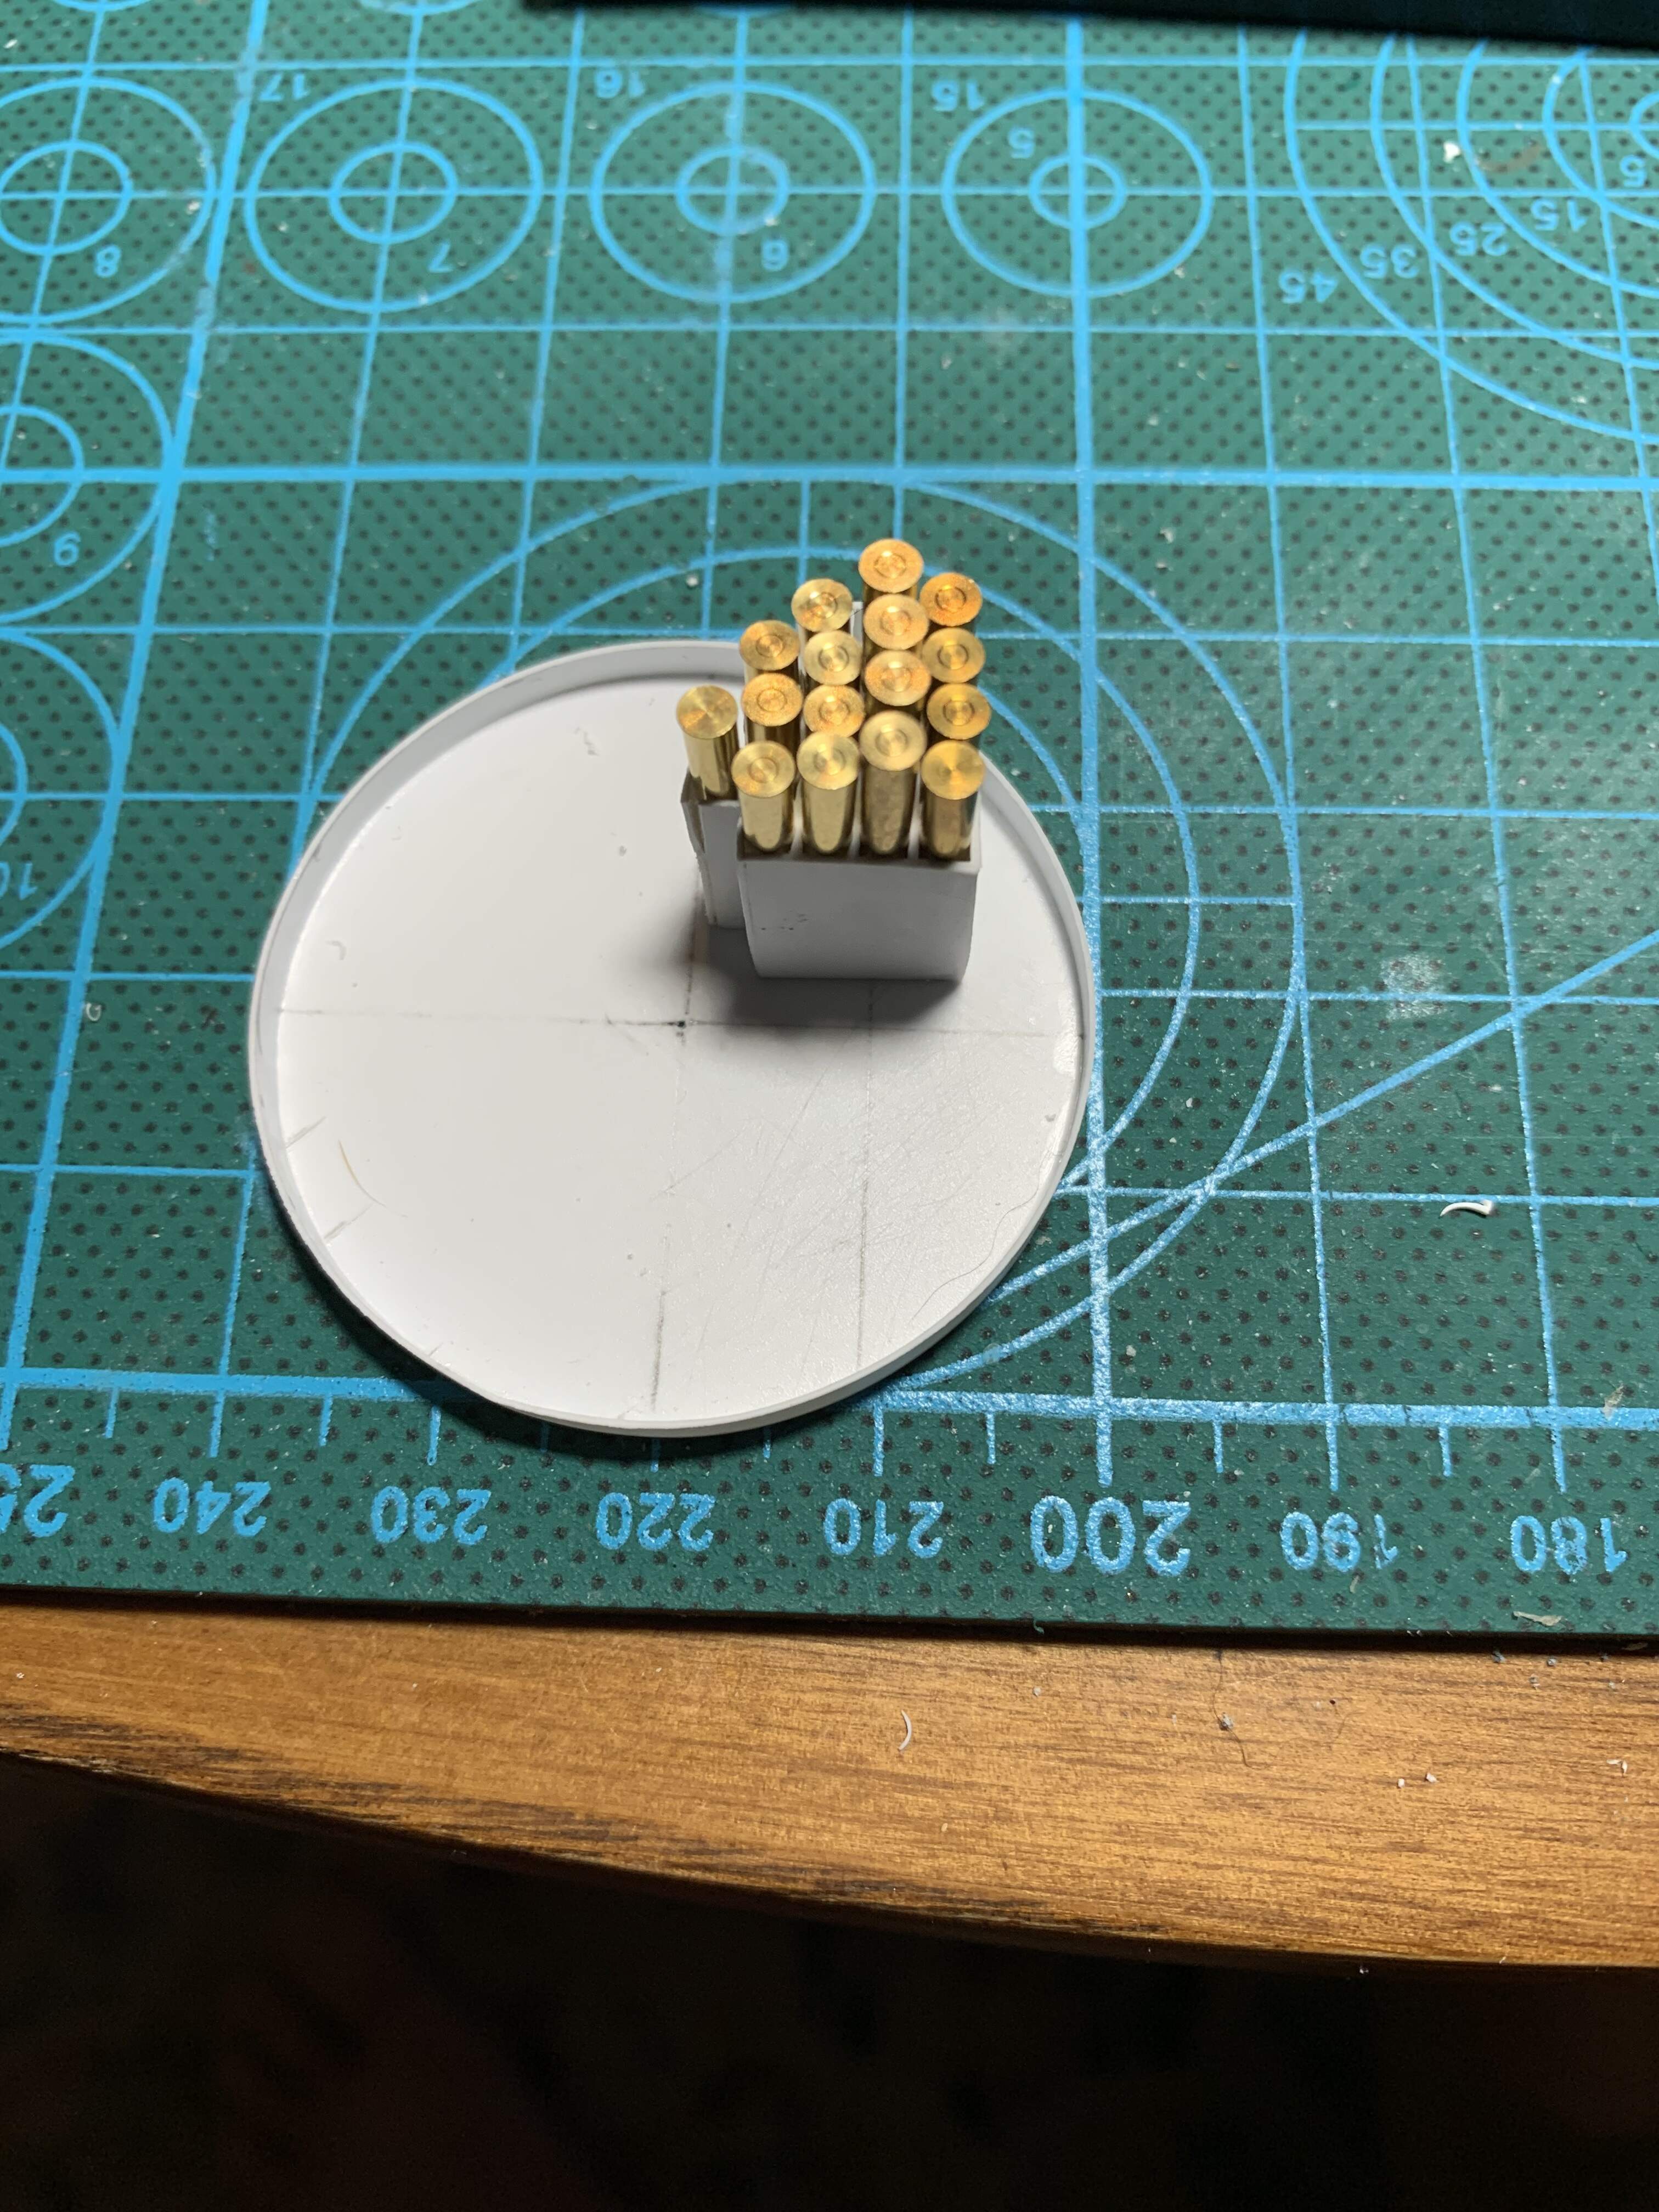
Work continues on the Churchill. I’ve started on the turret basket floor. So far I’ve cut out the floor, thankfully fletchers book has a turret like drawing with dimensions marked out on it. I also built one of the two ammo ready racks, the second one being much smaller for 4 rounds. This took quite a while as I need a lot of small cuts for the outer walls and the dividers but I think it turned out well. To populate it I’ll be using the afv club 6 pounder brass ammo pack. It comes with 4x4 ammo types listed as APC-BC, APC-T, APDS, and APC, as well as 4 spent casings I’ll be displaying on the beach around the tank.
6 Likes
Looks perfect!
1 Like
Thanks! I had considered remaking the ammo rack as some of the dividers aren’t perfectly straight but once filled with shells it’s not noticeable
Very nice . Those shells stacked like that are interior jewelry
Thanks, I’m really happy with the AFV club shells. They are really nice.
1 Like