Well I’ve collected all of the parts in need for my Ferret build so I’ve made a brief start this evening. This is the basic kit with Scorpion Miniature Model sets, interior, exterior, wheels, turret and rear basket. I know some will ask why I didn’t just buy the Accurate Armour Ferret, the reason being using SMM’s modular approach to sets I can build as close to my first vehicle as possible. Plus there is a lot left over to build a generic Mk1 at a later date with a few more bits from SMM.
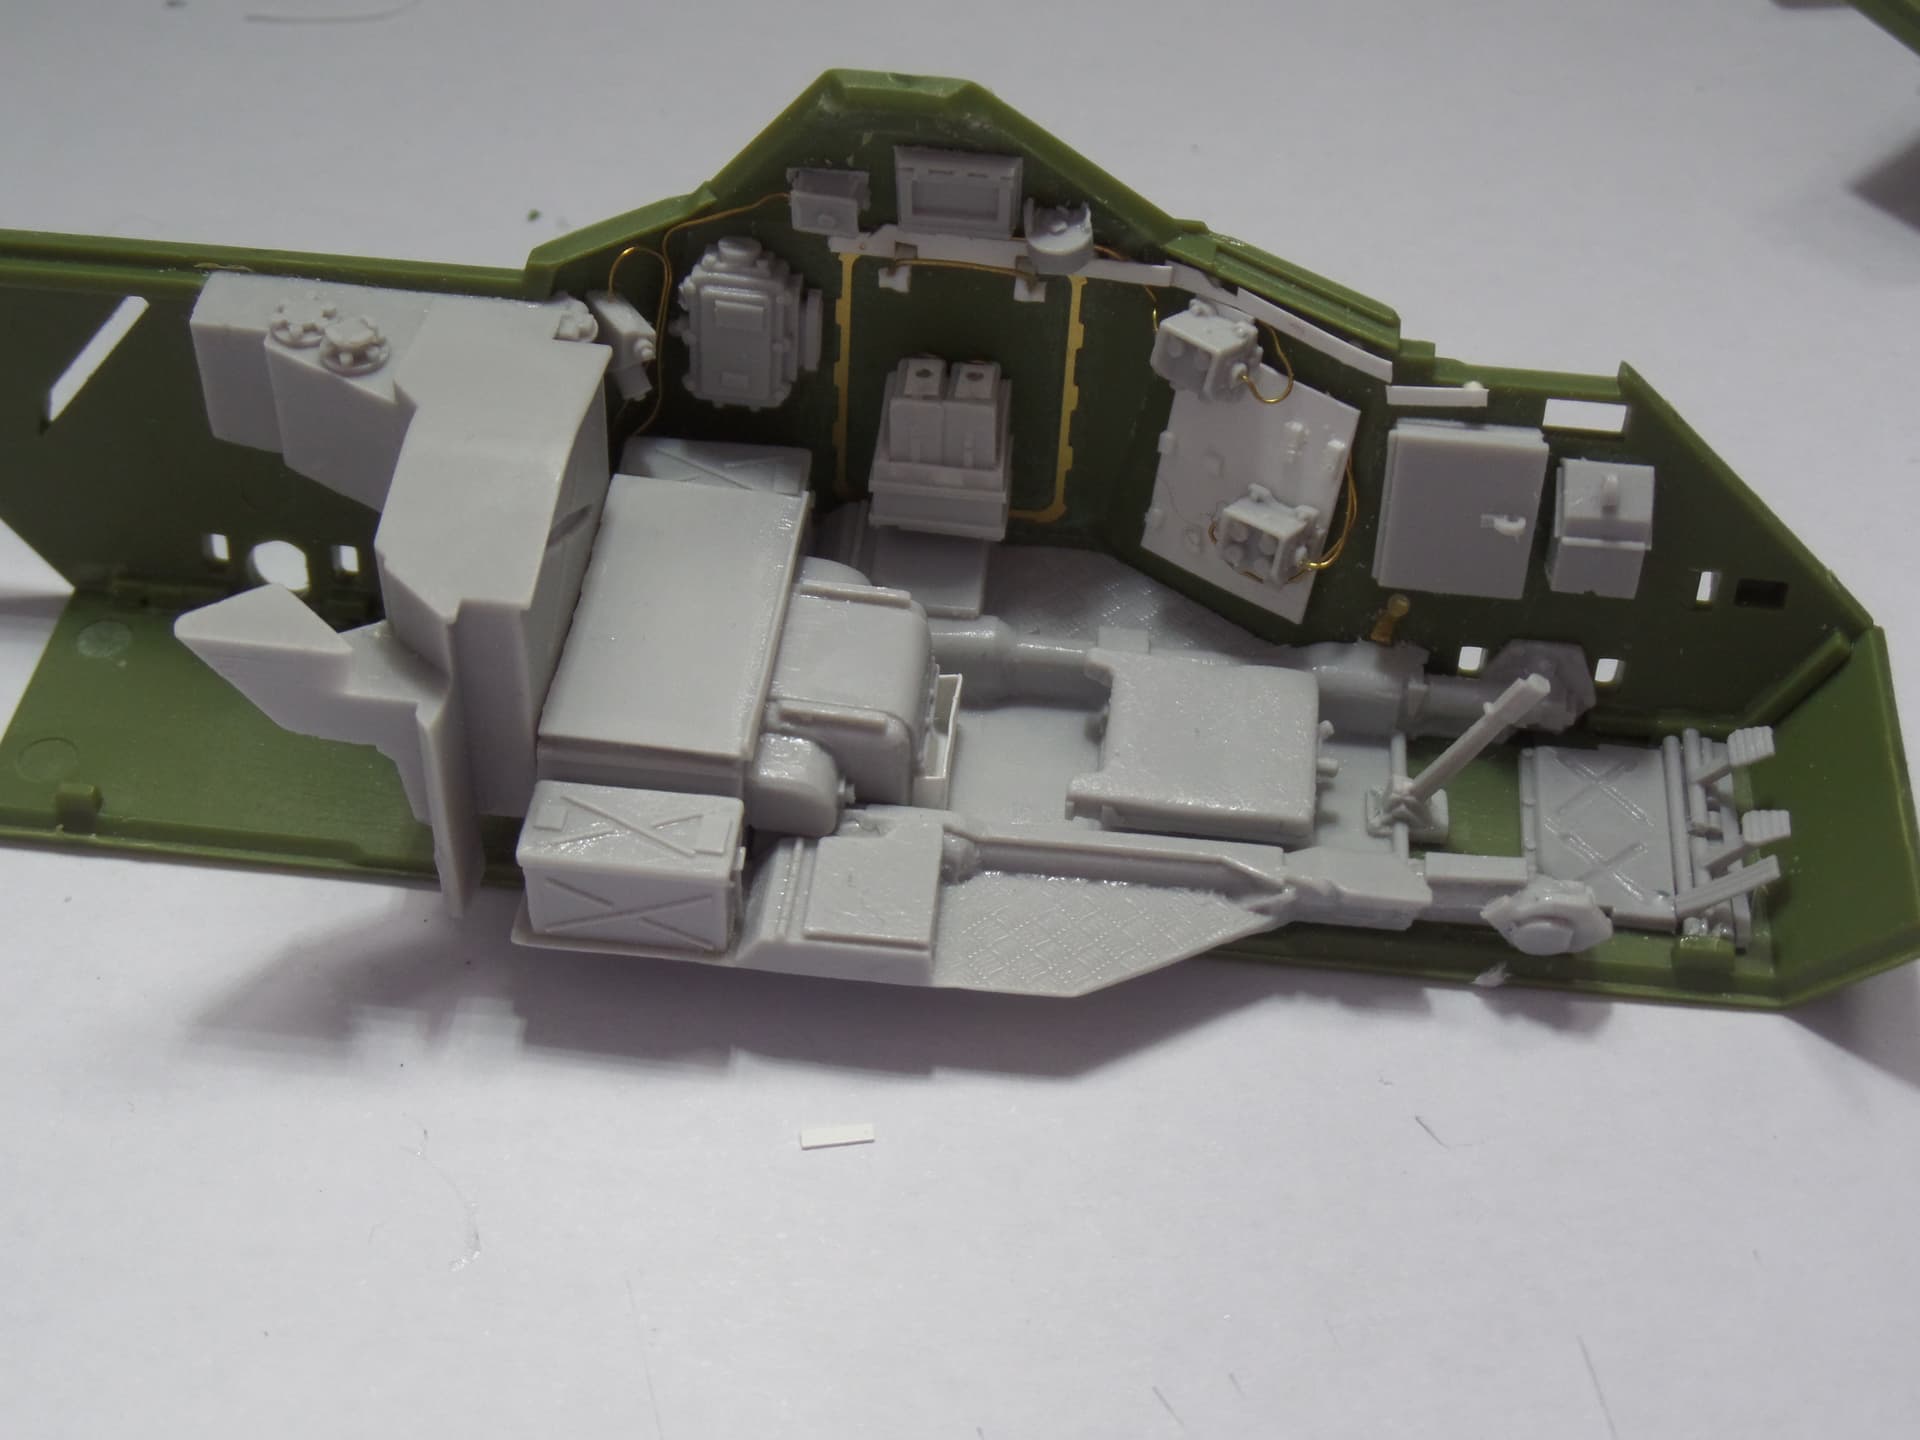
I have shaved off some of the kit to facilitate the fitting of the fuel tank. Also shaved off the side hatch detail and fitted the SMM etch weld detail, plus removed all of the detail on the hull floor.
I’ve fitted the pegs on the outside of the hull which allowed a tarpaulin to be secured over the crew compartment on a Mk1.
I don’t think I’ll be joining the hull together until most of the resin detail parts are in place as otherwise it will be very difficult to to position everything correctly and make sure it’s square.
10 Likes
Nice start mate… Will be tagging along to see how it goes together for you … 
2 Likes
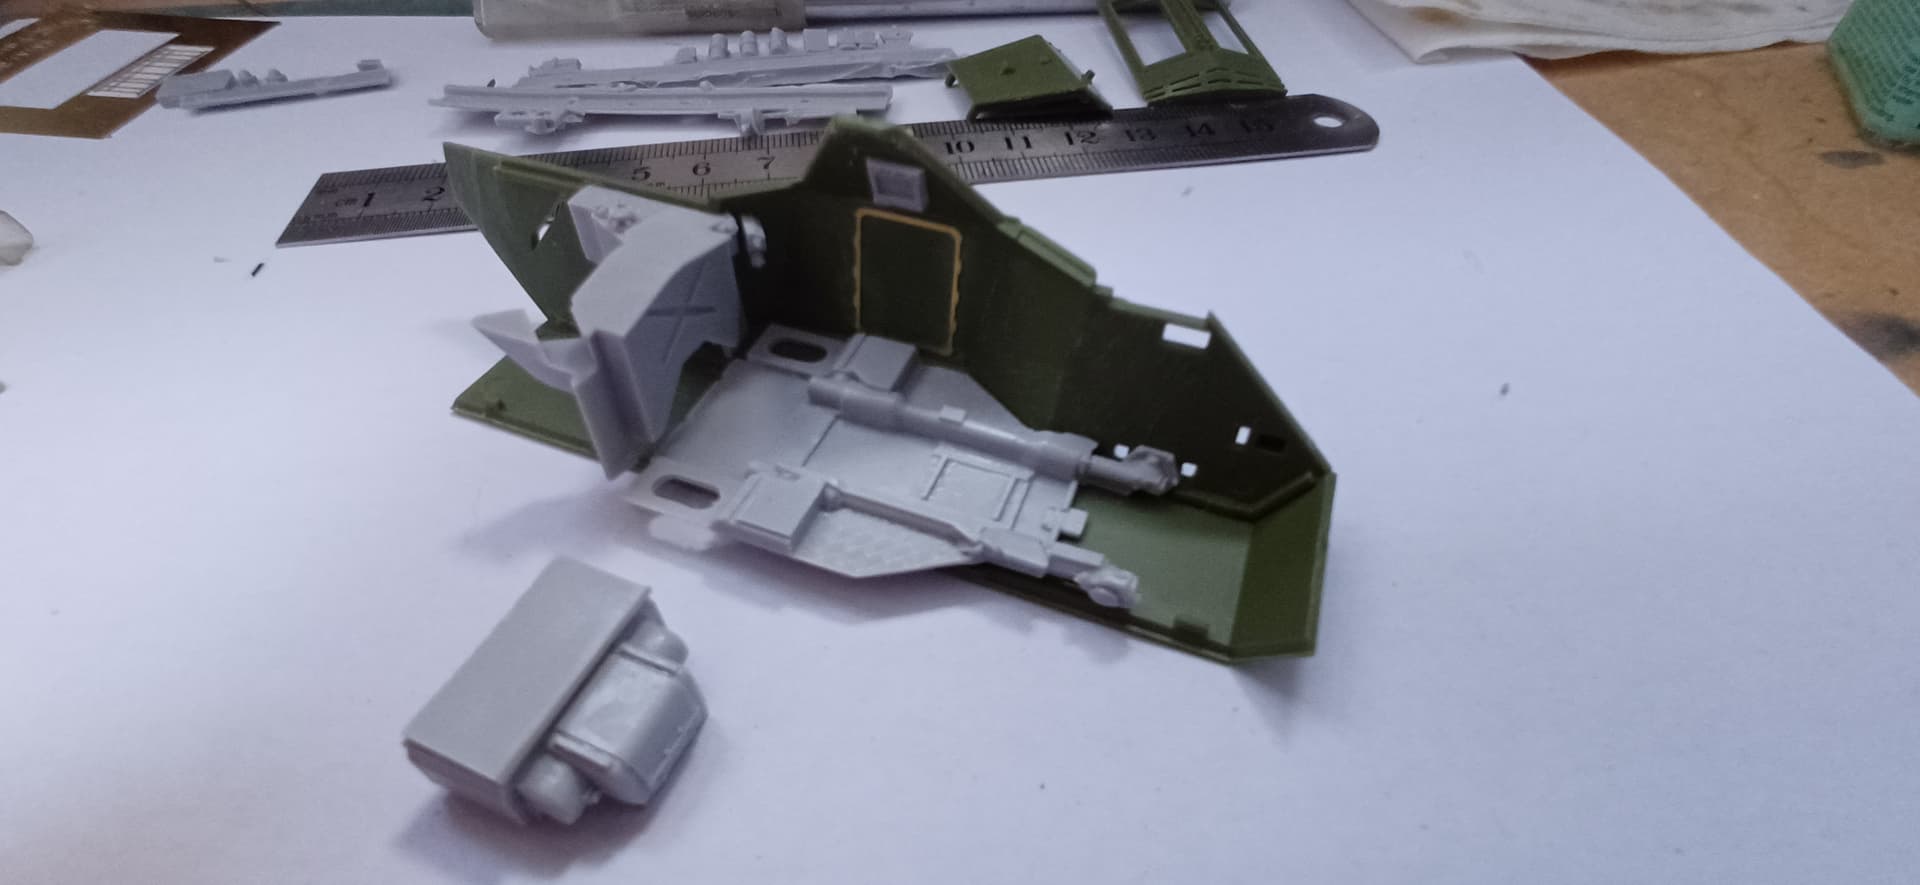
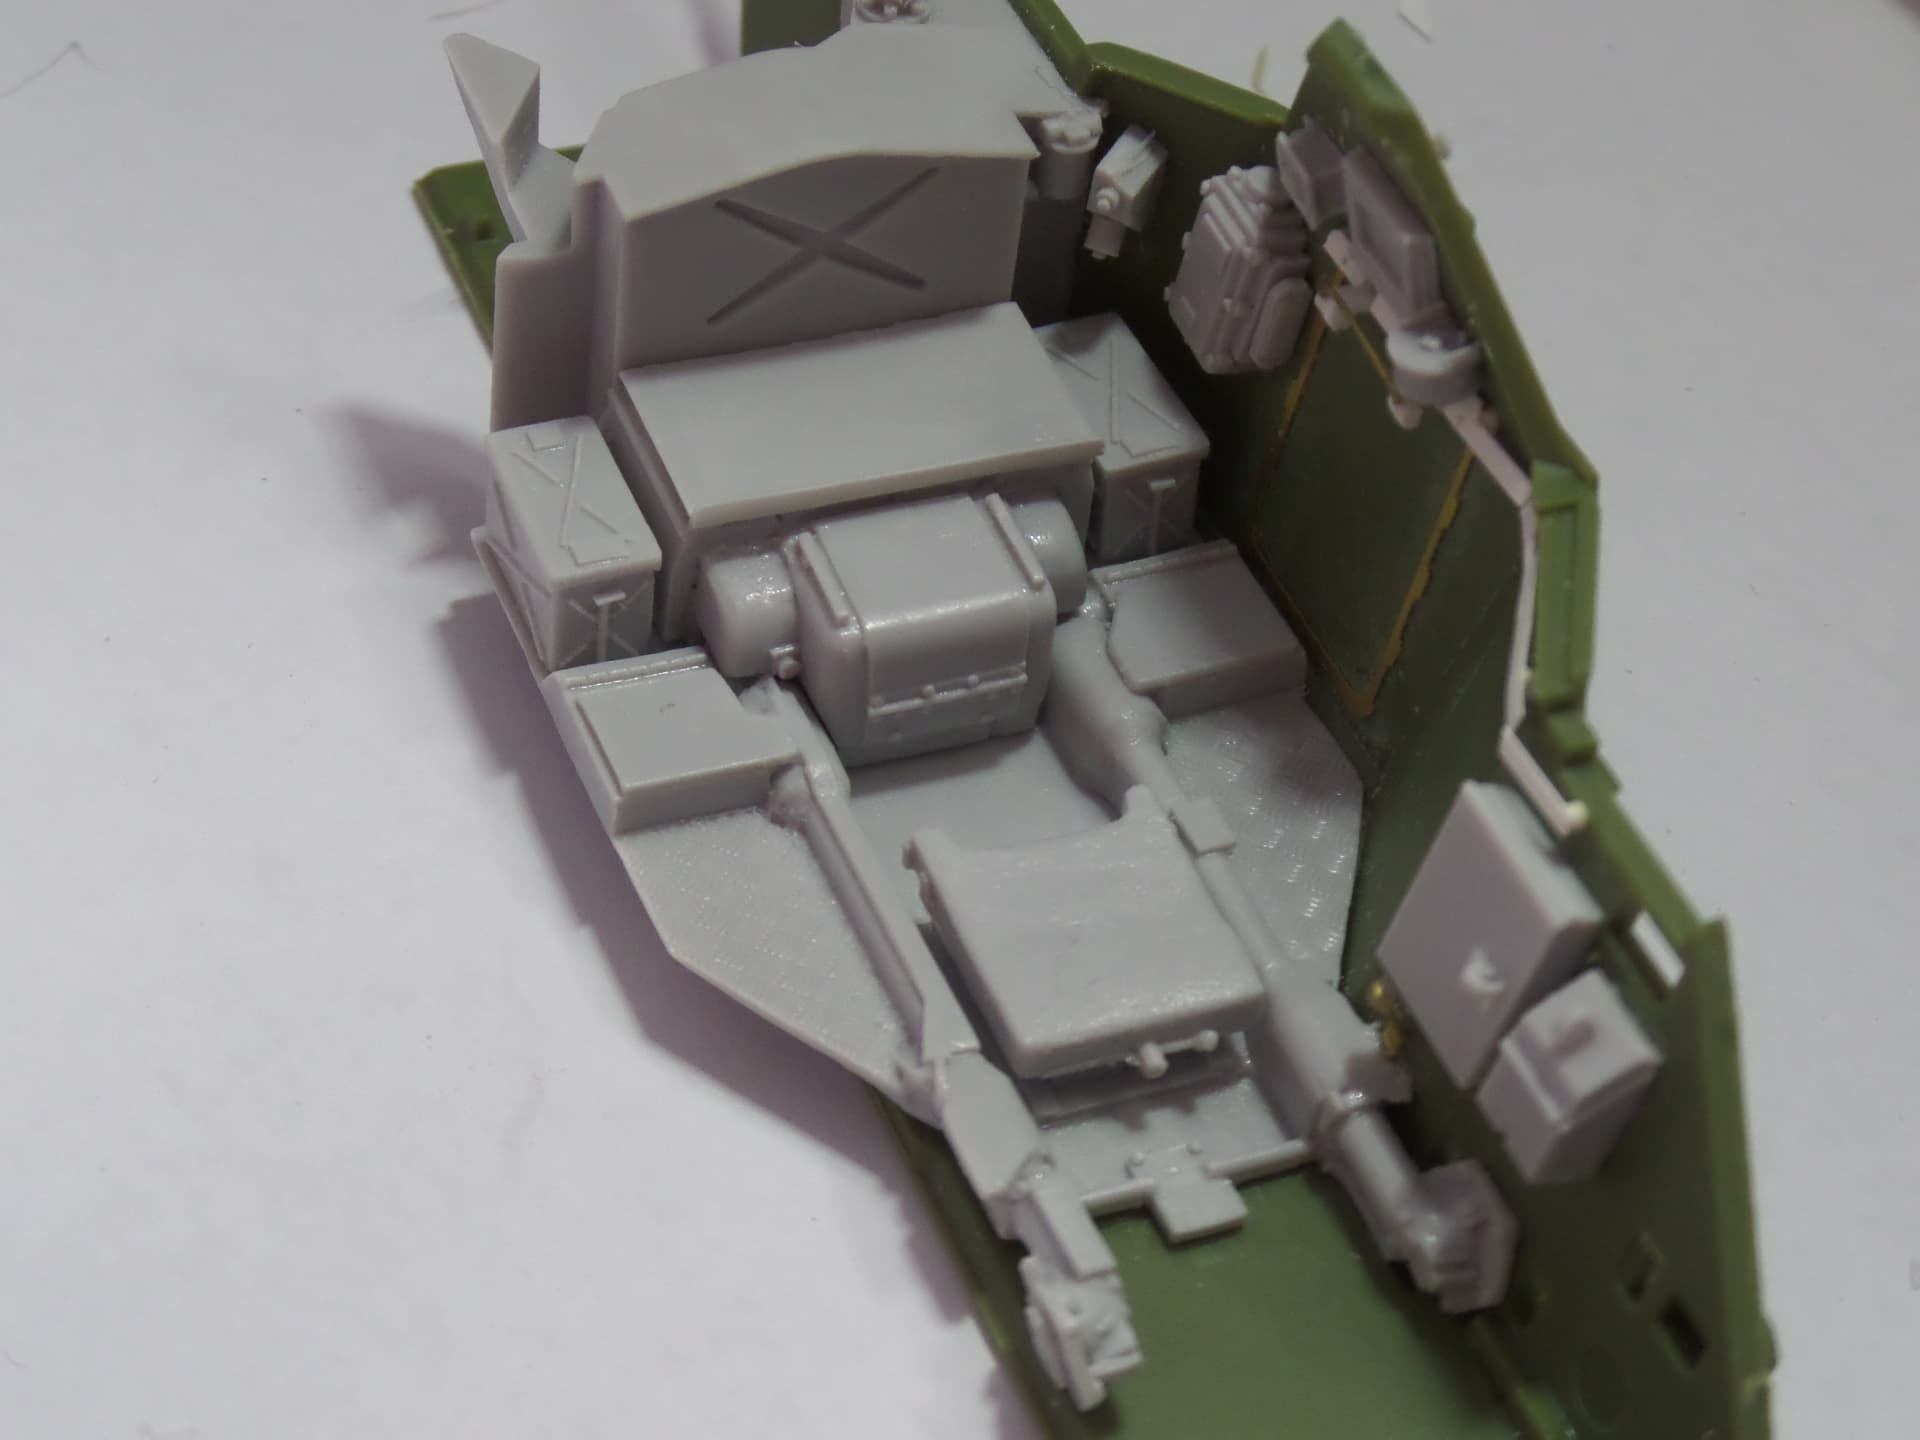
A few little bits done on a lazy Sunday afternoon. Hull floor glued on to give a base for everything else to fit to and around. Then fuel tank and crew compartment floor fitted and it’s all gone together with zero issues so far with a very good fit. Viewing visors left and right fitted and the gearbox cover dry fitted as are the battery boxes. I’ve got a plan in my head how it’s all going to go as some things can’t be fitted until other parts are done. I plan on adding some wiring around the electrical distribution box but won’t be going overboard as once all the parts are in and the hull closed up it will be hardly visible.
7 Likes
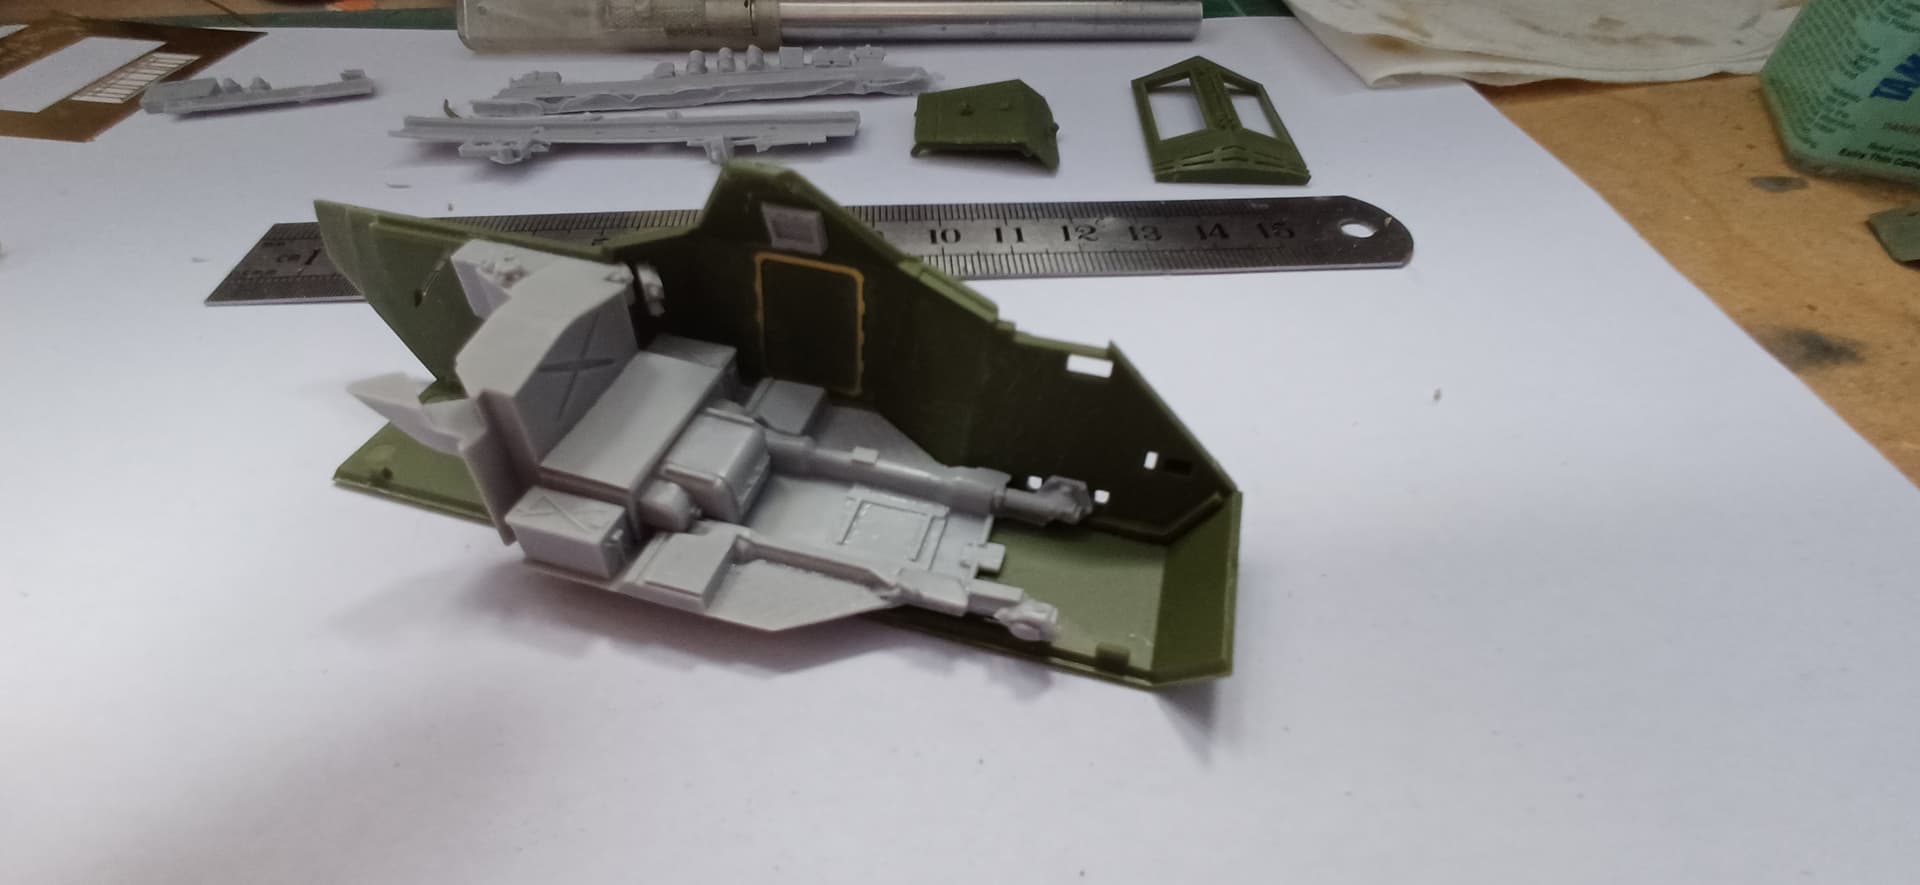
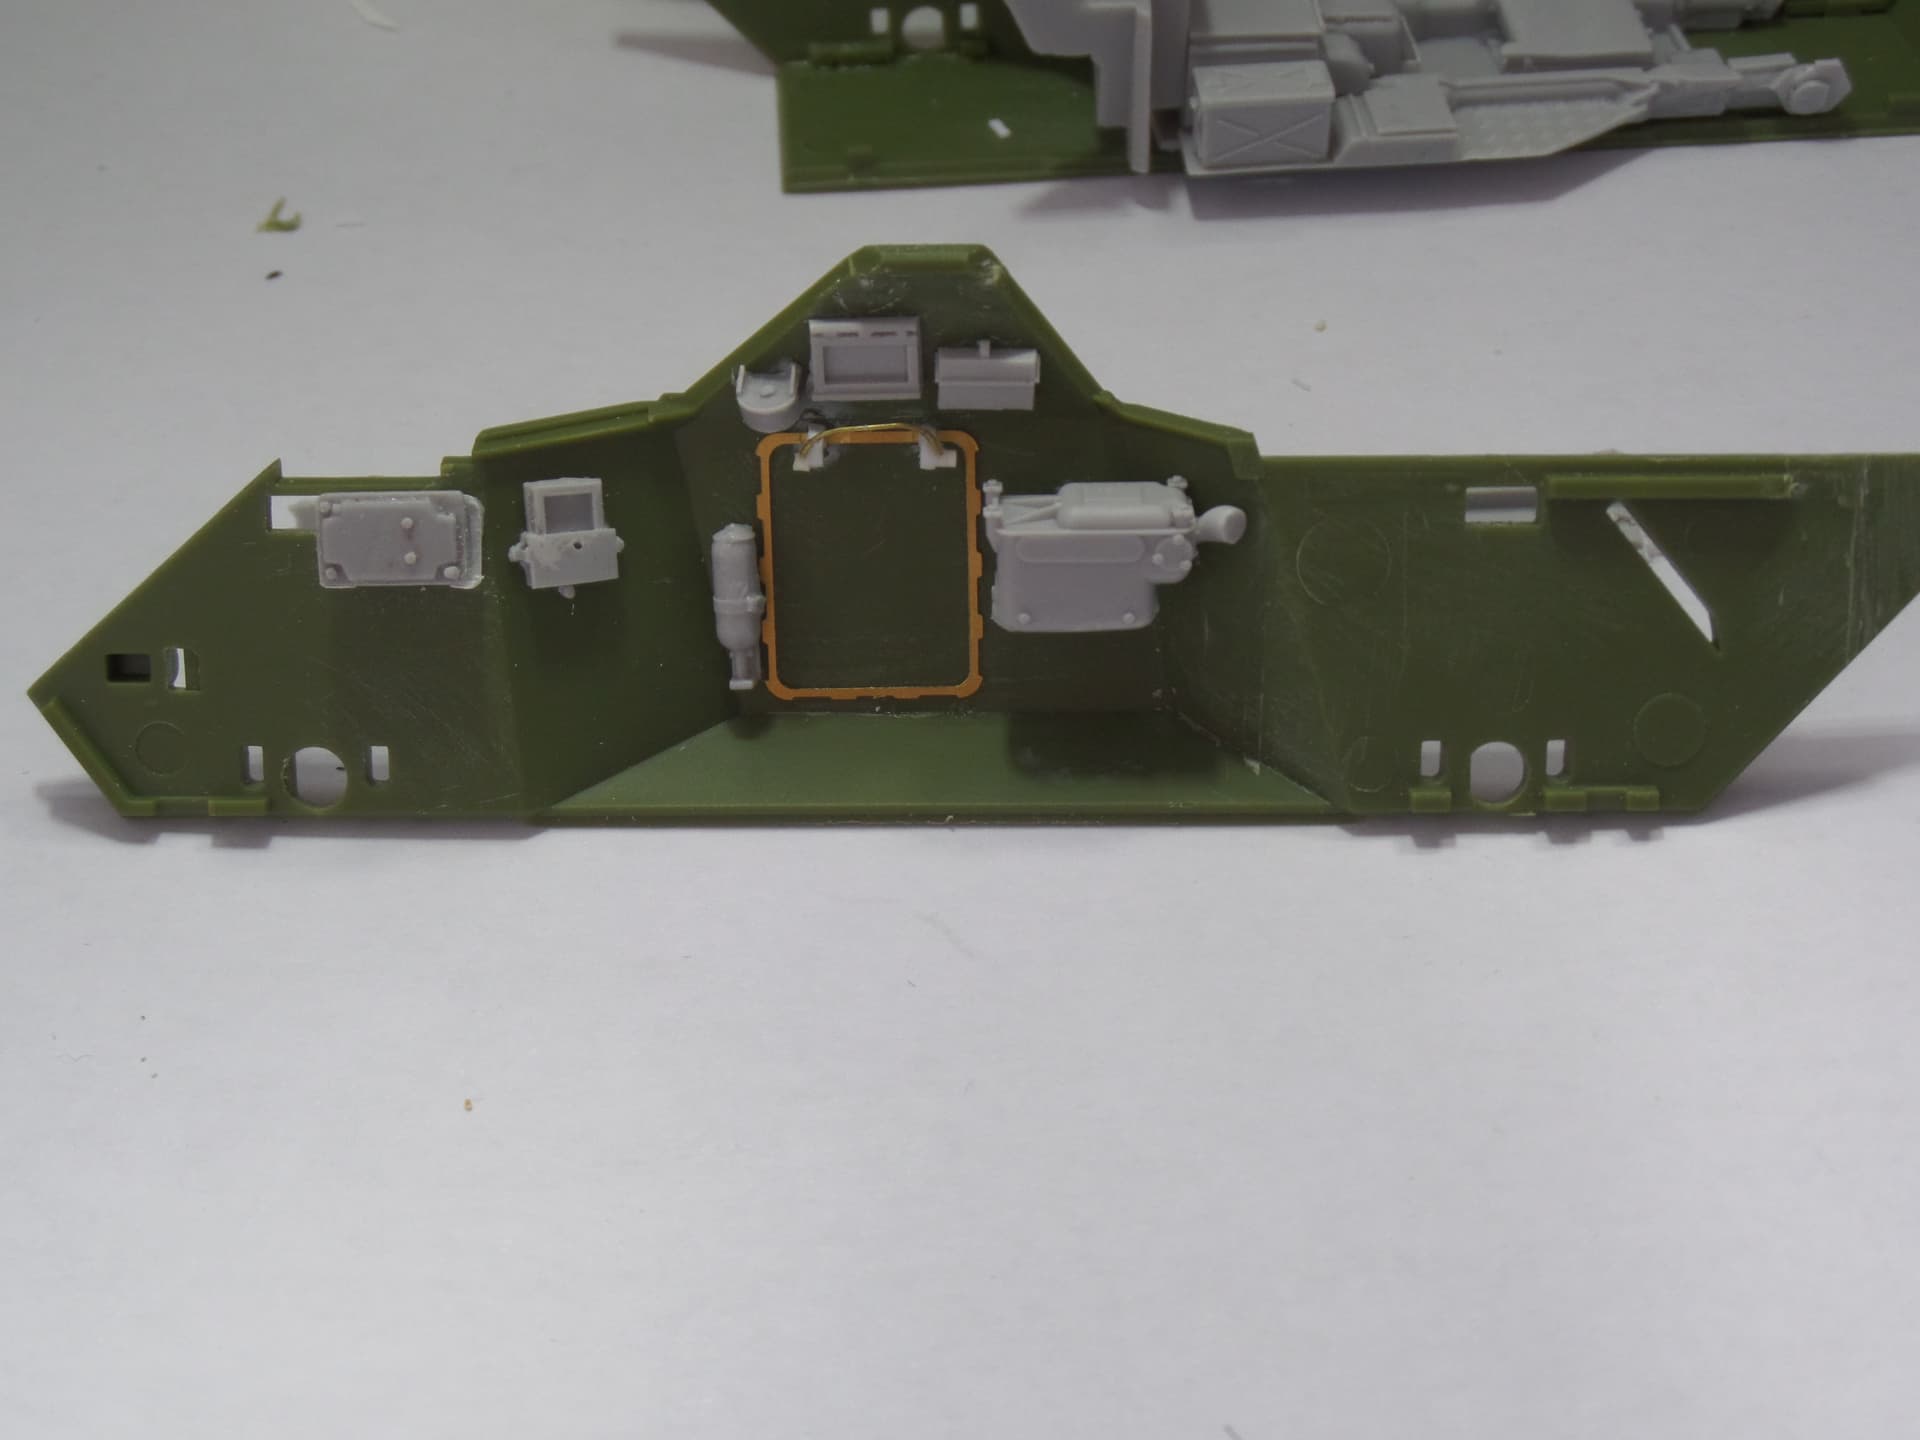
Most of the left hand side of the hull is now complete, battery boxes, gearbox cover and generator panel in. Also the light, smoke grenade discharger switch box, drivers seat base and spare periscope stowage to the left of the driver. I haven’t added the ammo stowage or radio rack at this time as they will need to be painted before their addition.
I’ve added some wiring covers which run down the left hand side of the hull and also the handle for the escape hatch. As there is no gearbox transfer lever in the kit I made one from scrap etch with a superglue knob on the end which is just below the large periscope box to the left of the driver. There will also be a radio services panel to the left of the drivers seat. When Clansmen was introduced this was fitted so all of the necessary radio boxes could be in one place, simplifying wiring etc.
9 Likes
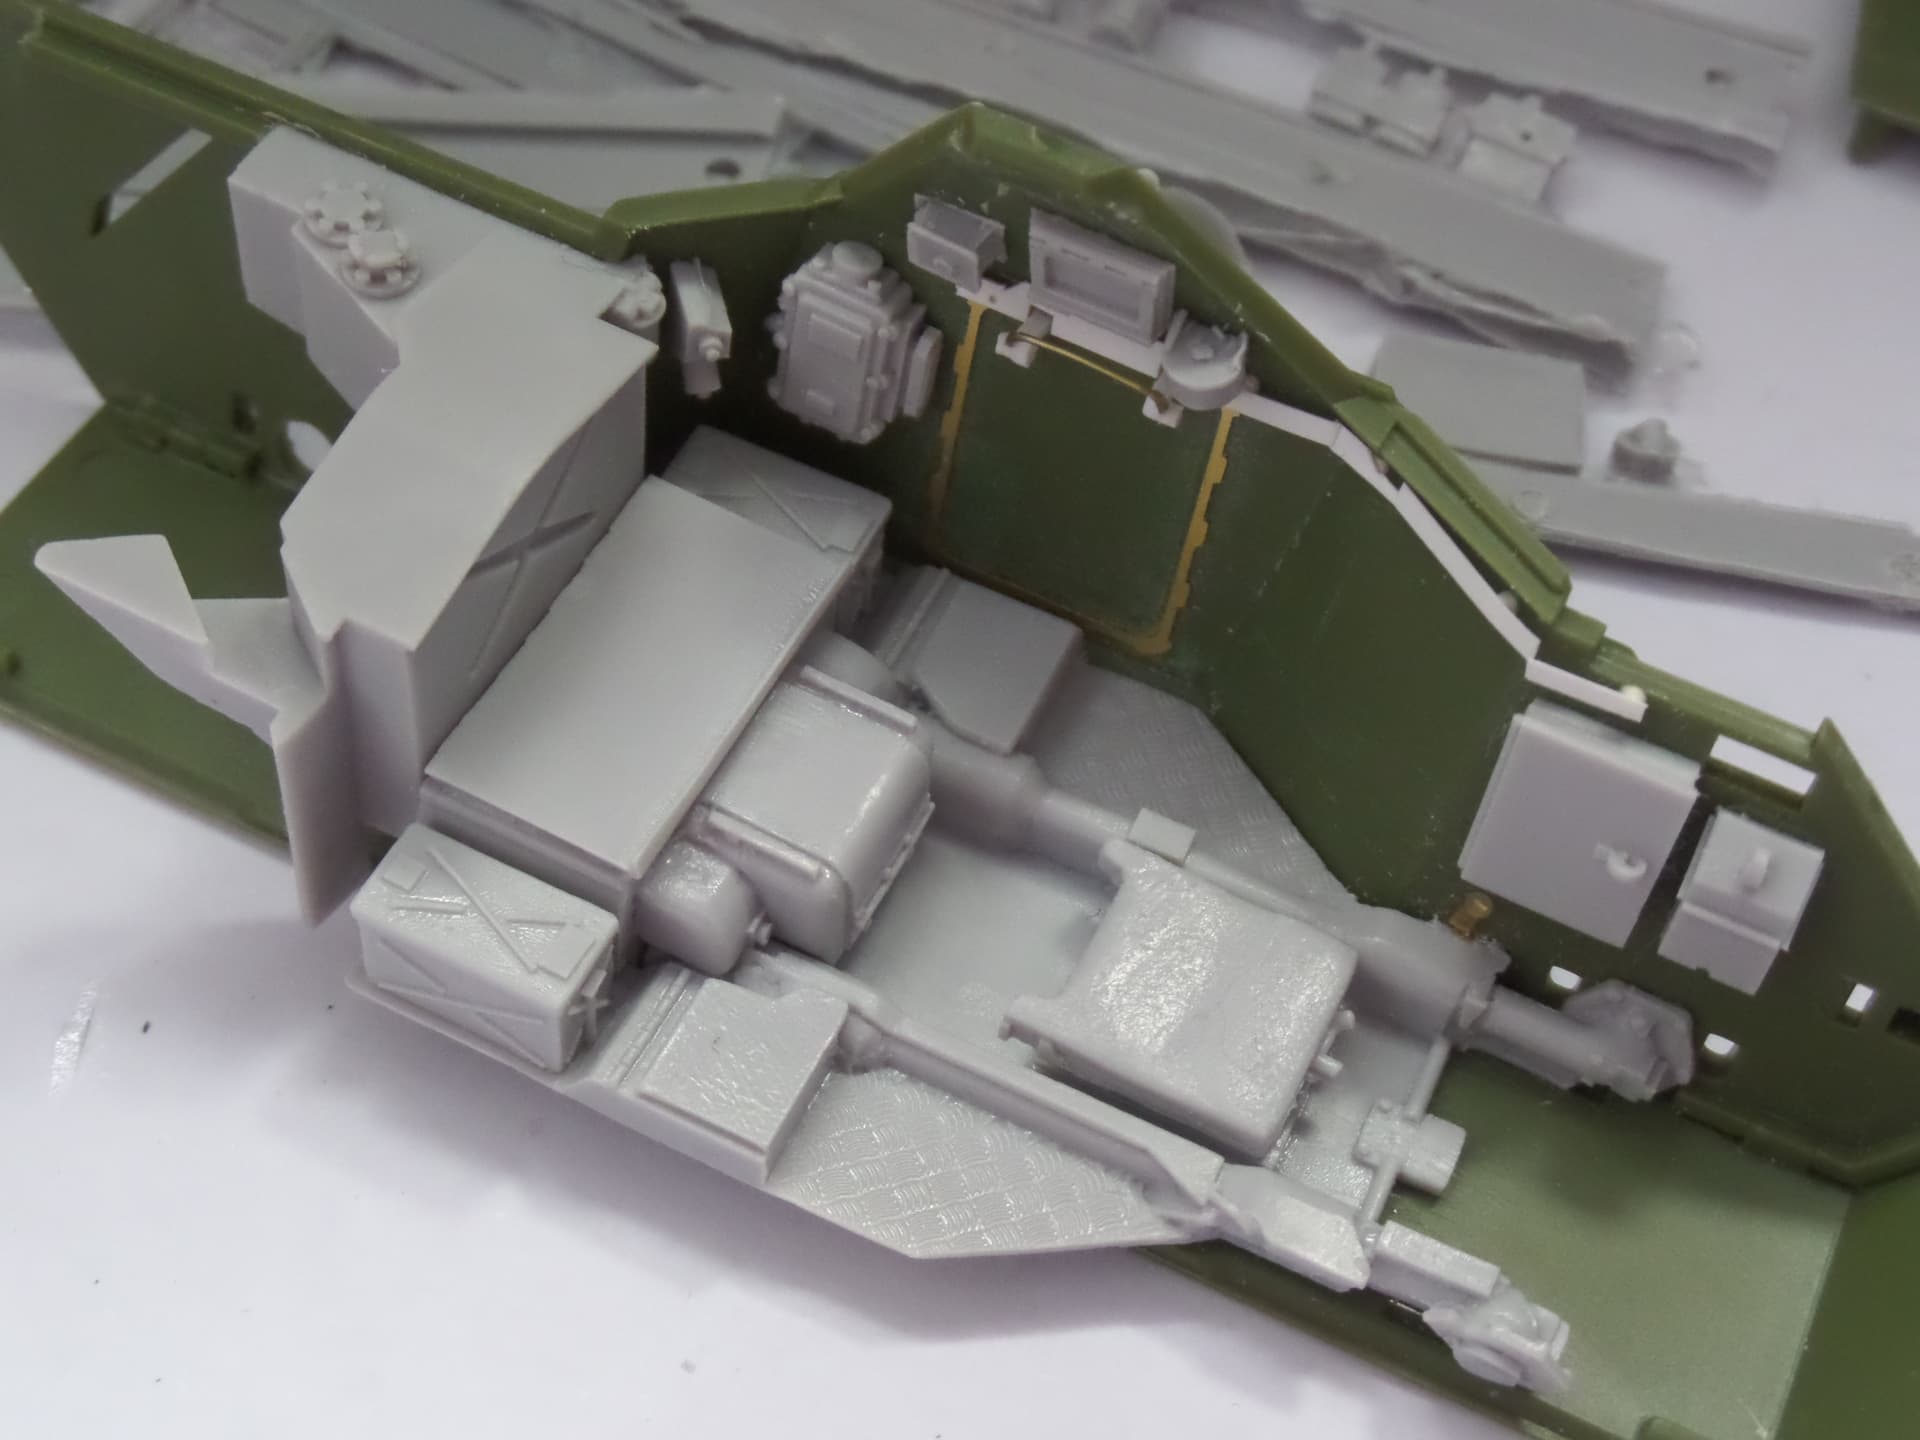
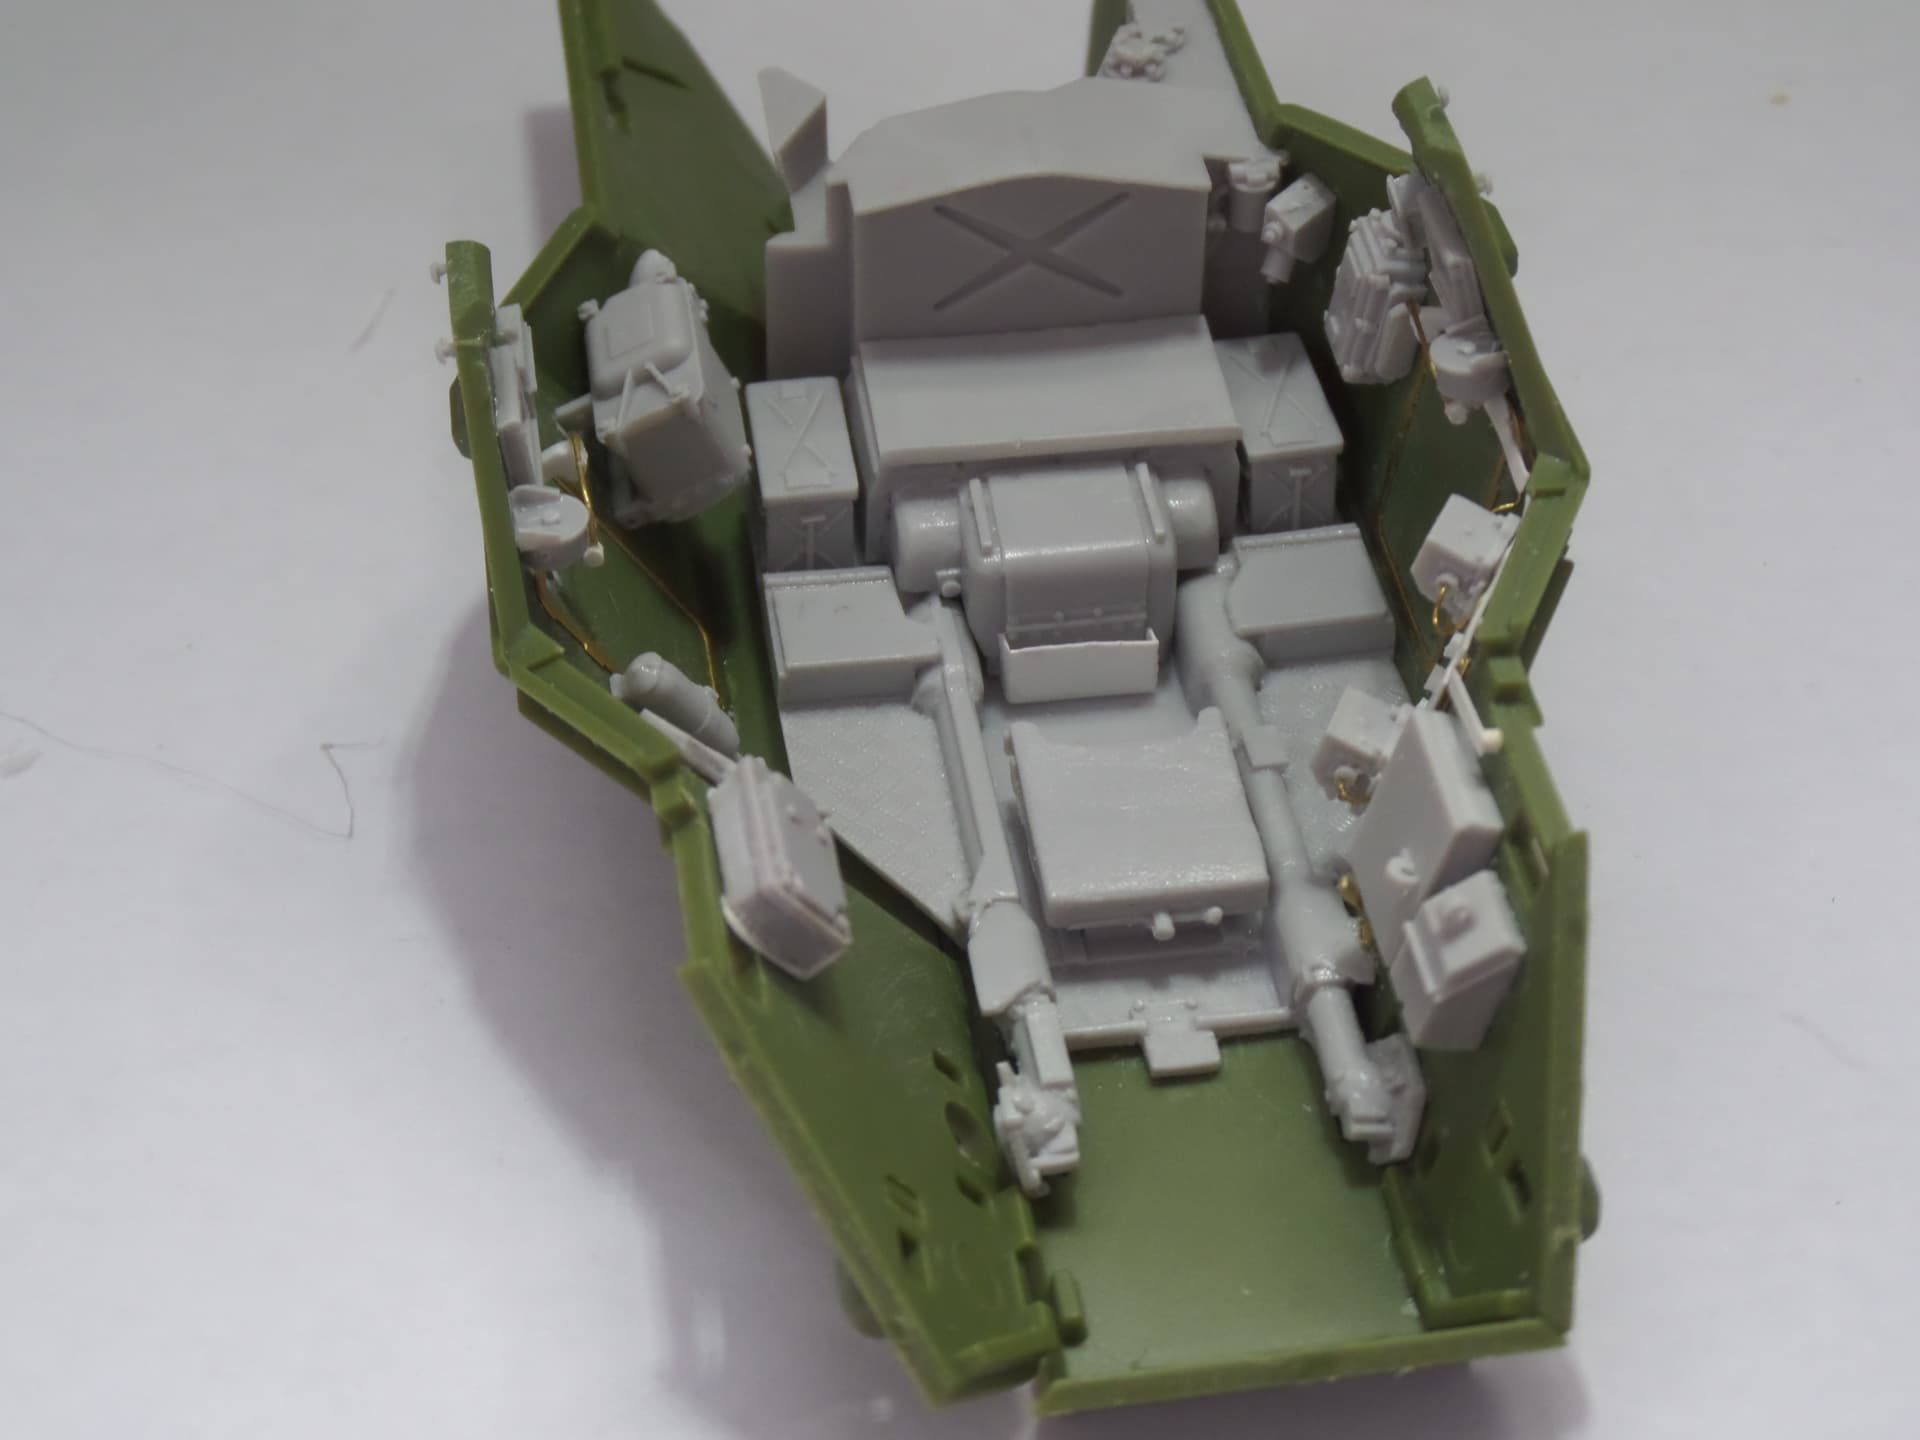
To continue, more stowage fitted to the left and right side of the hull. Radio services panel and commanders and drivers boxes fitted with wiring.
The hull won’t be fitted together until internal painting is done.
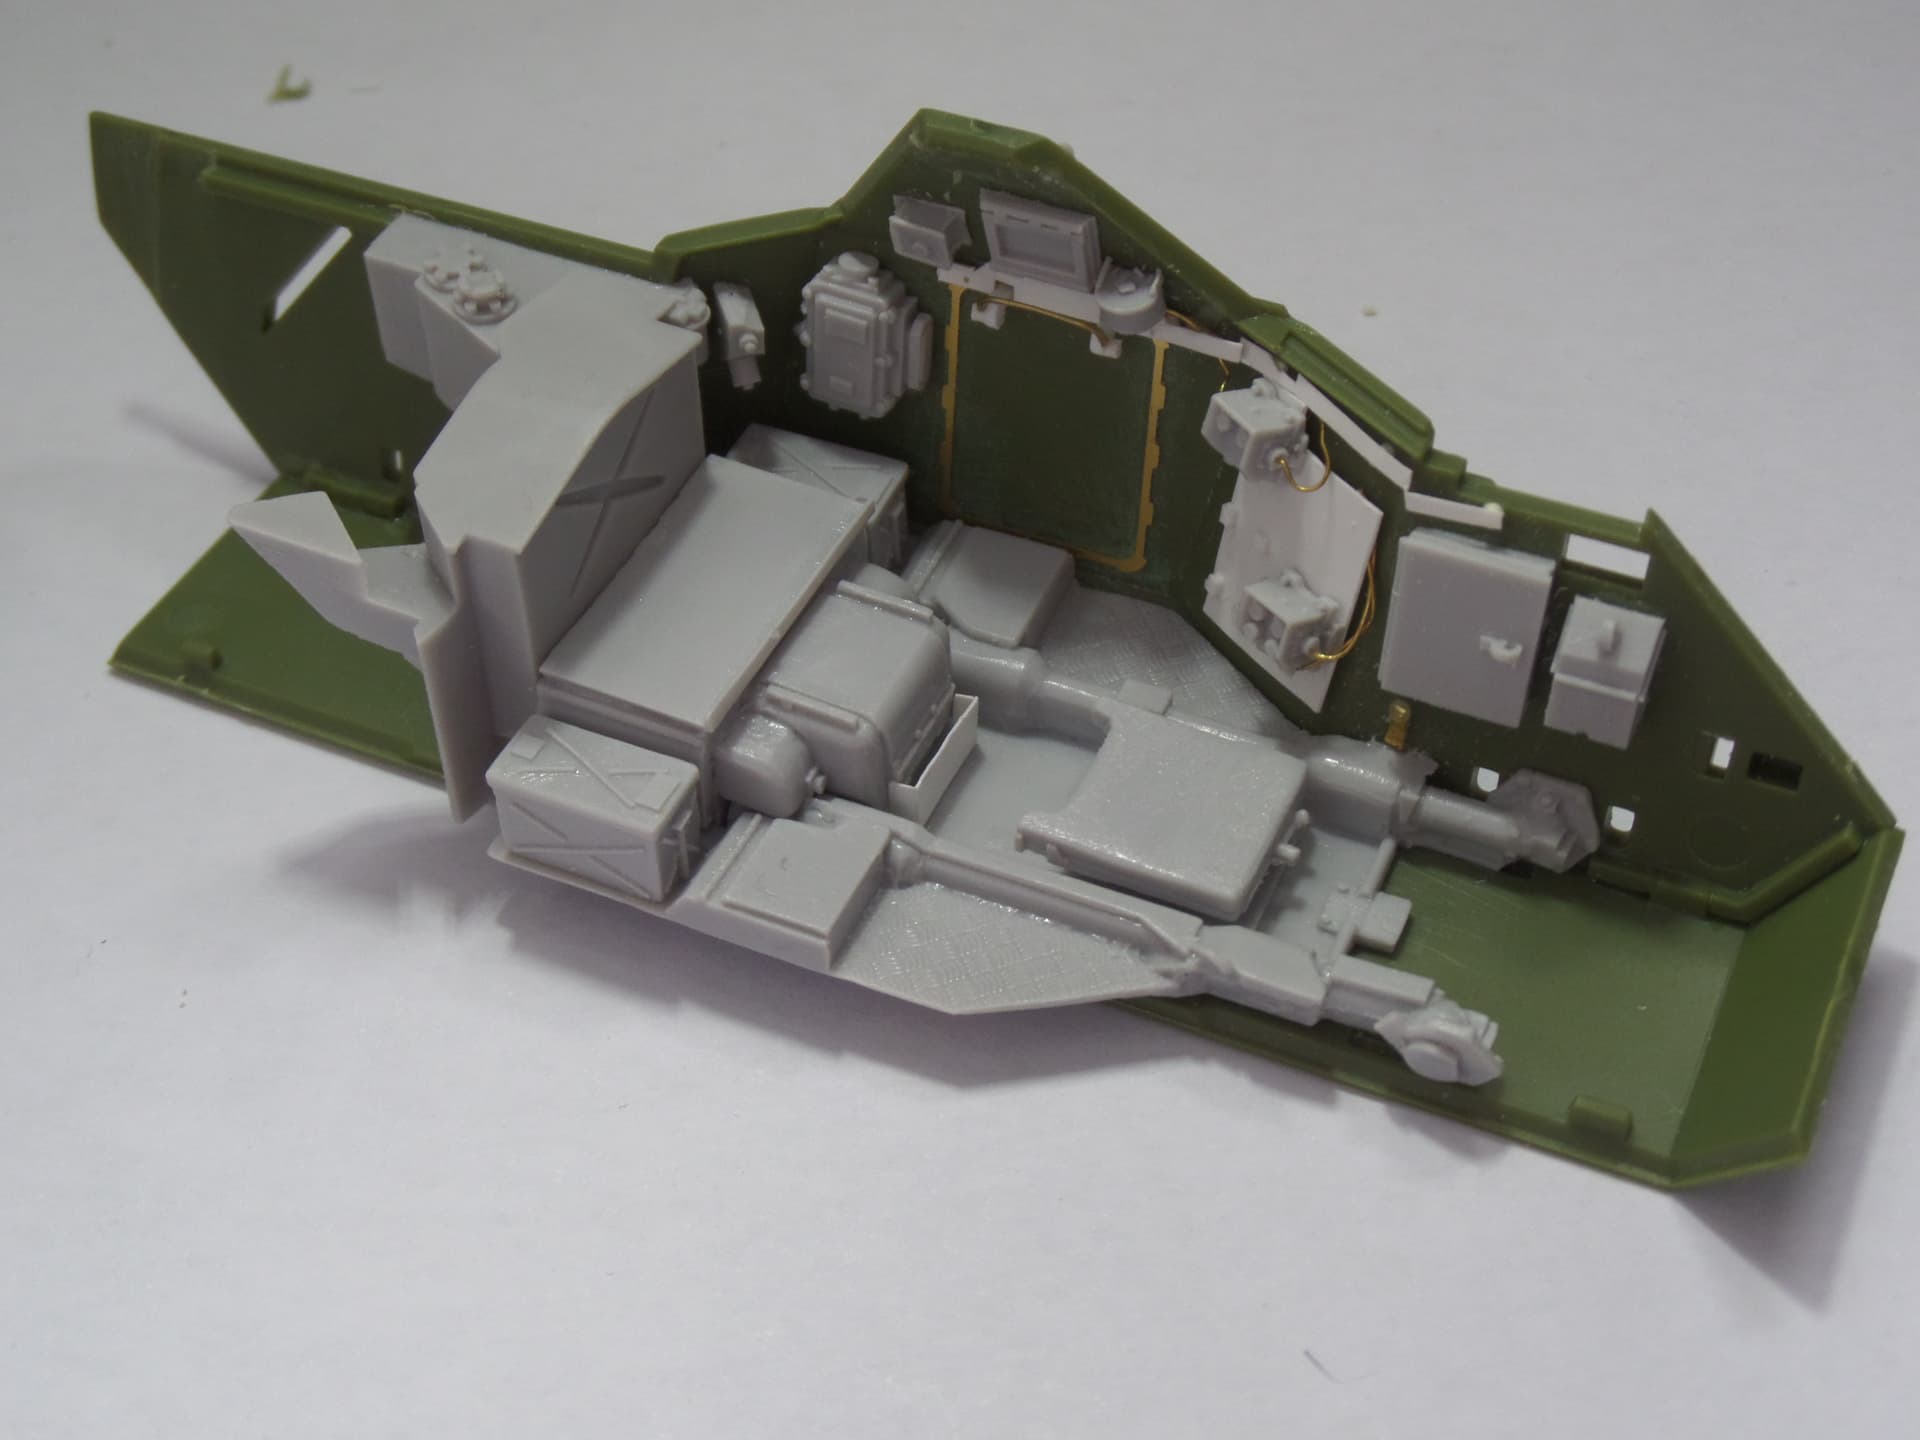
Right hand side of the hull is getting there. Air cleaner fitted but the drivers gear selector leaver won’t be fitted until after the hull is together. A few bits and pieces to be scratched, SMG ammunition stowage needs to be built as magazines were always in webbing.
10 Likes
Boy, those resin bits sure make a huge difference. You are doing great with it.
2 Likes
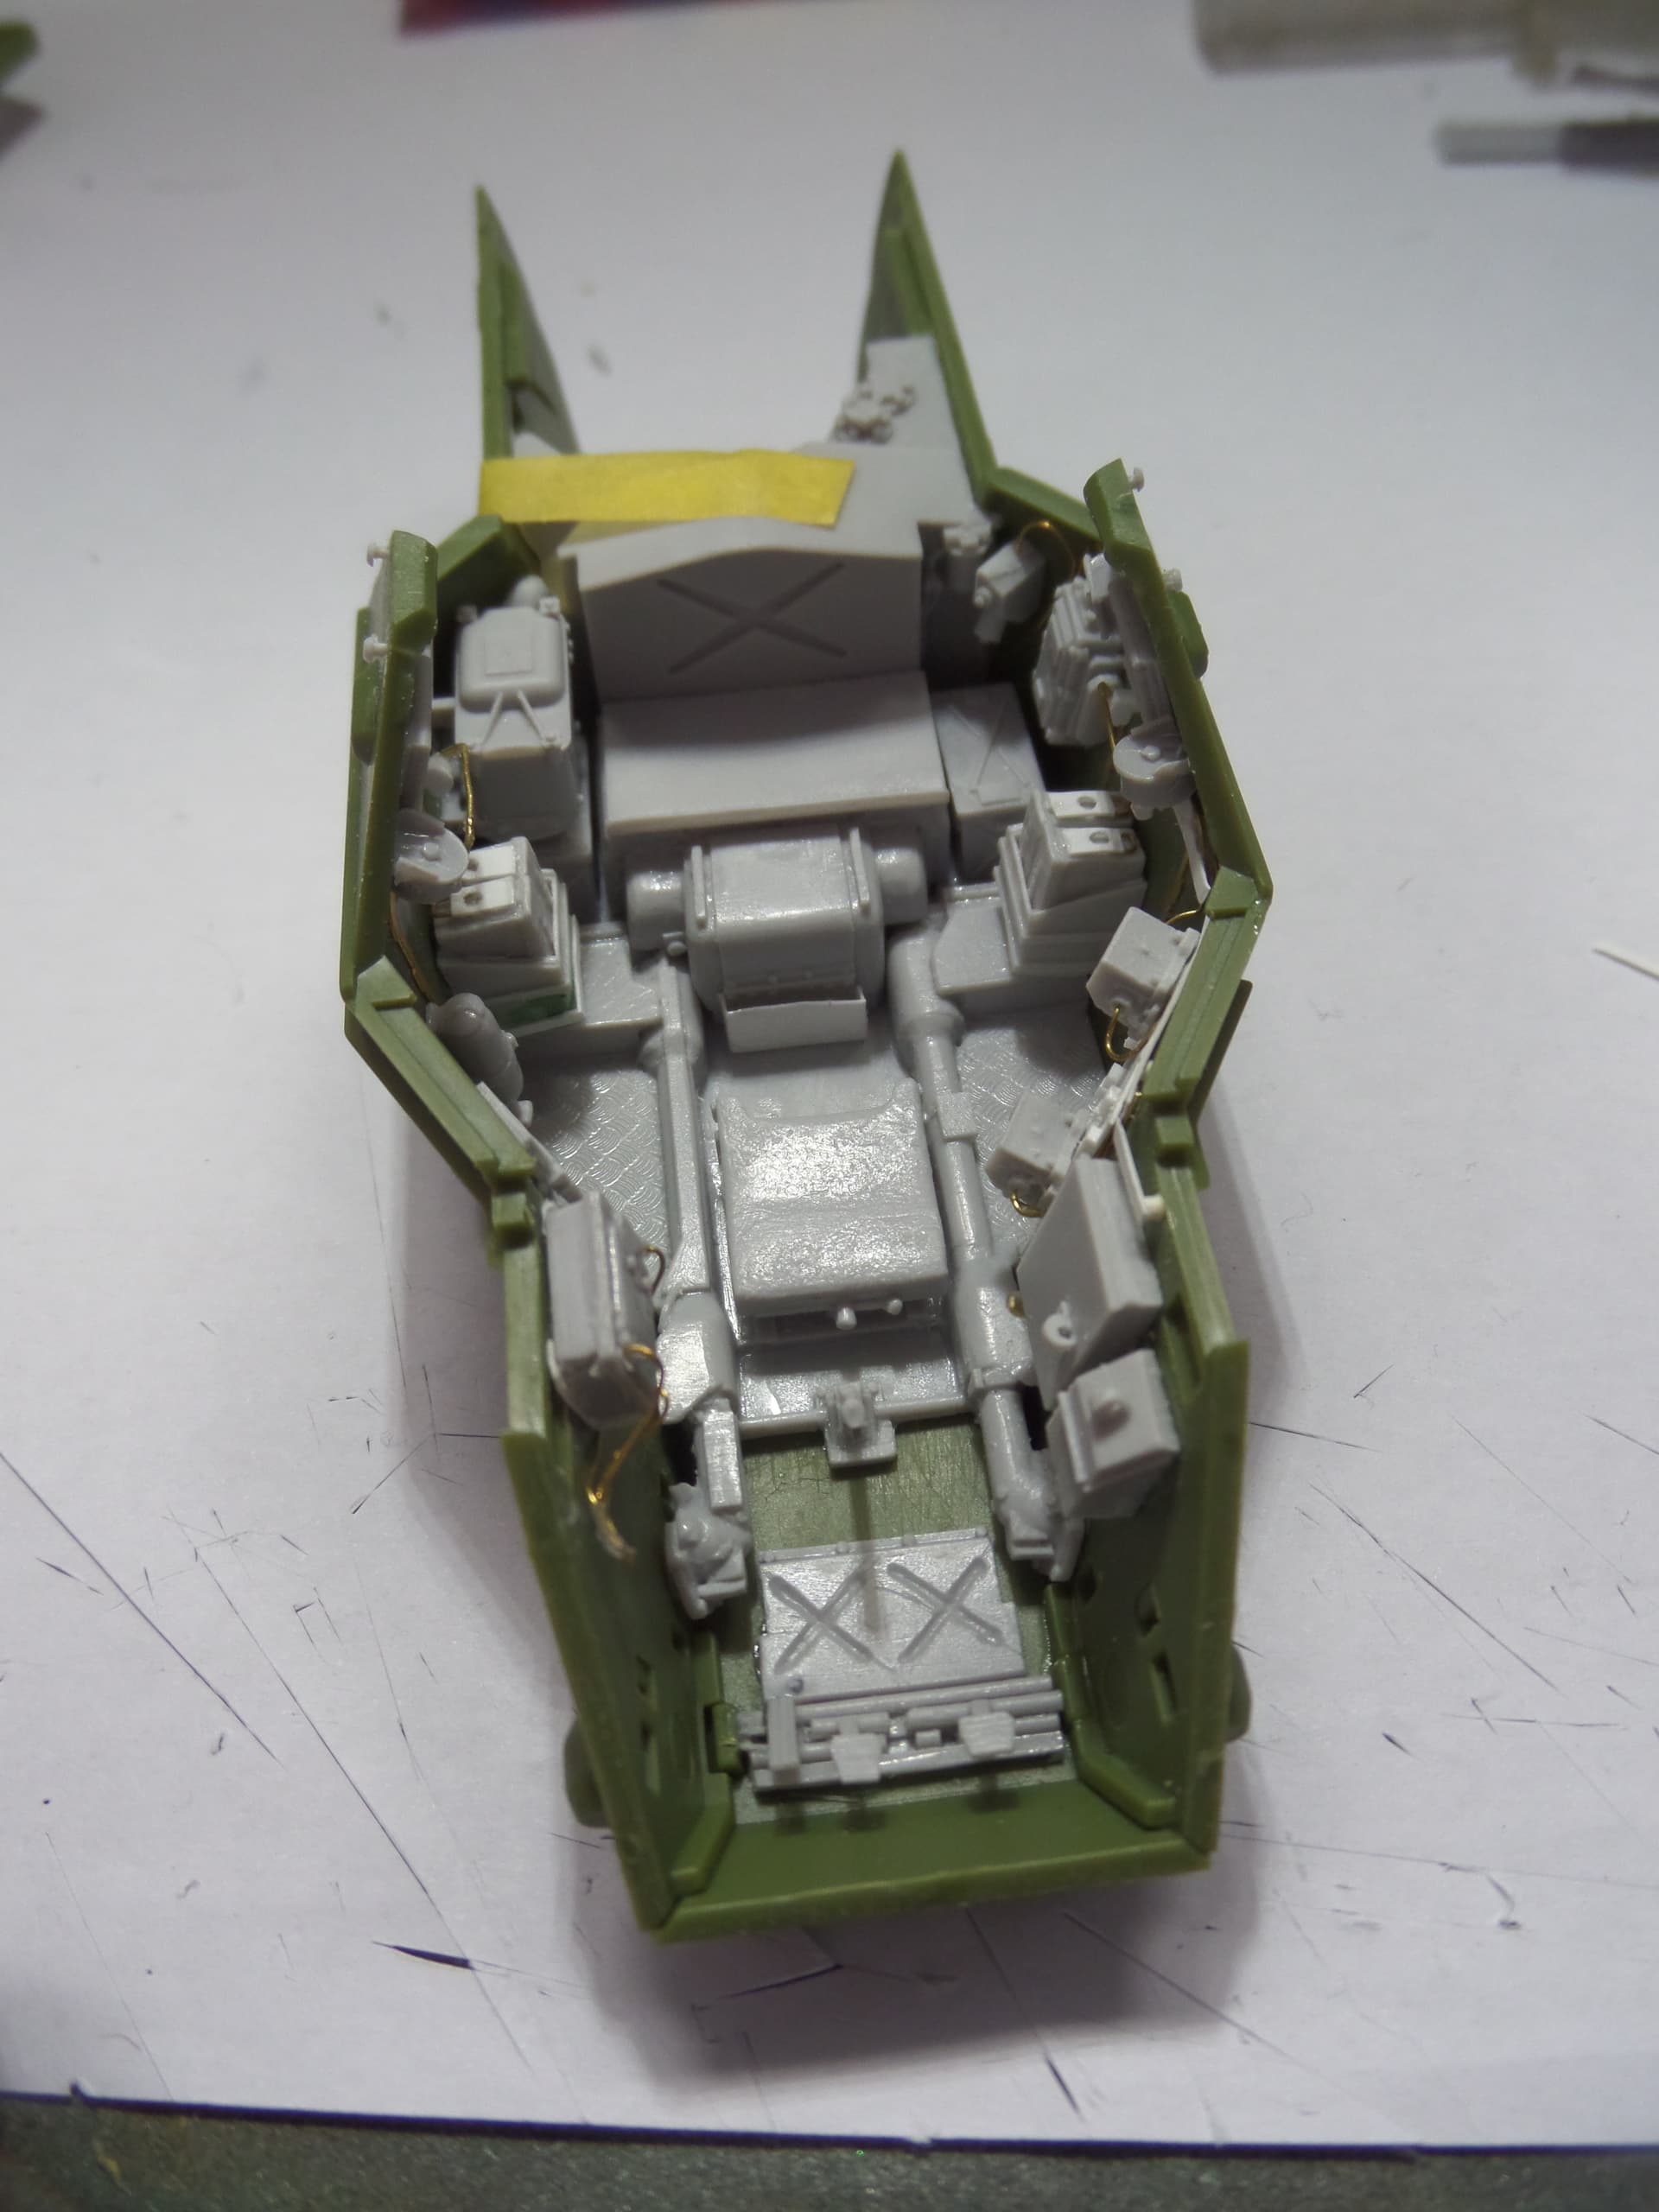
I think with this kind of kit it screams out for an interior and SMM really stepped up. I’ve put the drivers floor plate in and pedals, both escape hatch ammo stowage bins and just taped the two hull sections together on the 2nd pic to give an idea of just how busy it is. still a few bits to go in there also before painting. I’ve added the plates to the end of the ammunition boxes to better represent modern 7.62mm boxes.
The small stowage bin on the front of the gearbox cover is scratched as although SMM supply it with a first aid box in there, typically they weren’t put in there as all the crap from the commanders boots would drip, roll or slide onto it.
13 Likes
Looking very good mate. It’s a nice interior but your little additions give it a complete look. The cables for the crew boxes are very neat and the Gympy box end plates is a very clever touch.
Will really pop once the paint is on…
1 Like
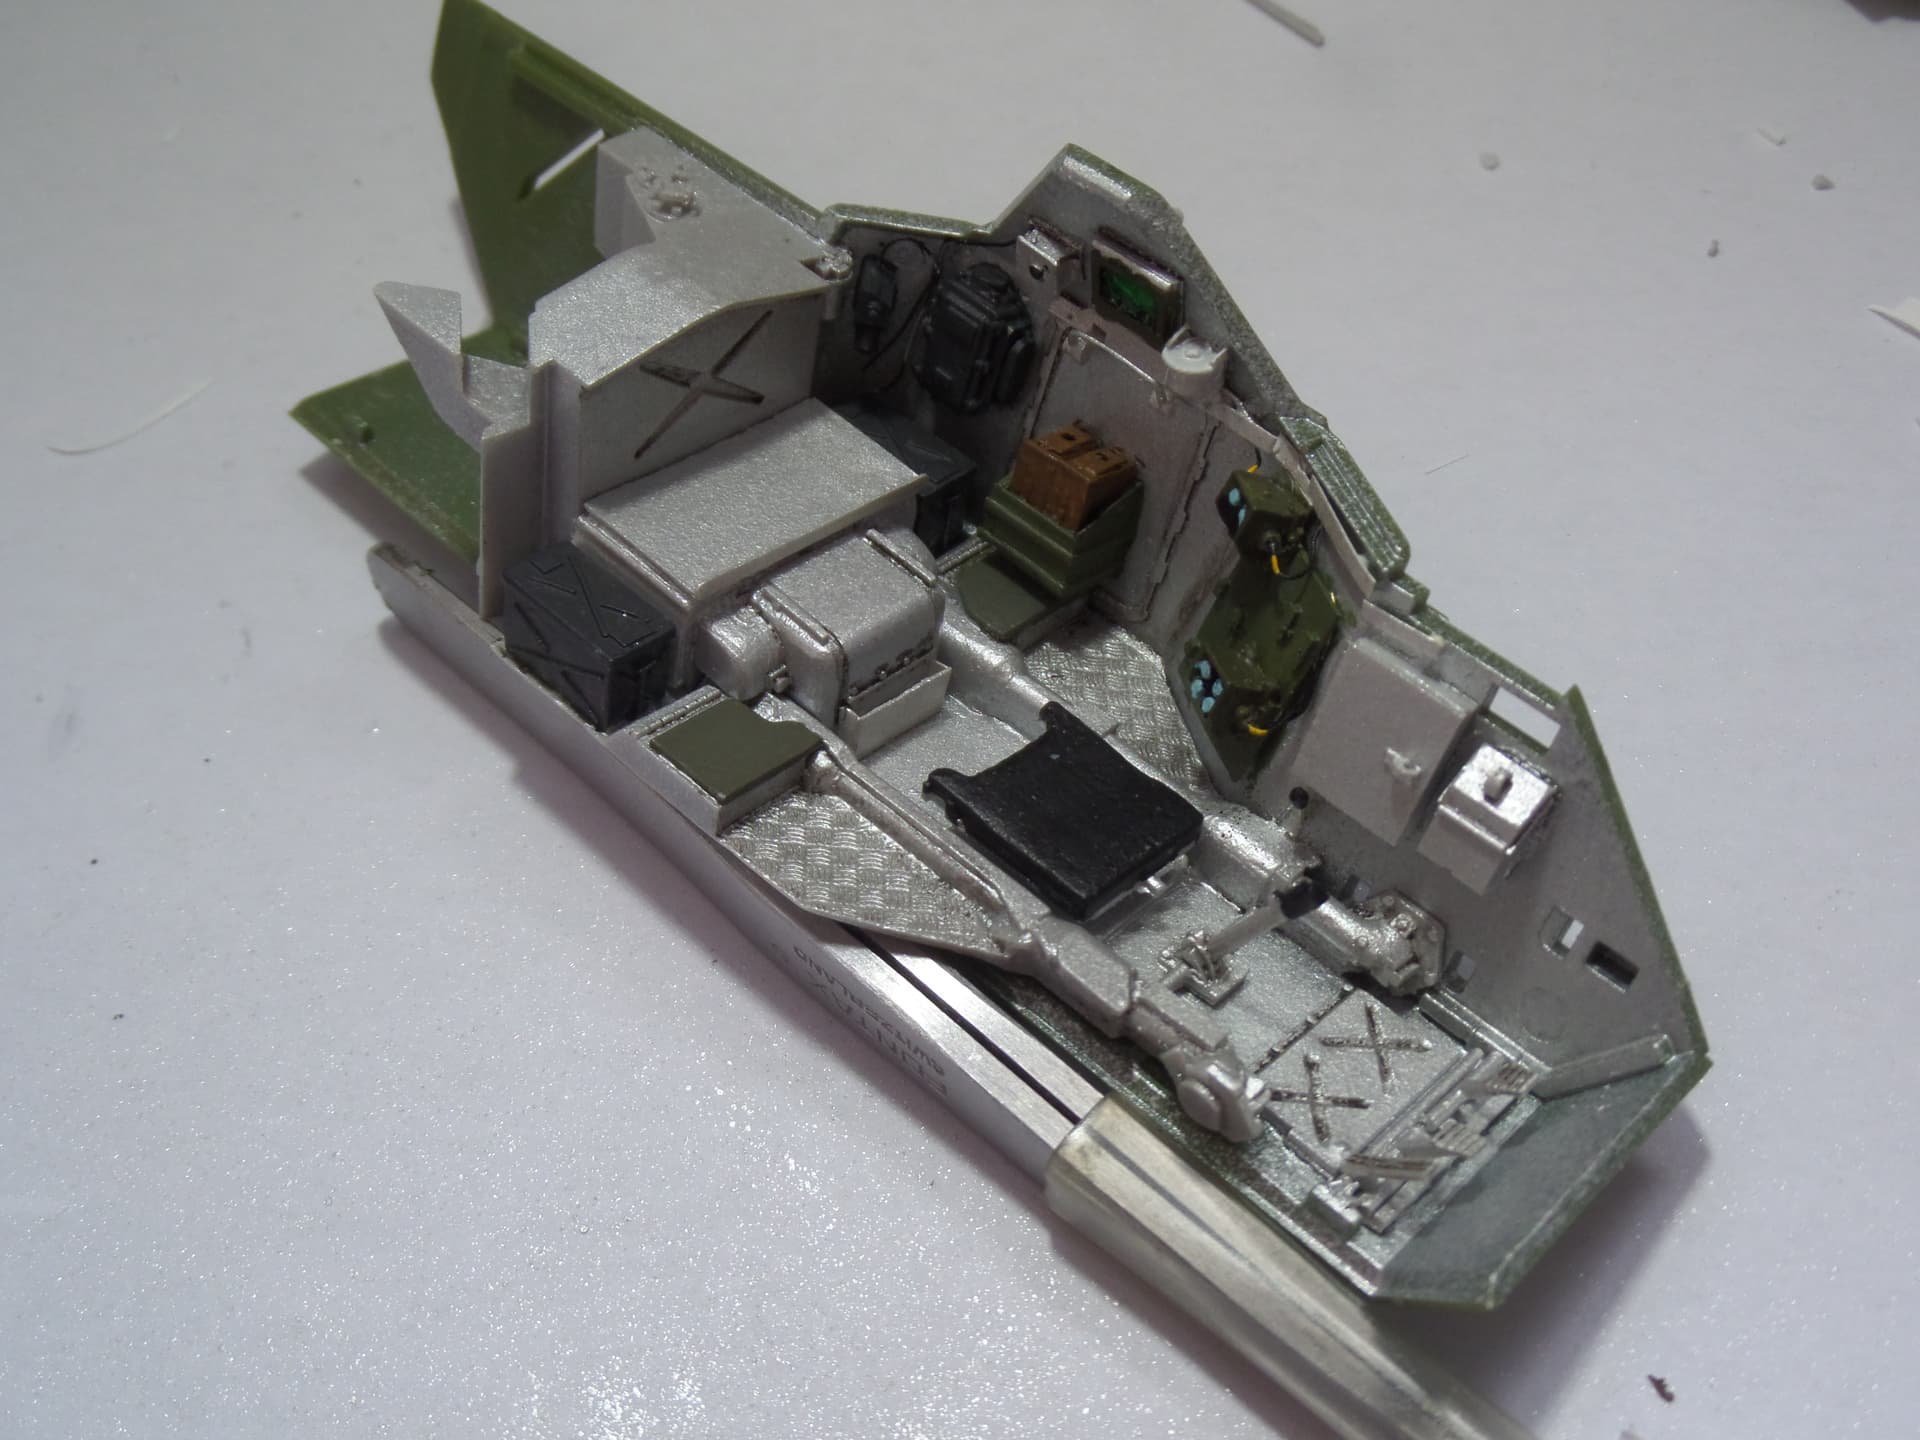
And again a small update. Some interior painting and detail painting done, make me realise how bad my close up eyesight is getting!! I’ve never done such a garish interior before, who on earth in MoD thought silver was a good colour? Thank god we’ve changed to gloss white now. Need to clear coat it after a few more bits painted and then do a pin wash some more.
9 Likes
That looks very very good mate … I had to laugh about the silver interiors … they were a complete biblical PIA … you would go in with a set of clean green denims, then come out looking like a spaceman in his silver suit … (what silver did you use for it ?) You doing the vision blocks clear green ?
1 Like
It would still rub off onto your kit months down the line as well! I’ve done the side vision block clear green over a silver surface, but I think I’ll tone it down for the drivers and commanders sights. Maybe a base of oily steel and then clear green, not quite sure yet. I may decide to just do them black.
2 Likes
Radio tray and 353 radios fitted with wiring. The tray is more than adequate for the task and the radios to my eye are spot on in detail. They are slightly sloped on the sides which I imagine is to facilitate clean molding and removal. It’s easy enough to get them squared off.
8 Likes
Excellent. That detail is jumping out now mate. The harness wiring is spot on
2 Likes
Man SMM really saves this kit! With a little more work they could have put out their own Ferret.
1 Like
Great work so far; I might have to look into the SMM interior and other goodies.
1 Like
It saves the modeller also. I was fully planning on scratching an interior for this and also possibly building a new turret but hey presto SMM saved the day. As I’ve said before I could have bought Accurate Armour, however SMM’s modular approach to upgrading the kit allows me to build exactly what I want.
2 Likes
A very small update, fitted the commanders seat. In real life the seat is on rails so it can be slid back and forth as well as adjusted vertically. This had to happen as the Clansman radios protruded further forward than Larkspur and No 19 sets. Without the adjustment the harness wiring would get ripped off. The paint used for the interior is Vallejo silver 70.997, Johnny asked previously and I forgot to say.
5 Likes
So, this is a small bit of inaccuracy in this set? I’m sure it can be easily corrected with some styrene if one wants too. Anyway, looking good. 
1 Like
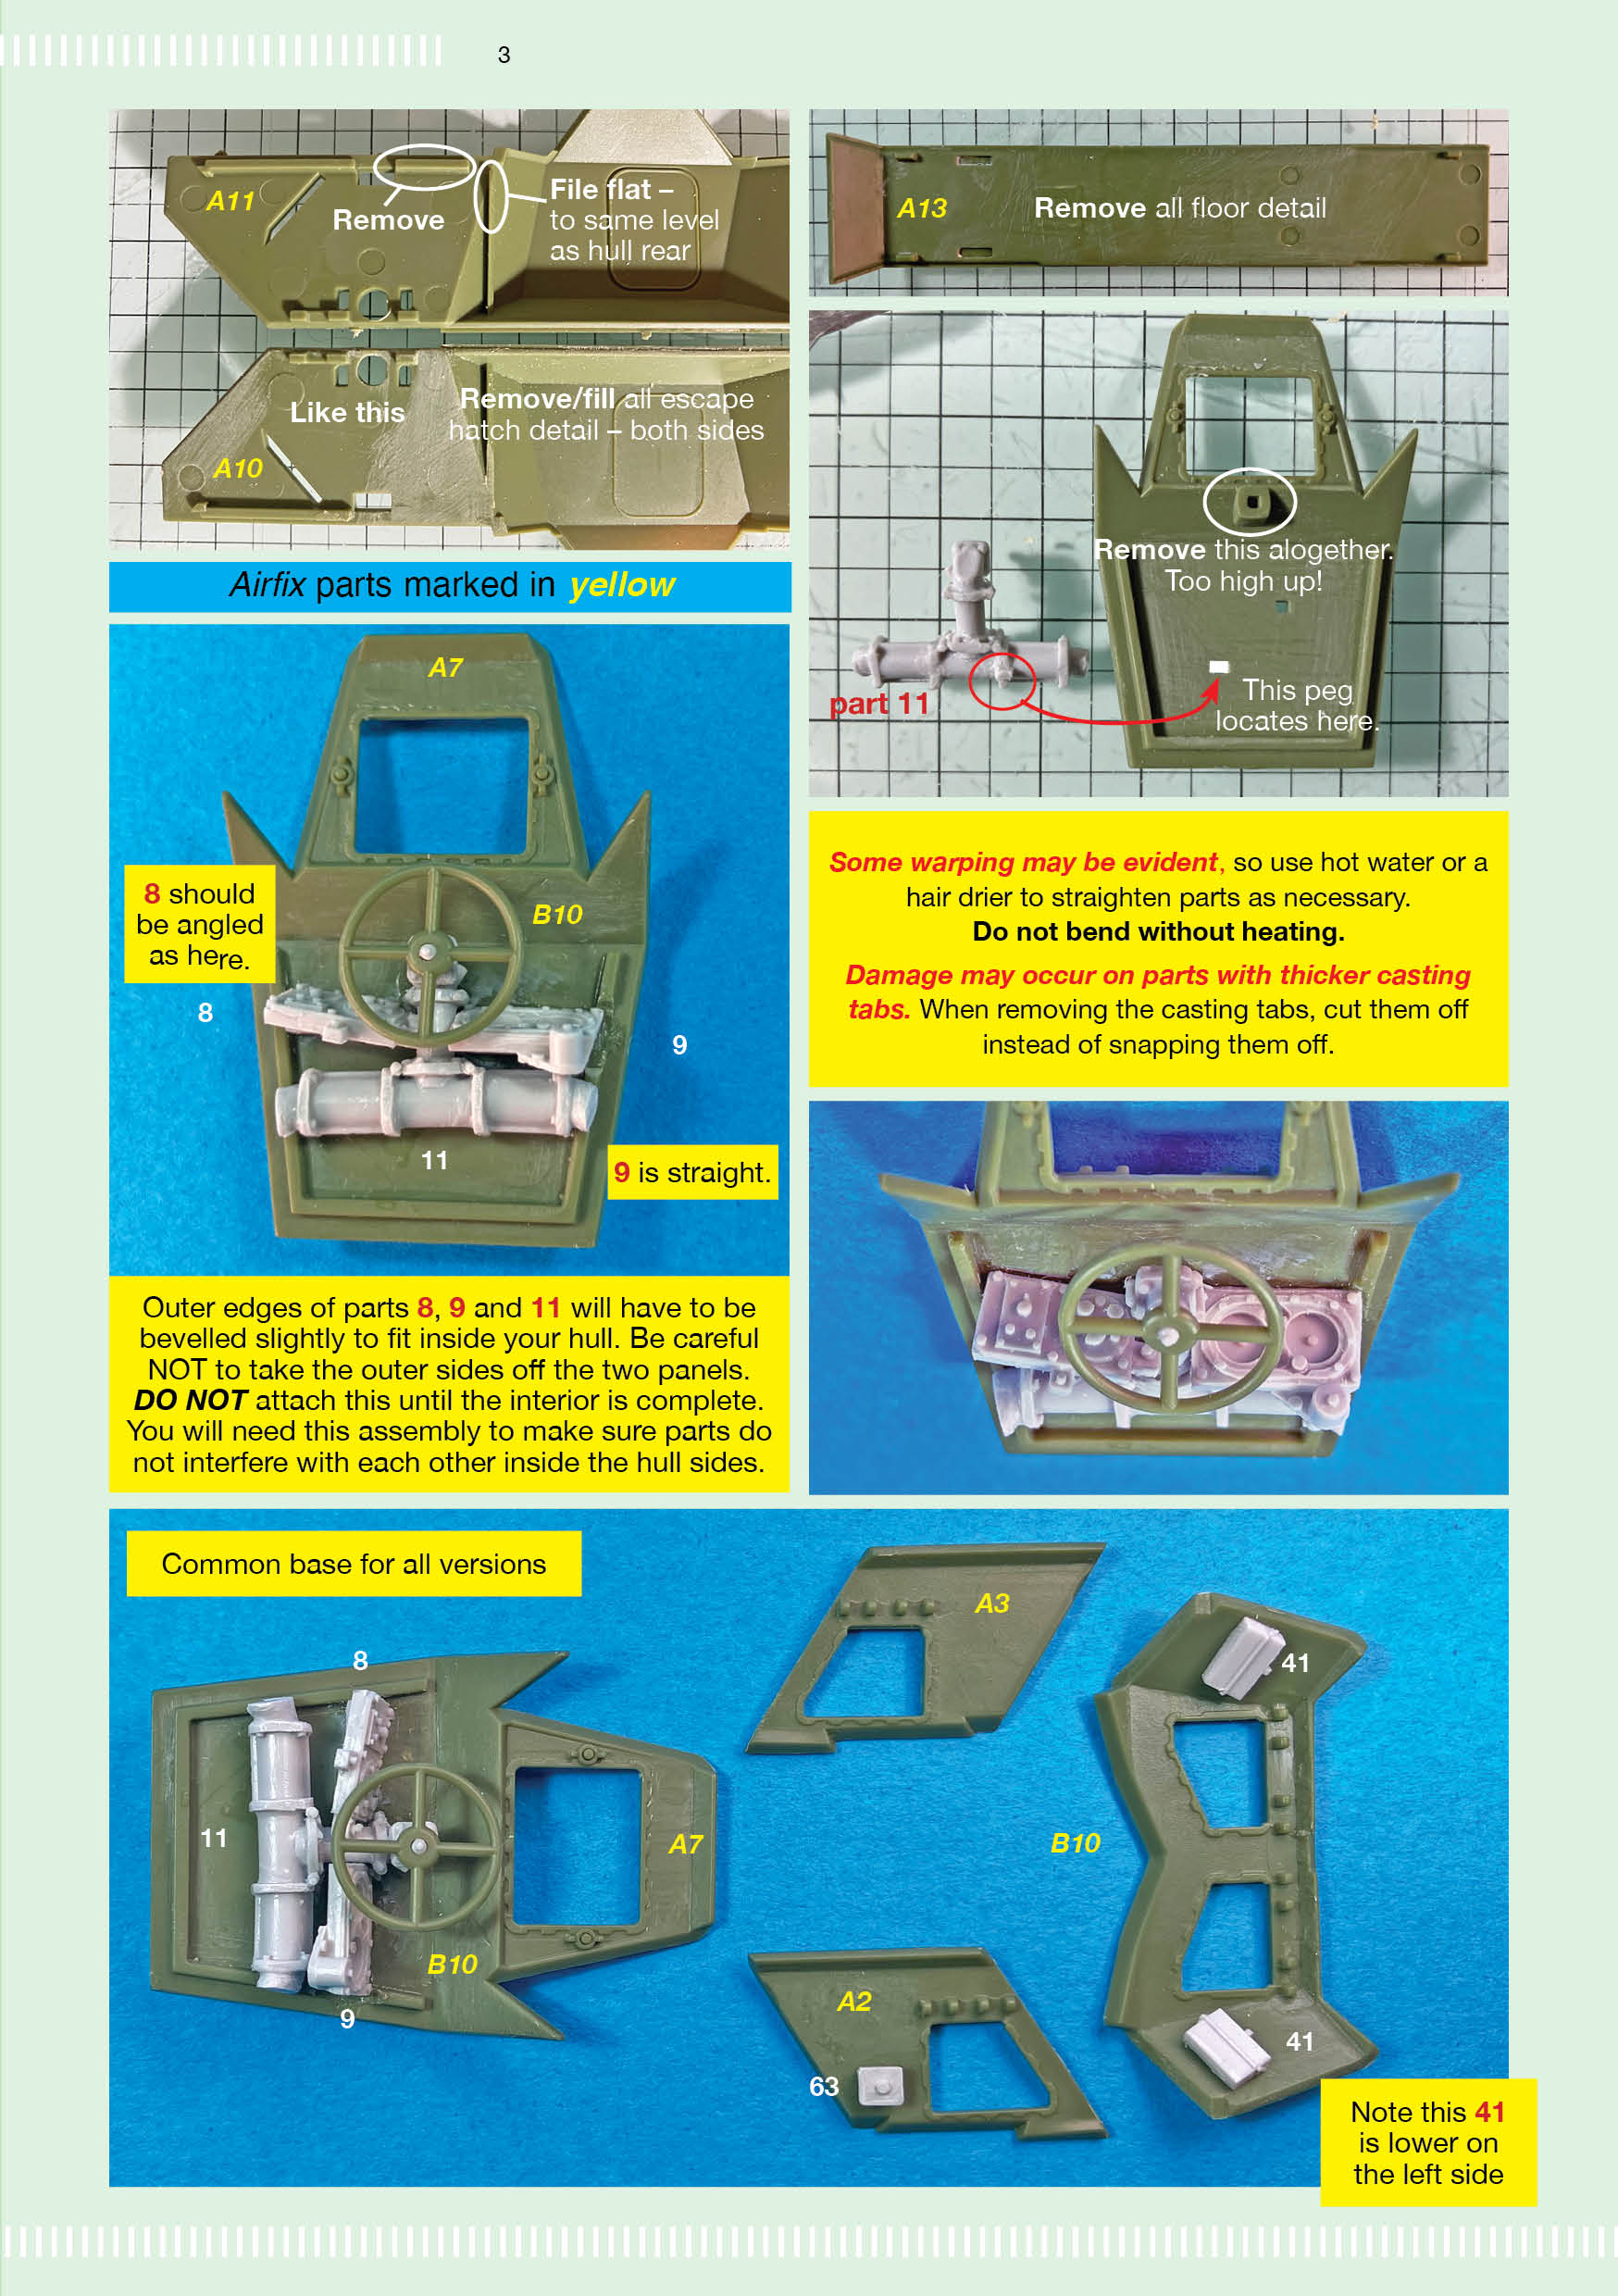
I would advise following the instructions in order.
The nose needs to be built first with the steering box and instruments. The reason is that stuff on the hull sides can clash with the nose fittings. I hope you have taken this into account.
It is nice to see one being built up. You’re doing a great job. Keep it up:-)
4 Likes