It’s definitely not a good PR win for Airfix… You have to wonder how a firm with so much history can get it so wrong…
1 Like
You’re a better man than I am for persevering through that. It looks like it’s almost made out of wax.
2 Likes
It’ll get there.
I can understand their idea of making a simplified beginners kit. Or something quick for wargaming. But compromising details and fit issues are going to have the opposite effect on what they want. It should have been done better, it’s a big step back for Airfix.
I’ll be voting with my wallet on this one.
2 Likes
I’ll post Dragon’s #7370 as an example of what can be done in 1/72nd.
Bear in mind that it’s a different sub-version of Tiger.
David

Thank you very much for the assembled photo. I was using a photo of the roof part but the angle wasn’t perfect.
Now, thanks to you, I can get technical with it;
David
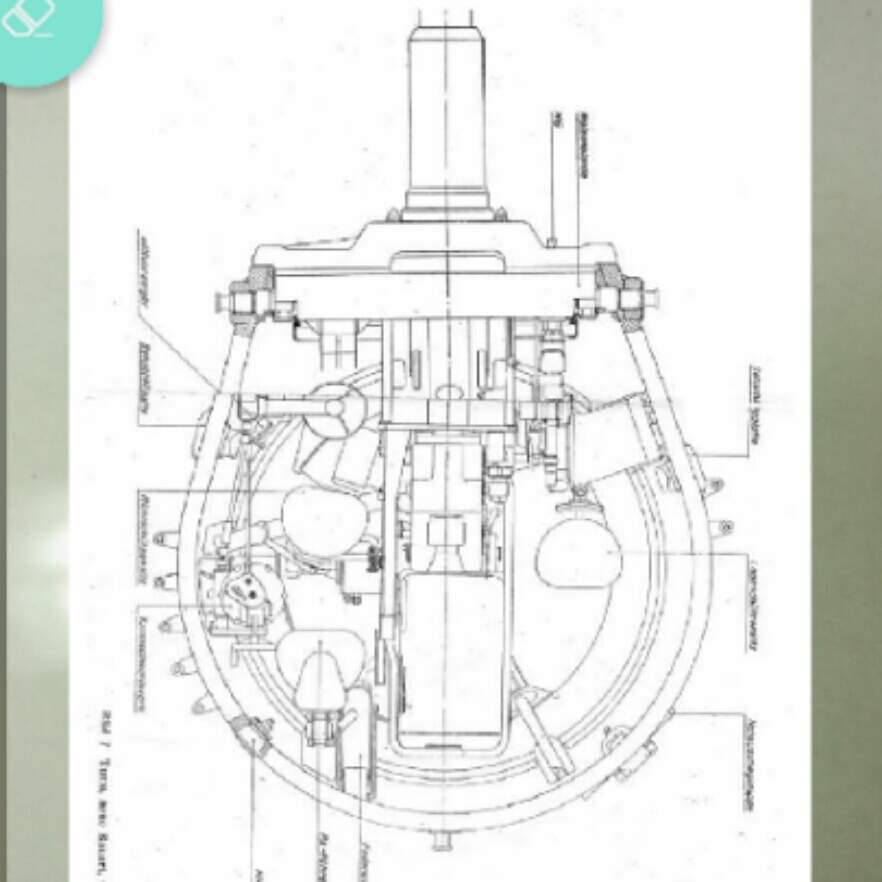
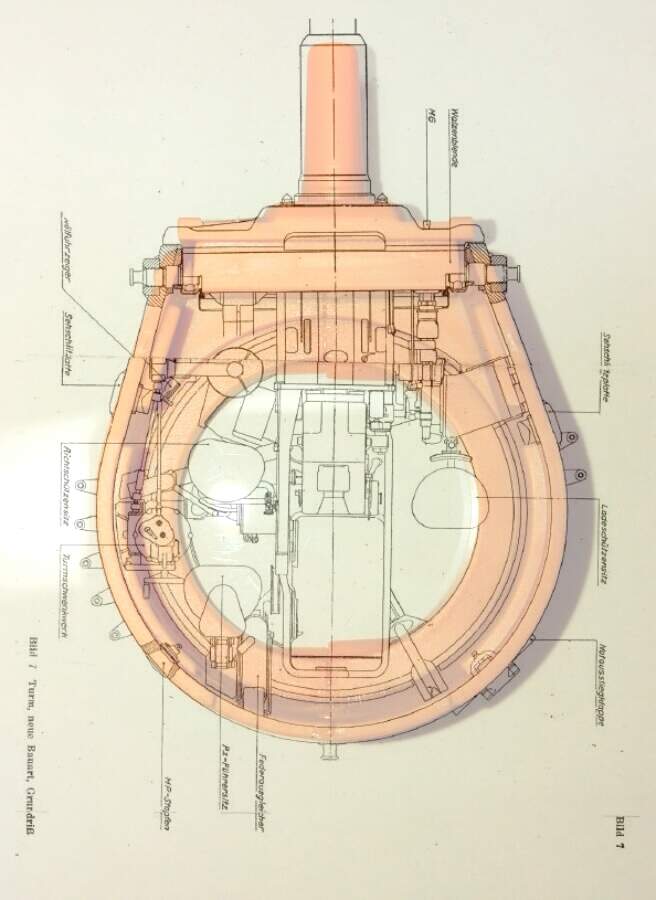
Hi David, I must admit when I lined the kit photo up with the photo of the drawing I downloaded from the Tigertank181.com it looked pretty accurate. I’m not completely clear on the provenance of that drawing, the site claims it is from a manual “D656/22 - the Tiger E and Command Tiger Turret Equipment & Operating Instructions”, whatever that is.
I tried lining up your drawing with it as well, and it does seem like the Airfix part is closer to that drawing that your drawing is to either of them.
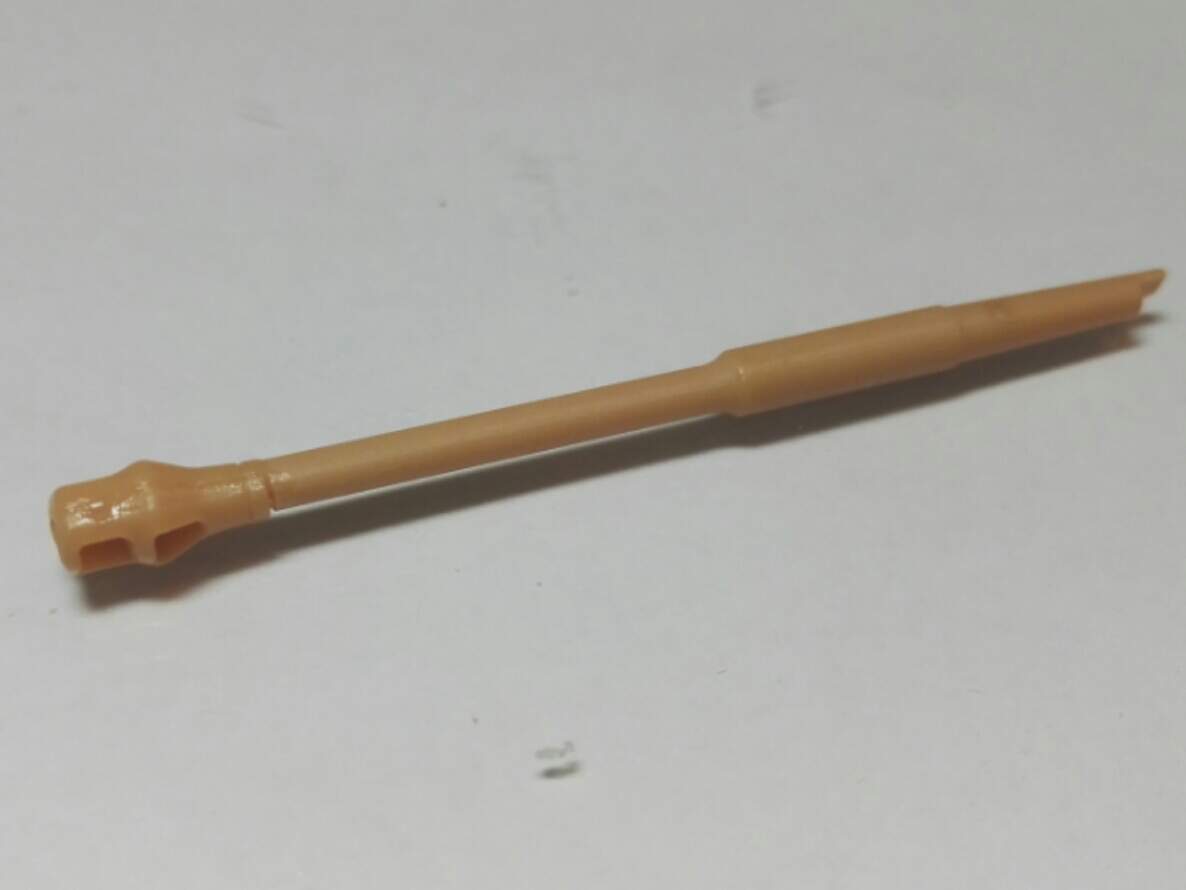
It’s a bit hard to be sure, especially as I took the photo and lined up the photos with my phone. It also seems from that drawing like the kit part has the gun in the right position. The mantlet does seem to be wrong in size and shape. Also from, what I can tell, the gun mounting tube (whatever it’s called) should be a straight cylinder, not tapered as the kit part is, is that correct?
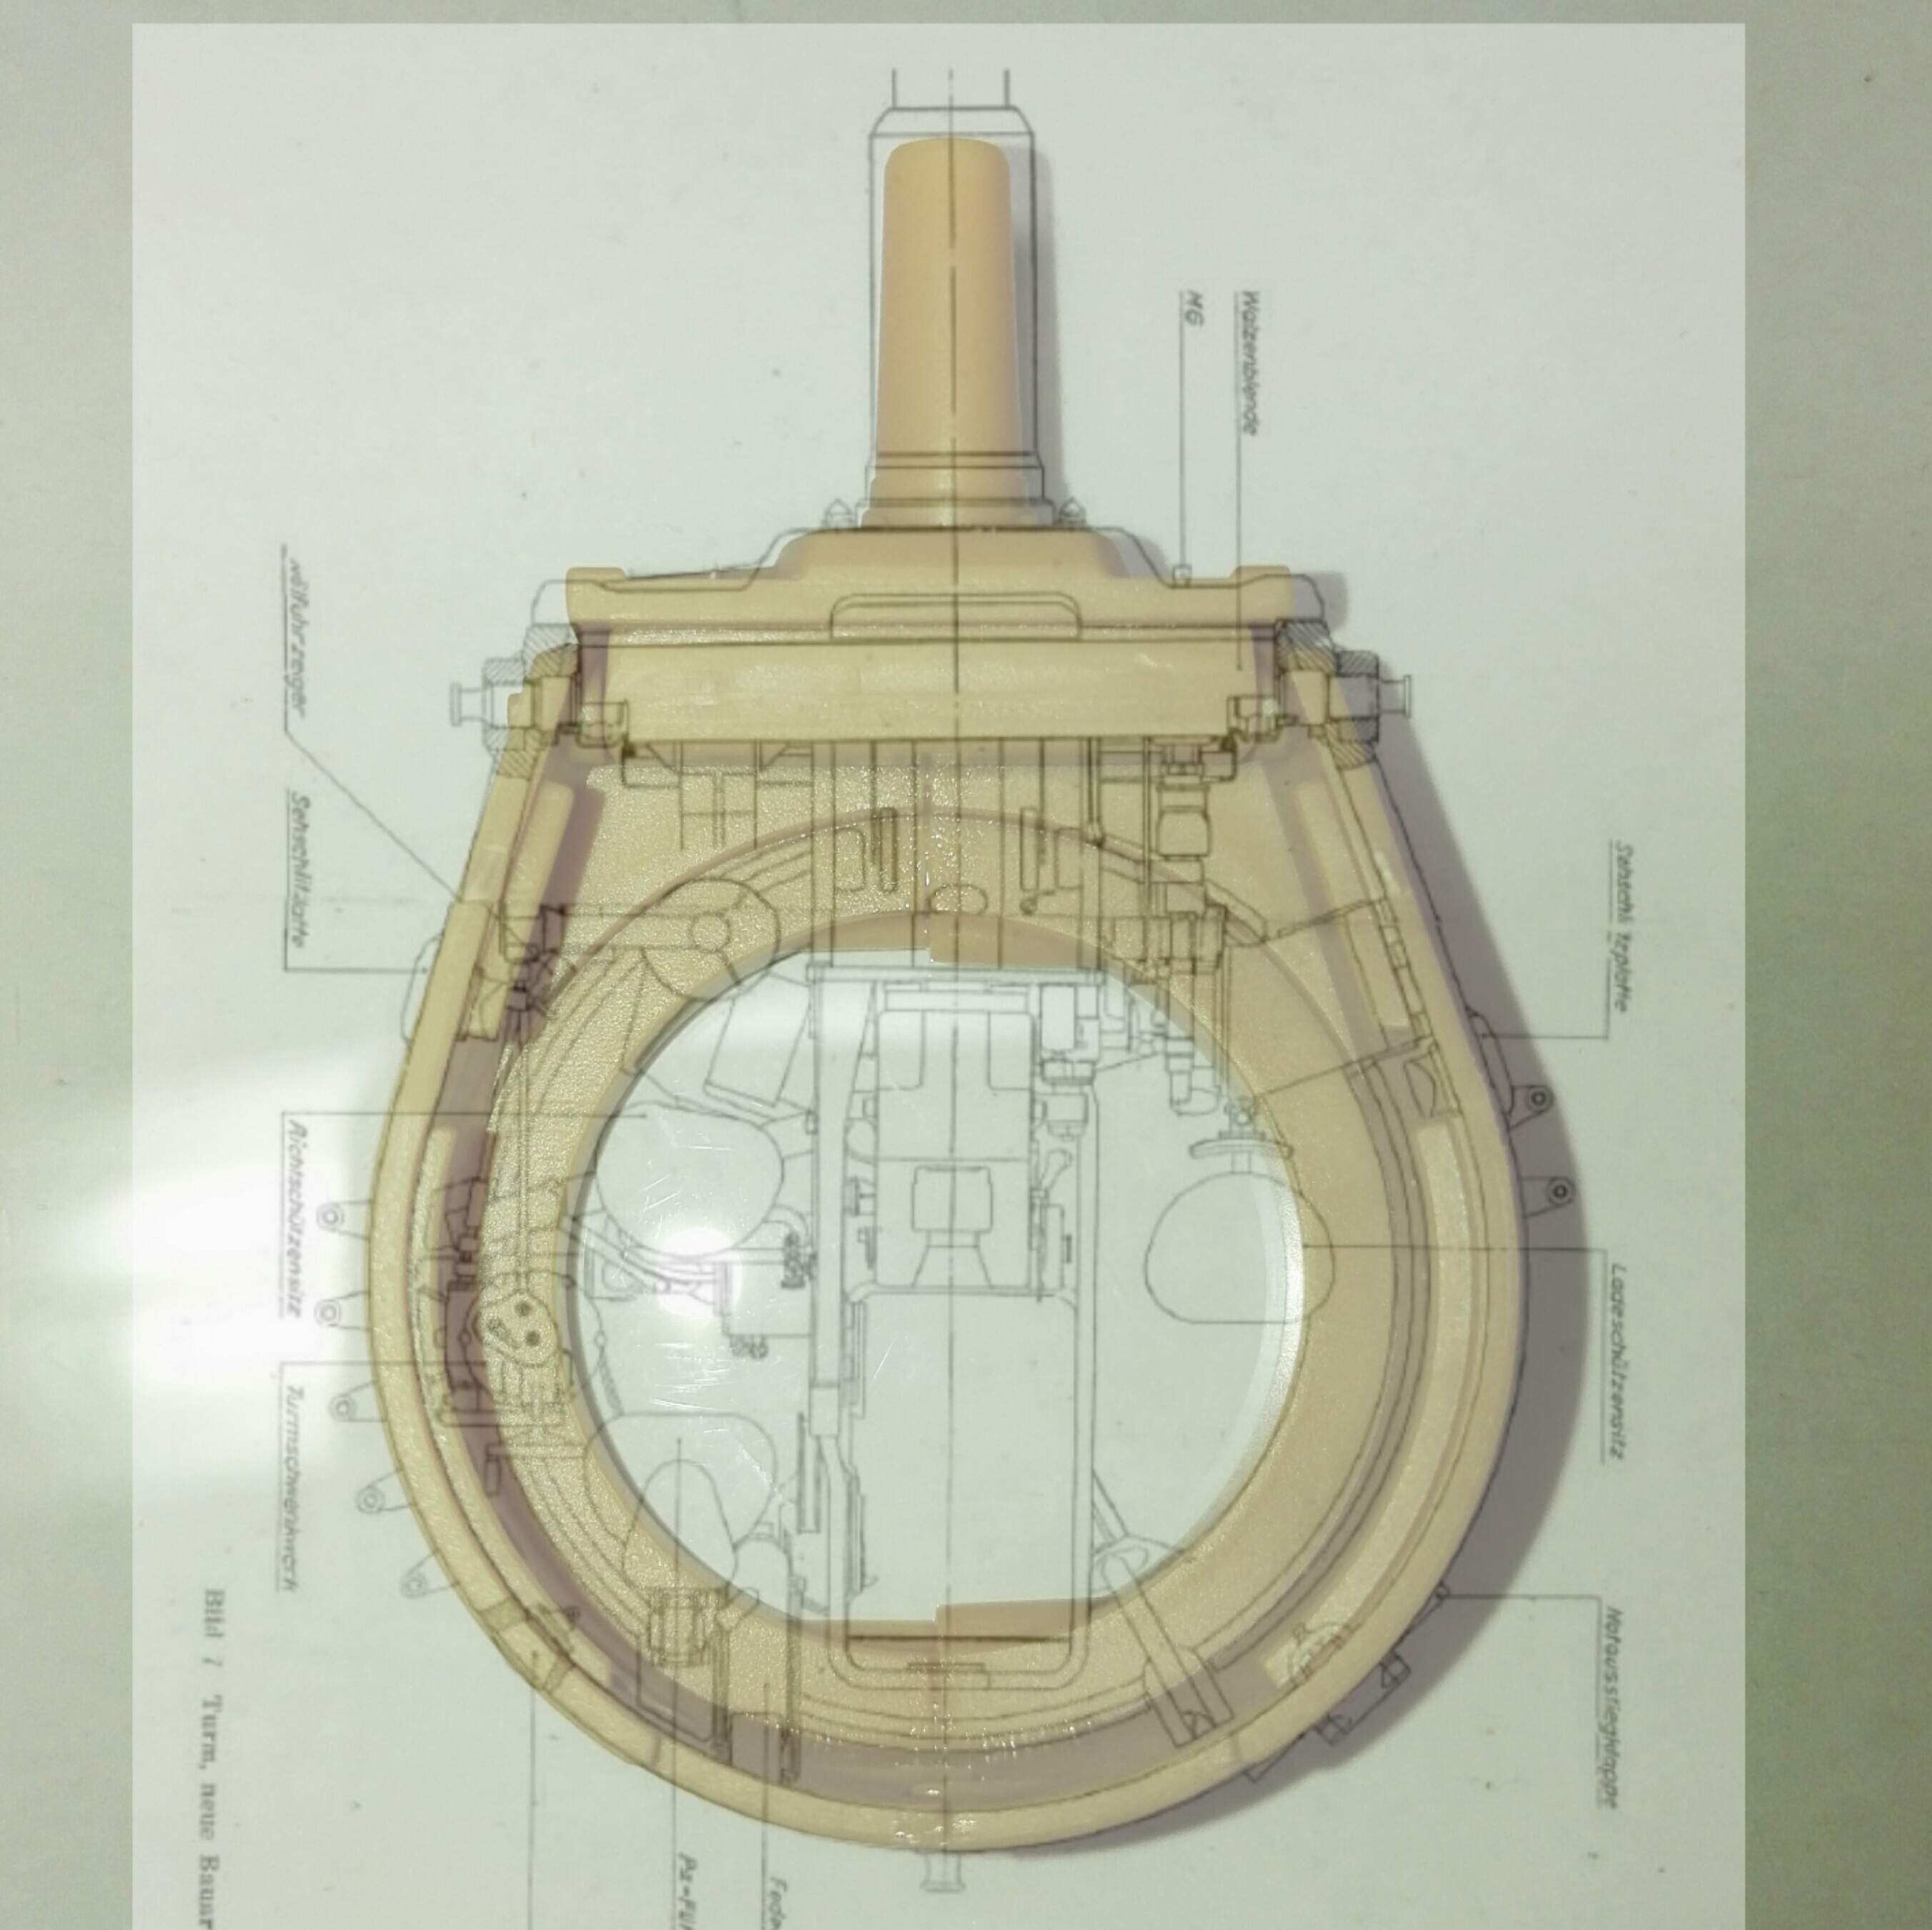
A slightly clearer view of the kit with the drawing.
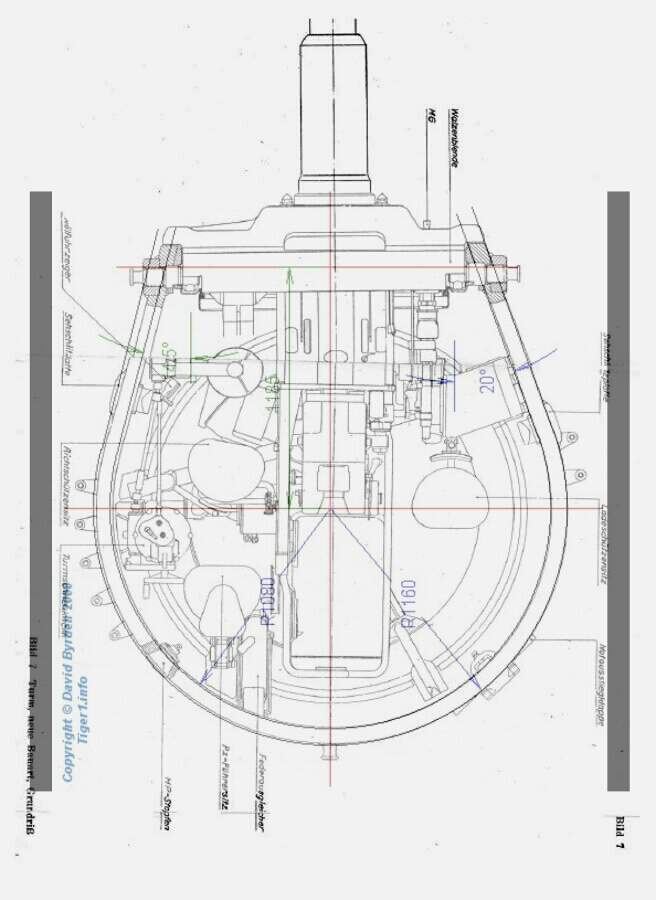
Your drawing with that drawing:
Your drawing with the kit part:
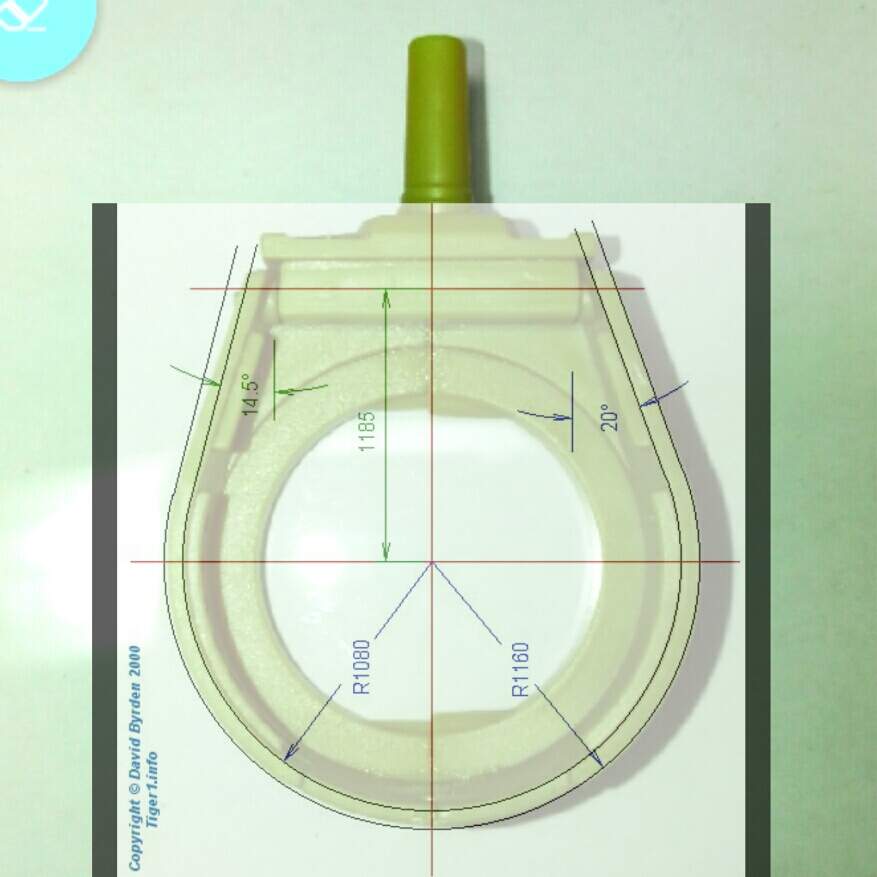
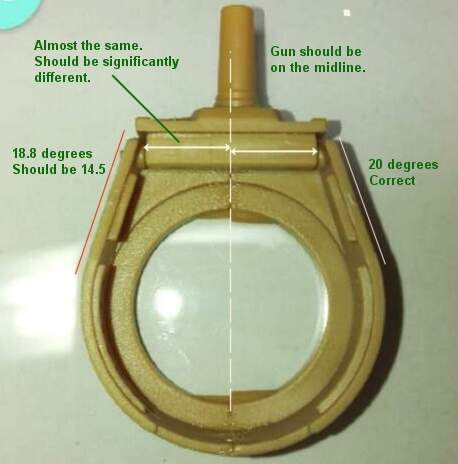
We’re looking at quite subtle differences here.
When you fit the Airfix turret on the German drawing, you got what seemed like a good fit, but you had actually rotated the turret by a couple of degrees to achieve it. In that situation the gun won’t extend straight forward, the visors won’t be looking straight forward, etc.
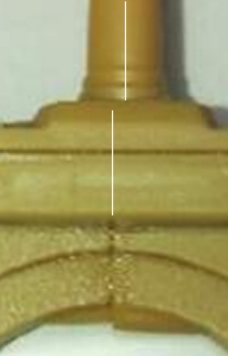
I am using the joint between the Airfix turret halves to determine the precise mid-line of their turret and align it exactly forwards for comparison with drawings. I had to rotate your photo to get this alignment.
Looking at your first photo, the joint line should match up exactly with the gun, but it obviously does not:
The angles that I quoted as “correct” are taken from German factory drawings and are as authoritative as one can get. The drawing from the Turret Manual was based on those drawings so it’s a second-level source. Nevertheless, when you measure a good copy of it, you find that the angles agree. The quality of drawings in German manuals was very high.
Furthermore, I have measured many other features of the Tiger, and assigned dimensions to several other related diagrams from the manuals. Literally all of them are in agreement with the angles that I quoted.
Yes, the gun sleeve should not have a taper. That’s a shockingly bad representation.
David
1 Like
Thanks David, I have no doubts you are correct about all of that. Lumbering through with the Xmas mail today was the big Jentz / Doyle book - well, we all need some good presents - so I’m feeling a bit more informed already.
Back to building it. Here’s the turret with the escape hatch with chamfered edges, also the turret bins, the ventilator in the centre of the turret, and the armour guard over the loader’s periscope.

The gun sleeve was amputated, so no going back… 
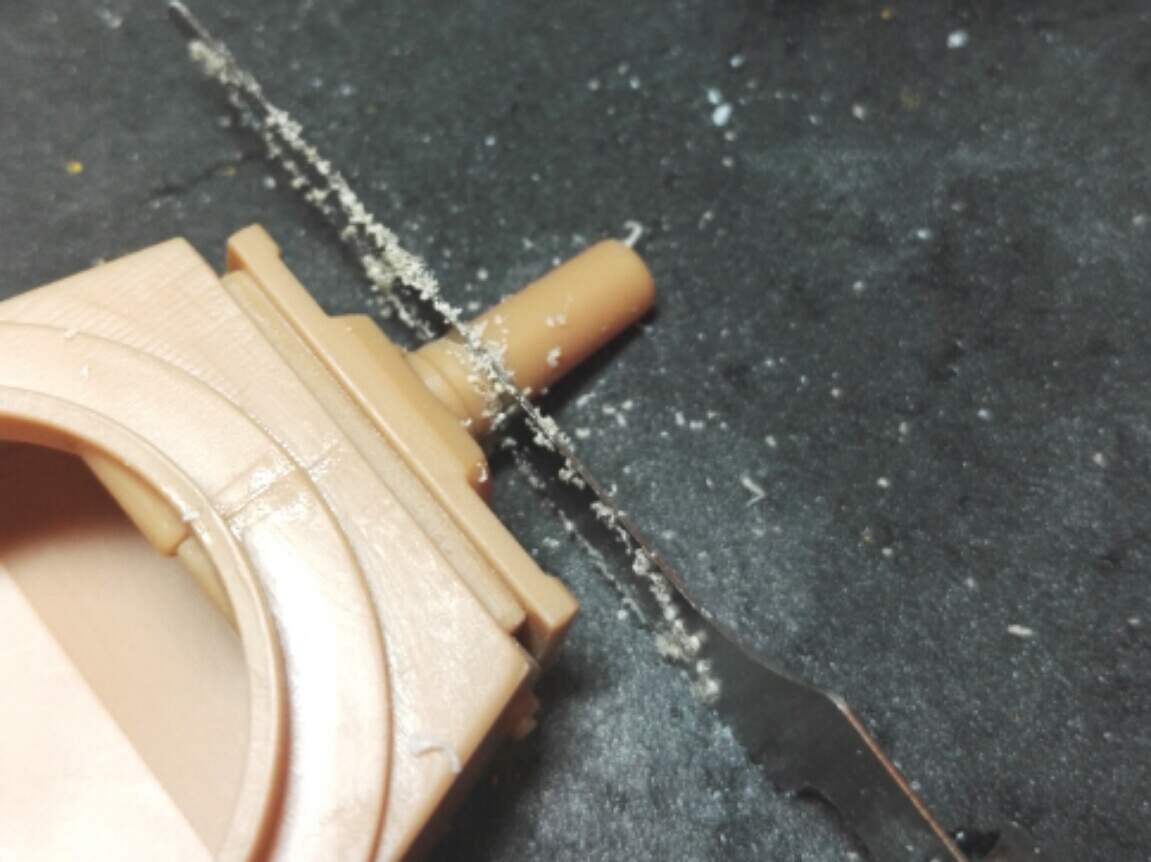
Eventually managed to track down an extra thick piece of sprue that I’d saved ages ago, and about three hours later I had a cylindrical tube about 9mm long and a width to match the stump that was left (probably slightly thinner than scale thickness, but the surgery stops at that point). Notice the gun goes through the tube to attach to the turret, which makes things a bit easier to align.
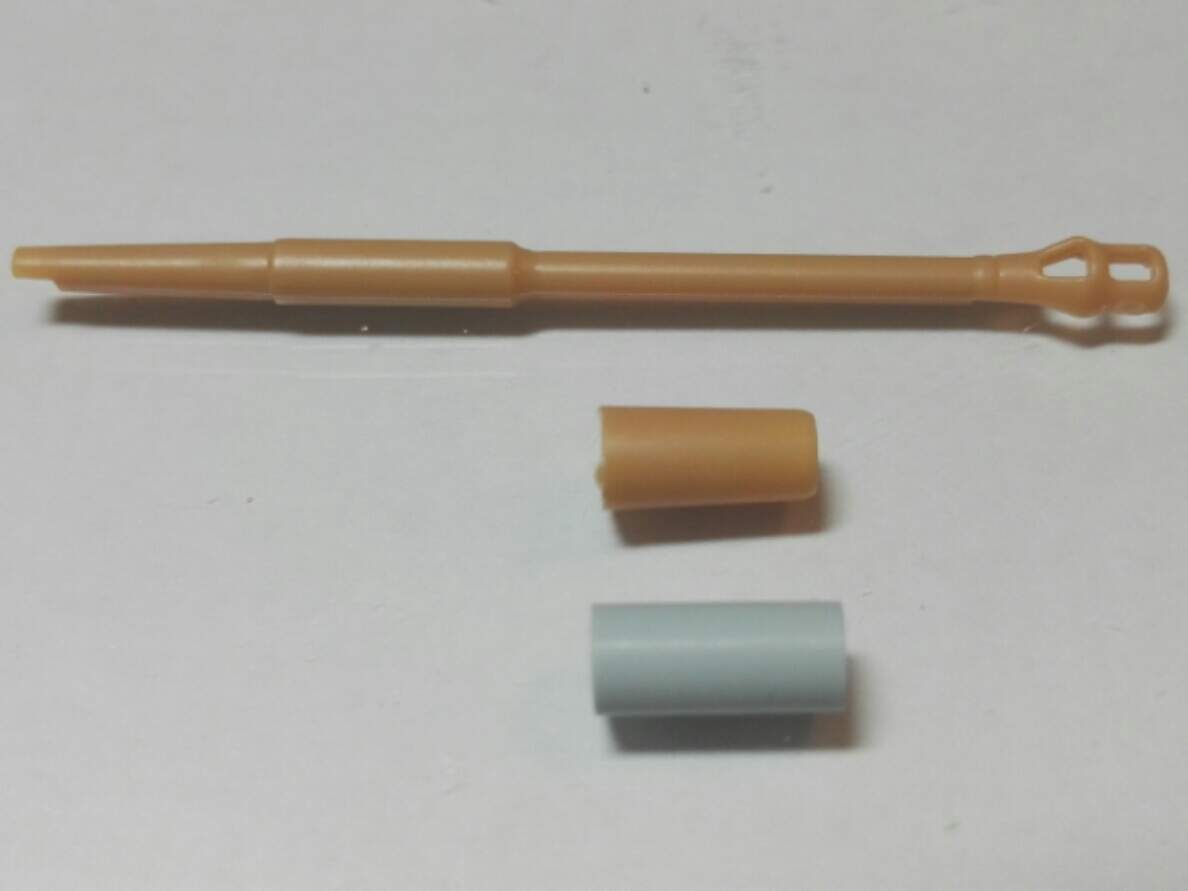
Here is the turret with the new gun sleeve, now with the end chamfered. Chamfer should probably take the end down a bit narrower, but I was paranoid about damaging the flat end surface.
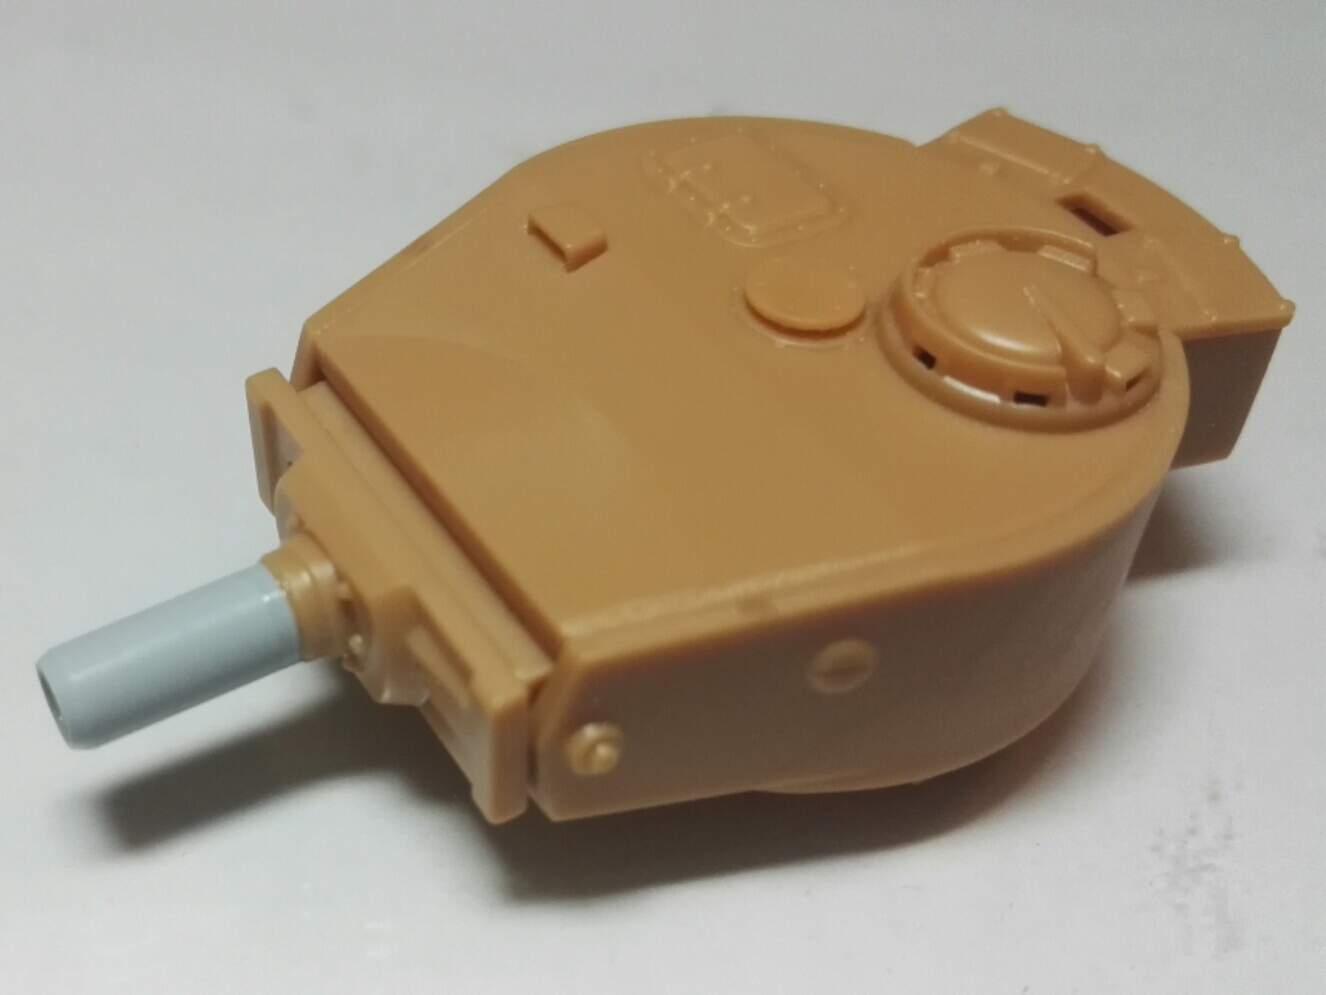
I’m not going to lie, it was hard work whittling that down and drilling a 3mm hole straight through. Would have been much easier to have made a perfect cylinder on a CAD application and then had it machined by a computer, but it seems that someone failed to do that, and presumably others failed to review and check. Never mind, it’s only a plastic kit, nothing truly critical (although repeated mistakes like these could be business critical).
The two piece muzzle brake isn’t up to much either, notice the small gap behind the inserted part. I may go for making a cover to go over it.
1 Like
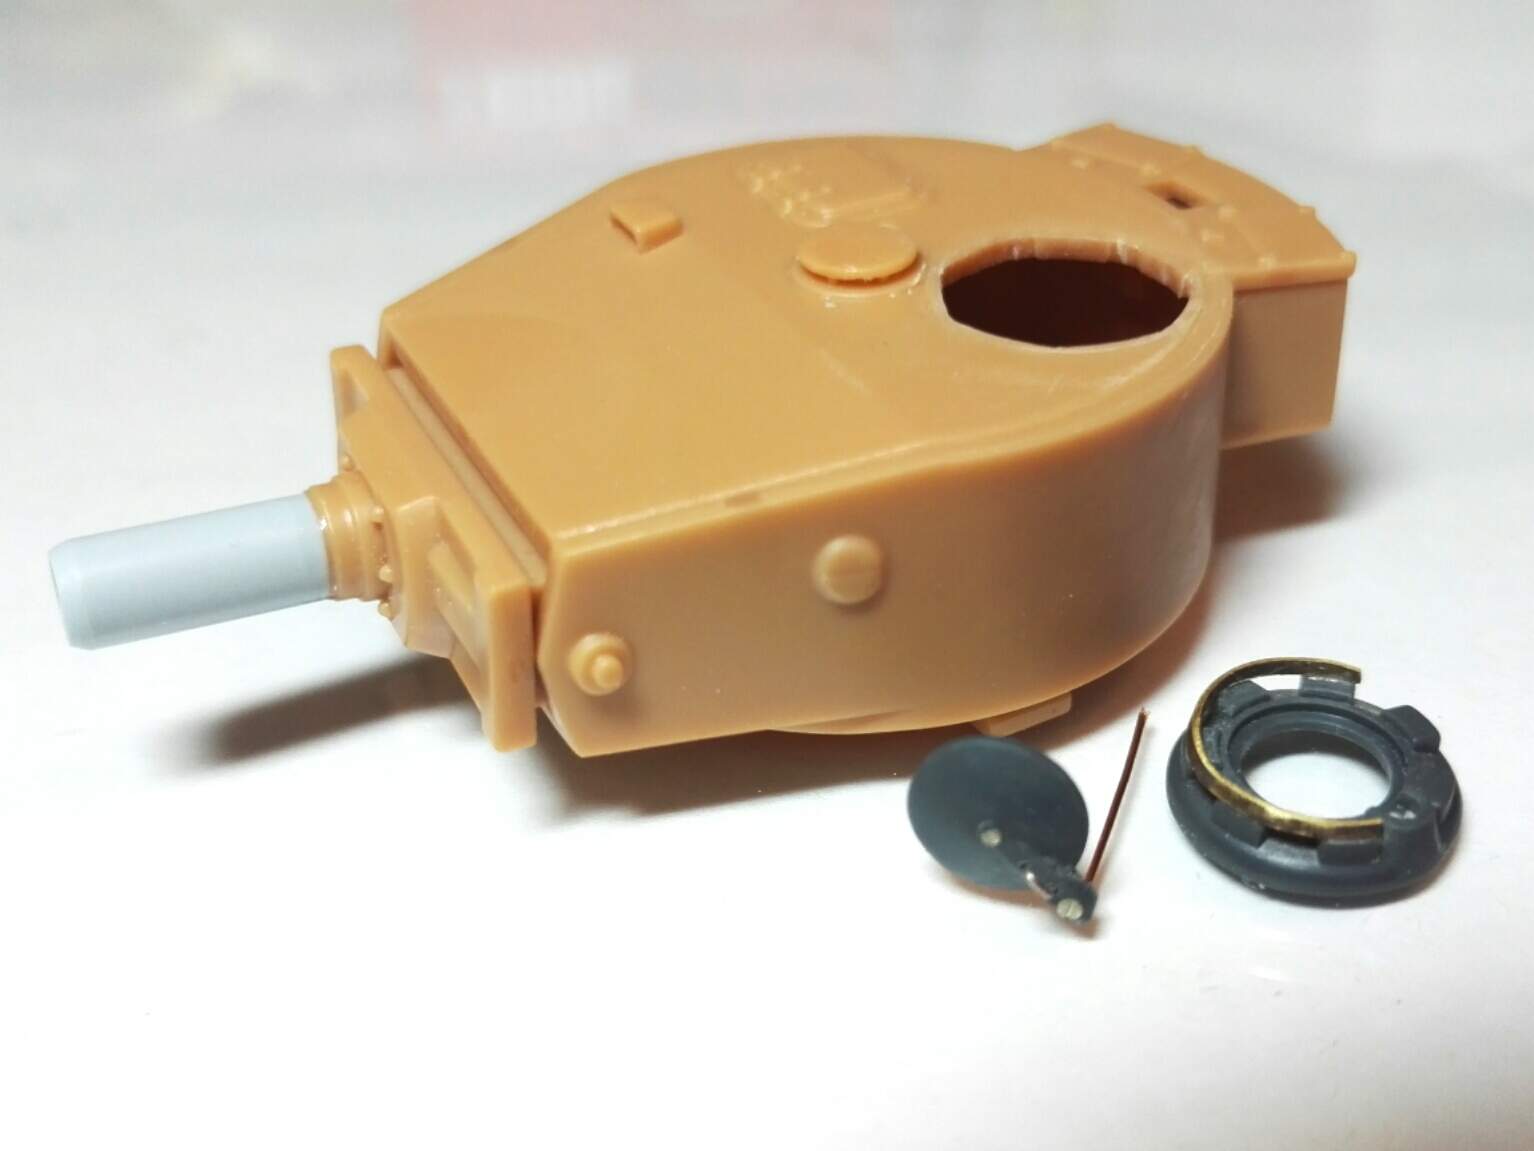
The MG ring and periscope guards are really terribly done, as is the commanders hatch and the pivot - the whole cupola is garbage! 

1 Like
Yes, would have been much better if the ring was a separate part.
I thought something didn’t look right about the cupola. Have they moulded that straight onto the turret roof?
As way of comparison I’ve just posted a brief review/unboxing and build of the Spitfire VC. It’s hard to believe that both of these kits have been released by the same company at the same time.
I only hope that they will do a better job on the 1/35 Cromwell.
Keep at it, it’s getting there.
1 Like
Right, now you both mentioned how  the cupola is, this is what happens next:
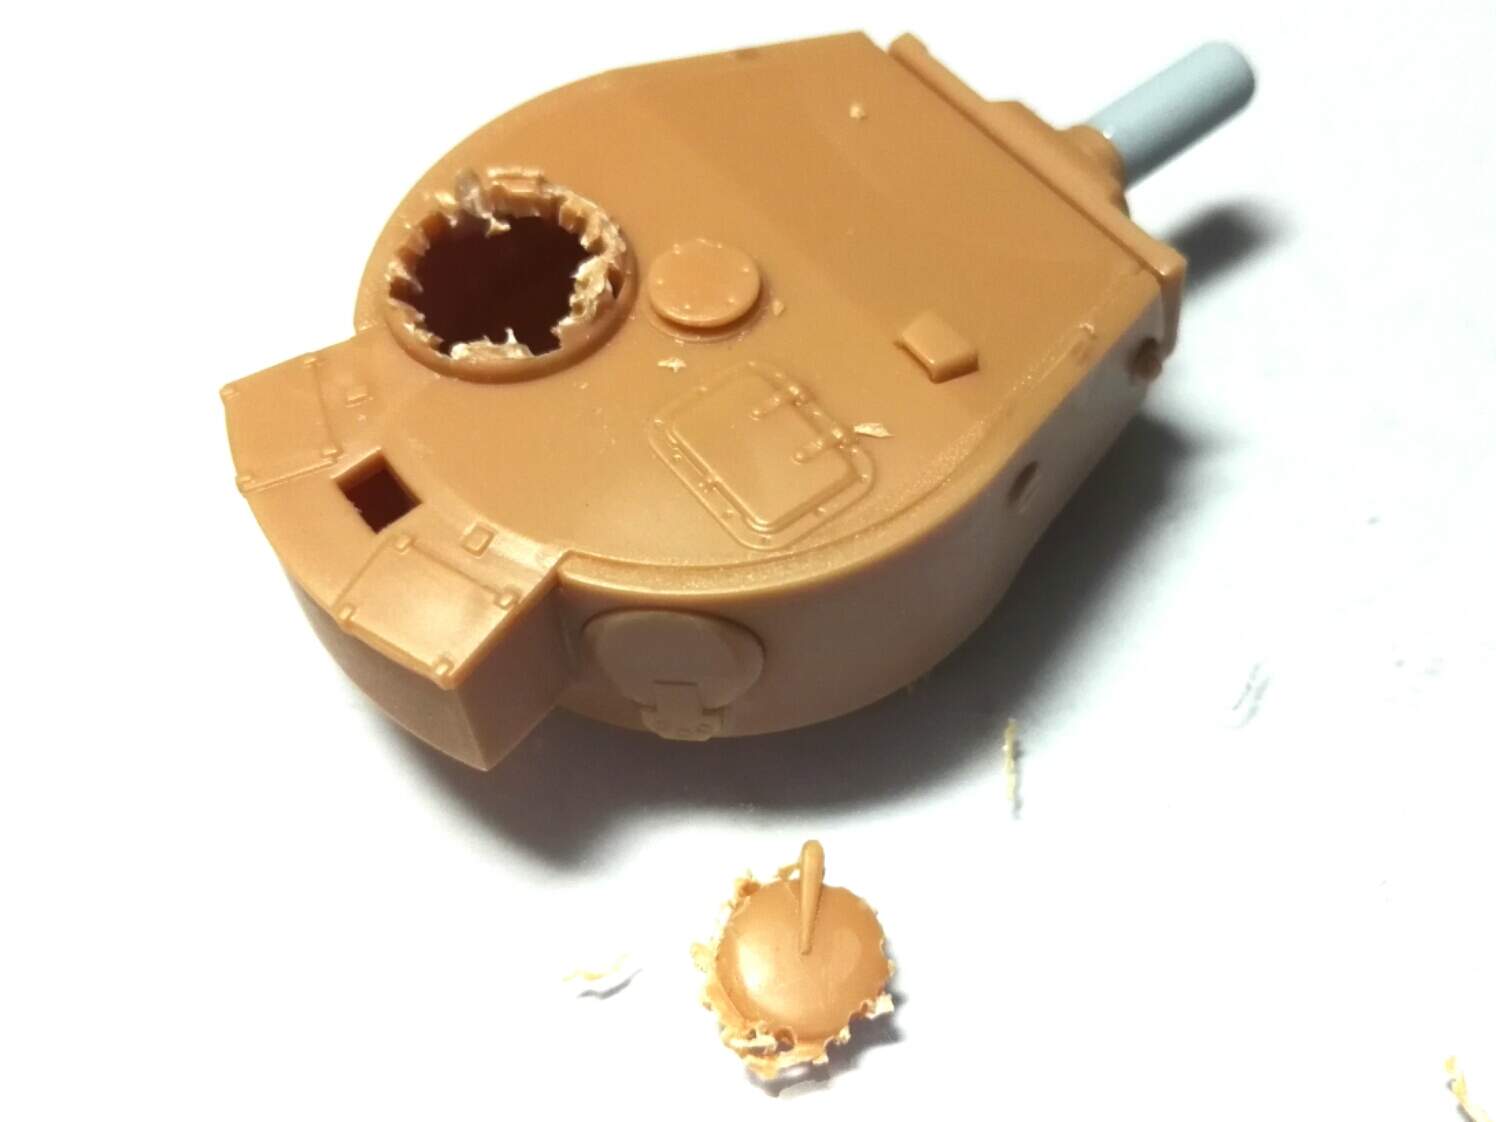
Making these items from scratch seems more or less impossible. I looked at a Dragon Panther A kit I have, but it didn’t look that great. Although it has apertures for the periscopes it didn’t look as much like the Tiger cupola as the one from an Armorfast Panther kit, even though it had no apertures. I have previously used decals to make the dark apertures. Some people might not think that’s an acceptable solution, but try looking at a photo of this type of cupola at 1/72 sort of distance.
Anyway, the Armorfast item comes in three parts, and the Tiger cupola seems to sit lower than the Panther version, so it was reduced on its base. The gun mount ring is a separate part, but has sections of periscope moulded on to it, so I found a thick enough piece of brass for a new one. The hatch lid was filed to more of a plain dome, and a big hinge screw, a little centre screw and a handle were added, then the hinge was drilled and a wire glued in place. Keeping options open so it can be open or closed.
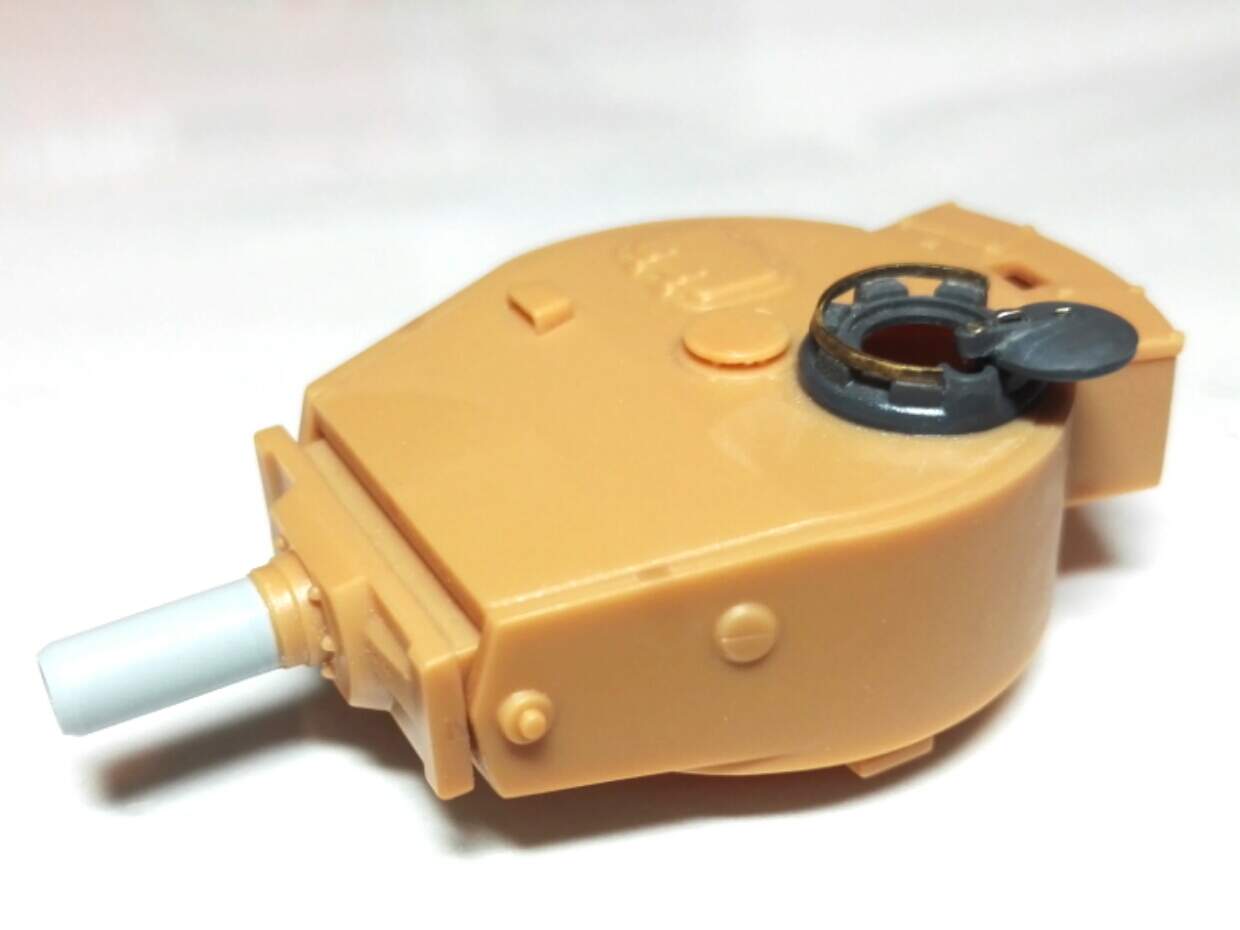

Well, it’s not perfect, but seems better than before.
5 Likes
Nice compromise 
1 Like
Forgot to also say, that work on the gun sleeve has also made a big difference and a huge improvement ,
1 Like
I agree. You’ve really improved this kit. It’ll be something to be proud of at the end I think.
1 Like
Thanks for voting for the new cupola over the old one.
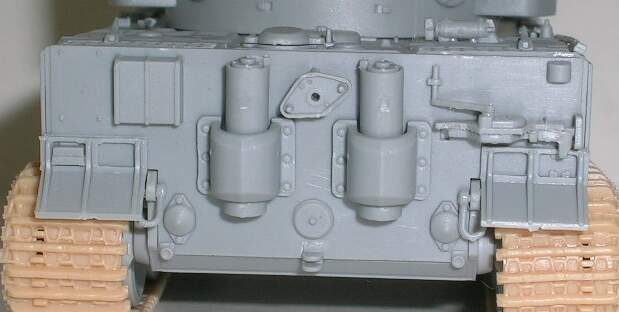
Added the five bolts or rivets to the top of the exhaust, and thinned down the shrouds:
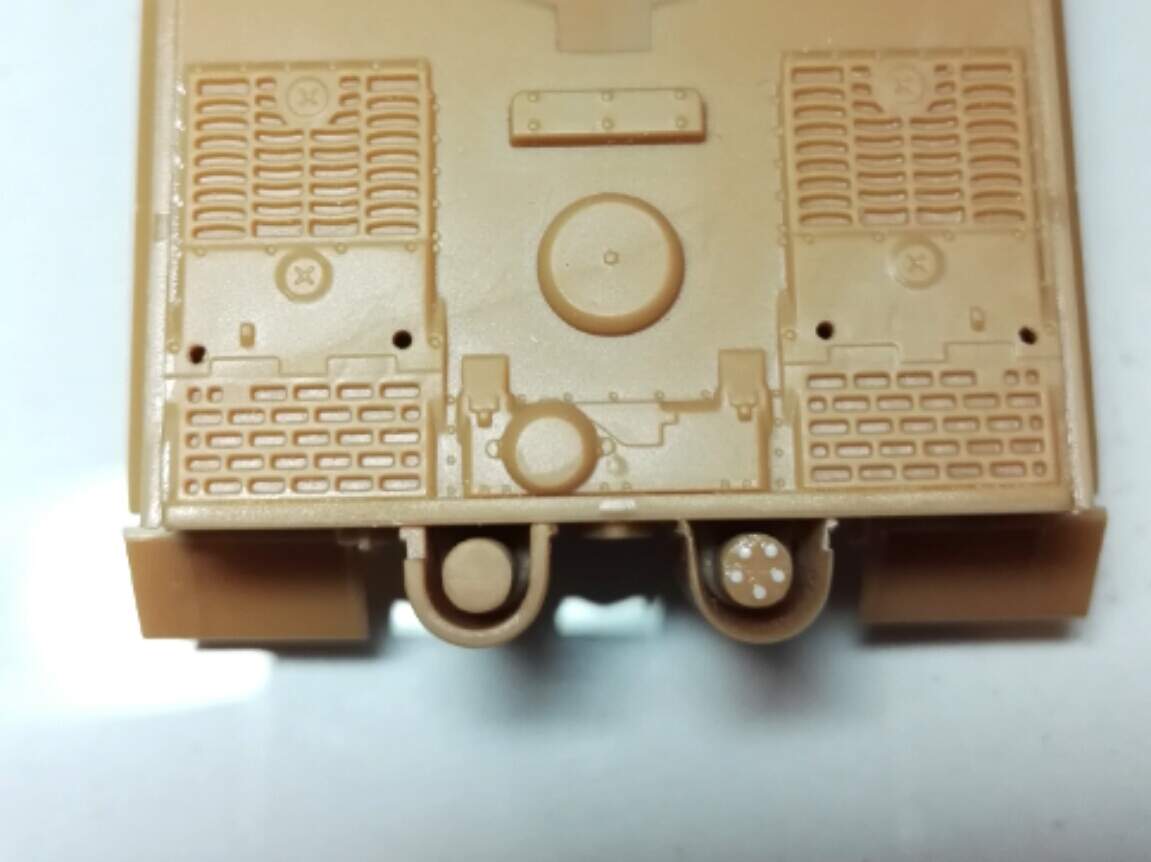
There’s nothing provided for the head lights. Since I think the lights were demountable, I’m just going to add rudimentary sockets and wiring. The lights went from two down to one mounted centrally after August 43, around the same time Zimmerit started being applied. So… and willing to be shot down here… I think the best I can get to dating what is represented by this kit, bearing in mind it has the new turret, but no Zimmerit, is July 43. No doubt there are some inconsistencies, but sticking to that I’ve started adding the sockets and wiring for two lights.
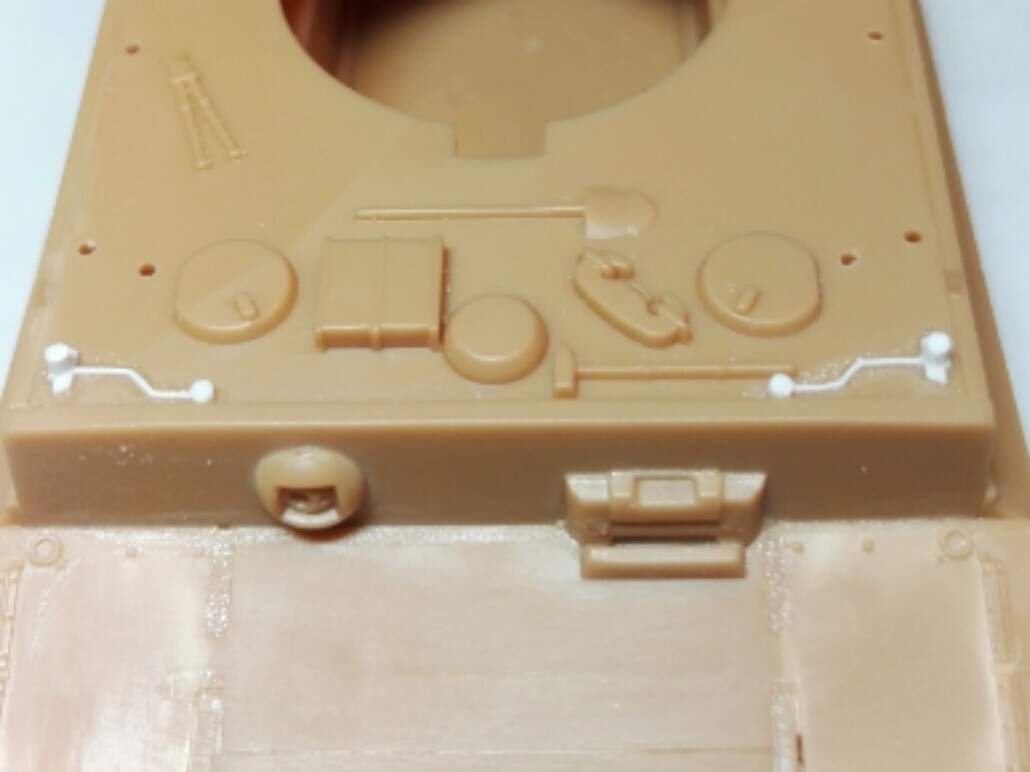
I’m now looking at those feeble blobs on the two hatches… 
2 Likes
Since the tank has no Feifels, no pistol port and no rear hull toolbox, and the travel lock is not yet in place, it must be from October-November 1943.
At this time the tank had one central headlight. Sorry!
David
My respects to you. I feel like I am watching someone trying to save a manged, starving, flea/tick infected animal. IMPS should give you an award for your life saving efforts to save this dog. 
4 Likes
Matt, I’m not sure a kit this bad deserves all this love, but you’re certainly turning a turd into a little jewel! Excellent effort with outstanding results! Keep on keeping on! 
3 Likes